Build Your First Indie Game
Chapter 1: Introduction to Indie Game Development
1.1 Understanding Indie Games: Definition and Scope
Indie games are video games created primarily by individuals or small teams without the financial support of a large game publisher. The term “indie” is short for “independent,” highlighting the autonomy developers have over their projects. This independence affects many aspects of development, including creative decisions, budget management, and marketing.
Unlike big-budget AAA titles, indie games often have smaller scopes, which allows developers to focus on unique gameplay mechanics, artistic styles, or storytelling approaches that might not fit mainstream expectations. This freedom can lead to innovative experiences but also requires careful management to avoid becoming overwhelmed.
What Makes a Game “Indie”?
- Team Size: Usually small, often just one or a few people.
- Budget: Limited financial resources compared to large studios.
- Creative Control: Developers retain full control over the game’s design and direction.
- Publishing: Often self-published or released on platforms that support independent creators.
Mind Map: Key Characteristics of Indie Games
Scope of Indie Games
Indie games vary widely in scope, from simple puzzle games to more complex RPGs or platformers. The scope is often defined by the developer’s skills, time availability, and resources. A manageable scope is crucial to completing a project without burnout or endless delays.
For example, a solo developer might create a minimalist 2D puzzle game with a handful of levels, while a small team could produce a narrative-driven adventure with multiple endings. Both are indie games but differ significantly in scale.
Mind Map: Scope Considerations
Example: Comparing Two Indie Games
-
Game A: A single developer creates a top-down shooter with basic enemy AI and 10 levels. The art is pixel-based and created using free tools. The game focuses on tight controls and replayability.
-
Game B: A team of three develops a story-rich platformer with hand-drawn art, multiple characters, and branching narratives. They allocate time for voice acting and original music.
Both games qualify as indie but differ in complexity and resource needs.
Why Understanding Indie Games Matters
Knowing what defines indie games helps set realistic goals. It clarifies what you can achieve alone or with a small team and guides decisions about which tools and methods to use. It also helps in identifying your target audience and how to position your game in the market.
In summary, indie games are defined by independence in development and publishing, often involving smaller teams and budgets. Their scope can range widely, but successful indie projects balance ambition with practical constraints. This understanding lays the groundwork for planning and executing your first indie game without unnecessary overwhelm.
1.2 Setting Realistic Expectations: Scope and Time Management
Setting realistic expectations is a crucial step when starting your first indie game project. It helps prevent frustration and keeps your progress steady. Two main areas to focus on are scope and time management.
Understanding Scope
Scope refers to the size and complexity of your game. It includes features, art assets, levels, mechanics, and polish. A common mistake for beginners is aiming too high, which leads to burnout or unfinished projects.
Mind Map: Scope Considerations
Example: Imagine you want to create a puzzle platformer. Instead of planning 50 levels with multiple enemy types and complex puzzles, start with 5 levels and one enemy type. This keeps the scope manageable and allows you to complete a playable demo.
Breaking Down Scope
Break your game idea into smaller parts. Identify the minimum viable product (MVP) — the smallest version of your game that still delivers the core experience.
Mind Map: MVP Breakdown
Focusing on the MVP helps you avoid feature creep, which is the tendency to keep adding features beyond the original plan.
Time Management
Time management is about planning how long each part of your project will take and sticking to that plan as closely as possible.
Mind Map: Time Management Steps
Task Breakdown
Divide your project into tasks based on the MVP. For example, “Implement player jump” or “Design first level layout.”
Estimation
Estimate how many hours or days each task will take. Be honest and add some buffer time for unexpected issues.
Scheduling
Create a schedule or timeline. Assign tasks to specific days or weeks. Use tools like simple to-do lists or calendars.
Prioritization
Focus on high-impact tasks first. For example, core gameplay mechanics should come before adding extra sound effects.
Buffer Time
Include extra time for debugging, learning curves, and rest. This prevents your schedule from collapsing if something takes longer than expected.
Example: Time Estimation for a Simple Feature
| Task | Estimated Time | Notes |
|---|---|---|
| Player Movement Script | 4 hours | Basic walking and jumping |
| Enemy AI | 6 hours | Simple patrol behavior |
| Level Design | 8 hours | One playable level |
| UI Setup | 3 hours | Start and pause menus |
| Sound Integration | 2 hours | Background music and SFX |
Total estimated time: 23 hours + buffer
Combining Scope and Time
When you know your scope and have time estimates, you can adjust either to fit your available time. For example, if you have only two weeks to work on the demo, you might reduce the number of levels or simplify mechanics.
Mind Map: Adjusting Scope and Time
Final Tips
- Start small and expand only if time allows.
- Track your progress to see if your estimates hold true.
- Don’t hesitate to cut features that don’t add enough value.
- Remember that a polished small game is better than a large unfinished one.
By setting realistic expectations around what you can achieve and how long it will take, you set yourself up for a smoother development experience and a finished demo you can be proud of.
1.3 Essential Tools and Software for Beginners
When starting your first indie game, choosing the right tools and software can make the process smoother and less frustrating. This section covers essential categories of tools, their purposes, and examples that suit beginners. To keep things clear, we’ll use mind maps in format to organize the options.
Core Categories of Tools
Game Engines
A game engine is the foundation where your game comes to life. It handles graphics, physics, input, and more. For beginners, ease of use, documentation, and community support matter most.
Example: If you want to build a simple 2D platformer, Godot offers a gentle learning curve and straightforward tools. Unity is a solid choice if you want flexibility and plan to expand later.
Art and Design Tools
Visuals are crucial even in simple games. Beginners can start with free or affordable software that balances features and usability.
Example: For a pixel-art game, Aseprite lets you create and animate sprites efficiently. If your game needs simple UI icons, Inkscape can help create clean vector images.
Sound and Music Tools
Sound effects and music add atmosphere and feedback. Beginners can start with simple tools for creating or editing audio.
Example: Use Bfxr to quickly generate jump or coin sounds for a platformer. Audacity can trim and adjust volume levels for recorded sounds.
Code Editors
While game engines often include scripting environments, standalone code editors can improve productivity.
Example: Visual Studio Code offers syntax highlighting and debugging for GDScript or C#, making scripting more manageable.
Version Control
Keeping track of changes and backing up your work is important, even for small projects.
Example: Using Git to save your project versions prevents accidental data loss and helps you experiment without fear.
Project Management
Organizing tasks and milestones helps maintain focus and progress steadily.
Example: Trello’s card system can track your game’s features, bugs, and art assets, helping you prioritize what to work on next.
Summary Mind Map
Choosing tools depends on your project’s needs and your comfort level. Start simple, focus on learning one or two tools well, and expand as your project grows. This approach reduces overwhelm and keeps development enjoyable.
1.4 Overview of the Game Development Process
The game development process can be broken down into several key stages, each with its own focus and goals. Understanding these stages helps you organize your work and avoid feeling overwhelmed. Here’s an overview of the typical steps involved in creating an indie game, from the initial idea to a playable demo.
Concept and Ideation
This is where your game starts as a simple idea. You decide what kind of game you want to make, the core mechanics, and the experience you want to deliver. It’s important to keep this stage lightweight and flexible. Sketch out your ideas, think about the genre, and consider what makes your game unique.
Example: You might decide to create a 2D puzzle platformer where the player manipulates gravity. At this stage, you jot down the main mechanic and the feeling you want the player to have.
Planning
Once you have a clear concept, you break it down into manageable tasks. This includes deciding what features are essential for your demo and setting a timeline. Planning helps you stay focused and prevents scope creep.
Example: You list tasks like “implement player movement,” “design level 1,” and “create basic UI.” You prioritize player movement first because it’s fundamental.
Prototyping
This stage is about quickly building a rough version of your game to test core mechanics. The goal is to see if your ideas work in practice without worrying about polish.
Example: You create a simple scene where the player can move and flip gravity. If it feels fun and intuitive, you proceed; if not, you adjust the mechanic.
Production
Here, you develop the full demo, adding art, sound, levels, and refining gameplay. This stage requires more detailed work and coordination of assets and code.
Example: You replace placeholder graphics with hand-drawn sprites, add background music, and design multiple levels that gradually introduce new challenges.
Testing and Iteration
Testing involves playing your game to find bugs and areas for improvement. Iteration means making changes based on feedback to enhance the experience.
Example: Playtesters report that a certain jump is too difficult. You adjust the jump height and retest until it feels fair.
Polishing and Finalizing
In this last stage before release, you focus on smoothing out rough edges, optimizing performance, and preparing your game for distribution.
Example: You add subtle particle effects when the player lands and balance the background music volume against sound effects.
Summary Mind Map
Each stage builds on the previous one, but the process is not always strictly linear. You might return to prototyping after testing if a mechanic needs reworking. Keeping your scope manageable and focusing on one step at a time helps prevent overwhelm. Remember, the goal is a playable demo, not a full game at this point. By following this structured approach, you can move steadily from idea to a demo you can share and improve upon.
1.5 Case Study: How a Simple Idea Became a Successful Indie Demo
This case study traces the journey of a straightforward game concept evolving into a polished indie demo. The example centers on a minimalistic puzzle-platformer called “Light Runner,” developed by a solo creator over three months. The goal was to demonstrate how clear planning, iterative design, and focused scope can lead to a tangible, playable demo without overwhelming complexity.
Initial Idea and Core Concept
The original idea was simple: a character runs through dark levels using a flashlight to reveal platforms and avoid traps. The core mechanic revolves around light revealing the environment, making navigation a puzzle itself.
Mind Map: Initial Idea Breakdown
This mind map helped the developer avoid feature creep by focusing on a few interrelated mechanics rather than many unrelated ideas.
Defining Scope and Priorities
To keep the project manageable, the developer prioritized features:
- Must-have: Basic movement, flashlight toggle, platform visibility linked to light
- Nice-to-have: Battery depletion mechanic, moving traps, sound effects
The decision was to build a vertical slice demonstrating the core mechanic first, deferring secondary features.
Mind Map: Feature Prioritization
This clear separation prevented the project from ballooning early on.
Prototyping and Iteration
The first prototype was a single level with basic controls and a toggleable light source. Platforms appeared only when illuminated. The developer used simple shapes and placeholder graphics to test gameplay.
Example: Prototype Feedback
- The flashlight toggle felt clunky; switching to a hold-to-light improved flow.
- Players found the darkness too punishing; adding subtle ambient light helped balance difficulty.
Iterating on these points refined the core experience without adding complexity.
Asset Creation and Integration
For art, the developer used a limited palette and geometric shapes to maintain clarity and reduce workload. Animations were minimal, focusing on smooth player movement and light effects.
Example: Asset Choices
- Platforms: simple rectangles with a glow effect when lit
- Player: a circle with a directional cone for the flashlight
- Background: solid dark color to emphasize light
This approach kept the visual style consistent and supported gameplay clarity.
Building the Demo Level
The demo level was designed to showcase the light mechanic and introduce basic traps. It included:
- A straightforward path requiring light to reveal platforms
- One moving trap visible only when illuminated
- A battery meter to hint at resource management (implemented but not fully functional)
Mind Map: Demo Level Elements
This level balanced challenge and clarity, providing a satisfying short experience.
Testing and Refinement
Playtesting involved friends and a small online group. Feedback focused on controls, difficulty, and clarity.
Key adjustments included:
- Smoother flashlight control (hold instead of toggle)
- Slightly brighter ambient light to reduce frustration
- Clearer visual feedback when traps were near
These changes improved player engagement without adding new features.
Packaging and Publishing
The developer prepared a Windows build, compressed it into a zip file, and wrote simple instructions. The demo was uploaded to a popular indie platform with a brief description and screenshots.
Example: Release Notes Summary
- “Light Runner” demo showcasing light-based platform puzzles
- Use arrow keys to move, hold spacebar to shine flashlight
- Avoid traps revealed only in light
This straightforward presentation matched the demo’s scope and tone.
Summary
This case study shows that starting with a clear, simple idea and focusing on core mechanics can lead to a successful indie demo. Prioritizing features, iterating based on feedback, and maintaining a consistent visual style helped keep the project manageable. The use of mind maps at various stages provided clarity and prevented scope creep.
The result was a playable demo that effectively communicated the game’s unique mechanic without overwhelming the developer or players.
Chapter 2: Ideation and Conceptualization
2.1 Brainstorming Game Ideas: Techniques and Exercises
Brainstorming game ideas is the first step toward creating a game that is both engaging and manageable. The goal is to generate a variety of concepts without immediately judging their feasibility. This process helps uncover unique angles and mechanics that can form the foundation of your indie game.
Techniques for Brainstorming
1. Free Writing: Set a timer for 5-10 minutes and write down every game idea that comes to mind. Don’t worry about quality or coherence. This exercise loosens mental blocks and surfaces raw concepts.
2. Mind Mapping: Start with a central theme or mechanic and branch out related ideas. This visual method helps organize thoughts and discover connections.
3. Constraints-Based Brainstorming: Limit yourself by setting specific constraints, such as “a game with only one button” or “a game set underwater.” Constraints often spark creativity by forcing you to think differently.
4. What-If Questions: Ask questions like “What if the player could control time?” or “What if the game had no enemies?” These questions can lead to unusual but interesting ideas.
5. Combining Genres or Mechanics: Mix elements from different genres or mechanics to create something new. For example, a puzzle game with RPG elements.
Exercises with Mind Maps
Here are some example mind maps to illustrate how you might organize ideas.
Mind Map 1: Central Theme - “Exploration”
This mind map helps you consider different settings, player abilities, objectives, and challenges around the theme of exploration.
Mind Map 2: Central Mechanic - “Time Manipulation”
This map breaks down how time manipulation could work mechanically and narratively.
Concrete Examples
-
Example 1: Using the Exploration mind map, you might decide on a game where the player explores an underwater forest, using diving and limited oxygen as key gameplay elements. The objective could be to collect rare artifacts while avoiding hostile sea creatures.
-
Example 2: From the Time Manipulation map, you could create a puzzle platformer where the player rewinds time to correct mistakes, with an energy meter limiting how often this can be done.
Tips for Effective Brainstorming
- Keep ideas visible. Use sticky notes, whiteboards, or digital tools to capture and rearrange concepts.
- Don’t discard ideas too early. Sometimes a discarded idea can inspire a better one later.
- Involve others if possible. Different perspectives can reveal blind spots.
- Focus on what excites you. Passion for an idea often translates into better development.
Brainstorming is not about finding the perfect idea immediately but about creating a pool of possibilities. From there, you can refine and combine ideas into a workable concept for your first indie game.
2.2 Identifying Your Target Audience and Genre
Identifying your target audience and genre is a foundational step in indie game development. It shapes design decisions, influences marketing, and helps keep your project focused. Without clarity here, you risk creating a game that doesn’t resonate or feels scattered.
Understanding Target Audience
Your target audience is the group of players most likely to enjoy and engage with your game. Defining this group helps tailor gameplay, art style, difficulty, and even narrative tone.
Consider these dimensions when identifying your audience:
- Age group: Kids, teens, adults, seniors.
- Gaming experience: Casual players, hardcore gamers, newcomers.
- Platform preference: Mobile, PC, console.
- Interests: Puzzle lovers, story-driven players, competitive gamers.
- Play style: Explorers, achievers, social players.
Mind Map: Target Audience Dimensions
Example: If you want to create a simple puzzle game for mobile devices, your target audience might be casual players aged 25-40 who enjoy short, engaging sessions.
Defining Genre
Genre categorizes your game based on gameplay mechanics, style, and player expectations. It helps players understand what to expect and allows you to benchmark your design against similar games.
Common genres include:
- Platformer
- Puzzle
- Role-Playing Game (RPG)
- Shooter
- Simulation
- Strategy
- Adventure
Genres can also blend, such as puzzle-platformers or RPG-strategy hybrids.
Mind Map: Common Game Genres
Example: A 2D side-scrolling game where the player solves puzzles to progress fits into the puzzle-platformer hybrid genre.
Matching Audience and Genre
The genre you choose should align with your target audience’s preferences. For example, hardcore RPG fans expect deep mechanics and story, while casual mobile players prefer quick, easy-to-learn games.
Mind Map: Aligning Audience and Genre
Practical Steps
- List your game ideas.
- For each, define who would enjoy it most.
- Choose a genre that fits the gameplay and audience.
- Research similar games to understand audience expectations.
Example Scenario
You want to make a game about managing a small farm. This concept appeals to players who enjoy relaxed, open-ended gameplay. The genre fits simulation or casual management. The likely audience is casual players on PC or mobile, possibly aged 18-45, who enjoy games like Stardew Valley or Animal Crossing.
Summary
Identifying your target audience and genre early helps keep your design focused and relevant. Use clear categories and examples to guide your choices. This clarity will save time and effort as you move from idea to prototype.
2.3 Defining Core Gameplay Mechanics with Examples
Defining core gameplay mechanics is a crucial step in shaping your indie game. These mechanics are the fundamental actions and rules that govern how players interact with your game world. Clear, well-thought-out mechanics create a solid foundation, making your game engaging and understandable. Let’s break down what core gameplay mechanics are, how to define them, and explore examples and mind maps to clarify the process.
What Are Core Gameplay Mechanics?
Core gameplay mechanics are the basic building blocks of your game’s interactivity. They include player actions (like jumping or shooting), rules (such as gravity or health systems), and feedback loops (like scoring or enemy behavior). These mechanics determine what players do and how the game responds.
Why Focus on Core Mechanics?
Focusing on a few core mechanics helps keep your project manageable and your game focused. Overloading your demo with too many mechanics can lead to confusion and scope creep. Instead, pick mechanics that support your game’s main idea and build around them.
How to Define Core Gameplay Mechanics
Start by asking:
- What is the primary action the player will perform?
- What rules govern this action?
- How does the game respond to player input?
- What challenges or obstacles arise from these mechanics?
Answering these questions helps you isolate the essential gameplay elements.
Example: Defining Core Mechanics for a Simple Platformer
Suppose you want to create a 2D platformer. The core mechanics might be:
- Player movement: running left and right
- Jumping: to navigate platforms
- Enemy interaction: avoiding or defeating enemies
- Collectibles: gathering coins for points
These mechanics define what the player does and how the game reacts.
Mind Map: Core Gameplay Mechanics for a 2D Platformer
Example: Defining Core Mechanics for a Puzzle Game
For a tile-matching puzzle game, core mechanics could be:
- Selecting tiles
- Swapping adjacent tiles
- Matching three or more tiles to clear them
- Scoring points based on matches
Mind Map: Core Gameplay Mechanics for a Tile-Matching Puzzle
Example: Defining Core Mechanics for a Top-Down Shooter
Core mechanics might include:
- Player movement in 8 directions
- Shooting projectiles
- Enemy spawning and behavior
- Health and damage system
Mind Map: Core Gameplay Mechanics for a Top-Down Shooter
Tips for Defining Core Mechanics
- Keep it simple: Start with a small set of mechanics that clearly express your game’s main idea.
- Make mechanics interactive: Ensure player actions have clear consequences.
- Test early: Prototype your mechanics quickly to see if they feel fun and intuitive.
- Iterate: Adjust mechanics based on testing and feedback.
Summary
Defining core gameplay mechanics means identifying the essential player actions, rules, and feedback loops that make your game work. Using mind maps helps organize these elements visually and keeps your design focused. Examples from different genres show how mechanics vary but always serve the same purpose: to create meaningful player interaction.
2.4 Creating a Simple Game Design Document (GDD)
Creating a Simple Game Design Document (GDD)
A Game Design Document, or GDD, is a blueprint for your game. It’s a place to organize your ideas, clarify your vision, and communicate your plan to yourself or others. For your first indie game, keeping the GDD simple and focused is key. It doesn’t have to be long or complicated — just clear enough to guide your development.
What Goes Into a Simple GDD?
A basic GDD should cover these core areas:
- Game Concept: A brief summary of what your game is about.
- Gameplay Mechanics: How the player interacts with the game.
- Story and Setting: Background, characters, and world details.
- Art and Audio Style: Visual and sound direction.
- User Interface: Menus, HUD, and controls.
- Technical Details: Platforms, tools, and any constraints.
Mind Map Example: Basic GDD Structure
This mind map helps you see the big picture and ensures you don’t miss important parts.
Example: Simple GDD for a 2D Puzzle Platformer
Game Concept
- Genre: Puzzle Platformer
- Core Idea: Navigate a small robot through levels by solving environmental puzzles.
- Unique Selling Point: Use magnetic powers to manipulate metal objects.
Gameplay Mechanics
- Player Actions: Move left/right, jump, activate magnet.
- Controls: Arrow keys for movement, spacebar to jump, M key to toggle magnet.
- Objectives: Reach the exit door in each level.
- Challenges: Timed switches, moving platforms, and enemies.
Story and Setting
- Plot Summary: The robot is escaping a malfunctioning factory.
- Characters: The robot (player), factory drones (enemies).
- World Description: Industrial factory with conveyor belts, metal walls.
Art and Audio Style
- Visual Style: Simple pixel art with muted colors.
- Sound Effects: Mechanical noises, magnetic hum.
- Music: Minimalist electronic background.
User Interface
- Menus: Start screen, pause menu, level select.
- HUD Elements: Health bar, magnet energy meter.
- Input Methods: Keyboard.
Technical Details
- Target Platforms: PC (Windows, Mac)
- Engine/Tools: Godot Engine
- Performance Constraints: Optimized for low-end machines.
Why Use a GDD?
Writing a GDD forces you to think through your game’s elements before you start coding or designing assets. It helps you spot potential problems early and keeps your project focused. When you’re working alone, it’s your reference point. If you bring others on board, it’s a communication tool.
Tips for Keeping Your GDD Simple and Useful
- Write in clear, concise language.
- Use bullet points and lists for easy scanning.
- Update the document as your game evolves.
- Include sketches or diagrams where helpful.
- Don’t worry about perfection; it’s a working document.
Mind Map Example: Gameplay Mechanics Breakdown
This breakdown helps you organize how the player will engage with the game world.
Final Thoughts
A simple GDD is a practical tool, not a literary masterpiece. Its value lies in clarity and focus. By outlining your game’s key components in a straightforward way, you reduce confusion and keep your project manageable. Whether you’re sketching ideas on paper or typing in a document, the GDD is your development compass.
2.5 Best Practice: Validating Your Idea Through Feedback
Validating your game idea through feedback is a crucial step to avoid spending time and effort on concepts that may not resonate with players. It helps you identify strengths, weaknesses, and potential improvements early on. This section explains practical methods to gather useful feedback and how to interpret it effectively.
Why Validate?
Before you write a single line of code or design an asset, you want to know if your idea has merit. Validation reduces guesswork and aligns your development with player expectations. It also helps you prioritize features and avoid scope creep.
Methods of Validation
Informal Conversations
Talk to friends, family, or fellow gamers about your idea. Present it clearly and listen to their reactions. Ask open-ended questions like “What would you expect from a game like this?” or “What excites you about this concept?”
Surveys and Questionnaires
Create simple surveys to gather structured feedback. Include questions about the game’s core mechanics, theme, and appeal. Keep surveys short to encourage completion.
Concept Art and Mockups
Visual aids help people understand your idea better. Share sketches, wireframes, or simple animations to illustrate gameplay or UI concepts.
Paper Prototyping
Use paper or cards to simulate gameplay mechanics. This low-tech approach lets you test rules and flow without programming.
Early Digital Prototypes
Build a minimal playable version focusing on core mechanics. Share it with a small group for hands-on feedback.
Interpreting Feedback
- Look for patterns rather than isolated opinions.
- Distinguish between subjective preferences and objective usability issues.
- Consider the source: feedback from your target audience carries more weight.
- Ask clarifying questions if feedback is vague.
Mind Map: Feedback Validation Process
Example: Validating a Puzzle Platformer Idea
Suppose you want to create a puzzle platformer where the player manipulates time to solve challenges. Here’s how you might validate this:
- Informal Conversations: Describe the time manipulation mechanic to friends and ask if it sounds fun or confusing.
- Surveys: Ask a small group if they enjoy puzzle platformers and what kind of time-based puzzles they find engaging.
- Concept Art: Share sketches showing time rewind and fast-forward effects on platforms.
- Paper Prototype: Create cards representing time states and simulate puzzle solutions.
- Digital Prototype: Build a simple level where the player can rewind a moving platform.
Feedback might reveal that players find the mechanic interesting but want clearer visual cues. You might also learn that some puzzles feel too complex early on. This information guides you to simplify initial levels and improve visual feedback.
Mind Map: Example Puzzle Platformer Feedback
Tips for Effective Feedback Sessions
- Be clear and concise when presenting your idea.
- Avoid leading questions that bias responses.
- Encourage honesty, even if feedback is critical.
- Take notes or record sessions for later review.
- Thank participants and keep them updated on progress.
Summary
Validating your game idea through feedback is about listening carefully and using insights to shape your project. It prevents wasted effort and helps ensure your game connects with players. Use a mix of methods, analyze responses thoughtfully, and be ready to adjust your concept based on what you learn.
Chapter 3: Planning Your Game Project
3.1 Breaking Down Your Game into Manageable Tasks
Breaking down your game into manageable tasks is a fundamental step that turns a big, vague idea into a clear, actionable plan. Without this, it’s easy to feel lost or overwhelmed. The goal is to split your project into smaller pieces that you can tackle one at a time, making steady progress and keeping your motivation intact.
Why Break Down Tasks?
Large projects can be intimidating because they seem endless. By dividing your game into chunks, you create checkpoints that help you track progress and adjust plans when needed. It also makes estimating time and resources more realistic.
Step 1: Identify Major Components
Start by listing the broad parts of your game. These are the big building blocks that form the core of your project. For example, a simple 2D platformer might have these components:
- Player Character
- Level Design
- Enemy AI
- User Interface
- Audio
- Game Mechanics
Step 2: Break Components into Subtasks
Each major component can be further divided into smaller tasks. For instance, the Player Character component might include:
- Design character sprite
- Animate running and jumping
- Implement movement controls
- Add collision detection
Step 3: Organize Tasks Logically
Group related tasks and arrange them in a sequence that makes sense. Some tasks depend on others, so order matters. For example, you need to implement movement controls before testing collision detection.
Step 4: Estimate Time and Difficulty
For each task, estimate how long it might take and how challenging it is. This helps prioritize and plan your schedule realistically.
Step 5: Create a Visual Map
Visualizing tasks helps clarify the structure and dependencies. Mind maps are a simple way to do this.
Example Mind Map for a 2D Platformer Game
Breaking Down a Task: “Implement Movement Controls”
- Set up input detection (keyboard/gamepad)
- Translate input into character movement
- Handle edge cases (e.g., simultaneous key presses)
- Test movement responsiveness
This breakdown clarifies what “implement movement controls” actually involves, making it less intimidating and easier to assign time.
Tips for Effective Task Breakdown
- Be Specific: Instead of “Create graphics,” say “Design idle animation frames for player.”
- Keep Tasks Small: Aim for tasks that can be completed in a few hours or a day.
- Include Testing: Always add testing and debugging as separate tasks.
- Use Action Verbs: Tasks should start with verbs like “Design,” “Implement,” “Test.”
Mind Map Showing Task Dependencies
This map shows that some tasks cannot start until others finish, helping you plan the order of work.
By breaking your game into manageable tasks and visualizing them, you gain clarity and control over the development process. It turns a big project into a series of achievable steps, making it easier to stay organized and motivated.
3.2 Time Estimation and Scheduling Using Agile Methods
Time estimation and scheduling are crucial steps in managing your indie game project without feeling overwhelmed. Agile methods, originally designed for software development, can be adapted to fit your indie game workflow by breaking down tasks into smaller, manageable chunks and iterating quickly.
Understanding Agile in Indie Game Development
Agile emphasizes flexibility and continuous improvement. Instead of planning everything upfront, you plan in short cycles called sprints, typically one to two weeks long. After each sprint, you review progress and adjust your plan accordingly.
Step 1: Break Down Your Work
Start by listing all the tasks you need to complete for your demo. This could include programming features, creating art assets, sound design, testing, and polishing. The goal is to make tasks small enough to complete within a sprint.
Example Task Breakdown for a Simple Platformer Demo
- Player movement script
- Enemy AI basic behavior
- Level design layout
- Background art
- Sound effects for jumps
- UI menu design
Step 2: Estimate Time for Each Task
Assign a rough time estimate to each task. Use hours or days depending on your preference. Keep estimates realistic; it’s better to overestimate slightly than underestimate and get stuck.
Example Estimates
- Player movement script: 8 hours
- Enemy AI basic behavior: 12 hours
- Level design layout: 10 hours
- Background art: 15 hours
- Sound effects for jumps: 4 hours
- UI menu design: 6 hours
Step 3: Prioritize Tasks
Identify which tasks are essential for your demo and which can be postponed or simplified. Prioritize core gameplay features first.
Step 4: Create a Sprint Schedule
Organize tasks into sprints. Each sprint should have a clear goal, like “Implement basic player controls and enemy behavior.”
Mind Map: Agile Sprint Planning
Step 5: Track Progress Daily
Use a simple task board or checklist to track what’s done, in progress, or to do. This helps maintain focus and quickly spot bottlenecks.
Mind Map: Daily Task Tracking
Step 6: Review and Adjust
At the end of each sprint, review what you accomplished. Did tasks take longer than expected? Were some easier? Adjust your estimates and priorities for the next sprint accordingly.
Example Sprint Plan for Week 1
| Task | Estimated Time | Status |
|---|---|---|
| Player movement script | 8 hours | Done |
| Enemy AI basic behavior | 12 hours | In Progress |
| Level design layout | 10 hours | To Do |
Tips for Effective Time Estimation and Scheduling
- Use relative sizing: Instead of exact hours, assign points (e.g., 1, 2, 3) to represent task complexity.
- Buffer time: Include extra time for unexpected issues.
- Limit work in progress: Focus on completing a few tasks rather than juggling many.
- Keep sprints short: Short cycles help you adapt quickly.
By applying these agile-inspired steps, you can create a realistic schedule that keeps your project moving forward without overwhelming you. The key is to stay flexible and adjust as you learn more about how long tasks actually take.
3.3 Prioritizing Features: Must-Have vs Nice-to-Have
Prioritizing features is a critical step in game development, especially for indie developers working with limited time and resources. The goal is to distinguish between “must-have” features—those essential for the core gameplay experience—and “nice-to-have” features, which enhance the game but are not crucial for the demo or initial release.
Why Prioritize?
Without clear prioritization, projects can become bloated, deadlines missed, and motivation lost. Focusing on must-haves ensures the game is playable and enjoyable in its simplest form before adding extras.
Defining Must-Have vs Nice-to-Have
- Must-Have: Features that define the game’s core mechanics, player interaction, and basic functionality.
- Nice-to-Have: Features that improve polish, add depth, or provide additional content but can be deferred or dropped without breaking the game.
Mind Map: Feature Prioritization Overview
Step 1: List All Features
Start by listing every feature you envision for your game. For example, in a simple 2D platformer:
- Player movement (run, jump)
- Enemy AI
- Collectibles
- Health system
- Pause menu
- Background music
- Particle effects
- Multiple levels
Step 2: Identify Core Gameplay
Ask yourself: What does the player absolutely need to experience the game? For the platformer, player movement and enemy AI are essential. Without them, the game isn’t functional.
Step 3: Categorize Features
Assign each feature to must-have or nice-to-have. For example:
- Must-Have:
- Player movement
- Enemy AI
- Basic health system
- One playable level
- Basic UI (health bar, score)
- Nice-to-Have:
- Multiple levels
- Background music
- Particle effects
- Pause menu
- Advanced enemy behaviors
Mind Map: Example for a 2D Platformer
Step 4: Consider Development Effort and Impact
Estimate how much time and effort each feature requires and how much it improves the player experience. Sometimes a nice-to-have feature might take a lot of time but add little to the core experience, making it a good candidate for later.
Step 5: Use the MoSCoW Method
This method divides features into:
- Must have
- Should have (important but not critical)
- Could have (nice additions)
- Won’t have (out of scope for now)
Example:
- Must have: Player controls, one level, enemy AI
- Should have: Health system, basic UI
- Could have: Background music, particle effects
- Won’t have: Multiplayer, advanced levels
Mind Map: MoSCoW Example
Step 6: Revisit and Adjust
Priorities can shift as development progresses. If a must-have feature proves too complex, consider simplifying it or moving some parts to nice-to-have.
Example: Simplifying a Feature
Suppose your enemy AI is too complex to implement fully. You might start with a simple patrol behavior (must-have) and add chasing or attacking behaviors later (nice-to-have).
Summary
Prioritizing features helps keep your project manageable and focused. By clearly separating must-haves from nice-to-haves, you ensure the core game is solid and playable. Use lists, mind maps, and frameworks like MoSCoW to organize your thoughts and make informed decisions. This approach reduces overwhelm and guides you toward a successful demo release.
3.4 Setting Milestones and Deadlines
Setting milestones and deadlines is a crucial step in managing your indie game project. Milestones act as checkpoints that mark significant progress points, while deadlines provide a time frame to keep you on track. Together, they help prevent the project from drifting aimlessly and reduce the chances of last-minute rushes.
Why Set Milestones?
Milestones break your project into digestible parts. Instead of facing a vague goal like “finish the game,” you focus on concrete achievements such as “complete player movement mechanics” or “design first level layout.” This approach makes progress measurable and motivates steady work.
What Makes a Good Milestone?
- Specific: Clearly define what success looks like.
- Achievable: Set realistic targets based on your skills and available time.
- Relevant: Ensure it contributes directly to the overall game demo.
- Time-bound: Attach a deadline to create urgency.
Example Milestones for a Simple Platformer Demo
- M1: Basic player movement implemented
- M2: First level designed and playable
- M3: Enemy AI integrated
- M4: UI menus functional
- M5: Sound effects and background music added
- M6: Playtesting and bug fixes completed
Setting Deadlines
Deadlines should be firm enough to encourage progress but flexible enough to accommodate unexpected challenges. When estimating time, consider:
- Your daily or weekly availability
- Complexity of each task
- Buffer time for testing and revisions
Mind Map: Milestones and Deadlines Planning
Tips for Effective Milestone and Deadline Setting
- Start with the big picture: Identify key features that define your demo.
- Break features into smaller tasks: For example, “player movement” can include “walking,” “jumping,” and “collision detection.”
- Estimate time per task: Be honest and add extra time for unexpected issues.
- Use a calendar or project management tool: Visual timelines help track progress.
- Review and adjust regularly: If a deadline is missed, analyze why and update your schedule.
Example: Adjusting Milestones
Suppose you planned to finish enemy AI by Week 6 but realize it requires more work. Instead of pushing everything back, you might:
- Split enemy AI into basic and advanced behaviors.
- Set a milestone for basic AI by Week 6.
- Schedule advanced AI for after the demo release.
Mind Map: Adjusted Milestones
Final Thoughts
Milestones and deadlines are tools to help you manage your time and expectations. They don’t have to be rigid rules but should guide your workflow. Regularly checking your progress against these markers keeps your project moving forward without feeling overwhelming.
3.5 Example: Planning a 2D Platformer Demo
Planning a 2D platformer demo involves breaking down the project into clear, manageable parts. This example will guide you through defining core elements, setting priorities, and organizing tasks using mind maps and concrete examples.
Step 1: Define the Core Concept
Start by outlining what your 2D platformer will be about. Keep it simple for a demo. For example, a character navigating through levels, avoiding obstacles, and collecting items.
Step 2: Identify Key Features
Focus on features essential for the demo. Avoid trying to include everything at once.
Step 3: Break Down Tasks
Divide the features into smaller tasks. This helps track progress and avoid overwhelm.
Step 4: Prioritize Tasks
Not all tasks are equally important. Prioritize to ensure the demo is playable as soon as possible.
Step 5: Set Milestones
Milestones mark progress points and keep the project on track.
Step 6: Example Timeline
Assign rough time estimates to each milestone.
Step 7: Visual Mind Map
A visual overview helps keep the project organized.
2D Platformer Demo Planning Mind Map
Summary
This example shows how to plan a 2D platformer demo by defining the core concept, identifying and prioritizing features, breaking down tasks, and setting milestones. Using mind maps in keeps the plan clear and accessible. The key is to focus on essential features first, ensuring a playable demo without getting bogged down by unnecessary complexity.
Chapter 4: Learning the Basics of Game Engines
4.1 Introduction to Popular Game Engines (Unity, Godot, Unreal)
When starting your indie game project, choosing the right game engine is a key decision. A game engine is the software framework that provides the tools and systems to build and run your game. Three popular options for indie developers are Unity, Godot, and Unreal Engine. Each has its own strengths, workflows, and communities. Understanding their core features helps you pick the one that fits your needs.
Unity
Unity is widely used for both 2D and 3D games. It supports multiple platforms, from PC to mobile and consoles. Unity uses C# as its primary scripting language, which is relatively easy to learn and widely supported.
- Strengths: Large asset store, extensive documentation, strong community support.
- Use case example: A 2D platformer with smooth animations and physics.
Mind map for Unity:
Godot
Godot is open-source and lightweight, designed to be easy to use for beginners. It supports both 2D and 3D game development, with a particular strength in 2D. Godot uses its own scripting language called GDScript, which has a syntax similar to Python, making it approachable for newcomers.
- Strengths: No licensing fees, flexible scene system, fast iteration.
- Use case example: A puzzle game with simple mechanics and clean visuals.
Mind map for Godot:
Unreal Engine
Unreal Engine is known for high-fidelity 3D graphics and powerful tools. It uses C++ and a visual scripting system called Blueprints, which allows you to create game logic without writing code. While often associated with large-scale projects, Unreal can be used for indie games, especially if you want advanced visuals.
- Strengths: Advanced rendering, Blueprint visual scripting, robust toolset.
- Use case example: A first-person exploration demo with realistic lighting.
Mind map for Unreal Engine:
Comparing the Engines
Here’s a simple comparison to clarify their differences:
Example Scenario
Imagine you want to create a simple 2D side-scrolling game with animated characters and basic physics. Unity and Godot both handle this well. Unity’s asset store can speed up development by providing ready-made assets, while Godot’s lightweight design lets you iterate quickly without licensing concerns.
If instead you aim to build a 3D first-person game with realistic lighting and detailed environments, Unreal Engine’s tools and rendering capabilities make it a strong candidate. Its Blueprint system also lowers the barrier if you’re less comfortable with C++.
Summary
- Unity: Good all-rounder, strong for both 2D and 3D, with a large ecosystem.
- Godot: Great for beginners and 2D projects, open-source and flexible.
- Unreal Engine: Best for high-quality 3D visuals and complex games, with visual scripting support.
Choosing an engine depends on your project’s needs, your programming comfort, and the type of game you want to build. Starting with small prototypes in each can help you get a feel for their workflows.
4.2 Setting Up Your Development Environment
Setting up your development environment is a foundational step in indie game development. It involves installing and configuring the software and tools you will use to create your game. A well-organized environment helps you work efficiently and reduces frustration later on.
Choosing Your Game Engine
Before setting up, decide on the game engine that suits your project. Popular beginner-friendly engines include Unity, Godot, and Unreal Engine. Each has its own installation process and system requirements.
Basic Components of a Development Environment
Your development environment typically includes:
- Game Engine: The core software where you build and run your game.
- Code Editor or IDE: Where you write scripts and code.
- Version Control System: To track changes and collaborate.
- Asset Management Tools: For organizing graphics, sounds, and other resources.
Step-by-Step Setup Example (Using Unity)
- Download and Install Unity Hub: Unity Hub manages different Unity versions and projects.
- Install a Unity Editor Version: Choose a stable release compatible with your system.
- Set Up a Code Editor: Unity works well with Visual Studio or Visual Studio Code.
- Create a New Project: Select a template (e.g., 2D or 3D) and specify the project location.
- Configure Project Settings: Adjust input, graphics, and build settings as needed.
Mind Map: Development Environment Setup
Organizing Your Project
A clear folder structure keeps your project manageable. For example:
Assets/
  Scripts/
  Art/
  Audio/
  Scenes/
  Prefabs/
ProjectSettings/
Packages/
This structure separates code, art, audio, and scene files, making it easier to find and update assets.
Configuring Version Control
Using version control like Git is a best practice even for solo developers. It allows you to track changes, revert mistakes, and backup your work.
- Initialize a Git repository in your project folder.
- Use a
.gitignorefile to exclude temporary or large files that don’t need tracking.
Example: Basic Gitignore for Unity
[Ll]ibrary/
[Tt]emp/
[Oo]bj/
[Bb]uild/
[Bb]uilds/
UserSettings/
*.csproj
*.unityproj
*.sln
*.user
*.userprefs
*.pidb
*.booproj
*.svd
*.pdb
*.mdb
*.opendb
*.VC.db
Mind Map: Version Control Setup
Setting Up Your Code Editor
Choose an editor that integrates well with your engine. For Unity, Visual Studio or Visual Studio Code are common choices.
- Install the editor.
- Add necessary extensions or plugins (e.g., C# support).
- Configure debugging tools.
Mind Map: Code Editor Setup
Testing Your Setup
After installation and configuration, create a simple test scene:
- Add a basic object (like a cube or sprite).
- Write a simple script to move the object.
- Run the scene to confirm everything works.
Summary
Setting up your development environment involves installing the game engine, configuring your code editor, organizing project files, and setting up version control. Taking the time to do this carefully will save headaches later and keep your project organized and manageable.
4.3 Navigating the Interface: A Beginner’s Guide
Navigating the interface of a game engine can feel like stepping into a new city without a map. This section breaks down the common elements you’ll encounter in most beginner-friendly engines like Unity or Godot, using clear examples and mind maps to guide you.
Main Interface Components
At its core, the interface is divided into several panels or windows, each serving a specific purpose. Here’s a simple mind map to visualize the typical layout:
Scene View
This is your workspace where you place and arrange game objects. Think of it as your game’s stage. You can move, rotate, and scale objects here. For example, dragging a character sprite into the scene and positioning it where you want it to start.
Game View
This panel shows what the player will see during gameplay. It’s essentially a preview window. When you hit play, the game runs here, allowing you to test mechanics and visuals.
Hierarchy / Scene Tree
This lists all the objects currently in your scene in a structured, often nested, format. For example, a player object might have child objects like a weapon or a light source. Clicking on an item here selects it in the Scene View.
Inspector / Properties Panel
When you select an object, this panel shows all its properties and components. You can tweak values like position coordinates, colors, or scripts attached to the object. For instance, changing the speed variable of a player controller script.
Project / Assets Browser
This is where all your game assets live: images, sounds, scripts, and prefabs. It works like a file explorer dedicated to your project. Dragging an asset from here into the Scene View adds it to your game.
Console / Output Window
Here you’ll see messages, warnings, and errors generated by your game or scripts. For example, if a script has a typo, the console will show an error message with details.
Toolbar
Usually found at the top, it contains buttons for play, pause, step, and tools for moving, rotating, or scaling objects.
Mind Map: Detailed Panel Functions
Example: Selecting and Modifying an Object
- In the Hierarchy, click on the “Player” object.
- The Inspector updates to show the Player’s components: Transform, Sprite Renderer, and PlayerController script.
- In the Inspector, change the Transform position from (0,0,0) to (2,1,0).
- Observe the Player object move in the Scene View accordingly.
This simple interaction is the foundation of building your game world.
Camera Navigation in Scene View
Moving around the Scene View is essential. Common controls:
- Pan: Hold middle mouse button and drag.
- Orbit: Hold right mouse button and move mouse.
- Zoom: Scroll wheel.
Getting comfortable with these controls lets you inspect your scene from different angles and distances.
Organizing Assets
Keeping your assets tidy saves time. Create folders in the Project Browser like:
- Sprites
- Scripts
- Audio
- Prefabs
Drag and drop files into these folders. For example, place all character images under Sprites > Characters.
Console Usage: Spotting Errors
When you run your game, the Console might show messages like:
NullReferenceException: Object reference not set to an instance of an object
PlayerController.Move()
This tells you there’s a script error in the PlayerController’s Move function. Clicking the message often takes you to the exact line in your code editor.
Summary
Understanding the interface panels and their roles helps you work efficiently. The Scene View is your playground, the Hierarchy organizes your objects, the Inspector lets you tweak details, and the Project Browser keeps your assets in order. The Console keeps you informed about issues, and the Toolbar gives you control over the editing process.
Getting familiar with these elements early on reduces confusion and helps you focus on making your game rather than hunting for buttons.
4.4 Creating Your First Scene: Step-by-Step Example
Creating your first scene in a game engine is a foundational step that brings your game idea into a visible, interactive space. This section walks through the process using a typical 2D engine setup, but the principles apply broadly. We’ll cover scene creation, adding objects, setting properties, and testing the scene.
Step 1: Create a New Scene
Most engines start with a default empty scene or allow you to create one from scratch. Think of a scene as a container for everything that happens in a particular part of your game.
- Open your game engine.
- Select “New Scene” or “Create Scene” from the menu.
- Save the scene immediately with a clear, descriptive name like
Level1orMainMenu.
Step 2: Add a Background
A background sets the visual tone and provides context. It can be a simple color, a static image, or a tilemap.
- Choose to add a new object or node.
- Select a sprite or image component.
- Import or select a background image.
- Position it at the center or origin point.
- Scale it to cover the visible area.
Example: For a 2D platformer, a simple sky gradient or a forest image works well.
Step 3: Add a Player Object
The player is the main interactive element.
- Add a new sprite or game object.
- Assign a player character image or placeholder shape (e.g., a colored square).
- Set the starting position, usually near the bottom center.
- Attach any necessary scripts or components for movement (this will be expanded later).
Step 4: Add Interactive Elements
Add platforms, obstacles, or collectibles.
- Create new objects for each element.
- Assign appropriate sprites.
- Position them logically (e.g., platforms at different heights).
- Add collision components to enable physics interactions.
Step 5: Organize the Scene Hierarchy
Keep your scene tidy by grouping related objects.
- Create empty parent objects or nodes named “Background”, “Player”, “Platforms”.
- Move objects under these parents.
Step 6: Set Camera and Viewport
Adjust the camera to frame your scene properly.
- Select the camera object.
- Set its position and zoom level.
- Test how the scene looks in the game view.
Step 7: Save and Test the Scene
Run the scene within the engine.
- Check that all objects appear as expected.
- Verify that the player and platforms are positioned correctly.
- Note any visual or functional issues for correction.
Mind Map: Creating Your First Scene
Example Walkthrough: Simple 2D Scene
Imagine you want to create a basic scene for a side-scrolling platformer demo.
- Create a new scene named
Level1. - Add a blue rectangle as the background to simulate the sky.
- Add a green rectangle at the bottom to represent the ground.
- Add a square sprite for the player, positioned slightly above the ground.
- Add two smaller rectangles as platforms at different heights.
- Group the ground and platforms under a parent named “Environment”.
- Position the camera so it shows the entire scene.
- Save and run the scene to see the player standing on the ground with platforms above.
This simple setup provides a visual and interactive foundation to build upon.
Tips
- Use placeholder graphics early to focus on layout and mechanics.
- Name objects clearly to avoid confusion later.
- Regularly save your scene to prevent data loss.
- Test frequently to catch issues early.
Creating your first scene is about assembling the pieces that will make your game come alive. It’s a practical step that turns ideas into something tangible and playable.
4.5 Best Practice: Organizing Your Project Files
Organizing your project files is a foundational step in indie game development that often gets overlooked. A clear and consistent folder structure saves time, reduces errors, and makes collaboration easier—even if you’re working solo. Here’s how to approach this task with practical examples and mind maps to guide you.
Why Organize?
Imagine searching through dozens of folders for a single sprite or script. Without a system, you waste time and risk overwriting or losing files. Organized projects help you focus on development rather than file hunting.
Core Principles
- Clarity: Folder names should be descriptive and intuitive.
- Consistency: Stick to one naming convention throughout.
- Separation: Group different asset types and code logically.
- Scalability: The structure should accommodate growth.
Typical Folder Structure
Here’s a common layout for a 2D indie game project:
- Assets/
- Art/
- Characters/
- Environments/
- UI/
- Audio/
- Music/
- SFX/
- Scripts/
- Scenes/
- Prefabs/
- Animations/
- Art/
- Builds/
- Docs/
- ThirdParty/
Mind Map: Basic Project Organization
Explanation of Key Folders
- Assets: This is your main working directory. Group assets by type to avoid clutter.
- Art: Separate characters, environments, and UI elements. For example, keep all character sprites in
Art/Characters. - Audio: Split music tracks and sound effects. This helps when you need to swap or update sounds.
- Scripts: Store all your code files here. If your project grows, consider subfolders by feature or system.
- Scenes: Keep your level or scene files here, so they’re easy to find.
- Prefabs: For reusable game objects, prefabs should have their own folder.
- Animations: Store animation clips and controllers separately.
- Builds: Keep your exported game builds here, organized by platform or version.
- Docs: Any design documents, notes, or licenses go here.
- ThirdParty: Assets or plugins from external sources.
Naming Conventions
Use lowercase or camelCase consistently. Avoid spaces and special characters. For example:
player_idle.pnginstead ofPlayer Idle.pngenemyAI.csinstead ofEnemy AI.cs
Mind Map: Naming Conventions
Example: Organizing a Simple 2D Platformer
Suppose you’re making a platformer with a player character, enemies, collectible coins, and a few levels.
- Assets/
- Art/
- Characters/
- player_idle.png
- player_run.png
- enemy_slime.png
- Environments/
- level1_background.png
- level2_background.png
- UI/
- health_bar.png
- coin_icon.png
- Characters/
- Audio/
- Music/
- main_theme.mp3
- SFX/
- jump.wav
- coin_pickup.wav
- Music/
- Scripts/
- PlayerController.cs
- EnemyAI.cs
- GameManager.cs
- Scenes/
- Level1.unity
- Level2.unity
- Prefabs/
- Player.prefab
- EnemySlime.prefab
- Coin.prefab
- Animations/
- PlayerIdle.anim
- PlayerRun.anim
- Art/
- Builds/
- Windows/
- Mac/
- Docs/
- GameDesignDoc.md
- ThirdParty/
- FreeSoundPack/
Tips for Maintaining Organization
- Regularly review and clean: Remove unused assets and scripts.
- Use version control: Tools like Git work better with organized projects.
- Comment and document: Keep notes on folder contents if needed.
- Avoid deep nesting: Don’t create too many subfolders; it makes navigation harder.
Mind Map: Maintenance Practices
In summary, a well-organized project structure is a practical habit that pays off throughout your development process. It reduces friction, helps you stay focused, and makes your work more accessible to others if you decide to collaborate. Start simple, stay consistent, and adjust as your project grows.
Chapter 5: Programming Fundamentals for Indie Games
5.1 Understanding Game Loops and Frame Updates
Understanding the game loop is fundamental to making any game work smoothly. At its core, a game loop is a repeating cycle that keeps the game running, updating its state, and rendering visuals on the screen. Without this loop, your game would be static — no movement, no interaction, no fun.
What is a Game Loop?
A game loop continuously performs three main tasks:
- Process Input: Detect player actions like keyboard presses or mouse clicks.
- Update Game State: Change positions, check collisions, update scores, and handle game logic.
- Render: Draw the current state of the game on the screen.
This cycle repeats many times per second, usually between 30 and 60 times, depending on the game and hardware.
Mind Map: Basic Game Loop Structure
Frame Updates Explained
Each iteration of the game loop is often called a “frame.” The frequency of these frames per second (FPS) affects how smooth the game feels. Higher FPS means smoother motion but requires more processing power.
The game loop must update the game state based on the time elapsed since the last frame. This ensures consistent movement regardless of frame rate fluctuations.
Mind Map: Frame Update Considerations
Example: Simple Game Loop in Pseudocode
while game_is_running:
    process_input()
    update_game_state(delta_time)
    render()
Here, delta_time is the time passed since the last frame. Using it helps keep movement smooth even if the frame rate changes.
Why Use Delta Time?
Imagine your character moves 100 pixels per second. If your game updates 60 times per second, each frame the character should move about 1.67 pixels (100 / 60). But if the frame rate drops to 30 FPS, the character should move 3.33 pixels per frame to maintain the same speed.
Delta time allows you to multiply movement by the exact time elapsed, keeping speed consistent.
Mind Map: Delta Time Usage
Fixed vs Variable Time Steps
- Variable Time Step: Update logic based on actual delta time. Easier to implement but can cause instability in physics simulations.
- Fixed Time Step: Update logic in fixed increments (e.g., 1/60th of a second). More stable for physics but requires careful handling if frame rates vary.
Many games combine both: fixed updates for physics and variable updates for rendering.
Example: Movement with Delta Time
function update_game_state(delta_time):
    player.position += player.speed * delta_time
If player.speed is 200 pixels per second and delta_time is 0.016 seconds (roughly 60 FPS), the player moves 3.2 pixels that frame.
Summary
The game loop is the heartbeat of your game. It processes input, updates the game world, and renders the results repeatedly. Managing frame updates properly, especially with delta time, ensures smooth and consistent gameplay across different hardware. Understanding these concepts early will make programming your game mechanics clearer and more reliable.
5.2 Basic Scripting Concepts with Practical Examples
Scripting in game development means writing small programs or sets of instructions that tell the game how to behave. These scripts control everything from player movement to enemy behavior and game events. Understanding basic scripting concepts is essential for turning your game idea into something interactive.
Key Concepts in Scripting
- Variables: Containers that store data values.
- Data Types: The kind of data stored (numbers, text, true/false).
- Functions: Blocks of code designed to perform a specific task.
- Conditionals: Decision-making structures that execute code based on conditions.
- Loops: Repeat actions multiple times.
- Events: Triggers that cause scripts to run.
Below is a mind map summarizing these concepts:
Variables and Data Types
Variables hold information your game needs. For example, a variable named playerHealth might store the player’s current health points.
int playerHealth = 100; // integer variable storing health
float playerSpeed = 5.5f; // float for speed with decimals
string playerName = "Alex"; // string for text
bool isAlive = true; // boolean for true/false
In this example, each variable has a specific data type. Using the correct type helps the game engine understand how to handle the data.
Functions
Functions group instructions to perform tasks. They can be called multiple times, which keeps your code organized and avoids repetition.
Example: A function to make the player jump.
void Jump() {
    // Apply upward force to player
    playerRigidbody.AddForce(Vector3.up * jumpStrength);
}
You can call Jump() whenever the player presses the jump button.
Conditionals
Conditionals let your game make choices. For example, checking if the player has enough health to survive an attack.
if (playerHealth > 0) {
    // Player is alive
    Debug.Log("Player is alive");
} else {
    // Player is dead
    Debug.Log("Game Over");
}
This script checks the player’s health and prints a message accordingly.
Loops
Loops repeat actions. For example, you might want to check all enemies in a list to update their behavior.
for (int i = 0; i < enemies.Length; i++) {
    enemies[i].Patrol();
}
This loop runs through each enemy and calls their Patrol function.
Events
Events trigger scripts when something happens, like a collision or the game starting.
Example: Running code when the player collects an item.
void OnTriggerEnter(Collider other) {
    if (other.CompareTag("Collectible")) {
        CollectItem(other.gameObject);
    }
}
This event detects when the player touches a collectible and calls a function to handle it.
Putting It All Together: Simple Player Health Script
int playerHealth = 100;

void TakeDamage(int damage) {
    playerHealth -= damage;
    if (playerHealth <= 0) {
        Die();
    } else {
        Debug.Log("Player hit! Health remaining: " + playerHealth);
    }
}

void Die() {
    Debug.Log("Player has died.");
    // Add death handling code here
}
This script reduces the player’s health when damage occurs, checks if the player is dead, and responds accordingly.
Summary Mind Map
Understanding these basics lets you start writing scripts that make your game interactive. Each concept builds on the others, so practicing with small examples helps solidify your grasp. As you progress, you’ll combine these elements to create more complex behaviors.
5.3 Implementing Player Controls: Walkthrough
Implementing player controls is a fundamental step in making your game interactive and enjoyable. Controls are the bridge between the player and the game world, so clarity and responsiveness are key. This section walks through setting up basic player controls, using a typical 2D platformer character as an example. The concepts apply broadly, whether you’re working in Unity, Godot, or another engine.
Understanding Player Controls
Player controls usually involve capturing input from the keyboard, mouse, or gamepad and translating that input into character movement or actions. The main components are:
- Input Detection: Recognizing when a player presses or releases a button or moves a joystick.
- Movement Logic: Deciding how the character should respond to that input.
- Feedback: Updating the game state and visuals accordingly.
Mind Map: Player Controls Overview
Step 1: Detecting Input
Start by choosing which inputs your game will support. For a simple 2D platformer, horizontal movement and jumping are typical.
Example (pseudocode):
float horizontalInput = Input.GetAxis("Horizontal");
bool jumpPressed = Input.GetButtonDown("Jump");
Here, horizontalInput will be a value between -1 (left) and 1 (right), and jumpPressed is true only on the frame the jump button is pressed.
Step 2: Applying Movement Logic
Use the input values to update the player’s position or velocity. For smooth movement, it’s common to modify the character’s velocity rather than position directly.
Example (pseudocode):
Vector2 velocity = playerRigidbody.velocity;
velocity.x = horizontalInput * moveSpeed;
if (jumpPressed && isGrounded) {
    velocity.y = jumpForce;
}
playerRigidbody.velocity = velocity;
This snippet moves the player left or right and applies an upward force to jump if the player is on the ground.
Step 3: Handling Edge Cases
- Preventing Mid-Air Jumps: Check if the player is grounded before allowing jumps.
- Smoothing Movement: Use acceleration and deceleration to avoid instant starts/stops.
- Input Buffering: Allow a small window to register jump input just before landing.
Mind Map: Movement Logic Details
Step 4: Providing Feedback
Player controls feel better when paired with visual and audio feedback.
- Animations: Switch between idle, running, and jumping animations based on movement state.
- Sound Effects: Play footsteps or jump sounds.
- Particle Effects: Dust clouds when landing or taking off.
Example logic for animation state:
if (Mathf.Abs(horizontalInput) > 0.1f) {
    animator.Play("Run");
} else {
    animator.Play("Idle");
}
if (!isGrounded) {
    animator.Play("Jump");
}
Complete Example Mind Map: Implementing Player Controls
Summary
Implementing player controls involves capturing input, translating it into movement, handling edge cases, and providing feedback. Start simple: detect input, move the player accordingly, and add polish with animations and sounds. Testing and tweaking responsiveness will improve the feel. This approach keeps the code manageable and the player experience clear.
5.4 Handling Collisions and Interactions
Collisions and interactions form the backbone of gameplay. They determine how objects in your game world respond when they meet or overlap. Handling these correctly ensures your game feels responsive and behaves as players expect.
What Are Collisions?
Collisions occur when two game objects occupy the same space or come into contact. Detecting collisions lets your game know when to trigger events like damage, pickups, or physics reactions.
Types of Collisions
- Bounding Box Collision: Uses rectangles or boxes around objects to check overlap.
- Circle Collision: Uses circles, simpler for round objects.
- Pixel Perfect Collision: Checks exact pixels, more precise but costly.
Most indie games start with bounding boxes or circles for simplicity.
Collision Detection vs. Collision Response
- Detection: Identifying that two objects have collided.
- Response: What happens after detection (e.g., bounce, stop, damage).
Mind Map: Collision Handling Overview
Implementing Collision Detection: Example in Pseudocode
function checkCollision(objA, objB):
    if objA.x < objB.x + objB.width and
       objA.x + objA.width > objB.x and
       objA.y < objB.y + objB.height and
       objA.y + objA.height > objB.y:
        return true
    else:
        return false
This example uses axis-aligned bounding boxes (AABB). It checks if the rectangles overlap on both the x and y axes.
Mind Map: Collision Response Options
Handling Interactions
Interactions are the game’s reactions to collisions. For example, when a player touches a collectible, the game should increase the score and remove the item.
Example: Player Collecting an Item
if checkCollision(player, collectible):
    player.score += collectible.value
    remove(collectible)
Example: Player Hitting an Enemy
if checkCollision(player, enemy):
    player.health -= enemy.damage
    knockback(player, enemy)
Mind Map: Common Interaction Scenarios
Best Practices
- Keep collision shapes simple: Complex shapes slow down the game.
- Separate detection and response: This makes your code cleaner and easier to maintain.
- Use layers or tags: To filter which objects should collide or interact.
- Test with debug visuals: Draw collision boxes or circles to see if detection works as expected.
Example: Organizing Collision Logic in Code
function update():
    for each obj in gameObjects:
        for each otherObj in gameObjects:
            if obj != otherObj and shouldCollide(obj, otherObj):
                if checkCollision(obj, otherObj):
                    handleCollision(obj, otherObj)
Here, shouldCollide filters unnecessary checks (e.g., two collectibles might not collide).
Summary
Handling collisions and interactions involves detecting when objects meet and deciding what happens next. Using simple collision shapes, separating detection from response, and organizing your code with filters and layers will keep your game running smoothly and your development manageable.
5.5 Debugging Tips and Common Pitfalls
Debugging is an essential part of game development, especially for indie developers working solo or in small teams. It’s the process of identifying, isolating, and fixing errors or unexpected behaviors in your game code. This section covers practical tips and common pitfalls to help you debug efficiently and avoid frustration.
Common Debugging Tips
-
Reproduce the Problem Consistently: Before fixing a bug, make sure you can trigger it reliably. This helps verify if your fix works and prevents chasing ghosts.
-
Use Debug Logs Wisely: Insert log statements to track variable values and program flow. For example, in Unity C#,
Debug.Log("Player position: " + player.transform.position);helps confirm if movement code runs as expected. -
Isolate the Issue: Narrow down the code section causing the problem by commenting out or disabling parts of your code. This reduces complexity and helps pinpoint the bug’s origin.
-
Check Assumptions: Bugs often arise from incorrect assumptions about how a function or engine feature works. Verify documentation or test small snippets to confirm behavior.
-
Step Through Code with a Debugger: Use your engine’s debugger to pause execution and inspect variables line-by-line. This is invaluable for understanding unexpected states.
-
Keep Your Code Organized: Clear, modular code is easier to debug. Avoid long functions and deeply nested logic.
-
Test Incrementally: Build your game in small, testable pieces. This limits the scope of bugs and makes them easier to find.
-
Use Version Control: Tools like Git allow you to track changes and revert to previous working states, which can save time when a bug appears after recent edits.
Common Pitfalls and How to Avoid Them
-
Ignoring Error Messages: Don’t overlook console errors or warnings. They often point directly to the problem.
-
Overusing Debug Logs: While helpful, excessive logging can clutter output and slow down your game. Remove or comment out logs once the issue is resolved.
-
Fixing Symptoms Instead of Causes: Changing code to hide a bug without understanding its root cause can create new problems later.
-
Not Backing Up Before Big Changes: Always commit or save your project before major edits to avoid losing progress.
-
Assuming the Engine is Bug-Free: Sometimes bugs stem from engine quirks or version-specific issues. Check if others have reported similar problems.
-
Neglecting Edge Cases: Test your game under unusual conditions, like extreme player input or unusual screen sizes, to catch hidden bugs.
-
Skipping Playtesting: Bugs often show up only during real gameplay. Regular playtesting helps uncover issues early.
Example: Debugging a Player Jump Bug
Imagine your player character doesn’t jump when pressing the jump button. Here’s a step-by-step debugging approach:
- Reproduce: Confirm the jump fails every time you press the button.
- Check Input: Add a debug log inside the input handler to verify the jump button press is detected.
if (Input.GetButtonDown("Jump")) {
    Debug.Log("Jump button pressed");
    // jump code
}
- Isolate Code: Temporarily disable other movement code to ensure nothing blocks jumping.
- Verify Conditions: Check if conditions like “isGrounded” are correctly set. Add logs to confirm.
Debug.Log("Is grounded: " + isGrounded);
- Step Through: Use the debugger to see if the jump force is applied.
- Fix: If “isGrounded” is never true due to incorrect collision detection, adjust your ground check logic.
Mind Map: Debugging Workflow
Mind Map: Common Pitfalls
Mind Map: Debugging Tools
Debugging is a skill that improves with practice. By approaching bugs methodically and using the tools and techniques outlined here, you can reduce frustration and keep your project moving forward.
Chapter 6: Designing Game Assets
6.1 Creating Simple 2D Art: Tools and Techniques
Creating simple 2D art is a foundational skill for indie game development. It involves producing visual elements like characters, backgrounds, objects, and UI components that are clear, functional, and fit the style of your game. This section covers the essential tools and techniques to get started, along with practical examples and mind maps to organize your approach.
Tools for Creating Simple 2D Art
When starting out, the choice of tool depends on your goals, budget, and platform. Here are common categories:
- Pixel Art Editors: Focused on pixel-level control; ideal for retro or minimalist styles.
- Vector Graphics Editors: Use mathematical paths; good for scalable, clean art.
- Raster Graphics Editors: Work with pixels but offer more painting and editing tools.
Popular Tools by Category
| Tool | Type | Strengths | Example Use Case |
|---|---|---|---|
| Aseprite | Pixel Art | Animation support, pixel tools | Creating a walking sprite |
| Piskel | Pixel Art | Browser-based, free | Quick sprite prototyping |
| Inkscape | Vector | Free, scalable graphics | Designing UI icons |
| Adobe Illustrator | Vector | Industry standard, precise | Logo or menu design |
| Krita | Raster | Free, painting-focused | Background art or textures |
| Photoshop | Raster | Extensive features | Complex character art |
Mind Map: Choosing a Tool Based on Your Needs
Techniques for Simple 2D Art
-
Start with a Concept Sketch: Use pencil and paper or a digital sketch to outline your idea. Keep it rough; the goal is to define shapes and composition.
-
Choose a Color Palette: Limit your colors to maintain consistency and reduce complexity. For pixel art, 3-5 colors can be enough.
-
Work with Layers: Separate elements like background, characters, and UI to make editing easier.
-
Use Grids and Guides: Especially important in pixel art to keep proportions and alignment consistent.
-
Keep Resolution in Mind: Decide on your art resolution early. For pixel art, common sizes are 16x16, 32x32, or 64x64 pixels per sprite.
-
Create Simple Animations: Use frame-by-frame animation for movement or effects. Keep animations short and loopable.
Mind Map: Basic Workflow for Creating 2D Art
Example: Creating a Simple Player Sprite in Pixel Art
- Step 1: Sketch a small humanoid figure roughly 32x32 pixels.
- Step 2: Define a palette of 4 colors: skin tone, shirt color, pants color, and outline.
- Step 3: Draw the outline using the darkest color on a grid.
- Step 4: Fill in colors inside the outline.
- Step 5: Add simple shading by using a slightly darker color on one side.
- Step 6: Create a walking animation with 3 frames: standing, left foot forward, right foot forward.
Example: Designing a Vector-Based Button
- Step 1: Draw a rounded rectangle for the button base.
- **Step 2: Add a simple icon or text label centered inside.
- Step 3: Use gradients or flat colors to give depth.
- Step 4: Export as SVG or PNG for use in your game UI.
Tips for Efficiency and Consistency
- Reuse assets where possible to save time.
- Maintain a style guide that defines colors, line thickness, and shapes.
- Regularly test your art in the game engine to ensure it looks correct at runtime.
- Use naming conventions and organized folders to keep your project tidy.
Mind Map: Maintaining Art Consistency
In summary, creating simple 2D art is about choosing the right tools, following a clear workflow, and applying basic techniques that suit your game’s style. Starting small and building up gradually helps avoid overwhelm and keeps your project manageable.
6.2 Introduction to Sprite Animation with Examples
Sprite animation is the process of creating the illusion of movement by displaying a sequence of images, or frames, in rapid succession. Each frame is a slightly different version of the sprite, which when played in order, simulates motion. This technique is fundamental in 2D game development and is often used for characters, objects, effects, and UI elements.
What is a Sprite Sheet?
A sprite sheet is a single image file that contains multiple frames of a sprite arranged in a grid or sequence. Using a sprite sheet is more efficient than loading individual images because it reduces memory usage and improves rendering performance.
Basic Concepts of Sprite Animation
- Frame: A single image in the animation sequence.
- Frame Rate: How many frames are shown per second (fps). Higher fps means smoother animation.
- Looping: Repeating the animation sequence continuously.
- Frame Duration: How long each frame is displayed.
Mind Map: Core Elements of Sprite Animation
Example 1: Simple Walk Cycle
Imagine a character walking. The walk cycle might have 6 frames showing different leg and arm positions. When played at 12 fps, the character appears to walk smoothly.
| Frame | Description |
|---|---|
| 1 | Left leg forward |
| 2 | Both legs mid-step |
| 3 | Right leg forward |
| 4 | Both legs mid-step |
| 5 | Left leg back |
| 6 | Right leg back |
By cycling through these frames repeatedly, the character’s legs move in a natural walking pattern.
Mind Map: Walk Cycle Animation
Example 2: Button Hover Effect
A UI button might have a simple animation when hovered over, such as a glow or bounce. This could be a 3-frame animation:
| Frame | Description |
|---|---|
| 1 | Normal button |
| 2 | Slightly larger |
| 3 | Glow effect added |
This quick animation plays once on hover and returns to the normal state when the mouse leaves.
Mind Map: UI Button Animation
Implementing Sprite Animation: Step-by-Step
- Prepare your frames: Design each frame of the animation and arrange them in a sprite sheet.
- Load the sprite sheet into your game engine.
- Define frame boundaries: Specify the coordinates and size of each frame within the sprite sheet.
- Set frame rate: Decide how fast the animation should play.
- Create an animation loop: Cycle through frames in order, resetting to the first frame after the last.
- Control playback: Start, stop, or pause the animation based on game events.
Example Code Snippet (Pseudocode)
spriteSheet = loadImage('character_walk.png')
frames = [frame1, frame2, frame3, frame4, frame5, frame6]
currentFrame = 0
frameRate = 12 // frames per second

timer = 0

function update(deltaTime) {
  timer += deltaTime
  if (timer >= 1/frameRate) {
    currentFrame = (currentFrame + 1) % frames.length
    timer = 0
  }
}

function draw() {
  drawImage(spriteSheet, frames[currentFrame])
}
Tips for Effective Sprite Animation
- Keep frame sizes consistent to avoid jitter.
- Use enough frames to make motion smooth but not so many that it becomes resource-heavy.
- Test animations at different frame rates.
- Use looping for continuous actions (walking, idle) and one-shot animations for events (attacks, hits).
- Organize sprite sheets logically, grouping related animations together.
Mind Map: Tips for Sprite Animation
Sprite animation is a straightforward but powerful tool. By breaking down movements into frames and controlling their playback, you bring static images to life. Starting with simple animations like walk cycles or button effects builds a foundation for more complex sequences later on.
6.3 Designing User Interface Elements
Designing user interface (UI) elements is a crucial step in making your game accessible and enjoyable. UI elements are the visual components players interact with, such as buttons, menus, health bars, and inventory screens. Good UI design helps players understand the game state and controls without confusion or frustration.
Key Principles of UI Design
- Clarity: Each element should clearly communicate its purpose. Avoid ambiguous icons or labels.
- Consistency: Use a uniform style for fonts, colors, and layouts.
- Simplicity: Keep interfaces straightforward; avoid clutter.
- Feedback: UI elements should respond visibly to player actions.
- Accessibility: Consider colorblind-friendly palettes and readable fonts.
Mind Map: UI Element Categories
Designing Buttons
Buttons are the most common interactive UI elements. They should look clickable and provide immediate feedback when pressed.
Example: A “Start Game” button
- Shape: Rounded rectangle
- Color: Contrasting with background (e.g., bright green on dark gray)
- Label: Clear text, e.g., “Start”
- Feedback: Changes shade or adds a subtle shadow on hover/click
Mind Map: Button Design Considerations
Menus and Layout
Menus organize game options and settings. They should be easy to navigate and visually balanced.
Example: Pause Menu
- Options: Resume, Settings, Quit
- Layout: Vertical list, centered on screen
- Highlight: Current selection changes color or is underlined
Mind Map: Menu Design
Information Displays
These elements show game data like health, score, or time remaining. They should be visible but not intrusive.
Example: Health Bar
- Position: Top-left corner
- Style: Horizontal bar filling from left to right
- Color: Green when full, red when low
- Label: Numeric value or icon
Mind Map: Information Display
Interaction Elements
Inventory slots, sliders, and dialog boxes allow players to interact with game systems.
Example: Inventory Slot
- Visual: Square with border
- State: Empty (transparent), filled (item icon visible), selected (highlighted border)
- Interaction: Click to select or drag-and-drop
Mind Map: Interaction Elements
Practical Example: Designing a Simple Pause Menu UI
- Menu Container: Semi-transparent dark rectangle centered on screen.
- Title: “Paused” text at top, large font.
- Buttons: Vertical list - Resume, Settings, Quit.
- Button Style: Rounded rectangles, light gray background, dark text.
- Feedback: Buttons change color on hover and click.
This design keeps the menu simple and functional, with clear navigation and visual feedback.
Summary
Designing UI elements involves balancing clarity, consistency, and usability. Using simple shapes, clear labels, and consistent styles helps players interact with your game smoothly. Mind maps can organize your design process by breaking down UI components and their considerations. Always test your UI with real users to catch confusing elements early.
6.4 Sound Effects and Music: Finding and Implementing Audio
Sound is a key part of game experience. It helps players understand actions, sets mood, and makes gameplay feel alive. This section covers how to find suitable audio assets and how to implement them effectively in your game.
Understanding the Role of Audio
Audio in games usually falls into two categories:
- Sound Effects (SFX): Short sounds triggered by player actions or game events, like footsteps, jumps, or item pickups.
- Music: Longer, continuous tracks that establish atmosphere or emotion.
Both contribute differently but complement each other.
Mind Map: Types of Game Audio
Finding Audio Assets
You have three main options for sourcing audio:
- Create Your Own: Using software like Audacity or GarageBand to record or synthesize sounds.
- Use Free or Paid Asset Libraries: Many sites offer royalty-free sounds and music.
- Hire or Collaborate: Work with composers or sound designers.
For a first indie demo, using free or affordable assets is often the most practical.
Example: Selecting Footstep Sounds
If your game has a character walking on different surfaces, you might need multiple footstep sounds (grass, wood, stone). Look for short, clear clips that match your game’s style. Avoid overly complex or noisy sounds that could distract.
Implementing Sound Effects
Sound effects should be triggered by specific game events. For example, when the player jumps, a jump sound plays once.
Best practices:
- Use short clips to avoid lag.
- Avoid overlapping too many sounds at once.
- Adjust volume levels to balance with music.
- Use spatial audio if your engine supports it, so sounds come from the right direction.
Example: Jump Sound in Unity (C#)
AudioSource audioSource;
public AudioClip jumpSound;

void Start() {
    audioSource = GetComponent<AudioSource>();
}

void Jump() {
    // Jump logic here
    audioSource.PlayOneShot(jumpSound);
}
This plays the jump sound once whenever the player jumps.
Implementing Music
Music usually loops in the background. You want smooth transitions and volume control.
Key points:
- Loop tracks seamlessly.
- Fade music in and out between scenes or events.
- Keep music volume lower than sound effects for clarity.
Example: Looping Background Music in Godot (GDScript)
var music = preload("res://music/background.ogg")

func _ready():
    var audio = AudioStreamPlayer.new()
    audio.stream = music
    audio.loop = true
    add_child(audio)
    audio.play()
This code loads and plays background music that loops indefinitely.
Mind Map: Implementing Audio Workflow
Tips for Audio Quality and Performance
- Use compressed formats (like OGG) for music to save space.
- Keep sound effects short and optimized.
- Avoid playing too many sounds simultaneously to prevent audio clutter.
- Test audio on different devices to ensure consistent experience.
Summary
Sound effects and music are essential for player immersion. Start by identifying what sounds your game needs, find or create appropriate assets, then implement them with attention to timing, volume, and performance. Simple, well-placed audio can greatly enhance your demo without adding complexity.
6.5 Best Practice: Asset Optimization for Performance
Asset optimization for performance is a crucial step in indie game development, especially when working with limited resources and aiming for smooth gameplay. Optimizing assets means reducing their impact on memory, load times, and rendering performance without sacrificing the visual or audio quality players expect. This section covers practical techniques and examples to help you keep your game running efficiently.
Why Optimize Assets?
Every asset you add—textures, models, sounds—consumes memory and processing power. Unoptimized assets can cause frame rate drops, longer load times, or even crashes on lower-end devices. Optimization ensures your game remains accessible and enjoyable.
Key Areas of Asset Optimization
Texture Optimization
Resolution Reduction: High-resolution textures look great but consume more memory. For example, a 2048x2048 texture uses four times the memory of a 1024x1024 texture. If your game uses pixel art or small sprites, oversized textures are unnecessary. Choose the smallest resolution that maintains acceptable visual quality.
Compression Formats: Use texture compression formats supported by your target platform, such as DXT1/5 or ASTC. These formats reduce texture size in memory and on disk without a significant visual hit. For example, Unity automatically compresses textures if you enable it in import settings.
Mipmapping: Mipmaps are smaller versions of textures used when objects are far away. They reduce texture aliasing and improve performance by decreasing the workload on the GPU. Most engines generate mipmaps automatically, but ensure this is enabled.
Model Optimization
Polygon Count Reduction: Simplify 3D models by reducing polygons where detail is unnecessary. For example, a distant tree model can have fewer polygons than one close to the camera. Tools like Blender’s decimate modifier help automate this.
Level of Detail (LOD): Create multiple versions of a model with varying detail levels. The game engine switches between them based on camera distance. This approach balances visual quality and performance.
Efficient UV Mapping: Optimize UV layouts to minimize wasted texture space. Efficient UVs allow you to use smaller textures or fewer atlases, which reduces draw calls and memory usage.
Audio Optimization
Compression Formats: Use compressed audio formats like Ogg Vorbis or MP3 instead of uncompressed WAV files. For example, a 10-second uncompressed WAV might be 1 MB, while the Ogg version could be 100 KB.
Sample Rate Adjustment: Lowering the sample rate from 44.1 kHz to 22 kHz can reduce file size with minimal audible difference, especially for sound effects.
Looping and Trimming: Trim silence from audio clips and create seamless loops to save memory and improve playback efficiency.
General Best Practices
Asset Reuse: Reuse textures, models, and sounds where possible. For example, use a single texture atlas for multiple UI elements instead of separate files. This reduces draw calls and memory overhead.
Proper File Formats: Choose file formats that balance quality and size. PNG is good for lossless 2D images, but JPEG or compressed textures are better for photographs or large textures.
Streaming vs Loading: Stream large assets like music or long animations instead of loading them entirely into memory. This approach reduces initial load times and memory spikes.
Example: Optimizing a 2D Platformer Sprite Sheet
Suppose you have a sprite sheet with 256x256 pixel frames for character animations. If the game runs on low-end devices, consider:
- Reducing frame size to 128x128 pixels if the character appears small on screen.
- Compressing the sprite sheet using a format like ETC2 (for mobile) or DXT1 (for PC).
- Combining multiple animations into a single texture atlas to reduce draw calls.
- Enabling mipmaps if the engine supports it, to improve rendering at different scales.
This process can reduce memory usage by up to 75% without noticeable quality loss.
Summary Mind Map
Optimizing assets is about making smart trade-offs. The goal is to maintain the player’s experience while keeping your game lightweight and responsive. Start with the biggest offenders—usually textures and audio—and apply these techniques incrementally. Testing on your target hardware will guide you on where optimization matters most.
Chapter 7: Building Core Gameplay Mechanics
7.1 Implementing Movement and Physics
Movement and physics form the backbone of most games, especially those where player control and interaction with the environment matter. This section breaks down the essentials of implementing movement and physics in a clear, step-by-step way, using simple examples to illustrate each concept.
Core Concepts of Movement and Physics
Movement in games usually means changing the position of a character or object over time. Physics adds realism by simulating forces like gravity, friction, and collisions.
Here’s a mind map outlining the key components:
Step 1: Basic Movement Without Physics
Start simple. Imagine a 2D character that moves left and right based on player input.
Example in pseudocode:
if (left_key_pressed) {
  position.x -= speed * deltaTime
}
if (right_key_pressed) {
  position.x += speed * deltaTime
}
Here, speed is a constant defining how fast the character moves, and deltaTime ensures movement is smooth regardless of frame rate.
This approach is called kinematic movement because you directly set the position.
Step 2: Adding Gravity
Gravity pulls objects downward. To simulate it, introduce velocity and acceleration.
Mind map for gravity implementation:
Example:
velocityY += gravity * deltaTime
position.y += velocityY * deltaTime
if (position.y <= groundLevel) {
  position.y = groundLevel
  velocityY = 0
}
This simulates falling and landing.
Step 3: Implementing Jumping
Jumping is a vertical movement against gravity.
Add a jump velocity when the player presses the jump button, but only if the character is on the ground.
Example:
if (jump_key_pressed && onGround) {
  velocityY = jumpForce
  onGround = false
}
The gravity code from Step 2 will pull the character back down.
Step 4: Handling Horizontal Movement with Acceleration and Friction
Instead of instantly changing position, use velocity and acceleration for smoother, more natural movement.
Mind map:
Example:
if (left_key_pressed) {
  velocityX -= acceleration * deltaTime
} else if (right_key_pressed) {
  velocityX += acceleration * deltaTime
} else {
  velocityX *= friction
}
position.x += velocityX * deltaTime
Friction here is a value less than 1 (e.g., 0.9) that gradually reduces velocity.
Step 5: Collision Detection Basics
To prevent the player from falling through the ground or walking through walls, implement collision detection.
Simplest approach: axis-aligned bounding box (AABB).
Mind map:
Example:
if (playerBox.intersects(groundBox)) {
  position.y = groundBox.top + playerBox.height / 2
  velocityY = 0
  onGround = true
}
Step 6: Putting It All Together – Simple 2D Platformer Movement
Here’s a concise example combining horizontal movement, gravity, jumping, and collision:
// Constants
gravity = -9.8
acceleration = 50
friction = 0.8
jumpForce = 15

// Variables
velocityX = 0
velocityY = 0
position = {x: 0, y: groundLevel}
onGround = true

deltaTime = timeSinceLastFrame

// Input
if (left_key_pressed) velocityX -= acceleration * deltaTime
else if (right_key_pressed) velocityX += acceleration * deltaTime
else velocityX *= friction

if (jump_key_pressed && onGround) {
  velocityY = jumpForce
  onGround = false
}

// Apply gravity
velocityY += gravity * deltaTime

// Update position
position.x += velocityX * deltaTime
position.y += velocityY * deltaTime

// Collision with ground
if (position.y <= groundLevel) {
  position.y = groundLevel
  velocityY = 0
  onGround = true
}
This example covers the essentials needed to move a character realistically in a 2D space.
Notes on Physics Engines
Many game engines provide built-in physics systems that handle forces, collisions, and constraints automatically. When starting out, it’s useful to understand these basics before relying on engine features.
Summary Mind Map
This structured approach helps build a solid foundation for character movement and physics in your indie game.
7.2 Creating Enemies and NPC Behavior
Creating enemies and NPC (non-player character) behavior is a key part of making your game world feel alive and engaging. This section breaks down the process into manageable steps, with examples and mind maps to clarify concepts.
Understanding Enemy and NPC Roles
Enemies typically challenge the player, while NPCs often provide information, quests, or atmosphere. Both require behavior patterns that feel consistent and purposeful.
Basic Components of Behavior
- State: What the character is doing (idle, patrol, attack, flee).
- Triggers: Conditions that cause state changes (player proximity, health level).
- Actions: What the character does in each state (move, shoot, talk).
Mind Map: Enemy Behavior Structure
Example: Simple Enemy AI
Imagine a 2D platformer enemy that patrols a platform and chases the player if nearby.
- Idle/Patrol: Moves back and forth between two points.
- Chase: If the player is within 5 units, move toward the player.
- Attack: If within 1 unit, perform an attack.
This can be implemented with a simple state machine:
enum EnemyState { Patrol, Chase, Attack }
EnemyState currentState = EnemyState.Patrol;

void Update() {
  switch(currentState) {
    case EnemyState.Patrol:
      Patrol();
      if (PlayerInRange(5)) currentState = EnemyState.Chase;
      break;
    case EnemyState.Chase:
      ChasePlayer();
      if (PlayerInRange(1)) currentState = EnemyState.Attack;
      else if (!PlayerInRange(5)) currentState = EnemyState.Patrol;
      break;
    case EnemyState.Attack:
      AttackPlayer();
      if (!PlayerInRange(1)) currentState = EnemyState.Chase;
      break;
  }
}
Mind Map: NPC Behavior Structure
Example: Simple NPC Interaction
An NPC that stands idle until the player presses a button nearby, then starts a dialogue.
- Idle: NPC waits.
- Talk: When player interacts, show dialogue box.
Pseudocode:
bool playerNearby = false;
bool isTalking = false;

void Update() {
  if (playerNearby && Input.GetKeyDown(KeyCode.E)) {
    isTalking = true;
    ShowDialogue();
  }
  if (isTalking && DialogueFinished()) {
    isTalking = false;
  }
}

void OnTriggerEnter(Collider other) {
  if (other.CompareTag("Player")) playerNearby = true;
}

void OnTriggerExit(Collider other) {
  if (other.CompareTag("Player")) playerNearby = false;
}
Designing Behavior with Finite State Machines (FSM)
FSMs help organize behavior by defining states and transitions clearly. Each state has specific actions and conditions to move to other states.
Mind Map: FSM Example for Enemy
Adding Complexity Gradually
Start with simple behaviors and add layers:
- Add random idle animations.
- Introduce different attack types.
- Add health and reactions to damage.
Example: Enemy Reaction to Damage
When health drops below 30%, enemy flees.
if (health < maxHealth * 0.3f) {
  currentState = EnemyState.Flee;
  FleeFromPlayer();
}
Tips for Effective Enemy and NPC Behavior
- Keep behaviors predictable but not boring.
- Use clear triggers to avoid erratic actions.
- Test behaviors in isolation before integrating.
- Use debugging tools to visualize states.
Summary
Creating enemies and NPCs involves defining clear states, triggers, and actions. Using state machines keeps behavior organized and manageable. Start simple, test often, and build complexity as you go.
7.3 Designing Collectibles and Power-ups
Designing collectibles and power-ups is a key part of creating engaging gameplay. These elements offer players incentives to explore, take risks, and experiment with the game’s mechanics. When done well, they add depth without overwhelming the player or cluttering the experience.
What Are Collectibles and Power-ups?
- Collectibles are items the player gathers, often for points, achievements, or progression. Examples include coins, gems, keys, or story fragments.
- Power-ups temporarily or permanently enhance the player’s abilities, such as increased speed, extra health, or new weapons.
Both serve different purposes but can overlap. For instance, a collectible might grant a power-up once enough are collected.
Designing Collectibles
When designing collectibles, consider the following:
- Purpose: What motivates the player to collect these? Is it score, unlocking content, or story progression?
- Placement: Are collectibles easy to find or hidden in challenging spots? This affects exploration and difficulty.
- Quantity: Too many can feel like busywork; too few might not motivate players.
- Visual Clarity: Collectibles should stand out but not distract.
Example: Simple Coin Collectible
- Purpose: Increase score and encourage exploration.
- Placement: Spread along the main path and in secret areas.
- Quantity: Moderate, enough to reward thorough players.
- Visual: Bright gold coin with a slight shine.
Designing Power-ups
Power-ups should be meaningful and balanced. Consider:
- Effect Duration: Temporary boosts encourage strategic use; permanent upgrades reward progress.
- Impact on Gameplay: Does it enhance core mechanics or introduce new ones?
- Acquisition Method: Are power-ups found, earned, or purchased?
- Limitations: Cooldowns or limited uses prevent overpowering.
Example: Speed Boost Power-up
- Effect: Doubles player speed for 5 seconds.
- Acquisition: Found in hidden boxes.
- Limitation: Cooldown of 30 seconds before reuse.
Mind Map: Designing Collectibles
Mind Map: Designing Power-ups
Integrating Collectibles and Power-ups
Combining collectibles and power-ups can create layered gameplay. For example, collecting a set number of gems might grant a power-up. This encourages players to engage with both systems.
Example: Gem Collection Leading to Shield Power-up
- Collect 10 gems to activate a temporary shield.
- Shield lasts 10 seconds, absorbing damage.
- Gems placed in increasingly difficult locations.
Balancing Tips
- Avoid making collectibles mandatory for progression unless that is a core design choice.
- Power-ups should feel rewarding but not break the challenge.
- Test placement and frequency to maintain player interest without frustration.
Summary
Design collectibles and power-ups with clear goals and player experience in mind. Use visual cues and thoughtful placement to guide players. Balance their effects and availability to keep gameplay engaging and fair.
7.4 Adding Game Progression and Levels
Adding game progression and levels is a key step in shaping the player’s experience and maintaining engagement. Progression gives players a sense of accomplishment and structure, while levels provide distinct challenges and environments that keep the gameplay fresh.
Understanding Game Progression
Game progression refers to how the player advances through the game, either by increasing difficulty, gaining new abilities, or exploring new content. It can be linear, branching, or open-ended depending on the design.
Types of Progression
- Linear Progression: Players move through levels or stages in a fixed order.
- Branching Progression: Players choose different paths or levels, affecting the story or gameplay.
- Open Progression: Players can explore levels or content in any order, often seen in sandbox or open-world games.
Mind Map: Types of Game Progression
Designing Levels
Levels are the discrete segments of gameplay that offer challenges, puzzles, or story beats. Each level should have clear goals, obstacles, and a sense of progression from the previous one.
Key Elements to Consider When Adding Levels
- Difficulty Curve: Levels should gradually increase in challenge to match player skill development.
- Theme and Setting: Each level can have a unique visual or thematic identity.
- Objectives: Define what the player needs to accomplish to complete the level.
- Rewards: Provide incentives such as items, story progression, or new mechanics.
Mind Map: Level Design Components
Example: Adding Progression and Levels in a 2D Platformer
Imagine a simple 2D platformer where the player controls a character jumping through obstacles.
- Start with a Basic Level: Introduce basic movement and jumping.
- Increase Difficulty: Add moving platforms and simple enemies in the next level.
- Introduce New Mechanics: In level three, add a double jump ability.
- Vary Themes: Change the background and music to reflect a forest, then a cave.
- Set Clear Objectives: Reach the exit door, collect a key, or defeat a mini-boss.
This gradual introduction of new challenges and mechanics keeps the player engaged and provides a clear sense of progression.
Implementing Progression Mechanically
- Use variables to track player progress, such as current level or abilities gained.
- Unlock new levels only after completing previous ones (for linear progression).
- Save player state to allow returning to levels.
Mind Map: Progression Implementation
Example Code Snippet (Pseudocode)
# Track current level
current_level = 1

# Function to load next level
def load_next_level():
    global current_level
    if current_level < max_level:
        current_level += 1
        load_level(current_level)
    else:
        show_game_complete_screen()
Balancing Progression
Balance is crucial. If levels get too hard too fast, players may quit. If too easy, they may get bored. Playtesting helps find the right curve.
Summary
Adding progression and levels involves defining how players move through the game, designing levels with increasing challenges and clear objectives, and implementing systems to track and unlock content. Using mind maps can help organize these elements clearly during planning.
7.5 Example: Building a Simple Combat System
A combat system is a core mechanic in many games, even simple ones. It involves player actions, enemy reactions, and rules that govern damage and health. Here, we’ll build a straightforward combat system suitable for a beginner indie game demo.
Key Components of a Simple Combat System
- Player Input: How the player initiates an attack.
- Attack Mechanics: What happens when an attack is triggered.
- Enemy Response: How enemies react to being attacked.
- Health Management: Tracking damage and death.
- Feedback: Visual or audio cues to communicate combat events.
Mind Map: Simple Combat System Structure
Step 1: Player Input
The player needs a way to trigger attacks, typically through a button press. To avoid spamming, an attack cooldown is useful.
Example:
// Pseudocode for Unity
float attackCooldown = 1.0f; // 1 second cooldown
float lastAttackTime = -1f;

void Update() {
  if (Input.GetButtonDown("Fire1") && Time.time - lastAttackTime > attackCooldown) {
    Attack();
    lastAttackTime = Time.time;
  }
}
This snippet checks if the attack button is pressed and if enough time has passed since the last attack.
Step 2: Attack Mechanics
When the player attacks, the game needs to detect if an enemy is hit. This can be done with simple collision checks or raycasts.
Example:
void Attack() {
  // Define attack range
  float attackRange = 1.5f;
  Vector3 attackPoint = transform.position + transform.forward * attackRange;

  // Detect enemies in range
  Collider[] hitEnemies = Physics.OverlapSphere(attackPoint, 0.5f, enemyLayer);

  foreach (Collider enemy in hitEnemies) {
    enemy.GetComponent<Enemy>().TakeDamage(10);
  }
}
This code checks for enemies within a small sphere in front of the player and applies damage.
Step 3: Enemy Response
Enemies need to handle damage and know when to die.
Example:
public class Enemy : MonoBehaviour {
  public int maxHealth = 30;
  private int currentHealth;

  void Start() {
    currentHealth = maxHealth;
  }

  public void TakeDamage(int damage) {
    currentHealth -= damage;
    if (currentHealth <= 0) {
      Die();
    }
  }

  void Die() {
    // Play death animation or effects
    Destroy(gameObject);
  }
}
This class manages enemy health and removes the enemy when health reaches zero.
Step 4: Health Management
Both player and enemies need health tracking. For the player, you might want to add UI elements showing health.
Example:
public class PlayerHealth : MonoBehaviour {
  public int maxHealth = 100;
  private int currentHealth;

  void Start() {
    currentHealth = maxHealth;
  }

  public void TakeDamage(int damage) {
    currentHealth -= damage;
    UpdateHealthUI();
    if (currentHealth <= 0) {
      Die();
    }
  }

  void UpdateHealthUI() {
    // Update health bar or text
  }

  void Die() {
    // Handle player death
  }
}
Step 5: Feedback
Feedback helps players understand combat events. Simple sound effects and visual flashes can improve clarity.
Example:
- Play a sword swing sound when attacking.
- Flash enemy sprite red when hit.
- Show damage numbers briefly.
public void TakeDamage(int damage) {
  currentHealth -= damage;
  StartCoroutine(FlashRed());
  // Show damage number
  if (currentHealth <= 0) {
    Die();
  }
}

IEnumerator FlashRed() {
  SpriteRenderer sr = GetComponent<SpriteRenderer>();
  Color originalColor = sr.color;
  sr.color = Color.red;
  yield return new WaitForSeconds(0.1f);
  sr.color = originalColor;
}
Summary Mind Map: Combat System Workflow
This simple combat system covers the essentials needed for a playable demo. It can be expanded with combos, different attack types, or enemy AI, but starting with these basics keeps development manageable and focused.
Chapter 8: User Interface and User Experience
8.1 Designing Intuitive Menus and HUDs
Designing intuitive menus and HUDs (Heads-Up Displays) is a key part of making your game accessible and enjoyable. These elements provide players with essential information and controls without distracting from gameplay. Getting them right means balancing clarity, simplicity, and functionality.
What Makes a Menu or HUD Intuitive?
- Clarity: Players should immediately understand what each element does.
- Consistency: Use familiar layouts and symbols to reduce the learning curve.
- Responsiveness: Menus and HUDs should react quickly and predictably to input.
- Minimalism: Avoid clutter; only show what’s necessary at the moment.
Mind Map: Core Principles of Intuitive Menu Design
Mind Map: HUD Design Considerations
Examples and Best Practices
Menu Design Example: Pause Menu
Imagine a pause menu with these elements:
- Resume button at the top center
- Options button below resume
- Exit to main menu at the bottom
Why this works:
- The most common action (resume) is the easiest to find.
- Buttons are stacked vertically, following natural eye movement.
- Labels are short and clear.
HUD Example: Health and Ammo Display
A common approach is to place health on the top-left corner and ammo count on the top-right.
- Health bar uses a simple red bar with a numeric value.
- Ammo count shows current bullets and total reserve.
Why this works:
- Separating these two stats prevents confusion.
- Using color coding (red for health) leverages common associations.
- Numeric values complement bars for precision.
Tips for Implementation
- Use consistent fonts and colors throughout menus and HUD.
- Group related controls or info logically; for example, all audio settings together.
- Provide immediate visual or audio feedback when buttons are pressed.
- Test your design with real users to catch confusing elements.
- Keep menus navigable via keyboard/controller as well as mouse/touch.
Mind Map: Common Menu Elements
Summary
Intuitive menus and HUDs reduce player frustration and improve game flow. Focus on clear labeling, logical grouping, and minimal clutter. Use familiar layouts and consistent design to help players navigate quickly. Test early and often to ensure your interface serves the player’s needs without getting in the way.
8.2 Implementing Buttons and Interactive Elements
Buttons and interactive elements are the backbone of user interaction in any game interface. They allow players to navigate menus, trigger actions, and control settings. Implementing these elements effectively requires attention to both functionality and user experience.
Understanding Buttons and Interactive Elements
At their core, buttons are UI components that respond to user input, typically clicks or taps. Interactive elements can include sliders, toggles, checkboxes, and draggable items. Each serves a specific purpose but shares the need for clear feedback and intuitive behavior.
Basic Components of a Button
- Visual Representation: The graphic or shape players see.
- Hitbox: The area that detects input.
- States: Different appearances based on interaction (normal, hover, pressed, disabled).
- Action: The code or event triggered when activated.
Mind Map: Button Implementation Overview
Step-by-Step Example: Creating a Simple Button in Unity
- Create the Visual: Use a UI Image component with a button graphic.
- Add a Button Component: This handles input and state changes.
- Set Up States: Customize colors or sprites for Normal, Highlighted, Pressed, and Disabled.
- Assign an OnClick Event: Link a function to execute when the button is pressed.
public class ButtonActions : MonoBehaviour
{
    public void OnStartButtonPressed()
    {
        Debug.Log("Start button pressed!");
        // Add game start logic here
    }
}
Attach this script to a GameObject, then assign the OnStartButtonPressed method to the button’s OnClick event in the inspector.
Handling Interactive Elements Beyond Buttons
- Sliders: Allow users to select a value within a range.
- Toggles: Represent on/off states.
- Dropdowns: Provide a list of options.
Each requires similar considerations: clear visual states, responsive input handling, and feedback.
Mind Map: Interactive Elements
Best Practices for Interactive Elements
- Clear Visual Feedback: Change colors, shapes, or add animations to indicate states.
- Consistent Behavior: Similar elements should behave the same way throughout the game.
- Accessible Input: Support mouse, keyboard, and touch where applicable.
- Responsive Hitboxes: Make clickable areas slightly larger than the visual element to improve usability.
- Debounce Input: Prevent multiple activations from a single press.
Example: Implementing a Toggle Button
A toggle button switches between two states, such as sound on/off.
public class SoundToggle : MonoBehaviour
{
    public bool isSoundOn = true;
    public void ToggleSound()
    {
        isSoundOn = !isSoundOn;
        Debug.Log("Sound is now " + (isSoundOn ? "On" : "Off"));
        // Add sound enabling/disabling logic here
    }
}
Assign this method to a button’s OnClick event. Update the button’s visual state accordingly to reflect the current sound status.
Handling Input Events
Interactive elements rely on event-driven programming. Most engines provide event listeners or callbacks for input detection. For example, Unity uses the OnClick event for buttons, while Godot uses signals like pressed().
Mind Map: Input Handling for Buttons
Tips for Testing Interactive Elements
- Test with different input methods.
- Verify visual feedback matches the state.
- Check hitbox sizes and responsiveness.
- Ensure no accidental multiple activations.
Implementing buttons and interactive elements with these principles ensures players can navigate and control your game interface without confusion or frustration. Clear feedback and consistent behavior build trust and make the experience smoother.
8.3 Providing Player Feedback Through Visual and Audio Cues
Providing player feedback through visual and audio cues is a fundamental part of game design. It helps players understand what’s happening, guides their actions, and makes the game feel responsive. Without clear feedback, players can feel lost or frustrated. This section covers practical ways to implement feedback and examples that illustrate these principles.
Why Feedback Matters
Feedback confirms player actions, signals success or failure, and communicates game state changes. It reduces confusion and keeps players engaged by making the game world feel alive and reactive.
Types of Player Feedback
Player feedback generally falls into two categories: visual and audio. Both can work together or separately depending on the context.
- Visual Feedback: Changes in color, animation, UI elements, particle effects, screen shake, or camera movement.
- Audio Feedback: Sound effects, musical cues, voice lines, or ambient sounds.
Mind Map: Visual Feedback
Mind Map: Audio Feedback
Examples of Visual Feedback
1. Button Interaction: When a player hovers over a button, it changes color or slightly enlarges. This tells the player the button is interactive. For example, a green button might brighten on hover and depress visually on click.
2. Health Bar Color Shift: A health bar that changes from green to yellow to red as health decreases quickly communicates danger without reading numbers.
3. Damage Indication: Flashing the character sprite red or applying a brief screen shake when hit signals damage clearly. This is more immediate than just subtracting health points.
4. Collectible Items: Adding a sparkle or glow effect to items that can be picked up draws attention and confirms their importance.
5. Progress Feedback: Animating score increments or showing a small pop-up text like “+10 XP” reinforces player achievements.
Examples of Audio Feedback
1. Jump Sound: A short, distinct sound when the player jumps confirms the action and adds weight to movement.
2. Collision Noise: A thud or bounce sound when hitting an obstacle or enemy provides tactile feedback.
3. Success Chime: A pleasant tone when completing a task or collecting an item rewards the player.
4. Warning Sounds: A rising beep or heartbeat sound when health is low alerts the player to danger.
5. Environmental Audio: Footsteps that change based on surface type (grass vs. metal) increase immersion and provide subtle cues.
Integrating Visual and Audio Feedback
Combining both types often works best. For example, when a player picks up a coin:
- The coin glows briefly (visual)
- A satisfying chime plays (audio)
This dual feedback confirms the action clearly and makes it feel rewarding.
Best Practices
- Be Consistent: Use similar feedback for similar actions to build player intuition.
- Avoid Overload: Too many effects can confuse or annoy players. Prioritize clarity.
- Match Feedback to Game Style: A cartoonish game might use exaggerated animations and sounds, while a horror game might prefer subtle cues.
- Test Feedback: Watch players interact and see if they notice and understand the cues.
Summary
Visual and audio feedback are essential tools for communicating with players. Simple changes like color shifts, animations, and sounds can make a big difference in how players perceive and enjoy your game. Thoughtful, clear feedback reduces frustration and enhances the overall experience.
8.4 Accessibility Considerations in Indie Games
Accessibility in indie games means designing your game so that as many people as possible can enjoy it, regardless of physical, sensory, or cognitive differences. It’s about removing unnecessary barriers without compromising your creative vision. This section covers practical considerations and examples to help you make your game more accessible.
Why Accessibility Matters
Accessibility isn’t just a checkbox; it improves the experience for all players. Clear visuals, adjustable controls, and thoughtful audio design benefit everyone, not only those with disabilities. Plus, it broadens your potential audience.
Key Areas of Accessibility
Here’s a mind map to organize the main accessibility considerations:
Visual Accessibility
Colorblindness affects a significant portion of the population. Offering a colorblind mode that changes problematic colors to distinguishable alternatives is a straightforward fix. For example, instead of red and green enemies, use red and blue or add distinct shapes.
Text size and font choice matter. Use readable fonts and allow players to adjust text size. Small or fancy fonts can strain players’ eyes. High contrast between text and background improves readability.
UI scalability means your interface should adapt to different screen sizes and allow players to zoom or resize elements. This helps players with low vision or those playing on smaller devices.
Auditory Accessibility
Not all players can hear game sounds or dialogue. Subtitles and captions should be clear, synchronized, and include speaker identification when possible. For example, showing “[Enemy approaching!]” helps players who can’t hear audio cues.
Visual audio cues can supplement or replace sounds. Flashing lights or screen shakes timed with important sounds provide alternative feedback.
Volume controls should be granular, letting players adjust music, effects, and dialogue independently.
Motor Accessibility
Some players have limited mobility or use alternative input devices. Customizable controls let players remap keys or buttons to suit their needs. For instance, allowing a jump action to be triggered by multiple buttons or a single key press.
Alternative input methods might include support for gamepads, switches, or touch controls.
Difficulty adjustments can reduce fast reflex requirements or complex input sequences. For example, toggling auto-aim or slowing down enemy speed.
Cognitive Accessibility
Clear instructions and tutorials help players understand game mechanics without confusion. Avoid jargon and keep explanations concise.
Consistent UI layouts reduce cognitive load. If menus or buttons move around, players may struggle to find what they need.
Adjustable game speed or pause options let players control the pace, accommodating different processing speeds.
Simplified mechanics or optional hints can help players who find complex systems overwhelming.
Example: Implementing Accessibility in a Puzzle Platformer
- Visual: Added a colorblind mode switching red/green platforms to blue/yellow.
- Auditory: Included subtitles for all dialogue and visual cues for key sound effects.
- Motor: Allowed full key remapping and added a slow-motion toggle for tricky sections.
- Cognitive: Provided a step-by-step tutorial with clear, simple language and consistent UI icons.
Summary
Accessibility is about thoughtful design choices that respect player diversity. Small changes, like adding subtitles or allowing control remapping, can make a big difference. Building accessibility into your game from the start is easier than retrofitting it later and shows respect for your players’ varied needs.
8.5 Best Practice: Playtesting UI with Real Users
Playtesting your game’s user interface (UI) with real users is a crucial step to ensure your design is intuitive, accessible, and enjoyable. It helps identify issues you might miss as the creator, since you’re too close to the project. This section covers practical methods, examples, and mind maps to guide you through effective UI playtesting.
Why Playtest UI?
Playtesting reveals how actual players interact with menus, buttons, HUDs, and other interface elements. It shows whether your UI communicates clearly and supports gameplay without causing frustration or confusion.
Setting Up Your Playtest
- Choose representative users: Pick testers who resemble your target audience. If your game targets casual players, avoid only testing with experienced gamers.
- Define clear goals: Decide what you want to learn—navigation ease, button clarity, menu responsiveness, or overall satisfaction.
- Prepare scenarios: Create tasks for testers, such as “Start a new game,” “Adjust audio settings,” or “Pause and resume gameplay.”
Conducting the Playtest
- Observe silently: Watch how users interact without guiding them. Note hesitations, misclicks, or repeated attempts.
- Ask questions after tasks: Instead of interrupting, ask what they expected or found confusing after they finish a task.
- Record sessions: Video or screen capture helps review details later.
Mind Map: UI Playtesting Workflow
Common UI Issues to Watch For
- Unclear labels: Testers hesitate or ask what a button does.
- Hidden controls: Important options buried in submenus.
- Inconsistent design: Different styles or placements confuse users.
- Overloaded screens: Too much information at once.
Example: Testing a Pause Menu
Imagine your pause menu has options: Resume, Settings, Quit.
- Task: “Pause the game and change the volume.”
- Observation: Testers pause easily but struggle to find the volume slider because it’s nested under ‘Settings’ with no clear label.
- Feedback: Users suggest adding a volume icon directly on the pause screen.
- Action: You add a volume control on the pause menu for quicker access.
Mind Map: Pause Menu Playtest Example
Gathering Quantitative and Qualitative Data
- Quantitative: Time taken to complete tasks, number of errors, clicks to reach an option.
- Qualitative: User comments, facial expressions, frustration levels.
Analyzing Results
Look for patterns across testers. If multiple users struggle with the same element, it’s a clear sign to improve it. Prioritize fixes that block core gameplay or cause confusion.
Iteration and Retesting
After making UI changes, run another round of playtests. This confirms whether fixes worked and uncovers new issues.
Mind Map: Iterative Playtesting Cycle
Final Tips
- Keep sessions short and focused to avoid tester fatigue.
- Encourage honest feedback; remind testers there are no wrong answers.
- Use simple prototypes or wireframes early to save time.
- Document all findings clearly for your development team.
Playtesting UI with real users is not a one-time task but an ongoing process that sharpens your game’s interface and player experience. It helps turn assumptions into facts and guesswork into actionable improvements.
Chapter 9: Testing and Iteration
9.1 Setting Up a Testing Plan
Setting up a testing plan is a crucial step in game development, especially for indie developers aiming to release a polished demo. A testing plan organizes how you will identify and fix issues, ensuring your game works as intended and provides a good player experience. It also helps avoid last-minute chaos and overlooked bugs.
What is a Testing Plan?
A testing plan is a structured approach that outlines what to test, how to test it, who will test, and when testing will occur. It breaks down the game into components and defines clear goals for each testing phase.
Why Have a Testing Plan?
Without a plan, testing can become random and inefficient. You might miss critical bugs or waste time on minor issues. A plan keeps testing focused and manageable, especially when juggling limited time and resources.
Components of a Testing Plan
Step 1: Define Testing Objectives
Start by listing what you want to achieve with testing. For example, you might want to confirm that the player can complete the first level without getting stuck or that the controls respond correctly.
Example:
- Confirm player movement works on keyboard and gamepad.
- Ensure enemies behave as expected.
- Verify UI buttons respond to clicks.
- Check that the game does not crash after 30 minutes of play.
Step 2: Determine the Scope
Decide which parts of your game will be tested. For a demo, focus on core gameplay and critical features rather than every minor detail.
Example:
- Test core mechanics: jumping, shooting, collecting items.
- Test menus and HUD elements.
- Test audio playback.
- Test on Windows and Mac platforms.
Step 3: Choose Testing Types
Different tests serve different purposes. Here are common types:
- Functional Testing: Does each feature work as intended?
- Playtesting: Are players enjoying the game? Is it understandable?
- Compatibility Testing: Does the game run on all targeted devices?
- Performance Testing: Does the game maintain stable frame rates?
Step 4: Assign Roles
If you’re solo, you’ll wear all hats, but it helps to separate tasks mentally or with tools. If you have others, assign who tests what.
Example:
- Developer: Functional and performance testing.
- Friends or community members: Playtesting and feedback.
Step 5: Create a Schedule
Set realistic deadlines for each testing phase. For example:
- Week 1: Internal functional testing.
- Week 2: External playtesting.
- Week 3: Bug fixes and final checks.
Step 6: Plan Reporting and Feedback
Decide how testers will report bugs and feedback. Use simple tools like spreadsheets, shared documents, or bug trackers.
Example:
- Bug reports include steps to reproduce, screenshots, and severity.
- Feedback forms ask about enjoyment, difficulty, and controls.
Example Mind Map for a Simple Testing Plan
Practical Example: Testing Player Movement
- Objective: Ensure player can move left, right, jump, and crouch smoothly.
- Scope: Test on keyboard and controller.
- Testing Type: Functional and playtesting.
- Role: Developer tests functionality; external testers report feel and responsiveness.
- Schedule: Test during internal testing phase.
- Reporting: Document any input lag, stuck animations, or unresponsive controls.
Tips for Effective Testing Plans
- Keep tests focused and manageable; don’t try to test everything at once.
- Use clear, simple language in your plan so anyone can understand it.
- Regularly update the plan as the game evolves.
- Include time for retesting after fixes.
Setting up a testing plan may seem like extra work, but it saves time and frustration later. It turns testing from a guessing game into a clear, actionable process. That way, your demo will be more stable and enjoyable when it reaches players.
9.2 Playtesting Techniques and Gathering Feedback
Playtesting is a crucial step in game development that helps identify issues, improve gameplay, and ensure the player experience aligns with your vision. It involves observing players as they interact with your game and collecting their feedback to guide improvements. This section covers practical techniques for playtesting and methods to gather useful feedback.
Playtesting Techniques
-
Internal Playtesting
- Conducted by the development team.
- Focuses on identifying obvious bugs, balancing issues, and basic gameplay flow.
- Example: A developer plays through a level multiple times to check for collision errors or progression blockers.
-
Closed Playtesting
- Involves a small group of trusted testers, often friends or colleagues.
- Allows for more candid feedback in a controlled environment.
- Example: Inviting three friends to play your demo and asking them to think aloud as they play.
-
Open Playtesting
- Released to a wider audience, sometimes publicly.
- Provides diverse feedback and uncovers issues that internal testers might miss.
- Example: Uploading a demo to a platform like Itch.io and inviting players to report bugs and share impressions.
-
Remote Playtesting
- Testers play the game on their own devices and provide feedback asynchronously.
- Useful when testers are geographically dispersed.
- Example: Sharing a build with testers via email and collecting feedback through a survey.
-
In-Person Playtesting Sessions
- Observing players directly as they play.
- Allows you to note body language, frustration points, and unexpected behaviors.
- Example: Sitting with a tester and watching how they navigate menus or handle controls.
Gathering Feedback
Collecting feedback effectively requires clear communication and structured methods. Here are some approaches:
-
Surveys and Questionnaires
- Use targeted questions to get specific insights.
- Include a mix of rating scales, multiple choice, and open-ended questions.
- Example questions:
- “On a scale of 1 to 5, how intuitive did you find the controls?”
- “What part of the game did you find most frustrating?”
-
Interviews and Discussions
- Conduct short interviews after play sessions.
- Encourage testers to explain their thought process and feelings.
- Example: Asking “What was your strategy for completing the level?” to understand player decision-making.
-
Gameplay Metrics
- Track in-game data such as time spent on levels, number of deaths, or item usage.
- Helps quantify player behavior and identify pain points.
- Example: Noticing that 70% of players quit at a specific checkpoint suggests difficulty spikes.
-
Observation Notes
- Take detailed notes during in-person sessions.
- Record unexpected player actions or confusion.
- Example: A player repeatedly tries to jump through a closed door, indicating unclear level design.
Mind Map: Playtesting Techniques
Mind Map: Feedback Gathering Methods
Example Scenario
Imagine you have a simple puzzle game demo. You conduct a closed playtest with five friends. You ask them to play while thinking aloud. Afterward, you give them a short survey asking about difficulty, controls, and enjoyment.
During play, you notice one player gets stuck on a puzzle for an unusually long time. In the survey, multiple players mention that the hint system is unclear. Using this information, you decide to add clearer hints and adjust puzzle difficulty.
Summary
Effective playtesting combines multiple techniques to get a well-rounded view of your game’s strengths and weaknesses. Observing players, asking targeted questions, and analyzing gameplay data all contribute to meaningful feedback. This feedback then guides your next development steps, helping you improve your game without guessing what players want or need.
9.3 Debugging Common Issues
Debugging is an essential part of game development. It’s the process of identifying, isolating, and fixing problems that prevent your game from working as intended. While it can sometimes feel tedious, understanding common issues and how to approach them systematically will save you time and frustration.
Common Types of Bugs
- Syntax Errors: Mistakes in code spelling or structure that prevent compilation or running.
- Logic Errors: Code runs but produces incorrect behavior or results.
- Runtime Errors: Errors that occur while the game is running, such as null references or out-of-bounds exceptions.
- Performance Issues: Slow frame rates, lag, or memory leaks.
- Visual Glitches: Sprites not displaying correctly, UI elements misplaced.
- Physics and Collision Problems: Objects passing through each other or unexpected movement.
Mind Map: Debugging Workflow
Step 1: Identifying the Problem
Start by clearly defining what isn’t working. For example, if your player character won’t jump, note exactly what happens when you press the jump button. Does the character do nothing, or does it move incorrectly? Try to reproduce the issue consistently. This helps avoid chasing random or intermittent bugs.
Step 2: Isolating the Cause
Once you know what’s wrong, narrow down where it happens. Use print statements or logging to check values and flow. For example, if the jump doesn’t trigger, print a message when the jump input is detected and when the jump function runs. If the first prints but the second doesn’t, the problem lies between input detection and jump execution.
Mind Map: Isolation Techniques
Example: Null Reference Exception
Suppose your game crashes with a “NullReferenceException” when trying to access an enemy’s health. This usually means the enemy object wasn’t properly assigned or instantiated. To debug:
- Check where the enemy is created.
- Confirm the reference isn’t null before accessing.
- Add a conditional check:
if(enemy != null) {
    enemy.TakeDamage(10);
} else {
    Debug.Log("Enemy reference is null");
}
This simple check prevents crashes and helps identify missing assignments.
Step 3: Fixing the Issue
After isolating the cause, apply the fix. Keep changes small and test frequently. For example, if a collision isn’t detected because the collider is disabled, enable it and test immediately. Avoid making multiple unrelated changes at once; it complicates tracking what solved the problem.
Step 4: Verifying the Fix
Once fixed, test the game thoroughly to ensure the issue is resolved and no new problems appeared. Play through relevant sections and try edge cases. For example, if you fixed jumping, test jumping on different surfaces and while moving.
Mind Map: Common Debugging Tools
Example: Visual Debugging of Collisions
If your character passes through platforms, use debug drawing to visualize colliders:
void OnDrawGizmos() {
    Gizmos.color = Color.red;
    Gizmos.DrawWireCube(collider.bounds.center, collider.bounds.size);
}
Seeing the collider boundaries helps confirm if they are positioned and sized correctly.
Performance Issues
If the game runs slowly, check for:
- Excessive object instantiation or destruction.
- Unoptimized loops or expensive operations in Update methods.
- Large textures or uncompressed assets.
Use the profiler to identify hotspots. For example, if a script runs heavy calculations every frame, consider moving it to a less frequent update or simplifying the logic.
Example: Fixing Frame Rate Drops
If your game slows down when many enemies appear, try pooling enemies instead of creating/destroying them repeatedly. This reduces garbage collection and improves performance.
Summary
Debugging is about methodical investigation. Use logs, breakpoints, and visual aids to understand what your game is doing. Isolate problems, fix them incrementally, and verify thoroughly. With practice, debugging becomes a straightforward part of your workflow rather than a roadblock.
9.4 Iterating Based on Player Data and Feedback
Iterating based on player data and feedback is a crucial step in refining your indie game. It involves analyzing how players interact with your demo, identifying pain points or areas of confusion, and making targeted changes to improve the experience. This process is cyclical: gather data, interpret it, implement changes, then test again.
Understanding Player Data
Player data can come in many forms: quantitative metrics like completion rates, time spent on levels, and death counts, as well as qualitative feedback from surveys, forums, or direct conversations. Both types are valuable. Numbers tell you what is happening; player comments often explain why.
Mind Map: Sources of Player Data
Interpreting Feedback
Not all feedback requires action. Look for patterns rather than isolated opinions. For example, if multiple players mention that a jump is too difficult or a control feels unresponsive, that signals a design issue worth addressing. Conversely, a single comment about a minor annoyance might be less urgent.
Mind Map: Interpreting Feedback
Example: Adjusting Difficulty Based on Data
Suppose your demo shows a high death rate on the third level, and players report frustration with a particular enemy’s attack speed. You can experiment by slightly reducing the enemy’s attack speed or increasing player health in that section. After implementing changes, track if death rates decrease and if player feedback improves.
Mind Map: Iteration Cycle
Practical Steps for Iteration
- Collect Data Consistently: Use built-in analytics or simple logging to track player behavior. Combine this with structured feedback forms.
- Organize Feedback: Group similar comments and data points to see trends.
- Prioritize Changes: Focus on fixes that improve core gameplay or remove blockers.
- Make Incremental Changes: Avoid overhauling multiple systems at once. Small, focused tweaks make it easier to measure impact.
- Communicate with Players: Let testers know their feedback is valued and inform them about changes made.
Example: Improving User Interface Based on Feedback
Players might report that the health bar is hard to see during intense moments. After reviewing gameplay footage and feedback, you decide to increase its size and add a contrasting outline. Subsequent feedback shows players find it easier to track health, confirming the iteration’s success.
Mind Map: Prioritizing Changes
Avoiding Common Pitfalls
- Ignoring Data: Don’t rely solely on your own assumptions; player data is a reality check.
- Overreacting to Outliers: Not every negative comment means a problem.
- Changing Too Much at Once: This makes it hard to know what worked.
- Neglecting Communication: Keeping players informed builds trust and encourages ongoing feedback.
Iterating based on player data and feedback is about making your game clearer, more fun, and more accessible. It’s a steady process of listening, adjusting, and testing. The goal is not perfection but continuous improvement that keeps your players engaged and your project moving forward.
9.5 Example: Refining Game Mechanics Through Iteration
Refining game mechanics through iteration is a core part of indie game development. It means testing your mechanics, gathering feedback, analyzing what works and what doesn’t, and then making targeted improvements. This process repeats until the gameplay feels balanced, engaging, and intuitive. Let’s break down how this looks in practice with concrete examples and mind maps.
Understanding Iteration in Game Mechanics
Iteration is not about random changes but about focused adjustments based on player experience and data. For example, if your player character’s jump feels too floaty or too short, you test different jump heights and gravity settings, then observe how players respond.
Example: Refining a Jump Mechanic
Imagine you have a 2D platformer where the player complains that the jump is either too slow or too hard to control. Your initial jump mechanic looks like this:
- Jump height: 5 units
- Gravity: 9.8 units/sec²
- Jump duration: 0.5 seconds
After playtesting, you get feedback that the jump feels sluggish and the player often overshoots platforms.
Step 1: Identify the Problem
- Players find the jump too floaty.
- Controls feel unresponsive.
Step 2: Hypothesize Solutions
- Increase gravity to make the jump fall faster.
- Reduce jump height for better control.
- Add variable jump height based on button press duration.
Step 3: Implement and Test
You try increasing gravity to 15 units/sec² and reducing jump height to 4 units. You also add a mechanic where holding the jump button longer increases jump height, allowing for short and long jumps.
Step 4: Gather Feedback
Players report the jump feels more responsive and controllable. Some suggest the jump is now too short for certain platform gaps.
Step 5: Iterate Again
You tweak jump height to 4.5 units and slightly reduce gravity to 13 units/sec². This balances responsiveness and reach.
Mind Map: Jump Mechanic Iteration
Example: Balancing Enemy Difficulty
Suppose your game has an enemy that shoots projectiles. Players say the enemy is too hard to dodge. Initially, the enemy fires every 1 second with projectiles moving at 10 units/sec.
Step 1: Analyze Player Feedback
- Players feel overwhelmed by the firing rate.
- Projectiles are too fast to react to.
Step 2: Plan Adjustments
- Increase time between shots to 1.5 seconds.
- Reduce projectile speed to 7 units/sec.
- Add a brief warning animation before shooting.
Step 3: Implement Changes
You make the changes and test internally.
Step 4: Playtest and Collect Data
Players find the enemy challenging but fair. The warning animation helps them anticipate attacks.
Step 5: Final Adjustments
You slightly reduce the warning animation duration to keep tension high.
Mind Map: Enemy Difficulty Iteration
General Tips for Iteration
- Keep changes small and isolated. Adjust one parameter at a time to understand its impact.
- Use player feedback as data, not as gospel. Look for patterns rather than single opinions.
- Document each iteration. Keep track of what you changed and why.
- Test with different player skill levels. What’s easy for one player might be hard for another.
- Balance fun and challenge. Mechanics should feel rewarding, not frustrating.
Example: Iterating a Collectible System
Your game includes coins that players collect for points. Players report that collecting coins feels repetitive and doesn’t add much excitement.
Step 1: Identify the Issue
- Collecting coins is monotonous.
- No incentive beyond score increase.
Step 2: Brainstorm Solutions
- Add sound and visual effects when collecting.
- Introduce combo multipliers for collecting multiple coins quickly.
- Place coins in challenging locations.
Step 3: Implement and Test
You add a sparkle effect and a satisfying chime. You implement a combo system that doubles points if coins are collected within 2 seconds of each other.
Step 4: Gather Feedback
Players find collecting coins more engaging and rewarding.
Step 5: Iterate Further
You adjust the combo timer to 1.5 seconds for more challenge and add occasional rare coins worth extra points.
Mind Map: Collectible System Iteration
Summary
Iteration is a cycle of testing, feedback, and refinement. Using clear examples like jump mechanics, enemy behavior, and collectibles shows how small, deliberate changes improve gameplay. Mind maps help visualize the process and keep your development organized. Remember, iteration is about improving player experience step-by-step, not rushing to perfect the game in one go.
Chapter 10: Preparing Your Game Demo for Release
10.1 Polishing Your Game: Final Touches and Bug Fixes
Polishing your game means refining it to a state where it feels complete, smooth, and enjoyable, even if it’s just a demo. This stage is about fixing bugs, improving visuals and audio, and tightening gameplay. It’s not about adding new features but making sure what’s already there works well and looks intentional.
What Polishing Involves
- Fixing bugs that disrupt gameplay or cause crashes.
- Smoothing out controls and animations.
- Balancing difficulty and pacing.
- Enhancing visual and audio feedback.
- Cleaning up the user interface.
Mind Map: Polishing Your Game
Bug Fixes
Start by identifying bugs through playtesting. Keep a list of issues and prioritize those that block progress or cause crashes. For example, if a player can get stuck in a wall or an enemy AI behaves erratically, those need immediate attention. Fixing a bug might involve checking collision boundaries, adjusting AI state machines, or correcting event triggers.
Example: In a 2D platformer demo, a bug caused the player to fall through the floor on certain edges. The fix involved tightening the collision box and adding an extra check in the physics update to prevent tunneling.
Gameplay Refinement
Polishing controls means making sure the player’s inputs feel responsive and consistent. If a jump feels delayed or the character slides unexpectedly, tweak the input handling or physics parameters. Animation transitions should be smooth to avoid jarring visual jumps.
Example: A top-down shooter demo had a delay between pressing the shoot button and the bullet firing. Adjusting the input polling rate and removing unnecessary frame delays improved responsiveness.
Balancing difficulty is also part of polishing. If a level feels too hard or too easy, adjust enemy health, damage, or spawn rates. Playtest with different skill levels to find a comfortable range.
Visual Improvements
Check for inconsistent art styles or placeholder graphics that stand out. Replace or tweak these to maintain a cohesive look. Adding subtle particle effects like dust when the player lands or sparks on enemy hits can add polish without heavy work.
Lighting adjustments can improve mood and clarity. For example, increasing ambient light in dark areas helps players see hazards better.
Example: In a puzzle game demo, adding a soft glow around interactive objects helped players identify what to click, reducing confusion.
Audio Enhancements
Make sure sound effects trigger at the right moments and match the action. Avoid overlapping sounds that clutter the audio space. Balance volumes so music doesn’t drown out important effects.
Example: In a rhythm game demo, the sound of hitting notes was slightly out of sync. Adjusting the audio playback timing to match the visual cues improved player satisfaction.
UI Cleanup
Menus and HUD elements should be clear and easy to navigate. Use readable fonts and consistent button styles. Remove unnecessary clutter and ensure buttons respond visually when hovered or clicked.
Example: A demo had a confusing pause menu with too many options. Simplifying it to just Resume and Quit made it more user-friendly.
Mind Map: Bug Fixing Workflow
Final Tips
- Test on different devices or screen sizes if possible.
- Keep backups before major changes.
- Avoid last-minute feature additions; focus on stability.
- Use checklists to track polishing tasks.
Polishing is the difference between a demo that feels rough and one that feels ready to share. It’s about respect for your players’ experience and your own work. Taking the time to smooth out rough edges pays off in how your game is received.
10.2 Creating a Build: Step-by-Step Guide
Creating a build is a crucial step in turning your game from a development project into a playable demo. It packages your game into a format that others can run without needing your development environment. This guide walks through the process clearly and practically.
Step 1: Prepare Your Project
Before building, ensure your project is tidy. Remove unused assets and scripts to reduce build size and avoid confusion. Double-check that your scenes are properly saved and that the main scene is set as the starting point.
Step 2: Configure Build Settings
Open your game engine’s build settings panel. For example, in Unity, this is under File > Build Settings. Here, select the target platform (Windows, Mac, Linux, WebGL, etc.). Add the scenes you want included in the build. Make sure the main gameplay scene is at the top or marked as the first scene.
Step 3: Set Player or Application Settings
Adjust settings like resolution, screen mode (windowed or fullscreen), and quality. Check options for icons, splash screens, and company/game name. These details personalize your build and improve user experience.
Step 4: Choose Build Location
Select a folder where the build files will be saved. It’s best to create a dedicated folder for each build version to avoid overwriting previous builds accidentally.
Step 5: Build and Run
Click the build button. The engine compiles your game into an executable or web package. This process can take from seconds to minutes depending on project size. After building, test the build by running it on your machine to confirm it works as expected.
Step 6: Troubleshoot Build Issues
If the build fails or crashes, check the build logs for errors. Common issues include missing assets, incompatible plugins, or incorrect platform settings. Fix these and rebuild.
Step 7: Optimize Build Size
If your build is too large, consider compressing textures, removing unused assets, or adjusting quality settings. Smaller builds are easier to distribute and download.
Mind Map: Build Creation Process
Example: Building a Windows Demo in Unity
- Open File > Build Settings.
- Select “PC, Mac & Linux Standalone” and choose Windows as the target.
- Add your main scene to the Scenes In Build list.
- Click Player Settings and set resolution to 1280x720, windowed mode.
- Set company name and product name.
- Choose a folder named “DemoBuild_Windows” on your desktop.
- Click Build and wait.
- After completion, open the folder and run the .exe file to test.
Mind Map: Troubleshooting Common Build Issues
Following these steps ensures your demo build is stable, properly configured, and ready to share. Building isn’t just a technical step; it’s the moment your game becomes accessible beyond your development environment.
10.3 Packaging and Compressing Your Demo
Packaging and compressing your demo is a crucial step before sharing it with players. It ensures that your game files are organized, easy to distribute, and quick to download. This section covers how to prepare your demo for packaging, the compression options available, and practical examples to guide you through the process.
Why Packaging Matters
Packaging your demo means gathering all necessary files—game executables, assets, configuration files—into a single folder or archive. This prevents missing files and confusion for players. Compressing reduces the file size, making downloads faster and saving bandwidth.
Step 1: Organize Your Demo Files
Before compressing, ensure your demo folder contains only what’s needed. Remove temporary files, unused assets, and development backups. Keep your folder structure logical and simple.
Example folder structure:
DemoProject/
├── DemoProject.exe
├── Data/
│   ├── sprites.png
│   ├── sounds.wav
│   └── levels.json
├── README.txt
└── LICENSE.txt
Step 2: Choose a Compression Format
Common compression formats include ZIP, RAR, and 7z. ZIP is widely supported across platforms without extra software. 7z often achieves better compression but requires users to have compatible software.
| Format | Pros | Cons |
|---|---|---|
| ZIP | Universal support | Slightly larger files |
| RAR | Good compression | Requires WinRAR or similar |
| 7z | Best compression | Less universal |
Step 3: Compress Your Demo
Use compression software to create an archive of your demo folder. Here’s a simple example using ZIP on Windows:
- Right-click the demo folder.
- Select “Send to” > “Compressed (zipped) folder”.
- Name the archive appropriately, e.g., “MyGameDemo.zip”.
On macOS, right-click and choose “Compress”. On Linux, use terminal commands like zip -r MyGameDemo.zip DemoProject/.
Step 4: Verify the Archive
After compression, test the archive by extracting it to a new location. Launch the game from the extracted folder to confirm all files are intact and the game runs properly.
Mind Map: Packaging and Compressing Your Demo
Additional Tips
- Include a README file with instructions on how to run the demo.
- Keep file names simple and avoid spaces or special characters to prevent extraction issues.
- If your demo is large, consider splitting the archive into parts, but only if necessary.
Example: Compressing a Unity Game Demo
Unity creates a build folder containing the executable and data files. To package:
- Locate the build folder (e.g., “MyUnityGame_Win64”).
- Remove any unnecessary logs or temp files.
- Right-click the folder and create a ZIP archive.
- Test the ZIP by extracting and running the executable.
This straightforward process ensures your demo is ready for distribution without confusing your players or causing download headaches.
10.4 Writing Effective Release Notes and Documentation
Writing effective release notes and documentation is a crucial step in sharing your game demo. Clear, concise notes help players understand what’s new, what’s fixed, and how to get the most out of your game. Good documentation also reduces confusion and support requests, making your life easier.
What Are Release Notes?
Release notes are a summary of changes, improvements, and fixes in your game demo. They accompany each new build or update and serve as a communication bridge between you and your players.
Key Elements of Release Notes
- Version Number: Clearly state the version to avoid confusion.
- Date: When the update or demo was released.
- Summary: A brief overview of the update.
- New Features: What new gameplay elements or content have been added.
- Bug Fixes: Issues that have been resolved.
- Known Issues: Any remaining problems players should be aware of.
- How to Update: Instructions if necessary.
Mind Map: Structure of Release Notes
Writing Tips
- Use simple language; avoid jargon.
- Be honest about bugs and limitations.
- Keep it organized with bullet points or numbered lists.
- Highlight player-impacting changes first.
- Include examples or brief explanations if a feature is complex.
Example Release Notes
Version 1.0.2 - 2024-06-15
- Added: New enemy type “Shadow Stalker” with stealth mechanics.
- Fixed: Player could get stuck on the second level’s moving platform.
- Fixed: Audio glitch when collecting coins.
- Known Issue: Occasional frame drops on low-end devices.
- To update, download the new build from the same link.
What Is Documentation?
Documentation covers instructions, controls, gameplay tips, and any other information that helps players understand and enjoy your demo. It can be a simple README file, an in-game help menu, or a PDF.
Essential Documentation Components
- Game Overview: What the game is about.
- Controls: How to play.
- Objectives: What players should aim for.
- Tips and Tricks: Helpful hints.
- Troubleshooting: Common issues and fixes.
Mind Map: Documentation Components
Best Practices for Documentation
- Keep it concise but complete.
- Use headings and subheadings for easy navigation.
- Include images or diagrams if they clarify controls or UI.
- Update documentation alongside your demo.
- Write from the player’s perspective.
Example Documentation Snippet
Controls:
- Move: Arrow keys or WASD
- Jump: Spacebar
- Attack: Left mouse button
Objective: Collect all the coins in each level while avoiding enemies. Reach the exit door to progress.
Tips:
- Use the double jump to reach higher platforms.
- Watch enemy patrol patterns to avoid detection.
Troubleshooting: If the game crashes on startup, try updating your graphics drivers or lowering the resolution in the settings file.
Combining Release Notes and Documentation
It’s helpful to link your documentation in your release notes or package them together. This ensures players have all the information they need in one place.
Mind Map: Integration
In summary, clear release notes and thorough documentation improve player experience and reduce support overhead. They show professionalism and care, which can encourage players to stick with your game and provide useful feedback.
10.5 Best Practice: Demo Distribution Strategies
Distributing your game demo effectively is key to gathering feedback, building an audience, and testing your game’s appeal. The goal is to reach the right players without overwhelming yourself or your resources. Here are practical strategies, supported by examples and mind maps, to help you distribute your demo thoughtfully.
Understand Your Audience and Platform Fit
Before choosing distribution channels, consider who your game is for and where those players spend time. For example, a pixel-art puzzle game might find a better home on itch.io than on a large storefront like Steam, where competition is fierce.
Mind map:
Example: A developer making a casual mobile-style game chose to share their demo on itch.io and Reddit communities focused on casual gaming, rather than launching on Steam early.
Use Multiple Channels, But Prioritize Quality Over Quantity
Spreading your demo across many platforms can increase reach but also divides your attention. Focus on a few well-chosen platforms where you can engage with players and respond to feedback.
Mind map:
Example: A solo developer uploaded their demo to itch.io and posted updates on Twitter and a Discord server dedicated to indie games, allowing them to manage player interaction without spreading themselves too thin.
Prepare Your Demo for Each Platform
Each platform has its own requirements and audience expectations. Tailor your demo’s presentation accordingly:
- Create clear, concise descriptions highlighting what players can expect.
- Provide screenshots and short videos demonstrating gameplay.
- Include installation instructions if necessary.
Mind map:
Example: On itch.io, a developer included a short video showing the first level and a list of controls, helping players understand the game quickly and reducing confusion.
Engage with Players and Collect Feedback
Distribution isn’t just about putting your demo online. Active engagement encourages players to share their thoughts and helps you improve.
- Respond to comments and questions.
- Ask specific questions to guide feedback.
- Use surveys or polls when appropriate.
Mind map:
Example: After releasing a demo, a developer pinned a post asking players what they liked and what felt confusing, which led to actionable feedback on level design.
Leverage Game Jams and Events
Participating in game jams or local indie events can provide a built-in audience for your demo and valuable feedback.
Mind map:
Example: A developer entered their demo into a small online game jam, gaining exposure to a community that provided detailed feedback and helped spread the word.
Monitor and Analyze Distribution Results
Track where your downloads and feedback come from to focus your efforts on the most productive channels.
Mind map:
Example: After noticing most downloads came from a Reddit post, a developer prioritized engaging with that community for future updates.
Summary Mind Map
Distributing your demo is a balance between reaching enough players and maintaining manageable engagement. By choosing platforms thoughtfully, preparing your demo well, and actively engaging with players, you create a feedback loop that improves your game and builds a foundation for future releases.
Chapter 11: Publishing and Sharing Your Demo
11.1 Choosing Platforms for Your Demo (Itch.io, Steam, etc.)
Choosing the right platform to publish your indie game demo is a crucial step that affects visibility, audience reach, and even your workflow. Each platform has its own set of features, requirements, and community culture. Understanding these differences helps you make an informed decision that fits your goals and resources.
Key Considerations When Choosing a Platform
- Audience Type: Different platforms attract different player demographics and interests.
- Ease of Use: How simple it is to upload, update, and manage your demo.
- Cost and Revenue Model: Fees, revenue share, and payment methods.
- Community and Exposure: Built-in communities, discoverability, and promotional tools.
- Technical Requirements: Supported file types, build sizes, and platform restrictions.
Popular Platforms for Indie Game Demos
Itch.io
- Audience: Itch.io is known for experimental, indie, and niche games. Its community is open to early demos and prototypes.
- Ease of Use: Uploading a demo is straightforward. You can update builds anytime without approval delays.
- Cost: Free to upload; you can set your own revenue share or even offer your game for free.
- Community: Itch.io offers community features like game jams and user reviews.
- Technical: Supports Windows, Mac, Linux, and web builds.
Steam
- Audience: Steam has a massive, diverse user base, including many gamers looking for polished titles.
- Ease of Use: Requires going through Steam Direct, which involves a fee and some paperwork.
- Cost: $100 recoupable fee per product; Steam takes approximately 30% revenue share.
- Community: Strong community features like forums, achievements, and user reviews.
- Technical: Supports multiple platforms and has built-in tools for updates and patches.
Game Jolt
- Audience: Focused on indie games, especially 2D and pixel art styles.
- Ease of Use: Simple upload process and flexible demo hosting.
- Cost: Free to upload; revenue options through donations or sales.
- Community: Active community with user comments and ratings.
- Technical: Supports Windows, Mac, Linux, and HTML5 games.
Kongregate
- Audience: Primarily browser-based games and casual players.
- Ease of Use: Uploading HTML5 or Flash games is straightforward.
- Cost: Free to upload; revenue through ad sharing and in-game purchases.
- Community: Large casual gaming community.
- Technical: Focus on web technologies.
Mind Map: Platform Selection Factors
Mind Map: Itch.io Overview
Mind Map: Steam Overview
Example: Choosing Between Itch.io and Steam for Your Demo
Suppose you have a small 2D puzzle game demo. You want quick feedback and easy updates. Itch.io suits this because it allows instant uploads and has a community open to early-stage games. You can share your demo link easily and gather player comments.
If you plan to eventually release a full game on Steam, uploading a polished demo there might help build anticipation. However, the initial setup is more involved, and the audience expects a higher level of polish.
Summary
Selecting a platform depends on your demo’s readiness, your target audience, and your willingness to navigate platform requirements. For quick, flexible demo releases, Itch.io and Game Jolt are excellent. For broader exposure and eventual commercial release, Steam is a solid choice despite its higher entry barrier. Understanding these trade-offs helps you avoid unnecessary complications and focus on what matters: making and sharing your game.
11.2 Setting Up Store Pages and Uploading Your Demo
Setting up your store page and uploading your demo is a crucial step in sharing your game with players. This process involves preparing your game files, creating a clear and informative store page, and following platform-specific requirements. Doing this well helps players understand what your game offers and encourages downloads.
Preparing Your Demo Files
Before uploading, ensure your demo build is stable and packaged correctly. Compress your files into a single archive if the platform requires it. Check that your executable runs on intended systems and that all assets are included.
Key Elements of a Store Page
A store page is the storefront for your game. It should quickly communicate what your game is about and why someone might want to try it. Here are the main components:
- Title and Subtitle: Clear and concise. Avoid overly long titles.
- Description: Summarize gameplay, core mechanics, and what makes your demo worth trying.
- Screenshots: High-quality images showing gameplay, UI, and art style.
- Trailer or Video: A short clip demonstrating gameplay or key features.
- System Requirements: Minimum and recommended specs if applicable.
- Tags and Categories: Help players find your game through searches.
- Developer Info: Your name or studio, contact info, and links if allowed.
Mind Map: Store Page Components
Uploading Your Demo
Each platform has its own upload interface and requirements. Generally, the steps include:
- Create a Developer Account: Register and verify your identity.
- Start a New Project or Game Entry: Fill in basic info like game title.
- Upload Game Files: Use the platform’s uploader, which may support drag-and-drop or require specific file formats.
- Fill Store Page Details: Enter descriptions, upload media, and set tags.
- Set Pricing and Availability: For demos, this is usually free, but you may need to specify regions or platforms.
- Review and Submit: Preview your page and submit it for approval if needed.
Mind Map: Upload Process
Example: Uploading a Demo to Itch.io
- Register an account on Itch.io.
- Click “Upload New Project” and enter your game’s title.
- Upload your zipped demo build.
- Fill out the description with a brief overview and instructions.
- Add screenshots and optionally a trailer.
- Tag your game with relevant genres and themes.
- Set the project type to “Game Demo” and price to free.
- Publish the page.
Tips for a Smooth Upload
- Double-check file sizes and formats.
- Use clear, jargon-free language in descriptions.
- Preview your store page on different devices.
- Keep your media consistent with your game’s style.
- Follow platform guidelines to avoid delays.
By carefully setting up your store page and uploading your demo correctly, you make it easier for players to find and enjoy your game. This step is about clarity and accessibility, not just aesthetics. A well-organized page reflects professionalism and respect for your audience.
11.3 Marketing Basics: Creating Trailers and Screenshots
Marketing your indie game demo involves showing potential players what your game is about in a clear and appealing way. Two of the most effective tools for this are trailers and screenshots. Both serve to communicate your game’s core experience quickly and directly.
Creating Effective Trailers
A trailer is a short video that highlights your game’s main features, atmosphere, and gameplay. It should be concise, focused, and easy to follow. Here are key points to consider:
- Length: Aim for 30 to 90 seconds. Longer trailers risk losing viewer interest.
- Structure: Start with a hook that grabs attention, show gameplay or story elements, and end with a call to action (like “Demo available now”).
- Content: Show actual gameplay rather than just cinematic scenes unless your game is narrative-driven.
- Pacing: Keep the pace steady; avoid long static shots or overly fast cuts.
- Audio: Use clear sound effects and music that fit the game’s mood but don’t overpower the visuals.
Example Trailer Outline
Trailer Mind Map
Taking Screenshots
Screenshots are static images that capture key moments or elements of your game. They are often the first thing players see on store pages or social media.
- Quality: Use high-resolution images without compression artifacts.
- Variety: Include shots that show different aspects, such as environment, characters, UI, and action.
- Clarity: Avoid cluttered images; focus on clear, readable scenes.
- Context: Add captions or annotations sparingly to explain features if needed.
Screenshot Selection Example
- Main character in a distinctive pose
- A challenging level or environment
- User interface showcasing health, inventory, or score
- A moment of interaction or combat
Screenshot Mind Map
Practical Tips
- Capture footage and screenshots directly from your game engine or build to ensure accuracy.
- Use consistent lighting and camera angles for screenshots to maintain a professional look.
- When editing trailers, keep transitions simple and avoid excessive effects.
- Test your trailer and screenshots on different devices to ensure they look good everywhere.
By focusing on clear, honest representation of your game through trailers and screenshots, you help players understand what to expect and decide whether to try your demo.
11.4 Engaging with the Community and Gathering Feedback
Engaging with the community and gathering feedback are essential steps after releasing your indie game demo. This interaction helps you understand how players experience your game, what works well, and what needs improvement. It also builds a base of interested players who can support your project moving forward.
Why Engage with the Community?
- Direct Player Insight: Players often notice issues or opportunities you might miss.
- Building Relationships: Responding to feedback shows you value your audience.
- Improving the Game: Constructive criticism guides your development priorities.
How to Engage Effectively
- Choose the Right Platforms: Identify where your potential players hang out, such as forums, social media, or game-specific communities.
- Be Present and Responsive: Regularly check comments and messages. Acknowledge feedback even if you can’t act on it immediately.
- Encourage Constructive Feedback: Ask specific questions to guide players in providing useful input.
- Create a Feedback Loop: Share updates and explain how player input influences changes.
Gathering Feedback: Methods and Examples
-
Surveys and Questionnaires: Simple forms asking about gameplay, controls, difficulty, and enjoyment.
- Example: After a demo release, send a short survey asking players to rate the tutorial clarity and enemy difficulty.
-
Playtesting Sessions: Invite players to test the game live or remotely, observing their reactions and noting issues.
- Example: Host a Discord playtest where players share their screen and talk through their experience.
-
Community Discussions: Use forums or social media threads to start conversations about specific game aspects.
- Example: Post a thread asking for opinions on the game’s art style or level design.
-
Bug Reporting Channels: Provide a clear way for players to report bugs, such as a dedicated email or issue tracker.
- Example: Create a pinned post on your game’s forum for bug reports, categorizing issues by severity.
Mind Map: Community Engagement Workflow
Mind Map: Feedback Types and Handling
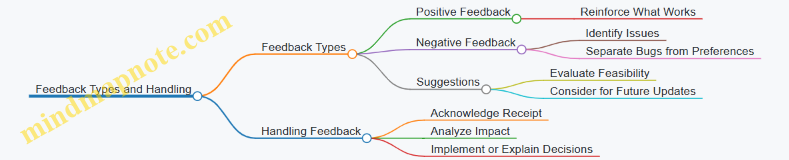
Tips for Maintaining a Healthy Community
- Set clear guidelines for respectful communication.
- Avoid defensive responses; thank players for their input.
- Balance transparency with managing expectations.
- Celebrate community contributions, such as fan art or bug reports.
Example Scenario
After releasing a puzzle game demo, the developer creates a Discord server and pins a feedback form link. Players report that some puzzles feel too obscure. The developer responds by clarifying hints in the next update and posts a message explaining the change. This openness encourages more players to share their thoughts, improving the game and fostering goodwill.
In summary, engaging with your community is a continuous process that requires attention and openness. By actively listening and responding to feedback, you make your game better and build a group of players who feel connected to your project.
11.5 Case Study: Successful Indie Demo Launch
Launching a demo is a critical step for indie developers. It’s the first real interaction between your game and potential players. This case study examines the launch of “Pixel Quest,” a 2D puzzle-platformer developed by a solo creator over six months. The demo launch offers practical lessons on preparation, execution, and follow-up.
Planning the Launch
The developer began by setting clear goals: gather player feedback, build a small community, and test the game’s core mechanics in a real environment. The demo was designed to showcase the first three levels, enough to communicate the game’s style and mechanics without overwhelming players.
A simple mind map helped organize launch tasks:
This structure ensured no step was overlooked and helped prioritize tasks.
Creating the Demo Build
The developer focused on stability and polish. The demo was tested on multiple devices to catch platform-specific bugs. A small group of friends and fellow developers played the demo before launch, providing early feedback and catching issues that automated tests missed.
Marketing and Presentation
Instead of a flashy trailer, the developer created a short, straightforward video highlighting gameplay and controls. Screenshots emphasized the game’s unique art style and level design. The Itch.io page included a clear description, system requirements, and instructions for reporting bugs.
Social media posts were scheduled to coincide with the demo release, using simple messages and direct links. The developer also shared behind-the-scenes content to build interest without overselling.
Launch Day
On launch day, the demo went live on Itch.io and Steam. The developer monitored feedback channels closely, responding to questions and bug reports promptly. This responsiveness helped build trust and encouraged more players to try the demo.
Gathering and Using Feedback
Players were invited to complete a short survey focusing on gameplay enjoyment, difficulty, and technical issues. The developer also monitored comments on the store pages and social media.
Feedback revealed that some puzzles were too difficult for new players and a few minor bugs affected progression. The developer prioritized these issues for the next update.
Post-Launch Mind Map
Key Takeaways
- Start small: A focused demo with limited levels helped manage scope and player expectations.
- Test thoroughly: Early testing with real users caught issues automated tests missed.
- Clear communication: Simple marketing materials and honest descriptions set the right tone.
- Engage players: Prompt responses to feedback built goodwill.
- Use feedback wisely: Prioritizing fixes based on player input improved the game’s quality.
This case shows that a successful demo launch doesn’t require a big budget or flashy marketing. Careful planning, clear communication, and genuine engagement with players form the foundation for a productive launch experience.
Chapter 12: Managing Your Indie Game Development Journey
12.1 Staying Motivated and Avoiding Burnout
Staying motivated during indie game development is a challenge many face, especially when working solo or with a small team. Motivation isn’t a constant; it fluctuates based on progress, obstacles, and personal circumstances. Recognizing this variability is the first step toward managing it effectively.
Burnout happens when sustained effort meets diminishing returns in energy and enthusiasm. It’s not about working hard but about working without enough recovery or balance. Avoiding burnout means balancing work with rest and maintaining a sense of purpose.
Understanding Motivation Drivers
Motivation often comes from a mix of internal and external factors. Internal motivation includes personal satisfaction, creative freedom, and the joy of problem-solving. External motivation might be feedback from players, deadlines, or community engagement.
Here’s a simple mind map to visualize motivation factors:
Practical Ways to Stay Motivated
-
Set Small, Clear Goals: Large projects can feel overwhelming. Break your work into small, achievable tasks. Completing these gives a sense of progress and accomplishment.
-
Celebrate Progress: Even minor wins deserve recognition. Finished a character sprite? Completed a level prototype? Take a moment to appreciate it.
-
Maintain a Routine: Consistency helps build momentum. Set aside regular time slots for development, but keep them reasonable to avoid fatigue.
-
Switch Tasks When Stuck: If you hit a roadblock in programming, switch to designing assets or writing documentation. This change can refresh your focus.
-
Engage with Others: Share progress with friends, forums, or social media. Positive feedback can boost morale, and constructive criticism can guide improvements.
-
Keep a Development Journal: Document daily or weekly progress and challenges. Reflecting on this can highlight growth and clarify next steps.
Mind Map: Strategies to Maintain Motivation
Recognizing and Avoiding Burnout
Burnout signs include persistent fatigue, irritability, loss of interest, and reduced productivity. When these appear, it’s time to adjust your approach.
Preventive measures:
- Take breaks: Short, frequent breaks during work sessions help maintain focus.
- Set boundaries: Define work hours and stick to them to separate development from personal time.
- Physical activity: Even light exercise can improve mood and energy.
- Sleep: Prioritize rest to support cognitive function.
Mind Map: Burnout Warning Signs and Prevention

Example: Managing Motivation in a 2D Puzzle Game Project
Alex, an indie developer, planned to create a 2D puzzle game. Early enthusiasm led to long work sessions, but after a few weeks, progress slowed and frustration grew.
To regain motivation, Alex:
- Broke the project into smaller tasks, focusing first on core mechanics.
- Scheduled daily 1-hour work blocks instead of marathon sessions.
- Shared weekly updates with a small online community, receiving helpful feedback.
- Switched between coding and level design to keep things fresh.
- Took weekends off completely to recharge.
This approach helped Alex maintain steady progress without feeling overwhelmed.
Summary
Motivation in indie game development is manageable by understanding its sources, setting clear goals, maintaining routines, and balancing work with rest. Recognizing burnout signs early and adjusting habits prevents long-term setbacks. Using simple tools like task lists, journals, and community interaction supports sustained effort and enjoyment throughout the project.
12.2 Time Management Tips for Solo Developers
Time management is a crucial skill for solo indie developers who juggle multiple roles—from coding and art to marketing and testing. Without a team to share the workload, managing your time effectively can make the difference between steady progress and burnout. Here are practical tips and examples to help you organize your workday and keep your project moving forward.
Prioritize Tasks Using the Eisenhower Matrix
The Eisenhower Matrix divides tasks into four categories based on urgency and importance. This helps you focus on what truly matters.
Example: If you have a bug that prevents players from progressing, it’s urgent and important. Fix it first. Designing new content is important but can wait until after the demo launch.
Break Work into Time Blocks
Divide your day into focused intervals, such as 25- or 50-minute blocks with short breaks. This method, often called the Pomodoro Technique, helps maintain concentration and reduces fatigue.
Example: Spend one 50-minute block coding player controls, then take a 10-minute break to stretch or check messages. Repeat this cycle to maintain steady progress without feeling overwhelmed.
Set Clear Daily Goals
Before starting your workday, list 2–3 achievable goals. This keeps your efforts targeted and provides a sense of accomplishment.
Example: Today’s goals might be: implement enemy AI movement, create two new enemy sprites, and test collision detection.
Use a Simple Task Management System
Keep track of tasks with a straightforward to-do list or a lightweight app. Organize tasks by priority and mark them off as you complete them.
Avoid Multitasking
Switching between tasks can slow you down and increase errors. Focus on one task at a time until it’s done or reaches a natural stopping point.
Example: If you’re coding, avoid jumping to art creation mid-session. Finish the coding segment, then switch gears.
Schedule Buffer Time
Leave some unallocated time in your schedule to handle unexpected issues or to refine work. This prevents delays from cascading.
Example: If you plan four hours of work, allocate 30 minutes as buffer to fix unforeseen bugs or adjust assets.
Batch Similar Tasks
Group related tasks to reduce context switching.
Example: Dedicate a morning session solely to programming, and an afternoon session to asset creation.
Use Time Tracking to Understand Your Workflow
Track how long tasks actually take to improve future estimates and identify distractions.
Example: You might find that creating animations takes twice as long as expected, prompting you to adjust your schedule accordingly.
Set Boundaries and Define Work Hours
Establish clear start and end times for your workday to maintain balance and avoid burnout.
Example: Work from 9 AM to 1 PM, then take the afternoon off or use it for non-development activities.
Mind Map: Time Management Overview
By applying these strategies, solo developers can create a structured workflow that balances productivity with well-being. The key is to find a rhythm that fits your personal style and project demands, adjusting as you learn what works best for you.
12.3 Learning from Failure and Iterating on Your Work
Learning from failure and iterating on your work is a fundamental part of indie game development. Failure here doesn’t mean the end; it means information. Each setback or unexpected result provides data about what works and what doesn’t in your game. The key is to approach these moments with curiosity and a structured mindset.
Understanding Failure in Game Development
Failure can take many forms: a mechanic that feels clunky, a level that players find confusing, or performance issues that slow down gameplay. Recognizing these failures early saves time and effort later.
Mind Map: Types of Failures and Responses
Example: Fixing Unbalanced Difficulty
Imagine you designed an enemy that is too hard for players to defeat early in the game. Playtesters repeatedly get stuck, causing frustration. Instead of ignoring this or making the enemy easier without thought, you analyze the problem. Is the enemy’s attack pattern too fast? Does the player lack necessary tools? You decide to slow the enemy’s attack speed and add a visual cue before attacks. After implementing these changes, you test again and find players progress more smoothly.
Iteration: The Cycle of Improvement
Iteration means repeating the cycle of testing, feedback, and improvement. It’s not about perfecting the game in one go but gradually refining it. Each iteration should have clear goals: fix a bug, improve a mechanic, or polish visuals.
Mind Map: Iteration Process
Example: Iterating on Player Controls
You notice players complain about sluggish movement. You try increasing speed but find it makes the character hard to control. Next, you add acceleration and deceleration to smooth movement. Playtesters respond positively, saying the character feels more responsive. This shows iteration is about experimenting and learning what works best.
Strategies to Learn from Failure
- Keep a Development Journal: Record issues encountered, attempted solutions, and outcomes. This helps track what worked and what didn’t.
- Use Version Control: Save versions before major changes so you can revert if needed.
- Prioritize Feedback: Not all feedback is equally valuable. Focus on recurring issues or those that affect core gameplay.
- Separate Emotional Response from Analysis: It’s easy to feel discouraged by failure. Treat it as data, not a judgment.
Mind Map: Learning from Failure Strategies

Example: Handling a Bug That Crashes the Game
A crash occurs when players enter a specific area. Instead of panicking, you document the bug, reproduce it consistently, and isolate the cause—a missing asset reference. After fixing it, you test the area thoroughly to confirm stability. This systematic approach turns failure into a manageable task.
Final Thoughts
Failure and iteration are not separate steps but intertwined throughout development. Embracing this cycle helps you improve your game steadily without feeling overwhelmed. Each iteration brings you closer to a playable, enjoyable demo.
12.4 Building a Support Network and Finding Collaborators
Building a support network and finding collaborators are practical steps that can make your indie game development smoother and more enjoyable. Working alone is possible, but having others to share ideas, solve problems, or contribute skills can improve your project and keep motivation steady.
Why Build a Support Network?
A support network provides feedback, encouragement, and accountability. It helps you avoid isolation, which can lead to stalled progress or burnout. Your network can include fellow developers, artists, sound designers, writers, or even players who give constructive criticism.
Finding Collaborators
Collaborators bring complementary skills. For example, if you’re strong in programming but weak in art, partnering with an artist can fill that gap. Collaboration also spreads workload, making deadlines more manageable.
How to Build Your Network and Find Collaborators
- Start Small and Local: Look for local game development meetups, workshops, or clubs. Meeting face-to-face can build trust faster.
- Online Communities: Forums, Discord servers, and social media groups dedicated to indie development are good places to meet people with similar interests.
- Show Your Work: Share progress updates or prototypes. This invites feedback and attracts collaborators interested in your project.
- Be Clear About What You Need: Specify the skills or roles you’re looking for and what you offer in return.
- Respect Time and Boundaries: Everyone has different availability. Agree on communication frequency and responsibilities upfront.
Mind Map: Building a Support Network
Mind Map: Finding Collaborators
Examples
-
Example 1: Local Meetup Collaboration Sarah, a programmer, attended a local game dev meetup. She met Tom, an artist, and they discussed their projects. Sarah shared her prototype, and Tom offered to create character sprites. They agreed to meet weekly and set clear roles: Sarah handles coding, Tom handles art. This collaboration helped Sarah finish her demo faster.
-
Example 2: Online Community Partner Alex posted on a Discord server for indie developers, looking for a composer. He described his game’s style and shared a gameplay video. Jamie, a musician, responded with a sample track. They agreed on milestones and used Trello to track tasks. Regular voice chats kept communication clear.
-
Example 3: Sharing Progress to Attract Help Mia shared weekly development logs on a forum, including screenshots and challenges she faced. This transparency led to offers of help from others who had experience with similar issues. One member joined as a level designer, improving the game’s pacing.
Tips for Successful Collaboration
- Use tools like version control (Git) to manage code changes.
- Set realistic deadlines and check in regularly.
- Keep communication open and constructive.
- Document decisions to avoid confusion.
- Be open to feedback and willing to adjust your approach.
Building a support network and finding collaborators is about connecting with people who complement your skills and share your commitment. It requires clear communication, mutual respect, and a willingness to work together toward a common goal.
12.5 Best Practice: Documenting Your Development Process
Documenting your development process is a practical habit that pays off in clarity, efficiency, and ease of collaboration. It’s not about writing a novel but about capturing key decisions, progress, challenges, and solutions in a way that you or others can quickly understand later. Good documentation can save hours of guesswork and reduce frustration when revisiting your project after a break or onboarding a collaborator.
Why Document?
- Track Progress: Knowing what you’ve done and what remains helps maintain focus.
- Identify Patterns: Recording bugs and fixes reveals recurring issues.
- Improve Communication: Clear notes help if you work with others or seek feedback.
- Support Reflection: Reviewing your notes can highlight what worked and what didn’t.
What to Document?
- Design Decisions: Why you chose certain mechanics, art styles, or tools.
- Technical Solutions: Code snippets, algorithms, or workarounds.
- Bugs and Fixes: Problems encountered and how you resolved them.
- Feature Status: What’s complete, in progress, or postponed.
- Ideas and To-Dos: New thoughts or improvements for later.
How to Document?
Keep it simple and consistent. Use formats that suit your workflow, such as text files, spreadsheets, or specialized apps. The key is accessibility and clarity.
Example Mind Map: Development Documentation Structure
This mind map breaks down documentation into manageable categories, making it easier to locate information.
Example: Documenting a Bug Fix
Bug: Player character clips through walls when moving fast.
Date: 2024-05-10
Cause: Collision detection not accounting for velocity.
Fix: Implemented raycasting ahead of movement to detect obstacles.
Result: Player no longer clips through walls at any speed.
Notes: Test with varying speeds to ensure stability.
This note is brief but contains all necessary details to understand the problem and solution.
Tips for Effective Documentation
- Write as You Go: Don’t wait until the end; document while the context is fresh.
- Use Clear Headings: Organize notes with dates and topics for easy scanning.
- Include Visuals: Screenshots, diagrams, or flowcharts can clarify complex points.
- Be Concise: Focus on essential information; avoid unnecessary detail.
- Review Regularly: Update documentation to reflect changes and new insights.
Example Mind Map: Weekly Documentation Routine
This routine encourages steady documentation without overwhelming your schedule.
Tools and Formats
- Files: Lightweight, easy to edit, and support formatting.
- Version Control Comments: Use commit messages to document code changes.
- Issue Trackers: Record bugs and feature requests with status updates.
- Diagrams: Simple flowcharts or mind maps in help visualize structure.
Final Thought
Documenting your development process is a practical investment in your project’s health. It doesn’t have to be perfect or exhaustive, but it should be consistent and clear enough to serve as a reliable reference. Over time, this habit reduces confusion, speeds up problem-solving, and makes your indie game journey smoother.
Chapter 13: Legal and Business Essentials
13.1 Understanding Copyright and Intellectual Property
When you create a game, you’re not just writing code or drawing sprites; you’re producing intellectual property (IP). Intellectual property refers to creations of the mind that have commercial value and are protected by law. Copyright is one of the main legal tools that protect your game’s unique elements from unauthorized use.
What Is Copyright?
Copyright grants the creator exclusive rights to reproduce, distribute, display, perform, and create derivative works based on the original. For indie developers, this means your code, artwork, music, story, and characters are protected once fixed in a tangible form (like saved files).
- Automatic Protection: Copyright applies automatically upon creation—no registration needed to have rights, though registering can help in legal disputes.
- Duration: Typically lasts for the creator’s lifetime plus 70 years (varies by jurisdiction).
- Scope: Protects the expression of ideas, not the ideas themselves. For example, your unique character design is protected, but the general concept of a space shooter is not.
What Counts as Copyrightable Material in Games?
- Source code and scripts
- Visual assets: sprites, textures, models
- Audio: music, sound effects, voice acting
- Storylines, dialogue, and characters
- User interface designs
What Copyright Does Not Cover
- Game mechanics and rules
- Ideas and concepts
- Systems or methods
This distinction is important. Two games can share similar mechanics but differ in expression, which is what copyright protects.
Intellectual Property Mind Map
Example: Copyright in Practice
Imagine you create a 2D platformer with a unique character named “Pixel Pete” who wears a red hat and jumps on moving platforms. Your specific character design, the artwork of the platforms, and the story behind Pixel Pete are protected by copyright. However, the general idea of a platformer where a character jumps on platforms is not.
If another developer makes a platformer with a character wearing a blue hat and different art, they are not infringing your copyright, even if the gameplay feels similar.
Fair Use and Exceptions
Some uses of copyrighted material are allowed without permission, such as for critique, teaching, or parody. However, these exceptions are limited and often don’t apply to commercial game development.
Protecting Your Work
- Keep records of your creation dates and drafts.
- Use watermarks or metadata in your assets.
- Consider registering your copyright if you plan to distribute widely.
Summary
Understanding copyright helps you protect your creative work and respect others’ rights. It clarifies what parts of your game are legally yours and what parts are open for others to use or adapt. This knowledge prevents accidental infringement and supports a healthy creative environment.
13.2 Basics of Licensing Game Assets
When creating an indie game, you often need assets like graphics, sounds, music, or code snippets. Licensing these assets properly is crucial to avoid legal trouble and ensure you have the right to use them as intended. This section explains the basics of licensing game assets, illustrated with examples and mind maps to clarify key points.
What is a License?
A license is a legal agreement that grants you permission to use an asset under specific conditions. It defines what you can and cannot do with the asset, such as whether you can modify it, use it commercially, or redistribute it.
Common Types of Licenses for Game Assets
- Public Domain: No restrictions; you can use, modify, and distribute freely.
- Creative Commons (CC): Various versions with different permissions and restrictions.
- Royalty-Free: You pay once (or get it free) and can use the asset multiple times, often with some limitations.
- Proprietary License: Custom terms set by the creator or company.
Mind Map: License Types and Permissions
Key License Terms Explained
- Attribution: You must credit the creator.
- Non-Commercial: You cannot use the asset for commercial purposes.
- No Derivatives: You cannot modify the asset.
- ShareAlike: If you modify and distribute, you must license your derivative under the same terms.
Example: Using a Character Sprite
Suppose you find a character sprite under a CC BY license. This means you can use and modify the sprite in your game, including commercial projects, but you must credit the original artist somewhere in your game or documentation. If you omit attribution, you violate the license.
If the sprite is CC BY-NC, you cannot use it in a game you plan to sell. You would need to either find a different asset or get explicit permission from the creator.
Mind Map: How to Choose an Asset License
Using Royalty-Free Assets
Royalty-free assets often come with fewer restrictions but watch out for limits on redistribution. For example, a royalty-free music track might allow you to include it in your game but not to sell the track separately or share it as a standalone file.
Custom or Proprietary Licenses
Some assets come with custom licenses. For example, a paid asset from an online marketplace might allow you to use it in one project only, or require you to buy additional licenses for multiple projects. Always read the license carefully.
Best Practices When Licensing Assets
- Read the license fully: Don’t assume based on the source or file name.
- Keep records: Save license documents or screenshots.
- Give proper attribution: Even if not required, it’s good practice.
- Avoid mixing incompatible licenses: Some licenses can’t be combined in one project.
- When in doubt, ask: Contact the creator for clarification or permission.
Example: Mixing Assets with Different Licenses
Imagine your game uses a CC BY-SA background image and a CC BY-ND character sprite. The ShareAlike clause requires your game to be licensed similarly, but the No Derivatives clause forbids modifying the character sprite. This conflict means you can’t legally combine these assets without violating one license. You would need to replace one asset or get permission.
Summary
Licensing game assets is about understanding what permissions you have and respecting the creator’s terms. Clear knowledge of license types and terms helps you avoid legal issues and maintain good relationships with asset creators. Always check licenses carefully and document your compliance.
13.3 Setting Up Your Indie Game Business
Setting up your indie game business is a practical step that helps you manage finances, protect your work, and create a professional framework for your project. It might sound formal, but it’s mostly about organizing your efforts so you can focus on making games without unnecessary headaches.
Why Set Up a Business?
Forming a business entity separates your personal finances from your game income and expenses. This separation can protect your personal assets if something goes wrong. It also makes tax filing clearer and can improve your credibility with partners, platforms, and customers.
Common Business Structures for Indie Developers
- Sole Proprietorship: The simplest form, where you and your business are legally the same. Easy to set up but offers no personal liability protection.
- Limited Liability Company (LLC): Provides liability protection and flexible tax options. Popular among indie developers because it balances simplicity with legal protection.
- Corporation: More complex and often unnecessary for small indie projects, but useful if you plan to scale or seek investment.
Steps to Set Up Your Indie Game Business
- Choose a Business Name: Pick a name that represents your game or studio. Check availability to avoid conflicts.
- Register Your Business: Depending on your location, this might involve filing paperwork with local or state authorities.
- Obtain Necessary Licenses and Permits: Usually minimal for digital game development, but verify local requirements.
- Open a Business Bank Account: Keeps your finances organized and professional.
- Set Up Accounting and Bookkeeping: Track income, expenses, and taxes from the start.
Mind Map: Indie Game Business Setup
Example: Setting Up an LLC for an Indie Game
Imagine you’re creating a 2D puzzle game and want to keep things professional. You decide to form an LLC called “PuzzleCraft Studios.” You check your state’s business registry to confirm the name is free. Then, you file the LLC formation documents online, pay the filing fee, and receive your official registration.
Next, you open a business bank account under PuzzleCraft Studios. This helps you keep your game sales income separate from your personal money. You also choose a simple bookkeeping app to track your expenses, like software licenses and asset purchases.
With the LLC in place, if someone sues over a copyright claim or a contract dispute, your personal assets are shielded. This setup also makes it easier to invoice collaborators or receive payments from platforms.
Mind Map: Example LLC Setup
Tax Considerations
Your business structure affects how you pay taxes. Sole proprietors report income on personal tax returns. LLCs can be taxed as sole proprietors or corporations, depending on elections made. Keeping clear records of income and expenses is essential regardless of structure.
Keeping It Manageable
You don’t need to be an expert accountant or lawyer to set up your indie game business. Many jurisdictions offer straightforward online registration. Use simple tools for bookkeeping and keep receipts organized. The goal is to create a clear boundary between your game work and personal life.
Summary
Setting up your indie game business means choosing a legal structure, registering your business, opening a bank account, and organizing your finances. Doing this early helps protect you, keeps your money organized, and makes your project look professional. It’s a practical foundation that supports your creative work without adding unnecessary complexity.
13.4 Managing Finances and Budgeting
Managing finances and budgeting is a critical part of indie game development, even if your project is small or a side hobby. Without a clear understanding of where your money goes, it’s easy to run out of funds before your demo is complete. This section breaks down the essentials of budgeting and financial management tailored for indie developers.
Understanding Your Budget Categories
Start by dividing your expenses into clear categories. This helps you see where your money is going and identify areas to cut costs if needed.
Budget Categories Mind Map
Example: Budgeting for a Simple 2D Game Demo
Imagine you plan to build a 2D platformer demo. Your rough budget might look like this:
- Software licenses: $0 (using free tools like Godot and GIMP)
- Hardware: $0 (using existing PC)
- Asset purchases: $100 (buying some sound effects and sprites)
- Marketing & Distribution: $50 (Itch.io fees and small ad campaign)
- Operational Expenses: $0 (home workspace)
- Contingency Fund: $50
Total estimated budget: $200
This example shows that even a modest budget requires planning. Allocating a contingency fund is important because unexpected costs often arise.
Tracking Income and Expenses
Keep a simple spreadsheet or use budgeting software to record every expense and income related to your game project. This habit prevents surprises and helps you adjust your spending.
Expense Tracking Mind Map
Prioritizing Spending
Not all expenses are equal. Prioritize spending that directly impacts your game’s quality and completion. For example, investing in a good audio pack might improve player experience more than a fancy website at the demo stage.
Managing Cash Flow
Cash flow is the timing of money coming in and going out. If you plan to fund your project from savings or part-time work, estimate when you’ll have funds available and schedule expenses accordingly.
Example: Monthly Budget Breakdown
If your total budget is $600 over 3 months, you might allocate:
- Month 1: $200 for asset purchases and software
- Month 2: $200 for marketing and additional assets
- Month 3: $150 for distribution and contingency
- Remaining $50 reserved for unexpected costs
Avoiding Common Pitfalls
- Underestimating costs: Always add a buffer to your estimates.
- Ignoring small expenses: Small purchases add up; track them.
- Mixing personal and project finances: Keep them separate to avoid confusion.
Budget Review and Adjustment
Regularly review your budget against actual spending. Adjust your plans if you’re overspending in one category or underspending in another. Flexibility helps keep your project on track.
Mind Map: Budget Review Process
Budget Review Mind Map
Summary
Managing finances and budgeting is about clarity and control. By categorizing expenses, tracking spending, prioritizing wisely, and reviewing regularly, you reduce financial surprises and keep your indie game project moving forward. Even with a small budget, thoughtful money management makes a difference.
13.5 Example: Simple Contracts for Collaborators
When working with collaborators on an indie game, having a simple contract can prevent misunderstandings and protect everyone involved. A contract doesn’t need to be a complex legal document; it can be straightforward and clear, covering key points that matter most to your project.
Key Elements of a Simple Collaborator Contract
Here’s a mind map outlining the main sections you should consider including:
Simple Collaborator Contract Mind Map

Parties Involved
Clearly state who is involved in the contract. Include full names and roles (e.g., artist, programmer, sound designer). This avoids confusion about who is responsible for what.
Example:
This agreement is between Jane Doe (Artist) and John Smith (Game Developer).
Scope of Work
Define what each collaborator is expected to deliver. Be specific about tasks and outputs.
Example:
Jane Doe will create 20 character sprites and 10 background images for the game demo.
Timeline
Set deadlines or milestones to keep the project on track.
Example:
All assets must be delivered by August 15, 2024.
Compensation
Clarify how and when collaborators will be paid or compensated. This might be a fixed fee, hourly rate, or revenue share.
Example:
Jane Doe will receive $500 upon delivery of all assets.
Intellectual Property (IP)
Specify who owns the rights to the work created. Usually, the game developer retains ownership, but the contract should state this clearly.
Example:
All artwork created by Jane Doe under this agreement will be the exclusive property of John Smith.
Confidentiality
If your project contains sensitive information, include a confidentiality clause.
Example:
Both parties agree not to disclose any project details to third parties without prior consent.
Termination
Explain how either party can end the agreement and what happens to work and payments if that occurs.
Example:
Either party may terminate this agreement with 7 days’ written notice. Compensation will be prorated based on work completed.
Signatures
Both parties should sign and date the contract to confirm agreement.
Example:
______________________ Date: __________ (Jane Doe)
______________________ Date: __________ (John Smith)
Sample Simple Contract Template
Indie Game Collaboration Agreement
Parties:
- Developer: John Smith
- Collaborator: Jane Doe (Artist)
Scope of Work:
- Create 20 character sprites and 10 background images.
Timeline:
- Deliverables due by August 15, 2024.
Compensation:
- $500 payable upon delivery.
Intellectual Property:
- All work is the exclusive property of John Smith.
Confidentiality:
- Project details are confidential.
Termination:
- Agreement may be terminated with 7 days’ notice.
- Compensation prorated.
Signatures:
______________________ Date: __________ (Jane Doe)
______________________ Date: __________ (John Smith)
Visualizing Contract Components
Why Keep It Simple?
A concise contract is easier to understand and less intimidating for collaborators who may not be familiar with legal jargon. It helps set clear expectations without overwhelming anyone. If the project grows or involves more complex arrangements, you can always revisit and expand the contract.
Final Tips
- Write in plain language.
- Be specific about deliverables and deadlines.
- Discuss terms openly before writing.
- Keep a signed copy for all parties.
This approach keeps your collaboration professional and your project moving forward without unnecessary confusion.
Chapter 14: Post-Demo Steps and Next Moves
14.1 Collecting and Analyzing Player Feedback
Collecting and analyzing player feedback is a crucial step after releasing your game demo. It helps you understand what works, what doesn’t, and where to focus your efforts next. The process can be straightforward if you break it down into clear stages: gathering feedback, organizing it, analyzing patterns, and deciding on actionable steps.
Gathering Feedback
Start by deciding where and how you want to collect feedback. Common channels include:
- In-game surveys or prompts
- Forums and community boards
- Social media comments
- Direct emails or messages
- Playtesting sessions
Each channel has its own strengths. For example, in-game surveys capture immediate reactions, while forums provide more detailed discussions.
Organizing Feedback
Once you have feedback, organize it to make sense of the volume. Group comments by themes such as:
- Gameplay mechanics
- Controls and responsiveness
- Graphics and art style
- Story and narrative
- Bugs and technical issues
- User interface
This grouping helps identify which areas need the most attention.
Analyzing Patterns
Look for recurring points or trends in the feedback. Are multiple players mentioning a particular bug? Is there confusion about a game mechanic? Are certain features praised consistently? Recognizing these patterns guides your priorities.
Deciding on Actions
Not all feedback requires changes. Weigh the impact and feasibility of each suggested improvement. Some might be quick fixes; others could require significant redesign. Prioritize based on what improves player experience most effectively within your resources.
Mind Map: Feedback Collection Channels
Mind Map: Feedback Organization Themes
Mind Map: Analysis and Action
Example: Handling Feedback for a Puzzle Game Demo
Suppose your demo is a puzzle game and you receive the following feedback:
- Several players say the controls feel sluggish.
- A few mention that the difficulty spikes abruptly.
- Many praise the art style.
- Some report a bug where a puzzle piece disappears.
Organizing this, you get:
- Controls: sluggish response
- Difficulty: uneven progression
- Graphics: positive comments
- Bugs: disappearing puzzle piece
Analyzing, the control issue and bug are urgent because they affect playability. The difficulty spike is important but might be adjusted gradually. The art style is a strength to maintain.
Action plan:
- Investigate and fix the disappearing piece bug.
- Optimize control responsiveness.
- Smooth out difficulty progression in upcoming updates.
- Keep the art style consistent.
This example shows how clear feedback handling leads to focused improvements.
Tips for Effective Feedback Collection
- Keep surveys short and specific to avoid fatigue.
- Encourage honest and constructive criticism.
- Acknowledge feedback publicly when possible to build trust.
- Use quantitative data (ratings, completion rates) alongside qualitative comments.
- Remember that not all feedback is equally valuable; consider the source and context.
In summary, collecting and analyzing player feedback is about listening carefully, organizing information clearly, and making informed decisions. It’s a practical process that, when done well, helps your game grow in ways that matter to your players.
14.2 Planning Updates and Feature Expansions
Planning updates and feature expansions after releasing a demo is a critical step to keep your game relevant and improve player experience. It requires balancing player feedback, technical feasibility, and your original vision. The goal is to enhance the game without overwhelming yourself or your audience.
Understanding the Purpose of Updates
Updates serve several purposes: fixing bugs, improving gameplay, adding content, and responding to player feedback. Before planning, categorize potential updates by priority and impact.
Mind Map: Types of Updates
- Updates
  - Bug Fixes
    - Crash fixes
    - UI glitches
    - Performance improvements
  - Gameplay Enhancements
    - Balancing difficulty
    - Tweaking controls
    - Adding tutorials
  - Content Additions
    - New levels
    - Additional characters
    - Extra game modes
  - Quality of Life
    - Save/load features
    - Accessibility options
    - UI improvements
Gathering and Organizing Feedback
Collect feedback from players through surveys, forums, or direct messages. Organize it into categories such as bugs, feature requests, and general comments. Prioritize issues that affect gameplay negatively or are frequently mentioned.
Example: Feedback Categorization
- Bug: Player character gets stuck on a platform edge.
- Feature Request: Add a map to help navigation.
- General Comment: Controls feel sluggish.
Setting Realistic Goals
Choose updates that fit your current resources and timeline. Avoid adding large features that require a complete overhaul. Instead, focus on incremental improvements that keep the game stable and enjoyable.
Mind Map: Update Planning Workflow
- Update Planning
  - Collect Feedback
  - Categorize & Prioritize
  - Assess Technical Feasibility
  - Define Scope
  - Schedule Development
  - Test & Iterate
  - Release Update
Defining the Scope of Feature Expansions
Feature expansions should align with your game’s core mechanics and theme. For example, if your demo is a puzzle game, adding new puzzle types or levels fits better than introducing a combat system.
Example: Feature Expansion for a Puzzle Game
- New puzzle mechanics: introducing timed challenges.
- Additional levels: increasing difficulty gradually.
- Hint system: helping players stuck on puzzles.
Balancing New Features and Stability
Adding new features can introduce bugs or performance issues. Allocate time for testing and optimization. Sometimes, polishing existing features improves player satisfaction more than adding new ones.
Scheduling Updates
Plan updates in manageable chunks. For example, a small patch for bug fixes followed by a larger content update. Communicate the schedule clearly to players to manage expectations.
Example Update Schedule
- Week 1-2: Fix critical bugs reported in demo.
- Week 3-5: Develop and test new levels.
- Week 6: Release update with bug fixes and new content.
Using a Mind Map to Track Update Progress
- Update Progress
  - Bugs Fixed
  - Features Developed
  - Testing Status
  - Player Feedback Post-Update
Communicating with Players
Keep players informed about upcoming updates and changes. Transparency builds trust and encourages continued engagement.
Summary
Planning updates and feature expansions involves collecting and prioritizing feedback, defining achievable goals, aligning new content with your game’s core, balancing stability with innovation, scheduling work realistically, and maintaining clear communication. This structured approach helps you improve your game steadily without losing focus or burning out.
14.3 Preparing for Full Game Development
Preparing for full game development is a crucial step after releasing a demo. It involves assessing what worked, what didn’t, and planning how to expand your project without losing control or enthusiasm. This phase bridges the gap between a small, manageable prototype and a larger, more complex product.
Assessing Your Demo
Start by reviewing player feedback and your own observations. Identify core mechanics that resonated and those that felt unfinished or confusing. Consider technical issues encountered during the demo phase and how they might scale.
Defining the Scope
Full games require a clear scope to avoid feature creep. Use your demo as a foundation and decide which features to keep, improve, or discard. Prioritize elements that enhance player engagement and align with your original vision.
Resource Planning
Moving from demo to full game means more time, effort, and possibly collaborators. Estimate the resources you’ll need, including art, sound, programming, and testing. Factor in your available time and budget realistically.
Project Structure and Workflow
Establish a workflow that supports larger development. This might include version control systems, task management tools, and regular milestones. Organize your project files and codebase to accommodate growth.
Mind Map: Preparing for Full Game Development
Example: Expanding a Puzzle Platformer Demo
Suppose your demo featured three levels with basic jumping and puzzle mechanics. Players enjoyed the puzzles but found the controls a bit clunky. Your next steps could include:
- Improving player controls for smoother movement.
- Designing additional levels that introduce new puzzle elements gradually.
- Adding a simple story or theme to give context.
- Planning for sound effects and music to enhance atmosphere.
- Estimating that these additions will double your development time.
Setting Milestones
Break down your full game into phases, such as prototype expansion, content creation, polishing, and testing. Assign deadlines to each phase to maintain momentum and track progress.
Risk Management
Identify potential risks like scope creep, burnout, or technical hurdles. Develop contingency plans, such as cutting less critical features or scheduling regular breaks.
Mind Map: Risk Management in Full Game Development
Final Thoughts
Preparing for full game development is about building on your demo’s foundation with clear goals and realistic plans. It requires balancing ambition with practical constraints and maintaining a steady workflow. By organizing your approach and anticipating challenges, you set yourself up for a smoother development journey.
14.4 Leveraging Your Demo for Funding and Partnerships
Leveraging your demo for funding and partnerships is a practical step that can help move your indie game project beyond the initial stages. A well-crafted demo acts as a proof of concept, showing potential backers and collaborators what you can deliver. Here’s how to approach this process methodically.
Understanding the Role of Your Demo
Your demo is more than just a playable slice of your game; it’s a communication tool. It demonstrates your skills, vision, and the viability of your concept. When approaching funders or partners, the demo should clearly highlight the core gameplay, art style, and unique features that set your game apart.
Preparing Your Demo for Funding and Partnerships
Before reaching out, ensure your demo is polished enough to make a solid impression but don’t aim for perfection. Funders understand demos are early versions. Focus on:
- Stability: Avoid crashes or game-breaking bugs.
- Clarity: Make sure the gameplay and objectives are understandable.
- Presentation: Include a brief pitch or overview document summarizing your game’s concept, target audience, and development roadmap.
Mind Map: Key Elements to Highlight in Your Demo Pitch
Identifying Potential Funding Sources and Partners
Different funding sources have different interests and requirements. Common options include:
- Crowdfunding platforms
- Indie game publishers
- Grants and competitions
- Private investors or angel investors
- Collaborative partnerships with other developers or studios
Each type requires a tailored approach. For example, publishers often want to see a clear market fit and a plan for full game completion, while crowdfunding backers may be more interested in the game’s concept and community engagement.
Approaching Funders and Partners
When you contact potential funders or partners, be concise and professional. Include:
- A link to your demo with clear instructions on how to play
- A one-page summary of your game and its goals
- Your development timeline and funding needs
- Your team’s background and relevant experience
Mind Map: Outreach Strategy
Example: Using a Demo to Secure a Publisher Partnership
Imagine you have a polished 10-minute demo of a puzzle-platformer. You identify a publisher known for supporting indie puzzle games. You send a concise email with:
- A link to the demo hosted on a secure platform
- A pitch document highlighting your game’s unique mechanics and target audience
- A clear development timeline showing milestones and funding requirements
The publisher plays the demo, appreciates the core gameplay, and requests a video call. During the call, you discuss how their marketing support and funding can help you finish the game. This leads to a partnership agreement.
Example: Crowdfunding with a Demo
You decide to launch a crowdfunding campaign. Your demo showcases the main gameplay loop and art style. You prepare a campaign page that includes:
- A download link for the demo
- A video walkthrough
- A detailed description of the game’s vision and stretch goals
Backers play the demo, provide feedback, and share it within their networks, helping you reach your funding goal.
Tips for Success
- Keep your demo focused: Highlight the strongest aspects of your game.
- Be transparent about what the demo represents and what remains to be done.
- Use feedback from early players to refine your pitch and demo.
- Build relationships rather than just seeking money; partners who believe in your project can offer more than funds.
Leveraging your demo effectively requires clear communication, preparation, and understanding the needs of your potential funders or partners. By presenting a compelling, playable slice of your game alongside a realistic plan, you increase your chances of securing the support needed to continue development.
14.5 Best Practice: Maintaining Momentum After Demo Release
Maintaining momentum after releasing your game demo is crucial to keep your project moving forward without losing steam. The initial excitement of launch can quickly fade, so having a clear plan helps sustain progress and motivation. This section outlines practical steps and strategies to keep your development active and productive.
Set Clear, Achievable Goals
After release, define specific short-term goals. These could be fixing bugs reported by players, adding a small feature, or improving an existing mechanic. Clear goals prevent feeling overwhelmed and provide a sense of accomplishment.
Regularly Review Player Feedback
Player feedback is a valuable source of information. Organize feedback into categories such as bugs, gameplay suggestions, and usability issues. Prioritize what aligns with your vision and what can realistically be addressed.
Maintain a Development Schedule
Create a lightweight schedule that fits your available time. Even dedicating small, consistent blocks of time to development helps maintain progress. Avoid overcommitting; the goal is steady, manageable work.
Communicate Progress Transparently
Share updates with your community or testers. Transparency builds trust and keeps people engaged. Updates can be brief but should highlight what was done and what’s coming next.
Use Version Control and Backups
Keep your project organized with version control tools. This practice prevents setbacks and allows you to experiment without fear. Regular backups are essential to avoid data loss.
Celebrate Small Wins
Recognize and appreciate small milestones. Completing a bug fix or improving a feature deserves acknowledgment. This positive reinforcement helps maintain motivation.
Example: Post-Demo Workflow
Imagine you released a puzzle game demo. Players report a few bugs and suggest a hint system. Your post-demo workflow might look like this:
- Collect and categorize feedback.
- Prioritize fixing critical bugs first.
- Plan a small update to add a basic hint feature.
- Schedule development tasks across two weeks.
- Share progress updates on your community page.
- After the update, gather new feedback and repeat the cycle.
Maintaining momentum is about balancing progress with realistic expectations. By setting clear goals, organizing feedback, scheduling work, and communicating openly, you create a sustainable development rhythm. This approach helps you move steadily from demo to a more polished game without feeling overwhelmed.