Cosmetology Science and Advanced Beauty Technology
1. Foundations of Skin Biology for Cosmetology Practice
1.1 Skin Anatomy and Functional Layers for Treatment Planning
Skin is not one uniform sheet; it’s a layered system with different jobs. Treatment planning works best when you match what you see on the surface to what’s happening in the layers beneath it. Think of the skin as a wall with multiple layers: the outer layer protects, the middle layer provides structure, and the deeper layer supports circulation and sensation.
The Epidermis and Its Built-In Workflow
The epidermis is the outer barrier made mostly of keratinocytes. It has no blood vessels, so it relies on nutrients diffusing from the dermis. This matters because barrier damage can look “surface-level,” yet the recovery pace depends on dermal support.
- Stratum corneum: The tough, keratin-rich layer that resists water loss. When it’s disorganized, skin can feel rough, look dull, and sting with routine products.
- Stratum granulosum: Cells are preparing for the final keratinization process. If this layer is stressed, you may see early signs like uneven texture.
- Stratum spinosum: Provides mechanical strength. Treatments that affect cohesion here can influence how well the skin holds together.
- Basal layer: The production zone where new keratinocytes form. Slower turnover can contribute to persistent dullness and delayed smoothing.
Example: A client with dry, flaky cheeks often has a compromised stratum corneum. A plan that focuses only on “adding moisture” may help temporarily, but if the barrier lipids and shedding pattern aren’t supported, flaking tends to return.
The Dermis and the Structure Behind the Surface
The dermis contains collagen and elastin fibers, plus blood vessels, nerves, and immune cells. It’s where many visible changes originate because it determines firmness, elasticity, and inflammatory response.
- Papillary dermis: The upper dermis with fine connective tissue and capillaries. It influences subtle texture and early inflammatory changes.
- Reticular dermis: The deeper, thicker dermis with denser collagen bundles. It contributes to long-term firmness and the way skin responds to repeated stress.
Example: If a client has persistent redness after cleansing, the dermis may be reacting to irritation. A plan that reduces harsh surfactants and supports barrier recovery often improves comfort before any texture goals.
The Hypodermis and Why “Skin” Feels Different
The hypodermis, also called the subcutaneous layer, is rich in fat and connective tissue. It affects how skin moves over deeper structures and can influence swelling patterns. While most topical products target the epidermis and upper dermis, the way skin drapes can change how treatments feel and how results appear.
Example: Two clients may both have “puffiness,” but one may have more fluid retention while the other has more structural volume. The treatment approach should reflect comfort, expected response, and realistic outcomes.
Functional Layer Map for Treatment Planning
Treatment planning becomes systematic when you translate observations into layer-specific targets. Surface findings guide your first pass, and your product and service choices should follow the same logic.
Mind Map: Layer Targets and What You Typically See
Turning Anatomy into a Practical Decision Path
Start with comfort and barrier status because the epidermis is your immediate interface. If the skin barrier is unstable, aggressive exfoliation or strong actives often increase irritation and prolong recovery. Once the skin is comfortable, you can address texture and tone with more confidence.
Example: For a client with acne-prone skin and visible dryness, you might begin with a gentle cleanser, a moisturizer with film-forming support, and a carefully introduced active. The goal is to keep the stratum corneum functioning while you work on the underlying drivers of congestion.
Quick Layer-to-Goal Matching
- Barrier problems (tightness, flaking, stinging): prioritize epidermal support.
- Inflammation signs (persistent redness, sensitivity): reduce irritant load and calm the dermal response.
- Texture and firmness goals (uneven surface, reduced bounce): plan for dermal structure support with consistent routines.
- Movement and swelling differences: account for hypodermal contribution when setting expectations.
When you plan this way, anatomy stops being memorization and becomes a reasoning tool. You’re not guessing; you’re matching visible effects to the layer most likely responsible.
1.2 Skin Cell Types and Their Roles in Barrier Integrity
The skin barrier is not one single wall. It’s a layered system where different cell types handle different jobs: building the outer “brickwork,” managing water balance, and keeping irritants and microbes from getting comfortable. When you understand which cells do what, treatment choices become more logical—especially when you’re trying to improve dryness, sensitivity, or rough texture.
The Epidermis as a Production Line
The epidermis is where most barrier work happens. Cells move upward over time, changing shape and chemistry as they go. Think of it as a conveyor belt: new cells are made at the bottom, then they mature, then they become part of the outer barrier.
Keratinocytes the Main Builders
Keratinocytes are the dominant cell type in the epidermis. Basal keratinocytes divide and generate new cells. As cells move upward, they stop dividing and start producing structural proteins and lipid-related components. By the time they reach the upper layers, they form the tough, flattened cells that make up the stratum corneum.
A key detail for barrier integrity is that keratinocytes don’t just stack; they coordinate with lipids. In the upper epidermis, keratinocytes release lipid-containing structures that help form the mortar between corneocytes. If this coordination is disrupted, you often see increased transepidermal water loss and a rougher surface.
Example: A client with frequent hot showers and harsh cleansing may notice tightness after washing. The cleanser can strip surface lipids and disturb the environment that supports proper lipid organization. Even if the skin still has keratinocytes, the “mortar” system is less effective, so water escapes more easily.
Corneocytes the Outer Bricks
Corneocytes are keratinocytes that have fully matured and flattened. They are filled with keratin and surrounded by a tough envelope. This envelope helps resist mechanical stress and limits water loss.
Corneocytes also influence how well the skin tolerates actives. When the outer layer is compromised, stronger exfoliants or irritating ingredients can cause stinging because the barrier is less able to buffer chemical contact.
Example: If someone uses a strong exfoliant too often, they may feel immediate smoothness but develop ongoing dryness. The corneocytes may be disrupted faster than they can be replaced and properly organized.
Langerhans Cells the Immune Sentinels
Langerhans cells are immune cells located in the epidermis. They help the skin detect and respond to potential threats. For barrier integrity, their role matters because inflammation can change how keratinocytes behave.
When the barrier is stressed, immune signaling can increase, which may lead to redness, itch, or a cycle of irritation. This is why barrier repair and gentle routines often reduce “sensitivity” more reliably than aggressive treatment.
Example: A person with eczema-prone skin may react quickly to new products. Even if the ingredient list looks reasonable, the barrier may be inflamed already, so the immune system is more reactive.
Melanocytes the Pigment Managers
Melanocytes reside in the basal layer and produce melanin. Melanin is transferred to keratinocytes, where it helps protect against UV-related damage. Barrier integrity and pigmentation are connected because inflammation and oxidative stress can worsen uneven tone.
Melanocytes don’t directly form the barrier bricks, but they influence the skin’s overall stability. Reducing irritation and supporting barrier function can reduce the conditions that trigger post-inflammatory hyperpigmentation.
Example: After a pimple is picked or aggressively treated, the area can darken later. Supporting barrier recovery and avoiding repeated irritation helps prevent the pigment response from becoming prolonged.
Merkel Cells the Touch Responders
Merkel cells are sensory cells in the basal layer. They contribute to touch sensation and are part of the skin’s communication system. While they are not the primary barrier builders, their presence reminds you that barrier damage can change how the skin feels.
When the barrier is compromised, nerve endings and sensory cells can become more noticeable, leading to stinging or heightened awareness of minor irritation.
Mind Map: Cell Types and Barrier Roles
Putting It Together for Practical Barrier Thinking
Barrier integrity depends on both structure and environment. Keratinocytes build and coordinate lipid organization. Corneocytes provide the outer physical resistance. Immune cells can amplify or calm responses depending on barrier stress. Pigment cells and sensory cells reflect the skin’s stability through tone and comfort.
Example: For a client with dryness and visible flaking, you’d expect issues in corneocyte organization and lipid support. A routine that focuses on gentle cleansing, consistent moisturization, and barrier-friendly actives helps the system catch up: new cells mature properly, lipid organization improves, and the skin feels less reactive.
When you treat the barrier as a system of cell roles rather than a single “fix,” you can explain outcomes clearly and choose interventions that match the underlying problem.
1.3 Skin Microbiome Principles and Implications for Skin Care Routines
Your skin hosts a living community of microbes that helps set the rules for barrier function, irritation thresholds, and how quickly redness settles after friction. In skin care, the goal is not to “sterilize” the surface; it’s to support a stable barrier so the resident microbes can do their job without being constantly disrupted.
Core Concepts That Shape Microbial Behavior
Microbial balance is local. The microbiome differs by body site because moisture, sebum, and friction vary. Even within the face, the forehead, cheeks, and nose can behave differently, so a single routine can’t be equally effective everywhere.
The barrier is the main gatekeeper. When the stratum corneum is intact, it limits water loss and reduces the cues that encourage harmful overgrowth. When the barrier is compromised, microbes that tolerate stress can gain an advantage.
Nutrients and pH influence which microbes thrive. Sebum components, sweat salts, and dead skin proteins provide resources. Skin pH also affects enzyme activity and the survival of different microbial groups.
Disturbance is often about frequency and formulation, not just ingredients. Over-cleansing, harsh surfactants, frequent exfoliation, and aggressive alcohol-based toners can repeatedly strip lipids and increase irritation, which indirectly shifts microbial balance.
How Skin Care Changes the Microbiome Without Needing to “Target” It
A routine changes the microbiome mainly through barrier effects, moisture balance, and irritation level.
- Cleansers: Mild surfactants remove sweat and excess oils while leaving enough lipids to keep the barrier calm. If a cleanser leaves tightness or visible flaking, that’s a sign it’s likely pushing the skin toward a stressed state.
- Moisturizers: Humectants help maintain hydration, and emollients reduce friction and water loss. A stable barrier tends to reduce the inflammatory signals that can favor imbalance.
- Actives: Many actives work by changing cell turnover or inflammation. If they’re introduced too quickly or used too often, the resulting irritation can outweigh the intended benefit.
- Sunscreen: Daily photoprotection reduces inflammation drivers. Less inflammation means fewer “permission slips” for microbes associated with stressed skin.
Practical Routine Implications with Clear Examples
Example 1: Acne-prone skin that gets worse after “deep cleaning.” A client uses a foaming cleanser twice daily plus a strong exfoliant every other day. They notice burning after cleansing and more bumps the next day. The likely issue is barrier stress. A better approach is switching to a gentler cleanser, reducing exfoliation frequency, and using a moisturizer that supports lipids. As irritation drops, the skin often becomes more predictable.
Example 2: Sensitive cheeks that flare with new products. A client introduces a new toner and a high-strength serum at the same time. Within a week, redness appears and persists. Instead of adding more soothing products, simplify: keep one change at a time, choose lower-irritation formulations, and prioritize barrier support. This reduces the number of variables that could be shifting the microbial community.
Example 3: Eczema-prone skin and “too much” moisturizing. Some clients over-apply occlusive layers during active flares, then stop abruptly when it improves. Consistency matters. Using a moisturizer regularly to maintain barrier function supports microbial stability and reduces itch-scratch cycles.
Mind Map: Microbiome to Routine Connections
Building a Microbiome-Friendly Routine Without Overcomplication
Start with a barrier-first baseline: gentle cleansing, consistent moisturizing, and daily sun protection. Introduce one active at a time, using the lowest effective frequency, and adjust based on signs of irritation such as burning, tightness, or increased flaking. If a routine change causes discomfort, treat that as a signal to reduce stress on the barrier rather than as a reason to add more layers. When the skin is calm, the microbiome tends to behave more predictably—like a well-organized roommate, not a chaotic house party.
1.4 Skin Physiology of Hydration Sebum and Natural Moisturizing Factors
Hydration in skin is not just “water in the skin.” It is a balance between water movement, barrier lipids, and the skin’s own moisturizing chemistry. When this balance shifts, you see predictable changes: tightness, flaking, rough texture, or a shiny surface that still feels dry.
The Barrier Controls Water Loss
The outermost layer, the stratum corneum, acts like a layered wall. Water is lost mainly through tiny pathways between corneocytes, where lipid organization matters. If lipids are disrupted, water escapes more easily, and the skin compensates by changing sebum behavior and surface chemistry.
A practical way to picture it: if the “mortar” between cells is weak, water leaks out even if the “bricks” are fine. That is why moisturizers that support lipids often help more than products that only add water.
Natural Moisturizing Factors and Their Job
Natural moisturizing factors, or NMF, are water-attracting compounds inside corneocytes. They come largely from breakdown products of skin proteins. When NMF is adequate, corneocytes hold onto water and stay flexible.
If NMF drops, the skin can look dry even when the surface feels wet. You may notice fine scaling after cleansing, especially with harsh surfactants that remove surface lipids and can reduce the conditions that maintain NMF.
Sebum and Surface Hydration
Sebum is produced by sebaceous glands and spreads across the skin surface. It contributes to the barrier by reducing water loss and by supporting a healthy surface environment. Sebum also interacts with NMF and surface lipids, influencing how water is retained and how easily the skin sheds.
Important nuance: oily skin can still be dehydrated. When water loss is high, the surface may look shiny while deeper layers feel tight.
Water Movement and Osmotic Pull
Water in the skin moves according to concentration gradients. NMF increases the skin’s ability to hold water by creating an osmotic pull inside corneocytes. Meanwhile, the barrier lipids slow down the escape routes.
This is why layering matters. A humectant can attract water, but without barrier support, that water may leave quickly. A lipid-supporting moisturizer can slow loss, giving humectants time to do their work.
How Cleansing Changes the System
Cleansing affects hydration by removing sebum, surface lipids, and some water-soluble components. Over-cleansing can reduce NMF conditions and increase transepidermal water loss.
Example: A client with dry cheeks uses a foaming cleanser twice daily and applies moisturizer immediately. After a week, they report tightness and visible micro-flaking. Adjusting to a gentler cleanser or reducing frequency often improves comfort because the barrier has fewer “resets” each day.
Mind Map: Hydration, Sebum, and NMF
Putting It Together in a Simple Routine Logic
A useful routine aims to (1) reduce unnecessary water loss, (2) support NMF-like water holding, and (3) maintain a surface lipid environment.
Example: For dehydrated, slightly oily skin, a lightweight moisturizer can still help if it supports barrier lipids. If the client also uses a strong cleanser, the moisturizer may not “win” because water loss keeps happening at the same rate.
Case Study: Interpreting Signs Correctly
Case Study: A client reports “dry but greasy” skin. They have shine on the forehead and tightness after washing.
- Likely hydration issue: increased water loss.
- Likely contributing factor: cleansing removes surface lipids faster than they are replaced.
- Likely physiology: NMF may be reduced by repeated stripping, while sebum still produces surface oil.
A better approach is to reduce cleansing aggressiveness and use a moisturizer that supports barrier lipids, then reassess comfort after a few days.
Key Takeaways for Treatment Planning
Hydration depends on both water holding (NMF) and water loss control (barrier lipids). Sebum supports the surface environment but does not guarantee hydration. When skin feels dry, the cause is often not “lack of water,” but a mismatch between water loss and water retention.
1.5 Skin Sensation Inflammation and Itch Pathways Relevant to Aesthetic Services
Skin sensation is not just “feeling.” It is a communication system that starts at nerve endings in the epidermis and dermis, then gets interpreted through immune signals, barrier status, and hydration level. For aesthetic services, the practical goal is simple: reduce unnecessary irritation while still achieving the intended exfoliation, cleansing, or active delivery.
Core Sensory Pathways for Itch and Pain
Itch and pain share some wiring but are not the same experience. Itch is commonly driven by specific nerve fibers that respond to chemical messengers released in skin. Pain often involves different fibers and tends to dominate when tissue damage or strong mechanical stress occurs. In practice, a client may describe “sting” during a treatment, then later report “itch” as the skin recovers. That sequence matters because it suggests the skin is transitioning from immediate irritation toward a longer inflammatory response.
Nerve endings detect signals through receptors on the cell membrane. When the barrier is compromised, irritants and water loss increase, which makes nerve endings more reactive. Even mild actives can feel stronger on compromised skin because the same dose reaches deeper layers or stays in contact longer.
Inflammation How It Starts and Why It Changes Sensation
Inflammation begins when skin cells and immune cells release mediators such as histamine-like signals, cytokines, and prostaglandins. These mediators do two things relevant to aesthetic work: they recruit immune activity and they sensitize nerves. Sensitized nerves fire more easily, so the client experiences stronger sensations from the same stimulus.
A useful way to think about it is “threshold lowering.” When inflammation is present, the sensory threshold drops. That is why a client who tolerated a product last month may react this month after over-cleansing, aggressive exfoliation, or a barrier disruption from weather or friction.
Barrier Disruption the Trigger That Keeps on Giving
The stratum corneum barrier limits water loss and blocks many irritants. When it is disrupted, transepidermal water loss increases, the skin becomes drier, and the surface becomes less stable. Dryness alone can increase itch, but barrier disruption also allows irritant molecules to interact more directly with nerve endings and immune cells.
Aesthetic services can contribute to barrier disruption through friction, heat, occlusion, over-exfoliation, or prolonged contact time with cleansing or active products. The same service can be gentle on one skin type and irritating on another because baseline barrier integrity differs.
Itch Mediators and Common Aesthetic Triggers
Histamine is famous, but it is not the only itch driver. Non-histamine pathways also matter, especially when itch is linked to skin dryness, inflammation, or irritation rather than classic allergy.
Common triggers in aesthetic settings include:
- Cleansers that are too stripping for the client’s current barrier state.
- Exfoliation that is too frequent or too strong for the skin’s tolerance.
- Occlusive aftercare that traps heat or irritants for some clients.
- Fragrance and essential oils that can irritate sensitive skin even without a true allergy.
- Heat and steam that can increase blood flow and mediator release in reactive skin.
A practical example: a client with mild eczema-prone skin receives a strong exfoliation. The immediate sensation may be manageable, but within hours they may feel tightness and later itch. That pattern fits barrier disruption plus inflammation-driven nerve sensitization.
Systematic Service Planning to Reduce Unwanted Itch
Start with the assumption that irritation is cumulative. Then manage three variables: barrier status, contact time, and intensity.
- Barrier status check: look for visible dryness, roughness, micro-flaking, or redness that suggests lowered tolerance.
- Intensity control: choose milder exfoliation or lower energy settings when the skin shows early signs of reactivity.
- Contact time control: shorten dwell time for actives on reactive clients and rinse thoroughly.
- Aftercare that supports recovery: prioritize gentle, bland hydration and barrier support before adding additional actives.
A slightly playful rule of thumb: if the skin feels “too awake” during the service, it will likely be “too chatty” after.
Mind Map: Itch and Inflammation Links in Aesthetic Context
Example: From Service Choice to Client Sensation
Scenario: A client with dry, slightly flaky cheeks requests brightening and receives a peel.
- Before service: The skin shows micro-flaking, suggesting a lower sensory threshold.
- During service: The peel is applied with a shorter dwell time and rinsed promptly.
- After service: The client uses a bland moisturizer and avoids additional exfoliants for several days.
- Expected sensation pattern: Less sting during the session and reduced likelihood of delayed itch because barrier recovery is supported and mediator-driven nerve sensitization is minimized.
This is the core logic behind itch prevention: you are not only treating the visible concern, you are managing the skin’s communication system so it does not overreact to normal treatment steps.
2. Histology and Barrier Science for Effective Skin Care
2.1 Stratum Corneum Structure and Desquamation Mechanics
The stratum corneum is the outermost layer of the epidermis, built to manage two jobs at once: keep water from leaving and keep irritants from entering. It looks like a simple “skin layer,” but it behaves more like a layered system of bricks and mortar—except the mortar is mostly lipids, and the bricks are dead cells that still matter.
Stratum Corneum Structure
Corneocytes are flattened, keratin-rich cells that have lost their nuclei and most internal organelles. They are not “inactive”; they are chemically and mechanically prepared to resist stress. Their surface is coated with proteins and lipids that help them stick together and withstand friction.
Between corneocytes sits the intercellular lipid matrix, organized into lamellae. This lipid arrangement is crucial because it slows water loss and limits the movement of many substances. If the lipid layers are disordered, water escapes more easily and the skin feels drier or looks rougher.
A key structural feature is the corneocyte envelope. It forms a tough outer shell that anchors lipids and contributes to mechanical stability. Think of it as part of the “brick” that helps the “mortar” stay in place.
Desquamation Mechanics
Desquamation is the controlled shedding of corneocytes. It is not random peeling; it is a regulated process that balances cohesion between cells with the need to renew the surface.
Cohesion is influenced by:
- Lipid organization: Proper lamellar order supports consistent cell-to-cell spacing.
- Corneocyte surface chemistry: Surface coatings affect how strongly cells adhere.
- Enzymatic activity: Enzymes help loosen attachments at the right time.
As corneocytes mature, their attachments weaken in a stepwise way. The surface then sheds small amounts during normal washing and friction, keeping the outer layer functional.
From Foundation to Function
A useful way to connect structure to outcome is to follow the “life cycle” of a surface cell:
- Formation and packing: Cells become flattened and filled with keratin, increasing mechanical resilience.
- Lipid loading: Lipids are arranged to create a barrier-friendly matrix.
- Surface readiness: The envelope and surface coatings prepare corneocytes for contact with the environment.
- Controlled release: Desquamation gradually removes cells that have served their purpose.
When any step is disrupted, the surface can become uneven. You may see rough texture, increased flaking, or a tight, dry feel after cleansing.
Mind Map: Stratum Corneum and Desquamation
Practical Examples for Understanding
Example: Why harsh cleansing can increase flaking A cleanser that strips lipids or disrupts lipid organization can weaken the “mortar.” Even if corneocytes are intact, reduced lipid support can make shedding less controlled. The result is more visible flakes and a rougher surface.
Example: Why occlusive moisturizers often feel better quickly Occlusives reduce water loss from the stratum corneum. When water content stays more stable, corneocytes remain more flexible and desquamation tends to look more even. The skin may feel smoother because the surface is not over-drying.
Example: Why exfoliation changes texture Mechanical or chemical exfoliation removes part of the outer corneocyte layer. If the barrier lipids are not supported afterward, the surface can shed more than intended. That’s why post-exfoliation care often focuses on restoring comfort and barrier function.
Common Signs Linked to Desquamation Issues
- Fine, dry flaking often points to reduced lipid support and over-drying.
- Patchy roughness can reflect uneven shedding or inconsistent cohesion.
- Tightness after washing suggests water loss is outpacing the skin’s ability to maintain a stable surface.
Key Takeaway for Treatment Planning
When you assess texture, dryness, or flaking, you are indirectly assessing how well corneocytes are held together and how smoothly they shed. Structure determines cohesion; cohesion determines how the surface renews. If you remember that chain, product choices and in-room steps become easier to justify with observable skin behavior.
2.2 Lipid Organization and Barrier Disruption Pathways
The skin barrier is not just a wall; it’s a layered system that depends on lipid order. In the stratum corneum, lipids are arranged in repeating lamellae that slow water loss and limit the entry of irritants. When lipid organization is disturbed, the barrier becomes leaky, and the skin often responds with dryness, roughness, and increased sensitivity.
Lipid Organization in the Stratum Corneum
Stratum corneum lipids are mainly ceramides, cholesterol, and free fatty acids. Their job is to form tightly packed layers that regulate diffusion. Ceramides act like molecular “anchors” that help maintain lamellar structure. Cholesterol supports packing and fluidity control, while free fatty acids fill gaps and strengthen the barrier’s physical continuity.
A helpful way to picture this is as a zipper: ceramides provide the teeth, cholesterol helps the zipper move smoothly without snagging, and fatty acids complete the closure. If one component is missing or mismatched, the zipper doesn’t fully meet, and water escapes more easily.
How Lipids Get Organized
Lipid organization is built during normal keratinocyte maturation and then maintained as corneocytes shed and renew. Enzymes help convert precursor lipids into barrier-ready forms. The resulting lamellae create a tortuous route for water molecules, meaning water has to travel a longer, more complicated path rather than moving straight through.
This matters for product use because barrier repair is not only about adding “more” lipids. It’s about supporting the right lipid environment so the skin can reassemble ordered layers.
Barrier Disruption Pathways
Barrier disruption usually follows a few common routes. Each route changes lipid structure, lipid quantity, or both.
Reduced Lipid Content
When the skin produces fewer barrier lipids, lamellae become thinner and less continuous. This can happen with aging, frequent cleansing, and some inflammatory conditions. The practical sign is persistent dryness that doesn’t improve with simple moisturization alone.
Example: A client who washes with a strong cleanser and skips moisturizer may notice tightness within hours. The cleanser can strip surface lipids, and the skin may not replace them quickly enough.
Altered Lipid Composition
Even if total lipid levels are present, the ratio can shift. If ceramides are relatively low or fatty acid profiles are less compatible with lamellar packing, the barrier becomes less efficient.
Example: Two moisturizers can feel equally “rich,” but one may better support barrier lipids than the other. The difference often shows up after several days as reduced flaking and less stinging during application.
Disrupted Lamellar Structure
Heat, friction, and harsh surfactants can interfere with how lipids stack. Disordered lamellae create more pathways for water to escape.
Example: After a vigorous exfoliation routine, a client may experience redness and a burning sensation. That discomfort often reflects a barrier that’s temporarily reorganizing, not a “purge.”
Increased Protease Activity and Surface Imbalance
When the barrier is stressed, enzymes that break down proteins can become more active. This can indirectly worsen lipid organization by changing the surface environment and corneocyte cohesion.
Example: Overuse of strong exfoliants can lead to rough texture and visible scaling. The skin may be breaking down faster than it can rebuild.
Mind Map: Lipid Organization and Disruption
Practical Integration for Treatment Planning
Barrier disruption is often visible before it’s measurable. If a client reports tightness after cleansing, stinging with routine products, or persistent flaking, the most direct interpretation is that lipid organization is compromised.
A systematic approach is to reduce further disruption first: use gentle cleansing, avoid over-exfoliation, and prioritize products that support barrier lipids and reduce water loss. Then, once the skin feels calmer, you can introduce targeted actives more safely, because an organized lipid environment makes irritation less likely.
Example workflow: For a client with dry, reactive cheeks, start with a mild cleanser and a lipid-supporting moisturizer for several days. If stinging decreases and texture smooths, you can add a low-strength exfoliant or brightening active later, rather than starting both at once.
In short, lipid organization determines barrier performance, and disruption pathways explain why “more product” sometimes fails. The goal is to restore ordered lamellae conditions, not just to cover the surface.
2.3 Transepidermal Water Loss Measurement and Interpretation
Transepidermal water loss, or TEWL, measures how much water escapes from the skin through the outer barrier. Think of it as a “leak rate” test: the higher the leak rate, the more the barrier is struggling. TEWL is not a diagnosis by itself, but it is a useful measurement for tracking barrier function across time, products, and services.
What TEWL Measures and Why It Matters
TEWL reflects the combined effect of barrier lipids, corneocyte structure, hydration level, and surface conditions. When the stratum corneum is disorganized or lipids are reduced, water moves outward more easily. When the barrier is well organized and hydrated, the leak rate drops. TEWL is also sensitive to surface moisture and recent washing, which is why measurement conditions matter.
Measurement Conditions That Control Accuracy
TEWL instruments typically use a sensor that detects a water vapor gradient near the skin surface. If the environment is unstable, the reading becomes unstable too.
Key controls:
- Acclimation time: Let the client rest in the measurement room so skin temperature and surface conditions stabilize.
- Room climate: Keep temperature and humidity consistent; otherwise, the gradient changes.
- Site selection: Use the same anatomical location each time because skin thickness and lipid composition vary.
- Pre-test behavior: Avoid exfoliation, harsh cleansing, or heavy occlusion right before testing unless the protocol intentionally includes them.
- Contact and pressure: Follow the device instructions so the sensor sits consistently without compressing the skin.
A simple example: if you measure TEWL right after a facial wash, you may capture temporary surface hydration rather than true barrier function. Waiting the standardized time after cleansing gives a reading that better represents baseline barrier status.
Interpreting TEWL Values Without Guessing
TEWL interpretation depends on device type and protocol, so focus on within-client change more than absolute numbers. Still, you can interpret patterns logically.
Common interpretation framework:
- High TEWL at baseline: Suggests barrier impairment, often seen with irritation, over-cleansing, or compromised lipid organization.
- TEWL decreases after a barrier-supporting routine: Indicates improved barrier function or reduced water escape.
- TEWL stays high despite hydration products: Suggests hydration alone is not enough; lipid organization and irritation control may be the limiting factors.
- TEWL spikes after a service: May indicate transient barrier stress; the timing of the post-service measurement determines whether it is expected recovery or persistent damage.
Concrete example: A client with frequent dryness shows elevated TEWL on the cheek. After a week of gentle cleansing and a lipid-focused moisturizer used consistently, TEWL drops and skin feels less tight. That pairing—measurement change plus functional comfort—supports a barrier improvement rather than a coincidence.
Mind Map: TEWL Measurement and Interpretation
Practical Protocol for a Salon or Clinic Session
A systematic workflow reduces measurement noise.
- Prepare the site: Clean gently if needed, then follow the protocol’s waiting time before measuring.
- Acclimate: Have the client sit quietly for the standardized period.
- Measure consistently: Use the same site, same sensor placement, and the same number of readings per site.
- Record conditions: Note room climate, recent product use, and any visible irritation.
- Interpret as change: Compare to the client’s own baseline and prior sessions.
Example workflow: You measure TEWL on the lateral cheek at baseline, then again after a service that includes barrier-supporting steps. If the first post-service reading is higher but the next reading later in the session or at a follow-up visit is lower, you can interpret the early increase as transient stress rather than permanent worsening.
Common Pitfalls and How to Avoid Them
- Measuring too soon after washing: Surface moisture can distort the gradient.
- Switching sites between sessions: Differences in skin thickness create misleading “improvements.”
- Ignoring irritation signs: Redness and stinging often correlate with higher TEWL, so document them alongside the numbers.
- Overreacting to a single reading: TEWL varies; trends across sessions are more reliable than one data point.
Linking TEWL to Barrier Decisions
TEWL helps you decide whether to prioritize barrier repair, reduce irritant exposure, or adjust cleansing frequency. If TEWL is high and redness is present, the logical move is to reduce stressors and support barrier recovery. If TEWL is normal but texture is rough, you can focus on surface management without assuming the barrier is the limiting factor. TEWL is a measurement of barrier function, so let it guide which lever you pull—then verify with the next measurement.
2.4 Barrier Support Ingredients and Their Mechanisms of Action
A skin barrier is not just a wall; it’s a layered system that manages water, lipids, and controlled shedding. When barrier function is weakened, products that “feel moisturizing” may still fail to reduce dryness because they don’t address the barrier’s actual jobs: slowing water loss, restoring lipid organization, and supporting the skin’s ability to renew.
Barrier Jobs Ingredients Must Support
- Reduce Transepidermal Water Loss: The barrier’s outer lipid layers limit evaporation. Ingredients that form stable films or replenish lipids help here.
- Rebuild Lipid Organization: Ceramides, cholesterol, and free fatty acids work as a set. If one piece is missing, the barrier can’t pack lipids as efficiently.
- Support Desquamation Control: The barrier sheds dead cells in an orderly way. Ingredients that influence hydration and keratin structure can improve surface smoothness.
- Maintain Microenvironment: Skin functions best within a mildly acidic range. pH-supporting ingredients help enzymes involved in barrier maintenance work properly.
Mind Map: Barrier Support Mechanisms
Humectants That Pull Water into the Stratum Corneum
Humectants attract water and help the outer layer stay flexible. Glycerin is a classic example: it increases water content in the stratum corneum, which can reduce the tight, rough feel that comes from dryness. Panthenol adds a practical bonus because it also supports comfort and can reduce the look of irritation when used consistently.
Easy example: If a client uses a cleanser that leaves skin squeaky, a humectant-rich serum applied on slightly damp skin can restore softness without needing heavy occlusion.
Occlusives and Film Formers That Slow Water Loss
Occlusives reduce evaporation by creating a barrier-like layer on the surface. Petrolatum is highly effective because it’s stable and forms a strong protective layer. Dimethicone works similarly but with a lighter feel for many users. Film formers can also help by forming a thin, flexible coating that reduces water escape while still allowing some skin movement.
Easy example: For winter dryness, a thin layer of petrolatum on dry patches after a hydrating lotion often improves comfort within days because it directly targets water loss.
Lipid-Replenishing Systems That Rebuild the Barrier Core
Ceramides are the most recognizable barrier lipids, but they work best as part of a system. Cholesterol and free fatty acids help ceramides pack into organized layers. When formulas include multiple components, the barrier has a better chance to restore the “brick-and-mortar” structure—where bricks are corneocytes and mortar is lipid organization.
Easy example: A cream containing ceramides plus cholesterol and fatty acids can be more effective for persistent dryness than a product that only provides humectants, because it addresses the barrier’s lipid architecture.
Keratin-Conditioning Ingredients That Improve Surface Behavior
Urea supports hydration and can soften keratin structure, which helps roughness. At appropriate strengths, it can make dry skin feel smoother without relying on strong exfoliation. Lactic acid provides gentle exfoliation at low concentrations, helping remove excess surface buildup so hydration products can spread more evenly.
Easy example: If skin looks flaky after cleansing, a low-strength lactic acid product used a few times per week can reduce visible flaking, while daily humectants maintain comfort.
Niacinamide That Supports Multiple Barrier Pathways
Niacinamide is useful because it supports barrier function in more than one way. It can improve the barrier’s ability to retain water and helps reduce the appearance of uneven texture that often accompanies barrier stress. It also tends to be well tolerated, which matters for clients who need consistent barrier support.
Easy example: A client with redness and dryness can use a niacinamide serum in the morning and a ceramide cream at night to keep the barrier stable while reducing the “dry-then-irritated” cycle.
pH Support That Keeps Barrier Enzymes Working
The skin surface is naturally mildly acidic, which supports enzymes involved in lipid processing and barrier maintenance. Buffering systems and mild acid salts can help maintain that environment, especially when cleansers or harsh routines shift pH upward.
Easy example: If a cleanser is very stripping, switching to a gentler cleanser and pairing it with a pH-supporting moisturizer can improve barrier comfort more reliably than adding extra occlusion alone.
Putting It Together in a Simple Routine
A systematic approach is: cleanse gently, hydrate with humectants, support lipids with ceramides, and seal with occlusion when needed. For example, a morning routine might use a humectant serum and a ceramide moisturizer, while a night routine adds a thin occlusive layer on the driest areas. This sequence matches the barrier’s needs from inside-out and surface-to-depth, rather than relying on one ingredient to do everything.
2.5 Barrier Assessment Methods for Clinical and Salon Settings
Barrier assessment is the practical step that turns “my skin feels dry” into a service plan with measurable targets. The goal is not to diagnose like a dermatologist; it is to identify barrier status, likely drivers, and the safest next actions.
Core Barrier Signals You Can Observe
Start with what you can see and feel, because barrier problems usually show up as a pattern.
- Surface dryness and roughness: Look for flaking, tightness after cleansing, and makeup that clings then breaks up.
- Redness and sensitivity: Note whether redness appears quickly after washing, exfoliation, or temperature changes.
- Texture changes: Check for uneven roughness, “sandpaper” feel, or tiny bumps that worsen after harsh products.
- Comfort after routine steps: A simple test is to compare comfort after a gentle cleanser versus a foaming cleanser.
Example: A client reports stinging with toner. In the room, you observe mild redness at the cheeks and the client says the skin feels tight within 2–3 minutes after cleansing. That points to barrier irritation rather than simple dehydration.
Simple Screening Workflow for Clinics and Salons
Use a consistent sequence so results are comparable across visits.
- Intake and trigger mapping: Ask about recent changes: new cleanser, stronger actives, longer hot showers, frequent scrubs, or mask friction.
- Baseline visual check: Photograph in consistent lighting if your setting allows.
- Touch and timing: Assess dryness and sensitivity immediately, then again at 5 minutes.
- Product challenge check: If appropriate, compare how skin reacts to a gentle rinse versus a product step you control.
- Decision and documentation: Record the barrier category and the service plan.
Barrier categories you can use operationally:
- Compromised barrier: frequent stinging, persistent redness, visible flaking.
- Dry barrier: tightness and roughness with minimal redness.
- Irritated barrier: sensitivity after specific triggers, often with transient redness.
Instrument Options from Most Accessible to Most Specific
You can assess barrier function with tools that measure either water loss, surface lipids, or skin surface properties.
- Wood’s lamp: Helps highlight certain pigment patterns and inflammation-related changes, but it does not directly measure barrier function.
- Corneometer: Estimates skin surface hydration. Low readings support dehydration, but hydration alone does not confirm barrier integrity.
- Tewameter: Estimates transepidermal water loss. Higher values suggest barrier disruption.
- Sebum and surface analysis: Useful for context, since oily skin can still have a compromised barrier.
Practical note: Instruments are sensitive to room humidity, recent product contact, and time since cleansing. Standardize prep time and avoid measuring right after steaming or exfoliation.
Measurement Protocol That Prevents “False Results”
A good protocol reduces noise.
- Environment: Keep room temperature and humidity stable when possible.
- Skin prep: No exfoliants, masks, or strong actives for the agreed window before measurement.
- Rest period: Let the client acclimate for about 15 minutes before readings.
- Site selection: Use the same facial zones each visit.
- Replicates: Take multiple readings per site and average.
Example: If a client arrives sweaty from commuting and you measure immediately, hydration readings may look higher due to surface moisture. Waiting for acclimation helps you measure the barrier state rather than the commute.
Mind Map: Barrier Assessment Methods
Integrated Example Case: From Assessment to Service Choice
A client with acne history requests a brightening facial.
- Screening: After cleansing, cheeks feel tight within minutes. There is mild redness around the mouth and chin.
- Instrument context: Corneometer is low on cheeks. Tewameter is elevated compared with typical baseline for that setting.
- Interpretation: The barrier looks disrupted, not just dehydrated.
- Service decision: Skip strong exfoliation and focus on barrier-support steps first. Use gentle cleansing, short contact times, and products designed for lipid support.
- Recheck plan: Reassess comfort and, if available, repeat hydration and Tew readings at the end of the session.
This approach keeps the treatment aligned with the skin’s current capacity. When the barrier improves, actives become easier to tolerate, and the plan stops fighting the client’s skin.
3. Dermatologic Chemistry for Ingredient Selection
3.1 Water Solubility Partitioning and Skin Penetration Concepts
Skin penetration is easier to understand when you separate two ideas: whether a molecule dissolves in water, and whether it can cross the skin’s barrier layers. Water solubility mainly affects how a compound behaves in the watery parts of a product and in the skin’s outer surface fluids. Penetration depends on how the compound balances attraction to lipids versus attraction to water.
The Skin Barrier as Two Different Neighborhoods
The outer barrier is often described as a “brick and mortar” system. The bricks are corneocytes, which are relatively water-friendly. The mortar is lipid-rich, which is water-repellent. A molecule that prefers water will have an easier time moving through watery regions but may struggle to cross the lipid mortar. A molecule that prefers lipids can cross the mortar more readily but may have trouble distributing through the watery surface and deeper aqueous environments.
A practical way to think about it: penetration is a sequence of handoffs. First, the ingredient must leave the product and spread across the skin surface. Then it must partition into the barrier lipids. After that, it must keep moving without getting trapped or precipitating.
Partitioning: The Molecule’s “Preference Settings”
Partitioning describes how a compound divides itself between two phases, such as oil-like lipids and water. If a compound has strong affinity for lipids, it will concentrate in the lipid mortar. If it has strong affinity for water, it will concentrate in the aqueous layers.
Water solubility matters because it controls how much of the ingredient can be present in the aqueous portion of a formulation. If the ingredient is poorly soluble in water, it may form tiny solid particles or remain stuck in a less mobile phase. That reduces the amount available to partition into lipids, even if the molecule is theoretically capable of crossing.
Diffusion: How Fast the Ingredient Can Move
Even when partitioning is favorable, diffusion determines the rate. Diffusion slows when a molecule is large, strongly bound, or repeatedly encounters environments where it does not “fit.” In the skin, the lipid mortar is the main diffusion bottleneck for many topical actives.
A simple example: imagine two ingredients with the same partitioning behavior. The smaller one generally diffuses faster than the larger one. That difference can show up as a faster onset or a shallower versus deeper distribution.
Formulation Water Solubility: What Changes on the Skin
A product is not just “water plus ingredient.” It contains emulsifiers, solvents, humectants, and film formers that affect how the ingredient is held and released.
Consider three scenarios:
- High water solubility ingredient: It dissolves well in the product’s watery phase, spreads easily, and can reach the skin surface uniformly. If it is also reasonably lipophilic, it can partition into the lipid mortar.
- Low water solubility ingredient: It may require a solubilizer, a specific solvent system, or a delivery vehicle. Without that, it can remain in droplets or form aggregates that reduce effective contact with the barrier.
- Moderate solubility ingredient: It can work well when the formulation keeps it in a stable dissolved state and prevents crystallization during storage and application.
Practical Example: Choosing Between Two Similar Actives
Suppose you compare two hypothetical molecules, A and B.
- Molecule A dissolves readily in water and has moderate lipid affinity. It can spread in a lotion base and partition into the barrier lipids. You’d expect more consistent penetration across applications.
- Molecule B has similar lipid affinity but is much less water-soluble. In the same lotion, B may not distribute evenly. It might sit in the film left on the surface, leading to slower or more variable penetration.
This is why “water solubility” is not a standalone property. It interacts with the formulation’s solvent system and with the skin’s lipid-water structure.
Mind Map: Water Solubility and Penetration Logic
A Quick Check You Can Use in Practice
When an ingredient “doesn’t seem to work,” the issue is often not only the ingredient itself. Ask three questions in order: Is it staying dissolved in the product? Does it have a reasonable balance between water and lipid affinity? And does the formulation help it reach the barrier lipids rather than leaving it stranded in the surface film?
If you can answer those, you’ve already done most of the science homework—without needing a lab coat.
3.2 Surfactants Emulsifiers and Cleansing Performance Fundamentals
Surfactants and Emulsifiers in Cleansing
Cleansers do two jobs at once: they lift soil from the skin surface and they keep that soil suspended so it rinses away. Surfactants are the main performers. Emulsifiers are the supporting cast when the cleanser contains oils, waxes, or other non-water ingredients that must be dispersed in water.
A useful way to think about cleansing is “oil meets water, but they don’t like each other.” Surfactants contain both water-attracting and oil-attracting parts. When you apply the cleanser, these molecules position themselves at interfaces, reducing the tension that would otherwise keep oil stuck together. The result is smaller oil droplets that can be carried away by water.
Surfactant Fundamentals for Skin Cleansing
Surfactants are classified by how they carry charge in water. This matters because charge influences irritation potential, compatibility with other ingredients, and how well the cleanser performs in hard water.
- Anionic surfactants are strong cleaners and foam well. They can feel “tight” if used at high levels or paired with harsh systems.
- Cationic surfactants are usually not used as primary cleansers for facial skin because they can be incompatible with many anionic ingredients and may increase irritation risk.
- Nonionic surfactants tend to be milder and more tolerant across formulations, often used to improve feel and reduce harshness.
- Amphoteric surfactants can behave like either anionic or cationic depending on pH, which helps them balance cleansing with gentler skin feel.
Cleansing performance is not only about strength. It also depends on critical micelle concentration (CMC), the point where surfactant molecules form micelles. Below the CMC, fewer micelles are available to trap oils and dirt. Above it, micelles increase and cleansing improves, but too much surfactant can raise irritation and leave the skin feeling squeaky.
Emulsifiers and Why They Matter
Many cleansers are emulsions or emulsion-like systems. If oil and water separate, you get uneven cleansing, inconsistent texture, and poor rinse behavior. Emulsifiers help stabilize the dispersed phase by forming a protective layer around droplets.
Key practical idea: the cleanser’s “phase behavior” controls how it breaks during rinsing. A stable emulsion that never breaks can leave residue. A system that breaks too easily can separate in the bottle or on the skin. Good emulsifiers strike a balance so the cleanser spreads, captures soil, and then releases it during rinsing.
Cleansing Performance Fundamentals
Cleansing is a sequence: wetting, penetration, emulsification, micelle solubilization, and rinse removal.
- Wetting: Surfactants lower surface tension so the cleanser spreads instead of beading.
- Penetration: The cleanser must reach the interface where sebum and sunscreen sit.
- Emulsification: Oil droplets are broken into smaller units.
- Micelle solubilization: Micelles hold the oil so it stays suspended.
- Rinse removal: The suspended mixture leaves with water.
A concrete example: if a cleanser feels slippery but doesn’t remove sunscreen well, it may be forming a film rather than micelles. Another example: if it removes everything but leaves redness, the surfactant system may be too aggressive or the formula may be too low in skin-friendly balancing components.
Mind Map: Surfactants and Cleansing Mechanics
Example: Matching Cleansing Systems to Real Skin Soil
Example 1: Oily sunscreen and sebum A cleanser needs enough emulsification to break sunscreen oils and enough micelle capacity to keep them suspended. If the surfactant system is too mild, you may see patchy removal. If it’s too strong, you may get fast removal with a dry, reactive feel.
Example 2: Dry or barrier-compromised skin The goal is effective soil removal with reduced stripping. A common approach is using a gentler surfactant blend plus supportive agents that improve rinse feel. The practical check is whether the skin feels comfortable 30 minutes after cleansing, not just whether it looks “clean” immediately.
Advanced Details Without Guesswork
Hard water can reduce cleansing efficiency by interfering with certain surfactant systems and changing how micelles form. pH influences surfactant ionization, which changes both feel and performance. Formulation balance matters: a cleanser can be strong on paper but unpleasant in practice if it over-stabilizes residue or if the surfactant blend creates a film.
A good internal standard is to evaluate cleansing in terms of both removal and after-feel. Removal tells you whether micelles and emulsification are doing their job. After-feel tells you whether the surfactant system is staying within the skin’s tolerance while still doing the work.
3.3 Humectants Emollients Occlusives and Film Formers
Humectants, Emollients, Occlusives, and Film Formers
Skin feels “dry” for different reasons, so the first job is to match the ingredient type to the problem. Humectants help water stay in the outer layers, emollients improve softness by filling gaps and smoothing texture, occlusives reduce water loss by slowing evaporation, and film formers create a flexible surface layer that can support comfort and reduce friction. In practice, many products combine all four, but the order of action matters: humectants need water to work, emollients need contact to soften, occlusives need coverage to block evaporation, and film formers need a dry-down or set time to form their layer.
Humectants
Humectants are water-attracting molecules that increase hydration by pulling water into the stratum corneum. Common examples include glycerin, propanediol, hyaluronic acid, and panthenol. A useful mental model is “bring water, then hold it.” If you apply a humectant to completely dry skin, it may still help, but the effect is limited by available water.
Practical example: After cleansing, lightly mist or apply a damp toner, then apply a glycerin-based serum. The dampness provides water for the humectant to bind, which improves the immediate feel and supports longer comfort.
Formulation detail: Humectants can be water-soluble and may increase tackiness. To keep a product pleasant, formulators balance them with emollients and adjust viscosity so the product spreads without feeling sticky.
Emollients
Emollients soften by improving how skin feels and how the surface reflects light. They include esters, fatty alcohols, squalane, and certain silicones. Emollients are not primarily water binders; instead, they reduce roughness by smoothing microtexture and supporting lipid-like behavior at the surface.
Practical example: For rough, flaky areas, a cream with squalane and fatty alcohols can reduce the “sandpaper” sensation even before any exfoliation. This is because the surface becomes more uniform and less prone to catching.
Formulation detail: Emollients can be chosen for spreadability versus slip. A lighter emollient blend may suit daytime use, while a richer blend can better support comfort during colder, drier conditions.
Occlusives
Occlusives reduce transepidermal water loss by forming a more continuous barrier that slows evaporation. Petrolatum is the classic example, along with certain waxes and heavy oils. Occlusives are especially helpful when the skin barrier is compromised or when the environment is drying.
Practical example: On very dry elbows or hands, applying a thin layer of petrolatum at night can noticeably reduce tightness by the next morning. The key is thin coverage; thick layers can feel greasy and may interfere with comfort.
Formulation detail: Occlusives can be heavy and may feel occlusive or shiny. Many products use them in controlled amounts or pair them with lighter emollients to keep the finish acceptable.
Film Formers
Film formers create a flexible, semi-continuous layer on the skin. Unlike occlusives, which primarily block evaporation through coverage, film formers often focus on comfort, slip, and reduced friction, and they can help hold other ingredients in place. Examples include acrylates copolymers and certain polymers used in lotions and gels.
Practical example: A gel-cream with a film former can feel less greasy than an occlusive cream while still reducing the “dry drag” that happens when skin rubs against fabric.
Formulation detail: Film formers require correct application and drying time. If a product is layered too quickly with incompatible textures, the film may not set evenly, leading to pilling or patchy feel.
How They Work Together
A systematic routine uses each category for its job. Humectants first to load water, emollients next to smooth and improve texture, then occlusives or film formers to reduce loss and improve comfort.
Integrated example routine:
- After cleansing, apply a glycerin-based serum to damp skin.
- Follow with a lotion containing emollients like squalane for softness.
- Finish with a thin layer of a film-forming gel or a light occlusive cream on the driest areas.
This order prevents a common mistake: applying an occlusive too early can trap a surface that feels dry, while a humectant needs water to bind.
Mind Map: Ingredient Roles and Practical Pairings
Quick Decision Guide
If the skin feels tight after cleansing, start with humectants. If it feels rough or looks flaky, add emollients to smooth. If it feels dry and tight despite hydration, use an occlusive on top. If it feels dry but you want a lighter finish, choose a film former to reduce friction without the heavier coverage.
3.4 pH Buffers Chelators and Stabilizers in Skin Care Formulas
Skin care products live in a narrow comfort zone: the skin surface is usually slightly acidic, while many ingredients behave better when pH is controlled. pH buffers, chelators, and stabilizers work together to keep formulas effective and predictable, especially when water, salts, and time are involved.
pH Buffers the Job Description
A pH buffer resists change when acids or bases are added. In practice, buffers help a cleanser or serum stay near its intended pH after manufacturing, during storage, and after dilution on skin.
A simple way to think about it: if your formula is a boat, the buffer is the ballast that prevents sudden tilting. Without it, small variations from raw materials or water quality can shift pH enough to change ingredient performance.
Example: A gentle cleanser is formulated to sit around pH 5.5. If the buffer system is weak, the pH may drift toward 6.5 after a few weeks. That shift can alter surfactant behavior, potentially making the feel less mild and changing how well the product rinses.
Buffer Systems How They Are Chosen
Buffers are selected based on the target pH range and the ingredient compatibility.
- Acidic range buffers often use systems that maintain stability around pH 4–6.
- Neutral range buffers are used when the formula must sit closer to pH 7.
- Compatibility checks matter because some buffers interact with actives, metals, or preservatives.
A practical formulation habit is to test pH after mixing, after adding actives, and after holding at realistic temperatures. If pH changes during these steps, the buffer system is not doing its job.
Chelators the Metal Problem Solver
Chelators bind metal ions such as iron and copper. These metals can catalyze oxidation, discoloration, and breakdown of sensitive ingredients.
Even if your water is “clean,” trace metals can enter from raw materials, equipment, or packaging. Chelators reduce the chance that metals turn your carefully chosen active into a less reliable version of itself.
Example: A vitamin C derivative system can be sensitive to oxidative conditions. If trace metals are present, the formula may darken faster. Adding an appropriate chelator can slow discoloration and help maintain consistent appearance.
Chelators also support preservative performance by reducing conditions that favor microbial growth indirectly through ingredient degradation.
Stabilizers the Time and Temperature Guardians
Stabilizers keep the overall product structure and performance from drifting.
They can act in different ways:
- Emulsion stabilizers reduce separation in creams and lotions.
- Thickening and rheology stabilizers maintain texture so the product spreads consistently.
- Antioxidant stabilizers protect against oxidation beyond what pH and chelation can handle.
- Degradation stabilizers help certain actives resist hydrolysis or breakdown.
Example: A gel-cream with a high-water phase may feel fine at day one, then become grainy or watery after storage. A stabilizer strategy might include adjusting polymer selection, ionic strength, and emulsifier balance so the physical structure stays intact.
How These Pieces Work Together
pH buffers control the chemical environment; chelators control metal-driven reactions; stabilizers control physical and chemical integrity over time.
If you only use one tool, the others can still cause problems. For instance, a well-buffered formula can still discolor if metals are unbound. A chelated formula can still destabilize if the emulsion system is weak.
Mind Map: pH Buffers Chelators and Stabilizers
Practical Formulation Workflow
- Set the target pH based on the product type and skin compatibility goals.
- Select a buffer system that holds that pH without causing ingredient incompatibility.
- Add a chelator when oxidation-sensitive ingredients or metal exposure risk is present.
- Choose stabilizers that match the product’s physical form, such as emulsion vs gel.
- Validate with simple checks: pH over time, color/clarity change, viscosity or texture consistency, and separation.
Example: A Balanced Serum Scenario
A serum contains a water-soluble active and a film-forming polymer.
- The buffer keeps pH stable so the active stays in its intended form.
- A chelator reduces metal-driven oxidation that could change color or potency.
- A stabilizer supports polymer behavior so the serum remains smooth and does not thin excessively.
If the serum later feels thinner, you investigate stabilizers first. If it darkens, you check chelation and oxidation pathways. If pH drifts, you revisit the buffer system.
This is the practical logic: pH buffers manage the environment, chelators manage reactive contaminants, and stabilizers manage the product’s structure and endurance. Together, they turn “it worked in the lab” into “it works reliably on the shelf and on skin.”
3.5 Antioxidants Preservatives and Their Compatibility Considerations
Antioxidants Preservatives and Compatibility Considerations
Antioxidants and preservatives both fight “time problems,” but they do it in different ways. Antioxidants slow oxidation reactions that can change color, odor, and skin feel. Preservatives control microbial growth that can spoil a product even when oxidation is slow. Compatibility matters because the chemistry that protects one failure mode can accidentally interfere with the other.
Core Concepts That Drive Compatibility
Start with what each system needs to work.
- Antioxidants require the right environment to remain effective. Many are sensitive to pH, metal ions, and oxygen exposure. If the formula is already metal-contaminated or oxygen-rich, the antioxidant can be consumed faster.
- Preservatives require conditions that limit microbial survival. Their performance depends on pH, water activity, surfactant type, and the presence of ingredients that can bind or inactivate them.
A practical example: a serum with a strong antioxidant blend may still fail shelf life if it has a pH that makes the preservative mostly inactive, or if the formula contains ingredients that “soak up” the preservative.
Antioxidant Types and What They Can Affect
Antioxidants are often categorized by mechanism.
- Reducing antioxidants (commonly certain phenolic or sulfur-containing types) donate electrons to interrupt oxidation chains. They can be less stable in the presence of strong oxidizers.
- Chelators reduce oxidation indirectly by tying up metal ions that catalyze oxidation. If chelators are present, they can also influence preservative availability by changing the ionic environment.
- Oxygen-management strategies include film formers and packaging choices that reduce oxygen contact. Even without changing chemistry, lower oxygen exposure can reduce how quickly antioxidants are consumed.
Compatibility note: antioxidants that are strongly colored or reactive can interact with other actives, causing discoloration that looks like “oxidation,” even when the preservative is doing its job.
Preservative Types and Their pH Dependence
Most preservative systems have a “sweet spot” pH range where the active form is most effective.
- Organic acids and related preservatives often work best in mildly acidic formulas. If pH drifts upward, the preservative can lose activity.
- Quaternary ammonium preservatives can be sensitive to anionic surfactants because they may form complexes that reduce free preservative concentration.
- Phenoxyethanol and similar systems can be more tolerant across ranges, but still respond to formula composition and microbial challenge.
Example: a cleanser with an anionic surfactant base may need a different preservative strategy than a nonionic cream, because the surfactant can reduce preservative effectiveness.
The Compatibility Triangle
Think of three interacting variables: pH, solubilization, and free concentration.
- pH controls preservative ionization and antioxidant stability.
- Solubilization controls whether ingredients stay in solution or form microdomains that can trap actives.
- Free concentration determines whether preservatives are available to inhibit microbes.
If an antioxidant is poorly soluble, it may partition into a phase where it is less able to protect the rest of the formula. If a preservative is bound by other ingredients, it may be “present” but not “available.”
Common Interaction Patterns
Below are frequent, easy-to-spot patterns that guide troubleshooting.
- Chelators vs. metals vs. preservatives: Chelators reduce metal-catalyzed oxidation, but they also change ionic strength. That can shift preservative behavior, especially in formulas with salts.
- Antioxidants vs. oxidizable actives: Some actives are easily oxidized and may consume antioxidants quickly. When that happens, the preservative may look fine while the product still degrades.
- Surfactant systems vs. cationic preservatives: Anionic surfactants can reduce the activity of cationic preservatives by complexing.
- High electrolyte formulas: Salts can affect preservative partitioning and microbial tolerance. A formula that passes at one salt level can fail at another.
Testing and Decision Workflow
Compatibility is confirmed through a sequence of checks rather than guesswork.
- Set pH first, then choose preservative. Adjusting pH later can invalidate preservative performance.
- Confirm antioxidant stability under realistic stress. Use controlled heat/light/oxygen exposure to see whether antioxidants are consumed.
- Run preservative efficacy testing with the final formula. Do not test a “nearby” prototype if the final includes different solubilizers or chelators.
- Check sensory and appearance changes. Color shift and odor changes can indicate antioxidant depletion even if microbial counts are controlled.
A simple example workflow: formulate at target pH, add antioxidant blend, then run preservative efficacy testing. If results fail, adjust pH within allowed limits or change preservative chemistry rather than adding more antioxidant.
Mind Map: Compatibility Drivers and Practical Checks
Example: Two Formulas with Different Outcomes
Example 1: Antioxidant-rich serum that still spoils
- The serum has a strong antioxidant blend.
- pH is adjusted for skin comfort but ends up slightly above the preservative’s effective range.
- Result: microbial growth increases while oxidation looks controlled.
- Fix: re-tune pH to the preservative’s effective window or switch to a preservative system with appropriate pH behavior.
Example 2: Preservative passes but product darkens
- The preservative system is effective in efficacy testing.
- A chelator is missing or metal contamination is present.
- Result: oxidation-driven color and odor changes occur even with good microbial control.
- Fix: add or adjust chelation and ensure packaging reduces oxygen exposure.
Practical Compatibility Rules That Save Time
- Do not treat antioxidant and preservative selection as independent. pH and ionic environment connect them.
- Avoid “more of everything” fixes. If preservative fails, changing antioxidant dose usually won’t help.
- Match preservative chemistry to the surfactant system. If the base uses anionic surfactants, cationic preservatives often need special handling.
- Validate with the final formula. Small changes in solubilizers, salts, or chelators can shift performance.
When antioxidants and preservatives are chosen with the same formula constraints in mind, you get a product that stays stable in both the chemical and microbial sense. That’s the real compatibility win: fewer surprises between day one and the last day on the shelf.
4. Cosmetic Formulation Science for Skin Care Products
4.1 Product Types and Base Selection for Cream Gel Lotion and Serum
Choosing a base is less about “what feels nice” and more about controlling how water, oil, and actives behave on skin. A good base makes the product spread predictably, stay stable in the bottle, and deliver actives without turning the formula into a chemistry experiment.
Core Product Types and What They Do
Creams are typically oil-in-water emulsions with a richer feel. They’re built for barrier support because they can carry both emollients and film formers while still containing enough water for comfort.
Gels are usually water-forward systems that feel lighter and can be easier to layer. They’re often chosen when you want a fast-drying finish or when you need a stable way to suspend or dissolve certain actives.
Lotions sit between creams and gels. They’re designed for everyday use when clients want hydration without heaviness.
Serums are usually lower-viscosity, higher-active products. They’re not automatically “stronger”; they’re often simply easier to apply in thin layers so actives can reach the skin surface and upper layers consistently.
Base Selection Logic from Skin Feel to Stability
Start with three questions: (1) How should it feel on skin, (2) what must it do to actives, and (3) how will it survive storage.
-
Texture targets guide viscosity and structure. If the goal is cushion and slip, you lean toward cream emulsions. If the goal is quick absorption, you lean toward lotions or gels.
-
Active compatibility determines the system. Some actives prefer certain pH ranges, and some dislike high oil content or high salt. Even when an active is “soluble,” it may still destabilize an emulsion or separate over time.
-
Stability and preservation determine the base architecture. A formula that separates, thickens unexpectedly, or loses preservative effectiveness becomes unreliable, even if it starts out pleasant.
Emulsion Foundations for Cream and Lotion
Creams and lotions commonly use oil-in-water emulsions. The emulsion needs a structure that keeps oil droplets dispersed and prevents phase separation.
- Emollient choice affects spread and comfort. A lighter emollient blend can make a lotion feel airy, while heavier emollients can make a cream feel protective.
- Emulsifier system affects stability and skin feel. Some emulsifiers create a smoother glide; others can feel more draggy.
- Thickening and structuring control viscosity. If viscosity is too low, the product may feel watery and separate; if too high, it may drag and leave residue.
Easy example: A client with dry, tight skin may tolerate a cream better than a gel because the emulsion can deliver a more persistent film. A client with oily, acne-prone skin may prefer a lotion with lighter emollients and a thinner emulsion structure.
Gel Foundations for Lightweight Delivery
Gels rely on a network that traps water. That network can be built with different gelling agents, and the choice changes how the product behaves when spread.
- Water-based gel systems are often good for layering because they dry down without leaving a heavy film.
- Suspension gels can hold insoluble particles, but they require careful viscosity and mixing so particles don’t settle.
Easy example: If a client wants to use an exfoliant at night, a gel base can reduce the “greasy aftermath,” making it easier to apply a second product afterward.
Serum Bases for Thin-Layer Consistency
Serums are typically lower-viscosity and designed for even coverage. The base must support actives while staying stable at the intended pH.
- Water-based serum bases suit hydrophilic actives and often feel clean.
- Hydroalcoholic or mixed systems can improve solubility for certain actives, but they may increase dryness risk for sensitive clients.
- Polymer and film-former choices influence how the serum dries and whether it pills under moisturizer.
Easy example: A niacinamide serum in a water-based base can layer well under a lotion because it dries quickly and doesn’t require heavy oil content.
Mind Map: Product Types and Base Selection
Practical Base-to-Client Matching
A simple matching method is to pair the product type with the client’s tolerance and routine.
- If the client needs barrier comfort and tolerates richer textures: choose a cream base with a stable emulsion and a film that reduces water loss.
- If the client wants hydration without heaviness: choose a lotion base with lighter emollients and controlled viscosity.
- If the client prefers quick absorption or layers multiple actives: choose a gel base that dries down evenly.
- If the client needs precise active delivery in a thin layer: choose a serum base that supports the active at the correct pH and minimizes pilling.
Quick Checklist for Base Decisions
- Confirm the target texture and absorption.
- Confirm the active’s pH range and solubility needs.
- Confirm the emulsion or gel’s stability plan for separation and viscosity.
- Confirm the product’s layering behavior to avoid clumping or pilling.
When these four items agree, the base stops being a background detail and becomes the reason the product works in real routines.
4.2 Emulsion Systems Selection and Stability Testing Methods
Selecting an emulsion is mostly about matching three things: the skin goal, the product experience, and the stability risks. A stable emulsion is not just “not separating”; it resists changes in droplet size, phase behavior, and microbial growth over time.
Emulsion Types and When They Fit
Oil-in-water (O/W) emulsions spread easily, feel lighter, and are usually the default for water-based serums and lotions. Water-in-oil (W/O) emulsions feel richer and can be useful when you want stronger occlusion, but they require careful water management to avoid instability. Multiple emulsions like W/O/W can provide layered delivery, yet they are harder to keep stable because they add extra interfaces.
A practical example: if a client wants a lightweight moisturizer for daytime, start with an O/W system. If the goal is barrier support for very dry skin, you might choose an O/W with a higher emollient level or consider a W/O approach for a thicker cream.
Choosing the Continuous Phase and Surfactant Strategy
The continuous phase determines how ingredients distribute and how the emulsion behaves under stress. In O/W systems, the water phase carries water-soluble actives and buffers; in W/O systems, the oil phase dominates and water-soluble ingredients must be handled differently.
Emulsifiers reduce interfacial tension and form a protective layer around droplets. Nonionic emulsifiers often tolerate a wide range of conditions, while ionic emulsifiers can be more sensitive to electrolyte levels. If your formula includes salts, choose emulsifiers and thickeners that remain compatible across the expected pH and ionic strength.
Concrete example: a cleanser with high electrolyte content can destabilize an emulsion if the emulsifier system is not salt-tolerant. A simple fix is adjusting emulsifier type or lowering salt while maintaining cleansing performance.
Thickening and Droplet Size Control
Viscosity affects how quickly droplets collide and coalesce. Thickeners also influence droplet size by changing how the emulsion forms during mixing. If you see graininess or slow separation, droplet size distribution may be too broad.
A useful rule of thumb: if you increase viscosity without addressing emulsifier coverage, you may slow separation but still allow gradual coalescence. Balance both: emulsifier coverage for interfacial stability and rheology for physical stability.
Stability Testing Methods That Actually Reveal Problems
Stability testing should mimic real handling: temperature changes, centrifugation stress, and time. Use a small set of tests early, then expand once you identify the likely failure mode.
Core tests
- Centrifuge test: accelerates separation by forcing phases to move. If it breaks here, it will likely fail in normal storage.
- Thermal cycling: alternates between warm and cool conditions to stress phase behavior.
- Freeze-thaw: checks whether ice formation disrupts the emulsion structure.
- Storage at set temperatures: monitors separation, viscosity drift, and odor changes.
- Freeze and thaw plus re-mixing observation: distinguishes reversible flocculation from irreversible breakdown.
What to record
- Layering or creaming rate
- Particle or droplet changes (even visual “grain” matters)
- Viscosity change and spreadability
- pH drift and any color change
- Emulsifier precipitation or ring formation at the container wall
Mind Map: Emulsion Selection and Stability Testing
Example: Troubleshooting a Cream That Separates
A trial cream shows slight creaming after one week at warm storage. The first question is whether it is reversible. If gentle mixing restores uniformity, the emulsion likely underwent flocculation rather than full coalescence.
Next, compare two variables in small batches: emulsifier level and thickener system. If increasing emulsifier reduces creaming, interfacial protection was insufficient. If changing thickener reduces creaming but texture becomes too stiff, you may have improved physical stability at the cost of user feel. The goal is a stable emulsion with acceptable spread and absorption.
Finally, run a centrifuge test on both versions. If the version with higher emulsifier survives centrifugation, it has a stronger interfacial barrier. If both fail, the problem may be droplet size distribution or incompatibility between emulsifier and electrolyte/pH conditions.
Example: Matching a Serum Emulsion to Handling Needs
A serum emulsion must tolerate repeated opening and shaking. Choose an O/W system with a thickening approach that maintains viscosity without locking in overly large droplets. During testing, include thermal cycling because room temperature storage and bathroom temperature swings are common real-world stressors.
If viscosity drops after cycling, the emulsion may be losing structure even if it does not fully separate. That matters for dosing and perceived performance, so viscosity drift should be treated as a stability failure, not a cosmetic detail.
4.3 Thickening Systems and Rheology Control for Texture and Spreadability
Rheology is how a product flows and holds its shape, and texture is the client-facing result. In skin care, the goal is usually simple: easy spreading during application, stable viscosity at rest, and a finish that feels smooth rather than sticky or draggy. Achieving that goal starts with understanding what “thick” really means—viscosity, yield stress, and how the formula behaves under shear.
Core Rheology Concepts for Texture
Viscosity describes resistance to flow at a given shear rate. Spreadability depends on how viscosity changes when you rub the product; many formulas are designed to thin under shear so they glide on, then thicken again after application. Yield stress is the force needed to start movement; too much yield stress can make a cream feel stiff, while too little can lead to runny behavior.
A practical way to think about it: a pumpable lotion needs to move through the system, but a jar cream needs to hold its shape on the shelf. The same ingredient can behave differently depending on concentration, pH, ionic strength, and the presence of oils.
Thickening Mechanisms and When They Work
Thickening systems fall into a few functional families. Each family thickens by a different mechanism, which affects feel, stability, and sensitivity.
-
Polymer thickeners build viscosity by forming entangled networks or interacting chains.
- Example: A carbomer gel can feel “tight” and smooth when properly neutralized, but it can become grainy if neutralization is uneven.
-
Associative thickeners thicken through reversible interactions between polymer segments and the formula’s hydrophobic components.
- Example: An acrylates/C10-30 alkyl acrylate crosspolymer can create a creamy lotion texture that spreads well because the structure loosens under shear.
-
Emulsion structure contributes thickness through droplet size distribution and the continuous phase’s viscosity.
- Example: A fine oil-in-water emulsion often feels more elegant than a coarse one because the dispersed droplets pack differently and reduce “phase separation” sensations.
-
Lamellar and gel-phase systems use structured lipids or surfactant layers to create a semi-solid network.
- Example: A lamellar gel can give a cushiony slip, but it may require careful temperature control during manufacture.
Formulation Variables That Control Rheology
Rheology is not just “which thickener.” It’s also “how the thickener is used.” Key variables include:
- pH and ionization: Many thickeners depend on charge state. If pH drifts, viscosity can drop or the gel can collapse.
- Electrolytes and salts: Ionic strength can screen charges and weaken polymer networks.
- Solvent system: Water content and humectant levels change chain mobility.
- Oil phase fraction: More oil can increase perceived thickness, but it can also destabilize certain polymer systems.
- Temperature and cooling profile: Some structures form only during cooling, so the same formula can behave differently if processed at different temperatures.
A simple in-house check is to record viscosity at a consistent temperature and shear rate. If you don’t control temperature, you’re comparing apples to soup.
Shear Behavior and Client Feel
Spreadability is strongly linked to shear-thinning behavior. A shear-thinning formula reduces resistance during rubbing, then rebuilds structure afterward. This helps prevent “drag” and reduces the chance of product sliding off before it settles.
To connect lab behavior to real use, consider three moments:
- Dispense: The product must flow through the pump or spatula without excessive force.
- Application: Under hand shear, viscosity should drop enough to spread.
- After application: Viscosity should recover so the product doesn’t feel watery or migrate.
Mind Map: Thickening Systems and Rheology Control
Example Formulation Scenarios
Example: Pump Lotion With Smooth Slip
- Choose an emulsion base with a fine droplet distribution.
- Use an associative thickener to create a creamy viscosity that thins during rubbing.
- Keep pH within the thickener’s effective window and minimize salt additions.
- Validate that viscosity recovers after shear by comparing measurements before and after controlled mixing.
Example: Jar Cream With Shape Retention
- Increase yield stress using a polymer system that forms a stronger network at rest.
- Ensure neutralization is complete and uniform to avoid uneven gel structure.
- Balance oil fraction so the cream holds shape without becoming waxy.
- Check scoopability by measuring how the product deforms under a consistent force.
Example: Gel Serum With Light Spread
- Use a gel-forming polymer that provides low-to-moderate viscosity but strong shear thinning.
- Keep electrolytes low and control pH tightly to prevent gel collapse.
- Confirm that the gel does not string or clump during dispensing.
Testing and Tuning Without Guesswork
A systematic approach is to vary one factor at a time and observe both texture and stability. Start with a target viscosity range, then adjust thickener type before concentration. Once the mechanism fits, fine-tune concentration to hit the desired yield stress and shear-thinning profile.
Finally, document the processing conditions—mixing order, neutralization timing, and cooling steps—because rheology is often more sensitive to method than to ingredient choice. If you change the method, the formula may still be “the same,” but it won’t behave the same.
4.4 Preservative Systems and Microbial Risk Reduction Strategies
Preservatives are not “anti-germ magic.” They are a controlled backup plan for the moments when microbes get a chance: when water is present, when the product is handled, and when the formula is used over time. The goal is to reduce microbial growth to a level that stays safe and stable for the product’s intended use.
Core Microbial Risk Foundations
Microbes need three things: water, nutrients, and time. Most skin care products contain water, and many also include ingredients that microbes can use as carbon sources. Time matters because even a low initial contamination can multiply if the product conditions allow it.
Risk also depends on how the product is used. A pump bottle usually introduces fewer microbes than a jar because fewer hands touch the product. A mask that is scooped out and spread on skin increases contamination opportunities. A preservative system must handle both the formula’s chemistry and the real-world handling pattern.
Preservative System Types and How They Work
Preservatives are typically chosen to target microbial survival in water-based environments. Many work by disrupting cell membranes, interfering with metabolism, or preventing replication. Because different microbes respond differently, formulators often use combinations rather than a single ingredient.
A useful way to think about it is “coverage.” One preservative may be strong against bacteria but weaker against yeast or molds. Another may cover fungi better. Together they create a broader safety net.
pH Control and Preservative Performance
Many preservatives are pH-dependent, meaning their effectiveness changes with acidity. If a formula’s pH drifts during storage or after mixing with other products, preservative performance can drop. That’s why pH targets are not just cosmetic preferences; they are part of the microbial control strategy.
Example: A lotion formulated at a pH where a preservative is mostly in its active form should be tested for pH stability. If the pH rises after a few weeks, the preservative may become less effective even though the ingredient is still present.
Formulation Factors That Reduce Microbial Growth
Preservatives are one layer. Other formulation choices reduce the conditions microbes need.
- Low water activity: Some systems use humectants and polymers that bind water, making it less available.
- High salt or sugar levels: These can slow microbial growth, though they must be balanced against skin feel and compatibility.
- Emulsion stability: A stable emulsion prevents phase separation that can create microenvironments where microbes survive.
- Chelation: Binding metal ions can reduce microbial growth support.
Example: A cream that separates into watery layers is not just a texture problem. It can create a more favorable environment for microbial survival, so stability testing supports microbial safety.
Manufacturing Hygiene and Contamination Control
Even the best preservative system cannot compensate for poor handling during production. Microbial risk reduction starts before filling.
- Raw material control: Incoming materials are screened, and water quality is managed.
- Equipment sanitation: Cleaning validation reduces biofilm risk in tanks, hoses, and pumps.
- Process discipline: Minimizing hold times and controlling temperatures reduces microbial opportunity.
Example: If a batch is held warm for too long during processing, microbes that entered early can multiply before preservatives are fully incorporated.
Packaging and Use Pattern Risk Management
Packaging is part of the preservative strategy because it controls exposure.
- Pump and airless systems: Lower contamination from hands and saliva.
- Tubes: Better than jars because product is dispensed without dipping.
- Jars: Highest risk because users scoop product, introducing skin flora.
Example: A jar of exfoliating mask may require a stronger or broader preservative system than a pump serum, even if the ingredient list looks similar.
Testing Strategy That Matches Real Use
Microbial testing is not a single checkbox. It’s a set of checks that confirm the preservative system can handle contamination scenarios.
- Preservative efficacy testing: Confirms the formula can reduce microbial counts under defined challenge conditions.
- Stability testing: Checks whether pH, viscosity, and appearance remain consistent, which supports preservative performance.
- Microbial limits testing: Ensures the product meets acceptance criteria during shelf-life.
Example: A formula might pass efficacy testing at launch but fail after pH drift. Stability testing helps catch that mismatch.
Mind Map: Preservative Systems and Microbial Risk Reduction
Practical Example: Building a Safer Lotion System
Start with a water-based lotion base and set a pH target that supports preservative activity. Choose a preservative combination that covers bacteria and fungi, then verify that the pH stays within the effective range during storage. Confirm emulsion stability so the product doesn’t separate into water-rich pockets. Finally, match packaging to use: a pump reduces contamination risk, while a jar increases it and may require stronger controls.
Practical Example: When “It Passed Once” Is Not Enough
A formula can pass initial microbial limits but still fail preservative efficacy under challenge conditions. That happens when the preservative system is not broad enough or when the active form is not present at the right pH. The fix is systematic: confirm pH stability, verify preservative coverage, and retest under conditions that reflect how the product will be used.
4.5 Packaging Compatibility and Formulation Integrity Over Time
Packaging is not a finishing step; it is part of the formulation. A product can be chemically stable in a lab beaker and still fail in a real bottle because oxygen, light, metal ions, or headspace water find a way in. This section builds a practical chain of reasoning: identify what the formula is vulnerable to, then choose packaging that blocks the relevant pathways.
Packaging Compatibility Foundations
Start with a “stability map” of the formula. List the main actives and excipients, then mark which ones are sensitive to:
- Oxygen (oxidation of certain antioxidants and vitamin derivatives)
- Light (photo-oxidation and color shift)
- Metal ions (catalyzed oxidation from trace contamination)
- Water ingress (changes in viscosity, microbial risk, or phase separation)
- Volatile loss (fragrance components or solvents affecting feel and performance)
Next, connect those vulnerabilities to packaging features:
- Material: glass, multilayer plastic, aluminum, or coated metals
- Barrier performance: oxygen transmission rate and light protection
- Closure system: gasket type, liner material, and seal integrity
- Dispensing method: pump, airless pump, jar, or tube
A simple example: a serum with an oxidation-prone active should not be stored in a clear jar with frequent dipping. Even if the formula is well preserved, the repeated oxygen exposure and water transfer from fingers can destabilize it.
Mind Map: Packaging Failure Pathways
Barrier Choices and Their Practical Meaning
Glass is a strong default for chemical inertness, especially for aqueous and emulsion systems. Clear glass transmits light, so amber or opaque glass is often chosen when photo-sensitivity is present. Multilayer plastics can provide excellent oxygen and moisture barriers, but they vary widely by grade and thickness.
Closures matter because the seal is where oxygen and water can sneak in. A pump with a poor liner can allow slow ingress even if the bottle wall is strong. For jars, the lid is only part of the story: every opening invites air and potential water transfer.
Dispensing method is a major integrity lever. Airless pumps reduce headspace oxygen contact because product is drawn without large air replacement. Tubes can limit oxygen exposure for some formulas, but they may not be ideal for very thick gels that need consistent extrusion.
Compatibility Testing That Actually Answers Questions
Validation should connect packaging to outcomes. Use a structured approach:
-
Container-closure compatibility
- Check for leaching or adsorption by comparing formula performance before and after storage.
- Watch for pH drift, viscosity changes, and color shift.
-
Container closure integrity
- Evaluate whether the seal prevents oxygen and moisture ingress over time.
-
Stability under realistic stress
- Run accelerated conditions that reflect the formula’s vulnerabilities, then confirm with longer storage.
-
Functional performance checks
- Confirm dispensing behavior, spreadability, and emulsion stability after storage.
Example: Choosing Packaging for an Oxidation-Prone Serum
Assume a water-based serum containing a vitamin C derivative and a chelating system. The formula is designed to resist oxidation, but it still needs a low-oxygen environment.
-
Option A: Clear jar
- High oxygen exposure from headspace and repeated opening
- Water transfer risk from fingers
- Likely outcome: gradual color change and texture drift
-
Option B: Amber glass with airless pump
- Reduced light exposure
- Lower headspace oxygen contact
- Better control of contamination risk
- Likely outcome: slower oxidation and more consistent viscosity
A good packaging decision is the one that matches the failure pathway you identified, not the one that looks best on a shelf.
Example: Emulsion Stability and Water Migration
For a cream emulsion, water migration can destabilize the system by shifting the balance between oil and water phases. If a closure liner is too permeable to moisture, the product may thicken or separate after storage. Testing should include both chemical indicators (pH, color) and physical indicators (phase behavior, viscosity).
Quick Checklist for Packaging Integrity
- Identify which ingredients are sensitive to oxygen, light, metal ions, water ingress, and volatile loss.
- Choose packaging materials and closures that block the relevant pathways.
- Prefer dispensing methods that minimize air contact and contamination risk.
- Validate with container-closure integrity and functional performance checks.
- Confirm that stored product still behaves like the freshly made batch.
5. Active Ingredients and Evidence Based Mechanisms
5.1 Keratolytics Exfoliants and Their Role in Surface Renewal
Keratolytics are agents that loosen the bonds holding dead skin cells together on the surface. In practice, they speed up the normal shedding process, which can improve rough texture, clogged pores, and dull appearance. The key idea is simple: you are not “erasing” skin, you are helping the top layer release more efficiently so the next layer can look and behave more evenly.
Surface Renewal Basics
The outermost layer, the stratum corneum, is made of flattened dead cells held together by a mix of lipids and protein structures. When shedding is slow or uneven, cells accumulate and the surface feels rough. Keratolytics target the chemistry that contributes to that stickiness, so the surface becomes smoother over time.
A helpful way to think about exfoliation is as a controlled schedule. Too little exfoliation leaves buildup; too much disrupts the barrier and can cause stinging, redness, and rebound dryness. Good protocols aim for consistent, tolerable change rather than rapid “peel and pray” results.
How Keratolytics Work
Most keratolytics fall into a few functional categories based on the type of bond or structure they influence.
- Acid-based exfoliants (commonly alpha hydroxy acids and beta hydroxy acids) reduce cohesion between corneocytes. They also influence how water moves through the surface, which affects comfort.
- Enzyme-based exfoliants (like proteases) break down protein components that help cells stay attached.
- Retinoid-related keratolysis (retinoids are covered elsewhere in the book, but they share the same “surface renewal” goal) normalizes shedding and can reduce microcomedones.
Even within acid-based exfoliants, behavior differs. Beta hydroxy acids are more oil-compatible, so they tend to work better for clogged, pore-focused concerns. Alpha hydroxy acids are often more about surface smoothness and visible texture.
Mind Map: Keratolytics and Surface Renewal
Practical Examples for Real Skin
Example 1: Rough, dry cheeks with fine flaking A client reports tightness after cleansing and a sandpapery feel. A low-strength acid exfoliant used a few times per week can reduce the uneven shedding that causes visible flakes. Pairing with a bland moisturizer helps the surface tolerate the increased turnover. If stinging appears during application, reduce frequency rather than increasing product strength.
Example 2: Blackheads and clogged pores on the nose A client’s main issue is congestion rather than dryness. A beta hydroxy acid exfoliant can help because it works in a more oil-friendly environment, reaching within the pore opening more effectively than many water-based exfoliants. Use a consistent schedule, and avoid stacking multiple exfoliating products at the same time.
Example 3: Sensitive skin that tolerates exfoliation poorly Instead of choosing a stronger keratolytic, the protocol focuses on lower intensity and better timing. Use exfoliation on non-consecutive days, apply moisturizer immediately after, and keep the rest of the routine simple. The goal is to maintain barrier function while still achieving gradual surface renewal.
Advanced Details That Matter in Practice
Concentration and pH are not interchangeable. Two products can list similar “active” percentages but behave differently because acidity changes how much of the active form is available and how the skin experiences the formula.
Vehicle and layering change outcomes. A keratolytic in a watery gel may feel different from the same active in a cream. Layering also matters: applying a keratolytic over a fully occlusive layer can reduce contact time, while applying it over a very dry surface can increase irritation.
Tolerance is the limiting factor. The most common failure mode is escalating too quickly. A better approach is to monitor signs of barrier stress—burning, persistent redness, and increased dryness—and then adjust frequency or strength.
Safety and Service Integration
Keratolytics are most effective when the routine supports them. Cleansing should be gentle, moisturization should be consistent, and sun protection is essential because exfoliated skin can be more reactive to UV exposure. In a treatment plan, keratolytics are typically integrated as a home-care step that complements in-room services rather than competing with them.
When used thoughtfully, keratolytics provide a measurable improvement in surface behavior: less roughness, fewer visible flakes, and smoother-looking skin that doesn’t feel like it’s constantly being “worked on.”
5.2 Retinoids Retinol and Retinoid Alternatives in Skin Care Routines
Retinoids are a family of ingredients that influence how skin cells behave, especially in the epidermis. In practice, they help with uneven texture, clogged pores, and the look of fine lines by supporting more orderly cell turnover. The key is matching the retinoid type to the skin concern and then building tolerance so the routine stays consistent.
Core Concepts and How Retinoids Work
Retinoids act by binding to retinoid receptors in skin cells. That signaling affects keratinization, which is the process that forms the outer skin layer. When keratinization becomes more organized, you often see smoother texture and fewer rough, congested areas. Retinoids also influence collagen-related processes indirectly, which is why they can improve the appearance of fine lines over time.
A practical way to think about them: retinoids are not “instant fixes.” They are more like a slow adjustment to the skin’s internal schedule. Early irritation is common because the skin is learning the new routine.
Retinoid Types and Where They Fit
Retinol is a common over-the-counter option. It must be converted within the skin to the active form, so it tends to be gentler than stronger prescription retinoids. Retinal is closer to the active form and often feels more direct, which can be helpful for people who want faster visible changes but still prefer a step below the strongest options.
Retinoid alternatives are not the same mechanism, but they can support similar goals like smoother texture and reduced congestion. Examples include:
- Bakuchiol for people who want a retinoid-like routine with typically lower irritation.
- PHA and BHA for exfoliation support, especially when retinoids are too irritating at first.
- Azelaic acid for uneven tone and acne-prone skin, with a different pathway than retinoids.
Choosing Based on Skin Concern and Tolerance
Start with the concern, then check tolerance.
- For clogged pores and rough texture, retinol or retinal often makes sense.
- For sensitive skin that reacts quickly, consider a lower-strength retinoid, a slower schedule, or an alternative like azelaic acid or a gentle exfoliant.
- For uneven tone, retinoids can help texture and gradual pigment appearance, while azelaic acid can add targeted support.
A simple decision rule: if your skin is already inflamed or very reactive, begin with alternatives or gentle exfoliation and only introduce retinoids once the barrier is stable.
Building a Routine Without Overdoing It
Retinoids are usually used at night because they can be unstable in light and because sunscreen is the daytime non-negotiable. The routine should be boring in a good way.
- Cleanse with a gentle, non-stripping cleanser.
- Dry skin thoroughly before applying retinoids.
- Use a pea-sized amount for the whole face, not a spot treatment.
- Moisturize after if you need comfort.
- Increase frequency slowly based on skin response.
Example schedule for many beginners:
- Week 1–2: 1 night per week
- Week 3–4: 2 nights per week
- Week 5–6: every other night
If irritation shows up, reduce frequency rather than switching ingredients immediately. Skin tolerance is a skill, not a personality trait.
Managing Irritation and Adjusting the Plan
Common signs of overuse include persistent stinging, visible redness, and flaking that doesn’t settle. When that happens:
- Pause retinoids for several days until the skin calms.
- Resume at a lower frequency.
- Consider “sandwiching” by applying moisturizer before and after the retinoid.
Avoid stacking multiple strong actives on the same night. If you use a BHA or exfoliating acid, keep it on different nights from retinoids until your skin is steady.
Mind Map: Retinoids and Alternatives in Practice
Example Routines for Common Scenarios
Example: Acne-prone and congested
- Night 1: retinol (pea-sized, moisturizer after)
- Night 2: moisturizer only
- Night 3: azelaic acid or gentle BHA if tolerated
- Day: sunscreen and simple hydration
Example: Sensitive skin with visible flaking
- Week 1: moisturizer only at night
- Week 2: bakuchiol or azelaic acid on alternate nights
- Week 3+: introduce low-frequency retinol only after flaking settles
Example: Uneven tone with mild congestion
- Night: retinol on a consistent schedule
- Alternate nights: azelaic acid
- Keep exfoliating acids off retinoid nights until tolerance is proven
Advanced Details That Still Matter
Retinoids can be formulated in different bases, which affects how they feel and how well they spread. A thicker cream base can reduce the “hot” sensation some people experience. Also, consistency matters more than chasing a stronger product too early; a routine you can repeat for months beats a routine you abandon after two weeks.
When you choose an alternative, treat it as part of the same system: cleanse gently, moisturize reliably, and keep daytime sun protection steady. That combination is what turns retinoids and their alternatives from “sometimes helpful” into “predictably useful.”
5.3 Vitamin C Derivatives and Oxidation Control in Formulations
Vitamin C in skincare is less about a single ingredient and more about managing a chemical personality: it reacts with oxygen, light, and certain metals. Derivatives are tools for controlling that reactivity, improving stability, and shaping how much active ends up available at the skin surface.
Core Chemistry and Why Oxidation Matters
Ascorbic acid (AA) is effective but unstable in many product environments. Oxidation converts it into less active forms, which can also change color and odor. In practice, oxidation control is not one step; it is a system that includes pH, packaging, chelation, and formulation design.
A useful mental model is “availability vs. survival.” AA must survive storage long enough to be used, then it must convert or remain active at the skin. Derivatives often trade faster conversion for better shelf stability, or they convert more gradually to reduce irritation risk.
Derivative Types and Conversion Behavior
Different derivatives have different conversion pathways and rates. That rate affects both performance and tolerance.
- Ascorbic acid derivatives: often require conversion to AA on skin or within the formula.
- Phosphate and glycoside forms: generally more stable in storage, with conversion occurring through skin enzymes or chemical steps.
- Fat-soluble derivatives: designed to partition into lipid phases, which can support delivery in barrier-related contexts.
A practical example: if a client’s skin is reactive, a derivative that converts more slowly can reduce the “hit” while still supporting brightening goals over time. If a formula must be very low pH for AA stability, a derivative may allow a more comfortable pH range.
Oxidation Control Levers in Formulation
Oxidation control is achieved by stacking multiple barriers.
-
pH management AA is more stable at lower pH, but lower pH can increase irritation for some users. Derivatives can allow higher pH while maintaining stability.
-
Chelation of metals Trace metals catalyze oxidation. Chelators bind metals so oxygen-driven reactions slow down.
-
Antioxidant pairing Using complementary antioxidants can reduce oxidative stress in the formula. The goal is to protect the vitamin C species without creating incompatibilities.
-
Oxygen and light reduction Headspace oxygen, light exposure, and permeable packaging all influence oxidation. Reducing oxygen exposure and using protective packaging helps maintain color and potency.
-
Emulsion and phase design If vitamin C is in an aqueous phase, it faces oxygen and metal ions more directly. Choosing emulsifier systems, controlling droplet size, and limiting water activity can reduce exposure.
Mind Map: Oxidation Control System
Practical Formulation Examples
Example 1: Low pH Ascorbic Acid Serum A formulator chooses AA for direct activity and sets a low pH to slow oxidation. To reduce metal-catalyzed reactions, a chelator is included. The formula is filled into an opaque, low-oxygen system to limit exposure after opening. The result is a product that can be potent but requires careful tolerance screening.
Example 2: Higher pH Derivative Lotion A derivative is selected to maintain stability at a more skin-friendly pH. Chelation and antioxidant pairing still matter, but the formula is designed to reduce conversion stress and irritation risk. The lotion texture supports consistent application, which matters because uneven spreading can create patchy performance.
Example 3: Emulsion Placement for Reduced Exposure If the formula is an emulsion, the formulator considers where the derivative sits. Placing the active in a less oxygen-accessible region of the system can reduce oxidation. This is not magic; it is simply reducing contact with the most reactive environment.
Testing and Interpretation in Real Terms
Stability testing should track more than “it didn’t separate.” Color shift and odor changes often correlate with oxidation. Potency assays confirm whether the active remains available. For derivatives, conversion-related performance should be evaluated in a way that reflects how the product is used, not just how it behaves in a beaker.
Mind Map: Derivative Selection Logic
Formulation Decision Checklist
Before finalizing a vitamin C derivative system, confirm: the pH supports the derivative’s stability needs, chelation is adequate for the expected metal load, the antioxidant set is compatible, and packaging reduces oxygen and light exposure. Then check that the texture and application method support consistent delivery rather than “some areas get more active than others.”
5.4 Niacinamide and Multi Pathway Skin Benefits with Practical Use
Niacinamide is a small molecule that supports skin through multiple, overlapping pathways rather than one single “miracle.” In practice, that means it can help with barrier function, uneven tone, and visible redness while staying compatible with many routine steps.
Core Mechanisms You Can Reason About
Niacinamide contributes to barrier stability by supporting lipid synthesis and improving the way the outer layers hold water. When the barrier is more consistent, skin tends to feel less tight and looks calmer, which matters because many “tone” issues worsen when the barrier is irritated.
It also influences pigment handling. Instead of only reducing existing dark spots, it helps regulate processes involved in transferring pigment within the skin. That’s why it can improve overall unevenness, not just one stubborn mark.
For redness and sensitivity, niacinamide can reduce the intensity of inflammatory signaling. The practical takeaway is that it often pairs well with actives that might otherwise feel harsh, because it can improve tolerance.
Mind Map: Multi Pathway Logic
Practical Use Framework
Start with a realistic goal: niacinamide is a “steady improvement” ingredient. It’s most useful when you use it consistently and give your skin time to settle into the routine.
A common starting point is 2% to 5% in leave-on products. If your skin tolerates it well, you can move toward 10% formulations, but higher isn’t automatically better. Some people feel mild flushing or tingling with stronger percentages, especially if they’re also using exfoliants.
Apply it to clean, dry skin. If you use a toner, apply niacinamide after the toner and before heavier creams. If you use a serum, niacinamide can be the serum or it can be layered under a serum that targets a specific concern.
Example: Building a Simple Routine
Morning
- Gentle cleanser
- Niacinamide serum (2% to 5%)
- Moisturizer
- Sunscreen
Evening
- Gentle cleanser
- Niacinamide serum
- Moisturizer
This structure works because niacinamide supports the barrier while sunscreen handles the biggest driver of new pigment. Without sunscreen, niacinamide can still help, but the overall tone improvement is harder to maintain.
Example: Pairing with Exfoliants Without Chaos
If you use an exfoliant like a low-strength acid or a retinoid, niacinamide can act like a buffer for comfort.
- On exfoliant nights: cleanse, apply niacinamide, then apply the exfoliant, then moisturize.
- On non-exfoliant nights: cleanse, apply niacinamide, then moisturize.
This spacing reduces the chance that you’ll stack multiple “irritation potentials” at once. Your skin should feel like it’s being guided, not scolded.
Mind Map: How to Choose a Niacinamide Plan

Case Study: Three Common Scenarios
1. Acne-prone skin with post-blemish marks Use niacinamide 4% to 5% once daily for a week, then twice daily if comfortable. Keep exfoliation gentle and consistent, and prioritize sunscreen. The goal is fewer new marks and calmer skin between breakouts.
2. Redness-prone skin that reacts to actives Use niacinamide in the morning and on non-active nights at night. When you introduce an active, keep niacinamide in place and moisturize well. If redness spikes, reduce active frequency rather than removing niacinamide.
3. Dry, uneven texture Use niacinamide daily and pair it with a moisturizer that seals in hydration. If you’re also using an exfoliant, avoid doing both on the same night at first. Texture improvements often come from barrier steadiness plus gradual surface renewal.
Practical Troubleshooting
If you experience mild tingling, reduce frequency to every other day and ensure your moisturizer is doing its job. If the tingling persists, switch to a lower percentage or a different base formula. If you’re using multiple actives, separate them by time or alternate nights so your skin can respond without stacking stressors.
Niacinamide works best when it’s treated as a consistent part of the routine, not a one-off experiment. When your barrier is stable, the rest of your skincare plan tends to behave better.
5.5 Sunscreen Filters and Photoprotection Principles for Product Design
Photoprotection starts with matching filter chemistry to real-world light exposure and skin tolerance. A sunscreen is not just “SPF”; it is a system that must absorb, scatter, and remain stable on skin long enough to do the job.
Light Types That Matter for Product Design
UVA and UVB differ in wavelength and biological impact. UVB is strongly linked to sunburn and drives much of SPF testing, while UVA contributes to deeper dermal effects and visible aging. Broad-spectrum performance means the formula must cover both ranges without sacrificing stability or skin feel.
Filter Categories and How They Behave
Organic filters absorb specific UV wavelengths and convert energy internally, then dissipate it as heat. In practice, each organic filter has a defined absorption range, so coverage depends on filter selection and ratios.
Mineral filters scatter and reflect UV using particulate structures. They tend to be more photostable, but their appearance and film formation depend on particle size, surface treatment, and dispersion quality.
A common design goal is to combine complementary mechanisms: one group for strong UVB coverage, another for UVA coverage, and a third for overall film robustness.
UVA Coverage and Critical Wavelength Thinking
UVA protection is not a single number; it is a balance of absorption across UVA1 and UVA2. Product designers use UVA metrics and critical wavelength concepts to ensure the formula meaningfully covers longer UVA wavelengths, not just the edge of the spectrum.
Photostability and Why It Changes the Outcome
Filters can degrade under light, reducing protection during wear. Photostability is therefore a performance requirement, not a nice-to-have. Designers evaluate how filters behave together, since some combinations can increase degradation or change absorption profiles.
A practical example: if a formula uses a UVB-strong organic filter paired with a UVA filter that is less stable, the final broad-spectrum result may drop faster than expected. The fix is not “more filter,” but selecting compatible filter partners and confirming stability in relevant conditions.
Formulation Factors That Affect Real Protection
Even a well-chosen filter system can underperform if the product fails to form a uniform film. Key variables include:
- Dispersion quality for mineral particles to avoid patchiness.
- Emulsion type and viscosity to control spread and reduce migration.
- Film formers that improve adherence and water resistance.
- Solvent and surfactant choices that influence filter solubility and stability.
Example: a lightweight gel that spreads easily may still leave uneven coverage if it dries too fast or lacks sufficient film-forming polymers. A thicker cream may spread less but can form a more continuous film if the rheology supports even application.
Water Resistance and Wear Mechanics
Water resistance depends on how well the film resists disruption. Designers test after controlled wetting and drying cycles, then verify that filter distribution remains consistent. A formula can be photostable yet still fail water resistance if the film breaks down.
Example: a sunscreen with strong film formers may maintain coverage better during sweating, even if the SPF is slightly lower at baseline. That trade-off matters for real usage.
Safety, Tolerability, and Skin Compatibility
Filter selection must consider skin irritation potential, especially for sensitive or barrier-compromised clients. Designers evaluate pH compatibility, solvent systems, and the likelihood of stinging on application.
A practical approach is to design for tolerance first, then optimize performance. If a formula causes frequent irritation, clients will apply less or avoid it, which defeats the purpose.
Designing for Consistent Application
Sunscreen performance depends on dose. Formulation can support consistent application by improving spreadability, reducing greasiness that discourages full coverage, and minimizing visible residue that leads to under-application.
Example: a product that feels too dry may cause people to apply thinner layers to avoid discomfort. A balanced texture helps users apply the intended amount without fighting the product.
Mind Map of Sunscreen Filter Design Logic
Mind Map: Sunscreen Filters and Photoprotection Principles
Example Formulation Pathway for Balanced Coverage
Start with a target coverage profile: strong UVB absorption plus meaningful UVA coverage. Choose filter partners that complement each other’s spectral ranges and demonstrate photostability as a system. Then build a film that stays continuous through normal wear and, if needed, water exposure.
Finally, confirm tolerability and application behavior. If the formula stings or feels unpleasant, the “best” filter system becomes irrelevant because real-world use will be inconsistent.
6. Safety Assessment and Regulatory Compliance for Cosmetology
6.1 Ingredient Safety Evaluation and Risk Assessment Workflow
Ingredient safety work is mostly a disciplined chain of questions: what is it, how much is used, where it goes on the skin, who might react, and what evidence supports safe use. A good workflow keeps the answers traceable, so decisions are explainable when a client asks, a batch behaves oddly, or a formula needs adjustment.
Step 1: Define the Scope of Use
Start by writing a short “use statement” for the ingredient: product type (cleanser, leave-on serum, rinse-off mask), intended skin area (face, body, scalp), exposure duration (seconds, hours), and target population (general adult, sensitive skin, professional use only). Example: a preservative in a rinse-off cleanser has a different exposure profile than the same preservative in a leave-on moisturizer.
Step 2: Collect Ingredient Identity and Composition Data
Gather the ingredient’s exact name, chemical form, purity range, and any relevant mixture components. If the ingredient is supplied as a blend, list the blend’s constituents and their typical percentages. Example: “fragrance” is not one substance; it is a mixture, so risk assessment must treat it as such rather than as a single entity.
Step 3: Map Exposure and Concentration
Safety depends on dose. Record the maximum intended concentration in the finished product and estimate how much product contacts skin per use. For leave-on products, consider frequency and typical application amount. Example: if a retinoid-like active is used at a low percentage but applied daily, the cumulative exposure is higher than a weekly application at the same percentage.
Step 4: Identify Hazard Categories Using Evidence
Hazard is about what an ingredient can do under relevant conditions. Use a structured checklist:
- Irritation potential: redness, burning, stinging.
- Sensitization potential: delayed allergic-type reactions.
- Photoreactivity: increased risk after light exposure.
- Comedogenic or follicular effects: clogged pores or texture changes.
- Systemic concern: only if credible absorption and toxicity signals exist.
Example: an ingredient with known sensitization signals requires extra attention to patch testing and concentration limits, even if it is effective.
Step 5: Evaluate Skin Compatibility and Product Context
An ingredient’s behavior changes with the formula. Consider pH, solvent system, surfactants, and the presence of penetration enhancers. Example: a mild exfoliant at a low pH may irritate more than the same exfoliant at a buffered pH, because the skin barrier is already under stress.
Step 6: Perform Risk Characterization
Risk is hazard plus exposure plus vulnerable populations. A simple way to express it is:
- Low risk when hazard signals are minimal, exposure is limited, and the formula context supports barrier tolerance.
- Moderate risk when hazard signals exist but are controlled by concentration, pH, and usage limits.
- Higher risk when hazard signals are strong and exposure is frequent or prolonged.
Example: a fragrance component with sensitization potential in a leave-on product used daily is higher risk than the same component in a short-contact rinse-off cleanser.
Step 7: Decide Controls and Document the Rationale
Controls can be formulation, process, or client-use related:
- Formulation controls: reduce concentration, adjust pH, change solvent system, remove known reactive impurities.
- Process controls: ensure batch consistency, verify preservative efficacy, control raw material quality.
- Use controls: patch testing guidance, contraindication screening, clear instructions for sensitive skin.
Example: if an ingredient is borderline for irritation at the target pH, lowering the concentration and adding barrier-supporting emollients can reduce discomfort while keeping performance.
Step 8: Validate with Practical Testing and Monitoring
Use testing that matches the risk level:
- In-use tolerability checks for new formulas.
- Patch testing for ingredients with sensitization or prior irritation signals.
- Stability and microbial checks to prevent degradation products from creating new hazards.
Example: a formula that is stable in lab conditions but separates in real storage may expose clients to higher irritation if the ingredient distribution changes.
Step 9: Create a Client-Facing Safety Plan
Translate the technical assessment into practical guidance: who should avoid the ingredient, who should patch test, and what to do if irritation occurs. Example: for a leave-on product containing a known sensitizer, recommend patch testing 24–48 hours before first full use and stop if burning or swelling occurs.
Mind Map: Ingredient Safety Evaluation Workflow
Example: Leave-On Moisturizer with Fragrance
Assume a moisturizer contains a fragrance blend at a typical leave-on level.
- Scope: face, daily use, long contact time.
- Identity: fragrance is a mixture; treat as multiple potential sensitizers.
- Exposure: higher than rinse-off because it stays on skin.
- Hazard: fragrance mixtures can cause irritation or sensitization in some people.
- Context: if the formula is low pH or includes strong surfactants, risk increases.
- Risk: moderate to higher risk for sensitive clients.
- Controls: consider reducing fragrance level, ensuring gentle pH, and adding patch-test guidance.
- Validation: run tolerability checks and monitor complaints for patterns.
Example: Rinse-Off Cleanser with Mild Exfoliating Acids
- Scope: short contact time.
- Exposure: lower than leave-on, but repeated daily use still matters.
- Hazard: acids can irritate if pH is too low or if skin barrier is compromised.
- Context: buffering and surfactant choice affect irritation.
- Risk: often lower than leave-on when pH is controlled and concentration is appropriate.
- Controls: set pH targets, avoid harsh surfactant combinations, and provide guidance for sensitive skin.
Step 10: Finalize the Safety Record
Close the workflow with a concise safety record that includes: the use statement, ingredient identity, concentration and exposure assumptions, hazard categories considered, risk characterization outcome, controls applied, and validation results. This turns “we think it’s safe” into “we can explain why it’s safe for the intended use.”
6.2 Patch Testing Protocols and Interpretation of Reactions
Patch testing is a controlled way to check whether a client’s skin reacts to specific ingredients under near-real conditions. The goal is not to “find the one culprit” instantly; it’s to sort likely triggers from harmless exposures with enough structure that you can act on the results.
Foundations of Patch Testing
Patch testing uses small amounts of substances applied to the skin and left in place for a set period. Reactions are then read at defined time points because many relevant responses are delayed. A practical mindset is: consistent placement, consistent occlusion, consistent timing, consistent reading.
Before you apply anything, confirm the client meets basic readiness criteria: no active widespread flare on the test area, no recent use of strong topical steroids on the test site, and no history of severe reactions that would make patch testing unsafe in your setting. If the client has very reactive skin, you still proceed carefully, but you may need fewer allergens per session to avoid overwhelming the skin.
Selecting Test Substances and Controls
Choose substances based on the client’s history and product exposure. A good starting set often includes common fragrance components, preservatives, surfactants, and known irritants relevant to their routine. If you are testing a finished product, test the product as-is only when your protocol allows it; otherwise, test the ingredient or a standardized preparation.
Controls prevent misreading. Use a negative control such as the vehicle used to dilute the test material, and include a positive control if your protocol requires it. Without controls, a “red patch” could be irritation from the vehicle, not an allergy.
Preparing the Skin and Applying Patches
Clean the test area gently and dry it completely. Avoid alcohol wipes right before application because they can alter barrier behavior. Shave only if your protocol requires it, and do it well in advance so the skin can calm down.
Apply patches to a consistent location, typically the upper back for adults, because it’s stable and less likely to be rubbed. Label each patch clearly and record the map so you can interpret later without guesswork.
Occlusion matters. If patches are too loose, the test material can dry out and reduce contact. If they’re too tight, you can create pressure-related artifacts. The “just right” approach is secure contact without skin blanching.
Timing and Reading Schedule
Most patch testing reads at multiple time points. A common structure is an initial read around 48 hours, followed by a final read around 72 to 96 hours. Some reactions evolve after the first read, so skipping the later read can miss clinically relevant delayed responses.
During the test period, instruct the client to keep the area dry and avoid friction or heavy sweating. If the client must shower, they should avoid soaking the patch area and pat dry around it.
Interpreting Reactions Systematically
Interpretation is about pattern recognition plus severity grading. Use a consistent scale such as:
- Negative: no visible reaction.
- Doubtful: faint redness without clear edges.
- Weak positive: mild erythema with or without slight infiltration.
- Strong positive: clear erythema with papules and/or vesicles.
- Extreme: intense reaction with ulceration or marked spreading.
Also note morphology. Erythema with small papules or vesicles often suggests a stronger immune-type response. A reaction that looks like simple dryness or mild irritation at the edges may be irritation rather than allergy, especially if it matches the vehicle control.
Mind Map: Patch Testing Workflow
Example: Interpreting a Mixed Outcome
A client reports burning and redness after using a scented moisturizer. You test fragrance-related components and the moisturizer’s preservative system, plus a vehicle control.
At the first read, the fragrance-related patch shows faint redness, while the vehicle control is negative. At the final read, the fragrance patch becomes clearly erythematous with small papules, and the vehicle control remains negative. This pattern supports a delayed, likely specific reaction rather than general irritation.
Now consider a different client: the vehicle control shows mild redness at the final read, and several patches show similar mild erythema without papules. That pattern leans toward irritation from the vehicle or application conditions, so you would be cautious about labeling every positive as an allergy.
Example: Distinguishing Irritation from Allergy
If a patch produces only mild, diffuse redness that fades quickly and mirrors the negative control, irritation is more likely. If the reaction is sharply localized to the patch area, increases at later readings, and shows papules or vesicles, allergy becomes more likely.
Documentation and Client Communication
Record the patch map, test substances, concentrations or preparations, application site, and each reading time with grades and morphology. When you summarize results, focus on what the client should avoid and what can likely be tolerated, using the control comparisons to explain why.
A clean documentation habit prevents the most common mistake: treating a “maybe” as a confirmed trigger. Patch testing is precise enough to guide decisions, but only when timing, controls, and reading are handled consistently.
6.3 Sensitization Irritation and Contact Dermatitis Fundamentals
Skin reactions during cosmetology services usually fall into two buckets: irritation and sensitization. Irritation is a direct, dose-dependent effect on the skin barrier. Sensitization is an immune-mediated response that can appear after prior exposure, then recur with smaller exposures later. Contact dermatitis is the umbrella term that includes both.
Core Concepts That Keep You Oriented
Irritation behaves like a “too much, too soon” problem. Strong surfactants, high acidity or alkalinity, friction, heat, and prolonged occlusion can disrupt the stratum corneum. The skin responds with redness, dryness, stinging, and sometimes scaling. Sensitization behaves more like “memory with a delay.” The first exposure may cause no obvious reaction, but it primes immune pathways. A later exposure triggers a faster, more noticeable response.
A helpful mental model is timing plus pattern. Irritation often shows up quickly after exposure and improves when the trigger stops. Sensitization often has a delayed onset and can spread beyond the exact contact area.
Irritation vs Sensitization
Irritation can be chemical or physical. Chemical irritation includes extreme pH, solvent-like ingredients, and repeated exposure to cleansing products. Physical irritation includes friction from tools, aggressive exfoliation, and prolonged massage with insufficient glide. In practice, you’ll see localized erythema and discomfort that tracks with where the product or tool contacted.
Sensitization is typically allergic contact dermatitis. It is not about “strong ingredients only.” A mild ingredient can still sensitize some people. Common culprits in skin care workflows include fragrance components, preservatives, certain botanical extracts, and rubber accelerators from gloves. The reaction may be itchy, persistent, and sometimes vesicular, with a tendency to flare after the next exposure.
Contact Dermatitis Types and What They Look Like
Contact dermatitis includes:
- Irritant Contact Dermatitis: barrier damage leading to redness, burning, roughness, and sometimes cracking.
- Allergic Contact Dermatitis: immune response causing itching, papules, swelling, and sometimes blistering.
- Photo-Contact Dermatitis: a chemical becomes reactive after light exposure, producing dermatitis in light-exposed areas.
Pattern recognition matters. Irritant dermatitis often matches the application area and intensity. Allergic dermatitis can extend beyond the contact site and may show more itch than burn.
Mind Map: Reaction Pathways and Clues
Practical Examples You Can Use Immediately
Example: Irritant reaction from a cleanser A client uses a new foaming cleanser twice daily and reports stinging during cleansing. Over a few days, the skin feels tight and looks slightly red around the mouth and nose. The pattern fits irritation: direct barrier stress and improvement when the cleanser is paused.
Example: Allergic reaction after a service product A client receives a facial with a fragranced mask. The first time, they feel fine. Two days after the next visit, they develop itchy, raised patches where the mask was applied, and a few spots appear slightly beyond the treated area. The delayed itch and spread suggest sensitization rather than simple irritation.
Example: Glove-related dermatitis A client develops redness and itch on the hands after repeated glove use. The reaction appears in the same general distribution as glove contact and persists for several days. This points to an allergic component associated with glove materials or accelerators, not to “sweat irritation” alone.
Systematic Assessment During a Service
When a reaction is suspected, treat it like a safety workflow, not a guessing game.
- Stop exposure immediately to the suspected product, tool, or process.
- Assess symptoms: burning versus itch, pain level, and whether there is swelling or blistering.
- Check distribution: strictly at contact points suggests irritation; spread and strong itch lean allergic.
- Review timing: onset during the service suggests irritation; onset after a delay suggests sensitization.
- Document clearly: product names, contact time, area treated, and onset timing.
If there is significant swelling, blistering, or involvement beyond the treated area, service should be paused and the client should be advised to seek medical evaluation.
Advanced Details That Prevent Common Mistakes
A key mistake is assuming “natural” equals “gentle.” Botanical extracts can contain sensitizers, and essential oils can be irritating or allergenic depending on concentration and individual susceptibility. Another mistake is relying only on the first exposure outcome. Sensitization can be silent at first, then show up later.
Finally, occlusion changes the game. Products applied under occlusive conditions can increase penetration and intensify irritation, even when the ingredient itself is not extreme. If a client reports worsening under wraps or heavy layering, barrier stress is a likely driver.
Case Study: Turning Clues into a Decision

This approach keeps your reasoning grounded: timing, distribution, and symptom type guide whether you treat the situation as irritation, sensitization, or a photo-related pattern.
6.4 Labeling Requirements and Claims Support for Skin Care Products
Labeling is where science meets paperwork. For skin care products, it also determines whether a client can use the product safely and whether a business can make claims that match what the formula and testing actually support.
Core Label Elements and Why They Matter
A complete label typically includes the product identity, ingredient list, net quantity, manufacturer or distributor details, directions for use, and any required warnings. Each element reduces a different kind of risk:
- Identity and directions prevent misuse. Example: a cleanser labeled “for external use” and “rinse off” should not be treated like a leave-on serum.
- Ingredient listing supports avoidance of known triggers. Example: a client with a history of fragrance sensitivity can scan for “parfum” or specific allergen components.
- Net quantity and batch information help with traceability. Example: if a batch shows unexpected irritation patterns, you can identify affected lots.
- Warnings and contraindications reduce harm. Example: if a product includes strong exfoliating acids, the label should guide frequency and mention irritation potential.
Claims: What You Can Say Versus What You Must Prove
Claims are statements that imply a product does something to the skin. Claims can be explicit (“reduces dark spots”) or implied (“helps prevent acne”). The key idea is simple: the claim must be consistent with the product’s formulation and supported by appropriate evidence.
Common claim categories include:
- Cosmetic function claims: cleansing, moisturizing, conditioning, softening. Example: “leaves skin feeling smooth” is generally easier to support than “treats eczema.”
- Performance claims: hydration duration, spreadability, sensory outcomes. Example: “improves skin hydration after 2 hours” requires testing under defined conditions.
- Appearance claims: brightness, even tone, reduction in the look of discoloration. Example: “helps reduce the appearance of redness” should be backed by a study using a consistent measurement method.
A practical rule for salons and formulators: if the claim suggests a medical effect, it needs a higher level of regulatory scrutiny. If it stays within cosmetic appearance and function, the evidence expectations are usually more straightforward.
Evidence Types and How to Match Them to Claims
Different claims require different evidence. The label should not promise more than the testing supports.
- In-use or consumer perception studies support sensory and short-term appearance claims. Example: “skin feels hydrated” can be supported by a panel rating after controlled use.
- Instrumental measurements support quantified outcomes. Example: “reduces transepidermal water loss” should be supported by barrier measurements.
- Clinical or controlled studies support stronger appearance claims. Example: “reduces the look of hyperpigmentation” should use a defined protocol and scoring method.
When evidence is limited, the label should stay specific and restrained. Example: instead of “prevents acne,” a label might say “helps reduce the look of blemishes” if the study supports that narrower statement.
Substantiation Workflow for a Compliant Label
A systematic workflow keeps claims aligned with reality:
- List every claim exactly as it will appear on the label and marketing materials.
- Map each claim to the ingredient rationale and the intended mechanism. Example: if claiming moisturization, ensure the formula includes humectants and emollients with a plausible film-forming strategy.
- Match each claim to evidence with defined endpoints and conditions.
- Check wording for scope. Example: “reduces” is stronger than “helps reduce.”
- Verify consistency across front label, back label, and directions. Example: if directions limit use to once daily, the claim should not imply results from multiple daily applications.
Mind Map: Labeling and Claims Support
Example: Turning a Claim into Label-Ready Wording
Scenario: A formula contains niacinamide and gentle exfoliating agents. The team wants a label statement.
- Overreaching claim: “Treats hyperpigmentation.”
- More label-aligned claim: “Helps reduce the appearance of uneven tone.”
Then the label directions should match the claim scope:
- If the study used once-daily application, the label should instruct once daily.
- If the study measured outcomes after 8 weeks, the label should avoid implying immediate results.
Example: Ingredient Listing and Client Safety
A client reads the ingredient list to decide whether to use a product during a sensitive period.
- If the label lists fragrance components, the client can choose accordingly.
- If the label lists known irritant categories, the client can adjust frequency or avoid use.
This is why ingredient listing is not just compliance; it’s a practical safety tool.
Common Labeling Pitfalls to Avoid
- Mismatch between directions and claims: claiming long-term results while instructing infrequent use.
- Vague claims without support: “works for all skin problems” is hard to substantiate and hard for clients to interpret.
- Inconsistent terminology: using different names for the same effect across label panels.
Clear labeling is a quiet form of quality control. It helps clients use products as intended and helps businesses stay honest about what the product can reasonably do.
6.5 Sanitation Documentation and Client Record Keeping Standards
Sanitation documentation is what turns good habits into consistent outcomes. Client records are what turn repeated services into safer, more tailored care. Together, they create a clear trail: what was done, what the skin did, and what you decided next.
Core Purpose and Practical Boundaries
Keep records focused on decisions and outcomes, not every minute detail. A useful record answers three questions: What products and tools were used? What sanitation steps were followed? How did the client respond, including any irritation or reactions?
Use the minimum information needed to support safe care. If a detail does not affect sanitation, contraindication screening, or treatment adjustments, it usually does not belong in the record.
Sanitation Documentation Essentials
Document sanitation in a way that another trained person could repeat your process.
- Before service: record that tools were cleaned, disinfected, and dried according to your standard procedure.
- During service: record glove changes, wipe-downs between steps, and any barrier use (like disposable covers).
- After service: record disposal actions, laundering or replacement of linens, and storage conditions.
- Equipment specifics: for items like spatulas, rollers, or device tips, record whether they were single-use, disinfected, or discarded.
A simple rule: if the step affects cross-contamination risk, it must be documented.
Client Record Keeping Essentials
Client records should capture baseline risk and service-specific changes.
Include:
- Client intake: skin history, allergies, known sensitivities, current medications if relevant to skin tolerance, and contraindications.
- Service plan: what you planned to do and why, including the products used in-room.
- Home care alignment: what you recommended and how you instructed the client to use it.
- Response: redness duration, stinging, dryness, breakouts, or any adverse reaction.
- Next-step decisions: whether you adjusted intensity, changed actives, or modified aftercare.
Avoid vague notes like “skin looked better.” Replace them with observable outcomes such as “reduced flaking by session 2” or “persistent burning after cleansing, discontinued active application.”
Mind Map: Documentation Flow
Example: Standard Service Entry
Use a consistent format so entries are fast and complete.
Client: “A.”
- Intake update: No new allergies reported. History of sensitive skin.
- Service: Gentle facial with cleansing, exfoliating step skipped due to active irritation.
- Products used: Cleanser, barrier cream, hydrating mask.
- Sanitation: Tools cleaned and disinfected prior to use; gloves worn during extractions; disposable spatula used for product removal; linens replaced after service.
- Client response: Mild tightness at 10 minutes, resolved by end of service.
- Next steps: Continue home cleanser; avoid exfoliating actives for 7 days.
This entry shows both sanitation and the logic behind the treatment change.
Example: Adverse Reaction Documentation
If a reaction happens, document it without guessing.
- What you observed: timing, location, severity, and visible signs.
- What was used immediately before: products, tools, and any device contact.
- What you did: stopped the step, removed product, applied a neutral barrier, and monitored.
- Client instructions: aftercare guidance and when to seek medical advice.
- Follow-up plan: note that future services require modified product selection and more conservative intensity.
Keep the tone factual. “Client reported burning during step 3; active application stopped; redness decreased within 20 minutes” is more useful than “something went wrong.”
Quality Control and Consistency Checks
Before the client leaves, confirm that:
- sanitation steps are recorded for the tools actually used,
- the product list matches what was applied,
- any skipped steps are explained,
- adverse events include timing and actions taken.
Afterward, store records securely and ensure access is limited to authorized staff. Records are only helpful if they can be retrieved when needed.
Mind Map: What to Record
Closing Standard
Good documentation is not extra work for its own sake. It is the written version of safe practice: clear enough to repeat, specific enough to learn from, and organized enough to protect the client and the team.
7. Skin Analysis and Treatment Protocol Development
7.1 Client Intake History and Contraindication Screening
A good intake is not a form-filling exercise; it’s a risk-reduction tool that also improves outcomes. The goal is to understand what the skin is doing today, what it has done in the past, and what could interfere with the planned service.
Core Intake Categories
Start with the basics that affect almost every treatment decision.
- Reason for visit and desired outcome: Ask what the client wants to change and what they’ve tried. Example: “I want fewer clogged pores” leads you to discuss cleansing habits, comedogenic products, and whether exfoliation is appropriate.
- Current skin routine: Record cleanser, moisturizer, sunscreen, exfoliants, retinoids, and any spot treatments. Example: If they use a strong exfoliant at home and you plan a resurfacing service, you’ll likely adjust intensity or timing.
- Medical history: Capture conditions that affect healing, sensation, or immune response. Example: Diabetes may slow recovery; autoimmune conditions may change how the skin tolerates irritation.
- Medication and topical use: Include oral meds and prescription topicals. Example: Isotretinoin history matters for resurfacing timing; topical steroids can mask irritation and complicate assessment.
- Allergies and prior reactions: Note ingredient allergies, medication allergies, and past reactions to cosmetics or procedures. Example: A history of contact dermatitis to fragrance or preservatives changes product selection and patch-testing needs.
- Pregnancy and breastfeeding status: Some actives and procedures require extra caution. Example: You may avoid certain retinoid-related products and adjust service recommendations.
- Lifestyle factors: Smoking, sun exposure patterns, and occupational heat or chemical exposure can influence barrier function and irritation risk.
Contraindication Screening Logic
Screening works best when you separate absolute reasons to avoid from relative reasons to modify.
- Absolute or near-absolute reasons to avoid: Active infection (viral, bacterial, fungal), open wounds, uncontrolled inflammatory flares, and suspected skin cancer in the treatment area. Example: If there is a weeping rash, you pause aesthetic services and focus on medical evaluation.
- Relative reasons to modify: Recent aggressive treatments, very reactive skin, recent sunburn, or medications that alter healing or sensitivity. Example: After a recent chemical peel, you may delay resurfacing and prioritize barrier support.
Use a simple decision rule: if the skin barrier is currently compromised or the client’s risk of irritation is high, choose a gentler service or postpone.
Skin History Questions That Matter
Ask questions that reveal patterns rather than isolated events.
- Recent exfoliation and retinoid use: “What have you used in the last 2–4 weeks?” Example: A client who started a new retinoid last week may not tolerate additional exfoliation.
- History of herpes outbreaks: Particularly relevant for procedures that can trigger flare-ups. Example: If they’ve had cold sores, you plan prophylaxis per protocol and adjust service intensity.
- Bleeding tendency and anticoagulants: Important for procedures that may cause bruising. Example: If they take blood thinners, you reduce pressure and avoid aggressive mechanical approaches.
- Scarring tendencies: Keloid or hypertrophic scarring history affects how you manage resurfacing and energy-based treatments.
Documentation That Prevents Confusion
Record information in a way that supports consistent decisions across sessions.
- Client-reported details: Use client’s words for key symptoms and reactions.
- Observed findings: Note redness, scaling, active lesions, dryness level, and sensitivity.
- Service plan adjustments: Write what you changed and why. Example: “Postponed exfoliation due to recent sunburn; initiated barrier-focused routine.”
Mind Map: Intake to Screening Flow
Example: Two Intake Outcomes
Example 1: Acne-prone skin with recent home exfoliation
- Intake finds: client started a strong leave-on exfoliant 7 days ago and reports stinging.
- Screening outcome: relative contraindication to immediate resurfacing.
- Plan adjustment: pause exfoliation service, focus on barrier support and technique coaching for cleansing and moisturizer use.
Example 2: Hyperpigmentation with a history of keloids
- Intake finds: client reports thick scars after minor cuts.
- Screening outcome: relative contraindication requiring conservative intensity and careful monitoring.
- Plan adjustment: choose lower-risk options first, document scar history, and set expectations for gradual progress.
Practical Screening Checklist
Before confirming the service, verify three things: the skin is not actively inflamed or infected, the client’s recent product and procedure history won’t stack irritation, and the planned service matches the client’s healing and sensitivity profile. If any answer is unclear, treat it as a reason to slow down rather than proceed.
7.2 Skin Typing and Condition Classification for Service Matching
Skin typing is the starting point, but service matching works best when you treat “type” as a baseline and “condition” as the current storyline. A person can be oily by type and still have a dehydrated, irritated barrier today. Your job is to sort what’s stable from what’s temporary, then choose products and in-room steps that fit both.
Step 1: Separate Skin Type from Skin Condition
Skin type describes how the skin tends to behave over time, mainly through sebum and surface comfort. Common types include dry, normal, oily, and combination. Skin condition describes what’s happening now, such as dehydration, sensitivity, acne activity, redness, flaking, or uneven tone.
A simple rule: if the issue changes quickly with weather, cleansing habits, or a new product, it’s more likely a condition than a type. If it stays consistent across seasons and routines, it’s more likely type.
Step 2: Use Observations That Clients Can’t “Talk Their Way Out Of”
Rely on what you can see and feel in the first minutes.
- Surface shine and pore appearance: shine suggests higher sebum output; enlarged pores suggest oil plus texture, not just “big pores.”
- Tightness and flaking: tightness after cleansing often points to dehydration or barrier disruption.
- Redness pattern: diffuse background redness can suggest sensitivity or irritation; localized redness can follow friction or active inflammation.
- Texture and roughness: roughness can come from dryness, clogged follicles, or both.
- Post-cleansing behavior: if the skin feels comfortable for 10–15 minutes, barrier function is likely more stable than if it tightens immediately.
Example: A client reports “I’m oily.” You notice tightness within minutes of cleansing and fine flaking around the mouth. Type may be oily, but the condition includes dehydration and barrier stress. Service matching should prioritize barrier recovery before aggressive exfoliation.
Step 3: Classify Conditions into Practical Buckets
Use condition buckets that map directly to treatment choices.
- Barrier stress: tightness, stinging, visible dryness, uneven texture after cleansing.
- Dehydration: dullness, fine lines that look worse after washing, makeup clings to dry patches.
- Inflammation and sensitivity: persistent redness, reactive burning with new products.
- Acne and follicular congestion: comedones, inflamed papules, clogged texture.
- Hyperpigmentation and uneven tone: patchy darkening, post-inflammatory marks, dullness.
- Aging-related texture: loss of firmness, deeper wrinkles, crepey feel.
Example: Two clients with “dark spots” can differ. One has smooth skin with isolated marks (tone issue). Another has roughness, flaking, and redness (tone plus barrier stress). The second client needs gentler resurfacing and barrier-first sequencing.
Step 4: Match Buckets to Service Priorities
Service matching is sequencing, not just selecting products.
- Barrier stress or sensitivity first: choose calming, low-irritation steps; avoid strong exfoliation on day one.
- Dehydration support: use hydration layers that reduce water loss; confirm comfort before adding actives.
- Acne activity: focus on controlling inflammation and congestion; keep mechanical steps conservative.
- Hyperpigmentation: start with consistent photoprotection and tone-supporting ingredients; exfoliation should be tolerance-based.
- Texture and aging: combine gentle resurfacing with firming-supportive routines, but only after barrier stability.
Mind Map: Skin Typing and Condition Classification
Step 5: Build a Classification Grid You Can Use During Consults
A grid keeps decisions consistent across clients.
| Category | What You Look For | What You Avoid Initially |
|---|---|---|
| Type | Shine, dryness, pore pattern over time | Assuming one issue explains everything |
| Barrier Stress | Tightness, stinging, roughness after cleansing | Strong acids or high-friction steps |
| Dehydration | Dullness, fine lines after washing | Over-cleansing and stripping cleansers |
| Sensitivity | Redness that reacts to products | New actives during the same session |
| Acne/Clogging | Comedones, inflamed bumps, uneven texture | Aggressive mechanical extraction |
| Uneven Tone | Patchy marks, post-inflammatory spots | High-intensity resurfacing on irritated skin |
Example: Two Clients, Same “Problem,” Different Plans
Client A: Oily type, but barrier stress shows up as tightness and flaking. Classification: oily + barrier stress + dehydration. Matching: gentle cleansing, hydration support, calming in-room steps; postpone stronger exfoliation.
Client B: Normal type with mild sensitivity and isolated post-inflammatory marks. Classification: normal + mild sensitivity + hyperpigmentation. Matching: tolerance-based tone support with careful exfoliation pacing; prioritize comfort and consistency.
Step 6: Confirm with a Quick Tolerance Check
Before you commit to more active steps, reassess comfort after the first gentle phase. If the skin stings, reddens, or tightens quickly, you treat that as data. Reduce intensity, focus on barrier support, and reclassify the condition as “active stress” rather than “stable concern.”
7.3 Objective Assessment Tools for Texture Tone and Barrier Status
Objective assessment is the difference between “it feels better” and “we can track change.” The goal is to measure skin features that relate to texture, tone, and barrier function, then choose treatments and home care that match what the measurements show.
Texture Assessment Tools and What They Measure
Texture is not just roughness. It includes surface irregularity, visible scaling, and how easily products spread. Start with a standardized visual scale and a consistent lighting setup.
1) Visual grading with a reference scale Use a 0–3 or 0–4 scale for roughness, flaking, and pore visibility. Keep the same magnification distance and the same light angle each visit. Example: if a client’s cheeks score 3 for flaking today, you know you should prioritize barrier support and gentle exfoliation rather than aggressive resurfacing.
2) Surface imaging for repeatability A simple handheld camera with fixed distance and lighting can capture baseline and follow-up images. The key is consistency: same camera height, same angle, same time of day. Example: after two weeks of a hydration-focused plan, you compare images and see whether scaling decreased even if redness stayed the same.
3) Tactile assessment with controlled technique If you use touch, standardize it: same finger pressure, same number of passes, and note whether the texture feels dry, bumpy, or smooth but tight. Example: a “tight” feel with minimal visible flaking often points to barrier water loss rather than heavy surface buildup.
Tone Assessment Tools and How to Interpret Them
Tone includes uneven pigmentation, redness, and overall color balance. Objective tools help separate “more pigment” from “more inflammation.”
1) Colorimetric thinking with practical observation Use a structured look: note erythema (redness), hyperpigmentation (brown/gray spots), and overall dullness. Example: if redness is dominant but spots are minimal, a calming and barrier-first approach usually makes more sense than targeting pigment immediately.
2) Imaging under consistent lighting Capture images in the same lighting conditions. If you can, include both bright and slightly angled light to reveal surface reflectance changes. Example: dullness that improves with hydration often looks different under angled light than true pigment reduction.
3) Spot mapping for lesion tracking Create a simple face map and record location and size categories. Example: a post-inflammatory mark that shrinks from “coin-sized” to “half-coin-sized” is a measurable outcome even when color change is subtle.
Barrier Status Assessment Tools and Decision Links
Barrier status is about water retention and lipid integrity. You want tools that reflect barrier function rather than guessing from appearance alone.
1) TEWL style reasoning with practical surrogates If you have a TEWL device, use it consistently on the same area and allow the skin to acclimate. If you do not, use observation plus standardized touch: dryness, tightness, and flaking patterns can still guide decisions when recorded systematically. Example: fine flaking with tightness suggests barrier stress; you reduce exfoliation frequency and increase occlusive support.
2) Hydration measurement when available A corneometer-type device estimates surface hydration. Track relative changes, not absolute perfection. Example: if hydration rises but redness persists, you may be improving water content while inflammation still needs attention.
3) Redness and irritation indicators Record erythema intensity and whether it is localized or widespread. Example: localized redness around the mouth and nose often changes how you plan cleansing and product layering.
4) Barrier recovery response after a standardized challenge Some clinics use a mild, controlled assessment like a brief cleansing exposure and then re-checking after a set interval. Keep it gentle and consistent. Example: if the skin looks worse after cleansing, you adjust cleanser type and reduce friction.
Mind Map: Objective Assessment Workflow
Example: Turning Measurements into a Treatment Plan
A client reports sensitivity and shows mild roughness on the cheeks, scattered brown marks, and visible tightness after cleansing.
- Texture score: roughness 2/3, flaking 1/3.
- Tone: erythema 2/3, hyperpigmentation 1/3.
- Barrier: tightness present, hydration measurement shows low baseline if available.
Integrated interpretation: barrier stress is likely driving sensitivity and contributing to uneven appearance. The plan prioritizes gentle cleansing, a barrier-support moisturizer, and short-contact calming actives if tolerated. Pigment targeting is delayed until redness and tightness improve, because pigment changes are harder to interpret when inflammation is still active.
Example: Documenting Change Without Guessing
At baseline, record: cheek roughness 2/3, erythema 2/3, hydration low, and mark two hyperpigmented spots with size categories. At follow-up, repeat the same lighting and same scoring. If roughness drops to 1/3 and hydration rises but erythema stays 2/3, you adjust the plan toward anti-irritation and barrier consistency rather than increasing exfoliation.
Objective assessment works when it is boring in the best way: consistent method, clear scoring, and decisions that follow the numbers and observations.
7.4 Treatment Plan Design with Stepwise Home Care Integration
A treatment plan works best when in-room services and home care follow the same logic: reduce the problem, protect the barrier, and increase tolerance to the right actives. Stepwise home care integration means you change one variable at a time, so you can tell what helped, what irritated, and what needs adjusting.
Step 1: Translate Skin Findings into Home Care Goals
Start with the client’s intake and skin analysis, then convert observations into measurable goals. For example, if you see rough texture and mild flaking, your goal might be “improve surface comfort and reduce visible dryness within 2–4 weeks.” If you see uneven tone with sensitivity, your goal might be “support barrier first, then introduce tone-focused actives slowly.”
A simple rule: barrier support comes before stronger exfoliation or higher-frequency retinoid use. If the barrier is stressed, actives can feel like they’re doing “more,” but the skin often responds with redness and rebound dryness.
Step 2: Build a Baseline Routine That Can Survive Real Life
Home care must fit how the client actually behaves. A baseline routine usually includes:
- Gentle cleanser used once daily or every other day if dryness is present.
- Moisturizer with humectants plus emollients, applied on slightly damp skin.
- Sunscreen every morning, because most tone and texture goals depend on consistent photoprotection.
Example: A client with dry, reactive cheeks cleanses at night only, moisturizes twice daily, and uses sunscreen in the morning. This stabilizes comfort before you add anything that changes cell turnover.
Step 3: Choose One Active Track per Phase
To avoid “everything at once,” assign one main track per phase. Common tracks include:
- Barrier repair track: ceramides, cholesterol-like lipids, glycerin, panthenol.
- Hydration track: humectants and film formers, often paired with gentle occlusion.
- Surface renewal track: low-strength exfoliation with careful frequency.
- Tone track: niacinamide or vitamin C derivatives, introduced slowly.
- Anti-aging track: retinoids or retinoid alternatives, introduced gradually.
Example: For a client with both mild hyperpigmentation and dryness, you might run a barrier repair track for 2 weeks, then start a tone track at low frequency while keeping exfoliation off the table.
Step 4: Set Frequency Rules and Tolerance Checks
Frequency is the lever you control. Use a “start low, increase slowly” approach with clear tolerance checks:
- If there is no stinging, tightness, or visible worsening, increase frequency at the next step.
- If irritation appears, pause the active track and continue baseline care until comfort returns.
A practical schedule example for retinoid introduction:
- Week 1: apply a pea-sized amount to dry skin at night, 1–2 times.
- Week 2: increase to every other night if comfortable.
- Week 3–4: move toward nightly use only if the skin stays calm.
Step 5: Align Home Care with In-Room Services
In-room treatments change the skin’s threshold. After a resurfacing or exfoliation service, home care should shift toward barrier recovery and reduced active load.
Example: After a chemical exfoliation session, the client uses only cleanser, moisturizer, and sunscreen for 48–72 hours. The next active reintroduction happens after the skin looks and feels stable, not on the calendar alone.
Step 6: Use a Simple Decision Tree for Adjustments
When results stall or irritation shows up, you need a consistent response plan.
Mind Map: Treatment Plan Design With Stepwise Home Care Integration
Document the Plan So It Can Be Followed
Documentation should include the exact routine, active frequency, and what to do if irritation occurs. A good plan answers three questions: “What do they do?”, “How often?”, and “What changes if the skin reacts?”
Example:
- Morning: gentle cleanse (or rinse), moisturizer, sunscreen.
- Night: cleanse, moisturizer.
- Active phase: retinoid 2 nights/week for 2 weeks, then every other night.
- If stinging lasts more than 10–15 minutes or redness increases: stop retinoid, keep baseline for 5–7 days, then restart at 1 night/week.
Stepwise integration turns a treatment plan into a controlled experiment the client can actually run. When you change one variable at a time, you get clearer outcomes and fewer “mystery reactions,” which is the whole point.
7.5 Adverse Event Management and Service Modification Procedures
Adverse events in aesthetic services usually fall into a few predictable categories: irritation, allergic reactions, burns or overexposure, infection risk from compromised skin, and vasovagal responses. The goal is not to “win” against symptoms; it is to stop the process safely, document what happened, and adjust the plan so the client can continue receiving care without repeating the same trigger.
Recognizing Early Signals and Acting Fast
Start with a simple rule: if a symptom is worsening during the session, treat it as a stop signal. Early signals include burning that increases over minutes, swelling that spreads beyond the treated area, hives, blistering, sudden intense redness, or dizziness with nausea. For energy-based or resurfacing services, also watch for delayed-looking skin changes that appear quickly after the first minutes.
A practical response sequence:
- Pause the service immediately.
- Remove the active agent or stop the device output.
- Assess airway breathing circulation at a basic level if the client looks unwell.
- Cool the area appropriately when indicated by the service type and your protocol.
- Notify the supervising clinician or follow your workplace escalation policy.
- Decide whether the client needs urgent medical evaluation.
Differentiating Irritation from Allergy
Irritation tends to be dose-related and localized to where the product or energy was applied. It often looks like redness, tightness, mild stinging, and dryness that improves with time and barrier support.
Allergy is more likely when symptoms include itching, hives, raised welts, or swelling that extends beyond the application site. It can also show up after a delay, so documentation matters even when the client seems “mostly okay” at the end of the visit.
Example: A client receives a chemical exfoliation and reports stinging that peaks within the first few minutes and then settles. That pattern fits irritation. Another client develops itchy raised bumps within the same session and the bumps appear around the jawline where product contacted skin. That pattern fits possible allergy and requires service modification.
Decision Rules for Service Modification
Use a tiered approach so decisions are consistent:
- Stop and treat: blistering, rapidly spreading swelling, severe pain, or signs of anaphylaxis.
- Stop and modify: moderate irritation with clear triggers, persistent redness beyond expected recovery, or any suspected allergy.
- Stop and reassess: symptoms that don’t match the expected response for the service type.
Service modification options include lowering concentration, increasing dilution, reducing contact time, changing the delivery method, switching to a gentler active, or spacing sessions farther apart. If the event is suspected to be allergic, avoid the suspected ingredient class in future services until the client is cleared by appropriate medical guidance.
Documentation That Actually Helps
Record the essentials while they are fresh:
- Date time and service performed
- Products used including batch or lot when available
- Application duration and any device settings
- Exact symptoms onset and progression
- Skin appearance description using consistent terms
- Interventions performed during the visit
- Client response after intervention
- Photos if your policy allows and consent is documented
A good note prevents the same mistake from becoming a recurring plot twist.
Mind Map: Adverse Event Management Workflow
Concrete Examples with Clear Outcomes
Example 1: Chemical Exfoliation Irritation
A client develops tightness and redness that intensifies during the final minute of contact. You stop, rinse thoroughly, and apply a bland barrier-supporting moisturizer per protocol. The client improves over the next hour but remains red the next day. Modification: reduce contact time, lower active strength, and add a barrier-support step before the next session.
Example 2: Suspected Contact Allergy
A client receives a mask and reports intense itching shortly after removal. You observe small raised welts around the mask perimeter. You stop further services, document the product used, and modify the plan by avoiding that ingredient category in future visits. Modification also includes switching to a simplified routine for subsequent sessions.
Example 3: Energy-Based Overexposure
A client reports sharp pain and you observe patchy blistering. You stop immediately, follow cooling and aftercare steps in your protocol, and escalate for medical evaluation. Future service modification: do not repeat the same settings; reassess suitability and adjust the treatment approach entirely.
Service Modification Planning for the Next Visit
Before the next appointment, confirm what changed: the active strength, the contact time, the device settings, or the product base. Also confirm what did not change, because that helps isolate the trigger. If the client had a vasovagal response, adjust the session length, hydration guidance, and positioning. If the client had barrier disruption, prioritize recovery steps before introducing any new actives.
A consistent adverse event process turns “something went wrong” into “we learned what to change,” without guessing or repeating the same risk.
8. Advanced Aesthetic Treatment Systems and Device Fundamentals
8.1 Energy Based Modalities Overview and Safety Boundaries
Energy based modalities use controlled physical energy to create a desired skin response. In practice, the “desired response” is always paired with a safety boundary, because skin is not a passive surface—it’s living tissue with variable sensitivity, hydration, and barrier integrity.
What Counts as Energy Based
Energy based modalities include light based systems (lasers and intense pulsed light), radiofrequency, ultrasound, and electrical stimulation. Each category delivers energy through a specific mechanism:
- Light targets chromophores such as melanin or hemoglobin.
- Radiofrequency heats tissue using electrical resistance.
- Ultrasound transfers mechanical energy that can affect tissue structure.
- Electrical stimulation influences neuromuscular or sensory pathways depending on settings and placement.
A useful mental model is to separate energy source, delivery method, and tissue interaction. If you can name those three, you can usually predict what can go wrong.
Foundational Safety Boundaries
Safety boundaries are not just “avoid burns.” They include dose control, correct patient selection, and equipment discipline.
-
Patient suitability
- Skin type and pigmentation history affect risk of discoloration.
- Active infection, open wounds, and certain inflammatory conditions increase complication risk.
- Medications and recent procedures can change skin reactivity.
-
Device readiness
- Verify calibration, probe condition, and consumable integrity.
- Confirm the correct applicator size, lens, or tip is installed.
- Ensure cooling systems and interlocks function as designed.
-
Dose and exposure control
- Energy is delivered as a combination of intensity, duration, and coverage.
- Overlapping passes can unintentionally increase total dose.
- Incorrect distance or contact pressure can shift energy delivery.
-
Protection and hygiene
- Eye protection must match the wavelength and device type.
- Clean surfaces and proper barrier use reduce cross-contamination.
- Treat the client’s skin like a “closed system”: keep the field consistent and avoid unnecessary friction.
How Energy Interacts with Skin
Different modalities share a common pattern: energy is absorbed, converted to heat or mechanical effects, and then triggers a biological response. The safety boundary is the point where tissue damage outpaces controlled remodeling.
- Light based systems: absorption depends on wavelength and target. Darker targets absorb more, so settings that look safe on one skin tone may be risky on another.
- Radiofrequency: heating depends on tissue conductivity and contact. Poor contact can create uneven heating.
- Ultrasound: coupling matters. Air gaps reduce transmission and can concentrate energy.
- Electrical stimulation: intensity and placement determine comfort and efficacy; incorrect placement can cause unwanted sensations or irritation.
Practical Risk Controls That Actually Work
Use a structured workflow so safety isn’t a memory test.
- Start low and verify: begin with conservative settings and observe immediate skin response.
- Use test spots: a small area confirms response before full coverage.
- Track parameters: record energy, duration, pulse settings, and pass count.
- Respect time between sessions: tissue needs recovery to avoid cumulative irritation.
- Stop criteria: if pain becomes sharp or persistent, if blistering occurs, or if discoloration is rapidly worsening, pause and reassess.
Mind Map: Safety Boundaries for Energy Based Modalities
Example: Light Based Settings with a Test Spot
A client with medium skin tone wants improvement in uneven pigmentation. The practitioner selects conservative parameters and performs a test spot in a less visible area. After treatment, the skin is evaluated for expected transient redness and absence of blistering. If the response is stronger than anticipated, the practitioner reduces intensity and limits overlap for the full session. The key safety move is not “more caution forever,” but “measure response, then adjust dose.”
Example: Radiofrequency Contact and Overlap
A client with mild laxity receives radiofrequency. The practitioner ensures full contact using the correct technique and avoids stacking passes in the same region. If the skin shows uneven heating patterns, the practitioner corrects contact and reduces overlap rather than increasing intensity. This prevents localized overheating while keeping the overall treatment consistent.
Example: Ultrasound Coupling Consistency
During an ultrasound session, the practitioner maintains uniform coupling and checks for air gaps near the treatment edge. If the response is patchy, the practitioner re-applies coupling and corrects technique before continuing. Consistency matters because uneven transmission can concentrate energy where it shouldn’t.
Summary of the Safety Logic
Energy based modalities are safe when three things stay aligned: the client is suitable, the device is ready, and the delivered dose matches the observed skin response. When any link breaks, the correct action is to pause, reassess, and adjust the plan—rather than forcing the session to continue.
8.2 Electromagnetic and Electrical Principles for Skin Applications
Skin applications use electricity and electromagnetic fields to create controlled effects at or near the surface. The key is to connect three ideas: what the device outputs, how the body conducts and absorbs, and how the treatment parameters shape the result.
Core Quantities and How Devices Produce Them
Electrical devices describe output using a few measurable quantities. Voltage is the electrical “push,” current is the flow, and power is how fast energy is delivered. In alternating systems, frequency matters because tissues respond differently as the field changes direction faster or slower. For electromagnetic methods, wavelength and field strength help predict how energy distributes through space.
A practical way to think about it: if you keep voltage the same but change resistance, current changes. If you keep current the same but change resistance, voltage changes. Skin and underlying tissue resistance are not constant, so the same device settings can behave differently across clients.
Tissue Conductivity and Permittivity
Biological tissue is not a simple wire. It contains water, ions, and fat, which influence how it conducts electricity and how it stores energy in an electric field. Conductivity describes how easily charge moves; permittivity describes how strongly the tissue polarizes in response to an electric field. Together, they determine how much energy turns into heat versus how much spreads through the field.
Example: a more hydrated surface and higher ionic content generally reduce effective resistance, so current can increase at the same voltage. That’s why good skin prep and consistent contact conditions matter.
Impedance and Why It Controls Current
Impedance combines resistance and reactance, meaning it depends on frequency. At different frequencies, the same tissue can “look” more or less conductive. This is why devices specify frequency bands and why treatment outcomes can shift when settings change.
A simple calculation mindset helps: if impedance rises, current falls, and less energy reaches the target region for the same voltage. If impedance falls, current rises, and energy delivery increases.
Energy Deposition and Thermal Effects
Many skin devices aim to deposit energy in a controlled way. When electrical energy is absorbed, it can convert to heat through resistive losses. The temperature rise depends on delivered energy, tissue heat capacity, blood perfusion, and how quickly heat can spread.
Example: two clients receive the same joules, but one has higher baseline skin temperature and stronger blood flow. That client may show a smaller temperature rise because heat is removed faster.
Field Geometry and Depth Control
Depth is not only about power; it’s also about how the field lines travel. Electrode spacing, applicator shape, and coupling method determine where current density concentrates. Smaller spacing often concentrates current near the surface, while different configurations can shift the dominant region deeper.
Example: if a device uses a pair of electrodes, moving them farther apart changes the current path and can reduce surface concentration. That’s why consistent placement and contact pressure are not “comfort details”; they are part of the physics.
Coupling, Contact, and Skin Interface Effects
The skin-electrode interface is where many real-world problems start. Dry skin, poor gel coverage, hair, and uneven pressure can increase contact impedance. Higher interface impedance can cause energy to concentrate at the contact points, increasing discomfort and reducing effective delivery to deeper targets.
Example: if gel is applied too thinly, small air gaps can form. Those gaps act like insulators, so the device may deliver less energy to tissue while still producing localized heating at the interface.
Safety Boundaries Through Electrical Reasoning
Safety is about preventing excessive heating, avoiding unintended stimulation, and managing conductive pathways. Devices often include limits for maximum power, duty cycle, and treatment time. Duty cycle matters because tissue can cool between pulses; a lower duty cycle can reduce peak temperature even if average power is similar.
Example: a pulsed mode with short on-times and longer off-times can feel more tolerable than continuous delivery because heat has time to dissipate.
Parameter Selection with a Systematic Workflow
A consistent approach links settings to the goal.
- Define the target zone using the device’s field geometry and intended depth.
- Select frequency and mode based on how the device couples energy and how tissue impedance changes with frequency.
- Set intensity and duty cycle to control energy deposition rate and peak temperature.
- Standardize coupling conditions with uniform contact, correct gel or interface medium, and stable placement.
- Monitor skin response using observable cues like redness pattern and comfort level, then adjust parameters if response is outside the expected range.
Mind Map: Electromagnetic and Electrical Skin Applications
Example: Translating Settings into Expected Effects
Suppose a device offers two modes: one at a lower frequency and one at a higher frequency, both with adjustable intensity. If the higher-frequency mode couples more strongly to the interface, it may produce more surface heating at the same intensity. The workflow would therefore start with lower intensity for the higher-frequency mode, verify comfort and redness pattern, and then adjust gradually while keeping contact conditions consistent.
Example: Why Consistent Gel Application Matters
If gel coverage varies, interface impedance changes. That means the same nominal intensity can deliver different effective energy to tissue. Standardizing gel thickness and ensuring full contact reduces variability, making treatment outcomes more predictable and safer.
8.3 Ultrasound and Mechanical Energy Concepts for Treatment Delivery
Ultrasound and mechanical energy devices share a goal: deliver controlled physical effects to skin and superficial tissues. The difference is how the energy is generated and transferred. Ultrasound uses sound waves at frequencies above human hearing, while mechanical energy relies on direct contact motion such as oscillation, vibration, or controlled agitation.
Foundational Physics for Treatment Delivery
Ultrasound is described by frequency, intensity, and duty cycle. Frequency relates to how rapidly the wave oscillates; higher frequency generally targets more superficial layers. Intensity describes how much energy is delivered per area, and duty cycle describes the on-off pattern that affects heat buildup. Mechanical energy is described by amplitude, frequency, and contact pressure. Even when two devices “feel” similar, their amplitude and pressure determine whether you get surface smoothing or deeper tissue response.
A practical way to think about both categories is: energy must be sufficient to create a measurable skin response, but not so high that barrier function or comfort is compromised. That balance is why settings, contact technique, and treatment time matter as much as the device itself.
Energy Transfer and Tissue Response
Energy transfer depends on coupling. For ultrasound, coupling gel reduces air gaps so sound waves can pass efficiently. For mechanical devices, coupling is the skin-to-head contact and the consistency of pressure. When coupling is poor, energy delivery becomes uneven, which can show up as patchy redness, inconsistent texture changes, or client discomfort.
Tissue response is typically a combination of micro-level effects: mild thermal changes, gentle mechanical stimulation, and temporary alterations in fluid movement. The skin often responds first at the surface, then shows longer-lasting changes through improved hydration, smoother texture, and reduced appearance of roughness. The key is that the response should be gradual and repeatable across sessions.
Treatment Technique That Actually Controls Outcomes
For ultrasound, technique usually follows three rules: keep the applicator moving, maintain consistent contact, and avoid lingering. Movement prevents localized overheating and reduces the chance of over-treating one spot. For mechanical energy, technique focuses on glide speed, pressure, and pattern. A steady, overlapping pattern helps prevent “striping” where one pass is stronger than the next.
A simple example: if a client has mild dehydration and roughness, you might choose a lower intensity or gentler mechanical setting and extend the number of passes. If the client has thicker surface buildup, you may increase mechanical action slightly while still keeping pressure controlled. In both cases, you’re matching the delivery method to the skin’s current tolerance.
Safety Boundaries and Contraindication Logic
Safety is not just “avoid this condition.” It’s also about why the condition changes risk. For example, impaired sensation can make it harder for the client to report discomfort, so you rely more on conservative settings and careful technique. Broken skin increases the risk of irritation and uneven energy transfer. Areas with compromised circulation or active inflammation require extra caution because tissue response may be exaggerated.
A useful workflow is to treat the device settings as a starting point, then adjust based on skin response during the session. If redness rises quickly or persists longer than expected, you reduce intensity, shorten contact time, or switch to a less aggressive modality.
Mind Map: Ultrasound and Mechanical Energy Concepts
Example: Matching Modality to Skin Concern
Consider two clients with different surface states.
Client A has mild roughness and dryness. A conservative ultrasound setting with good gel coupling can support smoother feel without aggressive surface disruption. The applicator stays in motion, with overlapping passes that cover the entire area evenly.
Client B has thicker surface buildup and tolerates mechanical stimulation well. A mechanical energy approach with controlled pressure and moderate oscillation can help lift and smooth surface texture. The practitioner uses a consistent pattern and avoids pressing so hard that the skin becomes overly reactive.
In both cases, the “best” setting is the one that produces a predictable response: comfortable during treatment, mild and short-lived afterward, and improving texture over repeated sessions.
Example: Troubleshooting Uneven Results
If a client reports hot spots or you observe uneven redness, the likely causes are poor coupling, inconsistent movement, or excessive dwell time. The fix is straightforward: reapply gel, reduce intensity slightly, and increase glide consistency. For mechanical energy, uneven results often come from inconsistent pressure or skipping overlap. The correction is to standardize pressure and slow down just enough to maintain overlap without lingering.
Key Takeaways for Treatment Delivery
Ultrasound and mechanical energy are controlled physical tools. Outcomes depend on energy parameters, coupling, and technique. Safety is managed through contraindication logic and real-time adjustment based on skin response. When those pieces align, the treatment becomes repeatable rather than guessy—like a good recipe, not a coin toss.
8.4 Laser and Light Based Systems for Targeted Skin Concerns
Laser and light systems work by delivering energy that skin structures absorb differently. The key idea is simple: match the wavelength to the target, deliver enough energy to create a controlled effect, and protect surrounding tissue so the result stays predictable. In practice, “target” can mean pigment, blood vessels, or the skin’s surface and deeper layers depending on the device and settings.
Core Concepts for Choosing a System
Start with three questions. First, what is the primary target: melanin, hemoglobin, or water-rich tissue? Second, what is the skin’s risk profile: darker phototypes, recent sun exposure, active inflammation, or a history of keloids. Third, what outcome is expected: visible clearance, texture smoothing, or controlled resurfacing.
Absorption determines where energy goes. Shorter wavelengths are often absorbed more by superficial pigment, while longer wavelengths can penetrate deeper with different absorption patterns. Pulse duration matters too: very short pulses can limit heat spread, while longer pulses allow more thermal diffusion.
Device Types and What They Commonly Treat
Pulsed Light Systems use a broad spectrum filtered into bands. They are frequently used for vascular and pigment concerns, but the filter choice and fluence control determine selectivity. A practical example: for mild facial redness, a clinician selects a filter that emphasizes hemoglobin absorption and uses conservative settings first, then adjusts based on immediate skin response.
Vascular Lasers target hemoglobin and are used for visible blood vessels. A typical workflow is to treat in overlapping passes, then reassess after the expected downtime window. If the skin shows excessive blistering or prolonged darkening, the next session reduces fluence or increases pulse spacing.
Pigment Lasers target melanin. Because melanin is also present in normal skin, darker phototypes require stricter parameter selection and careful pre- and post-care. For example, a client with sun-tanned skin should postpone treatment until baseline color stabilizes, since extra melanin increases the risk of unwanted heating.
Fractional Resurfacing Lasers create microscopic treatment zones separated by untreated areas. This supports faster recovery than fully ablative approaches because the surrounding skin helps re-epithelialize. A common example is treating uneven texture: the clinician chooses a density and energy level that produce visible pinpoint endpoints without turning the entire area into a uniform burn.
Safety Boundaries and Risk Controls
Safety is not a checklist; it’s parameter logic. Always confirm skin type, recent sun exposure, medication history, and prior reactions. Use test spots when uncertainty exists, especially for pigment and vascular concerns.
Cooling and contact methods reduce surface temperature peaks. Proper eye protection is mandatory for both client and operator, and the room setup should prevent accidental exposure.
Post-treatment care should match the energy delivered. For vascular and pigment treatments, the goal is to calm inflammation and support barrier recovery. For fractional resurfacing, the care plan focuses on hydration, infection prevention, and minimizing friction during the healing window.
Treatment Planning from Assessment to Settings
A systematic plan connects assessment findings to device settings.
- Identify the target by visual pattern and distribution.
- Estimate depth and concentration based on lesion type.
- Select wavelength and pulse strategy to control heat confinement.
- Choose fluence and spot size to balance efficacy and comfort.
- Define endpoints that indicate adequate effect without over-treatment.
- Schedule follow-up based on the biology of the target.
For instance, with a superficial redness pattern, the endpoint may be transient erythema and mild warmth. With deeper vessels, the endpoint may require different pulse duration and fluence, but still should avoid prolonged blistering.
Mind Map: Laser and Light Based Systems
Mind Map: Target to Parameter Mapping
Example: Parameter Adjustment Using Real Responses
A clinician treats a client with facial telangiectasia using a vascular laser. After the session, the client reports warmth for several hours, and the skin shows mild, localized redness without blistering. In the next session, the clinician increases fluence slightly or adjusts pulse duration to improve vessel clearance while keeping the endpoint consistent. If instead the client develops prolonged darkening, the clinician reduces fluence and reconsiders pulse timing to reduce collateral heating.
Example: Fractional Resurfacing for Uneven Texture
For a client with roughness and mild discoloration, the clinician selects fractional settings that create visible microthermal zones while preserving intervening skin. The treatment area is divided into grids to maintain consistent coverage. Post-care emphasizes gentle cleansing and barrier support, since the untreated zones need to migrate and close the treated gaps efficiently.
Practical Summary for Targeted Outcomes
Successful laser and light treatments are built on matching wavelength and pulse strategy to the target, then using endpoints and skin response to guide parameter refinement. When the plan is consistent and the safety logic is clear, the results become less about guesswork and more about controlled physics applied to real skin.
8.5 Device Setup Calibration and Standard Operating Procedures
A reliable treatment starts before the device touches skin. Setup calibration is the process of confirming that the device’s output matches its settings, that safety controls work, and that the treatment environment supports consistent delivery. Standard operating procedures (SOPs) turn that process into repeatable steps, so different operators can produce similar results.
Core Setup Principles
Begin with three checks that prevent most avoidable problems: power readiness, parameter integrity, and safety interlocks.
- Power readiness means stable voltage and correct battery status. If a device uses a battery, confirm it is fully charged or connected to a stable power source. Low power can change output behavior.
- Parameter integrity means the displayed settings match what the device will deliver. Confirm the correct mode, applicator, and preset. If the device supports user profiles, verify you are using the intended profile.
- Safety interlocks means the device refuses to operate when conditions are unsafe. Test that emergency stop, handpiece lockouts, and protective eyewear prompts function as designed.
A simple example: if a device offers two applicator sizes, selecting the wrong one can change energy density even when the numeric setting looks correct. Treat the applicator choice as part of calibration, not an afterthought.
Calibration Workflow from Basics to Precision
Pre-Use Verification
- Inspect cables, handpieces, and connectors for damage or looseness.
- Clean and dry contact surfaces according to the manufacturer’s instructions for your device class.
- Confirm consumables are correct and within their usable condition window.
If your device uses a coupling medium, verify the medium type and viscosity. Too thin can reduce effective coupling; too thick can interfere with consistent contact.
Output Confirmation
Many devices include internal checks, such as sensor readings or self-tests. Run the self-test, then perform any required output verification steps.
- For devices with built-in monitors, confirm the device reports stable readings.
- For devices that require external verification, use the specified test method and record the result.
A practical example: if the device reports a temperature or power stability metric, log it. If stability is marginal, pause and troubleshoot before treating clients.
Applicator and Contact Setup
Correct contact is often the difference between “works” and “works inconsistently.”
- Confirm the applicator is seated and aligned.
- Use the correct pressure approach. If the SOP specifies “light contact,” define it operationally, such as maintaining consistent skin contact without blanching.
- Ensure the treatment area is prepared to the expected surface condition, such as clean and dry when required.
Standard Operating Procedures That Actually Get Used
A good SOP has a start point, a decision point, and a stop point.
Start Point
- Verify client identity and treatment area.
- Confirm contraindication screening is complete.
- Select the treatment parameters from the plan and confirm they match the device mode.
- Put on required protective equipment.
Decision Point
Before each session, decide whether conditions allow treatment.
- If the device self-test fails, do not proceed.
- If the applicator is damaged or coupling conditions cannot be met, reschedule or switch to a safe alternative service.
- If the client’s skin condition changed since intake, reassess and adjust the plan.
Example: if a client arrives with unexpected active irritation, you may need to reduce intensity or choose a different service. The SOP should specify who has authority to modify parameters.
Stop Point
Stop the session if safety thresholds are exceeded or if the client reports symptoms that require immediate pause. Document what happened and what was changed.
Documentation and Consistency Controls
Record enough information to reproduce the session and to explain outcomes.
- Device identification and serial number.
- Calibration or verification results.
- Parameters used, including mode, applicator, and any coupling medium details.
- Skin response observations during the session.
- Any deviations from SOP and the reason.
A short log example: “Mode A, applicator 10 mm, coupling gel type X, output verification stable within tolerance, client reported mild warmth at minute 3, continued at reduced pass count.”
Mind Map: Device Setup Calibration and SOP Flow
Example: Full Setup-to-Treatment Run
- The operator completes inspection and runs the device self-test.
- The operator selects the correct mode and applicator size, then confirms the displayed parameters match the treatment plan.
- Output verification is performed, and the result is logged.
- The treatment area is prepared to the required surface condition.
- Protective equipment is confirmed, and the applicator is seated and aligned.
- During the first pass, the operator checks contact quality and client comfort, then proceeds using the planned pass count.
- If the device reports instability or the client reports escalating discomfort, the operator pauses, documents the event, and follows the SOP stop procedure.
This structure keeps calibration from becoming a one-time ritual and turns it into a dependable habit. The device delivers what you set, the operator follows the same logic every time, and the client gets consistent care.
9. Chemical Exfoliation and Professional Skin Resurfacing
9.1 Alpha Hydroxy Acids Beta Hydroxy Acids and Their Use Cases
Alpha Hydroxy Acids And Their Use Cases
Alpha hydroxy acids (AHAs) are water-soluble acids that primarily work on the skin surface and the upper epidermis. They help loosen the “glue” between dead skin cells, which can improve roughness and make other products spread more evenly. AHAs are also useful for dullness and uneven tone, because smoother surface texture reflects light more consistently.
Core Mechanisms in Plain Terms
AHAs reduce cohesion in the stratum corneum, so shedding becomes more orderly. They also influence how keratin cells mature, which can gradually improve the look of fine dry lines. The practical takeaway is simple: AHAs are most noticeable when skin is dry, rough, or uneven at the surface.
Common AHA Types and What They’re Best At
- Glycolic acid: smaller molecule, often feels more “active.” Good for rough texture and surface-level discoloration.
- Lactic acid: typically gentler, also supports hydration feel because it’s associated with moisturizing properties in many formulations.
- Mandelic acid: larger molecule, often chosen when you want AHA benefits with a slower pace.
- Tartaric and citric acids: usually appear in blends; they can contribute to exfoliation and pH adjustment.
AHA Use Cases with Clear Examples
Example 1: Dry rough cheeks A client reports “sandpaper texture” after cleansing. A low-strength glycolic or lactic product used a few nights per week can improve smoothness over several weeks. Pair it with a bland moisturizer to reduce the chance of tightness.
Example 2: Post-blemish marks that look superficial Marks fade faster when the surface turnover is more consistent. A lactic or mandelic option used at night, followed by sunscreen in the morning, supports gradual improvement.
Example 3: Uneven tone from inconsistent routine If the main issue is dullness rather than deep pigmentation, an AHA used consistently can make the skin look more uniform because the surface is renewing at a steadier rate.
Beta Hydroxy Acids and Their Use Cases
Beta hydroxy acids (BHAs), most notably salicylic acid, are oil-soluble. That matters because it allows them to work within pores where sebum and debris accumulate. BHAs are often a better match for clogged pores and acne-prone skin than AHAs.
Core Mechanisms in Plain Terms
Salicylic acid penetrates into the lipid-rich environment of follicles and helps reduce the buildup that contributes to comedones. It also supports exfoliation, but the “center of gravity” is different: BHAs target pore congestion more directly.
BHA Use Cases with Clear Examples
Example 1: Blackheads and small bumps A client with visible comedones can benefit from a salicylic cleanser or leave-on product. Start with a lower frequency (for example, every other night) and monitor dryness.
Example 2: Oily skin that stings with AHAs If AHAs cause noticeable tightness, a BHA may be better tolerated because the routine can be adjusted around pore-focused needs. Still, hydration support is not optional.
Example 3: Acne that improves but leaves texture When breakouts calm down, continued BHA use can help maintain clearer pores, which supports a smoother look.
How to Choose Between AHA and BHA
A good rule is to match the acid to the main problem.
- Choose AHA when the priority is surface roughness, dryness-related dullness, or uneven tone that looks more superficial.
- Choose BHA when the priority is clogged pores, comedones, or acne-prone texture.
Mind Map: AHA and BHA Decision Path
Practical Routine Integration Without Guesswork
Frequency and Escalation
Start with a conservative schedule, then adjust based on comfort. A common approach is to begin with a few nights per week, then increase only if there is no persistent burning, peeling that lasts more than a day or two, or worsening redness.
Pairing with Moisturizer and Sunscreen
Exfoliation changes how the skin barrier behaves temporarily. A moisturizer with simple humectants and emollients helps reduce the “dry friction” feeling. Sunscreen in the morning is essential because exfoliated skin can be more reactive to UV exposure.
Mind Map: Safe Integration Steps

Example: Two Simple Weekly Schedules
Example AHA-focused week
- Mon: moisturizer only
- Wed: AHA night, then moisturizer
- Fri: moisturizer only
- Sun: AHA night, then moisturizer
Example BHA-focused week
- Tue: BHA leave-on or cleanser, then moisturizer
- Thu: moisturizer only
- Sat: BHA leave-on or cleanser, then moisturizer
Both schedules assume morning sunscreen every day. The difference is where the exfoliation emphasis goes: surface smoothing for AHAs, pore-focused clearing for BHAs.
9.2 Poly Hydroxy Acids and Gentle Exfoliation Strategies
Poly hydroxy acids (PHAs) are exfoliating acids designed to be gentler than many stronger options. They work by loosening the bonds between surface cells, so skin sheds more evenly. The practical difference is that PHAs tend to cause less immediate stinging and redness for many people, especially when the barrier is already irritated.
What Makes PHAs Behave Differently
PHAs include gluconolactone, lactobionic acid, and galactose derivatives. Their larger molecular size slows penetration into deeper layers, which helps limit sudden irritation. They also tend to retain water in the stratum corneum, so the skin often feels more comfortable during the exfoliation window.
A useful way to think about PHAs is “surface management.” They reduce roughness and dullness by improving how cells release, rather than forcing aggressive turnover. That means results are usually gradual, but consistency matters more than intensity.
Choosing the Right PHA for the Skin Concern
Different PHAs pair well with different goals.
- Gluconolactone: Often chosen for sensitive or easily reactive skin because it can be well tolerated while still supporting smoother texture.
- Lactobionic acid: Common for dryness and uneven texture, since it can support hydration while exfoliating.
- Galactose derivatives: Frequently used when a gentle approach is needed for tone and surface refinement.
If you’re building a routine, match the PHA to the client’s “most fragile point.” For example, if the main complaint is roughness with frequent redness, start with a lower-strength PHA and slower frequency.
Concentration and Frequency Without Guesswork
Gentle does not mean “no rules.” PHAs still act as acids, so dose and schedule determine comfort.
A systematic approach:
- Start low: Use the lowest effective concentration available in the product line.
- Start infrequent: Begin once or twice weekly.
- Assess after two to three weeks: Look for reduced roughness without persistent stinging.
- Increase only one variable at a time: Either increase frequency or concentration, not both.
Example: If a client uses a PHA serum on Monday, they should avoid adding another exfoliating product that same day. The goal is to let the skin show you what the PHA alone can do.
Formulation Factors That Influence Tolerance
Even within the same acid family, tolerance varies based on the full formula.
Key formulation elements:
- pH: Lower pH generally increases exfoliating activity but also increases irritation risk. Many PHA products are formulated to balance effectiveness with comfort.
- Humectants and film formers: Ingredients that hold water can reduce the “tight” feeling after exfoliation.
- Buffering systems: They help keep the acid behavior consistent.
- Emollient base: A richer base can improve glide and reduce friction during application.
Example: A PHA product in a lightweight gel may feel stingier than a PHA product in a lotion base, even if the acid type is similar. The skin’s experience depends on the whole system.
Gentle Exfoliation Strategies in Real Routines
PHAs fit best when the routine is designed around barrier stability.
Strategy A: Single-Active Days Use PHA on one day, keep the rest of the routine simple.
- Morning: cleanser, moisturizer, sunscreen.
- Night: cleanser, PHA, moisturizer.
Example: For a client with mild post-acne marks and sensitive cheeks, use PHA twice weekly at night and keep retinoids for other nights only if tolerated.
Strategy B: Layering for Comfort If a client is sensitive, apply moisturizer first, then PHA, then moisturizer again. This “buffer layer” can reduce direct acid contact.
Example: A client who reports mild stinging after PHA can switch from direct application to moisturizer-first layering for two weeks, then reassess.
Strategy C: Gradual Escalation of Surface Refinement Use PHA to improve texture first, then expand goals.
- Weeks 1–2: focus on comfort and smoothness.
- Weeks 3–6: if tolerated, increase frequency slightly.
- After improvement: maintain with a steady schedule.
Mind Map: Poly Hydroxy Acids and Gentle Exfoliation Strategies
Monitoring and Adjusting When Skin Says “Not Today”
If stinging is sharp, redness lasts beyond the next day, or the skin feels tight and uncomfortable repeatedly, reduce frequency first. If the issue persists, lower concentration or pause until the skin returns to baseline comfort. The best exfoliation plan is the one the skin can repeat without accumulating irritation.
Example: A client who starts PHA twice weekly but develops ongoing redness should drop to once weekly for two weeks, then decide whether to continue or switch to a lower-strength option.
9.3 Lactic Glycolic Salicylic and Mandelic Acid Formulation Considerations
A well-built exfoliant formula starts with a simple question: what job should the acid do on the skin surface and in the upper layers? Lactic, glycolic, salicylic, and mandelic acids differ in how they dissolve in water, how they move through skin, and how they influence irritation risk. A good formulation plan treats those differences like tools in a kit—use the right one for the concern, then control the conditions that make stinging and redness more likely.
Foundational Chemistry and Skin Behavior
Lactic acid is water-soluble and tends to feel gentler than smaller acids at comparable pH because it is larger and less aggressive in penetration. It supports smoother texture and moisturized feel, especially when paired with humectants.
Glycolic acid is smaller and often more effective for surface renewal, but it can be more irritating when pH is low or when the formula lacks buffering and barrier support.
Salicylic acid is oil-soluble, which helps it work in and around pores. It is often chosen for blackheads and clogged follicles, but it can be drying if the formula doesn’t include adequate emollients and a careful pH strategy.
Mandelic acid is larger than glycolic and tends to be better tolerated while still supporting exfoliation and tone improvement. It’s a frequent choice when you want noticeable results without pushing irritation too hard.
A practical formulation rule: the same “percent acid” can behave very differently depending on pH, solvent system, and the presence of buffering agents and skin-conditioning ingredients.
pH Targeting and Buffering Logic
Acids are strongest when more of the molecules are in the un-ionized form. Lower pH increases exfoliating activity but also increases irritation potential. Instead of chasing the lowest pH, set a target range that matches the intended use.
- For leave-on exfoliating products, aim for a pH that supports efficacy while keeping irritation manageable.
- For rinse-off products, you can use a lower pH because contact time is shorter.
Buffering matters because skin and formula pH can shift during use. A formula that starts at the right pH but drifts during storage or after dilution can end up harsher than expected.
Solvent Systems and Ingredient Compatibility
Acids need a workable environment. Water-soluble acids like lactic and glycolic generally integrate easily into aqueous systems. Salicylic acid often requires solubilizers or specific emulsifier systems to prevent graininess and uneven dosing.
Compatibility checks should cover:
- Emulsions: acids can destabilize some emulsion types if pH is far from the system’s comfort zone.
- Thickeners: some polymers change viscosity with pH, affecting spread and perceived strength.
- Preservatives: preservative efficacy can shift with pH, so microbial safety and stability must be evaluated together.
A simple example: if salicylic acid is not fully solubilized, you may see sediment. That can cause patchy exfoliation—some areas get more acid than others—leading to uneven irritation.
Blending Strategies for Multi-Acid Formulas
Multi-acid products can be effective, but layering acids without a plan often increases irritation without improving outcomes. Use blending to balance:
- Surface smoothing (lactic and glycolic)
- Pore-focused exfoliation (salicylic)
- Tone support with gentler feel (mandelic)
A systematic approach:
- Choose the primary acid based on the main concern.
- Add a secondary acid only if it improves the texture or pore behavior you’re targeting.
- Keep the total irritation load in check by controlling pH and contact time.
Example: a leave-on toner for rough texture might prioritize lactic or mandelic, then include a small amount of glycolic for extra surface renewal. A spot or targeted serum for clogged pores might prioritize salicylic, then use lactic or mandelic to reduce the “drying edge.”
Stability, Packaging, and Use Conditions
Acid formulas must remain consistent over time. Key checks include:
- pH drift during storage
- color or odor changes that can indicate degradation
- sedimentation for poorly solubilized salicylic systems
- container compatibility to avoid leaching or corrosion
Packaging also affects user experience. Pumps reduce contamination and help maintain consistent dosing, while jars can introduce water and microbes, which can indirectly destabilize the formula.
Irritation Control Through Formulation Support
If you want exfoliation without turning the skin into a red flag, include barrier-supporting components that reduce friction and water loss. Humectants help maintain hydration during exfoliation, and emollients reduce the “tight” feeling that often leads to overuse.
A useful example workflow for a multi-acid lotion:
- Start with a pH that supports efficacy but isn’t extreme.
- Ensure salicylic is fully solubilized or well-dispersed.
- Add humectants for comfort.
- Add emollients to reduce dryness.
- Validate viscosity so the product spreads evenly.
Mind Map: Multi-Acid Formulation Decision Flow
Example: Building a Balanced Leave-On Exfoliating Lotion
Imagine a lotion intended for rough texture with occasional clogged pores. A sensible plan is to prioritize lactic or mandelic for smoother feel, then add a modest amount of glycolic for extra surface renewal. Include salicylic only if the formula can solubilize it cleanly and if the pH and emollient system are tuned to prevent dryness.
The success criteria are straightforward: the lotion should spread evenly, remain stable without sediment, and maintain a pH that doesn’t drift into a harsher zone. If any of those fail, the formula may still “work” on paper, but it will likely feel inconsistent on skin.
9.4 Neutralization Timing and Post Treatment Barrier Support
After a chemical exfoliation service, the goal is simple: stop the active from continuing to work once the target endpoint is reached. Neutralization timing is the difference between controlled surface renewal and unnecessary barrier stress. Timing also determines how well your post-treatment barrier support products can do their job.
Foundational Timing Concepts
Chemical exfoliation acts in two phases. First is the contact phase, when acids interact with the stratum corneum and loosen surface cohesion. Second is the continuation phase, when residual product and ongoing chemical activity can keep affecting the skin even after you’ve “removed” the visible layer.
Neutralization timing is therefore about managing three variables:
- Contact time: how long the active stays on the skin.
- Residual product: what remains in creases, around hairlines, and in uneven application.
- Skin response: redness, warmth, and sensitivity that can indicate you’ve reached the intended endpoint.
A practical endpoint is not “no sensation.” Mild warmth can be normal, but escalating burning, rapidly spreading redness, or visible frosting beyond the expected pattern means you should shorten the continuation phase by acting sooner.
Neutralization Timing Workflow
Use a consistent sequence so your timing is repeatable across clients.
- Start a timer at first full coverage rather than at the first swipe. Uneven coverage creates uneven continuation.
- Monitor at short intervals during the last third of the planned contact time. This is where you decide whether to neutralize on schedule or slightly early.
- Neutralize promptly once the endpoint is reached. If your protocol calls for a fixed time, still adjust when the skin response diverges.
- Rinse thoroughly after neutralization. Neutralizer alone is not a “rinse substitute,” because residues can keep the skin exposed to reactive ingredients.
A helpful example: if a client’s skin is more reactive than usual, you might neutralize 30–60 seconds earlier than the standard contact time, then rinse longer to remove residual product from the T-zone and around the mouth.
Choosing Neutralization and Rinsing Strategy
Neutralization products vary by service protocol, but the logic stays the same: neutralize the active and remove it. If you neutralize and then leave residue behind, you’ve only changed the chemistry, not the exposure.
Consider these practical details:
- Application thickness matters. Thicker layers trap more active and increase residual risk.
- Hairline and nasolabial folds trap product. Spend extra time rinsing those areas.
- Water temperature affects comfort. Use comfortably cool to neutral water to reduce post-treatment warmth.
Post Treatment Barrier Support Principles
Once the active is stopped, the skin still needs help. The barrier may be temporarily disorganized, and the skin can lose water more easily. Barrier support products should focus on hydration, lipid replenishment, and calming.
A systematic post-treatment routine:
- Immediate soothing: apply a calming, low-irritation layer to reduce perceived heat and support comfort.
- Hydration first: use humectants to pull water into the outer layers.
- Seal and protect: apply a light occlusive or film-former to reduce transepidermal water loss.
- Avoid new irritants: skip strong actives for the next 24–72 hours depending on the service intensity.
Example for a typical client: after neutralization and rinsing, apply a soothing gel, then a ceramide-containing moisturizer. Finish with a thin layer of a barrier-support cream if the skin feels tight or looks dry.
Mind Map: Neutralization and Barrier Support
Integrated Example Scenarios
Scenario 1: Standard sensitivity, planned contact time met
- Neutralize at the scheduled time.
- Rinse thoroughly, especially around the mouth.
- Apply soothing gel, then ceramide moisturizer, then a thin protective layer.
Scenario 2: Reactive skin, early endpoint signs
- Neutralize 30–60 seconds early.
- Rinse longer to remove residual product.
- Use a simpler post-treatment routine: soothing first, then hydration, and only a light seal if needed.
Scenario 3: Uneven application risk
- If coverage was uneven, treat neutralization as a “remove and reset” moment.
- Rinse more carefully to prevent pockets of residual active.
- Follow with barrier support that prioritizes comfort and water retention.
Neutralization timing and barrier support work together: timing stops the chemistry, and barrier support manages the skin’s immediate recovery needs. When both are handled deliberately, the result is controlled exfoliation with fewer surprises.
9.5 Contraindications and Risk Controls for Resurfacing Services
Resurfacing changes the skin’s surface barrier on purpose, so the goal is simple: match the service to the skin’s current tolerance and prevent avoidable complications. Risk controls start before the first product touches the face and continue through aftercare.
Foundational Contraindication Logic
Contraindications fall into three practical buckets: skin not ready, skin not safe, and skin not appropriate for the chosen method.
- Skin not ready means the barrier is already compromised. If the stratum corneum is inflamed or actively irritated, additional disruption can prolong recovery.
- Skin not safe means there is an infection, a healing wound, or a condition that can worsen or spread with resurfacing.
- Skin not appropriate means the method and depth don’t match the concern or the client’s risk profile.
A useful rule of thumb: if you cannot confidently explain why the skin will tolerate the procedure, you should not proceed.
Skin Not Ready
Avoid chemical or mechanical resurfacing when there is active irritation such as burning, widespread redness, or visible peeling that is not clearly controlled. Also avoid when there is recent over-exfoliation from home products, especially if multiple actives were used close together.
Easy example: A client used a strong exfoliating cleanser plus a leave-on acid at night for three days and now reports stinging during cleansing. Even if the goal is “smoother texture,” the skin is already in a high-sensitivity state, so the safer move is to pause resurfacing and focus on barrier recovery.
Skin Not Safe
Do not perform resurfacing over active infections (herpes simplex outbreaks, impetigo, infected folliculitis), open wounds, or recent burns. Avoid over unhealed surgical sites and areas with significant trauma.
Also treat post-inflammatory hyperpigmentation risk seriously: resurfacing can increase pigment transfer when the skin is inflamed or when sun exposure is uncontrolled.
Easy example: A client has a small herpes outbreak near the lip. Resurfacing can worsen the lesion and increase spread risk, so the correct control is to defer and follow a medical clearance pathway.
Method Mismatch and Depth Risk
Risk rises when the chosen method is too aggressive for the client’s skin type, tolerance, and the specific concern.
- Chemical exfoliation: stronger acids or longer contact times increase irritation and downtime.
- Mechanical exfoliation: higher pressure or aggressive particle selection increases micro-injury.
Easy example: A client with very dry, sensitive skin wants “fast results” for uneven tone. If the plan uses a high-strength exfoliant or heavy mechanical pressure, the likely outcome is prolonged redness and more pigment risk. A safer plan uses gentler resurfacing or delays until tolerance improves.
Risk Controls Before the Service
- Intake screening: document current actives, recent procedures, skin history, and any tendency toward abnormal healing.
- Timing check: confirm adequate spacing from recent waxing, laser, injections, peels, or at-home strong actives.
- Sun exposure control: if the client has had recent unprotected sun exposure, postpone or reduce intensity.
- Patch testing when appropriate: for new clients or new product systems, use a small controlled test area to observe tolerance.
- Baseline photos and notes: record redness, dryness, and texture so you can compare response.
Risk Controls During the Service
- Start conservative: use the lowest effective intensity and shortest contact time.
- Monitor continuously: watch for persistent burning, unusual swelling, or rapid color change.
- Neutralization discipline: for chemical exfoliation, follow the correct neutralization steps and timing so the process stops predictably.
- Hygiene and cross-contamination control: sanitize tools and prevent product transfer between clients.
Easy example: During a peel, a client reports sharp burning that does not fade quickly. The risk control is to stop, neutralize as required, and reassess rather than “pushing through.”
Risk Controls After the Service
Aftercare is part of the procedure, not an optional add-on.
- Barrier-first home routine: use gentle cleansers and simple moisturizers; avoid new actives until the skin is calm.
- Sun protection: strict photoprotection reduces pigment risk during recovery.
- Redness and irritation monitoring: provide clear thresholds for when to contact the provider.
Easy example: If a client’s skin is still tight and red at the expected recovery point, they should pause any exfoliating products and focus on hydration and barrier support.
Mind Map: Contraindications and Risk Controls
Case Example: Choosing Safety over Speed
A client with mild acne scarring requests a strong resurfacing session for the next weekend. Intake reveals recent at-home retinoid use and a history of post-inflammatory hyperpigmentation after irritation.
Risk control decisions:
- Defer the high-intensity plan.
- Use a gentler resurfacing approach or focus on barrier stabilization first.
- Set a recovery-based timeline rather than a calendar-based one.
The outcome is not “less effective,” it is more predictable: the skin is more likely to recover cleanly, which supports better long-term appearance.
10. Microdermabrasion and Mechanical Exfoliation Techniques
10.1 Abrasive Selection and Particle Size Effects on Outcomes
Abrasive exfoliation works by controlled friction: particles move across the stratum corneum, lifting loosened cells and smoothing rough texture. The outcome depends on particle size, shape, hardness, and how much force and time the tool applies. Particle size is the easiest variable to reason about, but it only makes sense when paired with skin sensitivity and the service goal.
Core Concepts of Abrasive Particle Size
Smaller particles generally create a more uniform, gentler surface effect because they contact fewer cells per unit time and remove less material per pass. Larger particles tend to produce faster visible smoothing, but they also increase the risk of micro-tears, post-procedure redness, and uneven rebound dryness.
A practical way to think about it: particle size controls the “step height” of removal. If the steps are too tall for the client’s barrier tolerance, the skin responds with inflammation, which can look like irritation even when the technique is correct.
Particle Size and Expected Outcomes
Fine Particles
Fine abrasives are typically used for surface refinement and clients who are reactive, dry, or prone to irritation. They can improve the look of dullness and help makeup sit more evenly. Because removal is modest, the barrier usually recovers quickly when post-care is consistent.
Example: A client with roughness from dehydration rather than thick buildup benefits from a fine abrasive setting for a short contact time, followed by immediate barrier support.
Medium Particles
Medium abrasives balance visible smoothing with manageable risk. They are often appropriate for mild comedonal congestion, uneven texture, and early hyperkeratosis. Medium particles can still be too aggressive if the client has compromised barrier function, so technique matters.
Example: For a client with mild forehead bumps, medium particles used with light pressure and short passes can reduce texture without turning the session into a “redness marathon.”
Coarse Particles
Coarse abrasives remove more material per pass and can be useful for stubborn thickened areas. The tradeoff is higher likelihood of irritation, especially on cheeks and around the mouth where skin is thinner.
Example: On localized callused-like roughness, coarse particles may be appropriate for brief, targeted work, while the rest of the face stays on a finer setting.
Shape and Hardness Matter More Than People Expect
Particle size is only half the story. Angular particles can cut more than rounded ones at the same size. Harder particles maintain cutting action longer, which can increase removal even if the particle size is unchanged.
Example: Two abrasives with the same particle size can behave differently if one is more angular. The more angular option may require less pressure to avoid over-exfoliation.
How Particle Size Interacts with Pressure and Time
Abrasive removal is not a single-variable equation. Pressure increases contact force, and time increases the number of passes. If you increase particle size, you usually need to reduce either pressure, time, or both.
A simple rule for consistent outcomes: when particle size goes up, contact intensity should go down.
Example: If you move from fine to medium particles, keep the same number of passes but reduce pressure, then reassess skin response before continuing.
Skin Response Monitoring During the Service
Watch for early signs that the abrasive is exceeding barrier tolerance. Mild transient pinkness can be normal, but persistent bright redness, stinging that escalates quickly, or visible pinpoint bleeding suggests the removal is too deep or too forceful.
Example: If a client reports sharp stinging during the first few passes, pause, reduce pressure, switch to finer particles, and extend recovery support rather than pushing through.
Mind Map: Abrasive Selection Logic
Example Workflow for Choosing Particle Size
- Start with the client’s barrier status. If the skin is dry, recently irritated, or shows active sensitivity, choose fine particles.
- Match the goal to the removal level. For mild texture, fine or medium is usually enough.
- Use medium particles only if the client tolerates the first short pass without escalating stinging.
- Reserve coarse particles for localized thickened areas, and keep the rest of the face on a finer setting.
- Adjust intensity based on response. If redness increases quickly, reduce pressure, shorten contact time, or switch to finer particles.
Practical Takeaways
Particle size shapes removal depth and comfort. Fine particles prioritize tolerance and quick recovery, medium particles aim for balanced smoothing, and coarse particles are for targeted thick buildup with stricter control. The best results come from pairing particle size with pressure and time, then letting skin response guide the next move.
10.2 Suction Settings and Pressure Control for Comfort and Safety
Suction settings control how strongly the device pulls skin and how much mechanical stress is applied. Pressure control is not just about comfort; it also affects redness duration, bruising risk, and how evenly exfoliation occurs.
Foundational Principles of Suction Mechanics
Suction creates a pressure gradient between the device head and the skin surface. Higher suction generally increases lift of the stratum corneum and can improve visible exfoliation, but it also increases the chance of micro-injury if the skin is held too long or the area is too sensitive.
Comfort is influenced by three variables: suction strength, contact time, and how much skin is allowed to tent into the opening. If the skin is pulled too aggressively, the client feels sharp discomfort and the operator tends to reduce contact time, which can create uneven results.
Safety is influenced by how the skin responds during the session. A healthy response is mild, uniform erythema that fades within a short window. Excessive erythema, pinpoint bleeding, or persistent tenderness indicates the mechanical load was too high.
Pressure Control Workflow for Consistent Results
Start with a baseline setting appropriate for the client’s skin sensitivity and the device head size. Then use a short “test pass” on a low-risk area to confirm skin response before treating the full zone.
Maintain even pressure by using the device’s intended glide method rather than pressing harder when suction feels weak. If you need more effect, adjust suction incrementally or reduce the distance between passes, not the force of your hand.
Use a predictable pass pattern: straight, overlapping strokes with consistent speed. Speed matters because slower movement increases dwell time, effectively raising the mechanical load even if suction is unchanged.
Choosing Settings by Skin Response and Area
Different body areas tolerate mechanical stress differently. Cheeks and forehead often handle moderate suction better than the periorbital region, where skin is thinner and more reactive.
A practical approach is to set suction to “comfortable but noticeable” and then refine based on response:
- If the skin shows no change after the test pass, increase suction one step or slow the pass slightly.
- If the skin turns red quickly and feels hot or sharp, decrease suction one step or increase pass speed.
- If you see uneven lifting or patchy redness, check technique first: head angle, overlap consistency, and whether the skin is being dragged.
Comfort Checks During Treatment
Comfort checks should be built into the rhythm of the session. Ask the client to rate discomfort early, then again after the first minute in a new zone.
Watch for objective cues:
- Mild, even pinkness suggests the setting is within tolerance.
- Bright red blotches or a “stinging” sensation suggests suction is too high or dwell time is too long.
- Any sign of bruising means you reduce suction and shorten contact immediately.
If discomfort rises during a pass, stop, release suction, and reassess. Continuing while the skin is already reacting usually leads to worse outcomes and more cleanup afterward.
Advanced Control Variables Operators Can Manage
Head fit and seal: A poor seal reduces effective suction and tempts the operator to compensate with higher settings. Ensure the head sits flat and the skin surface is clean and dry.
Skin hydration state: Very dry skin can feel tight and react quickly. Very oily skin can reduce friction and change how the head glides, affecting dwell time. Adjust suction and technique rather than forcing aggressive settings.
Angle and edge effects: Tilting the head concentrates suction at the edge, increasing localized stress. Keep the head aligned to the skin plane.
Session pacing: Fatigue and rushing increase dwell time. Use a timer for each zone so speed stays consistent.
Mind Map: Suction Settings and Pressure Control
Example: Setting Adjustment for a Sensitive Client
A client with easily reddened cheeks reports mild stinging during the test pass at a moderate setting. The operator stops suction, releases the head, and waits for the skin to calm. For the next pass, suction is reduced one step and the operator increases pass speed while keeping overlap the same. The result is uniform pinkness without sharp discomfort, and the client can tolerate the full session.
Example: Uneven Lifting on the Jawline
During treatment, the jawline shows patchy redness and the exfoliation looks inconsistent. Instead of raising suction, the operator checks technique: the head is slightly angled and the strokes are too slow near the chin. The operator re-centers the head, improves glide speed, and keeps suction unchanged. The redness becomes more even, and the client reports less pulling.
Example: Preventing Bruising on the Upper Cheek
A client’s upper cheek shows pinpoint bleeding after a longer-than-planned dwell time. The operator immediately stops, releases suction, and lowers suction for the remainder of the session. Passes are shortened, and the operator uses faster, lighter glides with consistent overlap. The rest of the treatment proceeds without further bleeding, and post-care focuses on barrier support rather than additional mechanical stress.
10.3 Treatment Depth Considerations and Skin Response Monitoring
Treatment depth is the practical difference between “effective” and “effective enough to cause problems.” In mechanical exfoliation and energy-assisted resurfacing, depth determines how much tissue is influenced, how quickly the skin recovers, and what you should expect to see during and after the session.
Start with the goal. If the target is surface roughness, you plan for superficial influence. If the goal is deeper texture change, you plan for greater penetration or mechanical reach, but you also plan for longer recovery and tighter monitoring. Depth is not a single setting; it’s the combined result of device output, contact pressure or spacing, treatment time, and the client’s skin characteristics.
Foundational Depth Drivers
Skin thickness varies by body area and client. Even within the face, areas like the cheeks and jaw can behave differently because of differences in barrier robustness and baseline hydration. Pigmentation level matters too: darker skin often shows slower post-inflammatory fading, so you monitor redness and irritation more conservatively.
Device mechanics also matter. For mechanical methods, particle size, suction strength, and contact angle influence how aggressively material is removed. For energy-based methods, the delivered dose and pulse behavior determine how far energy travels and how much heat accumulates.
Finally, technique controls depth. Consistent passes reduce the chance of accidental over-treatment. Overlapping too much in one spot can turn a controlled plan into a patchy one, where some areas are overworked and others are under-treated.
Skin Response Monitoring Framework
Monitoring should be continuous, not a single “check at the end.” You’re looking for response patterns that indicate whether you stayed within the intended depth range.
Use three checkpoints: immediate, early, and recovery-phase.
- Immediate checkpoint: Observe color change, uniformity, and comfort level. Mild, even erythema suggests you reached the intended superficial zone. Uneven blotching or rapid escalation in discomfort suggests localized over-treatment.
- Early checkpoint: Reassess within minutes after the session. Persistent burning, swelling, or patchy heat indicates that the skin is reacting more strongly than expected.
- Recovery-phase checkpoint: Track the next 24–72 hours. You expect gradual improvement in redness and no worsening. If irritation increases after the session, the depth likely exceeded the skin’s tolerance.
A simple rule helps: if the skin response is moving in the wrong direction, you reduce depth next time and shorten exposure time. Your goal is repeatable results, not one dramatic session.
Depth Targets by Skin Concern
Different concerns justify different depth targets.
- Surface texture and dullness: Aim for superficial influence. Expect quick normalization and minimal downtime.
- Roughness from clogged pores: Use moderate depth with careful uniformity. Watch for prolonged redness around the nose and cheeks.
- Stubborn hyperpigmentation drivers: Depth should be conservative because irritation can worsen discoloration. Prioritize barrier support and tolerance before increasing intensity.
If you’re unsure, start shallower. You can always increase in later sessions, but you can’t reverse a too-deep reaction without paying for it in recovery time.
Mind Map: Depth and Monitoring Logic
Example: Adjusting Depth Using Response Signals
A client with mild roughness requests a stronger session. During treatment, you notice erythema that is mostly even, but one cheek area turns darker and the client reports sharper stinging there. You pause, reduce pressure or spacing for the remaining passes, and avoid additional overlap in that zone.
In the early checkpoint, the cheek remains warmer than the surrounding areas. In the recovery-phase checkpoint, redness peaks at 48 hours and then slowly improves, but the treated cheek lingers longer than expected. For the next session, you keep the same overall plan but reduce depth by lowering intensity or shortening contact time, and you add extra barrier-support steps in the home routine.
This is the core monitoring idea: you don’t just record what happened; you translate it into a safer, more consistent depth target for the next session.
10.4 Post Procedure Care for Barrier Recovery and Redness Control
Post-procedure skin care is mostly about two jobs: restoring the barrier’s water-holding ability and calming the inflammatory signals that cause redness. The barrier is not “fixed” instantly; it rebuilds in layers, and your routine should match that timeline.
Foundational Principles for Recovery
Start with the idea that redness is a normal response to controlled stress. Your goal is to reduce excess irritation while still allowing the skin to recover its normal cell turnover. That means you avoid anything that increases friction, heat, or harsh cleansing during the first window.
A useful rule: treat the skin like it just finished a workout. You can support recovery, but you don’t add another intense session immediately.
Immediate Aftercare Window
For the first 24 hours, prioritize gentle cleansing, barrier support, and temperature control.
- Cleansing: Use lukewarm water and a mild, fragrance-free cleanser or skip cleansing if the skin is not oily. Pat dry with a soft towel.
- Moisturizing: Apply a simple moisturizer with humectants and a lipid-supporting base. If the skin feels tight, add a thin layer more rather than switching to a stronger active.
- Redness control: Cool compresses can help if the skin feels hot. Keep compresses brief and clean; stop if the skin becomes more irritated.
- Sun protection: Avoid direct sun. If you must go outside, use a physical barrier like a hat and clothing first.
Example: After a resurfacing service, a client with visible redness applies a bland moisturizer immediately after the appointment, then repeats in the morning and evening. They skip exfoliating toners and any “tingly” products for at least several days.
Barrier Recovery over Days 2 to 7
During this phase, the skin’s surface is stabilizing. You can gradually reintroduce routine steps, but keep the focus on tolerance.
- Moisturizer layering: If dryness persists, use a moisturizer twice daily. If needed, add a thin occlusive layer only on the driest areas.
- Cleansing adjustments: Keep cleansing gentle and brief. Over-cleansing can prolong redness by stripping surface lipids.
- Avoid friction: No scrubs, brushes, or aggressive towel drying. Even “light” exfoliation can restart irritation.
- Active ingredient pause: Pause retinoids, strong acids, and high-strength vitamin C until redness fully settles and the skin feels comfortable.
Example: A client who normally uses a retinoid at night waits until the skin no longer stings with plain moisturizer. When they restart, they use it less frequently and monitor for return of redness.
Managing Redness Triggers
Redness often worsens when the skin is repeatedly challenged. Common triggers include heat, sweating, alcohol-based products, fragrance, and tight clothing that rubs.
- Heat: Hot showers and saunas can increase blood flow and prolong redness.
- Sweat and friction: Exercise is not forbidden, but choose lower-intensity options and keep the skin protected from rubbing.
- Product irritation: Avoid fragranced mists, essential oils, and “cooling” gels that contain irritant ingredients.
Example: If a client insists on a workout the day after treatment, they can wear breathable, non-rubbing fabric and cleanse gently afterward, then reapply moisturizer.
Practical Home Care Routine Templates
Use a simple structure so clients don’t improvise.
Day 0 to 1 template
- Cleanse: lukewarm water or mild cleanser
- Treat: cool compress if hot
- Moisturize: bland moisturizer
- Protect: avoid sun and heat
Days 2 to 7 template
- Cleanse: mild cleanser
- Moisturize: twice daily, add occlusive only if needed
- Reintroduce: return to normal routine only when comfortable
Mind Map: Post Procedure Care Logic
Safety Boundaries and When to Escalate
Most mild redness settles with barrier support. Escalation is appropriate when redness is rapidly worsening, pain is significant, or there are signs of infection such as spreading warmth, pus, or fever. In those cases, stop home experimentation and seek clinical evaluation.
Example: A client reports increasing burning after each moisturizer application and visible swelling that spreads beyond the treated area. The correct response is to stop all actives and contact a clinician rather than switching to a stronger soothing product.
Quick Checklist for Consistent Results
- Keep cleansing gentle and brief.
- Moisturize early and often, but avoid adding new actives.
- Control heat, friction, and sun exposure.
- Restart normal products only when the skin feels comfortable, not just when it looks better.
This approach reduces the chance that redness becomes a feedback loop where irritation keeps the barrier from fully recovering.
10.5 Hygiene Practices for Consumables and Equipment Maintenance
Hygiene is not a separate task from skin care; it is part of the service itself. When consumables and equipment are handled consistently, you reduce cross-contamination, prevent product spoilage, and keep tools performing the way they were designed to.
Core Principles for Clean Workflows
Start with a simple rule: clean comes before contact. Clean hands, clean surfaces, and clean tools are established before anything touches the client’s skin. Then use separation: keep “clean” items in one zone and “used” items in another. If you ever have to think, “Did this touch something used?” treat it as contaminated and replace or reprocess it.
A second rule is time control. Many hygiene failures happen because items sit out too long. For example, a spatula left in a jar of cream can pick up skin oils and bacteria, then contaminate the remaining product. Use single-use portions or dispense into a clean container.
Consumables That Must Be Single Use or Controlled
Not all consumables are equal. Some are designed for one client and one session; others can be reused only if they are reprocessed correctly.
Use single-use items for anything that contacts skin directly and cannot be reliably disinfected, such as:
- Cotton rounds, gauze, and wipes
- Disposable spatulas and applicators
- Lancet-style tools and single-use blades
- Mask liners and neck strips
For controlled reuse, follow the “clean-to-dirty” path. For instance, a reusable bowl can be disinfected, but a reusable brush that touches skin cannot be treated like a reusable bowl unless it is properly cleaned and disinfected between clients.
Example: During a hydration mask service, dispense the mask product into a small cup for that client. Discard the cup after use. Do not return leftovers to the original jar.
Equipment Cleaning and Disinfection Sequence
Equipment hygiene usually follows four steps: remove debris, wash, disinfect, and dry. Skipping steps is a common reason tools still feel “clean” but fail hygiene standards.
- Remove debris: Wipe off visible residue first. Dried product is harder to remove and can shield microbes.
- Wash: Use detergent or an approved cleaning agent to remove oils and residues.
- Disinfect: Apply an appropriate disinfectant with correct contact time. Short contact times are a frequent mistake.
- Dry: Drying matters because moisture can support microbial survival and can also affect tool performance.
Example: A metal comedone extractor should be cleaned immediately after use. If residue dries on the tip, the disinfectant may not reach the surface effectively.
Maintenance for Tool Performance and Safety
Maintenance is hygiene with a longer timeline. Worn or poorly maintained tools can create micro-tears in skin, increase friction, and make cleaning harder.
- Inspect regularly: Check for cracks, loose parts, and damaged tips.
- Lubricate only when appropriate: Some tools require light lubrication to prevent corrosion and sticking. Use only products compatible with the tool and cleaning process.
- Replace worn consumable components: Replace filters, pads, or replaceable heads according to the manufacturer’s instructions.
Example: If a suction device loses consistent airflow, cleaning may be correct but the seal may be failing. A failing seal can also increase contamination risk because residue is harder to remove.
Storage and Labeling Practices
Storage prevents “clean items becoming dirty.” Keep disinfected tools in closed containers or covered trays. Store consumables in sealed packaging until use.
Labeling reduces mix-ups. Mark:
- Opened disinfectant bottles with date and time
- Prepared solutions with contents and expiration window
- Any pre-dispensed portions that are allowed for limited time use
Mind Map: Hygiene Practices for Consumables and Equipment Maintenance
Practical Examples for Common Service Moments
Example 1: Cleansing and exfoliation setup Lay out clean items first. Open disposables only when you are ready to use them. If you switch tasks mid-service, keep unused items covered and do not place them on a surface that has held used items.
Example 2: Device attachments and contact surfaces If a device uses removable tips or heads, treat each attachment as a separate hygiene unit. Clean and disinfect attachments between clients, then store them in a covered container until the next use.
Example 3: Towels and linens Use fresh linens for each client. If linens are used as a barrier during a service, they still count as contaminated once they contact skin. Do not reuse linens “because they look clean.”
Quick Hygiene Checks That Catch Errors Early
Before the first client, confirm disinfectant is within its usable time window and that tools are dry. During the service, watch for the moment when clean hands touch used items, then return to clean tasks. After the service, reprocess tools immediately rather than letting residue set.
A consistent workflow turns hygiene from a checklist into a habit: clean zone, clean hands, correct sequence, correct storage. That’s the whole system, and it works because it removes uncertainty.
11. Hydration Therapies and Delivery Systems for Actives
11.1 Humectant Based Hydration Approaches and Layering Strategies
Hydration products work best when you treat “water in the skin” as a system, not a single ingredient. Humectants pull water toward the outer layers, but they need a plan for where that water comes from and how it stays put long enough to help.
Core Humectant Concepts for Practical Use
Humectants are water-attracting molecules that increase the water content of the stratum corneum. Common examples include glycerin, propanediol, hyaluronic acid, and panthenol. Their performance depends on three variables: the starting dryness level, the surrounding humidity, and whether the skin barrier can slow water loss.
A simple way to think about it: humectants are the “magnet,” but the barrier is the “lid.” If the lid leaks, the magnet can only do so much.
Layering Strategy from Clean Skin to Sealed Finish
Layering is not about stacking products until something feels slippery. It is about matching each layer to a job.
- Cleanse gently and avoid squeaky dryness. Over-stripping increases water loss and makes humectants work against a leak.
- Apply a humectant layer on slightly damp skin. Damp skin gives humectants immediate water to bind. If skin feels fully dry, re-wet with a fine mist or a damp cloth.
- Add a supportive emollient layer. Emollients improve comfort and reduce friction, helping the skin tolerate actives and daily movement.
- Seal with an occlusive or film former when needed. This step reduces evaporation. It is especially useful for dry, flaky, or post-procedure skin.
Mind Map: Humectant Hydration System
Choosing the Right Humectant Approach by Skin Behavior
If your client has tight, dry skin, start with glycerin or propanediol-based products and follow with a light emollient. If the skin is flaky or rough, add a sealing step after the humectant layer. If the skin is oily but dehydrated, use humectants with a lighter emollient and avoid heavy occlusives that can feel greasy.
For sensitive skin, prioritize fewer steps and avoid strong exfoliation the same day as a hydration reset. Humectants can reduce discomfort, but they do not replace barrier repair when the barrier is actively irritated.
Example: Simple Two-Step Routine for Dry Skin
- Step 1: Apply a humectant serum or lotion to damp skin.
- Step 2: Seal with a thin layer of a cream containing emollients and a modest occlusive.
Reasoning: the first step increases water content, and the second step slows evaporation so the water stays long enough to improve surface feel.
Example: Three-Step Layering for Post-Exfoliation Comfort
- Step 1: Humectant product on damp skin.
- Step 2: Barrier-supporting emollient cream.
- Step 3: A light occlusive layer only where dryness shows up most.
Reasoning: after exfoliation, the barrier is temporarily less efficient. Targeted sealing reduces the “drying effect” that can otherwise appear within hours.
Advanced Layering Details That Prevent Common Mistakes
- Don’t apply humectants to fully dry skin. If skin is dry, humectants may feel tacky without improving comfort.
- Avoid over-massaging. Rubbing can increase irritation and worsen water loss.
- Match occlusive strength to need. A thin film is often enough; heavy occlusives are for clearly compromised dryness.
- Use consistent timing. Applying after cleansing and before the skin fully cools helps maintain the dampness window.
Mind Map: Layering Workflow in the Treatment Room
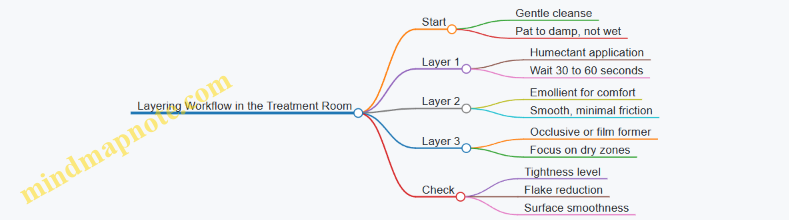
Monitoring Results Without Guesswork
Track two signals: tightness (how the skin feels within the first hour) and surface behavior (whether flaking reduces by the next day). If tightness persists, the barrier lid is likely insufficient or the humectant was applied to dry skin. If the skin feels comfortable but looks dull, the emollient layer may be too light for that client’s dryness pattern.
11.2 Occlusive Film Formers for Barrier Repair Support
A barrier-repair product needs two jobs: reduce water loss and help the skin rebuild a stable surface. Occlusive film formers mainly handle the first job by forming a semi-closed layer that slows evaporation. The second job is supported indirectly because less dehydration means enzymes and barrier lipids can work closer to their normal rhythm.
How Occlusion Works in Plain Terms
Occlusion is not “grease on top.” It’s a controlled reduction of transepidermal water loss (TEWL). When the film is continuous, water molecules have fewer escape routes. When the film is too thick or too occlusive for the skin type, it can feel heavy and may trap heat, which is why texture and application amount matter.
A useful mental model is a “lid with airflow.” A good film former reduces evaporation while still allowing the skin to tolerate normal daily movement and cleansing. This is why many barrier routines use film formers in short, targeted steps rather than as the only layer.
Mind Map: Occlusive Film Formers and Their Roles
Ingredient Families and What They Tend to Do
Petrolatum and mineral oil derivatives create a strong, long-lasting occlusive layer. They’re especially helpful when the skin feels tight, flaky, or post-procedure dry. Example: after a gentle chemical exfoliation session, a thin layer over the treated area can reduce the “dry sting” that often appears as the surface re-equilibrates.
Waxes and fatty alcohol esters can form a more structured film. They often feel less sticky than pure petrolatum, but they still reduce evaporation. Example: a balm-style moisturizer with a waxy base can be used at night on hands or elbows where TEWL is high.
Silicone elastomers and film-forming silicones spread easily and create a flexible barrier that can improve slip and reduce friction. They’re often a good choice when clients dislike heavy occlusion. Example: a silicone-based moisturizer can be applied after a hydrating serum to help the skin feel smoother without the same level of tack.
Fatty acids and lipid blends support barrier repair by contributing to surface lipids. They may be less “lid-like” than petrolatum but can integrate better with other barrier-support ingredients. Example: a cream containing fatty acids and cholesterol-type components can be used as the daytime layer, while petrolatum is reserved for nights during flare-ups.
Layering Strategy That Actually Makes Sense
Occlusive film formers work best when paired with a humectant step. Humectants bring water into the upper layers; occlusives then slow its escape. If you apply occlusion to very dry skin without any humectant, the film can feel tight and may not improve comfort as much.
Simple layering example:
- Cleanse gently and pat dry.
- Apply a humectant-rich serum or lotion.
- Wait about 30–60 seconds so it settles.
- Apply a small amount of occlusive film former.
For very sensitive skin, use a smaller amount and increase only if comfort improves. For acne-prone skin, prioritize lighter film formers (often silicone-based) and reserve heavier occlusives for localized dry patches.
Advanced Details for Better Outcomes
Amount control: Occlusion is dose-dependent. A “thin enough to disappear” layer often performs better than a thick layer that sits on top. If the product smears or pills, reduce quantity or change the order of application.
Timing after irritation: After exfoliation or mechanical work, the skin may be inflamed and more permeable. Occlusion can reduce TEWL, but it can also increase the sensation of heat. Example: if a client reports burning after a service, switch to a gentler barrier cream first, then use a film former only once the stinging settles.
Compatibility with cleansing: Some occlusive layers require a more thorough cleanse to remove residue. Example: if a client uses a strong occlusive at night, recommend a gentle cleanser in the morning and avoid harsh scrubbing that can worsen surface disruption.
Quick Example Protocol for Barrier Recovery
- Day 1–2: Humectant moisturizer twice daily; light film former in the morning if needed.
- Day 3–5: Add a thicker occlusive only at night or on the driest zones.
- Ongoing: Maintain with barrier-support cream; use occlusion only when tightness or flaking returns.
This approach keeps the barrier supported without turning every day into a heavy-lotion marathon. The goal is steady comfort and stable surface function, not maximum coverage.
11.3 Delivery Methods for Serums and Masks in Treatment Rooms
Serums and masks work differently because they sit on the skin for different lengths of time and they deliver actives through different “routes.” A serum is usually applied in thin layers with controlled friction, while a mask is designed to hold contact longer and create a more stable environment at the surface. In a treatment room, the goal is to match delivery method to skin barrier status, tolerance, and the active’s job.
Foundational Concepts for Delivery
Contact Time and Skin Tolerance
Contact time changes how much active can interact with the outer layers. If the barrier is compromised, longer contact can increase irritation even when the active is “correct.” A practical rule: start with shorter contact for reactive skin, then extend only after the skin shows stable comfort.
Layering Order and Why It Matters
Layering isn’t just about stacking products; it’s about controlling water movement and film formation. Typically, apply water-based products before heavier occlusive ones so the skin can hydrate first, then lock in. If you reverse the order, you may reduce penetration and create a slippery surface that makes even gentle massage less consistent.
Friction and Massage Pressure
Massage can improve distribution, but it also increases heat and mechanical stress. Use light, slow strokes for serums and reserve deeper massage for well-tolerated skin. Think of massage as “evening out coverage,” not “working the product in until it disappears.”
Serum Delivery Methods in the Treatment Room
Hand Application with Controlled Spreading
This method is best for serums that need even distribution without heavy rubbing. Use a small amount, warm it between fingers, then press and glide lightly. Example: for a niacinamide serum, apply in two thin passes—first to cheeks and forehead, second to blend edges—so the amount stays consistent across the face.
Brush or Applicator Spreading for Uniform Coverage
A soft brush or dedicated applicator can reduce uneven streaking, especially on textured areas. Example: for a peptide serum, use short brush strokes to cover the T-zone evenly, then lightly tap to settle the film.
Layered Application for Actives with Different Roles
Some treatments benefit from two serum layers: one for hydration support and one for targeted action. Example: apply a hydrating serum first to reduce dryness-related sting, then a second serum with a mild active. Keep the second layer thinner so it doesn’t trap excess moisture and cause pilling.
Mask Delivery Methods in the Treatment Room
Sheet Masks for Stable Contact
Sheet masks provide consistent contact time and reduce the temptation to “keep checking.” Example: for a soothing mask, place it so it fully contacts the jawline and around the nose, then remove after the set time without stretching the material.
Gel and Cream Masks for Controlled Occlusion
Gel masks tend to feel lighter and can be useful when skin is sensitive to heavy films. Cream masks provide more occlusion and can support barrier recovery when used briefly. Example: for dry, tight skin, use a short cream mask session, then follow with a simple moisturizer to prevent dryness rebound.
Clay and Peel-Off Masks for Surface Management
These masks require careful timing because they can dry the surface quickly. Example: for oily skin, apply a thin layer and remove promptly at the recommended time; longer contact can worsen dehydration and trigger more oil production.
Rinse-Off Masks for Clean Finish
Rinse-off masks are useful when you need to remove residue and reset the surface before the next step. Example: after a clarifying mask, rinse thoroughly, pat dry, then apply a barrier-support moisturizer to reduce post-treatment tightness.
Mind Map: Serum and Mask Delivery Decision Flow
Integrated Room Workflow Example
- Assess barrier comfort: If the client reports stinging or visible dryness, choose a hydrating serum first.
- Apply serum in thin layers: Use hand application with light pressure, then wait briefly for the surface to settle.
- Select mask type by tolerance: Use a sheet or gel mask for sensitive skin; use clay only with strict timing.
- Maintain contact without overhandling: Avoid lifting edges to “check progress.”
- Finish with a barrier-support moisturizer: This step reduces dryness rebound and improves comfort.
Practical Example: Two Common Scenarios
Sensitive Skin After Cleansing
Use a hydrating serum first, then a short sheet mask. Keep massage minimal, and seal with a moisturizer immediately after removal.
Oily Skin Needing Surface Refinement
Use a thin clay mask with strict timing, rinse thoroughly, then apply a lightweight serum followed by a non-greasy moisturizer to prevent dehydration-driven oil rebound.
11.4 Steam Heat and Controlled Warming Effects on Skin Behavior
Steam heat is a controlled way to raise skin surface temperature and soften the outer layers enough to improve comfort and treatment efficiency. In a salon setting, the goal is not to “cook” the skin; it is to support safe cleansing, soften debris, and make subsequent steps more predictable.
Foundational Skin Behavior Under Warmth
Warmth changes skin behavior through three main pathways: increased blood flow, softened stratum corneum, and altered water movement.
- Increased blood flow can make skin look more even temporarily because redness and pallor shift with circulation. This is why you should avoid judging long-term redness changes immediately after warming.
- Softened stratum corneum reduces the stiffness of the outer barrier. Think of it like loosening a dried paste: exfoliants and extractions often work more smoothly when the surface is less rigid.
- Altered water movement increases the mobility of water in the upper layers. That can improve pliability, but it also means the skin can feel tight if warming is followed by harsh cleansing or rapid dehydration.
A practical rule: warming improves handling of the skin, but it does not replace barrier support afterward.
How Steam Heat Is Applied in a Controlled Way
Controlled warming depends on three variables: distance, duration, and skin response checkpoints.
- Distance controls intensity. Closer steam delivers more heat to the surface; farther steam warms more gently.
- Duration controls cumulative effect. Short sessions can soften without excessive dryness.
- Response checkpoints prevent “set it and forget it.” You watch for persistent burning, uneven blotching, or sudden discomfort.
A simple workflow is to warm first, then immediately proceed to the step that benefits most from softened surface conditions, such as gentle cleansing or mask application.
Effects on Common Treatment Steps
Cleansing: Warmth helps loosen sebum and surface debris, so a cleanser can lift without excessive rubbing. Example: for normal-to-oily skin, a warm pre-step can reduce the need for repeated passes with a foaming cleanser.
Extraction and Comedone Management: Softening can make plugs easier to release, but it also increases the risk of irritation if pressure is excessive. Example: if you see resistance, you pause and reassess rather than increasing force.
Mask Penetration and Comfort: A warmed surface can improve the feel of hydrating masks and reduce the “cold shock” some clients experience. Example: a gel mask applied after warming often spreads more evenly and feels less sticky.
Post-Warmth Barrier Risk: Warmth can increase transepidermal water loss if the skin is left exposed. Example: if you warm and then wait too long before applying a moisturizer, the skin may feel tight within minutes.
Mind Map: Steam Heat and Skin Behavior
Safety Boundaries and Practical Decision Rules
Steam heat is best treated like a tool with settings, not a blanket. Use these decision rules:
- Stop immediately if burning persists, skin becomes patchy, or the client reports sharp discomfort.
- Avoid warming over compromised barrier such as active dermatitis, open wounds, or severely inflamed acne where heat can worsen symptoms.
- Keep timing tight: warm, then proceed to the step that benefits most, then seal with appropriate aftercare.
Example: Two Client Scenarios
Example: Oily Skin Prep for Cleansing
- Warm at a moderate distance for a brief period.
- Follow with a gentle cleanser using minimal passes.
- Finish with a lightweight moisturizer to reduce post-warm tightness.
Example: Dry or Sensitive Skin Comfort Support
- Use a gentler approach with shorter duration.
- Skip aggressive cleansing afterward; choose a low-foam, non-stripping cleanser.
- Apply a barrier-supporting moisturizer immediately to limit water loss.
Aftercare That Makes the Warming Worth It
After warming, the skin needs a quick “closure step.” Apply a moisturizer that matches the client’s tolerance and the service goal, and avoid stacking multiple drying actions right after steam. If you keep the sequence tight—warm, treat, moisturize—the skin behavior you want is consistent, and the client experience stays comfortable.
11.5 Monitoring Hydration Response and Adjusting Treatment Frequency
Hydration response is not just “skin feels better.” It’s a measurable shift in comfort, barrier stability, and how quickly the skin returns to baseline after a treatment session. The goal is to match treatment frequency to the skin’s recovery speed, not to the therapist’s schedule.
Foundational Signals to Track
Start with a small set of observable indicators so you can compare sessions without guesswork.
- Comfort: note tightness, stinging, and itch during the first 24 hours. Example: if a client reports mild tightness only on day one and no stinging, that’s a good sign the barrier tolerated the session.
- Visual barrier cues: look for persistent redness, flaking that increases after day two, or uneven dryness patches. Example: dryness that improves immediately but returns worse by day three suggests the treatment was too aggressive or too frequent.
- Texture and glide: assess how the skin feels during cleansing and after product application. Example: if the skin becomes rougher after repeated sessions, the exfoliation or mechanical steps may be outpacing barrier repair.
- Product behavior: watch whether hydration products absorb quickly and evenly or sit unevenly. Example: patchy absorption often means the barrier is still disrupted, even if the skin looks “less dry” at first.
Mind Map: Hydration Monitoring Workflow
A Simple Scoring Method That Stays Practical
Use a 0–3 scale for three categories: comfort, visual barrier, and texture.
- 0: no change or worsening
- 1: slight improvement but not stable
- 2: clear improvement that holds through day three
- 3: strong improvement with stable comfort and texture
Example: A client scores comfort 2, visual barrier 2, texture 1. That pattern often means hydration is helping, but the skin surface may need gentler handling or more barrier-supporting steps before increasing intensity.
Interpreting Patterns to Adjust Frequency
Frequency should change when the skin’s recovery pattern changes.
-
Improves and stabilizes
- Signs: comfort improves on day one, redness is minimal, and texture stays smoother through day three.
- Action: keep the current interval. Example: if you’re doing hydration sessions every 7–10 days and the client holds improvement, continue.
-
Improves then regresses
- Signs: day-one comfort improves, but by day three the skin feels tighter, looks drier, or shows increased flaking.
- Action: extend the interval or reduce intensity. Example: move from every 7 days to every 10–14 days, and ensure barrier-supporting steps are included in the next session.
-
No change or worsening
- Signs: persistent stinging, increasing redness, or roughness that grows after each visit.
- Action: pause frequency increases and simplify the in-room plan. Example: keep hydration steps but remove or reduce any mechanical or exfoliating components until comfort stabilizes.
Adjusting the Treatment Plan, Not Just the Calendar
When frequency changes, the session content should usually change too. Hydration can be delivered, but barrier repair determines how long it lasts.
- If the skin is tolerating well, you can keep hydration steps consistent and only adjust frequency.
- If the skin is struggling, prioritize barrier support: more time for gentle occlusive film formation, fewer steps that increase surface stress, and careful product layering.
Example workflow: A client with dehydration and mild irritation receives a hydration mask plus a barrier-support moisturizer. If they regress by day three, the next session keeps the same mask but shortens any warming step and increases the time spent on barrier-support application.
Mind Map: Decision Rules for Frequency
Concrete Example Schedules
- Stable responder: hydration sessions every 10 days for 2–3 visits, then reassess. If scores remain 2–3 through day three, continue the interval.
- Regression responder: start at 10–14 days instead of 7. If scores improve to 2 across comfort and visual barrier, you can gradually shorten to 10 days.
- Worsening responder: stop increasing frequency. Keep sessions spaced and reduce intensity until comfort scores return to at least 1–2 and visual barrier stabilizes.
Documentation That Makes Adjustments Obvious
Record the scores, the client’s home-care adherence, and which in-room steps were used. Example: if a client skips sunscreen or uses a new cleanser, the hydration response may reflect routine changes rather than treatment frequency. Clear notes prevent you from “correcting” the wrong variable.
12. Integrated Skin Care Workflows for Results and Consistency
12.1 Designing Multi Session Protocols for Common Skin Concerns
Multi session protocols work best when each visit has a clear job: calm the skin, restore barrier function, improve the target issue, and then lock in tolerance. Think of it like building a stable base before adding height—your client’s skin will notice the difference.
Step One: Define the Concern Precisely
Start with a short, practical classification based on what you can see and what the client reports.
- Acne prone skin: comedones, inflamed papules, oiliness, and sensitivity to products.
- Hyperpigmentation: uneven tone, post inflammatory marks, and slow fading.
- Dehydration and barrier weakness: tightness, flaking, stinging, and dull texture.
- Texture and roughness: visible scaling, clogged pores, and uneven smoothness.
Example: If a client has both acne and dehydration, your protocol should prioritize barrier recovery first, because aggressive exfoliation can worsen inflammation and prolong healing.
Step Two: Choose a Treatment Goal for Each Session
A simple four session rhythm covers many common cases.
- Session 1: reduce irritation and establish comfort.
- Session 2: begin controlled exfoliation or active delivery.
- Session 3: increase effectiveness while maintaining tolerance.
- Session 4: consolidate results and improve home care adherence.
If the client’s skin is reactive, you can stretch the timeline by adding a “comfort session” where you focus on hydration, gentle cleansing, and barrier support.
Step Three: Match in Room Actions with Home Care
Your in room work should make home care easier, not harder.
- After exfoliation, home care should shift toward gentle cleansing, barrier support, and sun protection.
- After hydration focused sessions, home care should emphasize consistent moisturizing and avoidance of unnecessary actives.
Example: A client who uses multiple strong actives at home may need a temporary “simplify week” so the treatment plan doesn’t fight their routine.
Step Four: Use a Tolerance Ladder
Tolerance is not a yes or no question. Use a ladder so the skin can adapt.
- Low intensity: short contact times, mild exfoliation, or hydration masks.
- Moderate intensity: slightly stronger exfoliation or more consistent active delivery.
- Higher intensity: deeper mechanical work or stronger active schedules only if the skin stayed comfortable.
Rule of thumb: if stinging, persistent redness, or increased flaking occurs, you reduce intensity at the next visit rather than “pushing through.”
Mind Map: Multi Session Protocol Logic
Example: Four Session Protocol for Acne Prone Skin
Session 1: gentle cleanse, soothing hydration, and barrier support. Home care: simplify to cleanser + moisturizer + sun protection.
Session 2: introduce controlled exfoliation (short, mild) and targeted active delivery. Home care: keep moisturizer consistent; avoid adding new actives.
Session 3: increase exfoliation intensity slightly if the client reports no stinging or prolonged redness. Add spot focused treatment rather than full face escalation.
Session 4: focus on maintenance. Home care: reintroduce actives gradually, one change at a time, so you can identify what the skin tolerates.
Example: Four Session Protocol for Hyperpigmentation
Session 1: barrier stabilization and even tone support with hydration and gentle surface smoothing.
Session 2: controlled resurfacing with careful post treatment recovery. Home care: emphasize consistent sun protection and reduce competing strong actives.
Session 3: continue gradual resurfacing while monitoring dryness. Home care: maintain moisturizer and keep active use steady.
Session 4: consolidate results and improve routine consistency. Home care: adjust frequency of actives based on comfort, not just ambition.
Progress Checks That Prevent Protocol Drift
At each visit, record three things: comfort, visible change, and routine adherence. If comfort drops, you lower intensity. If visible change is minimal but comfort is good, you adjust the method or frequency rather than increasing strength immediately.
Session Scheduling That Fits Real Life
For many clients, a weekly schedule works for the first two sessions, then spacing can increase to protect tolerance. If the client has an event, schedule the most intensive step at least several days before, so redness and dryness have time to settle.
A good multi session protocol is less about doing more and more about doing the right amount, in the right order, with the home routine supporting the plan.
12.2 Combining Product Use With In Room Services Safely
Combining take-home products with in-room services works best when you treat the skin like a system with inputs, outputs, and limits. The goal is not to “stack everything,” but to match product functions to what the service is doing that day.
Foundational Rule Set for Safe Pairing
Start with three checks before you choose products for the same client session.
-
Barrier status first. If the barrier is compromised, aggressive actives and high-friction services compete with healing. A simple example: a client with visible peeling and tightness should not receive strong exfoliation and a new retinoid on the same day.
-
Irritation budget. Every service adds stress through heat, friction, occlusion, or chemical action. Products also add stress through pH shifts, penetration enhancers, or strong actives. Example: if you’re doing a chemical exfoliation, keep the home routine for that day focused on gentle cleansing and barrier support.
-
Timing matters. Many actives are fine when spaced out, but risky when layered immediately. Example: apply a soothing, hydrating layer after a service, then resume stronger actives later according to tolerance.
How to Map Service Effects to Product Functions
Think of each in-room service as changing one or more skin variables: hydration, surface renewal, inflammation level, and barrier lipid organization. Then choose products that support the variable you’re targeting.
- Cleansing and steam. These reduce surface debris and temporarily increase skin water content. Pair with humectants and gentle film formers afterward to help water stay put.
- Mechanical exfoliation. This increases surface turnover and can create micro-irritation. Pair with barrier lipids and calming agents, and avoid introducing new strong actives.
- Chemical exfoliation. This changes keratin structure and can alter pH and irritation pathways. Pair with neutralizing and barrier recovery support, and postpone retinoids or strong exfoliants.
- Hydration masks and occlusive wraps. These increase water and reduce water loss. Pair with light hydration first, then use occlusion only if the client tolerates it.
Mind Map: Safe Product and Service Combination
Practical Workflow for the Treatment Room
Use a consistent sequence so nothing gets missed.
-
Before the service: confirm what the client used at home in the last 24–48 hours. Example: if they used a strong exfoliant last night, you may reduce the intensity of today’s exfoliation.
-
During the service: keep product contact intentional. Example: if you’re using a cleanser that leaves a tight feel, follow with a hydrating step rather than jumping straight to an active.
-
After the service: prioritize comfort and barrier support. A typical approach is a calming, hydrating layer first, then a lipid-supporting moisturizer if the client tolerates it.
-
Home instructions: specify what to do tonight and tomorrow morning. Example: “Tonight: gentle cleanser and moisturizer only. Tomorrow: resume your routine except pause retinoid and exfoliant until skin feels normal.”
Examples That Show the Logic
Example 1: Chemical Exfoliation Day for Mild Hyperpigmentation
- In-room: chemical exfoliation.
- Post-service: soothing hydration and barrier moisturizer.
- Home tonight: gentle cleanse and moisturizer only.
- Home tomorrow: sunscreen plus moisturizer; pause retinoid and additional exfoliants for several days or until tolerance returns.
Example 2: Microdermabrasion for Texture With a Sensitive Client
- In-room: mechanical exfoliation.
- Post-service: film-forming hydration to reduce water loss.
- Home tonight: no new actives; focus on comfort.
- Home tomorrow: resume mild routine, but avoid introducing a new vitamin C or strong exfoliant immediately.
Example 3: Hydration Mask for Dehydrated Skin
- In-room: hydration mask.
- Post-service: moisturizer with humectants and a light occlusive if needed.
- Home tonight: continue hydration support; if the client uses retinoids, keep the timing consistent with their usual schedule rather than accelerating it.
Safety Notes That Prevent Common Mistakes
- Do not introduce multiple “first-time” actives in the same 24-hour window. If a client is trying a new retinoid and a new exfoliant, start one at a time.
- Avoid combining high-friction services with strong surface actives the same day. The skin may look fine initially and then react later.
- Document what you used and what you told them to pause. Clear instructions reduce accidental overuse.
When you connect service effects to product roles, the routine becomes predictable: support the skin right after the service, pause what would add unnecessary stress, and resume actives only when comfort and barrier function are stable.
12.3 Managing Tolerance With Gradual Escalation of Actives
Tolerance is the difference between “it works” and “it works without turning the client into a red, itchy science experiment.” In skin care services, tolerance management means choosing actives and schedules that the skin can handle today, while still moving toward the target outcome.
Foundational Principles of Tolerance
Start with the skin’s current state, not the desired endpoint. If the barrier is compromised, actives that are normally well tolerated can cause stinging, scaling, or flare-ups. A practical baseline is to assess barrier comfort, visible irritation, and how the client’s skin responds to cleansing and routine products.
Next, separate irritation from effectiveness. Some actives can produce mild, temporary tingling or dryness that improves as the skin adapts. True intolerance usually shows up as worsening redness, persistent burning, swelling, or new rash-like patterns.
Finally, escalate one variable at a time. If you increase frequency, concentration, and add a new active in the same week, you lose the ability to tell what caused the reaction.
A Stepwise Escalation Framework
Use a simple progression: introduce, adapt, and consolidate.
-
Introduce: Use a low frequency and a small amount. Example: a retinoid or exfoliant applied every third night for two weeks, or a leave-on active used once every other day.
-
Adapt: Keep the same active while improving support. Example: add a barrier-friendly moisturizer and keep cleansing gentle. If the client is comfortable, increase frequency slightly rather than jumping to daily use.
-
Consolidate: Once tolerance is stable, increase consistency toward the treatment plan. Example: move from every other night to alternate nights, then to near-daily only if there is no irritation trend.
A useful rule: if irritation is present, pause escalation and focus on barrier recovery until symptoms settle.
Mind Map: Tolerance Management Workflow
Practical Escalation Examples
Example 1: Retinoid for Acne and Texture
- Week 1–2: Apply a pea-sized amount to dry skin, every third night.
- Week 3–4: If comfortable, switch to every other night.
- Week 5–6: If still stable, move to near-daily or keep alternate nights depending on dryness.
- Barrier support: moisturizer immediately after, and consider a “buffer” method by applying moisturizer first, then retinoid, then moisturizer again.
Example 2: Leave-On Exfoliant for Dullness
- Week 1: Use once every 3–4 days.
- Week 2: If no persistent redness, increase to every other day.
- Week 3: If tolerance holds, move to daily only on areas that need it, not necessarily the whole face.
- Cleansing: avoid harsh scrubs during the escalation window.
Example 3: Combining Actives Without Overloading
- Phase A: Start with one active (for example, niacinamide) while keeping other actives out.
- Phase B: Add the second active at low frequency after comfort is stable.
- Phase C: Only after both are tolerated, adjust frequency of the primary active.
This sequencing prevents the classic “everything stings” problem where you can’t identify the trigger.
Monitoring and Decision Rules
Track skin response trends, not single moments. A brief tingle during application can be normal for some clients, but irritation that grows day by day is a signal to reduce frequency.
If irritation appears, use a structured response:
- Reduce the active to the last tolerated frequency.
- Keep moisturizer consistent.
- Avoid adding new actives until the skin returns to baseline comfort.
If symptoms are severe—swelling, widespread rash, or intense burning—stop the active and reassess the plan before continuing.
Mind Map: Escalation Decisions
Documentation That Makes Escalation Work
A short log prevents guesswork. Record the active, frequency, and the client’s comfort level each week. When a reaction happens, the log tells you what changed and how quickly the skin responded, which is exactly what you need to adjust the next step.
Tolerance management is not about being cautious forever. It’s about building a predictable routine where the skin can adapt, and where changes are measurable enough to guide the next adjustment.
12.4 Documentation Templates for Progress Tracking and Compliance
A good documentation system does two jobs: it shows what you did, and it shows why you did it. When those two match, compliance becomes easier and progress becomes measurable. The templates below are designed for consistent use across intake, treatment sessions, and home care.
Core Documentation Principles
Start every file with the same baseline fields so later sessions can be compared without guesswork. Record objective observations alongside subjective impressions. Use dates and times, not “morning” or “last week.” Keep wording specific: “mild erythema on cheeks” is more useful than “skin looked irritated.” Finally, document consent and contraindication checks at the point where decisions are made.
Mind Map: Documentation Flow
Intake Template for Baseline Consistency
Use this at the first visit and whenever the treatment plan changes significantly.
Client Intake Snapshot
- Client details: name, contact, preferred communication
- Visit date and service requested
- Medical and skin history: conditions, medications, allergies
- Recent exposures: retinoids, exfoliants, procedures, sunburn
- Contraindication screening: pregnancy status if relevant, active infections, open wounds, recent isotretinoin use
- Skin assessment: barrier status, sensitivity level, texture, tone, visible concerns
- Baseline photos: date, lighting notes, consent status
- Goals: what the client wants to improve and what “better” means to them
- Consent: acknowledgment of risks, aftercare expectations, and service boundaries
Example If a client reports using a strong exfoliant within the last 7 days, document the product name and timing, then adjust the plan to a lower-intensity approach. That single line prevents later confusion when the skin reacts.
Treatment Plan Template for Clear Decision Making
A plan should read like a checklist, not a novel.
Treatment Plan Summary
- Primary concern and working diagnosis: e.g., “uneven tone with mild barrier compromise”
- Service sequence: session 1–N with service names and intensity level
- Safety limits: maximum frequency, maximum active strength, stop conditions
- Home care integration: cleanser type, moisturizer approach, sunscreen requirement, active schedule
- Tolerance strategy: what to do if redness, dryness, or stinging occurs
- Review points: when you reassess and what triggers changes
Example If the plan includes chemical exfoliation, specify the expected “settling period” and the exact adjustment rule, such as reducing frequency if erythema lasts beyond a defined window.
Session Documentation Template for Progress and Compliance
Record session details immediately after the service while memory is fresh.
Session Record
- Session date and time
- Pre-session check: skin condition since last visit, any new irritation or medication changes
- Products used: names, lot numbers if applicable, application order
- Device or technique settings: for energy-based or mechanical services, include settings and duration
- Procedure notes: areas treated, endpoint observed, any deviations from plan
- Immediate skin response: erythema level, edema, discomfort score
- Post-care provided: aftercare instructions given and understood
- Client feedback: what felt helpful or uncomfortable
- Next steps: scheduled date and any home care changes
Example If a client reports stinging during application, document the moment it started and whether you paused, rinsed, or adjusted product concentration. That detail matters for both safety and future formulation choices.
Progress Tracking Template for Objective Comparisons
Progress notes should be structured so you can compare session to session.
Progress Metrics Grid
- Date
- Barrier indicators: dryness, tightness, visible flaking
- Texture: roughness or clogged areas
- Tone: hyperpigmentation visibility and distribution
- Sensitivity: stinging or itching rating
- Tolerance: any adverse reactions and duration
- Outcome summary: one sentence describing change since last visit
Example If tone improves but sensitivity worsens, the record should reflect the trade-off. Then you can keep the service but adjust the active strength or reduce frequency.
Compliance Checklist Template for Risk Reduction
Use a short checklist to prevent missed steps.
Compliance Checklist
- Sanitation: tool disinfection, surface cleaning, glove use where required
- Consumables: single-use items disposed correctly
- Product traceability: lot numbers recorded for any regulated or high-risk items
- Consent verified: service and photo consent where applicable
- Contraindication re-check: any new allergies, infections, or medication changes
- Incident log: document any unexpected reaction and actions taken
Mind Map: What to Record When
Example Documentation Snippet for One Session
Session Record Example
- Date: 2026-02-10
- Pre-check: client reports mild tightness day after last visit, no new medications
- Products: cleanser (brand), moisturizer (brand), treatment serum (brand, lot #)
- Service: mechanical exfoliation, suction setting documented, treated areas cheeks and chin
- Response: mild erythema, no swelling; discomfort score 2/10
- Aftercare: sunscreen emphasized; active reduced to every other night for 1 week
- Next: reassess in 10–14 days; stop condition recorded if erythema persists beyond 48 hours
This structure keeps your records readable, defensible, and genuinely useful for improving outcomes.
12.5 Practical Example Workflows for Sensitive Acne Prone and Hyperpigmented Skin
Below are two integrated workflows you can run in a salon setting while keeping home care simple. Each workflow starts with the same logic: confirm tolerance, protect the barrier, treat the main driver, then prevent recurrence.
Workflow a Sensitive Acne Prone Skin
Step 1: Intake and tolerance check
- Ask about recent irritation: new actives, frequent exfoliation, or harsh cleansing.
- Confirm contraindications: active infection, recent isotretinoin use, or pregnancy-related restrictions for certain actives.
- Do a quick “comfort test” at the end of the visit: apply a bland moisturizer to a small area and note stinging or redness after 10–15 minutes.
Step 2: In room cleanser and barrier reset
- Use a gentle, low-foam cleanser. Example: a non-stripping gel cleanser used with lukewarm water and minimal rubbing.
- Apply a thin layer of a barrier-support moisturizer before any active treatment. This reduces the chance that actives cause a “surface protest.”
Step 3: Targeted treatment choice Pick one primary tool per session to avoid stacking irritation.
- If the skin is inflamed: choose soothing hydration first, then a mild exfoliation only if tolerated.
- If the skin is mostly clogged: choose a keratolytic approach with controlled exposure.
Step 4: Example session plan
- Cleanse (60 seconds, no scrubbing).
- Apply hydrating mask for 10 minutes.
- Spot treat or apply a low-strength keratolytic product to the whole face only if comfort is good.
- Finish with a moisturizer and a light, non-greasy occlusive layer if dryness is present.
Step 5: Home care assignment for the next 2 weeks
- Morning: gentle cleanser, moisturizer, sunscreen.
- Evening: gentle cleanser, moisturizer; introduce one active only if the skin stayed comfortable.
- Example schedule: week 1 use the active every other night; week 2 increase to nightly only if there is no persistent burning or peeling.
Step 6: Review and adjust
- If redness or tightness lasts more than 24 hours, reduce frequency and increase barrier support.
- If breakouts continue but irritation is low, maintain the active and refine technique: less product, more even application, and consistent cleansing timing.
Workflow B Hyperpigmented Skin with Sensitivity
Hyperpigmentation often comes with uneven barrier behavior. The workflow below treats both pigment and the conditions that keep pigment from fading.
Step 1: Intake and pattern recognition
- Identify triggers: friction, post-acne marks, sun exposure, or irritation from over-exfoliation.
- Ask about current routine: frequency of exfoliants, strength of retinoids, and whether sunscreen is used daily.
Step 2: In room preparation
- Cleanse gently and avoid mechanical scrubbing.
- Use a hydration step to reduce dryness-related pigment darkening.
Step 3: Controlled brightening sequence Choose a two-part approach: pigment support plus barrier stability.
- Pigment support: a well-tolerated brightening active (for example, niacinamide or a vitamin C derivative) applied in a thin layer.
- Barrier stability: moisturizer with film-formers or ceramide-like support.
Step 4: Example session plan
- Cleanse.
- Apply a calming, hydrating mask for 10 minutes.
- Apply brightening serum to areas with marks.
- Finish with moisturizer; if the skin is dry, add a light occlusive layer.
Step 5: Home care assignment for the next 2 weeks
- Morning: gentle cleanser, brightening serum or moisturizer with brightening support, sunscreen.
- Evening: cleanser, moisturizer; if tolerated, add a retinoid or gentle exfoliant on alternate nights.
- Example schedule: start with brightening in the morning daily, then add evening actives slowly to avoid “pigment plus irritation” cycles.
Step 6: Review and adjust
- If marks look darker after starting actives, the likely issue is irritation or insufficient sun protection; reduce actives and reinforce sunscreen consistency.
- If marks fade but texture is rough, increase hydration and keep exfoliation minimal.
Mind Map for Workflow a and B
Integrated Example: Two Client Profiles in One Day
Client 1: Sensitive acne with dryness
- Session focus: hydration first, then a mild keratolytic only if comfort is good.
- Home: moisturizer and sunscreen daily; active every other night.
Client 2: Post-acne hyperpigmentation with mild stinging
- Session focus: brightening serum in the morning plus barrier support.
- Home: brightening daily in the morning; evening actives only after stinging resolves.
Both clients leave with a routine that respects the barrier. The difference is the “main job” per workflow: unclog and calm for acne, fade marks while preventing irritation for hyperpigmentation.