Essential Soil Water and Fertilizer Knowledge for Everyday Farming
1. Introduction to Soil Water and Fertilizer Fundamentals
1.1 Understanding Soil Composition and Its Impact on Water Retention
Soil composition is the foundation of healthy farming. It determines how well your soil holds water, nutrients, and supports plant roots. Understanding the components of soil helps you manage water retention effectively, ensuring your crops get the moisture they need without wasting water.
What Makes Up Soil?
Soil is made up of four main components:
- Mineral particles: Sand, silt, and clay
- Organic matter: Decomposed plant and animal material
- Water: Moisture held in soil pores
- Air: Spaces in soil that hold oxygen for roots and microbes
Each component affects water retention differently.
Mind Map: Soil Composition Components
How Soil Texture Affects Water Retention
Soil texture is determined by the proportion of sand, silt, and clay particles. It influences how much water soil can hold and how quickly water drains.
- Sandy soils: Large particles, large pores, drain quickly, low water retention.
- Clay soils: Tiny particles, small pores, hold water tightly, slow drainage.
- Loam soils: Balanced mix, good water retention and drainage.
Example:
A sandy soil farm may need more frequent irrigation because water drains quickly. Conversely, clay soils may hold water longer but risk waterlogging if over-irrigated.
Mind Map: Soil Texture and Water Retention
Role of Organic Matter in Water Retention
Organic matter improves soil structure by creating aggregates that increase pore space, allowing soil to hold more water and air.
- Increases water holding capacity
- Improves nutrient availability
- Enhances soil aeration
Example:
Adding compost or cover crops to your soil can increase organic matter, helping sandy soils retain moisture better and improving clay soil structure for better drainage.
Mind Map: Organic Matter Benefits
Practical Example: Assessing Your Soil’s Water Retention
-
Feel Test: Take a handful of moist soil and squeeze it.
- If it falls apart easily, it’s sandy.
- If it forms a ribbon when pressed between fingers, it has more clay.
-
Water Test: Dig a small hole, fill it with water, and observe how fast it drains.
- Fast drainage indicates sandy soil.
- Slow drainage indicates clay soil.
-
Add Organic Matter: Try mixing compost into your soil and observe changes in moisture retention over time.
Understanding your soil composition helps you tailor your irrigation and fertilization practices to improve water efficiency and crop health. Remember, healthy soil means healthy plants!
1.2 The Role of Water in Plant Growth: Basic Principles
Water is a fundamental component for plant growth and development. Understanding how water supports plants helps farmers manage irrigation effectively and ensure healthy crops.
Why Water is Essential for Plants
- Solvent for Nutrients: Water dissolves nutrients in the soil, making them accessible for plant roots.
- Transport Medium: It moves nutrients and sugars within the plant through the xylem and phloem.
- Photosynthesis: Water is a raw material in photosynthesis, enabling plants to produce energy.
- Temperature Regulation: Through transpiration, water helps cool plants and maintain internal temperature.
- Cell Structure: Water maintains turgor pressure, keeping cells firm and supporting plant structure.
Mind Map: Key Roles of Water in Plant Growth
Water Movement in Plants
Water moves from the soil into the roots by osmosis, travels up through the xylem vessels, and evaporates from leaf surfaces in a process called transpiration. This movement creates a continuous flow that helps distribute nutrients and maintain plant health.
Mind Map: Water Movement Process
Example: How Water Deficiency Affects Plants
Imagine a tomato plant in a small farm that hasn’t been watered for several days during a hot spell. The leaves start wilting and curling because the plant cells lose turgor pressure. Nutrient uptake slows down, and fruit development is stunted. This example shows how critical timely watering is to avoid yield loss.
Practical Tips for Farmers
- Check Soil Moisture: Use simple tools like a soil probe or your finger to feel moisture levels.
- Observe Plant Signs: Wilting, leaf curling, or yellowing can indicate water stress.
- Water Deeply and Less Frequently: Encourages deep root growth and improves drought resistance.
- Match Watering to Crop Stage: Seedlings and flowering plants often need more water.
Mind Map: Water Management Best Practices
By understanding these basic principles, beginning farmers and agricultural workers can optimize water use, promoting healthy plant growth and improving crop yields.
1.3 Essential Nutrients in Fertilizers and Their Functions
Fertilizers provide plants with essential nutrients that are crucial for their growth, development, and productivity. These nutrients are generally divided into three categories: macronutrients, secondary nutrients, and micronutrients. Understanding these nutrients and their functions helps farmers apply the right fertilizers to meet crop needs efficiently.
Macronutrients
Macronutrients are required by plants in large amounts. They include Nitrogen (N), Phosphorus (P), and Potassium (K), often referred to as NPK.
- Nitrogen (N): Vital for leaf and stem growth. It is a major component of chlorophyll, the compound plants use in photosynthesis.
- Phosphorus (P): Important for root development, flowering, and fruiting. It helps in energy transfer within the plant.
- Potassium (K): Enhances overall plant health, disease resistance, and water regulation.
Mind Map: Macronutrients
Example:
A corn farmer notices yellowing leaves (a sign of nitrogen deficiency). By applying a nitrogen-rich fertilizer like urea, the farmer helps the crop regain its green color and vigor.
Secondary Nutrients
These are also essential but needed in smaller quantities than macronutrients.
- Calcium (Ca): Important for cell wall structure and root development.
- Magnesium (Mg): Central element in chlorophyll molecule, essential for photosynthesis.
- Sulfur (S): Needed for protein synthesis and enzyme function.
Mind Map: Secondary Nutrients
Example:
Tomato plants showing blossom-end rot may be suffering from calcium deficiency. Adding gypsum or lime can supply calcium and improve fruit quality.
Micronutrients
Micronutrients are required in very small amounts but are critical for plant health.
- Iron (Fe): Necessary for chlorophyll synthesis.
- Manganese (Mn): Involved in photosynthesis and nitrogen metabolism.
- Zinc (Zn): Important for growth hormone production and enzyme systems.
- Copper (Cu): Plays a role in photosynthesis and respiration.
- Boron (B): Essential for cell wall formation and reproductive growth.
- Molybdenum (Mo): Needed for nitrogen fixation and utilization.
- Chlorine (Cl): Involved in osmosis and ionic balance.
Mind Map: Micronutrients
Example:
A farmer growing beans notices poor pod development, a symptom of boron deficiency. Applying borax in small amounts corrects the problem and improves yield.
Summary Table of Nutrients and Their Functions
| Nutrient | Function | Deficiency Symptom Example |
|---|---|---|
| Nitrogen | Leaf/stem growth, chlorophyll synthesis | Yellowing leaves |
| Phosphorus | Root growth, flowering, energy transfer | Poor root development |
| Potassium | Disease resistance, water regulation | Weak stems, poor fruit quality |
| Calcium | Cell wall strength, root development | Blossom-end rot in tomatoes |
| Magnesium | Central to chlorophyll | Interveinal chlorosis (yellowing between veins) |
| Sulfur | Protein synthesis | Pale leaves, stunted growth |
| Iron | Chlorophyll synthesis | Yellowing young leaves |
| Manganese | Photosynthesis, nitrogen metabolism | Brown spots on leaves |
| Zinc | Growth hormone production | Shortened internodes, small leaves |
| Copper | Photosynthesis, respiration | Twisted leaves, dieback |
| Boron | Cell wall formation, reproduction | Poor fruit/pod set |
| Molybdenum | Nitrogen fixation/utilization | Yellowing, poor growth |
| Chlorine | Osmosis, ionic balance | Wilting, leaf spotting |
Practical Tip for Beginning Farmers
Start by testing your soil to understand which nutrients are deficient. Use balanced fertilizers or specific nutrient amendments based on crop needs. Remember, over-application can harm plants and the environment.
By mastering the essential nutrients and their functions, you can make informed decisions to optimize fertilizer use, improve crop health, and increase yields sustainably.
1.4 Overview of Soil Fertility and Water Management in Farming
Soil fertility and water management are two fundamental pillars that support successful farming. Understanding how they interact and influence crop growth is essential for beginning farmers and agricultural workers aiming to optimize yields sustainably.
What is Soil Fertility?
Soil fertility refers to the soil’s ability to provide essential nutrients to plants in adequate amounts and proper balance for growth. Fertile soil contains a good mix of macronutrients (nitrogen, phosphorus, potassium) and micronutrients (iron, zinc, manganese, etc.), organic matter, and a suitable pH level.
What is Water Management?
Water management in farming involves the efficient use and conservation of water to meet crop needs without wastage or causing harm to the soil or environment. It includes irrigation scheduling, soil moisture monitoring, and techniques to reduce evaporation and runoff.
Mind Map: Key Components of Soil Fertility and Water Management
How Soil Fertility and Water Management Work Together
Water is the medium through which nutrients dissolve and move to plant roots. Without adequate water, even fertile soil cannot deliver nutrients effectively. Conversely, poor soil fertility can limit a plant’s ability to utilize water efficiently.
Example:
Imagine a tomato farm where the soil is rich in nutrients but the irrigation is irregular. The plants may suffer from water stress, leading to poor nutrient uptake and stunted growth. On the other hand, overwatering a nutrient-poor soil can cause nutrient leaching, wasting fertilizer and polluting groundwater.
Practical Example: Balancing Fertility and Water on a Small Farm
Scenario: A beginning farmer notices yellowing leaves on their corn crop, a sign of nitrogen deficiency, despite regular watering.
Steps to address:
- Soil Testing: Conduct a soil test to confirm nutrient levels and pH.
- Adjust Fertilizer: Apply a nitrogen-rich fertilizer as recommended.
- Irrigation Check: Ensure watering is consistent but not excessive to prevent nutrient leaching.
- Mulching: Apply organic mulch to retain soil moisture and improve organic matter.
This integrated approach improves both soil fertility and water availability, promoting healthier crops.
Mind Map: Integrated Management Practices
Summary
- Soil fertility and water management are interconnected and critical for crop success.
- Proper nutrient availability depends on adequate soil moisture.
- Efficient water use prevents nutrient loss and environmental damage.
- Regular soil testing and monitoring help tailor management practices.
- Simple techniques like mulching and drip irrigation can significantly improve both soil fertility and water conservation.
By mastering these basics, beginning farmers can create a strong foundation for sustainable and productive farming.
1.5 Practical Example: Assessing Your Farm’s Soil and Water Status
Assessing your farm’s soil and water status is a crucial first step to making informed decisions about irrigation and fertilization. This practical example will guide you through simple, effective steps to evaluate your soil and water conditions using easy-to-understand methods and tools.
Step 1: Visual Inspection of Soil and Water Conditions
Start by walking through your fields and observing the soil and moisture conditions.
- Look for soil texture and color: Dark, crumbly soil usually indicates good organic matter content, while pale or compacted soil may need improvement.
- Check soil moisture: Squeeze a handful of soil. If it forms a ball and crumbles easily, moisture is adequate. If it falls apart or feels dry, the soil may be too dry.
- Observe plant health: Wilting or yellowing plants can indicate water stress or nutrient deficiencies.
Step 2: Simple Soil Moisture Test (Feel Method)
This no-cost method helps estimate soil moisture levels.
| Soil Texture | Moisture Level | Description |
|---|---|---|
| Sandy soil | Dry | Soil feels loose, does not hold shape when squeezed |
| Loamy soil | Moist | Soil forms a ball but crumbles when poked |
| Clay soil | Wet | Soil forms a sticky ball and holds shape well |
Example:
- Take soil from root zone (about 6 inches deep).
- Squeeze soil in your hand.
- Compare with the table above to estimate moisture.
Step 3: Conducting a Basic Soil Test
A soil test provides detailed information about nutrient levels and pH.
How to collect a soil sample:
- Use a clean trowel or soil probe.
- Collect 10-15 subsamples from different spots in the field.
- Mix samples thoroughly in a clean bucket.
- Take about 1-2 cups of the mixed soil for testing.
Where to test:
- Local agricultural extension offices
- Certified soil testing labs
Example:
- After testing, you receive a report showing nitrogen, phosphorus, potassium levels, and pH.
- If nitrogen is low, plan to add nitrogen-rich fertilizer.
Step 4: Measuring Soil Moisture with a Simple Tool
If available, use a soil moisture meter for more precise readings.
How to use:
- Insert the probe into the soil at root depth.
- Read moisture level on the meter.
Example:
- Moisture meter reads 25% volumetric water content.
- Based on crop needs, decide if irrigation is needed.
Mind Map: Assessing Your Farm’s Soil and Water Status
Step 5: Interpreting Results and Planning
Once you have your observations and test results:
- Compare soil moisture to crop requirements. For example, corn needs about 50-70% soil moisture in the root zone.
- Check nutrient levels against recommended values. If phosphorus is low, consider adding phosphate fertilizer.
- Assess pH: Most crops prefer pH 6.0-7.0. If soil is acidic, lime application may be needed.
Example:
- Soil test shows low nitrogen and slightly acidic pH (5.8).
- Plan to apply nitrogen fertilizer and lime to adjust pH.
- Soil moisture meter shows soil is dry; schedule irrigation.
Summary Checklist for Assessing Soil and Water Status
- Visual inspection of soil texture, color, and plant health
- Perform soil moisture feel test
- Collect and send soil samples for testing
- Use soil moisture meter if available
- Interpret soil test and moisture data
- Develop irrigation and fertilization plan based on findings
By regularly assessing your farm’s soil and water status using these simple steps and tools, you can make better decisions that improve crop health and yield while conserving resources.
2. Soil Water Management Best Practices
2.1 Measuring Soil Moisture: Tools and Techniques for Beginners
Understanding soil moisture is crucial for effective irrigation and crop health. Measuring soil moisture helps farmers avoid overwatering or underwatering, which can affect plant growth and nutrient uptake.
Why Measure Soil Moisture?
- Ensures optimal water availability for crops
- Prevents water wastage and reduces costs
- Helps in scheduling irrigation efficiently
- Protects soil structure and prevents nutrient leaching
Common Tools for Measuring Soil Moisture
Feel and Appearance Method
- The simplest, no-cost method
- Take a handful of soil and squeeze it:
- If it forms a ball and crumbles easily, moisture is adequate
- If it feels sticky and forms a ribbon, soil is too wet
- If it falls apart and feels dry, soil needs watering
Soil Moisture Meter (Tensiometer or Probe)
- Measures soil water tension or volumetric water content
- Easy to use and affordable for beginners
- Insert probe into soil and read moisture level on dial or digital display
Gravimetric Method
- Collect soil samples, weigh them wet, dry in oven, then weigh dry
- Calculate moisture content by weight difference
- Accurate but time-consuming and requires equipment
Time Domain Reflectometry (TDR) Sensors
- Electronic sensors that measure soil moisture via electromagnetic signals
- More expensive, used in precision agriculture
Mind Map: Soil Moisture Measurement Tools
Step-by-Step Example: Using a Soil Moisture Meter
- Select a spot near your crop roots.
- Insert the moisture meter probe vertically into the soil about 6 inches deep.
- Wait a few seconds for the reading to stabilize.
- Read the moisture level on the dial or digital screen.
- Interpret the reading:
- 0-10%: Very dry, irrigation needed
- 10-20%: Dry, consider watering soon
- 20-40%: Ideal moisture range for most crops
- 40%+: Soil is wet, hold irrigation
Example: Farmer John checks his tomato bed with a moisture meter. The reading shows 15%, so he decides to irrigate lightly to maintain optimal moisture.
Mind Map: Soil Moisture Measurement Process
Tips for Beginners
- Always measure soil moisture at root zone depth (usually 4-6 inches).
- Take multiple readings in different parts of your field for accuracy.
- Combine methods: use feel method for quick checks and moisture meters for precise data.
- Record your readings to track changes over time.
Practical Example: Feel Method in Action
Maria, a beginning farmer, checks soil moisture by taking a handful of soil from her pepper plants. She squeezes it and notices it crumbles easily, indicating good moisture. She skips irrigation for the day, saving water and costs.
Summary
Measuring soil moisture is a fundamental skill for everyday farming. Beginners can start with simple feel methods and progress to using moisture meters for better precision. Regular monitoring helps optimize irrigation, conserve water, and promote healthy crop growth.
2.2 Irrigation Methods: Choosing the Right System for Your Farm
Irrigation is a critical component of successful farming, especially when natural rainfall is insufficient or irregular. Choosing the right irrigation system can improve water efficiency, boost crop yields, and reduce labor and costs. This section explores common irrigation methods, their advantages and disadvantages, and how to select the best system for your farm.
Common Irrigation Methods
Surface Irrigation
Surface irrigation involves distributing water over the soil surface by gravity flow. It includes furrow, basin, border, and flood irrigation.
- Advantages: Low initial cost, simple to operate, no special equipment needed.
- Disadvantages: Can cause waterlogging or uneven distribution, less efficient water use.
Example: A small vegetable farm uses furrow irrigation by creating shallow channels between rows and flooding them periodically.
Drip Irrigation
Drip irrigation delivers water directly to the root zone through a network of tubes and emitters.
- Advantages: High water efficiency, reduces evaporation and runoff, precise nutrient delivery.
- Disadvantages: Higher initial cost, requires maintenance to prevent clogging.
Example: A tomato grower installs drip lines under plastic mulch to provide consistent moisture and fertilizer.
Sprinkler Irrigation
Water is sprayed over crops like rainfall using sprinklers mounted on fixed or movable systems.
- Advantages: Suitable for various crops and terrains, can cover large areas.
- Disadvantages: Water loss due to evaporation and wind drift, moderate installation cost.
Example: A small grain farm uses portable sprinklers to irrigate during dry spells.
Subsurface Irrigation
Water is applied below the soil surface through buried pipes or tubes.
- Advantages: Minimizes evaporation, delivers water directly to roots.
- Disadvantages: High installation cost, complex maintenance.
Example: A high-value orchard uses subsurface drip irrigation to optimize water use.
Mind Map: Irrigation Methods Overview
Factors to Consider When Choosing an Irrigation System
- Crop Type: Some crops like vegetables benefit from drip irrigation, while grains may do well with sprinklers.
- Soil Type: Sandy soils drain quickly and may need frequent irrigation; clay soils hold water longer.
- Water Availability: Limited water resources favor efficient systems like drip.
- Farm Size and Topography: Large or uneven fields may require specific systems.
- Budget and Labor: Initial investment and ongoing maintenance costs.
Mind Map: Choosing the Right Irrigation System
Practical Examples
Example 1: Small-Scale Vegetable Farm with Limited Water
Maria runs a 1-acre vegetable farm in a semi-arid region. She has limited water and wants to maximize efficiency. She chooses a drip irrigation system with emitters spaced according to her crop rows. This allows her to deliver water directly to roots, reduce evaporation, and apply liquid fertilizer through fertigation.
Example 2: Large Grain Farm on Flat Terrain
John manages 50 acres of wheat on flat land with moderate water availability. He opts for a center pivot sprinkler system to cover large areas efficiently. The system is automated to run during cooler parts of the day, reducing evaporation losses.
Example 3: Small Orchard with High-Value Crops
Lina has a 2-acre orchard of fruit trees. She installs a subsurface drip irrigation system to deliver water directly to the root zone, minimizing water loss and improving tree health. Though the initial cost is higher, the system reduces labor and water use over time.
Summary
Choosing the right irrigation system depends on multiple factors including crop type, soil, water availability, farm size, and budget. Understanding the pros and cons of each method helps you make an informed decision that improves water use efficiency and crop productivity.
Remember, starting small and scaling your irrigation system as you gain experience can be a practical approach for beginning farmers.
2.3 Scheduling Irrigation Based on Crop Needs and Soil Type
Efficient irrigation scheduling is essential to ensure crops receive the right amount of water at the right time. Overwatering wastes water and nutrients, while underwatering stresses plants and reduces yield. Understanding your crop’s water needs and your soil’s water-holding capacity helps you create an effective irrigation schedule.
Understanding Crop Water Needs
Different crops have varying water requirements depending on their growth stage, climate, and physiology. For example, leafy vegetables generally need more frequent watering than drought-tolerant grains.
-
Growth Stages and Water Demand:
- Germination: Moderate moisture to encourage seed sprouting.
- Vegetative Growth: High water demand for leaf and stem development.
- Flowering and Fruiting: Critical water period; stress can reduce yield.
- Maturity: Reduced water needs; overwatering can cause disease.
-
Example:
- Tomatoes require consistent moisture during flowering and fruit set to avoid blossom end rot.
- Corn needs ample water during tasseling and silking stages.
Soil Type and Water Retention
Soil texture influences how much water it can hold and how quickly it drains.
-
Sandy Soils:
- Low water retention, quick drainage.
- Require more frequent, lighter irrigation.
-
Loamy Soils:
- Balanced water retention and drainage.
- Moderate irrigation frequency.
-
Clay Soils:
- High water retention, slow drainage.
- Less frequent but deeper irrigation to avoid waterlogging.
Mind Map: Factors Influencing Irrigation Scheduling
Calculating Irrigation Frequency and Amount
- Determine Crop Evapotranspiration (ETc): Amount of water crop uses.
- Adjust for Effective Rainfall: Subtract rainfall from ETc.
- Consider Soil Water Holding Capacity: Amount of water soil can store.
- Set Irrigation Interval: Based on how quickly soil dries.
Practical Example: Scheduling Irrigation for Lettuce on Sandy Soil
- Lettuce requires frequent watering due to shallow roots.
- Sandy soil drains quickly, holding less water.
Step-by-step:
- Calculate ETc for lettuce (e.g., 5 mm/day).
- Check recent rainfall (e.g., 2 mm).
- Effective water need = 5 - 2 = 3 mm/day.
- Sandy soil holds ~10 mm water in root zone.
- Irrigation interval = 10 mm / 3 mm/day ≈ 3 days.
- Apply about 10 mm water every 3 days to maintain moisture.
Mind Map: Scheduling Irrigation for Lettuce on Sandy Soil
Tips for Effective Scheduling
- Use soil moisture sensors or tensiometers to monitor moisture.
- Adjust schedules based on weather forecasts.
- Observe plant signs: wilting indicates water stress.
- Avoid watering during hottest part of the day to reduce evaporation.
Summary
Scheduling irrigation by considering crop water needs and soil type optimizes water use, promotes healthy crops, and improves yields. Using simple calculations and observations, even beginning farmers can develop effective irrigation plans tailored to their farm conditions.
2.4 Mulching to Conserve Soil Moisture: Materials and Application Tips
Mulching is one of the simplest and most effective practices to conserve soil moisture, regulate soil temperature, suppress weeds, and improve overall soil health. For beginning farmers and agricultural workers, understanding the right materials and application techniques can significantly enhance water retention and crop productivity.
What is Mulching?
Mulching involves covering the soil surface around plants with a protective layer of material. This layer reduces evaporation, keeps the soil cooler in hot weather, and can also add organic matter to the soil as it decomposes.
Benefits of Mulching for Soil Moisture Conservation
- Reduces evaporation: Mulch acts as a barrier that slows down water loss from the soil.
- Improves water infiltration: Mulch helps rainwater soak into the soil rather than running off.
- Regulates soil temperature: Keeps soil cooler during hot days and warmer during cold nights.
- Suppresses weed growth: Reduces competition for water and nutrients.
Common Mulching Materials
Organic Mulches
- Straw or hay
- Grass clippings
- Leaves
- Wood chips or bark
- Compost
Inorganic Mulches
- Plastic sheeting (black or clear)
- Landscape fabric
- Gravel or stones
Mind Map: Types of Mulch and Their Benefits
How to Apply Mulch Effectively
- Prepare the soil: Remove weeds and water the soil thoroughly before applying mulch.
- Choose appropriate mulch: Select based on crop type, climate, and availability.
- Apply the right thickness:
- Organic mulches: 2 to 4 inches thick.
- Inorganic mulches: Follow manufacturer recommendations.
- Keep mulch away from plant stems: Leave a small gap around stems to prevent rot and pests.
- Replenish mulch as needed: Organic mulches decompose and may need topping up during the growing season.
Practical Examples
Example 1: Using Straw Mulch for Tomato Plants
- After transplanting tomato seedlings, apply a 3-inch layer of wheat straw around the base.
- This helps retain moisture during dry spells and reduces weed growth.
- Monitor soil moisture weekly and water underneath the mulch as needed.
Example 2: Plastic Mulch for Early-Season Melons
- Lay black plastic sheeting over prepared beds before planting melon seeds.
- Cut holes for planting and secure edges with soil.
- The plastic warms the soil, conserves moisture, and suppresses weeds.
Example 3: Leaf Mulch in a Vegetable Garden
- Collect fallen leaves, shred them with a mower.
- Apply a 2-inch layer around cool-season crops like lettuce and spinach.
- This mulch improves moisture retention and slowly adds nutrients as leaves break down.
Mind Map: Mulching Application Tips
Final Tips for Beginning Farmers
- Start small: Try mulching a small plot to observe effects.
- Use locally available materials to reduce costs.
- Combine mulching with other water-saving practices like drip irrigation.
- Regularly check soil moisture under mulch to avoid over or underwatering.
By integrating mulching into your daily farming routine, you can conserve precious soil moisture, improve crop health, and reduce labor associated with watering and weeding.
2.5 Practical Example: Setting Up a Simple Drip Irrigation System
Drip irrigation is an efficient way to deliver water directly to the roots of your plants, minimizing water waste and promoting healthy growth. This section will guide you through setting up a simple drip irrigation system suitable for small farms or garden plots.
Why Choose Drip Irrigation?
- Conserves water by reducing evaporation and runoff.
- Delivers water directly to the root zone.
- Reduces weed growth by limiting water to non-crop areas.
- Can be automated for convenience.
Materials Needed:
- Main water source (tap or pump).
- Filter to prevent clogging.
- Pressure regulator (if needed).
- Mainline tubing (usually 1/2 inch or 3/4 inch).
- Drip tubing or drip lines with emitters.
- Connectors, end caps, and stakes.
- Timer (optional).
Step-by-Step Setup Guide
Plan Your Layout
- Measure the area to be irrigated.
- Identify plant rows or beds.
- Decide on emitter spacing based on crop water needs.
Prepare the Water Source
- Attach a filter to prevent debris from clogging emitters.
- Install a pressure regulator if your water pressure is above recommended levels (usually 20-30 psi).
Lay Out the Mainline Tubing
- Run the main tubing along your planting rows.
- Use connectors to branch off drip lines to individual plants or rows.
Install Drip Lines
- Place drip tubing with emitters near the base of plants.
- Use stakes to keep tubing in place.
Cap the Ends
- Seal the end of each drip line with end caps to maintain pressure.
Test the System
- Turn on the water and check each emitter for proper flow.
- Look for leaks or blockages and fix as needed.
Optional Automation
- Attach a timer to automate watering schedules.
Example: Setting Up Drip Irrigation for a Tomato Bed
- Bed size: 10 feet by 4 feet.
- Tomato plants spaced 18 inches apart.
- Use drip tubing with emitters spaced every 18 inches.
- Mainline tubing runs along the length of the bed.
- Connect drip lines branching off mainline to each plant row.
Tips for Success
- Regularly clean filters to prevent clogging.
- Flush tubing at the start and end of the season.
- Adjust watering frequency based on weather and soil moisture.
- Combine with mulching to retain soil moisture.
Troubleshooting Common Issues
| Problem | Cause | Solution |
|---|---|---|
| No water at emitters | Clogged filter or tubing | Clean filter, flush tubing |
| Uneven water flow | Pressure too high or low | Adjust pressure regulator |
| Leaks in tubing | Punctures or loose connectors | Repair tubing, tighten fittings |
By following these steps and tips, beginning farmers and agricultural workers can efficiently set up a drip irrigation system that conserves water, improves crop health, and simplifies daily farm management.
3. Understanding Soil Fertility and Nutrient Cycles
3.1 Macronutrients vs Micronutrients: What Plants Really Need
Understanding the nutrients plants require is fundamental for effective soil fertility management. Nutrients are broadly categorized into macronutrients and micronutrients based on the quantity plants need.
Macronutrients
Macronutrients are elements plants need in large amounts. They are essential for growth, development, and reproduction.
- Primary Macronutrients: Nitrogen (N), Phosphorus (P), Potassium (K)
- Secondary Macronutrients: Calcium (Ca), Magnesium (Mg), Sulfur (S)
Functions and Examples:
-
Nitrogen (N): Vital for leaf and stem growth; part of chlorophyll and amino acids.
- Example: A cornfield showing pale yellow leaves may indicate nitrogen deficiency.
-
Phosphorus (P): Important for root development and energy transfer.
- Example: Stunted root systems in young tomato plants can be due to low phosphorus.
-
Potassium (K): Helps with water regulation, disease resistance, and fruit quality.
- Example: Potato plants with scorched leaf edges often suffer potassium deficiency.
-
Calcium (Ca): Strengthens cell walls and aids root and leaf development.
-
Magnesium (Mg): Central component of chlorophyll, crucial for photosynthesis.
-
Sulfur (S): Needed for protein synthesis and enzyme function.
Micronutrients
Micronutrients are required in much smaller quantities but are just as essential.
- Common micronutrients include Iron (Fe), Manganese (Mn), Zinc (Zn), Copper (Cu), Boron (B), Molybdenum (Mo), Chlorine (Cl), and Nickel (Ni).
Functions and Examples:
-
Iron (Fe): Necessary for chlorophyll synthesis.
- Example: Yellowing between leaf veins (interveinal chlorosis) in young soybean leaves often signals iron deficiency.
-
Zinc (Zn): Important for growth hormone production and enzyme systems.
-
Boron (B): Crucial for cell wall formation and reproductive growth.
- Example: Poor fruit set in apples can be due to boron deficiency.
-
Manganese (Mn), Copper (Cu), Molybdenum (Mo), Chlorine (Cl), Nickel (Ni): Each plays specialized roles in enzyme activation and metabolic processes.
Mind Map: Plant Nutrients Overview
Mind Map: Symptoms of Nutrient Deficiencies
Practical Example: Diagnosing Nutrient Needs on a Small Farm
Imagine you are growing lettuce and notice that the leaves are pale green and growth is slow. This is a classic sign of nitrogen deficiency. To address this:
- Conduct a simple soil test or use a home soil test kit to check nitrogen levels.
- Apply a nitrogen-rich fertilizer, such as composted manure or a balanced NPK fertilizer with higher nitrogen content.
- Monitor the plants over the next two weeks for improvement.
Similarly, if your tomato plants have poor fruit development and the growing tips appear distorted, suspect boron deficiency. Applying boron-containing fertilizers or foliar sprays can help.
Summary
- Plants need both macronutrients and micronutrients for healthy growth.
- Macronutrients are required in larger amounts; micronutrients in trace amounts.
- Recognizing deficiency symptoms helps in timely nutrient management.
- Soil testing combined with observation ensures balanced fertilization.
By understanding these nutrient categories and their roles, beginning farmers and agricultural workers can make informed decisions to improve soil fertility and crop health effectively.
3.2 Soil pH and Its Effect on Nutrient Availability
Soil pH is a measure of how acidic or alkaline your soil is, and it plays a crucial role in determining which nutrients are available to your crops. Understanding soil pH helps you manage fertilizer application effectively and maintain healthy plant growth.
What is Soil pH?
-
Soil pH is measured on a scale from 0 to 14.
- pH < 7: Acidic soil
- pH = 7: Neutral soil
- pH > 7: Alkaline soil
-
Most crops prefer a pH range between 6.0 and 7.5.
How Soil pH Affects Nutrient Availability
Why Does pH Affect Nutrient Availability?
- Soil pH influences chemical forms of nutrients.
- At certain pH levels, nutrients can become locked in forms plants cannot absorb.
- For example, phosphorus tends to bind with iron and aluminum in acidic soils, making it unavailable.
Practical Example: Managing Soil pH for Corn Farming
- A farmer tests soil and finds pH = 5.2 (acidic).
- Symptoms: Corn leaves show yellowing (possible iron toxicity or phosphorus deficiency).
- Action:
- Apply agricultural lime (calcium carbonate) to raise pH toward 6.5.
- Retest soil after 3 months.
- Adjust fertilizer application based on new pH and nutrient availability.
Adjusting Soil pH: Best Practices
-
Raising pH (making soil less acidic):
- Apply lime (calcitic or dolomitic lime).
- Use wood ash carefully (alkaline).
-
Lowering pH (making soil more acidic):
- Apply elemental sulfur or aluminum sulfate.
- Use acidifying fertilizers like ammonium sulfate.
-
Always perform soil tests before applying amendments.
Mind Map: Soil pH Management Steps
Additional Example: Vegetable Garden pH Adjustment
- Problem: Tomatoes growing poorly in alkaline soil (pH 8.0).
- Solution:
- Incorporate elemental sulfur into soil.
- Add organic matter like compost to improve buffering.
- Mulch to maintain moisture and support microbial activity.
Summary
- Soil pH directly influences nutrient availability.
- Most crops thrive in slightly acidic to neutral pH.
- Regular soil testing and appropriate amendments help optimize pH.
- Adjusting pH improves fertilizer efficiency and crop yields.
Understanding and managing soil pH is a foundational skill for everyday farmers aiming to maximize nutrient uptake and maintain healthy soils.
3.3 Organic Matter and Its Role in Nutrient Cycling
Organic matter is a vital component of healthy soil and plays a crucial role in nutrient cycling, which directly impacts crop growth and soil fertility. Understanding how organic matter functions can help beginning farmers and agricultural workers improve soil management practices for sustainable farming.
What is Organic Matter?
Organic matter consists of decomposed plant and animal residues, microorganisms, and substances synthesized by soil organisms. It includes:
- Fresh residues: Leaves, stems, roots
- Decomposed material: Humus
- Living organisms: Bacteria, fungi, earthworms
Why is Organic Matter Important?
Organic matter improves soil structure, water retention, and nutrient availability. It acts as a reservoir for essential nutrients and supports the microbial activity necessary for nutrient cycling.
The Role of Organic Matter in Nutrient Cycling
Organic matter is central to the transformation and movement of nutrients through the soil. Here’s how it works:
- Decomposition: Soil microbes break down organic residues, releasing nutrients like nitrogen (N), phosphorus (P), and sulfur (S) in plant-available forms.
- Nutrient Storage: Humus binds nutrients, preventing them from leaching away.
- Microbial Activity: Organic matter feeds beneficial microbes that convert nutrients into forms plants can absorb.
- Soil Aggregation: Improves soil structure, enhancing root growth and nutrient uptake.
Mind Map: Organic Matter and Nutrient Cycling
Practical Examples
Example 1: Adding Compost to Improve Soil Fertility
A beginning farmer adds well-decomposed compost made from kitchen scraps and crop residues to their vegetable garden. Over time, the soil becomes darker and crumbly, indicating higher organic matter content. This improves water retention and nutrient availability, resulting in healthier plants and better yields.
Example 2: Using Cover Crops to Increase Organic Matter
An agricultural worker plants legumes such as clover or vetch after the main crop harvest. These cover crops add biomass to the soil and fix atmospheric nitrogen, enriching the soil organic matter and nutrient content when they decompose.
Example 3: Crop Residue Management
Instead of burning leftover stalks after harvest, a farmer chops and incorporates them into the soil. This practice returns nutrients to the soil and increases organic matter, enhancing soil fertility and moisture retention.
Tips for Maintaining and Increasing Soil Organic Matter
- Regularly add organic amendments such as compost or manure.
- Practice crop rotation and include cover crops.
- Minimize soil disturbance by reducing tillage.
- Avoid burning crop residues; instead, incorporate them into the soil.
- Maintain proper soil moisture to support microbial activity.
By understanding and managing organic matter effectively, farmers can promote nutrient cycling, improve soil health, and achieve sustainable crop production.
3.4 Practical Example: Conducting a Soil Test and Interpreting Results
Conducting a soil test is one of the most important steps you can take to understand your farm’s soil fertility and nutrient needs. It helps you make informed decisions about fertilizer application and soil amendments, ensuring healthy crop growth and efficient use of resources.
Step 1: Collecting Soil Samples
- Tools Needed: Clean trowel or soil probe, bucket, plastic bags or soil sample boxes, permanent marker.
- Sampling Procedure:
- Select multiple spots across your field or garden to get a representative sample (usually 10-15 subsamples per area).
- Dig 6-8 inches deep (root zone depth for most crops).
- Mix the subsamples thoroughly in the bucket.
- Take about 1-2 cups of the mixed soil and place it in a labeled bag.
Example: For a 1-acre vegetable plot, collect 10 subsamples evenly spaced, mix, and send a composite sample for testing.
Step 2: Sending Soil Samples to a Lab
- Contact your local agricultural extension office or a reputable soil testing lab.
- Fill out the submission form with details about your crop and management practices.
- Ship or drop off the sample as instructed.
Step 3: Understanding Soil Test Report
A typical soil test report includes:
- Soil pH: Indicates acidity or alkalinity.
- Macronutrients: Nitrogen (N), Phosphorus (P), Potassium (K).
- Secondary Nutrients: Calcium (Ca), Magnesium (Mg), Sulfur (S).
- Micronutrients: Iron (Fe), Manganese (Mn), Zinc (Zn), Copper (Cu), Boron (B), Molybdenum (Mo).
- Organic Matter Content: Percentage of decomposed plant/animal material.
Mind Map: Interpreting Soil Test Results
Example Interpretation
| Parameter | Result | Interpretation | Recommended Action |
|---|---|---|---|
| Soil pH | 5.5 | Acidic soil | Apply agricultural lime to raise pH |
| Phosphorus (P) | Low | Nutrient deficiency | Apply phosphorus fertilizer (e.g., rock phosphate) |
| Potassium (K) | Adequate | Sufficient for crop growth | Maintain current management |
| Organic Matter | 2% | Low organic matter content | Incorporate compost or plant cover crops |
Step 4: Applying the Results on Your Farm
- Adjust lime application to correct soil pH gradually.
- Apply fertilizers based on nutrient deficiencies to avoid waste and environmental harm.
- Use organic amendments to improve soil structure and moisture retention.
- Retest soil every 2-3 years to monitor changes.
Additional Tips
- Avoid sampling right after fertilizer or lime application.
- Sample at the same time each year for consistent monitoring.
- Keep records of soil test results and amendments applied.
Summary Mind Map: Soil Testing Workflow
By following these steps and understanding your soil test results, you can optimize fertilizer use, improve soil health, and increase crop yields sustainably.
3.5 Using Cover Crops to Enhance Soil Fertility Naturally
Cover crops are plants grown primarily to benefit the soil rather than for harvest. They play a crucial role in sustainable farming by naturally enhancing soil fertility, improving soil structure, and reducing erosion. For beginning farmers and agricultural workers, understanding how to use cover crops effectively can lead to healthier soils and better crop yields without relying heavily on synthetic fertilizers.
What Are Cover Crops?
Cover crops are typically grown during off-season periods or between main crops. Common types include legumes, grasses, and brassicas. Each type offers unique benefits to the soil.
- Legumes (e.g., clover, vetch, peas): Fix atmospheric nitrogen into the soil, enriching nitrogen content.
- Grasses (e.g., rye, oats, barley): Improve soil organic matter and prevent erosion.
- Brassicas (e.g., radish, mustard): Break compacted soil layers and suppress pests.
Benefits of Using Cover Crops
- Nitrogen Fixation: Leguminous cover crops host bacteria that convert atmospheric nitrogen into forms plants can use.
- Soil Structure Improvement: Roots create channels that enhance aeration and water infiltration.
- Erosion Control: Cover crops protect soil surface from wind and water erosion.
- Weed Suppression: Dense cover crop growth shades out weeds.
- Organic Matter Addition: When cover crops decompose, they add valuable organic matter to the soil.
Mind Map: Benefits of Cover Crops
How to Select Cover Crops
Selection depends on your farm’s goals, climate, and soil type.
- Goal: Increase Nitrogen → Choose legumes like hairy vetch or crimson clover.
- Goal: Improve Soil Structure → Choose deep-rooted brassicas like tillage radish.
- Goal: Prevent Erosion → Choose fast-growing grasses like rye or oats.
Planting and Management Tips
- Timing: Plant cover crops immediately after harvesting the main crop or during fallow periods.
- Seeding Rate: Follow seed supplier recommendations; overseeding can cause competition.
- Termination: Kill cover crops before planting the next crop using mowing, rolling, or herbicides (if applicable).
- Incorporation: Incorporate cover crop residues into the soil to speed decomposition and nutrient release.
Practical Example: Using Hairy Vetch to Fix Nitrogen
A beginning farmer plants hairy vetch after harvesting early-season vegetables. The vetch grows through fall and winter, fixing nitrogen in the soil. In spring, the farmer mows the vetch and incorporates it into the soil before planting tomatoes. This practice reduces the need for synthetic nitrogen fertilizers and improves tomato growth.
Mind Map: Cover Crop Management Cycle
Additional Example: Rye for Erosion Control and Weed Suppression
Rye is planted in late fall on a sloped farm field. Its dense growth protects the soil from winter rains and suppresses winter weeds. In early spring, the farmer terminates the rye by rolling it down and plants corn directly into the rye mulch, conserving moisture and reducing weed pressure.
Summary
Using cover crops is a natural, cost-effective way to enhance soil fertility, improve soil health, and reduce reliance on chemical fertilizers. By selecting the right cover crop and managing it properly, beginning farmers can build resilient soils that support sustainable crop production.
Resources for Further Learning
- Local agricultural extension services for cover crop recommendations.
- Seed suppliers specializing in cover crops.
- Online tools for cover crop selection based on region and goals.
By integrating cover crops into your farming system, you take a significant step toward sustainable soil and nutrient management.
4. Selecting and Applying Fertilizers Effectively
4.1 Types of Fertilizers: Organic, Inorganic, and Slow-Release
Fertilizers are essential for replenishing nutrients in the soil to support healthy crop growth. Understanding the different types of fertilizers helps farmers choose the best option for their soil, crops, and farming practices. In this section, we will explore three main types of fertilizers: organic, inorganic, and slow-release. Each type has unique characteristics, benefits, and practical applications.
Organic Fertilizers
Organic fertilizers are derived from natural sources such as plant residues, animal manure, compost, and other organic materials. They improve soil health by adding organic matter and enhancing microbial activity.
Key Features:
- Release nutrients slowly as they decompose
- Improve soil structure and water retention
- Environmentally friendly and sustainable
Common Examples:
- Compost
- Manure (cow, chicken, horse)
- Bone meal
- Fish emulsion
- Green manure (cover crops like clover or vetch)
Practical Example: A beginning farmer uses well-aged cow manure to enrich their vegetable garden soil. Over time, the manure breaks down, releasing nitrogen and other nutrients, while also improving soil texture and moisture retention.
Mind Map: Organic Fertilizers
Inorganic Fertilizers
Inorganic fertilizers, also called synthetic or chemical fertilizers, are manufactured through industrial processes. They provide nutrients in concentrated forms and are typically fast-acting.
Key Features:
- Nutrients are immediately available to plants
- Precise nutrient content (N-P-K ratios)
- Easy to apply and store
Common Examples:
- Urea (high nitrogen content)
- Superphosphate (phosphorus source)
- Potassium chloride (potash)
- Ammonium nitrate
Practical Example: An agricultural worker growing corn applies a balanced NPK fertilizer (10-10-10) at planting to ensure the young plants receive immediate nutrients for early growth.
Mind Map: Inorganic Fertilizers
Slow-Release Fertilizers
Slow-release fertilizers are designed to release nutrients gradually over time, reducing nutrient loss and improving efficiency. They can be organic, inorganic, or a combination.
Key Features:
- Controlled nutrient release matching crop uptake
- Reduced frequency of application
- Minimized environmental impact
Common Examples:
- Coated urea (polymer-coated)
- Organic-based slow-release blends
- Sulfur-coated fertilizers
Practical Example: A beginning farmer growing tomatoes uses polymer-coated urea fertilizer. This fertilizer releases nitrogen slowly over several weeks, reducing the need for multiple applications and preventing nitrogen leaching.
Mind Map: Slow-Release Fertilizers
Summary Table: Fertilizer Types Comparison
| Fertilizer Type | Source | Nutrient Release | Soil Health Impact | Application Frequency | Example Use Case |
|---|---|---|---|---|---|
| Organic | Natural (manure, compost) | Slow, as microbes decompose | Improves soil structure and microbes | Less frequent, seasonal | Vegetable garden with compost manure |
| Inorganic | Synthetic chemicals | Fast, immediately available | No direct improvement, may degrade soil over time | Often multiple times per season | Corn field with NPK fertilizer |
| Slow-Release | Coated or blended | Gradual, controlled release | Can improve efficiency, less runoff | Less frequent, often once per season | Tomato crop with polymer-coated urea |
Tips for Choosing Fertilizers
- Conduct a soil test to identify nutrient deficiencies.
- Consider crop nutrient requirements and growth stages.
- Match fertilizer type to your soil health goals and environmental conditions.
- Use organic fertilizers to build long-term soil fertility.
- Use inorganic fertilizers for quick nutrient boosts when needed.
- Use slow-release fertilizers to improve nutrient use efficiency and reduce labor.
By understanding these fertilizer types and their practical applications, beginning farmers and agricultural workers can make informed decisions that support healthy crops and sustainable farming.
4.2 Calculating Fertilizer Requirements Based on Soil Tests
Understanding how to calculate fertilizer requirements based on soil tests is a crucial skill for every farmer. It ensures that crops receive the right amount of nutrients, preventing both deficiencies and excesses that can harm plants and the environment.
Step 1: Collect and Analyze Soil Samples
- Collect soil samples from different parts of your field to get a representative analysis.
- Send samples to a reliable soil testing lab.
- Receive a report showing nutrient levels (N, P, K, pH, micronutrients).
Step 2: Understand Soil Test Results
- Nutrient levels are usually reported in parts per million (ppm) or mg/kg.
- Soil pH affects nutrient availability.
- The report often includes recommendations for fertilizer application.
Step 3: Determine Crop Nutrient Requirements
- Different crops have different nutrient needs.
- Example: Corn requires higher nitrogen than beans.
- Use crop nutrient guides or extension service recommendations.
Step 4: Calculate Fertilizer Needs
-
Formula to calculate fertilizer amount:
Fertilizer Needed (kg/ha) = (Crop Nutrient Requirement - Soil Nutrient Supply) / Fertilizer Nutrient Content -
Crop Nutrient Requirement: Amount of nutrient needed by the crop (kg/ha).
-
Soil Nutrient Supply: Amount available in soil (kg/ha), derived from soil test.
-
Fertilizer Nutrient Content: Percentage of nutrient in fertilizer.
Mind Map: Calculating Fertilizer Requirements
Example 1: Calculating Nitrogen Fertilizer for Wheat
- Soil test shows available nitrogen: 30 kg/ha
- Wheat nitrogen requirement: 120 kg/ha
- Fertilizer used: Urea (46% N)
Calculation:
- Nutrient deficit = 120 - 30 = 90 kg N/ha
- Fertilizer needed = 90 / 0.46 ≈ 196 kg urea/ha
So, apply approximately 196 kg of urea per hectare.
Example 2: Phosphorus Fertilizer Calculation for Tomatoes
- Soil test available P: 15 kg/ha
- Tomato P requirement: 50 kg/ha
- Fertilizer: Triple Super Phosphate (TSP) with 46% P2O5
Note: Convert P to P2O5 by multiplying by 2.29 (P2O5 contains 43.6% P)
- Convert soil P to P2O5: 15 kg P × 2.29 = 34.35 kg P2O5/ha
- Crop requirement in P2O5: 50 × 2.29 = 114.5 kg P2O5/ha
- Nutrient deficit = 114.5 - 34.35 = 80.15 kg P2O5/ha
- Fertilizer needed = 80.15 / 0.46 ≈ 174.24 kg TSP/ha
Apply approximately 174 kg of TSP per hectare.
Tips for Accurate Calculations
- Always use updated soil test results.
- Adjust calculations based on expected yield and local recommendations.
- Consider nutrient losses due to leaching or volatilization.
- When using organic fertilizers, nutrient content varies; test or estimate carefully.
Mind Map: Fertilizer Calculation Workflow
By following these steps and examples, beginning farmers and agricultural workers can confidently calculate fertilizer requirements tailored to their soil and crop needs, optimizing growth while minimizing waste and environmental impact.
4.3 Timing Fertilizer Application for Maximum Crop Uptake
Proper timing of fertilizer application is crucial to ensure that crops receive nutrients when they need them most, maximizing nutrient use efficiency and minimizing waste or environmental harm. Understanding crop growth stages, soil conditions, and weather patterns helps farmers apply fertilizers at the optimal time.
Why Timing Matters
- Nutrients applied too early may leach away before plants can use them.
- Applying fertilizer too late can stunt growth or reduce yield.
- Synchronizing fertilizer application with crop nutrient demand improves uptake and reduces costs.
Key Growth Stages and Fertilizer Timing
| Crop Growth Stage | Nutrient Demand | Fertilizer Timing Recommendation |
|---|---|---|
| Germination & Seedling | Moderate nitrogen for root and shoot growth | Apply starter fertilizer at or just before planting |
| Vegetative Growth | High nitrogen demand for leaf and stem growth | Side-dress nitrogen during early vegetative stage |
| Flowering & Fruiting | Increased phosphorus and potassium demand | Apply phosphorus and potassium before flowering |
| Maturation | Reduced nutrient uptake | Avoid heavy fertilization to prevent waste |
Mind Map: Fertilizer Timing Factors
Practical Examples
Example 1: Corn Fertilizer Timing
- Corn requires nitrogen heavily during the vegetative stage.
- Apply a small amount of starter fertilizer at planting to support early growth.
- Side-dress nitrogen fertilizer when corn is 6-12 inches tall to meet peak nitrogen demand.
- Avoid applying nitrogen too early to prevent leaching during heavy rains.
Example 2: Tomato Fertilizer Timing
- Apply balanced fertilizer at transplanting.
- Increase potassium application as plants begin flowering to support fruit development.
- Use foliar feeding with micronutrients during fruit set for better quality.
Mind Map: Timing Strategy for Different Fertilizer Types
Tips for Effective Fertilizer Timing
- Conduct soil tests to understand nutrient availability.
- Monitor crop growth stages closely.
- Consider weather forecasts to avoid fertilizer loss by rain.
- Use split applications to match nutrient demand over time.
- Combine fertilizer application with irrigation when possible (fertigation).
By carefully timing fertilizer applications according to crop needs and environmental conditions, farmers can enhance nutrient uptake efficiency, reduce costs, and promote sustainable farming practices.
4.4 Methods of Fertilizer Application: Broadcasting, Banding, and Foliar Feeding
Fertilizer application is a critical step in ensuring that crops receive the necessary nutrients for optimal growth. Choosing the right method depends on factors such as crop type, soil condition, and available resources. In this section, we explore three common fertilizer application methods: broadcasting, banding, and foliar feeding, along with practical examples and mind maps to help you understand and implement these techniques effectively.
Broadcasting
Broadcasting is the process of spreading fertilizer evenly across the entire soil surface before planting or during early crop growth.
- Advantages:
- Simple and quick to apply over large areas.
- Suitable for many crops and soil types.
- Disadvantages:
- Nutrient loss risk due to runoff or volatilization.
- Less efficient nutrient placement compared to other methods.
Example: A beginning farmer preparing a wheat field applies a balanced NPK fertilizer by broadcasting it evenly using a hand spreader before sowing seeds. This ensures nutrients are available throughout the root zone.
Mind Map: Broadcasting
Banding
Banding involves placing fertilizer in concentrated bands either beside or below the seed row. This method places nutrients close to the root zone, improving nutrient uptake efficiency.
- Advantages:
- Reduced nutrient loss.
- Enhanced root access to nutrients.
- Can reduce fertilizer quantity needed.
- Disadvantages:
- Requires more precise equipment or labor.
- Risk of seed damage if fertilizer is too close.
Example: An agricultural worker planting corn uses a planter equipped with a banding attachment to place phosphorus-rich fertilizer 2 inches to the side and 2 inches below the seed. This targeted placement helps young plants access phosphorus quickly, promoting early root development.
Mind Map: Banding
Foliar Feeding
Foliar feeding is the application of liquid fertilizer directly onto plant leaves, allowing nutrients to be absorbed through the foliage.
- Advantages:
- Quick nutrient uptake, especially for micronutrients.
- Useful for correcting nutrient deficiencies during the growing season.
- Can be combined with pesticide or fungicide sprays.
- Disadvantages:
- Limited nutrient quantity can be applied.
- Risk of leaf burn if concentration is too high.
Example: A beginning farmer notices yellowing leaves on tomato plants, indicating iron deficiency. They prepare a diluted iron chelate solution and spray it onto the leaves early in the morning to correct the deficiency rapidly.
Mind Map: Foliar Feeding
Summary Table of Fertilizer Application Methods
| Method | Description | Advantages | Disadvantages | Best Use Case |
|---|---|---|---|---|
| Broadcasting | Evenly spreading fertilizer over soil surface | Quick, covers large areas | Nutrient loss risk, less precise | Pre-planting, early growth stages |
| Banding | Placing fertilizer in bands near seed | Efficient nutrient use, reduced loss | Requires precision, seed damage risk | Row crops, nutrient-sensitive crops |
| Foliar Feeding | Spraying liquid fertilizer on leaves | Rapid uptake, corrects deficiencies | Limited quantity, leaf burn risk | Micronutrient application, stress conditions |
Practical Tips for Farmers
- Always calibrate your fertilizer spreader or applicator to avoid over- or under-application.
- When banding, maintain safe distance from seeds to prevent fertilizer burn.
- For foliar feeding, apply during cooler parts of the day (early morning or late afternoon) to reduce evaporation and leaf damage.
- Combine methods when appropriate; for example, broadcast basal fertilizer and use foliar feeding to correct deficiencies during the season.
By understanding and applying these fertilizer methods thoughtfully, beginning farmers and agricultural workers can improve nutrient use efficiency, reduce waste, and promote healthier crop growth.
4.5 Practical Example: Preparing and Applying Compost Tea as a Fertilizer
Compost tea is a nutrient-rich liquid fertilizer made by steeping compost in water. It provides plants with essential nutrients and beneficial microorganisms that improve soil health and plant growth. This practical example will guide you through preparing and applying compost tea on your farm.
What is Compost Tea?
- A liquid extract brewed from compost
- Contains soluble nutrients and beneficial microbes
- Enhances nutrient availability and soil microbial activity
Benefits of Compost Tea
- Improves soil structure and fertility
- Promotes healthy root development
- Increases plant resistance to diseases
- Environmentally friendly and cost-effective
Materials Needed
- Well-aged, high-quality compost (preferably from your farm)
- Non-chlorinated water (rainwater or dechlorinated tap water)
- A 5-gallon bucket or container
- A stirring stick or aquarium air pump (optional for aeration)
- A fine mesh bag or old nylon stocking (optional)
Step-by-Step Preparation Process
- Select Compost: Use 1 to 2 cups of mature compost. Avoid fresh compost as it may contain harmful pathogens.
- Fill Container: Add 5 gallons of non-chlorinated water to your bucket.
- Combine: Place compost directly into the water or inside a mesh bag for easy removal.
- Aerate: Stir the mixture vigorously for 5 minutes, then stir 2-3 times daily, or use an aquarium air pump to keep oxygen flowing.
- Brew: Let the mixture steep for 24 to 48 hours at room temperature. Avoid brewing longer to prevent harmful bacteria growth.
- Strain: Remove the compost solids by straining through a fine mesh.
Application Methods
- Soil Drench: Pour the compost tea around the base of plants to improve soil microbial life and nutrient availability.
- Foliar Spray: Use a spray bottle or backpack sprayer to apply on leaves early morning or late afternoon to avoid sunburn.
- Frequency: Apply every 1 to 2 weeks during the growing season for best results.
Example Scenario
Farmer Jane has a small vegetable garden and wants to reduce chemical fertilizer use. She prepares compost tea every week using compost from her farm. She applies it as a soil drench to her tomato plants and as a foliar spray to her leafy greens. Over the season, she notices healthier plants, improved soil texture, and reduced pest issues.
Tips and Best Practices
- Use fresh compost tea within 8 hours for maximum microbial activity.
- Avoid using chlorinated water as it kills beneficial microbes.
- Store compost tea in a shaded, cool place if not applying immediately.
- Always test on a small area before widespread foliar application to check for plant sensitivity.
By integrating compost tea into your fertilizer routine, you promote sustainable soil health and reduce dependency on synthetic fertilizers, making your farming practices more eco-friendly and productive.
5. Integrated Soil Water and Fertilizer Management
5.1 Balancing Water and Nutrient Supply for Optimal Crop Growth
Achieving optimal crop growth depends heavily on the careful balance between soil water availability and nutrient supply. Both elements are interdependent: water acts as the medium through which nutrients dissolve and move to plant roots, while nutrients support the physiological processes that enable plants to utilize water efficiently.
Why Balance Matters
- Water without nutrients: Plants may grow poorly or show deficiency symptoms even if water is adequate.
- Nutrients without water: Nutrients remain locked in the soil and unavailable to plants.
- Excess water: Can cause nutrient leaching, reducing fertilizer efficiency and harming the environment.
- Insufficient water: Limits nutrient uptake and reduces crop yield.
Key Principles for Balancing Water and Nutrients
Mind Map: Balancing Water and Nutrients
Practical Examples
Example 1: Scheduling Irrigation to Match Fertilizer Application
A tomato farmer applies nitrogen fertilizer during the early growth stage. To ensure the fertilizer is effectively absorbed, irrigation is scheduled shortly after fertilizer application. This practice helps dissolve the nutrients and carry them to the root zone without causing runoff or leaching.
Example 2: Using Soil Moisture Sensors to Prevent Overwatering
A vegetable grower installs soil moisture sensors to monitor moisture levels in real-time. When sensors indicate soil moisture is sufficient, irrigation is paused, preventing excess water that could wash away applied fertilizers.
Example 3: Adjusting Fertilizer Type Based on Water Availability
In a dryland farm, a farmer chooses slow-release fertilizers that provide nutrients gradually, matching the limited water availability and reducing nutrient loss.
Steps to Balance Water and Nutrient Supply
Mind Map: Steps to Balance Water and Nutrients
Tips for Everyday Farmers
- Always test your soil before applying fertilizers.
- Use mulch to conserve soil moisture and improve nutrient retention.
- Avoid applying fertilizers before heavy rains to reduce nutrient runoff.
- Match fertilizer application with irrigation events to maximize nutrient uptake.
- Keep records of water and fertilizer applications to identify what works best.
Balancing water and nutrient supply is a dynamic process that requires observation, planning, and adjustment. By integrating these practices, beginning farmers and agricultural workers can improve crop health, yield, and sustainability on their farms.
5.2 Avoiding Nutrient Leaching Through Proper Irrigation Practices
Nutrient leaching occurs when water moves nutrients, especially nitrogen and potassium, below the root zone, making them unavailable to plants and potentially contaminating groundwater. Proper irrigation management is essential to minimize nutrient loss and maintain soil fertility.
Understanding Nutrient Leaching
- What is Nutrient Leaching?
- Downward movement of soluble nutrients beyond the root zone due to excess water.
- Common Nutrients Lost: Nitrogen (nitrate form), Potassium, Sulfates.
- Consequences: Reduced fertilizer efficiency, increased costs, environmental pollution.
Mind Map: Causes and Effects of Nutrient Leaching
Best Practices to Avoid Nutrient Leaching
-
Match Irrigation Amount to Crop Water Needs
- Avoid over-irrigation by understanding crop evapotranspiration rates.
- Use soil moisture sensors to monitor soil water content.
-
Use Efficient Irrigation Methods
- Drip irrigation delivers water directly to roots, reducing runoff and deep percolation.
- Sprinkler irrigation should be managed to avoid excess water application.
-
Schedule Irrigation Appropriately
- Apply water in smaller, more frequent doses rather than large amounts at once.
- Time irrigation to avoid periods of heavy rainfall.
-
Incorporate Soil Amendments
- Organic matter improves soil structure and water-holding capacity, reducing leaching.
-
Split Fertilizer Applications
- Apply fertilizers in multiple smaller doses aligned with crop uptake to reduce nutrient loss.
Mind Map: Proper Irrigation Practices to Prevent Nutrient Leaching
Practical Example: Implementing Drip Irrigation to Reduce Nutrient Leaching
Scenario: A beginning farmer growing tomatoes on sandy soil noticed poor fertilizer efficiency and suspected nutrient leaching.
Steps Taken:
- Installed a drip irrigation system to deliver water directly to the root zone.
- Used a soil moisture sensor to monitor moisture levels and irrigated only when necessary.
- Split nitrogen fertilizer into three applications during the growing season.
Outcome:
- Reduced water use by 30%.
- Improved fertilizer uptake with healthier plants and higher yields.
- Minimized nutrient runoff and leaching.
Practical Example: Scheduling Irrigation to Avoid Leaching After Heavy Rainfall
Scenario: A farmer growing maize experienced heavy rains after fertilization, leading to suspected nutrient loss.
Solution:
- Delayed irrigation for 2-3 days after heavy rain to allow soil to dry to optimal moisture levels.
- Applied fertilizer in smaller doses post-rainfall.
- Used mulch to reduce evaporation and maintain soil moisture.
Result:
- Reduced nutrient leaching.
- Maintained steady nutrient availability for crops.
Summary
Avoiding nutrient leaching is critical for sustainable farming and cost-effective fertilizer use. By adopting proper irrigation practices such as matching water application to crop needs, using efficient irrigation systems, scheduling irrigation wisely, and integrating fertilizer management, farmers can protect soil fertility and the environment.
Additional Tips
- Regularly test soil nutrient levels to track nutrient availability.
- Consider cover crops to capture residual nutrients and prevent leaching during off-season.
- Educate farm workers on the importance of irrigation timing and amounts.
By integrating these practices, beginning farmers and agricultural workers can optimize water and nutrient use, leading to healthier crops and more sustainable farming operations.
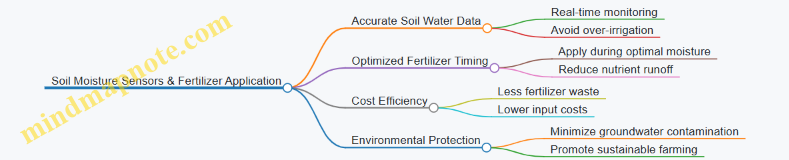
5.3 Using Soil Moisture Sensors to Optimize Fertilizer Application
Efficient fertilizer application is crucial for maximizing crop yield while minimizing waste and environmental impact. One powerful tool that beginning farmers and agricultural workers can use is the soil moisture sensor. These sensors provide real-time data on soil water content, enabling more precise decisions about when and how much fertilizer to apply.
What Are Soil Moisture Sensors?
Soil moisture sensors measure the volumetric water content in soil. They come in various types, such as capacitance sensors, tensiometers, and gypsum blocks, each with different mechanisms but the same goal: to inform you about the soil’s moisture status.
Why Use Soil Moisture Sensors for Fertilizer Application?
- Avoid Nutrient Leaching: Applying fertilizer when soil is too wet can cause nutrients to wash away below the root zone.
- Enhance Nutrient Uptake: Fertilizers are most effective when plants can absorb nutrients, which requires adequate but not excessive soil moisture.
- Reduce Costs: Applying fertilizer only when needed saves money and reduces environmental harm.
Mind Map: Benefits of Soil Moisture Sensors in Fertilizer Management
How to Use Soil Moisture Sensors to Optimize Fertilizer Application
- Install Sensors at Root Zone Depth: Place sensors where most roots absorb water and nutrients (usually 6-12 inches deep).
- Monitor Soil Moisture Regularly: Check sensor readings daily or weekly depending on crop needs.
- Set Thresholds for Fertilizer Application: Determine soil moisture levels that indicate the best time to fertilize (e.g., when soil is moist but not saturated).
- Coordinate Irrigation and Fertilizer Application: Use sensor data to avoid fertilizing before heavy irrigation or rainfall.
- Adjust Fertilizer Rates Based on Moisture Data: If soil is dry, reduce fertilizer application to prevent stress; if moist, apply recommended rates.
Practical Example: Using a Capacitance Soil Moisture Sensor for Fertigation
- Scenario: A tomato farmer uses a capacitance sensor connected to an irrigation controller.
- Process: The sensor measures soil moisture continuously. When moisture drops below 30%, the irrigation system activates, delivering water mixed with liquid fertilizer (fertigation).
- Result: Fertilizer is applied only when plants can absorb it efficiently, reducing waste and improving crop health.
Mind Map: Steps to Optimize Fertilizer Application Using Soil Moisture Sensors
Additional Tips
- Combine with Soil Testing: Use soil nutrient tests alongside moisture data to fine-tune fertilizer types and amounts.
- Use Multiple Sensors: For larger fields, install sensors in different zones to capture variability.
- Leverage Technology: Many modern sensors connect to smartphones or computers for easy monitoring and alerts.
Summary
Using soil moisture sensors empowers farmers to apply fertilizers precisely when plants can best use them, saving resources and protecting the environment. By integrating sensor data into everyday farm management, beginning farmers can enhance productivity and sustainability.
5.4 Practical Example: Combining Fertigation with Drip Irrigation
Fertigation is the process of delivering fertilizers dissolved in irrigation water directly to the plant root zone. When combined with drip irrigation, it allows precise, efficient, and timely nutrient application, reducing waste and improving crop yield.
What is Fertigation?
- Application of water-soluble fertilizers through irrigation systems.
- Targets nutrients directly to the root zone.
- Saves labor and reduces fertilizer runoff.
Why Combine Fertigation with Drip Irrigation?
- Drip irrigation delivers water slowly and directly to the soil near plant roots.
- Fertilizers applied via drip ensure nutrients are available exactly where and when plants need them.
- Reduces nutrient leaching and environmental pollution.
Step-by-Step Guide to Combining Fertigation with Drip Irrigation
-
Assess Your Crop and Soil Needs
- Conduct soil tests to determine nutrient requirements.
- Identify crop growth stages that require fertilization.
-
Choose Appropriate Fertilizers
- Use water-soluble fertilizers compatible with drip systems.
- Examples: Urea, potassium nitrate, monoammonium phosphate.
-
Set Up Fertigation Equipment
- Fertilizer tank or injector.
- Backflow preventer to avoid contamination.
- Filters to prevent clogging.
- Injection pump or venturi injector.
-
Calculate Fertilizer Dosage
- Based on soil test results and crop nutrient needs.
- Example: For tomatoes, nitrogen requirement might be 150 kg/ha over the season.
-
Program Irrigation and Fertilization Schedule
- Synchronize fertigation events with irrigation cycles.
- Apply smaller doses more frequently for steady nutrient supply.
-
Monitor System Performance
- Check for uniform water and fertilizer distribution.
- Inspect emitters for clogging.
-
Adjust Based on Crop Response
- Observe plant growth and leaf color.
- Modify nutrient concentration or frequency if needed.
Mind Map: Fertigation with Drip Irrigation
Example Scenario: Fertigation for Tomato Crop Using Drip Irrigation
- Farm size: 1 hectare
- Crop: Tomatoes
- Soil test results: Nitrogen deficient
- Fertilizer: Urea (46-0-0)
- Irrigation: Drip system with 2 L/hr emitters spaced 50 cm apart
Implementation:
- Total nitrogen required: 150 kg N/ha
- Split into 10 fertigation events over growing season
- Each event: 15 kg N/ha
- Dissolve 32.6 kg urea per event in fertilizer tank (since urea is 46% N)
- Inject fertilizer solution during irrigation cycles twice per week
Benefits observed:
- Uniform nutrient distribution
- Reduced fertilizer use by 15% compared to broadcasting
- Improved fruit size and yield
Tips for Successful Fertigation with Drip Irrigation
- Always flush the system after fertigation to prevent clogging.
- Use acidifiers if water pH is high to keep fertilizers dissolved.
- Regularly calibrate fertilizer injectors.
- Keep records of fertigation schedules and crop responses.
Combining fertigation with drip irrigation is a powerful practice for beginning farmers aiming to optimize water and nutrient use efficiently. By following these steps and examples, you can improve crop health, reduce input costs, and promote sustainable farming.
5.5 Monitoring Crop Health to Adjust Water and Fertilizer Inputs
Monitoring crop health is a vital practice that enables farmers to make informed decisions about adjusting water and fertilizer inputs. Healthy crops indicate that soil water and nutrient levels are adequate, while signs of stress or deficiency suggest the need for intervention. This section will guide you through practical methods to monitor crop health effectively and adjust your management practices accordingly.
Why Monitor Crop Health?
- Detect early signs of water stress or nutrient deficiency.
- Optimize resource use, reducing waste and cost.
- Improve crop yield and quality.
- Prevent long-term soil degradation.
Key Indicators of Crop Health
- Leaf Color and Texture: Yellowing leaves may indicate nitrogen deficiency; pale or bluish-green can suggest other nutrient imbalances.
- Growth Rate: Stunted growth can signal insufficient water or nutrients.
- Wilting: Often a sign of water stress, either from drought or overwatering.
- Leaf Spots or Necrosis: Could indicate nutrient toxicity or disease.
- Root Health: Healthy roots are white and firm; dark, mushy roots may indicate overwatering or poor soil aeration.
Mind Map: Crop Health Monitoring Overview
Practical Steps to Monitor and Adjust
-
Regular Visual Inspections: Walk through your fields daily or weekly to observe crop condition.
- Example: Noticing yellowing lower leaves on corn may indicate nitrogen deficiency.
-
Use Soil Moisture Sensors: These devices provide real-time data on soil water content.
- Example: A sensor shows soil moisture dropping below 50% field capacity, signaling the need for irrigation.
-
Chlorophyll Meters: Measure leaf greenness to assess nitrogen status.
- Example: Low chlorophyll readings prompt a side-dress nitrogen application.
-
Record Observations: Keep a notebook or digital log of crop symptoms and environmental conditions.
- Example: Logging a pattern of wilting after irrigation helps identify overwatering.
-
Adjust Watering Schedule: Based on observations and sensor data, modify irrigation frequency and amount.
-
Modify Fertilizer Application: Increase or decrease fertilizer rates or change the nutrient mix based on crop needs.
Mind Map: Adjusting Inputs Based on Crop Health
Examples
-
Example 1: Nitrogen Deficiency in Tomatoes
- Observation: Lower leaves turn yellow while upper leaves remain green.
- Action: Apply a nitrogen-rich fertilizer at a recommended rate.
- Result: New growth appears greener within 7-10 days.
-
Example 2: Overwatering in Lettuce
- Observation: Leaves are yellow and soft; soil feels soggy.
- Action: Reduce irrigation frequency and improve drainage.
- Result: Lettuce recovers, and leaf firmness improves.
-
Example 3: Using Soil Moisture Sensors in Maize
- Observation: Sensor data shows soil moisture below threshold.
- Action: Irrigate immediately with measured water volume.
- Result: Wilting stops, and plants regain turgidity.
Tips for Effective Monitoring
- Combine visual inspection with technology for best results.
- Monitor at different times of day to catch transient stress.
- Involve farm workers in observation to increase data points.
- Use simple charts or apps to track changes over time.
By consistently monitoring crop health and responding to the signs your plants give, you can fine-tune your water and fertilizer inputs, leading to healthier crops, better yields, and more sustainable farming practices.
6. Soil Conservation Techniques to Enhance Water and Nutrient Retention
6.1 Contour Farming and Terracing to Reduce Runoff
Contour farming and terracing are two effective soil conservation techniques that help reduce water runoff, prevent soil erosion, and improve water infiltration on sloped farmland. These practices are especially valuable for beginning farmers working on hilly or uneven terrain.
What is Contour Farming?
Contour farming involves plowing, planting, and cultivating crops along the natural contours of the land, rather than up and down slopes. This method creates natural barriers that slow down water flow, reducing soil erosion and allowing more water to soak into the soil.
Benefits of Contour Farming:
- Reduces soil erosion by slowing runoff
- Increases water infiltration and retention
- Helps maintain soil fertility
- Improves crop yields on sloped land
Example: Imagine a hillside farm where crops are planted in rows that follow the curve of the hill rather than straight up and down. When it rains, water flows more slowly along these curved rows, giving the soil time to absorb moisture instead of washing it away.
What is Terracing?
Terracing transforms a steep slope into a series of flat, step-like levels. Each terrace acts as a small field that holds water and soil, preventing runoff and erosion. Terracing is often used on steeper slopes where contour farming alone is insufficient.
Benefits of Terracing:
- Greatly reduces runoff and soil loss
- Creates flat planting areas on steep slopes
- Enhances water conservation and nutrient retention
- Facilitates easier farming operations on hills
Example: A farmer with a steep hillside builds terraces by cutting into the slope and creating flat platforms supported by retaining walls or earth banks. Crops are planted on these platforms, and water is retained rather than rushing downhill.
Mind Map: Contour Farming
Mind Map: Terracing
How to Implement Contour Farming
- Identify the Contour Lines: Use simple tools like an A-frame level or contour gauge to find the natural lines that run across the slope.
- Mark the Contours: Mark these lines in the field with stakes or flags.
- Plow Along Contours: Prepare the soil by plowing or tilling along these lines rather than up and down the slope.
- Plant Crops: Sow seeds or transplant seedlings following the contour lines.
Practical Example: A beginning farmer uses a homemade A-frame level to locate contour lines on a gentle hillside. They mark these lines with sticks and plant rows of beans along them. After a rain, the farmer notices less soil washed away compared to previous years.
How to Build Terraces
- Survey the Slope: Determine the slope steepness and length.
- Design Terrace Layout: Decide on the width and height of each terrace step.
- Cut and Fill: Excavate soil from the uphill side and use it to build up the downhill side, creating a flat platform.
- Construct Retaining Walls: Use stones, wood, or earth banks to support the terrace edges.
- Plant Crops: Use the flat terraces for planting.
Practical Example: A small-scale farmer on a steep hillside builds bench terraces using local stones for retaining walls. They plant vegetables on each terrace, reducing soil loss and improving water retention.
Additional Tips
- Combine contour farming with mulching to further reduce evaporation and runoff.
- Regularly maintain terraces to prevent breaches and collapse.
- Use cover crops on terraces and contour rows to protect soil during off-seasons.
By adopting contour farming and terracing, farmers can sustainably manage soil and water resources, leading to healthier crops and more productive land even on challenging slopes.
6.2 No-Till and Reduced Tillage Practices for Soil Health
Introduction
No-till and reduced tillage are farming practices designed to minimize soil disturbance. These methods help maintain soil structure, improve water retention, and enhance microbial activity, all of which contribute to healthier, more productive soils.
What is No-Till Farming?
No-till farming means planting crops without turning the soil over. Instead of plowing, seeds are directly inserted into the soil using specialized equipment.
What is Reduced Tillage?
Reduced tillage involves minimal soil disturbance compared to conventional tillage. It may include shallow cultivation or strip-till, where only narrow strips of soil are tilled for planting.
Benefits of No-Till and Reduced Tillage
- Improved Soil Structure: Soil aggregates remain intact, reducing erosion.
- Enhanced Water Retention: Undisturbed soil holds moisture better.
- Increased Organic Matter: Crop residues remain on the surface, decomposing slowly.
- Better Microbial Activity: Soil organisms thrive in less disturbed environments.
- Reduced Labor and Fuel Costs: Less machinery use means savings.
Mind Map: Benefits of No-Till and Reduced Tillage
How to Implement No-Till and Reduced Tillage Practices
- Assess Your Soil and Crop Needs: Some soils and crops respond better to no-till than others.
- Use Appropriate Equipment: No-till drills or planters are designed to place seeds without disturbing the soil.
- Manage Crop Residues: Leave crop residues on the field to protect soil and add organic matter.
- Control Weeds Effectively: Use cover crops, mulches, or targeted herbicides as tillage is reduced.
- Monitor Soil Health: Regularly check soil moisture, compaction, and organic matter levels.
Mind Map: Steps to Implement No-Till/Reduced Tillage
Examples of No-Till and Reduced Tillage in Everyday Farming
Example 1: No-Till Corn Planting
Farmer Jane uses a no-till planter to sow corn directly into last season’s wheat stubble. She leaves the residue on the field, which reduces soil erosion and retains moisture during dry spells. Over time, she notices improved soil structure and reduced fuel costs.
Example 2: Reduced Tillage in Vegetable Production
On a small vegetable farm, Farmer Luis uses strip-till to prepare narrow planting rows while leaving the areas between rows undisturbed. This helps maintain soil moisture and reduces compaction from machinery.
Example 3: Cover Crops and No-Till
Farmer Amina plants a cover crop mix after harvesting soybeans. The cover crops protect the soil surface and add organic matter. When planting the next crop, she uses no-till equipment to minimize disturbance.
Tips for Success
- Start gradually by reducing tillage intensity over time.
- Use cover crops to improve soil cover and fertility.
- Monitor for weed pressure and adapt control methods.
- Maintain equipment properly for effective seed placement.
Summary
No-till and reduced tillage practices offer practical ways to improve soil health, conserve water, and reduce costs. By minimizing soil disturbance, farmers can build resilient soils that support sustainable crop production.
Additional Resources
- Local agricultural extension services for equipment demonstrations.
- Online tutorials on no-till planter use.
- Soil health monitoring guides tailored for beginning farmers.
6.3 Incorporating Organic Amendments to Improve Soil Structure
Organic amendments are natural materials added to soil to enhance its physical, chemical, and biological properties. Improving soil structure through organic amendments is vital for water retention, nutrient availability, and root development, all of which contribute to healthier crops and sustainable farming.
What Are Organic Amendments?
- Compost
- Manure
- Green Manure (cover crops)
- Crop Residues
- Biochar
Benefits of Organic Amendments on Soil Structure
- Improved Aggregation: Organic matter helps soil particles bind together forming stable aggregates.
- Enhanced Porosity: Creates spaces for air and water movement.
- Increased Water Holding Capacity: Organic matter can hold several times its weight in water.
- Better Root Penetration: Looser soil allows roots to grow deeper and access nutrients.
- Stimulates Microbial Activity: Microorganisms break down organic matter releasing nutrients.
Mind Map: Organic Amendments and Soil Structure
How to Incorporate Organic Amendments: Step-by-Step
- Assess Your Soil: Conduct a soil test to understand current organic matter levels and texture.
- Choose Appropriate Amendment: Based on availability and crop needs.
- Prepare the Amendment: Compost should be well-decomposed; manure should be aged to avoid burning plants.
- Apply at the Right Time: Usually before planting or during soil preparation.
- Incorporate into Soil: Mix amendments into the top 6-8 inches of soil using a tiller or hand tools.
- Maintain Regular Applications: Organic matter breaks down over time; repeat annually or as needed.
Practical Examples
-
Example 1: Using Compost to Improve Sandy Soil
- Sandy soils drain quickly and hold little water.
- Adding 2-3 inches of mature compost and mixing it into the topsoil improves water retention and nutrient availability.
- Result: Better moisture for crops like tomatoes and peppers.
-
Example 2: Applying Green Manure in Vegetable Plots
- Planting a cover crop like hairy vetch after harvesting lettuce.
- After 6-8 weeks, till the vetch into the soil.
- This adds nitrogen and organic matter, reducing the need for synthetic fertilizers.
-
Example 3: Incorporating Aged Manure in Corn Fields
- Spread aged cow manure evenly across the field in early spring.
- Incorporate with a plow to prevent nitrogen loss.
- Enhances soil fertility and structure for the growing season.
Mind Map: Practical Application Workflow
Tips for Success
- Avoid fresh manure directly on crops to prevent burning.
- Use local organic materials to reduce costs.
- Combine amendments for balanced nutrient supply.
- Monitor soil moisture after application; organic matter can change water needs.
- Encourage earthworms and beneficial microbes by maintaining organic matter.
Incorporating organic amendments is a simple, cost-effective way to improve soil structure, enhance water retention, and boost crop productivity. By understanding the types, benefits, and application methods, beginning farmers can build healthier soils that sustain their farming for years to come.
6.4 Practical Example: Building a Raised Bed to Improve Drainage and Fertility
Raised beds are an excellent solution for farmers facing poor soil drainage or low fertility. By elevating the soil level, raised beds improve water drainage, enhance root growth, and allow for better control over soil quality and nutrient management. This section will guide you through the process of building a raised bed, with practical tips and examples.
Why Build Raised Beds?
- Improved Drainage: Elevated soil prevents waterlogging, especially in heavy clay or compacted soils.
- Enhanced Soil Fertility: You can fill raised beds with nutrient-rich soil and organic matter.
- Better Root Development: Looser soil structure encourages healthy root growth.
- Weed and Pest Control: Easier to manage weeds and pests.
Step-by-Step Guide to Building a Raised Bed
-
Choose the Location:
- Select a sunny spot with good access to water.
- Avoid low-lying areas prone to flooding.
-
Determine Size and Shape:
- Common dimensions: 4 feet wide (for easy reach), length as per available space.
- Height: 6 to 12 inches minimum; up to 18 inches for better drainage.
-
Prepare the Ground:
- Clear grass, weeds, and debris.
- Loosen the soil beneath to encourage root penetration.
-
Build the Frame (Optional):
- Use untreated wood, bricks, or stones.
- Ensure sturdy construction to hold soil.
-
Fill the Bed:
- Use a mix of topsoil, compost, and organic matter.
- Example mix: 50% topsoil, 30% compost, 20% coarse sand or perlite for drainage.
-
Planting:
- Choose crops suited to your climate and soil.
- Follow recommended spacing and watering practices.
-
Maintenance:
- Mulch to retain moisture and suppress weeds.
- Regularly add compost or organic fertilizers.
Mind Map: Raised Bed Construction Overview
Example: Building a Raised Bed for Tomato Plants
- Location: South-facing garden corner with full sun.
- Size: 4 ft wide x 8 ft long x 12 inches high.
- Frame: Untreated cedar wood planks.
- Soil Mix:
- 40% local topsoil
- 40% homemade compost
- 20% coarse sand for drainage
- Planting: 4 tomato plants spaced 2 feet apart.
- Watering: Drip irrigation system installed for consistent moisture.
- Mulching: Straw mulch applied to conserve water and reduce weeds.
Outcome: The raised bed improved drainage significantly, preventing root rot during heavy rains. The compost-rich soil boosted tomato growth and yield.
Tips for Success
- Avoid treated wood to prevent chemical leaching into soil.
- Regularly replenish organic matter to maintain fertility.
- Use soil moisture meters to avoid over or underwatering.
- Rotate crops annually to prevent nutrient depletion and pest buildup.
Mind Map: Benefits and Maintenance of Raised Beds
By incorporating raised beds into your farming practice, you can effectively manage soil water and fertility challenges, leading to healthier crops and improved yields. This simple yet powerful technique is especially valuable for beginning farmers looking to optimize their soil conditions with minimal investment.
6.5 Crop Rotation and Its Benefits for Soil Water and Nutrient Management
Crop rotation is a farming practice where different types of crops are planted sequentially on the same land across different growing seasons. This method is essential for maintaining soil health, optimizing water use, and improving nutrient management.
Why Crop Rotation Matters for Soil Water and Nutrients
- Breaks Pest and Disease Cycles: Different crops attract different pests and diseases. Rotating crops reduces the buildup of harmful organisms.
- Enhances Soil Fertility: Certain crops, like legumes, fix atmospheric nitrogen, enriching the soil naturally.
- Improves Soil Structure: Diverse root systems help aerate the soil and improve water infiltration.
- Optimizes Water Use: Different crops have varying water needs and rooting depths, which can help balance soil moisture.
Mind Map: Benefits of Crop Rotation
Common Crop Rotation Strategies
-
Legume-Grain Rotation: Plant legumes (e.g., beans, peas) one season, followed by grains (e.g., maize, wheat) the next. Legumes fix nitrogen, reducing the need for synthetic fertilizers for the grain crop.
-
Root-Tuber-Grain Rotation: Rotating root crops (e.g., carrots, potatoes) with grains helps manage soil structure and nutrient balance.
-
Three or Four-Year Rotations: Incorporate cover crops or green manures in the rotation to add organic matter and improve soil moisture retention.
Practical Example: Simple 3-Year Crop Rotation Plan for a Small Farm
| Year | Crop Type | Benefits |
|---|---|---|
| 1 | Legumes (e.g., beans) | Fixes nitrogen, improves fertility |
| 2 | Leafy greens (e.g., spinach) | Uses available nitrogen, shallow roots |
| 3 | Root crops (e.g., carrots) | Breaks pest cycles, improves soil structure |
Mind Map: Crop Rotation Cycle Example
How Crop Rotation Improves Soil Water Management
- Root Diversity: Different crops develop roots at varying depths, enhancing water absorption throughout the soil profile.
- Reduced Soil Compaction: Alternating deep-rooted and shallow-rooted crops prevents soil compaction, improving water infiltration.
- Organic Matter Increase: Crop residues from rotation add organic matter, which increases the soil’s water-holding capacity.
Example: Rotating Deep-Rooted and Shallow-Rooted Crops
- Planting deep-rooted crops like alfalfa or sunflower one season helps break up compacted layers.
- Follow with shallow-rooted crops like lettuce or onions that benefit from improved topsoil moisture.
Tips for Successful Crop Rotation
- Plan Ahead: Map out your rotation schedule for at least 3-4 years.
- Know Your Crops: Understand the nutrient needs and root characteristics of each crop.
- Include Legumes: Always include nitrogen-fixing crops to naturally replenish soil nitrogen.
- Monitor Soil Health: Regularly test soil to observe improvements and adjust rotations accordingly.
Summary
Crop rotation is a simple yet powerful practice that helps beginning farmers and agricultural workers maintain soil fertility, improve water management, and reduce reliance on chemical inputs. By thoughtfully alternating crops, you can create a resilient farming system that supports healthy plants and sustainable yields.
7. Troubleshooting Common Soil Water and Fertilizer Issues
7.1 Identifying Signs of Overwatering and Underwatering
Proper water management is crucial for healthy crops. Both overwatering and underwatering can stress plants, reduce yields, and even cause plant death. Recognizing the signs early helps farmers adjust irrigation practices effectively.
Signs of Overwatering
- Wilting despite wet soil: Plants may appear droopy or wilted even though the soil is saturated.
- Yellowing leaves: Lower leaves often turn yellow first due to root oxygen deprivation.
- Root rot and fungal growth: Excess moisture encourages root decay and fungal diseases.
- Slow growth: Waterlogged roots can’t absorb nutrients efficiently.
- Soil surface crusting or water pooling: Visible standing water or compacted soil surface.
Example:
A tomato plant in a low-lying field shows yellowing leaves and wilting even after recent rains. The soil feels soggy to touch, indicating overwatering.
Signs of Underwatering
- Wilting with dry soil: Plants droop because of insufficient water; soil feels dry several inches below surface.
- Brown, crispy leaf edges: Leaves develop dry, burnt tips and margins.
- Leaf drop: Plants shed older leaves to conserve moisture.
- Stunted growth: Lack of water limits cell expansion and nutrient transport.
- Cracked or hard soil: Soil appears dry, hard, and may crack.
Example:
Corn plants in a sandy soil field show curled leaves with brown edges during a dry spell. Soil is dry and crumbly, indicating underwatering.
Mind Map: Signs of Overwatering vs Underwatering
How to Confirm Water Stress Type
- Check soil moisture: Use a soil probe or simply dig 4-6 inches deep to feel moisture.
- Observe plant behavior: Wilting with wet soil = overwatering; wilting with dry soil = underwatering.
- Look for secondary signs: Fungal presence suggests overwatering; dry, brittle leaves suggest underwatering.
Example:
A farmer notices wilting squash plants. Soil probe shows dry soil 6 inches deep, confirming underwatering. Irrigation schedule is adjusted accordingly.
Best Practices to Avoid Water Stress
- Regular soil moisture monitoring: Use inexpensive tensiometers or soil moisture meters.
- Adjust irrigation frequency and amount: Tailor watering to crop type, soil texture, and weather.
- Improve soil drainage: Incorporate organic matter or create raised beds to prevent waterlogging.
- Mulch application: Helps retain moisture and reduce evaporation.
Example:
A small-scale farmer installs a simple soil moisture meter and notices soil stays wet longer after irrigation. She reduces watering frequency, preventing overwatering.
Mind Map: Managing Water Stress

By learning to identify these signs and using simple tools and observations, beginning farmers can maintain optimal soil moisture, promoting healthy crops and better yields.
7.2 Diagnosing Nutrient Deficiencies Through Plant Symptoms
Understanding nutrient deficiencies is crucial for maintaining healthy crops and maximizing yields. Plants exhibit specific symptoms when lacking essential nutrients, and recognizing these signs early can help you apply the right fertilizer and avoid crop loss.
Common Nutrient Deficiencies and Their Symptoms
| Nutrient | Symptoms on Plants | Example Crop Affected |
|---|---|---|
| Nitrogen (N) | Yellowing of older leaves (chlorosis), stunted growth | Corn, Wheat |
| Phosphorus (P) | Dark green or purplish leaves, delayed maturity | Tomato, Potato |
| Potassium (K) | Yellowing or browning at leaf edges (marginal scorch), weak stems | Potato, Cotton |
| Magnesium (Mg) | Interveinal chlorosis (yellowing between veins) on older leaves | Citrus, Tomato |
| Iron (Fe) | Interveinal chlorosis on young leaves, leaf tips may die | Soybean, Beans |
| Calcium (Ca) | Deformed young leaves, blossom end rot in fruits | Tomato, Pepper |
Mind Map: Diagnosing Nutrient Deficiencies
Detailed Examples
Example 1: Nitrogen Deficiency in Corn
- Symptom: Older leaves turn pale yellow starting from the tip and progressing along the midrib.
- Cause: Nitrogen is mobile in plants, so deficiency symptoms appear first on older leaves.
- Action: Apply a nitrogen-rich fertilizer such as urea or ammonium nitrate.
Example 2: Phosphorus Deficiency in Tomato Plants
- Symptom: Leaves develop a purplish tint, especially on the undersides.
- Cause: Phosphorus is vital for energy transfer; deficiency slows growth.
- Action: Add rock phosphate or a phosphorus-containing fertilizer.
Example 3: Potassium Deficiency in Potato
- Symptom: Leaf edges turn yellow then brown and dry out; plants may be weak.
- Cause: Potassium regulates water and nutrient movement.
- Action: Use potassium sulfate or muriate of potash fertilizer.
Example 4: Iron Deficiency in Soybean
- Symptom: Young leaves show yellowing between veins while veins remain green.
- Cause: Iron is immobile; deficiency shows first on young leaves.
- Action: Foliar spray with iron chelates or soil application of iron sulfate.
Practical Tips for Diagnosing Nutrient Deficiencies
- Observe which leaves are affected first: Mobile nutrients show symptoms on older leaves; immobile nutrients on younger leaves.
- Look for color changes: Yellowing, purpling, or browning can indicate specific deficiencies.
- Check leaf patterns: Interveinal chlorosis vs. entire leaf yellowing helps differentiate nutrients.
- Consider soil pH: Some nutrients become unavailable in acidic or alkaline soils.
- Use soil and tissue testing: Confirm suspected deficiencies before applying fertilizers.
Mind Map: Steps to Diagnose Nutrient Deficiency
By learning to recognize these symptoms and understanding their causes, beginning farmers and agricultural workers can make informed decisions to maintain soil fertility and ensure healthy crop growth.
7.3 Managing Soil Salinity and Its Impact on Fertilizer Use
Soil salinity is a common challenge in many farming areas, especially in arid and semi-arid regions. It occurs when soluble salts accumulate in the soil to levels that negatively affect plant growth. Managing soil salinity is crucial because high salt levels can interfere with nutrient uptake, reduce fertilizer efficiency, and ultimately decrease crop yields.
What is Soil Salinity?
Soil salinity refers to the presence of high concentrations of soluble salts such as sodium chloride, calcium sulfate, and magnesium sulfate in the soil. These salts can come from natural sources or from irrigation water with high salt content.
How Does Soil Salinity Affect Fertilizer Use?
- Reduced Nutrient Uptake: Excess salts create osmotic stress, making it harder for plants to absorb water and nutrients.
- Nutrient Imbalance: High sodium levels can displace essential nutrients like potassium and calcium in the soil.
- Fertilizer Inefficiency: Fertilizers may leach away faster or become chemically unavailable due to salt interactions.
Mind Map: Effects of Soil Salinity on Fertilizer Use
Best Practices for Managing Soil Salinity
-
Regular Soil Testing:
- Conduct soil tests to monitor salt levels and nutrient status.
- Example: Use an electrical conductivity (EC) meter to measure soil salinity.
-
Improve Drainage:
- Ensure proper field drainage to prevent salt accumulation.
- Example: Create raised beds or install drainage tiles.
-
Leaching Excess Salts:
- Apply extra irrigation water to flush salts below the root zone.
- Example: After a dry spell, irrigate deeply to push salts down.
-
Select Appropriate Fertilizers:
- Use fertilizers with low salt index to avoid adding more salts.
- Example: Prefer ammonium sulfate over potassium chloride in saline soils.
-
Adjust Fertilizer Application Timing:
- Apply fertilizers when soil moisture is adequate to reduce salt stress.
- Example: Fertilize after irrigation or rainfall.
-
Use Salt-Tolerant Crops and Varieties:
- Choose crops that can tolerate higher salinity levels.
- Example: Barley and sugar beet are more salt-tolerant than beans.
-
Incorporate Organic Matter:
- Organic matter improves soil structure and water retention.
- Example: Add compost or manure to help buffer salt effects.
Practical Example: Managing Salinity on a Small Farm
Farmer Maria noticed poor growth in her tomato plants despite regular fertilization. Soil testing revealed high salinity (EC of 6 dS/m). She took the following steps:
- Installed simple drainage ditches to improve water movement.
- Applied extra irrigation water to leach salts below the root zone.
- Switched to a fertilizer with a lower salt index.
- Added compost to improve soil organic matter.
- Planted salt-tolerant varieties in the most affected areas.
After one growing season, tomato growth improved, and yields increased by 20%.
Mind Map: Step-by-Step Salinity Management Plan
Summary
Managing soil salinity is essential to maintain fertilizer effectiveness and ensure healthy crop growth. By regularly testing soil, improving drainage, carefully selecting fertilizers, and adopting salt-tolerant crops, farmers can mitigate the negative impacts of salinity. Practical, low-cost interventions like leaching salts and adding organic matter can make a significant difference, especially for beginning farmers facing salinity challenges.
7.4 Practical Example: Adjusting Fertilizer Application After Heavy Rainfall
Heavy rainfall can significantly impact fertilizer effectiveness and soil nutrient availability. Understanding how to adjust fertilizer application after such events is crucial for maintaining crop health and optimizing nutrient use.
Why Adjust Fertilizer Application After Heavy Rainfall?
- Nutrient Leaching: Excess water can wash away soluble nutrients like nitrogen (nitrate), reducing availability to plants.
- Soil Erosion: Surface runoff may remove topsoil rich in organic matter and nutrients.
- Dilution Effect: Nutrients already applied may become diluted in the soil solution, lowering concentration.
- Root Damage: Saturated soils can harm roots, affecting nutrient uptake.
Step-by-Step Guide to Adjusting Fertilizer Application
-
Assess the Rainfall Impact:
- Check the amount and duration of rainfall.
- Observe signs of waterlogging or runoff on your fields.
-
Inspect the Crop and Soil Condition:
- Look for yellowing leaves or stunted growth indicating nutrient deficiency.
- Test soil moisture to ensure it has drained sufficiently before reapplication.
-
Conduct a Soil Test (if possible):
- Measure nutrient levels post-rainfall to identify losses.
-
Adjust Fertilizer Rates:
- Increase nitrogen application cautiously if leaching is suspected.
- Consider split applications to reduce nutrient loss.
-
Choose Appropriate Fertilizer Types:
- Use slow-release or stabilized fertilizers to minimize leaching.
-
Modify Application Timing:
- Wait until soil moisture is optimal to avoid further nutrient loss.
-
Implement Soil Conservation Practices:
- Use mulching or cover crops to reduce erosion and nutrient runoff.
Mind Map: Adjusting Fertilizer After Heavy Rainfall
Example Scenario
Farm Situation:
- A beginning farmer applies nitrogen fertilizer to a cornfield.
- A heavy rainstorm delivers 3 inches of rain within 24 hours.
Observations:
- Soil is saturated with standing water in low-lying areas.
- Corn leaves show slight yellowing 5 days after the rain.
Action Taken:
- The farmer waits 3 days for the soil to drain.
- Conducts a simple soil test using a home kit, finding low nitrate levels.
- Applies a split dose of nitrogen fertilizer at half the original rate.
- Uses mulch around plants to reduce further nutrient runoff.
Outcome:
- Corn plants recover with improved leaf color.
- Yield meets expectations despite the heavy rainfall.
Additional Tips
- Use Soil Moisture Sensors: To know when soil is ready for fertilizer application.
- Avoid Fertilizing Before Forecasted Rain: To minimize nutrient loss.
- Record Rainfall and Fertilizer Applications: Helps in planning future adjustments.
By following these steps and examples, farmers can effectively manage fertilizer use after heavy rainfall, protecting their investment and promoting healthy crop growth.
7.5 When and How to Re-Test Soil for Accurate Management
Maintaining healthy soil is crucial for successful farming, and regular soil testing is a key part of this process. Re-testing soil allows you to track changes in nutrient levels, pH, and overall soil health, ensuring your fertilizer and water management strategies remain effective.
When to Re-Test Soil
- After Major Crop Cycles: Test soil at the end of a growing season to understand nutrient depletion.
- Before Planting a New Crop: Especially if changing crop types, since nutrient needs vary.
- After Applying Fertilizers or Amendments: To monitor their impact and avoid over-application.
- Following Extreme Weather Events: Heavy rains or droughts can alter soil nutrient availability.
- Every 1-3 Years: For general monitoring, depending on soil type and farming intensity.
How to Re-Test Soil: Step-by-Step Guide
- Select Sampling Sites: Choose representative spots across your field to get an accurate picture.
- Collect Soil Samples: Use a clean soil probe or spade to take samples from 6-8 inches deep.
- Mix Samples: Combine samples from each site into one composite sample.
- Dry and Package Samples: Air dry the soil, place in clean bags, and label clearly.
- Send to a Lab: Choose a reputable soil testing laboratory and specify tests needed (pH, NPK, micronutrients).
- Interpret Results: Compare with previous tests and recommended nutrient levels for your crops.
- Adjust Management Practices: Modify fertilizer types, amounts, or irrigation based on findings.
Mind Map: When to Re-Test Soil
Mind Map: How to Re-Test Soil
Practical Examples
Example 1: Re-Testing After Heavy Rainfall
Farmer Jane noticed yellowing leaves on her corn crop after a week of heavy rains. Suspecting nutrient leaching, she collected soil samples from multiple spots, sent them for testing, and found nitrogen levels had dropped significantly. Based on the results, she applied a nitrogen-rich fertilizer and adjusted her irrigation schedule to prevent overwatering.
Example 2: Routine Soil Testing for Crop Rotation
Farmer Luis rotates between legumes and maize. Before planting maize, he re-tested his soil to check nitrogen levels, since legumes fix nitrogen naturally. The test showed sufficient nitrogen, so he reduced synthetic fertilizer application, saving costs and protecting the environment.
Tips for Accurate Soil Testing
- Use clean tools to avoid contamination.
- Sample at consistent depths.
- Label samples clearly with date and location.
- Keep records of all test results for trend analysis.
- Consult local extension services for region-specific advice.
Regular soil re-testing empowers you to make informed decisions, optimize fertilizer use, conserve water, and ultimately improve crop yields sustainably.
8. Sustainable Practices for Long-Term Soil and Water Health
8.1 Incorporating Agroforestry and Buffer Strips
Agroforestry and buffer strips are powerful, sustainable farming practices that help improve soil water retention, reduce erosion, and enhance nutrient cycling. These methods integrate trees, shrubs, and grasses into agricultural landscapes, creating multifunctional systems that benefit both crops and the environment.
What is Agroforestry?
Agroforestry is the intentional integration of trees and shrubs with crops and/or livestock on the same land. This combination can improve soil structure, increase biodiversity, and optimize water use.
Benefits of Agroforestry:
- Enhances soil moisture retention by providing shade and reducing evaporation.
- Improves soil fertility through leaf litter and nitrogen-fixing species.
- Acts as windbreaks, reducing soil erosion.
- Provides additional income sources (fruit, timber, fodder).
What are Buffer Strips?
Buffer strips are vegetated areas, usually grasses, shrubs, or trees, planted between fields or along waterways. They act as filters to trap sediment, nutrients, and pesticides before they reach water bodies.
Benefits of Buffer Strips:
- Reduce nutrient runoff and protect water quality.
- Stabilize soil and prevent erosion.
- Provide habitat for beneficial insects and wildlife.
Mind Map: Agroforestry Components and Benefits
Mind Map: Buffer Strip Design and Functions
Practical Examples
Example 1: Alley Cropping with Leguminous Trees
- A farmer plants rows of Gliricidia sepium (a nitrogen-fixing tree) spaced 5 meters apart with maize grown in the alleys.
- The trees provide shade, reduce wind speed, and their pruned leaves are used as green manure to enrich soil.
- This practice improves soil moisture and fertility, leading to higher maize yields with reduced fertilizer use.
Example 2: Riparian Buffer Strip to Protect a Stream
- A buffer strip of native grasses and shrubs is established along a small stream bordering a vegetable farm.
- The strip traps runoff containing fertilizers and pesticides, preventing contamination of the water.
- It also stabilizes the stream bank, reducing erosion during heavy rains.
Example 3: Windbreaks Using Fast-Growing Trees
- Planting rows of Casuarina or Eucalyptus trees on the windward side of a field reduces wind speed.
- This minimizes soil moisture loss and protects young crops from wind damage.
- The trees can later be harvested for timber or firewood, providing extra income.
How to Start Incorporating Agroforestry and Buffer Strips on Your Farm
- Assess your land: Identify areas prone to erosion, water runoff, or nutrient loss.
- Select appropriate species: Choose trees and shrubs suited to your climate, soil, and farming goals.
- Plan layout: Design alley cropping patterns, buffer strip widths, and locations.
- Prepare the soil: Clear planting sites and improve soil if necessary.
- Plant and maintain: Establish trees/shrubs and manage them through pruning and protection.
- Monitor and adapt: Observe impacts on soil moisture, fertility, and crop performance.
Incorporating agroforestry and buffer strips is a practical, low-cost way to improve your farm’s soil and water management while enhancing biodiversity and resilience. Starting small and learning through experience will help you reap the full benefits over time.
8.2 Using Biofertilizers and Microbial Inoculants
Biofertilizers and microbial inoculants are natural alternatives to chemical fertilizers that harness the power of beneficial microorganisms to improve soil fertility and plant health. These biological agents enhance nutrient availability, promote plant growth, and support sustainable farming practices.
What Are Biofertilizers?
Biofertilizers are preparations containing living microorganisms which, when applied to seeds, plant surfaces, or soil, colonize the rhizosphere or the interior of the plant and promote growth by increasing the supply or availability of primary nutrients to the host plant.
Common Types of Biofertilizers and Their Functions
Biofertilizers Mind Map
How Biofertilizers Work
- Nitrogen Fixers: Convert atmospheric nitrogen into forms plants can absorb.
- Phosphate Solubilizers: Release phosphorus from insoluble compounds in soil.
- Potassium Mobilizers: Make potassium more available to plants.
- PGPR: Enhance plant growth by producing growth hormones and suppressing pathogens.
- Mycorrhizal Fungi: Extend root surface area to improve water and nutrient uptake.
Benefits of Using Biofertilizers
- Improve soil fertility naturally.
- Reduce dependency on chemical fertilizers.
- Enhance crop yield and quality.
- Promote sustainable and eco-friendly farming.
- Improve soil microbial diversity and health.
Practical Examples
Example 1: Using Rhizobium for Legume Crops
- Crop: Soybean
- Practice: Treat soybean seeds with Rhizobium inoculant before planting.
- Outcome: Enhanced nitrogen fixation, leading to better growth and higher yields without extra nitrogen fertilizer.
Example 2: Applying Phosphate Solubilizing Bacteria (PSB)
- Crop: Maize
- Practice: Mix PSB inoculant into soil or apply as seed coating.
- Outcome: Increased phosphorus availability, improved root development, and increased grain production.
Example 3: Incorporating Mycorrhizal Fungi
- Crop: Tomato
- Practice: Apply mycorrhizal inoculants to transplant roots.
- Outcome: Improved nutrient and water uptake, better drought resistance, and healthier plants.
How to Use Biofertilizers Effectively
Mind Map: Steps to Apply Biofertilizers
Integrating Microbial Inoculants into Your Farm Routine
- Rotate crops to maintain microbial diversity.
- Use biofertilizers in combination with organic amendments like compost.
- Monitor crop response and soil health regularly.
Summary
Using biofertilizers and microbial inoculants is a practical, cost-effective, and environmentally friendly way to enhance soil fertility and crop productivity. By understanding their types, functions, and application methods, beginning farmers can improve their farm’s sustainability and reduce reliance on chemical inputs.
8.3 Water Harvesting Techniques for Dryland Farming
Water harvesting is a critical practice for dryland farming, where rainfall is scarce and irregular. By capturing and storing rainwater efficiently, farmers can improve soil moisture, reduce erosion, and enhance crop yields even in arid conditions. This section explores practical water harvesting techniques, supported by easy-to-understand examples and mind maps to help beginning farmers implement these methods effectively.
What is Water Harvesting?
Water harvesting involves collecting and storing rainwater from roofs, fields, or catchment areas to use during dry periods. It helps maximize the utility of limited rainfall and supports sustainable farming.
Key Water Harvesting Techniques for Dryland Farming
Water Harvesting Techniques Mind Map
Detailed Explanation and Examples
1. Contour Bunding
- How it works: By constructing embankments along the natural contour lines of a slope, water runoff is slowed down, allowing more water to seep into the soil.
- Example: A farmer with a gently sloping field builds small earthen bunds spaced 10 meters apart along contours. After a rainfall, water pools behind the bunds, soaking into the soil and reducing erosion.
2. Check Dams
- How it works: Small dams built across gullies or small streams trap runoff water, which gradually percolates into the ground.
- Example: In a dryland area prone to gully erosion, a farmer constructs a stone check dam. This slows water flow, reduces soil loss, and recharges groundwater that nearby crops can access.
3. Farm Ponds
- How it works: Excavated ponds collect runoff during rains and store it for irrigation during dry periods.
- Example: A farmer digs a 10m x 10m pond near the field. During the rainy season, runoff fills the pond, which is then used to irrigate vegetable crops during drought.
4. Rooftop Rainwater Harvesting
- How it works: Rainwater from roofs is directed via gutters into storage tanks.
- Example: A small-scale farmer installs gutters on the barn roof, channeling rainwater into a 2000-liter tank. This water is used for livestock and garden irrigation.
5. Percolation Pits
- How it works: Pits filled with stones increase water infiltration and reduce surface runoff.
- Example: Along a farm boundary, the farmer digs several 1m deep pits filled with gravel. These pits capture runoff and help recharge the water table.
6. Zai Pits
- How it works: Small holes dug in degraded soil capture rainwater and organic matter, improving moisture and fertility.
- Example: On a degraded dryland plot, the farmer digs zai pits 30cm wide and 15cm deep, fills them with compost, and plants millet seeds. The pits concentrate water and nutrients, boosting crop growth.
Integrated Mind Map: Water Harvesting Benefits and Practices
Practical Tips for Beginning Farmers
- Start small: Implement one or two water harvesting techniques on a small plot before scaling up.
- Use locally available materials like stones, earth, and organic matter to reduce costs.
- Regularly inspect and maintain structures, especially after heavy rains.
- Combine water harvesting with soil fertility practices like adding compost to maximize benefits.
- Collaborate with neighbors to build larger structures like check dams or contour bunds for greater impact.
Summary
Water harvesting techniques are essential tools for dryland farmers to conserve moisture, improve soil health, and increase productivity. By understanding and applying methods like contour bunding, check dams, farm ponds, rooftop harvesting, percolation pits, and zai pits, farmers can build resilience against drought and make the most of limited rainfall.
Implementing these techniques with practical examples and local adaptation can transform dryland farming into a more sustainable and productive endeavor.
8.4 Practical Example: Creating a Farm Nutrient Budget for Sustainability
Creating a farm nutrient budget is a powerful tool for managing soil fertility sustainably. It helps you balance nutrient inputs and outputs, ensuring your crops get what they need without wasting resources or harming the environment. Below, we will walk through the steps of creating a nutrient budget, supported by mind maps and practical examples.
What is a Nutrient Budget?
A nutrient budget is like a financial budget, but instead of money, it tracks nutrients—mainly nitrogen (N), phosphorus (P), and potassium (K)—coming into and leaving your farm system.
- Inputs: Fertilizers, organic amendments, biological fixation, irrigation water, atmospheric deposition.
- Outputs: Crop removal, leaching, erosion, gaseous losses.
Step 1: Identify Nutrient Inputs
Example:
- You apply 100 kg/ha of nitrogen fertilizer.
- You add 5 tons/ha of compost containing 0.5% nitrogen (which equals 25 kg N).
- Your legume cover crop fixes approximately 30 kg N/ha.
Total N input = 100 + 25 + 30 = 155 kg N/ha
Step 2: Calculate Nutrient Outputs
Example:
- Crop uptake: Your harvested crop removes 120 kg N/ha.
- Estimated leaching loss: 10 kg N/ha.
- Volatilization loss: 5 kg N/ha.
Total N output = 120 + 10 + 5 = 135 kg N/ha
Step 3: Calculate Nutrient Balance
Nutrient Balance = Nutrient Inputs - Nutrient Outputs
Example:
- N balance = 155 - 135 = +20 kg N/ha
A positive balance means nutrients are accumulating in the soil, which can be good for building fertility but may risk leaching if excessive. A negative balance indicates nutrient mining, which can reduce soil fertility over time.
Step 4: Adjust Your Management Plan
If your budget shows a surplus or deficit, adjust fertilizer rates, organic amendments, or crop rotations accordingly.
Example:
- If surplus is large, consider reducing synthetic fertilizer next season.
- If deficit, increase organic inputs or fertilizer application to avoid yield loss.
Step 5: Monitor and Update Regularly
Keep records each season to track changes and improve accuracy.
Summary Mind Map of Creating a Farm Nutrient Budget
Additional Practical Tips:
- Use soil tests to estimate existing nutrient levels.
- Consider crop nutrient requirements from extension guides.
- Factor in nutrient content of organic materials (ask for lab analysis if possible).
- Use simple spreadsheets or farm management apps to track data.
Example Spreadsheet Layout for Nutrient Budget (Nitrogen)
| Item | Amount (kg/ha) |
|---|---|
| Fertilizer N | 100 |
| Compost N | 25 |
| Biological Fixation N | 30 |
| Total Inputs | 155 |
| Crop Uptake N | 120 |
| Leaching Loss N | 10 |
| Volatilization Loss N | 5 |
| Total Outputs | 135 |
| Nutrient Balance | +20 |
By regularly creating and reviewing your farm nutrient budget, you can optimize fertilizer use, reduce costs, protect the environment, and maintain healthy, productive soils for years to come.
8.5 Community-Based Approaches to Soil and Water Management
Community-based approaches harness the collective knowledge, labor, and resources of local farmers and stakeholders to improve soil and water management sustainably. These approaches foster collaboration, knowledge sharing, and joint problem-solving, which are especially valuable for beginning farmers and agricultural workers who benefit from shared experience and support.
Why Community-Based Approaches Matter
- Shared Resources: Pooling tools, seeds, organic amendments, and labor reduces individual costs.
- Knowledge Exchange: Farmers share best practices, troubleshoot problems, and innovate together.
- Collective Action: Coordinated efforts can address larger challenges like watershed management or pest control.
- Social Support: Encourages sustainable practices through peer encouragement and accountability.
Key Elements of Community-Based Soil and Water Management
Examples of Community-Based Practices
-
Farmer Field Schools (FFS)
- Farmers meet regularly to learn about soil health, water conservation, and fertilizer use.
- Example: In a village, farmers gather weekly to observe demonstration plots showing the benefits of mulching and drip irrigation.
- Outcome: Improved adoption of water-saving techniques and organic fertilizer use.
-
Community Irrigation Management
- Local groups manage shared irrigation canals or drip systems.
- Example: A cooperative of 20 farmers maintains a gravity-fed irrigation canal, scheduling water delivery to reduce waste and ensure fair distribution.
- Outcome: Reduced water loss and increased crop yields.
-
Collective Composting Initiatives
- Communities create large compost piles using crop residues and animal manure.
- Example: A neighborhood compost site where farmers contribute organic waste and share the resulting compost.
- Outcome: Improved soil fertility and reduced dependence on chemical fertilizers.
-
Soil and Water Conservation Committees
- Groups organize terracing, contour planting, and tree planting on communal lands.
- Example: A village committee leads a project to plant vetiver grass along slopes to prevent erosion.
- Outcome: Enhanced soil stability and water retention.
How to Start a Community-Based Soil and Water Management Group
Practical Example: Community-Led Watershed Management
In a semi-arid region, a group of farmers formed a watershed committee to tackle declining water availability and soil degradation. They:
- Conducted a community mapping exercise to identify erosion hotspots.
- Organized tree planting days to establish windbreaks and improve infiltration.
- Built small check dams and contour trenches collectively to slow runoff.
- Shared knowledge on organic fertilizer application to improve soil structure.
Result: Over three years, the area saw improved groundwater recharge, reduced soil erosion, and increased crop productivity.
Tips for Success
- Engage local leaders and respected farmers to champion the group.
- Use participatory approaches to ensure all voices are heard.
- Celebrate small wins to build momentum.
- Link with agricultural extension services and NGOs for technical support.
Community-based approaches empower farmers to sustainably manage soil and water resources by working together. These collaborative efforts not only improve farm productivity but also build resilient agricultural communities.
9. Technology and Innovation in Soil Water and Fertilizer Management
9.1 Mobile Apps and Digital Tools for Soil and Water Monitoring
In modern farming, mobile apps and digital tools have become invaluable for monitoring soil and water conditions efficiently and accurately. These technologies empower beginning farmers and agricultural workers to make informed decisions, optimize resource use, and improve crop yields.
Why Use Mobile Apps and Digital Tools?
- Real-time data collection and analysis
- Easy access to soil and water information
- Improved accuracy compared to manual methods
- Cost-effective and time-saving
- Supports sustainable farming practices
Key Features to Look for in Soil and Water Monitoring Apps
- Soil moisture measurement and tracking
- Nutrient level analysis
- Weather and irrigation scheduling
- Soil pH monitoring
- Data logging and history tracking
- Alerts and recommendations
Popular Mobile Apps and Tools
| App Name | Features | Example Use Case |
|---|---|---|
| SoilWeb | Soil data, maps, and descriptions | Checking soil types and characteristics before planting |
| FieldSense | Soil moisture sensors integration, data logging | Monitoring soil moisture to optimize irrigation |
| AgriApp | Fertilizer recommendations, pest alerts | Getting fertilizer advice based on soil test results |
| Teralytic | Soil sensor data, nutrient tracking | Using sensors to monitor nitrogen levels in real-time |
| CropX | Soil moisture mapping, irrigation guidance | Mapping soil moisture variability across fields |
Mind Map: Mobile Apps and Digital Tools for Soil and Water Monitoring
Practical Example: Using a Mobile App to Track Soil Moisture
Scenario: A beginning farmer wants to optimize irrigation for their tomato crop to avoid overwatering and water stress.
Step-by-Step:
- Download and install a soil moisture monitoring app such as FieldSense.
- Connect compatible soil moisture sensors placed at different depths in the tomato field.
- Set up alerts to notify when soil moisture drops below the crop’s optimal threshold.
- Use app data to schedule irrigation only when necessary, conserving water and preventing nutrient leaching.
- Review historical moisture trends to adjust irrigation plans for future growing seasons.
Outcome: The farmer reduces water usage by 25% while maintaining healthy crop growth.
Tips for Getting Started with Digital Soil and Water Monitoring
- Start with simple, user-friendly apps before advancing to complex systems.
- Pair apps with affordable soil sensors for more accurate data.
- Regularly update app data with manual soil tests for calibration.
- Use app recommendations as guidelines but combine with field observations.
- Join online farming communities to share experiences and get support.
By integrating mobile apps and digital tools into everyday farming, beginning farmers and agricultural workers can enhance their soil and water management practices, leading to more productive and sustainable farms.
9.2 Precision Agriculture: Using GPS and Sensors for Targeted Fertilization
Precision agriculture is a modern farming approach that uses technology to optimize field-level management regarding crop farming. By employing GPS and sensor technologies, farmers can apply fertilizers more accurately and efficiently, reducing waste and environmental impact while improving crop yields.
What is Precision Agriculture?
Precision agriculture involves collecting detailed data about soil conditions, crop health, and environmental factors to make informed decisions about resource application. Targeted fertilization means applying the right amount of fertilizer at the right place and time.
Mind Map: Key Components of Precision Agriculture for Fertilization
How GPS Technology Helps in Targeted Fertilization
- Field Mapping: GPS allows farmers to create detailed maps of their fields showing variations in soil type, nutrient levels, and crop performance.
- Variable Rate Application (VRA): Using GPS-guided equipment, fertilizers can be applied at different rates across the field based on specific needs.
- Guidance Systems: GPS helps operators steer equipment precisely, reducing overlap and missed areas.
Example: A farmer uses GPS to map zones in a 50-acre field where nitrogen levels vary. The fertilizer spreader is programmed to apply 30% less fertilizer in zones with higher nitrogen, saving costs and preventing runoff.
Role of Sensors in Precision Fertilization
- Soil Nutrient Sensors: Measure real-time nutrient levels such as nitrogen, phosphorus, and potassium.
- Soil Moisture Sensors: Help determine irrigation needs, which influence fertilizer uptake.
- Crop Health Sensors (NDVI - Normalized Difference Vegetation Index): Detect plant vigor and nutrient deficiencies by analyzing reflected light.
Example: A soil nutrient sensor detects low phosphorus in a section of the field. The farmer adjusts the fertilizer application map to increase phosphorus in that area only.
Integrating GPS and Sensor Data for Decision Making
Combining GPS field maps with sensor data allows for creating precise fertilizer application maps.
Mind Map: Data Integration Workflow
Equipment Used in Precision Fertilization
- Variable Rate Fertilizer Spreaders: Adjust fertilizer output on-the-go based on GPS and sensor data.
- Drones: Capture aerial images to assess crop health and nutrient status.
- Automated Tractors: Follow GPS-guided paths for precise application.
Example: A farmer uses a drone to capture NDVI images showing stressed crop areas. The data is fed into the fertilizer spreader’s control system, which increases fertilizer application in those zones.
Practical Example: Implementing Precision Fertilization on a Small Farm
- Step 1: Conduct a soil test and create a GPS map of the farm.
- Step 2: Install soil nutrient and moisture sensors in representative zones.
- Step 3: Use a handheld GPS device or smartphone app to mark areas with different soil characteristics.
- Step 4: Develop a variable rate fertilizer application plan based on sensor data.
- Step 5: Use a fertilizer spreader equipped with GPS guidance to apply fertilizer accordingly.
- Step 6: Monitor crop growth using drone imagery or handheld NDVI sensors.
- Step 7: Adjust fertilizer plans for the next season based on observed results.
Benefits of Using GPS and Sensors for Targeted Fertilization
- Reduced fertilizer costs by avoiding over-application.
- Minimized environmental pollution from fertilizer runoff.
- Improved crop yields through precise nutrient management.
- Enhanced ability to manage large or variable fields effectively.
Challenges and Tips for Beginners
- Initial Investment: Equipment can be costly; consider starting small or renting.
- Learning Curve: Training may be needed to interpret data and operate equipment.
- Data Management: Organize and back up data carefully.
Tip: Start with simple GPS mapping and basic soil tests before investing in advanced sensors.
By integrating GPS and sensor technologies into your fertilization practices, you can make smarter decisions that save money, protect the environment, and boost your farm’s productivity.
9.3 Remote Sensing and Drones for Crop and Soil Health Assessment
Remote sensing and drones have revolutionized how farmers monitor crop and soil health, providing timely, accurate, and detailed information that was once difficult to obtain. These technologies enable precision agriculture practices that optimize resource use, improve yields, and reduce environmental impact.
What is Remote Sensing?
Remote sensing involves collecting data about the earth’s surface without physical contact, typically using satellites, aircraft, or drones equipped with sensors. It captures information in various wavelengths, including visible light, infrared, and thermal bands.
How Drones Fit In
Drones, or unmanned aerial vehicles (UAVs), are a flexible and cost-effective platform for remote sensing. They can fly low and slow over fields, capturing high-resolution images and data tailored to specific farm needs.
Benefits of Using Remote Sensing and Drones in Farming
- Early Detection of Crop Stress: Identify water stress, nutrient deficiencies, or pest infestations before visible symptoms appear.
- Soil Health Monitoring: Detect soil moisture variability, erosion, compaction, and organic matter distribution.
- Efficient Resource Management: Target irrigation and fertilizer applications precisely where needed.
- Yield Prediction: Analyze crop vigor and growth patterns to estimate yields.
Key Technologies and Sensors
- Multispectral Cameras: Capture data in multiple wavelengths to assess plant health (e.g., Normalized Difference Vegetation Index - NDVI).
- Thermal Cameras: Detect temperature differences indicating water stress or disease.
- RGB Cameras: Provide high-resolution color images for visual inspection.
Mind Map: Remote Sensing and Drones in Agriculture
Practical Examples for Everyday Farmers
Example 1: Using a Drone to Detect Water Stress
A beginning farmer notices some patches in the field where crops look less vigorous. By flying a drone equipped with a multispectral camera, the farmer generates an NDVI map showing areas with lower vegetation health. The map reveals that these patches correspond to zones with poor irrigation coverage. The farmer adjusts the irrigation system to deliver more water to those areas, improving crop health and yield.
Example 2: Soil Moisture Mapping for Efficient Irrigation
An agricultural worker uses a drone with a thermal camera to survey fields early in the morning. Cooler areas on the thermal map indicate higher soil moisture, while warmer areas show dryness. Using this information, the worker schedules irrigation only for the dry zones, conserving water and preventing overwatering.
Example 3: Disease Spotting with RGB Imaging
A farmer flies a drone with a high-resolution RGB camera over a tomato crop. The images reveal small patches with discolored leaves that are not yet visible from the ground. Early identification allows the farmer to apply targeted treatments, preventing disease spread.
Getting Started Tips for Farmers
- Start with affordable drone models designed for agriculture.
- Learn basic image processing software or partner with local agri-tech services.
- Combine drone data with traditional scouting for best results.
- Use free or low-cost apps that help interpret NDVI and other indices.
Summary
Remote sensing and drones provide powerful tools for monitoring crop and soil health. By integrating these technologies into everyday farming, beginning farmers and agricultural workers can make informed decisions that save resources, increase productivity, and promote sustainable practices.
9.4 Practical Example: Using a Smartphone App to Track Irrigation Schedules
Managing irrigation efficiently is crucial for conserving water and ensuring healthy crop growth. Smartphone apps can simplify this task by helping farmers schedule, monitor, and optimize irrigation based on real-time data and crop needs. Below, we explore how to use such an app effectively, with examples and mind maps to guide you.
Why Use a Smartphone App for Irrigation Scheduling?
- Convenience: Access schedules anytime, anywhere.
- Precision: Tailor irrigation based on soil moisture, weather forecasts, and crop type.
- Record Keeping: Track past irrigation events to improve future decisions.
- Alerts & Reminders: Get notifications to irrigate or pause watering.
Step-by-Step Guide to Using an Irrigation Scheduling App
-
Choose the Right App
- Examples: “CropX”, “IrriWatch”, “FieldSense”, “HydroPoint”.
- Features to look for: soil moisture integration, weather updates, customizable schedules.
-
Set Up Your Farm Profile
- Enter farm location (GPS coordinates).
- Specify crop types and growth stages.
- Input soil type and field size.
-
Connect Sensors (Optional but Recommended)
- Soil moisture sensors provide real-time data.
- Weather stations or local forecasts integrated.
-
Create Irrigation Schedules
- Define irrigation frequency and duration.
- Adjust based on crop water requirements and weather.
-
Monitor and Adjust
- Review app notifications and data.
- Modify schedules as needed for rainfall or dry spells.
-
Record Irrigation Events
- Log start and stop times.
- Note any issues or observations.
Example Scenario: Using “IrriWatch” App on a Tomato Farm
- Farm Setup: 2 hectares, sandy loam soil, tomatoes at flowering stage.
- Sensors: Soil moisture probes installed at 15 cm depth.
- Weather: Dry forecast for the next 5 days.
Process:
- Input farm details and crop stage.
- App recommends irrigation every 3 days for 30 minutes.
- Soil moisture sensor shows moisture dropping below threshold.
- App sends alert: “Irrigation needed today.”
- Farmer starts drip irrigation via app control.
- Records irrigation event.
Outcome:
- Tomatoes receive optimal water, avoiding stress and water waste.
- Farmer saves time and water compared to manual scheduling.
Mind Map: Using a Smartphone App for Irrigation Scheduling
Tips for Maximizing App Benefits
- Regularly calibrate soil moisture sensors.
- Update crop growth stages in the app.
- Use app data to plan fertilizer application alongside irrigation.
- Share data with agricultural advisors for expert guidance.
Additional Example: Manual Scheduling with Weather Integration
If you don’t have sensors, apps like “FieldSense” allow manual input of weather data and visual soil checks to suggest irrigation schedules.
- Farmer checks soil moisture by feel.
- Inputs weather forecast into app.
- App suggests irrigation every 4 days.
- Farmer sets reminders and logs watering.
This approach still improves water use efficiency compared to guesswork.
Summary
Using a smartphone app to track irrigation schedules empowers farmers to make data-driven decisions, conserve water, and promote healthier crops. Whether integrated with sensors or relying on manual inputs, these digital tools are accessible and practical for everyday farming.
Start by exploring free or low-cost apps, set up your farm profile, and gradually incorporate sensor data for best results. Remember, consistent monitoring and record-keeping are key to optimizing irrigation over time.
9.5 Future Trends in Sustainable Fertilizer and Water Use
As the global population grows and climate change impacts farming conditions, sustainable fertilizer and water use is becoming more critical than ever. Innovations and emerging trends are shaping the future of agriculture to optimize resource use, reduce environmental impact, and improve crop productivity. Below, we explore key future trends, supported by practical examples and mind maps to help you visualize these concepts.
Precision Agriculture and Smart Farming
Precision agriculture uses data-driven technologies to apply water and fertilizers only where and when needed, minimizing waste and maximizing efficiency.
- Examples:
- Variable rate technology (VRT) for fertilizer application adjusts nutrient delivery based on soil variability.
- Soil moisture sensors trigger irrigation systems only when soil water drops below crop-specific thresholds.
Mind Map: Precision Agriculture

Development of Biofertilizers and Microbial Solutions
Biofertilizers use beneficial microbes to enhance nutrient availability and promote plant growth naturally, reducing reliance on chemical fertilizers.
- Examples:
- Rhizobium bacteria for nitrogen fixation in legume crops.
- Mycorrhizal fungi improving phosphorus uptake.
Mind Map: Biofertilizers

Water Harvesting and Recycling Technologies
Innovations in capturing and reusing water help farmers manage irrigation sustainably, especially in water-scarce regions.
- Examples:
- Rainwater harvesting systems storing water for dry periods.
- Use of treated wastewater for irrigation.
Mind Map: Water Harvesting & Recycling
Nanotechnology in Fertilizer Delivery
Nanotechnology enables controlled-release fertilizers that improve nutrient use efficiency and reduce environmental pollution.
- Examples:
- Nano-encapsulated fertilizers releasing nutrients slowly over time.
- Nano-sensors monitoring soil nutrient levels in real-time.
Mind Map: Nanotechnology in Fertilizers
Integration of Artificial Intelligence (AI) and Machine Learning
AI analyzes large datasets from farms to predict crop needs, optimize irrigation schedules, and recommend fertilizer applications.
- Examples:
- AI-powered apps that suggest fertilization plans based on weather forecasts and soil data.
- Machine learning models predicting drought stress to adjust irrigation proactively.
Mind Map: AI & Machine Learning in Farming
Circular Agriculture and Waste-to-Nutrient Systems
Transforming agricultural and organic waste into valuable fertilizers and soil amendments promotes sustainability.
- Examples:
- Composting farm residues to create organic fertilizer.
- Anaerobic digestion producing biogas and nutrient-rich digestate for soil application.
Mind Map: Circular Agriculture
Practical Example: Implementing a Smart Irrigation and Fertilizer System
Imagine a small farm adopting a smart system that combines soil moisture sensors, weather data, and AI recommendations. The system automatically adjusts irrigation and fertilizer delivery through drip lines, ensuring crops receive optimal water and nutrients without excess. This reduces water use by 30% and fertilizer costs by 20%, while improving crop yields.
Summary
Future trends in sustainable fertilizer and water use focus on technology integration, biological solutions, and circular resource management. By embracing these innovations, beginning farmers and agricultural workers can improve productivity, reduce environmental impact, and build resilient farming systems for the future.
10. Summary and Action Plan for Everyday Farmers
10.1 Key Takeaways on Soil Water and Fertilizer Management
Managing soil water and fertilizer effectively is essential for healthy crops, sustainable farming, and maximizing yields. Here are the core points every beginning farmer and agricultural worker should remember, presented with clear examples and mind maps to help visualize the concepts.
Mind Map: Core Concepts of Soil Water and Fertilizer Management
Key Takeaway 1: Understand Your Soil and Water
- Example: Before planting, conduct a soil test to check nutrient levels and pH. For instance, a sandy soil will drain quickly and need more frequent watering, while clay soil retains water longer but may require aeration.
- Practice: Use simple soil moisture meters or the ‘feel test’ (squeeze soil in your hand) to gauge moisture levels.
Key Takeaway 2: Match Water Supply to Crop Needs
- Example: Tomatoes require consistent moisture; overwatering can cause root rot, while underwatering leads to blossom end rot. Adjust irrigation frequency accordingly.
- Practice: Mulch around plants to reduce evaporation and keep soil moist longer.
Key Takeaway 3: Apply Fertilizers Based on Soil Tests and Crop Requirements
- Example: If soil tests show nitrogen deficiency, apply nitrogen-rich fertilizers like urea or composted manure. Avoid blanket fertilizer application to save costs and prevent pollution.
- Practice: Use slow-release fertilizers or organic amendments to provide nutrients steadily.
Key Takeaway 4: Timing and Method of Fertilizer Application Matter
- Example: Applying fertilizer just before heavy rain can cause nutrient runoff. Instead, apply fertilizer during dry periods or use fertigation (fertilizer through irrigation) for efficient uptake.
- Practice: Banding fertilizer near plant roots improves nutrient availability.
Key Takeaway 5: Integrate Water and Fertilizer Management
- Example: Using drip irrigation combined with fertigation allows precise water and nutrient delivery, reducing waste and improving plant health.
- Practice: Monitor crop growth and adjust water and fertilizer inputs accordingly.
Key Takeaway 6: Maintain Soil Health for Long-Term Productivity
- Example: Incorporate cover crops like clover to fix nitrogen naturally and improve soil structure.
- Practice: Add organic matter regularly through compost or green manures.
Mind Map: Practical Examples for Everyday Application
Summary Example: Farmer Maria’s Approach
Maria, a beginning farmer, tested her soil and found low phosphorus. She mulched her vegetable beds to conserve moisture and installed a simple drip irrigation system. She applied phosphorus fertilizer in bands near the roots and watered consistently based on soil moisture readings. By monitoring her crops weekly, she adjusted watering and fertilizing schedules, leading to healthier plants and better yields.
Remember, effective soil water and fertilizer management is a continuous learning process. Start simple, observe carefully, and adapt your practices to your farm’s unique conditions for the best results.
10.2 Developing a Customized Soil and Water Management Plan
Creating a tailored soil and water management plan is essential for maximizing crop productivity, conserving resources, and maintaining soil health on your farm. This section guides you through the steps to develop a plan that fits your unique farm conditions, crop types, and available resources.
Step 1: Assess Your Farm’s Soil and Water Conditions
- Conduct soil tests to determine nutrient levels, pH, texture, and organic matter content.
- Evaluate water sources and availability (rainfall, irrigation, groundwater).
- Observe soil drainage and moisture retention characteristics.
Example: A beginning farmer in a semi-arid region tests their soil and finds sandy texture with low organic matter and moderate nitrogen levels. Water availability is limited to a small well.
Step 2: Identify Crop Water and Nutrient Requirements
- List the crops you plan to grow.
- Research each crop’s water needs (e.g., mm of water per growth stage).
- Understand nutrient demands, focusing on key macronutrients (N, P, K).
Example: The farmer plans to grow tomatoes and maize. Tomatoes require moderate water and high potassium, while maize needs more nitrogen and consistent moisture.
Step 3: Choose Appropriate Soil and Water Management Practices
- Select irrigation methods suited to water availability and crop needs (drip, sprinkler, furrow).
- Plan fertilizer application based on soil test results and crop nutrient requirements.
- Incorporate soil conservation techniques like mulching or cover cropping.
Example: Given limited water, the farmer opts for drip irrigation to minimize waste and applies compost and balanced NPK fertilizers according to soil test recommendations.
Step 4: Develop a Schedule for Irrigation and Fertilizer Application
- Create a calendar outlining when and how much to irrigate and fertilize.
- Align irrigation with critical crop growth stages.
- Time fertilizer applications to maximize uptake and reduce losses.
Example: The farmer schedules drip irrigation every 3 days during flowering and fruiting stages and applies nitrogen fertilizer in split doses to avoid leaching.
Step 5: Monitor and Adjust Your Plan
- Use soil moisture sensors or simple tools like a soil probe.
- Observe plant health and growth regularly.
- Adjust irrigation and fertilization based on weather, crop response, and soil moisture data.
Example: After a heavy rain, the farmer reduces irrigation frequency and postpones fertilizer application to prevent nutrient runoff.
Mind Map: Developing Your Customized Soil and Water Management Plan
Additional Example: Small-Scale Vegetable Farmer
Maria owns a small vegetable farm with loamy soil and access to a nearby stream. She grows leafy greens and peppers.
- Soil tests show balanced nutrients but slightly acidic pH.
- She chooses sprinkler irrigation to cover the entire bed efficiently.
- Applies lime to adjust soil pH and uses organic fertilizer weekly.
- Mulches beds to retain moisture and reduce weeds.
- Monitors soil moisture with a simple finger test and adjusts irrigation accordingly.
Her customized plan helps improve yields and reduces water waste.
Tips for Success
- Keep detailed records of soil tests, irrigation, and fertilizer applications.
- Start small and scale your plan as you gain experience.
- Consult local agricultural extension services for region-specific advice.
- Use simple tools and observations to guide decisions.
By following these steps and examples, you can create a practical and effective soil and water management plan tailored to your farm’s needs, helping you achieve sustainable and productive farming.
10.3 Record Keeping and Monitoring for Continuous Improvement
Effective record keeping and monitoring are essential practices for every farmer aiming to improve soil water and fertilizer management over time. Keeping detailed records helps you track what works, identify problems early, and make informed decisions for future crops.
Why Record Keeping Matters
- Tracks fertilizer types, amounts, and application dates
- Monitors irrigation schedules and soil moisture levels
- Helps identify patterns in crop performance related to soil and water management
- Provides data for adjusting practices to improve yields and reduce waste
What to Record
Mind Map: Key Elements to Record
How to Keep Records
- Use a dedicated farm notebook or digital spreadsheet
- Mobile apps designed for farm management can simplify data entry
- Take photos regularly to visually document crop and soil conditions
Example: Simple Record Sheet for Fertilizer and Irrigation
| Date | Fertilizer Type | Amount (kg/ha) | Application Method | Irrigation Method | Water Applied (mm) | Notes |
|---|---|---|---|---|---|---|
| 2024-04-10 | Compost | 500 | Broadcasting | Drip | 10 | Soil moist, no deficiency |
| 2024-04-17 | Urea | 50 | Banding | Drip | 8 | Leaves showing slight yellowing |
Monitoring for Continuous Improvement
- Review records monthly or after each crop cycle
- Compare crop yields with fertilizer and irrigation data
- Adjust fertilizer types, amounts, or timing based on soil test results and crop response
- Modify irrigation schedules to prevent over- or under-watering
Mind Map: Continuous Improvement Cycle
Practical Example: Using Records to Solve a Yellowing Leaf Problem
- Observation: Leaves on tomato plants turn yellow mid-season.
- Record Review: Check fertilizer application records—urea was applied 7 days ago.
- Soil Test: Recent test shows low magnesium.
- Action: Adjust fertilizer mix to include magnesium-rich amendments.
- Monitor: Record changes and observe leaf color improvement over next 2 weeks.
Tips for Beginners
- Start simple: record only key data points and expand as you get comfortable.
- Consistency is key: record data at the same time and format each time.
- Use visual aids like charts or graphs to spot trends easily.
By maintaining thorough records and regularly monitoring your soil water and fertilizer management, you empower yourself to make smarter decisions that lead to healthier crops and more sustainable farming practices.
10.4 Practical Example: Creating a Seasonal Calendar for Fertilizer and Irrigation
Creating a seasonal calendar is an essential step for everyday farmers to efficiently manage fertilizer application and irrigation throughout the growing season. This calendar helps you plan activities based on crop growth stages, soil moisture needs, and nutrient requirements, ensuring optimal plant health and yield.
Step 1: Identify Your Crop Growth Stages
Understanding the key growth stages of your crop is crucial because water and nutrient needs vary at each stage. Typical stages include:
- Germination/Seedling
- Vegetative Growth
- Flowering
- Fruit/Seed Development
- Maturation/Harvest
Example: For maize, the vegetative stage requires more nitrogen, while flowering needs balanced nutrients and consistent moisture.
Step 2: Assess Local Climate and Rainfall Patterns
Knowing your region’s rainfall distribution helps you schedule irrigation and fertilizer applications to avoid nutrient leaching or water stress.
Example: If heavy rains are expected in June, plan fertilizer application before or after this period to reduce runoff.
Step 3: Determine Fertilizer Types and Application Timing
Match fertilizer types (e.g., nitrogen-rich, phosphorus-rich) to crop needs at each growth stage.
Example:
- Apply phosphorus and potassium at planting to support root development.
- Apply nitrogen in split doses during vegetative and early flowering stages.
Step 4: Plan Irrigation Frequency and Amount
Adjust irrigation based on soil type and crop water demand. Sandy soils may require more frequent watering than clay soils.
Example:
- Irrigate every 3 days during vegetative growth.
- Reduce frequency during maturation to avoid excess moisture.
Mind Map: Seasonal Calendar Components
Mind Map: Example Seasonal Calendar for Tomato Farming (Temperate Climate)
Example: Creating Your Own Seasonal Calendar
- Start with a blank monthly calendar.
- Mark the planting date and expected harvest date.
- Add crop growth stages along the timeline.
- Schedule fertilizer applications based on soil test results and crop needs.
- Plan irrigation frequency considering soil type and weather forecasts.
- Include reminders for soil moisture checks and crop health monitoring.
Tips for Effective Use
- Keep records of actual rainfall and irrigation applied.
- Adjust the calendar annually based on observations and results.
- Use simple tools like colored markers or digital calendar apps for easy visualization.
By creating and following a seasonal calendar tailored to your farm’s conditions and crops, you can optimize fertilizer and water use, reduce waste, and improve crop yields sustainably.
10.5 Resources and Support Networks for Beginning Farmers
Starting a farming journey can be both exciting and challenging. Fortunately, numerous resources and support networks exist to help beginning farmers succeed in managing soil water and fertilizer effectively. This section provides a comprehensive guide to key resources, organizations, and community groups that can provide guidance, training, and practical assistance.
Government and Extension Services
Many countries have agricultural extension services that offer free or low-cost advice, soil testing, and workshops tailored to local conditions.
- Example: In the United States, the USDA Cooperative Extension System provides localized support through county offices.
- Best Practice: Visit your local extension office to get soil testing kits and attend workshops on irrigation and fertilization.
Online Educational Platforms and Courses
Online platforms offer flexible learning opportunities on soil and water management.
- Example: Websites like Coursera, Udemy, and FutureLearn offer courses on sustainable agriculture and soil science.
- Best Practice: Enroll in beginner-friendly courses such as “Soil Health and Fertility” or “Irrigation Management” to build foundational knowledge.
Farmer Cooperatives and Associations
Joining cooperatives or associations helps farmers share knowledge, pool resources, and access group discounts on inputs.
- Example: Local organic farming cooperatives often organize field days demonstrating composting and drip irrigation.
- Best Practice: Participate actively in meetings to exchange tips on fertilizer application timing and water-saving techniques.
Agricultural Supply Stores and Consultants
These outlets often provide expert advice on fertilizer products and irrigation equipment.
- Example: A local agri-store might offer soil testing services and recommend fertilizers suited to your soil type.
- Best Practice: Bring a soil test report when purchasing fertilizers to get tailored recommendations.
Community Gardens and Demonstration Farms
Hands-on learning is invaluable. Community gardens and demo farms showcase best practices in soil and water management.
- Example: Visiting a nearby demonstration farm practicing contour farming and fertigation.
- Best Practice: Volunteer at community gardens to gain practical experience in mulching and irrigation scheduling.
Digital Tools and Mobile Apps
Technology can simplify monitoring and management.
- Example: Apps like “SoilWeb” provide soil data; “Fieldmargin” helps track irrigation schedules.
- Best Practice: Use smartphone apps to log fertilizer applications and soil moisture readings for better decision-making.
Mind Maps
Below are mind maps to visualize the resources and support networks:
Mind Map 1: Types of Support Networks
Mind Map 2: How to Utilize Resources Effectively
Mind Map 3: Example Support Pathway for a Beginning Farmer
Practical Example
Scenario: Maria is a beginning farmer who wants to improve her soil fertility and water management.
- She visits her local agricultural extension office and obtains a soil test kit.
- After testing, she attends a workshop on organic fertilizer application.
- Maria joins a nearby farmer cooperative where she learns about drip irrigation installation.
- She downloads a mobile app to track irrigation and fertilizer schedules.
- By participating in community garden activities, she gains hands-on experience with mulching and composting.
Through these resources and networks, Maria builds confidence and improves her farm’s productivity sustainably.
Summary
Accessing and utilizing resources and support networks is essential for beginning farmers to master soil water and fertilizer management. Combining expert advice, community knowledge, educational tools, and technology empowers farmers to make informed decisions and adopt best practices effectively.