Film Production and Cinematic Storytelling Techniques
1. Foundations of Cinematic Storytelling
1.1 Defining Story, Plot, Theme, and Dramatic Purpose
A script can look busy and still fail to communicate. The fix is separating four ideas that often get mixed together: story (what happens), plot (how and why it’s arranged), theme (what it means), and dramatic purpose (what the audience should feel and learn at each step).
Story
Story is the sequence of events in cause-and-effect order. It answers: What changes? A useful way to test story is to ask whether the protagonist’s situation is different at the end than at the beginning.
Example: A student wants a scholarship. She studies, interviews, and wins. That’s story: her circumstances change from “not selected” to “selected.”
Story also includes the emotional trajectory. If she wins but feels nothing, the story still happened, but the audience may not experience the intended shift.
Plot
Plot is the arrangement of story events to control attention and momentum. It answers: What do we see first, and what do we withhold? Plot is not just chronology; it’s selection.
A practical plot tool is the promise and payoff pattern: you show a question early, then you pay it off later with an answer that changes decisions.
Example: Early, the student’s interview goes badly because she’s unprepared. Later, we learn she was sabotaged by a rival. The payoff reframes the earlier failure, so the audience feels the story “click” into place.
Theme
Theme is the recurring idea the film argues for or against through choices and consequences. It answers: What is the story saying about people and their world? Theme is not a slogan; it’s an observation tested by events.
Example theme statement: “People become more honest when they risk losing something.” The film proves or complicates this by showing characters who choose honesty at a cost, and characters who avoid it.
A theme becomes clearer when you track value conflicts: what the protagonist believes is right versus what the situation demands.
Dramatic Purpose
Dramatic purpose is the specific job a scene or sequence performs in the audience’s experience. It answers: Why does this moment exist right now? Dramatic purpose is often emotional (tension, relief, dread) and informational (reveal, clarify, misdirect).
A scene can have multiple purposes, but one should lead.
Example: In a scholarship interview scene, the leading purpose might be pressure: the protagonist must perform under scrutiny. Supporting purposes could include character exposure (we learn what she values) and plot movement (we learn the scholarship committee’s criteria).
How They Fit Together
Think of it as a chain:
- Story provides the raw events.
- Plot organizes those events to guide attention.
- Theme gives the events meaning through repeated value conflicts.
- Dramatic purpose ensures each scene earns its place.
If you’re stuck, start with story change, then decide what the audience needs to know when, then choose the theme argument the choices will support.
Mind Map: Core Definitions and Relationships
Mind Map: Scene-Level Purpose Builder
Integrated Example: One Scene, All Four Layers
Scene: The student meets the scholarship committee after a humiliating practice interview.
- Story: She enters believing she’s unprepared, then learns the committee values a specific kind of community work.
- Plot: The scene is placed after earlier failure so the new criteria reframes what “good” means.
- Theme: Her instinct is to hide weakness; she chooses to describe her real volunteer work instead, risking rejection.
- Dramatic purpose: The leading purpose is pressure with a reframing reveal. We feel the risk, and we gain the information that will shape her next decision.
When these layers align, the audience doesn’t need to be told what to think. They can track change, anticipate consequences, and recognize the film’s argument through the choices on screen.
1.2 Translating Script Meaning into Visual and Auditory Language
A script’s meaning lives in more than what characters say. It’s carried by what they want, what they fear, what they hide, and what changes by the end of the scene. Your job in production is to translate those layers into images and sounds that the audience can understand without a narrator.
Start with Meaning Units
Break the scene into “meaning units” before you plan shots. A meaning unit is a small chunk where the emotional or informational status changes.
- Objective shift: the character’s goal changes or becomes clearer.
- Revelation: new information enters the scene.
- Pressure change: stakes rise, time tightens, or control slips.
- Relationship adjustment: power, trust, or distance changes.
Example: In a scene where a manager says, “We’ll talk later,” the meaning unit might be “delay equals avoidance,” not “we will talk later.” That distinction guides visuals and audio.
Map Meaning to Visual Signals
Visual storytelling works best when each meaning unit has at least one reliable visual signal.
- Power and control: use blocking and camera height. A character who controls the room often occupies the center of the frame or stays closer to the camera’s axis.
- Distance and honesty: show physical separation when characters avoid truth. When honesty arrives, reduce distance or align bodies toward each other.
- Uncertainty: use framing instability sparingly. If the character is unsure, tighten coverage on hands, eyes, or small movements rather than shaking the whole camera.
- Time pressure: shorten shot duration and tighten action-to-cut timing when decisions must be made quickly.
Example: If the manager is avoiding a confrontation, keep them slightly turned away during key lines, then pivot toward the other character only when they finally admit the real reason.
Map Meaning to Auditory Signals
Sound can carry meaning even when dialogue is minimal or misleading.
- Dialogue clarity vs. concealment: when a character lies, keep their voice steady but let background sound intrude slightly, suggesting the world is “not cooperating.”
- Silence as emphasis: a pause after a line can signal regret, calculation, or a decision. The pause must be timed to the breath and the other character’s reaction.
- Spatial cues: use room tone and reverb to anchor where characters are. If someone is “out of place,” their audio space can feel different.
- Information through effects: a recurring sound can represent a threat or a memory. The audience learns the association through repetition.
Example: When a character receives a text that changes everything, you can keep the dialogue going but let the text notification be the only clean sound for a moment, then let the room tone return as the character’s face reacts.
Build a Two-Layer Translation Plan
For each meaning unit, plan two layers: what the audience must know and how the scene should feel.
- Cognitive layer: the audience’s understanding. What changes in facts or intentions?
- Affective layer: the audience’s emotional interpretation. What should they sense about the character’s state?
A single visual choice can serve both layers, but it’s safer to assign at least one element to each layer.
Example: A confession scene might require the audience to know the truth (cognitive) and feel the character’s fear (affective). Visuals can show trembling hands; audio can reduce background noise so the confession lands cleanly.
Use Dialogue as a Reference, Not a Script for the Camera
Dialogue often contains subtext, so treat the spoken line as a clue rather than the final meaning.
- If the line is polite but the subtext is hostile, shoot the polite face while cutting to the other character’s micro-reaction.
- If the line is a threat but the character is bluffing, keep their voice controlled while letting their body language contradict them.
This approach prevents the common mistake of filming “what was said” instead of filming “what it meant.”
Mind Map: Meaning Translation Workflow
Example: One Scene, Multiple Meanings
Consider a brief exchange:
- Character A: “You’re overreacting.”
- Character B: “Then why are you sweating?”
Meaning unit: A is dismissing to regain control; B is calling out fear.
- Visual: A stays composed in frame center while B is slightly off-axis, then B’s closer framing arrives as the truth lands.
- Audio: A’s dialogue stays even; the room tone becomes more noticeable during A’s line, then drops slightly as B speaks.
- Cut logic: cut to B’s eyes right before “sweating” to make the accusation feel earned, not random.
When you translate meaning this way, the audience doesn’t need to decode. They just experience the shift.
1.3 Building Audience Experience Through Rhythm, Clarity, and Tension
Audience experience is built from three practical levers: rhythm (when information arrives), clarity (what the audience can reliably understand), and tension (what the audience wants to resolve). When these levers work together, viewers don’t need to “figure it out” in a stressful way; they can follow the story and feel the pressure of what’s at stake.
Rhythm: Timing That Guides Attention
Rhythm is the pattern of emphasis across time. It comes from scene length, shot duration, cut frequency, and the spacing of key actions and reveals. A simple rule helps: if nothing changes for a while, the audience starts looking for meaning in small details. That can be useful, but only if those details are actually meaningful.
Start with a baseline: decide where the scene’s “information beats” land. For example, in a two-person conversation scene, you might plan three beats: (1) the request, (2) the refusal or hesitation, (3) the consequence. Then shape rhythm so each beat arrives after a short setup that makes it feel earned.
Concrete example: a character says, “I can’t do that.” If the next shot cuts immediately, the line lands as a flat statement. If you insert a beat—an awkward pause, a glance to the door, a hand hovering near a pocket—the audience reads the refusal as a decision under pressure. The pause is not filler; it is time for subtext to become visible.
Clarity: Making Meaning Legible
Clarity is the audience’s confidence that they understand what they’re seeing and why it matters. It depends on blocking, camera placement, sound hierarchy, and continuity of cause and effect.
A reliable method is to treat each scene like a mini system with a single job. The job might be “establish the relationship,” “reveal the plan,” or “prove the lie.” Once you know the job, you can remove competing signals. If the job is to reveal a lie, don’t bury the evidence in a background action that the audience might miss.
Practical clarity checks:
- Spatial clarity: Can the audience track where characters are relative to each other without guessing?
- Causal clarity: If the character acts, does the scene show a reason the audience can connect?
- Auditory clarity: Is dialogue intelligible over music and effects, especially at the moment of decision?
Concrete example: during a tense argument, keep the dialogue clean and let the environment do the work. If the room is loud, lower the music or change the scene’s audio strategy so the audience hears the exact words that create the conflict.
Tension: Pressure with a Payoff Path
Tension is not just “something bad might happen.” It’s the audience’s sense that a specific outcome is likely, and that the current choices move the story toward or away from it. Tension becomes stronger when the audience can predict the shape of the problem.
Build tension through three steps:
- Define the desired outcome for at least one character.
- Introduce a constraint that blocks the outcome.
- Escalate the constraint in a way the audience can track.
Concrete example: a character needs a keycard to enter a secure room. The constraint is that the keycard is missing. The escalation is that the security system logs attempts, so every search increases the risk. The audience isn’t guessing what “bad” means; they understand how the situation worsens.
How the Three Levers Interlock
Rhythm controls when the audience receives information. Clarity controls whether that information is usable. Tension controls whether the audience cares about what happens next. If rhythm is fast but clarity is low, the audience feels lost. If clarity is high but rhythm is slow, the scene can feel like it’s waiting for permission to matter. If both are strong but tension is vague, the audience may understand the scene yet feel little pressure.
A useful workflow is to plan each scene’s “tension beats” and then decide how rhythm and clarity support them. For each tension beat, ask:
- What new information arrives here?
- Is it visually and audibly unambiguous?
- Does it change the odds of the outcome?
Mind Map: Rhythm Clarity Tension
Example: One Scene, Three Purposes
Imagine a scene where a character tries to stop a mistake.
- Rhythm: Start with a short setup showing the character noticing the problem, then cut quickly into the moment they decide to intervene.
- Clarity: Keep the camera angle consistent during the decision so the audience can track hands, objects, and who hears what.
- Tension: The desired outcome is “prevent the mistake.” The constraint is “the system is already running.” The escalation is “the window closes with every delay.”
The result is a scene where the audience can follow the logic, feel the countdown, and understand exactly what each action changes.
1.4 Establishing Genre Conventions And Their Practical Use on Set
Genre conventions are not rules carved into stone; they are shared expectations that help the audience read the story quickly. On set, they become practical decisions about what to emphasize, what to simplify, and what to repeat so the film feels coherent. The goal is not to copy a template, but to use conventions as a communication system.
What Genre Conventions Actually Do
Genre conventions answer three production questions.
-
How should we interpret events? If the film is a thriller, a character’s hesitation reads as danger management, not indecision. If it’s a romantic comedy, awkward timing reads as social friction, not a plot malfunction.
-
How should we pace information? Horror often withholds explanations until the audience has felt the threat. Mystery often reveals clues in a pattern that invites comparison.
-
What should the camera and sound prioritize? Action films tend to favor clear spatial geography and readable movement. Drama often allows lingering shots that let subtext land.
A useful mindset: conventions are the audience’s shortcut. Your job is to keep that shortcut accurate.
Translating Conventions into Production Choices
Start with a short “convention list” for the script. Keep it small enough to use during production.
- Character behavior: What do characters typically do when stressed in this genre?
- Conflict shape: Is the threat external, internal, or both?
- Visual grammar: What does the film do with framing, motion, and contrast?
- Sound behavior: What gets emphasized—dialogue clarity, environmental tension, or rhythmic impact?
- Resolution style: Does the genre reward explanation, sacrifice, or reversal?
Then convert each item into a set-level instruction. For example, “thriller tension” becomes “shoot dialogue with interruptions and partial occlusions so the audience feels the pressure,” not “make it tense.”
Practical On-Set Techniques That Keep Conventions Consistent
Blocking and geography. Many genres rely on spatial clarity. In action, the audience must track who is where and what can reach what. A simple practice is to rehearse the scene with tape marks on the floor and confirm sightlines before lighting. If the genre is horror, you can still maintain geography, but you may choose to hide it selectively by placing the camera where the character cannot see.
Coverage strategy. Conventions often dictate which moments matter. In a comedy, reaction shots are not optional; they are the punchline’s timing mechanism. In a courtroom drama, you may prioritize establishing shots of the room and clean angles that support argument structure. Plan coverage so the edit can preserve the genre’s rhythm without forcing awkward rearrangements.
Performance direction. Genre shapes how emotions are expressed. A noir protagonist may underplay feelings; a rom-com lead may externalize them through timing and physical comedy. Direct actors with concrete targets: “Pause one beat longer before answering,” or “Let the smile arrive after the lie, not before it.” These instructions keep performances aligned with genre expectations.
Lighting and contrast. Conventions often rely on readability. Even in stylized genres, the audience needs enough information to follow the story. A practical approach is to define a “read zone” for faces and key props, then decide how much of the rest of the frame can fall into shadow.
Sound emphasis. Genre conventions frequently live in audio. In a horror scene, dialogue clarity can be intentionally interrupted by environmental sounds to create uncertainty. In a musical or action sequence, rhythm and impact sounds can carry the pacing. On set, record clean dialogue and usable room tone so the editor can support the genre’s audio logic.
Mind Map: Genre Conventions to Set Instructions
Example: Using Conventions Without Copy-Pasting
Scenario: A scene where a character discovers a hidden message in a locked drawer.
-
Mystery approach: Keep the drawer’s location and the character’s line of sight consistent. Shoot a clear close-up of the message reveal, then cut to a reaction that invites analysis. Audio should stay mostly stable so the audience can focus on the clue.
-
Thriller approach: Use partial occlusions and faster coverage changes so the reveal feels like a risk. Let background noise rise during the moment of discovery, but keep dialogue intelligible. The reveal should trigger immediate action planning rather than contemplation.
-
Comedy approach: Frame the drawer reveal as a timing problem. Let the character misread the message first, then correct themselves with a beat that lands like a joke. Keep sound effects light and avoid over-darkening the scene.
In each version, the “drawer reveal” is the same event, but the genre conventions change how the audience interprets it, which in turn changes camera, performance, and sound decisions.
Consistency Checks During Production
Before moving on from a scene, ask three questions.
-
Can the audience read the scene’s purpose within the first minute? If not, coverage or blocking may be fighting the genre’s shortcut.
-
Do the performances match the genre’s emotional grammar? If a comedic beat lands like a tragedy, the edit will struggle.
-
Does the audio support the intended uncertainty or clarity? If dialogue is muddy, the genre’s information pacing collapses.
Genre conventions work best when they are treated as a set of production instructions you can verify, not a vibe you hope the audience catches.
1.5 Mapping Story Beats to Production Decisions
A story beat is a unit of change: a decision is made, a truth lands, a relationship shifts, or a plan fails. Mapping beats to production decisions means you decide, for each beat, what the audience must understand and feel, then choose the concrete filmmaking choices that deliver that outcome. The goal is not “more detail,” it’s fewer surprises later.
Start with a simple beat worksheet. For each beat, write: (1) the character’s objective in that moment, (2) the obstacle, (3) the outcome, and (4) the audience takeaway. If you can’t state the audience takeaway in one sentence, the beat is probably doing vague work.
Beat to Camera and Blocking
Once the takeaway is clear, camera and blocking become tools rather than defaults. When a character gains power, the framing often tightens or stabilizes. When they lose control, the framing may loosen, drift, or cut away at the wrong time—on purpose.
Example: In a scene where a detective finally learns the suspect’s alibi is fabricated, you can stage the beat so the detective’s body language changes before the dialogue confirms it. Use a slightly wider shot during the suspicion beat, then move to a tighter shot as the confirmation lands. The audience reads the shift even if the line delivery is restrained.
Practical rule: plan coverage so the edit can support the beat. If the beat depends on a reaction, ensure you have at least one clean reaction angle and one angle that shows the trigger (the person, object, or information). Without both, the edit has to invent meaning.
Beat to Lighting and Production Design
Lighting and design choices should reinforce the outcome, not just the mood. If the beat is “truth revealed,” you can increase clarity: more motivated key light, fewer distracting shadows, and a cleaner separation between subject and background. If the beat is “truth withheld,” you can reduce clarity: keep the subject partially obscured, let practicals dominate, or place the key information in a less readable area of the frame.
Example: A character hides a letter in a drawer. During the concealment beat, keep the drawer area visually busy—hands, reflections, and clutter. During the discovery beat, simplify the visual field so the audience’s eyes land where the story wants them.
Continuity is part of this mapping. If a beat requires the audience to track a specific object, that object’s position, label, and visibility must be consistent across takes. A “small” prop mismatch can break the beat even when the acting is perfect.
Beat to Sound and Performance Timing
Sound often carries the beat when visuals can’t. A beat of realization can be supported by a subtle change: room tone drops, a distant sound becomes prominent, or a background noise masks a line until the reveal.
Example: During a tense conversation, the audience expects a lie. You can record a consistent bed of ambient noise, then lower it slightly at the moment the character says the wrong detail. That makes the line feel exposed without adding any dramatic music.
Performance timing is also a production decision. Decide whether the beat lands on the line, the pause before the line, or the reaction after the line. Then schedule coverage and rehearsal to capture that exact landing.
Beat to Edit Strategy and Scheduling
Editing strategy should be decided before shooting, because it affects what you must capture. If a beat is meant to feel sudden, you need options for quick transitions: matching eyelines, consistent action frames, and enough coverage to cut on the exact moment of outcome.
If a beat is meant to feel inevitable, you may want longer takes or fewer cuts so the audience experiences the shift as a gradual accumulation.
Scheduling follows the same logic. Beats that require complex setups—stunts, special lighting, or heavy blocking—should be grouped by setup where possible, but not at the cost of performance continuity. If the beat depends on a character’s emotional progression, keep those beats close together in the shooting day.
Mind Map: Mapping Beats to Production Decisions
Example: Beat Mapping for a Short Sequence
Beat 1: The character lies to protect someone.
- Objective: keep the truth hidden.
- Obstacle: the other person notices a detail.
- Outcome: the lie holds for now.
- Audience takeaway: the lie is fragile.
Production choices:
- Camera: medium framing with a slight handheld feel to suggest instability.
- Lighting: keep the face readable but let the background stay distracting.
- Sound: maintain a steady ambient bed; don’t “spotlight” the lie.
- Edit plan: cut on the other person’s noticing reaction, not on the line itself.
Beat 2: The character’s lie collapses.
- Objective: regain control.
- Obstacle: evidence appears.
- Outcome: truth is confirmed.
- Audience takeaway: the protection attempt fails.
Production choices:
- Camera: tighten on the character as the evidence lands.
- Lighting: increase clarity around the evidence and the character’s face.
- Sound: reduce ambient noise slightly at the confirmation moment.
- Edit plan: cut faster, with options to match action from evidence to reaction.
This is the mapping in practice: each beat becomes a checklist of what must be captured and how the audience should interpret it. When you do this consistently, production decisions stop being guesses and start being choices with reasons.
2. Script Development and Screenplay Craft
2.1 Developing Loglines, Synopses, and Story Engines
A logline, a synopsis, and a story engine all answer different questions, so they should not be written the same way. A logline is a compact promise about what happens and why it matters. A synopsis is a guided tour of the plot with enough cause-and-effect to prevent misunderstandings. A story engine is a working tool that keeps the plot generating decisions even when you’re tired, busy, or tempted to “fix” a scene by rewriting it into something else.
Loglines That Stay Specific Under Pressure
Start with four ingredients: protagonist, want, obstacle, and consequence. “Want” should be concrete enough to act on. “Obstacle” should be more than “things get hard”; it should be a force that blocks the want in a particular way. “Consequence” should describe what changes if the protagonist fails.
A useful logline test: if you remove the last clause, does the remaining sentence still describe a story rather than a mood? If not, tighten the want and obstacle.
Example:
- Protagonist: A first-year paramedic
- Want: Keep a patient alive long enough to reach the hospital
- Obstacle: A chemical spill contaminates the scene and disables the team’s equipment
- Consequence: If the patient dies, the paramedic’s certification is revoked and their younger sibling loses the only caregiver they have
A logline built from those pieces reads like a single sentence with no wasted adjectives.
Synopses That Explain How the Plot Works
A synopsis should be structured, not just summarized. Use a sequence of turning points: setup, first reversal, midpoint shift, major setback, final push, and resolution. Each turning point should include a decision, not only an event.
To keep it readable, write in three layers:
- What changes in the protagonist’s situation.
- What they do in response.
- What it costs or reveals.
If you find yourself listing scenes like a checklist, convert each scene into a decision with a tradeoff. For instance, “They go to the warehouse” becomes “They choose the warehouse because it offers evidence, but it puts them in a trap they can’t see yet.”
Example synopsis excerpt (short):
- Setup: The paramedic finds a pattern in prior calls tied to the same chemical source.
- First reversal: Their attempt to report it triggers a cover-up that blocks access to records.
- Midpoint shift: They discover the chemical is being used to force compliance from a specific facility.
- Major setback: They save a victim, but the evidence is destroyed during the rescue.
- Final push: They stage a controlled response to bait the source into exposing itself.
- Resolution: The protagonist survives the fallout, but the cost is that their sibling must take over caregiving permanently.
Notice how each line includes a cause-and-effect link, not just “then this happened.”
Story Engines That Generate Scenes Instead of Rewriting Them
A story engine is a set of constraints and promises that produce scenes. It typically includes:
- Core problem: the central conflict stated as a pressure on the protagonist.
- Rules of the world: what can and cannot happen, including practical limits.
- Character engine: what the protagonist believes, what they fear, and what they do when stressed.
- Antagonistic pressure: a counter-force that reacts to the protagonist’s choices.
- Escalation path: how stakes rise through specific mechanisms.
The key is that the engine should tell you what to do next, not just what to want.
Mind Map: Logline, Synopsis, Story Engine
Building the Engine from the Logline
Once you have a logline, expand it into an engine by asking three questions.
- What does the obstacle do to the protagonist’s plan? Turn it into a concrete interference.
- What does the protagonist do under that interference? Turn it into a decision pattern.
- How does the consequence show up in the next scene? Turn it into an escalation mechanism.
Mind Map: From Logline Ingredients to Engine Components
Practical Workflow That Doesn’t Waste Drafts
Write the logline first, but don’t treat it as sacred. Use it as a constraint to prevent vague plots. Then write a synopsis that follows the turning points implied by the logline’s consequence. Finally, convert the synopsis into a story engine by extracting the rules, decision patterns, and escalation mechanisms.
If a later scene feels “off,” check whether it violates one of the engine’s constraints. If it does, fix the scene by changing the decision or the interference, not by pretending the character suddenly wants something else.
Example: Scene sanity check
- If the engine says the obstacle disables equipment, a scene where the protagonist magically has the right tool should be replaced with a decision that uses what remains, or with a new interference that explains why the tool is available.
That’s the whole point: loglines focus the promise, synopses explain the path, and story engines keep the path consistent while you write.
2.2 Structuring Scenes with Objectives, Obstacles, and Outcomes
A scene is easiest to build when you can answer three questions: What does each character want right now (objective)? What blocks them in the moment (obstacle)? What changes by the end (outcome)? If you can’t state those clearly, you usually end up with dialogue that sounds busy but doesn’t move.
Objectives that stay specific under pressure
An objective should be concrete enough to act on. “Be respected” is vague; “get the keycard from Mara before the audit starts” is actionable. Objectives also need a time limit, even if the script doesn’t say it. If the scene takes place during a lunch break, the objective should fit inside that window.
A practical way to write objectives is to attach them to a verb and a target:
- Verb: ask, hide, persuade, escape, confess, bargain
- Target: person, object, information, permission, location
Example: In a scene where a character wants to borrow a car, the objective might be “convince the mechanic to hand over the keys without calling the owner.” That objective implies tactics, risks, and what counts as success.
Obstacles that are physical, social, and informational
Obstacles work best when they are not just “things that happen,” but forces that react to the character’s attempts.
Use three obstacle types to keep the scene from flattening:
- Physical: distance, locked doors, limited time, weather, injury
- Social: status differences, loyalty, embarrassment, rules enforced by people
- Informational: missing facts, misdirection, uncertainty, hidden motives
If you only use one type, the scene can become repetitive. A character tries the same approach because the world never pushes back in different ways.
Example: A character tries to sneak into a building (physical). The guard recognizes them (social). The character doesn’t know the guard’s shift ends in ten minutes (informational). Each obstacle changes what the character can do next.
Outcomes that create a new situation
An outcome is not “they talked.” It’s the state of the scene’s problem at the end. Outcomes can be:
- Win: the objective is achieved
- Partial: progress happens, but the core problem remains
- Loss: the objective fails
- Trade: they get something, but at a cost
Outcomes should also shift power. If the objective is about control of information, the outcome should change who knows what. If it’s about access, the outcome should change who has entry.
A helpful test: after the scene ends, what is now harder or easier for the character? If nothing changes, the scene likely needs a stronger obstacle or a clearer objective.
Scene structure as a cause-and-effect chain
Once you have objective, obstacle, and outcome, you can shape the scene into beats that escalate the character’s problem.
A simple beat model:
- Approach: the character states or demonstrates the objective through action
- First resistance: the obstacle appears in a manageable form
- Attempt: the character uses a tactic based on their plan
- Complication: the obstacle adapts or a new obstacle type enters
- Decision: the character chooses a route that costs something
- Outcome: the scene ends with a changed situation
This model prevents the common issue where scenes start with intent but end with a conversation that never forces a choice.
Mind Map: Objectives, Obstacles, Outcomes
Example: A scene built from objective, obstacle, outcome
Setup: Jordan needs access to the server room to retrieve a file before it’s wiped.
- Objective: Get the maintenance badge from the night technician.
- Obstacle: The technician won’t hand it over without verifying the requestor’s identity.
- Attempt: Jordan offers a plausible reason and tries to rush the technician.
- Complication: The technician checks the log and realizes Jordan’s name doesn’t match the request.
- Decision: Jordan chooses to admit they’re not authorized, asking for a short window instead of the badge.
- Outcome: The technician grants a five-minute entry but keeps Jordan under observation, making the next scene about completing the task without being caught.
Notice how the outcome isn’t just “Jordan got in.” It’s “Jordan got in with surveillance,” which creates a new problem immediately.
Example: Two characters, one scene, two objectives
When two characters share a scene, each should have their own objective. The scene’s tension comes from the mismatch.
- Character A objective: persuade Character B to sign a document.
- Character B objective: delay signing until they can confirm a detail.
Obstacles should connect to those objectives. If A tries to pressure B, B’s obstacle might be informational (“I need to verify the clause”), while A’s obstacle might be social (“the witness is watching”). The outcome should reflect whose objective moved forward.
Quick checklist for revision
- Can you state each character’s objective in one sentence with a verb and target?
- Do obstacles force different tactics, not just repeated attempts?
- Does the ending outcome change power, access, or knowledge?
- Does the scene include at least one decision point where the character pays a cost?
When these answers are clear, the scene becomes easier to write and easier to edit, because every line is tied to a specific attempt and a specific consequence.
2.3 Writing Dialogue with Subtext and Performance Constraints
Dialogue does two jobs at once: it communicates information and it reveals how characters feel about that information. Subtext is the gap between what’s said and what’s meant. Performance constraints are the practical limits that keep the gap playable on screen—breath, timing, physical action, and what the actor can realistically do in the moment.
The Core Idea of Subtext
Subtext starts with a character goal. If a character wants something, their words will try to get it without paying the full cost of honesty. For example, a manager who needs compliance might say, “We’ll review the process next week,” while meaning, “I’m buying time because I’m not ready to admit the mistake.” The audience hears the surface plan and watches the character avoid the real topic.
A useful rule: every line should carry at least one of these pressures—fear, pride, desire, guilt, or control. If a line has no pressure, it tends to sound like exposition wearing a costume.
Mind Map of Subtext Mechanics
Performance Constraints That Shape the Words
Subtext fails when the line is impossible to perform. Screen dialogue is often delivered in fragments, with interruptions, glances, and micro-pauses. Write with the actor’s body in mind.
- Breath and sentence length: If a line requires a long, uninterrupted sentence, it will either be rushed or broken in rehearsal. Prefer shorter sentences that can be paced.
- Listening behavior: Characters rarely speak while fully ignoring the other person. Include listening cues through action beats: a character checks a phone, avoids eye contact, or repeats a phrase they heard.
- Emotional escalation limits: A character can’t jump from calm to confession in one breath unless the scene is built for that. Stage escalation across multiple lines or across a line that changes meaning mid-delivery.
- Physical action compatibility: If the character is opening a drawer, their dialogue should accommodate the timing. Silence can be part of the subtext.
Writing Method from Goal to Line
Start with a scene objective for each character, then decide what they can safely reveal. Next, choose a strategy that matches the pressure.
- Deflect when the truth would cost too much.
- Reframe when the character wants to control the terms.
- Bargain when they need cooperation.
- Threaten indirectly when direct threats would backfire.
Then write the line so the surface meaning sounds reasonable. Subtext should look like a normal conversation, not a riddle.
Example: Same Situation, Different Subtext
Situation: A tenant is late on rent. The landlord wants payment without escalating.
Surface-friendly dialogue
- Landlord: “I sent the notice so we’re aligned on the timeline.”
- Tenant: “I saw it. I’m working on it.”
Subtext version with performance-ready pressure
- Landlord: “I sent the notice so we’re aligned on the timeline.” (tone: careful, controlled)
- Tenant: “I saw it. I’m working on it.” (tone: defensive, quick)
- Landlord: “Good. Because next week is when it becomes a problem.” (a beat, then softer) “For both of us.”
The surface says “timeline.” The subtext says “I’m watching, and I’m preparing.” The final line adds control without sounding like a threat—until the audience notices the shift.
Example: Subtext Through What’s Omitted
Omission is often cleaner than contradiction. If a character avoids a key detail, the audience fills the gap.
- Friend: “You didn’t answer.”
- Character: “I was busy.”
- Friend: “Busy doing what?”
- Character: “Sorting things out.” (doesn’t specify)
The omission forces the actor to choose how to react: irritation, shame, or calculation. The subtext lives in the refusal to name the real activity.
Advanced Detail Without Complexity Explosion
When you revise, test each line with two questions:
- If the actor delivers this line honestly, what do they want right now?
- What does the other character hear that the script never states?
If either answer is vague, adjust the strategy or add a concrete listening beat. Subtext becomes reliable when it’s tied to a specific want and a specific tactic, not when it’s tied to mood alone.
Practical Checklist for Drafting
- Each line has a surface function and a hidden tactic.
- At least one pressure source drives the choice of words.
- Sentence length supports breath and natural pauses.
- Listening behavior is visible through action beats.
- Escalation happens across lines or across a line’s meaning shift.
- Omitted details are intentional and performable.
2.4 Designing Action Lines for Coverage and Blocking
Action lines are the bridge between what the script says and what the camera can actually capture. They describe movement, spatial relationships, and timing in a way that helps the director, actors, and crew plan coverage without guessing. When action lines are clear, you get fewer “we can’t shoot that” moments and more consistent performances across takes.
Core Purpose of Action Lines
Action lines should answer three practical questions: Where is the character? What are they doing with their body? What changes by the end of the beat? If an action line only tells you the emotion, it won’t help blocking or coverage. If it only tells you the location, it won’t help performance continuity.
A useful rule: every action line should either (1) move the scene forward, (2) clarify geography, or (3) create a camera-friendly reason to cut. “He looks at the door” is geography. “He looks at the door, then steps back as it opens” is forward motion plus a beat boundary.
Beat Boundaries and Camera Decisions
Coverage planning depends on beat boundaries. A beat boundary is where something meaningful happens: a decision, a reveal, a handoff, a change in power, or a physical interruption.
When you write action lines, include micro-outcomes. For example, instead of “She argues,” specify “She points at the contract, then folds it and pushes it away.” That gives editors and continuity supervisors something concrete to match.
For coverage, think in terms of shot motivation:
- Establishing geography: wide or medium to orient the viewer.
- Performance emphasis: close-ups on decisions, reactions, and physical emphasis.
- Interaction clarity: two-shots or over-the-shoulder angles when characters share space.
Blocking Clarity Through Spatial Language
Blocking fails when action lines are vague about distance, direction, and relative positions. Replace “over there” with measurable anchors.
Use consistent spatial references:
- Doors, windows, furniture edges as fixed landmarks.
- Camera-facing orientation like “toward camera” or “toward the window.”
- Relative placement like “left of the desk” or “between the couch and the hallway.”
Example action line improvements:
- Weak: “He walks to the table.”
- Clear: “He crosses to the table at the far wall, stops beside the chair, and sets the folder down.”
The second version tells you where he stops, which matters for eyelines, props, and matching coverage.
Timing and Repeatability
Actors need actions that can be repeated with the same duration and endpoints. Action lines should specify start and end states.
A repeatable action line includes:
- Start condition: “after the knock,” “as the light flickers,” “when she turns.”
- Action: movement or manipulation.
- End condition: “hand on the latch,” “eyes on him,” “door fully closed.”
If you write “He hesitates,” you’ve described a feeling but not a duration. Better: “He pauses with his hand hovering over the latch for two beats, then turns the knob.”
Practical Mind Map for Action Lines
Mind Map: Designing Action Lines for Coverage and Blocking
Example: Turning Script Action into Shootable Blocking
Scenario: Two characters in a kitchen. One wants the truth; the other tries to delay.
Less useful action line: “He blocks her and argues.”
Coverage-ready action lines:
- “She steps into the kitchen and stops at the counter. He is seated, facing away.”
- “She reaches for the drawer handle. He stands quickly, moving between her and the drawer.”
- “He keeps his body angled toward the drawer while speaking; she watches his hands.”
- “She pulls back, then circles to the other side of the counter. He follows her movement, staying between her and the drawer.”
- “She finally grabs the drawer pull with her left hand; he releases it and looks at her, defeated.”
Why this works: each line creates a new spatial arrangement, which supports different coverage choices. The “between her and the drawer” moment is a natural reason for a two-shot or an over-the-shoulder angle. The final “defeated” beat has a clear end state for close-up reaction.
Advanced Detail: Designing for Continuity Without Over-Specifying
You want enough specificity to prevent drift, but not so much that actors feel stapled to the page. Aim for endpoints and constraints, not micromanagement.
Use constraints like:
- “His hand stays on the latch until she speaks.”
- “She keeps her gaze on his face, not the drawer.”
Avoid constraints like:
- “His fingers must curl exactly at 1.2 seconds.”
The first type preserves performance and continuity across takes. The second type often turns into a timing contest that nobody asked for.
Quick Checklist for Action Lines
- Does each beat end with a changed state?
- Are landmarks and relative positions clear?
- Are actions repeatable with defined start and end conditions?
- Do the actions naturally suggest coverage types?
- Are eyelines and prop interactions specified enough to match?
When action lines meet these criteria, blocking becomes a plan rather than a negotiation, and coverage becomes a logical sequence rather than a scramble.
2.5 Revising Drafts with Script Notes, Table Reads, and Coverage Checks
Revising Drafts With Script Notes Table Reads and Coverage Checks
Revision works best when you treat it like engineering: you change one thing, you verify the effect, and you keep a paper trail. The goal is not to “fix everything,” but to reduce confusion and increase intention—so the script can survive production.
Start with Notes That Can Be Acted On
Script notes often arrive as opinions, but revisions need decisions. Convert each note into an action statement tied to a specific page, scene, or character goal.
- Opinion note: “This feels slow.”
- Actionable rewrite: “In Scene 12, shorten the setup by removing Beat 3 and moving the reveal to the end of the scene.”
When notes are vague, ask for the missing measurement: what should the audience understand, and when? A useful note points to a gap in clarity, not just a feeling.
Run a Table Read to Test Readability and Performance Fit
A table read is a low-cost way to catch problems that don’t show up on the page. It tests whether dialogue carries meaning without visual support, and whether character intentions land.
Use a simple structure:
- Assign roles and read once without stopping. Capture where people stumble or lose track.
- Read again with targeted stops. Pause only when a line causes confusion, contradicts a prior fact, or blocks an actor’s natural emphasis.
- Record three categories of issues:
- Clarity: Who wants what right now?
- Continuity: Does a detail contradict earlier information?
- Performance: Can the actor deliver it naturally, or does it sound like explanation?
Example: If a character says, “I’m fine,” but the next line reveals they are not fine, the read will usually expose the mismatch. The fix is often to move the contradiction earlier, or to change the second line so it follows from the first.
Apply Coverage Checks to Prevent Production Surprises
Coverage checks translate story intent into shootable material. They help you avoid a script that looks good in theory but collapses under time, locations, or camera logic.
A practical coverage check asks:
- Are key moments covered by the script’s scene count and length? If a character makes a major decision, does the scene give enough time for reaction and consequence?
- Do scenes contain actionable beats? If a scene is mostly standing and explaining, it may require too many coverage angles to feel dynamic.
- Is the geography coherent? If the script implies a character can reach a place instantly, confirm the blocking and travel time.
A quick method: mark each scene with its primary function—setup, turn, reveal, escalation, or resolution. If a scene marked “reveal” is mostly dialogue without a visible change, consider adding a concrete action or shifting the reveal to a moment with physical consequence.
Mind Map: Revision Loop from Notes to Shootable Scenes
Example: Turning Confusing Notes into Concrete Rewrites
Suppose notes say: “The protagonist’s motivation is unclear in Scene 7.”
A systematic fix might look like this:
- Before: Motivation is stated in a long explanation.
- After: Motivation is shown through a choice that costs them something small but real.
Then run a micro-check:
- In the table read, does the actor know what they are trying to achieve in the first ten seconds?
- In the coverage check, does the scene include at least one visible action that changes the situation, not just the information?
Keep a Revision Log So You Don’t Recreate Old Problems
Maintain a short log with three columns: Change, Reason, Verification. Verification can be as simple as “table read: no stumbling on the new line” or “coverage check: reveal now has reaction beats.” This prevents the common cycle of fixing a symptom, then accidentally reintroducing the original confusion later.
Final Pass: Consistency Across Draft Versions
Before moving on, scan for continuity anchors: names, timelines, and recurring props or locations. If you cut a scene, confirm that any facts it introduced are either removed or re-established elsewhere. A script that stays consistent is easier to shoot, edit, and understand—usually with fewer pages than you think.
3. From Script to Production Plan
3.1 Script Breakdown for Scheduling, Budgeting, and Resource Planning
A script breakdown turns pages into a production checklist. The goal is not to list everything that could happen; it’s to identify what must be planned, what can be flexible, and what will cost time or money if you ignore it.
Core Inputs and Output Targets
Start with the script’s final shooting draft, plus any notes that affect production reality (locations, special equipment requirements, continuity constraints). Then decide what your breakdown must produce for the schedule and budget. A practical target is three outputs:
- A scene-by-scene inventory of elements that drive time and cost.
- A resource list that maps elements to departments.
- A scheduling-friendly structure that groups scenes into shootable blocks.
What You Break Down
Break each scene into categories that correspond to how crews actually work.
Scene facts
- Location and set type (interior/exterior, practical address, stage vs. real).
- Time of day and weather dependencies.
- Scene length in script pages and estimated screen time.
Story requirements
- Number of characters present, including background extras.
- Props that must be sourced, built, or handled with care.
- Wardrobe continuity needs (specific garments, uniforms, multiple looks).
- Stunts, special actions, or safety-critical moments.
Production requirements
- Camera and lighting complexity (night exteriors, heavy contrast, large coverage).
- Sound complexity (crowds, wind, dialogue distance, music playback).
- VFX needs (clean plates, tracking markers, greenscreen).
Logistics and constraints
- Travel time between locations.
- Permit or access windows.
- Power, water, and generator needs.
- Set dressing reset requirements between takes or scenes.
Mind Map: Breakdown Categories and Their Scheduling Impact
Script Breakdown Mind Map
Turning Elements into Schedule Logic
A schedule is built from constraints, not wishes. Use the breakdown to identify which scenes can share a setup and which must be isolated.
-
Setup continuity grouping: If two scenes share the same location and wardrobe state, they can often be shot back-to-back. If a scene requires a major set reset, treat it as a boundary.
-
Department bottlenecks: Some elements slow everything down. Examples: a location with limited access, a stunt day, a greenscreen setup, or a scene requiring extensive wardrobe changes. Mark these as “anchor” constraints.
-
Cast availability: Principal cast scenes should be clustered to reduce travel and downtime. Background-heavy scenes can be scheduled around principal availability, since extras are usually easier to swap than lead availability.
-
Time-of-day dependencies: Night exteriors, golden-hour windows, and weather-sensitive exteriors should be grouped by condition. If the script specifies a time that affects lighting continuity, reflect that in the breakdown so the schedule doesn’t quietly break story logic.
Budgeting from the Breakdown
Budgeting becomes easier when each cost is tied to a breakdown element.
- People costs: Crew hours scale with setup complexity and number of days. If a scene needs multiple lighting setups or heavy camera movement, it will likely increase shooting time.
- Equipment costs: Special lenses, rigs, grip packages, generators, and audio gear should be triggered by script requirements, not by guesswork.
- Locations and permits: Treat permits as scene-level constraints. If a permit covers multiple scenes, group them; if not, plan separate blocks.
- Props and wardrobe: Items that must be sourced or built should be flagged early. If a prop appears in multiple scenes, confirm whether it can remain on set or must be transported and tracked.
- Post costs: VFX and complex sound scenes should be identified during breakdown so post time is not invented later.
Example Scene Breakdown and How It Drives Decisions
Example: Scene 12, Interior Apartment, Night
- Characters: 2 principals, 3 background (neighbors in hallway).
- Props: phone with a specific case, a lit lamp, a letter that must match earlier pages.
- Wardrobe: both principals change jackets between takes.
- Camera and lighting: low-key lighting, two coverage setups (wide establishing, then close dialogue).
- Sound: hallway noise risk, dialogue requires clean lavs.
- Logistics: apartment location requires parking permits; elevator access limited.
Scheduling implications
- Group with other night interiors in the same building if available, since the location and permit are anchor constraints.
- Plan wardrobe changes with enough buffer for continuity and quick resets.
- Allocate extra time for hallway noise control and dialogue cleanup, since sound complexity affects shooting efficiency.
Budget implications
- Flag additional grip and lighting time for low-key setups.
- Add audio time for dialogue clarity and potential ADR planning if hallway noise overwhelms production takes.
- Note permit and parking costs as scene-level lines.
Quality Checks That Prevent Breakdown Failures
A breakdown is only useful if it’s consistent.
- No missing categories: Every scene should have location, characters, and at least a basic note on props/wardrobe.
- Consistent naming: Use the same location names and character identifiers across the script.
- Cross-scene continuity: If a prop or wardrobe item appears again, confirm whether it’s the same physical item.
- Complexity flags: Mark safety actions, VFX, and sound-risk scenes so they don’t get treated like ordinary scenes.
When the breakdown is done this way, scheduling and budgeting stop being separate tasks. They become two views of the same scene inventory, which is exactly what you want when time and money are both limited.
3.2 Creating a Shot List and Scene Coverage Strategy
A shot list is the bridge between the script and what the camera actually records. A coverage strategy is the rule set that decides which moments get filmed more than once, which angles are optional, and which details are non-negotiable. Together, they prevent two common problems: missing a needed visual for continuity and spending time on shots that don’t serve the edit.
Start with Scene Requirements
Begin by rewriting each scene as a set of requirements. For example, a scene might need: (1) establishing geography, (2) a clear view of who is speaking, (3) reaction coverage for at least two beats, and (4) a specific prop action that must be visible for later payoff.
A practical way to do this is to label each beat with a purpose:
- Orientation: Where are we and what’s the situation?
- Information: What must the audience understand?
- Emotion: What changes in the character’s stance?
- Action: What physical event must be readable?
Build a Coverage Map Before You List Shots
Coverage is easier to design when you know the edit’s needs. If the scene will cut on dialogue, you need clean angles for each speaker. If the scene will cut on reactions, you need reaction shots that match the timing of the line.
Use this simple logic:
- If a line carries new information, plan at least one shot that clearly shows the speaker.
- If a line triggers a decision or realization, plan at least one reaction shot that shows the response.
- If a prop matters, plan a shot where the prop is visible at the moment it changes state.
Mind Map: Shot List Inputs and Coverage Decisions
Create the Shot List in a Consistent Order
A good shot list reads like a checklist for the editor and a schedule for the crew. Use a consistent ordering so people can find things quickly.
A reliable order is:
- Establishing and geography (wide or medium-wide)
- Primary dialogue coverage (speaker angles)
- Reactions and reverses (reaction angles and over-the-shoulder)
- Action and prop shots (insert shots and functional close-ups)
- Transitions and safety (extra options that protect the edit)
For each shot, specify what changes in the frame. “Medium on speaker” is less useful than “Medium on speaker, hand moves to pocket after line 12.” The more concrete the action, the easier it is to match takes.
Example: Two-Person Conversation with a Prop Beat
Imagine a scene where Person A confronts Person B, and Person B slides a key across the table.
- Shot 1: Wide establishing both characters and the table. Purpose: orientation.
- Shot 2: Over-the-shoulder on Person A while A speaks. Purpose: information clarity.
- Shot 3: Over-the-shoulder on Person B while B responds. Purpose: reverse angle for dialogue.
- Shot 4: Close-up insert of the key sliding. Purpose: action readability for later payoff.
- Shot 5: Reaction close-up on Person A after the key lands. Purpose: emotional change.
- Shot 6: Reaction medium on Person B when A calls out the key. Purpose: edit flexibility.
Notice what’s missing: you don’t need five different wides. You need enough angles to cover the dialogue and the prop moment without forcing the editor to use awkward cut points.
Optional vs Mandatory Coverage Tiers
To keep the plan realistic, assign each beat a tier:
- Mandatory: If you miss it, the scene becomes harder to edit or continuity breaks.
- Preferred: Helps pacing and reduces strain during assembly.
- Optional: Nice to have, but you can skip if time runs short.
In the key example, the insert of the key is usually mandatory, while an extra wide might be optional.
Advanced Detail: Managing Continuity Through Shot List Notes
Continuity problems often come from under-specified actions. Add small, concrete flags:
- “Hand position before and after line”
- “Cup level at start of beat”
- “Door position relative to frame edge”
- “Wardrobe item visible or hidden in this angle”
These notes reduce the number of “Can we do that again?” moments. They also help the editor understand what each take is actually usable for.
Advanced Detail: Coverage That Matches the Intended Edit
If you plan to cut on dialogue, prioritize clean speaker angles. If you plan to cut on reactions, prioritize reaction coverage that aligns with the emotional beat.
A quick test: after you write the shot list, imagine assembling the scene using only those shots. If you can’t cover a beat without jumping to a less relevant angle, adjust the list now while it’s still cheap.
Mind Map: Coverage Tiers and Beat Mapping
A shot list and coverage strategy aren’t about filming everything. They’re about choosing the minimum set of images that lets the edit communicate clearly, while keeping continuity intact and the crew’s time focused on what matters.
3.3 Building a Production Schedule with Realistic Dependencies
A production schedule is a dependency map disguised as dates. The goal is not to fill a calendar; it’s to ensure every task has what it needs when it needs it. Realistic dependencies come from three sources: story requirements (what must be captured), physical constraints (what can’t happen without time or access), and workflow handoffs (what must be finished before the next department can start).
Start with a dependency inventory. For each scene, list the assets that must exist before shooting: locations cleared, wardrobe available, props ready, set dressing complete, camera package reserved, and sound plan approved. Then list the outputs that must be delivered after shooting: camera media labeled, sound synced, continuity notes logged, and any VFX plates captured. If you skip the “after” outputs, you’ll discover missing materials during editing, which is the schedule’s least favorite surprise.
Next, translate dependencies into scheduling logic. Use a simple rule: tasks that require the same resource cannot overlap unless you have redundancy. For example, if you have one camera body and one lighting kit, you can’t schedule two complex night scenes at the same time without either renting more gear or simplifying one setup. Likewise, if a location permit restricts access to a two-hour window, your schedule must treat that window as a hard boundary, not a suggestion.
A practical method is to build the schedule in layers.
- Hard dates and access windows: permits, actor availability, equipment delivery, and any location restrictions.
- Critical path scenes: scenes with the most dependencies or the highest risk of delay, often those requiring special locations, stunts, VFX elements, or complex blocking.
- Supporting tasks: rehearsals, wardrobe checks, camera tests, and sound checks that reduce on-set friction.
- Buffer placement: add time where uncertainty is highest, not where you feel optimistic.
Consider a common dependency chain: a dialogue scene in a rented office. The scene depends on location access, wardrobe continuity for both characters, and clean production sound. If the office is only available on Tuesday, you schedule the shoot Tuesday. Then you schedule wardrobe fitting Monday so the actors arrive with the correct continuity details. You also schedule a sound check Monday afternoon to confirm microphone placement works with the room’s acoustics. After the shoot, you schedule media ingest and sync the same day or the next morning so editors can start assembling while the details are still fresh.
To keep dependencies visible, use a dependency matrix. Rows are tasks; columns are prerequisites. Mark each prerequisite as one of three types: resource, approval, or physical readiness. Resource prerequisites include gear and crew. Approval prerequisites include script sign-off, shot list confirmation, and final location approval. Physical readiness includes set dressing, props, and wardrobe continuity. This classification helps you decide where to add buffer. If it’s a resource issue, you can sometimes swap personnel or simplify setups. If it’s an approval issue, you need earlier review cycles. If it’s physical readiness, you need more hands-on time.
Mind Map: Production Schedule Dependencies
Example: Scheduling a Two-Day Scene Block
Day 1 is a daytime exterior with a moving camera and multiple angles. Day 2 is an interior night scene that requires the same lead actor and a specific lighting setup. The dependencies look like this:
- Day 1 shoot depends on: location access, wardrobe continuity for the lead, and camera package readiness.
- Day 2 shoot depends on: actor availability, lighting kit availability, and interior set dressing completion.
- Day 2 also depends on Day 1 outputs: continuity notes and any prop state changes.
If Day 1 runs long, you don’t just lose time; you risk arriving at Day 2 without the correct prop state or continuity details. The fix is to schedule a short continuity checkpoint at the end of Day 1: confirm prop placement, wardrobe condition, and any required resets. That checkpoint is a dependency buffer, not a random break.
Case Study: When a Dependency Breaks
A crew schedules a courtroom scene on Friday because the judge’s availability is the hard date. On Thursday, the set dressing team discovers the required signage prop is missing. The schedule fails because the dependency was treated as “nice to have” rather than “physical readiness.” The correction is to add a prop verification task earlier in the week and tie it directly to the courtroom shoot. In the dependency matrix, that prop becomes a physical readiness prerequisite for Friday. Once it’s explicit, you can assign ownership and a check time, which turns a surprise into a scheduled step.
A realistic schedule is built by making dependencies explicit, classifying them by type, and placing buffers where the schedule is most likely to be wrong. When you do that, the calendar stops pretending it controls reality and starts reflecting it.
3.4 Planning Locations, Permits, and On Site Logistics
Location planning is where the script’s needs meet real-world constraints: access, noise rules, power, weather exposure, and how long you can keep people standing in the same spot without losing the shot. The goal is not to find the “perfect” place; it’s to find places that can reliably produce the scenes you wrote.
Start with Scene Requirements, Not Addresses
Begin by translating each scene into location requirements. For example, a café scene might need: controlled background noise, reliable lighting for faces, room for a camera and two crew members, and a way to keep extras from blocking sightlines. Write these as checkable items so you can compare locations objectively.
A practical method is to create a one-page “scene-to-location” checklist:
- Blocking needs: where actors must stand and how they move
- Camera needs: lens range, tripod vs. handheld, and sightline clearance
- Sound needs: dialogue distance, traffic noise tolerance, and reverberation
- Continuity needs: matching signage, window direction, and visible props
- Operational needs: parking, loading access, and restroom availability
Scout with a Logistics Lens
A scout is not just a visual check. Walk the space with the production plan in mind.
- Time-of-day test: confirm how light changes during your planned shoot window.
- Noise audit: stand where dialogue will happen and note recurring sounds (HVAC cycles, footsteps, nearby deliveries).
- Power reality check: identify where you can plug in and whether circuits can handle your load.
- Movement map: trace actor paths and crew movement to avoid bottlenecks.
Example: If a scene requires a slow tracking shot past a window, confirm the window isn’t blocked by a fixed display case and that reflections won’t ruin the frame.
Permits and Permissions That Actually Matter
Permits are often treated as paperwork, but they control what you can physically do. Track three categories:
- Filming permits: city or jurisdiction approval for production activity
- Property permissions: written consent from the owner or manager
- Operational approvals: parking plans, street closures, special effects rules
Build a permit matrix with columns for: scene number, location, permit type, required dates, lead time, and responsible person. This prevents the classic failure mode where the location is approved but the street parking plan is not.
Example: A permit might allow filming, but only during specific hours. If your schedule depends on golden-hour light, you must align call times with the permit window or adjust the shot plan.
On Site Logistics That Keep the Day Moving
On-site logistics is the difference between “we can shoot this” and “we can shoot this today.” Plan the flow of people, gear, and information.
Key logistics components:
- Arrival and staging: where vehicles park, where gear is unloaded, and how crew enters the set
- Set boundaries: what areas are off-limits to extras, visitors, and nonessential crew
- Communication: who gives updates on changes, delays, or safety concerns
- Continuity control: how wardrobe, props, and marks are reset between takes
- Safety and compliance: walkways, trip hazards, ladder rules, and fire safety for practical effects
Example: If you’re shooting in a hallway, decide whether the camera will face down the corridor or across it. That choice affects how you position crew so they don’t block actor movement or create echoing noise.
Risk Checks and Contingency That Don’t Waste Time
Contingency planning should be specific enough to act on quickly.
- Weather fallback: identify an indoor alternative or a covered area for the same action.
- Noise fallback: plan a second take angle that reduces exposure to a recurring sound source.
- Access fallback: confirm backup parking or loading routes if the first option is blocked.
Keep contingency decisions tied to shot requirements. If the scene’s meaning depends on a particular background, don’t treat “anywhere indoors” as a true substitute.
Mind Map: Location Planning Workflow
Example: One Day Plan for a Street Scene
- Before call time: confirm permit hours, parking layout, and where the unit base is staged.
- First setup: shoot wide establishing coverage while traffic is lighter, then move to tighter dialogue coverage where you can control background.
- During breaks: reset marks and props, and re-check audio levels because nearby activity often changes after lunch.
- End of day: verify continuity items (signage, visible bags, wardrobe) before wrap so tomorrow’s scene doesn’t start with a fix.
Mind Map: Permit and Logistics Checklist
Location planning works best when it’s treated as a chain: scene needs drive scouting, scouting informs permits and logistics, and logistics protects performance and sound. When those links are explicit, the day becomes predictable enough to focus on the work that only humans can do.
3.5 Assembling a Crew Workflow with Roles and Communication Protocols
A smooth shoot is mostly a communication system with cameras attached. Before you call “action,” you want clear ownership of decisions, predictable ways to request changes, and a shared understanding of what “done” means for each department.
Core Crew Roles and What They Actually Own
Start by mapping roles to deliverables, not job titles. For example, the director owns story intent and performance direction; the director of photography owns image capture decisions; the production designer owns the look of environments and continuity of props and set dressing.
A practical baseline crew workflow often includes:
- Producer or Line Producer: schedules, staffing, budget tracking, and approvals.
- Director: performance, blocking intent, and scene-level story choices.
- Director of Photography: camera, lensing, lighting approach, and exposure targets.
- 1st Assistant Director: daily plan, call sheets, timing, and on-set coordination.
- Production Designer: set dressing continuity and visual consistency.
- Art Department: props, dressing, and continuity support.
- Camera Department: camera operation, rigging, lens changes, and data handling.
- Sound Department: dialogue capture, sync workflow, and audio continuity.
- Wardrobe and Hair/Makeup: continuity of appearance and touch-up cadence.
- Visual Effects Supervisor or VFX Lead: on-set capture needs for compositing.
- Post Supervisor or Editor Liaison: file handoff expectations and metadata needs.
Communication Protocols That Prevent Chaos
Communication should be structured around three moments: planning, execution, and verification.
Planning happens in pre-call and morning meetings. The goal is to confirm what will be shot, how it will be shot, and what could block it. A simple rule: if a department cannot state its “must-have” for the day, it will improvise later.
Execution happens through a consistent command chain. On set, the 1st AD typically runs timing and scene order. The director gives performance direction. The DP decides exposure and lighting changes. If someone needs to deviate—swap a lens, adjust coverage, change a prop—there should be a request path and a decision owner.
Verification happens at the end of each setup and at wrap. Verification means continuity checks, audio sanity checks, and confirming that the take matches the slate and scene plan.
A Day-of-Production Workflow with Clear Handoffs
Use a repeatable loop for every setup.
- Setup Brief: 1st AD confirms scene, take plan, and timing constraints. DP and director confirm coverage intent. Sound confirms mic plan and slate approach.
- Blocking and Marks: director and actors finalize positions. Art and wardrobe confirm continuity-critical details.
- Camera and Lighting: camera department locks framing; DP confirms exposure and lighting continuity. If VFX is involved, capture requirements are verified.
- Sound Check: sound team confirms levels, sync method, and background noise expectations.
- Rehearsal and Performance Pass: director runs the performance beats. The goal is to catch acting issues before the “real” takes.
- Take Execution: slate, action, and performance. The crew stays quiet enough to capture clean dialogue.
- Immediate Review: sound and camera confirm the take is usable. If not, the decision to reshoot is made quickly with the director and DP.
- Reset and Continuity: art and wardrobe reset props and appearance. Camera department prepares for the next setup.
This loop reduces the most common failure mode: discovering problems after the crew has already moved on.
Mind Map: Crew Workflow and Communication
Example: Handling a Mid-Take Change Without Losing the Day
Imagine the director wants a tighter framing after the first rehearsal. The director asks for it; the DP confirms whether it affects exposure and focus; the camera department checks lens availability and whether the move changes blocking. The 1st AD updates timing and informs sound and art that the next take will require a reset.
A good protocol is: request → decision owner → impact check → timing update. If the change affects dialogue performance, sound confirms mic coverage before the take. If it affects props, art resets before rolling. The crew doesn’t argue about taste; it checks feasibility and updates the plan.
Example: Audio Continuity as a Communication Habit
If a scene has multiple angles, sound continuity matters. The sound team marks mic placement and notes any wardrobe interference. During setup transitions, the sound lead confirms that the mic plan is still valid before the camera rolls again. The director doesn’t need to know every technical detail, but they do need to know when a take is compromised so performance can be repeated correctly.
When roles and communication are consistent, the shoot feels less like improvisation and more like coordinated problem-solving—still creative, just with fewer surprises.
4. Preproduction Design and Visual Development
4.1 Developing Visual Style Through References and Style Guides
A visual style is not a single look; it’s a set of repeatable decisions that keep the film coherent from script page to final grade. References show what you like and why, while a style guide turns preferences into constraints your team can actually follow.
Start with Story Requirements Before Visual Taste
Begin by listing what the story needs to communicate clearly. If a scene’s tension depends on proximity, you’ll likely favor tighter framing and controlled depth of field. If a character’s isolation is the point, you’ll plan compositions that create negative space and consistent spatial rules. This step prevents the common problem of choosing “cool” visuals that don’t support the scene’s job.
Write three short statements:
- Emotional intent per sequence: what the audience should feel and when.
- Information priority: what must be readable in every shot.
- Continuity rules: what should stay consistent across locations or time.
Build a Reference Library with Purpose
Collect references in categories so you can reuse them during production planning.
- Composition references: framing patterns, camera height, and how characters relate to the frame.
- Lighting references: contrast level, directionality, and how practicals behave.
- Color references: skin tone behavior, saturation limits, and how shadows are treated.
- Camera references: movement style, lens character, and how motion blur is handled.
- Texture references: grain, softness, and how “real” surfaces look.
For each reference, add a one-line note that answers: “Which story requirement does this solve?” If you can’t connect it to a requirement, it’s probably decoration.
Translate References into Measurable Targets
References become useful when you convert them into targets your team can check.
Create a “style translation sheet” with fields like these:
- Contrast target: how deep shadows should go before they lose detail.
- Skin tone rule: where skin should land on the saturation and warmth spectrum.
- Shadow color behavior: neutral, slightly cool, or tinted by practicals.
- Highlight roll-off: hard clipping vs gentle compression.
- Depth of field preference: typical lensing and how often you want background separation.
Example: If your references show readable faces in low light, you might set a rule that key exposure must preserve skin detail even when the scene is “dark.” That’s a production decision, not a vibe.
Create a Style Guide That Survives Real Schedules
A style guide should be short enough to use on set and specific enough to reduce guesswork.
Include:
- Look bible pages: 6–12 representative frames with notes on composition, lighting, and color.
- Shot-level rules: what changes per scene and what never changes.
- Continuity standards: wardrobe color handling, prop placement tolerance, and lighting consistency expectations.
- Camera and lens guidance: typical focal lengths, camera height ranges, and movement constraints.
- Lighting approach: how you motivate light sources and what you do when practicals are insufficient.
A good test: if a new cinematographer joins mid-production, they should be able to match the established look without asking for “the feeling.” They should ask about the targets.
Mind Map: Reference to Style Guide Workflow
Example: One Decision Chain from Reference to Set
Suppose your references show a “quiet tension” look: faces stay readable, shadows are tinted slightly cool, and backgrounds fall off without turning into mush.
- Reference note: “Readable faces in low light; cool shadow bias; controlled background separation.”
- Target: skin detail preserved; shadows slightly cool; depth of field consistent with medium shots.
- Style guide rule: when lighting is motivated by practicals, add a hidden fill so skin exposure never drops below the chosen threshold.
- On-set check: during lighting tests, compare skin rendering and shadow tint against the look bible frame, not against the monitor’s brightness alone.
Advanced Detail: Preventing Style Drift
Style drift usually comes from small, untracked changes: a new lens, a different operator, a “quick fix” exposure adjustment, or a color pipeline mismatch.
To reduce drift:
- Lock the reference set: decide which frames represent the look for each major sequence.
- Define approval points: what gets checked at camera tests, lighting tests, and before picture lock.
- Record deviations: if you change a target, note why and what you changed so the team can compensate elsewhere.
A visual style is easiest to maintain when it’s treated like a system. References show the destination; the style guide defines the route; the targets keep everyone from taking shortcuts that change the story.
4.2 Creating Storyboards and Shot Diagrams for Complex Scenes
Complex scenes usually fail for predictable reasons: the camera path is unclear, continuity details get lost, or the blocking doesn’t match the intended coverage. Storyboards and shot diagrams exist to prevent those failures early, when changes are cheap and everyone can still agree on what “the scene” actually is.
What Storyboards Solve and What They Don’t
A storyboard is a sequence of visual frames that communicates action, camera intent, and timing. It’s best for answering: “What happens, and how does the audience experience it?” A shot diagram is more technical: it clarifies spatial relationships—where people and camera positions are relative to each other.
Use storyboards to plan narrative flow and shot order. Use shot diagrams to plan blocking, camera placement, and line-of-sight. If you try to use only one, you’ll either lose spatial clarity or lose timing clarity.
Start with Scene Inputs Before You Draw
Before sketching, list the scene’s non-negotiables in plain language:
- Camera intent: static, handheld, tracking, or motivated movement.
- Audience focus: who the viewer should understand as the primary subject at each beat.
- Continuity anchors: props, wardrobe states, and marks on the floor.
- Sound and performance constraints: where dialogue must land cleanly, and where movement must avoid mic interference.
Then translate those inputs into a beat outline. Each beat becomes a storyboard “unit,” even if the final edit later combines or splits beats.
Break the Scene into Coverage Blocks
For complex scenes, plan coverage in blocks rather than individual shots from the start. A coverage block is a set of shots that share the same spatial setup and performance rhythm.
Example: In a confrontation in a narrow hallway, you might group coverage into:
- Block A: establishing and approach (camera can stay on one side of the corridor).
- Block B: argument and escalation (camera positions shift, but actors keep consistent marks).
- Block C: interruption and exit (new blocking, new camera side).
This approach keeps you from redrawing everything when you realize the hallway is too tight for two opposite angles.
Storyboard Frame Rules That Keep Teams Aligned
Each storyboard frame should include enough information to prevent guesswork:
- Subject priority: mark who is the main focus.
- Camera position: a simple “camera icon” or label like C1, C2.
- Lens or framing intent: wide, medium, close, or an approximate field-of-view.
- Action state: what the character is doing at that moment.
- Continuity notes: prop location, hand positions, and wardrobe changes.
A practical rule: if someone can’t identify the focus character and the camera side from one frame, the frame needs one more cue.
Shot Diagrams for Spatial Clarity
Shot diagrams answer questions storyboards often leave implicit:
- Where is the camera relative to actors?
- What lines of sight are blocked by set dressing?
- Where can the camera physically go without crossing actor paths?
Draw diagrams at the scale of the room, not the scale of your artistic ability. Use a top-down or three-quarter plan view. Mark:
- Walls and key set pieces
- Actor marks (A1, A2, etc.)
- Camera positions (C1, C2)
- Movement paths (arrows)
- Look direction (small arrows from faces)
Mind Map: Storyboards and Shot Diagrams for Complex Scenes
Example: Narrow Hallway Confrontation
Scenario: Two characters argue in a hallway. One character moves toward a door while the other tries to stop them.
Storyboard approach: Create three frames per beat:
- Frame 1: establishing angle showing both characters and the door.
- Frame 2: close or medium on the speaker who controls the emotional beat.
- Frame 3: reaction or interruption shot that changes the power dynamic.
Shot diagram approach: Use a top-down plan with two camera positions on the same side of the hallway to avoid impossible cross-corridor camera moves.
    flowchart TD
  A[Hallway Layout] --> B[C1: Wide establishing]
  A --> C[C2: Medium on speaker]
  A --> D[C3: Close on reaction]
  B --> E[Door mark D1]
  C --> F[Actor marks A1 A2]
  D --> G[Movement path arrows]
  E --> H[Continuity check prop/hand state]
  F --> I[Line-of-sight check between faces]
  G --> J[Camera feasibility check for operator path]
The key is that the diagram prevents you from planning a “dramatic” angle that the hallway geometry won’t support.
Validation Pass Before Production
Do a final sweep that’s boring in the best way:
- Continuity sweep: props and wardrobe states match across adjacent frames.
- Coverage feasibility: each camera position has a plausible operator path and doesn’t require blocking to teleport.
- Blocking-camera compatibility: characters can hit their marks while maintaining the intended line of sight.
When storyboards and shot diagrams agree, the scene becomes easier to shoot and easier to edit, because the footage will already reflect the intended audience experience.
4.3 Designing Production Design Props and Wardrobe Continuity
Production design props and wardrobe continuity are the quiet glue that keeps a viewer from noticing the seams. The goal is simple: when a character picks up a mug, the mug should look like the same mug in every shot, and when a shirt gets wrinkled in one take, it should not magically un-wrinkle in the next.
Foundational Continuity Principles
Start with a continuity baseline: what must stay consistent, what can change, and what changes on purpose. For example, a character’s wedding ring should match across the scene, while a coffee spill might be allowed to evolve if the script calls for it.
Next, define continuity “levels.” Level 1 is identity continuity (the object is the same: label, color, shape, wear pattern). Level 2 is state continuity (the object’s condition: clean vs. smudged, cap on vs. off). Level 3 is placement continuity (where it sits: left pocket, on the table corner, hanging at the same angle). Most problems happen when teams treat all three levels as one.
Finally, plan for continuity under production pressure. If the schedule forces multiple takes, you need a repeatable reset method: a checklist, a prop table layout, and a clear handoff between set dressing, wardrobe, and the script supervisor.
Prop Design for Identity and State
Design props so they can be recognized quickly by the camera. A prop that looks identical from one angle but different from another is a continuity trap. For instance, a leather wallet should have a distinctive stitch pattern or edge wear that reads on close-ups.
Build “continuity-friendly” props. Choose materials that behave predictably: matte finishes hide fingerprints better than glossy ones, and fabric that holds shape reduces the need for constant steaming. If a prop must look used, create a controlled wear plan: where scuffs go, how labels fade, and what parts should remain crisp.
When you create prop variants, label them internally. A “same prop, different take” approach works only if the team can swap quickly without guessing. For example, if a character drops a phone, you may need three versions: intact, cracked, and missing back cover. Each version should have a clear visual marker that is not visible to the camera but is obvious to the crew.
Wardrobe Continuity That Survives Real Movement
Wardrobe continuity is not just about matching outfits; it’s about matching how fabric behaves. A jacket sleeve rolled up in one shot should roll up in the next, and the same goes for button states, collar position, and tie knots.
Use a “wardrobe map” for each character. List the garments, fasteners, and likely continuity points: belt buckle position, watch placement, shirt cuff exposure, and any visible undershirt. Then add a reset plan for each point. For example, if a character’s cuff is held by a pin, the reset plan should include where the pin goes and how to verify the cuff sits at the same height.
For makeup-adjacent wardrobe issues, coordinate with the wardrobe and continuity team. If a stain transfers from a shirt to a collar, decide whether the stain is part of the story progression or an accidental continuity error. The script supervisor should know the intent so notes are consistent.
Practical Continuity Workflow on Set
A reliable workflow reduces memory load. Keep a prop staging area with a consistent layout: “ready” props in one zone, “used” props in another, and “reset needed” props clearly marked. Wardrobe should have a similar staging logic: garment bags labeled by character and scene, plus a small kit for quick fixes.
Use quick verification methods. Before rolling, do a 10-second scan: check the visible faces of props, the most camera-facing seams of clothing, and any items that are likely to shift during blocking.
When continuity breaks are unavoidable, document the break and align expectations. If a prop must be swapped because it broke, the team should know whether the change is acceptable for the edit. Continuity is a decision process, not a punishment system.
Mind Map: Prop and Wardrobe Continuity
Example: The Same Mug Across Multiple Setups
A character drinks from a ceramic mug in three setups. The mug must remain the same even if the character’s hand position changes.
- Identity: the mug has a chipped handle edge and a small logo on the side. Those features are visible in close-ups.
- State: after the first take, the rim shows a faint lipstick mark. Decide whether that mark should persist for continuity or be cleaned for the next take.
- Placement: in the wide shot, the mug sits near the table’s front edge. In the close-up, it should still be near the same edge relative to the table grain.
Reset method: after each take, the prop assistant wipes the mug rim only if the continuity plan says the lipstick mark should not persist, then returns it to a marked spot on the table.
Example: Jacket Buttons and Sleeve Rolls
A character’s jacket is buttoned in the opening shot, unbuttoned in the middle, and partially rebuttoned at the end.
- For the opening shot, the top button must be fastened and the collar seam should align with the same shoulder line.
- For the middle shot, the unbuttoned state must include the same gap width at the button line and the same sleeve roll height.
- For the end shot, the rebuttoning must restore the same button alignment and sleeve roll.
Reset method: wardrobe uses a small ruler or reference mark on the inside cuff to confirm sleeve roll height, then checks button alignment against a visual reference point on the garment.
4.4 Planning Cinematography Through Lenses, Camera Movement, and Lighting Intent
Planning cinematography is mostly about making choices that survive contact with reality. Lenses affect what fits in the frame and how space feels. Camera movement affects what the audience notices and when. Lighting intent affects what the scene communicates even when the camera is still.
Lenses for Story Readability
Start with the question: what should feel close, what should feel distant, and what should feel important?
- Field of view and framing: A wider lens shows more environment, which helps establish location and relationships. A longer lens compresses space, which can make two characters feel closer even if they stand farther apart.
- Perspective and blocking: If you use a wide lens, foreground objects can dominate. That’s useful for separation, but it can also steal attention from the actor’s face. With longer lenses, you can keep backgrounds calmer, but you may need more distance between subjects to avoid awkward compression.
- Depth of field as emphasis: Shallow depth of field can isolate a face, but it also raises the risk of missing focus during movement. A practical rule: if the actor will move toward or away from camera, plan either a deeper stop or a movement that stays within a predictable focus zone.
Mind Map: Lens Planning
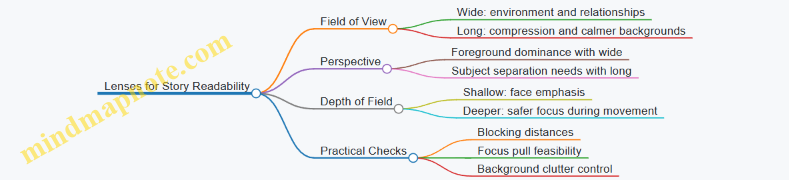
Camera Movement for Attention Control
Movement should serve the scene objective, not just cover production needs. Decide what changes in the viewer’s job: where to look, what to notice, and what to feel.
- Motivated moves: If a character turns to speak, a slight push or pivot can follow the change in attention. If the scene is about discovery, a slow reveal move can let the audience “arrive” at the information at the same time as the character.
- Speed and acceleration: Smooth, consistent speed reads as intentional. Jerky starts and stops often feel like the camera is reacting instead of guiding.
- Movement type and lens pairing: A handheld walk with a wide lens can feel energetic, but it also exaggerates parallax and can make backgrounds slide. A dolly or gimbal move with a longer lens can look steadier and emphasize spatial relationships.
- Continuity and performance: If you plan a move that changes the background behind the actor, confirm wardrobe and blocking continuity. A face that stays in focus while the background changes can still feel distracting if the background contains competing shapes.
Mind Map: Camera Movement Planning
Lighting Intent for What the Scene Means
Lighting intent is the plan for how the scene should read: where the eye goes, how characters separate from the environment, and what emotional temperature the image carries.
- Key light and shape: The key light defines the face’s shape. If you want clarity and straightforward emotion, keep the key consistent and avoid overly complex shadow patterns. If you want separation, place the key so the subject’s silhouette and facial planes remain legible.
- Fill and contrast: Fill controls how much detail survives in shadows. Too little fill can make faces hard to read, especially on darker wardrobe. Too much fill can flatten the image and reduce the sense of depth.
- Practical sources and motivation: Practical lights like lamps or streetlights should justify the direction of illumination. If the practical is “on” but the shadows don’t match its position, viewers may not name the problem, but they’ll feel the mismatch.
- Background control: Lighting the background is not decoration; it’s navigation. A brighter background can pull attention away from the actor. A darker or more controlled background can keep the viewer anchored.
Mind Map: Lighting Intent
Integrated Planning Workflow
Use a repeatable sequence so decisions don’t contradict each other.
- Choose lens range from blocking: Measure distances between camera, subject, and background. Decide whether you need compression or environment.
- Plan movement with focus in mind: If the camera moves, decide whether focus will be rack-pulled, held, or tracked. Then choose a depth of field that supports that plan.
- Set lighting to the lens and movement: Wider framing often needs more background control because more environment enters the frame. Longer lenses can tolerate less background illumination but still require separation.
- Confirm with a test frame: Check face readability first, then check background distractions, then check whether highlights from practicals behave.
Example: Two Characters in a Small Room
- Lens choice: Use a wider lens if you want the room to matter, like showing the cramped distance between them. Use a longer lens if you want the conversation to feel intimate and compressed.
- Movement: If one character steps closer, a subtle push toward the face that’s speaking can reinforce attention without changing the scene’s geography too much.
- Lighting intent: Place the key so both faces are readable from the planned camera position. Add fill only as needed to keep shadow detail on the darker face, and keep background brightness low enough that the audience doesn’t read the wall before the dialogue.
Example: Reveal Through a Corridor
- Lens choice: A longer lens can make the corridor feel tighter and more controlled, which supports a suspenseful reveal without needing extreme contrast.
- Movement: A slow dolly move that ends with the subject framed in the same screen position each time helps continuity across takes.
- Lighting intent: Keep the corridor’s brightest area aligned with the reveal target. If the brightest patch sits behind the actor, the audience will look there first, even if the actor is speaking.
4.5 Coordinating Sound Planning With Script Requirements and Set Constraints
Sound planning works best when it starts with what the script demands and ends with what the set allows. The trick is to treat sound as a set of constraints you can design around, not a last-minute fix.
Foundational Inputs from the Script
Begin by marking every audio-relevant moment in the script: dialogue, overlapping speech, off-screen voices, radio/phone audio, diegetic music, and sound effects that must be heard clearly. For each moment, note the required clarity level. For example, a two-line argument in a quiet kitchen needs clean dialogue and minimal noise; a crowded street chase may prioritize intelligibility over perfect isolation.
Next, identify audio “anchors” that must survive production realities. If the plot hinges on a specific phrase, that phrase becomes an anchor. Plan microphone placement and take structure to protect it. If a character hears a distant sound that changes their behavior, plan for consistent distance cues so the editor can cut without confusing the audience.
Set Constraints That Change the Plan
Every set has limits that affect how sound can be captured. Room size, wall material, ceiling height, and background noise sources (HVAC, traffic, generators) determine how much separation you can realistically achieve. A small tiled bathroom will ring; a warehouse with open doors will leak noise. Even the blocking matters: if actors must stand near a noisy practical (like a running fan), you plan for it rather than hoping it disappears.
Also account for physical constraints: where cables can run, where boom operators can stand, and how far microphones can reach without visible interference. If the script requires a close-up with a boom-friendly angle, but the camera position blocks the boom, you adjust the plan early.
Translating Requirements into a Sound Capture Strategy
Turn script needs into a practical capture strategy using three layers: coverage, redundancy, and workflow.
Coverage means deciding which microphones are responsible for which sounds. Dialogue is typically covered by a primary lav strategy and, when possible, a boom for clean perspective. Effects and ambience are covered by dedicated recorders or room mics placed to avoid actor proximity.
Redundancy means protecting critical lines with more than one path. A common approach is lav for each speaking actor plus a boom that can be used when lav placement is compromised by wardrobe or movement. For radio or phone audio, redundancy might include a direct feed from the playback device and a mic capture for natural room tone.
Workflow means planning how takes become usable clips. If you need fast editorial assembly, you standardize slate/take naming, timecode sync, and how you label “special” audio moments like overlapping dialogue or off-screen voices.
Mind Map: Script to Set to Sound
Example: Quiet Scene with a Noisy Practical
Script: Two characters argue in a living room while a ceiling fan runs. The argument contains a line that reveals the motive.
Set constraint: The fan produces constant broadband noise and creates air movement that can affect mic handling.
Plan: Use lavs on both actors as the primary dialogue capture, and add a boom when the camera angle allows. Place a room mic farther from the actors to capture ambience, but keep it away from the fan’s direct airflow to reduce wind noise. During rehearsal, record a short test take and confirm the motive line stays intelligible at the intended distance. If it doesn’t, adjust blocking so the actors face slightly away from the fan or reposition the fan speed for the take.
Example: Overlapping Dialogue in a Reverberant Room
Script: Three people talk at once in a hallway with hard surfaces.
Set constraint: Reverb smears consonants, and actors must cross paths.
Plan: Prioritize intelligibility over perfect separation. Assign each speaking actor a lav and ensure the boom operator can still track at least one primary speaker for perspective. For the editor, label which lines are “priority” and which are “secondary” so post can choose the cleanest source per moment. If the hallway is too ringy, use set dressing or temporary absorption where it won’t interfere visually, and schedule shorter takes to reduce cumulative noise changes.
Validation Loop That Prevents Surprises
Before rolling the full scene, run brief sound checks that match the script’s critical moments. Monitor levels and intelligibility, not just peak meters. Confirm that timecode sync holds and that special audio sources are captured in a way the editor can identify quickly. Then communicate adjustments: if a line is critical, blocking and mic placement get treated as part of the performance plan, not an afterthought.
5. Directing Actors and Blocking for Performance
5.1 Casting Considerations and Performance Fit for the Script
Casting is where the script stops being a set of intentions and starts becoming behavior. Your job is to match the actor’s usable skills—voice, timing, physical control, and emotional range—to the specific demands already written on the page.
Start with Script Demands, Not Actor Reputation
Begin by listing what each character must do in scenes, not what they “feel like.” For example, a character who delivers a calm explanation under pressure needs control of pace and breath, not just intensity. A character who lies convincingly in a single line needs micro-behavior: eye focus, pauses, and how the body reacts before the words do.
A practical way to sort demands:
- Verbal precision: clarity under speed, ability to land subtext without mumbling.
- Emotional calibration: staying believable when emotions shift quickly.
- Physical logic: movement that supports blocking and camera geography.
- Social dynamics: how they respond to power, conflict, and intimacy.
Define Performance Targets per Scene
For each key scene, write a performance target in plain language. “He’s angry” is too broad; “He keeps his voice steady while his hands show impatience” is usable. Then identify what the actor must demonstrate in rehearsal.
Example targets:
- Confrontation: the character speaks first, then stops, then resumes with a different rhythm.
- Revelation: the character tries to maintain normal behavior, fails, and corrects themselves.
- Humiliation: the character laughs too quickly, then realizes it, then tries to regain control.
These targets help you evaluate auditions consistently and reduce the “I like them” problem.
Match Voice and Language to Character Function
Voice casting is often treated as taste, but it’s also mechanics. Consider:
- Speech tempo: can the actor deliver lines at the script’s intended pressure?
- Articulation under emotion: can they stay intelligible when upset?
- Register control: can they shift formality without sounding like a different person?
Example: If a character uses short sentences to dominate, an actor who naturally speaks in long, flowing phrases will fight the scene’s power structure.
Evaluate Subtext Through Behavior, Not Interpretation
Subtext is not a mood; it’s what the character does while saying something else. During auditions, ask for the same line with different behavior constraints.
Example exercise:
- Read a line as if the character is trying to be helpful.
- Read the same line as if the character is buying time.
- Read the same line as if the character is protecting someone.
You’re listening for changes in timing, emphasis, and physical restraint. If the actor only changes tone but not behavior, the subtext may not survive on camera.
Consider Continuity of Performance Across Takes
Film acting is repeated. Casting should account for how reliably an actor can reproduce a performance beat.
Look for:
- Repeatable physical actions: a gesture that can be performed consistently at the same moment.
- Stable emotional trajectory: the same arc across takes without drifting.
- Clear “start points”: the actor can enter the scene state quickly after a reset.
Example: A character who must soften their voice at the exact moment they admit fault needs a repeatable cue, like a breath pattern or a specific pause.
Mind Map: Casting Considerations and Performance Fit
Example: Casting a Character with a Specific Job
Imagine a character who must negotiate while hiding fear. The script requires:
- calm, measured dialogue
- a brief slip in posture during a key sentence
- immediate recovery without overacting
In auditions, you can test this by asking for two takes:
- Fear hidden: steady pace, minimal movement.
- Fear leaks: same words, but posture tightens on the key sentence, then relaxes.
If the actor can’t keep the words consistent while changing the body timing, the “hidden fear” will likely collapse during coverage.
Practical Casting Checklist for the Table Read
Use the table read to confirm fit before you chase polish.
- Do they understand the scene objective quickly?
- Can they land the line’s intention without extra explanation?
- Does their pace match the script’s pressure?
- Are their physical choices readable even without blocking?
- Can they repeat the same beat when you ask for a second take?
Casting is not just selecting talent; it’s selecting reliability. When the actor’s strengths align with the script’s specific demands, the performance becomes easier to direct, easier to shoot, and easier for the audience to follow.
5.2 Conducting Rehearsals With Objectives and Emotional Beats
Rehearsals work best when they are built around two things: what the character wants in the moment, and what changes inside them as the moment plays out. An objective gives the scene a direction; an emotional beat gives it a reason to move. If you skip either, you usually get performance that looks busy but doesn’t land.
Start with Clear Objectives
An objective is a specific, actionable target the character pursues during a defined stretch of time. “Be honest” is too vague; “Get the truth out of them before they leave” is usable. During rehearsal, ask the actor to state the objective in one sentence, then translate it into behavior.
Example: In a kitchen scene, the objective might be “Keep them from calling the police.” The behavior could be blocking the phone, controlling the conversation pace, and using a calm tone that doesn’t match the character’s fear.
Define Emotional Beats as Change Points
Emotional beats are not feelings you display; they are shifts you cause or suffer. A beat should mark a change in strategy, belief, or control. Keep beats short and countable. If you can’t point to where the shift happens, the beat is probably a mood rather than a beat.
Example beat ladder for the same kitchen scene:
- Beat 1: Confidence that the plan will work.
- Beat 2: Surprise when the other person doesn’t react.
- Beat 3: Panic that turns into bargaining.
- Beat 4: Resignation when the call goes through.
Rehearsal Flow That Prevents Guesswork
- Read for objective first. Run the scene once with the actor speaking the lines while you track whether the objective is pursued every time the dialogue changes.
- Mark beat boundaries. Stop at each shift and ask, “What changed right here?” The actor should answer with a concrete change, not a general emotion.
- Rehearse the behavior, not the feeling. If the character is panicking, rehearse what they do differently: faster interruptions, tighter physical space, fewer questions, more direct requests.
- Lock the beat timing. Do two takes where the beat boundaries occur at the same line or action. Consistency matters because camera coverage will later depend on it.
- Test with interruptions. Have the actor repeat the scene while you call out a distraction (a door opens, a phone rings). The objective should still drive the performance.
Practical Mind Map for Scene Rehearsal
Mind Map: Rehearsal With Objectives and Emotional Beats
Example Rehearsal Notes You Can Actually Use
Scene: Two siblings argue in a hallway. One has the keys to a car the other needs.
- Objective: Get the keys back without escalating.
- Beat 1: Controlled negotiation. The actor speaks slower, keeps hands visible.
- Beat 2: The other sibling refuses. The actor’s questions become sharper; they close distance.
- Beat 3: A threat appears, then gets pulled back. The actor starts to raise their voice, then stops and switches to pleading.
- Beat 4: The keys are taken anyway. The actor’s body goes still for a beat before the final line, signaling the strategy has failed.
During rehearsal, you might notice that the actor keeps the same volume throughout. That’s a sign the emotional beats aren’t changing the tactics. Fix it by assigning a tactic per beat: negotiate in Beat 1, pressure in Beat 2, self-correct in Beat 3, accept in Beat 4.
Common Failure Points and Targeted Fixes
- Failure: The objective is clear, but the performance feels flat. Fix: Add a tactic change at each beat boundary.
- Failure: The actor shows different emotions, but nothing changes in the scene. Fix: Tie each beat to a decision: “I will try X now.”
- Failure: Beats are too many. Fix: Combine adjacent beats that share the same tactic and only separate when the strategy truly shifts.
When rehearsals are built this way, you get performances that are readable under different camera angles. The actor isn’t guessing what to do; they’re executing a plan that changes for specific reasons.
5.3 Blocking Scenes for Camera Coverage and Continuity
Blocking is the choreography that makes coverage feel inevitable. You’re choosing where bodies go, how they turn, and what the camera can reliably see—then you’re keeping those choices consistent across takes so editing doesn’t turn into a scavenger hunt.
Core Principles for Coverage That Edits Cleanly
Start with two questions before you move anyone: “What must the audience understand in this moment?” and “What must the camera be able to show without guessing?” Coverage works best when every shot has a job.
- Establish spatial rules early. Decide the characters’ relationship to fixed landmarks: doorways, windows, furniture edges, floor marks. If the audience can track “left of the table” and “near the window,” continuity becomes easier.
- Plan sightlines, not just positions. A character can stand in the right spot and still be unfilmable if another actor blocks the lens. Check line-of-sight from each camera angle you intend to use.
- Use repeatable movement beats. Big gestures are harder to repeat than small ones. If you need a character to reach for something, define the exact moment they arrive at the object and the exact direction their hand travels.
- Separate performance continuity from camera continuity. Performance continuity means the emotional and physical logic stays consistent. Camera continuity means the camera can cut between angles without the audience noticing a “teleport.”
A Systematic Blocking Workflow
Step 1: Map the scene’s geography. Walk the set and mark three to five “anchor points” per location. Example: in a kitchen scene, anchors might be the fridge, the sink, the table corner, and the doorway.
Step 2: Mark camera-friendly zones. For each planned shot, identify where the actors must be so the camera sees faces and key actions. If a close-up requires a clean cheek line, block so the actor’s head can face camera without twisting awkwardly.
Step 3: Build a coverage ladder. A practical ladder is wide → medium → close, or wide → over-the-shoulder → close. The ladder should follow the story’s information flow: first show context, then clarify relationships, then emphasize the decisive detail.
Step 4: Lock continuity-critical actions. Choose the actions that must match across takes: handoffs, object placement, door positions, eye-lines, and where feet land after a turn.
Step 5: Run “cut tests” during rehearsal. After blocking, simulate edits: call “cut” between angles while actors hold the same physical state. If a cut reveals a mismatch, fix the movement beat, not the dialogue.
Mind Map: Blocking for Coverage and Continuity
Concrete Example: Kitchen Confrontation
Imagine two characters arguing in a kitchen. The script has: (1) a wide reveal of the argument, (2) an over-the-shoulder exchange, and (3) a close-up moment when one character decides to leave.
Blocking plan:
- Wide shot: Both characters occupy opposite sides of the table. Anchor feet near the table corners so their distance stays consistent.
- Over-the-shoulder: The speaker stands so their face is visible over the listener’s shoulder. The listener’s head angle must stay within a narrow range to keep the listener’s eyes readable.
- Close-up: The leaving character turns toward the doorway and takes two steps. Lock the exact landing spot of the second step, because that’s where the doorway edge will frame their face.
Continuity locks:
- The mug on the counter must remain at the same distance from the sink edge.
- The doorway must be at the same open angle when the close-up begins.
- The leaving character’s hand must reach the doorknob at the same beat relative to the line.
If the close-up doesn’t match the wide, don’t “fix it in editing.” Adjust the turn timing so the doorway framing matches the wide’s spatial logic.
Advanced Details That Prevent Common Failures
- Eye-lines: Decide whether characters look at each other, at a prop, or past each other. Then block so the camera can capture the intended target without forcing unnatural head angles.
- Turns and pivots: A pivot is rarely repeatable unless you define the pivot point. Use floor marks and rehearse the pivot with the same tempo.
- Prop interactions: If a character picks up a phone, define where the phone starts, where it ends, and how long it stays in frame. Even small changes can break continuity when you cut to a close-up.
- Performance under constraints: If an actor can’t hit the camera-friendly angle without losing the performance, revise the shot plan. Blocking should support acting, not fight it.
Quick Blocking Checklist for Each Take
- Anchor points confirmed
- Sightlines checked for each planned angle
- Movement beats repeatable
- Continuity-critical actions locked
- Cut test passes between wide and close
When blocking is systematic, coverage stops being a collection of separate performances and becomes one continuous physical story the camera can reliably capture.
5.4 Directing Performance Using Marks, Timing, and Subtext Tools
Directing performance gets easier when you treat acting choices like engineering decisions: you define constraints, you test options, and you keep what reads. Marks, timing, and subtext are three tools that work together. Marks keep the scene readable. Timing keeps it alive. Subtext keeps it meaningful.
Marks That Protect Readability
Marks are not decoration; they are spatial promises. If an actor steps off the mark, the camera may still capture the face, but the audience’s mental map can break.
Start with two mark types:
- Camera marks: where the actor stands so the lens sees the intended face angle.
- Interaction marks: where hands, eyes, and bodies meet so the action looks intentional.
A practical approach: mark the first stable pose of each beat, then mark any handoff points (passing an object, stepping between two characters, turning to reveal information). Everything else can be “free movement” as long as it returns to the next stable pose.
Example: In a kitchen argument, you might mark the protagonist at the counter edge for the first line, then mark the other actor at the fridge door for the response. When the protagonist reaches for the mug, you mark the hand position relative to the mug prop. The performance can be messy emotionally, but the geography stays consistent.
Timing That Serves the Beat
Timing is how you control the audience’s attention without changing the script. You’re directing the duration of choices: when a character commits, hesitates, or changes their mind.
Use timing in three layers:
- Entry timing: when the actor begins speaking after the previous line ends.
- Reaction timing: when the actor shows the thought after the line lands.
- Action timing: how long the physical action takes before the next line.
A simple rehearsal method: perform the scene twice.
- First pass: hit every line with neutral timing.
- Second pass: keep the same words, but adjust only one variable at a time—reaction timing first, then entry timing.
If the scene feels rushed, don’t add more emotion. Add space. A reaction that lasts 0.5 seconds longer can turn “I heard you” into “I processed you.”
Subtext That Controls Meaning Without Changing Dialogue
Subtext is the gap between what a character says and what they actually want. You can direct subtext through three questions that lead to observable behavior.
Subtext Questions
- Want: What does the character try to get in this moment?
- Fear: What do they risk if they fail?
- Strategy: What do they do to reduce that risk?
Turn answers into actions:
- Want might become approach or withholding.
- Fear might become stalling or over-explaining.
- Strategy might become eye contact control or tone shifts.
Example: A character says, “It’s fine,” but wants the other person to stop asking questions. Their strategy could be to keep their body angled away, speak quickly on the word “fine,” and then pause before the next sentence as if they’re deciding whether to reveal more.
How Marks, Timing, and Subtext Interlock
Marks tell you where the audience can read the face and body. Timing tells you when the audience should notice the change. Subtext tells you what change to notice.
If you only use marks, performances can look like well-lit choreography. If you only use subtext, performances can drift out of frame or lose spatial clarity. If you only use timing, you get rhythm without direction. Together, they create choices that remain readable under camera movement and editing.
Mind Map: Directing Performance Tools
Example: One Beat, Three Directives
Scene moment: Character A learns Character B lied.
- Mark directive: A stands on the mark at the table edge so the camera sees the eyes when A looks down.
- Timing directive: A delays the first response by a beat, then speaks on the exhale.
- Subtext directive: A wants control of the conversation, fears humiliation, and uses calm questions to test B’s story.
Result: The audience reads the lie not because the actor “acts shocked,” but because the geography stays stable, the reaction arrives at the right moment, and the behavior matches the hidden goal.
Practical Checklist for the Director
- Can the audience track who is facing whom without guessing?
- Where is the first stable pose for each beat?
- What is the reaction timing target for the key line?
- What is the want-fear-strategy triad for this moment?
- If the performance changes, does it still land on the next readable pose?
Use these tools to make choices repeatable. Repeatable choices are what survive coverage, edits, and the inevitable “take two” adjustments.
5.5 Managing Coverage Options Without Losing Performance Integrity
Coverage is the safety net that lets the edit team build a coherent story. It’s also the reason actors sometimes feel like they’re performing for a camera that keeps moving the goalposts. The trick is to treat coverage choices as a performance tool, not a paperwork exercise.
Start with a simple principle: every additional angle must serve a specific edit problem. If you can’t name the problem, you probably don’t need the shot. For example, if a scene’s emotional turn happens on a single line, you’re not collecting “more footage”; you’re protecting the ability to cut on that line without breaking continuity.
Coverage Decisions That Protect Performance
-
Define the performance beats before you decide coverage. Mark the scene’s objective shifts: when the character changes tactics, tone, or intent. Then plan coverage so at least one camera angle can hold each beat cleanly.
- Example: In a confrontation, the actor might begin firm, then soften on a specific sentence. If you only have wide shots, the edit may force a cut that lands between sentences, weakening the turn.
-
Choose a primary camera for continuity of performance. One camera should be the “anchor” that captures the actor’s face, hands, and eye line consistently. The other cameras can be flexible.
- Example: If Camera A stays near the eyeline and Camera B roams, the editor can always find a stable version of the performance.
-
Match coverage to the edit’s likely needs. Ask what the editor will do with the scene: hold on reactions, cut on dialogue, or emphasize blocking. Coverage that supports those choices reduces the temptation to use awkward cut points.
- Example: If the scene is mostly dialogue with subtle reactions, you need reaction coverage that includes the actor’s face and breath timing.
-
Avoid “coverage gaps” during emotional transitions. A gap is when the performance changes, but your angles don’t overlap in a way that allows a clean cut.
- Example: If Camera B is on the wrong side of the eyeline during the apology line, you may lose the ability to cut between the speaker and listener without a jump.
Mind Map: Coverage Planning Logic
Practical Coverage Patterns That Work
Pattern A: Wide + Two Mediums
- Wide establishes space and blocking.
- Mediums cover the speaker and the listener so reaction cuts are natural.
- Example: Two actors at a kitchen table. Camera A wide. Camera B on the speaker’s face. Camera C on the listener’s face. When the listener interrupts, you can cut instantly without losing the emotional shift.
Pattern B: One Static Close + One Moving Wide
- Close stays locked for performance continuity.
- Wide moves to track blocking changes.
- Example: A character tries to leave, then changes their mind. The close captures the decision moment; the wide shows the physical choice.
Pattern C: Coverage for a Single Line Scene
- If a scene hinges on one sentence, plan coverage around that line.
- Example: A character says, “I didn’t mean it.” You need at least one angle that captures the full sentence with the actor’s face readable, plus a reaction angle that includes the listener’s immediate response.
Advanced Details Without Making It Complicated
Eyeline continuity beats camera placement. If the actor looks at the wrong place between takes, coverage becomes harder to edit even if the shots are technically perfect. Communicate eyeline targets clearly, and keep them consistent across cameras.
Reset time is part of coverage. If a camera move requires the actor to repeat a performance from a different starting position, you’re trading coverage for fatigue. Instead, plan moves that occur during natural pauses or during lines that can be repeated without changing intent.
Use “coverage overlap windows.” For each beat, decide how many seconds you need of usable material. A common approach is to ensure you have at least one angle that covers the beat start and another that covers the beat end, with overlap so the editor can cut mid-beat if needed.
Mind Map: Overlap Windows

Example Workflow on Set
- Mark three beats on the script: challenge, softening, decision.
- Choose Camera A as the anchor on the primary speaker’s face for the full scene.
- Place Camera B to capture the listener’s reaction during softening and decision.
- During blocking changes, keep Camera A rolling and let Camera B reposition during a pause.
- After each take, check quickly: can you see the beat start and beat end on at least two angles?
When coverage is planned this way, you don’t “collect shots.” You collect edit-ready performance moments, which is the only kind that matters once the scene is on the timeline.
6. Cinematography and Lighting for Story Meaning
6.1 Choosing Camera Formats and Managing Exposure and Dynamic Range
Choosing a camera format is really choosing a set of constraints: how much light you can capture cleanly, how much you can stretch later, and how reliably you can keep skin tones and highlights where you want them. The goal is not to “get the most dynamic range,” but to make exposure decisions that match your story needs—especially when you have mixed lighting, fast motion, or faces in shadow.
Camera Formats as Practical Tradeoffs
Start with the format’s sensor size and readout behavior. Larger sensors generally collect more photons per pixel, which helps reduce noise in shadows. Smaller sensors can still look good, but they often demand tighter exposure discipline and more careful lighting.
Next, consider codec and bit depth. A 10-bit recording gives you more room to represent subtle gradients than an 8-bit one, which matters for skies, walls, and out-of-focus backgrounds. Compression also affects how cleanly the image holds up in post, especially around fine textures and edges.
Finally, check how the camera handles highlight roll-off. Two cameras can measure the same “dynamic range” on paper, yet one may clip highlights sooner or produce harsher transitions. On set, you care about the shape of the highlight curve, not the headline number.
Exposure Fundamentals That Prevent Post Headaches
Exposure is a chain: shutter speed, aperture, ISO, and lighting. If you underexpose faces and then lift in post, you amplify noise and reduce color separation. If you overexpose highlights, you can’t “recover” what never got recorded.
A practical approach is to expose for skin and important midtones first, then protect highlights. Use a waveform or histogram to watch the brightest meaningful areas—windows, practical lamps, car headlights, or specular reflections on faces.
Concrete example: in a night exterior with streetlights, you might expose so that faces sit around the middle of the waveform range while the brightest streetlight spill stays below the clipping point. If you instead expose for the streetlights, faces will become a noisy gray mess after correction.
Dynamic Range as a Usable Budget
Dynamic range is easiest to manage when you treat it like a budget. Your scene has bright zones and dark zones; your camera has a limited amount of clean information it can store. If the scene contrast exceeds that budget, you must decide what to sacrifice.
Common sacrifice choices:
- Let deep shadows go darker if they are not story-critical.
- Preserve highlight detail on faces and key props.
- Accept that some background elements will clip if they are not readable.
Concrete example: a courtroom scene with a bright window behind a character. If the window is story-relevant, you may need to control it with flags or diffusion. If it’s just background motivation, you can let it clip slightly while keeping the character’s face within a safe exposure range.
Highlight Management and Roll-Off
Highlight roll-off is where “looks” are made. Many cameras have a point where highlights transition from smooth to clipped. You can find that point by testing: record a chart or a practical lamp at different exposures and check where the waveform flattens.
On set, use a simple rule: if the waveform shows flat tops on faces’ speculars or key practicals, reduce exposure until the waveform returns to a sloped peak. This often costs less than trying to fix clipped highlights later.
Practical Monitoring Workflow
Use monitoring tools consistently:
- Waveform for exposure placement.
- False color for quick “too bright” and “too dark” checks.
- A calibrated monitor or reliable LUT preview for skin tone sanity.
Concrete example: during interior interviews with mixed practicals, you can set exposure using the waveform on the face while using false color to ensure the practical lamps are not fully clipping. Then verify with a quick playback check at the end of each setup.
Advanced Considerations for Real Scenes
Motion and exposure interact. Fast shutter speeds reduce motion blur but also reduce light per frame, which can push ISO higher and raise noise. If you must use a fast shutter, compensate with lighting rather than hoping post will fix it.
Also watch for color shifts in shadows. As you lift underexposed areas, colors can desaturate or skew. This is another reason to protect midtones and skin exposure early.
Finally, consider lens transmission and filtration. A lens that loses contrast wide open can make exposure decisions harder because the image looks “fine” on a monitor but the waveform may reveal that highlights are already near the edge.
Mind Map: Camera Formats and Exposure Management
Example: Night Exterior with Practical Lights
You’re filming a character walking past streetlights. The practical lamps are bright enough to clip easily, but the face must stay readable.
- Set exposure using the face waveform so midtones sit in a comfortable range.
- Check the brightest lamp area on the waveform; if it flatlines, lower exposure slightly.
- If the face drops too low, add light to the face rather than raising ISO.
- Confirm with playback: look for smooth highlight transitions on skin and lamp reflections.
This workflow keeps the image stable: you’re not guessing, and you’re not relying on post to invent highlight detail that was never captured.
6.2 Lighting Setups for Mood, Focus, and Spatial Clarity
Lighting does three jobs at once: it guides attention (focus), it communicates feeling (mood), and it makes space readable (spatial clarity). The trick is to decide which job is primary for each moment, then build the setup so the others support it instead of competing.
Core Principles That Prevent Chaos
Start with a simple hierarchy: key light for focus, fill for legibility, and back or edge light for separation. Mood comes from the balance between these sources and their direction, not from random brightness changes.
- Focus is about contrast where the eye should land. If the subject’s face is not the brightest or most contrasty area in the frame, the viewer will search.
- Mood is about how contrast and color behave across the scene. A low-contrast setup can feel calm or uncertain; higher contrast can feel tense or decisive.
- Spatial clarity is about gradients and occlusion. Shadows that fall in consistent directions help the brain place objects in depth.
A practical rule: if you can’t describe the lighting in one sentence, you probably can’t repeat it for continuity.
Mood Through Contrast and Color Behavior
Mood is often created by controlling contrast ratio and color temperature relationship.
- Contrast ratio: For a tense conversation, keep the key strong and let fill be limited. For a reflective moment, raise fill so the shadows soften.
- Color temperature: Use one dominant temperature for the subject and let background sources drift slightly warmer or cooler. This keeps the scene cohesive while still giving the eye a reason to separate foreground from background.
Example: In a dim hallway, place the key as a motivated practical bounce from a wall lamp. Keep the subject’s face neutral, but allow the background to go slightly cooler so the corridor feels longer.
Focus Through Direction and Shaping
Direction matters because it defines facial planes and eye-line readability.
- Front or slightly off-axis key: clearer faces, less drama.
- 45-degree side key: more texture and stronger emotional emphasis.
- Top-down key: can feel interrogative or vulnerable, but use it sparingly because it can flatten eye contact.
Shaping controls how the light transitions across the face.
- Harder sources create crisp shadow edges and stronger separation.
- Softer sources create gradual falloff and a calmer look.
Example: For a character who is hiding something, use a side key with a controlled soft edge. Keep the catchlights in the eyes consistent by maintaining the same relative angle between key and camera.
Spatial Clarity Through Shadow Logic and Layering
Spatial clarity improves when shadows and highlights behave like they belong to the same world.
- Shadow direction consistency: If the key is from camera-left, major shadows should generally fall camera-right unless you’re intentionally simulating a different light source.
- Layering: Light the subject first, then add a separate treatment for midground and background. Even a small amount of background shaping helps depth.
A common mistake is lighting everything evenly. That removes depth cues and makes the scene look like it’s floating in a flat brightness.
Example: In a living room, keep the subject’s key and fill tight. Add a dim rim or background light behind the sofa to separate it from the wall. The viewer reads the room as layered without needing extra camera movement.
Mind Map: Lighting Setup Priorities
A Systematic Setup Workflow
- Block the camera and subject positions. Lighting decisions depend on where the camera sees the subject’s face and silhouette.
- Place the key for focus. Aim for a clear facial hierarchy: eyes and cheek planes should read before the background does.
- Add fill to control mood. Adjust fill until the emotional intent matches the contrast level you want.
- Add separation. Use a rim or edge light to prevent blending, especially when the background is similar in tone.
- Shape the background. Light it just enough to create depth gradients, not enough to steal attention.
- Check continuity. Record key angles, note diffusion, and verify catchlights and shadow direction after any repositioning.
Example: Three Lighting Recipes for Common Scenes
1) Daytime Office Conversation
- Key: soft, slightly above eye level, 45 degrees off-axis.
- Fill: moderate, to keep skin natural and readable.
- Separation: subtle edge to separate from desks and window light.
2) Night Street Argument
- Key: harder side light with limited fill.
- Separation: stronger rim from the opposite side to keep silhouettes crisp.
- Background: dim practical-motivated shaping so the street recedes.
3) Quiet Bedroom Reflection
- Key: soft source close to camera axis but slightly off to preserve form.
- Fill: higher than you’d expect, reducing harsh shadows.
- Separation: minimal, just enough to keep the character from merging with bedding.
Quick Diagnostic Questions
- Where is the viewer’s eye supposed to land, and is the face the most contrasty area?
- Do shadows agree with the assumed light direction?
- Does the background have enough tonal structure to show depth without becoming the subject?
Answering those three questions before rolling saves time later, because it turns lighting from guesswork into a repeatable decision chain.
6.3 Shaping Light with Flags, Diffusion, and Practical Sources
Light shaping is mostly about controlling three things: where the light goes, how hard it hits, and what it looks like once it lands on skin, fabric, and surfaces. Flags, diffusion, and practical sources each handle one of those jobs—then you combine them so the final image feels intentional rather than accidental.
Flags: Controlling Spill and Creating Shape
A flag is any opaque material placed between the light and the subject to block unwanted rays. The key idea is that light travels in straight lines, so moving a flag changes the edge of illumination. That edge is what gives faces and objects their readable form.
Practical flag uses
- Cutting background spill: Place a flag between the key light and the background to keep the background from “glowing” and stealing attention.
- Shaping a cheek highlight: Use a small flag close to the subject to carve a narrower highlight on the face.
- Preventing lens flare: Flag the light source relative to the camera axis when you see haze or streaks.
Distance rule of thumb
- Flag close to the subject gives a sharper, more controlled edge.
- Flag farther from the subject makes the blocked area less precise, because the light has more room to “wrap” around the flag’s position.
Example You’re shooting a two-person conversation near a bright window. The window is your practical background source, but it’s washing both faces. Add a flag between the window and each actor so the window contributes only to the background tone, not the face exposure. Then let the key light do the face work.
Diffusion: Softening Without Losing Direction
Diffusion spreads light so shadows become less crisp and highlights become smoother. It does not magically create “better” light; it changes the size of the apparent light source.
What diffusion changes
- Shadow edges: Hard shadows soften into gradual transitions.
- Specular highlights: Skin and glossy surfaces show smaller, less defined reflections.
- Contrast: Overall contrast often drops slightly, especially in close-ups.
Common diffusion choices
- White diffusion (scrim, fabric): Softer and more forgiving, but it can reduce contrast.
- Scrims and diffusion frames: Useful when you need a large, even source.
- Half diffusion or diffusion with a grid: Keeps more direction while still reducing harshness.
Placement matters Diffusion closer to the light makes it behave more like a larger source, which typically softens more. Diffusion closer to the subject can preserve more direction and reduce the “milky” look.
Example For an interview, you want a gentle highlight on the nose and cheek without turning the face into a flat painting. Place diffusion between the key and the subject, but keep it relatively close to the light and avoid over-diffusing. Watch the catchlights: if they shrink too much, you’ve softened past the point of usefulness.
Practical Sources: Motivating Light in the Scene
A practical source is any visible light in the frame—lamps, screens, candles, streetlights through a window. The goal is not to light everything with the practical; it’s to make the practical feel like it has a job.
How practicals help
- Motivation: They explain why a wall is brighter than the floor.
- Color variation: A warm lamp can coexist with cooler ambient light without looking random.
- Catchlights and eye detail: A motivated source gives the eyes a believable reflection.
Practical integration workflow
- Expose for the subject first using your key and fill strategy.
- Add practicals as accents so they support the story lighting rather than fight it.
- Control spill with flags so the practical doesn’t flatten the scene.
Example A character sits under a desk lamp. You light the face with a controlled key from camera-left. Then you place the lamp in frame and flag it so it contributes only to the motivated pool of light on the desk and a warm edge on the character’s shoulder. The lamp becomes believable because it affects nearby surfaces, not because it’s the brightest thing in the frame.
Combining Tools for Predictable Results
Flags and diffusion work best when you treat them as a system: diffusion sets softness, flags set direction and containment, and practicals add motivated texture.
Mind Map: Light Shaping Workflow
Quick Diagnostic Checks
- If the background is too bright: add flags to block spill from the key and practicals.
- If the face looks washed out: reduce diffusion strength or move diffusion slightly farther from the light.
- If the practical looks fake: ensure it affects at least one nearby surface and contributes to eye reflections.
Case Example: Night Interior with One Lamp
You’re filming inside a room with a single lamp visible. Start with a key light that gives the face shape, then add diffusion to soften it to match the lamp’s character. Use flags to prevent the key from lighting the far wall, keeping the room’s depth. Finally, let the lamp provide a warm pool on the desk and a subtle rim on the subject’s shoulder. The scene reads as one coherent lighting setup because each tool has a specific job, and the image shows the results of those jobs.
6.4 Camera Movement Planning for Motivation and Readability
Camera movement is not decoration; it’s a decision about where the viewer’s attention should land next. The planning goal is simple: move only when the story needs a shift in emphasis, and move in a way that stays readable in space, time, and screen direction.
Start with Motivation Before Mechanics
Write the movement as an action the camera performs for a reason. Ask three questions for every planned move:
- What changes in the scene? A character enters, a secret is revealed, a threat closes distance, or a plan fails.
- What should the audience notice first? The answer becomes your movement target.
- Why not cut? If the story beat can be communicated with a cut, movement should earn its keep.
A practical rule: if the movement doesn’t point to a new piece of information, it’s probably just “movement for movement’s sake,” which viewers will feel even if they can’t name it.
Define Readability Constraints Early
Readability is about preventing confusion, not about making everything obvious. Plan around these constraints:
- Spatial clarity: Keep the camera’s position consistent with geography. If the character is left of frame, don’t suddenly flip the scene unless blocking supports it.
- Screen direction continuity: If a character moves rightward in one shot, avoid reversing direction in the next shot without a reason. Viewers track motion patterns faster than they track explanations.
- Line-of-sight management: Movement should not repeatedly pass through foreground objects that hide the subject unless the blocking is meant to create interruption.
- Speed matching: A slow dolly move can feel calm; a fast one can feel panicked. Match movement speed to the emotional and informational pace of the beat.
Choose Movement Types by Function
Different moves solve different problems. Pick the one that matches the function you need.
- Dolly in for emphasis: Use when the scene’s meaning tightens, such as a confession or a realization. Keep the subject centered or use a deliberate off-center composition that you can maintain.
- Dolly out for context: Use when the audience needs to understand scale, consequences, or a new relationship between characters.
- Pan for discovery: Use when information is revealed across space, like someone approaching from a corridor. Plan the pan start and end so the reveal lands cleanly.
- Truck for relationship: Side-to-side movement can show two characters’ proximity or separation. It works best when the camera stays parallel to the action so the audience doesn’t feel “dragged” sideways.
- Arc for perspective change: An arc can shift the viewer’s angle to match a character’s changing power or uncertainty. Plan the arc radius so the subject doesn’t distort unnaturally.
Build a Movement Map from Blocking
Before the camera moves, the actors move. Use blocking to create a movement map: where the subject is, where the camera needs to be, and what the camera must keep in frame.
Mind Map: Camera Movement Planning
Plan the Operator Path and Rig Constraints
A movement plan fails when the operator can’t physically do it or when the lens choice undermines the plan.
- Operator path: Mark the camera’s start and end positions, plus any intermediate points. If the move requires a turn, decide the pivot point and rehearse it.
- Focal length implications: Longer lenses magnify small framing errors. If you’re using a telephoto look, movement must be smoother and more controlled because the frame “tightens” visually.
- Rig choice: A handheld move can be readable if it’s motivated by character viewpoint and stays consistent in intensity. A stabilized move can feel too smooth if the scene requires urgency; match the tool to the beat.
- Start and end frames: The audience remembers the beginning and the landing. Plan those frames first, then design the move between them.
Use Examples That Show the Logic
Example: Dolly In for a Confession
- Blocking: The character steps closer to a table, then stops.
- Plan: Start wider so the room context is visible. Dolly in only after the character stops moving, so the audience isn’t forced to track both body motion and camera motion at once.
- Readability check: Keep the character’s eyes in the same general screen area during the move. If you drift, the audience reads it as a framing mistake, not a story choice.
Example: Pan for a Threat Entering Frame
- Blocking: The threat appears from a doorway.
- Plan: Begin the pan early enough that the doorway is already in frame, but don’t start so early that the audience watches the camera instead of the reveal.
- Readability check: End the pan with the threat’s face or key identifying feature visible, not just their shoulder or silhouette.
Example: Truck to Show Distance Between Two Characters
- Blocking: One character backs away while the other advances.
- Plan: Truck sideways to keep both characters in relation, rather than letting one character slide out of frame. The movement should reinforce the changing distance, not fight it.
- Readability check: Avoid crossing the foreground object line unless the blocking intends an obstruction beat.
Integrate Movement into Coverage
Movement affects coverage because it changes what can be matched later.
- Performance continuity: If the actor’s performance is the priority, design movement that doesn’t force them to hit marks differently across takes.
- Matchable alternatives: Plan a second option that uses a cut or a simpler move if the rig or timing slips.
- Version discipline: Keep the movement path consistent across takes when possible. If you change the path, you may create continuity problems that editing can’t fully fix.
A good movement plan makes the viewer’s job easier: it guides attention with clear intent, keeps geography stable, and lands the important information where it can be seen without effort.
6.5 Maintaining Continuity With Lens, Exposure, and Lighting Consistency
Continuity is what keeps a viewer from noticing the seams. In practice, lens choice, exposure, and lighting consistency are the three most common places where seams appear—especially when you shoot out of order, swap batteries, or change crew call times.
Foundational Continuity Rules
Start with a simple principle: every shot in a scene should preserve the viewer’s spatial and visual expectations. That means:
- Spatial continuity: the camera’s position and angle relative to the subject should match the script’s geography.
- Optical continuity: lens focal length and camera height should stay consistent when the story implies the same viewpoint.
- Photometric continuity: exposure and lighting should maintain the same “brightness logic,” even if the lighting rig is physically adjusted.
A practical way to remember this: if the audience can’t tell where the camera “teleported,” the rest has a chance to feel seamless.
Lens Continuity: Focal Length, Perspective, and Framing
Lens continuity is mostly about perspective, not just matching the same focal length number.
- Match focal length when the viewpoint is meant to be stable. Example: In a two-shot where characters talk across a table, switching from a 50mm to a 35mm without changing camera position will make faces and table edges distort differently.
- If you must change focal length, change camera position to preserve perspective. Example: To go from a wider to a tighter shot while keeping the subject’s face size consistent, move the camera closer rather than simply zooming.
- Lock framing intent. Use a consistent method for marks: tape on the floor, chair positions, and “frame landmarks” (e.g., the actor’s eye line relative to the top third of frame).
Common seam: the actor’s head size changes between shots, even though the blocking looks the same.
Exposure Continuity: Exposure Logic over Exact Numbers
Exposure continuity is about keeping the image’s brightness relationships consistent.
- Use a repeatable exposure target. Example: If you expose for a character’s face at a consistent skin tone level, keep that target across takes. Don’t chase “looks” by eye alone.
- Separate exposure from creative intent. If you intentionally change exposure for a narrative reason, document it so editors and colorists know it’s planned.
- Maintain camera settings when possible. Example: For a dialogue scene, keep ISO, shutter angle, and aperture consistent unless the lighting plan changes.
Common seam: one take looks slightly brighter, and the next looks flatter, making the performance feel like it happened in a different room.
Lighting Continuity: Direction, Quality, and Practical Sources
Lighting continuity has three layers: direction, quality, and sources.
- Direction: Keep key light direction consistent relative to camera. Example: If the key is 30 degrees off camera-left for shot A, it should remain effectively the same for shot B unless you’re changing the camera’s viewpoint.
- Quality: Preserve softness and contrast. Example: A hard-edged key (small source) will create sharper facial shadows than a diffused key (large source). If you swap diffusion or move flags, expect a visible change.
- Practical sources: Keep motivated lights consistent. Example: If a lamp is meant to glow in the background, its brightness and color temperature should not drift between takes.
Common seam: the shadow under the chin shifts shape, even when the actor’s position is unchanged.
On Set Workflow That Prevents Drift
Continuity is easier when you treat it like a checklist.
- Before rolling: confirm lens, focal length, and camera height. Record them in the shot log.
- Set exposure: take a reference frame and note the exposure method (e.g., face target, gray card, waveform level).
- Light for the scene, not the take: adjust lighting for the entire scene’s coverage plan, then only fine-tune.
- After any change: re-check lens framing, exposure target, and key light direction.
- Between setups: verify that the “brightness logic” still matches the scene’s intended time and environment.
Mind Map: Continuity with Lens, Exposure, and Lighting
Example: Dialogue Scene Coverage Without Seams
Imagine a scene where two characters talk in a kitchen. You shoot a wide two-shot, then coverage singles.
- Wide two-shot: 50mm, camera at eye level, key light from camera-left, exposure set for face brightness.
- Single on Character A: keep the same lens and camera height if the viewpoint is meant to feel continuous. If you switch to 85mm for emphasis, move the camera closer so the face size and perspective match the wide.
- Single on Character B: keep key direction consistent relative to camera. If you rotate the key to accommodate the new angle, re-check shadow placement under the chin and around the nose.
If you do this, the viewer experiences the scene as one continuous space, even though you shot it in pieces.
Quick Continuity Checks Before You Call It Done
- Does the actor’s face size change unexpectedly between shots?
- Do skin tones look like they belong to the same lighting environment?
- Do shadows land in the same places when blocking is unchanged?
- Do practical lights (lamps, screens) maintain consistent brightness?
Continuity isn’t about making every frame identical. It’s about making changes feel like they belong to the camera’s story, not to the crew’s schedule.
7. Production Sound and on Set Audio Capture
7.1 Microphone Selection and Placement for Dialogue and Effects
Good dialogue audio starts with two decisions: what you’re trying to capture, and what you’re trying to reject. A microphone is less a “sound collector” and more a directional filter that trades off clarity, noise, and placement sensitivity. For effects, the goal is usually the opposite: capture a specific source cleanly enough that it can sit in the mix without fighting dialogue.
Core Principles for Selecting Microphones
Start by matching microphone behavior to the scene geometry.
- Choose a pickup pattern that fits the room. In a quiet room, a wider pattern can be forgiving. In a reverberant space, a tighter pattern helps keep reflections from smearing consonants.
- Match the microphone to the distance you can maintain. If actors must move, you’ll likely rely on a closer mic approach (often lavalier) or a boom strategy with controlled range.
- Plan for noise sources before you arrive. HVAC hum, wardrobe rustle, and camera fan noise are predictable. If you can’t control them, you must control mic placement and orientation.
Dialogue Microphone Options and When They Win
Boom microphones are ideal when you can keep them positioned just out of frame. They offer strong intelligibility when placed consistently and can reduce wardrobe noise because they don’t ride on clothing.
Lavalier microphones excel when blocking is unpredictable or when actors need freedom. They also help when you can’t keep a boom close enough. The tradeoff is that clothing handling and body movement become part of the recording.
Shotgun microphones can work for dialogue from a distance, but they’re placement-sensitive. If the boom operator can’t keep the mic aimed at the mouth, a shotgun’s rejection won’t save you.
Placement for Clean Dialogue
Placement is a chain: mouth-to-mic distance, mic angle, and the path of unwanted sound.
- Set the mouth-to-mic distance. A practical target is close enough to capture consonants without forcing the actor to change delivery. If the mic is too far, room reflections and background noise rise faster than the direct voice.
- Aim the mic at the mouth, not the actor’s chest. Even small angle changes can shift what the mic “hears” from the room versus the direct voice.
- Control vertical height. For booms, keep the mic near the actor’s mouth line. For lavs, keep the capsule positioned consistently relative to the sternum or collar area.
- Stabilize the mic against movement. Boom: use a steady hand and avoid sudden arcs. Lav: secure the cable so it doesn’t rub fabric during gestures.
A simple way to sanity-check placement is to listen for three things during rehearsal: consonant clarity, background level, and handling noise. If consonants are dull, distance or angle is usually the culprit. If background is loud, the mic is likely too far or too wide in pickup.
Placement for Dialogue in Motion and Crowds
When actors move, you can’t “fix it in post” if the mic loses the direct voice. For walking scenes, prefer lavs or a boom plan that tracks the mouth line without crossing behind heads. In crowds, use the tightest practical pickup and separate dialogue sources by distance and orientation. If two voices are equally close to the same mic, you’ll get blend that’s hard to separate later.
Microphone Placement for Effects
Effects microphones should be chosen for source separation.
- For close, specific sources like footsteps, props, or a door, place the mic near the action but out of frame and away from clothing contact. Use a short boom or a dedicated mic on a stand if the source is repeatable.
- For room tone and ambience, record it separately and consistently. Capture a few takes at the same camera position and similar actor activity level so the edit has a stable bed.
- For transient sounds, prioritize placement over pattern. A mic that’s slightly off-axis can miss the sharp part of the sound, which matters for impact cues.
Mind Map: Dialogue and Effects Microphone Workflow
Example: Two Actors in a Reverberant Room
Use a boom for the actor who stays closer to the camera and lavs for both if they frequently turn away. Position the boom so it points at the mouth line and keep the mic height stable as they shift. Record a room tone take after blocking settles. If the dialogue sounds “hollow,” reduce distance and tighten the pickup by adjusting angle rather than raising gain.
Example: Action Scene with Dialogue over Footsteps
Record dialogue with lavs to maintain consistent capture during movement. For footsteps, place a dedicated mic near the floor path for a clean transient. Keep the effects mic away from the lav cable so cable rub doesn’t contaminate the impact layer. During rehearsal, test a full take and listen for whether footsteps mask consonants; if they do, adjust effects mic distance or reposition it to favor the foot contact point.
Example: Close-Up Conversation with Minimal Movement
A boom can be enough if the framing stays stable. Place the mic just out of frame, aimed at the mouth, and keep the distance consistent across both actors. Add a separate ambience recording at the same camera position so the cut between angles doesn’t reveal a change in room character.
7.2 Recording Clean Dialogue and Managing Background Noise
Clean dialogue is mostly about controlling what you capture, not fixing what you wish you captured. The goal is simple: the microphone hears the actor clearly, and the rest of the world stays quiet enough to ignore.
Core Principles for Clean Dialogue
Start with placement. A boom mic placed just out of frame, aimed at the mouth, usually beats a mic placed farther away because distance increases both room tone and unwanted sounds. Aim for a consistent distance across takes so the actor’s voice level doesn’t swing wildly.
Next is gain staging. Record with enough headroom that peaks don’t clip, but not so low that you later boost noise. A practical rule: set levels so loud dialogue peaks stay comfortably below clipping, then re-check after blocking changes.
Finally, manage the environment. Background noise is rarely one thing; it’s a stack of small sources like HVAC hum, footsteps, distant traffic, and crew movement. If you can reduce even one layer, the dialogue becomes easier to clean.
Microphone Placement and Orientation
Use the actor’s mouth as your reference point. If the mic is too high, you’ll capture more ceiling reflections; if it’s too low, you’ll pick up breath and plosives. Keep the mic aimed slightly downward toward the mouth to reduce off-axis noise.
Watch for “shadow zones.” If the actor turns their head away, the mic angle may no longer favor their voice. For scenes with head turns, you can either adjust the mic during the take or plan coverage so the actor’s performance stays within a workable speaking angle.
Managing Plosives and Handling Noise
Plosives like “P” and “B” create pressure bursts that can overload the capsule. A small change in mic angle often helps more than heavy-handed processing later. If you use a windscreen, confirm it doesn’t introduce muffling that makes consonants disappear.
Handling noise matters even with boom mics. A cable brushing clothing or a stand bump can create sharp transients that are hard to remove. Route cables so they don’t cross movement paths, and keep the boom operator’s movement smooth and predictable.
Controlling Background Noise on Set
Treat background noise like a checklist.
- Identify the loudest sources: HVAC, generators, monitors, and nearby traffic.
- Reduce at the source: turn off what can be turned off, move equipment, or close doors.
- Isolate the actor: reposition the actor away from noise sources rather than relying on post.
When you can’t remove noise, you can still make it consistent. Consistent room tone is easier to manage than noise that changes every few seconds.
Practical Workflow for Clean Takes
Before rolling, do a quick “listen test.” Have the actor speak at normal volume and then at the loudest expected volume. Confirm the mic captures clarity and that the noise floor stays stable.
During takes, watch for three common problems:
- Mic drift: the boom slowly moves off-axis.
- Actor distance change: the actor steps back or leans away.
- Crew movement: someone walks behind the camera or rustles gear.
After each take, do a short monitoring check. If dialogue intelligibility drops, fix the cause immediately rather than hoping the next take magically improves.
Mind Map: Clean Dialogue and Noise Control
Example: Two Ways to Handle the Same Scene
Scenario: A character delivers a calm line in a room with a steady HVAC hum.
- Approach A: Mic farther from the actor, gain set low to avoid clipping.
- Result: dialogue is quieter relative to the hum, so later cleanup requires more aggressive noise reduction.
- Approach B: Mic closer and aimed at the mouth, gain set with headroom.
- Result: dialogue-to-noise ratio improves, consonants stay clearer, and the hum becomes less intrusive.
The difference isn’t magic processing; it’s distance, orientation, and level choices.
Example: When Background Noise Cannot Be Removed
Scenario: Outdoor dialogue near intermittent traffic.
If traffic passes unpredictably, you can’t “erase” it cleanly without harming dialogue. Instead, plan performance and capture:
- Ask the actor to keep delivery steady so the mic hears consistent speech energy.
- Roll slightly longer to capture clean dialogue before and after the noisiest moments.
- Mark the take with notes about when the traffic peaks so editing can choose the best portions.
This keeps the final dialogue usable without turning the mix into a guessing game.
Quick Checklist for the Boom Operator and Sound Team
- Mic aimed at mouth, not at the actor’s chest or shoulder.
- Levels set for peaks with headroom.
- Cable routed to avoid contact with movement.
- Background sources reduced or isolated.
- Pre-roll listen test completed.
- Post-take intelligibility check done fast and decisively.
Clean dialogue is a chain of small decisions. When each link is solid, post becomes a refinement step instead of a rescue mission.
7.3 Syncing Audio With Timecode and Clapper Workflow
Syncing audio to picture is mostly about consistency: the camera and recorder must agree on a shared timeline, and the clapper provides a visible and audible “anchor” you can find quickly. The goal is not just to get things lined up once, but to keep them lined up across takes, cards, and editing sessions.
Foundational Concepts You Need Before You Start
Timecode is a running timestamp (hours:minutes:seconds:frames) that both devices can record. Frame rate must match between camera and audio recorder, or you’ll get slow drift that looks like “why is dialogue sliding?”
The clapper creates a sharp event: the visual edge is easy to locate in the video timeline, and the audio transient is easy to locate in the waveform. Even if timecode is perfect, the clapper is still your fast sanity check.
Equipment Setup That Prevents Most Sync Problems
-
Match frame rate and timecode mode
- Set the camera to the intended frame rate (for example, 24.00 or 29.97).
- Set the audio recorder to the same frame rate.
- Choose a timecode source strategy: either both devices free-run (not ideal) or one device is the reference (better).
-
Confirm timecode is actually recording
- Record a short test clip.
- In playback or metadata view, verify the timecode values advance.
- If timecode is missing, you’ll be forced to rely entirely on clapper alignment.
-
Route audio correctly
- Dialogue should go into the recorder channels you will use later.
- If you’re feeding the camera as well, keep track of which device is “master” for each channel.
The Clapper Workflow from Slate to Edit
A good clapper workflow is repeatable, not fancy.
-
Slate before rolling
- Write the scene and take clearly.
- Make sure the clapper board is in frame and the mic is positioned so the clap is captured cleanly.
-
Roll picture and audio together
- Start the camera and recorder using the same trigger method you planned.
- Wait for both to reach stable recording state.
-
Call the slate and clap once
- The clap should be one decisive motion.
- Avoid multiple partial claps; they create multiple transients and confuse waveform matching.
-
Record the first spoken line after the clap
- This gives you a second anchor: the start of dialogue.
- If the actor speaks before the clap, you lose the clean “before/after” structure.
-
Mark take changes consistently
- If you change a take, slate again. Don’t assume the editor will infer it from timecode alone.
Practical Sync Methods in Post
Method A: Timecode First, Clapper Second
Use timecode to align entire takes quickly, then use the clapper to verify the offset is correct.
- Import both media.
- Auto-sync using timecode.
- Jump to the clapper event and confirm the visual edge and audio transient line up.
- If they don’t, check whether the recorder was set to the correct frame rate.
Method B: Clapper First When Timecode Is Unreliable
If timecode is missing or inconsistent, manually align using the clapper.
- Find the first clear clap transient in the audio waveform.
- Find the corresponding frame where the clapper sticks separate.
- Nudge the audio until the transient hits the exact frame.
- Then verify dialogue starts match the expected moment.
Common Failure Modes and Fixes
- Frame rate mismatch: timecode alignment looks close at first, then drifts. Fix by correcting recorder frame rate and re-recording if possible.
- Clapper not in frame: you can still sync by audio transient, but you lose the fastest visual anchor. Fix by ensuring the slate is visible.
- Multiple claps: waveform shows several peaks. Fix by clapping once and decisively.
- Wrong channel used: the clap is recorded but on a different track. Fix by labeling channels and confirming routing during setup.
Mind Map: Timecode and Clapper Sync Workflow
Example: Two Devices with Correct Timecode
You shoot at 24.00 fps. The camera and recorder both show advancing timecode during a test. In post, you auto-sync by timecode and then jump to the clapper. The clapper edge lands exactly on the frame where the waveform spike occurs. Dialogue begins right after the clap, and the actor’s mouth movement matches the first syllable. That’s the “good path”: timecode handles the bulk alignment, clapper confirms the offset.
Example: Timecode Missing, Clapper Saves the Day
The recorder starts without timecode metadata, but the clapper is visible and the clap is captured on the dialogue track. In post, you ignore auto-sync and align manually: you place the audio transient on the exact frame where the clapper sticks separate. After alignment, you check that the first spoken word lands at the correct moment relative to the actor’s mouth. Once that matches, you can trust the take for editing.
Quick Checklist Before You Leave the Set
- Frame rate matches on camera and recorder.
- Timecode is advancing during recording.
- Clapper is visible in frame.
- Clap is captured as a single clear transient.
- Each take has a fresh slate.
- Dialogue starts after the clap.
7.4 Capturing Production Sound for Music and Foley Needs
Production sound isn’t only about dialogue staying intelligible. It also determines how cleanly you can build music cues and Foley layers later, because the mix needs usable references: room tone, texture, and timing. The goal is simple—capture what you can on set so post has fewer guesses.
Foundational Targets for Music and Foley Capture
Start by separating three audio categories:
- Dialogue reference: clean speech takes, recorded with consistent mic placement.
- Environment reference: background ambience that matches each scene’s location and time.
- Action reference: sounds tied to physical events, like footsteps, cloth movement, doors, and prop handling.
A practical rule: if an editor can’t confidently place a sound in time and space, Foley and music editing become guesswork. Your job on set is to provide time anchors and believable ambience.
Planning Before You Roll
Before recording, confirm what the scene requires beyond dialogue. A quick checklist helps:
- Where will Foley live: footsteps, hand movements, object interactions, clothing rustle.
- What must be preserved: room tone continuity, door/impact transients, vehicle noise beds.
- What should be avoided: unnecessary handling noise near the boom, mic stand squeaks, and crew chatter.
Then align the plan with the script. If a character opens a drawer, you want clean reference for the action’s timing and the room’s response, even if you expect to replace the sound later.
Microphone Strategy for Music and Foley Support
Use microphones to capture both clarity and context:
- Boom for dialogue: keep it positioned to minimize pickup of the action area unless the action is part of the dialogue moment.
- Plant or proximity mics for action: when footsteps or prop interactions are central, add a mic that can capture texture without relying on post-only reconstruction.
- Room tone capture: use the same mic chain when possible so ambience matches the dialogue take.
A common mistake is treating ambience as an afterthought. If you only record room tone at the end of the day, you’ll struggle to match the acoustics of earlier setups.
Recording Techniques That Make Post Easier
Room Tone with Intent
Record room tone in multiple takes per setup. Aim for:
- Before rolling dialogue: captures the “starting” ambience.
- During natural pauses: captures the scene’s baseline without interruptions.
- After action: captures how the room settles.
If the location has intermittent noise (HVAC cycles, distant traffic), record long enough to include at least one full cycle. Otherwise, post will hear the seam.
Action Takes with Clean Timing
For Foley needs, timing matters as much as fidelity. When an action occurs, capture:
- A take with the action performed normally.
- A take with the action performed slightly slower if the performance is fast and the sound needs separation.
This gives editors options for aligning Foley and music hits to the performance rhythm.
Handling Noise Control
Keep mic systems quiet:
- Use cable slack management to prevent rubs.
- Avoid touching stands during takes.
- Assign a single person to adjust boom position between takes.
If you hear stand noise in the dialogue track, you’ll either have to cut around it or spend time hunting for usable alternatives.
Managing Music Considerations on Set
Music editing often depends on clean reference points. Even if music is added later, you still want:
- Clear sync reference: consistent timecode and slate marks.
- Performance timing: record the moment actors hit beats, even if music will be replaced.
- Avoiding accidental masking: if a temp track is played on set, keep its level controlled so it doesn’t contaminate dialogue and ambience references.
If a scene includes a planned rhythm—like clapping, tapping, or a character striking an object—capture those sounds with enough detail that music editors can align cues without re-creating the timing from scratch.
Advanced Details for Foley-Friendly Production Audio
Multi-Mic Coherence
When using multiple mics, ensure they share the same recording settings and are routed consistently. In post, coherence means:
- The ambience doesn’t “jump” between mics.
- The action sound doesn’t disappear when you switch sources.
A quick sanity check is to monitor during takes and confirm that the action mic isn’t clipping while the boom remains usable.
Continuity Across Setups
Ambience continuity is the hidden boss fight. To maintain it:
- Record room tone whenever the camera moves to a new angle.
- Note changes in doors, curtains, or open windows that affect reflections.
- Keep mic positions and gain structure consistent within a scene.
If the room changes acoustics, post can’t fix physics with EQ.
Mind Map: Production Sound Inputs for Music and Foley
Example: Drawer Opening Scene
A character opens a drawer and pauses. On set, you record:
- Dialogue takes with the boom positioned for speech.
- Room tone before the action, then again after the drawer closes.
- Two action takes: one normal speed, one slightly slower.
- If footsteps or clothing movement occur in the same moment, add a proximity mic so the Foley editor can match texture.
In post, the editor can place the drawer transient precisely, then use the room tone recorded for that exact setup to keep the Foley from sounding like it happened in a different room.
Example: Footsteps in a Hallway
For a hallway scene, you capture:
- Room tone for each camera angle, because reflections change with framing.
- Footstep reference with a mic that hears the floor texture.
- A few extra takes where the actor varies stride length slightly, so Foley has options for matching the edit.
The result is a Foley track that blends with the ambience bed instead of fighting it.
7.5 Troubleshooting Common On Set Audio Problems and Fixes
On set audio problems usually fall into a few predictable buckets: the mic isn’t capturing what you think, the signal is being distorted or lost, the environment is fighting you, or sync is going sideways. The fastest fixes come from checking in a sensible order: source → mic → signal path → recording settings → sync → playback verification.
Quick Triage Workflow
Start with a 30-second test before rolling: speak at the actor’s normal distance, clap once near the mic, and confirm you can hear both clearly on headphones. If the test fails, don’t keep shooting; fix the chain.
- Confirm the source: Is the actor speaking, moving, or turning away? Are footsteps or wardrobe creating noise at the same time?
- Confirm the mic placement: Is the mic still where it was during rehearsal? Has it rotated, loosened, or been covered by wardrobe?
- Confirm the signal path: Are cables seated, the transmitter powered, and the correct channel selected?
- Confirm recording settings: Are you recording the right input, at the right level, and not clipping?
- Confirm sync: Does the clapper spike appear where expected relative to picture?
- Confirm playback: Listen to the first take immediately; don’t wait for dailies.
Common Problems and Practical Fixes
Dialogue Is Too Quiet or Inconsistent
Likely causes: mic moved, wrong input selected, transmitter gain too low, actor distance changed, or wind/handling noise masking speech.
Fixes:
- Re-seat the lav and re-check orientation so the capsule faces the mouth area.
- If the actor’s blocking changes distance, adjust gain for the farthest expected position rather than the closest.
- Watch for wardrobe friction: if the mic cable rubs fabric, secure it with gentle slack and tape points away from movement.
- Verify the recorder is set to the intended channel and that monitoring is routed correctly.
Example: An actor delivers lines while stepping back. The first take sounds fine, the second is barely audible. The mic didn’t move, but the gain was set for the close position; raise gain slightly and re-test at the far mark.
Dialogue Is Distorted or Clipping
Likely causes: input gain too high, sudden loud consonants, transmitter overload, or a mic placed too close to the mouth.
Fixes:
- Lower input gain and aim for peaks that stay safely below clipping.
- If distortion happens only on certain words, check mic placement and distance; a lav too close can overload on hard consonants.
- If using wireless, confirm the transmitter output and that the receiver isn’t set to an incorrect mode.
Example: The waveform shows flat-topped peaks during one line. The actor leaned in for emphasis. Reset gain and re-block the mic cable so it doesn’t shift when the actor leans.
Background Noise Is Overpowering
Likely causes: HVAC, traffic, crew chatter, camera fan noise, or mic picking up reflections from hard surfaces.
Fixes:
- Move the mic and actor relative to the noise source; even a small reposition can change what the mic hears.
- Use directional mics for boom when appropriate, and keep the boom out of the camera’s noise path.
- Reduce reflections by choosing a different angle or adding soft barriers near the mic position.
- Call for quiet during takes and coordinate slate calls so the crew isn’t talking during the performance window.
Example: In a room with a hard floor, dialogue sounds hollow and noisy. The boom is picking up more room than voice. Re-aim the boom slightly closer to the actor’s mouth line and tighten the mic-to-mouth distance.
Wind Noise or Handling Noise
Likely causes: missing or poorly seated wind protection, outdoor airflow, loose lav cable, or clothing rubbing.
Fixes:
- Ensure the windscreen is fully covering the capsule and not slipping.
- For lavs, secure the cable so it can’t move against fabric.
- If the actor gestures, check that the mic cable has enough slack to move without tugging.
Example: Outdoors, the first take is clean, the second has a constant hiss. The windscreen shifted during a wardrobe adjustment. Re-seat it and do a quick test at the same wind conditions.
Hum, Buzz, or Electrical Interference
Likely causes: grounding issues, power supplies too close, incorrect cable routing, or wireless interference.
Fixes:
- Change cable routing away from power bricks and lights.
- Separate audio cables from camera power and video transmitters.
- For wireless, scan and re-select frequencies if interference is present.
- If hum appears only when a device turns on, isolate the device by powering down one item at a time.
Example: A low 60 Hz hum appears only when a particular light is switched on. Route the mic cable farther from the light’s power lead and confirm the recorder input is not accidentally monitoring a different source.
No Audio or Wrong Channel Recording
Likely causes: wrong input selected, muted channel, dead battery, transmitter off, or recording armed incorrectly.
Fixes:
- Confirm the recorder is armed and the correct track is enabled.
- Check batteries in both transmitter and recorder.
- Confirm the receiver is tuned to the correct transmitter.
- Do a quick monitoring check before rolling.
Example: The slate is visible, but the audio track is flat. The recorder was set to a different input for the previous setup. Switch inputs, re-arm, and roll again.
Mind Map: On Set Audio Troubleshooting
Mini Case Study: One Scene, Multiple Issues
During a dialogue scene, take one is quiet, take two is distorted, and take three has a constant hiss. The team checks in order: mic placement shows the lav rotated after wardrobe; gain is then adjusted for the actor’s farthest blocking mark; finally, the windscreen is re-seated after a wardrobe change. The fourth take is clean because each fix targets a different link in the chain rather than treating symptoms.
Verification Checklist Before Rolling Again
- Headphones confirm dialogue intelligibility.
- Peaks show no clipping during normal delivery.
- Background noise is acceptable for the location.
- Wireless and cables are stable and correctly routed.
- Clapper sync appears as expected.
If you can’t pass the checklist, you don’t have a “good take waiting to happen.” You have a solvable problem in the chain—find the link, fix it, and move on.
8. Visual Effects Practical Integration and in Camera Techniques
8.1 Planning VFX Shots with Plates, Tracking, and Reference Photography
A VFX shot plan starts with a simple question: what must stay consistent in the final image? The answer usually splits into three buckets—camera motion, scene geometry, and visual continuity. Plates, tracking, and reference photography are the tools that keep those buckets from drifting apart.
Plates: What You Capture and Why It Matters
A plate is the cleanest possible record of the live-action environment where the VFX will live. Plan plates early because they determine what tracking can solve later.
- Capture intent before capture settings. If the shot needs a stable horizon, avoid tilting the camera during takes. If the shot needs parallax, plan a move that actually changes viewpoint rather than a tiny handheld wobble.
- Protect the plate from contamination. Keep lens flares, heavy smoke, and fast foreground motion under control. If you must have them, note where they occur so you can plan around tracking gaps.
- Record enough takes for coverage. One take rarely gives the best tracking. A second take with a slightly different camera path can provide better feature overlap.
Practical example: you’re adding a character’s shadow to an existing scene. The plate must include the ground plane clearly, with consistent lighting and no moving objects crossing the shadow area during the key moments.
Tracking: Turning Real Motion into Usable Data
Tracking is the process of estimating camera movement and sometimes scene structure from the plate. The goal is not “perfect math”; it’s usable alignment that survives the edit.
- Choose tracking targets that match the shot. Feature-rich surfaces (brick, pavement texture, window frames) track better than smooth walls. If the environment is too uniform, add temporary tracking aids on set.
- Plan for occlusion. If the camera passes behind a character, expect tracking to lose confidence. Mitigate by ensuring the camera move continues to reveal enough features before and after the occlusion.
- Stabilize the problem before solving it. Use consistent lens settings when possible. If you zoom during the shot, tracking becomes harder because focal length changes alter the mapping.
Practical example: you’re replacing a sign on a storefront. If the camera pans quickly, tracking may wobble around the sign area. A common fix is to track using features across the whole storefront, not just the sign region, then constrain the sign replacement with a clean planar or object-based solve.
Reference Photography: Building a Reality Check
Reference photography provides the “what it looks like” layer that tracking alone cannot guarantee. Tracking tells you where the camera went; reference helps you decide what the world should look like.
- Photograph surfaces relevant to the VFX. Capture the ground plane, walls, and any surfaces that will receive shadows, reflections, or contact points.
- Match the lighting conditions. Take reference at the same time of day and with similar weather. If you can’t, at least note the differences so you can adjust the VFX lighting plan.
- Include measurement cues. A simple tape measure shot next to a known object gives scale. Even rough scale helps prevent “almost right” results.
Practical example: you’re adding a floating object that casts a shadow onto a desk. Reference photos of the desk surface texture and edge highlights help the shadow feel grounded, even if the shadow is composited with a clean matte.
Integrated Workflow: From Plate to Comp
Use a workflow that keeps decisions connected.
- Shot intent definition. Identify what must be locked: camera motion only, or also object placement and lighting.
- Plate capture plan. Confirm lens behavior, motion style, and occlusion risks.
- Tracking plan. Select feature regions, decide whether you need planar tracking or object tracking, and plan for occlusions.
- Reference capture plan. Photograph surfaces, record scale cues, and capture lighting notes.
- Test solve on a short segment. Validate that tracking holds through the hardest part of the move.
- Comp constraints. Use tracking output to drive camera alignment, then use reference to drive shading, shadows, and contact.
Mind Map: Planning VFX Shots with Plates, Tracking, and Reference Photography
Example: Replacing a Window with a Moving City View
- Plates: Record the interior scene with the window area unobstructed. Avoid fast zooms; keep the camera move smooth so the window frame remains stable in the image.
- Tracking: Track across the window frame and nearby interior edges. If a curtain swings, treat it as an occlusion and ensure the frame is visible before and after the curtain movement.
- Reference: Photograph the window frame texture and the interior wall color under the same lighting. Capture a scale reference using a known object near the window.
- Comp constraints: Align the city view to the tracked window plane, then match the interior lighting direction so reflections and highlights land consistently on the frame.
This approach keeps the shot coherent: plates give the raw motion, tracking provides alignment, and reference supplies the visual rules that make the VFX feel like it belongs in the same physical space.
8.2 Using Practical Effects and Set Extensions for Believability
Believability in practical effects comes from two things: physical cause-and-effect on set, and consistent spatial logic across camera angles. If the audience can predict what should happen when something moves, breaks, heats up, or gets wet, the illusion holds even when the effect is clearly staged.
Core Principles for Practical Effects
Start by defining the “physics contract” of the shot. For example, if a character knocks over a stack of books, the books must fall with believable weight, friction, and timing relative to the impact. That means you plan not just the moment of collapse, but also how the stack is built, how it’s released, and what the camera will capture during the fall.
Next, design for repeatability. A practical effect that can only be done once is usually a coverage problem waiting to happen. Build the effect so it can be reset quickly and consistently: replaceable breakaway pieces, repeatable rig positions, and clear cues for performers and crew.
Finally, protect continuity. Practical effects often create mess, residue, or altered surfaces. Decide early whether the shot requires a clean reset between takes, and if not, plan your coverage order so the “mess state” only moves forward.
Practical Effects That Earn Their Keep
Use practical effects when they solve a story problem that would be harder to fake later. A few reliable categories:
- Controlled breakage: Breakaway glass, sugar-glass props, or pre-scored materials. The key is matching thickness and weight so the shards behave like the prop.
- Smoke and haze: Use it to reveal light and depth, not to hide problems. Keep density consistent across takes so the background doesn’t “breathe” between angles.
- Water and moisture: Plan drainage and drying. If a wall gets wet, it must look wet from every angle you intend to cut to.
- Heat and light sources: Practical flames and bulbs should be motivated by the scene. If a “hot” effect appears, the lighting it produces must match the character’s exposure and shadows.
A simple example: a character pours coffee onto a desk. You can use a safe prop liquid with similar viscosity, but believability also depends on how it spreads, how it reflects overhead lights, and whether it stains the same way across takes.
Set Extensions for Spatial Logic
Set extensions extend the world beyond the physical set walls. They work best when they maintain consistent perspective, scale, and surface detail.
Begin with camera geometry. If the extension is meant to read as a hallway, measure the vanishing point relative to lens choice and camera height. A common mistake is building an extension that looks right from one angle but collapses when the camera moves a few feet.
Then match surface behavior. Floors should have the same sheen and texture as the set. Walls should share the same paint absorption and edge treatment. Even small differences in gloss can betray the seam when the camera pans.
Finally, plan interaction. If actors touch the extended wall or pass through a doorway, you need physical clearance, safe edges, and reliable blocking marks. A set extension that looks real but can’t be used by performers becomes a background painting, not a believable space.
Mind Map: Practical Effects and Set Extensions
Example: Breakaway Window with Coverage Planning
Imagine a scene where a window shatters after a thrown object hits it. The practical effect should include a controlled impact point, a breakaway pane designed to fracture in a predictable pattern, and a plan for shard cleanup.
For believability, the thrown object must arrive at the same time the pane breaks, and the character’s reaction must match the sound and motion. For coverage, shoot wide first if the window is clean, then move to tighter angles after the break so you don’t spend time resetting shards between every take.
Example: Set Extension for a Doorway into a Hall
A doorway extension can fail when the hallway depth doesn’t match the lens perspective. Build the hallway with measured depth and consistent wall spacing, then test with the intended lens and camera height.
To keep it believable, align lighting across the seam. If the set lighting suggests a light source from the left, the extension must reproduce that direction and intensity so shadows fall the same way. If the hallway is dimmer, reduce exposure on the extension rather than relying on darkness to hide mismatched detail.
Practical Checklist for On-Set Decisions
- Can the effect be reset quickly without changing its behavior?
- Does the effect’s physical outcome match the shot’s timing and sound cues?
- Are surfaces and lighting consistent across the seam between set and extension?
- Does the coverage order respect continuity states like mess, haze density, or wetness?
- Do actors have safe, usable space to interact with the extended environment?
When these points are handled, practical effects and set extensions stop being “special” and start being reliable tools for making the scene’s world behave the way the audience expects.
8.3 Green Screen and Compositing Friendly Production Practices
Green screen works best when you treat it like a lighting and measurement problem, not a magic cleanup problem. The goal is simple: capture clean separation between subject and background, then make compositing decisions with predictable inputs.
Foundations for Keying Friendly Footage
Start with a consistent green background that is evenly lit. Uneven illumination creates green gradients that keying software struggles to interpret, especially around hair and shoulders. Aim for a smooth, matte surface with minimal wrinkles, and keep the subject far enough from the screen to reduce spill.
Spill is the green light bouncing onto the subject. It shows up as a green cast in shadows and along edges, which can force extra cleanup later. A practical rule is to increase distance between subject and screen, then use flags or negative fill to deepen the subject’s shadows without letting green creep in.
Set Lighting That Separates Subject from Screen
Light the subject for the camera exposure you want, not for how the green looks to your eye. If the subject is underexposed, the key edge becomes noisy because the subject’s darker areas contain less usable detail. If the subject is overexposed, the edge can bloom and lose texture.
Use a three-part approach:
- Background lighting: even, controlled, and slightly lower contrast than the subject.
- Subject lighting: motivated by your scene plan, with controlled contrast.
- Edge control: reduce spill with distance, flags, and careful placement of practical lights.
When you add rim or back light, keep it from turning green. A rim light that grazes the screen can reflect green back into the subject’s edge, making the key look “clean” but the composite look wrong.
Camera and Exposure Choices That Keep Edges Stable
Lock your camera settings early. Changing exposure mid-take shifts the green channel behavior and can break key consistency across shots. Use a stable white balance and avoid auto modes.
Focus matters more than people expect. Soft focus on the subject edge forces the key to decide between blurred foreground and blurred background, which often produces halos. If you need depth of field variation, plan it: rack focus during a take can be done, but expect key quality to change across the focus plane.
Wardrobe and Hair Practices That Reduce Cleanup
Avoid materials that reflect green strongly, including shiny fabrics and wet surfaces. If you must use reflective wardrobe, increase distance and add light shaping to control reflections.
Hair is the usual trouble spot. Provide separation with backlight that is not green, and ensure the hair is not pressed against the screen. If the subject’s hair is long and moves, capture a few test takes and check the edge in motion, not just on a still frame.
Compositing Friendly Production Data
Shoot with compositing in mind by capturing the information you’ll need later.
- Record a clean plate of the empty green screen at the same camera settings.
- Capture reference stills for lighting direction, including a frame of the subject’s intended environment if you can.
- Keep lens and camera position consistent across takes that will be composited together.
- If you plan to add motion blur, capture motion blur behavior intentionally by matching shutter and movement style.
Also, slate takes clearly. Editors and compositors should be able to find the exact take that matches the final performance, not the one that “looks close.”
Mind Map: Green Screen to Compositing Workflow
Example: A Two-Minute Setup That Saves Hours
Imagine a character walking toward camera while talking. You want the key to hold during motion.
- Place the subject several feet from the screen and use flags to prevent green bounce onto the subject’s sides.
- Light the background evenly, then light the subject to your intended exposure. Confirm with a test take and check the edge on a monitor.
- Record a clean plate before the performance.
- Keep the camera locked and avoid autofocus changes.
- Use wardrobe that doesn’t reflect green strongly.
During compositing, the key will still need refinement, but the edge will remain stable through movement, so you spend time on integration details like shadow placement rather than fighting flicker.
Example: When the Key Looks Fine but the Composite Doesn’t
A common failure mode is a clean key with a wrong look. The subject may be keyed correctly, but the shadows and contrast don’t match the new background.
Fix this by matching:
- Shadow direction and softness to the background light.
- Subject contrast so it sits in the same exposure range as the environment.
- Grain or texture so the subject doesn’t look like a cutout.
If the subject still carries a green tint, address spill at capture time first. If it’s already baked in, correct it during compositing, but expect less clean results than if the set had been controlled.
Practical Checklist for Production Day
- Background evenly lit and wrinkle-free
- Subject separated from screen with spill control
- Locked camera settings and stable focus
- Clean plate captured
- Wardrobe avoids strong green reflection
- Rim light planned to avoid green bounce
- Take labeling consistent with intended composite shots
These practices keep the key predictable and reduce the amount of edge surgery needed later, which is exactly what you want when schedules are tight and deadlines are not interested in your optimism.
8.4 Motion Control and Camera Data Capture for Post Production
Motion control is the practice of repeating camera movement with high precision so post production can composite elements that must line up. The key idea is simple: if the camera path and timing are recorded reliably, you can recreate the same perspective later without guessing.
Foundational Concepts for Repeatable Camera Moves
A motion-controlled move has three parts: the spatial path, the timing, and the lens and camera settings. Spatial path means where the camera is in 3D space over time. Timing means when each frame happens relative to the move. Lens and camera settings include focal length, focus distance, aperture, exposure, and any stabilization behavior.
A practical way to think about it: if you can replay the move exactly, you can shoot multiple passes—clean plates, actors, interactive props, VFX elements—while keeping perspective consistent. If you cannot, you end up relying on tracking and cleanup that may work, but costs time and increases risk.
Planning the Move for Post Production Needs
Start with the shots you will need later. If you expect to composite a foreground element, you need consistent camera motion and consistent focus behavior. If you plan to replace the background, you need a clean plate shot that matches the camera path and exposure.
Before any take, lock down these decisions:
- Lens choice and focal length. Changing focal length changes perspective and field of view.
- Focus strategy. Decide whether focus is fixed for the whole move or changes at specific moments.
- Exposure strategy. Keep ISO, shutter, and aperture consistent across passes unless the shot design requires variation.
- Frame rate and shutter angle. Motion control timing must match the capture settings.
Capturing Camera Data That Post Production Actually Uses
Motion control systems typically record the rig position and timing, but post production also needs camera metadata. Capture should include:
- Lens parameters: focal length, focus distance (or focus ring position), and aperture.
- Camera settings: frame rate, shutter, ISO, white balance, and exposure mode.
- Sync references: timecode or a reliable frame sync method.
- Calibration notes: lens distortion profile, sensor crop mode, and any stabilization settings.
A common mistake is assuming the motion controller alone is enough. It helps with camera path, but compositing needs lens behavior and timing alignment to avoid subtle “almost matching” frames.
Workflow for Multi Pass Shoots
A multi pass workflow is easiest when you treat each pass as a controlled experiment. Use a consistent slate and naming convention so editorial and VFX can match takes.
Example workflow for a foreground character interacting with a CG environment:
- Record the move with the camera rig and capture a clean background plate.
- Shoot the character pass with the same move, same lens, and the same focus plan.
- Shoot any interactive elements that require separate compositing, such as a practical prop that must appear in front of the character.
- Capture reference frames for scale and geometry if needed, such as a checkerboard or measured markers.
The “repeatability” comes from matching camera settings and the motion path, not from hoping the tracking will fix differences.
Timing, Sync, and Frame Accuracy
Motion control is sensitive to frame accuracy. If the move is recorded at one frame rate and played back at another, or if the camera starts recording late, the perspective will drift.
To reduce drift:
- Use a shared sync source when possible.
- Confirm that the camera record start aligns with the motion controller start.
- Record a short test move and compare frame-by-frame alignment in a quick composite or overlay.
If you see consistent offsets, fix the sync rather than adjusting in post.
Lens and Focus Consistency Across Passes
Lens changes are obvious, but focus changes can be sneaky. If focus is intended to rack during the move, record the focus behavior so post can match depth of field and sharpness.
If focus is not intended to change, lock it mechanically or use a focus method that resists drift. Even small focus differences can cause edge softness that looks like compositing error.
Example: shooting a plate at fixed focus and then shooting a character pass with autofocus enabled can produce different bokeh and edge contrast. The composite may look “fine” until you compare frames near high-contrast edges.
Mind Map: Motion Control and Camera Data Capture
Example: Matching a CG Background Replacement
A practical scenario: you want to replace a real hallway background with a CG hallway while keeping a practical foreground object sharp.
- Shoot the motion-controlled move with the camera locked to a chosen focal length.
- Capture a clean plate with the same exposure and white balance.
- Shoot the foreground object pass with focus locked to the object plane.
- In post, use the recorded camera path and lens metadata to render the CG hallway from the same perspective.
If the foreground object looks slightly different in scale or edge sharpness, check two things first: lens metadata consistency and sync alignment. Those are the usual culprits before you blame tracking.
Example: Debugging a Subtle Perspective Drift
You notice that the CG background aligns for the first second, then slowly diverges.
A systematic check:
- Verify frame rate match between motion capture and camera recording.
- Confirm camera record start time relative to motion start.
- Check whether any stabilization mode changed between passes.
- Compare focal length and crop mode in the metadata.
Fixing sync or settings usually resolves drift faster than redoing the composite.
8.5 Managing Continuity for VFX Elements and Cleanup Requirements
Continuity for VFX isn’t just “keep it consistent.” It’s a chain of small, verifiable facts that let compositing match what the camera captured. When those facts are missing, the fix usually shows up as extra cleanup work, longer comp time, or visible seams.
Start with a simple rule: every VFX element needs a continuity plan that covers geometry, motion, lighting, and identity. Geometry means where things are in space. Motion means how they move relative to the camera and each other. Lighting means how they look under the scene’s light. Identity means what the element is supposed to be—shape, color, material, and any markings.
Continuity Inputs That Prevent Cleanup
- Reference photography and measurements: Capture angles, distances, and lens metadata for any plate that will be used to rebuild perspective. If a prop is replaced, photograph both versions in the same lighting and position.
- Tracking-friendly surfaces: Prefer textures that remain stable and have enough contrast. If you must shoot a smooth wall, add temporary tracking markers that won’t appear in the final frame or can be removed cleanly.
- Continuity of occlusion: VFX often fails where something passes in front of something else. Plan for who blocks whom, and record those moments with stills or short clips.
- Lighting continuity: Note practical light positions and intensity changes. If a practical lamp flickers, record the pattern so the VFX element can match it.
- Identity continuity: If a character’s costume changes between takes, document it. Even small differences in logos or fabric sheen can force heavy roto and color correction.
A Systematic On-Set Workflow
Use a repeatable loop for each VFX shot: preflight, capture, verify, and log.
- Preflight: Before rolling, confirm what will be replaced, what will be tracked, and what will be cleaned. Decide whether you need a clean plate, an element pass, or both.
- Capture: Record at least one take where the VFX element is absent (for clean plates) and one take where it is present (for interaction). If the element is interactive, capture additional takes for edge cases like partial occlusion.
- Verify: After the take, check that the tracking area is usable and that the VFX element’s boundaries are visible. A quick look at motion blur and exposure consistency saves hours later.
- Log: Write down take numbers, lens settings, and any continuity deviations. “We moved the prop slightly” is not a log; “prop moved 12 cm toward camera, same height” is.
Cleanup Requirements That Compositors Will Actually Need
Cleanup is the work of removing or correcting things that should not be in the final image. For VFX, cleanup typically includes:
- Roto and object removal: Wires, stands, markers, and temporary props.
- Edge stabilization: Fixing halos, fringing, and mismatched motion around the VFX boundary.
- Background restoration: Replacing areas that were blocked during the shoot.
- Continuity corrections: Adjusting exposure, color temperature, and contrast so the VFX element blends without looking “stuck on.”
To reduce cleanup, plan for “clean data.” For example, if you place a tracking marker behind a character, you may need to roto the marker every time the character crosses it. If you instead place the marker on a wall area that stays unobstructed, you trade a small setup change for a large reduction in roto time.
Mind Map: Continuity and Cleanup for VFX
Example: Replacing a Missing Sign in a Moving Shot
You shoot a street scene where a sign is removed for safety. The VFX plan needs a clean plate and a tracked plate.
- During capture: Record one take with the sign absent for background restoration. Record another take with the sign area blocked by a temporary stand so the camera movement is identical.
- Continuity checks: Confirm that the stand doesn’t cast a new shadow pattern that changes across takes. If it does, note it and capture additional takes.
- Cleanup: In comp, remove the stand using roto and replace the sign area using the clean plate. Then match the sign’s brightness to the scene exposure so it doesn’t look like a sticker.
Example: A Character Interacting with a CG Object
A character reaches toward a CG device. The key continuity risk is boundary mismatch during hand contact.
- During capture: Shoot a take with the CG device absent so the background is clean. Shoot a take with a practical placeholder that matches the CG device’s approximate size and position.
- Continuity checks: Ensure the placeholder stays aligned with the intended CG position across takes. If the actor’s hand placement changes, log it and consider additional takes for consistent contact.
- Cleanup: Roto only the placeholder boundaries where needed, then use the tracked interaction to replace the placeholder with the CG device. Stabilize edges around fingers to avoid flicker.
When continuity is managed this way, cleanup becomes targeted rather than reactive. You still do cleanup, but you do it with a clear map of what must be removed, what must be restored, and what must match—frame by frame, not guess by guess.
9. Post Production Workflow from Ingest to Picture Lock
9.1 Organizing Media with Naming, Folder Structures, and Metadata
Good organization is less about neatness and more about reducing decision fatigue. When you can find the right clip in seconds, you edit faster, fix mistakes sooner, and avoid “mystery footage” that nobody remembers recording.
Core Principles for Media Organization
Start with three rules that stay true across cameras, editors, and storage systems:
- Names describe content, not convenience. A filename should tell you what it is and where it belongs.
- Folders mirror the production workflow. If your edit starts from “Picture,” your folders should make that obvious.
- Metadata fills the gaps names can’t. Notes, timecode, and camera settings help when two takes share similar names.
A practical mindset: names help humans scan; metadata helps software search; folder structure helps teams navigate.
Naming Conventions That Scale
Use a consistent pattern for every clip, still image, and audio file. A common approach is:
- ProjectCode: short, unique identifier (e.g.,
LANTERN01) - Scene:
SC01,SC02 - Take:
T01,T02 - Camera:
A,B,C - Roll or Angle: optional when you have multiple records per camera
- Type:
VID,AUD,IMG
Example filenames:
LANTERN01_SC03_T02_CAMA_VID_001LANTERN01_SC03_T02_CAMA_AUD_001LANTERN01_SC03_T02_CAMB_VID_001LANTERN01_SC03_T02_CAMB_AUD_001LANTERN01_SC03_T02_STILLS_IMG_001
Two details prevent common pain:
- Zero-pad numbers (
T02notT2) so sorting stays correct. - Keep the same token order across all file types so search patterns work.
Folder Structures That Match Post Needs
A folder structure should support the way you actually work during post. One reliable layout is to separate source media, work files, and exports.
Example structure:
01_SourceCameraACameraBAudioStills
02_ProxyCameraACameraB
03_EditProjectFilesRenders
04_SoundStemsMixPrep
05_ColorLookDevGrades
06_ExportsPictureMasterSoundMasterDeliverables
This separation prevents accidental edits to originals and makes it clear where to look when someone asks, “Where’s the proxy for Camera A?”
Metadata That Actually Helps
Metadata should answer questions you’ll face later:
- Timecode and sync references: helps align audio and picture.
- Scene and take mapping: links clips to the script breakdown.
- Slate and take notes: captures what changed (new blocking, different lens, alternate dialogue).
- Color and camera identifiers: useful when multiple cameras share similar filenames.
A lightweight approach is enough: store a spreadsheet or CSV alongside the media that maps each take to its files and notes. The key is that the mapping is consistent with the naming tokens.
Mind Map: Organization Workflow
Example: Handling a Reshoot Without Chaos
Suppose you reshoot Scene 03 Take 02. You want the new footage to be findable without overwriting the old.
Use a suffix token for revision, such as R1 for the original and R2 for the reshoot:
LANTERN01_SC03_T02_CAMA_VID_R1_001LANTERN01_SC03_T02_CAMA_VID_R2_001
Then update your mapping table so the editor knows which revision is the “approved” one for the cut. This avoids the classic problem where the editor grabs the wrong take because both look “correct.”
Mind Map: Metadata Fields to Track
Practical Checklist for a Clean Ingest
Before editing begins, confirm these items are true:
- Every file follows the same naming token order.
- Source and proxy are separate and never mixed.
- Scene/take mapping matches the script breakdown.
- Missing or corrupted files are logged with what you do have.
- Exports go to a dedicated folder so the edit project stays stable.
When these basics are consistent, the rest of post production becomes a sequence of decisions rather than a sequence of searches.
9.2 Ingest, Proxy Workflow, and Backup Procedures
Ingest is the moment you turn camera files into an organized editing-friendly library. A good workflow prevents two common problems: editors hunting for missing clips, and post teams discovering too late that audio or timecode didn’t survive the transfer.
Ingest Foundations That Prevent Chaos Later
Start by defining what “done” means for ingest: every clip is present, each clip has a stable name, and the media is stored in a location your editor can access consistently. Use a naming convention that matches the shoot day and camera role, such as SCENE_TAKE_CAM_DATE. If the camera already names files, keep that structure but add a prefix so you can sort quickly in file browsers.
Create a manifest during ingest. A manifest is a simple record of what was copied: source path, destination path, file size, and duration if available. Even a basic spreadsheet or CSV helps you compare “expected” versus “received” without guessing.
Proxy Workflow That Keeps Editors Moving
Proxies are lower-resolution versions of your footage that make scrubbing and timeline playback smoother. The key is to ensure proxies always map back to the original media, so relinking is automatic rather than a scavenger hunt.
A practical approach is to generate proxies in a consistent codec and resolution profile, then store them in a dedicated proxy folder that mirrors the original folder structure. For example, if originals live in:
PROJECT/ORIGINALS/Day01/A001/
then proxies live in:
PROJECT/PROXIES/Day01/A001/
When your NLE supports it, configure the project to prefer proxies for editing and switch to originals for final export. If your NLE doesn’t support automatic switching, keep a clear “proxy edit” versus “final conform” step in your edit checklist.
Backup Procedures That Actually Survive Mistakes
Backups are not one thing; they are layers. A reliable minimum is: one working copy, one backup copy, and one offsite or otherwise separated copy. The goal is to protect against accidental deletion, drive failure, and human error during transfers.
Use a “copy then verify” rule. Copying without verification is like signing a receipt without looking at the items. Verification can be as simple as comparing file sizes and checksums after transfer. If you can’t compute checksums, at least compare file counts and sizes, and spot-check durations.
Adopt a versioned backup strategy for ingest. For example, if you discover a missing folder after the first backup, you don’t overwrite the only backup. You create BACKUP_01, BACKUP_02, and so on, so you can trace what changed.
Mind Map: Ingest, Proxy Workflow, and Backup Procedures
Example: A Clean Ingest for One Shoot Day
Suppose Day01 has two cameras: A001 and B002. You create:
PROJECT/ORIGINALS/Day01/A001/PROJECT/ORIGINALS/Day01/B002/PROJECT/PROXIES/Day01/A001/PROJECT/PROXIES/Day01/B002/
During ingest, you copy each card’s contents into the matching destination folder and generate a manifest entry per file. After copying, you verify file counts and sizes against the manifest. Then you generate proxies using the same proxy profile for both cameras. Finally, you run a quick relink test: open a short sequence that uses clips from both cameras and confirm playback uses proxies.
Example: Backup Recovery Test That Finds Problems Early
After the first backup completes, pick one day folder (like Day01) and perform a restore into a separate test location. Confirm that:
- the folder contains the expected number of clips
- filenames match the manifest destinations
- proxies exist if your edit workflow depends on them
This test is short but catches the most expensive failure mode: “the backup exists” but the restored media is incomplete or misnamed.
Practical Ingest Checklist
- Confirm naming rules and folder structure before copying
- Generate a manifest during ingest
- Copy then verify using counts and sizes, ideally checksums
- Generate proxies with a consistent profile and mirrored structure
- Test a small edit sequence to confirm proxy mapping
- Maintain layered backups with versioned folders
- Restore-test one day folder to validate recovery
9.3 Editing for Story Clarity with Scene Assembly and Beat Alignment
Story clarity is mostly a logistics problem: you assemble the right pieces in the right order, then you make sure each beat lands with the audience’s attention where it needs to be. Beat alignment means the emotional and informational “turns” in the scene happen at the same time as the viewer’s understanding. When those two match, the edit feels inevitable instead of stitched.
Scene Assembly Foundations
Start with the scene’s job. Ask what changes by the end: a decision is made, a lie is exposed, a relationship shifts, or a plan collapses. Then build the scene from the inside out.
-
Choose the anchor performance. Pick the take that best carries the scene’s central objective. If the objective is “get the truth,” the anchor is the moment the character earns or fails to earn that truth.
-
Assemble in beat order, not shot order. Even if coverage is messy, you can still cut to the beat sequence. A beat is a unit of action or realization, usually marked by a change in objective, obstacle, or outcome.
-
Use continuity as a readability tool. Match eyelines, screen direction, and spatial logic so the viewer doesn’t spend attention on “where are we?”
-
Keep transitions purposeful. A cut should either (a) move the action forward, (b) reveal new information, or (c) compress time. If none of those are true, the cut is probably just decoration.
Beat Alignment Method
Treat each beat like a small contract: the edit promises the viewer something, then pays it off immediately.
- Beat start: the moment the character commits to a new objective or the scene introduces a new constraint.
- Beat pressure: the obstacle phase, where the viewer should feel the friction.
- Beat payoff: the outcome moment, where the viewer learns what changed.
A practical way to check alignment is to watch the scene twice: once for performance and once for information. On the second pass, pause mentally at each line of dialogue or action that changes meaning. If the viewer understands the change before the edit shows it, you have a timing mismatch.
Example: Assembling a Confrontation Scene
Imagine a scene where Mara confronts Jules about missing equipment.
- Beat 1: Mara states the problem and sets the objective: “You took it.”
- Beat 2: Jules denies and redirects: “I didn’t. Ask the crew lead.”
- Beat 3: Mara reveals evidence: a photo timestamp.
- Beat 4: Jules’s outcome: silence, then a confession.
Assembly approach:
- Use Mara’s strongest delivery for Beat 1, then cut to Jules for Beat 2 denial.
- For Beat 3, don’t cut away too early. Let the viewer see Mara’s hand move toward the evidence so the reveal feels earned.
- For Beat 4, keep the confession moment clean. If you cut to Mara’s reaction before Jules finishes the confession, the viewer may think the confession failed or was interrupted.
If you have multiple reaction options, choose the one that matches the beat payoff. Reactions are not interchangeable; they belong to specific outcomes.
Mind Map: Scene Assembly and Beat Alignment
Advanced Details That Prevent Confusion
-
Dialogue cut timing. Cut on meaning changes, not on sentence boundaries. If a character’s tone flips mid-sentence, the cut should follow that flip so the viewer tracks the shift.
-
Reaction shot discipline. A reaction shot should either confirm the payoff or show the next objective forming. If it shows neither, it’s a distraction.
-
Beat compression without losing logic. You can shorten pressure beats by trimming pauses, but keep the obstacle-to-payoff sequence intact. If you remove the “why this matters” moment, the payoff lands flat.
-
Coverage fallback strategy. When you lack a clean moment, use a nearby beat-consistent angle rather than forcing a perfect line reading. The viewer forgives imperfect audio if the meaning is clear and the performance intent is readable.
Quick Self-Check Before Moving On
- Can a viewer summarize the scene’s change in one sentence after watching once?
- Do cuts happen at moments of meaning change?
- Are reactions tied to outcomes, not just to other characters’ existence?
- If you mute the scene, does the action still communicate the beat sequence?
When these answers are yes, scene assembly stops being a matter of taste and becomes a matter of clarity—exactly what the audience needs to keep following the story.
9.4 Continuity Checks and Version Control Through Picture Lock
Picture lock is less a single moment and more a controlled stop: the edit is finalized, and every later change must be traceable, intentional, and reversible. Continuity checks and version control are what keep “final” from turning into “final-ish.”
Continuity Checks That Protect Story Logic
Continuity is not only about props and wardrobe. It also covers spatial relationships, timing, and performance continuity—things viewers notice even when they cannot name them.
Start with a checklist that matches your edit structure. For each scene, verify:
- Spatial continuity: eyelines, screen direction, and blocking positions relative to landmarks.
- Temporal continuity: match the duration of actions across cuts, especially when a character’s movement spans multiple shots.
- Performance continuity: gestures, pauses, and emotional beats that must land in the same order.
- Continuity of details: props, wardrobe states, hair, makeup, and visible set dressing.
- Audio continuity: door slams, footsteps, room tone presence, and dialogue overlap behavior.
A practical workflow is to scan the timeline in two passes. First pass is “story logic”: does the scene play coherently from start to end without confusing cause and effect? Second pass is “visual math”: does every cut preserve the same spatial and temporal facts?
Version Control That Makes Changes Auditable
Version control answers three questions: What changed, why it changed, and what it replaced. Without that, you end up with multiple “final” files that behave differently in subtle ways.
Use a naming convention that encodes sequence and status. For example, include reel or episode identifiers, edit type, and version number. Then enforce a rule: only one file is allowed to be the current “picture lock candidate” at a time.
When you generate a new version, capture a short change log tied to the exact timeline segment. A good log entry is specific enough that someone else can locate the issue quickly.
Example change log entries:
- “Scene 12: replaced shot B with take 3; dialogue overlap now matches audio guide; no other timeline changes.”
- “Scene 7: fixed wardrobe continuity on left sleeve; adjusted cut timing by 6 frames to preserve gesture.”
Mind Map: Continuity and Version Control
Advanced Continuity Checks Without Overchecking
Some continuity problems are predictable. For instance, if a character crosses frame between two shots, you must confirm that the crossing direction and speed match the edit’s implied geography. If you cut on a gesture, confirm the gesture’s start and end frames align with the cut points.
Also watch for “continuity by accident.” A prop might be correct in the final shot but wrong in the preceding shot that leads into it. Viewers often remember the lead-in, not the isolated moment.
Version Control Gatekeeping for Picture Lock
Picture lock should include a gate that defines what is allowed after locking. Commonly, you permit only fixes that do not alter story structure: removing obvious artifacts, correcting sync errors, or addressing continuity issues that were missed.
To keep this practical, maintain a rollback path. That means you keep the last approved locked version available and you document each post-lock change as a delta against it. If a fix introduces a new issue, you can revert without guessing.
Example: A Continuity Issue from Timeline to Version
Suppose Scene 9 has a continuity error: a character’s cup is in hand in Shot 1, but in Shot 2 the cup is absent while the dialogue implies they still hold it.
- Mark the issue at the exact timestamp where the cup disappears.
- Confirm whether the problem is performance (hand position), prop continuity (cup swapped), or edit timing (cut occurs before the hand reaches the cup).
- Choose the smallest fix that preserves performance: often it’s a cut timing adjustment or a replacement take.
- Create a new version with a change log: “Scene 9: restored cup continuity by swapping to take with hand contact; adjusted cut by 4 frames.”
- Re-run the two-pass continuity scan for Scene 9 only, then spot-check adjacent scenes for knock-on effects.
Practical Completion Criteria
Picture lock is reached when:
- All marked continuity issues are resolved or explicitly waived with documented rationale.
- The change log for the final version matches the actual timeline differences.
- The locked version can be reproduced from the same media and settings used for the candidate.
When continuity checks and version control work together, the edit stops being a moving target. It becomes a stable reference point that sound, color, and finishing can trust.
9.5 Preparing Exports for Sound Editing Color and Finishing
Exports are where “it looks right on my timeline” becomes “it survives the next tool.” This section turns picture and audio into predictable inputs for sound editing, color, and final finishing by controlling format, naming, timing, and deliverable scope.
Foundational Principles for Reliable Exports
Start with a single source of truth: the locked edit timeline (or a clearly labeled near-lock version). If the picture changes after exports, you want to know exactly what changed and regenerate only what’s affected.
Use consistent frame rate and timecode. If your edit is 23.976 but your export is 24.000, you’ll get drift that forces re-sync work. Treat audio sync as a first-class requirement: export audio with the same start time reference used in the edit.
Keep color management coherent. Even if you plan to grade later, export in a way that preserves the intended baseline. The goal is not “perfect color in the edit,” but “no surprises in the grade.”
Picture Exports for Sound Editing and Color
Export a picture reference that sound editors can trust for timing and spotting. A common approach is a high-quality, edit-friendly codec (or image sequence when required) plus an audio reference track.
For sound editing, you typically need:
- A picture file with stable frame timing
- A reference audio track for dialogue and music placement
- Clear markers for scene boundaries and key moments
For color, you typically need:
- A conform-ready picture reference or sequence
- Metadata that matches the edit timeline (frame rate, resolution, aspect)
- A color-managed baseline that matches the grading workflow
Example Export Checklist
- Confirm timeline frame rate matches project settings.
- Confirm export start time aligns with the timeline start.
- Export picture with the same resolution and aspect ratio as the finishing target.
- Include a slate or burn-in frame count if your pipeline relies on it for conform.
Audio Exports for Sound Editing
Sound editing usually benefits from stems or track-separated exports rather than one mixed file. The exact split depends on how you recorded and organized production audio.
A practical split is:
- Dialogue (cleaned or production reference)
- Music reference
- Effects reference
- Optional guide tracks (scratch vocals, temp VO)
Export audio in a format that preserves sync and avoids unnecessary recompression. Use consistent sample rate and bit depth across deliverables so the sound editor doesn’t have to guess whether a file was resampled.
Example Audio Naming
Use names that encode role, timeline, and version so you can trace provenance:
PROJ_Scene01_DialogueRef_v03.wavPROJ_Scene01_MusicRef_v03.wavPROJ_MasterPictureRef_v03.mov
Finishing-Ready Deliverables and Version Control
Finishing is sensitive to version mismatches. A small change in picture can invalidate audio sync, marker positions, and conform decisions.
Adopt a version rule:
- Increment version when you change picture timing, not just when you tweak audio levels.
- Keep a “picture reference” version and an “audio reference” version aligned to the same timeline.
Also decide what markers travel. If your pipeline uses markers for scene cuts, dialogue start points, or music cues, export them in the format your downstream tools can read, or mirror them with a consistent naming convention.
Mind Map: Export Inputs and Outputs
Validation Workflow That Catches Real Problems
Before sending files downstream, do three checks.
-
Sync spot check: verify dialogue hits at the start of the film and at least two later points where cuts are frequent. If sync is off early, it will usually get worse.
-
Duration and frame count: compare exported duration to timeline duration. A one-frame mismatch can create a conform headache.
-
Tool playback check: open the exported picture and audio in the target environment. If the tool shows dropped frames, wrong aspect ratio, or missing audio, fix it now rather than after sound editing begins.
Integrated Example Workflow
Imagine a short scene export for finishing:
- Export
MasterPictureRef_v03for sound editing with reference audio. - Export dialogue and effects references as separate WAV files for sound editing.
- Export a color baseline reference that matches the conform settings.
- Run sync checks at the first line, a mid-scene cut, and the final beat.
When these three exports share the same timeline reference and version number, the downstream steps become mechanical instead of detective work. That’s the whole point: fewer surprises, faster corrections, and a cleaner handoff between departments.
10. Editing Techniques for Rhythm Emotion and Audience Guidance
10.1 Building Structure Through Scene Transitions and Beat Timing
A film’s structure is not just “what happens,” but how quickly the audience learns what matters. Scene transitions and beat timing are the tools that control that learning. When they’re consistent, the story feels inevitable; when they’re inconsistent, the audience starts guessing whether the film is confused.
Scene Transitions That Preserve Meaning
A transition is a decision about continuity of attention. Before choosing a method, ask what the audience should feel: continuity, contrast, or a deliberate reset.
- Cut for continuity of time and space: Use when the action logically continues and the audience should stay oriented. Example: A character reaches for a phone in shot A, and shot B starts with the phone already in hand.
- Cut for contrast: Use when you want a new emotional register without explaining it. Example: After a tense argument, cut to a quiet kitchen where the same character performs a mundane task.
- Match cut for thematic linkage: Use when two images share a shape, motion, or idea. Example: A hand slams a car door, and the next shot begins with a hand closing a book.
- Dissolve for time passage or memory: Use when you want the audience to accept a shift without tracking exact mechanics. Example: A character stares at a photo, and the image dissolves into the moment the photo was taken.
- Sound bridge for continuity of attention: Keep one audio element across the cut so the audience doesn’t feel “teleported.” Example: A radio host’s voice continues as the visuals change to a new location.
A practical rule: if the transition changes location, time, or emotional tone, the film must compensate by making the new information readable within a beat or two.
Beat Timing That Controls Information Flow
A beat is a unit of change: a decision, realization, refusal, or action that alters the next moment. Timing is how long the audience gets to process that change.
- Fast beats for pressure: Short durations work when the character has limited options. Example: A suspect answers a question, then immediately tries to redirect—no pause to “think,” only to survive.
- Medium beats for negotiation: Give space for responses that carry subtext. Example: Two characters exchange polite lines while each is testing the other’s boundaries.
- Slow beats for consequence: Extend the moment when the story needs the audience to register weight. Example: After a confession, hold on the listener’s face long enough to show the first internal reaction.
To keep timing systematic, track three layers per scene: goal, obstacle, and turn. The goal is what the character wants now. The obstacle is what blocks it. The turn is the moment the scene direction changes.
A Simple Scene Blueprint
Use this sequence to avoid gaps between beats:
- Set the goal clearly within the first beat.
- Introduce the obstacle before the audience relaxes.
- Escalate with a new tactic rather than repeating the same attempt.
- Land a turn where the character’s plan fails or succeeds in a way that changes stakes.
- End with a question that the next scene can answer.
Example: In a scene where a journalist wants an interview, the first beat shows the request. The second beat shows the source refusing. The third beat introduces a tactic: evidence. The turn is the source agreeing but only if the journalist meets a condition. The scene ends with the condition stated, so the next scene can begin with the journalist scrambling to comply.
Mind Map: Structure Through Transitions and Beat Timing
Example: Two Ways to Transition the Same Moment
Same moment: A character receives a text that changes their plan.
-
Option A: Cut with a beat of silence
- Beat 1: The character reads the text.
- Beat 2: Silence while their face registers the change.
- Transition: Cut to the next location where the new plan begins.
- Result: The audience feels the immediate impact.
-
Option B: Sound bridge into the next scene
- Beat 1: The character reads the text.
- Transition: The text notification sound continues under the next shot.
- Beat 2: The next scene starts with the character already moving.
- Result: The audience feels momentum rather than shock.
Both are valid, but they lead to different audience interpretations. The “right” choice depends on whether the story wants the change to land as a realization or as a switch in action.
Putting It Together Without Overengineering
When you plan transitions and beats together, you reduce guesswork on set and in the edit. For each scene, write one sentence for the goal, one for the obstacle, and one for the turn. Then choose a transition that matches what the audience should carry into the next scene: continuity of attention, contrast of emotion, or a guided reset.
10.2 Using Cut Types for Meaning Including Match Cuts and Whip Pans
Cut types are not just editing habits; they are meaning tools. A cut decides what the audience compares, what they ignore, and how quickly they feel oriented. The trick is to choose a cut that supports the scene’s job: clarify geography, track emotion, or compress time without confusing people.
Match Cuts for Visual and Emotional Continuity
A match cut links two shots through a shared element—shape, motion, position, or even rhythm. The audience reads the similarity as a relationship, so the cut can imply continuity, transformation, or cause-and-effect.
The Core Mechanic
A match cut usually works best when three things line up:
- Form: the visual shape is similar (door frame to window frame, hand to hand).
- Motion: movement continues across the cut (a swing that becomes a different swing).
- Timing: the cut lands on a meaningful beat, not mid-sentence unless the story requires it.
Example: Time Compression with a Shape Match
Shot A: A character’s hand closes a book.
Shot B: The next shot shows a hand closing a different book, same framing and similar hand position.
Meaning: the story jumps forward while telling the audience to treat the action as the same “unit” of behavior. If you keep the camera angle and framing consistent, the audience feels the jump as a clean step rather than a jolt.
Example: Cause-and-Effect with a Motion Match
Shot A: A glass tips and spills.
Shot B: A faucet turns on and water pours, matching the arc of the falling liquid.
Meaning: the cut suggests the spill leads to the new situation, even if the location changes. The motion match does the bridge work.
Common Failure Modes
- Too many matches: if you match shape and motion and lighting and wardrobe, the audience may feel the editor “showing off” instead of understanding.
- Wrong beat: cutting a fraction too early or late can make the motion feel broken, which reads as error.
- Unclear intent: if the two shots share a similarity but the story doesn’t benefit from it, the match becomes noise.
Whip Pans for Speed, Direction, and Controlled Disorientation
A whip pan is a fast camera movement that blurs the frame and carries the viewer into the next shot. It’s useful when you want to move attention quickly, reset the viewer’s focus, or imply a sudden shift in information.
The Core Mechanic
A whip pan relies on three elements:
- Direction: the whip points the audience toward the next subject.
- Duration: the whip must be long enough to sell the motion but short enough to keep orientation.
- Landing: the next shot should be stable and readable, often with a clear subject in the center or a strong silhouette.
Example: Attention Shift During a Conversation
Shot A: Two people talk; the listener’s eyes flick toward something off-screen.
Shot B: A whip pan follows the gaze and lands on the object—an approaching car, a dropped package, or a person entering.
Meaning: the whip externalizes attention. The audience doesn’t have to guess what changed; the camera “follows the thought.”
Example: Emotional Snap Without Dialogue
Shot A: Close-up on a character’s face, expression tightening.
Shot B: Whip pan to a wider view revealing the reason—smoke, a threat, or a missing item.
Meaning: the whip acts like a punctuation mark. It can replace a line of explanation, as long as the landing shot clearly answers the emotional question raised in the close-up.
Common Failure Modes
- Whip without a reason: if the story doesn’t need speed or a reset, the whip becomes a distraction.
- Landing that’s too busy: if the next frame is cluttered, the audience spends time searching instead of receiving the intended information.
- Inconsistent direction: if the whip points somewhere illogical relative to the scene geography, viewers feel lost.
Choosing Between Match Cuts and Whip Pans
Use a match cut when the story wants the audience to compare two moments as related. Use a whip pan when the story wants the audience to reorient quickly and accept a shift in attention.
A practical decision rule:
- If the audience should feel continuity or transformation, pick a match cut.
- If the audience should feel a sudden shift of focus, pick a whip pan.
Mind Map: Cut Types and Meaning
Micro-Checklist for Editors
Before you commit to the cut, ask three questions:
- What comparison am I asking the viewer to make? (Match cut.)
- What attention change am I causing? (Whip pan.)
- Does the landing frame answer the question raised by the previous shot?
When those answers are clear, the cut type becomes a precise tool instead of a stylistic gamble.
10.3 Managing Pacing with Duration Targets and Tension Curves
Pacing is how long the audience spends on each unit of story information: a decision, a realization, a threat, a change in power. Duration targets keep those units from drifting, while tension curves make sure the audience knows when to lean forward and when to breathe.
Duration Targets: Turning Time into Story Units
Start by defining what a “unit” is for your film. In dialogue scenes, a unit might be one objective attempt (ask, refuse, counter). In action scenes, a unit might be one escalation (approach, complication, consequence). Once you pick the unit, you can set a duration target that matches the emotional job.
A practical way to set targets is to work at the scene level first, then refine at the beat level.
- Scene target: total runtime for the scene’s story job (setup, confrontation, aftermath).
- Beat target: runtime for each beat’s objective shift.
- Micro target: runtime for the moment of payoff (a reveal line, a door opening, a shot that confirms the plan).
Example: In a two-person confrontation, the scene job is “pressure the truth out of someone.” You might target 6–8 minutes total. Beat 1 (establish objective) 1.5–2 minutes, Beat 2 (resistance) 2–3 minutes, Beat 3 (reversal) 1–2 minutes, Beat 4 (aftermath) 1 minute. If Beat 2 runs long, the scene often feels like it’s arguing with itself instead of moving toward a decision.
Tension Curves: Designing When Pressure Rises and Releases
A tension curve is the pattern of audience uncertainty and stakes. It doesn’t require constant intensity; it requires planned movement. The audience relaxes when they understand what’s happening, then tightens when something changes.
Use three curve components:
- Baseline: the current level of stakes and clarity.
- Increase: new information, a worsening constraint, or a failed attempt.
- Release: confirmation, a temporary win, or a shift to a different problem.
A common mistake is stacking increases back-to-back without a release. That creates “loud but flat” tension: the audience feels busy, not compelled.
Mind Map: Duration Targets and Tension Curves
Integrating Both: Matching Beat Duration to Curve Movement
Once you have targets and a curve, you can check alignment. Each beat should “spend” time in proportion to what the audience needs.
- Increase beats: shorter, more specific, fewer detours. The audience is waiting for the next change.
- Release beats: slightly longer, because understanding needs room. Let the audience register the new reality.
- Payoff micro moments: the shortest and most exact. If you cut away too late, you blur the payoff; if you cut too early, you remove the confirmation.
Example: A character discovers a hidden note. If the discovery beat is 20 seconds but the payoff is delayed by 40 seconds of reaction montage, the curve spikes and then loses its point. Better: keep the discovery beat tight, then give the reaction beat enough time to register meaning.
Advanced Details: Practical Editing Checks
Use three concrete passes on your edit.
- Beat timing pass: mark where each objective attempt begins and ends. Compare actual durations to targets. If a beat is off by more than ~20–30%, decide whether the story job changed or the scene is wandering.
- Curve pass: label each beat as Increase, Baseline, or Release. If you see three Increases in a row, insert a Release beat or restructure the information order.
- Payoff precision pass: identify the top three payoff moments in the scene. Ensure each has a clear lead-in (setup clarity), a clean moment (confirmation), and a controlled exit (no extra questions left unanswered).
Example: A Tension Curve with Duration Targets
Imagine a 7-minute scene where a detective tries to get a witness to admit they saw the suspect.
- 0:00–1:30 Baseline: objective set, stakes introduced.
- 1:30–3:30 Increase: witness resists; new detail appears (a time discrepancy).
- 3:30–4:30 Release: witness partially agrees; the detective gains leverage.
- 4:30–6:00 Increase: witness retracts; a threat enters the room.
- 6:00–7:00 Release: final admission lands; the scene ends with a clear outcome.
The curve rises, releases, rises again, then resolves. The durations support that rhythm: resistance gets time, but the final admission gets precision.
Mind Map: Quick Scene Audit
Pacing improves when time and tension agree. Duration targets prevent drift; tension curves prevent fatigue. Together, they make the edit feel inevitable, not merely fast.
10.4 Sound Driven Editing With Dialogue Music And Effects Integration
Sound-driven editing means you cut picture using what the audience hears, then you make the visuals support that audio logic. Dialogue is the anchor: it carries meaning, timing, and attention. Music and effects guide pacing and spatial understanding, but they should never fight the dialogue for dominance.
Core Principle: Dialogue Leads, Everything Else Serves
Start by identifying the “dialogue spine” of each scene: the lines that must land clearly. When you edit to dialogue, you preserve intelligibility first, then you shape rhythm.
Example: Two characters argue. If you cut on the end of a sentence, the next shot may start late and the audience has to “catch up.” Instead, cut on a consonant or breath that naturally cues the turn, then let the new shot settle by the time the next phrase begins.
Editing to Dialogue Timing Without Making It Robotic
Dialogue timing has three useful layers: performance, breath, and emphasis. You can use all three without turning the edit into a metronome.
- Performance: where the actor changes intent (agreement to refusal, calm to irritation).
- Breath: where the speaker resets, often a clean place for a cut.
- Emphasis: where a key word lands, which should feel intentional even if the cut is subtle.
Practical workflow: assemble a rough cut using longer takes first, then tighten only where clarity or emotional turn requires it. If you cut every line, you risk flattening performance dynamics.
Music Integration That Respects Story Information
Music often signals transitions, but it can also mask dialogue. Treat music like a background character: present, but not in charge.
Use music to:
- Mark scene boundaries when picture alone is ambiguous.
- Smooth uncomfortable cuts by filling the gap between two different visual rhythms.
- Reinforce emotional direction when dialogue is restrained.
Example: A character says, “I’m fine,” while looking away. Keep the dialogue clean and intelligible. Let the music shift under the reaction shot, not during the spoken line, so the audience hears the contradiction rather than the soundtrack.
Effects Integration for Spatial Coherence and Pacing
Effects do two jobs: they establish space and they create momentum. If effects are inconsistent, the audience feels it even when they can’t name it.
Common effects-driven edit cues:
- Footsteps that imply movement through space.
- Room tone changes that indicate a cut or a new location.
- Impact sounds that justify a visual change.
Example: In a hallway scene, you cut from a wide shot to a close-up. If the footsteps continue but the room tone changes abruptly, the cut feels “stuck.” Instead, align the cut with a natural transition in the ambience, such as a door closing or a step landing.
Building a Sound-First Edit Plan
Before fine editing, create a simple map of what must be heard and when.
Mind Map: Sound Driven Editing Inputs
Advanced Technique: Layered Cuts with Intentional Overlap
A strong edit often uses overlap: the audio from the outgoing shot continues briefly into the incoming shot, or vice versa. This reduces the “hard edge” of cuts.
Example: A character finishes a sentence in one shot. Start the next shot slightly before the sentence ends, but keep the dialogue uninterrupted. The incoming shot can show the listener’s reaction while the outgoing line still plays, creating continuity without confusing the dialogue.
Advanced Technique: Managing Competing Transients
Transients are sharp audio events like plosives in dialogue, drum hits, and impacts. If two transients land at the same moment, the audience hears a blur.
Rule of thumb: when a key word includes a strong consonant, avoid placing a music hit or impact peak on the same frame. If you must, adjust the cut so the visual change happens with the dialogue transient, while the music transient lands a fraction earlier or later.
Example: One Scene, Three Edit Passes
Pass 1: Dialogue-only assembly. Keep music muted and effects minimal. Ensure every line is understandable.
Pass 2: Add music under dialogue, then adjust cut points where music would otherwise mask emphasis.
Pass 3: Add effects and ambience, then fix spatial continuity by aligning room tone and movement cues.
This sequence prevents you from chasing problems caused by earlier layers.
Checklist for Dialogue Music and Effects Integration
- Dialogue clarity: no missing words, no rushed overlaps.
- Music level: it supports emotion without covering consonants.
- Effects continuity: footsteps, ambience, and impacts match the implied space.
- Transient management: avoid stacking sharp events on the same moment.
- Cut logic: every cut has an audio reason, even if the reason is subtle.
Mind Map: Decision Rules for Cut Points
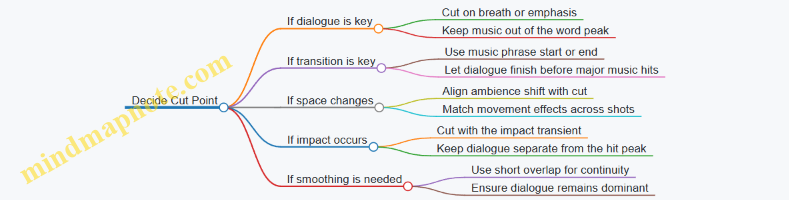
Sound-driven editing is less about cutting to sound effects for their own sake and more about using audio to preserve meaning. When dialogue stays clear, music supports the emotional direction, and effects keep space consistent, the edit feels effortless because the audience never has to work to understand what’s happening.
10.5 Creating Coverage Based Edits With Performance Consistency
Coverage-based editing is the practice of assembling the story from what you actually captured, while keeping performances coherent across angles. The goal is simple: the audience should feel continuity even when the camera changes. The tricky part is that coverage can tempt you to “fix” performance problems with cuts. Instead, you use cuts to preserve the performance you already have.
Foundational Principle: Performance Continuity over Shot Continuity
Start by treating each actor’s performance as the primary timeline. Shot continuity matters, but it’s secondary to whether the character’s intention and energy match from one angle to the next. A practical rule: if the character’s objective changes, you need a cut that supports that change. If the objective stays the same, you should cut in a way that doesn’t reset the actor’s rhythm.
Example: In a scene where a character starts calm, then grows defensive, you should not cut from a calm close-up to a defensive wide shot unless the wide shot includes the same emotional transition at the same moment. If it doesn’t, you either choose a different take or you cut earlier or later so the transition lands cleanly.
Coverage Strategy: Build a “Performance Ladder”
Before you edit, identify the best take for each beat of the scene. Then decide which camera angle will represent each beat. Think of it as a ladder: the wide shot gives geography, the medium shot gives interaction, and the close-up gives intention. You’re not choosing “best shot.” You’re choosing “best beat representation.”
A simple workflow:
- Mark the scene’s beats by intention shifts (ask, resist, concede, threaten, soften).
- For each beat, pick the angle where the actor’s intention is clearest.
- Only then decide where to cut between angles.
Cut Logic: Match the Actor’s Motion and Breath
Most continuity issues come from cutting during a physical or vocal transition. You can reduce those problems by cutting on:
- A completed gesture (hand lowers, body settles)
- A breath boundary (end of a sentence, pause before the next)
- A head turn that already happens in both angles
Example: If the actor looks away mid-sentence in the close-up but looks forward in the wide, cutting on that moment will feel like the character “teleports” attention. If the wide shot has the same look-away, use that moment. If not, cut a beat earlier or later so the attention shift happens inside a single angle.
Handling Mismatched Takes Without Breaking the Scene
Coverage often includes takes where the actor’s timing differs. Your job is to preserve the scene’s emotional timeline, not to force every line to land at the exact same frame.
Use these tools in order:
- Choose the best line delivery for the story beat, even if it means switching angles.
- Time the cut to the sentence boundary rather than the gesture boundary when dialogue is the anchor.
- Use reaction shots as bridges when the primary shot’s performance doesn’t match.
Example: Suppose the close-up has a longer pause before “Fine,” while the wide shot delivers it quickly. If the pause is important for tension, keep the close-up for the pause and use the wide shot for the following action. If the pause isn’t important, prioritize the wide shot’s timing and cut the close-up to match the sentence cadence.
Audio First: Dialogue Continuity Controls the Edit
Even if the visuals match, the audience will notice when dialogue timing jumps. Start by locking dialogue rhythm:
- Align takes so the sentence starts and ends feel consistent.
- Avoid cutting between angles mid-word.
- If you must cut mid-phrase, do it only when the audio waveform and mouth movement both support it.
Example: Two angles record the same line with slightly different room tone. If you cut between them, the noise floor jump can distract. Use a short crossfade or match the room tone so the cut feels like a camera change, not a sound change.
Continuity Checks: The Three Pass Method
Do not rely on one viewing. Use three passes with different questions.
- Performance Pass: Watch only the actor’s face and hands. Ask: does the intention flow naturally?
- Spatial Pass: Watch blocking and eyelines. Ask: does the character’s attention land where it should?
- Rhythm Pass: Watch timing with audio muted or low. Ask: do cuts land at stable moments?
If you find an issue, fix it at the source: swap takes, adjust cut points, or choose a different bridge shot. Don’t keep stacking fixes on top of a broken beat.
Mind Map: Coverage Based Editing with Performance Consistency
Example: A Two-Character Confrontation
Scene: Character A accuses Character B. Coverage includes A close-up, B close-up, and a two-shot.
- Beat 1: A states the accusation.
- Use A close-up for intention clarity.
- Beat 2: B resists.
- Use B close-up, but cut from A to B on the end of A’s sentence.
- Beat 3: A presses harder.
- Use A close-up again, but only if A’s defensive energy matches the moment B’s resistance peaks.
- Beat 4: B relents.
- Use B close-up for the softening moment, then cut to the two-shot for geography as B explains.
If the two-shot shows B relenting earlier than the close-up, don’t cut to it during the resistance phase. Keep the close-up until the relenting beat completes, then use the two-shot as a clean continuation.
Coverage-based editing works when you treat performances as the timeline and shots as the vocabulary. When you cut with intention, breath, and cadence in mind, the edit stops being a patchwork and starts reading like a single continuous moment.
11. Sound Design Music Editing and Mix Preparation
11.1 Sound Editing for Dialogue Cleanup and Effects Assembly
Dialogue editing starts with one goal: make the words understandable without making the editing obvious. That means cleaning the audio so it sounds like a consistent performance, then assembling effects so they support the scene rather than compete with it.
Dialogue Cleanup Foundations
Begin with a quick triage pass. Listen for the big categories of problems: missing syllables, clipping, heavy noise, inconsistent room tone, and background sounds that intrude during key lines. Mark those moments so you don’t “fix” the entire track when only a few seconds need attention.
Next, establish a reference. Pick one clean line from the same take or the same setup and use it as your tonal anchor. If the actor’s voice sounds slightly different across takes, your job is to make the final edit sound intentional, not identical.
Then clean in layers:
- Remove obvious defects first: trim long silences that contain clicks, cut out coughs that overlap consonants, and reduce clipping artifacts when possible.
- Stabilize noise: apply noise reduction carefully, focusing on steady hiss or hum. If the noise reduction creates “underwater” artifacts, reduce the amount and rely more on selective cuts.
- Restore continuity: ensure the voice doesn’t jump in loudness or tone from line to line. Use gain and EQ to match, not to chase perfection.
A practical example: if a character’s line ends with a breath that gets cut off, don’t leave the breath missing. Instead, trim the breath from the same performance moment and crossfade it under the next line so the transition feels like one continuous thought.
Dialogue Assembly and Performance Consistency
Dialogue assembly is where editing choices become storytelling choices. When you cut between takes, match the emotional beat and the mouth movement timing. Even if the audio is technically clean, a mismatch in consonant timing can make the performance feel off.
Use these checks:
- Loudness continuity: keep dialogue within a narrow range so the listener doesn’t constantly adjust.
- Spectral continuity: match brightness and warmth. A line that sounds too “thin” will feel like it belongs to a different scene.
- Room tone continuity: if the background changes abruptly, the cut becomes visible.
Room tone is the quiet glue. If you remove noise too aggressively, you may also remove the sense of space. A common approach is to build a room-tone bed from the cleanest sections around the dialogue, then loop or crossfade it under edits.
Effects Assembly for Clarity and Space
Effects assembly includes production sound elements that support the scene: footsteps, doors, impacts, handling sounds, and environmental layers. The key rule is separation by purpose. Dialogue carries meaning; effects carry context.
Start by grouping effects by timing:
- Transient effects: sharp events like door slams and hits.
- Sustained effects: engines, HVAC, distant traffic.
- Texture effects: subtle movement like fabric rustle or small object taps.
For transient effects, edit for impact. Trim to the moment the event becomes audible, then shape the tail so it doesn’t smear into the next line. For sustained effects, keep them steady and avoid sudden level changes that draw attention.
A concrete example: in a scene where someone speaks near a running sink, you might keep the sink sound present but reduce it during the most intelligible consonants. That’s not “ducking for the sake of ducking”; it’s making sure the listener can parse speech.
Mind Map: Dialogue Cleanup and Effects Assembly
Advanced Details Without the Guesswork
When dialogue must be assembled from multiple takes, treat matching like a checklist. If the voice changes in brightness, match EQ first, then adjust gain. If the voice changes in perceived distance, revisit room tone and reverb consistency rather than only EQ.
For effects, avoid stacking too many layers at once. If the scene has footsteps, a nearby appliance, and distant traffic, choose which one is primary at each moment. Secondary layers should sit lower and change more slowly, so the listener’s attention stays on the dialogue.
Finally, do a “speech intelligibility pass.” Listen at a moderate volume and focus only on consonants and sentence endings. If you can understand the dialogue without strain, the cleanup and assembly are doing their job, and the effects can remain present without becoming the main event.
11.2 Designing Foley and Environmental Layers for Spatial Coherence
Spatial coherence means the soundscape behaves like the world on screen: sources stay anchored to their locations, movement changes level and timing in predictable ways, and the room “agrees” with the visuals. Foley and environmental layers are the tools that make that agreement audible.
Foundational Concepts for Coherent Space
Start by separating three roles. Foley supplies intentional, close-up actions: footsteps, cloth, hand contact, object handling. Environmental layers supply the setting: HVAC hum, distant traffic, birds, water, wind, and room tone. Ambience is the glue that prevents silence from sounding like a recording booth.
A practical rule: if the image shows a physical interaction, Foley handles it; if the image shows a place, environment handles it. When both are present, they must share the same “distance logic.” For example, a character’s footsteps should not sound like they’re in a different room than their dialogue.
Mind Map: Spatial Coherence Checklist
Foley Design That Stays Put
Record Foley with a plan for placement. If a character walks toward camera, the footfalls should grow in level and brightness, not just get louder. A simple way to test: mute everything except footsteps and dialogue. If the footsteps feel like they belong to a different acoustic space, fix the Foley reverb and EQ before adding ambience.
Use layered Foley only when it helps spatial clarity. For footsteps, combine a contact layer (heel/toe), a surface layer (floor texture), and sometimes a secondary layer (shoe squeak or scuff). Keep the surface layer consistent across the scene so the floor doesn’t “change material” mid-walk.
Cloth and hand interactions are often the first place coherence breaks. A jacket rustle that sounds dry and close while the room sounds wet and reflective will feel wrong. Match the cloth’s reverb tail to the environment’s early reflections so the sound seems to originate from the same physical volume.
Environmental Layers That Agree with the Room
Build environment from two components: a bed and details. The bed is steady room tone that supports dialogue intelligibility. Details are slower-moving elements like distant traffic or intermittent wind gusts.
Choose a room tone strategy before you start placing details. In a small room, room tone should be present but not dominant, with a smooth spectrum that doesn’t fight consonants. In a large space, room tone can be more spacious, but keep it consistent so the audience doesn’t feel the camera is cutting between different locations.
When you add distant sounds, treat them as if they have a distance dial. Increase distance by reducing high frequencies and adding more reverb, but keep the reverb character the same. If the reverb changes character, the audience hears a new room even if the visuals didn’t change.
Spatial Coherence Through Reverb and Early Reflections
Reverb is not one knob; it’s a set of behaviors. Early reflections tell the brain about room size and surface placement. Late reverb tells the brain about decay and depth.
A reliable workflow is to create a “space template” for each location. Put dialogue and key Foley through the same reverb template, then fine-tune per source. If dialogue sounds like it’s in a hallway but footsteps sound like they’re in a studio, you’ll see the mismatch immediately once you solo the two.
Movement, Cuts, and Timing
Spatial coherence also depends on edit behavior. When a character crosses the frame, panning should follow their screen position, but timing must follow the cut. If you cut mid-step, you need to decide whether the step belongs to the outgoing shot or the incoming shot. The wrong choice creates a phantom footfall that feels like the character “teleports” acoustically.
For continuous shots, keep ambience movement smooth. If the camera pans, the environment can shift slightly in level and stereo image, but avoid abrupt changes at cut points unless the location truly changes.
Example: Apartment Hallway Scene
A character enters an apartment hallway, walks past a door, and stops to listen.
- Foley: footsteps on tile with a clear contact layer; cloth rustle kept close and then slightly softened as the character turns away.
- Environment bed: low, steady room tone with a gentle high-frequency roll-off so dialogue stays readable.
- Details: a faint refrigerator hum behind one door, introduced only when the character is near that door.
- Reverb template: hallway early reflections applied consistently to dialogue and footsteps; the hum uses the same reverb character but with more distance filtering.
If the character stops, reduce footstep activity instantly, but keep room tone steady. Silence after movement often sounds like a recording artifact, not a pause.
Example: Outdoor Street with Wind and Traffic
A character walks under trees near a busy road.
- Foley: shoe impacts with surface texture; add subtle leaf/branch interactions only when the character brushes foliage.
- Environment bed: wind bed that remains continuous, with level changes tied to camera direction and character proximity.
- Details: traffic pulses that vary slowly; keep them behind dialogue by using consistent distance filtering.
- Coherence check: solo dialogue plus environment. If the dialogue feels “closer” than the footsteps, adjust Foley distance filtering and reverb amount to match.
Practical Quality Checks
Do three quick solos. First, solo Foley and confirm the floor and room match the dialogue. Second, solo environment and ensure the bed doesn’t change character across cuts. Third, solo dialogue plus one Foley element and verify that both share the same early-reflection feel.
When spatial coherence is right, the audience doesn’t notice the sound design. They just stop thinking about where the room is.
11.3 Music Editing for Emotional Support and Narrative Emphasis
Music editing is the part of post production where you make the score behave like a reliable narrator. It should support what the picture already says, strengthen what the dialogue implies, and keep the audience oriented when the story gets busy. The goal is not to make the music “stand out,” but to make it land at the right moments with the right intensity.
Core Principles for Narrative Support
Start with the scene’s job. Ask what the scene must accomplish: reveal information, change power dynamics, reset attention after a cut, or underline a character choice. Then choose music edits that match that job.
A practical rule: edit for transitions, not for bars. If a cut happens on a character’s inhale, the music should usually change with the inhale, even if that means starting a cue slightly off the downbeat. When the edit follows the picture’s timing, the music feels intentional rather than pasted.
Workflow from Picture Assembly to Music Placement
- Mark emotional beats. Use the edit timeline to tag moments like realization, decision, restraint, or release. Keep the tags short: “hesitates,” “chooses,” “lets go.”
- Identify cue functions. For each cue, decide what it does: establish mood, carry tension, soften a reveal, or provide continuity across cuts.
- Create placement drafts. Place cues quickly in rough form, then iterate. Early drafts should prioritize coverage of the beat tags, not perfect musical alignment.
- Refine with micro-edits. Once placement is correct, adjust entry/exit points, remove awkward tails, and smooth overlaps.
Editing Techniques That Actually Matter
1. Entry and exit timing
- If a scene begins with silence, consider delaying the cue until the first meaningful action. For example, if a character opens a door and pauses, start the music on the pause, not on the door movement.
- For exits, avoid cutting music mid-phrase unless the cut demands it. If you must cut mid-phrase, make sure the picture cut is the reason, not the convenience.
2. Crossfades and overlap management Crossfades are useful when the new cue continues the same emotional direction. If the scene’s emotion flips, use a cleaner transition: a hard cut, a brief gap, or a single-note handoff.
Example: In a confrontation, you may fade out a warm theme as the first insult lands, then fade in a tense cue only after the character commits to a response. That keeps the audience from feeling the “wrong” emotion during the argument’s setup.
3. Looping without sounding looped Looping works when the scene’s duration is stable and the loop’s rhythm matches the on-screen pacing. To prevent obvious repetition, edit the loop’s start point to align with a visual beat, and shorten the loop’s tail so the next entry feels like continuation rather than restart.
4. Dynamic range control through edit choices If the music feels too loud, don’t fix it only with volume. Consider trimming frequency-heavy sections, removing long sustained chords during dialogue, or choosing a cue variant with fewer attacks.
5. Dialogue-first editing Dialogue clarity is a constraint, not a preference. When dialogue is dense, keep music either under the speech with minimal rhythmic conflict or step it aside during key words. A common approach is to reduce music density during the first sentence of a reveal, then let it return as the character reacts.
Emotional Emphasis Through Cue Selection and Arrangement
Music editing often involves choosing which part of a cue to use. Treat the cue like a tool with multiple heads.
- Use the cue’s “setup” for anticipation. If the cue has a slow build, start it early enough that the build reaches the moment of decision.
- Use the cue’s “release” for resolution. If the cue resolves harmonically, align that resolution with the character’s action, not with the camera’s movement.
- Use partial instrumentation when you need support without distraction. If a cue’s full orchestration crowds dialogue, use an alternate take or a section with fewer elements.
Mind Map: Music Editing for Emotional Support and Narrative Emphasis
Music Editing Mind Map
Example: Editing a Reveal Scene
Imagine a scene where a character reads a letter, freezes, then chooses to hide the truth. The edit has three beats: scan, realize, decide.
- Place a restrained cue during scan so the audience expects something to land.
- Start the cue’s build on realize, but keep the first strong attack aligned with the freeze frame or the first visible reaction.
- During decide, either switch to a darker variant or thin the arrangement so the character’s choice stays readable. If the character speaks, reduce rhythmic activity under the sentence and let the music return on the reaction beat after the line.
Practical Checklist for Finishing
- Every cue entry has a reason tied to a beat or a cut.
- Music transitions match emotional direction changes.
- Dialogue remains intelligible without constant manual ducking.
- Loops are trimmed so they don’t announce themselves.
- Final pass checks for awkward tails, missing downbeats, and unintended overlaps.
11.4 Preparing Stems and Mix Deliverables for Post Teams
Stems are the “hand-off language” between sound editing, music editing, and final mixing. A good stem package makes it easy to check balance, fix problems, and assemble alternate versions without asking the same questions twice. The goal is not to send everything you recorded; it’s to send what the next person needs, in a predictable structure, with clear naming and timing.
Foundational Principles for Stem Packages
Start with three decisions: what gets separated, how it’s timed, and how it’s labeled.
-
Separation level: Split by function, not by convenience. For example, dialogue should be its own stem even if it came from multiple takes. Music should be separate from effects so mix revisions don’t force rework across layers.
-
Timing reference: Decide whether stems are delivered with the same session start time as the picture edit or with a defined timecode offset. Consistency matters more than the specific choice. If your stems align to the picture timeline, the mixer can drop them in without re-syncing.
-
Labeling rules: Use a naming pattern that encodes project, reel, track type, and version. A mixer should be able to identify the content from the filename alone.
What to Include in Common Deliverables
A practical deliverable set usually includes:
- Dialogue stem: Cleaned dialogue, including any dialogue processing you approved (noise reduction, EQ, de-essing). If you used multiple passes, deliver a single “final approved” dialogue stem plus optional alternates only when requested.
- Music stem: Music as edited for the picture, including any music edits like fades and transitions.
- SFX stem: All non-dialogue sound effects, including room tone beds if they are meant to be mixed as a unit.
- Ambience and room tone stem: Optional but useful when the mixer needs control over background continuity. If you already baked ambience into SFX, don’t duplicate it.
- FX music or special layers: Only if they are meaningfully separate in the mix plan.
- Mix-minus dialogue: Often requested for localization and ADR workflows. It’s dialogue removed from the music+SFX bed, not a random cut.
Naming and Versioning That Prevents Confusion
Use a consistent pattern such as:
PROJECT_SCENE_TAKE_ORIGIN_STEMTYPE_VERSION(or a similar scheme your team already uses)- Include sample rate and bit depth in the delivery manifest or filename suffix.
Versioning should reflect intent:
- v01, v02 for incremental edits
- vFinal only when the content is approved for mix
If you change timing, treat it as a new version even if the audio content is identical.
Export Settings and Technical Checks
Deliver stems in a format that preserves quality and is easy to import. Common choices are WAV with the project sample rate.
Before sending, run checks:
- Peak and clipping: Ensure no unexpected clipping. If you normalized, document it.
- Phase sanity: If you used stereo processing, confirm the stem doesn’t collapse when summed.
- Channel order: Match the expected layout (e.g., stereo L/R). If you deliver 5.1 or 7.1, document channel mapping.
- Duration alignment: Stems should match picture length for the reel or timeline segment.
Example Stem Package for a Single Reel
Assume a reel with dialogue, music, and effects. Deliver:
PROJ_R01_DLG_v03.wavPROJ_R01_MUS_v03.wavPROJ_R01_SFX_v03.wavPROJ_R01_AMB_v02.wav(only if ambience is separated)PROJ_R01_MIXMINUS_DLG_v03.wav(if requested)
Also include a short manifest listing:
- sample rate, bit depth, duration
- timecode start reference
- whether dialogue includes room tone or whether ambience is separate
Mind Map: Stem Content and Delivery Logic
Mind Map: Mix-Minus Dialogue Definition

Case Example: Avoiding a Common Ambience Trap
If you deliver ambience as part of SFX, the mixer might still add ambience again, causing double background and a “thick” sound that feels like the room got bigger. The fix is simple: decide whether ambience is a dedicated stem or embedded in SFX, then follow that rule consistently across the reel.
Deliverable Checklist for Sending
- Dialogue, music, and SFX stems are separated by function
- Stems align to the picture timeline reference
- Filenames and versions follow the agreed pattern
- Export format matches team expectations
- No unexpected clipping or duration mismatch
- Manifest includes sample rate, bit depth, and timecode reference
- Mix-minus dialogue is defined and verified
When these pieces are in place, the next team can focus on balance and creative decisions instead of detective work. That’s the quiet advantage of good stem preparation: fewer surprises, faster iteration, and cleaner handoffs.
11.5 Quality Checks for Loudness Clipping and Phase Issues
Quality checks in sound finishing are mostly about preventing two kinds of “invisible damage”: level problems that distort, and timing problems that cancel. Both can survive editing and still ruin the final mix, so checks should be systematic and repeatable.
Foundational Concepts for Reliable Checks
Start with what you’re checking. Clipping happens when a waveform exceeds the allowed headroom, producing flattened peaks and harsh artifacts. Phase issues happen when two signals that should reinforce instead partially cancel due to polarity flips, misalignment, or frequency-dependent delays.
A practical rule: treat loudness and phase as separate failure modes. Fixing one without checking the other can create a new problem, like making dialogue louder while accidentally increasing cancellation in the low mids.
Loudness Clipping Checks
-
Confirm your monitoring chain. If your speakers or headphones distort, you’ll chase ghosts. Use a known-safe monitoring level and trust the meters more than your ears.
-
Inspect peak and true-peak behavior. Peak meters show sample-level maxima; true-peak meters estimate inter-sample peaks that can still clip after encoding. If true-peak exceeds your target, reduce gain or re-balance the mix.
-
Scan the full timeline, not just loud moments. Clipping can appear in short transients like consonants, impacts, or cymbal tails. A quick pass through the entire program catches issues that don’t show up in a single scrub.
-
Use clip indicators and waveform review. Look for flat-topped peaks or sudden spikes. Then identify the source: dialogue, music, effects, or a specific stem.
-
Fix at the source when possible. If a single stem clips, reduce that stem’s level or adjust its processing. If the mix clips only after summing, rebalance stems and consider gentle limiting with transparent settings.
Phase Issue Checks
Phase problems often show up as thin dialogue, hollow vocals, weak bass, or “center” sounds that feel unstable. The key is to test both polarity and alignment.
-
Check polarity and routing. A polarity flip can happen during stem export, bus routing, or re-import. Compare the same signal on two channels: if one is inverted, the center may disappear.
-
Perform correlation checks. Correlation meters help you see whether stereo content is reinforcing or canceling. Values near zero suggest cancellation; strongly positive values suggest coherence.
-
Use mono compatibility tests. Collapse the mix to mono and listen for missing elements. If dialogue or bass vanishes, you likely have phase cancellation between channels.
-
Inspect alignment for multi-mic dialogue and stereo effects. If two mics capture the same source with different distances, small timing differences can create comb filtering. Nudge alignment or adjust delay to restore reinforcement.
-
Check frequency-dependent phase. Some phase issues are not obvious in time-domain alignment because they vary by frequency. If the sound is “present but wrong,” try targeted EQ moves while also verifying delays.
Integrated Workflow for Finishing
Do checks in this order: (1) peak/true-peak safety, (2) mono compatibility, (3) correlation and polarity sanity, (4) targeted source fixes, (5) re-check loudness after phase corrections.
This order matters because phase fixes can change perceived loudness, and loudness fixes can mask phase artifacts. The goal is to end with a mix that is safe on meters and stable in listening.
Mind Map: Loudness Clipping and Phase Quality Checks
Example: Dialogue That Gets Thinner After Limiting
You notice dialogue sounds clear in stereo but loses body in mono. True-peak is also slightly above target. First, reduce the limiting threshold or stem gain so true-peak is safe. Then run a mono check again. If the body returns, the limiter was masking a cancellation problem; if it doesn’t, you likely have misalignment between dialogue mics or a polarity inversion. Fix alignment or polarity at the dialogue stem level, then re-run true-peak checks.
Example: Bass That Disappears in the Center
A stereo music bed has strong low end in stereo, but in mono the bass seems to vanish. Correlation may hover near zero. Collapse to mono and listen to the bass line alone. If it disappears, check whether the low-frequency content is out of phase between left and right, often due to stereo widening or mismatched delays. Reduce stereo width for the low band or adjust delays so the bass reinforces. After that, confirm true-peak safety again because changing low-frequency balance affects peak behavior.
Practical Checklist for Final Verification
- True-peak is within the delivery limit across the full timeline.
- No stem shows obvious clipping artifacts when soloed.
- Mono mix retains dialogue intelligibility and low-end presence.
- Correlation indicates coherent reinforcement for the main mix.
- Polarity and routing are consistent across exported stems.
- After any phase fix, loudness safety is re-verified.
12. Color Finishing and Distribution Strategy for Release
12.1 Color Workflow from Dailies to Final Grade with Consistent Targets
A color workflow is easiest to manage when you treat it like a pipeline with checkpoints. Dailies are the first checkpoint; final grade is the last. Everything in between should preserve intent: exposure and contrast should be consistent, skin tones should stay believable, and the overall look should match the story’s needs without drifting scene to scene.
Foundational Targets for Consistency
Start by defining targets before you touch creative grading. Targets are not “style.” They are measurable guardrails.
- Exposure intent: Decide how bright highlights should feel and how deep shadows should sit. For example, if a character’s face is meant to be readable in a dim room, you’ll protect midtone detail rather than crush it.
- White balance intent: Choose a reference for neutral areas. A common practice is to identify a “neutral” prop (gray card, white shirt, or painted wall) and keep its temperature stable across shots.
- Contrast intent: Determine whether contrast is meant to be gentle or punchy. A practical test is to compare two frames from different scenes: if the same material (like a concrete wall) looks flatter or harsher, your contrast target is drifting.
- Skin tone intent: Pick a skin tone range and stick to it. If one actor’s face shifts from warm to cool across scenes, the audience notices even when they can’t name why.
Dailies Ingest and Calibration
Dailies often arrive with a technical baseline: a default transform, basic noise reduction, and a standardized viewing setup. Your job is to confirm that baseline is stable.
- Verify viewing conditions: Ensure your monitor brightness and contrast are set consistently. If your display is too bright, you’ll grade too dark; if it’s too dim, you’ll grade too bright.
- Check color space and gamma: Confirm the dailies are interpreted correctly in your grading tool. A mismatch can make blacks look lifted or highlights clip early.
- Spot-check representative shots: Don’t grade everything at once. Review a few shots from each lighting setup: daylight exteriors, interior practicals, mixed lighting, and any special cases like night scenes.
Example: If an interior scene shot with warm practicals looks gray in dailies, you might be seeing a white balance mismatch rather than a lighting problem. Fixing interpretation early prevents chasing the wrong issue later.
Building a Repeatable Scene-to-Scene Workflow
A consistent workflow usually has three layers: technical normalization, look development, and shot-level refinement.
- Technical normalization: Bring exposure and white balance into alignment. Use scopes to avoid guessing.
- If skin is too red, check whether the overall temperature is off or whether saturation is being pushed.
- If shadows are noisy or muddy, adjust exposure first before applying heavy contrast.
- Look development: Apply the creative intent across the sequence. Keep it restrained at first.
- Example: Suppose the story wants “cool evenings.” Instead of making everything blue, you can cool the shadows while keeping skin near the same temperature.
- Shot-level refinement: Handle outliers without breaking the look.
- Example: A shot with a different lens flare behavior might need a slightly different highlight rolloff, but the skin target should remain consistent.
Using Scopes and Reference Frames
Scopes are your reality check. Use them to confirm that your adjustments are doing what you think.
- Waveform helps you track exposure and highlight behavior. If two scenes meant to match show different highlight levels, your rolloff target is inconsistent.
- Vectorscope helps you monitor hue and saturation. If skin shifts hue, it often shows up as a movement away from your expected skin cluster.
- False color (if available) can quickly reveal whether faces are sitting in the intended exposure zone.
Reference frames prevent “death by good intentions.” Pick a few frames that represent the grade’s intent: one hero close-up, one mid shot, one exterior. When you start a new scene, compare against these references.
Managing Versions and Picture Lock
Color work is sensitive to editorial changes. When picture lock approaches, you want fewer surprises.
- Lock the edit timeline first: If cuts change frequently, your grade may need repeated rework.
- Use version discipline: Keep a clear chain of versions so you can return to a known state if a late change causes drift.
- Re-check continuity after changes: Even a small trim can alter perceived exposure because the surrounding shots set expectations.
Example: If a scene is shortened by removing a brighter establishing shot, the next shot may feel darker even if its exposure is unchanged. A quick re-check against your reference frames fixes the perception.
Final Grade Consistent Targets and Deliverables
Before exporting, confirm that the final grade meets the same targets you defined at the start.
- Consistency pass: Review the entire sequence in order, not just scene-by-scene. Drift often appears over time.
- Highlight and shadow sanity: Ensure highlights don’t clip unexpectedly and shadows retain intended detail.
- Deliverable checks: Confirm the export settings match the intended viewing pipeline so the grade doesn’t shift due to incorrect interpretation.
A good final grade feels boring in the best way: skin stays stable, exposure intent holds, and the look reads consistently from the first shot to the last.
12.2 Correcting Exposure White Balance and Contrast for Story Readability
Story readability starts before you touch contrast sliders. Your goal is simple: make the audience’s eyes and ears do the intended job. Exposure, white balance, and contrast are the three levers that determine whether skin tones look believable, whether details survive in shadows and highlights, and whether the image communicates the scene’s emotional temperature.
Foundations of Exposure White Balance and Contrast
Exposure correction answers: “Is the scene too dark, too bright, or uneven?” White balance correction answers: “Does neutral look neutral, and do colors feel consistent across shots?” Contrast correction answers: “Do important details separate clearly from their surroundings?”
A practical order helps avoid chasing your tail. First, normalize exposure so the overall luminance sits where it belongs. Second, correct white balance so color relationships are stable. Third, shape contrast so faces, props, and key background elements read without crushing.
Exposure Correction for Readable Images
Begin with a waveform or histogram view and a quick check of a few reference points: faces, bright practicals, and any large dark areas. If faces are underexposed, skin will look muddy even after you fix white balance. If highlights are clipped, no later contrast adjustment can restore lost detail.
Use a scene-level approach. For example, if a night interior is consistently dark across multiple takes, adjust exposure globally rather than pushing individual shots until they match by accident. Then refine locally only where the story needs it, such as lifting a character’s face while keeping the background moody.
Concrete example: a character stands near a window. The window is bright, the face is dim. If you expose for the face, the window may blow out; if you expose for the window, the face becomes a silhouette. The readable solution is usually to preserve window detail and lift the face enough to keep facial features visible, even if the window remains brighter than the face.
White Balance Correction for Consistent Color Meaning
White balance is not just about making the image “warmer” or “cooler.” It’s about keeping known neutrals neutral and keeping lighting logic consistent. If a scene uses tungsten practicals, the overall palette should reflect that source. If daylight dominates, the palette should follow daylight behavior.
Start with neutrals. Find areas that should be gray or white: a wall, a shirt, a prop card, or a neutral costume fabric. If none exist, use skin tone as a secondary reference, but remember skin can shift with exposure and contrast.
Concrete example: two shots of the same character in the same location. Shot A looks slightly green; Shot B looks slightly magenta. If the story requires the character to feel calm and grounded, you don’t want the color cast to suggest a different lighting environment. Correct white balance so the character’s skin and the background surfaces match the intended lighting.
Contrast Shaping for Clarity Without Flattening
Contrast has multiple meanings: global contrast, local contrast, and micro-contrast. Global contrast affects the overall separation between light and dark. Local contrast affects edge definition and texture. Micro-contrast affects how “present” details feel, especially in skin and fabric.
A common mistake is to increase global contrast to make the image look punchier, then discover that faces lose shape. Instead, aim for separation where it matters. If the scene is meant to feel tense, you may increase separation around the subject while keeping the background from turning into a featureless blur.
Use a targeted workflow: adjust global contrast first to establish overall separation, then apply local contrast carefully to edges and textures. If you see halos around subjects, your local contrast or sharpening is too aggressive.
Concrete example: in a dim hallway, the character’s face should remain readable, but the walls should not turn into a noisy gray. You can maintain readability by lifting the midtones slightly, then controlling the contrast so the face retains shape while the background stays subdued.
Mind Map: Exposure White Balance Contrast Workflow
Practical Example: Matching a Daylight Interior Sequence
Imagine three shots of a conversation near a window. Shot 1 is slightly underexposed, Shot 2 has a cooler cast, and Shot 3 has reduced contrast so the characters blend into the background.
- Exposure: raise Shot 1 until facial features are visible without clipping the window. Confirm with the waveform that highlights remain intact.
- White balance: neutralize Shot 2 by sampling a neutral wall area and adjusting tint to remove the green/magenta shift. Recheck skin tone after exposure is stable.
- Contrast: restore Shot 3’s separation by adjusting midtone contrast and local contrast around faces and key props. Keep the background from gaining too much detail.
When these three levers are corrected in this order, the sequence reads as one continuous lighting environment, and the audience can focus on the dialogue rather than the image’s internal inconsistencies.
12.3 Creative Grading for Mood Continuity and Character Separation
Creative grading is where story intent becomes visible. Mood continuity keeps the audience oriented across scenes, while character separation ensures each person reads clearly even when they share the same location, lighting, and camera settings.
Core Concepts for Mood Continuity
Mood is not just “color.” It’s the combined behavior of exposure, contrast, color balance, and texture across time. Start by choosing a baseline look for the scene’s emotional temperature. For example, a tense negotiation might use slightly lower midtone contrast and a cooler balance, while a private confession might lift the midtones and soften the highlights.
Continuity means you repeat the same decisions consistently, not the same numbers. If Scene 14 is graded with a cooler skin balance and slightly compressed highlights, Scene 15 should inherit those traits unless the script changes the emotional situation. A practical rule: when the story mood changes, change one or two grading levers clearly, and keep the rest stable.
Character Separation Without Breaking Believability
Character separation is about readability and hierarchy. The audience should know who matters in the frame without squinting at subtle color differences.
Use three tools in order:
- Value placement: Make the primary character’s face sit in a readable range. If everyone is equally bright, the eye has no job.
- Color bias: Nudge skin toward a consistent direction per character. Keep it natural by limiting saturation changes and avoiding extreme hue shifts.
- Edge and contrast: Use local contrast or edge contrast to separate silhouettes from backgrounds, especially when characters wear similar wardrobe colors.
A common mistake is to “color-code” characters too strongly. If Character A is always orange and Character B is always teal, the look becomes a costume. Instead, separate them by small, consistent biases that match the lighting logic of the scene.
Workflow for Consistent Looks Across Scenes
Begin with a reference frame from each major story state. A story state is a combination of location lighting and emotional intent, such as “daylight exterior with guarded conversation” or “interior night with relief.”
Then build a look stack:
- Global balance: White balance and overall contrast shape.
- Skin management: A controlled skin tone path that avoids clipping and hue drift.
- Scene-specific shaping: Local adjustments for windows, practical lights, or motivated shadows.
- Character separation layer: Targeted corrections for faces and key wardrobe elements.
Keep the stack order stable. If you change the order, you may fix one problem while reintroducing another, like adjusting skin after you’ve already pushed saturation into the highlights.
Mind Map: Mood Continuity and Character Separation
Example: Same Location, Different Emotional States
Imagine two scenes in the same office. Both use overhead fluorescents, but one is hostile and the other is calm.
For the hostile scene, keep the global balance slightly cool, reduce midtone contrast, and let shadows roll off more gently so faces don’t look harshly lit. For the calm scene, warm the midtones a touch, increase midtone contrast slightly, and preserve highlight behavior so the office lighting still feels consistent. The room stays the same; the emotional “pressure” changes.
Example: Two Characters Under One Practical Light
A night interior with a single lamp creates strong color spill. If both characters stand near the lamp, their faces may converge into the same warm tone.
First, correct global balance so the lamp’s color is believable. Next, manage skin separately: keep Character A’s skin slightly closer to neutral by reducing the warm bias in midtones, while Character B keeps a bit more of the lamp’s warmth. Finally, add a subtle local contrast lift on the primary character’s face so the eye lands there even when wardrobe colors match the background.
Advanced Details That Actually Matter
- Highlight roll-off: If highlights clip differently between scenes, the mood changes even when color balance looks consistent.
- Shadow hue drift: Cool shadows can make a scene feel distant; warm shadows can make it feel intimate. Decide per story state and keep it steady.
- Skin hue stability: Track skin hue across cuts. If skin shifts hue when the camera exposure changes, the audience reads it as “wrong lighting,” even if the scene is technically correct.
- Local vs global discipline: Use local corrections for character separation, but keep global corrections responsible for the scene’s overall mood. Otherwise you end up with characters that look edited onto the footage.
Mood continuity and character separation work best when they share the same logic: the world’s lighting stays coherent, and the grade guides attention through controlled value, color, and contrast decisions.
12.4 Deliverables Preparation with Aspect Ratio and Codec Requirements
Deliverables preparation is where your edit becomes something other people can reliably play, review, and archive. Aspect ratio and codec requirements are the two biggest sources of “it looks fine on my machine” problems, so treat them like constraints, not preferences.
Aspect Ratio Fundamentals That Prevent Rework
Start by confirming the intended frame geometry for the delivery. Aspect ratio is not just a number; it determines how the image is cropped or letterboxed, which affects composition and readability.
- Choose the master framing first. If your project is shot for a 2.39:1 theatrical look but your timeline is 16:9, you must decide whether to crop, reframe, or create a separate deliverable timeline.
- Decide between letterbox and crop. Letterboxing preserves the full frame but adds black bars; cropping removes content. For dialogue-heavy scenes, cropping can cut off gestures that support performance clarity.
- Lock safe areas. Even if you deliver multiple aspect ratios, keep key action inside a consistent “safe” region. A practical approach is to mark a conservative center area and ensure faces and important props stay inside it.
Example: You finish a 2.39:1 master. For a 16:9 platform deliverable, you create a 16:9 version by either (a) letterboxing the 2.39:1 image with black bars or (b) reframing to avoid losing heads and hands. If the platform expects “fill,” you reframe; if it expects “fit,” you letterbox.
Codec Requirements as Playback Contracts
A codec is the compression method that determines how the file is stored and decoded. Different codecs can change perceived sharpness, motion smoothness, and color fidelity.
- Match the delivery spec exactly. If a distributor requests a specific codec container combination, follow it. “Close enough” often fails during automated checks.
- Use consistent frame rate. If your timeline is 23.976 fps, don’t deliver at 24 fps unless the spec says so. Frame rate mismatches can cause audio drift or cadence issues.
- Control bit depth and color range. If the spec calls for a particular color space or range, comply. Incorrect range handling can crush blacks or lift shadows, making the grade look wrong.
Example: A client requests an H.264 MP4 for review. If you export with a different level setting than requested, the file may still play, but their system might reject it or transcode again, changing quality.
Deliverable Matrix Planning
Create a deliverable matrix before exporting. This prevents last-minute “we need one more version” chaos.
- List each required output. Include aspect ratio, resolution, frame rate, codec/container, audio format, and target duration.
- Define the master source. Decide whether all exports come from the same picture-locked timeline or from separate aspect-ratio timelines.
- Assign responsibility for checks. One person verifies technical compliance; another verifies visual correctness.
Example deliverable matrix (conceptual):
- Theatrical master: 2.39:1, 4K, 23.976 fps, specified codec, 5.1 audio.
- Online review: 16:9, 1080p, 23.976 or 24 fps per spec, stereo audio.
- Trailer cut: 2.39:1, 4K or 1080p, same frame rate as master, stereo.
Export Settings That Stay Consistent Across Versions
Consistency matters because small export differences compound across multiple deliverables.
- Use the same color pipeline. If you grade to a target and then export with different color management settings, you can get mismatched contrast between versions.
- Keep audio aligned. Confirm that audio starts at the same timecode position in every export. A one-frame shift is easy to miss and annoying to fix.
- Verify duration and frame count. Automated systems often check exact frame counts. If your edit ends on a different frame boundary, you can fail compliance.
Mind Map: Deliverables Preparation Workflow
Practical Validation Checklist
Before you send anything, do a short, repeatable test.
- Open the file in at least two players to catch decoder quirks.
- Check letterbox bars and crop edges for accidental shifts.
- Scrub through fast motion to ensure compression artifacts don’t obscure faces or text.
- Confirm audio format and loudness targets if the spec includes them.
Example: A 16:9 review export looks slightly softer than the 2.39:1 master. The difference is expected if the review spec uses a higher compression ratio. What you must verify is that faces remain readable and dialogue remains intelligible, not that every pixel matches the theatrical master.
Example: Two Aspect Ratios from One Picture Lock
If you deliver both 2.39:1 and 16:9, the cleanest approach is to keep picture lock consistent and only change framing rules.
- For letterboxed 16:9, export the same 2.39:1 image with bars added.
- For reframed 16:9, create a second timeline that preserves performance intent and keeps key elements inside safe areas.
Either way, document which method you used so reviewers know what to expect when they compare versions.
12.5 Distribution Planning with Screeners Press Kits and Release Deliverables
Distribution planning is mostly paperwork with a purpose: it ensures the right people receive the right files in the right format, with enough context to use them correctly. Start by separating “what the audience sees” from “what partners need to promote and evaluate the film.” Then build a delivery checklist that matches each recipient’s role.
Core Delivery Categories
- Screeners for evaluation: versions meant for reviewers, festival programmers, and internal stakeholders. These typically prioritize playback reliability and consistent audio levels.
- Press kits for coverage: materials that let journalists and partners write accurately without chasing details. This includes stills, credits, and plot summaries.
- Release deliverables for exhibitors and platforms: versions designed for technical compliance, including specific codecs, aspect ratios, and audio configurations.
A practical rule: if a file is meant to be watched, confirm it plays end-to-end on at least two different systems. If a file is meant to be published, confirm it is readable without contacting your team.
Screeners Planning
Define screener tiers so you don’t send the same thing everywhere. For example:
- Festival screener: include a clear runtime, aspect ratio, and subtitle track status. If subtitles are present, verify they match the dialogue timing.
- Reviewer screener: include a short synopsis and contact info in a companion document, not inside the video.
- Internal screener: include a version with production notes or timecode markers if your team uses them for feedback.
Before exporting, decide your audio target. A common approach is to keep dialogue intelligible and avoid sudden loudness jumps between scenes. Then do a quick “walkthrough test”: play the first 30 seconds, a mid-film dialogue scene, and the loudest effects moment.
Press Kit Essentials
A press kit should answer questions a writer will ask in the first five minutes. Keep it structured and consistent.
- One-page facts sheet: title, logline, runtime, genre, rating, release year, and key credits.
- Cast and crew list: names spelled exactly as they should appear in print.
- Short and long synopsis: short for quick context, long for plot clarity.
- Stills package: high-resolution images with captions and credit lines.
- Poster and key art: include safe margins and confirm legibility at common thumbnail sizes.
Example: if your film includes a character with a distinctive name, ensure the spelling matches the script title page and the final credits. Writers copy what you provide, and corrections later are avoidable.
Release Deliverables Checklist
Treat deliverables like a contract with the receiving system.
- Video: confirm aspect ratio, frame rate, and resolution match the request.
- Audio: specify channel layout (for example, stereo vs. 5.1) and ensure the mix is not clipped.
- Subtitles and captions: include the correct language codes and verify line breaks.
- Metadata: provide title, year, and track labels in the required format.
- File naming: use a consistent convention so recipients can sort deliveries without opening folders.
A simple naming scheme reduces mistakes: Title_Year_DeliveryType_Aspect_Audio_Version.ext. Keep version numbers aligned across video, subtitles, and any companion documents.
Mind Map: Distribution Workflow
Example: Delivery Package Structure
Use a folder layout that mirrors how recipients think.
01_ScreenersScreener_Festival_v03.mp4Screener_Festival_Subtitles.srt
02_PressKitFactsSheet.pdfSynopsis_Short.txtSynopsis_Long.txtStills/KeyArt/
03_ReleaseDeliverablesVideo/Audio/Subtitles/Metadata/
README_DeliverySummary.txt
The readme should state what’s inside, the runtime, and any known limitations (for example, “subtitles included in SRT only”). If you don’t know a detail, leave it blank rather than guessing.
Mind Map: Readme Delivery Summary
Final Packaging Discipline
Before sending anything, run a last pass: confirm every referenced file exists, every subtitle file matches the correct video version, and every credit name matches the final approved spelling. This is the unglamorous part that prevents the most common distribution headaches—wrong version, missing subtitle, or a press kit that says one thing while the film says another.