Frontend System Design and Senior Developer Interview Guide
1. Introduction to Frontend System Design
1.1 Understanding Frontend System Design Fundamentals
Frontend system design is about structuring the client-side part of a web application so it can deliver a smooth, maintainable, and scalable user experience. It involves deciding how components interact, how data flows, and how the system handles user input and external data. At its core, frontend system design balances user interface complexity, performance, and maintainability.
What is Frontend System Design?
Frontend system design is the process of planning and organizing the architecture of the user-facing part of an application. It covers:
- Component structure and hierarchy
- State and data management
- Communication with backend services
- Performance considerations
- Responsiveness and accessibility
The goal is to create a system where features can be added or changed with minimal friction, and where the user experience remains consistent and fast.
Key Elements of Frontend System Design
Let’s break down the main elements with a mind map:
Components and Their Role
Components are the building blocks of the UI. Good design encourages small, focused components that do one thing well. This makes it easier to test, reuse, and maintain code.
Example: Consider a button component. Instead of hardcoding styles and behavior everywhere, you create a reusable <Button> component that accepts props for label, click handler, and style variants. This approach reduces duplication and centralizes changes.
State Management Basics
State represents the data that drives the UI. Managing state effectively is crucial to avoid bugs and ensure predictable behavior.
- Local state lives inside a component and affects only that component.
- Global state is shared across multiple components, often managed with libraries or context.
- Side effects include asynchronous operations like API calls or timers.
Example: A shopping cart app might keep the list of items in global state so multiple components (cart summary, product list) can access and update it.
Data Flow Patterns
How data moves through the system affects complexity and maintainability.
- Unidirectional data flow means data moves in one direction, typically from parent to child components. This simplifies reasoning about state changes.
- Bidirectional data flow allows two-way binding but can introduce complexity.
- Event-driven architectures use events to decouple components.
Example: React uses unidirectional data flow, where parent components pass props down, and children notify parents of events via callbacks.
Performance Considerations
Performance impacts user satisfaction directly. Frontend design should minimize unnecessary rendering and resource loading.
- Use rendering optimization techniques like memoization.
- Apply code splitting to load only what’s needed.
- Implement caching strategies for API responses.
Example: Lazy loading images below the fold reduces initial load time.
Communication with Backend
Frontend systems interact with backend services to fetch or send data.
- Handle API integration with clear error handling.
- Use WebSockets for real-time updates.
- Design retry and fallback mechanisms.
Example: A chat app uses WebSockets to receive messages instantly, while falling back to polling if the connection drops.
User Experience Factors
Good frontend design ensures the app feels responsive and accessible.
- Provide immediate feedback on user actions.
- Ensure keyboard and screen reader accessibility.
- Design for different screen sizes.
Example: A form shows inline validation errors as the user types, preventing frustration.
Summary Mind Map
Frontend system design is the foundation for building applications that are easier to maintain and scale. Understanding these fundamentals helps senior developers make informed architectural decisions and communicate their reasoning clearly during interviews and in real projects.
1.2 Key Components of Modern Frontend Architectures
Modern frontend architectures are built from several core components that work together to deliver a seamless user experience. Understanding these components helps in designing systems that are scalable, maintainable, and performant. Below, we break down the main parts and illustrate their relationships with mind maps and practical examples.
Core Components Overview
- UI Components: The building blocks of the user interface, usually encapsulated and reusable.
- State Management: Controls how data flows and changes across the application.
- Routing: Manages navigation and URL handling.
- Data Layer: Interfaces with backend services and APIs.
- Build & Tooling: Processes and bundles code for deployment.
- Performance Optimization: Techniques to improve load times and responsiveness.
- Testing: Ensures reliability and correctness.
Mind Map: High-Level Frontend Architecture
UI Components
UI components are the visible parts of the application. They should be designed to be reusable and isolated. For example, a button component should handle its own styles and behavior but accept props to customize its appearance or action.
Example:
function Button({ label, onClick }) {
  return <button onClick={onClick}>{label}</button>;
}
Separating components into presentation (concerned with how things look) and container components (concerned with how things work) helps maintain clarity and separation of concerns.
State Management
State management governs how data is stored and updated. Local state is confined to a component, while global state is shared across the app.
Example:
- Local state: A toggle switch’s on/off status managed within the component.
- Global state: User authentication status shared across multiple pages.
Using libraries like Redux or Context API helps manage complex state flows.
Mind Map: State Management Types
Routing
Routing controls which UI components render based on the URL. Client-side routing allows for single-page applications (SPAs) to navigate without full page reloads.
Example:
Using React Router:
<BrowserRouter>
  <Switch>
    <Route path="/home" component={HomePage} />
    <Route path="/profile" component={ProfilePage} />
  </Switch>
</BrowserRouter>
Nested routes allow complex layouts, such as a dashboard with sub-sections.
Data Layer
The data layer connects the frontend to backend services. It handles fetching, caching, and updating data.
Example:
Fetching data with fetch:
async function fetchUser(userId) {
  const response = await fetch(`/api/users/${userId}`);
  return response.json();
}
GraphQL clients like Apollo provide declarative data fetching and caching.
WebSockets enable real-time data updates, useful in chat or live feed applications.
Build & Tooling
Modern frontend projects rely on build tools to transform and bundle code.
- Module Bundlers (Webpack, Vite) combine files into optimized bundles.
- Transpilers (Babel, TypeScript) convert modern syntax to browser-compatible code.
- Linters (ESLint) enforce code quality.
Example:
A Webpack config might specify entry points, loaders for CSS and images, and plugins for optimization.
Performance Optimization
Performance is critical. Techniques include:
- Code Splitting: Break code into chunks loaded on demand.
- Lazy Loading: Load components or images only when needed.
- Caching: Store assets and data locally to reduce network requests.
Example:
React’s React.lazy and Suspense enable lazy loading:
const LazyComponent = React.lazy(() => import('./HeavyComponent'));

function App() {
  return (
    <Suspense fallback={<div>Loading...</div>}>
      <LazyComponent />
    </Suspense>
  );
}
Testing
Testing ensures the frontend behaves as expected.
- Unit Tests: Test individual components or functions.
- Integration Tests: Test interactions between components.
- End-to-End Tests: Simulate user flows in a browser.
Example:
Using Jest and React Testing Library to test a button click:
test('calls onClick when clicked', () => {
  const handleClick = jest.fn();
  render(<Button label="Click me" onClick={handleClick} />);
  fireEvent.click(screen.getByText('Click me'));
  expect(handleClick).toHaveBeenCalledTimes(1);
});
Understanding these components and how they fit together is essential for designing robust frontend systems. Each piece plays a role in creating applications that are easy to develop, maintain, and scale.
1.3 Role of a Senior Frontend Developer in System Design
A senior frontend developer plays a pivotal role in shaping how a frontend system is designed, built, and maintained. This role extends beyond writing code to include architectural decisions, collaboration, and mentoring. The responsibilities often blend technical expertise with strategic thinking.
Core Responsibilities
- Architectural Planning: Defining the structure of the frontend application, choosing frameworks, libraries, and design patterns that align with project goals.
- Performance Considerations: Ensuring the system is optimized for speed, responsiveness, and scalability.
- Code Quality and Maintainability: Establishing coding standards, enforcing best practices, and setting up testing strategies.
- Cross-team Collaboration: Coordinating with backend engineers, designers, product managers, and QA to align frontend architecture with overall system requirements.
- Mentorship and Leadership: Guiding junior developers, conducting code reviews, and fostering a culture of continuous improvement.
Mind Map: Senior Frontend Developer Responsibilities
Example: Choosing a State Management Approach
Imagine a project where the frontend needs to handle complex user interactions and real-time updates. A senior developer evaluates options like Redux, Context API, or MobX. They consider the team’s familiarity, scalability, and debugging ease. After analysis, they recommend Redux for its predictable state container and middleware support, and design the store structure accordingly. This decision impacts maintainability and future feature integration.
Balancing Technical and Non-Technical Skills
While technical decisions are crucial, a senior frontend developer must also communicate effectively. They translate complex technical concepts into understandable terms for stakeholders. They negotiate trade-offs between feature delivery speed and code quality, ensuring sustainable development.
Mind Map: Skills Beyond Coding
Example: Leading a Design Review Meeting
During a design review, a senior developer identifies potential performance bottlenecks in a proposed UI component. They suggest alternatives that reduce re-renders and improve accessibility. By presenting data and examples, they help the team reach a consensus that balances user experience and technical feasibility.
In summary, the senior frontend developer acts as a bridge between code and strategy. They ensure the frontend system is robust, efficient, and aligned with business goals while fostering a productive team environment.
1.4 Common Challenges and How to Approach Them
Frontend system design is full of practical challenges that test both your technical skills and your ability to balance trade-offs. Here, we break down some of the most frequent issues you’ll encounter and suggest clear, example-driven approaches to handle them.
Challenge 1: Managing Complexity in Large Codebases
As projects grow, so does complexity. Without clear boundaries, your code can become tangled, making maintenance and scaling difficult.
Approach: Adopt modular design and clear separation of concerns early. Use component-driven development where each UI piece is self-contained.
Example: In a large dashboard app, split the UI into widgets like charts, tables, and filters. Each widget manages its own state and API calls, reducing interdependencies.
Mind Map: Managing Complexity
Challenge 2: State Management Across Components
Sharing and synchronizing state between components can quickly become confusing, especially with asynchronous data.
Approach: Choose a state management pattern that fits the app size and complexity. For small apps, React’s Context API or hooks might suffice; for larger apps, Redux or similar libraries provide structure.
Example: In an e-commerce site, keep the shopping cart state centralized using Redux to ensure all components reflect updates instantly.
Mind Map: State Management
Challenge 3: Performance Bottlenecks
Slow rendering, janky animations, or sluggish interactions frustrate users and can cause drop-offs.
Approach: Profile your app to identify bottlenecks. Use techniques like memoization, virtualization, and debouncing to reduce unnecessary work.
Example: For a long list of messages, implement windowing (e.g., react-window) to render only visible items, cutting down DOM nodes and improving scroll performance.
Mind Map: Performance Optimization
Challenge 4: Cross-Browser and Device Compatibility
Different browsers and devices interpret CSS and JavaScript differently, causing inconsistencies.
Approach: Test early and often on target browsers. Use feature detection and polyfills when necessary. Stick to widely supported standards.
Example: Use CSS Grid with fallback flexbox layouts for older browsers, ensuring the layout remains functional.
Mind Map: Cross-Browser Compatibility
Challenge 5: Handling Asynchronous Data and API Failures
APIs can be slow, unreliable, or return unexpected data, which can break the UI or degrade user experience.
Approach: Implement robust error handling and loading states. Use retries or fallback data when appropriate.
Example: In a weather app, show a spinner while fetching data, display a user-friendly error message if the API fails, and cache the last successful response for offline use.
Mind Map: Async Data Handling
Challenge 6: Balancing Feature Velocity and Code Quality
Pressure to deliver features quickly can lead to technical debt and fragile code.
Approach: Establish coding standards and automated testing early. Use code reviews to maintain quality without slowing down progress.
Example: Set up unit tests for critical components and require peer reviews before merging new features.
Mind Map: Feature Velocity vs Quality
These challenges are common but manageable with clear strategies and disciplined practices. The key is to anticipate issues, communicate trade-offs, and apply solutions that fit the context of your project and team.
1.5 Example: Designing a Scalable Dashboard Application
Designing a scalable dashboard application requires careful consideration of architecture, data flow, performance, and user experience. Let’s walk through a practical example, breaking down the key components and decisions involved.
Step 1: Define Core Requirements
Before coding, clarify what the dashboard needs to do. Typical requirements might include:
- Display multiple widgets with real-time data
- Support user customization (adding/removing widgets)
- Handle large data volumes efficiently
- Responsive layout for desktop and mobile
- Fast initial load and smooth updates
Step 2: High-Level Architecture Mind Map
This map helps visualize the main parts and their relationships.
Step 3: Component Design
Each widget is a self-contained component. For example, a line chart widget might:
- Fetch data from the API or subscribe to a WebSocket
- Maintain its own loading and error states
- Allow configuration (time range, metrics)
Example:
function LineChartWidget({ widgetId, config }) {
  const [data, setData] = React.useState(null);
  const [loading, setLoading] = React.useState(true);

  React.useEffect(() => {
    fetchData(config).then(response => {
      setData(response);
      setLoading(false);
    });
  }, [config]);

  if (loading) return <div>Loading...</div>;
  return <Chart data={data} />;
}
This keeps each widget independent and reusable.
Step 4: State Management
Centralize global state (e.g., user preferences, widget layout) using a store like Redux or Zustand. Widget-specific state can remain local to reduce complexity.
Example:
// Global store example
const useDashboardStore = create(set => ({
  widgets: [],
  layout: {},
  addWidget: widget => set(state => ({ widgets: [...state.widgets, widget] })),
  updateLayout: layout => set({ layout }),
}));
This separation helps scalability and maintainability.
Step 5: Data Handling and Real-time Updates
Dashboards often require live data. Use WebSockets or Server-Sent Events for push updates. Combine with caching to avoid redundant requests.
Example:
const socket = new WebSocket('wss://example.com/data');
socket.onmessage = event => {
  const update = JSON.parse(event.data);
  updateStoreWithNewData(update);
};
Widgets subscribe to relevant slices of the store to update only when necessary.
Step 6: Performance Considerations
- Code Splitting: Load widgets on demand to reduce initial bundle size.
- Virtualization: For lists or tables with many rows, render only visible items.
- Memoization: Use
React.memoanduseMemoto avoid unnecessary re-renders.
Example:
const MemoizedWidget = React.memo(LineChartWidget);
Step 7: Layout and Responsiveness
Use a grid system or CSS Flexbox/Grid to allow dynamic rearrangement and responsiveness.
Example Mind Map:
Implement drag-and-drop with libraries like react-beautiful-dnd or custom handlers.
Step 8: User Preferences and Persistence
Store user settings locally or on the backend to maintain state across sessions.
Example:
// Save layout to localStorage
useEffect(() => {
  localStorage.setItem('dashboardLayout', JSON.stringify(layout));
}, [layout]);
Summary Mind Map
This example outlines a practical approach to building a dashboard that can grow in complexity without becoming unmanageable. Each piece is designed to be modular, efficient, and user-friendly.
2. Designing Scalable and Maintainable Frontend Architectures
2.1 Modular Design Patterns and Componentization
Modular design and componentization are foundational to building maintainable and scalable frontend systems. They help break down complex interfaces into manageable, reusable pieces. This section explains core concepts, patterns, and practical examples to illustrate how to apply modular design effectively.
What is Modular Design?
Modular design means structuring your frontend codebase into distinct, loosely coupled units. Each module encapsulates a specific piece of functionality or UI, exposing a clear interface and hiding internal details. This separation reduces complexity and improves code reuse.
Why Componentization?
Componentization is a specific form of modular design focused on UI elements. Components are self-contained building blocks that manage their own state, markup, and styles. They can be combined to form larger interfaces.
Mind Map: Core Concepts of Modular Design
Common Modular Design Patterns
-
Container-Presenter Pattern
- Container components handle data fetching and state.
- Presenter components focus on UI rendering.
- Example: A
UserListContainerfetches users, passes data toUserListfor display.
-
Higher-Order Components (HOCs)
- Functions that take a component and return an enhanced component.
- Useful for cross-cutting concerns like logging or theming.
-
Render Props
- Components accept a function as a prop to control what to render.
- Allows sharing code between components with different UI.
-
Hooks (in React)
- Encapsulate reusable logic in functions.
- Promote modularity by separating logic from UI.
Mind Map: Componentization Patterns
Practical Example: Modularizing a Todo Application
Suppose you are building a Todo app. Instead of one large file, you split it into components:
TodoApp(container)TodoList(presenter)TodoItem(presenter)AddTodoForm(presenter)
TodoApp handles state and logic:
function TodoApp() {
  const [todos, setTodos] = React.useState([]);

  const addTodo = (text) => {
    setTodos([...todos, { id: Date.now(), text, completed: false }]);
  };

  const toggleTodo = (id) => {
    setTodos(todos.map(todo => todo.id === id ? { ...todo, completed: !todo.completed } : todo));
  };

  return (
    <div>
      <AddTodoForm onAdd={addTodo} />
      <TodoList todos={todos} onToggle={toggleTodo} />
    </div>
  );
}
TodoList renders the list:
function TodoList({ todos, onToggle }) {
  return (
    <ul>
      {todos.map(todo => (
        <TodoItem key={todo.id} todo={todo} onToggle={onToggle} />
      ))}
    </ul>
  );
}
TodoItem handles individual item UI:
function TodoItem({ todo, onToggle }) {
  return (
    <li
      onClick={() => onToggle(todo.id)}
      style={{ textDecoration: todo.completed ? 'line-through' : 'none', cursor: 'pointer' }}
    >
      {todo.text}
    </li>
  );
}
AddTodoForm manages input:
function AddTodoForm({ onAdd }) {
  const [input, setInput] = React.useState('');

  const handleSubmit = (e) => {
    e.preventDefault();
    if (input.trim()) {
      onAdd(input.trim());
      setInput('');
    }
  };

  return (
    <form onSubmit={handleSubmit}>
      <input value={input} onChange={e => setInput(e.target.value)} placeholder="Add todo" />
      <button type="submit">Add</button>
    </form>
  );
}
This separation makes each component focused and testable. Changes to input handling won’t affect the list rendering, and vice versa.
Mind Map: Todo App Component Structure
Best Practices for Modular Design and Componentization
- Single Responsibility: Each module or component should do one thing well.
- Clear Interfaces: Define explicit inputs (props) and outputs (events or callbacks).
- Avoid Deep Nesting: Keep component hierarchies shallow to reduce complexity.
- Reusability: Build components that can be reused in different contexts.
- Stateless vs Stateful: Prefer stateless components when possible; keep state at higher levels.
- Consistent Naming: Use clear, descriptive names for components and modules.
Summary
Modular design and componentization reduce complexity by breaking frontend systems into manageable parts. Using patterns like container-presenter separation and hooks encourages clean, reusable code. Concrete examples, like the Todo app, show how to apply these principles in practice. Keeping components focused and interfaces clear leads to easier maintenance and better scalability.
2.2 State Management Strategies with Practical Examples
Managing state in frontend applications is a core challenge, especially as complexity grows. State refers to any data that influences the UI or behavior of your app. This can include user input, server responses, UI toggles, or even application-wide settings. Choosing the right strategy depends on the app’s size, complexity, and team preferences.
Types of State
Before jumping into strategies, it helps to categorize state:
- Local UI State: Component-specific data like toggles, form inputs, or modal visibility.
- Shared State: Data shared across multiple components, such as user authentication status or theme settings.
- Server State: Data fetched from APIs that needs to be cached or synchronized.
- URL State: Information encoded in the URL, like query parameters or route paths.
Mind Map: State Management Overview
Strategy 1: Local Component State
The simplest form of state management lives inside components, typically using hooks like useState in React. This is ideal for data that does not need to be shared.
Example: A toggle button that shows or hides a menu.
function MenuToggle() {
  const [isOpen, setIsOpen] = React.useState(false);
  return (
    <>
      <button onClick={() => setIsOpen(!isOpen)}>
        {isOpen ? 'Close Menu' : 'Open Menu'}
      </button>
      {isOpen && <nav>Menu Items Here</nav>}
    </>
  );
}
This approach keeps state close to where it’s used, minimizing complexity.
Strategy 2: Context API for Shared State
When multiple components need access to the same data, React’s Context API can provide a lightweight global store without adding external dependencies.
Example: Sharing a user’s theme preference across the app.
const ThemeContext = React.createContext('light');

function ThemeProvider({ children }) {
  const [theme, setTheme] = React.useState('light');
  return (
    <ThemeContext.Provider value={{ theme, setTheme }}>
      {children}
    </ThemeContext.Provider>
  );
}

function ThemedButton() {
  const { theme, setTheme } = React.useContext(ThemeContext);
  return (
    <button
      style={{ background: theme === 'dark' ? '#333' : '#eee' }}
      onClick={() => setTheme(theme === 'dark' ? 'light' : 'dark')}
    >
      Toggle Theme
    </button>
  );
}
Context works well for simple shared state but can become unwieldy if the state shape grows complex or updates are frequent.
Strategy 3: State Management Libraries (Redux, MobX, Zustand)
For larger applications, dedicated libraries help organize state and side effects.
- Redux: Centralizes state in a single store with strict rules for updates via actions and reducers.
- MobX: Uses observable data and reactions, allowing more direct mutation.
- Zustand: A minimalistic store with hooks-based API.
Example: Using Redux to manage a todo list.
// actions.js
const ADD_TODO = 'ADD_TODO';
function addTodo(text) {
  return { type: ADD_TODO, payload: text };
}

// reducer.js
function todosReducer(state = [], action) {
  switch (action.type) {
    case ADD_TODO:
      return [...state, { id: Date.now(), text: action.payload, completed: false }];
    default:
      return state;
  }
}

// store.js
const store = Redux.createStore(todosReducer);

// Component
function TodoApp() {
  const [input, setInput] = React.useState('');
  const todos = ReactRedux.useSelector(state => state);
  const dispatch = ReactRedux.useDispatch();

  function handleAdd() {
    if (input.trim()) {
      dispatch(addTodo(input));
      setInput('');
    }
  }

  return (
    <>
      <input value={input} onChange={e => setInput(e.target.value)} />
      <button onClick={handleAdd}>Add Todo</button>
      <ul>
        {todos.map(todo => (
          <li key={todo.id}>{todo.text}</li>
        ))}
      </ul>
    </>
  );
}
Redux enforces a predictable state flow but introduces boilerplate. MobX and Zustand offer alternatives with less ceremony.
Strategy 4: Server State Management
Server state requires synchronization with backend data. Libraries like React Query or SWR handle caching, background updates, and stale data.
Example: Fetching and displaying a list of users with React Query.
import { useQuery } from 'react-query';

function UsersList() {
  const { data, error, isLoading } = useQuery('users', () =>
    fetch('/api/users').then(res => res.json())
  );

  if (isLoading) return <div>Loading...</div>;
  if (error) return <div>Error loading users</div>;

  return (
    <ul>
      {data.map(user => (
        <li key={user.id}>{user.name}</li>
      ))}
    </ul>
  );
}
This approach abstracts away manual caching and refetching logic.
Strategy 5: URL State
Sometimes state is best stored in the URL to enable bookmarking or sharing. This includes query parameters or route segments.
Example: Filtering a product list by category via URL query.
import { useLocation, useHistory } from 'react-router-dom';

function useQuery() {
  return new URLSearchParams(useLocation().search);
}

function ProductFilter() {
  const query = useQuery();
  const history = useHistory();
  const category = query.get('category') || 'all';

  function setCategory(newCategory) {
    query.set('category', newCategory);
    history.push({ search: query.toString() });
  }

  return (
    <select value={category} onChange={e => setCategory(e.target.value)}>
      <option value="all">All</option>
      <option value="books">Books</option>
      <option value="electronics">Electronics</option>
    </select>
  );
}
URL state is useful for deep linking but requires synchronization with internal state.
Mind Map: State Management Strategies
Summary
- Use local state for isolated UI concerns.
- Use Context API for simple shared state without heavy tooling.
- Use state management libraries when the app grows in complexity or requires advanced features like middleware.
- Use server state libraries to handle asynchronous data fetching and caching.
- Use URL state to keep the app’s state shareable and bookmarkable.
Choosing the right strategy often means combining several approaches. For example, local state for form inputs, Context for user settings, Redux for complex global data, and React Query for server data. Understanding these options and when to apply them is key to building maintainable and scalable frontend systems.
2.3 Handling Side Effects and Asynchronous Data Flows
Handling side effects and asynchronous data flows is a fundamental part of frontend system design. Side effects are operations that interact with the outside world or modify state outside the local function scope, such as API calls, timers, logging, or DOM manipulations. Managing these effectively ensures your application remains predictable, maintainable, and performant.
Understanding Side Effects
Side effects differ from pure functions, which always return the same output for the same input and cause no observable changes outside their scope. In frontend applications, side effects typically include:
- Fetching data from a server
- Writing to local storage
- Updating the DOM outside the framework’s control
- Setting timers or intervals
- Subscribing to events or external data streams
Proper handling means isolating side effects and controlling when and how they execute.
Asynchronous Data Flows
Asynchronous operations don’t complete immediately and often involve callbacks, promises, or async/await syntax. Managing these flows requires coordination to avoid race conditions, memory leaks, or inconsistent UI states.
Mind Map: Side Effects and Async Data Flow Overview
Common Patterns for Handling Side Effects
-
Use Effect Hooks (React example)
useEffectruns after render and is ideal for side effects.- Cleanup functions prevent leaks (e.g., unsubscribing).
-
Middleware in State Management
- Redux middleware like
redux-thunkorredux-sagahandles async logic outside components.
- Redux middleware like
-
Custom Hooks or Services
- Encapsulate side effects in reusable functions.
-
Observables and Streams
- RxJS or similar libraries manage complex async flows with operators.
Example: Fetching Data with useEffect and Cleanup
import React, { useState, useEffect } from 'react';

function UserProfile({ userId }) {
  const [user, setUser] = useState(null);
  const [error, setError] = useState(null);

  useEffect(() => {
    let isMounted = true; // flag to avoid setting state on unmounted component

    async function fetchUser() {
      try {
        const response = await fetch(`/api/users/${userId}`);
        if (!response.ok) throw new Error('Network response was not ok');
        const data = await response.json();
        if (isMounted) setUser(data);
      } catch (err) {
        if (isMounted) setError(err.message);
      }
    }

    fetchUser();

    return () => {
      isMounted = false; // cleanup to prevent state update after unmount
    };
  }, [userId]);

  if (error) return <div>Error: {error}</div>;
  if (!user) return <div>Loading...</div>;

  return <div>{user.name}</div>;
}
This example shows:
- Side effect (fetching data) isolated inside
useEffect. - Cleanup function prevents state updates if the component unmounts before fetch completes.
- Error handling inside async function.
Mind Map: Async Data Flow with useEffect
Managing Side Effects in Redux with Middleware
Redux itself is synchronous, so async side effects require middleware.
- redux-thunk: Allows action creators to return functions (thunks) that dispatch actions asynchronously.
- redux-saga: Uses generator functions to manage side effects declaratively.
Example with redux-thunk:
// Action creator with thunk
function fetchUser(userId) {
  return async (dispatch) => {
    dispatch({ type: 'USER_FETCH_REQUEST' });
    try {
      const response = await fetch(`/api/users/${userId}`);
      const data = await response.json();
      dispatch({ type: 'USER_FETCH_SUCCESS', payload: data });
    } catch (error) {
      dispatch({ type: 'USER_FETCH_FAILURE', error: error.message });
    }
  };
}
This keeps side effects out of components and centralizes async logic.
Mind Map: Redux Async Side Effects
Handling Cancellation and Race Conditions
When multiple async requests can overlap, cancellation or ignoring stale responses is necessary.
Example with AbortController:
useEffect(() => {
  const controller = new AbortController();

  async function fetchData() {
    try {
      const response = await fetch('/api/data', { signal: controller.signal });
      const data = await response.json();
      setData(data);
    } catch (err) {
      if (err.name === 'AbortError') {
        // Request was aborted
        return;
      }
      setError(err.message);
    }
  }

  fetchData();

  return () => controller.abort();
}, []);
This prevents state updates from outdated requests.
Mind Map: Cancellation and Race Conditions
Summary
Handling side effects and asynchronous data flows requires isolating side effects, managing their lifecycle, handling errors, and preventing race conditions. Using hooks like useEffect, middleware in state management, and cancellation techniques keeps your frontend predictable and responsive. Clear separation of concerns and thoughtful cleanup are key to maintainable code.
This section provides foundational patterns and examples that senior developers should understand and apply during system design and interviews.
2.4 Code Splitting and Lazy Loading for Performance Optimization
Code splitting and lazy loading are techniques aimed at improving the initial load time of frontend applications by breaking the codebase into smaller chunks and loading them on demand. Instead of delivering the entire JavaScript bundle upfront, these strategies allow the browser to fetch only the necessary code for the current view, deferring other parts until they are needed.
What is Code Splitting?
Code splitting is the process of dividing a large bundle into smaller pieces, often called chunks. These chunks can then be loaded independently. This reduces the amount of JavaScript the browser has to parse and execute initially.
Mind Map: Code Splitting
Example:
Imagine a single-page application (SPA) with three routes: Home, Profile, and Settings. Without code splitting, the entire app’s JavaScript is bundled into one large file. With route-based code splitting, each route’s code is split into separate chunks. When a user visits the Home page, only the Home chunk loads. If they navigate to Profile, the Profile chunk loads dynamically.
// React example with dynamic import
import React, { Suspense, lazy } from 'react';
import { BrowserRouter as Router, Route, Switch } from 'react-router-dom';

const Home = lazy(() => import('./Home'));
const Profile = lazy(() => import('./Profile'));
const Settings = lazy(() => import('./Settings'));

function App() {
  return (
    <Router>
      <Suspense fallback={<div>Loading...</div>}>
        <Switch>
          <Route exact path="/" component={Home} />
          <Route path="/profile" component={Profile} />
          <Route path="/settings" component={Settings} />
        </Switch>
      </Suspense>
    </Router>
  );
}

export default App;
Here, each route component is loaded only when the user navigates to that route.
What is Lazy Loading?
Lazy loading is the technique of loading resources only when they are needed. In frontend development, this often means deferring the loading of JavaScript modules, images, or other assets until they are required by the user interaction or viewport.
Mind Map: Lazy Loading
Example:
Continuing from the previous example, lazy loading is implemented via the React.lazy() function combined with Suspense. This defers loading the component’s code until it is actually rendered.
Another example is lazy loading images:
<img src="placeholder.jpg" data-src="large-image.jpg" alt="Example" class="lazy" />

<script>
  if ('IntersectionObserver' in window) {
    const lazyImages = document.querySelectorAll('img.lazy');
    const observer = new IntersectionObserver((entries, observer) => {
      entries.forEach(entry => {
        if (entry.isIntersecting) {
          const img = entry.target;
          img.src = img.dataset.src;
          img.classList.remove('lazy');
          observer.unobserve(img);
        }
      });
    });
    lazyImages.forEach(img => observer.observe(img));
  } else {
    // Fallback: load all images immediately
    document.querySelectorAll('img.lazy').forEach(img => {
      img.src = img.dataset.src;
      img.classList.remove('lazy');
    });
  }
</script>
This script loads images only when they enter the viewport, saving bandwidth and improving perceived performance.
Combining Code Splitting and Lazy Loading
These two techniques often work hand-in-hand. Code splitting creates the chunks, and lazy loading determines when to fetch them.
Mind Map: Combined Approach
Example:
In a Vue.js app, you can define async components that are loaded lazily:
const AsyncComponent = () => import('./MyComponent.vue');

export default {
  components: {
    AsyncComponent
  }
}
This defers loading MyComponent.vue until it is actually rendered.
Best Practices
- Split by Route or Feature: Focus on splitting code around user navigation points or major features.
- Use Dynamic Imports: Modern bundlers support dynamic
import()syntax, which is the standard way to split code. - Provide Loading Feedback: Use placeholders or spinners to inform users while chunks load.
- Preload Critical Chunks: For routes or components likely to be visited next, consider preloading to reduce wait time.
- Handle Errors Gracefully: Network failures can cause chunk loading to fail; implement fallback UI or retry logic.
- Monitor Bundle Sizes: Avoid creating too many tiny chunks, which can increase overhead.
Summary
Code splitting and lazy loading are practical ways to improve frontend performance by reducing the initial JavaScript payload and loading resources only when needed. They require thoughtful application design and tooling support but can significantly enhance user experience, especially in large applications.
2.5 Example: Building a Modular E-commerce Frontend
When designing a modular e-commerce frontend, the goal is to break down the application into manageable, reusable parts that can evolve independently. This approach improves maintainability, scalability, and collaboration across teams.
Core Modules in a Modular E-commerce Frontend
Let’s start by identifying the key modules:
- Product Catalog
- Product List
- Product Details
- Filters & Sorting
- Shopping Cart
- Cart Overview
- Cart Item Management
- User Account
- Authentication
- Order History
- Checkout
- Payment Processing
- Shipping Details
- Shared Components
- Buttons
- Modals
- Notifications
- Utilities
- API Client
- State Management
- Form Validation
Each module should encapsulate its own logic and UI, exposing only necessary interfaces to other parts of the app.
Mind Map: Module Relationships
Example: Product Catalog Module
The Product Catalog module is a good place to start. It includes product listing, details, and filtering.
- Product List Component fetches and displays a paginated list of products.
- Product Details Component shows detailed information when a product is selected.
- Filters & Sorting Component allows users to narrow down results.
Each component should be independent but communicate via shared state or props.
// ProductList.jsx
import React, { useEffect, useState } from 'react';
import { fetchProducts } from '../utils/apiClient';

function ProductList({ filters, onSelectProduct }) {
  const [products, setProducts] = useState([]);

  useEffect(() => {
    fetchProducts(filters).then(setProducts);
  }, [filters]);

  return (
    <div>
      {products.map(product => (
        <div key={product.id} onClick={() => onSelectProduct(product)}>
          <h3>{product.name}</h3>
          <p>{product.price}</p>
        </div>
      ))}
    </div>
  );
}

export default ProductList;
This component is focused on a single responsibility: fetching and displaying products based on filters.
Mind Map: Product Catalog Component Interaction
State Management
For state, a centralized store (like Redux or Context API) can hold the current filters and selected product. This keeps components decoupled but synchronized.
// FilterContext.js
import React, { createContext, useState } from 'react';

export const FilterContext = createContext();

export function FilterProvider({ children }) {
  const [filters, setFilters] = useState({ category: '', priceRange: [0, 1000] });

  return (
    <FilterContext.Provider value={{ filters, setFilters }}>
      {children}
    </FilterContext.Provider>
  );
}
Components consume this context to read or update filters without tight coupling.
Example: Shopping Cart Module
The Shopping Cart module manages cart items and totals.
- Cart Overview lists items with quantities and prices.
- Cart Item Management allows updating quantities or removing items.
// CartContext.js
import React, { createContext, useReducer } from 'react';

const initialState = { items: [] };

function cartReducer(state, action) {
  switch (action.type) {
    case 'ADD_ITEM':
      return { items: [...state.items, action.payload] };
    case 'REMOVE_ITEM':
      return { items: state.items.filter(item => item.id !== action.payload) };
    case 'UPDATE_QUANTITY':
      return {
        items: state.items.map(item =>
          item.id === action.payload.id ? { ...item, quantity: action.payload.quantity } : item
        )
      };
    default:
      return state;
  }
}

export const CartContext = createContext();

export function CartProvider({ children }) {
  const [state, dispatch] = useReducer(cartReducer, initialState);

  return (
    <CartContext.Provider value={{ cart: state, dispatch }}>
      {children}
    </CartContext.Provider>
  );
}
This reducer pattern keeps cart logic centralized and predictable.
Mind Map: Shopping Cart State Flow
Integration Example
In the main app component, wrap the app with providers:
import React from 'react';
import { FilterProvider } from './contexts/FilterContext';
import { CartProvider } from './contexts/CartContext';
import ProductList from './components/ProductList';
import CartOverview from './components/CartOverview';

function App() {
  return (
    <FilterProvider>
      <CartProvider>
        <ProductList />
        <CartOverview />
      </CartProvider>
    </FilterProvider>
  );
}

export default App;
This structure keeps concerns separated but allows shared state where needed.
Best Practices Highlighted
- Single Responsibility: Each component and module handles one clear task.
- Encapsulation: Modules hide internal details and expose minimal interfaces.
- State Centralization: Shared state is managed in context or stores to avoid prop drilling.
- Reusability: Shared components like buttons and modals are used across modules.
- Separation of Concerns: UI, state, and API interactions are separated.
This example shows how modular design in an e-commerce frontend leads to a cleaner, more maintainable codebase. Each module can be developed, tested, and deployed independently, making the system easier to scale and adapt.
3. Browser Architecture and Its Impact on Frontend Design
3.1 Overview of Browser Rendering Pipeline
The browser rendering pipeline is the sequence of steps a browser takes to convert HTML, CSS, and JavaScript into the pixels you see on the screen. Understanding this pipeline is crucial for frontend engineers aiming to optimize performance and troubleshoot rendering issues.
Key Stages of the Browser Rendering Pipeline
- Parsing HTML to DOM
- Parsing CSS to CSSOM
- Constructing the Render Tree
- Layout (Reflow)
- Painting
- Compositing
Let’s break down each stage with examples and mind maps.
Parsing HTML to DOM
The browser starts by parsing the HTML document into a Document Object Model (DOM) tree. Each HTML element becomes a node in this tree.
- The parser reads the HTML sequentially.
- It creates nodes for tags, text, and attributes.
- Scripts can block parsing if they are synchronous.
Example:
<html>
  <body>
    <h1>Hello World</h1>
  </body>
</html>
This simple HTML results in a DOM tree with html as the root node, containing body, which contains h1.
Mind map:
- DOM Tree
- html
- body
- h1 ("Hello World")
- body
- html
Parsing CSS to CSSOM
While the DOM is being built, the browser parses CSS files and inline styles to create the CSS Object Model (CSSOM).
- CSSOM represents all style rules.
- It includes selectors, properties, and values.
- CSSOM and DOM combine later to form the render tree.
Example:
h1 {
  color: blue;
  font-size: 24px;
}
This CSS rule will be parsed into CSSOM nodes representing the h1 selector and its properties.
Mind map:
Constructing the Render Tree
The render tree is built by combining the DOM and CSSOM. It contains only the nodes that need to be rendered (visible elements).
- Invisible elements like
<head>or elements withdisplay: noneare excluded. - Each node has style information applied.
Example:
Given the earlier HTML and CSS, the render tree will have an h1 node styled with blue color and 24px font size.
Mind map:
- Render Tree
- body
- h1 (color: blue, font-size: 24px)
- body
Layout (Reflow)
The browser calculates the exact position and size of each render tree node.
- This step determines geometry based on viewport size, styles, and content.
- Layout is triggered initially and on changes affecting geometry.
Example:
If the viewport width is 800px, the h1 might be positioned at the top-left corner with a height based on font size.
Mind map:
Painting
Painting converts the layout information into actual pixels.
- The browser fills in colors, draws text, borders, shadows, images.
- This happens on layers, often one per stacking context.
Example:
The blue text of the h1 is painted onto a layer.
Mind map:
- Painting
- Layer 1
- Draw text: "Hello World" in blue
- Layer 1
Compositing
The final step combines painted layers into the final image shown on the screen.
- Layers are composited in order.
- GPU acceleration often used here.
Example:
If the page has multiple layers (e.g., fixed header, scrolling content), compositing merges them.
Mind map:
Putting It All Together
Practical Example: What Happens When You Change a Style?
Suppose you change the color of an h1 from blue to red via JavaScript:
document.querySelector('h1').style.color = 'red';
- The CSSOM updates for that node.
- The render tree style updates.
- Because only color changed (a paint property), the browser skips layout and directly repaints the affected layer.
- This saves time compared to triggering a full layout.
Understanding which CSS properties trigger layout, paint, or compositing helps write performant code.
This overview shows that the browser rendering pipeline is a multi-step process where each phase builds on the previous. Knowing these stages helps frontend engineers optimize rendering, avoid costly reflows, and deliver smoother user experiences.
3.2 JavaScript Engine Internals and Optimization Techniques
JavaScript engines are the backbone of frontend performance. Understanding their internals helps senior developers write code that runs faster and scales better. This section breaks down how engines work and offers practical optimization tips.
How JavaScript Engines Work
At a high level, a JavaScript engine takes your source code, parses it, compiles it to machine code, and executes it. The process involves several stages:
- Parsing: The engine reads your code and generates an Abstract Syntax Tree (AST).
- Bytecode Generation: The AST is transformed into bytecode, an intermediate representation.
- Baseline Compilation: The bytecode is compiled into machine code for quick execution.
- Optimization: Hot code paths are identified and recompiled with optimizations.
- Garbage Collection: Unused memory is cleaned up to free resources.
Here’s a simple mind map to visualize this:
Parsing and AST
Parsing is the first step. The engine breaks down code into tokens and builds an AST, a tree structure representing the code’s syntax. For example, the expression a + b * c becomes a tree where multiplication is evaluated before addition due to operator precedence.
Understanding this helps avoid writing ambiguous or overly complex expressions that can slow parsing.
Bytecode and Baseline Compilation
Most modern engines, like V8 (Chrome) or SpiderMonkey (Firefox), compile JavaScript into bytecode first. Bytecode is faster to interpret than raw source code. Baseline compilation then converts bytecode into machine code without heavy optimization, allowing quick startup.
Example:
function add(a, b) {
  return a + b;
}
This simple function quickly compiles to machine code on first run.
Optimization Techniques
Engines monitor which functions or loops run frequently (hot code). They apply optimizations such as:
- Inline Caching: Caches the type of objects to speed up property access.
- Type Specialization: Generates optimized machine code assuming specific types.
- Function Inlining: Replaces function calls with the function body to reduce call overhead.
These optimizations improve performance but require stable code patterns. Frequent type changes or dynamic property additions can deoptimize the code.
Mind map for optimization:
Garbage Collection (GC)
JavaScript engines use garbage collection to reclaim memory. The most common algorithm is mark-and-sweep:
- Mark: Identify reachable objects.
- Sweep: Clean up unreachable objects.
Generational GC divides objects into young and old generations, collecting young objects more frequently since most short-lived objects die quickly.
Understanding GC helps avoid memory leaks and performance hiccups caused by excessive allocations.
Practical Optimization Tips
- Avoid Changing Object Shapes: Adding or deleting properties dynamically forces the engine to deoptimize. Define all properties upfront.
Example:
// Less optimal
const obj = {};
obj.a = 1;
obj.b = 2;

// Better
const obj = { a: 1, b: 2 };
- Use Consistent Types: Mixing types in arrays or variables can cause deoptimization.
Example:
// Avoid
const arr = [1, 'two', 3];

// Prefer
const arr = [1, 2, 3];
-
Minimize Closure Usage in Hot Paths: Closures can increase memory usage and slow down optimization.
-
Prefer Loops Over Recursion for Large Iterations: Recursive calls add stack overhead and may prevent optimization.
-
Cache Length in Loops: Accessing array length repeatedly can be slower.
Example:
// Less optimal
for (let i = 0; i < arr.length; i++) {
  // ...
}

// Better
for (let i = 0, len = arr.length; i < len; i++) {
  // ...
}
- Avoid Excessive Object Allocations: Reuse objects when possible to reduce GC pressure.
Example: Optimizing a Property Access Hotspot
Consider a function that accesses a property repeatedly inside a loop:
function sumPrices(products) {
  let total = 0;
  for (let i = 0; i < products.length; i++) {
    total += products[i].price;
  }
  return total;
}
If products contains objects with different shapes or missing price properties, the engine may deoptimize. Ensuring uniform object shapes and consistent property presence helps maintain optimized machine code.
Summary Mind Map
Understanding these internals equips senior frontend developers to write code that aligns with engine strengths, avoids pitfalls that trigger deoptimization, and ultimately delivers smoother user experiences.
3.3 Understanding Event Loop and Task Queues
The event loop is a core concept in JavaScript and browser environments that allows asynchronous operations to run without blocking the main thread. Understanding how it works is essential for designing responsive frontend systems and debugging tricky timing issues.
What is the Event Loop?
JavaScript runs on a single thread, which means it can only execute one piece of code at a time. The event loop is the mechanism that manages the execution of multiple tasks by queuing them and running them sequentially, ensuring the UI remains responsive.
At a high level, the event loop continuously checks if the call stack is empty. If it is, it takes the next task from the task queue and pushes it onto the call stack for execution.
Key Components:
- Call Stack: Where the JavaScript engine keeps track of function calls. It operates in a last-in, first-out manner.
- Task Queues: Queues that hold tasks waiting to be executed. There are multiple types:
- Macro-task queue (also called task queue)
- Micro-task queue
- Event Loop: The process that monitors the call stack and task queues, deciding what to execute next.
Mind Map: Event Loop Overview
Macro-tasks vs Micro-tasks
Tasks are categorized into macro-tasks and micro-tasks. The event loop prioritizes micro-tasks over macro-tasks.
-
Macro-tasks include:
setTimeoutsetInterval- I/O events
- UI rendering
-
Micro-tasks include:
- Promise callbacks (
.then,.catch,.finally) MutationObservercallbacks
- Promise callbacks (
After executing a macro-task, the event loop runs all micro-tasks before moving to the next macro-task.
Mind Map: Task Execution Order
Example 1: Understanding Execution Order
console.log('script start');

setTimeout(() => {
  console.log('setTimeout');
}, 0);

Promise.resolve().then(() => {
  console.log('promise1');
}).then(() => {
  console.log('promise2');
});

console.log('script end');
Expected output:
script start
script end
promise1
promise2
setTimeout
Explanation:
- The synchronous code runs first:
script startandscript end. - The promise callbacks are micro-tasks, so they run after the current script but before the macro-task.
- The
setTimeoutcallback is a macro-task and runs last.
Example 2: Micro-tasks Can Queue More Micro-tasks
Promise.resolve().then(() => {
  console.log('promise1');
  Promise.resolve().then(() => {
    console.log('promise2');
  });
});
console.log('script end');
Expected output:
script end
promise1
promise2
Explanation:
- The synchronous
console.log('script end')runs first. - The first promise callback runs next.
- Inside it, another promise callback is queued as a micro-task, so it runs immediately after the first micro-task before the event loop continues.
Why Does This Matter?
Understanding the event loop and task queues helps you:
- Avoid common pitfalls with asynchronous code.
- Write non-blocking UI updates.
- Debug timing issues, such as why some callbacks run before others.
- Optimize performance by controlling when code executes.
Mind Map: Practical Tips
In summary, the event loop is the engine that keeps JavaScript responsive by managing the execution order of synchronous code, micro-tasks, and macro-tasks. Mastering its behavior is a must for senior frontend developers designing complex, performant applications.
3.4 Memory Management and Garbage Collection in Browsers
Memory management in browsers is a core part of frontend performance and stability. When your JavaScript code runs, it allocates memory for variables, objects, functions, and DOM elements. Over time, some of this memory becomes unused or unreachable. Efficiently reclaiming that memory without interrupting user experience is the job of the browser’s garbage collector.
How Memory is Allocated
When you create a variable or an object in JavaScript, the engine allocates memory space for it on the heap (for objects) or stack (for primitives and function calls). For example:
let user = { name: 'Alice', age: 30 };
Here, the object { name: 'Alice', age: 30 } is stored in the heap, and the variable user holds a reference to that memory.
The Problem of Unused Memory
If you later do:
user = null;
The reference to the object is removed. If no other references to that object exist, it becomes unreachable and eligible for garbage collection.
Garbage Collection Basics
Garbage collection (GC) is the process of automatically identifying and freeing memory that is no longer needed. Browsers use different algorithms, but the most common is Mark-and-Sweep.
Mark-and-Sweep Algorithm
- Mark Phase: The GC starts from root references (global variables, currently executing functions, etc.) and marks all reachable objects.
- Sweep Phase: It then scans the heap, collecting objects that were not marked (unreachable).
This process frees memory without requiring explicit deallocation from the developer.
Mind Map: Mark-and-Sweep Process
Reference Counting
Some engines also use reference counting, where each object keeps track of how many references point to it. When the count drops to zero, the object can be freed immediately. However, this approach struggles with circular references, which is why mark-and-sweep is preferred.
Mind Map: Reference Counting
Memory Leaks in Frontend Applications
Memory leaks occur when objects remain reachable but are no longer needed, causing gradual memory growth. Common causes include:
- Detached DOM nodes: Elements removed from the DOM but still referenced in JavaScript.
- Closures holding references: Functions that capture variables and keep them alive unintentionally.
- Global variables: Excessive or forgotten globals that persist.
Example: Detached DOM Node Leak
function setup() {
  const element = document.getElementById('myDiv');
  element.addEventListener('click', () => {
    console.log('Clicked!');
  });
  // Later, if 'myDiv' is removed from DOM but 'element' is still referenced,
  // the memory for that node cannot be reclaimed.
}
Here, if the event listener or variable element persists after the node is removed, the memory stays allocated.
Best Practices to Avoid Memory Leaks
- Remove event listeners when elements are removed.
- Avoid unnecessary global variables.
- Nullify references to large objects when no longer needed.
- Use tools like browser memory profilers to detect leaks.
Mind Map: Avoiding Memory Leaks
Example: Cleaning Up Event Listeners
const button = document.getElementById('submit');
function onClick() {
  console.log('Submitted');
}
button.addEventListener('click', onClick);

// Later when button is removed
button.removeEventListener('click', onClick);
Removing the listener allows the button and its associated memory to be garbage collected.
Memory Management in Modern Frameworks
Frameworks like React and Vue help manage memory by controlling component lifecycles. For instance, React’s useEffect cleanup functions allow you to remove subscriptions or listeners when components unmount.
useEffect(() => {
  const id = setInterval(() => console.log('tick'), 1000);
  return () => clearInterval(id); // Cleanup on unmount
}, []);
Without cleanup, intervals or subscriptions can cause leaks.
Summary
- Memory is allocated on the heap and stack.
- Garbage collection frees unreachable memory, primarily via mark-and-sweep.
- Reference counting exists but has limitations.
- Memory leaks happen when references persist unintentionally.
- Proper cleanup of event listeners, closures, and globals is essential.
- Modern frameworks provide lifecycle hooks to aid memory management.
Understanding these concepts helps senior frontend developers design performant, stable applications and troubleshoot memory-related issues effectively.
3.5 Example: Optimizing Animation Performance Using Browser APIs
Animations can make interfaces feel alive but can also be a source of jank and sluggishness if not handled properly. This section walks through practical ways to optimize animation performance by leveraging browser APIs effectively.
Understanding the Problem
Animations trigger changes in the browser’s rendering pipeline. Poorly optimized animations cause frame drops, leading to a choppy user experience. The key is to minimize expensive operations like layout recalculations and repaints.
Mind Map: Animation Performance Factors
Key Principles for Animation Optimization
-
Use
requestAnimationFramefor JavaScript-driven animations- It schedules animation updates just before the browser repaints.
- Prevents unnecessary calculations and aligns with the refresh rate.
-
Prefer CSS Transforms and Opacity over properties that trigger layout or paint
- Properties like
top,left,width, orheightcause layout recalculations. - Transforms (
translate,scale,rotate) andopacityare handled by the compositor thread, avoiding layout and paint.
- Properties like
-
Avoid layout thrashing
- Reading layout properties (e.g.,
offsetWidth) immediately after writing styles forces synchronous layout. - Batch DOM reads and writes separately.
- Reading layout properties (e.g.,
-
Use the Web Animations API when possible
- Provides a performant, declarative way to run animations.
- Allows control over playback and timing.
-
Throttle or debounce animations triggered by scroll or resize events
- Use
requestAnimationFrameor Intersection Observer to avoid overwhelming the main thread.
- Use
Example 1: Smooth Box Movement Using requestAnimationFrame and Transforms
const box = document.querySelector('.box');
let start = null;
let duration = 2000; // 2 seconds

function animate(timestamp) {
  if (!start) start = timestamp;
  const elapsed = timestamp - start;
  const progress = Math.min(elapsed / duration, 1);
  // Using translateX for GPU-accelerated animation
  box.style.transform = `translateX(${progress * 300}px)`;
  if (progress < 1) {
    requestAnimationFrame(animate);
  }
}

requestAnimationFrame(animate);
Explanation:
requestAnimationFrameschedules the animation callback.- Using
transform: translateXavoids layout recalculations. - The animation runs smoothly at the browser’s refresh rate.
Mind Map: Animation Loop Using requestAnimationFrame
Example 2: Avoiding Layout Thrashing
// Bad practice: reading and writing layout properties alternately
for (let i = 0; i < items.length; i++) {
  const height = items[i].offsetHeight; // read
  items[i].style.height = height + 10 + 'px'; // write
}

// Better practice: batch reads and writes
const heights = [];
for (let i = 0; i < items.length; i++) {
  heights.push(items[i].offsetHeight); // batch read
}
for (let i = 0; i < items.length; i++) {
  items[i].style.height = heights[i] + 10 + 'px'; // batch write
}
Explanation:
- Reading layout properties forces the browser to flush pending changes.
- Interleaving reads and writes causes multiple forced layouts.
- Batching reads and writes minimizes layout recalculations.
Example 3: Using the Web Animations API
const element = document.querySelector('.circle');

const animation = element.animate([
  { transform: 'translateX(0px)', opacity: 1 },
  { transform: 'translateX(300px)', opacity: 0.5 }
], {
  duration: 1000,
  iterations: Infinity,
  direction: 'alternate',
  easing: 'ease-in-out'
});

// Control playback
animation.pause();
setTimeout(() => animation.play(), 2000);
Explanation:
- The Web Animations API runs animations on the compositor thread.
- It provides methods to control playback, pause, and reverse.
- It avoids layout and paint costs associated with JavaScript-driven animations.
Mind Map: Web Animations API Workflow
Example 4: Using Intersection Observer to Trigger Animations
const observer = new IntersectionObserver((entries) => {
  entries.forEach(entry => {
    if (entry.isIntersecting) {
      entry.target.classList.add('animate');
      observer.unobserve(entry.target);
    }
  });
});

document.querySelectorAll('.fade-in').forEach(el => {
  observer.observe(el);
});
Explanation:
- Intersection Observer triggers animations only when elements enter the viewport.
- Reduces unnecessary animation work for offscreen elements.
- Improves overall page performance.
Summary
Optimizing animation performance involves understanding how browsers handle rendering and minimizing expensive operations. Using requestAnimationFrame aligns animation updates with the browser’s paint cycle. Favoring CSS transforms and opacity leverages the compositor thread, avoiding layout and paint costs. Avoid layout thrashing by batching DOM reads and writes. The Web Animations API offers a performant and flexible alternative to manual animation loops. Finally, Intersection Observer helps trigger animations efficiently based on visibility.
Applying these techniques results in smoother animations, better responsiveness, and an improved user experience.
4. Performance Optimization Best Practices
4.1 Measuring Frontend Performance: Tools and Metrics
Measuring frontend performance is a foundational step in building responsive, user-friendly web applications. It involves collecting data on how quickly and efficiently a page loads and responds to user interactions. This section covers key tools and metrics to measure frontend performance, supported by practical examples and mind maps to clarify concepts.
Key Performance Metrics
Understanding which metrics matter is the first step. Here’s a mind map outlining the core frontend performance metrics:
First Contentful Paint (FCP) measures the time from navigation to when the browser renders the first piece of DOM content, like text or an image. It gives a sense of when users see something happening.
Largest Contentful Paint (LCP) tracks when the largest visible element (like a hero image or headline) finishes loading. It’s a better indicator of perceived load speed.
Time to Interactive (TTI) marks when the page becomes fully interactive—meaning event handlers are registered and the UI responds reliably.
Speed Index measures how quickly the visible parts of the page are populated.
First Input Delay (FID) captures the delay between a user’s first interaction and the browser’s response.
Total Blocking Time (TBT) sums up the time the main thread is blocked during page load, impacting responsiveness.
Cumulative Layout Shift (CLS) quantifies unexpected layout shifts, which can frustrate users.
Tools for Measuring Performance
Here’s a mind map of popular tools and their primary uses:
Browser DevTools are the most immediate way to inspect performance. The Performance panel records page load and runtime activities, showing CPU usage, scripting time, and rendering events. The Network panel helps identify slow resource loads.
Lighthouse is an automated tool that runs audits on a page and provides scores and suggestions. It reports on many metrics including FCP, LCP, TTI, and CLS.
WebPageTest offers detailed waterfall charts showing the timing of every resource request and visual progress snapshots.
Real User Monitoring (RUM) collects performance data from actual users, providing insights into how your site performs in the wild.
Example: Measuring Performance of a Blog Homepage
Imagine you want to assess the performance of a blog homepage. Here’s a step-by-step example using Chrome DevTools:
- Open the blog homepage in Chrome.
- Open DevTools (F12 or Cmd+Option+I).
- Go to the Performance tab.
- Click “Reload” to record the page load.
- Observe the flame chart and summary metrics.
You might see that the FCP occurs at 1.2 seconds, LCP at 2.8 seconds, and TTI at 3.5 seconds. The Network panel shows a large hero image taking 1.5 seconds to download.
Based on this data, you could optimize the hero image by compressing it or using a modern format like WebP to reduce load time and improve LCP.
Example Mind Map: Performance Measurement Workflow
Summary
Measuring frontend performance requires focusing on meaningful metrics that reflect user experience. Tools like DevTools and Lighthouse provide actionable data. Regular measurement and analysis help identify bottlenecks and guide optimization efforts. Keeping an eye on loading speed, interactivity, and visual stability ensures your frontend remains responsive and pleasant to use.
4.2 Critical Rendering Path Optimization
The Critical Rendering Path (CRP) is the sequence of steps a browser takes to convert HTML, CSS, and JavaScript into pixels on the screen. Optimizing this path reduces the time it takes for users to see meaningful content, improving perceived performance.
What is the Critical Rendering Path?
The CRP involves several stages:
- DOM Construction: Parsing HTML to build the Document Object Model (DOM).
- CSSOM Construction: Parsing CSS to build the CSS Object Model (CSSOM).
- Render Tree Construction: Combining DOM and CSSOM to create the render tree, which represents what will be painted.
- Layout (Reflow): Calculating geometry and positions of elements.
- Painting: Filling pixels on the screen.
JavaScript can block the CRP because scripts may modify the DOM or CSSOM, so the browser pauses parsing to execute scripts.
Why Optimize the CRP?
The faster the CRP completes, the sooner the user sees content. Delays cause blank screens or unresponsive pages. Optimizing CRP means minimizing blocking resources and speeding up parsing and rendering.
Mind Map: Critical Rendering Path Overview
Key Optimization Techniques
-
Minimize Critical Resources
- Reduce the number and size of CSS and JavaScript files needed for initial rendering.
- Inline critical CSS to avoid extra network requests.
-
Defer Non-Critical JavaScript
- Use
deferorasyncattributes to prevent scripts from blocking HTML parsing.
- Use
-
Prioritize CSS Loading
- Load CSS early since it blocks rendering.
- Avoid @import in CSS as it delays CSSOM construction.
-
Reduce Render-Blocking Resources
- Identify and eliminate or defer resources that block rendering.
-
Optimize Server Response Times
- Faster server responses reduce time to first byte, speeding up CRP.
-
Use Resource Hints
preloadandprefetchcan prioritize critical resources.
Mind Map: CRP Optimization Techniques
Example 1: Inline Critical CSS
Suppose your homepage uses a simple header and hero section visible immediately. Instead of loading a large CSS file, extract the CSS needed for these above-the-fold elements and inline it in the <head>:
<style>
  header { background: #333; color: white; padding: 1rem; }
  .hero { font-size: 2rem; margin: 2rem 0; }
</style>
<link rel="stylesheet" href="styles.css">
Inlining this CSS means the browser can start rendering the header and hero without waiting for the external stylesheet to download.
Example 2: Deferring JavaScript
Consider a script that adds interactivity to a widget below the fold. Loading it synchronously blocks HTML parsing.
Change:
<script src="widget.js"></script>
To:
<script src="widget.js" defer></script>
The defer attribute tells the browser to continue parsing HTML and execute the script after the DOM is fully built, reducing blocking time.
Example 3: Avoiding CSS @import
Using @import inside CSS files delays CSSOM construction because the browser must fetch and parse the imported CSS before continuing.
Instead of:
@import url('reset.css');
body { font-family: Arial; }
Use multiple <link> tags in HTML:
<link rel="stylesheet" href="reset.css">
<link rel="stylesheet" href="main.css">
This allows parallel fetching and faster CSSOM construction.
Example 4: Using Resource Hints
To prioritize loading of a font used in the header, add:
<link rel="preload" href="/fonts/header-font.woff2" as="font" type="font/woff2" crossorigin="anonymous">
This tells the browser to fetch the font early, reducing delays in text rendering.
Summary
Optimizing the Critical Rendering Path means understanding what blocks rendering and how to reduce or defer those blocks. Prioritize CSS loading, defer JavaScript, inline critical styles, avoid CSS imports, and use resource hints. These steps reduce the time to first meaningful paint and improve user experience.
Optimizing CRP is a balance between network efficiency and rendering speed. Each project may require different trade-offs, but the principles remain consistent.
4.3 Efficient Resource Loading and Caching Strategies
Efficient resource loading and caching are crucial for frontend performance. They reduce load times, decrease bandwidth usage, and improve the overall user experience. This section covers practical strategies with examples and mind maps to clarify concepts.
Understanding Resource Loading
Resource loading involves fetching assets like HTML, CSS, JavaScript, images, fonts, and data from servers. The browser requests these resources, and the speed of this process affects how quickly a page becomes usable.
Key factors influencing resource loading:
- Number of requests: More requests mean more round-trips.
- Resource size: Larger files take longer to download.
- Order of loading: Critical resources should load first.
- Network conditions: Latency and bandwidth vary.
Mind Map: Resource Loading Basics
Strategies to Optimize Resource Loading
-
Minimize HTTP Requests
- Combine files where possible (e.g., CSS and JS bundling).
- Use image sprites for icons.
-
Use HTTP/2 or HTTP/3
- These protocols allow multiplexing multiple requests over a single connection, reducing overhead.
-
Prioritize Critical Resources
- Inline critical CSS to avoid render-blocking.
- Use
rel="preload"orrel="prefetch"for important assets.
-
Lazy Loading
- Load images and components only when they enter the viewport.
-
Compression
- Enable Gzip or Brotli compression on the server.
-
Caching
- Cache static assets aggressively.
- Use cache busting techniques for updates.
Mind Map: Resource Loading Optimization
Caching Strategies
Caching stores copies of resources closer to the user or in the browser to avoid repeated downloads.
Types of caching relevant to frontend:
- Browser Cache: Stores resources locally using HTTP headers.
- Service Worker Cache: Custom caching logic via JavaScript.
- CDN Cache: Edge servers cache assets geographically closer to users.
HTTP Caching Headers
- Cache-Control: Controls how, and for how long, resources are cached.
max-agespecifies the time a resource is considered fresh.no-cacheforces revalidation.
- ETag: A unique identifier for a resource version.
- Last-Modified: Timestamp of last resource change.
Example: Setting Cache-Control Header
Cache-Control: public, max-age=31536000, immutable
This tells browsers to cache the resource for one year and that it won’t change, so no revalidation is needed.
Cache Busting
When resources change, browsers need to fetch the new version. Cache busting techniques include:
- Adding hash fingerprints to filenames (e.g.,
app.abc123.js). - Changing query parameters (less preferred).
Mind Map: Caching Strategies
Example: Combining Resource Loading and Caching
Imagine a news website with heavy images and dynamic content.
-
Resource Loading:
- Critical CSS is inlined to render the header quickly.
- Images below the fold use lazy loading.
- JavaScript is split into vendor and app bundles, loaded asynchronously.
-
Caching:
- Static assets like logos and fonts have long
max-ageand immutable headers. - Dynamic JSON data uses short cache times with ETag validation.
- Service worker caches assets for offline support.
- Static assets like logos and fonts have long
This approach balances fast initial load and up-to-date content.
Practical Code Snippet: Lazy Loading Images
<img src="placeholder.jpg" data-src="large-image.jpg" alt="Example" loading="lazy" />
The loading="lazy" attribute defers loading until the image is near the viewport.
Practical Code Snippet: Preloading Fonts
<link rel="preload" href="/fonts/roboto.woff2" as="font" type="font/woff2" crossorigin="anonymous" />
This hints the browser to fetch the font early without blocking rendering.
Summary
Efficient resource loading and caching require understanding what resources are critical, how to reduce their size and number, and how to store them effectively. Combining these strategies leads to faster, more responsive frontend applications.
4.4 Minimizing Reflows and Repaints with Practical Examples
When a webpage changes, the browser often has to recalculate styles, re-layout parts of the page, and repaint pixels on the screen. These processes are known as reflows (or layouts) and repaints. Minimizing these operations is key to keeping your frontend responsive and smooth.
What Are Reflows and Repaints?
- Reflow (Layout): The browser recalculates the position and size of elements. This happens when the DOM structure or CSS affecting layout changes.
- Repaint: The browser redraws pixels on the screen without recalculating layout, usually triggered by changes in color, visibility, or other paint-only properties.
Reflows are more expensive than repaints because they involve layout calculations that can cascade through the DOM tree.
Mind Map: Causes of Reflows and Repaints
Best Practices to Minimize Reflows and Repaints
-
Batch DOM Updates
- Instead of multiple small changes, group DOM manipulations together.
- Example: Use a DocumentFragment or build HTML as a string and insert once.
-
Avoid Layout Thrashing
- Reading layout properties immediately after writing triggers forced synchronous reflow.
- Example: Don’t query
offsetHeightright after changing styles; cache values instead.
-
Use CSS Transforms and Opacity for Animations
- These properties trigger only repaints, often GPU-accelerated, avoiding reflows.
-
Minimize Changes to Layout-affecting Properties
- Avoid changing properties like width, height, margin frequently.
-
Use Classes Instead of Inline Styles
- Changing classes can be more efficient than many inline style changes.
-
Use Visibility or Opacity Instead of Display None
display:nonetriggers reflow;visibility:hiddenoropacity:0only trigger repaint.
Practical Example 1: Batch DOM Updates
Inefficient:
const list = document.getElementById('list');
items.forEach(item => {
  const li = document.createElement('li');
  li.textContent = item;
  list.appendChild(li); // DOM updated on every iteration
});
Efficient:
const list = document.getElementById('list');
const fragment = document.createDocumentFragment();
items.forEach(item => {
  const li = document.createElement('li');
  li.textContent = item;
  fragment.appendChild(li);
});
list.appendChild(fragment); // Single DOM update
Batching reduces reflows by limiting the number of layout recalculations.
Practical Example 2: Avoid Layout Thrashing
Problematic:
const box = document.getElementById('box');
box.style.width = '100px';
const height = box.offsetHeight; // Forces reflow
box.style.height = height + 'px';
Better:
const box = document.getElementById('box');
const height = box.offsetHeight; // Read once
box.style.width = '100px';
box.style.height = height + 'px'; // Write after read
Reading layout properties after writes causes the browser to flush pending changes immediately, hurting performance.
Practical Example 3: Use Transforms for Animations
Animating width or height triggers reflow; animating transform or opacity triggers only repaint.
Inefficient:
.box {
  transition: width 0.3s ease;
}
Efficient:
.box {
  transition: transform 0.3s ease;
}
JS to animate:
box.style.transform = 'translateX(100px)';
This keeps the layout intact and leverages GPU acceleration.
Mind Map: Strategies to Reduce Reflows/Repaints
Practical Example 4: Using Classes Instead of Inline Styles
Less efficient:
element.style.color = 'red';
element.style.backgroundColor = 'blue';
element.style.fontSize = '16px';
More efficient:
.highlight {
  color: red;
  background-color: blue;
  font-size: 16px;
}
element.classList.add('highlight');
Changing a class triggers fewer style recalculations than multiple inline style changes.
Summary
Minimizing reflows and repaints boils down to understanding what triggers them and how to avoid unnecessary layout recalculations. Group DOM changes, avoid reading layout properties after writes, prefer GPU-friendly CSS properties for animations, and use classes to manage styles efficiently. These practices keep your frontend responsive and your users happy.
4.5 Example: Improving Time to Interactive on a Content-heavy Site
Improving Time to Interactive (TTI) on a content-heavy site requires a focused approach to reduce the time between when the page starts loading and when the user can reliably interact with it. TTI is critical because users expect responsiveness, especially on pages with lots of content, images, and scripts.
Understanding Time to Interactive
TTI measures when the page is visually rendered and capable of reliably responding to user input. A page might look ready, but if the main thread is busy, clicks or scrolls can lag. The goal is to minimize main thread blocking and prioritize critical resources.
Mind Map: Key Factors Affecting TTI
Step 1: Analyze the Current State
Use performance tools like Lighthouse or Chrome DevTools Performance tab to identify long tasks and resource bottlenecks. Look for:
- Long JavaScript execution blocks
- Large scripts delaying parsing and execution
- Render-blocking CSS and JS
- Slow server response times
Step 2: Break Up Long JavaScript Tasks
Long tasks block the main thread, delaying interactivity. Splitting these tasks into smaller chunks allows the browser to handle user input between them.
Example:
// Before: A single long loop
for (let i = 0; i < hugeArray.length; i++) {
  processItem(hugeArray[i]);
}

// After: Chunked processing with setTimeout
function processChunk(startIndex, chunkSize) {
  const end = Math.min(startIndex + chunkSize, hugeArray.length);
  for (let i = startIndex; i < end; i++) {
    processItem(hugeArray[i]);
  }
  if (end < hugeArray.length) {
    setTimeout(() => processChunk(end, chunkSize), 0);
  }
}
processChunk(0, 100);
This approach yields control back to the browser, improving responsiveness.
Step 3: Code Splitting and Lazy Loading
Load only the JavaScript needed for the initial viewport. Defer non-critical code until after the page is interactive.
Example:
// Using dynamic import
button.addEventListener('click', async () => {
  const module = await import('./heavyModule.js');
  module.doHeavyWork();
});
This delays loading heavy modules until user interaction.
Step 4: Optimize Critical CSS and Defer Non-critical Styles
Inline critical CSS for above-the-fold content and load the rest asynchronously.
Example:
<style>
  /* Critical CSS here */
</style>
<link rel="stylesheet" href="styles.css" media="print" onload="this.media='all'">
<noscript><link rel="stylesheet" href="styles.css"></noscript>
This ensures the browser can render the page quickly without waiting on large CSS files.
Step 5: Prioritize Resource Loading
Use resource hints like preload and prefetch to prioritize important assets.
Example:
<link rel="preload" href="main.js" as="script">
<link rel="preload" href="hero-image.jpg" as="image">
This tells the browser to fetch critical resources early.
Step 6: Minimize Third-party Script Impact
Third-party scripts can block the main thread or delay interactivity.
Example:
- Load third-party scripts asynchronously or defer them.
- Use performance budgets to limit their size.
<script src="third-party.js" async></script>
Step 7: Optimize Images and Media
Large images can delay page load and block rendering.
Example:
- Use responsive images (
srcset) to serve appropriate sizes. - Lazy-load offscreen images.
<img src="small.jpg" srcset="large.jpg 1024w, medium.jpg 640w" loading="lazy" alt="Example">
Mind Map: Workflow to Improve TTI
Final Notes
Improving TTI is about balancing what the user needs immediately with what can wait. Breaking up JavaScript work, prioritizing critical resources, and deferring non-essential work all contribute to a faster, more responsive experience. Each site will have unique bottlenecks, so measuring and iterating is key.
5. Frontend Scalability Engineering
5.1 Designing for High Traffic and Large User Bases
Designing frontend systems to handle high traffic and large user bases requires a combination of architectural foresight, performance optimization, and thoughtful resource management. The goal is to maintain responsiveness and reliability even when thousands or millions of users interact with your application simultaneously.
Key Considerations
- Load Distribution: Ensuring no single part of your system becomes a bottleneck.
- Efficient Resource Usage: Minimizing CPU, memory, and network overhead on both client and server.
- Graceful Degradation: The system should remain usable under stress, even if some features slow down.
- Caching Strategies: Reducing redundant data fetching and computation.
- Asynchronous Processing: Keeping the UI responsive by offloading heavy tasks.
Mind Map: Designing for High Traffic and Large User Bases
Load Distribution
For frontend systems, distributing load often involves using Content Delivery Networks (CDNs) to serve static assets closer to users geographically. This reduces latency and server load. Additionally, breaking the frontend into micro-frontends can help isolate traffic spikes to specific parts of the application, preventing a single feature from overwhelming the entire system.
Example: An e-commerce site might serve product images and scripts via a CDN, while the checkout micro-frontend handles payment flows separately. If the product catalog experiences a surge, the checkout remains unaffected.
Resource Optimization
Splitting code into smaller chunks and loading them only when needed (lazy loading) prevents users from downloading unnecessary code upfront. Efficient state management avoids excessive re-renders and data fetching.
Example: A social media app loads the main feed first and defers loading the messaging module until the user navigates there. State updates in the feed use selectors to minimize re-renders.
Caching
Caching reduces repeated network requests and computations. Browser cache stores static assets, while service workers can cache API responses and assets for offline or faster repeat access. Memoization in code prevents recalculating expensive operations.
Example: A news website uses service workers to cache the latest headlines, so returning users see content instantly even with spotty connectivity.
Asynchronous Processing
Heavy computations or data processing can block the main thread, causing UI jank. Using Web Workers offloads these tasks to background threads. Throttling or debouncing user input events prevents overwhelming the system with rapid-fire updates.
Example: An analytics dashboard processes large datasets in a Web Worker, keeping the UI responsive while charts update.
Graceful Degradation
Not all users have the same device capabilities or network conditions. Designing fallback UIs and using feature flags to disable non-critical features under load ensures the core experience remains intact.
Example: A video streaming site disables auto-play and high-resolution streams when bandwidth is low, showing a simpler interface.
Monitoring & Metrics
Tracking real user performance and setting performance budgets helps detect and address issues before they impact a large user base.
Example: A team sets a budget of 3 seconds for Time to Interactive and monitors it continuously, alerting when exceeded.
Concrete Example: Scaling an Infinite Scroll Feed
Imagine a news feed that loads articles as the user scrolls. To handle millions of users:
- Use pagination with API endpoints that support cursor-based fetching to avoid large payloads.
- Cache previously loaded articles in IndexedDB or session storage to avoid refetching.
- Implement virtualization to render only visible articles, reducing DOM nodes.
- Debounce scroll events to limit API calls.
- Serve static assets like images and scripts via a CDN.
This approach keeps the UI smooth and the backend load manageable.
In summary, designing frontend systems for high traffic involves distributing load, optimizing resource use, caching intelligently, processing asynchronously, degrading gracefully, and monitoring continuously. Each piece works together to keep the user experience stable and performant under heavy use.
5.2 Load Balancing and CDN Usage in Frontend Delivery
Load balancing and content delivery networks (CDNs) are fundamental tools for ensuring frontend applications remain responsive and reliable under varying traffic conditions. Both serve to distribute workload, but they operate at different layers and solve distinct problems.
What is Load Balancing?
Load balancing is the process of distributing incoming network traffic across multiple servers or instances to optimize resource use, maximize throughput, minimize response time, and avoid overload on any single server.
- Purpose: Prevent any one server from becoming a bottleneck.
- Scope: Typically operates at the server or application layer.
Mind Map: Load Balancing Basics
Example: Round Robin Load Balancing
Imagine you have three frontend servers: Server A, Server B, and Server C. A round robin load balancer sends the first request to Server A, the second to Server B, the third to Server C, then cycles back to Server A. This simple approach evenly distributes requests but doesn’t consider server load.
What is a CDN?
A Content Delivery Network is a geographically distributed network of proxy servers and their data centers. The goal is to serve content to end-users with high availability and high performance.
- Purpose: Reduce latency by serving content from a location close to the user.
- Scope: Primarily handles static assets like images, CSS, JavaScript, and sometimes dynamic content.
Mind Map: CDN Components and Functions
Example: CDN in Action
A user in Tokyo requests a JavaScript file. Instead of fetching it from a server in New York, the CDN serves it from the closest edge server in Tokyo, cutting down load time significantly.
How Load Balancing and CDN Work Together
While load balancers distribute traffic among backend servers, CDNs cache and deliver static content closer to users. Together, they reduce server load and improve user experience.
Mind Map: Combined Frontend Delivery Architecture
Example: E-commerce Site Setup
- User requests homepage.
- CDN serves cached CSS, images, and JavaScript.
- For product data, the request goes through a load balancer.
- Load balancer routes request to the least busy server.
- Server responds with dynamic content.
This setup reduces latency for static assets and balances load for dynamic content.
Load Balancing Strategies Relevant to Frontend
- Round Robin: Simple and effective for evenly capable servers.
- Least Connections: Routes traffic to the server with the fewest active connections, useful when requests vary in duration.
- IP Hash: Routes requests from the same client IP to the same server, helpful for session persistence.
Example: Using IP Hash for Session Persistence
A user logs into a web app. Using IP hash ensures their requests consistently hit the same server, preventing session data loss without centralized session storage.
CDN Caching Best Practices
- Set Appropriate Cache-Control Headers: Define how long assets stay cached.
- Use Cache Invalidation: Update or remove cached content when it changes.
- Leverage Versioning: Append version strings to asset URLs to force cache refresh.
Example: Cache Versioning
Instead of loading /styles.css, use /styles.v2.css. When the stylesheet updates, increment the version to ensure browsers and CDN edge servers fetch the latest file.
Practical Considerations
- Dynamic vs Static Content: CDNs excel with static assets; dynamic content often requires load balancers and backend scaling.
- SSL Termination: Load balancers can handle SSL termination, reducing backend server load.
- Health Checks: Load balancers monitor server health and reroute traffic if a server fails.
Example: Health Check Impact
If Server B goes down, the load balancer stops sending requests to it, preventing errors and maintaining uptime.
Summary
Load balancing and CDNs are complementary. Load balancers distribute dynamic traffic across servers to prevent overload and downtime, while CDNs cache and deliver static assets closer to users to reduce latency. Understanding how to configure and combine these tools is essential for building frontend systems that scale and perform well under load.
5.3 Handling Real-time Data and WebSocket Architectures
Real-time data handling is a core requirement for many modern frontend applications, from chat apps to live dashboards and collaborative tools. WebSockets provide a persistent, full-duplex communication channel between client and server, enabling instant data exchange without repeated HTTP requests.
Understanding WebSocket Basics
- WebSocket is a protocol distinct from HTTP but starts with an HTTP handshake.
- Once established, the connection remains open, allowing bidirectional communication.
- This reduces overhead compared to polling or long-polling techniques.
Key Concepts in Real-time Frontend Design
- Connection Lifecycle: Opening, maintaining, and closing connections gracefully.
- Message Handling: Parsing, validating, and processing incoming messages.
- Reconnection Strategies: Handling network interruptions without losing state.
- Backpressure Management: Avoiding client or server overload by controlling message flow.
Mind Map: WebSocket Architecture Overview
Integrating WebSockets in Frontend Applications
-
Establishing the Connection:
const socket = new WebSocket('wss://example.com/socket'); socket.onopen = () => { console.log('Connection opened'); socket.send(JSON.stringify({ type: 'subscribe', channel: 'updates' })); }; socket.onmessage = (event) => { const data = JSON.parse(event.data); // Process incoming data console.log('Received:', data); }; socket.onerror = (error) => { console.error('WebSocket error:', error); }; socket.onclose = (event) => { console.log('Connection closed:', event.reason); }; -
Message Processing and State Updates:
- Use a centralized state management approach to handle incoming data.
- Batch updates if messages arrive rapidly to avoid excessive re-renders.
-
Reconnection Logic:
- Implement exponential backoff to avoid hammering the server.
- Preserve user state or subscriptions when reconnecting.
Mind Map: Reconnection Strategy
Example: Simple Reconnection with Exponential Backoff
function createWebSocket(url) {
  let socket;
  let retries = 0;

  function connect() {
    socket = new WebSocket(url);

    socket.onopen = () => {
      console.log('Connected');
      retries = 0; // Reset retries on successful connection
    };

    socket.onclose = () => {
      const timeout = Math.min(1000 * 2 ** retries, 30000); // cap at 30s
      console.log(`Disconnected. Reconnecting in ${timeout}ms`);
      setTimeout(connect, timeout);
      retries++;
    };

    socket.onerror = (err) => {
      console.error('Socket error:', err);
      socket.close();
    };

    socket.onmessage = (event) => {
      const message = JSON.parse(event.data);
      // Handle message
      console.log('Message received:', message);
    };
  }

  connect();
  return {
    send: (data) => {
      if (socket.readyState === WebSocket.OPEN) {
        socket.send(JSON.stringify(data));
      } else {
        console.warn('Socket not open. Message not sent:', data);
      }
    }
  };
}

const wsClient = createWebSocket('wss://example.com/socket');

// Usage example
wsClient.send({ type: 'ping' });
Handling Backpressure and Message Flooding
- When the server sends messages faster than the client can process, the UI may lag or freeze.
- Strategies to mitigate this:
- Throttling: Limit how often updates trigger UI changes.
- Batching: Accumulate messages and update the UI in chunks.
- Prioritization: Process critical messages first.
Mind Map: Backpressure Management
Example: Batching Incoming Messages
let messageQueue = [];
let isUpdating = false;

function processMessages() {
  if (messageQueue.length === 0) {
    isUpdating = false;
    return;
  }

  // Process batch
  const batch = messageQueue.splice(0, messageQueue.length);
  // Update state/UI with batch
  console.log('Processing batch:', batch);

  // Schedule next batch
  setTimeout(processMessages, 100); // process every 100ms
}

socket.onmessage = (event) => {
  const data = JSON.parse(event.data);
  messageQueue.push(data);
  if (!isUpdating) {
    isUpdating = true;
    processMessages();
  }
};
Security Considerations
- Always validate and sanitize incoming messages.
- Use secure WebSocket connections (
wss://). - Authenticate users before opening WebSocket connections.
- Implement origin checks on the server to prevent unauthorized access.
Summary
Handling real-time data with WebSockets requires managing connection lifecycle, message flow, reconnection, and backpressure. Practical implementations involve establishing robust reconnection logic, batching updates to keep the UI responsive, and securing the communication channel. These practices ensure a smooth user experience even under heavy real-time data loads.
5.4 Progressive Web Apps and Offline-first Strategies
Progressive Web Apps (PWAs) aim to combine the best of web and native apps, focusing on reliability, speed, and engagement. One of the core principles is the ability to function offline or under poor network conditions. Offline-first strategies prioritize delivering a usable experience without relying on a live connection, improving resilience and user satisfaction.
What Makes a PWA?
- Responsive: Works on any device and screen size.
- Connectivity independent: Functions offline or on low-quality networks.
- App-like: Feels like a native app with smooth interactions.
- Fresh: Updates content in the background.
- Safe: Served via HTTPS.
- Discoverable: Identifiable as an app by search engines.
- Re-engageable: Supports push notifications.
- Installable: Can be added to the home screen.
The offline capability is often the trickiest part, requiring careful design and tooling.
Core Technologies for Offline-first PWAs
- Service Workers: Scripts that run in the background, intercepting network requests and managing caching.
- Cache API: Stores assets and data locally for quick retrieval.
- IndexedDB: A client-side database for storing structured data offline.
- Manifest File: Defines app metadata, including icons and display modes.
Mind Map: Offline-first PWA Architecture
Cache Strategies Explained
- Cache First: Serve from cache if available, else fetch from network. Good for static assets like CSS, JS, images.
- Network First: Try network first, fallback to cache if offline. Useful for dynamic content.
- Stale-While-Revalidate: Serve cached content immediately, then update cache in the background.
Choosing the right strategy depends on the type of resource and user expectations.
Example: Implementing a Basic Service Worker with Cache First Strategy
const CACHE_NAME = 'app-cache-v1';
const ASSETS_TO_CACHE = [
  '/',
  '/index.html',
  '/styles.css',
  '/app.js',
  '/logo.png'
];

self.addEventListener('install', event => {
  event.waitUntil(
    caches.open(CACHE_NAME).then(cache => cache.addAll(ASSETS_TO_CACHE))
  );
});

self.addEventListener('fetch', event => {
  event.respondWith(
    caches.match(event.request).then(cachedResponse => {
      return cachedResponse || fetch(event.request);
    })
  );
});
This service worker caches essential assets during installation and serves them from cache when requested. If the asset isn’t cached, it fetches from the network.
Handling Dynamic Data with IndexedDB and Background Sync
Static assets are straightforward to cache, but dynamic data (like user-generated content or API responses) requires more care.
- Use IndexedDB to store data locally.
- When offline, save user actions or data changes in IndexedDB.
- Use Background Sync API to send stored changes to the server once the connection is restored.
Mind Map: Offline Data Flow
Example: Simplified Flow for Offline Form Submission
// IndexedDB helper (simplified)
function saveFormData(data) {
  // Open DB and store data
}

self.addEventListener('sync', event => {
  if (event.tag === 'sync-form-data') {
    event.waitUntil(
      sendStoredDataToServer()
    );
  }
});

function sendStoredDataToServer() {
  // Retrieve data from IndexedDB
  // Send to server
  // Clear stored data on success
}
On form submission, if offline, data is saved locally. When connectivity returns, the service worker triggers sync to send data.
User Experience Considerations
- Show clear indicators when the app is offline.
- Inform users when data is saved locally and will sync later.
- Handle conflicts gracefully if data changes on server and client.
Summary
Offline-first PWAs rely on service workers, caching strategies, and local storage to provide a reliable experience regardless of network conditions. Understanding when and how to cache assets and data, combined with thoughtful UI feedback, ensures users can interact with your app smoothly even offline.
5.5 Example: Scaling a Social Media Feed with Infinite Scroll
Infinite scroll is a common pattern in social media feeds, allowing users to continuously load content as they scroll down. Scaling such a system requires careful consideration of frontend design, backend support, and performance optimization. This example breaks down the key design aspects and practical implementation details.
Key Challenges in Scaling Infinite Scroll
- Data Volume: Social media feeds can contain millions of posts. Loading all at once is impossible.
- Latency: Users expect smooth scrolling without noticeable delays.
- State Management: Keeping track of loaded content, user position, and new incoming posts.
- Resource Usage: Avoiding excessive memory consumption and network requests.
- Consistency: Handling new posts, deleted posts, or edits while the user scrolls.
Mind Map: Core Components of Infinite Scroll Feed
Data Fetching and Pagination
The backend API should support paginated requests, typically using cursor-based pagination to avoid offset pitfalls. Each request includes a cursor or timestamp indicating where to continue loading posts.
Example API call:
fetch(`/api/feed?cursor=${lastPostId}&limit=20`)
  .then(res => res.json())
  .then(data => {
    // Append new posts
  });
Cursor-based pagination is preferred over offset because it handles data changes between requests more gracefully.
Rendering with Virtualization
Rendering thousands of posts at once is inefficient and can crash the browser. Virtualization renders only the visible subset of posts plus a buffer.
Example using a simple virtualization approach:
const visibleCount = 20;
const buffer = 5;

function renderPosts(scrollTop) {
  const startIndex = Math.max(0, Math.floor(scrollTop / postHeight) - buffer);
  const endIndex = startIndex + visibleCount + 2 * buffer;
  const visiblePosts = allPosts.slice(startIndex, endIndex);
  // Render visiblePosts
}
This approach reduces DOM nodes and improves scroll performance.
State Management
Track loaded posts, loading status, and the current cursor. Use a state container or framework state (React’s useState/useReducer, Redux, etc.) to manage this.
Example state shape:
const state = {
  posts: [],
  cursor: null,
  isLoading: false,
  hasMore: true
};
When the user scrolls near the bottom, trigger data fetching if hasMore is true and isLoading is false.
Scroll Event Handling
Scroll events fire rapidly. Use throttling or debouncing to limit API calls and rendering updates.
Example throttling with lodash:
window.addEventListener('scroll', _.throttle(handleScroll, 200));

function handleScroll() {
  if (window.innerHeight + window.scrollY >= document.body.offsetHeight - 500) {
    loadMorePosts();
  }
}
This triggers loading when the user is within 500px of the bottom.
Lazy Loading Images
Images are often the heaviest resources. Use the loading="lazy" attribute or Intersection Observer API to defer loading images until they are about to enter the viewport.
Example with Intersection Observer:
const observer = new IntersectionObserver((entries) => {
  entries.forEach(entry => {
    if (entry.isIntersecting) {
      const img = entry.target;
      img.src = img.dataset.src;
      observer.unobserve(img);
    }
  });
});

// Attach observer to images with data-src attribute
Handling New and Deleted Posts
Feeds are dynamic. New posts may appear at the top, and some posts may be deleted or updated. Strategies include:
- Polling or WebSocket to receive updates.
- Merging new posts at the top without disrupting scroll position.
- Removing deleted posts from state.
Example: Maintaining scroll position when prepending new posts:
const prevScrollHeight = container.scrollHeight;

// Prepend new posts
state.posts = [...newPosts, ...state.posts];
render();

const newScrollHeight = container.scrollHeight;
container.scrollTop += newScrollHeight - prevScrollHeight;
This adjustment prevents the feed from jumping.
Error Handling and User Feedback
Show loading indicators while fetching. Display retry options on failure.
Example:
{state.isLoading && <Spinner />}
{state.error && <button onClick={retryFetch}>Retry</button>}
Summary Mind Map: Workflow for Infinite Scroll Feed
This example shows that scaling an infinite scroll feed involves a combination of frontend techniques (virtualization, throttling, lazy loading), backend support (cursor pagination), and user experience considerations (loading states, error handling). Each piece contributes to a smooth, scalable feed that can handle large volumes of data without overwhelming the browser or confusing the user.
6. Advanced State Management and Data Flow Patterns
6.1 Flux, Redux, and Alternatives: When and How to Use Them
State management is a core concern in frontend system design. As applications grow, managing state across components becomes complex. Flux and Redux emerged to address this complexity by providing structured ways to handle state changes. However, they are not the only options, and knowing when and how to use them—or alternatives—is key.
What is Flux?
Flux is an architectural pattern introduced by Facebook to manage unidirectional data flow. It consists of four main parts:
- Actions: Payloads of information that send data from the application to the dispatcher.
- Dispatcher: Central hub that manages all data flow.
- Stores: Containers for application state and logic.
- Views: React components that listen to stores and re-render accordingly.
The key idea is that data flows in one direction: from actions to dispatcher, then to stores, and finally to views.
Flux Mind Map
Simple Example
Imagine a to-do app where you add items:
- User clicks “Add” button.
- An action
{ type: 'ADD_TODO', text: 'Buy milk' }is created. - Dispatcher sends this action to stores.
- Store updates its list of todos.
- View re-renders with the new list.
This clear flow helps avoid tangled state updates.
What is Redux?
Redux builds on Flux principles but simplifies and standardizes the pattern:
- Single store holds the entire application state.
- State is immutable; updates happen via pure functions called reducers.
- Actions are plain objects describing what happened.
- Middleware can intercept actions for side effects.
Redux emphasizes predictability and ease of debugging.
Redux Mind Map
Redux Example
Consider the same to-do app:
- Initial state:
{ todos: [] } - Action:
{ type: 'ADD_TODO', text: 'Buy milk' } - Reducer:
function todoReducer(state = { todos: [] }, action) { switch(action.type) { case 'ADD_TODO': return { ...state, todos: [...state.todos, action.text] }; default: return state; } } - Dispatching the action updates the state immutably.
When to Use Flux or Redux
- Your app has complex state interactions that are hard to manage with local component state.
- You want predictable state changes with clear traceability.
- You need time-travel debugging or replaying actions.
- Your team values strict architectural patterns.
However, for small or medium apps, Redux can be overkill. It adds boilerplate and cognitive load.
Alternatives to Flux and Redux
Context API + Hooks
React’s Context API combined with hooks like useReducer can handle moderate global state without external libraries.
MobX
Uses observable state and reactions, allowing mutable state and less boilerplate. It’s more implicit but can be simpler for some use cases.
Zustand
A minimalistic state management library with a simple API, useful for small to medium apps.
Recoil
Designed for React, it offers fine-grained state management with atoms and selectors.
Mind Map: State Management Options
How to Choose
- Assess complexity: If your app has many components sharing state with complex update logic, a structured approach like Redux is beneficial.
- Consider team familiarity: Introducing Redux requires understanding reducers, middleware, and immutability.
- Evaluate performance needs: Some libraries optimize rendering differently.
- Boilerplate tolerance: Redux involves more setup than Context API or Zustand.
Practical Example: Counter with Redux vs Context API
Redux:
- Store holds
{ count: 0 } - Action
{ type: 'INCREMENT' } - Reducer increments count immutably
Context API + useReducer:
- Create context with initial state
{ count: 0 } - useReducer handles
'INCREMENT' - Components consume context and dispatch actions
Both approaches work, but Redux shines when scaling beyond simple counters.
In summary, Flux and Redux provide solid, predictable patterns for managing state in complex frontend apps. Alternatives exist and can be better suited for simpler or different scenarios. Understanding the trade-offs helps you pick the right tool for your project.
6.2 Context API and Hooks for State Sharing
In React applications, sharing state across multiple components can become cumbersome if you rely solely on prop drilling—passing props down through many layers of components. The Context API combined with React Hooks offers a cleaner, more scalable way to share state without cluttering your component hierarchy.
What is Context API?
Context API provides a way to pass data through the component tree without having to pass props manually at every level. It’s designed for global data that many components might need, such as user authentication status, theme settings, or language preferences.
How Hooks Fit In
React Hooks, introduced in React 16.8, allow you to use state and other React features without writing a class. The useContext hook specifically lets you subscribe to React context from a functional component.
Mind Map: Context API and Hooks for State Sharing
Creating and Using Context: A Simple Example
Imagine you want to share a theme setting (light or dark) across your app.
import React, { createContext, useState, useContext } from 'react';

// 1. Create the context
const ThemeContext = createContext();

// 2. Create a provider component
function ThemeProvider({ children }) {
  const [theme, setTheme] = useState('light');

  const toggleTheme = () => {
    setTheme((prevTheme) => (prevTheme === 'light' ? 'dark' : 'light'));
  };

  return (
    <ThemeContext.Provider value={{ theme, toggleTheme }}>
      {children}
    </ThemeContext.Provider>
  );
}

// 3. Create a consumer component using useContext
function ThemedButton() {
  const { theme, toggleTheme } = useContext(ThemeContext);

  return (
    <button
      onClick={toggleTheme}
      style={{
        backgroundColor: theme === 'light' ? '#fff' : '#333',
        color: theme === 'light' ? '#000' : '#fff',
        padding: '10px 20px',
        border: 'none',
        borderRadius: '4px',
        cursor: 'pointer'
      }}
    >
      Current Theme: {theme} (Click to toggle)
    </button>
  );
}

// 4. Use the provider at the root
function App() {
  return (
    <ThemeProvider>
      <ThemedButton />
    </ThemeProvider>
  );
}

export default App;
In this example:
ThemeContextis created withcreateContext().ThemeProviderholds the state and provides it to all children.ThemedButtonconsumes the context usinguseContext.
This pattern avoids passing theme and toggleTheme props down manually.
Mind Map: Steps to Use Context API with Hooks
Practical Considerations
-
Avoid Overuse: Context is great for global or app-wide state but not ideal for every piece of state. Overusing context can cause performance issues because any change in context value triggers re-renders in all consuming components.
-
Memoize Context Value: To prevent unnecessary re-renders, memoize the value passed to the provider.
const value = React.useMemo(() => ({ theme, toggleTheme }), [theme]);

<ThemeContext.Provider value={value}>
  {children}
</ThemeContext.Provider>
- Split Contexts: If you have unrelated pieces of state, consider using multiple contexts to isolate updates.
Example: Sharing User Authentication State
const AuthContext = createContext();

function AuthProvider({ children }) {
  const [user, setUser] = useState(null);

  const login = (userData) => setUser(userData);
  const logout = () => setUser(null);

  const value = React.useMemo(() => ({ user, login, logout }), [user]);

  return <AuthContext.Provider value={value}>{children}</AuthContext.Provider>;
}

function UserProfile() {
  const { user, logout } = useContext(AuthContext);

  if (!user) return <div>Please log in.</div>;

  return (
    <div>
      <p>Welcome, {user.name}!</p>
      <button onClick={logout}>Logout</button>
    </div>
  );
}

function App() {
  return (
    <AuthProvider>
      <UserProfile />
    </AuthProvider>
  );
}
This example shows how authentication state can be shared and updated globally.
Summary
- Context API provides a way to share state without prop drilling.
- The
useContexthook simplifies consuming context in functional components. - Memoizing context values helps avoid unnecessary re-renders.
- Use multiple contexts to separate concerns and optimize performance.
- Context is best suited for global or widely shared state, not for every local state.
Using Context API with hooks strikes a balance between simplicity and scalability in state sharing for React apps.
6.3 Handling Complex Data Dependencies and Caching
Managing complex data dependencies in frontend applications is a challenge that grows with the scale and interactivity of your app. When multiple components rely on shared data or when data transformations depend on other data sources, keeping everything consistent and performant requires careful design.
Understanding Data Dependencies
Data dependencies occur when one piece of data relies on another. For example, a user profile component might depend on user settings and preferences fetched from different endpoints. If the settings update, the profile component may need to re-render or adjust its behavior.
Poor handling of these dependencies can lead to unnecessary re-renders, stale data, or inconsistent UI states.
Mind Map: Data Dependencies Overview
Strategies for Managing Complex Dependencies
-
Centralize State Management Using a single source of truth, like Redux or MobX, helps track dependencies explicitly. When data changes, only components subscribed to the affected slices update.
-
Use Selectors and Memoization Selectors compute derived data and memoize results to avoid redundant recalculations. This reduces unnecessary renders and improves performance.
-
Normalize Data Shape Flatten nested data structures to avoid deep updates and make cache updates easier. For example, store entities by ID rather than nested objects.
-
Explicit Cache Invalidation Define clear rules for when cached data should refresh. This might be time-based (TTL), event-based (user action), or manual triggers.
-
Dependency Graphs Represent data dependencies as graphs to understand and manage update flows. This can prevent circular dependencies and help optimize update sequences.
Mind Map: Caching Strategies
Example 1: Handling Dependent API Calls with Memoized Selectors
Imagine an app that shows a list of products and their categories. Categories come from one API, products from another. Products reference categories by ID.
- Fetch categories and products separately.
- Normalize categories and products into dictionaries keyed by ID.
- Use a selector to join product data with category names.
const selectCategories = (state) => state.categories.byId;
const selectProducts = (state) => state.products.byId;

const selectProductsWithCategory = createSelector(
  [selectProducts, selectCategories],
  (products, categories) => {
    return Object.values(products).map(product => ({
      ...product,
      categoryName: categories[product.categoryId]?.name || 'Unknown'
    }));
  }
);
This selector recalculates only when products or categories change, avoiding unnecessary recomputations.
Example 2: Cache Invalidation with Stale-While-Revalidate
Suppose you cache user profile data in memory with a TTL of 5 minutes. When the cache expires, you still serve the cached data immediately but trigger a background fetch to update it.
let cache = { data: null, timestamp: 0 };
const TTL = 300000; // 5 minutes

async function getUserProfile() {
  const now = Date.now();
  if (cache.data && now - cache.timestamp < TTL) {
    // Serve cached data
    revalidateUserProfile(); // async update
    return cache.data;
  }
  // Cache expired or empty
  const freshData = await fetchUserProfileFromAPI();
  cache = { data: freshData, timestamp: now };
  return freshData;
}

async function revalidateUserProfile() {
  const freshData = await fetchUserProfileFromAPI();
  cache = { data: freshData, timestamp: Date.now() };
  // Notify UI or trigger update
}
This approach balances responsiveness and freshness.
Example 3: Dependency Graph to Avoid Circular Updates
In a complex form, field A depends on field B, and field B depends on field C. If field C changes, updates should propagate in order: C → B → A.
Representing this as a graph:
When C updates, the system updates B first, then A. Detecting cycles (e.g., A → C) prevents infinite loops.
Summary
Handling complex data dependencies and caching requires clarity on how data flows and changes propagate. Centralizing state, using memoization, normalizing data, and defining cache invalidation rules are key. Visualizing dependencies as graphs can prevent bugs and improve update efficiency. Practical examples like memoized selectors and stale-while-revalidate caching illustrate these principles in action.
6.4 Example: Implementing Undo/Redo Functionality in a Text Editor
Undo and redo are essential features in any text editor, allowing users to revert or reapply changes. Implementing these features requires managing state history efficiently and intuitively. Let’s break down the problem and build a clear approach.
Core Concepts
- State History: Keep track of past states to revert (undo) or move forward (redo).
- Current State Pointer: Indicates which state is currently active.
- Operations Stack: Two stacks or arrays, one for undo history and one for redo history.
Mind Map: Undo/Redo State Management
Step-by-Step Implementation Outline
-
Initialize State
- Start with an initial empty string or document state.
- Undo stack is empty.
- Redo stack is empty.
-
On User Input (e.g., typing or deleting)
- Push the current state onto the undo stack.
- Clear the redo stack (because new changes invalidate redo history).
- Update the current state with the new content.
-
Undo Operation
- Check if undo stack is not empty.
- Push current state onto redo stack.
- Pop the last state from undo stack and set it as current.
-
Redo Operation
- Check if redo stack is not empty.
- Push current state onto undo stack.
- Pop the last state from redo stack and set it as current.
Mind Map: User Interaction Flow
Code Example (React-based Simplified Text Editor)
import React, { useState } from 'react';

function TextEditor() {
  const [undoStack, setUndoStack] = useState([]);
  const [redoStack, setRedoStack] = useState([]);
  const [content, setContent] = useState('');

  const handleChange = (e) => {
    const newValue = e.target.value;
    setUndoStack(prev => [...prev, content]); // Save current state
    setContent(newValue);
    setRedoStack([]); // Clear redo on new input
  };

  const undo = () => {
    if (undoStack.length === 0) return;
    const previous = undoStack[undoStack.length - 1];
    setUndoStack(prev => prev.slice(0, prev.length - 1));
    setRedoStack(prev => [...prev, content]);
    setContent(previous);
  };

  const redo = () => {
    if (redoStack.length === 0) return;
    const next = redoStack[redoStack.length - 1];
    setRedoStack(prev => prev.slice(0, prev.length - 1));
    setUndoStack(prev => [...prev, content]);
    setContent(next);
  };

  return (
    <div>
      <textarea value={content} onChange={handleChange} rows={10} cols={50} />
      <div>
        <button onClick={undo} disabled={undoStack.length === 0}>Undo</button>
        <button onClick={redo} disabled={redoStack.length === 0}>Redo</button>
      </div>
    </div>
  );
}

export default TextEditor;
Explanation
- Every time the user types or deletes, the current content is pushed onto the undo stack before updating.
- The redo stack is cleared because new edits invalidate the redo history.
- Undo pops the last state from the undo stack and pushes the current state onto the redo stack.
- Redo pops from the redo stack and pushes the current state onto the undo stack.
This approach ensures a linear history of states and simple navigation back and forth.
Handling Edge Cases and Optimizations
- Limit Stack Size: To avoid memory bloat, limit the undo and redo stacks to a fixed size (e.g., 100 states).
- Batching Changes: Group rapid changes (like typing a word) into a single undo step to improve user experience.
- Immutable Data Structures: Use immutable data to avoid accidental mutations.
- Complex Editors: For rich text or collaborative editors, consider operational transforms or CRDTs for undo/redo.
Mind Map: Enhancements and Considerations
6.5 Example: Optimizing State Updates in Large Forms
Managing state in large forms can quickly become a performance bottleneck if not handled carefully. When every keystroke or interaction triggers a full re-render or an expensive state update, the user experience suffers. This section explores practical ways to optimize state updates in large forms, focusing on minimizing unnecessary renders and improving responsiveness.
Understanding the Problem
Large forms often have many input fields, some of which may depend on others. A naive approach is to store the entire form state in a single object and update it on every change. This can cause the entire form or large parts of the UI to re-render unnecessarily.
Key issues:
- Updating the entire form state on every input change.
- Re-rendering all child components even if only one field changes.
- Complex validation logic running on every update.
Mind Map: State Update Challenges in Large Forms
Strategy 1: Split State into Smaller Chunks
Instead of one big state object, split the form state into smaller, isolated pieces. For example, manage each input’s state locally or group related fields into sub-states.
Example:
function LargeForm() {
  const [name, setName] = React.useState('');
  const [email, setEmail] = React.useState('');
  const [address, setAddress] = React.useState({ street: '', city: '', zip: '' });

  return (
    <>
      <NameInput value={name} onChange={setName} />
      <EmailInput value={email} onChange={setEmail} />
      <AddressInput value={address} onChange={setAddress} />
    </>
  );
}
By isolating state, updates to the name field won’t cause EmailInput or AddressInput to re-render.
Strategy 2: Use React.memo and useCallback to Prevent Unnecessary Renders
Wrap input components with React.memo so they only re-render when their props change. Use useCallback to memoize event handlers.
Example:
const NameInput = React.memo(({ value, onChange }) => {
  console.log('Rendering NameInput');
  return <input value={value} onChange={e => onChange(e.target.value)} />;
});

function LargeForm() {
  const [name, setName] = React.useState('');

  const handleNameChange = React.useCallback(value => {
    setName(value);
  }, []);

  return <NameInput value={name} onChange={handleNameChange} />;
}
This prevents NameInput from re-rendering unless value or onChange changes.
Mind Map: Component Rendering Optimization
Strategy 3: Debounce Expensive Updates
For inputs that trigger expensive operations (like validation or API calls), debounce the update to reduce frequency.
Example:
function useDebouncedValue(value, delay) {
  const [debouncedValue, setDebouncedValue] = React.useState(value);

  React.useEffect(() => {
    const handler = setTimeout(() => {
      setDebouncedValue(value);
    }, delay);

    return () => {
      clearTimeout(handler);
    };
  }, [value, delay]);

  return debouncedValue;
}

function EmailInput({ value, onChange }) {
  const debouncedEmail = useDebouncedValue(value, 300);

  React.useEffect(() => {
    // Trigger validation or API call with debouncedEmail
  }, [debouncedEmail]);

  return <input value={value} onChange={e => onChange(e.target.value)} />;
}
This delays validation until the user stops typing for 300ms.
Strategy 4: Use Form Libraries with Optimized State Management
Libraries like react-hook-form or Formik internally optimize state updates by isolating field states and minimizing re-renders. Using such libraries can save time and improve performance.
Example with react-hook-form:
import { useForm } from 'react-hook-form';

function LargeForm() {
  const { register, handleSubmit, formState } = useForm();

  const onSubmit = data => console.log(data);

  return (
    <form onSubmit={handleSubmit(onSubmit)}>
      <input {...register('name')} />
      <input {...register('email')} />
      <input {...register('address.street')} />
      <input {...register('address.city')} />
      <input {...register('address.zip')} />
      <button type="submit">Submit</button>
    </form>
  );
}
This approach avoids unnecessary re-renders by managing each input’s state internally.
Mind Map: Summary of Optimization Techniques
Final Notes
Optimizing state updates in large forms is about reducing the scope and frequency of updates. Splitting state, memoizing components, debouncing expensive operations, and leveraging specialized libraries all contribute to a smoother user experience. The goal is to update only what needs updating, when it needs updating, and no more.
7. Security Considerations in Frontend System Design
7.1 Common Frontend Security Vulnerabilities
Frontend security vulnerabilities are weaknesses in the client-side code or architecture that attackers can exploit to compromise user data, application integrity, or user experience. Understanding these vulnerabilities is essential for senior developers designing robust frontend systems.
Mind Map: Common Frontend Security Vulnerabilities
Cross-Site Scripting (XSS)
XSS occurs when an attacker injects malicious scripts into web pages viewed by other users. The injected script runs in the victim’s browser, potentially stealing cookies, session tokens, or manipulating the DOM.
Types of XSS:
- Stored XSS: Malicious script is permanently stored on the server (e.g., in a database) and served to users.
- Reflected XSS: Script is reflected off a web server, usually via a URL parameter.
- DOM-based XSS: The vulnerability exists in client-side code that manipulates the DOM using untrusted data.
Example: Suppose a comment section displays user input without sanitization:
const comment = getUserInput();
document.getElementById('comments').innerHTML += `<p>${comment}</p>`;
If a user submits <script>alert('XSS')</script>, the script executes for anyone viewing the comments.
Best Practice: Always sanitize and encode user inputs before inserting into the DOM, or use safe APIs like textContent instead of innerHTML.
Cross-Site Request Forgery (CSRF)
CSRF tricks a user’s browser into sending unwanted requests to a web application where they are authenticated. This can cause unauthorized actions like changing user settings.
Example: An attacker crafts a hidden form on their site that submits a POST request to a banking app to transfer money, relying on the victim’s active session.
Best Practice: Use anti-CSRF tokens that are validated on the server side and implement the SameSite cookie attribute to restrict cross-origin requests.
Insecure Direct Object References (IDOR)
IDOR happens when an application exposes internal object references (like database keys) without proper authorization checks.
Example:
A URL like /user/profile?id=123 shows user 123’s profile. If the app doesn’t verify the logged-in user’s permission, another user can change the ID to access unauthorized data.
Best Practice: Always verify user permissions on the server before serving sensitive data.
Clickjacking
Clickjacking tricks users into clicking something different from what they perceive, by overlaying transparent or disguised elements.
Example: An attacker embeds your site in an invisible iframe and overlays buttons that trigger unwanted actions.
Best Practice: Use the X-Frame-Options header or Content-Security-Policy: frame-ancestors to prevent your site from being framed.
Man-in-the-Middle (MITM) Attacks
MITM attacks intercept communication between the user and server, potentially stealing or altering data.
Example: An attacker on the same network intercepts unencrypted HTTP traffic.
Best Practice: Always use HTTPS with valid certificates and implement HSTS headers.
Sensitive Data Exposure
Storing or transmitting sensitive data (passwords, tokens, personal info) insecurely can lead to leaks.
Example: Storing JWT tokens in localStorage exposes them to XSS attacks.
Best Practice: Use secure, HttpOnly cookies for tokens and avoid exposing sensitive data in URLs.
Security Misconfigurations
Misconfigured servers, headers, or permissions can open doors for attackers.
Example:
Missing security headers like Content-Security-Policy or overly permissive CORS settings.
Best Practice: Regularly audit configurations and apply strict security policies.
Broken Authentication and Session Management
Weaknesses in login, logout, or session handling can allow attackers to hijack accounts.
Example: Sessions that never expire or predictable session IDs.
Best Practice: Implement secure session management with expiration, regeneration, and invalidation on logout.
This overview covers the most common frontend vulnerabilities. Each requires careful attention during design and development to protect users and maintain trust.
7.2 Secure Handling of User Input and Data Validation
User input is the front door to your application. If you don’t control what comes in, you risk letting in trouble. Secure handling of user input and data validation are essential steps to prevent common vulnerabilities like injection attacks, cross-site scripting (XSS), and data corruption.
Why Validate and Sanitize?
- Validation checks if the input meets expected formats or rules.
- Sanitization cleans the input to remove or neutralize harmful content.
Both are necessary because validation alone might reject invalid data but won’t protect against cleverly crafted malicious input that still passes basic checks.
Mind Map: Secure Input Handling
Validation Techniques with Examples
1. Type and Format Validation
Use explicit checks for expected data types and formats. For example, if expecting an email:
function validateEmail(email) {
  const emailRegex = /^[^@\s]+@[^@\s]+\.[^@\s]+$/;
  return emailRegex.test(email);
}

console.log(validateEmail('[email protected]')); // true
console.log(validateEmail('bad-email')); // false
2. Length and Range Checks
Prevent buffer overflows or unexpected values by limiting input size and numeric ranges.
function validateUsername(username) {
  return typeof username === 'string' && username.length >= 3 && username.length <= 20;
}

function validateAge(age) {
  return Number.isInteger(age) && age >= 0 && age <= 120;
}
3. Pattern Matching
Regex can enforce complex rules, but be cautious to avoid overly permissive or overly restrictive patterns.
Sanitization Strategies
Sanitization depends on where the input will be used.
- HTML Context: Escape
<,>,&,",'to prevent XSS. - URL Context: Encode characters to prevent URL injection.
- SQL Context: Use parameterized queries instead of manual sanitization.
Example of escaping HTML:
function escapeHTML(str) {
return str.replace(/[&<>"']/g, function (tag) {
const charsToReplace = {
'&': '&',
'<': '<',
'>': '>',
'"': '"',
"'": '''
};
return charsToReplace[tag] || tag;
});
}
const userInput = '<script>alert("xss")</script>';
const safeInput = escapeHTML(userInput);
console.log(safeInput); // <script>alert("xss")</script>
Context Awareness
Validation and sanitization must be tailored to the context where the data is used. Input safe for one context may be dangerous in another.
- HTML Rendering: Escape to prevent XSS.
- JavaScript Execution: Avoid injecting untrusted input into code.
- SQL Queries: Use parameterized queries to avoid injection.
- URLs: Encode parameters to prevent injection or redirect attacks.
Example: Using parameterized queries in a backend API (Node.js with SQL):
const query = 'SELECT * FROM users WHERE email = ?';
db.execute(query, [userEmail], (err, results) => {
  // safe from SQL injection
});
Client-side vs Server-side Validation
- Client-side validation improves user experience by providing immediate feedback.
- Server-side validation is the security gatekeeper. Never trust client-side validation alone.
Example: A form that validates email format on the client but also checks on the server before processing.
Error Handling
Inform users when input is invalid, but avoid exposing internal details or system logic.
Example:
try {
  if (!validateEmail(userInput)) {
    throw new Error('Invalid email format');
  }
  // process input
} catch (e) {
  console.log('Please enter a valid email address.');
}
Summary
- Always validate input type, format, length, and range.
- Sanitize input based on where it will be used.
- Use context-aware strategies to prevent injection attacks.
- Combine client-side validation for UX with server-side validation for security.
- Handle errors gracefully without leaking sensitive information.
Secure input handling is a foundational skill for frontend developers, especially at senior levels where system design decisions impact overall application safety and reliability.
7.3 Cross-Origin Resource Sharing (CORS) and Content Security Policy (CSP)
Frontend security often hinges on controlling what resources a web page can access and from where. Two key mechanisms that enforce these controls are Cross-Origin Resource Sharing (CORS) and Content Security Policy (CSP). Both serve distinct purposes but work together to protect users and applications from common web vulnerabilities.
Cross-Origin Resource Sharing (CORS)
Browsers enforce the Same-Origin Policy (SOP) by default, which restricts web pages from making requests to a different origin than the one that served the page. An origin is defined by the scheme (protocol), host, and port. SOP prevents malicious scripts on one site from accessing sensitive data on another.
CORS is a controlled relaxation of SOP. It allows servers to specify who can access their resources and which HTTP methods are permitted.
How CORS Works
- When a browser makes a cross-origin HTTP request (e.g., AJAX call to a different domain), it includes an
Originheader. - The server responds with
Access-Control-Allow-Originheader specifying which origins are allowed. - If the origin is allowed, the browser permits the response to be read by the client-side script.
- For certain requests (like those with custom headers or methods other than GET/POST), the browser sends a preflight OPTIONS request to check permissions.
Mind Map: CORS Workflow
Example: Simple CORS Setup
Imagine a frontend app at https://app.example.com making a fetch request to an API at https://api.example.com.
Server-side (Node.js/Express) example:
app.use((req, res, next) => {
  res.header('Access-Control-Allow-Origin', 'https://app.example.com');
  res.header('Access-Control-Allow-Methods', 'GET,POST,PUT');
  res.header('Access-Control-Allow-Headers', 'Content-Type');
  next();
});
Client-side fetch:
fetch('https://api.example.com/data')
  .then(response => response.json())
  .then(data => console.log(data));
If the server does not include the appropriate CORS headers, the browser blocks the response.
Credentials and CORS
By default, browsers do not send cookies or HTTP authentication information in cross-origin requests. To include credentials:
- Client sets
credentials: 'include'in fetch orwithCredentials = truein XMLHttpRequest. - Server must respond with
Access-Control-Allow-Credentials: true. Access-Control-Allow-Origincannot be a wildcard (*) when credentials are used; it must be explicit.
Common Pitfalls
- Using
Access-Control-Allow-Origin: *with credentials causes the browser to reject the response. - Forgetting to handle preflight OPTIONS requests on the server.
- Allowing overly broad origins can expose APIs to abuse.
Content Security Policy (CSP)
CSP is a browser security standard that helps prevent cross-site scripting (XSS), clickjacking, and other code injection attacks by specifying which sources of content are allowed.
It works by sending a Content-Security-Policy HTTP header that defines rules for loading resources such as scripts, styles, images, fonts, and more.
Mind Map: CSP Directives Overview
Example: Basic CSP Header
Content-Security-Policy: default-src 'self'; img-src https://images.example.com; script-src 'self' https://cdn.example.com; style-src 'self' 'unsafe-inline';
This policy means:
- By default, only load resources from the same origin (
'self'). - Images can also be loaded from
images.example.com. - Scripts can be loaded from the same origin and
cdn.example.com. - Styles can be loaded from the same origin and inline styles are allowed (
'unsafe-inline').
Inline Scripts and CSP
Inline scripts are blocked by default because they are a common vector for XSS. To allow inline scripts, you can:
- Use
'unsafe-inline'(not recommended). - Use a nonce or hash to whitelist specific inline scripts.
Example with nonce:
Content-Security-Policy: script-src 'nonce-abc123';
HTML:
<script nonce="abc123">console.log('Allowed inline script');</script>
Reporting Violations
CSP can be configured to send violation reports to a specified endpoint using report-uri or report-to. This helps detect and debug CSP issues.
Example: CSP with Reporting
Content-Security-Policy: default-src 'self'; report-uri /csp-report-endpoint;
Server endpoint /csp-report-endpoint would receive JSON reports when violations occur.
Common CSP Challenges
- Overly restrictive policies can break legitimate functionality.
- Inline styles and scripts require careful handling.
- Third-party scripts often require explicit whitelisting.
Integrating CORS and CSP
While CORS controls which origins can access your resources, CSP controls what resources your page can load and execute. Both are essential for a secure frontend system.
Mind Map: Security Controls Interaction
Practical Example: Secure API with CORS and CSP
Suppose you have a single-page app at https://app.example.com that fetches data from https://api.example.com and loads scripts from a trusted CDN.
Server (API) CORS headers:
Access-Control-Allow-Origin: https://app.example.com
Access-Control-Allow-Methods: GET,POST
Access-Control-Allow-Headers: Content-Type
Access-Control-Allow-Credentials: true
Frontend server CSP header:
Content-Security-Policy: default-src 'self'; script-src 'self' https://cdn.trusted.com; connect-src https://api.example.com; img-src 'self';
This setup ensures:
- The API only accepts requests from the frontend origin.
- The frontend only loads scripts from its own origin and the trusted CDN.
- AJAX calls are restricted to the API domain.
In summary, CORS and CSP are complementary tools. CORS manages who can talk to your backend, while CSP governs what your frontend can load and run. Understanding and configuring both correctly is a fundamental skill for senior frontend developers aiming to build secure and robust web applications.
7.4 Authentication and Authorization Best Practices
Authentication and authorization are foundational to frontend system design. They ensure that users are who they say they are and that they can only access resources they’re permitted to. Mistakes here can lead to security breaches or poor user experience. This section covers practical approaches and examples to get these right.
Authentication vs Authorization
- Authentication: Verifying identity.
- Authorization: Granting access based on identity.
Authentication vs Authorization Mind Map
Best Practices for Authentication
-
Use Established Protocols
- Implement OAuth 2.0 or OpenID Connect rather than custom solutions.
- Example: Using an identity provider (IdP) like Auth0 or a corporate SSO.
-
Secure Token Storage
- Avoid storing tokens in localStorage due to XSS risks.
- Prefer HttpOnly, Secure cookies with proper SameSite attributes.
- Example: Storing JWT in a cookie with
HttpOnlyandSecureflags.
-
Implement Multi-Factor Authentication (MFA)
- Adds a second layer beyond passwords.
- Example: SMS code, authenticator apps, or hardware keys.
-
Session Management
- Use short-lived tokens with refresh tokens.
- Invalidate tokens on logout or password change.
- Example: Access tokens expire after 15 minutes; refresh tokens last longer but are revocable.
-
Password Handling
- Enforce strong password policies.
- Use bcrypt or Argon2 for hashing on the backend.
- Frontend can provide password strength feedback.
Best Practices for Authorization
-
Principle of Least Privilege
- Users get only the permissions they need.
- Example: A user with “read-only” role cannot access editing features.
-
Role-Based Access Control (RBAC)
- Define roles and assign permissions.
- Example: Roles like Admin, Editor, Viewer with distinct capabilities.
-
Fine-Grained Permissions
- Sometimes roles are too coarse; use attribute-based or permission scopes.
- Example: Allow editing only on documents owned by the user.
-
Enforce Authorization on Both Frontend and Backend
- Frontend hides UI elements based on permissions.
- Backend validates all requests regardless of frontend checks.
-
Token Scopes and Claims
- Include user roles and permissions in tokens.
- Example: JWT claims contain
role: 'admin'orpermissions: ['read', 'write'].
Example: Implementing Authentication and Authorization in a React App
// Simplified example of role-based rendering
function Dashboard({ user }) {
  return (
    <div>
      <h1>Welcome, {user.name}</h1>
      {user.role === 'admin' && <AdminPanel />}
      {user.permissions.includes('edit') && <EditButton />}
    </div>
  );
}
- Here, the frontend uses user info from a decoded JWT or context.
- The backend must still verify the user’s permissions on any sensitive API call.
Mind Map: Token Storage and Security Considerations
Token Storage Mind Map
Example: Refresh Token Flow
- User logs in and receives an access token (short-lived) and a refresh token (long-lived).
- Access token is used for API requests.
- When access token expires, frontend sends refresh token to get a new access token.
- Refresh token is stored securely (HttpOnly cookie).
async function fetchWithAuth(url) {
  let token = getAccessToken();
  let response = await fetch(url, { headers: { Authorization: `Bearer ${token}` } });

  if (response.status === 401) {
    // Access token expired, try refreshing
    const refreshResponse = await fetch('/auth/refresh', { method: 'POST', credentials: 'include' });
    if (refreshResponse.ok) {
      const data = await refreshResponse.json();
      setAccessToken(data.accessToken);
      // Retry original request
      response = await fetch(url, { headers: { Authorization: `Bearer ${data.accessToken}` } });
    } else {
      // Redirect to login
      window.location.href = '/login';
    }
  }

  return response;
}
Summary
- Use proven authentication protocols and avoid reinventing the wheel.
- Store tokens securely to minimize attack surface.
- Implement multi-factor authentication for sensitive apps.
- Apply least privilege principles and enforce authorization on both frontend and backend.
- Use clear token scopes and roles to manage permissions.
- Always validate permissions server-side, never trust frontend checks alone.
These practices form the backbone of secure and user-friendly frontend authentication and authorization.
7.5 Example: Implementing Secure Token Storage and Renewal
Secure token storage and renewal is a critical part of frontend security, especially when dealing with authentication tokens like JWTs or OAuth tokens. Poor handling can lead to token theft, session hijacking, or unauthorized access. This section walks through practical approaches to storing tokens securely in the browser and implementing token renewal mechanisms.
Understanding Token Storage Options
Before jumping into code, let’s map out common storage options and their security implications.
Token Storage Mind Map
Recommended Approach
Use HttpOnly, Secure cookies for storing refresh tokens to protect against XSS, and keep access tokens in memory to reduce exposure. This setup requires a backend endpoint to issue new access tokens using the refresh token.
Implementation Example
Step 1: Storing Tokens
- Access Token: Store in a JavaScript variable (in-memory).
- Refresh Token: Stored in an HttpOnly, Secure cookie set by the server.
Step 2: Using Tokens in API Calls
Access tokens are included in the Authorization header. When the access token expires, the frontend calls a refresh endpoint to get a new access token.
Step 3: Token Renewal Logic
let accessToken = null;

async function fetchWithAuth(url, options = {}) {
  if (!accessToken) {
    accessToken = await getNewAccessToken();
  }

  options.headers = {
    ...options.headers,
    'Authorization': `Bearer ${accessToken}`
  };

  let response = await fetch(url, options);

  if (response.status === 401) { // Token expired or invalid
    accessToken = await getNewAccessToken();
    if (!accessToken) {
      throw new Error('Authentication required');
    }
    options.headers['Authorization'] = `Bearer ${accessToken}`;
    response = await fetch(url, options);
  }

  return response;
}

async function getNewAccessToken() {
  try {
    const response = await fetch('/auth/refresh-token', {
      method: 'POST',
      credentials: 'include' // Send cookies
    });
    if (response.ok) {
      const data = await response.json();
      return data.accessToken; // New access token
    }
  } catch (e) {
    console.error('Failed to refresh token', e);
  }
  return null;
}
Step 4: Handling Logout and Token Revocation
Clear the in-memory access token and call a backend endpoint to clear the refresh token cookie.
async function logout() {
  accessToken = null;
  await fetch('/auth/logout', {
    method: 'POST',
    credentials: 'include'
  });
  // Redirect or update UI accordingly
}
Mind Map: Token Lifecycle and Renewal Flow
Token Lifecycle Mind Map
Security Notes
- Avoid storing tokens in localStorage or sessionStorage due to XSS risks.
- Use the
SameSiteattribute on cookies to mitigate CSRF. - Always use HTTPS to protect tokens in transit.
- Implement short-lived access tokens to limit exposure.
- Refresh tokens should be securely stored and rotated.
This example balances security and usability by leveraging browser cookie features and in-memory storage. It minimizes token exposure to JavaScript while enabling seamless token renewal without forcing users to log in repeatedly.
8. Testing Strategies for Frontend Systems
8.1 Unit Testing Components and Utilities
Unit testing is the foundation of reliable frontend code. It ensures that individual pieces—components or utility functions—work as expected in isolation. This section covers practical approaches to unit testing, focusing on clarity and maintainability.
Why Unit Test Components and Utilities?
- Catch bugs early: Testing small units helps identify issues before they escalate.
- Facilitate refactoring: Tests act as safety nets when improving or changing code.
- Document behavior: Well-written tests clarify how components and utilities should behave.
Mind Map: Unit Testing Components and Utilities
Unit Testing Components
Unit testing components means verifying their output and behavior given certain inputs (props, state, context). The goal is to test the component in isolation without involving external systems.
Key Practices
- Render the component: Use a testing utility to render the component in a virtual DOM.
- Check output: Verify the rendered output matches expectations (text, structure, classes).
- Test props: Confirm the component behaves correctly with different prop values.
- Simulate events: Trigger user interactions and check the resulting behavior.
- State testing: If the component manages internal state, test state transitions.
Example: Testing a Button Component
import React from 'react';
import { render, fireEvent } from '@testing-library/react';
import Button from './Button';

test('renders button with label and handles click', () => {
  const handleClick = jest.fn();
  const { getByText } = render(<Button label="Click me" onClick={handleClick} />);

  const button = getByText('Click me');
  expect(button).toBeInTheDocument();

  fireEvent.click(button);
  expect(handleClick).toHaveBeenCalledTimes(1);
});
This test confirms the button renders with the correct label and calls the provided click handler once when clicked.
Snapshot Testing
Snapshot tests capture the rendered output and compare it to a stored snapshot. They are useful for catching unexpected changes but should be used judiciously to avoid brittle tests.
import React from 'react';
import renderer from 'react-test-renderer';
import Button from './Button';

test('matches snapshot', () => {
  const tree = renderer.create(<Button label="Snapshot" />).toJSON();
  expect(tree).toMatchSnapshot();
});
Unit Testing Utilities
Utility functions are usually pure functions or small helpers. Testing them involves verifying outputs for given inputs, including edge cases.
Key Practices
- Test typical inputs: Confirm the function returns expected results for normal cases.
- Test edge cases: Include empty inputs, nulls, or unusual values.
- Test error handling: If the function throws errors, verify that behavior.
Example: Testing a Utility Function
// utils.js
export function capitalize(str) {
  if (typeof str !== 'string') throw new TypeError('Expected a string');
  if (str.length === 0) return '';
  return str[0].toUpperCase() + str.slice(1);
}

// utils.test.js
import { capitalize } from './utils';

test('capitalizes the first letter', () => {
  expect(capitalize('hello')).toBe('Hello');
});

test('returns empty string for empty input', () => {
  expect(capitalize('')).toBe('');
});

test('throws error for non-string input', () => {
  expect(() => capitalize(null)).toThrow(TypeError);
});
Mocking and Isolating Dependencies
When utilities or components depend on external modules or APIs, mocks help isolate the unit under test.
- Use Jest’s mocking capabilities to replace dependencies with controlled implementations.
- Verify that dependencies are called correctly without executing their real logic.
Summary
Unit testing components and utilities requires focusing on small, isolated pieces of code. Clear, concise tests that cover expected behavior and edge cases improve code quality and developer confidence. The examples here show straightforward ways to write tests that are easy to understand and maintain.
8.2 Integration Testing for Complex Interactions
Integration testing verifies that different parts of your frontend system work together as expected. Unlike unit tests, which focus on isolated components or functions, integration tests cover interactions across multiple components, services, or modules. This is especially important for complex user flows where state, UI, and external data sources intertwine.
Why Integration Testing Matters
- Catches interface mismatches: Ensures components communicate correctly.
- Validates data flow: Confirms that state changes propagate as intended.
- Tests real user scenarios: Simulates how users interact with multiple parts of the app.
- Reduces regression risk: Protects against bugs introduced by changes in interconnected code.
Key Areas to Cover in Integration Tests
Strategies for Effective Integration Testing
-
Test Realistic User Flows: Write tests that mimic how users navigate and interact with the app, such as filling forms, submitting data, and viewing results.
-
Use Mocks and Stubs Judiciously: Mock external APIs to control responses and simulate edge cases, but keep mocks close to real behavior to avoid false positives.
-
Focus on State Transitions: Verify that state updates trigger the correct UI changes and side effects.
-
Test Asynchronous Behavior: Handle promises, timers, and event-driven updates carefully to avoid flaky tests.
-
Isolate Integration Boundaries: While testing interactions, avoid turning integration tests into full end-to-end tests by limiting scope to frontend components and services.
Example: Integration Test for a Multi-step Form
Imagine a checkout form with three steps: user info, shipping details, and payment. Each step is a separate component, but they share state and validation logic.
import { render, screen, fireEvent, waitFor } from '@testing-library/react';
import CheckoutForm from './CheckoutForm';

test('completes multi-step checkout flow', async () => {
  render(<CheckoutForm />);

  // Step 1: User Info
  fireEvent.change(screen.getByLabelText(/name/i), { target: { value: 'Jane Doe' } });
  fireEvent.change(screen.getByLabelText(/email/i), { target: { value: '[email protected]' } });
  fireEvent.click(screen.getByText(/next/i));

  // Step 2: Shipping Details
  await waitFor(() => screen.getByLabelText(/address/i));
  fireEvent.change(screen.getByLabelText(/address/i), { target: { value: '123 Elm St' } });
  fireEvent.click(screen.getByText(/next/i));

  // Step 3: Payment
  await waitFor(() => screen.getByLabelText(/credit card/i));
  fireEvent.change(screen.getByLabelText(/credit card/i), { target: { value: '4111111111111111' } });
  fireEvent.click(screen.getByText(/submit/i));

  // Confirmation
  await waitFor(() => screen.getByText(/thank you for your order/i));
  expect(screen.getByText(/thank you for your order/i)).toBeInTheDocument();
});
This test covers multiple components, state transitions, and user interactions in one flow. It ensures the form behaves correctly as users move through steps.
Handling Asynchronous Updates
Integration tests often involve async operations like API calls or timers. Use utilities like waitFor or findBy from testing libraries to wait for UI updates instead of arbitrary delays.
Example: Testing API Interaction with Mocked Fetch
import { rest } from 'msw';
import { setupServer } from 'msw/node';
import { render, screen, fireEvent, waitFor } from '@testing-library/react';
import UserProfile from './UserProfile';

const server = setupServer(
  rest.get('/api/user', (req, res, ctx) => {
    return res(ctx.json({ name: 'Alice', age: 30 }));
  })
);

beforeAll(() => server.listen());
afterEach(() => server.resetHandlers());
afterAll(() => server.close());

test('loads and displays user data', async () => {
  render(<UserProfile />);

  fireEvent.click(screen.getByText(/load profile/i));

  await waitFor(() => screen.getByText(/alice/i));
  expect(screen.getByText(/age: 30/i)).toBeInTheDocument();
});
This test simulates an API call and verifies that the component updates accordingly. It also allows injecting error responses to test failure handling.
Common Pitfalls
- Testing too much at once, making tests brittle and hard to debug.
- Over-mocking, which can hide integration issues.
- Ignoring edge cases like network failures or invalid data.
- Not cleaning up after tests, leading to state leakage.
Summary
Integration testing bridges the gap between unit tests and full end-to-end tests. It focuses on how components and modules work together, especially for complex interactions involving state, UI, and asynchronous data. Writing clear, focused integration tests with realistic scenarios helps catch bugs early and ensures your frontend system behaves reliably under real-world conditions.
8.3 End-to-End Testing with Realistic User Scenarios
End-to-end (E2E) testing simulates real user interactions with your application from start to finish. Unlike unit or integration tests, which focus on isolated components or small groups of components, E2E tests validate the entire system’s behavior, including frontend, backend, and external services. This approach ensures that all parts work together as expected in realistic conditions.
Why Focus on Realistic User Scenarios?
Testing with realistic user scenarios means crafting tests that mirror how actual users navigate and use your application. This helps catch issues that might not appear in isolated tests, such as workflow interruptions, UI glitches, or unexpected state changes.
Key Elements of Effective E2E Testing
- User Flows: Define common paths users take, such as signing up, logging in, making a purchase, or submitting a form.
- Data Setup and Cleanup: Prepare the system state before tests and reset it afterward to avoid flaky tests.
- Assertions on UI and Backend: Verify that UI changes reflect backend responses correctly.
- Cross-Browser and Device Testing: Ensure consistent behavior across environments.
Mind Map: Components of E2E Testing with Realistic User Scenarios
Designing Realistic User Scenarios
Start by identifying the most common and critical user journeys. For example, in an e-commerce app, a typical flow might be: browse products → add to cart → checkout → payment → order confirmation.
Each step should be tested with realistic inputs and expected outcomes:
- Browsing: Verify product lists load correctly, filters work, and pagination behaves as expected.
- Adding to cart: Confirm the cart updates and persists across pages.
- Checkout: Test form validations, address entry, and shipping options.
- Payment: Simulate payment gateway responses, including success and failure.
- Confirmation: Check order summary and email notifications.
Example: E2E Test for a Login Flow Using Cypress
describe('User Login Flow', () => {
  beforeEach(() => {
    cy.visit('/login');
  });

  it('allows a user to log in with valid credentials', () => {
    cy.get('input[name="email"]').type('[email protected]');
    cy.get('input[name="password"]').type('correctpassword');
    cy.get('button[type="submit"]').click();

    cy.url().should('include', '/dashboard');
    cy.get('.welcome-message').should('contain', 'Welcome, User');
  });

  it('shows error on invalid credentials', () => {
    cy.get('input[name="email"]').type('[email protected]');
    cy.get('input[name="password"]').type('wrongpassword');
    cy.get('button[type="submit"]').click();

    cy.get('.error-message').should('be.visible').and('contain', 'Invalid email or password');
  });
});
This test covers both a successful login and a failure scenario, reflecting realistic user behavior.
Mind Map: Login Flow Test Scenario
Handling Complex Scenarios
Some user flows involve multiple steps and external dependencies. For example, a multi-step form with conditional logic or a chat application with real-time updates.
In these cases:
- Break down the flow into smaller testable segments.
- Use mocks or stubs for external services when necessary but keep some tests fully integrated to catch integration issues.
- Validate state transitions carefully.
Example: Testing a Multi-Step Form
describe('Multi-Step Form Submission', () => {
  it('completes the form and submits successfully', () => {
    cy.visit('/multi-step-form');

    // Step 1: Personal Info
    cy.get('input[name="firstName"]').type('Jane');
    cy.get('input[name="lastName"]').type('Doe');
    cy.get('button.next').click();

    // Step 2: Address
    cy.get('input[name="address"]').type('123 Main St');
    cy.get('input[name="city"]').type('Anytown');
    cy.get('button.next').click();

    // Step 3: Review & Submit
    cy.get('.review-section').should('contain', 'Jane Doe');
    cy.get('button.submit').click();

    // Confirmation
    cy.get('.success-message').should('contain', 'Thank you for your submission');
  });
});
Mind Map: Multi-Step Form Test
Best Practices for E2E Testing
- Keep tests deterministic: Avoid flaky tests by controlling data and environment.
- Use realistic test data: Mimic actual user input formats and values.
- Test error states: Include scenarios for invalid input, network failures, and edge cases.
- Automate test runs: Integrate E2E tests into your CI/CD pipeline.
- Balance coverage and speed: Prioritize critical flows to keep test suites manageable.
E2E testing with realistic user scenarios is a powerful way to ensure your frontend behaves as expected in real-world conditions. By focusing on actual user journeys and verifying outcomes at every step, you reduce the risk of surprises after deployment.
8.4 Performance and Load Testing Frontend Applications
Performance and load testing in frontend applications focus on ensuring your app remains responsive and stable under various conditions, including heavy user traffic or complex interactions. This section covers practical approaches, tools, and examples to help you validate and improve your frontend’s performance.
Why Performance and Load Testing Matter
Performance testing measures how fast and smoothly your app responds to user actions, while load testing evaluates how it behaves under expected or peak user loads. Both are crucial because frontend bottlenecks can cause slow rendering, janky animations, or even crashes, directly impacting user experience.
Key Concepts Mind Map
Performance and Load Testing Mind Map
Performance Testing: Practical Steps
-
Identify Critical User Flows: Focus on the most common or important user interactions, such as page load, form submission, or navigation.
-
Measure Baseline Performance: Use browser tools like Chrome DevTools or Lighthouse to capture initial metrics.
-
Profile and Analyze: Look for long scripting times, large resource sizes, or layout thrashing.
-
Apply Optimizations: Examples include code splitting, image compression, or reducing unnecessary re-renders.
-
Re-measure and Compare: Confirm improvements and ensure no regressions.
Example: Measuring Time to Interactive (TTI)
Suppose you have a single-page app (SPA) with a dashboard. Using Lighthouse, you find TTI is 6 seconds, which feels sluggish. Profiling reveals a large bundle and blocking scripts.
Optimization: Split the bundle by routes and lazy load non-critical components.
Result: TTI drops to 3 seconds, improving user experience.
Load Testing: Simulating Real User Conditions
Load testing helps verify your frontend can handle multiple users simultaneously without degrading.
Example: Load Testing a Search Feature
Imagine a search page expected to handle 1000 concurrent users.
Setup: Use a tool like k6 to simulate 1000 virtual users performing searches with realistic think times.
Metrics to Watch: Response time, error rate, and browser CPU/memory usage.
Findings: If response times spike or errors increase, investigate backend API limits or frontend rendering bottlenecks.
Mind Map: Load Testing Workflow
Combining Performance and Load Testing
Performance and load testing are complementary. For example, under load, your app might experience slower script execution or memory leaks that don’t show up in isolated performance tests.
Example: Detecting Memory Leaks Under Load
Run a load test simulating 500 users interacting with a chat app. Monitor memory usage in Chrome DevTools.
If memory steadily increases without release, you likely have a leak, such as event listeners not being cleaned up.
Fixing this improves stability and responsiveness during real-world usage.
Tips for Effective Testing
- Automate tests to run regularly, catching regressions early.
- Test on multiple devices and network conditions to cover diverse user environments.
- Use realistic data and user flows to get meaningful results.
- Monitor both frontend and backend, as frontend performance often depends on backend responsiveness.
Performance and load testing are not one-off tasks but ongoing practices that help maintain a smooth user experience as your frontend evolves. Clear metrics, realistic simulations, and iterative improvements form the backbone of reliable frontend systems.
8.5 Example: Writing Tests for a Dynamic Form with Validation
Testing dynamic forms with validation requires a clear strategy to cover both the user interactions and the underlying validation logic. The goal is to ensure that the form behaves correctly as users input data, trigger validation rules, and submit the form.
Mind Map: Testing a Dynamic Form with Validation
Step 1: Setup and Render
Start by rendering the form component in your test environment. Use a testing library that supports DOM interaction, such as React Testing Library or similar.
import { render, screen, fireEvent } from '@testing-library/react';
import DynamicForm from './DynamicForm';

test('renders initial form fields', () => {
  render(<DynamicForm />);
  expect(screen.getByLabelText(/Name/i)).toBeInTheDocument();
  expect(screen.getByLabelText(/Email/i)).toBeInTheDocument();
});
This test confirms that the form renders the expected fields initially.
Step 2: Test User Input and Validation
Simulate user input and check validation feedback. For example, if the email field requires a valid email format:
test('shows error message on invalid email', () => {
  render(<DynamicForm />);
  const emailInput = screen.getByLabelText(/Email/i);
  fireEvent.change(emailInput, { target: { value: 'invalid-email' } });
  fireEvent.blur(emailInput); // trigger validation on blur
  expect(screen.getByText(/Invalid email address/i)).toBeInTheDocument();
});
This test ensures that invalid input triggers the correct error message.
Step 3: Test Dynamic Field Behavior
If the form adds or removes fields based on user actions, test these changes explicitly.
test('adds phone number field when checkbox is checked', () => {
  render(<DynamicForm />);
  const checkbox = screen.getByLabelText(/Add phone number/i);
  fireEvent.click(checkbox);
  expect(screen.getByLabelText(/Phone Number/i)).toBeInTheDocument();
});
This confirms that dynamic fields appear as expected.
Step 4: Test Form Submission
Test both successful and unsuccessful submissions.
test('submit button disabled when form is invalid', () => {
  render(<DynamicForm />);
  const submitButton = screen.getByRole('button', { name: /submit/i });
  expect(submitButton).toBeDisabled();
});

test('form submits successfully with valid data', () => {
  const mockSubmit = jest.fn();
  render(<DynamicForm onSubmit={mockSubmit} />);
  fireEvent.change(screen.getByLabelText(/Name/i), { target: { value: 'Alice' } });
  fireEvent.change(screen.getByLabelText(/Email/i), { target: { value: '[email protected]' } });
  const submitButton = screen.getByRole('button', { name: /submit/i });
  fireEvent.click(submitButton);
  expect(mockSubmit).toHaveBeenCalledWith({ name: 'Alice', email: '[email protected]' });
});
The first test checks that the submit button is disabled when inputs are invalid or empty. The second test verifies that submitting valid data calls the submission handler with the correct payload.
Step 5: Test Edge Cases and Error Handling
Consider edge cases like empty inputs, maximum length, or asynchronous validation failures.
test('shows error when required field is empty on submit', () => {
  render(<DynamicForm />);
  const submitButton = screen.getByRole('button', { name: /submit/i });
  fireEvent.click(submitButton);
  expect(screen.getByText(/Name is required/i)).toBeInTheDocument();
});

// Example of asynchronous validation
test('shows error if username is already taken', async () => {
  render(<DynamicForm />);
  const usernameInput = screen.getByLabelText(/Username/i);
  fireEvent.change(usernameInput, { target: { value: 'takenUsername' } });
  fireEvent.blur(usernameInput);
  const errorMessage = await screen.findByText(/Username already taken/i);
  expect(errorMessage).toBeInTheDocument();
});
The asynchronous test uses findByText which waits for the error message to appear.
Summary
Testing a dynamic form with validation involves:
- Verifying initial rendering of fields
- Simulating user input and triggering validation
- Testing dynamic field addition/removal
- Checking form submission behavior
- Covering edge cases and asynchronous validation
Writing tests this way ensures your form behaves reliably under various user interactions and data conditions.
9. Interview Preparation: System Design Questions
9.1 Approaching Frontend System Design Interview Questions
Frontend system design interviews test your ability to architect user-facing applications that are scalable, maintainable, and performant. The key is to approach these questions methodically, balancing technical depth with clear communication. Here’s a structured way to tackle them.
Step 1: Clarify Requirements
Start by asking questions to understand the scope and constraints. This helps avoid assumptions and shows you think critically.
- What is the core functionality?
- Who are the users and what’s the expected scale?
- Are there any specific performance or latency requirements?
- What platforms or browsers need support?
- Are there existing systems or APIs to integrate with?
Step 2: Define Core Components
Break down the system into major parts. For frontend, this often includes:
- UI Components
- State Management
- Data Fetching Layer
- Caching and Offline Support
- Performance Optimization
- Security Considerations
Step 3: Sketch Data Flow and Interaction
Describe how data moves through the system and how components interact. This clarifies complexity and potential bottlenecks.
Step 4: Address Scalability and Maintainability
Explain how your design handles growth in users, data, and features. Consider modularity, code reuse, and ease of updates.
Step 5: Highlight Trade-offs
No design is perfect. Discuss trade-offs you made and why, showing you can balance competing priorities.
Step 6: Summarize and Invite Feedback
Recap your design briefly and ask if the interviewer wants you to dive deeper into any part.
Mind Map: Frontend System Design Interview Approach
Example: Designing a News Feed Interface
Clarify Requirements:
- Users scroll through articles with images and text.
- Support 1 million daily active users.
- Must work on mobile and desktop browsers.
- Real-time updates for breaking news.
Define Core Components:
- Article List Component (virtualized for performance)
- State Management (e.g., Redux or Context API)
- Data Layer (REST API with pagination)
- Caching (localStorage or IndexedDB for offline reading)
- WebSocket for real-time updates
Data Flow:
- User scroll triggers fetch for next page.
- New articles pushed via WebSocket update state.
- State changes trigger re-render of visible articles.
Scalability & Maintainability:
- Virtualization reduces DOM nodes, improving performance.
- Modular components enable independent updates.
- Clear separation between UI and data fetching.
Trade-offs:
- Using WebSocket adds complexity but improves freshness.
- Virtualization may complicate accessibility.
Summary:
- Designed a modular, scalable news feed with real-time updates and offline support. Ready to discuss any part in detail.
This approach ensures you cover all critical aspects without getting lost in details or missing key points. It also demonstrates your ability to think like a system architect and communicate clearly.
9.2 Structuring Your Thought Process and Communication
Structuring your thought process and communication during a frontend system design interview is as important as the technical solution you propose. Interviewers want to see clarity, logical progression, and the ability to adapt your ideas based on feedback or constraints. Here’s a practical approach to organizing your response.
Step 1: Clarify the Problem
Start by restating the problem in your own words. Ask clarifying questions to understand scope, constraints, and priorities. This shows you’re not rushing and value precision.
Example: If asked to design a real-time chat app, you might ask: “Are we targeting mobile and desktop? How many concurrent users should the system support? Is message persistence required?”
Step 2: Define High-Level Components
Break the system into major parts. This helps organize your thoughts and gives the interviewer a roadmap.
Example: For the chat app, you might identify: message list UI, input box, WebSocket connection manager, local message cache, and notification system.
Step 3: Dive into Each Component
Discuss each part’s responsibilities, technologies, and challenges. Use simple diagrams or lists to keep it clear.
Example: For the WebSocket manager, explain how it maintains connection, handles reconnection, and propagates messages to the UI.
Step 4: Address Cross-Cutting Concerns
Talk about security, scalability, testing, and maintainability as they apply across components.
Example: Discuss how you’d secure message data in transit and at rest, or how you’d test the message input component.
Step 5: Summarize and Invite Feedback
Wrap up by summarizing your design and asking if the interviewer wants you to explore any part in more detail.
- Summarize Design
- Ask for Feedback or Focus Areas
Mind Map: Thought Process Structure
Example in Practice
Imagine you’re asked to design a collaborative document editor. Here’s how you might structure your response:
-
Clarify: “Is real-time collaboration required? What’s the expected number of simultaneous users? Should offline editing be supported?”
-
High-Level Components: Document editor UI, synchronization engine, conflict resolution logic, backend API, and offline storage.
-
Component Details: Explain how the synchronization engine uses operational transforms or CRDTs to merge changes, and how the UI reflects updates.
-
Cross-Cutting Concerns: Discuss authentication for document access, autosave for reliability, and testing strategies for synchronization correctness.
-
Summarize: “This design supports real-time collaboration with conflict resolution and offline editing. Would you like me to expand on the synchronization algorithm or the UI design?”
This approach keeps your answer organized, shows your ability to think systematically, and invites interaction, which interviewers appreciate.
9.3 Common Frontend System Design Interview Scenarios
Frontend system design interviews often focus on your ability to architect user-facing applications that are scalable, maintainable, and performant. The scenarios typically test your understanding of component design, state management, performance trade-offs, and interaction with backend services. Below are some common scenarios you might encounter, along with mind maps and examples to clarify the design considerations.
Scenario 1: Designing a News Feed (e.g., Social Media Timeline)
Key challenges:
- Efficiently loading and rendering a large list of posts
- Handling real-time updates (new posts, likes, comments)
- Supporting infinite scrolling or pagination
- Managing client-side caching and state
News Feed Design Mind Map
Example:
Imagine building a Twitter-like feed. Use a virtualized list component (e.g., react-window) to render only visible posts. Fetch posts in pages, appending new data as the user scrolls. Use a global state manager (Redux or Context) to store posts and update them optimistically when a user likes a post. For real-time updates, open a WebSocket connection to receive new posts and insert them at the top without resetting scroll.
Scenario 2: Building a Collaborative Document Editor
Key challenges:
- Real-time synchronization of document state across users
- Conflict resolution and operational transformation
- Efficient rendering of document changes
- Managing undo/redo history
Collaborative Editor Design Mind Map
Example:
Design a rich-text editor where multiple users can edit simultaneously. Use a CRDT (Conflict-free Replicated Data Type) to merge changes from different clients without conflicts. The frontend maintains a local copy of the document and applies patches received over WebSocket. To avoid excessive re-renders, batch incoming changes and update the UI incrementally. Implement undo/redo by storing patches in a stack.
Scenario 3: Designing a Real-time Chat Application
Key challenges:
- Low-latency message delivery
- Handling message ordering and duplicates
- Supporting typing indicators and read receipts
- Managing offline scenarios and message persistence
Real-time Chat Design Mind Map
Example:
Create a chat interface where messages are sent and received over WebSocket. Assign each message a unique ID to prevent duplicates. Use a virtualized list to render thousands of messages efficiently. Show typing indicators by broadcasting user typing events. Cache unsent messages locally so if the connection drops, messages can be sent once reconnected.
Scenario 4: Designing a Dashboard with Multiple Widgets
Key challenges:
- Loading and updating multiple independent data sources
- Isolating widget failures
- Optimizing rendering and minimizing unnecessary updates
- Supporting widget customization and rearrangement
Dashboard Design Mind Map
Example:
Build a dashboard where each widget fetches its own data independently. Use React.memo or equivalent to prevent re-rendering widgets when unrelated data changes. Implement lazy loading so widgets outside the viewport load only when scrolled into view. Allow users to drag and drop widgets to rearrange, storing layout preferences in local storage.
Scenario 5: Implementing a Search Interface with Autocomplete
Key challenges:
- Debouncing user input to reduce API calls
- Displaying suggestions with minimal latency
- Handling keyboard navigation and accessibility
- Managing cache for repeated queries
Search Autocomplete Design Mind Map
Example:
When a user types in the search box, debounce the input by 300ms before sending a request. Cancel any ongoing requests if the user types again quickly. Cache previous query results in memory to instantly show suggestions for repeated inputs. Implement keyboard navigation so users can use arrow keys to select suggestions, with proper ARIA attributes for screen readers.
These scenarios cover a broad range of frontend system design challenges. When approaching them in an interview, start by clarifying requirements and constraints, then outline your architecture with trade-offs. Use diagrams or mind maps to organize your thoughts clearly. Finally, tie your design back to user experience and maintainability, showing you understand both technical and practical aspects.
9.4 Example: Designing a Collaborative Document Editor
Designing a collaborative document editor is a classic frontend system design problem that tests your ability to handle real-time data synchronization, conflict resolution, and user experience under concurrent editing conditions. Let’s break down the key components and considerations, supported by mind maps and examples.
Core Features to Design
- Real-time collaborative editing
- Conflict resolution and consistency
- User presence and cursor tracking
- Version history and undo/redo
- Offline support and synchronization
Mind Map: High-Level Components
Real-time Collaborative Editing
At the heart of the system is the ability to let multiple users edit the same document simultaneously. This requires a synchronization algorithm to merge concurrent changes without losing data or causing inconsistencies.
Two popular approaches:
- Operational Transformation (OT): Transforms operations based on concurrency to maintain consistency.
- Conflict-free Replicated Data Types (CRDTs): Data structures designed to merge changes automatically.
Example:
Imagine two users typing at the same time:
- User A inserts "Hello " at position 0.
- User B inserts “World” at position 0.
OT would transform one operation relative to the other to maintain a consistent order, resulting in either “Hello World” or “World Hello” depending on the transformation rules.
Conflict Resolution and Consistency
The system must ensure eventual consistency: all clients converge to the same document state after all operations are applied.
Example:
If User A deletes a word that User B is editing, the system must handle this gracefully:
- OT transforms User B’s edit to apply to the updated document.
- CRDT merges the changes so no data is lost.
User Presence and Cursor Tracking
Showing where other users are editing improves collaboration.
Implementation details:
- Each client sends cursor position updates via WebSocket.
- Server broadcasts these positions to other clients.
- Clients render colored cursors or highlights.
Example:
User A sees User B’s cursor blinking at character 25 with a label “Bob”.
Version History and Undo/Redo
Users expect to undo changes and view past versions.
Example:
- Maintain an undo stack of operations per client.
- Undo triggers an inverse operation sent through the synchronization layer.
- Server persists snapshots or operation logs for version history.
Offline Support and Synchronization
Users may lose connectivity but still want to edit.
Approach:
- Queue operations locally.
- On reconnect, send queued operations to server.
- Merge with server state using OT or CRDT.
Mind Map: Data Flow for Real-Time Editing
Example Code Snippet: Simple Operation Object
const operation = {
  type: 'insert', // or 'delete'
  position: 5,
  text: 'Hello',
  userId: 'user123',
  timestamp: 1616161616161
};
This operation can be sent over WebSocket and transformed on the server.
Network Layer Considerations
- Use WebSocket for low-latency bi-directional communication.
- Implement heartbeat/ping to detect disconnections.
- Handle reconnection logic with operation queueing.
UI/UX Considerations
- Show real-time updates without flickering.
- Indicate other users’ cursors and selections.
- Provide visual feedback for syncing state (e.g., “Saving…” or “Offline”).
Summary
Designing a collaborative document editor involves coordinating multiple moving parts: synchronization algorithms, real-time communication, user state tracking, and offline resilience. The key is to keep the system consistent, responsive, and user-friendly. Using OT or CRDT for conflict resolution, WebSocket for communication, and a modular architecture for maintainability are good starting points. Concrete examples like operation objects and data flow diagrams help clarify the design.
This example is a solid interview topic because it touches on frontend system design fundamentals, real-time engineering, and user experience challenges all at once.
9.5 Example: Designing a Real-time Chat Application
Designing a real-time chat application is a classic frontend system design problem that tests your understanding of state management, real-time communication, scalability, and user experience. Let’s break down the key components and considerations, then walk through a practical example.
Core Requirements
- Real-time message exchange between users
- Support for multiple chat rooms or private conversations
- Message history loading and pagination
- User presence indicators (online/offline status)
- Typing indicators
- Message delivery status (sent, delivered, read)
High-Level System Components
Mind Map: Frontend Architecture
Real-time Communication Example
Use WebSockets for bidirectional communication. Here’s a simplified example of setting up a WebSocket client in React:
import React, { useEffect, useState, useRef } from 'react';

function ChatRoom({ roomId, currentUser }) {
  const [messages, setMessages] = useState([]);
  const ws = useRef(null);

  useEffect(() => {
    ws.current = new WebSocket(`wss://chat.example.com/rooms/${roomId}`);

    ws.current.onmessage = (event) => {
      const message = JSON.parse(event.data);
      setMessages((prev) => [...prev, message]);
    };

    ws.current.onclose = () => {
      console.log('WebSocket closed, attempting reconnect...');
      // Implement reconnection logic here
    };

    return () => {
      ws.current.close();
    };
  }, [roomId]);

  const sendMessage = (text) => {
    const message = { user: currentUser, text, timestamp: Date.now() };
    ws.current.send(JSON.stringify(message));
    setMessages((prev) => [...prev, message]); // Optimistic update
  };

  return (
    <div>
      <MessageList messages={messages} />
      <MessageInput onSend={sendMessage} />
    </div>
  );
}
This example shows basic message sending and receiving. Note the optimistic update where the message is added locally before server confirmation.
State Management Considerations
- Store messages in an append-only array with unique IDs.
- Use a normalized structure if supporting multiple rooms to avoid duplication.
- Track message delivery status with flags (e.g., sent, delivered, read).
- Manage user presence and typing indicators with separate state slices.
Mind Map: State Flow for Messages
Handling Message History and Pagination
On initial load, fetch recent messages via REST API. Implement infinite scroll or “load more” to fetch older messages.
Example API call:
async function fetchMessages(roomId, beforeTimestamp) {
  const response = await fetch(`/api/rooms/${roomId}/messages?before=${beforeTimestamp}`);
  const data = await response.json();
  return data.messages;
}
Append older messages to the beginning of the message list state.
Presence and Typing Indicators
Presence (online/offline) can be managed via WebSocket events or a separate presence service.
Typing indicators require emitting “user is typing” events with throttling to avoid flooding.
Example:
function handleTyping() {
  if (!typingTimeout) {
    ws.current.send(JSON.stringify({ type: 'typing', userId: currentUser.id }));
  }
  clearTimeout(typingTimeout);
  typingTimeout = setTimeout(() => {
    ws.current.send(JSON.stringify({ type: 'stopTyping', userId: currentUser.id }));
  }, 3000);
}
Message Delivery Status
Track message states:
- Sent: Message sent from client
- Delivered: Server acknowledged receipt
- Read: Recipient has seen the message
Implement acknowledgments via WebSocket messages with message IDs.
Example message acknowledgment:
{
  "type": "ack",
  "messageId": "12345",
  "status": "delivered"
}
Update the message status in the frontend state accordingly.
Scalability and Reliability Notes
- Use a message queue or pub/sub system on the backend to distribute messages efficiently.
- Implement reconnection and message replay on the client to handle dropped connections.
- Consider sharding chat rooms across servers if user base grows large.
Summary
Designing a real-time chat app involves balancing real-time communication, state management, and user experience. WebSockets provide the backbone for live updates, while REST APIs handle history and metadata. Managing state carefully ensures smooth UI updates and consistent user presence. Finally, handling edge cases like reconnection and message delivery status rounds out a robust design.
This example covers the essentials you’d discuss in a senior frontend system design interview, showing both architectural understanding and practical implementation details.
10. Interview Preparation: Coding and Problem Solving
10.1 Essential Algorithms and Data Structures for Frontend
In frontend development, algorithms and data structures are often overlooked in favor of frameworks and UI libraries. However, understanding core algorithms and data structures can improve your code’s efficiency, maintainability, and scalability. This section covers key concepts with practical examples relevant to frontend challenges.
Core Data Structures
-
Arrays
- The most common data structure in frontend, used for lists, queues, stacks.
- Example: Managing a list of user notifications.
-
Linked Lists
- Useful for efficient insertion and deletion when order matters.
- Example: Implementing undo/redo stacks.
-
Trees
- Hierarchical data representation, such as DOM trees or nested menus.
- Example: Rendering a file explorer.
-
Graphs
- Represent relationships, such as social networks or routing.
- Example: Visualizing connections in a social media app.
-
Hash Tables (Objects/Maps)
- Key-value stores for fast lookup.
- Example: Caching API responses.
-
Queues and Stacks
- Queues for task scheduling; stacks for backtracking.
- Example: Browser history stack.
Essential Algorithms
-
Sorting
- Sorting arrays efficiently affects UI responsiveness.
- Common algorithms: QuickSort, MergeSort, and built-in
.sort(). - Example: Sorting a table by column.
-
Searching
- Linear and binary search for finding elements.
- Example: Searching through a list of contacts.
-
Traversal
- Tree and graph traversal (DFS, BFS) for UI components and data.
- Example: Expanding nodes in a tree view.
-
Debouncing and Throttling
- Control function execution frequency to optimize event handling.
- Example: Handling window resize or scroll events.
-
Memoization
- Caching results of expensive function calls.
- Example: Optimizing expensive calculations in React components.
Mind Map: Data Structures in Frontend
Mind Map: Algorithms in Frontend
Practical Examples
Example 1: Debouncing a Search Input
Debouncing delays the processing of a function until a certain time has passed without it being called again. This prevents excessive API calls or computations.
function debounce(fn, delay) {
  let timer;
  return function(...args) {
    clearTimeout(timer);
    timer = setTimeout(() => fn.apply(this, args), delay);
  };
}

const searchInput = document.getElementById('search');
searchInput.addEventListener('input', debounce(event => {
  console.log('Searching for:', event.target.value);
  // Trigger API call here
}, 300));
Example 2: Implementing a Stack for Undo/Redo
Stacks are ideal for undo/redo because they follow last-in-first-out order.
class Stack {
  constructor() {
    this.items = [];
  }
  push(element) {
    this.items.push(element);
  }
  pop() {
    return this.items.pop();
  }
  peek() {
    return this.items[this.items.length - 1];
  }
  isEmpty() {
    return this.items.length === 0;
  }
}

const undoStack = new Stack();
const redoStack = new Stack();

function performAction(action) {
  undoStack.push(action);
  redoStack.items = [];
  // Apply action
}

function undo() {
  if (!undoStack.isEmpty()) {
    const action = undoStack.pop();
    redoStack.push(action);
    // Revert action
  }
}

function redo() {
  if (!redoStack.isEmpty()) {
    const action = redoStack.pop();
    undoStack.push(action);
    // Reapply action
  }
}
Example 3: Binary Search in a Sorted Array
Binary search cuts the search space in half each step, making it much faster than linear search on sorted data.
function binarySearch(arr, target) {
  let left = 0;
  let right = arr.length - 1;

  while (left <= right) {
    const mid = Math.floor((left + right) / 2);
    if (arr[mid] === target) return mid;
    else if (arr[mid] < target) left = mid + 1;
    else right = mid - 1;
  }
  return -1; // Not found
}

const sortedNumbers = [1, 3, 5, 7, 9, 11];
console.log(binarySearch(sortedNumbers, 7)); // Output: 3
Understanding these algorithms and data structures helps you write code that is not only correct but also efficient and scalable. They also prepare you for technical interviews where such knowledge is often tested through practical problems or system design discussions.
10.2 Writing Clean, Maintainable, and Performant Code
Writing clean, maintainable, and performant code is a cornerstone of senior frontend development. It’s not just about making things work; it’s about making them work well, now and in the future. Let’s break down the key principles and illustrate them with examples and mind maps.
Clarity Over Cleverness
Clear code is easier to read, debug, and extend. Avoid overly clever tricks that save a line or two but confuse readers. Naming variables and functions descriptively is the first step.
// Poor naming
const a = () => fetch('/api/data').then(r => r.json());

// Clear naming
const fetchUserData = () => fetch('/api/data').then(response => response.json());
Single Responsibility Principle (SRP)
Each function or component should have one clear purpose. This reduces complexity and makes testing simpler.
// Violates SRP: fetches data and updates UI
async function fetchDataAndUpdateUI() {
  const data = await fetch('/api/data').then(res => res.json());
  document.getElementById('output').textContent = JSON.stringify(data);
}

// SRP-compliant
async function fetchData() {
  return fetch('/api/data').then(res => res.json());
}

function updateUI(data) {
  document.getElementById('output').textContent = JSON.stringify(data);
}

async function main() {
  const data = await fetchData();
  updateUI(data);
}
Consistent Formatting and Style
Use consistent indentation, spacing, and naming conventions. This reduces cognitive load when scanning code.
// Inconsistent
function foo(){return 42}

// Consistent
function foo() {
  return 42;
}
Avoid Premature Optimization
Write straightforward code first. Optimize only after identifying bottlenecks. Premature optimization often complicates code unnecessarily.
Use Immutable Data Structures When Possible
Immutable data helps avoid side effects and makes state changes predictable.
// Mutable
const user = { name: 'Alice' };
user.name = 'Bob';

// Immutable
const user = { name: 'Alice' };
const updatedUser = { ...user, name: 'Bob' };
Mindful Use of Comments
Comments should explain why, not what. If code is clear, comments are often unnecessary.
// Bad comment
let count = 0; // initialize count to zero

// Good comment
// Reset count to zero before starting new calculation
let count = 0;
Performance Considerations
Write code that avoids unnecessary work. For example, minimize DOM manipulations and expensive computations inside loops.
// Inefficient
const items = document.querySelectorAll('.item');
items.forEach(item => {
  item.style.color = 'red';
});

// More efficient
const items = document.querySelectorAll('.item');
items.forEach(item => item.style.color = 'red');
While this example is trivial, in real cases batching DOM updates or using virtual DOM diffing matters.
Modular Code Structure
Break code into reusable modules or components. This improves maintainability and testability.
Mind Map: Writing Clean, Maintainable, and Performant Code
Example: Refactoring a Component for Clarity and Performance
Before:
function UserList(props) {
  const users = props.users;
  return users.map(user => {
    return <div key={user.id}><span>{user.name}</span><span>{user.email}</span></div>;
  });
}
After applying best practices:
function UserList({ users }) {
  if (!users || users.length === 0) {
    return <p>No users available.</p>;
  }

  return (
    <ul>
      {users.map(({ id, name, email }) => (
        <li key={id} className="user-item">
          <UserInfo name={name} email={email} />
        </li>
      ))}
    </ul>
  );
}

function UserInfo({ name, email }) {
  return (
    <>
      <span className="user-name">{name}</span>
      <span className="user-email">{email}</span>
    </>
  );
}
This refactor:
- Adds a guard for empty data.
- Uses destructuring for clarity.
- Extracts a smaller component (
UserInfo) for reusability and separation of concerns. - Uses semantic HTML (
ulandli).
Summary
Writing clean, maintainable, and performant code requires discipline and attention to detail. Prioritize clarity, break down responsibilities, keep formatting consistent, and optimize only when necessary. These habits reduce bugs, ease collaboration, and improve user experience.
10.3 Debugging and Optimization During Interviews
Debugging and optimization are essential skills to demonstrate during frontend interviews. Interviewers want to see how you approach problems methodically, identify bottlenecks, and improve code quality under pressure. This section breaks down practical strategies and examples to help you navigate these tasks effectively.
Understanding the Debugging Process
Debugging is more than just fixing errors; it’s about systematically narrowing down the root cause. Here’s a simple mind map to organize your approach:
Debugging Process Mind Map
This structure keeps your debugging focused and prevents random guesswork.
Practical Debugging Techniques
-
Reproduce Consistently: Always start by reproducing the bug reliably. If you can’t reproduce it, you can’t fix it. For example, if a button click sometimes fails, try to identify the exact conditions.
-
Use Browser DevTools: Leverage breakpoints, watch expressions, and the call stack to inspect runtime behavior. For instance, if a function returns unexpected data, step through it line-by-line.
-
Console Logging: Insert targeted
console.logstatements to track variable values and execution paths. Avoid flooding the console; be precise. -
Divide and Conquer: Comment out or isolate parts of the code to see if the problem persists. This helps pinpoint the faulty section.
-
Check Network Requests: Use the Network tab to verify API calls, payloads, and responses. Sometimes bugs stem from unexpected server data.
Optimization Strategies
Optimization during interviews isn’t about premature micro-optimizations but about improving clarity, efficiency, and scalability where it matters.
Optimization Focus Areas Mind Map
Example: Debugging and Optimizing a Virtualized List Component
Scenario: You’ve implemented a virtualized list to render thousands of items efficiently. However, the list sometimes lags or fails to update properly when new data arrives.
Step 1: Reproduce and Identify
- Notice lag when scrolling rapidly.
- New data updates don’t always reflect immediately.
Step 2: Debug
- Use breakpoints in the rendering function to check if re-renders trigger as expected.
- Add console logs to verify if the data state updates correctly.
- Inspect event handlers for scroll events to ensure they debounce properly.
Step 3: Analyze
- Discover that the scroll event handler fires too frequently, causing excessive re-renders.
- Identify that the component re-renders the entire list on every data update instead of only the changed items.
Step 4: Optimize
- Implement throttling on the scroll event handler to reduce update frequency.
- Use
React.memoor equivalent to prevent unnecessary re-renders of unchanged list items. - Apply keys properly to list items to help React track changes efficiently.
Step 5: Verify
- Confirm smoother scrolling.
- Check that new data updates appear promptly without full list re-renders.
Example: Debugging a Debounce Function
Scenario: A search input uses a debounce function to limit API calls, but the API is still called on every keystroke.
Step 1: Reproduce
- Type quickly and observe network requests.
Step 2: Debug
- Inspect the debounce implementation.
- Add console logs inside the debounce wrapper to see when the inner function executes.
Step 3: Analyze
- Realize the debounce function is recreated on every render, resetting the timer.
Step 4: Optimize
- Move the debounce function outside the component or memoize it using
useCallback.
Step 5: Verify
- Confirm API calls only happen after the user stops typing for the debounce delay.
Tips for Interview Debugging and Optimization
- Think Aloud: Explain your reasoning as you debug and optimize. This shows your problem-solving approach.
- Ask Clarifying Questions: Confirm assumptions about expected behavior and constraints.
- Prioritize Readability: Sometimes the best optimization is clearer code.
- Use Simple Examples: If stuck, recreate the problem in a smaller snippet.
- Stay Calm: Systematic investigation beats frantic guessing.
By combining structured debugging with targeted optimization, you demonstrate a balanced skill set that interviewers appreciate. The goal is to show you can find problems efficiently and improve code thoughtfully, not just fix bugs or speed up code blindly.
10.4 Example: Implementing a Virtualized List Component
Virtualized lists are essential when dealing with large datasets in frontend applications. Rendering thousands of DOM nodes at once can cause performance bottlenecks, slow rendering, and janky scrolling. Virtualization limits the number of rendered elements to only those visible in the viewport plus a small buffer, improving performance and user experience.
What is Virtualization?
Virtualization means rendering only a subset of the total list items at any given time. Instead of creating DOM nodes for every item, the component creates nodes for visible items and reuses them as the user scrolls.
Mind Map: Key Concepts of Virtualized List
Step 1: Define the Problem
Suppose we have a list of 10,000 items, each with a fixed height of 30px. Rendering all items at once would create 10,000 DOM nodes, which is inefficient.
Our goal is to render only the visible items based on the scroll position.
Step 2: Calculate Visible Items
Given:
itemHeight = 30pixelsviewportHeight = 600pixels (e.g., container height)totalItems = 10000
Number of visible items = Math.ceil(viewportHeight / itemHeight) = 20
Add a buffer of, say, 5 items above and below to avoid flickering during scroll.
Total rendered items = 20 + 5 + 5 = 30
Step 3: Track Scroll Position
Listen to the scroll event on the container. On scroll, calculate the index of the first visible item:
const scrollTop = container.scrollTop;
const startIndex = Math.floor(scrollTop / itemHeight) - buffer;
const safeStartIndex = Math.max(0, startIndex);
Calculate the end index accordingly:
const endIndex = safeStartIndex + visibleCount + buffer * 2;
const safeEndIndex = Math.min(totalItems - 1, endIndex);
Step 4: Render Visible Items Only
Render items from safeStartIndex to safeEndIndex. Position them absolutely inside a container with total height equal to totalItems * itemHeight.
Use a spacer div to create the total scrollable height:
<div style={{ height: totalItems * itemHeight + 'px', position: 'relative' }}>
  {items.slice(safeStartIndex, safeEndIndex + 1).map((item, index) => (
    <div
      key={safeStartIndex + index}
      style={{
        position: 'absolute',
        top: (safeStartIndex + index) * itemHeight + 'px',
        height: itemHeight + 'px',
        width: '100%'
      }}
    >
      {item.content}
    </div>
  ))}
</div>
Step 5: Optimize Scroll Handling
Scrolling fires many events rapidly. To avoid excessive re-rendering, throttle or debounce the scroll handler.
Example using throttling:
let ticking = false;
container.addEventListener('scroll', () => {
  if (!ticking) {
    window.requestAnimationFrame(() => {
      updateVisibleItems();
      ticking = false;
    });
    ticking = true;
  }
});
Complete Example (React)
import React, { useState, useRef, useEffect } from 'react';

const VirtualizedList = ({ items, itemHeight, height, buffer = 5 }) => {
  const [scrollTop, setScrollTop] = useState(0);
  const containerRef = useRef(null);

  const totalItems = items.length;
  const visibleCount = Math.ceil(height / itemHeight);

  const startIndex = Math.max(0, Math.floor(scrollTop / itemHeight) - buffer);
  const endIndex = Math.min(
    totalItems - 1,
    startIndex + visibleCount + buffer * 2
  );

  const onScroll = (e) => {
    setScrollTop(e.currentTarget.scrollTop);
  };

  return (
    <div
      ref={containerRef}
      onScroll={onScroll}
      style={{
        overflowY: 'auto',
        height: height + 'px',
        position: 'relative',
        border: '1px solid #ccc'
      }}
    >
      <div style={{ height: totalItems * itemHeight + 'px', position: 'relative' }}>
        {items.slice(startIndex, endIndex + 1).map((item, index) => (
          <div
            key={startIndex + index}
            style={{
              position: 'absolute',
              top: (startIndex + index) * itemHeight + 'px',
              height: itemHeight + 'px',
              width: '100%',
              boxSizing: 'border-box',
              borderBottom: '1px solid #eee',
              padding: '5px'
            }}
          >
            {item}
          </div>
        ))}
      </div>
    </div>
  );
};

export default VirtualizedList;
Notes on Variable Height Items
Handling variable height items adds complexity because you cannot calculate positions with a simple formula. You may need to:
- Measure each item’s height dynamically
- Maintain a map of cumulative heights
- Use libraries or more advanced techniques
This example focuses on fixed height for clarity.
Summary
Virtualized lists improve performance by limiting DOM nodes to visible items. The core steps are:
- Calculate visible indices based on scroll position
- Render only those items
- Use absolute positioning to place items correctly
- Maintain a container with total height to enable native scrolling
This approach is common in large-scale applications where rendering all items is impractical.
10.5 Example: Solving a Debounce and Throttle Problem
When building interactive web applications, controlling how often a function executes in response to rapid user events is crucial. Two common techniques for this are debouncing and throttling. Both help improve performance and user experience by limiting the rate at which event handlers run, but they serve different purposes.
What is Debounce?
Debounce delays the execution of a function until after a specified wait time has passed since the last time the function was invoked. It’s useful when you want to ensure that a function runs only once after a burst of events.
Use case example: Waiting for a user to stop typing before sending a search query.
What is Throttle?
Throttle ensures a function runs at most once every specified interval, regardless of how many times the event fires. It’s useful when you want to guarantee a function runs regularly but not too frequently.
Use case example: Handling window resize or scroll events where you want updates at a steady rate.
Mind Map: Debounce vs Throttle
Implementing Debounce
function debounce(func, wait) {
  let timeout;
  return function(...args) {
    clearTimeout(timeout);
    timeout = setTimeout(() => func.apply(this, args), wait);
  };
}
Explanation:
timeoutholds the timer ID.- Each call clears the previous timer.
- The function executes only after
waitmilliseconds have passed without a new call.
Example usage:
const searchInput = document.getElementById('search');

const handleSearch = debounce((event) => {
  console.log('Searching for:', event.target.value);
}, 300);

searchInput.addEventListener('input', handleSearch);
Here, the search function triggers only after the user stops typing for 300ms.
Implementing Throttle
function throttle(func, limit) {
  let lastFunc;
  let lastRan;
  return function(...args) {
    const context = this;
    if (!lastRan) {
      func.apply(context, args);
      lastRan = Date.now();
    } else {
      clearTimeout(lastFunc);
      lastFunc = setTimeout(function() {
        if ((Date.now() - lastRan) >= limit) {
          func.apply(context, args);
          lastRan = Date.now();
        }
      }, limit - (Date.now() - lastRan));
    }
  };
}
Explanation:
- Executes immediately if not run recently.
- Otherwise, schedules execution after the remaining wait time.
Example usage:
window.addEventListener('resize', throttle(() => {
  console.log('Window resized at', new Date().toLocaleTimeString());
}, 1000));
This logs the resize event at most once every second, no matter how often the event fires.
Mind Map: Debounce Implementation
Mind Map: Throttle Implementation
When to Use Which?
| Scenario | Use Debounce | Use Throttle |
|---|---|---|
| User typing in search input | Wait until user stops typing | Not ideal |
| Window resizing or scrolling | Not ideal | Limit updates to every interval |
| Button click spam prevention | Prevent multiple clicks | Limit clicks to one per interval |
Combined Example: Search Input with Throttle and Debounce
Sometimes, you might want to combine both techniques. For instance, you want to send search suggestions while the user is typing but limit the frequency to avoid flooding the server.
const throttledSearch = throttle((query) => {
  console.log('Throttled search for:', query);
}, 1000);

const debouncedSearch = debounce((query) => {
  console.log('Debounced search for:', query);
}, 300);

const input = document.getElementById('search');

input.addEventListener('input', (e) => {
  throttledSearch(e.target.value);
  debouncedSearch(e.target.value);
});
throttledSearchruns at most once per second, providing regular updates.debouncedSearchruns after the user stops typing for 300ms, ensuring a final update.
Summary
- Debounce delays execution until events stop firing.
- Throttle limits execution to a fixed rate.
- Both improve performance and UX by controlling event handler frequency.
- Choose based on whether you want to wait for inactivity (debounce) or limit regular updates (throttle).
- Implementations are straightforward and reusable.
This example illustrates not only how to implement these techniques but also when and why to use them in frontend system design, a common topic in senior developer interviews.
11. Collaboration and Leadership in Frontend Engineering
11.1 Best Practices for Code Reviews and Mentorship
Code reviews and mentorship are two pillars that support growth and quality in frontend engineering teams. They are not just about finding bugs or enforcing style guides but about fostering shared understanding and continuous improvement. Here’s a structured approach to making them effective.
Code Reviews: Purpose and Approach
Code reviews serve multiple purposes beyond catching errors. They help maintain code consistency, share knowledge, and improve design decisions. When done well, they reduce technical debt and improve team cohesion.
Key principles:
- Focus on the code, not the coder: Keep feedback objective and centered on the work.
- Be specific and actionable: Instead of “This is bad,” say “Consider using a memoized selector here to avoid unnecessary re-renders.”
- Balance critique with praise: Highlight what’s done well to encourage good practices.
- Keep reviews manageable: Large pull requests slow down feedback and increase errors.
Mind Map: Code Review Best Practices
Example: Giving Effective Feedback
Instead of:
// Reviewer comment:
// "This function is too long and confusing."
Try:
// "This function does multiple things. Could we split it into smaller helpers? For example, separate data fetching from UI rendering. This will improve readability and testability."
This approach guides the author toward concrete improvements.
Mentorship: Building Skills and Confidence
Mentorship in frontend engineering is about guiding less experienced developers through challenges and helping them grow their skills and confidence. It’s a two-way street: mentors learn from mentees’ fresh perspectives, and mentees gain from mentors’ experience.
Effective mentorship involves:
- Active listening: Understand the mentee’s goals and struggles.
- Tailored guidance: Adjust advice based on their current skill level.
- Encouraging autonomy: Provide support without taking over tasks.
- Sharing context: Explain why certain decisions are made, not just what to do.
Mind Map: Mentorship Essentials

Example: Mentoring Through a Bug Fix
A mentee struggles with a tricky asynchronous bug. Instead of fixing it for them, a mentor might:
- Ask the mentee to explain their current understanding.
- Suggest debugging steps, like adding console logs or using browser devtools.
- Discuss the event loop and async behavior relevant to the bug.
- Review the fix together, explaining why it works.
This process builds problem-solving skills rather than just delivering a solution.
Combining Code Reviews and Mentorship
Code reviews are a natural place for mentorship. When reviewing, consider:
- Explaining the rationale behind requested changes.
- Pointing out patterns or anti-patterns with examples.
- Encouraging questions and dialogue.
- Recognizing improvements over time.
Mind Map: Code Review as Mentorship
Example: Explaining a Design Suggestion
Instead of:
// "Use a different state management approach here."
Try:
// "Using a context-based state here might simplify prop drilling. For example, React's Context API can help share state across deeply nested components without passing props down manually. This can improve maintainability as the app grows."
This explanation helps the author understand the trade-offs and learn a new technique.
Practical Tips for Sustainable Practices
- Set clear expectations: Define what reviewers should focus on (logic, style, performance).
- Use checklists: Ensure consistent coverage of common concerns.
- Limit review size: Aim for pull requests under 400 lines when possible.
- Rotate reviewers: Spread knowledge and avoid burnout.
- Schedule regular mentorship check-ins: Keep communication open.
Mind Map: Sustainable Code Review Culture
In summary, effective code reviews and mentorship require clear communication, empathy, and a focus on growth. They are opportunities to improve code quality and build stronger teams. Approaching them with structure and kindness makes them valuable parts of a senior frontend developer’s toolkit.
11.2 Leading Design Discussions and Technical Decisions
Leading design discussions and technical decisions is a core responsibility for senior frontend developers and staff engineers. It requires balancing technical depth with clear communication, ensuring all voices are heard while steering the team toward a consensus that aligns with project goals and constraints.
Setting the Stage for Productive Discussions
Before the meeting, prepare by understanding the problem space thoroughly. Gather relevant data, previous decisions, and known constraints. Share an agenda in advance to help participants come ready with focused input.
During the discussion, start by clearly stating the problem and the objectives. Frame the conversation around user impact, maintainability, scalability, and performance. Avoid jumping into solutions too quickly; instead, encourage exploration of different approaches.
Mind Map: Leading a Design Discussion
Encouraging Participation
A common pitfall is dominating the conversation or letting the loudest voices steer the outcome. Use open-ended questions to invite quieter team members. For example, “What concerns do you see with this approach?” or “Are there alternatives we haven’t considered?”
If disagreements arise, acknowledge them and suggest breaking down the problem into smaller parts to isolate issues. This helps avoid gridlock and keeps the discussion constructive.
Evaluating Trade-offs
Technical decisions often involve trade-offs. Lay out the pros and cons clearly. For instance, when choosing between client-side rendering and server-side rendering, discuss:
- Performance implications
- SEO requirements
- Development complexity
- Caching strategies
Use simple tables or diagrams to visualize these trade-offs during the discussion.
Mind Map: Evaluating Trade-offs

Making the Decision
Once options are evaluated, aim for consensus but recognize when a decision needs to be made despite some dissent. Summarize the agreed-upon approach and the reasoning behind it. This transparency helps with future maintenance and onboarding.
Assign clear next steps and owners for implementation or further research. Follow up with documentation that captures the decision context.
Example: Leading a Discussion on State Management
Imagine the team is debating between Redux and Context API for a medium-sized application.
- Preparation: You gather data on app complexity, expected state sharing needs, and team familiarity.
- Facilitation: You start by outlining the criteria: scalability, ease of debugging, and learning curve.
- Participation: You ask, “What challenges have you faced with Redux in past projects?” and “How might Context API handle deeply nested updates?”
- Evaluation: You create a simple table comparing Redux and Context API on key points.
| Criteria | Redux | Context API |
|---|---|---|
| Scalability | Good for large apps | Better for smaller scopes |
| Debugging | Strong devtools support | Limited tools |
| Learning Curve | Steeper | Easier |
| Boilerplate | More verbose | Minimal |
-
Decision: The team agrees to start with Context API for rapid development and revisit Redux if complexity grows.
-
Documentation: You write a summary capturing this rationale and assign a team member to monitor state complexity.
Mind Map: Example Discussion Flow

Leading design discussions well means being both a technical guide and a facilitator. Your role is to create an environment where ideas can be evaluated fairly, decisions are made transparently, and the team moves forward with confidence.
11.3 Managing Cross-team Dependencies and Communication
Managing dependencies across frontend teams is a practical challenge that requires clear communication, well-defined interfaces, and shared understanding. When multiple teams work on interconnected parts of a system, the risk of misalignment grows. The goal is to reduce friction and avoid delays caused by unclear responsibilities or unexpected changes.
Key Principles for Managing Cross-team Dependencies
- Define Clear Boundaries: Each team should own specific modules or features with clear APIs or contracts. This reduces overlap and confusion.
- Establish Communication Channels: Regular syncs, shared documentation, and issue tracking help teams stay aligned.
- Use Versioning and Change Management: When interfaces or shared components change, versioning helps teams upgrade at their own pace.
- Prioritize Early Integration: Integrate components early and often to catch dependency issues before they escalate.
- Document Assumptions and Expectations: Explicitly state what each team expects from others to avoid misunderstandings.
Mind Map: Managing Cross-team Dependencies
Communication Strategies
-
Regular Sync Meetings: These should be short and focused. For example, a weekly 30-minute cross-team standup can highlight blockers and upcoming changes.
-
Shared Documentation: Use a central place for API specs, component libraries, and design guidelines. This reduces repetitive questions and ensures everyone references the same source.
-
Issue Tracking and Tagging: Use labels or tags to mark issues that affect multiple teams. This makes it easier to prioritize and assign responsibility.
-
Design Reviews Involving Multiple Teams: When a change impacts several teams, involve representatives early to gather feedback and identify risks.
Example: Coordinating a Shared UI Component Library
Imagine two teams: Team A builds the main application shell, and Team B maintains a shared UI component library. Team A depends on Team B’s components for buttons, modals, and forms.
- Clear Boundaries: Team B owns the component library; Team A uses it but does not modify components.
- Communication: Team B publishes a changelog and notifies Team A of upcoming breaking changes.
- Versioning: Team B uses semantic versioning. Team A upgrades dependencies on a schedule, testing changes in a staging environment.
- Early Integration: Team A integrates new component versions in a feature branch before merging to main.
- Documentation: Both teams contribute to a shared wiki detailing component usage and known issues.
This setup prevents Team A from being surprised by breaking changes and gives Team B feedback on real-world usage.
Mind Map: Communication Strategies for Shared Components
Handling Dependency Conflicts
Conflicts arise when teams have different priorities or timelines. Here are some approaches:
- Negotiation and Prioritization: Teams discuss and agree on which dependencies are critical and adjust schedules accordingly.
- Feature Flags: Use feature flags to deploy changes incrementally, reducing risk.
- Fallbacks and Graceful Degradation: Design components to handle missing or outdated dependencies without breaking.
Example: Resolving a Dependency Blocker
Team A needs a new modal component from Team B to launch a feature. Team B is delayed due to other priorities.
- Teams meet to discuss impact.
- Team A agrees to implement a temporary modal with limited functionality.
- Team B prioritizes the component fix in the next sprint.
- Once ready, Team A switches to the official component behind a feature flag.
This approach keeps progress moving without blocking either team.
Mind Map: Handling Dependency Conflicts
Summary
Managing cross-team dependencies is about clarity and communication. Define ownership, maintain open channels, and plan for change. Use tools like versioning and feature flags to reduce risk. When conflicts arise, negotiate and find practical workarounds. These steps help keep frontend projects moving smoothly even when multiple teams depend on each other.
11.4 Example: Facilitating a Frontend Architecture Review
Conducting a frontend architecture review is a key responsibility for senior developers and engineering leaders. It ensures that the system design aligns with project goals, performance requirements, and maintainability standards. This example walks through how to facilitate such a review effectively.
Step 1: Preparation
Before the meeting, gather the necessary materials:
- System diagrams (component hierarchy, data flow, deployment)
- Codebase overview (frameworks, libraries, folder structure)
- Performance metrics and bottlenecks
- Known pain points or technical debt
Prepare a clear agenda to keep the discussion focused.
Step 2: Setting the Context
Start the review by outlining:
- Project goals and constraints
- Current architecture overview
- Key challenges or recent changes
This ensures everyone shares the same baseline understanding.
Step 3: Walkthrough of the Architecture
Guide the team through the architecture using visual aids. Here’s a mind map to organize the discussion points:
Frontend Architecture Review Mind Map
Use this structure to systematically cover each aspect.
Step 4: Encourage Open Discussion
Invite team members to share observations or concerns. For example:
- Are components too tightly coupled?
- Is state management causing unnecessary re-renders?
- Are there any performance hotspots?
Capture feedback and prioritize issues.
Step 5: Propose Improvements with Examples
Based on feedback, suggest concrete changes. For instance:
-
Issue: Large monolithic components causing slow rendering.
Improvement: Break down components using atomic design. Example:
// Before: Large component function UserProfile() { return <div>...all user info and settings...</div>; } // After: Smaller components function UserProfile() { return ( <> <UserAvatar /> <UserDetails /> <UserSettings /> </> ); } -
Issue: State updates triggering unnecessary re-renders.
Improvement: Use memoization and selective state slices.
const UserDetails = React.memo(({ user }) => { // component only re-renders if user prop changes return <div>{user.name}</div>; }); -
Issue: Slow initial load time.
Improvement: Implement code splitting with dynamic imports.
const Settings = React.lazy(() => import('./Settings'));
Step 6: Document Decisions and Action Items
Summarize the review outcomes:
- Agreed architectural changes
- Areas needing further investigation
- Assigned owners for follow-up tasks
Clear documentation prevents misunderstandings and tracks progress.
Step 7: Follow-up
Schedule a follow-up meeting or checkpoint to review progress on action items and reassess the architecture if needed.
Summary
Facilitating a frontend architecture review involves clear preparation, structured walkthroughs, open dialogue, and actionable outcomes. Using visual tools like mind maps helps organize complex topics and keeps the team aligned. Concrete examples during the discussion clarify abstract concepts and guide improvements. This process supports building frontend systems that are scalable, maintainable, and performant.
11.5 Example: Writing Effective Documentation for Complex Systems
Writing documentation for complex frontend systems is often overlooked but crucial. Clear documentation helps onboard new team members, reduces misunderstandings, and serves as a reference during maintenance or scaling. The challenge is balancing detail with clarity and avoiding overwhelming readers.
Key Goals of Effective Documentation
- Clarity: Information should be easy to find and understand.
- Accuracy: Keep documentation up to date with the codebase.
- Context: Explain why decisions were made, not just what was done.
- Practicality: Include examples and usage scenarios.
Mind Map: Components of Effective Documentation
Structuring Documentation for a Complex Frontend System
-
Start with a high-level overview. Describe the system’s purpose and its place within the larger product or ecosystem. For example, “This module handles user authentication and session management across multiple micro-frontends.”
-
Include architecture diagrams. Visuals like component trees or data flow charts help readers grasp relationships quickly. For instance, a diagram showing how the authentication service interacts with the API gateway and local storage.
-
Provide setup and installation steps. Include environment variables, build commands, and any prerequisites. Example:
# Install dependencies
npm install

# Start development server
npm run start
- Document APIs and interfaces clearly. Specify input/output formats, expected errors, and side effects. Use tables or code snippets:
| Endpoint | Method | Description | Request Body | Response |
|---|---|---|---|---|
| /auth/login | POST | Authenticates user | { username: string, password: string } | { token: string, expiresIn: number } |
- Add practical examples. Show how to use components or functions in real scenarios. For example, a snippet demonstrating how to call the login API and handle success or failure.
async function login(username, password) {
  try {
    const response = await api.post('/auth/login', { username, password });
    saveToken(response.token);
  } catch (error) {
    console.error('Login failed:', error);
  }
}
-
Include troubleshooting and FAQs. Document common errors and their fixes. For example, “If you see a 401 error, check that your token is correctly stored and not expired.”
-
Maintain a changelog. Track major changes to keep everyone aligned.
Mind Map: Example Documentation Flow for Authentication Module
Tips for Writing Documentation That Sticks
- Write for your future self and new team members. Avoid jargon unless it’s explained.
- Use consistent terminology. Define terms upfront to prevent confusion.
- Keep sentences concise and paragraphs short. Large blocks of text discourage reading.
- Use bullet points and numbered lists. They improve scan-ability.
- Incorporate code snippets liberally. Examples clarify abstract concepts.
- Update documentation alongside code changes. Outdated docs cause more harm than none.
- Encourage peer reviews of documentation. Fresh eyes catch gaps or ambiguities.
Example: Documenting a Complex Component — “DataGrid”
Overview:
The DataGrid component displays tabular data with sorting, filtering, and pagination. It supports large datasets through virtualization.
Props:
| Prop | Type | Description |
|---|---|---|
| data | Array<Object> | Array of data objects to display |
| columns | Array<Object> | Column definitions (key, label, sortable) |
| pageSize | Number | Number of rows per page |
| onRowClick | Function | Callback when a row is clicked |
Example Usage:
<DataGrid
  data={users}
  columns={[
    { key: 'name', label: 'Name', sortable: true },
    { key: 'email', label: 'Email' }
  ]}
  pageSize={20}
  onRowClick={(row) => console.log('Clicked row:', row)}
/>
Performance Notes:
- Uses windowing to render only visible rows.
- Sorting is done client-side; for large datasets, consider server-side sorting.
Known Issues:
- Filtering does not support nested object keys yet.
Troubleshooting:
- If pagination buttons are unresponsive, ensure
pageSizeis a positive integer.
Writing effective documentation is about making complex systems approachable. It requires discipline to keep docs current and clear but pays off by reducing friction and increasing team productivity.
12. Real-world Case Studies and Practical Examples
12.1 Case Study: Migrating a Monolithic Frontend to Micro-Frontends
Migrating a monolithic frontend to a micro-frontend architecture is a substantial undertaking that requires careful planning and execution. This case study walks through a practical example of such a migration, highlighting key decisions, challenges, and solutions.
Background
The project began with a large single-page application (SPA) built using React. Over time, the codebase grew unwieldy, with multiple teams working on different features but sharing the same repository and deployment pipeline. This led to longer release cycles, increased risk of regressions, and difficulty scaling development.
The goal was to break down the monolith into smaller, independently deployable micro-frontends, each owned by a dedicated team, while maintaining a cohesive user experience.
Step 1: Understanding the Monolith
Before splitting the app, it’s crucial to map out the existing architecture and dependencies.
Mind Map: Understanding the Monolithic Frontend
The monolith had a central routing system and a shared Redux store. Features were tightly coupled, often importing components and state slices from each other.
Step 2: Defining Micro-Frontend Boundaries
The next step was to identify logical boundaries for micro-frontends. The team chose to align micro-frontends with business domains:
- Shell: Handles routing, authentication, and shared UI elements.
- User Profile: Manages user settings and preferences.
- Product Catalog: Displays products and categories.
- Shopping Cart: Manages cart state and checkout flow.
Mind Map: Micro-Frontend Boundaries
This separation allowed teams to work independently and deploy changes without affecting unrelated parts.
Step 3: Choosing Integration Strategy
Micro-frontends can be integrated using several approaches. The team selected Module Federation (Webpack 5) for runtime integration, allowing micro-frontends to be loaded dynamically and share dependencies.
Other options considered were iframe embedding and server-side composition, but those had drawbacks in terms of user experience and complexity.
Step 4: Refactoring Shared Dependencies
A major challenge was managing shared dependencies like React, React Router, and Redux. To avoid version conflicts and duplication, the team:
- Defined a shared dependency manifest.
- Configured Module Federation to share React and ReactDOM as singletons.
- Extracted common UI components into a shared library.
This ensured consistent versions and minimized bundle sizes.
Step 5: Decoupling State Management
The monolith used a single Redux store, which doesn’t scale well across micro-frontends. The team adopted a hybrid approach:
- Each micro-frontend manages its own local state.
- Shared state (e.g., user authentication status) is managed via a global event bus implemented with a lightweight pub/sub system.
This reduced tight coupling and allowed micro-frontends to evolve independently.
Step 6: Implementing Routing
Routing was centralized in the shell. The shell listens for route changes and loads the appropriate micro-frontend dynamically.
Each micro-frontend exposes its own sub-routes, which the shell delegates to after loading.
Mind Map: Routing in Micro-Frontend Architecture
This approach maintained a seamless navigation experience.
Step 7: Deployment and CI/CD
Each micro-frontend was set up with its own repository and CI/CD pipeline. Deployments became independent, reducing coordination overhead.
The shell was configured to load the latest versions of micro-frontends via dynamic imports, enabling gradual rollout and rollback.
Example: Loading the Product Catalog Micro-Frontend
// Shell's dynamic import for Product Catalog
import React, { Suspense, lazy } from 'react';

const ProductCatalog = lazy(() => import('productCatalog/ProductCatalogApp'));

function AppRouter({ route }) {
  switch(route) {
    case '/products':
      return (
        <Suspense fallback={<div>Loading Products...</div>}>
          <ProductCatalog />
        </Suspense>
      );
    // other routes
    default:
      return <HomePage />;
  }
}
This snippet shows how the shell lazily loads the Product Catalog micro-frontend using React’s lazy and Suspense.
Lessons Learned
- Incremental migration works best: The team migrated one feature at a time, reducing risk.
- Clear contracts between micro-frontends: Defining APIs and events upfront avoids integration headaches.
- Shared dependencies require careful versioning: Mismatched versions can cause subtle bugs.
- Performance considerations: Loading multiple micro-frontends can increase initial load time; code splitting and caching help mitigate this.
Migrating from a monolithic frontend to micro-frontends is a complex but manageable process. It demands clear boundaries, thoughtful integration, and robust tooling. This case study provides a grounded example of how to approach such a migration pragmatically.
12.2 Case Study: Implementing Accessibility at Scale
When accessibility is treated as a checkbox or an afterthought, it rarely works well. Implementing accessibility at scale means embedding it into every stage of frontend system design, development, and maintenance. This case study walks through a practical approach taken by a senior frontend team tasked with making a large, complex web application accessible to a broad range of users, including those with disabilities.
Understanding the Scope
The application was a multi-module enterprise dashboard with charts, forms, tables, and real-time updates. The team needed to support keyboard navigation, screen readers, color contrast, and dynamic content announcements.
Key Accessibility Areas and Strategies
Planning and Requirements Gathering
Before writing code, the team mapped out accessibility requirements aligned with WCAG 2.1 AA standards. They involved product managers, designers, and QA to ensure a shared understanding. This prevented surprises later and helped prioritize features that needed immediate attention.
Design: Semantic HTML and ARIA
The design team focused on using semantic HTML elements wherever possible. For example, instead of divs with click handlers, they used <button> elements for interactive controls. This simple change improved keyboard and screen reader support out of the box.
When semantic elements were insufficient, ARIA roles and attributes filled the gaps. For instance, complex widgets like custom dropdowns used role="listbox" and aria-expanded to communicate state.
Example:
<div role="listbox" tabindex="0" aria-expanded="false" aria-labelledby="dropdown-label">
  <div role="option" aria-selected="true">Option 1</div>
  <div role="option">Option 2</div>
</div>
Color Contrast and Visual Accessibility
Designers ensured color palettes met minimum contrast ratios. They used tools to simulate color blindness and adjusted colors accordingly. This was baked into the design system, so every new component inherited accessible colors by default.
Development: Keyboard Navigation and Focus Management
Keyboard users rely on logical tab order and visible focus indicators. The team audited all interactive elements to confirm they were reachable via keyboard. Custom components implemented tabindex carefully to avoid trapping focus.
Focus management was critical for dynamic content. For example, when a modal opened, focus was programmatically moved to the modal container, and returned to the triggering element on close.
Example (React snippet):
useEffect(() => {
  if (isOpen) {
    modalRef.current.focus();
  } else {
    triggerRef.current.focus();
  }
}, [isOpen]);
Dynamic Content and ARIA Live Regions
Real-time updates, such as notifications or data refreshes, needed to be announced to screen readers without disrupting the user. The team used ARIA live regions with appropriate politeness levels.
Example:
<div aria-live="polite" aria-atomic="true">
  {notificationMessage}
</div>
Testing: Automated and Manual
Automated tools like axe-core were integrated into the CI pipeline to catch regressions early. However, automated tests can’t catch everything.
Manual testing with screen readers (NVDA, VoiceOver) was scheduled regularly. Developers learned to navigate the app using only keyboard and screen readers to understand real user experiences.
User testing sessions included participants with disabilities to validate assumptions and uncover issues.
Maintenance: Regression and Training
Accessibility tests were added to the regression suite to prevent new code from breaking existing accessibility.
Documentation was created to guide developers on accessibility best practices, common pitfalls, and how to use the design system components correctly.
Regular training sessions helped keep accessibility knowledge fresh and encouraged a culture where accessibility was everyone’s responsibility.
Summary
Implementing accessibility at scale requires a systematic approach:
- Start with clear requirements and stakeholder alignment.
- Use semantic HTML and ARIA thoughtfully.
- Prioritize keyboard and screen reader support.
- Integrate accessibility into design systems.
- Combine automated and manual testing.
- Maintain accessibility through training and regression checks.
This case study shows that accessibility is not a feature but a foundation for frontend system design.
12.3 Case Study: Performance Tuning a High-Traffic News Website
Background
A popular news website faced performance issues during peak traffic hours. Users experienced slow page loads, delayed content rendering, and occasional UI freezes. The site had a complex frontend with multiple third-party widgets, heavy image content, and frequent real-time updates.
The goal was to improve page load times, reduce CPU usage on the client side, and ensure smooth interactions without compromising the rich content experience.
Initial Assessment
- Page Load Metrics: First Contentful Paint (FCP) was around 4.5 seconds, and Time to Interactive (TTI) hovered near 8 seconds.
- Resource Analysis: Over 150 network requests per page, many of which were unoptimized images and scripts.
- JavaScript Execution: Large bundles exceeding 1.2 MB, causing long parsing and execution times.
- Rendering: Frequent layout thrashing due to dynamic content injections and third-party ads.
Performance Tuning Approach
The tuning process focused on three main areas:
- Resource Optimization
- JavaScript and Rendering Efficiency
- Real-time Content Handling
Resource Optimization
Mind Map: Resource Optimization
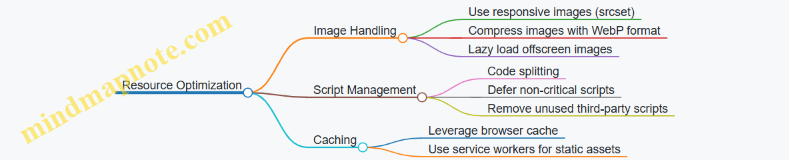
Examples:
- Converted all images to WebP and implemented
srcsetto serve appropriate sizes based on device resolution. - Applied lazy loading to images below the fold using the native
loading="lazy"attribute. - Split JavaScript bundles by route and deferred loading of analytics scripts until after user interaction.
JavaScript and Rendering Efficiency
Mind Map: JS and Rendering Efficiency
Examples:
- Enabled tree shaking and minification in the build pipeline to reduce bundle size by 30%.
- Refactored code to batch DOM reads and writes, eliminating multiple forced synchronous layouts.
- Replaced a traditional infinite scroll with a virtualized list component to render only visible items.
- Switched animations from changing
topandleftproperties totransform: translate3dfor GPU acceleration.
Real-time Content Handling
Mind Map: Real-time Content Handling
Examples:
- Implemented throttling on live news ticker updates to limit DOM updates to once every 500ms.
- Batched WebSocket messages to update multiple articles in a single render cycle.
- Used immutable.js to manage article state, reducing unnecessary re-renders in React components.
Results
- FCP improved from 4.5s to 2.1s
- TTI reduced from 8s to 3.5s
- Network requests dropped from 150+ to around 80, with significant reduction in payload size.
- CPU usage during page interaction decreased by 40%, resulting in smoother scrolling and animations.
Summary
Performance tuning for a high-traffic news site requires a multi-pronged approach. Optimizing resources reduces initial load times. Improving JavaScript execution and rendering efficiency prevents UI jank. Managing real-time updates carefully avoids overwhelming the browser with frequent DOM changes.
Each step involved measurable changes and concrete examples, demonstrating how targeted improvements can collectively enhance user experience without sacrificing content richness.
12.4 Example: Designing a Plugin System for Extensible Frontends
Designing a Plugin System for Extensible Frontends
Creating a plugin system in a frontend application allows you to extend functionality without modifying the core codebase. This approach supports modularity, encourages third-party contributions, and enables customization for different use cases. Let’s break down how to design such a system with practical examples and mind maps.
Core Concepts
A plugin system typically involves:
- Plugin Interface: A defined contract that plugins must follow.
- Plugin Registration: Mechanism to register plugins with the core system.
- Plugin Lifecycle: Initialization, execution, and teardown phases.
- Communication: How plugins interact with the core and possibly with each other.
- Isolation: Ensuring plugins do not interfere negatively with the core or other plugins.
Mind Map: Plugin System Components
Step 1: Define the Plugin Interface
The interface is a set of methods and properties that every plugin must implement. This ensures the core system can interact with plugins predictably.
Example interface in TypeScript:
interface Plugin {
  name: string;
  init(coreApi: CoreAPI): void;
  execute?(...args: any[]): void;
  destroy?(): void;
}
Here, init receives a coreApi object exposing methods and data the plugin can use. Optional methods execute and destroy allow plugins to perform actions and cleanup.
Step 2: Plugin Registration
Plugins can be registered statically (at build time) or dynamically (at runtime). For flexibility, dynamic registration is often preferred.
Example registration system:
class PluginManager {
  private plugins: Map<string, Plugin> = new Map();

  register(plugin: Plugin) {
    if (this.plugins.has(plugin.name)) {
      throw new Error(`Plugin with name ${plugin.name} already registered.`);
    }
    this.plugins.set(plugin.name, plugin);
    plugin.init(this.coreApi);
  }

  unregister(name: string) {
    const plugin = this.plugins.get(name);
    if (plugin) {
      plugin.destroy?.();
      this.plugins.delete(name);
    }
  }

  coreApi = {
    // Expose methods and data here
  };
}
Step 3: Plugin Lifecycle Management
Managing lifecycle ensures plugins initialize correctly and resources are cleaned up.
- Init: Called once when the plugin is registered.
- Execute: Optional, called to perform plugin-specific actions.
- Destroy: Called when the plugin is unregistered or the app unloads.
Step 4: Communication Between Core and Plugins
Plugins need to communicate with the core system and sometimes with other plugins. An event bus or pub/sub pattern works well.
Example event bus:
class EventBus {
  private listeners: Map<string, Function[]> = new Map();

  on(event: string, callback: Function) {
    if (!this.listeners.has(event)) {
      this.listeners.set(event, []);
    }
    this.listeners.get(event)!.push(callback);
  }

  emit(event: string, data?: any) {
    this.listeners.get(event)?.forEach(cb => cb(data));
  }
}
The core and plugins can subscribe to and emit events, enabling decoupled communication.
Step 5: Isolation and Error Handling
To prevent one plugin from crashing the entire app, isolate plugin execution and catch errors.
Example:
try {
  plugin.execute?.();
} catch (error) {
  console.error(`Error in plugin ${plugin.name}:`, error);
}
For stronger isolation, consider running plugins in web workers or iframes, but this adds complexity.
Example: Simple Plugin System in Action
Suppose you have a dashboard app, and you want to allow plugins to add widgets.
// Core API exposing method to add widgets
const coreApi = {
  addWidget(widget: HTMLElement) {
    document.getElementById('dashboard')!.appendChild(widget);
  }
};

// Plugin example
const clockPlugin: Plugin = {
  name: 'Clock',
  init(core) {
    const widget = document.createElement('div');
    widget.id = 'clock-widget';
    widget.style.padding = '10px';
    widget.style.border = '1px solid #ccc';
    widget.style.margin = '5px';

    function updateTime() {
      widget.textContent = new Date().toLocaleTimeString();
    }

    updateTime();
    setInterval(updateTime, 1000);

    core.addWidget(widget);
  }
};

// Register plugin
const manager = new PluginManager();
manager.register(clockPlugin);
This plugin adds a live clock widget to the dashboard without modifying core code.
Mind Map: Plugin System Workflow
Summary
Designing a plugin system involves defining clear interfaces, managing plugin lifecycles, enabling communication, and isolating plugins to maintain app stability. By following these steps and using simple patterns like event buses and registration managers, you can create extensible frontends that remain maintainable and scalable.
12.5 Example: Handling Internationalization and Localization
Internationalization (i18n) and localization (l10n) are essential for frontend systems that serve users across different languages and regions. While internationalization is the process of designing your app to support multiple languages and cultural norms, localization is the actual adaptation of content and UI for a specific locale.
Key Concepts and Challenges
- Language Translation: Converting text content accurately.
- Date, Time, and Number Formatting: Adapting formats to local conventions.
- Pluralization Rules: Handling different plural forms depending on language.
- Right-to-Left (RTL) Support: Adjusting UI for languages like Arabic or Hebrew.
- Cultural Sensitivities: Colors, icons, and imagery that may differ in meaning.
Mind Map: Core Areas of Frontend i18n and l10n
Practical Example: Implementing i18n in a React Application
Step 1: Organize Translations
Create JSON files for each locale, e.g., en.json and fr.json:
// en.json
{
  "greeting": "Hello, {name}!",
  "cart": "You have {count} {count, plural, one {item} other {items}} in your cart."
}

// fr.json
{
  "greeting": "Bonjour, {name} !",
  "cart": "Vous avez {count} {count, plural, one {article} other {articles}} dans votre panier."
}
Step 2: Use a Library for Message Formatting
Leverage ICU MessageFormat to handle pluralization and variable interpolation. For example, react-intl or formatjs:
import {FormattedMessage} from 'react-intl';

function Cart({count}) {
  return (
    <p>
      <FormattedMessage
        id="cart"
        values={{ count }}
      />
    </p>
  );
}
Step 3: Detect and Switch Locales
Detect user locale from browser settings or user preferences and load the corresponding messages:
const userLocale = navigator.language || 'en';
const messages = loadMessagesForLocale(userLocale);
Step 4: Format Dates and Numbers According to Locale
Use the native Intl API:
const date = new Date();
const formattedDate = new Intl.DateTimeFormat(userLocale, { dateStyle: 'long' }).format(date);

const price = 1234.56;
const formattedPrice = new Intl.NumberFormat(userLocale, { style: 'currency', currency: 'USD' }).format(price);
Step 5: Support Right-to-Left Layouts
Adjust the dir attribute on the root element:
const isRTL = ['ar', 'he', 'fa'].includes(userLocale.split('-')[0]);

return <div dir={isRTL ? 'rtl' : 'ltr'}>{/* app content */}</div>;
Mind Map: Steps to Implement i18n in Frontend
Additional Considerations
- Fallbacks: Always provide fallback strings for missing translations to avoid broken UI.
- Performance: Lazy-load locale data to reduce initial bundle size.
- Testing: Verify translations in context, especially plural forms and UI direction.
- Accessibility: Ensure screen readers handle localized content properly.
Summary
Handling internationalization and localization requires a mix of good data organization, leveraging existing libraries, and careful UI adjustments. By structuring your translations clearly, using ICU message formatting, and adapting layouts dynamically, you can build frontend systems that feel native to users worldwide without excessive complexity.