Human Machine Interface Design And Immersive Experience Engineering
1. Introduction to Human Machine Interface (HMI) and Immersive Experience
1.1 Understanding Human Machine Interface: Definitions and Scope
What is Human Machine Interface (HMI)?
Human Machine Interface (HMI) refers to the point of interaction between a human user and a machine, system, or device. It encompasses the hardware and software components that allow users to control, monitor, and communicate with machines effectively.
HMIs are critical in translating complex machine data into understandable formats and enabling intuitive user control.
Core Components of HMI:
Scope of HMI
HMI spans a broad range of applications and industries, including but not limited to:
- Industrial Automation (e.g., factory control panels)
- Automotive (e.g., dashboard interfaces)
- Consumer Electronics (e.g., smartphones, smart home devices)
- Healthcare (e.g., medical device interfaces)
- XR Technologies (e.g., VR/AR user controls)
Each domain requires tailored HMI design to meet specific user needs and operational contexts.
Mind Map: HMI Definition and Scope
Example 1: Automotive HMI
Modern cars feature sophisticated HMIs that combine touchscreens, voice commands, and physical controls. For instance, Tesla’s Model 3 uses a large central touchscreen as the primary interface, simplifying controls and providing real-time feedback on vehicle status.
This HMI design reduces driver distraction by consolidating controls and providing intuitive feedback.
Example 2: XR HMI
In Virtual Reality (VR), the HMI includes motion controllers, hand tracking, and spatial audio. For example, Oculus Quest uses hand tracking to allow users to interact naturally with virtual objects without physical controllers, enhancing immersion.
Designing these interfaces requires understanding spatial interactions and minimizing latency to maintain presence.
Why is Understanding HMI Important?
- Enables creation of intuitive and effective interfaces
- Improves user satisfaction and task performance
- Reduces errors and enhances safety
- Supports emerging technologies like XR by bridging human cognition with machine capabilities
Summary
Human Machine Interface is the critical bridge between humans and machines, encompassing diverse input/output methods and spanning multiple industries. Understanding its definitions and scope lays the foundation for designing immersive, user-centered experiences that are efficient, safe, and engaging.
1.2 The Evolution of Immersive Experience Technologies
Immersive experience technologies have dramatically evolved over the past several decades, transforming how humans interact with machines and digital environments. This evolution is marked by advances in hardware, software, and interaction paradigms that have progressively enhanced the depth, realism, and intuitiveness of user experiences.
Early Beginnings: Foundations of Immersion
- 1960s - Sensorama and Head-Mounted Displays (HMDs):
- Morton Heilig’s Sensorama (1962) was one of the first attempts to create a multisensory immersive experience, combining visuals, sound, vibration, and smell.
- Ivan Sutherland’s Sword of Damocles (1968) introduced the first HMD, laying groundwork for future VR systems.
Mind Map: Early Immersive Technologies
The Rise of Virtual Reality (VR) and Augmented Reality (AR)
-
1990s - Commercial VR Attempts:
- VR systems like the Virtuality arcade machines introduced immersive 3D gaming.
- Limitations included low resolution, high latency, and bulky hardware.
-
2000s - AR Emergence:
- AR applications began appearing in industrial and military contexts, overlaying digital information on real-world views.
-
Example: Boeing used AR glasses to assist technicians with wiring harness assembly, improving accuracy and reducing errors.
Mind Map: VR and AR Development
Modern Era: XR and Immersive Ecosystems
-
2010s - Consumer-Grade VR and AR:
- Oculus Rift (2012) and HTC Vive (2016) brought high-quality VR to consumers.
- Microsoft HoloLens (2016) and Magic Leap introduced advanced AR/MR devices with spatial mapping.
-
Integration of AI and Cloud Computing:
- AI enhances interaction through natural language processing and adaptive environments.
- Cloud and edge computing enable complex rendering and data processing remotely.
-
Example: VR therapy platforms use AI-driven adaptive scenarios to treat phobias and PTSD.
Mind Map: Modern XR Technologies
Emerging Trends and Future Directions
-
Brain-Computer Interfaces (BCI): Direct neural input/output for immersive control.
-
5G and Low Latency Networks: Enabling seamless, high-fidelity remote experiences.
-
Haptic and Multisensory Feedback: Increasing realism through touch, temperature, and force feedback.
-
Example: Researchers developing gloves with precise haptic feedback to simulate textures in VR.
Mind Map: Future Immersive Technologies
Summary
The evolution of immersive experience technologies reflects a journey from rudimentary multisensory devices to sophisticated XR ecosystems that blend virtual and physical realities. Each stage has introduced best practices such as user-centered design, multisensory integration, and iterative prototyping, which continue to shape the future of human-machine interfaces.
Example in Practice: Consider the transition from early VR arcade systems to modern VR therapy applications. Early systems focused on novelty and basic immersion, often limited by hardware constraints. Modern applications, however, prioritize user comfort, adaptive interaction, and measurable therapeutic outcomes, illustrating how immersive technology evolution is intertwined with refined design and engineering practices.
1.3 Key Roles: UX Designers, Interaction Engineers, and Experience Strategists
In the realm of Human Machine Interface (HMI) design and immersive experience engineering, understanding the distinct yet interconnected roles of UX Designers, Interaction Engineers, and Experience Strategists is crucial. Each role brings unique expertise that, when combined, creates seamless, engaging, and effective immersive experiences.
UX Designers
UX Designers focus on the overall user experience, ensuring interfaces are intuitive, accessible, and satisfying. They deeply understand user needs, behaviors, and pain points through research and testing.
Responsibilities:
- User research and persona development
- Wireframing and prototyping
- Usability testing and iteration
- Visual and interaction design principles
Example: Designing a VR meditation app interface that minimizes cognitive load by using simple, calming visuals and easy navigation.
Mind Map: UX Designer Focus Areas
Interaction Engineers
Interaction Engineers bridge the gap between design and technology by implementing and optimizing the interactive elements of immersive systems. They focus on input modalities, responsiveness, and system integration.
Responsibilities:
- Developing gesture, voice, and haptic input systems
- Ensuring low-latency and smooth interactions
- Integrating hardware sensors and software
- Collaborating with designers to realize interaction concepts
Example: Creating a gesture recognition system for an AR maintenance app that allows technicians to manipulate 3D models hands-free.
Mind Map: Interaction Engineer Focus Areas
Experience Strategists
Experience Strategists take a holistic view, aligning immersive experiences with business goals, user needs, and technological possibilities. They define long-term visions and roadmaps.
Responsibilities:
- Defining experience goals and KPIs
- Mapping user journeys across platforms
- Identifying opportunities for innovation
- Coordinating cross-disciplinary teams
Example: Strategizing a multi-platform XR campaign for a retail brand that integrates AR shopping with VR product demonstrations.
Mind Map: Experience Strategist Focus Areas
Integrated Example: Designing an Immersive Training Platform
- UX Designer: Conducts user interviews with trainees, creates wireframes for a VR training interface emphasizing clarity and ease of use.
- Interaction Engineer: Develops hand-tracking and voice command features to allow trainees to interact naturally with virtual equipment.
- Experience Strategist: Defines the training platform’s objectives to reduce onboarding time by 30%, plans rollout phases, and aligns with organizational goals.
This collaboration ensures the training platform is user-friendly, technically robust, and strategically aligned.
Summary
| Role | Primary Focus | Key Skills | Example Contribution |
|---|---|---|---|
| UX Designer | User experience and interface design | User research, prototyping, visual design | Designing intuitive VR meditation app UI |
| Interaction Engineer | Implementing interactive systems | Software development, hardware integration | Building gesture controls for AR maintenance app |
| Experience Strategist | Aligning experience with strategy | Strategic planning, user journey mapping | Planning multi-platform XR retail campaign |
Understanding these roles and their interplay is foundational for creating compelling human-machine interfaces and immersive experiences that resonate with users and meet organizational goals.
1.4 Importance of Integrating HMI with Immersive Technologies
Integrating Human Machine Interface (HMI) design with immersive technologies such as Virtual Reality (VR), Augmented Reality (AR), and Mixed Reality (MR) is crucial for creating seamless, intuitive, and engaging user experiences. This integration bridges the gap between human cognitive and physical capabilities and advanced technological systems, enabling users to interact naturally and effectively within digital environments.
Why Integration Matters
- Enhanced User Engagement: Immersive technologies provide rich sensory environments. When combined with well-designed HMIs, users feel more connected and involved.
- Improved Usability: Natural interaction methods (gesture, voice, gaze) reduce cognitive load and learning curves.
- Contextual Awareness: Immersive environments provide spatial and situational context, allowing HMIs to adapt dynamically.
- Increased Efficiency: Tasks can be performed faster and with fewer errors when interfaces align with human perception and motor skills.
- Expanded Accessibility: Immersive HMIs can accommodate diverse user needs, including those with disabilities.
Mind Map: Benefits of Integrating HMI with Immersive Technologies
Mind Map: Key Components in Integration
Real-World Examples
-
Automotive AR Heads-Up Display (HUD)
- Scenario: Drivers receive real-time navigation and hazard alerts projected onto the windshield.
- Integration: The HMI uses spatially aware AR to overlay information without distracting the driver.
- Benefit: Enhances safety by keeping eyes on the road and providing intuitive, glanceable data.
-
VR Surgical Training Simulators
- Scenario: Medical professionals practice complex procedures in a fully immersive VR environment.
- Integration: HMIs incorporate haptic feedback gloves and voice commands to mimic real surgical tools.
- Benefit: Improves skill acquisition and reduces risk in real surgeries.
-
AR Maintenance Assistance in Manufacturing
- Scenario: Technicians use AR glasses to receive step-by-step repair instructions overlaid on machinery.
- Integration: Gesture-based HMIs allow hands-free navigation through instructions.
- Benefit: Increases repair speed and accuracy while maintaining safety.
Best Practices for Integration
- Design for Natural Interaction: Use input methods that align with human instincts, such as gestures or voice.
- Leverage Contextual Data: Adapt interfaces based on user location, task, and environment.
- Prioritize Low Latency: Ensure system responsiveness to maintain immersion and prevent user frustration.
- Multisensory Feedback: Combine visual, auditory, and haptic cues to reinforce actions and system states.
- Iterative Testing in Realistic Settings: Validate designs with users in environments that simulate actual use cases.
Integrating HMI with immersive technologies is not just a technical challenge but a multidisciplinary endeavor that requires understanding human behavior, designing adaptive interfaces, and leveraging cutting-edge hardware. This synergy unlocks new possibilities for interaction, transforming how users experience digital systems across industries.
1.5 Overview of Best Practices and Real-World Examples
In the evolving fields of Human Machine Interface (HMI) design and Immersive Experience Engineering, adopting best practices early on is crucial to creating intuitive, effective, and engaging systems. This section provides a high-level overview of foundational best practices, supported by real-world examples to illustrate their application. Mind maps are included to visually organize these concepts and help you internalize the relationships between practices and outcomes.
Best Practices Mind Map
Key Best Practices with Examples
-
User-Centered Design
- Practice: Begin design with detailed user research, creating personas and journey maps to understand user needs.
- Example: In a VR medical training app, designers developed personas representing surgeons and nurses, which guided the creation of realistic scenarios and controls tailored to their workflows.
-
Iterative Prototyping and Testing
- Practice: Develop early prototypes and conduct frequent usability tests to refine interactions.
- Example: An automotive AR dashboard was prototyped using low-fidelity mockups and tested with drivers to optimize glance time and minimize distraction.
-
Multimodal Interaction
- Practice: Combine gestures, voice, and haptic feedback to create natural and flexible user interactions.
- Example: An AR maintenance app uses hand gestures to select components, voice commands to request information, and haptic pulses to confirm actions.
-
Accessibility and Inclusivity
- Practice: Design interfaces that accommodate diverse abilities, including color blindness, mobility impairments, and cognitive differences.
- Example: A VR educational platform incorporated adjustable text sizes, alternative navigation methods, and clear audio instructions to support learners with disabilities.
-
Visual and Spatial Design
- Practice: Use spatial anchors and consistent visual hierarchy to help users orient themselves and prioritize information.
- Example: In a VR architectural walkthrough, interactive hotspots were anchored to physical elements like doors and windows, helping users intuitively explore the space.
-
Audio and Multisensory Integration
- Practice: Employ spatial audio cues synchronized with haptic feedback to enhance immersion and interaction clarity.
- Example: A VR gaming interface used directional sound effects combined with controller vibrations to signal enemy proximity.
-
Performance and Responsiveness
- Practice: Optimize system latency and responsiveness to prevent motion sickness and maintain immersion.
- Example: A mixed reality collaboration tool prioritized low-latency networking and frame rates to ensure smooth shared experiences.
-
Safety, Ethics, and Privacy
- Practice: Implement transparent data policies, consent mechanisms, and design to avoid physical strain or disorientation.
- Example: An AR shopping app clearly informed users about data collection and provided settings to control personal information usage.
-
Leveraging Emerging Technologies
- Practice: Explore AI-driven adaptive interfaces and brain-computer interfaces to personalize and deepen user engagement.
- Example: An AI-powered VR learning environment adjusted difficulty and content pacing based on real-time user performance.
Summary Mind Map: Integrating Best Practices
By weaving these best practices into your HMI and immersive experience projects, you create systems that are not only functional but also engaging, safe, and inclusive. The examples demonstrate how theory translates into impactful real-world solutions, providing a roadmap for your design and engineering efforts.
2. Foundations of Human Machine Interface Design
2.1 Principles of Effective HMI Design
Human Machine Interface (HMI) design is the cornerstone of creating seamless, intuitive, and efficient interactions between users and machines. Effective HMI design ensures that users can operate systems safely, efficiently, and with satisfaction. Below, we explore the core principles that guide successful HMI design, accompanied by mind maps and practical examples to illustrate each concept.
Core Principles of Effective HMI Design
Usability
Usability is the foundation of effective HMI design. It ensures that users can interact with the system easily and successfully.
Key aspects:
- Learnability: How quickly can a new user accomplish basic tasks?
- Efficiency: Once learned, how quickly can tasks be performed?
- Memorability: Can users return after a period of non-use and still operate effectively?
- Error Prevention & Recovery: Does the system prevent errors and provide easy recovery?
- Satisfaction: Is the user experience pleasant and engaging?
Example: In an industrial control panel, the layout groups related controls logically, uses clear labels, and provides tooltips. New operators can learn the system within a day, and experienced operators perform tasks rapidly with minimal errors.
Consistency
Consistency reduces cognitive load by making interfaces predictable.
Types:
- Visual Consistency: Uniform fonts, colors, and iconography.
- Functional Consistency: Similar controls behave the same way across the system.
- Behavioral Consistency: Feedback and responses follow expected patterns.
Example: A vehicle infotainment system uses the same swipe gestures and button layouts across different screens, so drivers can operate it without distraction.
Feedback
Providing users with clear, immediate feedback helps them understand system status and the results of their actions.
Examples of feedback:
- Visual indicators (e.g., loading spinners, progress bars)
- Auditory signals (e.g., beeps, voice prompts)
- Haptic feedback (e.g., vibrations)
Example: In a smart home control app, when a user adjusts the thermostat, the interface immediately updates the temperature display and provides a subtle vibration to confirm the input.
Simplicity
Simplicity focuses on minimizing complexity to avoid overwhelming users.
Strategies:
- Use minimalistic design elements.
- Present only necessary information.
- Provide clear navigation paths.
Example: A wearable fitness tracker displays only key metrics like heart rate and steps on the main screen, with detailed data accessible via secondary menus.
Accessibility
Designing for accessibility ensures that users with diverse abilities can use the system effectively.
Considerations:
- Support for screen readers.
- High contrast modes.
- Adjustable font sizes.
- Alternative input methods.
Example: An AR headset interface includes voice commands and gesture controls, enabling users with limited hand mobility to interact comfortably.
Safety
Safety is critical, especially in systems where errors can cause harm.
Approaches:
- Implement fail-safe defaults.
- Provide clear warnings and confirmations for critical actions.
- Design interfaces to minimize accidental inputs.
Example: In a medical device interface, any command that could alter patient treatment requires double confirmation and displays clear warnings.
Flexibility & Customization
Allowing users to tailor interfaces to their preferences improves comfort and efficiency.
Examples:
- Adjustable layouts.
- Customizable shortcuts.
- Adaptive interfaces that learn user behavior.
Example: An XR design tool lets users customize tool palettes and shortcut keys, streamlining their workflow.
Mind Map: Principles of Effective HMI Design (Detailed)
Summary
Effective HMI design is a multi-faceted discipline that balances usability, consistency, feedback, simplicity, accessibility, safety, and flexibility. By applying these principles thoughtfully, designers and engineers create interfaces that empower users, reduce errors, and enhance overall experience.
Additional Example: Smart Factory Control Room
In a smart factory control room, the HMI dashboard integrates real-time data from multiple machines. The interface uses color coding to indicate machine status (green for normal, yellow for warning, red for critical), provides immediate feedback on operator commands, and supports voice control for hands-free operation. The system is designed with accessibility in mind, offering adjustable font sizes and alternative input methods. Safety protocols require confirmation before shutting down any machine, preventing accidental stoppages.
This example embodies many principles of effective HMI design, demonstrating how they work together in a complex, real-world environment.
2.2 Cognitive Load and User Attention in Interface Design
Understanding Cognitive Load
Cognitive load refers to the amount of mental effort being used in the working memory. In Human Machine Interface (HMI) design, managing cognitive load is crucial to ensure users can efficiently process information without feeling overwhelmed or distracted.
There are three types of cognitive load to consider:
- Intrinsic Load: The inherent difficulty associated with a specific task.
- Extraneous Load: The way information or tasks are presented to a user.
- Germane Load: The mental effort required to process and construct schemas.
Why Cognitive Load Matters in Interface Design
High cognitive load can lead to user errors, slower task completion, and frustration. For immersive experiences, where users are often navigating complex 3D environments or multitasking with multiple input modalities, managing cognitive load is even more critical.
Key Strategies to Manage Cognitive Load and User Attention
- Simplify Information Presentation: Break down complex information into smaller, digestible chunks.
- Prioritize Visual Hierarchy: Use size, color, and placement to guide user attention to the most important elements.
- Minimize Unnecessary Elements: Avoid clutter and irrelevant information that can distract users.
- Use Progressive Disclosure: Reveal information progressively as needed rather than all at once.
- Leverage Familiar Patterns: Use interface elements and interaction patterns users already know to reduce learning effort.
- Provide Clear Feedback: Immediate and clear responses to user actions help reduce uncertainty and cognitive effort.
Mind Map: Cognitive Load Factors in Interface Design
Mind Map: User Attention Management Techniques
Examples Illustrating Cognitive Load and User Attention
Example 1: Automotive HMI Dashboard
In modern cars, dashboards present critical information such as speed, navigation, and alerts. To reduce cognitive load:
- The speedometer is prominently displayed in the center with large, clear digits.
- Navigation instructions appear progressively, only showing the next turn rather than the entire route.
- Alerts use distinct colors (e.g., red for critical warnings) and audio cues to immediately capture attention.
This design ensures drivers can quickly grasp essential information without distraction, maintaining focus on driving.
Example 2: VR Training Simulation for Equipment Maintenance
A VR interface for training technicians on complex machinery uses progressive disclosure:
- Initially, only the main components are visible.
- As the user selects a component, detailed instructions and interactive elements appear.
- Visual highlights and audio prompts guide the user’s attention to the next step.
This approach prevents overwhelming the user with too much information at once and supports effective learning.
Example 3: AR Maintenance Application
An AR app overlays instructions on physical equipment. To manage cognitive load:
- The interface uses minimal text, relying on icons and arrows.
- Only relevant instructions for the current task step are displayed.
- Haptic feedback confirms successful actions, reducing the need to constantly check the screen.
This design keeps user attention focused on the task and environment, improving efficiency and safety.
Summary
Managing cognitive load and user attention is essential for effective HMI and immersive experience design. By simplifying information, prioritizing visual hierarchy, and using progressive disclosure, designers can create interfaces that are intuitive, reduce errors, and enhance user satisfaction.
2.3 Designing for Accessibility and Inclusivity
Designing for accessibility and inclusivity in Human Machine Interfaces (HMI) and immersive experiences is essential to ensure that all users, regardless of their abilities or backgrounds, can effectively interact with technology. Inclusive design not only broadens the user base but also enhances overall user satisfaction and usability.
Why Accessibility and Inclusivity Matter
- Legal and Ethical Responsibility: Many countries have regulations (e.g., ADA, WCAG) mandating accessible design.
- Market Expansion: Inclusive products reach a wider audience, including people with disabilities.
- Improved Usability: Accessibility features often improve the experience for all users.
Key Principles of Accessible and Inclusive Design
Designing for Visual Impairments
- High Contrast and Scalable Text: Use color palettes with sufficient contrast and allow text resizing.
- Screen Reader Compatibility: Ensure all UI elements have descriptive labels and roles.
- Example: In an AR navigation app, provide audio directions and haptic feedback alongside visual cues.
Designing for Hearing Impairments
- Visual and Textual Alternatives: Provide captions, transcripts, and visual alerts.
- Vibration and Haptic Signals: Use haptics to signal notifications or interactions.
- Example: VR training simulations include subtitles and flashing visual signals for important audio cues.
Designing for Motor Disabilities
- Alternative Input Methods: Support voice commands, eye tracking, and switch controls.
- Adjustable Interaction Zones: Make touch targets larger and allow customization.
- Example: An XR painting app supports voice commands to change brushes and colors, reducing reliance on fine motor skills.
Designing for Cognitive Disabilities
- Simplified UI: Use clear, concise language and avoid clutter.
- Consistent Navigation: Maintain predictable layouts and workflows.
- Error Prevention and Recovery: Provide helpful error messages and undo options.
- Example: A VR educational platform uses simple menus with iconography and step-by-step guidance.
Cultural and Language Inclusivity
- Localization: Support multiple languages and culturally relevant content.
- Flexible Date, Time, and Number Formats: Adapt to user locale.
- Example: An AR museum guide offers multi-language audio and text descriptions tailored to visitor preferences.
Best Practices Summary
| Practice | Description | Example |
|---|---|---|
| Use semantic markup and ARIA roles | Ensures compatibility with assistive technologies | Screen reader-friendly VR menus |
| Provide multiple feedback channels | Combine visual, audio, and haptic feedback | AR navigation with audio and vibration cues |
| Allow customization | Users can adjust text size, colors, and controls | XR app with adjustable UI scale and color themes |
| Test with diverse users | Include people with disabilities in usability testing | Beta testing with visually impaired users |
| Follow accessibility guidelines | WCAG, ISO standards for XR and HMI | Compliance with WCAG 2.1 in immersive apps |
Real-World Example: Accessible VR Meditation App
Scenario: A VR meditation app designed to be inclusive for users with visual, hearing, and motor impairments.
- Visual: High contrast UI, scalable text, and descriptive audio narration.
- Hearing: Subtitles for all audio content and visual pulse animations synced with breathing exercises.
- Motor: Voice commands to navigate menus and start/stop sessions.
This approach ensures users with diverse abilities can enjoy the immersive experience fully.
Conclusion
Designing for accessibility and inclusivity in HMI and immersive experiences requires a holistic approach that considers diverse user needs. By integrating multiple sensory channels, supporting alternative input methods, and adhering to established guidelines, designers and engineers can create experiences that are not only usable but delightful for everyone.
2.4 Case Study: Simplifying Complex Controls in Automotive HMIs
Introduction
Modern vehicles are equipped with increasingly complex Human Machine Interfaces (HMIs) that control everything from navigation and climate to entertainment and advanced driver assistance systems. However, the complexity often overwhelms users, leading to distraction and reduced safety. This case study explores best practices for simplifying automotive HMIs, focusing on intuitive design, minimizing cognitive load, and enhancing user satisfaction.
Challenges in Automotive HMIs
- Multiple functions consolidated into single interfaces
- Diverse user demographics with varying tech-savviness
- Safety-critical environment requiring minimal distraction
- Limited physical space for controls
Best Practices for Simplification
- Prioritize Core Functions: Identify the most frequently used controls and make them easily accessible.
- Progressive Disclosure: Hide advanced or less-used features behind secondary menus.
- Consistent Layouts: Use familiar iconography and consistent placement to reduce learning curve.
- Multimodal Interaction: Combine touch, voice, and physical controls to suit different contexts.
- Feedback and Confirmation: Provide clear visual and audio feedback to confirm user actions.
Mind Map: Simplifying Automotive HMI Controls
Example 1: Tesla Model 3 Touchscreen Interface
Tesla’s Model 3 replaces most physical buttons with a large central touchscreen. To simplify controls:
- Core functions like climate and media are accessible from the home screen.
- Secondary functions such as detailed vehicle settings are nested within menus.
- Voice commands allow hands-free control, reducing distraction.
- Visual feedback is immediate, e.g., climate changes update the screen dynamically.
This design reduces clutter and streamlines user interaction, but requires users to adapt to touchscreen reliance.
Mind Map: Tesla Model 3 HMI Simplification
Example 2: BMW iDrive System
BMW’s iDrive combines a rotary controller with a central display, balancing physical and digital controls:
- Physical rotary knob allows tactile navigation without looking away from the road.
- Menu hierarchy is designed to minimize depth, enabling quick access.
- Customizable favorites let users pin frequently used functions.
- Haptic feedback on the controller enhances user confidence.
This hybrid approach addresses safety by reducing visual distraction and cognitive load.
Mind Map: BMW iDrive Simplification
Example 3: Voice-First Interfaces
Some manufacturers are integrating voice-first HMIs to simplify control further:
- Users can perform tasks like setting navigation, adjusting temperature, or making calls via natural language.
- Reduces need to interact with complex menus or touchscreens.
- Example: Mercedes-Benz MBUX system supports conversational AI with context awareness.
Mind Map: Voice-First Automotive HMIs
Summary
Simplifying complex automotive HMIs requires a user-centered approach that balances accessibility, safety, and functionality. By prioritizing core functions, employing progressive disclosure, leveraging multimodal inputs, and providing clear feedback, designers can create interfaces that enhance driving experience and safety.
This case study illustrates that no single solution fits all; rather, a combination of physical controls, touchscreens, and voice commands tailored to the vehicle and user context yields the best results.
2.5 Best Practice: Iterative User Testing and Feedback Loops
Iterative user testing and feedback loops are foundational to creating effective Human Machine Interfaces (HMI) that truly resonate with users. This approach involves continuously testing prototypes or live systems with real users, gathering their feedback, analyzing results, and refining the design accordingly. The cycle repeats until the interface meets usability, accessibility, and satisfaction goals.
Why Iterative Testing Matters
- Early Problem Detection: Identifies usability issues before costly development or deployment.
- User-Centered Refinement: Ensures the design evolves based on actual user needs and behaviors.
- Risk Reduction: Minimizes the chance of product failure by validating assumptions.
- Improved User Satisfaction: Leads to interfaces that users find intuitive and enjoyable.
Mind Map: Iterative User Testing and Feedback Loops
Common Testing Methods in Iterative Cycles
| Method | Description | Example Use Case |
|---|---|---|
| Think-Aloud | Users verbalize thoughts while interacting | Testing a VR control panel for pilots |
| A/B Testing | Comparing two design variants | Button placement in AR maintenance app |
| Surveys & Interviews | Collect subjective feedback post-session | User comfort after a VR training module |
| Eye Tracking | Analyzing gaze patterns | Optimizing HUD elements in automotive XR |
| Performance Metrics | Task completion time, error rates | Efficiency in gesture-based interactions |
Example: Iterative Testing in Automotive HMI Design
Scenario: Designing a touchscreen dashboard for a car with integrated AR navigation.
- Prototype 1: Basic layout with large buttons.
- User testing revealed difficulty reaching buttons while driving.
- Feedback: Users suggested repositioning controls closer to steering wheel.
- Refinement: Adjusted layout to include voice commands and gesture controls.
- Prototype 2: Added voice and gesture input.
- Testing showed improved safety but occasional recognition errors.
- Further Iterations: Enhanced voice recognition algorithms and simplified gestures.
This iterative approach led to a safer, more intuitive interface that reduced driver distraction.
Example: Feedback Loop in VR Medical Training
Scenario: Developing a VR simulation for surgical training.
- Initial Prototype: Basic anatomy models with limited interactivity.
- User Testing: Surgeons reported lack of tactile feedback and unrealistic instrument behavior.
- Feedback Loop: Incorporated haptic devices and refined physics engine.
- Next Testing Round: Improved realism, but users requested better guidance cues.
- Design Update: Added contextual prompts and visual highlights.
Through multiple iterations, the VR training environment became highly effective and widely adopted.
Tips for Effective Iterative Testing
- Start Early: Begin testing with low-fidelity prototypes to catch major issues.
- Test Often: Short, frequent cycles yield better insights than infrequent large tests.
- Diverse Users: Include users with varying expertise, abilities, and backgrounds.
- Combine Methods: Use both qualitative and quantitative data for a holistic view.
- Document Changes: Keep detailed records of feedback and design decisions.
Mind Map: Effective Iterative Testing Cycle
Summary
Iterative user testing and feedback loops empower HMI designers and immersive experience engineers to create interfaces that are not only functional but also delightful and accessible. By embracing this cyclical process, teams can adapt to user needs dynamically, reduce development risks, and ultimately deliver superior experiences.
Remember: The user’s voice is the most valuable compass in navigating design decisions.
3. User-Centered Design Methodologies for Immersive Experiences
3.1 Empathy Mapping and Persona Development for XR Users
Empathy mapping and persona development are foundational techniques in user-centered design, especially critical in the context of XR (Extended Reality) where user needs, emotions, and contexts can be highly varied and immersive. These methods help UX designers, interaction engineers, and experience strategists deeply understand their users’ motivations, pain points, and behaviors, enabling the creation of more intuitive and engaging immersive experiences.
What is Empathy Mapping?
Empathy mapping is a collaborative visualization tool used to articulate what we know about a particular type of user. It helps teams build a shared understanding of user needs and drives decision-making based on real user insights.
An empathy map typically consists of four quadrants representing:
- Says: What the user verbally expresses.
- Thinks: What the user is thinking but might not say aloud.
- Does: The user’s actions and behaviors.
- Feels: The user’s emotional state.
Additionally, it often includes sections for user Pains (frustrations, obstacles) and Gains (goals, desires).
Why Use Empathy Mapping in XR?
XR experiences are multisensory and context-dependent, making it essential to understand not just what users do, but how they feel and think in immersive environments. For example, discomfort or disorientation in VR can cause users to abandon an experience. Empathy mapping surfaces these nuanced insights.
Example Empathy Map for an XR Training Application User
Persona Development for XR Users
Personas are fictional, yet data-driven archetypes representing key user groups. In XR, personas help tailor immersive experiences to diverse user needs, such as novices vs. experts, or users with different physical abilities.
A strong persona includes:
- Demographics
- Goals and motivations
- Behaviors and usage patterns
- Pain points and challenges
- Technology comfort level
- Context of use
Example Persona: “Alex, The XR Novice”
Name: Alex Johnson
Age: 29
Occupation: Marketing Specialist
Tech Comfort: Moderate
Goals:
- Learn to use XR applications for virtual meetings.
- Avoid feeling overwhelmed or disoriented.
Behaviors:
- Prefers guided tutorials.
- Uses XR devices for short sessions.
Pain Points:
- Gets confused by complex gestures.
- Experiences mild VR fatigue.
Context of Use:
- Home environment, often after work hours.
Mind Map: Steps to Create Empathy Maps and Personas for XR Users
Best Practices for Empathy Mapping and Persona Development in XR
- Include Multisensory Considerations: XR users interact through sight, sound, touch, and sometimes smell. Capture sensory experiences in empathy maps.
- Consider Physical and Cognitive Load: XR can be physically and mentally demanding; reflect this in user feelings and pains.
- Use Real User Data: Base personas on actual research, not assumptions.
- Iterate Frequently: As XR technology evolves, so do user behaviors and expectations.
- Collaborate Across Disciplines: Involve engineers, designers, and strategists to enrich empathy maps and personas.
Additional Example: Empathy Map for AR Navigation App User
By integrating empathy mapping and persona development into the XR design process, teams can create immersive experiences that truly resonate with users, reduce friction, and increase engagement and satisfaction.
3.2 Journey Mapping in Immersive Contexts
Journey mapping is a powerful UX tool that visualizes the user’s experience step-by-step as they interact with a product or system. In immersive contexts such as Virtual Reality (VR), Augmented Reality (AR), and Mixed Reality (MR), journey mapping takes on additional layers of complexity due to the spatial, sensory, and interactive dimensions involved. This section explores how to effectively create journey maps tailored for immersive experiences, integrating best practices and illustrative examples.
What is Journey Mapping in Immersive Contexts?
Journey mapping in immersive contexts captures the user’s emotional, cognitive, and physical interactions within a 3D or mixed environment. It helps designers and engineers understand pain points, moments of delight, and opportunities for enhancement throughout the immersive experience.
Key Components of an Immersive Journey Map
- User Actions: Physical movements, gestures, voice commands, and gaze direction.
- Touchpoints: Virtual objects, UI elements, environmental cues, and system feedback.
- Emotions: User feelings such as excitement, confusion, or frustration at each stage.
- Context: Environmental factors like lighting, spatial layout, and noise.
- Technology: Hardware and software elements influencing the experience.
Best Practices for Journey Mapping in XR
- Incorporate Spatial and Temporal Dimensions: Unlike traditional 2D interfaces, immersive experiences unfold in 3D space and over time. Map user movement trajectories and timing.
- Use Multisensory Data: Capture audio, haptic, and visual feedback to understand holistic user experience.
- Engage Real Users in Context: Conduct observations or diary studies within the immersive environment.
- Visualize Emotional States: Use emotive icons or color coding to represent user feelings dynamically.
- Iterate with Cross-Disciplinary Teams: Collaborate with engineers, designers, and strategists to capture technical and experiential nuances.
Mind Map: Journey Mapping Elements in Immersive Contexts
Example: Journey Mapping a VR Training Module for Firefighters
Scenario: A VR simulation trains firefighters to navigate a burning building safely.
| Stage | User Actions | Touchpoints | Emotions | Context | Technology |
|---|---|---|---|---|---|
| 1. Onboarding | Put on VR headset, calibrate | Tutorial UI, voice instructions | Curiosity, slight anxiety | Quiet training room | VR headset, motion sensors |
| 2. Exploration | Move through virtual corridors | Fire effects, heat simulation | Focused, alert | Simulated smoke, darkness | Haptic feedback gloves |
| 3. Decision Making | Choose escape route via gestures | Interactive map, voice prompts | Stress, urgency | Dynamic fire spread | Gesture recognition |
| 4. Completion | Exit building, receive feedback | Performance dashboard | Relief, accomplishment | Training environment reset | Analytics software |
This journey map highlights critical moments where users might feel overwhelmed (e.g., navigating smoke-filled corridors) and where system feedback can alleviate confusion (e.g., clear voice prompts).
Mind Map: Emotional Journey in VR Firefighter Training
Tips for Creating Immersive Journey Maps
- Leverage 3D Visualization Tools: Use software like Miro, UXPressia, or custom VR tools to represent the journey in spatial form.
- Capture Real-Time Data: Integrate telemetry from XR devices (e.g., gaze tracking, movement patterns) to enrich the journey map.
- Include Environmental Variables: Document how changes in the virtual environment impact user behavior.
- Use Storytelling: Narrate the journey from the user’s perspective to foster empathy.
Additional Example: AR Shopping Experience Journey Map
Scenario: A user shops for furniture using an AR app that overlays virtual items into their real living room.
- User Actions: Scanning room, selecting furniture, placing items, adjusting size/color.
- Touchpoints: AR placement UI, product catalog, feedback animations.
- Emotions: Excitement when previewing items, frustration if placement is inaccurate.
- Context: Lighting conditions, room size, device performance.
This journey map helps identify moments where technical limitations (e.g., poor lighting causing tracking errors) disrupt the experience and suggests design improvements like adaptive lighting compensation.
Summary
Journey mapping in immersive contexts requires a multidimensional approach that accounts for spatial, sensory, and emotional factors. By integrating real user data, multisensory feedback, and cross-disciplinary insights, designers and engineers can craft more intuitive and engaging immersive experiences. Using mind maps and concrete examples, such as VR firefighter training and AR shopping, helps ground these concepts in practical application.
3.3 Prototyping Techniques: From Paper to Virtual Reality
Prototyping is a critical step in the design process, especially in Human Machine Interface (HMI) and immersive experience engineering. It allows designers and engineers to explore ideas, test interactions, and gather user feedback early and often. In XR (Extended Reality) contexts, prototyping ranges from simple low-fidelity sketches to fully interactive virtual environments.
Overview of Prototyping Levels
- Low-Fidelity Prototypes: Quick, inexpensive, and easy to modify. Examples include paper sketches, storyboards, and wireframes.
- Mid-Fidelity Prototypes: Digital mockups with some interactivity, often created using UI design tools.
- High-Fidelity Prototypes: Fully interactive and immersive experiences built in VR/AR platforms or specialized prototyping software.
Mind Map: Prototyping Techniques Spectrum
Low-Fidelity Prototyping: Paper and Physical Mockups
Paper prototyping remains one of the fastest and most effective ways to visualize concepts and test user flows without investing heavily in development.
Example:
- Designing a gesture-based menu for an AR headset.
- Sketch out the menu options on paper cards.
- Use hand gestures to simulate selection and navigation.
- Gather user feedback on menu layout and interaction flow.
Best Practice: Encourage users to think aloud while interacting with paper prototypes to uncover usability issues early.
Mind Map: Paper Prototyping Process
Mid-Fidelity Prototyping: Digital Mockups and Clickable Interfaces
Tools like Figma, Adobe XD, and Sketch allow designers to create interactive wireframes that simulate user flows and basic interactions.
Example:
- Create a clickable prototype of a VR onboarding tutorial.
- Include hotspots that simulate gaze-based selection.
- Share with stakeholders for early feedback before development.
Best Practice: Use prototyping tools that support XR-specific interactions such as gaze, hand tracking, or voice to better approximate the final experience.
Mind Map: Mid-Fidelity Prototyping Workflow
High-Fidelity Prototyping: Immersive Virtual Reality and Augmented Reality
High-fidelity prototypes are built using game engines like Unity or Unreal Engine, or specialized XR prototyping platforms. These prototypes allow for realistic, immersive testing of spatial interactions, haptics, and multisensory feedback.
Example:
- Developing a VR training simulation for factory workers.
- Prototype includes realistic hand interactions, tool manipulation, and environmental sounds.
- Test for ergonomics, task efficiency, and safety.
Best Practice: Start with modular components to speed up iteration and reuse assets. Incorporate user telemetry data to analyze behavior and improve design.
Mind Map: High-Fidelity Prototyping Components
Integrating Prototyping Levels: A Practical Example
Scenario: Designing an AR maintenance app for industrial equipment.
- Low-Fidelity: Sketch paper wireframes of the AR interface showing overlay information and gesture controls.
- Mid-Fidelity: Create a clickable digital prototype simulating menu navigation and information panels.
- High-Fidelity: Build an AR prototype using ARKit that overlays instructions on real equipment, including voice commands and hand gestures.
This layered approach helps identify design flaws early and refine interactions progressively.
Summary
Prototyping in HMI and immersive experience engineering is a multi-stage process that benefits from combining low, mid, and high-fidelity techniques. Starting simple with paper sketches and advancing to fully immersive VR/AR prototypes ensures efficient use of resources and better user-centered designs. Always incorporate user feedback at every stage to iterate towards the most intuitive and effective interface.
3.4 Example: Designing a VR Training Module for Medical Professionals
Designing a VR training module for medical professionals requires a deep understanding of both the users’ needs and the complexities of medical procedures. This example demonstrates how to apply user-centered design methodologies and best practices to create an effective immersive learning experience.
Step 1: Define Learning Objectives and User Personas
Before development, clarify what skills or knowledge the VR module aims to impart. For example, training on laparoscopic surgery techniques.
User Personas Mind Map:
This mind map helps identify the target audience and tailor the experience accordingly.
Step 2: Journey Mapping of the Training Experience
Map the user’s journey from onboarding to mastery.
Journey Map Mind Map:
This ensures the training is structured and comprehensive.
Step 3: Prototyping Interaction and Environment
Focus on designing intuitive interactions that mimic real-world actions.
Interaction Design Mind Map:
Example: Using hand controllers to simulate holding a laparoscopic tool, with haptic feedback providing resistance when interacting with virtual tissue.
Step 4: Incorporating Multisensory Feedback
Multisensory feedback enhances immersion and learning retention.
- Visual cues such as color changes when an instrument is correctly positioned.
- Audio prompts guiding the user through each step.
- Haptic feedback simulating the texture and resistance of tissues.
Example: When a surgeon applies too much force, the system vibrates the controller and displays a warning message.
Step 5: Usability Testing and Iteration
Conduct testing sessions with actual medical professionals.
- Collect qualitative feedback on ease of use and realism.
- Measure task completion times and error rates.
Example: After initial testing, users reported difficulty in locating certain tools. The interface was updated to include a floating toolbox with labeled icons, improving accessibility.
Summary
By following these steps, the VR training module becomes a powerful tool for medical education, blending best practices in HMI design and immersive experience engineering.
This example illustrates how:
- User personas and journey maps guide design decisions.
- Interaction engineering focuses on natural and intuitive controls.
- Multisensory feedback reinforces learning.
- Iterative testing ensures continuous improvement.
This approach can be adapted to various medical training scenarios, from emergency response to diagnostic procedures, maximizing the impact of immersive technologies in healthcare education.
3.5 Best Practice: Incorporating Multisensory Feedback in Prototypes
In immersive experience engineering, multisensory feedback is a cornerstone for creating engaging, intuitive, and memorable interactions. By integrating multiple sensory channels—such as visual, auditory, haptic, and sometimes even olfactory or vestibular cues—designers can enhance user perception, reduce cognitive load, and improve task performance.
Why Multisensory Feedback Matters
- Enhances Realism: Combining senses mimics real-world interactions, increasing immersion.
- Improves Usability: Feedback through multiple channels helps confirm actions and guide users.
- Supports Accessibility: Different sensory modalities can accommodate diverse user needs.
Key Components of Multisensory Feedback
Practical Examples of Multisensory Feedback in Prototypes
-
VR Medical Training Simulator
- Visual: Realistic 3D anatomy models with color-coded areas indicating health status.
- Auditory: Heartbeat sounds and verbal instructions.
- Haptic: Force feedback gloves simulate tissue resistance during palpation.
-
AR Maintenance Application
- Visual: Highlighted parts and step-by-step animations.
- Auditory: Beeps confirming successful tool placement.
- Haptic: Vibration alerts for incorrect tool usage.
-
Immersive VR Game Interface
- Visual: Dynamic HUD elements that respond to player actions.
- Auditory: Spatialized footsteps and environmental sounds.
- Haptic: Controller vibrations synchronized with in-game events.
Implementing Multisensory Feedback in Prototypes
Implementation Mind Map
Tips for Effective Multisensory Feedback
- Start Simple: Begin with one or two sensory channels and expand gradually.
- Synchronize Feedback: Ensure timing between modalities is tight to avoid confusion.
- Consider Context: Match feedback intensity and type to the environment and user state.
- Avoid Overload: Too many simultaneous stimuli can overwhelm users.
- Accessibility: Provide alternative feedback modes for users with sensory impairments.
Summary
Incorporating multisensory feedback in prototypes is essential for crafting immersive and user-friendly experiences. By thoughtfully combining visual, auditory, and haptic cues, designers and engineers can create prototypes that not only demonstrate functionality but also evoke realistic and intuitive user interactions. Early integration and iterative testing of multisensory feedback ensure that the final product meets user needs and expectations effectively.
4. Interaction Engineering in XR Environments
4.1 Understanding Input Modalities: Gesture, Voice, and Haptics
Human-machine interfaces in XR environments rely heavily on diverse input modalities to create natural, intuitive, and immersive interactions. Understanding these input methods—gesture, voice, and haptics—is essential for UX Designers, Interaction Engineers, and Experience Strategists to craft seamless experiences.
Gesture Input
Gestures are physical movements of the hands, fingers, or body used to communicate commands or interact with virtual elements.
Types of Gesture Inputs:
- Static Gestures: Fixed hand poses or shapes (e.g., thumbs up, pinch).
- Dynamic Gestures: Movements over time (e.g., swipe, wave).
- Whole-Body Gestures: Full body motions (e.g., stepping forward, leaning).
Example:
In Microsoft HoloLens, users can perform an “air tap” gesture to select holographic objects, mimicking a mouse click in 3D space.
Best Practice:
- Design gestures that are easy to perform and remember.
- Avoid gestures that cause fatigue or require uncomfortable postures.
- Provide visual or audio feedback confirming gesture recognition.
Mind Map: Gesture Input Modalities
Voice Input
Voice input enables users to interact with systems through spoken commands or natural language.
Types of Voice Input:
- Command-Based: Specific phrases trigger actions (e.g., “Open menu”).
- Conversational: Natural language understanding for dialogue (e.g., virtual assistants).
- Dictation: Transcribing speech to text.
Example:
In VR applications like Oculus Quest, users can say “Take screenshot” or “Open inventory” to trigger actions without using controllers.
Best Practice:
- Use clear, concise commands.
- Support multiple languages and accents.
- Provide visual or auditory confirmation of recognized commands.
- Handle errors gracefully with suggestions or fallback options.
Mind Map: Voice Input Modalities
Haptic Input and Feedback
Haptics involve tactile sensations that provide users with physical feedback or allow input through touch.
Types of Haptic Feedback:
- Vibrotactile: Vibrations to signal events or interactions.
- Force Feedback: Resistance or pressure simulating physical properties.
- Thermal Feedback: Temperature changes to enhance realism.
Example:
The Ultraleap haptic device uses focused ultrasound to create the sensation of touching virtual objects in mid-air, enhancing immersion without physical controllers.
Best Practice:
- Use haptics to reinforce important interactions (e.g., button presses, alerts).
- Avoid excessive or distracting feedback.
- Calibrate intensity to user comfort.
Mind Map: Haptic Input and Feedback
Integrated Example: Gesture, Voice, and Haptics in an AR Maintenance Application
Imagine an AR application used by field technicians to repair complex machinery:
- Gesture: The technician points and pinches to select and manipulate virtual parts overlaid on the real machine.
- Voice: They say “Show wiring diagram” or “Next step” to navigate instructions hands-free.
- Haptics: The AR gloves provide subtle vibrations when a virtual component is correctly aligned or when an error occurs.
This multimodal interaction allows hands-free, intuitive control, improving efficiency and reducing errors.
Summary
Understanding and effectively integrating gesture, voice, and haptic input modalities enable the creation of immersive, natural, and accessible XR experiences. Designers and engineers should consider the strengths and limitations of each modality, user context, and hardware capabilities to deliver seamless human-machine interaction.
4.2 Designing Natural and Intuitive Interactions
Designing natural and intuitive interactions in XR environments is crucial for creating immersive experiences that feel seamless and engaging. When users interact with virtual or augmented worlds, the interface should minimize cognitive friction and leverage familiar real-world behaviors. This section explores key principles, strategies, and examples to help UX designers, interaction engineers, and experience strategists craft interactions that users can instinctively understand and enjoy.
Key Principles for Natural and Intuitive Interaction Design
- Leverage Real-World Metaphors: Use interaction patterns that mimic physical world behaviors (e.g., grabbing, pushing, pointing).
- Minimize Learning Curve: Design interactions that require little to no instruction.
- Provide Immediate Feedback: Users should receive clear, timely responses to their actions.
- Support Multimodal Inputs: Combine gestures, voice, gaze, and haptics for richer interaction.
- Maintain Consistency: Keep interaction patterns uniform across the experience.
- Consider Ergonomics: Design interactions that reduce physical strain and fatigue.
Mind Map: Core Elements of Natural Interaction Design
Designing with Real-World Metaphors
Humans naturally understand physical interactions. Translating these into XR:
- Grabbing and Manipulating: Users can reach out and “grab” virtual objects using hand tracking or controllers. For example, in a VR painting app, users pick up brushes and mix colors as they would in real life.
- Pointing and Selecting: Pointing with a finger or controller to select menu items or objects is intuitive. For instance, an AR maintenance app lets technicians point to machinery parts to get detailed info.
- Sliding and Swiping: Mimicking touchscreen gestures in mid-air or on surfaces helps users navigate menus or scroll content.
Example: In the Microsoft HoloLens interface, users can “air tap” to select holograms, a gesture similar to clicking a mouse, which feels natural and requires minimal training.
Mind Map: Multimodal Input Integration
Multimodal Input: Enhancing Intuitiveness
Combining multiple input types can reduce user effort and increase immersion.
- Gesture + Voice: Users might say “open menu” while pointing at a location.
- Gaze + Gesture: Eye tracking can highlight objects, and a hand gesture confirms selection.
- Haptics + Visual: When a user touches a virtual button, a subtle vibration reinforces the action.
Example: In the VR game “Beat Saber,” players use hand controllers to slash blocks. The game combines precise gesture recognition with audio and haptic feedback, making the interaction feel natural and satisfying.
Feedback: The Backbone of Intuitive Interaction
Feedback reassures users their actions have effect.
- Visual: Highlighting selected objects, animations, or color changes.
- Audio: Click sounds, voice confirmations, or spatial audio cues.
- Haptic: Vibrations or resistance sensations.
Example: In an AR shopping app, when users “grab” a virtual product, it slightly enlarges and emits a soft sound, confirming the selection.
Ergonomics: Designing for Comfort
Natural interactions must also be comfortable over time.
- Avoid requiring users to hold arms up for long periods.
- Design gestures within comfortable ranges.
- Provide rest states or alternative inputs.
Example: Oculus Quest recommends designing interactions that allow users to rest their arms by using controller buttons instead of continuous mid-air gestures.
Case Example: Gesture-Based Controls in Augmented Reality Maintenance Apps
Context: Technicians use AR glasses to receive instructions while repairing complex machinery.
Design Approach:
- Pointing gestures to select components.
- Pinch gestures to zoom or rotate 3D models.
- Voice commands to navigate menus hands-free.
- Visual and haptic feedback confirm selections.
Outcome: Technicians report faster task completion and reduced errors due to intuitive, hands-free controls that mimic natural behaviors.
Summary
Designing natural and intuitive interactions in XR requires a thoughtful blend of real-world metaphors, multimodal inputs, clear feedback, and ergonomic considerations. By grounding designs in familiar behaviors and reinforcing actions with multisensory feedback, designers can create immersive experiences that users quickly understand and enjoy.
For further reading, explore these resources:
- “Designing Gestural Interfaces” by Dan Saffer
- Microsoft HoloLens Interaction Design Guidelines
- Oculus Best Practices for VR Interaction Design
4.3 Managing Latency and Responsiveness in Immersive Systems
Latency and responsiveness are critical factors in delivering seamless and believable immersive experiences, especially in XR environments where delays can cause user discomfort, break immersion, or even induce motion sickness. This section explores the sources of latency, its impact on user experience, and best practices to manage and minimize latency in immersive systems.
Understanding Latency in Immersive Systems
Latency refers to the delay between a user’s action and the system’s response. In immersive XR systems, this includes the time taken for sensors to detect input, processing that input, rendering the updated scene, and displaying it back to the user.
Types of Latency:
- Input Latency: Delay from user action (e.g., gesture, head movement) to system recognition.
- Processing Latency: Time taken by the system to compute and update the virtual environment.
- Display Latency: Delay in rendering and displaying the updated frame to the user.
Impact of Latency on User Experience
- Motion Sickness: High latency can cause a mismatch between visual and vestibular cues, leading to nausea.
- Reduced Presence: Delays break the illusion of being ‘inside’ the virtual environment.
- Interaction Frustration: Slow responsiveness reduces user satisfaction and task efficiency.
Mind Map: Sources and Effects of Latency
Best Practices to Manage Latency and Improve Responsiveness
-
Optimize Hardware Selection
- Use high-refresh-rate displays (90Hz or above) to reduce display latency.
- Employ low-latency sensors and input devices.
-
Efficient Rendering Pipelines
- Implement techniques like foveated rendering to reduce GPU load.
- Use asynchronous timewarp or spacewarp to reproject frames and compensate for latency.
-
Predictive Tracking Algorithms
- Predict user head or hand movements to pre-render frames, reducing perceived latency.
-
Minimize Processing Overhead
- Optimize code and algorithms for faster computation.
- Use level-of-detail (LOD) models to reduce complexity where possible.
-
Network Latency Management (for networked XR)
- Use edge computing to bring processing closer to the user.
- Implement client-side prediction and lag compensation.
-
User Feedback and Adaptive Systems
- Provide subtle feedback during delays to maintain engagement.
- Adapt system performance dynamically based on latency measurements.
Example 1: Gesture-Based Controls in Augmented Reality Maintenance Apps
In an AR maintenance app for industrial equipment, latency in gesture recognition can cause delays in tool selection or command execution, frustrating users. To manage this:
- The system uses high-speed cameras with low sensor latency.
- Predictive algorithms anticipate hand movement trajectories to pre-emptively load UI elements.
- Asynchronous timewarp techniques ensure smooth visual updates even if processing lags.
This results in near-instantaneous response to gestures, improving user confidence and efficiency.
Mind Map: Latency Mitigation Techniques
Example 2: VR Gaming Interface Responsiveness
In a VR sword-fighting game, latency between the player’s physical sword movement and the virtual sword’s response can break immersion and reduce gameplay enjoyment. The development team implemented:
- Sensor fusion combining IMU and optical tracking for faster and more accurate input capture.
- GPU optimizations and foveated rendering to maintain high frame rates.
- Predictive tracking algorithms to anticipate player swings.
As a result, the game achieves sub-20ms motion-to-photon latency, delivering a highly responsive and immersive experience.
Summary
Managing latency and responsiveness in immersive systems is a multi-faceted challenge involving hardware, software, and design considerations. By understanding the sources of latency and applying best practices such as predictive tracking, rendering optimizations, and adaptive feedback, designers and engineers can create immersive experiences that feel natural, responsive, and comfortable for users.
4.4 Example: Gesture-Based Controls in Augmented Reality Maintenance Apps
Gesture-based controls have become a cornerstone in enhancing user interaction within Augmented Reality (AR) maintenance applications. These controls allow technicians and engineers to manipulate virtual objects, access information, and execute commands hands-free, improving efficiency and safety in complex environments.
Understanding Gesture-Based Controls in AR Maintenance
Gesture controls leverage sensors and cameras to detect user hand movements and translate them into commands. In maintenance scenarios, this means users can interact with machinery overlays, navigate manuals, or annotate components without physical contact.
Key Benefits:
- Hands-free operation reduces contamination and physical strain.
- Intuitive interactions shorten training time.
- Real-time feedback accelerates troubleshooting.
Mind Map: Gesture-Based Controls in AR Maintenance Apps
Practical Example: Gesture Controls in an AR HVAC Maintenance App
Scenario: A technician uses an AR headset to perform routine HVAC system diagnostics.
-
Gesture: Air Tap
- Function: Select a virtual control panel overlay.
- Example: The technician points at the virtual thermostat and performs an air tap to open detailed settings.
-
Gesture: Pinch and Drag
- Function: Zoom and pan 3D schematics.
- Example: Pinching fingers together and moving them apart zooms into a specific duct section.
-
Gesture: Swipe Left/Right
- Function: Navigate between maintenance steps.
- Example: Swiping right moves to the next step in the repair manual.
-
Gesture: Grab and Rotate
- Function: Rotate virtual components for inspection.
- Example: Grabbing a virtual valve and rotating it to view internal parts.
Mind Map: Gesture Interaction Flow in AR Maintenance
Best Practices Illustrated Through the Example
-
Clear Visual Feedback: When the technician performs an air tap, the selected control panel highlights with a glow effect, confirming recognition.
-
Gesture Discoverability: The app includes a tutorial overlay demonstrating common gestures with animations, helping new users learn quickly.
-
Error Prevention: The system requires a deliberate pinch-and-hold gesture before executing critical commands, reducing accidental inputs.
-
Customizable Gestures: Users can remap gestures to suit their preferences or physical limitations, enhancing accessibility.
-
Latency Minimization: Optimized sensor fusion algorithms ensure near-instantaneous response, maintaining immersion and trust.
Additional Example: Gesture-Based Annotation in AR Maintenance
A maintenance engineer inspecting a complex electrical panel uses a gesture to draw virtual notes directly onto the AR overlay:
- Gesture: Hold index finger extended and draw in the air.
- Function: Create freehand annotations.
- Benefit: Enables quick communication of issues without physical tools.
Summary
Gesture-based controls in AR maintenance apps provide an intuitive, efficient, and safe way for users to interact with complex systems. By integrating best practices such as clear feedback, discoverability, and customization, these interfaces significantly enhance the user experience and operational effectiveness.
This example underscores the importance of thoughtful interaction engineering in immersive environments, empowering UX designers, interaction engineers, and experience strategists to create impactful solutions.
4.5 Best Practice: Combining Multiple Input Modalities for Robust Interaction
In immersive environments such as XR (Extended Reality), relying on a single input modality can limit user interaction flexibility and accessibility. Combining multiple input modalities—such as gesture, voice, gaze, and haptics—creates more robust, natural, and inclusive user experiences. This section explores best practices for integrating multiple input methods, supported by mind maps and real-world examples.
Why Combine Multiple Input Modalities?
- Redundancy and Reliability: If one input method fails or is unavailable, others can compensate.
- Enhanced Accessibility: Supports users with different abilities or preferences.
- Natural Interaction: Mirrors real-world multi-sensory communication.
- Context Adaptability: Different modalities suit different tasks or environments.
Key Considerations When Combining Modalities
- Complementarity: Modalities should complement rather than conflict.
- Context Awareness: System should detect and adapt to current user context.
- Seamless Switching: Users can switch between modalities fluidly.
- Feedback Consistency: Provide clear, multimodal feedback to confirm actions.
Mind Map: Multi-Modal Interaction Design
Example 1: Gesture + Voice in AR Maintenance Application
In an augmented reality maintenance app for industrial equipment, users can use hand gestures to zoom or rotate 3D models, while voice commands trigger specific diagnostic tests or retrieve manuals.
- Benefit: Hands remain free for physical tasks while voice commands speed up complex operations.
- Implementation Tip: Use voice recognition only when the user is not actively gesturing to avoid command conflicts.
Mind Map: Gesture + Voice Integration
Example 2: Gaze + Haptics in VR Training
In a VR training simulation for surgeons, gaze tracking is used to select surgical tools by looking at them, while haptic gloves provide tactile feedback when tools are picked or when interacting with virtual tissue.
- Benefit: Gaze speeds up selection without controllers, and haptics enhance realism and precision.
- Implementation Tip: Calibrate gaze sensitivity to avoid accidental selections and provide subtle haptic cues for confirmation.
Mind Map: Gaze + Haptics Interaction
Best Practice Recommendations
- Design for Modality Synergy: Choose modalities that naturally complement each other for the task.
- Minimize Cognitive Load: Avoid overwhelming users by limiting simultaneous inputs.
- Provide Clear Multimodal Feedback: Reinforce user actions with visual, audio, and haptic cues.
- Implement Context-Aware Switching: Automatically adapt input modality based on environment or user state.
- Test with Diverse Users: Ensure accessibility and usability across different user groups.
By thoughtfully combining multiple input modalities, designers and engineers can create immersive experiences that are intuitive, accessible, and resilient to environmental or user variability, ultimately enhancing user satisfaction and task performance.
5. Visual Design and Spatial Layout in Immersive Interfaces
5.1 Principles of Visual Hierarchy in 3D Space
Visual hierarchy in 3D space is a critical design principle that guides users’ attention and interaction within immersive environments. Unlike traditional 2D interfaces, 3D spaces introduce depth, scale, and spatial relationships, which designers must leverage to create intuitive and engaging experiences.
Key Principles of Visual Hierarchy in 3D Space
- Depth and Layering: Objects closer to the user or in the foreground naturally attract more attention.
- Size and Scale: Larger objects command more visual weight and importance.
- Contrast and Color: Brightness, saturation, and color contrast help differentiate elements.
- Position and Placement: Elements placed at eye level or central field of view are more prominent.
- Motion and Animation: Moving objects draw attention faster than static ones.
- Lighting and Shadows: Proper use of lighting can emphasize or de-emphasize objects.
Mind Map: Visual Hierarchy in 3D Space
Applying Depth and Layering
In 3D interfaces, placing critical UI elements closer to the user can improve discoverability. For example, in a VR dashboard, the speedometer might be positioned slightly forward and larger than secondary controls to indicate priority.
Example: A VR cockpit interface places the main flight instruments within arm’s reach and slightly in front of the pilot, while navigation maps are displayed on a panel further away, reducing cognitive load.
Size and Scale for Emphasis
Scaling objects relative to their importance helps users quickly identify what matters. However, exaggerated scaling can break immersion, so balance is key.
Example: In an AR furniture app, the selected chair model is slightly larger and brighter than other items, signaling user focus.
Contrast and Color Usage
Using contrasting colors and brightness levels can separate interactive elements from the environment.
Example: A VR game uses neon-colored buttons against a muted background to guide players toward interactive hotspots.
Position and Placement Strategies
Positioning elements within the user’s natural line of sight or reachable zones enhances usability.
Example: In an AR maintenance app, instructions appear at eye level near the machine part being serviced, minimizing head movement.
Motion and Animation to Guide Attention
Subtle animations or motion can direct user focus without overwhelming.
Example: A floating notification gently pulses in a VR workspace to alert the user without breaking immersion.
Lighting and Shadows for Depth Perception
Dynamic lighting can create realistic depth cues and highlight important UI components.
Example: In a VR architectural walkthrough, spotlights highlight interactive doors, while ambient lighting keeps the environment natural.
Integrated Example: Spatial UI Design in a VR Architectural Walkthrough
Imagine a VR walkthrough where users explore a virtual home:
- Depth: Navigation arrows float closer to the user, layered above the floor.
- Size: The current room’s name is displayed larger than other labels.
- Contrast: Interactive objects glow softly with a contrasting color.
- Position: Information panels appear at eye level, directly in front of the user.
- Motion: Door handles subtly animate when the user approaches.
- Lighting: Key areas are illuminated to draw attention.
This combination ensures users intuitively understand where to look and interact.
Summary
Visual hierarchy in 3D space requires a thoughtful combination of depth, scale, color, position, motion, and lighting to create clear, intuitive, and immersive user interfaces. By applying these principles, designers can guide users naturally through complex environments, enhancing usability and engagement.
5.2 Color Theory and Contrast for XR Displays
Designing for XR (Extended Reality) displays requires a deep understanding of color theory and contrast principles to ensure clarity, comfort, and immersion. Unlike traditional 2D screens, XR interfaces operate within 3D environments where lighting, depth, and user focus dynamically influence color perception.
Understanding Color Theory in XR
Color theory involves the study of how colors interact, how they affect human perception, and how they can be combined effectively. In XR, this becomes more complex due to environmental lighting and spatial factors.
- Primary Colors: Red, Blue, Yellow — foundation for mixing other colors.
- Secondary Colors: Green, Orange, Purple — created by mixing primary colors.
- Tertiary Colors: Combinations of primary and secondary colors.
Mind Map: Basic Color Theory Concepts
Color Harmonies and Their Application in XR
Using color harmonies helps create visually pleasing and effective interfaces.
- Complementary Colors: Colors opposite each other on the color wheel (e.g., blue and orange). Used for high contrast and emphasis.
- Analogous Colors: Colors next to each other (e.g., blue, blue-green, green). Used for harmonious and calm environments.
- Triadic Colors: Three colors evenly spaced (e.g., red, yellow, blue). Used for vibrant and balanced designs.
Example: Using Complementary Colors in an AR Navigation App
An AR navigation app uses a blue interface overlay with orange highlights for important waypoints. This contrast helps users quickly identify key information without overwhelming the scene.
Contrast Principles in XR Displays
Contrast ensures readability and distinguishes interactive elements from the background.
- Luminance Contrast: Difference in brightness between foreground and background.
- Color Contrast: Difference in color hues and saturation.
- Spatial Contrast: Contrast created by depth and shadows in 3D space.
Mind Map: Contrast Types in XR
Challenges of Color and Contrast in XR
- Variable Lighting Conditions: Ambient light can change perceived colors.
- Depth and Distance: Colors may appear faded or altered with distance.
- Device Variability: Different XR devices have varying color gamuts and brightness.
Best Practices for Color and Contrast in XR
- Use High Contrast for Text and UI Elements: Ensure text and icons stand out against backgrounds.
- Test in Real Environments: Evaluate colors under different lighting and spatial conditions.
- Avoid Over-Saturation: Excessively bright colors can cause eye strain.
- Consider Color Blindness: Use color combinations distinguishable by users with common color vision deficiencies.
- Leverage Environmental Anchors: Use natural colors from the environment to guide interface color choices.
Example: Color and Contrast in a VR Architectural Walkthrough
In a VR architectural walkthrough, designers used muted earth tones for the environment and applied bright, high-contrast colors (e.g., white and neon green) for interactive hotspots. This approach ensured users could easily identify points of interest without breaking immersion.
Mind Map: Applying Color Theory and Contrast in XR Design
Summary
Color theory and contrast are foundational to crafting effective XR interfaces. By leveraging harmonious color schemes, ensuring sufficient contrast, and accounting for the unique challenges of immersive environments, designers can create intuitive, accessible, and engaging experiences.
For UX Designers, Interaction Engineers, and Experience Strategists, mastering these principles is essential to elevate the quality and usability of XR applications.
5.3 Designing for Depth and Scale: Avoiding User Disorientation
Designing immersive interfaces that effectively communicate depth and scale is critical to creating comfortable and intuitive user experiences in XR environments. Poor handling of these elements can lead to user disorientation, motion sickness, and reduced task performance.
Understanding Depth and Scale in Immersive Interfaces
- Depth refers to the perception of distance between objects and the user within a 3D space.
- Scale relates to the relative size of objects within the environment, often compared to real-world references or user expectations.
Properly designing for these factors helps users maintain spatial awareness and navigate virtual environments confidently.
Common Causes of User Disorientation Related to Depth and Scale
- Inconsistent or unrealistic scaling of objects.
- Lack of reliable visual cues for distance and size.
- Rapid or unnatural camera movements.
- Poorly designed spatial audio or haptic feedback.
Best Practices for Designing Depth and Scale
Mind Map: Designing for Depth and Scale
Visual Cues to Reinforce Depth and Scale
- Occlusion: Objects closer to the user partially obscure those behind them, reinforcing depth hierarchy.
- Shadows: Dynamic shadows provide spatial context and help define object placement.
- Perspective: Use of vanishing points and converging lines to simulate realistic depth.
- Parallax: Objects closer to the user move faster relative to the background when the user moves their head.
Example: In a VR architectural walkthrough, furniture closer to the user should occlude objects behind it, and shadows should align with a consistent light source to help users judge distances accurately.
Spatial Anchors and Environmental Landmarks
Providing fixed points of reference helps users orient themselves within the virtual space.
- Fixed Reference Points: Elements like doorways, windows, or furniture that remain static.
- Environmental Landmarks: Unique objects or textures that users can memorize to avoid getting lost.
Example: In an AR maintenance app, overlaying instructions anchored to specific machine parts helps users maintain spatial orientation and understand scale relative to the real equipment.
Consistent and Realistic Scaling
- Maintain real-world proportions where possible to avoid confusion.
- When exaggeration is necessary (e.g., for emphasis), provide clear visual or contextual cues.
- Consider user-relative scaling, especially in VR, where users can feel ‘shrunk’ or ‘giant’ if scale is off.
Example: A VR game that shrinks the user to insect size should include oversized environmental details and audio cues (e.g., louder ambient sounds) to reinforce the scale shift.
Designing Movement to Minimize Disorientation
- Use smooth, gradual camera and object movements.
- Avoid sudden jumps or teleportation without transitional effects.
- Incorporate motion blur or fade effects to ease transitions.
Example: In an AR navigation app, smoothly animating the path and directional arrows as the user moves helps maintain orientation without abrupt changes.
Multisensory Feedback Integration
- Spatial Audio: Sounds that change based on user position and orientation reinforce depth perception.
- Haptic Feedback: Vibrations or tactile cues can signal proximity or interaction with objects.
Example: In a VR training simulation, approaching a machine emits increasing mechanical sounds and subtle haptic pulses through controllers, enhancing spatial awareness.
User Testing and Iteration
- Conduct orientation and comfort tests to identify disorientation triggers.
- Use metrics like simulator sickness questionnaires and task completion times.
- Iterate designs based on user feedback to optimize depth and scale perception.
Example: Testing a VR museum tour with users revealed that inconsistent scale of exhibits caused confusion; adjusting object sizes and adding more spatial anchors improved navigation and comfort.
Summary
Designing for depth and scale in immersive experiences requires a multi-faceted approach that combines visual design, spatial referencing, consistent scaling, smooth movement, and multisensory feedback. By thoughtfully integrating these elements and validating through user testing, designers can significantly reduce user disorientation and create engaging, comfortable XR environments.
5.4 Example: Spatial UI Design in a VR Architectural Walkthrough
In VR architectural walkthroughs, spatial UI design plays a crucial role in helping users navigate, understand, and interact with complex 3D environments intuitively. The goal is to create interfaces that are seamlessly integrated into the virtual space, enhancing immersion without overwhelming or disorienting the user.
Key Objectives of Spatial UI in VR Architectural Walkthroughs:
- Provide clear navigation cues
- Present contextual information without clutter
- Enable intuitive interaction with architectural elements
- Maintain user orientation and spatial awareness
Mind Map: Core Components of Spatial UI Design in VR Architectural Walkthrough
Practical Example: Designing a Spatial UI for a VR Architectural Walkthrough
Scenario: A VR walkthrough for a new residential building allowing prospective buyers and architects to explore the space, view details, and interact with design elements.
-
Navigation:
- Use floating, semi-transparent wayfinding arrows that appear only when the user looks at decision points (e.g., hallway intersections).
- Teleportation points are marked with glowing circles on the floor, allowing quick movement between rooms.
- A small, retractable mini-map floats at the user’s wrist, showing their current location and orientation within the building.
-
Information Display:
- Interactive labels appear when the user points at an object (e.g., a window or door), showing material type, dimensions, and manufacturer.
- Contextual pop-ups provide design notes from the architect, accessible via a simple hand gesture.
-
Interaction:
- Users can select furniture pieces to toggle between different styles or colors.
- Annotation tools allow users to leave voice or text comments anchored to specific locations.
- Measurement tools enable users to measure distances between points by pointing and clicking.
-
Orientation:
- Environmental anchors such as a virtual sun position and shadows help users understand spatial relationships.
- A subtle compass appears at the bottom of the field of view, indicating cardinal directions.
-
User Comfort:
- UI elements maintain a comfortable distance (around 1.5 meters) from the user to avoid eye strain.
- Transitions between teleportation points use fade-in/fade-out effects to reduce motion sickness.
- Visual noise is minimized by hiding non-essential UI elements until needed.
Mind Map: Interaction Flow for User Exploring a Room
Best Practices Illustrated in This Example:
- Contextual UI: UI elements appear only when relevant, reducing clutter and cognitive load.
- Spatial Anchoring: UI components are anchored in 3D space relative to objects or the user, enhancing immersion.
- Multi-Modal Interaction: Combining gaze, gesture, and controller input for flexible user control.
- User Comfort: Attention to distance, motion effects, and visual noise to minimize discomfort.
- Feedback and Affordances: Clear visual and audio feedback for interactions to guide users.
Additional Example: Using Environmental Cues for Orientation
In a VR walkthrough of a multi-story building, designers implemented a virtual skylight that changes brightness and color temperature based on the time of day, helping users intuitively understand orientation and time context. This subtle environmental UI complements explicit navigation tools without distracting the user.
By thoughtfully integrating spatial UI elements into the VR architectural walkthrough, designers can create an immersive, informative, and comfortable experience that empowers users to explore and understand architectural spaces effectively.
5.5 Best Practice: Using Anchors and Environmental Cues for Orientation
In immersive environments, users often face challenges related to spatial orientation and navigation. Without clear reference points, users can become disoriented, leading to discomfort, frustration, and reduced usability. To mitigate this, designers employ anchors and environmental cues—visual, auditory, and haptic signals that help users understand their position and movement within the virtual or augmented space.
What Are Anchors and Environmental Cues?
- Anchors: Fixed points or objects in the environment that serve as stable references. Examples include landmarks, UI elements, or persistent objects.
- Environmental Cues: Sensory signals embedded in the environment that guide users, such as lighting, shadows, sound sources, textures, or haptic feedback.
Why Use Anchors and Environmental Cues?
- Help users maintain spatial awareness
- Reduce cognitive load by providing intuitive orientation
- Prevent motion sickness and disorientation
- Enhance immersion and user confidence
Mind Map: Anchors and Environmental Cues for Orientation
Practical Examples
Example 1: VR Architectural Walkthrough
In a VR walkthrough of a building, designers place distinctive furniture pieces and artworks as visual anchors in each room. A subtle ambient sound of a fountain near the lobby acts as an auditory anchor. Additionally, a floating compass UI remains visible in the user’s peripheral vision, always pointing north.
This combination helps users understand where they are and navigate intuitively without getting lost.
Example 2: AR Maintenance Application
An AR app for factory maintenance uses colored markers on machinery as anchors. When users approach a machine, the app highlights key components with glowing outlines. Directional audio cues guide users toward the next task station. If users move outside the safe zone, a gentle haptic pulse on the controller alerts them.
These cues ensure users stay oriented and safe while performing complex tasks.
Mind Map: Example 1 - VR Architectural Walkthrough Anchors
Mind Map: Example 2 - AR Maintenance Application Cues
Implementation Tips
- Consistency: Use anchors consistently across the experience to build user familiarity.
- Saliency: Make anchors visually or audibly distinct but not overwhelming.
- Multi-modality: Combine visual, auditory, and haptic cues for robust orientation.
- Context-awareness: Adapt cues based on user location and task.
- User Testing: Validate orientation aids with real users to ensure effectiveness.
By thoughtfully integrating anchors and environmental cues, immersive experience designers can significantly improve user orientation, comfort, and overall satisfaction.
6. Audio Design and Multisensory Integration
6.1 Role of Spatial Audio in Immersive Experience
Spatial audio is a cornerstone of immersive experience engineering, providing users with realistic and contextually relevant soundscapes that enhance presence and engagement. Unlike traditional stereo or mono audio, spatial audio simulates how sound behaves in a three-dimensional environment, allowing users to perceive direction, distance, and movement of sound sources around them.
Why Spatial Audio Matters in Immersive Experiences
- Enhances Presence: By mimicking real-world auditory cues, spatial audio makes virtual environments feel more believable and engaging.
- Improves Interaction: Directional sound helps users locate objects, characters, or events, improving navigation and interaction within XR environments.
- Supports Multisensory Integration: When combined with visual and haptic feedback, spatial audio contributes to a cohesive sensory experience.
- Reduces Cognitive Load: Clear audio cues can guide attention naturally, reducing the need for visual searching or confusion.
Key Concepts in Spatial Audio
Spatial Audio Mind Map
Best Practices for Implementing Spatial Audio
-
Use HRTF for Realistic Directionality: Head-Related Transfer Functions simulate how ears receive sound from different directions, crucial for accurate localization.
-
Incorporate Environmental Acoustics: Add reverberation and occlusion effects to simulate how sound interacts with virtual surfaces and objects.
-
Synchronize Audio with Visual Cues: Ensure audio sources move in tandem with their visual counterparts to avoid dissonance.
-
Optimize for Performance: Use efficient audio rendering techniques to maintain low latency and high frame rates.
-
Test Across Devices: Spatial audio perception can vary by hardware; test on headphones, speakers, and XR devices.
Example: Spatial Audio in a VR Escape Room
Imagine a VR escape room where players must locate a hidden key by following audio clues:
- Scenario: A faint ticking sound emanates from a locked safe.
- Implementation: Using spatial audio, the ticking is louder and clearer as the player approaches the safe, and its direction changes as the player moves around the room.
- User Benefit: The directional ticking guides the player intuitively, reducing frustration and enhancing immersion.
Example: Augmented Reality Navigation App
An AR app provides turn-by-turn navigation using spatial audio cues:
- Scenario: When a user needs to turn right, a sound plays from the right side.
- Implementation: The app uses binaural audio to position the sound accurately in 3D space relative to the user’s head orientation.
- User Benefit: Users can keep their eyes on the environment while receiving clear directional guidance.
Mind Map: Benefits and Applications of Spatial Audio
Summary
Spatial audio is essential for creating believable and effective immersive experiences. By carefully designing and implementing spatial soundscapes, UX designers, interaction engineers, and experience strategists can significantly elevate user engagement, comprehension, and satisfaction in XR environments.
6.2 Designing Audio Feedback for Interaction Confirmation
Audio feedback is a critical component in immersive experience design, especially for confirming user interactions. It enhances usability by providing immediate, intuitive cues that an action has been recognized and processed by the system. This section explores best practices, design principles, and examples for crafting effective audio feedback.
Why Audio Feedback Matters for Interaction Confirmation
- Reinforces user actions without requiring visual attention
- Improves accessibility for users with visual impairments
- Enhances immersion by mimicking real-world sensory responses
- Reduces cognitive load by providing clear, concise signals
Key Principles for Designing Audio Feedback
Mind Map: Principles of Audio Feedback for Interaction Confirmation
Types of Audio Feedback for Interaction Confirmation
- Click Sounds: Mimic physical button presses; simple and universally understood.
- Chimes and Tones: Pleasant, short melodies indicating success or completion.
- Voice Prompts: Spoken confirmations for complex or critical actions.
- Environmental Sounds: Contextual sounds that fit the immersive environment (e.g., a drawer closing sound when a menu closes).
Designing Audio Feedback: Step-by-Step
-
Identify Key Interactions to Confirm
- Button presses
- Menu selections
- Object manipulations
- System state changes
-
Select or Create Audio Cues
- Use sound libraries or custom recordings
- Ensure sounds are short and non-intrusive
-
Test Timing and Volume
- Audio should play immediately after interaction
- Volume balanced with other environmental sounds
-
Integrate with Multisensory Feedback
- Combine with haptic or visual cues for stronger confirmation
-
Iterate Based on User Feedback
- Conduct usability tests
- Adjust sounds for clarity and user preference
Example: Audio Feedback in a VR Drawing Application
- Interaction: User selects a brush tool
- Audio Cue: Soft “pop” sound confirming selection
- Interaction: User completes a stroke
- Audio Cue: Subtle swoosh sound indicating stroke completion
- Interaction: User erases a section
- Audio Cue: Light scratching sound matching eraser action
This approach helps users stay immersed without needing to look away from their work, reinforcing actions through intuitive sounds.
Mind Map: Designing Audio Feedback Workflow
Best Practice Example: Microsoft HoloLens Interaction Sounds
Microsoft HoloLens uses subtle, spatialized audio cues to confirm user interactions such as air taps and gestures. The sounds are designed to be unobtrusive yet clear, helping users understand when their input is registered without breaking immersion. This includes a soft “click” for selection and a gentle “whoosh” for menu transitions.
Tips for Effective Audio Feedback
- Avoid repetitive or annoying sounds that can fatigue users
- Use audio feedback to complement, not replace, visual and haptic cues
- Consider cultural differences in sound interpretation
- Ensure audio feedback does not interfere with critical environmental sounds
Summary
Designing audio feedback for interaction confirmation is about creating clear, timely, and contextually appropriate sounds that enhance user confidence and immersion. By following best practices and iterating with user input, designers can craft audio experiences that seamlessly integrate with the overall immersive environment.
6.3 Integrating Haptic Feedback with Audio Cues
Integrating haptic feedback with audio cues is a powerful technique in immersive experience engineering that enhances user engagement, improves interaction clarity, and deepens sensory immersion. When designed thoughtfully, the combination of tactile and auditory signals can create a more intuitive and satisfying user interface, especially in XR environments where traditional visual feedback may be limited or overloaded.
Why Integrate Haptics and Audio?
- Multisensory Reinforcement: Reinforces the perception of an event or action by stimulating multiple senses simultaneously.
- Improved Feedback Clarity: Helps users distinguish between different types of interactions or system states.
- Accessibility: Supports users with sensory impairments by providing alternative feedback channels.
- Immersion: Enhances the feeling of presence and realism in virtual or augmented environments.
Key Principles for Integration
- Temporal Synchronization: Audio and haptic signals should occur simultaneously or with minimal latency to feel cohesive.
- Complementary Roles: Use audio for spatial and contextual information, and haptics for localized, tactile sensations.
- Intensity Matching: Balance the strength of haptic pulses with audio volume and frequency to avoid sensory overload.
- Context Awareness: Adapt feedback based on user context, environment noise levels, and interaction type.
Mind Map: Integrating Haptic Feedback with Audio Cues
Examples of Effective Integration
-
VR Gaming Interface
- Scenario: When a player fires a weapon, a sharp haptic pulse is delivered to the controller simultaneously with the gunshot sound.
- Effect: The combined feedback increases realism and helps the player perceive the impact more vividly.
-
AR Maintenance Application
- Scenario: While guiding a technician through a repair, subtle vibrations on the wearable device coincide with audio instructions to highlight specific tools or parts.
- Effect: The technician’s attention is directed efficiently, reducing errors and improving task speed.
-
Mobile Navigation App
- Scenario: When approaching a turn, the phone vibrates gently while an audio cue announces the direction.
- Effect: The dual feedback ensures the user does not miss the instruction even in noisy environments.
Best Practice: Designing for Synchronization
- Use high-precision timers to coordinate audio and haptic output.
- Test on target hardware to measure latency and adjust timing.
- Provide fallback options where one modality can compensate if the other is unavailable.
Mind Map: Example Workflow for Designing Integrated Feedback
Summary
Integrating haptic feedback with audio cues is essential for creating rich, intuitive immersive experiences. By carefully synchronizing these sensory channels and tailoring feedback to user context, designers can significantly enhance usability, accessibility, and immersion. Employing iterative design and user testing ensures that the multisensory feedback is effective and well-received.
6.4 Example: Audio-Haptic Synchronization in VR Gaming Interfaces
In VR gaming, the immersive experience hinges heavily on how well audio and haptic feedback are synchronized to create a believable and engaging environment. This section explores the best practices and practical examples of audio-haptic synchronization, demonstrating how these sensory modalities work together to enhance user interaction and immersion.
Understanding Audio-Haptic Synchronization
Audio-haptic synchronization refers to the precise coordination between sound cues and tactile feedback to reinforce the perception of in-game events. When done correctly, it can:
- Increase realism and presence
- Provide intuitive feedback for player actions
- Enhance emotional engagement
- Improve gameplay responsiveness and satisfaction
Mind Map: Components of Audio-Haptic Synchronization in VR Gaming
Practical Example: Sword Combat in a VR Game
Imagine a VR sword-fighting game where the player swings a virtual sword to strike enemies. The synchronization between audio and haptic feedback is crucial to make each hit feel impactful.
-
Audio Feedback: A sharp metallic clang sound plays when the sword hits an enemy or object. The sound’s volume and pitch vary depending on the force and material hit.
-
Haptic Feedback: The VR controller vibrates with a pattern matching the impact’s intensity and duration. For a heavy strike, the vibration is strong and sustained; for a light tap, it is short and subtle.
-
Synchronization: The clang sound and vibration occur simultaneously, reinforcing the sensation of contact. If the audio lags behind the haptic feedback, the experience feels disjointed and less believable.
-
Example Implementation:
- Use low-latency audio APIs and haptic drivers.
- Trigger both feedbacks from the collision event in the game engine.
- Adjust intensity parameters dynamically based on collision force.
Mind Map: Sword Combat Audio-Haptic Feedback Flow
Additional Example: Environmental Interaction
In a VR horror game, the player opens a creaky door:
- Audio: A creaking door sound plays, spatially positioned to the door’s location.
- Haptics: The controller vibrates subtly as the player pushes or pulls the door handle.
- Synchronization: The vibration starts just as the creak begins, matching the door’s movement speed.
This synchronization helps the player feel physically connected to the environment, increasing tension and immersion.
Best Practices for Audio-Haptic Synchronization in VR Gaming
- Temporal Precision: Ensure audio and haptic feedback trigger within milliseconds of each other to avoid perceptible lag.
- Intensity Matching: Align the strength of vibrations with audio volume and pitch to maintain coherence.
- Context Awareness: Adapt feedback based on the game context, e.g., softer feedback for distant events.
- Hardware Calibration: Test across devices to accommodate differences in haptic actuators and audio output.
- Avoid Overstimulation: Balance feedback to prevent user fatigue or discomfort.
Summary
Audio-haptic synchronization is a powerful tool in VR gaming interfaces that significantly enhances user immersion and interaction quality. By carefully designing and aligning sound and tactile feedback, designers can create compelling experiences that feel natural and satisfying.
For UX Designers, Interaction Engineers, and Experience Strategists, mastering audio-haptic synchronization unlocks new dimensions of sensory engagement, making VR games more intuitive and emotionally resonant.
6.5 Best Practice: Balancing Audio Intensity to Avoid Sensory Overload
In immersive experiences, audio plays a crucial role in guiding users, providing feedback, and enhancing realism. However, improperly balanced audio intensity can lead to sensory overload, causing discomfort, distraction, or even disorientation. This section explores best practices for managing audio intensity effectively to create comfortable, engaging, and accessible immersive environments.
Understanding Sensory Overload in Audio
Sensory overload occurs when the brain receives more stimuli than it can process comfortably. In XR environments, loud, abrupt, or continuous intense audio can overwhelm users, reducing immersion and usability.
Key factors contributing to audio sensory overload:
- Excessive volume levels
- Overlapping or competing sounds
- Sudden loud noises without warning
- Lack of spatial audio cues
- Continuous background noise without variation
Best Practices for Balancing Audio Intensity
-
Implement Dynamic Volume Control
- Adjust audio levels contextually based on user focus and environment.
- Example: Lower background music volume when important voice instructions play.
-
Use Spatial Audio to Distribute Sound Sources
- Position sounds in 3D space to reduce cognitive load.
- Example: In a VR museum tour, place ambient sounds behind the user, while narration comes from the front.
-
Apply Audio Ducking Techniques
- Automatically reduce less important sounds when critical audio cues occur.
- Example: In an AR maintenance app, reduce machine noise volume when voice commands are issued.
-
Provide User-Controlled Audio Settings
- Allow users to adjust volume levels and toggle audio channels.
- Example: A VR meditation app offering separate sliders for ambient sounds and guided voice.
-
Avoid Abrupt Audio Transitions
- Use fade-ins and fade-outs to smooth volume changes.
- Example: Gradually increase alert sounds instead of sudden loud beeps.
-
Limit Continuous Loud Sounds
- Introduce natural breaks or reduce intensity over time.
- Example: In VR gaming, cycle intense battle sounds with quieter moments to prevent fatigue.
-
Test Audio Levels Across Different Devices and Environments
- Ensure consistent experience on headphones, speakers, and various acoustics.
Mind Map: Balancing Audio Intensity to Avoid Sensory Overload
Example 1: Audio Intensity Management in a VR Fitness App
In a VR fitness application, upbeat music motivates users, while voice coaching provides instructions. To avoid sensory overload:
- The music volume dynamically lowers when the coach speaks.
- Spatial audio positions the music as coming from behind, while the coach’s voice is centered.
- Users can adjust music and voice volumes independently.
- Transitions between workout phases use smooth audio fades.
This approach keeps users engaged without overwhelming them, enhancing focus and comfort.
Example 2: Sensory-Friendly AR Educational Experience
An AR app designed for children with sensory sensitivities incorporates:
- Gentle ambient sounds with low volume.
- Voice instructions with clear, moderate volume.
- Audio ducking to reduce background sounds during instructions.
- User settings to customize audio intensity or mute non-essential sounds.
This customization helps prevent sensory overload, making the experience inclusive and accessible.
Summary
Balancing audio intensity is essential to avoid sensory overload in immersive experiences. By implementing dynamic volume control, spatial audio, audio ducking, user customization, smooth transitions, and thorough testing, designers can create comfortable and engaging environments. These practices not only improve usability but also enhance emotional connection and accessibility for diverse users.
7. Usability Testing and Metrics for Immersive Interfaces
7.1 Setting Usability Goals for XR and HMI Systems
Setting clear usability goals is a foundational step in designing effective Human Machine Interfaces (HMI) and immersive XR (Extended Reality) systems. These goals guide the design process, help prioritize features, and provide measurable targets to evaluate success. In XR and HMI contexts, usability goals must address unique challenges such as spatial interaction, sensory integration, and user comfort.
Why Set Usability Goals?
- Focus Design Efforts: Goals clarify what aspects of usability are most critical.
- Measure Success: Provide benchmarks for testing and evaluation.
- Align Stakeholders: Ensure designers, engineers, and strategists share a common vision.
Key Dimensions of Usability in XR and HMI
Examples of Usability Goals in XR and HMI
-
Learnability: New users should be able to complete the onboarding tutorial within 5 minutes without external help.
-
Efficiency: Users should complete a maintenance task in AR-assisted assembly 20% faster than without XR support.
-
Error Tolerance: The system should allow users to undo or correct mistakes within 3 seconds of an incorrect gesture input.
-
Satisfaction: At least 85% of users report feeling comfortable and engaged during a 30-minute VR training session.
-
Accessibility: The interface must support voice commands and adjustable text sizes to accommodate users with visual or motor impairments.
Steps to Define Usability Goals
Example Scenario: Setting Usability Goals for a VR Medical Training Simulator
- Learnability: Trainees should be able to navigate the VR environment and perform basic procedures after a 10-minute tutorial.
- Efficiency: Procedures should be completed within 15% less time compared to traditional training.
- Error Tolerance: System provides immediate feedback and allows procedure retries without penalty.
- Satisfaction: 90% of trainees report high confidence in skills after training.
- Safety: Simulator must minimize motion sickness and physical strain.
Best Practices for Setting Usability Goals
- Be Specific and Measurable: Avoid vague goals; use concrete metrics.
- Consider the XR Context: Account for spatial, sensory, and ergonomic factors.
- Involve Users Early: Ground goals in real user needs and behaviors.
- Iterate and Refine: Usability goals may evolve with prototypes and testing.
- Balance Ambition and Feasibility: Set challenging but achievable targets.
Summary
Setting usability goals for XR and HMI systems requires a holistic understanding of user needs, task demands, and the immersive context. Clear, measurable goals enable teams to design interfaces that are intuitive, efficient, safe, and satisfying. Employing mind maps helps visualize the complex dimensions involved, ensuring comprehensive coverage and alignment across multidisciplinary teams.
7.2 Quantitative and Qualitative Metrics in Immersive Contexts
In immersive experience engineering and human machine interface (HMI) design, evaluating user interaction effectiveness requires a blend of quantitative and qualitative metrics tailored to the unique characteristics of XR environments. This section explores key metrics, their significance, and practical examples to help UX designers, interaction engineers, and experience strategists measure and optimize immersive experiences.
Quantitative Metrics
Quantitative metrics provide objective, numerical data that can be analyzed statistically. In immersive contexts, these metrics often focus on performance, physiological responses, and system analytics.
Key Quantitative Metrics:
- Task Completion Time: Measures how long a user takes to complete a specific task within the immersive environment.
- Error Rate: Counts the number of mistakes or incorrect actions during interaction.
- Interaction Frequency: Tracks how often users engage with certain interface elements or controls.
- Head and Eye Tracking Data: Captures gaze patterns and head movements to understand attention and focus.
- Physiological Metrics: Includes heart rate, galvanic skin response (GSR), and pupil dilation as indicators of stress, engagement, or cognitive load.
- System Latency and Frame Rate: Measures responsiveness and smoothness of the immersive experience.
- Spatial Positioning and Movement Patterns: Analyzes user navigation and spatial behavior within the virtual or augmented space.
Example:
In a VR training simulation for industrial machinery, measuring task completion time and error rate helps identify if users can efficiently and safely operate virtual equipment. Head tracking data reveals if users are focusing on critical controls or missing important visual cues.
Qualitative Metrics
Qualitative metrics capture subjective user experiences, feelings, and perceptions, often gathered through interviews, observations, and self-reporting tools.
Key Qualitative Metrics:
- User Satisfaction: Assessed via surveys or interviews, often using Likert scales.
- Sense of Presence: Measures how immersed and ‘present’ users feel within the environment.
- Usability Issues: Identified through think-aloud protocols and observational studies.
- Emotional Response: Captured via open-ended feedback or facial expression analysis.
- Cognitive Load: Assessed through subjective scales like NASA-TLX (Task Load Index).
Example:
After an AR maintenance application session, users complete a survey rating their sense of presence and describe any usability issues encountered. Observers note moments of confusion or hesitation, providing insights into interaction challenges.
Mind Map: Quantitative Metrics in Immersive Contexts
Mind Map: Qualitative Metrics in Immersive Contexts
Integrating Quantitative and Qualitative Metrics
Best practice in immersive experience evaluation involves combining both metric types to gain a holistic understanding. For instance, a VR educational app might use:
- Quantitative data: Task completion time, error rates, and gaze tracking to measure efficiency and attention.
- Qualitative data: Post-session interviews and presence questionnaires to understand user engagement and emotional impact.
This integration helps identify not just what is happening, but why, enabling targeted design improvements.
Practical Example: Measuring User Comfort and Task Efficiency in VR Workflows
Scenario: Designing a VR interface for warehouse inventory management.
- Quantitative: Track how long workers take to locate and scan items (task completion time), number of scanning errors (error rate), and head movement patterns to detect if users struggle to find UI elements.
- Qualitative: Conduct interviews to assess user comfort, any feelings of dizziness or disorientation, and perceived ease of use.
Outcome: Combining these metrics reveals that while task times are acceptable, users report discomfort due to UI placement. Adjusting UI spatial layout based on this feedback improves both comfort and efficiency.
Summary
| Metric Type | Examples | Purpose |
|---|---|---|
| Quantitative | Task Completion Time, Error Rate | Objective performance and physiological data |
| Qualitative | User Satisfaction, Sense of Presence | Subjective experience and usability insights |
By systematically applying these metrics, immersive experience teams can iteratively refine designs to create intuitive, engaging, and effective human machine interfaces.
7.3 Conducting Remote and In-Person User Testing
User testing is a critical step in validating Human Machine Interface (HMI) and immersive experience designs. Both remote and in-person testing methods have unique advantages and challenges, especially in XR environments where immersion and interaction fidelity are paramount. This section explores best practices, workflows, and examples to help UX Designers, Interaction Engineers, and Experience Strategists conduct effective user testing.
Remote User Testing
Remote user testing allows participants to engage with the interface or immersive experience from their own environment, increasing reach and diversity of testers.
Advantages:
- Access to geographically dispersed users
- Testing in real-world contexts
- Lower logistical costs
Challenges:
- Limited control over testing environment
- Potential technical difficulties
- Reduced ability to observe subtle user behaviors
Best Practices for Remote Testing:
- Use screen sharing and session recording tools compatible with XR (e.g., OBS Studio, Vysor for mobile AR)
- Provide clear, simple instructions and pre-test setup guides
- Use lightweight prototypes or cloud-streamed XR experiences to reduce hardware requirements
- Schedule sessions considering time zones and user availability
- Collect both quantitative data (task completion times, error rates) and qualitative feedback (interviews, surveys)
Example: A VR meditation app team conducted remote testing by distributing Oculus Quest headsets to participants and using a custom-built telemetry system to track user interactions. They paired this with Zoom sessions where users shared their experiences and answered questions. This approach revealed usability issues related to menu navigation that were not apparent in lab testing.
In-Person User Testing
In-person testing provides direct observation and richer contextual insights, which are invaluable for immersive experience evaluation.
Advantages:
- Ability to observe body language, facial expressions, and physical interactions
- Easier to manage hardware setup and troubleshoot issues
- Facilitates immediate follow-up questions and iterative testing
Challenges:
- Higher logistical costs and limited participant pool
- Potential for observer bias
Best Practices for In-Person Testing:
- Prepare a controlled environment minimizing distractions
- Use eye-tracking and motion capture tools to gather detailed interaction data
- Employ think-aloud protocols to understand user thought processes
- Record sessions with multiple cameras to capture different perspectives
- Debrief participants immediately after testing to gather fresh impressions
Example: An automotive HMI team tested an AR heads-up display prototype in a driving simulator lab. Observers noted driver gaze patterns and hand gestures, identifying that certain alerts were missed due to poor placement. Immediate adjustments were made, and the prototype was retested within the same session.
Mind Map: Remote User Testing Workflow
Mind Map: In-Person User Testing Workflow
Hybrid Testing Approaches
Combining remote and in-person testing can leverage the strengths of both methods. For example, initial broad remote testing can identify general issues, followed by focused in-person sessions for deep dives into complex interactions.
Example: A VR educational platform first conducted remote testing with hundreds of users to gather large-scale feedback on content engagement. Subsequently, a smaller group was invited for in-person sessions to analyze physical comfort and spatial navigation challenges.
Summary Checklist for Conducting User Testing
- Define clear objectives and success criteria
- Choose testing method based on goals and resources
- Prepare participants with clear instructions
- Use appropriate tools for data capture
- Observe and record user behavior comprehensively
- Analyze both quantitative and qualitative data
- Iterate designs based on findings
By thoughtfully combining remote and in-person user testing techniques, teams can ensure their HMI and immersive experience designs are both usable and engaging across diverse user contexts.
7.4 Example: Measuring User Comfort and Task Efficiency in VR Workflows
In immersive VR workflows, measuring user comfort and task efficiency is critical to ensure the experience is not only engaging but also sustainable over time. Poor comfort can lead to motion sickness, fatigue, or frustration, while inefficient task performance can reduce productivity and user satisfaction.
Key Aspects to Measure
- User Comfort: Physical and psychological well-being during and after VR use.
- Task Efficiency: Speed, accuracy, and ease with which users complete assigned tasks.
Mind Map: Measuring User Comfort in VR
Mind Map: Measuring Task Efficiency in VR Workflows
Practical Example: VR Assembly Line Training
Scenario: A manufacturing company uses a VR training module to teach new employees how to assemble a complex product.
Objective: Measure user comfort and task efficiency to improve the training experience.
Approach:
-
Setup: Participants wear VR headsets and complete assembly tasks in a simulated environment.
-
Comfort Measurement:
- Before and after each session, participants fill out the Simulator Sickness Questionnaire (SSQ) to report symptoms.
- Physiological data such as heart rate variability is monitored to detect stress.
- Observers note signs of fatigue or discomfort.
-
Task Efficiency Measurement:
- System logs record time taken for each assembly step and errors made.
- Video recordings analyze hand movements and interaction patterns.
- Post-session interviews gather subjective feedback on task difficulty.
-
Findings:
- Users experienced mild eye strain after 30 minutes but no severe motion sickness.
- Average task completion time decreased by 15% after iterative interface adjustments.
- Error rates dropped when additional visual cues were added.
-
Improvements Implemented:
- Added short breaks every 20 minutes to reduce fatigue.
- Enhanced controller ergonomics to reduce muscular strain.
- Simplified UI elements to reduce cognitive load.
Additional Example: VR Surgical Simulation
Scenario: Medical students use VR to practice surgical procedures.
Measurement Focus: Balancing high task efficiency with minimal discomfort to maintain concentration.
Methods:
- Use NASA TLX to assess cognitive workload.
- Track hand tremors and precision via motion sensors.
- Collect subjective comfort ratings after each session.
Outcome:
- Identified that longer sessions (>45 minutes) increased fatigue and reduced precision.
- Introduced adaptive difficulty levels to maintain engagement without overwhelming users.
Summary
Measuring user comfort and task efficiency in VR workflows requires a multi-faceted approach combining subjective self-reports, objective physiological data, and performance metrics. Integrating these measurements informs iterative design improvements that enhance both the immersive experience and practical usability.
By systematically applying these methods, UX designers, interaction engineers, and experience strategists can create VR workflows that are not only effective but also comfortable and sustainable for users.
7.5 Best Practice: Iterative Refinement Based on Data-Driven Insights
Iterative refinement is a cornerstone of designing effective Human Machine Interfaces (HMI) and immersive experiences. Leveraging data-driven insights allows designers, interaction engineers, and experience strategists to make informed decisions that enhance usability, engagement, and overall user satisfaction.
Why Iterative Refinement?
- Continuous Improvement: Interfaces evolve based on real user behavior rather than assumptions.
- Risk Reduction: Early detection of usability issues prevents costly redesigns.
- User-Centered: Aligns product development with actual user needs and preferences.
Key Steps in Iterative Refinement Using Data-Driven Insights
Data Collection Methods
- User Testing: Observing users interacting with the interface in controlled or natural environments.
- Analytics: Tracking metrics such as task completion time, error rates, and engagement levels.
- Feedback Surveys: Collecting subjective user feedback on experience and satisfaction.
Example: VR Training Module Optimization
Context: A VR training application for medical professionals was experiencing high dropout rates during complex procedural simulations.
Process:
- Data Collection: Analytics showed users struggled most during a suturing task; feedback surveys indicated confusion over tool selection.
- Data Analysis: High error rates and extended task times pinpointed interface complexity.
- Hypothesis: Simplifying tool selection and adding contextual guidance would improve performance.
- Design Iteration: Redesigned the tool selection menu with larger icons and added step-by-step audio cues.
- Validation: A/B testing revealed a 30% reduction in task completion time and increased user satisfaction.
- Repeat: Continued collecting data for further refinements.
Mind Map: Data-Driven Iterative Refinement Cycle in XR
Best Practices for Effective Iterative Refinement
- Define Clear Metrics: Establish measurable goals such as task success rate, error frequency, or user comfort.
- Combine Quantitative and Qualitative Data: Numbers tell what is happening; user feedback explains why.
- Prioritize Issues: Focus on changes that impact user experience most significantly.
- Maintain Version Control: Track changes and their effects systematically.
- Engage Cross-Functional Teams: Collaboration between UX designers, engineers, and strategists enriches insights.
Example: Gesture Control in AR Maintenance App
Scenario: An AR app for industrial maintenance used gesture controls, but users reported frequent misrecognition.
Iterative Approach:
- Data Collection: Logs revealed specific gestures had high error rates; user interviews highlighted frustration.
- Analysis: Environmental factors like lighting affected gesture detection.
- Iteration: Introduced alternative gestures less sensitive to lighting and added visual feedback confirming gesture recognition.
- Validation: Usability testing showed improved accuracy and reduced user frustration.
Summary
Iterative refinement based on data-driven insights is essential for creating intuitive and effective HMIs and immersive experiences. By systematically collecting and analyzing user data, forming hypotheses, implementing design changes, and validating outcomes, teams can continuously enhance their products to meet evolving user needs and technological landscapes.
8. Safety, Ethics, and Privacy in Human Machine Interfaces
8.1 Designing for Physical and Psychological Safety
Designing for physical and psychological safety in Human Machine Interfaces (HMI) and immersive experiences is paramount to ensure users feel secure, comfortable, and confident while interacting with technology. This section explores key considerations, best practices, and examples that UX designers, interaction engineers, and experience strategists can apply to create safe immersive environments.
Key Concepts in Physical and Psychological Safety
- Physical Safety: Preventing harm, injury, or discomfort caused by hardware, environment, or interaction design.
- Psychological Safety: Avoiding stress, anxiety, disorientation, or cognitive overload that may arise from immersive experiences.
Mind Map: Designing for Physical and Psychological Safety
Best Practices with Examples
Ergonomic Hardware Design
Practice: Use adjustable and lightweight devices to reduce physical strain.
Example: The Oculus Quest 2 headset includes adjustable straps and balanced weight distribution, minimizing neck strain during extended VR sessions.
Environmental Awareness and Boundary Systems
Practice: Implement virtual boundary systems (e.g., Chaperone in VR) to alert users when they approach physical obstacles.
Example: In HTC Vive, the Chaperone system projects a grid when users near the edge of their safe play area, preventing accidental collisions.
Motion Sickness Mitigation
Practice: Minimize latency and use teleportation or smooth locomotion options to reduce VR-induced nausea.
Example: Google Earth VR offers teleportation movement to help users explore vast spaces without triggering motion sickness.
Emergency Exit Mechanisms
Practice: Provide users with easy-to-access pause or exit controls and clear visual/audio cues for emergencies.
Example: In VR training simulations, pressing a dedicated controller button immediately pauses the experience and returns users to a safe menu.
Session Time Limits and Break Reminders
Practice: Encourage users to take breaks to prevent fatigue and eye strain.
Example: The VR meditation app “Tripp” includes gentle reminders after 20 minutes to rest or stretch.
Cognitive Load Management
Practice: Design interfaces with minimal clutter and reveal information progressively.
Example: Microsoft HoloLens apps often use spatial anchors to present information contextually, reducing cognitive overload.
Avoiding Sensory Overload
Practice: Balance audio and visual stimuli and allow users to adjust intensity.
Example: In immersive gaming, players can customize sound levels and visual effects to suit their comfort.
User Control and Consent
Practice: Provide clear onboarding explaining interactions and allow customization of settings.
Example: AR navigation apps like “Niantic’s Ingress” start with tutorials and let users adjust notification frequency.
Summary
Designing for physical and psychological safety requires a holistic approach that combines ergonomic hardware, thoughtful interaction design, environmental awareness, and user empowerment. By integrating these practices, immersive experiences become not only engaging but also safe and comfortable for diverse user groups.
8.2 Ethical Considerations in Immersive Experience Engineering
Immersive experience engineering, encompassing technologies like virtual reality (VR), augmented reality (AR), and mixed reality (MR), presents unique ethical challenges. As these technologies become more integrated into daily life, designers and engineers must carefully consider the ethical implications to protect users and society at large.
Key Ethical Dimensions in Immersive Experience Engineering
Privacy and Data Protection
Immersive systems often collect extensive personal data, including biometric data (eye tracking, heart rate), spatial environment data, and behavioral patterns. Ethical design requires:
- Explicit User Consent: Users must be informed clearly about what data is collected and how it will be used.
- Data Minimization: Collect only what is necessary.
- Secure Storage and Transmission: Implement strong encryption and access controls.
Example: An AR shopping app collects user location and gaze data to personalize ads. Ethical practice involves informing users upfront, offering opt-out options, and anonymizing data to prevent misuse.
Psychological Impact and Emotional Well-being
Immersive experiences can deeply affect emotions and cognition. Ethical considerations include:
- Avoiding designs that exploit addictive behaviors.
- Preventing emotional manipulation through persuasive design.
- Mitigating risks of desensitization to violence or trauma.
Example: A VR game that uses intense fear stimuli should include warnings and options to adjust intensity, ensuring users are not subjected to harmful psychological effects.
Accessibility and Inclusivity
Ethical immersive design must ensure equitable access:
- Designing for users with physical, sensory, or cognitive disabilities.
- Avoiding cultural biases in content and interaction paradigms.
Example: An AR navigation app provides audio descriptions and haptic feedback for visually impaired users, ensuring inclusivity.
User Safety
Immersive environments can pose physical risks:
- Preventing accidents caused by loss of spatial awareness.
- Reducing motion sickness through optimized frame rates and interaction design.
- Protecting users from cybersecurity threats like hacking or data breaches.
Example: A VR fitness app includes boundary systems and real-time alerts to prevent users from colliding with real-world objects.
Transparency and Informed Consent
Users should understand how immersive systems operate:
- Clear communication about AI-driven personalization.
- Disclosure of sponsored content or advertisements.
Example: An AR social platform clearly marks sponsored virtual objects and explains how user data influences content recommendations.
Social and Cultural Impact
Immersive experiences can influence societal norms and behaviors:
- Avoiding reinforcement of stereotypes or cultural insensitivity.
- Considering the digital divide and ensuring technology does not exacerbate inequalities.
Example: A VR educational program includes diverse cultural perspectives and is designed to be affordable and accessible to underserved communities.
Ethical Decision-Making Mind Map
Summary
Ethical considerations in immersive experience engineering require a multidisciplinary approach combining technical safeguards, user-centered design, and ongoing stakeholder engagement. By embedding ethics into the design process, professionals can create immersive technologies that respect user rights, promote well-being, and foster trust.
Further Reading & Resources
- IEEE Global Initiative on Ethics of Autonomous and Intelligent Systems
- XR Safety Initiative (XRSI) Ethical Framework
- “Ethics of Virtual Reality and Augmented Reality” - Journal Articles
8.3 Privacy Challenges in Data-Driven XR Systems
Extended Reality (XR) systems—encompassing Virtual Reality (VR), Augmented Reality (AR), and Mixed Reality (MR)—are inherently data-intensive. They collect, process, and analyze vast amounts of personal and environmental data to deliver immersive, context-aware experiences. However, this data-driven nature introduces significant privacy challenges that designers, engineers, and strategists must address to protect users and build trust.
Key Privacy Challenges in XR Systems
Data Collection: The Breadth and Sensitivity
XR devices capture an unprecedented range of data types:
- Biometric Data: Eye tracking reveals where users focus, heart rate monitors stress or excitement, and facial expression tracking captures emotional states.
- Environmental Data: XR systems scan and map physical surroundings to anchor virtual content, collecting detailed spatial information.
- Behavioral Data: Movement patterns, gesture usage, and interaction sequences provide insights into user habits.
Example: A VR fitness app tracks heart rate and movement to tailor workouts. While this improves personalization, the app also collects sensitive health data that, if mishandled, could expose users to privacy risks.
Data Storage and Security
Storing sensitive XR data locally or in the cloud presents security challenges:
- Local device storage may be vulnerable if the device is lost or stolen.
- Cloud storage can be targeted by cyberattacks.
- Encryption must be robust both at rest and in transit.
Example: An AR collaboration tool stores spatial maps of users’ homes on cloud servers. Without proper encryption and access controls, this data could be exploited for unauthorized surveillance.
Data Sharing and Third Parties
Many XR applications integrate third-party SDKs for analytics, advertising, or social features, which can lead to unintended data exposure.
- SDKs may collect data beyond the app’s scope.
- Data sharing agreements are often opaque to users.
Example: An AR game integrates an advertising SDK that collects user location and interaction data, which is then shared with advertisers without explicit user awareness.
User Consent and Transparency
Obtaining informed consent in XR environments is challenging:
- Privacy policies are often lengthy and complex.
- Real-time consent management is difficult when data collection is continuous and implicit.
Example: A VR social platform collects continuous audio and video data but only requests consent during initial setup, leaving users unaware of ongoing data capture.
Anonymization and De-identification Challenges
Spatial and biometric data are inherently personal and difficult to anonymize effectively.
- Even anonymized spatial maps can reveal home layouts.
- Biometric data can be linked back to individuals.
Example: A research project shares anonymized VR user data but fails to remove unique movement patterns, allowing re-identification of participants.
Regulatory Compliance
XR systems must navigate evolving regulations:
- GDPR mandates strict data protection and user rights.
- CCPA focuses on consumer data privacy in California.
- XR-specific regulations are emerging to address unique challenges.
Example: An international XR company updates its privacy framework to comply with GDPR by implementing granular consent options and data access requests.
Best Practices to Address Privacy Challenges
Summary
Privacy in data-driven XR systems is a multifaceted challenge involving sensitive biometric, environmental, and behavioral data. By understanding these challenges and integrating best practices—such as privacy by design, transparency, strong security, and regulatory compliance—designers and engineers can create immersive experiences that respect and protect user privacy.
Additional Mind Map: Privacy Risk Mitigation Strategies
8.4 Example: Implementing Consent and Data Protection in AR Applications
In augmented reality (AR) applications, user data privacy and consent are paramount due to the highly personal and context-aware nature of the technology. AR apps often collect sensitive data such as location, camera feeds, biometric information, and behavioral patterns, which necessitates robust consent mechanisms and data protection strategies.
Key Considerations for Consent and Data Protection in AR
- Transparency: Clearly inform users about what data is collected, why, and how it will be used.
- Granular Consent: Allow users to opt-in or opt-out of specific data collection types.
- Data Minimization: Collect only the data necessary for the core functionality.
- Security: Encrypt data both in transit and at rest.
- User Control: Provide easy access for users to review, modify, or delete their data.
- Compliance: Adhere to regulations such as GDPR, CCPA, and others.
Mind Map: Consent and Data Protection Workflow in AR Applications
Example Scenario: AR Navigation App
An AR navigation app overlays directions onto the real world through the user’s smartphone camera. It collects location data, camera feed, and user preferences.
Implementation Steps:
-
Consent Dialog at First Launch:
- The app presents a clear, concise privacy policy.
- Users are asked to grant permission for location tracking and camera access separately.
- Each permission includes an explanation of why it is needed.
-
Granular Controls in Settings:
- Users can toggle location sharing on/off.
- Camera access can be limited to specific features.
-
Data Minimization:
- Location data is processed locally when possible.
- Only anonymized usage statistics are sent to servers.
-
Secure Data Handling:
- All transmitted data is encrypted using TLS.
- Stored data is encrypted and access-restricted.
-
User Data Management:
- Users can view collected data in the app.
- Options to delete history or revoke permissions are provided.
Mind Map: User Consent Flow in AR Navigation App
Best Practices Illustrated
-
Progressive Disclosure: Instead of overwhelming users with all data requests at once, permissions are requested contextually when features are accessed.
-
Just-In-Time Consent: For example, the app requests camera access only when the user activates AR navigation mode.
-
Visual Feedback: When the camera is active, a visible indicator (e.g., a red dot) reminds users that data is being accessed.
-
Audit Trails: The app logs consent changes and data access events securely, enabling accountability.
Additional Example: Social AR App with Facial Recognition
A social AR app uses facial recognition to apply filters and effects.
- Explicit Consent: Users must explicitly agree to facial data processing.
- Data Storage: Facial data is processed locally and never uploaded to servers.
- Opt-Out: Users can disable facial recognition features anytime.
- Privacy by Design: The app uses ephemeral data that is discarded after the session.
Mind Map: Data Protection Strategies for Facial Recognition in AR
Summary
Implementing consent and data protection in AR applications requires a user-centered approach that prioritizes transparency, control, and security. By integrating clear consent flows, minimizing data collection, and empowering users with control over their data, AR experiences can build trust and comply with legal frameworks. Real-world examples, such as AR navigation and social apps, demonstrate how these principles can be applied effectively.
8.5 Best Practice: Transparent Communication and User Control
Transparent communication and empowering user control are foundational to ethical and effective Human Machine Interface (HMI) and immersive experience design. Users must understand what data is collected, how it is used, and have meaningful control over their interactions and privacy. This builds trust, enhances user satisfaction, and reduces risks related to misuse or discomfort.
Why Transparent Communication Matters
- Builds Trust: Users feel confident when they know what is happening behind the scenes.
- Increases Adoption: Clear communication reduces hesitation in adopting new immersive technologies.
- Mitigates Ethical Risks: Prevents misuse of sensitive data and respects user autonomy.
Core Elements of Transparent Communication
- Clear Privacy Policies: Written in plain language, accessible within the interface.
- Real-Time Notifications: Inform users when data is being collected or shared.
- Consent Mechanisms: Allow users to opt-in or opt-out of data collection or features.
- Feedback Channels: Provide easy ways for users to ask questions or report concerns.
Empowering User Control
- Granular Settings: Users can customize what data is shared and what features are enabled.
- Easy Access to Controls: Settings should be discoverable and intuitive.
- Undo and Reset Options: Allow users to revert changes or reset preferences.
- Contextual Controls: Controls appear relevant to the current interaction or environment.
Mind Map: Transparent Communication and User Control in Immersive Interfaces
Example 1: AR Application Consent Dialog
Scenario: An AR maintenance app collects location and usage data to optimize user experience.
Implementation:
- On first launch, the app presents a clear, concise consent dialog explaining what data is collected and why.
- Users can choose to allow all, some, or no data collection.
- The dialog includes links to detailed privacy policies and an FAQ.
- Users can revisit and change their consent choices anytime via the settings menu.
Impact: Users feel informed and in control, increasing trust and willingness to use the app.
Example 2: VR Experience Privacy Dashboard
Scenario: A VR social platform collects audio and gesture data to enable interaction.
Implementation:
- The platform includes a privacy dashboard accessible from the main menu.
- The dashboard shows what data is currently being collected in real-time.
- Users can toggle data collection on/off for specific sensors.
- Notifications appear if new data types are requested.
- Clear explanations accompany each setting.
Impact: Users can tailor their privacy preferences dynamically, fostering a safer and more comfortable environment.
Additional Mind Map: User Control Features
Summary
Transparent communication combined with robust user control mechanisms is essential for responsible HMI and immersive experience design. By clearly informing users and giving them meaningful control over their data and interactions, designers can create trustworthy, user-centric experiences that respect privacy and ethical standards.
Recommended Actions for Designers
- Integrate clear, jargon-free privacy notices early in the user journey.
- Design consent flows that are flexible and revisitable.
- Provide real-time feedback on data usage.
- Develop intuitive control panels for privacy and interaction settings.
- Encourage user feedback and iterate based on concerns.
9. Cross-Platform and Device Considerations
9.1 Designing Consistent Experiences Across XR Devices
Designing consistent experiences across XR devices is critical to ensure users feel comfortable, confident, and engaged regardless of the hardware they use. XR devices vary widely—from AR glasses and mobile AR apps to tethered VR headsets and standalone VR devices—each with different capabilities, input methods, and display characteristics. Achieving consistency means balancing uniformity in interaction patterns and visual language with adaptations for device-specific constraints.
Key Considerations for Consistency Across XR Devices
- User Interface (UI) Adaptability: Interfaces should scale and rearrange gracefully to fit different field-of-view sizes and resolutions.
- Interaction Paradigms: Maintain core interaction metaphors (e.g., gaze, gesture, voice) but adapt input methods based on device capabilities.
- Visual Language: Use consistent color schemes, typography, iconography, and spatial layouts.
- Performance Optimization: Ensure smooth frame rates and low latency on all devices to prevent motion sickness and maintain immersion.
- Context Awareness: Consider environmental factors such as lighting and user mobility.
Mind Map: Designing Consistent XR Experiences
Example 1: Cross-Device UI Adaptation in an AR Navigation App
An AR navigation app designed for both mobile phones and AR glasses uses a consistent visual language—same colors, fonts, and icons—but adapts UI placement. On mobile, directional arrows appear on the screen edges, while on AR glasses, arrows are spatially anchored in the user’s environment. Interaction on mobile relies on touch, whereas AR glasses support voice commands and simple hand gestures. This maintains a consistent brand and experience while respecting device differences.
Mind Map: Interaction Paradigm Adaptation
Example 2: Consistent Interaction in a VR Training Platform
A VR training platform for industrial workers supports both standalone VR headsets and tethered VR systems. The core interaction—selecting tools, manipulating objects, and navigating environments—remains consistent. However, on standalone devices, simplified hand tracking is used due to hardware limits, while tethered systems leverage advanced controllers with haptic feedback. The UI layout is adjusted to fit the different fields of view but uses the same iconography and color coding.
Best Practices Summary
- Develop a Design System: Create a shared library of UI components and interaction patterns adaptable across devices.
- Use Responsive and Adaptive Design: Design interfaces that fluidly adjust to different screen sizes and input methods.
- Prioritize Core User Goals: Focus on consistent task flows and feedback rather than exact replication of every UI element.
- Test Across Devices Early and Often: Gather user feedback on multiple hardware to identify inconsistencies.
- Document Device-Specific Guidelines: Clearly outline how designs should adapt per device to maintain consistency.
By thoughtfully balancing consistency with device-specific adaptations, designers and engineers can create seamless XR experiences that delight users no matter what hardware they choose.
9.2 Adapting Interfaces for Different Hardware Capabilities
Adapting interfaces for different hardware capabilities is a critical aspect of designing immersive experiences and human-machine interfaces (HMI) that deliver consistent, high-quality user experiences across diverse devices. XR devices vary widely in processing power, input methods, display resolution, field of view, tracking accuracy, and battery life. Understanding these differences and designing adaptable interfaces ensures usability, performance, and accessibility regardless of the hardware.
Key Considerations When Adapting Interfaces
- Processing Power & Performance Constraints
- High-end VR headsets can render complex 3D scenes, while mobile AR devices may require simplified graphics.
- Input Modalities
- Some devices support hand tracking and gestures; others rely on controllers or voice input.
- Display Characteristics
- Resolution, field of view (FOV), refresh rate, and color accuracy affect visual design.
- Tracking and Sensors
- Inside-out vs. outside-in tracking impacts spatial awareness and interaction fidelity.
- Battery and Thermal Limits
- Mobile devices need energy-efficient interfaces to prolong usage.
Mind Map: Adapting Interfaces for Hardware Capabilities
Best Practices with Examples
Performance Optimization
Practice: Implement Level of Detail (LOD) to dynamically adjust the complexity of 3D models based on device capability.
Example:
- In a VR architectural walkthrough, high-end headsets render detailed textures and complex lighting, while mobile AR devices use simplified models with baked lighting to maintain smooth frame rates.
Input Adaptation
Practice: Detect available input methods at runtime and tailor interaction accordingly.
Example:
- An AR maintenance app supports hand gestures on devices with cameras and gesture recognition but falls back to touch-based menus on simpler devices.
Visual Design Adjustments
Practice: Scale UI elements and adjust layout to accommodate different screen sizes and resolutions.
Example:
- A VR game adjusts the size and spacing of HUD elements depending on the headset’s FOV and resolution to prevent user eye strain.
Tracking Considerations
Practice: Use spatial anchors and relative positioning to maintain interface stability across devices with varying tracking precision.
Example:
- An AR navigation app uses GPS and visual markers to anchor waypoints, ensuring consistent placement whether the device uses inside-out tracking or GPS-only.
Power Management
Practice: Optimize animations and background processes to conserve battery life on mobile XR devices.
Example:
- A mobile AR educational app reduces particle effects and disables non-essential background updates when battery is low.
Mind Map: Example Workflow for Interface Adaptation
Additional Example: Responsive UI Design for AR Glasses vs. VR Headsets
-
AR Glasses: Limited FOV (~40-50 degrees), transparent display, primarily used in real-world environments.
- UI elements are minimalistic, semi-transparent, and anchored to real-world objects.
- Input relies on voice commands and simple gestures.
-
VR Headsets: Wide FOV (~100-110 degrees), fully immersive display.
- UI can be more detailed and spatially distributed around the user.
- Input includes controllers, hand tracking, and sometimes eye tracking.
Adaptation Strategy:
- Design a core UI system that can toggle between minimal, context-aware overlays for AR glasses and richer, spatially immersive interfaces for VR headsets.
- For AR glasses, prioritize glanceable information and quick interactions.
- For VR, leverage 3D space to organize information hierarchically and support complex interactions.
Summary
Adapting interfaces for different hardware capabilities requires a flexible, modular design approach that considers performance, input, visual presentation, tracking, and power constraints. By detecting device capabilities and dynamically adjusting the interface, designers and engineers can create immersive experiences that feel natural and performant across the diverse XR ecosystem.
9.3 Example: Responsive UI Design for AR Glasses and VR Headsets
Responsive UI design in XR environments is crucial to ensure seamless user experiences across diverse hardware with varying capabilities and interaction paradigms. AR glasses and VR headsets differ significantly in display size, field of view, input methods, and user context, requiring adaptive interface strategies.
Understanding Device Characteristics
| Feature | AR Glasses | VR Headsets |
|---|---|---|
| Display Type | Transparent, see-through | Opaque, immersive |
| Field of View (FOV) | Narrower (30°-50° typical) | Wider (90°-110° typical) |
| Interaction Methods | Gesture, voice, limited controllers | Controllers, hand tracking, voice |
| User Context | Mixed reality, real-world aware | Fully virtual environment |
Key Responsive UI Design Considerations
- Adaptive Layouts: UI elements must reposition and resize based on FOV and display constraints.
- Context Awareness: AR UIs should avoid obstructing real-world views; VR UIs can leverage full 3D space.
- Input Modality Adaptation: Interfaces must support different input methods gracefully.
- Performance Optimization: Lightweight UI components for AR glasses to preserve battery and processing.
Mind Map: Responsive UI Design Factors for AR Glasses and VR Headsets
Practical Example: Designing a Responsive Menu System
Scenario: A productivity app that runs on both AR glasses and VR headsets needs a menu system for tool selection.
AR Glasses Implementation:
- Menu appears as a semi-transparent floating panel anchored near the user’s hand or wrist.
- Limited options displayed to avoid cluttering the real-world view.
- Gesture-based selection with simple swipe and tap motions.
- Voice commands as a secondary input.
VR Headset Implementation:
- Menu is a fully 3D radial menu surrounding the user’s hand.
- Richer set of tools displayed in multiple layers.
- Controller joystick or hand tracking for navigation.
- Audio cues confirm selections.
Responsive Design Strategies:
- Use a shared design language but adapt layout density and interaction complexity.
- Implement conditional rendering: show fewer options on AR, full options on VR.
- Dynamically adjust UI scale based on device FOV.
Mind Map: Responsive Menu System Design
Additional Example: Notification System
AR Glasses: Notifications appear as subtle, non-intrusive banners at the bottom edge of the user’s view, fading quickly to avoid distraction.
VR Headsets: Notifications can appear as floating 3D objects within the environment, allowing users to interact or dismiss them with controllers.
Best Practice: Design notifications to respect user focus and context, adapting size, position, and interaction based on device.
Summary
Responsive UI design for AR glasses and VR headsets requires a deep understanding of device capabilities and user contexts. By leveraging adaptive layouts, input modality flexibility, and performance-conscious design, UX designers and interaction engineers can create immersive experiences that feel natural and intuitive across platforms.
This example illustrates how a single application can maintain a consistent brand and interaction philosophy while tailoring the UI to the strengths and limitations of each device type.
9.4 Best Practice: Modular Design Systems for Scalability
Modular design systems are essential for creating scalable, maintainable, and consistent human machine interfaces (HMI) and immersive experiences across multiple XR platforms and devices. By breaking down complex interfaces into reusable, independent components, designers and engineers can efficiently adapt and extend their systems without starting from scratch each time.
Why Modular Design Systems Matter in XR and HMI
- Scalability: Easily expand or modify interfaces as new features or devices emerge.
- Consistency: Maintain a unified look and feel across different platforms.
- Collaboration: Enable cross-disciplinary teams to work on discrete components simultaneously.
- Efficiency: Reduce development time by reusing tested components.
Core Principles of Modular Design Systems
- Componentization: Break UI and interaction elements into self-contained modules.
- Encapsulation: Each module manages its own state and behavior.
- Interoperability: Modules communicate through well-defined interfaces or APIs.
- Flexibility: Modules can be rearranged or replaced without affecting the whole system.
Mind Map: Key Elements of Modular Design Systems
Mind Map: Benefits of Modular Design in XR

Practical Examples
Example 1: Modular UI Components in an AR Maintenance Application
In an AR app designed for industrial machine maintenance, the interface is composed of modular components such as:
- Status Indicators: Small widgets showing machine health.
- Instruction Panels: Step-by-step repair guides.
- Gesture Controls: Modules handling hand gestures for navigation.
Each component is developed independently and can be updated or replaced without impacting others. For instance, the instruction panel can be localized for different languages without modifying gesture controls.
Example 2: Reusable Interaction Modules in a VR Training Simulator
A VR training platform uses modular interaction modules:
- Object Manipulation Module: Handles grabbing, moving, and releasing virtual objects.
- Feedback Module: Provides haptic and audio feedback.
- Navigation Module: Manages teleportation and locomotion.
These modules can be reused across different training scenarios, enabling rapid development of new simulations by combining existing modules.
Implementing Modular Design Systems: Step-by-Step
- Audit Existing Components: Identify reusable UI and interaction elements.
- Define Clear Interfaces: Specify inputs, outputs, and events for each module.
- Create a Component Library: Develop and document modules with usage guidelines.
- Use Design Tokens: Standardize colors, typography, and spacing for consistency.
- Integrate with Development Pipelines: Ensure modules fit into build and deployment workflows.
- Test Modules Independently: Validate functionality and performance in isolation.
- Iterate and Evolve: Continuously refine modules based on user feedback and new requirements.
Mind Map: Steps to Implement Modular Design Systems
Tips for XR-Specific Modular Design
- Design modules to handle varying input modalities (e.g., voice, gesture, controllers).
- Ensure components are responsive to spatial context, adapting to different environments.
- Incorporate performance optimization within modules to maintain smooth immersive experiences.
- Use environmental anchors as modular elements to help users orient themselves.
By adopting modular design systems, UX designers, interaction engineers, and experience strategists can build immersive experiences that are not only scalable and maintainable but also adaptable to the fast-evolving landscape of XR technologies.
9.5 Managing Performance Constraints Without Sacrificing UX
In immersive experience engineering and human machine interface (HMI) design, managing performance constraints is critical to delivering seamless, engaging user experiences. XR devices often have limited processing power, battery life, and network bandwidth, which can impact frame rates, latency, and overall responsiveness. However, sacrificing user experience for performance can lead to discomfort, disorientation, or disengagement. This section explores strategies and best practices to balance these trade-offs effectively.
Key Performance Constraints in XR and HMI
- Processing Power: Limited CPU/GPU capabilities on mobile XR devices.
- Battery Life: High computational demands drain battery quickly.
- Latency: Delays in rendering or input response cause motion sickness.
- Network Bandwidth: Streaming high-fidelity content requires stable connections.
- Thermal Throttling: Devices reduce performance to avoid overheating.
Strategies to Manage Performance Constraints
Optimize Rendering Pipeline
- Use level of detail (LOD) techniques to reduce polygon count for distant objects.
- Implement culling methods (frustum, occlusion) to avoid rendering unseen elements.
- Employ baked lighting instead of dynamic lighting where possible.
Efficient Asset Management
- Compress textures and models without perceptible quality loss.
- Use lightweight shaders tailored for target hardware.
- Stream assets dynamically based on user focus and proximity.
Adaptive Quality Techniques
- Dynamically adjust graphics quality based on current frame rate.
- Scale resolution or effects like shadows and reflections in real-time.
Input and Interaction Optimization
- Minimize input processing overhead by filtering unnecessary events.
- Use predictive algorithms to compensate for latency.
Network Optimization
- Implement data compression and caching.
- Use edge computing to reduce round-trip times.
Mind Map: Managing Performance Constraints Without Sacrificing UX
Example 1: Level of Detail (LOD) in a VR Architectural Walkthrough
Scenario: A VR application allows users to explore a detailed architectural model. Rendering all details at full fidelity causes frame drops.
Solution: Implement LOD by creating multiple versions of each 3D asset:
- High-detail models for close-up views.
- Medium-detail models for mid-range.
- Low-detail models or simple billboards for distant objects.
Outcome: Frame rate stabilizes at 90 FPS, maintaining smooth navigation without noticeable loss in visual quality.
Example 2: Dynamic Resolution Scaling in AR Maintenance App
Scenario: An AR app overlays instructions on complex machinery but struggles with latency on mobile AR glasses.
Solution: The app monitors frame rate and dynamically reduces rendering resolution during intensive scenes, restoring full resolution when possible.
Outcome: Users experience consistent responsiveness, and visual fidelity adjusts subtly without disrupting task flow.
Example 3: Predictive Input in Gesture-Based Controls
Scenario: Gesture recognition in an XR game suffers from input lag, frustrating users.
Solution: Implement predictive filtering algorithms that anticipate user motion based on recent input trends, reducing perceived latency.
Outcome: Interaction feels more immediate and natural, improving user satisfaction.
Best Practices Summary
- Profile Early and Often: Use profiling tools to identify bottlenecks.
- Set Performance Budgets: Define acceptable frame rates, latency, and resource usage.
- Prioritize UX Impact: Focus optimization efforts on elements that most affect user comfort and immersion.
- Iterate with User Feedback: Validate performance optimizations with real users to ensure no negative impact on experience.
- Leverage Platform-Specific Features: Utilize hardware acceleration and APIs optimized for target devices.
By thoughtfully managing performance constraints through these strategies, designers and engineers can deliver immersive, responsive, and comfortable experiences without compromising on visual or interaction quality.
10. Future Trends in HMI and Immersive Experience Engineering
10.1 Advances in Brain-Computer Interfaces and Neural Interaction
Brain-Computer Interfaces (BCIs) and neural interaction technologies represent a cutting-edge frontier in Human Machine Interface (HMI) design and immersive experience engineering. These technologies enable direct communication pathways between the human brain and external devices, bypassing traditional input methods such as keyboards, touchscreens, or voice commands. This section explores recent advances, practical applications, and best practices for integrating BCIs into immersive experiences.
What is a Brain-Computer Interface?
A Brain-Computer Interface is a system that measures brain signals, interprets them, and translates them into commands to control external devices. BCIs can be invasive (implanted electrodes) or non-invasive (EEG caps, fNIRS devices).
Key Advances in BCI and Neural Interaction
- Non-Invasive Signal Acquisition Improvements: Modern EEG devices have become more portable, affordable, and accurate, enabling real-time brainwave monitoring in consumer-grade devices.
- Machine Learning Integration: Advanced algorithms improve signal decoding, enabling more precise interpretation of user intent.
- Hybrid BCIs: Combining neural signals with other inputs (eye tracking, EMG) to enhance robustness and usability.
- Neurofeedback and Adaptive Systems: Systems that adapt in real-time to user cognitive states such as attention, fatigue, or emotional state.
- Wireless and Wearable BCIs: Increased mobility and comfort for users in immersive environments.
Mind Map: Core Components of BCI Systems
Example: Neural Interaction in VR for Accessibility
A recent project developed a VR painting application controlled by EEG signals, allowing users with limited motor abilities to create art by focusing attention on different mental tasks. The system decodes specific brainwave patterns to select colors, brush sizes, and shapes.
Best Practice: Start with simple, distinct mental commands to improve classification accuracy and gradually increase complexity as user proficiency grows.
Mind Map: Designing BCI-Enabled Immersive Experiences
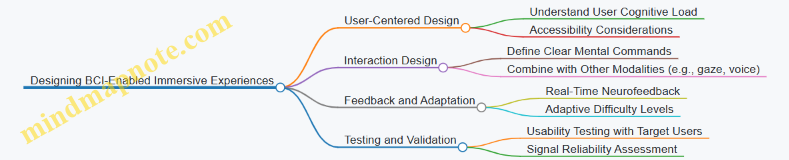
Example: Adaptive Gaming Using Neural Interaction
In an immersive VR game, players’ engagement levels are monitored via EEG. When attention drops, the game dynamically adjusts difficulty or introduces stimuli to re-engage the player.
Best Practice: Use continuous neurofeedback to personalize experience and maintain optimal user engagement.
Challenges and Considerations
- Signal Noise and Variability: Brain signals are inherently noisy and vary between individuals, requiring robust signal processing.
- Latency: Real-time interaction demands low-latency processing pipelines.
- User Training: Users often need training to generate consistent neural signals.
- Ethical Concerns: Privacy of neural data and informed consent are critical.
Future Directions
- Integration of BCIs with AI for predictive and proactive interfaces.
- Development of minimally invasive or fully non-invasive high-resolution neural sensors.
- Expansion of neural interaction beyond motor commands to emotional and cognitive state recognition.
By embracing these advances, UX designers, interaction engineers, and experience strategists can pioneer immersive experiences that are more intuitive, accessible, and deeply personalized, pushing the boundaries of human-machine symbiosis.
10.2 AI-Driven Adaptive Interfaces in XR
Artificial Intelligence (AI) is revolutionizing the way users interact with Extended Reality (XR) environments by enabling adaptive interfaces that dynamically respond to user behavior, preferences, and context. AI-driven adaptive interfaces enhance immersion, usability, and personalization, making XR experiences more intuitive and effective.
What Are AI-Driven Adaptive Interfaces?
AI-driven adaptive interfaces leverage machine learning algorithms, computer vision, natural language processing, and sensor data to adjust interface elements in real-time. These interfaces can modify layout, interaction methods, feedback, and content delivery based on continuous analysis of user input and environmental factors.
Key Components of AI-Driven Adaptive Interfaces in XR
AI-Driven Adaptive Interfaces Mind Map
How AI Enhances XR Interfaces
- Personalized Experience: AI models learn from user interactions to tailor content and controls, reducing cognitive load.
- Real-Time Adaptation: Interfaces can adjust to changing user states (e.g., fatigue, stress) or environmental conditions (lighting, noise).
- Multimodal Interaction Optimization: AI determines the most effective input method for the user at any moment (gesture, voice, gaze).
- Predictive Assistance: Anticipates user needs and offers proactive suggestions or shortcuts.
Example 1: Adaptive VR Training Simulator for Industrial Workers
- Scenario: A VR training system for machinery operation uses AI to monitor the trainee’s performance and stress levels via biometric sensors.
- Adaptive Features:
- If the system detects confusion or repeated errors, it simplifies the interface by highlighting essential controls.
- Voice command recognition adapts to the trainee’s accent and speech patterns.
- The difficulty level adjusts dynamically based on progress.
Adaptive VR Training Simulator Mind Map
Example 2: AI-Powered AR Navigation Assistant
- Scenario: An AR navigation app for indoor environments uses AI to adapt the interface based on user familiarity and environmental complexity.
- Adaptive Features:
- For first-time users, the interface provides detailed step-by-step visual cues.
- For experienced users, the system switches to minimalistic indicators to reduce clutter.
- The app detects noisy environments and shifts from audio instructions to haptic feedback.
AI-Powered AR Navigation Assistant Mind Map
Best Practices for Designing AI-Driven Adaptive Interfaces in XR
- Transparency: Clearly communicate when and how the interface adapts to maintain user trust.
- User Control: Allow users to override or customize adaptive behaviors.
- Data Privacy: Ensure biometric and behavioral data is securely handled and anonymized.
- Continuous Learning: Implement feedback loops to refine AI models based on user responses.
- Multimodal Integration: Seamlessly combine multiple input and output modalities for richer interaction.
Summary
AI-driven adaptive interfaces in XR represent a powerful approach to creating personalized, context-aware, and intuitive user experiences. By continuously analyzing user behavior and environmental factors, these interfaces dynamically optimize interaction, improving usability and engagement across diverse applications from training to navigation.
For UX Designers, Interaction Engineers, and Experience Strategists, embracing AI-driven adaptation in XR interfaces is essential to meet the evolving expectations of immersive technology users.
10.3 The Role of 5G and Edge Computing in Immersive Experiences
The rapid advancement of immersive technologies such as Virtual Reality (VR), Augmented Reality (AR), and Mixed Reality (MR) is heavily dependent on the underlying network infrastructure and computational resources. Two transformative technologies—5G and edge computing—are pivotal in enabling seamless, low-latency, and high-fidelity immersive experiences.
Understanding 5G and Edge Computing
- 5G: The fifth generation of wireless technology offers significantly higher bandwidth, ultra-low latency (as low as 1 ms), and massive device connectivity compared to previous generations.
- Edge Computing: A distributed computing paradigm that brings data processing closer to the user/device, reducing the need to send data to centralized cloud servers.
Why 5G and Edge Computing Matter for Immersive Experiences
Immersive experiences require real-time processing of large volumes of data, such as high-resolution video streams, sensor inputs, and complex 3D rendering. Traditional cloud computing introduces latency and bandwidth bottlenecks that can degrade user experience, causing motion sickness, lag, or reduced visual quality.
5G and edge computing together enable:
- Ultra-low latency interactions: Critical for VR/AR where delays over 20 ms can disrupt presence.
- High bandwidth streaming: Supports 4K+ video, detailed textures, and rich sensor data.
- Distributed processing: Offloads heavy computation from devices to nearby edge servers.
- Massive device support: Enables multi-user shared experiences in crowded environments.
Mind Map: Core Benefits of 5G and Edge Computing in Immersive Experiences
Practical Examples
Example 1: Cloud-Rendered VR Gaming
Scenario: A VR game streams high-quality graphics rendered on edge servers instead of the local headset.
- 5G provides the necessary bandwidth and low latency to stream the rendered frames.
- Edge servers handle complex physics and AI computations.
- Result: Lightweight VR headsets with longer battery life and richer visuals.
Example 2: AR-Assisted Remote Maintenance
Scenario: A technician uses AR glasses to receive real-time guidance from a remote expert.
- Edge computing processes sensor data and overlays instructions instantly.
- 5G ensures smooth video and data transmission without lag.
- Result: Faster troubleshooting and reduced downtime.
Example 3: Multi-User Virtual Collaboration
Scenario: Multiple users interact in a shared virtual workspace.
- Edge servers synchronize user positions and interactions with minimal delay.
- 5G supports simultaneous connections with stable throughput.
- Result: Natural, real-time collaboration without disruptive latency.
Mind Map: Integration Workflow of 5G and Edge Computing in XR
Best Practices for Leveraging 5G and Edge Computing in Immersive Design
- Optimize Data Streams: Compress and prioritize data to maximize 5G bandwidth efficiency.
- Design for Latency Sensitivity: Identify interactions that require ultra-low latency and offload them to edge servers.
- Use Adaptive Streaming: Dynamically adjust quality based on network conditions to maintain smooth experiences.
- Implement Edge-Aware Architectures: Architect applications to leverage edge computing for computation-heavy tasks.
- Test Across Network Conditions: Simulate varying 5G coverage and edge availability to ensure robustness.
Summary
5G and edge computing are revolutionizing immersive experience engineering by providing the infrastructure needed for real-time, high-quality, and scalable XR applications. By understanding and integrating these technologies thoughtfully, UX designers, interaction engineers, and experience strategists can create next-generation immersive experiences that are responsive, engaging, and accessible.
10.4 Example: AI-Personalized VR Learning Environments
Artificial Intelligence (AI) combined with Virtual Reality (VR) is revolutionizing the way personalized learning experiences are designed and delivered. AI-personalized VR learning environments adapt dynamically to individual learner needs, preferences, and performance, creating highly engaging and effective educational experiences.
Key Components of AI-Personalized VR Learning Environments
How AI Personalizes VR Learning: An Example Scenario
Imagine a VR environment designed to teach anatomy to medical students. The AI system begins by assessing the student’s prior knowledge through an initial quiz and interaction patterns. Based on this, it builds a learner profile.
- Adaptive Content: If the student struggles with cardiovascular anatomy, the system dynamically adjusts the modules to focus more on that area, providing additional 3D models and interactive quizzes.
- Real-time Feedback: As the student manipulates virtual organs, AI monitors hand gestures and responses, offering hints or explanations when errors occur.
- Learning Pace: The AI tracks the student’s pace and suggests breaks or accelerates content delivery accordingly.
This personalization ensures that the student remains engaged, challenged, and supported throughout the learning journey.
Mind Map: AI-Personalized VR Learning Workflow
Best Practices for Designing AI-Personalized VR Learning Environments
-
Start with Clear Learning Objectives: Define what skills or knowledge the VR environment aims to teach to guide AI adaptation effectively.
-
Incorporate Multimodal Interaction: Use voice, gesture, and gaze tracking to create natural and intuitive user experiences.
-
Ensure Transparency: Let learners understand how AI adapts content and provide options to customize their experience.
-
Prioritize Privacy and Data Security: Handle learner data responsibly, with clear consent and anonymization where possible.
-
Iterative Testing: Continuously test with real users to refine AI models and VR interactions.
Additional Example: Language Learning in VR with AI Personalization
A VR language learning platform uses AI to analyze pronunciation, vocabulary usage, and conversational flow. The system adapts scenarios based on learner confidence, introducing more complex dialogues or cultural contexts as proficiency grows. For example, if a learner struggles with verb conjugations, the AI inserts targeted practice sessions within immersive role-play scenarios.
Summary
AI-personalized VR learning environments represent a powerful fusion of immersive technology and intelligent adaptation. By tailoring experiences to individual learners, these systems enhance engagement, retention, and skill mastery, setting a new standard for education and training in XR contexts.
10.5 Best Practice: Preparing Design Strategies for Emerging Technologies
As emerging technologies like brain-computer interfaces (BCI), AI-driven adaptive systems, 5G connectivity, and edge computing rapidly evolve, preparing effective design strategies becomes crucial for HMI and immersive experience professionals. This section outlines best practices to future-proof your design approach, supported by mind maps and practical examples.
Key Principles for Designing with Emerging Technologies
- Flexibility: Design interfaces that can adapt to new input modalities and hardware.
- User-Centered Adaptability: Leverage AI and data to personalize experiences without compromising user control.
- Scalability: Build modular systems that can evolve as technology advances.
- Ethical Awareness: Anticipate privacy, security, and ethical implications early.
- Collaboration: Engage multidisciplinary teams to integrate diverse expertise.
Mind Map: Preparing Design Strategies for Emerging Technologies
Example 1: Designing for Brain-Computer Interfaces (BCI)
Scenario: Creating an immersive VR interface controlled via neural signals.
- Practice: Start with flexible input abstraction layers that can handle traditional controllers and BCI inputs interchangeably.
- Example: A VR painting app where users can switch between hand controllers and BCI commands for brush strokes.
- Benefit: This approach allows gradual integration of BCI as technology matures, ensuring usability for a broader audience.
Mind Map: BCI-Ready Interface Design

Example 2: AI-Driven Adaptive Interfaces in XR
Scenario: An AR navigation app that adjusts UI elements based on user behavior and environmental context.
- Practice: Incorporate machine learning models that analyze user preferences and environmental data to dynamically modify interface complexity and information density.
- Example: The app reduces visual clutter when the user is moving quickly or in complex environments, enhancing safety and comprehension.
- Benefit: Personalized experiences improve engagement and reduce cognitive load.
Mind Map: AI-Driven Adaptive Interface Components
Example 3: Leveraging 5G and Edge Computing for Immersive Experiences
Scenario: A multiplayer VR game that requires ultra-low latency and high bandwidth.
- Practice: Architect the system to offload heavy computations to edge servers close to users, reducing latency.
- Example: Real-time physics simulations and AI-driven NPC behaviors are processed on edge nodes, while the client handles rendering and input locally.
- Benefit: This design improves responsiveness and scalability, enhancing user immersion.
Mind Map: 5G and Edge-Enabled Immersive Experience Architecture
Summary
Preparing design strategies for emerging technologies requires a proactive, flexible, and user-centered mindset. By employing modular architectures, embracing AI personalization responsibly, and leveraging new infrastructure like 5G and edge computing, designers and engineers can create immersive experiences that are both innovative and sustainable. Incorporating ethical considerations and fostering collaboration across disciplines further ensures these technologies serve users effectively and safely.
11. Case Studies: Successful Human Machine Interface and Immersive Experience Projects
11.1 Automotive Industry: Enhancing Driver Experience with AR Dashboards
Augmented Reality (AR) dashboards represent a transformative leap in Human Machine Interface (HMI) design within the automotive industry. By projecting critical information directly onto the windshield or a transparent display, AR dashboards enable drivers to access navigation, safety alerts, and vehicle data without diverting their attention from the road.
Key Benefits of AR Dashboards in Automotive HMI
- Improved Safety: Minimizes driver distraction by integrating information in the line of sight.
- Enhanced Situational Awareness: Real-time contextual data overlays, such as hazard warnings and speed limits.
- Personalized Experience: Adaptive content based on driver preferences and driving conditions.
- Intuitive Interaction: Gesture and voice controls complement visual AR elements.
Mind Map: Core Components of AR Dashboards
Best Practice: Seamless Integration of AR Elements
Example: BMW’s AR Head-Up Display projects navigation arrows directly onto the road view, aligning perfectly with real-world landmarks. This reduces cognitive load by linking digital directions with physical surroundings.
- Practice: Use spatially accurate overlays to ensure AR elements correspond precisely with the environment.
- Example: Audi’s AR HUD highlights pedestrians and cyclists in low visibility conditions, enhancing driver reaction time.
Mind Map: Designing for Driver Cognitive Load
Example: Navigation Assistance with AR
A practical example is WayRay’s AR navigation system, which projects turn-by-turn directions onto the windshield with lane-level precision. Drivers see arrows and distance markers that appear to float on the road, simplifying complex maneuvers like highway exits.
- Best Practice: Incorporate predictive path visualization to help drivers anticipate upcoming actions.
Interaction Engineering: Gesture and Voice Controls
Integrating natural user inputs reduces the need for physical buttons, enhancing safety and immersion.
- Example: Mercedes-Benz MBUX Hyperscreen supports voice commands to adjust AR dashboard settings without manual interaction.
- Practice: Design gesture controls that are simple, distinct, and require minimal physical effort to avoid driver distraction.
Mind Map: Challenges and Solutions in AR Dashboard Design
Real-World Example: Hyundai’s AR Navigation System
Hyundai’s AR system integrates with their Blue Link connected car platform, overlaying navigation cues and points of interest directly onto the windshield. The system adapts dynamically to traffic conditions and provides lane guidance, improving driver confidence and reducing errors.
- Best Practice: Combine AR with real-time data streams to maintain relevance and accuracy.
Summary
AR dashboards in automotive HMI design exemplify how immersive experience engineering can enhance usability, safety, and driver satisfaction. By following best practices such as spatially accurate overlays, cognitive load management, and natural interaction methods, designers can create intuitive and effective AR interfaces.
Further Reading and Tools
- Unity and Unreal Engine AR SDKs for prototyping automotive AR dashboards.
- Research papers on cognitive load in automotive AR interfaces.
- Case studies from leading automotive manufacturers implementing AR HUDs.
11.2 Healthcare: Immersive Rehabilitation Systems
Immersive rehabilitation systems leverage Human Machine Interface (HMI) design and XR technologies to create engaging, effective therapy environments for patients recovering from injuries, surgeries, or managing chronic conditions. These systems combine virtual reality (VR), augmented reality (AR), and mixed reality (MR) with tailored interaction engineering to enhance patient motivation, track progress, and enable personalized therapy.
Why Immersive Rehabilitation?
Traditional rehabilitation can be repetitive and demotivating. Immersive systems introduce gamification, multisensory feedback, and real-time data to transform therapy into an engaging experience that encourages adherence and improves outcomes.
Key Components of Immersive Rehabilitation Systems
Immersive Rehabilitation Systems Mind Map
Best Practices in Designing Immersive Rehabilitation Systems
-
User-Centered Design: Involve patients and therapists early to understand needs, limitations, and preferences.
-
Multisensory Feedback: Combine visual, auditory, and haptic cues to reinforce correct movements and improve motor learning.
-
Adaptive Difficulty: Use real-time analytics to adjust exercise difficulty, keeping patients challenged but not frustrated.
-
Safety First: Design interfaces and hardware that minimize risk of injury and discomfort.
-
Data Privacy: Ensure compliance with healthcare regulations (e.g., HIPAA) when collecting and sharing patient data.
-
Motivational Elements: Incorporate goal-setting, rewards, and progress visualization to sustain engagement.
Example 1: VR-Based Stroke Rehabilitation
Scenario: A VR system designed to help stroke patients regain upper limb mobility.
- Patients wear a VR headset and use motion-tracked controllers.
- They perform virtual tasks like picking fruits or stacking blocks.
- The system provides real-time visual and auditory feedback on movement accuracy.
- Therapists monitor progress remotely and adjust exercise parameters.
Best Practice Highlight: Adaptive difficulty ensures exercises become more challenging as motor skills improve, maintaining patient motivation.
Example 2: AR-Assisted Physical Therapy for Knee Injuries
Scenario: An AR application that overlays guidance on a patient’s real-world environment during knee rehabilitation exercises.
- Using AR glasses, patients see visual markers indicating correct foot placement and movement paths.
- Voice commands allow hands-free interaction to start/stop sessions.
- Haptic feedback via wearable bands signals when movements deviate from the ideal range.
Best Practice Highlight: Multimodal interaction (visual, voice, haptic) accommodates different patient needs and enhances usability.
Mind Map: Designing for Patient Motivation
Patient Motivation Mind Map
Challenges and Solutions
Conclusion
Immersive rehabilitation systems represent a transformative approach in healthcare, merging HMI design and XR technology to create personalized, engaging, and effective therapy experiences. By following best practices such as user-centered design, multisensory feedback integration, and adaptive difficulty, designers and engineers can build solutions that improve patient outcomes and satisfaction.
For UX Designers, Interaction Engineers, and Experience Strategists, understanding the unique needs of healthcare users and collaborating closely with medical professionals is essential to designing immersive rehabilitation systems that are not only innovative but also practical and impactful.
11.3 Education: Interactive VR Classrooms
Interactive VR classrooms represent a transformative approach to education, leveraging immersive technology to create engaging, hands-on learning environments that transcend traditional physical and geographical limitations. This section explores best practices, detailed examples, and mind maps to help UX designers, interaction engineers, and experience strategists design effective VR educational experiences.
Key Benefits of Interactive VR Classrooms
- Immersive Engagement: Students feel present in the learning environment, increasing attention and retention.
- Experiential Learning: Complex concepts become tangible through 3D visualization and interaction.
- Accessibility: Enables remote learners to participate fully regardless of location.
- Collaboration: Facilitates real-time interaction and teamwork in a shared virtual space.
Best Practices for Designing Interactive VR Classrooms
-
User-Centered Content Design
- Tailor content to the cognitive level and learning objectives.
- Use storytelling and contextual scenarios to enhance understanding.
- Example: A VR biology class where students explore a virtual human heart, interacting with valves and chambers to learn blood flow.
-
Intuitive Interaction Models
- Employ natural gestures and voice commands to reduce learning curve.
- Provide clear affordances and feedback for actions.
- Example: Using hand tracking to manipulate virtual objects like chemical molecules in a VR chemistry lab.
-
Spatial Audio and Visual Cues
- Use spatialized audio to direct attention and simulate real classroom acoustics.
- Incorporate visual highlights and pointers to guide focus.
- Example: A virtual teacher’s voice coming from their avatar location, with sound fading based on distance.
-
Collaborative Features
- Enable multi-user environments with shared tools and whiteboards.
- Support avatar customization to foster identity and presence.
- Example: Group problem-solving sessions where students build virtual circuits together.
-
Performance and Comfort Optimization
- Minimize latency and avoid motion sickness through optimized frame rates.
- Design breaks and comfortable navigation to reduce fatigue.
- Example: Teleportation locomotion combined with seated activities to reduce discomfort.
Mind Map: Designing Interactive VR Classrooms
Example 1: Virtual History Classroom
Scenario: Students explore an ancient Roman city in VR.
-
Design Elements:
- 3D reconstruction of historical sites.
- Interactive NPCs (non-player characters) providing contextual information.
- Gesture-based navigation to move through the city.
- Collaborative group quests to solve historical mysteries.
-
Best Practice Highlight: Using storytelling and exploration to deepen engagement and contextual learning.
Example 2: VR Language Learning Environment
Scenario: Learners practice conversational skills in a virtual café.
-
Design Elements:
- Voice recognition to simulate real conversations.
- Real-time feedback on pronunciation.
- Social interaction with other learners’ avatars.
-
Best Practice Highlight: Integrating natural language processing with immersive context to enhance language acquisition.
Example 3: STEM Virtual Lab
Scenario: Chemistry students conduct experiments safely in VR.
-
Design Elements:
- Interactive 3D models of lab equipment and chemicals.
- Realistic simulation of chemical reactions.
- Safety warnings and guided procedures.
-
Best Practice Highlight: Combining hands-on experimentation with safety and repeatability.
Summary
Interactive VR classrooms offer a powerful medium to revolutionize education by making learning immersive, interactive, and collaborative. By following user-centered design principles, leveraging intuitive interactions, and optimizing for comfort and performance, designers and engineers can create impactful educational experiences that cater to diverse learner needs.
For further reading, explore tools like Unity and Unreal Engine for prototyping VR classrooms, and consider user testing with diverse learner groups to refine your designs.
11.4 Manufacturing: XR-Assisted Assembly Lines
In modern manufacturing, XR (Extended Reality) technologies—encompassing Augmented Reality (AR), Virtual Reality (VR), and Mixed Reality (MR)—are revolutionizing assembly line processes. XR-assisted assembly lines enhance worker efficiency, reduce errors, and improve training outcomes by overlaying digital information directly onto physical components and environments.
Key Benefits of XR in Manufacturing Assembly Lines
- Real-Time Guidance: Step-by-step visual instructions overlaid on components.
- Error Reduction: Immediate feedback on assembly mistakes.
- Hands-Free Operation: Voice commands and gesture controls enable workers to keep their hands free.
- Training & Onboarding: Immersive simulations accelerate skill acquisition.
- Remote Assistance: Experts can guide workers remotely through shared XR environments.
Mind Map: XR-Assisted Assembly Line Components
Example 1: Boeing’s AR-Assisted Wire Harness Assembly
Boeing implemented AR glasses to assist technicians assembling wire harnesses for aircraft. Traditionally, this was a complex, error-prone process involving paper manuals and 2D diagrams. With AR:
- Technicians see 3D wiring diagrams overlaid directly on the physical harness.
- The system highlights the correct wires and connectors.
- Real-time error detection alerts if a wrong connection is attempted.
Outcome:
- Assembly time reduced by 25%
- Error rates dropped significantly
- Worker satisfaction improved due to reduced cognitive load
Mind Map: Boeing AR Wire Harness Assembly Workflow
Example 2: Ford’s VR Training for Assembly Line Workers
Ford uses VR simulations to train new assembly line workers in a risk-free environment. Trainees can:
- Practice assembling complex parts virtually.
- Receive instant feedback on mistakes.
- Experience realistic scenarios including emergency procedures.
Outcome:
- Training time reduced by 40%
- Improved retention of assembly procedures
- Safer onboarding experience
Best Practices for Designing XR-Assisted Assembly Lines
- User-Centered Design: Engage assembly workers early to understand pain points and tailor XR content accordingly.
- Simplicity: Use clear, minimalistic overlays to avoid overwhelming users.
- Context Awareness: Ensure the system adapts to different assembly stages and worker skill levels.
- Multimodal Feedback: Combine visual, audio, and haptic cues for effective communication.
- Iterative Testing: Continuously test with real users on the assembly line to refine interactions.
- Safety First: Design interfaces that do not distract or obstruct workers’ vision or movement.
Mind Map: Best Practices for XR in Assembly Lines
Conclusion
XR-assisted assembly lines represent a transformative leap in manufacturing, blending human expertise with digital augmentation to optimize workflows. By integrating best practices and learning from real-world examples like Boeing and Ford, UX designers, interaction engineers, and experience strategists can craft immersive, efficient, and safe assembly environments that empower workers and drive operational excellence.
11.5 Best Practice: Cross-Disciplinary Collaboration for Project Success
Cross-disciplinary collaboration is a cornerstone for success in Human Machine Interface (HMI) design and immersive experience engineering projects. These projects inherently require diverse expertise, ranging from UX design, interaction engineering, software development, hardware integration, psychology, and domain-specific knowledge. By fostering collaboration across these disciplines, teams can create more holistic, user-centered, and technically feasible solutions.
Why Cross-Disciplinary Collaboration Matters
- Holistic Problem Solving: Different perspectives uncover hidden challenges and innovative solutions.
- User-Centered Outcomes: Combining technical and human factors expertise ensures interfaces meet real user needs.
- Technical Feasibility: Engineers and designers working together ensure designs are implementable and performant.
- Faster Iteration: Collaborative workflows reduce miscommunication and rework.
Key Roles and Their Contributions
Collaboration Frameworks and Practices
- Regular Cross-Functional Workshops: Facilitate knowledge sharing and align goals.
- Co-Design Sessions: Engage all stakeholders in ideation and prototyping.
- Shared Documentation and Tools: Use collaborative platforms (e.g., Figma, Miro, Jira) to maintain transparency.
- Agile Methodologies: Implement iterative sprints with continuous feedback loops.
- Design Reviews with Engineering Input: Early involvement of engineers to assess feasibility.
Example: Developing an AR Maintenance Application
Context: A team is creating an augmented reality app to assist technicians in complex machinery maintenance.
- UX Designers conduct user interviews to understand pain points.
- Interaction Engineers prototype gesture and voice controls to enable hands-free operation.
- Experience Strategists map the technician’s workflow to align app features with real-world tasks.
- Software Developers build the app integrating AR SDKs and hardware sensors.
- Domain Experts validate technical accuracy and safety compliance.
- Psychologists advise on minimizing cognitive overload during multitasking.
Outcome: The collaborative approach results in an intuitive, efficient AR tool that reduces maintenance time by 30% and improves technician satisfaction.
Tips for Effective Cross-Disciplinary Collaboration
- Establish a Common Language: Avoid jargon; use shared terminology to improve communication.
- Encourage Empathy Across Roles: Understand challenges and priorities of other disciplines.
- Define Clear Roles and Responsibilities: Prevent overlap and ensure accountability.
- Promote Psychological Safety: Create an environment where all voices are heard and respected.
- Leverage Collaborative Technologies: Use cloud-based tools for real-time collaboration and version control.
Summary
Cross-disciplinary collaboration is not just a best practice but a necessity in HMI and immersive experience projects. By integrating diverse expertise, teams can design interfaces that are user-friendly, technically sound, and aligned with strategic goals. The use of structured collaboration frameworks, combined with empathy and clear communication, drives project success and innovation.
For UX Designers, Interaction Engineers, and Experience Strategists, embracing cross-disciplinary collaboration unlocks the full potential of immersive technologies and human-machine interfaces, ultimately delivering richer, more impactful user experiences.
12. Tools and Resources for HMI and Immersive Experience Designers
12.1 Software Platforms for Prototyping and Simulation
In the realm of Human Machine Interface (HMI) design and Immersive Experience Engineering, selecting the right software platform for prototyping and simulation is crucial. These platforms enable designers, interaction engineers, and experience strategists to visualize, test, and iterate on their concepts efficiently before deployment.
Key Considerations When Choosing a Software Platform
- Ease of Use: Intuitive interfaces accelerate the prototyping process.
- Compatibility: Support for multiple XR devices and integration with other tools.
- Fidelity: Ability to create high-fidelity simulations that closely mimic real-world interactions.
- Collaboration: Features that support team workflows and feedback.
- Extensibility: Support for plugins, scripting, and custom modules.
Popular Software Platforms
Unity
Unity is a widely used game engine that has become a cornerstone for XR prototyping due to its versatility and extensive community support.
-
Features:
- Cross-platform deployment (VR, AR, mobile, desktop)
- Rich asset store
- Visual scripting with Bolt
- Real-time rendering
- Support for C# scripting
-
Example: Designing an AR navigation app prototype that overlays directions on the real world using Unity’s AR Foundation.
Unreal Engine
Known for its photorealistic rendering capabilities, Unreal Engine is favored for high-fidelity immersive experiences.
-
Features:
- Blueprint visual scripting
- Advanced lighting and shading
- Native VR and AR support
- High-performance optimization tools
-
Example: Creating a VR architectural walkthrough with realistic lighting and interactive elements.
Adobe XD
While primarily a 2D UI/UX design tool, Adobe XD supports prototyping for immersive interfaces through plugins and integrations.
-
Features:
- Vector-based design
- Interactive prototyping
- Integration with 3D tools
- Collaboration and sharing
-
Example: Rapid prototyping of an HMI dashboard for a smart home system, with interactive flow simulations.
Figma
Figma is a cloud-based design tool that supports collaborative interface design and prototyping.
-
Features:
- Real-time collaboration
- Interactive components
- Plugin ecosystem
- Version control
-
Example: Designing and testing multi-user interaction flows for a collaborative VR workspace.
Blender
Blender is an open-source 3D creation suite useful for modeling, animation, and rendering, often used alongside other engines.
-
Features:
- 3D modeling and sculpting
- Animation and rigging
- Real-time viewport rendering
- Python scripting
-
Example: Creating detailed 3D assets and animations for immersive training simulations.
Mind Map: Software Platforms Overview
Integrating Platforms for Enhanced Prototyping
Often, a combination of these tools yields the best results. For example, designers might create 3D assets in Blender, import them into Unity for interaction prototyping, and use Figma or Adobe XD to design complementary 2D interfaces.
Best Practices with Software Platforms
- Start Low-Fidelity: Begin with simple wireframes or blockouts to validate concepts quickly.
- Iterate Rapidly: Use platform features like live preview and hot reload to test changes immediately.
- Leverage Community Assets: Utilize asset stores and plugins to accelerate development.
- Test on Target Devices Early: Regularly deploy prototypes to actual hardware to assess performance and usability.
- Document and Share: Use collaboration tools and version control to keep teams aligned.
Example Workflow: Prototyping an Immersive HMI for Industrial Equipment
- Conceptual Design: Use Figma to map out the user flow and interface layout.
- 3D Asset Creation: Model equipment parts and environment in Blender.
- Interaction Prototyping: Import assets into Unity, implement gesture controls and feedback.
- User Testing: Deploy prototype to VR headset, gather feedback.
- Iteration: Refine based on user data, update assets and interactions.
By leveraging the strengths of these software platforms, HMI and immersive experience professionals can create compelling, user-centered prototypes that drive innovation and improve final product quality.
12.2 Hardware Kits and Development Environments
Designing and engineering immersive experiences and human machine interfaces (HMI) requires robust hardware kits and versatile development environments. These tools provide the foundation for prototyping, testing, and deploying XR applications and interfaces that deliver seamless user experiences.
Overview of Hardware Kits
Hardware kits are essential for creating immersive experiences as they provide the physical interface through which users interact with digital content. Choosing the right hardware depends on the project goals, target users, and interaction modalities.
Common Hardware Kits for HMI and XR Development:
- VR Headsets: Oculus Quest 2, HTC Vive Pro, Valve Index
- AR Glasses: Microsoft HoloLens 2, Magic Leap 2, Nreal Light
- Mixed Reality Devices: Varjo XR-3, Meta Quest Pro
- Input Devices: Leap Motion Controller (hand tracking), Ultraleap, Valve Knuckles Controllers
- Haptic Feedback Devices: HaptX Gloves, Teslasuit, bHaptics TactSuit
- Sensors and Trackers: OptiTrack motion capture, Vive Trackers, Intel RealSense
Mind Map: Hardware Kits for Immersive Experience Development
Development Environments
Development environments provide the software frameworks and tools necessary to build, simulate, and deploy immersive applications. They often integrate with hardware kits and support multiple platforms.
Popular Development Environments:
- Unity 3D: Widely used for XR development, supports C# scripting, extensive asset store, and plugins for various hardware.
- Unreal Engine: High-fidelity graphics, Blueprints visual scripting, ideal for photorealistic immersive experiences.
- Microsoft Mixed Reality Toolkit (MRTK): Open-source toolkit for HoloLens and Windows Mixed Reality devices, integrates with Unity.
- ARCore and ARKit: SDKs for Android and iOS AR development respectively.
- OpenXR: Cross-platform standard API to unify XR development across devices.
Mind Map: Development Environments for HMI and XR
Example 1: Using Unity and Oculus Quest 2 for Rapid Prototyping
A UX designer working on a VR training application can use Unity 3D combined with the Oculus Quest 2 headset to rapidly prototype and test immersive interactions. Unity’s XR Interaction Toolkit simplifies the integration of hand tracking and controller input, while the Oculus Quest 2 provides an untethered experience for realistic user testing.
Best Practice: Iteratively test prototypes with real users wearing the actual hardware to gather actionable feedback early.
Example 2: Developing an AR Maintenance App with HoloLens 2 and MRTK
An interaction engineer building an AR application for industrial maintenance can leverage Microsoft HoloLens 2 paired with the Mixed Reality Toolkit (MRTK) in Unity. MRTK offers pre-built components for gaze, gesture, and voice input, accelerating development and ensuring best practices in spatial UI design.
Best Practice: Use MRTK’s UX building blocks to maintain consistency and accessibility across the application.
Example 3: Integrating Haptic Feedback with Teslasuit and Unreal Engine
An experience strategist designing a VR rehabilitation program can integrate Teslasuit’s full-body haptic feedback with Unreal Engine’s high-fidelity environment. This combination enhances immersion by providing tactile sensations synchronized with visual and audio stimuli.
Best Practice: Calibrate haptic feedback intensity carefully to avoid discomfort and ensure it complements the visual experience.
Summary
Selecting the appropriate hardware kits and development environments is critical for successful human machine interface design and immersive experience engineering. Combining the right tools with iterative user-centered design practices enables teams to create engaging, intuitive, and effective XR applications.
Additional Resources
- Unity XR Documentation
- Unreal Engine XR Development
- Microsoft Mixed Reality Toolkit
- OpenXR Specification
- Oculus Developer Center
12.3 Community and Knowledge Sharing Resources
In the rapidly evolving fields of Human Machine Interface (HMI) design and Immersive Experience Engineering, staying connected with communities and leveraging knowledge-sharing platforms is essential for continuous learning, collaboration, and innovation. This section explores key communities, forums, and resources that UX Designers, Interaction Engineers, and Experience Strategists can tap into to deepen their expertise, exchange ideas, and stay updated on industry trends.
Why Community and Knowledge Sharing Matter
- Accelerate learning by accessing collective expertise
- Gain diverse perspectives on design challenges
- Discover emerging tools, frameworks, and best practices
- Network with professionals and potential collaborators
- Contribute back by sharing your own insights and projects
Key Types of Communities and Resources
Mind Map: Community and Knowledge Sharing Resources
Detailed Examples and How to Engage
-
Stack Overflow & Reddit
- Example: A UX Designer struggling with gesture recognition implementation can post questions on Stack Overflow tagged with ‘XR’ or ‘HCI’ and receive community-driven solutions.
- Best Practice: Provide clear, concise questions with code snippets or design context to get effective help.
-
LinkedIn Groups & Meetup
- Example: Joining the “XR Professionals” LinkedIn group to participate in discussions about emerging interaction paradigms.
- Attending local XR meetups to demo prototypes and get real-time feedback.
-
GitHub & OpenXR
- Example: Contributing to an open-source XR UI toolkit on GitHub, improving accessibility features.
- Following OpenXR working group discussions to stay aligned with industry standards.
-
Educational Platforms
- Example: Completing a Coursera specialization on HCI to understand foundational theories, then applying them in immersive experience projects.
- Sharing course projects on community forums for critique.
-
Conferences & Workshops
- Example: Presenting a case study at ACM CHI on multimodal interaction in VR training.
- Participating in hackathons to rapidly prototype and test new interface ideas.
-
Blogs & Newsletters
- Example: Subscribing to “Immersive Wire” to receive weekly updates on XR industry trends.
- Writing guest posts to share unique insights or project retrospectives.
-
Social Media & Discord
- Example: Following XR thought leaders on Twitter for bite-sized insights.
- Joining Discord servers like “XR Devs” to engage in voice chats and collaborative coding sessions.
Mind Map: How to Maximize Community Engagement
Final Thoughts
Building a strong network through community and knowledge sharing is not just about consuming information but also about contributing and collaborating. By engaging actively, professionals in HMI and immersive experience engineering can accelerate innovation, improve their design outcomes, and foster a culture of shared growth.
12.4 Example: Using Unity and Unreal Engine for Rapid XR Prototyping
Rapid prototyping is a critical phase in Human Machine Interface (HMI) and immersive experience design, enabling designers and engineers to quickly iterate and validate concepts before full-scale development. Unity and Unreal Engine are two of the most popular platforms for XR prototyping due to their powerful features, extensive XR support, and active communities.
Why Use Unity and Unreal Engine for XR Prototyping?
- Cross-Platform Support: Both engines support a wide range of XR devices including VR headsets (Oculus Quest, HTC Vive), AR glasses (HoloLens, Magic Leap), and mobile AR (ARKit, ARCore).
- Rich Asset Ecosystem: Access to thousands of assets, plugins, and tools that accelerate development.
- Visual Scripting: Tools like Unity’s Bolt and Unreal’s Blueprints allow non-programmers to prototype interactions quickly.
- Real-Time Rendering: High-fidelity visuals help stakeholders better understand the immersive experience.
Mind Map: Rapid XR Prototyping Workflow Using Unity and Unreal Engine
Example 1: Creating a Simple VR Menu in Unity
Step 1: Setup Project and XR Plugin
- Create a new Unity project.
- Install XR Interaction Toolkit via Package Manager.
- Configure XR settings for target device (e.g., Oculus Quest).
Step 2: Build the Scene
- Add XR Rig prefab for user viewpoint and controls.
- Create a Canvas with World Space render mode.
- Add buttons for menu options (e.g., Start, Settings, Exit).
Step 3: Implement Interaction
- Use XR Ray Interactor to enable pointer-based selection.
- Attach scripts or use Unity Events to handle button presses.
Step 4: Test and Iterate
- Deploy to headset.
- Collect user feedback on menu usability.
- Adjust button size, spacing, and interaction feedback.
Example 2: Rapid AR Object Placement Prototype in Unreal Engine
Step 1: Setup AR Project
- Create a new Unreal Engine project using the AR template.
- Enable ARCore or ARKit plugins depending on the device.
Step 2: Scene and Blueprint Setup
- Add AR Session Config to enable plane detection.
- Create a Blueprint actor for the 3D object to place.
Step 3: Interaction Design
- Use touch input to detect planes and place objects.
- Provide visual feedback (e.g., reticle) to indicate placement location.
Step 4: Testing and Refinement
- Test on physical device.
- Adjust object scale and placement logic based on user comfort.
Mind Map: Key Features for XR Prototyping in Unity vs Unreal
Best Practices for Using Unity and Unreal in Rapid XR Prototyping
- Start Simple: Focus on core interactions before adding polish.
- Leverage Visual Scripting: Enable quick iteration without deep coding.
- Use Placeholder Assets: Replace with high-fidelity assets after concept validation.
- Test Early and Often: Deploy prototypes to real devices to catch usability issues.
- Document Iterations: Keep track of changes and user feedback for continuous improvement.
By integrating Unity and Unreal Engine into your XR prototyping workflow, you can accelerate design validation, reduce development risks, and create immersive experiences that resonate with users and stakeholders alike.
12.5 Best Practice: Continuous Learning and Skill Development
In the rapidly evolving fields of Human Machine Interface (HMI) design and Immersive Experience Engineering, continuous learning and skill development are essential to stay current with emerging technologies, methodologies, and user expectations. This section explores best practices to foster ongoing growth, supported by practical examples and mind maps to guide your learning journey.
Why Continuous Learning Matters
- Technology Evolution: XR devices, interaction paradigms, and software tools are advancing quickly.
- User Expectations: Users demand more intuitive, immersive, and accessible experiences.
- Cross-Disciplinary Knowledge: Combining UX design, engineering, psychology, and data science requires ongoing skill expansion.
Strategies for Continuous Learning
-
Structured Learning Paths
- Enroll in specialized courses (e.g., Coursera, Udacity, edX) focusing on XR development, HMI design, and interaction engineering.
- Obtain certifications in relevant platforms like Unity, Unreal Engine, or UX design.
-
Hands-On Practice and Experimentation
- Build small projects or prototypes regularly to apply new concepts.
- Participate in hackathons or design challenges focused on immersive experiences.
-
Community Engagement and Networking
- Join professional groups such as XR Association, UXPA, or IEEE VR.
- Attend conferences, webinars, and workshops to learn from industry leaders.
-
Reading and Research
- Follow leading journals, blogs, and whitepapers in HMI and XR.
- Stay updated on emerging research in cognitive science and interaction design.
-
Mentorship and Collaboration
- Seek mentors with expertise in immersive technology.
- Collaborate across disciplines to gain diverse perspectives.
Example: A UX Designer’s Continuous Learning Journey
- Month 1-3: Complete an online course on VR interaction design.
- Month 4: Prototype a VR museum tour incorporating spatial audio and gesture controls.
- Month 5: Present prototype at a local XR meetup and gather feedback.
- Month 6: Read recent papers on haptic feedback integration.
- Month 7: Collaborate with an interaction engineer to improve latency issues.
- Month 8: Attend an international XR conference.
Mind Maps
Mind Map 1: Continuous Learning Framework for HMI and XR Professionals
Mind Map 2: Skill Areas to Develop in HMI and Immersive Experience
Mind Map 3: Resources for Continuous Learning
Additional Examples
- Interaction Engineer: Regularly experiments with new input devices like eye-tracking and integrates findings into prototypes, sharing results in internal knowledge bases.
- Experience Strategist: Subscribes to market trend reports and conducts quarterly workshops to align team skills with upcoming technology shifts.
Summary
Continuous learning in HMI and immersive experience engineering is not a one-time effort but a sustained practice. By combining structured education, practical application, community involvement, research, and mentorship, professionals can maintain relevance and drive innovation. Utilizing mind maps helps visualize and organize learning goals, ensuring a balanced development across technical, design, cognitive, and interpersonal skills.
Embrace continuous learning as a core part of your professional identity to excel in the dynamic world of Human Machine Interface Design and Immersive Experience Engineering.
13. Conclusion and Next Steps
13.1 Recap of Key Best Practices and Lessons Learned
In this section, we summarize the essential best practices and lessons learned throughout the journey of Human Machine Interface (HMI) design and Immersive Experience Engineering. These insights serve as guiding principles for UX Designers, Interaction Engineers, and Experience Strategists to create intuitive, effective, and engaging interfaces.
Mind Map: Key Best Practices Overview
Lesson 1: Prioritize User-Centered Design
Example: In designing a VR training module for medical professionals, empathy mapping helped identify stress points during procedures. Incorporating iterative user testing revealed that adding multisensory feedback (visual, audio, haptic) significantly improved skill retention and engagement.
Key Takeaway: Always start with deep user understanding and continuously validate designs with real users to ensure relevance and usability.
Lesson 2: Engineer Natural and Multimodal Interactions
Example: An AR maintenance app used gesture-based controls combined with voice commands to allow technicians to keep their hands free while accessing information. This multimodal approach improved task efficiency and reduced cognitive load.
Key Takeaway: Combining input modalities enhances robustness and accessibility, making interactions feel intuitive and seamless.
Lesson 3: Design Visual and Spatial Layouts to Support Orientation
Example: In a VR architectural walkthrough, spatial UI elements were anchored to environmental features, helping users maintain orientation and reducing disorientation or motion sickness.
Key Takeaway: Use environmental cues and consistent spatial hierarchies to guide users naturally through immersive spaces.
Lesson 4: Integrate Audio and Haptic Feedback Thoughtfully
Example: A VR gaming interface synchronized spatial audio with haptic feedback to confirm user actions, enhancing immersion without overwhelming the senses.
Key Takeaway: Balanced multisensory feedback reinforces interactions and improves user confidence.
Lesson 5: Employ Rigorous Usability Testing and Metrics
Example: Measuring user comfort and task efficiency in VR workflows revealed latency issues that were addressed to improve responsiveness, resulting in higher user satisfaction.
Key Takeaway: Use both quantitative and qualitative data to iteratively refine experiences.
Lesson 6: Uphold Safety, Ethics, and Privacy
Example: An AR application implemented clear consent flows and data protection measures, building user trust and complying with regulations.
Key Takeaway: Transparent communication and prioritizing user control are non-negotiable for ethical immersive design.
Lesson 7: Ensure Cross-Platform Scalability and Performance
Example: Responsive UI design allowed a single XR experience to adapt fluidly between AR glasses and VR headsets, maintaining consistent usability.
Key Takeaway: Modular design and performance optimization enable scalable, high-quality experiences across devices.
Lesson 8: Prepare for Future Technologies
Example: AI-personalized VR learning environments dynamically adapt content based on user behavior, demonstrating the potential of AI-driven adaptive interfaces.
Key Takeaway: Stay informed and design flexibly to leverage emerging technologies like AI and brain-computer interfaces.
Summary Mind Map: Lessons Learned

By integrating these best practices and lessons into your design and engineering workflows, you can create immersive human-machine interfaces that are not only cutting-edge but also user-friendly, ethical, and adaptable to future advancements.
13.2 Building a Career in HMI and Immersive Experience Engineering
Building a career in Human Machine Interface (HMI) and Immersive Experience Engineering is an exciting journey that combines creativity, technical skills, and user-centered thinking. This field is rapidly evolving, fueled by advances in XR technologies, AI, and human factors research, offering diverse opportunities for UX Designers, Interaction Engineers, and Experience Strategists.
Key Career Pathways
Each role plays a critical part in delivering seamless, intuitive, and engaging immersive experiences. Understanding your strengths and interests will help you choose the right path.
Essential Skills and Knowledge Areas
To thrive in this field, professionals should cultivate a blend of technical, design, and interpersonal skills.
Example: A UX Designer working on an AR maintenance app benefits from understanding sensor data and hardware constraints to design feasible interactions.
Educational Background and Certifications
While there is no single educational path, degrees in Human-Computer Interaction, Computer Science, Cognitive Science, or Design provide strong foundations.
Recommended certifications and courses:
- Certified Usability Analyst (CUA)
- XR Development courses on Coursera or Udemy
- Specialized workshops on gesture recognition, spatial audio, or haptics
Example: An Interaction Engineer might pursue a certification in embedded systems alongside XR programming courses to better integrate hardware and software.
Building a Portfolio
A strong portfolio showcasing projects, prototypes, and case studies is essential.
Tips:
- Include diverse examples: VR, AR, mixed reality, and traditional HMI projects.
- Highlight problem-solving approaches and user feedback integration.
- Demonstrate collaboration with cross-disciplinary teams.
Example: An Experience Strategist’s portfolio might include journey maps for immersive retail experiences, supported by user testing results and iterative design improvements.
Networking and Community Engagement
Engaging with the HMI and XR communities accelerates learning and career growth.
Example: Participating in a VR hackathon can provide hands-on experience and connections with industry professionals.
Staying Current with Emerging Trends
The XR and HMI landscape evolves quickly. Continuous learning is vital.
Strategies:
- Subscribe to journals and blogs (e.g., IEEE Spectrum, XR Today)
- Follow thought leaders on social media
- Experiment with new tools and devices
Example: A developer experimenting with AI-driven adaptive interfaces can gain a competitive edge by integrating machine learning into immersive experiences.
Summary
Building a career in HMI and Immersive Experience Engineering requires a multidisciplinary approach, combining design thinking, technical expertise, and user empathy. By developing relevant skills, engaging with communities, and continuously adapting to new technologies, professionals can create impactful, future-ready experiences.
Additional Resources
- Human-Computer Interaction Handbook
- Unity Learn XR Tutorials
- Interaction Design Foundation
- XR Association
13.3 Emerging Opportunities and Challenges
The landscape of Human Machine Interface (HMI) design and Immersive Experience Engineering is rapidly evolving, driven by technological advances and shifting user expectations. This section explores the emerging opportunities and challenges that professionals in the field must navigate to create impactful, user-centered experiences.
Emerging Opportunities
-
Integration of AI and Machine Learning
- AI enables adaptive interfaces that personalize experiences in real-time.
- Example: An XR shopping assistant that learns user preferences and suggests products accordingly.
-
Brain-Computer Interfaces (BCI)
- Direct neural interaction opens new frontiers for hands-free control.
- Example: A VR environment controlled by user thoughts for accessibility-impaired users.
-
5G and Edge Computing
- Ultra-low latency and high bandwidth allow seamless, high-fidelity immersive experiences.
- Example: Cloud-rendered VR games streamed to lightweight headsets.
-
Multimodal Interaction Expansion
- Combining voice, gesture, eye-tracking, and haptics for richer interaction.
- Example: An AR design tool where users manipulate 3D models via hand gestures and voice commands.
-
Cross-Industry Applications
- Expanding use cases in healthcare, education, manufacturing, and entertainment.
- Example: XR-assisted surgical training with real-time feedback.
Key Challenges
-
User Privacy and Data Security
- Immersive systems collect vast personal and biometric data.
- Challenge: Ensuring transparent data use and robust protection.
-
Designing for Diverse User Needs
- Accessibility and inclusivity remain complex in immersive contexts.
- Challenge: Creating adaptable interfaces for users with varying abilities.
-
Technical Limitations and Hardware Constraints
- Battery life, processing power, and ergonomic design limit prolonged use.
- Challenge: Balancing performance with user comfort.
-
Ethical Considerations
- Potential for addiction, misinformation, and psychological effects.
- Challenge: Designing experiences that respect user well-being.
-
Standardization and Interoperability
- Fragmented platforms and protocols hinder seamless experiences.
- Challenge: Developing common standards for XR content and HMI components.
Mind Maps
Mind Map 1: Emerging Opportunities in HMI and Immersive Experience
Mind Map 2: Challenges in HMI and Immersive Experience
Examples
-
AI-Powered Adaptive XR Interface: A virtual museum tour that adjusts content complexity based on visitor engagement and knowledge level, improving learning outcomes.
-
BCI-Controlled VR Wheelchair: Enabling users with limited mobility to navigate virtual environments through thought commands, enhancing accessibility and independence.
-
5G-Enabled Remote Collaboration: Designers across continents co-create in a shared AR workspace with minimal latency, boosting productivity.
-
Multimodal AR Maintenance App: Technicians use voice commands, hand gestures, and haptic feedback to repair complex machinery, reducing errors and training time.
-
Privacy-First AR Social Platform: Users control what biometric data is shared during immersive social interactions, fostering trust and adoption.
In conclusion, while the emerging opportunities in HMI and immersive experience engineering promise transformative user experiences, addressing the accompanying challenges is essential. UX designers, interaction engineers, and experience strategists must collaborate closely, leveraging best practices and ethical frameworks to harness these innovations responsibly and effectively.
13.4 Encouraging Innovation Through User-Centered Design
User-Centered Design (UCD) is a foundational approach that places the needs, behaviors, and feedback of users at the core of the design process. Encouraging innovation through UCD means fostering creativity and breakthrough solutions by deeply understanding users and iteratively refining designs based on real-world interactions.
Why User-Centered Design Fuels Innovation
- Empathy Drives Insight: By empathizing with users, designers uncover latent needs and pain points that inspire novel solutions.
- Iterative Feedback Loops: Continuous testing and refinement lead to unexpected discoveries and improvements.
- Cross-Disciplinary Collaboration: UCD encourages diverse teams to co-create, bringing fresh perspectives.
- Risk Mitigation: Early user involvement reduces costly failures, enabling bolder experimentation.
Mind Map: Core Components of User-Centered Design for Innovation
Example 1: VR Physical Therapy Application
Context: A team designing a VR app to assist stroke patients with motor recovery.
- Empathy: Conducted in-depth interviews with patients and therapists to understand challenges.
- Ideation: Brainstormed game-like exercises that motivate patients.
- Prototyping: Created low-fidelity VR mockups to test interaction comfort.
- Testing: Gathered feedback on ease of use and engagement.
- Iteration: Adjusted difficulty levels and added multisensory feedback based on user input.
Outcome: The app increased patient adherence by 40%, demonstrating how UCD-driven innovation improved therapeutic outcomes.
Mind Map: Innovation Opportunities in Immersive Experience via UCD
Example 2: Gesture-Based AR Maintenance Tool
Context: Designing an AR tool for factory workers to perform equipment maintenance hands-free.
- Empathy: Observed workers’ workflows and identified pain points with traditional manuals.
- Ideation: Proposed gesture controls to navigate instructions without touching devices.
- Prototyping: Developed gesture recognition prototypes using AR headsets.
- Testing: Collected user feedback on gesture intuitiveness and fatigue.
- Iteration: Simplified gestures and added visual cues to reduce errors.
Outcome: Maintenance time was reduced by 25%, showcasing innovation driven by user-focused design.
Best Practices to Encourage Innovation Through UCD
- Engage Users Early and Often: Involve users from concept to deployment to uncover hidden needs.
- Foster a Culture of Experimentation: Encourage teams to test bold ideas without fear of failure.
- Leverage Multidisciplinary Teams: Combine UX, engineering, psychology, and domain experts.
- Use Storytelling and Visualization: Bring user journeys and pain points to life to inspire creative solutions.
- Document and Share Learnings: Maintain a knowledge base of user insights and design iterations.
By embedding user-centered design deeply into the innovation process, teams in Human Machine Interface and Immersive Experience Engineering can create more meaningful, effective, and groundbreaking solutions that resonate with users and push the boundaries of technology.
13.5 Final Thoughts and Call to Action
As we conclude our exploration of Human Machine Interface (HMI) Design and Immersive Experience Engineering, it’s essential to reflect on the transformative potential these fields hold for the future of interaction and experience. The convergence of human-centered design principles with cutting-edge XR technologies offers unprecedented opportunities to create intuitive, engaging, and meaningful interfaces that empower users across industries.
Mind Map: Key Takeaways and Future Directions
Final Reflections
-
Human-Centered Design Remains Paramount: Regardless of technological advances, the core of effective HMI and immersive experience engineering is understanding and empathizing with users. For example, when designing an AR maintenance app for factory workers, involving them early in the design process ensures the interface matches their workflows and cognitive load.
-
Collaboration Drives Innovation: Complex immersive systems require expertise from multiple domains. A successful VR rehabilitation system integrates clinical insights, interaction engineering, and UX design to create a safe and effective experience.
-
Ethics and Privacy Cannot Be Afterthoughts: As XR systems collect more personal data and influence user perception, transparent communication and robust privacy safeguards are essential. For instance, an AR shopping app that requests location data must clearly explain its use and provide users control over their information.
-
Iterative Prototyping Enables Refinement: Rapidly testing prototypes with real users uncovers usability issues early. Consider a VR classroom where early user feedback revealed that spatial UI elements caused disorientation; iterative adjustments improved comfort and engagement.
-
Continuous Learning Fuels Growth: The XR field evolves rapidly. Designers and engineers should actively engage with new tools like Unity’s XR Interaction Toolkit or emerging AI-driven adaptive interfaces to stay ahead.
Call to Action: Steps for Practitioners
- Innovate Responsibly: Prioritize user well-being and ethical standards in every project.
- Share Knowledge: Contribute to open-source projects, write case studies, or participate in professional communities to foster collective growth.
- Design for Impact: Focus on creating immersive experiences that solve real problems and enhance human capabilities.
Example: Applying the Call to Action
Imagine you are designing an immersive experience for remote collaboration in VR. By applying these final thoughts:
- You engage diverse users early to understand their collaboration needs (User-Centered Design).
- Collaborate with network engineers to optimize latency and with psychologists to ensure cognitive comfort (Cross-Disciplinary Collaboration).
- Implement clear privacy settings for voice and gesture data (Ethics and Privacy).
- Use rapid prototyping to test interaction metaphors and spatial layouts (Iterative Testing).
- Stay informed on new XR collaboration tools and AI assistants (Continuous Learning).
This approach not only creates a functional product but also a meaningful, ethical, and delightful user experience.
By embracing these principles and actions, UX Designers, Interaction Engineers, and Experience Strategists can lead the charge in shaping the future of human-machine interaction and immersive experiences. The journey is ongoing—let’s innovate with empathy, responsibility, and creativity.