Professional Dog Training and Animal Behavior Techniques
1. Foundations of Behavioral Science for Dog Training
1.1 Behavioral Principles and How They Apply to Training Sessions
Behavior changes when the dog’s environment and consequences make one option more likely than another. In a training session, you are not “teaching obedience” in the abstract; you are arranging conditions so the dog can learn a specific pattern reliably. The principles below are the practical toolkit behind that arrangement.
The Core Loop
A useful way to plan any session is to run a tight loop: Cue or opportunity → Dog behavior → Consequence → Next repetition. If the dog succeeds, you strengthen the behavior. If the dog fails, you adjust the setup so failure becomes less likely next time.
- Cue or opportunity: A cue can be a word, hand signal, or a consistent setup that predicts what happens next.
- Behavior: Define it clearly. “Look” means eyes on you. “Heel” means position near your leg with attention.
- Consequence: The consequence is what the dog experiences immediately after the behavior.
- Next repetition: You change one variable at a time so learning is not a guessing game.
Reinforcement and Timing
Reinforcement increases the probability of a behavior. Timing matters because dogs learn from what happens right after the behavior.
Example: Teaching “sit.” If the dog sits and you mark and deliver the treat within a second, the dog connects sitting with the reward. If you deliver the treat after the dog stands up, the dog may learn that standing is the profitable moment.
A practical rule: if you can’t mark within a blink, reduce distance, lower distraction, or slow the dog down with management.
Markers and Clear Feedback
A marker (like “yes”) is a bridge between behavior and reinforcement. It tells the dog, “That was the moment.” Markers reduce confusion because the dog doesn’t have to guess which part of the sequence earned the reward.
Example: During “leave it,” you can mark the instant the dog turns away from the item and then feed from your hand. Without a marker, the dog may focus on the item and only later notice the treat.
Motivation and Reinforcer Fit
Reinforcers must be worth the dog’s effort. Motivation changes with hunger, novelty, stress, and prior learning.
Example: A dog that ignores food near the front door may not be “untrainable.” The door area may be too distracting, or the dog may be underfed, or the food may be low value compared to what the dog wants outside. Raise the value, reduce the challenge, or both.
Punishment, Correction, and Why Setup Wins
Punishment decreases behavior, but it can also increase fear, avoidance, or aggression if misapplied. In professional sessions, you typically get better results by preventing errors and reinforcing the alternative.
Example: A dog jumps on guests. Instead of trying to “stop jumping” midair, you can manage by having the dog on a leash, reward four paws on the floor, and only allow greetings when the dog can succeed. The dog learns the correct behavior because it is the easiest path to reinforcement.
Generalization Starts in the First Session
Dogs learn context. If you train only in one room, the dog may treat other places as “not part of the game.” Generalization begins when you vary small details early.
Example: For “sit,” practice in the living room, then the hallway, then near the front door. Keep the cue and the reinforcement consistent, but change the scenery. You are teaching that “sit” means sit, not “sit here.”
Error Management and Criteria
A criterion is the standard you require before you move on. If errors happen often, your criterion is too high for the current setup.
Example: If “down” is inconsistent, don’t immediately demand long holds. Start with a shorter duration, mark quickly, and gradually increase the hold time only when the dog is succeeding.
Mind Map: Behavioral Principles in Training Sessions
Putting It Together: A Short Session Blueprint
Start with an easy behavior the dog already does reliably, like sit. Use a marker and deliver reinforcement immediately. Then increase one variable at a time: slightly more distance, a new room, or a mild distraction. If the dog starts missing, reduce difficulty and rebuild success before raising the challenge again. This keeps learning steady and prevents the dog from practicing the wrong pattern.
A good session ends with more correct repetitions than incorrect ones. That doesn’t mean you never challenge the dog; it means you challenge in a way that still allows the dog to win often enough to learn.
1.2 Learning Mechanisms Including Habituation Sensitization and Conditioning
Dogs learn by changing what they do after experience. Three core mechanisms explain a lot of day-to-day training outcomes: habituation, sensitization, and conditioning. They can happen at the same time, but one usually dominates.
Habituation the “Seen It Before” Effect
Habituation is a decrease in response after repeated exposure to a stimulus that brings no meaningful consequence. The dog is not “ignoring” out of laziness; the nervous system is updating its estimate of importance.
A practical example: your dog hears the dishwasher run every evening. If nothing scary happens, the first few nights may trigger attention or pacing. After several repetitions, the dog’s startle shrinks and the dog settles sooner. In training terms, habituation helps you reduce baseline reactivity to predictable background events.
Key details that keep habituation from stalling:
- Consistency matters. If the stimulus is unpredictable, the dog may treat it as information rather than noise.
- Intensity matters. Habituation is easier when the stimulus is mild and the dog can remain below a stress threshold.
- Timing matters. If the dog is already aroused, habituation is harder because the dog is “busy” responding.
Sensitization the “That Got My Attention” Effect
Sensitization is the opposite: repeated exposure increases response when the stimulus predicts something unpleasant or urgent. The dog’s system becomes more alert, not less.
Example: a vacuum cleaner is turned on while your dog is already fearful of it. If the dog repeatedly experiences the vacuum as a threat, the next time you pick it up, the dog may react faster and more intensely. Even if the vacuum sound stays the same, the dog’s learned expectation makes the stimulus more powerful.
Sensitization also shows up in training mistakes. If you repeatedly correct a dog at the moment they are already overwhelmed, you may accidentally teach that the environment is escalating. That doesn’t mean “corrections cause fear” in every case; it means timing and context determine what the dog learns.
Conditioning the “Meaning Added” Effect
Conditioning happens when a stimulus gains predictive value through association. Two major types are useful for dog training: classical conditioning and operant conditioning.
Classical Conditioning Predicting Outcomes
Classical conditioning links a neutral cue to an automatic emotional or physiological response. The dog learns that “this predicts that.”
Example: every time the leash appears, the dog goes to the vet and experiences discomfort. Soon, the leash itself can trigger stress behaviors—panting, freezing, or trying to escape—before you even leave the house.
A training-friendly way to use this mechanism is to pair a previously neutral event with something good and safe. If the leash predicts calm walks with high-value rewards, the leash can become a cue for positive anticipation.
Operant Conditioning Shaping Behavior Through Consequences
Operant conditioning links a behavior to its consequences. If a behavior produces a desired outcome, it becomes more likely; if it produces an undesired outcome, it becomes less likely.
Example: you mark and reward when your dog looks at you during a trigger. Over time, looking becomes a behavior that “pays.” If instead you only reward when the dog is already calm, you may accidentally reinforce calmness indirectly while missing the earlier step that gets the dog there.
How the Mechanisms Interact in Real Sessions
A dog can habituate to a harmless stimulus while simultaneously being sensitized to a different one. Conditioning can also override habituation. For instance, if a doorbell sound is usually harmless but occasionally precedes a frantic visitor, the dog may stop habituating and start reacting again because the sound now predicts a meaningful event.
The practical takeaway: you don’t just ask “what is the dog doing?” You also ask “what is the dog learning about what happens next?”
Mind Map Habituation Sensitization Conditioning
Learning Mechanisms Mind Map
Worked Example Putting It Together
Imagine a dog that barks at the front door.
- The barking may be operant if attention or access follows barking.
- The doorbell sound may be classically conditioned if it predicts visitors who cause stress.
- The dog may or may not habituate to the door sound depending on whether consequences are consistent.
A coherent plan targets all three: manage access so barking doesn’t pay, pair door-related cues with calm rewards so the prediction shifts, and keep exposures at an intensity where habituation to harmless background noise can occur.
When you can name which mechanism is driving the behavior, your training choices become simpler: you adjust consequences for operant learning, adjust associations for classical learning, and adjust exposure conditions for habituation and sensitization.
1.3 Reinforcement Schedules and Their Effects on Behavior Stability
Reinforcement Schedules and Behavior Stability
Reinforcement schedules describe how often a dog gets something good after a behavior. The schedule doesn’t just affect speed of learning; it also shapes how steady the behavior stays when the environment gets messy. A stable behavior is one that keeps working across days, distractions, and imperfect conditions.
Core Idea: Rate, Timing, and Expectation
A reinforcement schedule has three practical effects:
- Rate of reinforcement: how frequently rewards arrive.
- Timing predictability: whether the dog can guess when the next reward will happen.
- Behavior pattern: whether the dog learns to respond quickly, slowly, or with persistence.
For example, if a dog gets a treat every time they sit, they usually sit quickly during training. If rewards become less predictable, the dog may still sit, but the response pattern can change. That change is not “good” or “bad” by itself; it’s a tool.
Mind Map: Reinforcement Schedules and What They Do
From Basics to Stability: The Five Main Schedules
Continuous Reinforcement
Continuous reinforcement means every correct response earns reinforcement. It’s ideal when teaching a new behavior, because the dog quickly links the cue or context to the outcome.
Example: You’re teaching “sit.” Each time the dog sits within your criteria, you mark and deliver a treat. After a few sessions, the dog offers sit more reliably.
Stability tradeoff: If you stop reinforcing suddenly, the behavior often drops quickly. The dog has learned that “sit equals treat, always.”
Fixed Ratio
Fixed ratio schedules reinforce after a set number of correct responses, like every 3rd or 5th success.
Example: You reward every 3rd sit during a calm moment. The dog may sit twice quickly, then “pause” briefly before the next reward arrives. That pause is the dog tracking the pattern.
Stability tradeoff: Once the ratio is learned, the behavior can be steady, but it may show a noticeable rhythm.
Variable Ratio
Variable ratio reinforces after an unpredictable number of responses. This schedule tends to produce high persistence because the dog can’t predict when the next reward will come.
Example: You reward sit after an average of every 3 responses, but the exact count varies (2, 4, 3, 5, 1…). The dog keeps offering sit because stopping would be risky.
Stability tradeoff: This schedule can maintain behavior strongly even when rewards are reduced, but it can also make the dog work harder than you want in some contexts. You still control the criteria and the environment.
Fixed Interval
Fixed interval schedules make reinforcement available after a set amount of time since the last reward, regardless of how many responses occur.
Example: You reward “settle” only if the dog is calm at 30-second marks. The dog may wait, then respond more around the expected time.
Stability tradeoff: The behavior can become time-locked. That’s useful for some tasks, but it can be less flexible if the dog needs to respond immediately.
Variable Interval
Variable interval schedules make reinforcement available after unpredictable time intervals. The dog learns to keep responding because rewards can arrive at any moment.
Example: You reward “check in” with a treat at irregular times averaging every 20 seconds. The dog doesn’t wait for a predictable moment; they keep offering attention.
Stability tradeoff: This often supports steady reliability in real-life conditions, where timing is never perfectly consistent.
Partial Reinforcement and Extinction Resistance
When rewards are delivered only sometimes, the dog is less likely to stop the behavior immediately if reinforcement becomes temporarily unavailable. That’s why partial reinforcement can help stability.
Example: Suppose you teach “leave it” with continuous reinforcement at first. Later, you switch to rewarding only some successful “leave it” moments while still preventing rehearsal of the wrong behavior. If a reward is missed once, the dog is more likely to keep trying than if they were trained under continuous reinforcement only.
Practical Integration: Choosing a Schedule for the Job
- Teaching a brand-new behavior: start with continuous reinforcement, then shift to partial reinforcement.
- Building persistence under mild frustration or distraction: use variable ratio or variable interval patterns.
- Training behaviors that should happen at time-based moments: use fixed or variable interval approaches.
Example scenario: You’re training “wait” at the door. Early on, reward every successful wait (continuous). Then reward every 2nd or 3rd success (fixed ratio). As the dog improves, reward unpredictably while keeping the door opening consistent with success (variable ratio). The dog learns that waiting works, even when the treat doesn’t arrive on every attempt.
Common Mistakes That Undermine Stability
- Changing criteria while also changing schedules: the dog can’t tell whether the behavior is wrong or just not being rewarded.
- Reducing reinforcement too fast: the dog may drop the behavior before they’ve learned it well.
- Using variable schedules without management: if the dog can rehearse the wrong behavior, persistence can strengthen the wrong pattern too.
A reinforcement schedule is only one part of stability. The other part is consistent criteria and careful prevention of errors. When those align, the dog’s behavior becomes reliable for the right reasons.
1.4 Motivation and Drive Including Resource Guarding and Access to Reinforcers
Motivation is the “why now” behind behavior. Drive is the internal push that makes certain outcomes more valuable at a given moment. In training, you don’t just teach a cue; you shape what the dog chooses when the cue appears and when it doesn’t.
Core Concepts That Keep Training Honest
A dog’s motivation is not constant. It changes with hunger, rest, novelty, social context, and prior learning. If you train a sit when the dog is underfed, overexcited, or already rehearsed the habit of ignoring you, the same cue can produce different results. Your job is to notice which reinforcers are currently “on the menu” and which ones are blocked.
Reinforcers must be accessible. If the dog wants a person, a toy, or a sniffing spot, but your setup prevents access, the dog may still learn, yet the learning will be slower and less reliable. Access is part of the reinforcement system, not a side detail.
Resource Guarding as a Motivation Problem
Resource guarding happens when the dog believes that access to something valuable is threatened. The key is that the dog’s motivation for the resource is high and the perceived risk of losing it is also high. Guarding can look like freezing, staring, growling, snapping, or escalating quickly. It can also be subtle: stepping between you and the item, tightening body posture, or moving the resource away.
A common mistake is treating guarding as “disrespect” or “dominance.” In practice, it’s usually about value plus risk. If you remove the risk while keeping the dog’s ability to earn safe access, you can change the dog’s emotional and behavioral response.
Access to Reinforcers and How It Shapes Choice
Think of training as a set of decisions the dog makes. Each decision depends on three things:
- Value: How much the dog wants the resource.
- Probability: How likely the dog is to get the resource after a behavior.
- Risk: How likely the dog is to lose the resource or be interrupted.
When risk is high, the dog may choose guarding even if you offer a treat, because the treat doesn’t fully replace what’s at stake. When risk is lowered, the dog can accept smaller reinforcers and learn that cooperation predicts continued access.
Mind Map: Motivation, Drive, and Guarding
Practical Examples That Tie It Together
Example 1: Food guarding during training. A dog growls when you reach toward a bowl. If you immediately try to “take” the bowl, you raise risk and the dog’s motivation to guard increases. Instead, you can practice a safer pattern: toss a high-value treat near the bowl without reaching toward the dog, then pause. Over repetitions, the dog learns that your presence predicts better outcomes, not loss. The dog’s guarding often decreases because the risk drops.
Example 2: Toy guarding with a tug. A dog grabs the tug and stiffens when you try to end the game. The dog’s drive for the toy is high, and the perceived risk is that the game will end abruptly. A better approach is to build a trade routine: you present a cue like “trade,” then offer a higher-value food item while you calmly release. The dog learns that giving up the toy predicts continued reinforcement.
Example 3: Access to sniffing spots. A dog lunges at the gate because sniffing is the most valuable outcome. If you hold the leash tight and deny access, the dog’s motivation stays high and risk rises. You can reduce risk by creating a predictable earn: the dog performs a simple behavior like “look” or “sit” briefly, then you open the gate for a short sniff window. The dog’s choice becomes: cooperate to get access.
A Simple Decision Checklist for Trainers
Before changing the cue or increasing difficulty, ask:
- What does the dog want right now?
- What is the dog afraid will happen?
- Is my setup accidentally blocking access or increasing risk?
- Am I delivering reinforcement quickly enough that the dog can connect the dots?
When you answer these, motivation stops being a mystery and becomes a controllable part of your training plan.
1.5 Measurement and Data Collection for Training Decisions
Training decisions get easier when you can answer three questions with evidence: What happened? How often? What changed after you acted? Measurement is not about turning your sessions into spreadsheets; it’s about reducing guesswork so you can adjust faster and more accurately.
Core Measurement Goals
Start with outcome clarity. An outcome is a behavior you can observe and count or rate consistently. For example, “dog stays near me” is vague, but “dog maintains heel position within one leash length for 10 seconds” is measurable.
Next, decide what kind of data you need. Frequency data counts how many times something occurs. Duration data measures how long it lasts. Latency data measures time until the behavior happens. Rate data combines frequency and time, which is useful when sessions vary in length.
Finally, connect measurement to decisions. If your plan is “increase reinforcement rate,” you need a metric that reflects learning, not just compliance. If your plan is “reduce reactivity,” you need a metric that reflects threshold and recovery, not only whether the dog eventually calms down.
What to Measure During Sessions
Use a simple hierarchy: behavior first, then context. Record the behavior, the trigger context, and the consequence you delivered.
A practical set of session fields:
- Behavior: the exact action you’re tracking
- Trigger: what preceded it (sound, person, distance, handling)
- Response: what the dog did next (approach, avoidance, freezing)
- Your action: cue, marker, correction, management, reinforcement
- Outcome: success, partial, or failure based on criteria
Keep definitions tight. If “success” means the dog orients to you within 2 seconds and stays within a defined zone, write that down and use it every time.
Data Collection Methods That Stay Usable
Trial Based Recording
Trial based recording works well for discrete skills like sit, down, leave it, and recall. Each trial is a chance to succeed or fail.
- Record success/failure per trial.
- Track latency for the first response.
- Note error type (missed cue, impulsive grab, disengagement).
Example: Teaching “leave it.” A trial starts when the item is presented. Success is the dog withdraws attention and looks back at you within 3 seconds. Failure is grabbing or persistent staring without disengagement.
Event Based Recording
Event based recording fits behavior problems that happen unpredictably, like barking, lunging, whining, or jumping.
- Record each event with a timestamp or sequence number.
- Record intensity using a consistent scale.
- Record recovery time until the dog returns to baseline.
Example: Leash reactivity at the park. Each time the dog lunges, record intensity from 1 to 5 and how long it takes to stop scanning and settle.
Duration and Interval Recording
Duration recording is useful for calm behaviors and maintenance skills. Interval recording is useful when you can’t track every moment.
- Duration: “dog remains in a settle for 60 seconds.”
- Interval: “in 10-second blocks, was the dog oriented to me at least once?”
Example: Teaching “place.” You can measure total time on mat plus interval checks for whether the dog stays relaxed enough to accept reinforcement.
Decision Rules from Data
Data should drive specific adjustments. Use decision rules you can apply without debating.
- If success rate is below your target for 10–20 trials, reduce difficulty: change distance, duration, or reinforcement criteria.
- If latency increases, the dog may be confused or under-motivated. Check cue clarity, marker timing, and reinforcer value.
- If errors cluster around a trigger, treat the trigger as the variable. Adjust management and threshold rather than repeating the same cue.
- If behavior improves but then drops after a few sessions, review session structure: warm-up, reinforcement rate, and fatigue.
Mind Map: Measurement Workflow
Mini Example with Integrated Recording
Suppose you’re training “wait” at a doorway.
- Baseline: dog breaks the wait 6 times in 20 trials.
- Data: record each break as an event with intensity (1 mild step, 5 full bolt) and note whether the door opened wide or stayed mostly closed.
- Decision: if breaks spike when the door opens fully, reduce the opening size and shorten the wait duration.
- Recheck: after 20 new trials, success improves to 14/20 with fewer high-intensity breaks.
The key is that the measurement tells you which variable mattered: door opening size and wait duration, not your general “effort” or the dog’s “attitude.”
Common Measurement Mistakes
Avoid measuring everything. If you track too many variables, you’ll stop collecting data reliably. Also avoid changing definitions midstream; if “success” changes, your trend becomes meaningless. Finally, don’t confuse calm appearance with learning. A dog can look relaxed while still not understanding the criteria, so keep your success definition behaviorally specific.
2. Canine Anatomy Physiology and Behavior Relevance
2.1 Sensory Systems and How Dogs Perceive Their Environment
Dogs don’t experience the world as a human camera feed. They sample it through multiple sensory channels, then prioritize what helps them predict outcomes. Training works best when you match your cues to the dog’s sensory strengths and respect the limits that shape attention.
Core Sensory Inputs Dogs Use
Vision. Dogs see the world with a wider field of view than many people, which helps them notice movement at the edges. Their color perception is limited compared with ours, so “red” and “green” cues are less reliable than contrast, shape, and motion. In practice, a hand signal that moves clearly and consistently often lands better than a subtle finger twitch.
Hearing. Dogs can detect higher frequencies and hear from farther away, but they also get pulled by many sounds. A dog that seems “ignoring” you may actually be tracking a distant noise. For training, that means your timing and marker placement must be crisp, and your environment should start easier than the final goal.
Smell. Olfaction is the dog’s most information-dense channel. Odors persist, spread, and layer over time, so the same location can “mean” something different depending on who was there and when. A walk that looks identical to you may be a changing map to the dog. When teaching behaviors like “leave it,” you’re often competing with odor-driven attention.
Touch and Proprioception. Dogs constantly feel their body position through skin and joints. Harness fit, collar pressure, and even paw surface texture can change comfort and confidence. If a dog flinches during handling, the issue may be sensory discomfort rather than defiance.
Taste and Internal State. Taste helps dogs evaluate food and water, but internal conditions also shift perception. Nausea, pain, or fatigue can reduce responsiveness across all senses, making cues seem “unclear” when the dog is simply not processing well.
How Sensory Processing Shapes Behavior
Dogs don’t just detect stimuli; they decide what to attend to. That decision depends on arousal level, prior learning, and the dog’s current goal. When arousal is high, sensory processing narrows: the dog focuses on the most urgent signal and misses subtle cues.
A practical example: you cue “sit” near a jogger. If the jogger’s movement is the dominant input, the dog may not register your hand position or your voice. The fix is not repeating the cue louder; it’s reducing the sensory load (distance, barriers, quieter routes) and reinforcing the behavior when the dog can actually perceive it.
Thresholds and Sensory Competition
Every dog has a threshold where attention flips from “you” to “the world.” Threshold isn’t a moral line; it’s a sensory balance point. Below threshold, the dog can learn. Above threshold, the dog may still move, but learning becomes inconsistent.
Consider leash reactivity. The dog’s hearing and smell can detect the trigger before you do, and the dog may already be tracking it. If you wait until the dog is visibly escalating, you’ve likely crossed the threshold. Better practice is to start training at a distance where the dog notices the trigger briefly, then returns attention to you.
Practical Training Adjustments Based on Sensory Strengths
- Use motion and contrast for visual cues. Make signals large enough to be seen at the dog’s typical distance.
- Keep your marker consistent in timing and sound. A marker that arrives late forces the dog to guess which behavior caused it.
- Control odor exposure when teaching “leave it.” Start with low-odor items and gradually increase challenge.
- Check equipment fit and handling comfort. A dog that resists touch may be communicating sensory discomfort.
- Match environment difficulty to the dog’s current threshold. If the dog can’t perceive the cue reliably, the cue isn’t the problem.
Mind Map: Dog Sensory Perception
Example Scenarios That Show Sensory Priorities
Example: Teaching “Come” in a yard with birds. Birds provide movement and sound, pulling attention away. Start with a quieter corner or a time of day with fewer birds, then reinforce coming immediately when the dog orients to you.
Example: “Leave it” with food on the floor. Smell dominates. If the dog lunges, the item is too challenging for the current threshold. Begin with a less aromatic object, reward rapid disengagement, and only later increase odor intensity.
Example: Handling for nail trims. If the dog stiffens at the same step each time, check touch sensitivity and restraint pressure. A change in equipment or handling position can restore cooperation without changing the dog’s personality.
When you treat sensory perception as the dog’s “input system,” training becomes more precise. You’re not guessing why the dog “won’t listen”; you’re aligning cues and environment with what the dog can actually detect and process right now.
2.2 Stress Responses Including Autonomic Arousal and Behavioral Indicators
Stress in dogs is not a single feeling. It’s a coordinated set of body changes and outward behaviors that help the animal cope with what it perceives as challenging. For training, the key is to notice early signs, because once the dog is fully over threshold, learning becomes slower and mistakes become more likely.
Autonomic Arousal the Body’s Control Panel
Autonomic arousal is the part of stress that runs “under the hood.” It’s driven by the nervous system and shows up in heart rate, breathing, muscle tone, and digestion. You don’t need lab equipment to observe it; you need consistent attention to patterns.
When a dog encounters a trigger, the body often shifts into a state that supports fast action. That can look like increased alertness, tighter posture, faster breathing, or a sudden inability to focus. In other situations, the dog may show the opposite pattern: lower energy, slower movement, and a “shut down” look. Both are stress responses; they just support different coping styles.
A practical way to think about it: the dog’s body is preparing either to move away, to move toward something, or to freeze and manage risk. Your job is to identify which preparation is happening and adjust the training setup so the dog can learn rather than merely cope.
Behavioral Indicators What You See in Real Time
Behavioral indicators are the visible outputs of autonomic arousal. They’re useful because they appear before the dog fully escalates, especially when you track them across sessions.
Common categories include:
- Orienting and scanning: head turns, repeated checking of the environment, and difficulty settling.
- Postural changes: stiffening, raised hackles, lowered head, or a “lean back” stance.
- Vocalizations and pacing: whining, barking, repetitive movement, or circling.
- Avoidance and escape behaviors: turning away, backing up, ducking behind you, or trying to leave.
- Freeze and shutdown: sudden stillness, reduced responsiveness to cues, or disengagement.
- Displacement behaviors: lip licking, yawning, scratching, or sniffing that seems unrelated to the environment.
A helpful rule: look for clusters, not single signs. One lip lick during a treat delivery is normal. Lip licking plus scanning plus stiff posture is a different story.
Threshold Concepts the Learning Cutoff
Threshold is the point where the dog’s stress response overwhelms the ability to process training cues. Below threshold, the dog can attend, take reinforcement, and try. At or above threshold, the dog may still take food sometimes, but the learning rate drops and the dog’s behavior becomes dominated by coping.
You can often estimate threshold by asking two questions:
- Can the dog recover after a brief trigger? Recovery suggests the dog is still learning.
- Does the dog’s behavior escalate with repetition? Escalation suggests the body is accumulating arousal.
Mind Map: Stress Signals and Training Decisions
Integrated Example Reading a Walk Encounter
Imagine a dog that usually walks calmly. On a sidewalk, a person appears at a distance. At first, you notice orienting: the dog’s head turns and scanning begins. Breathing seems faster and the dog’s body stiffens. You also see a small attempt to move away, not yet a full pull.
That cluster suggests rising autonomic arousal. If you keep the same distance and ask for heel, the dog may take the cue but will likely struggle to recover after the person passes. Instead, you can reduce intensity by increasing distance, then reinforce a calm orientation back toward you. The goal is not to “win” the encounter; it’s to help the dog practice a coping response that still allows learning.
If the dog shows freeze or shutdown—eyes unfocused, minimal response to cues, and a flat posture—your training plan should shift toward management and shorter, easier exposures. In that state, asking for precision behaviors is like trying to do math during a fire drill.
Practical Checklist for Each Session
Before you start training, decide what you will track: posture, scanning, pacing, and recovery. During the session, record whether stress signs appear as a single event or as a cluster, and note how quickly the dog returns to baseline after the trigger ends. Over time, this turns “the dog seems stressed” into a clear, repeatable reading of autonomic arousal and behavioral indicators.
2.3 Pain Illness and Medical Explanations for Behavior Changes
When a dog’s behavior changes, training explanations are tempting because they’re tidy. Medical explanations are often messier, but they’re also more important: pain and illness can change how a dog learns, how fast they recover, and whether they can safely participate in training. A good professional workflow treats behavior as a possible symptom, not just a problem to fix.
Core Concept Pain Changes Behavior Pathways
Pain can reduce movement, increase irritability, and narrow attention. A dog that used to tolerate handling may suddenly snap because touch is now costly. Even if the dog is “learning” during training, the learning rate may be low because the dog is focused on discomfort or trying to avoid it.
Illness can also shift behavior through energy changes, appetite changes, sleep disruption, and sensory alterations. For example, a dog with nausea may refuse food-based rewards, not because motivation is low, but because eating is unpleasant.
Step 1: Behavior Red Flags That Suggest Medical Review
Use a quick checklist during intake and each follow-up. Consider medical review when you see:
- Sudden onset without a clear training trigger
- Progressive worsening over days or weeks
- Pain behaviors such as yelping, guarding, reluctance to jump, or stiffness after rest
- Changes in elimination patterns paired with discomfort signs
- Sleep changes, restlessness, or inability to settle
- Appetite or water intake changes
- New aggression during handling or grooming
- Limping, head tilting, scratching, or abnormal posture
A practical rule: if the dog’s behavior changes faster than your training plan can plausibly explain, treat it as a medical question first.
Step 2: Distinguish Fear from Pain Without Guessing
Fear and pain can look similar because both can produce avoidance and defensive behavior. The difference often shows up in context and predictability.
- Pain tends to be linked to specific body actions or contact areas. The dog may tolerate a situation until a particular movement happens.
- Fear tends to be linked to a broader set of cues and may generalize quickly. The dog may react to the approach of a trigger even before contact.
Example: A dog growls when a leash is clipped. If the dog also flinches when the collar touches the neck, pain is more likely. If the dog growls only when the leash comes out but not during collar contact, fear or learned association becomes more likely.
Step 3: Gather Information That Helps a Veterinarian
Your goal is to provide observations, not diagnoses. Collect:
- Timeline: when the behavior started and whether it’s constant or episodic
- Location: where the dog seems uncomfortable and what movements trigger it
- Triggers: handling, stairs, car rides, grooming, specific rooms, or specific people
- Response: whether the dog avoids, freezes, pants, licks lips, or shows guarding
- Baseline changes: appetite, drinking, stool/urine, sleep, and energy
Keep notes simple and consistent. “Growls when touched on left shoulder during brushing” is more useful than “seems grumpy.”
Mind Map: Medical Versus Training Explanations
Step 4: Adjust Training Immediately While Waiting
Even before a medical appointment, you can reduce risk and improve clarity.
- Lower intensity: shorten sessions and reduce physical demands like jumping, fast recalls, or prolonged heeling.
- Modify handling: avoid grooming or body contact that reliably triggers discomfort.
- Use low-pressure rewards: if food is inconsistent, consider smaller, easier-to-tolerate options and avoid forcing intake.
- Track outcomes: note whether the dog improves with rest or worsens after activity.
Example: A dog suddenly refuses to do “down” and becomes snappy when corrected. Instead of pushing the behavior, switch to a supported position (e.g., training on a softer surface) and focus on cues that don’t require the painful movement. If the dog’s reactivity drops after rest and gentle positioning, pain becomes more likely.
Step 5: Advanced Details for Common Scenarios
-
Handling Aggression If aggression appears during grooming, nail trims, or collar adjustments, treat it as a potential pain signal. Start with observation: does the dog react to the tool, the touch location, or the duration of contact?
-
Elimination Changes Frequent accidents can be medical (urinary discomfort, GI upset) or behavioral (stress, routine disruption). If accidents cluster around specific times, include that timing in your notes. Discomfort often shows up as urgency, straining, or post-elimination agitation.
-
Sudden Reactivity A dog that becomes reactive on walks may be in pain from gait changes, ear discomfort, or vision issues. If reactivity correlates with certain routes, surfaces, or lighting, document it. That pattern can help narrow the likely source.
Step 6: Document Decision Logic
Write a short rationale for your plan: what you observed, what you ruled out, and what you changed in training to keep the dog safe. This protects the dog and keeps the training process honest.
Example decision note: “Behavior change began 10 days ago with guarding during shoulder touch and reluctance to jump. Sessions reduced to low-impact skills; grooming avoided. Medical review recommended due to handling-linked discomfort signs.”
When pain or illness is involved, the best training is the kind that respects the dog’s body first. Once medical causes are addressed, behavior work becomes clearer, faster, and safer for everyone involved.
2.4 Breed and Temperament Differences Without Overgeneralization
Breed can be a useful starting point, but it is not a personality test. A professional trainer treats breed as a set of probabilities shaped by history, not a script for what a specific dog will do today.
Core Idea: Breed Signals Tendencies, Not Guarantees
Dogs were selected for tasks: herding, guarding, retrieving, pulling, scenting, and more. Those selection pressures influence common patterns such as how quickly a dog notices movement, how long it can work, or how it responds to unfamiliar people. However, individual experience, early socialization, handling style, and current health can shift behavior dramatically.
A practical way to think about it: breed gives you hypotheses, and your observations confirm or reject them. If you only use breed, you’ll miss the dog in front of you.
Temperament Is Multi-Layered
Temperament is not one trait. It’s a stack of components that can move independently:
- Reactivity level: how strongly the dog responds to stimuli.
- Recovery speed: how quickly the dog returns to baseline.
- Sociability: comfort with people and other dogs.
- Motivation profile: what the dog finds worth working for.
- Persistence: how long the dog keeps trying when blocked.
- Sensitivity to handling: how the dog tolerates touch, restraint, and grooming.
Breed may influence some components, but it rarely predicts all of them. Two dogs of the same breed can differ more than dogs of different breeds.
Mind Map: Using Breed Without Falling into Stereotypes
Stepwise Method for Trainers
- Start with the dog’s current behavior: note what the dog does in neutral settings before you interpret it.
- Form breed-informed hypotheses: for example, a dog bred for herding may show strong chase or eyeing behavior toward moving objects.
- Test hypotheses with low-pressure trials: observe how the dog responds to controlled movement, distance, and cueing.
- Track recovery and learning: a dog that is “reactive” may still learn quickly if you keep sessions under threshold.
- Adjust the plan: if the dog’s behavior doesn’t match the hypothesis, you revise the hypothesis instead of forcing the dog into a label.
Concrete Examples That Show the Difference
Example: Herding Traits Without Herding Behavior A border-collie mix may stare at a jogger and increase intensity. That can look like “herding.” But the same dog might ignore the jogger when given a structured warm-up, a predictable cue routine, and a high-value reinforcer. The trainer doesn’t assume the dog is “born to herd.” Instead, the trainer treats the behavior as a learned response to movement plus arousal level, then builds an alternative behavior.
Example: Guarding Temperament With Different Triggers A “guarding” breed might be cautious with strangers. Yet the dog may be friendly at the door when the owner uses a consistent greeting routine and the dog is rewarded for calm observation. In this case, the guarding tendency shows up as threshold management needs, not as a fixed personality trait.
Example: Scent-Driven Focus That Isn’t Always Obsession A scent hound might track strongly on walks. Some owners interpret this as stubbornness. A better approach is to treat it as a motivation profile: the dog prefers scent work to leash walking. When the trainer adds short, structured scent games and then returns to walking with clear reinforcement criteria, the dog’s “stubbornness” often becomes cooperation.
Advanced Details: Context Changes the “Same” Dog
Breed tendencies often appear only under certain conditions:
- Distance and duration: a dog may be calm at 20 feet but escalate at 10.
- Novelty level: familiar routes can reduce arousal.
- Handling style: restraint, crowding, and sudden touch can reveal sensitivity.
- Competition for attention: other dogs, kids, or food availability can shift priorities.
So when you hear “that’s just how the breed is,” ask a more useful question: “Under what conditions does this dog show that pattern, and what changes it?”
Practical Takeaway
Use breed to generate hypotheses about thresholds and likely motivations, then verify with observation, recovery tracking, and controlled trials. The goal is not to predict the dog’s personality; it’s to design training that fits the dog’s real behavior in real contexts.
2.5 Environmental Constraints Including Space Noise and Handling Context
Dogs don’t learn in a vacuum. Space size, noise level, and the handling context shape what the dog can notice, how quickly the dog gets overwhelmed, and which behaviors are easiest to perform. A professional trainer treats these constraints as part of the training plan, not as “background conditions.”
Core Idea: Constraints Change What “Possible” Means
A behavior can be trained only if the dog can physically and mentally access the learning opportunity. In a cramped hallway, the dog may not be able to move away far enough to stay under threshold. In a loud room, the dog may hear fewer cues clearly, so the same reinforcement timing produces different results. In a vet-like handling context, the dog may associate touch with restraint, so calm handling skills need a different setup than a friendly living-room session.
Space Constraints and Movement Options
Start with the dog’s geometry. Limited space reduces the dog’s ability to choose distance, which often increases frustration and reactive responses.
- Small rooms: Use shorter sessions, lower criteria, and more frequent resets. Place the dog so the dog can turn away without bumping into furniture.
- Narrow hallways: Avoid training patterns that require the dog to pass close to the handler repeatedly. Instead, practice stationary skills like targeting, sit, or hand touches where the dog can keep a comfortable angle.
- Open yards: You can increase distance and add movement, but you still need to control distractions and reinforcement placement so the dog doesn’t “self-reward” by chasing or sniffing.
A practical rule: if the dog’s body can’t comfortably do the behavior you’re asking for, the problem isn’t the cue—it’s the environment.
Noise Constraints and Cue Clarity
Noise affects learning in two ways: it competes with the dog’s attention and it can raise baseline arousal.
- Competing noise reduces the signal-to-noise ratio. If you say “sit” while a vacuum runs, the dog may not hear the cue consistently, so the dog appears “confused.”
- Arousal increases can push the dog over threshold faster, making calm behaviors harder to access.
A simple way to manage this is to train with the noise present but at a level where the dog can still succeed. If the dog misses cues or becomes rigid, reduce the noise intensity, increase distance from the noise source, or shorten the duration of exposure.
Handling Context and Emotional Meaning
Handling context includes who is present, what the dog expects, how the dog is positioned, and what the dog has learned about touch and restraint.
- Different rooms mean different histories. A dog may tolerate grooming in one location but struggle in another because the “grooming room” predicts restraint.
- Different people mean different rules. A dog might accept a familiar handler’s touch but resist a new person’s approach.
- Different body positions matter. Standing over the dog can feel like pressure; kneeling beside the dog often reads as less confrontational.
When context changes, the dog may not generalize the skill. That’s not stubbornness; it’s learning specificity.
Mind Map: Environmental Constraints
Integrated Examples You Can Use Immediately
Example 1: Sit Training in a Small Room A client tries to teach “sit” in a tight kitchen. The dog repeatedly bumps the handler’s legs and then jumps up. The fix is environmental: move training to a spot where the dog can sit with a clear turn radius, reduce the number of reps per minute, and use a higher-value reinforcer delivered right after the sit. Once the dog can succeed without crowding, you can gradually increase difficulty by adding mild distractions.
Example 2: Leash Walking During Loud Household Noise A dog struggles to focus when the washing machine runs. Instead of repeating the cue “heel” louder, train with the machine on at a lower setting or from farther away. Mark and reinforce calm orientation toward the handler. If the dog starts scanning for the noise source or stiffens, pause and reset at a lower noise level. The goal is consistent reinforcement of calm attention, not endurance.
Example 3: Cooperative Handling in a New Location A dog tolerates nail trims at home but panics at a friend’s house. The behavior isn’t “worse dog”; the context changed. Start with cooperative touch skills in the new room: brief hand-to-body touches, immediate reinforcement, and no nail tools at first. Only after the dog can relax in that location do you introduce the next handling step.
Practical Checklist for Trainers
Before you change the dog’s behavior plan, check the environment:
- Is there enough space for the dog to choose distance?
- Is the noise level low enough for the dog to hear and process cues?
- Does the handling context match the dog’s learning history for that skill?
- Are you asking for the same behavior when the dog’s constraints have changed?
When you treat constraints as part of the training variables, you get fewer “mystery failures” and more predictable learning.
3. Reading Dog Behavior and Building Accurate Functional Assessments
3.1 Ethograms and Observable Behavior Definitions
An ethogram is a structured list of behaviors you can reliably observe and record. In training and behavior work, it’s the difference between “he seemed nervous” and “he licked his nose three times, then looked away for 6 seconds, then froze.” Observable behavior definitions turn that list into something you can teach to another person and still get similar results.
What Makes a Behavior Observable
Start with behaviors that meet three criteria: visible, specific, and repeatable. Visible means you can see it (or hear it in a way that’s clearly tied to the behavior, like a distinct vocalization type). Specific means the definition has clear boundaries, so “sniffing” doesn’t become a catch-all. Repeatable means two observers, using the same definition, should record the same event most of the time.
A useful trick is to write definitions using “topography” language: what the dog’s body is doing. For example, “paw lift” is more observable than “hesitation.” “Head turn away with eyes averted” is more observable than “avoidance.”
Building Blocks of Observable Definitions
Use consistent components across your ethogram entries.
- Behavior name: short and unambiguous.
- Operational definition: what you see, including body parts and sequence.
- Inclusion rules: what counts as the behavior.
- Exclusion rules: what looks similar but does not count.
- Intensity or duration options: how you’ll record time or strength.
Example definitions below show the level of detail that reduces disagreement.
Example: Defining Common Behaviors
- Nose lick: tongue contacts nose or lips and retracts; counts each contact.
- Lip lick: tongue contacts lips without nose contact; counts each contact.
- Freeze: body becomes motionless for at least 1 second while the dog is otherwise alert; excludes brief pauses during walking.
- Look away: head turns away from the trigger with eyes averted; excludes turning to follow a moving person if the eyes remain on the trigger.
- Whine: audible vocalization with continuous tone; excludes short yips that are clearly separate events.
Recording Formats That Match Your Goal
Ethograms are only useful if the recording method fits the question.
- Event recording: count discrete behaviors (e.g., nose licks, barking bouts).
- Duration recording: measure how long a behavior lasts (e.g., freezing time).
- Interval recording: score whether a behavior occurs in time blocks (e.g., every 10 seconds).
For training sessions, event and duration recording are common because they map neatly to changes in reinforcement and management. For longer assessments, interval recording can be more practical.
Mind Map: Ethogram Design Workflow
Mind Map: Turning Observations into Categories
Practical Example: Building a Mini Ethogram for Leash Reactivity
Imagine you’re observing a dog that may lunge at other dogs. Your ethogram might include:
- Look at trigger: eyes and head oriented toward the other dog.
- Orient away: head turns away and eyes avert.
- Freeze: motionless posture for ≥ 1 second.
- Lip lick: tongue contacts lips.
- Lunge: forward thrust with body weight shift toward trigger.
- Bark bout: one or more barks with no long silent gap between them.
Now you record during a baseline walk. If you see lip licking and freeze increasing before lunges, you have evidence that the dog is moving through a predictable sequence. That sequence becomes your training map: you can intervene earlier, when the early signals appear, rather than waiting for the full problem behavior.
Common Pitfalls and How to Avoid Them
- Vague definitions: “nervous” becomes multiple behaviors; split it into observable parts.
- Overlapping categories: if “look away” and “turn away” both capture the same movement, decide which one wins or define them by different body components.
- Changing definitions midstream: refine before data collection, then keep the rules stable for that dataset.
A good ethogram doesn’t just label behavior; it makes your observations consistent enough to guide decisions. When you can describe what happened in plain operational terms, training becomes less guesswork and more cause-and-effect.
3.2 Functional Assessment Framework for Antecedents Behaviors and Consequences
A functional assessment is a structured way to answer one practical question: what does the dog get or avoid when the behavior happens? You’re not trying to label the dog as “good” or “bad.” You’re mapping the behavior’s job in that specific situation.
Core Idea and What You Record
Start with three pieces:
- Antecedent: what reliably happens right before the behavior.
- Behavior: the observable action you can describe without guessing.
- Consequence: what changes immediately after the behavior.
To keep the assessment honest, define the behavior precisely. “Barks” is vague; “barks at the door while backing away” is usable. If you can’t describe it, you can’t measure it.
Step 1: Build a Clean Antecedent Map
Antecedents include more than people and objects. They also include distance, duration, and routine.
Common antecedent categories:
- Setting: hallway, yard, car, kitchen.
- Trigger: doorbell, leash clip, another dog.
- Timing: right after waking, during feeding, after a long nap.
- Constraints: leash length, baby gate, inability to approach or escape.
- State: sleepy, hungry, overexcited, recovering from a walk.
Example: A dog starts lunging when the leash is clipped. The antecedent isn’t only “leash clip.” It may be “leash clip + excited owner + immediate approach to the front door.” Each component matters because each can be changed.
Step 2: Define the Behavior in Observable Terms
Use a behavior definition that includes topography and context.
Good behavior definitions:
- “Snatches food from the counter within 2 seconds of the cook turning away.”
- “Growls and freezes when a person reaches toward the dog’s collar.”
Weak definitions:
- “Aggressive dog.”
- “Bad manners.”
If the dog shows multiple behaviors in a sequence, record the first reliable one. That’s often the behavior that starts the chain.
Step 3: Identify Consequences Without Mind Reading
Consequences are what the dog experiences after the behavior. They can be:
- Access: the dog gets something (attention, food, a person, a toy, a chance to leave).
- Escape or Avoidance: the dog removes something unpleasant (distance increases, the trigger stops).
- Automatic: the behavior produces internal effects (self-soothing, pacing).
- Socially Maintained: humans unintentionally reinforce the behavior (talking, pushing away, chasing).
Example: A dog whines at the gate. If the owner opens the gate after whining, the consequence is access to the environment. If the owner moves the dog away from the gate after whining, the consequence is escape from the trigger.
Step 4: Connect the Chain to Likely Function
Once you have antecedent and consequence patterns, you can infer function. You’re not diagnosing emotions; you’re identifying what reliably follows.
Mind map of the framework:
Step 5: Verify with Controlled Changes
A hypothesis becomes useful when you test it. Verification doesn’t require fancy equipment; it requires careful changes.
Two verification moves:
- Change the antecedent while keeping other variables stable. If the behavior drops when the trigger is farther away, distance is part of the antecedent.
- Change the consequence while keeping the antecedent stable. If the behavior increases when the trigger stops after barking, escape is likely involved.
Example: Doorbell barking. Hypothesis: barking causes the doorbell to stop (escape/avoidance). Verification: play the doorbell at low volume from a distance, then stop it before barking starts. If barking decreases and calm behavior increases, you’ve reduced the conditions that make barking effective.
Step 6: Turn Findings into Training Targets
Your assessment should produce two practical outputs:
- Prevention targets: what to change so the behavior has fewer chances to work.
- Replacement targets: what you teach so the dog can get the same outcome in a safer way.
Example: Counter surfing. If antecedent is “food prep + unattended counter” and consequence is “access to food,” prevention is managing access during prep. Replacement is teaching an alternative behavior that earns food (for example, going to a mat for a chew) under the same general routine.
Quick Example Walkthrough
Scenario: Dog lunges at other dogs on walks.
- Antecedent: other dog appears at a certain distance; owner tightens leash; dog’s body stiffens.
- Behavior: lunging with barking, then pulling forward.
- Consequence: owner changes direction and increases distance after the lunge.
- Function hypothesis: escape/avoidance from the trigger, plus arousal escalation.
- Verification: practice passing at a greater distance where lunging doesn’t occur; then gradually reduce distance while reinforcing calm attention.
When the chain is mapped clearly, training becomes less about arguing with the dog and more about adjusting the environment so the dog’s best options are also the easiest options.
3.3 Identifying Triggers Including Distance Duration and Context
A trigger is the specific combination of what happens before a behavior, what the dog experiences during that moment, and what the dog learns afterward. For professional training, the goal is not to label a dog as “reactive” or “fearful,” but to map the exact conditions that reliably precede the behavior. That map then guides management, training criteria, and safety decisions.
Foundational Concepts for Trigger Identification
Start with three variables you can control in observation: distance, duration, and context.
- Distance is how far the dog is from the trigger source when the dog first shows early signs. “Close” is not a feeling; it’s a measurable separation.
- Duration is how long the trigger remains present or how long the dog must tolerate it. A dog can handle a brief sight but fail when the exposure continues.
- Context is everything else that changes the dog’s internal state or the meaning of the trigger: location, time of day, leash setup, prior events, and what the dog is allowed to do.
A useful rule: if you only record one variable, you’ll misread the problem. If you record all three, you can usually find a pattern.
Mind Map: Trigger Variables and Early Signs
Step-by-Step Observation Method
- Define the behavior you’re tracking using observable terms. For example: “lunges toward the dog” or “backs away and freezes.”
- Mark the earliest sign that reliably appears before the full behavior. Early signs matter because they tell you where the dog is still learning.
- Measure distance at the first sign, not at the peak behavior. Peak behavior often happens after the dog has already crossed the threshold.
- Estimate duration in two ways: how long the trigger is present when early signs begin, and how long the dog must stay exposed before the behavior escalates.
- Record context variables that could shift the dog’s threshold. Examples include whether the dog is on a harness vs. collar, whether the dog has already practiced “looking at triggers,” and whether the dog is in a narrow hallway versus an open field.
A simple data sheet can be as plain as: trigger type, distance at first sign, duration until escalation, location, and what happened right after.
Distance: Finding the Threshold Without Guessing
Distance thresholds are rarely one number. They’re a range.
Example: A dog sees another dog across a park. At 30 meters, the dog orients and then looks back at the handler. At 20 meters, the dog freezes at first sight and then barks after 10–15 seconds. The trigger is not “dogs,” it’s “dogs at a distance that keeps the dog stuck in place long enough to escalate.”
In practice, you set training distance so the dog can succeed at the earliest sign stage, then you adjust gradually.
Duration: The Hidden Factor in “It Was Fine Last Time”
Duration explains many inconsistencies.
Example: Two days in a row, a dog tolerates a delivery person from the driveway. On day one, the person walks past in 5 seconds. On day two, the person stops to talk for 45 seconds. The dog’s early signs appear within the first 10 seconds on day two, and the full behavior follows after the stop continues.
This means the trigger includes the persistence of the stimulus, not just the stimulus itself.
Context: Same Trigger, Different Meaning
Context changes the dog’s internal state and the available options.
Example: A dog barks at bicycles on a sidewalk but stays calm on a bike path. The sidewalk has parked cars that block escape routes and increases the dog’s sense of being “trapped.” The bike path is wider, and the handler can step sideways to create space. The trigger is still the bicycle movement, but the context changes the dog’s ability to cope.
Other context shifts include:
- Leash tension and handler position: the dog may interpret the handler’s stance as “we can’t move.”
- Prior exposure: after repeated near-misses, the dog’s threshold can drop.
- Allowed behaviors: if the dog can turn away and disengage, the same trigger may produce different outcomes.
Consequences: What the Dog Learns Right After
After identifying triggers, check what the dog gets immediately after the behavior. Consequences often reinforce the trigger-response chain.
Example: A dog lunges at a person. The person steps back, creating distance. The dog learns that lunging makes the trigger go away. In that case, your trigger map must include the consequence pattern, because training will need to change what happens after early signs.
Putting It Together into Practical Criteria
Once you have distance, duration, and context, you can set criteria that keep the dog below threshold long enough to learn. If early signs appear at 20 meters after 10 seconds in a narrow hallway, your training starts at a distance and exposure length where early signs are manageable, then you adjust one variable at a time.
A trigger map is complete when it answers three questions: What starts it? What makes it escalate? What changes the outcome right after?
3.4 Recognizing Communication Signals Including Calming Signals and Conflict Behaviors
Dogs communicate constantly, even when they are “just standing there.” Your job is to notice the form of the signal, the timing, and the context. A single behavior can mean different things depending on arousal level, body tension, and what happened right before it.
Start with a simple rule: signals that reduce pressure tend to appear when the dog is uncomfortable, uncertain, or trying to prevent escalation. Signals that increase pressure tend to appear when the dog is pushing for control, access, or distance.
Core Building Blocks of Dog Communication
- Body orientation: Where the dog’s head and shoulders point often matters more than the tail position.
- Facial tension: Soft eyes and relaxed mouth differ from tight lips and hard staring.
- Movement quality: Smooth, loose movement usually signals lower conflict than stiff, abrupt movement.
- Temporal pattern: A brief glance can be curiosity; repeated, prolonged signals often reflect a growing internal state.
- Context match: A calming signal in a calm room is less informative than the same signal near a trigger.
Calming Signals That Actually Help You
Calming signals are not magic spells. They are attempts to manage social pressure. Look for clusters rather than one-off behaviors.
Common examples include:
- Lip licking: Often appears when the dog is unsure or waiting for something to happen.
- Yawning: Can be a stress-related release, especially if the dog is not tired.
- Turning the head away: A way to reduce direct pressure.
- Body lowering or partial crouch: Not the same as play bow; it can be a “please don’t come closer” posture.
- Slow blinking: Usually shows reduced intensity when paired with a softer body.
Example: At the door, a dog approaches the handle, then licks their lips repeatedly and turns their head when the door opens. The dog is not “being polite”; they are managing uncertainty. If you keep opening the door at the same intensity, the dog may shift from calming signals to conflict behaviors.
Conflict Behaviors That Signal Escalation
Conflict behaviors are the dog’s way of increasing control or creating distance. They can be subtle at first.
Watch for:
- Hard staring: Prolonged eye contact with a fixed head position.
- Freezing: Sudden stillness with tense muscles.
- Sniffing that stops abruptly: The dog interrupts a normal behavior to monitor the situation.
- Growling or showing teeth: Clear escalation signals.
- Lunging or snapping: Often the end of a progression, not the beginning.
Example: During greetings, a dog first turns the head away and licks their lips. If the other dog steps closer, the first dog may stop licking, stiffen, and stare. If the pressure continues, growling may appear. Treat the growl as information, not a “problem to punish.”
The Progression Model You Can Use in Real Time
Many dogs move through a sequence when pressure rises. You can’t always see every step, but you can learn to recognize early signs.
- Low pressure: relaxed posture, loose movement, normal sniffing
- Mild uncertainty: brief calming signals, head turns, intermittent lip licking
- Rising conflict: reduced movement, repeated signals, hard staring
- High conflict: freezing, growling, snapping, avoidance attempts
Example: On leash, a dog notices another dog at a distance. They start with a quick head turn and a few lip licks. If the handler shortens the leash and steps forward, the dog may freeze and stare. If you step back and increase distance, the dog often returns to calmer behaviors within a short window.
Mind Map: Signal Recognition
Practical Checklist for Each Training Moment
Before you interpret, ask three questions:
- What changed right before the signal? Distance, speed, tone, or access often explains the shift.
- Is the dog offering the signal repeatedly or once? Repetition usually indicates rising internal pressure.
- What is the dog’s body doing overall? A single lip lick with a relaxed body can be low concern; the same lip lick with stiffness and staring is a different story.
Example: A dog lip licks while waiting for a treat. If the dog’s shoulders are loose and they resume sniffing, it’s likely normal anticipation. If the dog lip licks while staring at a trigger and then backs away, it’s likely a calming attempt.
Integrating Signals into Your Training Decisions
When you see calming signals, you don’t “reward them” as a goal by default. Instead, you treat them as a cue to adjust the training setup: reduce intensity, increase distance, slow your movement, or change the dog’s focus. When you see conflict behaviors, you stop pushing for the next obedience step and prioritize safety and pressure reduction.
Example: A dog starts to stare and freeze during a recall practice near a distraction. You call again, but the dog cannot respond. The correct move is to lower difficulty immediately—move farther from the distraction, shorten the distance to success, and rebuild from a calmer baseline.
The more consistently you connect signals to context, the faster you’ll see patterns across sessions. Dogs are not random; their communication is a readable system. Your job is to read it early enough that the dog never has to “go to the last page.”
3.5 Distinguishing Fear Anxiety Frustration and Compulsion in Practical Cases
A functional assessment often starts with a simple question: what does the dog seem to want, and what happens right before the behavior? Fear, anxiety, frustration, and compulsion can look similar on the surface, but they differ in the dog’s internal state and the pattern of triggers and consequences.
Foundational Differences That Show Up in Real Life
Fear is typically tied to a specific threat. The dog’s body often shows a “protective” posture: backing away, freezing, low tail, tucked body, or sudden avoidance. The behavior usually reduces immediate danger.
Anxiety is more about uncertainty and sustained arousal. The dog may not have a single clear threat; instead, the dog seems on edge across time and contexts. You’ll often see scanning, repetitive checking, panting without exertion, pacing, or difficulty settling.
Frustration comes from blocked access to a desired outcome. The dog wants something—food, play, greetings, movement, sniffing—but the environment prevents it. The behavior often escalates with repeated attempts and can include whining, barking, lunging, or pawing.
Compulsion is a repetitive, seemingly “self-reinforcing” behavior that persists even when the original trigger is gone. The dog may appear unable to switch gears, and the behavior can intensify with stress. Common examples include excessive spinning, tail chasing, or repetitive circling.
Mind Map: Rapid Triage
Practical Decision Rules You Can Use Immediately
-
Look for the “escape route.” If the dog tries to move away, hide, or stop the interaction, fear is more likely. If the dog tries to move toward the goal but is blocked, frustration is more likely.
-
Check whether the dog can settle between exposures. Anxiety often leaves the dog unable to relax even when the trigger is absent. Fear may show a clearer on-off pattern: calm returns after the threat passes.
-
Observe escalation style. Frustration tends to ramp up with repeated attempts to get the outcome. Anxiety can ramp up with uncertainty and time. Compulsion often shows repetition that continues regardless of whether the environment changes.
-
Test the consequence without “testing” the dog. If removing the barrier stops the behavior quickly, frustration is likely. If distance reduction or predictable safety cues reduce the behavior, fear or anxiety is more likely. If the behavior continues even when access is granted or the trigger is removed, compulsion becomes more likely.
Example: Doorway Noise and Leash Reactivity
A client reports that their dog barks and lunges at the front door when someone approaches. The dog also freezes when the doorbell rings.
- Fear indicators: freezing and avoidance when the sound occurs; the dog backs away after barking.
- Frustration indicators to check: does the dog bark because it wants to greet, and does the behavior intensify when the owner holds the leash back?
A useful next step is to compare two moments: (a) doorbell sound with the dog behind a baby gate, and (b) a person approaching but the dog can see and smell through a barrier. If the barking is strongest when the sound happens and the dog avoids afterward, fear is primary. If barking is strongest when greeting is blocked, frustration is primary.
Example: Jumping at Food and “Can’t Stop” Circling
Another dog jumps at the kitchen counter and also circles repeatedly during meals.
- If the dog jumps mainly when food is visible and the owner delays access, frustration is likely.
- If circling continues even after the dog gets the food, and the dog seems unable to switch to eating or resting, compulsion is more likely.
A key nuance: frustration behaviors often function as “goal pursuit.” Compulsion behaviors often function as “pattern persistence.”
Example: Separation Behavior That Looks Like Fear
A dog whines and scratches after the owner leaves. The dog also pants and paces for the entire absence.
- If the dog reacts strongly to the owner’s specific departure cues (keys, shoes) and then calms quickly when the owner returns, fear or anxiety may be involved.
- If the dog remains highly aroused throughout the absence and struggles to settle even when the owner’s return is predictable, anxiety is more likely than fear.
Compulsion is less likely unless the repetitive behavior continues in a stereotyped way even when the dog is otherwise safe and calm.
Common Confusions and How to Separate Them
- Fear vs Anxiety: fear is usually tied to a clearer threat; anxiety is broader and more sustained.
- Frustration vs Anxiety: frustration often has a “blocked goal” signature; anxiety often has uncertainty and monitoring.
- Compulsion vs Fear/Anxiety: compulsion persists as a repetitive pattern even when the immediate threat or uncertainty is reduced.
Mini Checklist for Writing Your Functional Hypothesis
- What is the most consistent trigger?
- Does the dog move away, move toward, or repeat a pattern?
- Does the behavior stop when the goal is accessible or the uncertainty is removed?
- Does the dog recover quickly between exposures?
When you can answer those four questions, your hypothesis becomes testable through safe management and structured training choices, not guesswork.
4. Training Ethics Safety and Professional Practice Standards
4.1 Humane Training Principles and Avoiding Harmful Methods
Humane training is not “soft” training. It is training that respects the dog’s welfare while still being precise about behavior change. The core idea is simple: you shape behavior using consequences the dog can understand, and you avoid methods that create fear, pain, or confusion as a shortcut.
Humane Training Principles
Start with the dog’s learning system. Dogs repeat behaviors that reliably produce good outcomes and avoid behaviors that reliably produce bad outcomes. Humane training uses that logic while keeping the dog’s body and mind out of the danger zone.
1) Use the least intrusive effective tool. If a lure works, don’t jump straight to a correction. If a marker and reinforcement placement solve the problem, don’t add extra pressure. “Least intrusive” is not about being gentle; it’s about reducing unnecessary stress so the dog can learn.
2) Prevent rehearsal of the problem. Many harmful outcomes come from repeated failures. If a dog can practice lunging at every sidewalk dog, the behavior strengthens even if you “punish” it. Management—distance, barriers, timing, and setup—often does more humane work than consequences.
3) Keep the dog below threshold. Threshold is the point where the dog can no longer learn effectively. Above it, the dog’s brain prioritizes survival and escape. Humane training designs sessions so the dog can succeed often enough to build confidence.
4) Make consequences informative, not frightening. A consequence should teach. That means the dog experiences a predictable pattern: behavior happens, then a clear outcome follows. Harmful methods often create unpredictability, which increases anxiety and suppresses learning.
5) Prioritize consent and safety in handling. Cooperative handling reduces stress for both dog and person. If a dog needs a nail trim, the humane approach is to teach tolerance gradually and to use safe restraint only when necessary and time-limited.
Mind Map: Humane Training
Avoiding Harmful Methods
Harmful methods usually share one or more traits: they rely on pain or fear, they create confusion, or they increase the dog’s stress without teaching an alternative behavior.
Pain-based tools and aversive shocks. Any method that uses pain as the primary driver can suppress behavior temporarily while increasing fear, avoidance, or aggression risk. Even when the dog “seems fine,” the training may be teaching the dog to fear the handler’s presence or the environment.
Physical intimidation and dominance displays. Yanking, hitting, kneeing, or forcing the dog into compliance can create compliance through fear. That may look like obedience, but it often removes the dog’s ability to choose and learn.
Unclear corrections and inconsistent timing. If the dog receives an unpleasant consequence after a behavior you didn’t intend, the dog learns the wrong lesson. Inconsistent timing also makes the dog scan for danger rather than focus on the task.
Overcorrection for normal behavior. Dogs bark, jump, sniff, and mouth. Humane training distinguishes between nuisance and safety issues, then teaches an alternative. If you punish normal behavior without teaching what to do instead, you get suppression, not skill.
Systematic Replacement Strategies
When you remove harmful methods, you need replacements that still solve the problem.
Step 1: Identify the function. Is the dog barking for attention, frustration, or fear? Is jumping about greeting, arousal, or lack of impulse control? Function guides the choice of reinforcement.
Step 2: Manage the environment. If the dog lunges at scooters, increase distance and choose routes with fewer surprises. If the dog steals socks, use closed doors and baskets out of reach.
Step 3: Teach an incompatible or alternative behavior. For jumping, teach “four paws on the floor” and reinforce it. For leash reactivity, teach “look at me” or a calm orientation behavior and reinforce for appropriate attention.
Step 4: Build success gradually. Start with easier versions: quieter triggers, shorter distances, shorter durations, and higher reinforcement rates. Increase difficulty only when the dog can succeed.
Step 5: Fade supports and proof. Once the dog performs reliably, reduce supports like distance and high-value treats, while keeping criteria fair.
Examples That Show the Difference
Example: Leash Reactivity at Dogs
- Harmful approach: frequent harsh corrections when the dog lunges.
- Humane approach: start far enough away to notice dogs without reacting, mark and reward calm orientation, then gradually reduce distance. The dog learns that seeing a dog predicts good things, not pain.
Example: Jumping on Guests
- Harmful approach: pushing the dog off repeatedly or scolding during contact.
- Humane approach: teach a greeting routine. Ask for “sit” or “go to mat,” reinforce the behavior guests can reliably reward, and manage entry so the dog can’t rehearse jumping.
Example: Nail Trims
- Harmful approach: restrain aggressively and force the nail cut.
- Humane approach: pair the nail tool with treats, handle paws briefly, then extend sessions in small steps. The dog learns handling is safe and predictable.
Quick Checklist for Humane Decisions
Before a session, ask:
- Can I set this up so the dog succeeds more than it fails?
- What alternative behavior will I reinforce?
- Am I staying below threshold?
- Are my consequences clear and timely?
- If I need handling, can I make it cooperative and time-limited?
Humane training is measurable: the dog’s stress decreases, learning becomes faster, and the behavior you want becomes reliable without relying on fear or pain.
4.2 Safety Planning for Handling Equipment and High Arousal Dogs
High arousal dogs can learn, but they often cannot think clearly. Safety planning is how you make learning possible without turning every session into a test of luck. The goal is simple: reduce the chance of accidental reinforcement, injury, and escape while keeping the dog’s stress within a workable range.
Core Safety Mindset and Session Boundaries
Start by defining what “safe” means for this specific dog and environment. Safety is not only about you and the dog; it also includes the people nearby, the leash line, and the equipment you bring out.
- Set a stop rule before training begins. Example: if the dog escalates to lunging with rigid body posture and cannot reorient to you within 10–15 seconds, you end the attempt and reset from farther away.
- Choose a training distance you can control. If you cannot reliably manage the leash line, you are too close.
- Plan for the worst moment. The worst moment is usually the first 30 seconds after a trigger appears or when equipment comes out.
Equipment Roles and Risk Reduction
Equipment is not “magic”; it’s a tool for controlling access and preventing errors.
- Leash and line management: Use a leash length that lets you create distance without tangling. Keep slack when possible so the dog is not pulled forward by the line.
- Harness or collar choice: Use equipment that supports safe handling for the dog’s body shape and your handling style. If the dog can slip out, it’s not a safety plan.
- Muzzle use when appropriate: A muzzle can reduce risk during high arousal handling, but it must be introduced calmly and paired with treats so it doesn’t become a new trigger.
- Barriers and gates: A baby gate, pen, or room divider can prevent rehearsals of jumping or chasing and keeps you from stepping into the dog’s path.
- Treat delivery tools: A treat pouch or fanny pack reduces fumbling. Fumbling is how you drop food, lose control of the leash, and accidentally teach “equipment equals chaos.”
Stepwise Safety Planning Workflow
Use a consistent sequence so you don’t improvise under stress.
- Pre-session setup: Clear trip hazards, secure doors, and confirm you can exit the space without crossing the dog’s line of travel.
- Equipment check: Inspect clips, straps, and buckles. Test the leash connection once while the dog is calm.
- Dog readiness check: Look for early signs of escalation such as hard staring, stiff tail carriage, and rapid reorientation to the trigger.
- Controlled exposure: Present the trigger at a distance where the dog can notice it and still take food.
- Reinforcement and reset: Reinforce calm orientation and disengagement. If the dog crosses threshold, you increase distance or add a barrier, then try again later.
Mind Map: Safety Planning
Concrete Example: Leash Reactivity at the Door
Scenario: A dog barks and lunges at the door when the owner opens it.
- Setup: You place a barrier between you and the door area. You keep the leash short enough to prevent the dog from reaching you, but not so short that it pulls the dog forward.
- Equipment: You use a harness that doesn’t twist and a treat pouch to avoid reaching near the dog’s face.
- Stop rule: If the dog starts lunging with no ability to take food, you close the barrier and end the attempt.
- Training attempt: From a distance where the dog can still eat, you open the door slightly, mark calm attention, and feed. If barking rises, you close the door and reset farther back.
This plan prevents two common safety failures: stepping into the dog’s forward momentum and repeating the barking-lunge sequence until it becomes “the default.”
Concrete Example: High Arousal During Toy Play
Scenario: A dog becomes frantic when a toy appears and may mouth or jump.
- Setup: You start with a barrier or a pen so the dog cannot reach you instantly.
- Equipment: You use a long line if needed for controlled positioning, and you keep your hands away from the dog’s mouth.
- Safety rule: You stop play when the dog shows rigid body posture and cannot disengage to take food.
- Training approach: You reinforce a brief pause or orienting behavior before the toy is reintroduced. The toy becomes a reward for controlled behavior, not a trigger for chaos.
Advanced Details That Prevent “Small” Accidents
- Line-of-travel awareness: Don’t stand where the dog would run past you. Position yourself so the dog’s movement path leads away from you.
- Predictable body mechanics: Sudden bending, reaching, or turning can startle a high arousal dog and cause a sudden lunge.
- Two-person handling: If you work with a helper, assign roles. One person manages the dog’s position and leash; the other handles equipment and treats. Switching roles mid-escalation is a common source of mistakes.
- Threshold timing: Many dogs escalate within seconds of the trigger. Plan your reinforcement rate and your reset distance so you act before the dog fully commits to the behavior.
Safety planning is what makes training repeatable. When you reduce risk and control the environment, you also reduce the number of times the dog practices the problem behavior. That’s the foundation for effective learning.
4.3 Consent Based Handling and Cooperative Care Protocols
Consent based handling means the dog gets to participate in what happens to their body and environment. You still guide and manage, but you do it by reading the dog’s signals, offering choices, and stopping when the dog is not comfortable. The goal is not “making the dog happy.” The goal is predictable cooperation: the dog can learn that handling is safe, understandable, and controllable.
Core Concepts and Why They Work
Start with three practical ideas.
- Signals are information. A dog’s body language tells you whether the current plan is acceptable. If you ignore it, you train the dog to brace, avoid, or escalate.
- Choice reduces stress. Even small options—where to stand, whether to approach, how to position a leash—change the dog’s sense of control.
- Breaks are part of training. If the dog repeatedly shows discomfort, you don’t “push through.” You reset the plan to a lower difficulty level.
A useful mental model is “permission to continue.” If the dog is relaxed enough to proceed, you proceed. If not, you modify the plan until permission returns.
Consent Signals and Thresholds
You need a consistent way to interpret signals. Use a simple checklist during handling.
- Green: soft body, steady breathing, taking treats, moving toward you, loose leash.
- Yellow: brief freezing, lip licking without food, turning head away, stiffening during contact.
- Red: whale eye, growling, snapping, pulling away strongly, attempts to flee, repeated avoidance.
When you see yellow, slow down and reduce intensity. When you see red, stop the procedure and return to a step the dog can do comfortably.
Protocol Workflow for Cooperative Care
Use the same sequence every time so the dog can learn the pattern.
- Set up the environment. Choose a quiet spot, remove distractions, and ensure safe footing. If the dog is on slippery flooring, consent will be harder because the dog can’t feel stable.
- Offer an entry option. For example, present a target or allow the dog to approach the hand at their pace.
- Ask for a low-stakes behavior. Examples: “touch” to your palm, step onto a mat, or stand for one second. Reinforce immediately.
- Introduce the handling component in micro-steps. Contact should be brief and predictable. If you are teaching nail handling, start with touching the paw for one second, then reward.
- Check consent during the action. If the dog shows yellow, shorten the contact and increase distance. If red, end the attempt.
- End cleanly. Release the dog from the task and return to a neutral state. Ending well matters because it teaches the dog that cooperation is not a trap.
Mind Map: Consent Based Handling
Example 1: Paw Touch for Nail Prep
Goal: the dog tolerates brief paw contact.
- Step A: Place a mat on the floor. Ask for the dog to step onto the mat and reward.
- Step B: Offer a hand near the paw without touching. Reward for looking, sniffing, or relaxing.
- Step C: Touch the paw for one second, then reward and release.
- Step D: Repeat until the dog stays in green during contact.
If the dog goes yellow at Step C, reduce contact to a fraction of a second or increase distance so the dog can succeed again. If the dog goes red, stop and return to Step B.
Example 2: Collar and Leash Attachment
Goal: the dog accepts the sequence without bracing.
- Step A: Present the collar and reward the dog for approaching it.
- Step B: Bring the collar near the neck without fastening. Reward for calm behavior.
- Step C: Fasten for one second, reward, then unfasten.
- Step D: Build duration only after the dog stays green.
If the dog pulls away during fastening, you are asking for too much too soon. Shorten the fastening time and increase the number of successful repetitions.
Example 3: Exam Position for Cooperative Care
Goal: the dog can be positioned for a quick check.
- Step A: Teach a “mat settle” with reinforcement.
- Step B: Add a gentle body contact only after the dog is settled.
- Step C: Perform one brief check action, reward, and release.
Keep the check short and consistent. The dog should learn that the handling ends when they are still cooperative.
Common Errors That Break Consent
- Pushing through yellow. Yellow is a warning, not a suggestion.
- Increasing duration before tolerance. Longer contact is not the next step until shorter contact is reliable.
- Force to complete the task. Force teaches the dog that consent is irrelevant.
- Ending without release. If you stop while the dog is still tense, you may accidentally reinforce avoidance.
Practical Checklist for Each Session
Before you start, confirm: you have a safe setup, a clear low-stakes entry behavior, micro-steps planned, and a release cue ready. During the session, watch for green/yellow/red and adjust immediately. After the session, end on a success so the dog leaves with a clear message: cooperation works.
4.4 Documentation Informed Consent and Client Communication
In professional dog training, informed consent is not a formality; it is a shared understanding of what will happen, why it will happen, and what success and risk look like. Documentation makes that understanding durable when emotions run high, schedules change, or a client forgets a detail they agreed to in the first session.
Core Consent Concepts That Clients Can Actually Use
Start with three plain ideas.
- What you will do: training activities, handling procedures, equipment used, and session structure.
- Why you will do it: the behavior goal and the learning mechanism you expect to use.
- What could go wrong: realistic risks like increased arousal, temporary frustration, or a dog rehearsing an unwanted response if the plan is too ambitious.
A good consent conversation also clarifies what you will not do. If a client asks for a method that relies on pain or intimidation, the documentation should record the refusal and the alternative plan.
Documentation That Prevents Misunderstandings
Use consistent headings so clients can find answers quickly. Include:
- Client and dog details: names, ages, living situation, and who will participate.
- Behavior goals: observable targets stated in measurable terms (for example, “walk past a dog at 10 meters without lunging” rather than “be less reactive”).
- Baseline notes: what you observed, including triggers, distance, duration, and recovery time.
- Training plan summary: the skills being taught and the management steps used to reduce rehearsal of problem behavior.
- Equipment and handling: leash type, harness or collar, muzzle use if applicable, and how you will position yourself.
- Safety boundaries: when you will pause, how you will handle sudden escalation, and who is responsible for physical control.
- Client responsibilities: homework expectations, recording requirements, and what to do if the dog worsens.
- Consent statements: confirmation that the client understands the plan, risks, and alternatives.
A practical rule: if it affects the dog’s safety or the client’s expectations, it belongs in writing.
Client Communication That Stays Clear Under Pressure
Communication should be structured like a session: short, specific, and tied to the next action.
- Before training: confirm the goal for that session and the dog’s current threshold. Ask one question that matters, such as “What distance did the dog last stay under threshold?”
- During training: explain changes in real time. If you reduce distance or switch to a calmer setup, say why: “We’re lowering intensity so the dog can succeed and learn, not just cope.”
- After training: summarize outcomes with numbers or clear descriptors, then assign one or two homework tasks.
When a client reports a setback, respond with a process: review what changed, identify likely triggers, adjust criteria, and document the revised plan.
Mind Map: Consent and Communication Flow
Example Documentation Language That Works
Consent summary example
- “We will use marker-based reinforcement to teach calm engagement and controlled walking responses. We will also use management to prevent rehearsal of lunging while we build success at a safe distance. If your dog shows signs of escalating stress, we will reduce distance or end the session to prevent practice of the unwanted behavior. You agree to follow the homework steps and to pause training if the dog cannot recover within the agreed time window.”
Client responsibility example
- “For the next week, you will record the distance and dog behavior during walks. If the dog lunges or cannot settle within 2 minutes, you will stop the attempt, note the distance, and switch to the lower-intensity setup described in the plan.”
Example Client Message After a Difficult Session
“Today we saw escalation at the same distance as last time, and recovery took longer. We’re adjusting the plan by moving to a farther starting point and shortening the exposure so your dog can practice calm attention. Your homework is one short walk using the new distance, plus a 3-minute indoor settle practice before the walk. If you notice the same escalation pattern, stop at the first sign and send the distance and what you observed.”
Handling Consent Updates Without Confusion
Consent is not a one-time checkbox. Update documentation when:
- the goal changes (for example, from “reduce barking” to “reduce leash reactivity”)
- equipment or handling changes (for example, adding a muzzle for safety)
- the plan shifts due to new baseline data
Record the update date and the specific change. Clients trust clarity more than volume, and the dog benefits from consistent expectations.
A Simple Checklist for Every Session
- Goal for this session stated in observable terms
- Threshold check and safety pause criteria
- Equipment and handling confirmed
- Homework assigned with one measurable task
- Notes recorded while details are fresh
When documentation and communication are consistent, training becomes less guesswork and more decision-making. That’s the whole point: the dog learns faster when everyone involved knows what “success” means today.
4.5 Risk Management for Off Leash Work and Real World Environments
Off-leash training is not a “remove the leash” moment. It’s a risk-management decision that starts with the dog’s current behavior under real distractions and ends with a plan for what happens when things go sideways. The goal is simple: set conditions so the dog can succeed, and build reliable recovery steps so you can stay safe.
Core Risk Questions Before You Unclip
Start with three questions you can answer in one minute each:
- Can the dog reliably respond at your current distance and distraction level? If recall works only in a quiet yard, you’re not ready for a park.
- What is the most likely “bad outcome” in this environment? Examples include chasing a cyclist, running to a child, grabbing food from the ground, or ignoring you during a sudden noise.
- What is your fastest safe way to regain control? If your only option is sprinting, you’re designing a problem.
A practical rule: off-leash is appropriate only when the dog’s behavior is already stable on leash at comparable distances, and you can reduce the chance of rehearsal errors.
Environment Mapping and Trigger Boundaries
Real environments have invisible edges: sightlines, sound carry, and escape routes. Map them before training.
- Sightline risks: open fields with long lines of sight increase the chance of spotting triggers early.
- Sound risks: sudden noises can shift attention faster than you can cue.
- Escape routes: fences, hedges, and gaps can turn a “brief wander” into a long chase.
Use a trigger boundary approach. Decide the distance at which you will intervene or end the session before the dog crosses threshold.
Mind Map: Off-Leash Risk Workflow
Equipment and Setup That Reduce Panic
A professional setup prevents “heroics.” Keep a backup leash or long line available even when the dog is off-leash. The point is not to use it constantly; it’s to avoid being forced into unsafe choices.
Position yourself so you can move with the dog rather than against it. If the dog tends to drift toward distractions, stand slightly angled to guide attention back to you.
Reinforcement placement matters. If the dog must search for treats, you’re adding a competing behavior. Use consistent delivery locations so the dog learns where “good things” appear.
Execution: Short Reps, Clear Criteria, Fast Recovery
Off-leash sessions should look like this:
- Warm-up on leash with the exact cues you’ll use off-leash.
- Short off-leash reps in the safest zone first.
- End the rep early if the dog shows early signs of threshold.
Early signs include stiff posture, rapid scanning, ignoring your body cues, or sudden fixation on a moving object. When you see them, don’t wait for the full problem behavior.
Example: Recall with a Bike Trigger
- Environment: quiet path with occasional cyclists.
- Plan: choose a starting zone where cyclists appear at the far end of your sightline.
- Criteria: recall works on leash at that distance with calm body language.
- Off-leash reps: only attempt when a cyclist is far enough that the dog can hear and orient to you.
- Recovery: if the dog locks on, you interrupt immediately using your preplanned cue and regain engagement with a high-value treat delivered near your leg.
If the dog fails once, you reduce distance, increase structure, and rebuild from a safer setup rather than repeating the same conditions.
Recovery Protocols That Keep Everyone Safe
Have a written interruption plan in your head before you start. It should include:
- What cue you use to interrupt (a cue the dog already understands).
- What you do immediately after (reinforce orientation, not punishment).
- When you end the session (for example, two threshold events in one session).
If the dog runs toward a high-risk target, your first job is safety for people and the dog, not winning the moment. Use your backup line if needed and then return to structured work.
Documentation That Improves the Next Session
After each session, record:
- distraction type and distance
- dog’s body language before failure
- how quickly you regained engagement
- what setup change helped
A simple note like “Recall held at 20 m near parked cars; failed at 35 m when a cyclist appeared” is enough to adjust boundaries next time.
Case Study: Doorway to Off-Leash Readiness
A dog named Milo learned recall in a yard but ignored it at the park gate. The trainer used a trigger boundary: off-leash only began after Milo had completed three calm recalls at the same distance while on leash. Then off-leash reps were limited to a short loop away from the gate. When Milo began scanning toward the gate, the session ended early. Over several sessions, the trainer reduced the leash dependence by increasing success conditions rather than increasing difficulty.
Mind Map: Recovery and Session End Criteria
Off-leash work becomes professional when it’s planned like a series of controlled experiments: you choose conditions, set criteria, and have a recovery plan ready before you test the dog in the real world.
5. Relationship Building and Baseline Skills for Effective Learning
5.1 Establishing Reinforcer Value and Building a Training History
A dog does not “know” a cue has value until the dog has learned that the cue predicts something worth wanting. Reinforcer value is therefore not a guess; it is a measured relationship between a dog’s current state and specific outcomes. Training history is the record of those relationships over time, so you can avoid repeating what already failed and can spot patterns when behavior changes.
Step 1: Define Reinforcers as Outcomes
Start by listing what you can deliver quickly and consistently. Common categories include food, play, access, grooming, and environmental rewards like sniffing. Then decide what “success” looks like for each category. For example, a food reinforcer should be small enough to deliver at a steady pace; a tug reward should have a clear start and stop so it doesn’t become a chaotic negotiation.
Example: If your dog loves tennis balls, you might assume “ball = reinforcer.” In practice, the dog may value the chase more than the ball itself. Test by offering the ball without chasing. If the dog ignores it, you’ve learned the reinforcer is not the object.
Step 2: Measure Reinforcer Value in the Moment
Reinforcer value depends on arousal, hunger, health, and competing motivations. Use quick preference checks before you train.
- Offer two items at the same time and observe which is taken first.
- Vary the delivery: give one item freely, then later pair it with a cue.
- Watch for refusal: if the dog turns away, the reinforcer is not currently valuable.
Example: A dog that refuses kibble during a walk may still take tiny cheese bits. That doesn’t mean the dog is “picky”; it means the current competing stimulus is stronger than the baseline food value.
Step 3: Build a Training History That Explains Behavior
Training history is a simple log of what you tried, what the dog did, and what happened next. The goal is not paperwork for its own sake; it is to connect cause and effect.
Track these fields every session:
- Dog state: hungry, tired, excited, stressed, or neutral.
- Environment: indoors, driveway, park edge, hallway.
- Reinforcer used: type, size, and whether it was delivered immediately.
- Marker or timing: how quickly you signaled and delivered.
- Behavior outcome: success rate and common errors.
- Notes on triggers: what was happening when performance dropped.
Example: If your dog reliably sits indoors but fails outdoors, your history may show that you used the same reinforcer in both places. Later you discover the outdoor reinforcer needs to be higher value or delivered more frequently at first.
Step 4: Use Reinforcer Value to Set Training Criteria
Criteria are the rules for when a behavior earns reinforcement. If reinforcer value is low, you must lower criteria or increase reinforcement frequency. If reinforcer value is high, you can raise criteria without losing motivation.
Example: Teaching “sit” with a low-value treat may work for the first few reps, then stall. Your history will show a pattern: success rate drops after the treat supply is consumed. The fix is either to switch reinforcers, reduce distractions, or increase the rate of reinforcement early.
Step 5: Prevent Reinforcer Drift
Reinforcer drift happens when the dog learns that the reinforcer is inconsistent, delayed, or delivered for the wrong behavior. Training history helps you catch drift by comparing sessions.
Common drift causes:
- Slow delivery after the marker.
- Reinforcer given after the wrong response due to handler timing.
- Reinforcer used too rarely, so the dog stops working.
Example: If you mark “yes” for a behavior but the treat arrives late, the dog may start offering random behaviors to “catch” the reward. Your notes will show more variable responding after you changed your delivery speed.
Mind Map: Reinforcer Value and Training History
Quick Integrated Example: One Session, Two Lessons
On Monday, you teach “sit” indoors using small kibble. Your history shows 90% success in the first five reps, then 55% as the dog gets bored. On Tuesday, you repeat the setup but use tiny cheese bits and deliver immediately after the marker. Success stays above 85% across the session. The integrated lesson is that reinforcer value and delivery speed determine how long the dog stays engaged, and your training history tells you exactly which variable changed.
Practical Checklist for This Part
- Test reinforcers before training, not after frustration.
- Log dog state, environment, reinforcer type, timing, and outcomes.
- Use history to set criteria and to correct drift.
- Treat refusal as data, not as attitude.
5.2 Marker Training and Timing for Clear Feedback
Marker training is how you tell a dog, “That behavior is the one that earns the next consequence.” The marker is not the reward; it predicts the reward. Timing is what makes the prediction believable.
The Marker as a Bridge Between Behavior and Reward
A marker works best when it is consistent, brief, and always followed by reinforcement (at least during learning). If the marker happens after the dog has already moved on, the dog learns a different lesson than you intended.
Use one marker word or sound, such as “Yes,” or a click. Choose something you can deliver instantly without changing your tone or volume. Then decide what the marker means: “The behavior I just saw will pay.”
Example: You want sit. You wait for the dog’s rear to touch the ground, then mark immediately, then deliver a small treat from a predictable location. If you mark while the dog is standing up, the dog may learn that standing up is what earns treats.
Timing Rules That Prevent Confusing Lessons
Timing is easiest when you follow three rules.
- Mark the exact behavior you want. For sit, mark the moment the dog’s hips hit the floor. For hand targeting, mark when the nose touches your palm.
- Deliver reinforcement quickly after the marker. The dog should experience the reward as the consequence of the marked moment.
- Avoid marking “almost.” If the dog is still moving toward the target, don’t mark. Wait for the clean, observable criterion.
Example: Teaching “leave it.” If the dog glances away, you might be tempted to mark. Instead, define the criterion as “nose turns away and stays away for one beat,” then mark only when that happens.
Choosing Criteria and Making Them Observable
A marker cannot fix unclear criteria. If you cannot describe the behavior in one sentence, the dog cannot learn it reliably.
Write your criterion as an observable event:
- “Front paws on the mat”
- “Nose touches my hand”
- “Four paws on the floor”
- “Head turns toward me”
Then decide how strict you are at first. Early sessions should use criteria that the dog can succeed at quickly.
Example: For “down,” start by marking any lowering of the body toward the floor, then gradually require full down. If you jump straight to full down, you’ll get fewer marks and slower learning.
Marker Timing with Real-World Motion
Dogs move fast. Your job is to anticipate where the behavior will land.
- Position yourself so you can see the dog’s body clearly.
- Reduce distractions so you can focus on the moment of contact.
- Use short training bursts to keep your attention sharp.
Example: Teaching recall in a yard. If you are across the yard, you may mark late. Start closer, mark on arrival, then increase distance only after timing is accurate.
Common Timing Errors and What They Teach
Mistakes are informative because they create predictable learning.
- Late marker: You mark after the dog has already changed behavior. The dog learns the later behavior.
- Early marker: You mark before the dog completes the target. The dog learns the approach, not the finish.
- Marker without reinforcement: The dog learns that the marker is not reliable.
- Multiple marks for one behavior: The dog may treat the marker as a signal to keep doing the same thing rather than to finish.
Example: If you mark “Yes” repeatedly while the dog is sitting, the dog may start to look for the next mark by staying in the same position longer than you intended.
Building Marker Reliability Step by Step
Start with a behavior that is easy to produce on cue or on lure.
- Set up success. Use a quiet space and a dog that is motivated for treats.
- Mark only the criterion. One mark per successful repetition.
- Reinforce immediately. Keep the delay short enough that the dog connects the dots.
- Repeat with consistency. Same criterion, same marker, same reinforcement pattern.
Example: Sit training. Mark once when the dog sits. Treat. Reset. Repeat. After the dog reliably sits, you can add the cue word right before the behavior, but keep the marker timing the same.
Mind Map: Marker Training and Timing
A Practical Micro-Plan for Your Next Session
Choose one skill and run 10–20 repetitions.
- Define the criterion in one sentence.
- Mark once per success.
- Deliver a small treat immediately.
- If you miss the timing, pause and reset rather than marking anyway.
Example: For hand targeting, mark when the nose touches your palm. If the dog hovers near your hand, wait for contact. When contact is clean, mark and treat, then move your hand slightly to keep the dog engaged without changing the criterion.
5.3 Engagement Skills Including Orienting and Following
Engagement is the dog’s steady willingness to notice you and use you as a reference point. In practice, that means the dog can shift attention to you quickly, stay connected during mild distractions, and follow your movement without needing constant corrections. Orienting and following are two core skills that make later obedience training cleaner, because you spend less time fighting attention and more time shaping behavior.
Foundations of Orienting and Following
Orienting is the dog turning its head or body toward you in response to your presence, movement, or a cue. Following is the dog moving alongside or behind you in a predictable pattern, usually while you change direction or speed.
Start with a simple rule: the dog earns reinforcement for noticing you, not for guessing. If the dog looks away, you reduce the difficulty rather than increasing pressure. If the dog checks in, you reward promptly and clearly.
Example: In a quiet room, hold a treat at your side. Take one small step. The moment the dog orients toward you, mark and deliver the treat near your leg. Repeat with tiny steps until the dog starts checking your movement without being prompted.
Building Orienting with Clear Criteria
Use a marker or a consistent verbal click, then reward the exact behavior you want. Begin with low criteria: any head turn toward you counts. Gradually require more: head turn plus eye contact, then head turn plus body angle toward you.
A helpful way to avoid confusion is to separate “noticing” from “staying.” First teach orienting as a quick, single event. Only after it’s reliable do you add a brief hold.
Example: If the dog looks at you for half a second, reward. Next session, reward only when the dog’s eyes are on you for about one second. If the dog starts offering longer looks but then breaks, you’ve raised criteria too fast—drop back one step.
Following as Movement Literacy
Following is easier when the dog understands that your movement predicts reinforcement. You can teach this by pairing your steps with food delivery at a consistent location.
Start with a “shadow walk.” Walk slowly in a straight line. Reward the dog for staying within a comfortable zone near your leg. When the dog drifts, stop. Wait for the dog to re-enter the zone, then resume.
Example: If the dog lags behind, don’t tug the leash forward. Instead, stop moving. The dog usually reorients to you to figure out what changed, and that’s when you reward.
Progression from Static to Dynamic
Move through three stages:
- Static attention: dog orients while you stand.
- Low-motion following: you move straight at a slow pace.
- Direction changes: you pivot and continue, rewarding the dog for tracking your new path.
Keep sessions short and end while the dog is still successful.
Example: Do five minutes of orienting in place, then five minutes of straight-line following, then two minutes of gentle pivots. If the dog starts to wander, stop the pivots and return to straight-line work.
Managing Common Failure Modes
Dog stares but doesn’t move: reward orienting, then add a tiny step only after the dog checks in. The dog learns that attention leads to movement.
Dog follows but ignores cues later: you’ve likely reinforced following too much without teaching cue meaning. Use cues sparingly at first, and reward the cue-linked behavior, not random proximity.
Dog swings wide or crowds: adjust your reinforcement position. If the dog crowds your leg, deliver rewards slightly farther forward. If the dog swings wide, reward closer to your body and slow down.
Mind Map: Engagement Skills
Integrated Practice Plan for One Session
Begin with orienting in place for two minutes. Then do straight-line following for three minutes, rewarding only when the dog stays in the zone. Finish with two minutes of direction changes, rewarding the first correct tracking step after each pivot.
Example: If the dog misses a pivot and drifts away, don’t repeat the pivot immediately. Return to straight-line following for one minute, then try a single pivot again. This keeps learning tied to success rather than repeated failure.
When orienting and following are solid, later obedience skills become less about “getting through” distractions and more about choosing the right behavior at the right moment. Engagement is the foundation that makes that choice possible.
5.4 Building Calm Through Structured Settling and Relaxation Cues
Calm is not a personality trait you hope for; it’s a behavior you can train. The goal of structured settling is to teach the dog what “safe and low-effort” looks like in your presence, then to make that pattern easy to repeat when the environment gets busy.
Foundational Idea: Calm Is Reinforced Low Arousal
A dog settles when three things line up: the dog can succeed, the dog gets something worthwhile for staying settled, and the dog is not repeatedly pushed over threshold. If the dog is already over threshold, “calm cues” become background noise.
Start with short sessions where the dog is already somewhat comfortable. If your dog is panting hard, scanning constantly, or repeatedly trying to escape, reduce distance, lower stimulation, and shorten the settling duration.
Step 1: Choose a Relaxation Cue and a Settling Behavior
Pick one cue word or hand signal that means “settle.” Keep it consistent. Then decide what the dog will do: a down with loose body, a sphinx-like down, or a mat sit. Choose the position that your dog can hold without fighting their own body.
Example: If your dog naturally lies down during quiet moments, use that as the target. If your dog prefers sitting, start with a sit on a mat and only later shape a down.
Step 2: Build the Cue with a Marker and a Clear Reward
Use a marker like “yes” (or a click) to mark the exact moment the dog is relaxed enough to count. Reward should be immediate and of high value for that dog.
Criteria should be simple at first: loose posture, reduced head movement, and slower breathing. You are not asking for sleep; you’re asking for “less effort.”
Step 3: Structure Sessions with a Predictable Rhythm
A reliable rhythm prevents accidental pressure. Use a repeating loop:
- Settle cue
- Wait for the dog to offer the behavior
- Mark and reward
- Brief pause with no cue
- Repeat
Keep the pause short enough that the dog stays engaged, but long enough that you’re not constantly cueing. This teaches the dog that calm is not only a response to a command; it’s also a state that earns reinforcement.
Step 4: Shape Duration Without Turning It into a Test
Increase duration in tiny increments. If the dog breaks position, you didn’t fail the dog—you set the bar too high too fast.
Example progression for a down on a mat:
- Round 1: mark within 1–2 seconds of the down
- Round 2: mark after 3–4 seconds
- Round 3: mark after 6–8 seconds
- Continue only if the dog’s posture stays loose and the dog’s attention remains soft.
Step 5: Add Relaxation Cues for Real Life Contexts
Once the dog can settle reliably in a quiet room, generalize by changing one variable at a time: different room, different time of day, different person, or mild background noise.
Use the cue before the dog gets busy, not after. If you wait until the dog is already revved up, you’re cueing during the wrong state.
Example: Before guests arrive, ask for the mat settle while people are still in the hallway. Reward calm posture until the dog’s body language stays loose.
Step 6: Proof the Cue with “Calm Under Mild Distraction”
Proofing means the dog can settle even when something slightly interesting happens. Start with low-level distractions that don’t cause frantic scanning.
Example ladder:
- Person moves slowly behind a door
- Light foot traffic in the room
- A dropped object far away
For each step, keep sessions short and reward more frequently at first. If the dog starts to stiffen, step back to the last successful level.
Mind Map: Structured Settling and Relaxation Cues
Common Mistakes and Fixes
- Cueing repeatedly: If you keep repeating the cue, you teach the dog to ignore it until the last repetition. Instead, cue once, wait, and adjust difficulty.
- Rewarding the wrong moment: If you mark when the dog is about to break position, you reinforce the transition out of calm. Mark the calm posture itself.
- Pushing duration too fast: A dog that can’t hold calm will practice tension. Increase duration only when the dog’s body stays loose.
Practical Example: A 6-Minute Training Block
Minute 0–1: Set up mat, cue once, mark and reward any loose down/sit.
Minute 1–3: Increase criteria slightly by waiting a few extra seconds before marking.
Minute 3–5: Add mild distraction, such as slow movement nearby, and keep rewards frequent.
Minute 5–6: End on an easy rep with a quick mark to preserve motivation.
Structured settling works because it turns calm into a measurable, repeatable behavior. Your job is to keep the dog in the zone where calm is possible, then reinforce it consistently.
5.5 Creating Training Setups That Reduce Errors and Increase Success
A training setup is the environment plus the plan: what the dog can access, what the handler can control, and what the dog is likely to do next. When setups are good, errors drop because the dog is given fewer chances to fail. When setups are bad, errors rise because the dog is forced to guess.
Core Idea: Control the Inputs Before You Demand the Outputs
Start with a simple rule: if the dog is likely to make an error, reduce the difficulty rather than increasing your corrections. Difficulty comes from distance, duration, distraction level, movement speed, and the dog’s internal state (sleep, hunger, stress, arousal). Your job is to tune those inputs so the dog can succeed at the current learning stage.
Error Sources You Can Design Around
- Trigger intensity is too high: the dog sees or hears the target too strongly.
- Timing is too late: the marker or reward arrives after the dog has already moved into the wrong behavior.
- Reinforcement is inconsistent: the dog sometimes gets paid for the right choice and sometimes not.
- Criteria is too steep: you ask for a behavior that’s not yet fluent.
- The dog is over threshold: the dog can’t learn because it’s busy reacting.
Each source has a matching setup fix.
Mind Map: Training Setup Components
Step 1: Choose a Success Target Before the Session
Pick a measurable success rate for the skill you’re training. A practical target is 80–90% correct choices during the learning phase. If you’re getting fewer than that, your setup is too hard. Lower the difficulty until the dog can reliably offer the behavior you want.
Example: Teaching “leave it” near a dropped treat.
- Too hard: treat is within easy reach and the dog has a history of grabbing.
- Better setup: start with the treat placed farther away, use a barrier or longer line, and reward the dog for orienting away at the earliest sign of attention shift.
Step 2: Build a Difficulty Ladder You Can Step Down
A ladder is a list of small changes that reduce the chance of failure. Keep it specific.
- Distance ladder: farther to closer.
- Distraction ladder: quiet room to hallway to mild street noise.
- Movement ladder: stationary handler to slow steps to brisk steps.
- Duration ladder: one second to three to five.
Example: Teaching “sit” while a person walks past.
- Start with the passerby far enough that the dog can sit without lunging.
- Reward sit immediately.
- Only after several clean reps, reduce distance by a small amount.
Step 3: Use Equipment as a Learning Tool, Not a Crutch
Equipment should help you control outcomes.
- Use a long line or barrier to prevent rehearsing the wrong behavior.
- Use a front-clip harness or stable leash handling when you need physical control for safety.
- Keep reward delivery consistent: if you’re kneeling to feed, do it the same way each time.
Example: Recall practice in a yard.
- If the dog reliably ignores you when a squirrel appears, don’t practice recall at full squirrel intensity.
- Instead, set up with the dog on a line, reward fast turns back to you, and only later remove the line when the dog’s success rate is high.
Step 4: Engineer Timing with a Simple Reward System
Errors often happen because the dog’s behavior changes faster than the handler’s feedback.
- Mark at the exact moment the dog performs the target behavior.
- Deliver the reward quickly and predictably.
- If you can’t deliver fast enough, reduce the difficulty so the dog’s correct behavior is easier to repeat.
Example: Teaching “heel” position.
- If the dog drifts, don’t wait for the drift to become obvious.
- Reward the moment the dog’s shoulder is in the right zone, then reset before the dog rehearses the wrong position.
Step 5: Prevent Errors with “Reset Before Failure” Rules
A reset is not a punishment; it’s a return to a setup where success is likely.
- Decide in advance what counts as an error.
- If the dog approaches that point, you reset immediately.
- Reset can mean stepping away, increasing distance, changing the angle, or pausing.
Example: Doorbell reactivity.
- Error point: dog escalates from barking to lunging.
- Setup: doorbell is played at a volume and distance that keeps the dog below escalation.
- If you see early signs of escalation, you end the trial, lower intensity, and try again.
Mind Map: Reset Decision Logic
Step 6: Track Setup Variables, Not Just Outcomes
After each mini-block, note what you changed: distance, distraction, duration, handler movement, and reward type. This turns “it felt harder today” into something you can adjust next rep.
Example: You’re training “wait” at a doorway.
- If errors spike when you move your feet faster, slow down.
- If errors spike when the dog is hungry, adjust reward value or feed schedule.
Step 7: Close the Loop with a Clean End to the Session
End on a win. A good finish preserves motivation and prevents the dog from practicing frustration. If you had a rough block, reduce difficulty for the final reps.
Example: After several imperfect “leave it” trials, switch to a version where the dog can succeed instantly, then stop.
A well-designed setup is a quiet agreement between you and the dog: “This is learnable.” When you reduce error opportunities, you don’t just get cleaner behavior—you get faster learning with fewer confusing lessons.
6. Obedience Training Using Operant Conditioning and Shaping
6.1 Teaching Sit and Down with Shaping and Reinforcement Placement
Core Goal and Why It Works
Sit and down are useful because they create predictable body positions that are easy to reinforce and easy to combine with other cues. The training method here uses shaping: you reinforce small, accurate steps toward the final behavior while placing reinforcement so the dog’s attention stays with you rather than wandering off.
Setup That Prevents Confusion
Start with a dog that can focus for 30–60 seconds. Use a quiet area and a leash if needed. Choose one marker word or click and keep it consistent. Reinforcement placement matters: keep treats where the dog can find them quickly without searching.
Reinforcement placement rule: reward the behavior, not the dog’s guess. If the dog is already looking at your hand, you’ll accidentally reinforce attention instead of the position.
Shaping Plan from First Movement to Full Position
You will progress through clear criteria. If the dog stalls, you lower the criteria rather than repeating the same cue louder.
- Start with “lowering” behavior: reinforce any moment the dog’s rear moves toward the floor.
- Refine for sit: reinforce when the dog’s rear is on the ground with a stable posture.
- Refine for down: reinforce when the dog’s front end lowers and the body is fully down.
For sit, the dog’s rear is the key target. For down, the dog must also bring the front end down.
Mind Map: the Sit and Down Shaping Flow
Reinforcement Placement Techniques That Keep Learning Clean
Use two placement styles depending on what you’re shaping.
1) Near-target placement for sit
- Hold treats low and slightly in front of the dog’s nose.
- When the dog’s rear starts to lower, mark and deliver the treat close to where the dog’s body is moving.
- Keep your hand movement small so the dog learns the position, not the motion.
2) Forward-and-down placement for down
- Move the treat forward and down slowly enough that the dog must reach and lower the chest.
- Mark the moment the dog’s front end drops, then deliver the treat on the floor near the dog’s paws.
If the dog stands up to get the treat, you’re delivering too far forward or too high. Bring the treat closer to the dog’s body and slow the motion.
Example: Teaching Sit in Five Short Steps
Assume the dog is standing and watching you.
- Step A: Wait. The instant the dog’s rear dips, mark and deliver a treat near the dog’s hip.
- Step B: Now reinforce only deeper lowering. If the dog offers a full sit, reward immediately.
- Step C: Reinforce sit with stability. If the dog pops up right away, don’t mark that version; wait for a steadier sit.
- Step D: Add a brief cue only after the dog is already succeeding. Say “sit” once, then reward the position.
- Step E: Practice with small distractions. Reward faster for correct sit, and keep your cue quiet and consistent.
Example: Teaching Down Without Skipping the Hard Part
Down often fails because trainers jump from “rear down” to “full down” too quickly.
- Step A: Reinforce any front-end lowering while the dog is near standing.
- Step B: Reinforce elbows toward the floor. If the dog only crouches, reward the crouch and keep criteria gradual.
- Step C: Reinforce full down only when the dog’s body is on the floor for a brief moment.
- Step D: Once down is reliable, add the cue “down” and keep the hand motion minimal.
Criteria, Timing, and Error Correction
- Timing: mark the instant the correct position appears. If you mark after the dog stands back up, you’ve trained the wrong behavior.
- Criteria: raise difficulty only after several successes in a row. If success drops, lower criteria to the last reliable step.
- Avoid cue repetition: if you say “sit” three times, the dog learns that the cue is a background sound, not a request.
Quick Troubleshooting Mind Map
Reinforcement Placement Practice Checklist
- Treat is delivered within a second.
- Treat lands near the dog’s target body area.
- Your hand path is consistent and not exaggerated.
- You reward the position, not the chase.
Session Structure That Builds Momentum
Do 6–10 successful repetitions per behavior, then switch. End on a win. If the dog is getting it right, you can start adding duration later; for now, focus on clean sit and clean down first.
6.2 Teaching Stand and Recall Readiness with Controlled Reinforcement
Stand and recall readiness are two skills that share the same training engine: the dog learns that staying in a specific body position (stand) and orienting toward the handler (recall readiness) reliably produces reinforcement. The difference is timing and criteria. Stand is a posture cue; recall readiness is a state of attention that makes recall easier and safer.
Core Concepts Before You Start
Controlled reinforcement means you decide exactly what happens after the dog performs the target behavior, and you deliver it at a consistent moment. If reinforcement timing is sloppy, the dog will still learn something, but it may be “look at the handler sometimes” rather than “stand when asked” or “come when called.”
Recall readiness is not the full recall behavior yet. It’s the moment the dog is prepared to move toward you: eyes on you, body angled toward you, and reduced attention on distractions. You can build it with short, frequent successes.
Criteria is the bar you set for earning reinforcement. Start low enough that the dog can succeed repeatedly, then raise difficulty by adding duration, distance, or distraction.
Mind Map: The Training Flow
Step 1: Stand with Clear Shape and Fast Feedback
Begin in a low-distraction area. Use a marker if you have one, or a consistent verbal marker like “yes.” Ask for stand using your cue, then reinforce the exact moment the dog achieves the posture.
Example: You say “Stand,” the dog hesitates and shifts weight. You do not reinforce. The dog finally straightens into a stable stand. Mark immediately and deliver a small treat at your feet or slightly in front of your body.
Raise criteria gradually. First, reinforce any stand that lasts about one second. Next, reinforce stands that last three seconds. Then require a brief stillness—no stepping forward or turning away.
A practical trick: if the dog keeps stepping forward, reduce the lure distance and reward slightly behind the dog’s nose line so the dog’s body stays aligned rather than moving toward you.
Step 2: Build Recall Readiness Without Calling Yet
Now you’ll train the “ready to come” state. Stand still and present a mild cue to orient, such as your body turning slightly toward the dog and a soft “ready” signal. The dog doesn’t have to move; it just needs to orient toward you.
Reinforce the first moment the dog’s head and shoulders face you. If the dog looks away quickly, that’s fine—your criteria is too high or the distraction is too strong. Lower difficulty: increase distance from the distraction or shorten the time you wait before marking.
Example: A dog is sniffing the ground. You wait for a brief head lift and shoulder turn toward you. Mark and reward immediately. After several repetitions, the dog will start offering that orientation more often because it predicts reinforcement.
Step 3: Link Stand to Readiness with Controlled Reinforcement
This is where the two skills become a system. Ask for stand, then reinforce readiness while the dog remains standing.
Example sequence:
- Cue “Stand.”
- When the dog is standing, wait for the dog to look at you.
- Mark and reward that look while the dog is still in the stand.
- Repeat two or three times, then release.
If you only reinforce the stand posture, the dog may stand but keep scanning away. If you only reinforce looking at you, the dog may not hold stand long enough. Your goal is to reinforce both: posture first, attention second, without letting the dog practice the wrong pattern.
Step 4: Add Movement and Short Recall Readiness Trials
Once the dog can stand and look at you reliably, add a small handler movement. Take one step sideways or forward while the dog remains standing. Reinforce the dog’s continued orientation.
Then run readiness trials: you take a step, the dog stays oriented, you mark and reward. Only after the dog shows consistent readiness do you introduce the actual recall cue.
When you do introduce recall, keep it short and easy. Call once, reward immediately upon arrival, and then return to stand practice. This prevents the dog from learning that recall is a long, uncertain journey.
Common Failure Points and Fixes
- Reinforcing too late: If you mark after the dog already moved away, you teach “leave the stand to get treats.” Fix by marking the exact moment the dog is correct.
- Criteria jumps: If stand duration suddenly increases, the dog will break posture. Fix by stepping back one level and rebuilding.
- Over-distraction: If the dog can’t find readiness, reduce distance to the distraction or practice in a quieter area.
Session Structure That Keeps Learning Clean
A simple loop works well: warm-up with easy stand, switch to readiness orientation, then combine them for two to four linked repetitions, ending with a short recall success. Short sessions with high success rates teach faster than long sessions with repeated errors.
By controlling reinforcement timing and criteria, stand becomes a stable posture and recall readiness becomes a predictable attention state. Together, they make recall feel like the next logical step rather than a surprise request.
6.3 Teaching Heel Positioning with Luring Fading and Reinforcement Criteria
Heel positioning is the skill of keeping the dog near the handler’s leg with attention on the handler’s movement, not on the environment. The goal is not “perfect walking forever,” but a reliable position that you can earn, maintain, and recover from.
Core Concepts Before You Start
Start by defining what “heel” means for your training plan. Use a consistent target location, such as the dog’s shoulder aligned with your knee, with the dog’s body facing forward. Then decide what the dog should do with its attention: glance up often enough to stay coordinated, not stare at you continuously.
Heel is easiest when you separate three tasks: (1) getting into position, (2) staying in position while you move, and (3) responding when you change speed or direction. Luring helps with (1) and early (2). Fading helps the dog learn the position without needing the lure. Reinforcement criteria help you avoid accidental “wrong behavior rewards,” like forging ahead or lagging.
Luring Phase with Clear Criteria
Use a lure to guide the dog into the target spot. Keep the lure low and close to your leg so the dog learns the location, not the motion of your hand. Mark the moment the dog’s shoulder is aligned and the dog’s body is facing forward.
A practical setup:
- Begin stationary. Reward the first correct alignment.
- Take one step, mark and reward if the dog stays aligned.
- Increase to two steps, then three, only if the dog remains in position.
Reinforcement criteria during luring should be strict about location but flexible about speed. If the dog is aligned but your pace is slow, that’s still a win. If the dog is aligned but behind your leg by a noticeable amount, that’s a miss.
Fading the Lure Without Losing the Skill
Fading means removing the lure prompt while keeping the reinforcement for the same behavior. Do it gradually so the dog doesn’t have to guess.
Use a “prompt-to-criteria” ladder:
- Lure visible, reward only perfect alignment.
- Lure visible but less obvious, reward only perfect alignment.
- Lure hand motion becomes a consistent cue near your pocket, reward only perfect alignment.
- Cue becomes a hand position with no lure food, reward only perfect alignment.
- No visible cue, reward based on the dog’s position.
If the dog starts drifting when you reduce the lure, you faded too fast. Go back one rung, then try again with smaller changes.
Reinforcement Criteria That Build Reliability
Reinforcement criteria are your rules for when you mark and feed. For heel, criteria should include both position and movement quality.
A simple criteria set you can apply immediately:
- Position: shoulder aligned within a small tolerance; dog faces forward.
- Timing: mark within a second of the correct position.
- Stability: reward for staying aligned for at least two steps before you raise difficulty.
Then use a reinforcement schedule that matches training stage:
- Early: frequent rewards for correct alignment.
- Middle: reward every 2–4 correct steps.
- Later: reward after short sequences, then occasionally, while you still maintain the same position standard.
Avoid the common mistake of rewarding “almost there” too often. If you do, the dog learns that being slightly off is good enough.
Mind Map: Heel Positioning Workflow
Example: A Short Training Session That Doesn’t Drift
Start with a dog that can sit and follow basic hand cues.
- Stationary: Lure into heel position. Mark and reward when the shoulder aligns.
- One step: Take one step. Mark if the dog stays aligned. Reward.
- Two steps: Repeat. If the dog forges ahead, reduce to one step and tighten your lure placement.
- Fading rung: Make the lure less visible by keeping your hand closer to your pocket. Keep criteria the same.
- No lure: After three clean trials, remove the lure. If the dog drifts, return to the previous rung.
After 8–12 successful repetitions, stop while the dog is still accurate. If you keep going through sloppy reps, you train the dog to be sloppy.
Example: Handling a Common Failure Mode
If the dog repeatedly lags behind during the move, check two things. First, your lure may be too far forward, encouraging the dog to trail. Second, your reinforcement may be too slow, so the dog learns to “arrive late.” Fix it by rewarding earlier alignment and keeping the lure closer to your leg during the first two steps.
Quick Checklist for Your Criteria
- Mark only when the shoulder is aligned.
- Reward stability for at least two steps before increasing distance.
- Fade prompts one rung at a time.
- If accuracy drops, reduce difficulty immediately.
Heel training is mostly about consistency: same target, same criteria, and prompt-to-reward timing that teaches the dog what “right” feels like.
6.4 Teaching Leave It and Drop It with Safety Focused Protocols
Leave it and drop it are two sides of the same safety coin: one prevents access, the other restores control after access has happened. The key difference is timing. “Leave it” stops the dog from taking something; “drop it” gets the dog to release what’s already in the mouth. Both skills should be trained so the dog can succeed even when you are not perfectly fast.
Foundational Concepts That Make Safety Reliable
Start with the idea of competing behaviors. When the dog chooses to look away, back up, or sit, you can reinforce that choice. When the dog chooses to grab, you need a plan that prevents rehearsal of the grabbing pattern.
Safety also depends on reinforcement clarity. If the dog releases, the dog must reliably get the promised consequence. If the dog ignores the item, the dog must reliably get the promised consequence. Inconsistent timing creates “maybe” behavior, which is not what you want around food, toys, or hazards.
Finally, set your environment so you can control outcomes. If the dog can reach the item before you can mark and reinforce, you are training failure.
Mind Map: Leave It and Drop It
Teaching Leave It with a Stepwise Protocol
-
Start with a low-value item. Place a treat in your closed fist near the dog’s nose. Say nothing yet. Wait for the dog to stop trying to get it—often a head turn or licking your hand. The moment the dog shows an alternative behavior, mark and open your hand to deliver the treat from your palm.
-
Add the cue only after success. Once the dog reliably stops reaching and offers a pause or head turn, introduce the cue “leave it” right before the dog would normally reach. Reinforce the alternative behavior immediately.
-
Move from fist to floor. Put a treat on the ground at a distance where the dog cannot grab it before you can mark. If the dog leans in, you are too close. Increase distance or lower temptation. Mark and feed from your hand when the dog looks away or steps back.
-
Generalize to real objects. Use safe, non-food items first, like a cloth strip. Practice “leave it” when the item is stationary, then when it is lightly moved. Keep the dog’s job simple: notice the item, then choose you.
A practical example: your dog spots a dropped snack on the sidewalk. You cue “leave it,” then reward any head turn or step away. If the dog grabs, you have not trained the current difficulty level. Reduce distance next session and rebuild.
Teaching Drop It with a Trade That Doesn’t Create Conflict
-
Use a safe item and a predictable trade. Offer a toy or chew the dog can hold without panic. Present a higher-value food near the dog’s nose. The moment the dog’s mouth opens and the item leaves the mouth, mark and feed the food.
-
Avoid yanking. Pulling or grabbing the item teaches the dog that release is followed by discomfort or a tug-of-war. Instead, make release the easiest path to the better reward.
-
Add the cue after the behavior is fluent. Once the dog consistently releases when you present the food, add “drop it” just before the trade.
-
Build duration and reliability. Start with quick trades. Then practice holding the item for one extra second before you cue. Increase slowly so the dog learns that waiting does not cost the trade.
A practical example: your dog picks up a sock. You calmly bring a very smelly, high-value treat close to the nose and cue “drop it.” When the mouth opens, you mark and feed. The sock is not worth a chase; the trade is.
Safety Focused Protocols for Real Life
- Prevent rehearsal. If the dog can repeatedly grab and run, you are reinforcing the wrong behavior. Use barriers, leashes, and controlled access.
- Use management before correction. Correction is not a substitute for setup. If you cannot guarantee the dog will succeed, change the environment.
- Keep items safe. Train with items that are non-toxic and not likely to cause injury if swallowed.
- Plan for high arousal. When the dog is over threshold, reduce distance, lower temptation, and return to earlier criteria.
Quick Troubleshooting Checklist
- Dog ignores cue and grabs: you increased difficulty too fast; reduce access and rebuild.
- Dog releases but immediately grabs again: reinforce the redirection to you, not just the release.
- Dog hesitates to release: trade value is not high enough or the dog expects conflict; improve the trade and remove pulling.
When leave it and drop it are trained with clear criteria and safe trades, you get something practical: a dog that can make the safer choice under pressure, not just in a quiet room.
6.5 Teaching Impulse Control Skills Including Wait and Door Manners
Impulse control is not “being good.” It is learning that pausing, checking in, and waiting reliably produce outcomes. In training, you build that reliability by combining clear cues, consistent reinforcement, and careful management of difficulty.
Core Concepts That Make Wait Work
A wait cue means: “Stop moving toward the goal and keep your body under control.” The dog must understand three things: what behavior counts, when the behavior is allowed to end, and what happens if the dog breaks the rule.
Start with a low-stakes version. For example, teach wait while the dog is already calm and the “door” is actually a closed gate. If the dog can’t succeed, the setup is too hard, not the dog.
Reinforcement matters. Use a reward that is valuable enough to compete with the temptation. Then deliver it in a way that doesn’t accidentally teach “breaking the wait earns the reward.” A common fix is to reward the dog for stillness while you remain motionless, then release with a separate cue.
Skill Building Steps for Wait
- Define the behavior: Decide what “waiting” looks like. Common options are sit, stand, or a specific “place” position. Pick one and stick to it.
- Add the cue at the right time: Say the wait cue only when the dog is already in the position. If you say it after the dog starts moving, the cue becomes a predictor of movement.
- Use a short duration ladder: Begin with one second, then two, then three. Increase duration only when the dog succeeds multiple times.
- Separate “wait” from “release”: Use a release cue like “Okay” or “Free.” The dog learns that the wait cue means “not yet,” and the release cue means “now you may go.”
- Reinforce the pause, not the chase: Reward the dog while they are still. If the dog breaks the wait to reach you, you’ve reinforced the wrong behavior.
Example: Teaching Wait Before a Walk
You hold the leash and stand still. The dog is in a sit. You say “Wait,” count one, then say “Okay” and take one step toward the door. If the dog stays seated, you reward with a small treat delivered near the dog’s mouth. If the dog stands up early, you reset without scolding, reduce the difficulty (shorter duration), and try again.
Door Manners as a Wait with a Moving Environment
Door manners are wait skills applied to a real-life trigger: the door opens, the dog wants to go, and the environment changes. Your job is to make the dog’s “stillness” easier than the “launch.”
A practical door routine has three phases: approach, pause, and release.
- Approach: The dog is positioned (often sit or stand) at a consistent spot.
- Pause: You open the door slightly or hold it closed while the dog remains still.
- Release: You open fully and use the release cue.
If the dog lunges at the moment the door moves, you’re not ready for that level of door movement. Reduce the opening, increase the distance from the door, or slow your hand movement.
Example: Teaching Door Manners with Controlled Opening
Place the dog on a mat near the door. Stand behind the dog’s shoulder so you can open the door without blocking the dog’s view. Say “Wait,” then open the door a few inches. Count one. If the dog stays on the mat, close the door, reward, and repeat. Once the dog succeeds with small openings, increase to a half-open door, then a wider opening, always keeping the dog’s success rate high.
Common Errors and Fixes
- Error: Wait cue said while the dog is already moving. Fix by waiting for stillness first, then cue.
- Error: Reward delivered after the dog breaks. Fix by rewarding only during correct pauses.
- Error: Door opens fully before the dog is ready. Fix by using smaller door movements and shorter durations.
- Error: Release cue is inconsistent. Fix by always releasing with the same word and timing.
Mind Map: Wait and Door Manners Training Plan
Putting It Together: A Simple Session Flow
Begin with five short wait reps in a quiet area. Then move to the door routine with the same position and the same wait cue. Keep each rep brief, reward calm stillness, and release only when the dog has earned it. End the session on a success so the dog leaves with a clear pattern: pause first, then go.
7. Managing Behavior Through Antecedent Strategies and Environmental Design
7.1 Preventing Problem Behavior with Management and Barriers
Problem behavior usually happens when three things line up: a trigger shows up, the dog has the opportunity to do the behavior, and the behavior works well enough in that moment. Management and barriers don’t “fix” the dog; they reduce the chance of the problem happening long enough for learning to catch up. Think of it as building a safer training environment where good choices are easier than bad ones.
Core Idea: Make the Right Behavior the Default
Management works by changing access, distance, timing, and the dog’s ability to rehearse the unwanted pattern. If a dog can repeatedly practice barking at the door, the barking becomes the fastest route to relief or attention. If the dog can’t reach the trigger, you can teach an alternative response without stacking more repetitions of the problem.
Mind Map: Management Inputs and Outcomes
Step 1: Identify the Behavior Loop in Plain Terms
Write a quick loop for the problem behavior: Trigger → Opportunity → Behavior → Payoff. Example: “Doorbell rings → dog can see the door → barking → owner speaks or approaches.” The payoff might be attention, movement toward the trigger, or the dog’s own relief from doing something familiar. Once you know the payoff, you can decide what to block and what to replace.
Step 2: Block Opportunity with Barriers That Fit the Dog
Barriers should prevent the dog from reaching the trigger, not just “discourage” them.
- Gates and baby gates: Use them to separate rooms during high-risk times, like when guests arrive.
- Crates or pens: Place the dog where they can rest while still being part of the household. A crate is not a punishment box; it’s a location that prevents rehearsal.
- Furniture placement: A sofa can create a visual barrier so the dog can’t lock onto a window or hallway.
- Leash management indoors: A light drag line can prevent sudden launches while you supervise. The goal is safety and interruption, not constant correction.
Example: A dog that lunges at the front window during delivery days is given a pen with a partial visual block. The owner also sets up a “settle mat” routine before deliveries arrive.
Step 3: Control Distance So the Dog Can Learn
Distance is a training tool. If the dog is already over threshold, management becomes the main strategy until arousal drops.
- Start farther away than you think you need.
- Move closer only when the dog can notice the trigger without escalating.
- Keep sessions short so the dog doesn’t practice frustration.
Example: For leash reactivity, the handler chooses a route where the dog sees people at a distance that allows calm scanning. The handler reinforces quiet attention and turns away before the dog reaches the point of lunging.
Step 4: Prevent Rehearsal with Timing and Preemption
Many problem behaviors are “fast habits.” Preemption means acting before the dog starts the pattern.
- Watch for early signs: stiffening, hard staring, rapid head turns, sudden freezing, or frantic pacing.
- Intervene early with a barrier adjustment, a change in route, or a brief reposition.
- Avoid waiting for the full behavior to start.
Example: A dog that steals socks only when the owner is distracted is managed by keeping laundry in closed baskets and using a baby gate to limit access to the room during busy times.
Step 5: Replace the Blocked Behavior with a Clear Alternative
Management without an alternative creates a vacuum. The dog needs a job.
Choose a replacement behavior that matches the dog’s current needs:
- If the dog wants to greet: teach a mat or “go to place” routine.
- If the dog wants to chase: teach a structured game with a toy and a clear stop cue.
- If the dog wants to bark: teach quiet or a “look at me” response.
Example: Doorbell barking is managed by keeping the dog behind a gate. While guests are present, the dog practices going to a mat and earning calm treats. The barking never gets the chance to become the default.
Step 6: Use Barriers with Supervision and Consistency
Barriers only work when they’re actually used. If the gate is open “just for a minute,” the dog learns that the minute is the opportunity.
- Decide which times are high-risk and plan coverage.
- Assign who manages the barrier during those times.
- Keep the setup consistent across days so the dog doesn’t test boundaries.
Step 7: Troubleshoot Management Failures Without Blame
If the problem still happens, the barrier likely isn’t preventing access, distance isn’t sufficient, or timing is late.
- Barrier not enough: The dog can reach the trigger. Move the barrier or add a visual block.
- Distance too close: Increase distance and reduce session length.
- Timing late: Intervene at the first early sign.
Example: A dog still barks through a partially open door. The fix is to close the door fully or move the dog to a room where the sound is muffled and the dog can’t see the entry.
Practical Checklist for the Next Session
- Trigger loop written in one sentence.
- Barrier chosen to block access, not to “teach a lesson.”
- Distance set so the dog can succeed.
- Early signs identified for preemption.
- Replacement behavior planned with reinforcement.
- Setup used consistently during high-risk moments.
7.2 Using Distance and Duration to Control Exposure Intensity
Distance and duration are two knobs that change how intense a trigger feels to a dog. Distance reduces the strength of the stimulus reaching the dog, while duration controls how long the dog must cope with it. Together, they let you practice at a level where learning is possible instead of forcing endurance.
Foundational Idea: Intensity Is About What the Dog Experiences
A trigger’s “intensity” is not the trainer’s opinion; it’s the dog’s internal experience. Two dogs can see the same dog at the same distance and react differently because of arousal history, prior learning, and current stress. Your job is to find a starting point where the dog can notice the trigger, stay functional, and still take reinforcement.
A practical functional definition helps: the dog is under control when it can orient to you, accept food or play, and recover after a brief look at the trigger. If the dog cannot take reinforcement, freezes, escalates, or repeatedly fails to recover, intensity is too high.
Step 1: Set a Baseline with Distance First
Start by choosing a distance where the dog can see the trigger but does not fully engage in the problem behavior. Use a simple measurement: record the dog’s behavior every 5–10 seconds during a short exposure window.
Example: A dog reacts to bicycles. You begin at a distance where the dog notices the bike, looks back at you at least once, and takes treats without lunging. If the dog lunges or refuses treats, increase distance and try again.
Step 2: Add Duration Gradually
Once distance is workable, extend duration in small increments. Duration is often the hidden reason a plan fails: a dog can handle a 3-second exposure but not a 30-second one. Increase duration only after the dog shows consistent recovery.
A useful progression is: 3 seconds → 5 seconds → 8 seconds → 12 seconds, with a reset between attempts. Resets can be as simple as stepping away to lower intensity, then returning.
Step 3: Use a Two-Dimensional Plan
Think of a grid: distance on one axis, duration on the other. Each cell represents an intensity level. Your goal is to train in cells where the dog stays functional, then move toward cells that are slightly harder.
Mind Map: Distance and Duration Control
Step 4: Choose Which Knob to Turn When
When you see early signs of escalation, adjust the knob that reduces intensity fastest.
- If the dog is already struggling at the current distance, shorten duration first. This often prevents the dog from practicing the problem behavior.
- If the dog is calm and responsive but you want more challenge, extend duration before reducing distance. Reducing distance changes the stimulus strength more dramatically.
Example: A dog barks at people approaching. At 20 meters, the dog can take treats for 10 seconds. You extend to 15 seconds successfully. Next session, you keep duration at 15 seconds and reduce distance to 18 meters. If barking spikes, you return to 20 meters while keeping duration short.
Step 5: Keep the Dog’s Job Clear During Exposure
Distance and duration control intensity, but the dog still needs a clear behavior to do. Pair exposure with a training task that competes with the problem behavior.
Common tasks:
- Look at handler for reinforcement
- Touch target while trigger passes
- Loose-leash position with intermittent treats
Example: For leash reactivity to dogs, you set a distance where the dog can see the other dog and still touch your hand. You keep duration short enough that the dog can complete 5–8 touches before the arousal climbs. Then you end the set while the dog is still learning.
Step 6: Track Recovery, Not Just Reaction
A dog can “not react” and still be over threshold if it takes a long time to recover. Recovery time is a better signal for when to stop.
Decision rule:
- If the dog returns to baseline quickly, you can extend duration slightly next time.
- If recovery is slow even without full escalation, increase distance or shorten duration immediately.
Mind Map: Practical Decision Rules
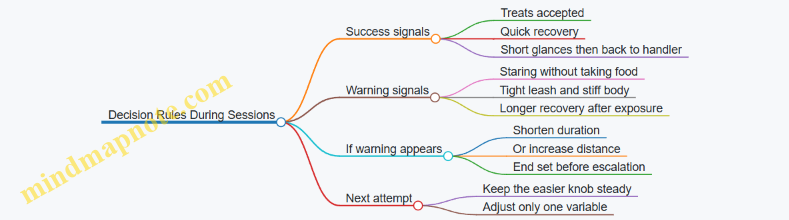
Step 7: Integrate with Real Walks
On walks, you can use distance and duration as “micro-practices.” Instead of one long exposure, do brief, repeatable exposures.
Example: At the park, the dog sees a skateboard. You stop at a distance where the dog can take treats for 8 seconds, then move away. After a minute, you repeat. Over multiple sessions, you reduce distance by small amounts while keeping duration at a level the dog can handle.
Distance and duration are not just safety tools; they are learning tools. When you control intensity precisely, the dog gets to practice noticing the trigger and choosing a better response—without rehearsing the problem behavior.
7.3 Structuring Walks Including Route Choice and Reinforcement Zones
A walk is not just exercise; it’s a training environment with moving targets. The goal of route choice and reinforcement zones is to control what the dog practices. If you repeatedly pass the same trigger without a plan, you practice the trigger. If you repeatedly place reinforcement where calm behavior is likely, you practice calm.
Foundational Idea: Practice What You Want
Start by defining the behavior you want to increase during the walk, such as loose leash walking, checking in, or staying under threshold near mild distractions. Then decide what the dog should do instead of the unwanted behavior. For example, if pulling happens when the dog sees a jogger, the replacement behavior might be orienting to you and moving on when you cue.
Route Choice: Build a Walk That Matches the Dog’s Current Skills
Choose routes based on two variables: distraction intensity and predictability. A predictable route helps you plan reinforcement timing and reduces surprise errors.
- Low distraction routes for skill building: quieter streets, fewer intersections, and fewer “surprise” doorways where people appear.
- Moderate distraction routes for generalization: the same general area, but with controlled exposure to the target trigger.
- Avoid novelty spikes early: brand-new routes can raise arousal even when the environment looks similar.
A practical rule: if you cannot reliably predict where the dog will notice something, you cannot reliably reinforce the alternative behavior.
Reinforcement Zones: Create Places Where Calm Pays
Reinforcement zones are short segments of the route where you pre-plan what you’ll reward and when. Think of them as “behavior checkpoints.” Zones reduce decision fatigue because you already know what to do when you reach them.
Use three zone types:
- Entry zones: the first 5–15 meters where the dog’s attention is likely to shift. Reward quick orientation to you and calm walking.
- Trigger zones: the segment where the dog would normally react. Reward the replacement behavior at a higher rate than usual.
- Exit zones: the last stretch after the trigger passes. Reward recovery behaviors like relaxed posture, slower pace, and voluntary checking.
Keep zones small at first. Large zones make it harder to time reinforcement and increase the chance the dog practices the unwanted response.
Marker Timing and Rate: Reinforce the Right Moment
During zones, use a marker to mark the exact behavior you want, then deliver reinforcement promptly. If you mark late, you teach the dog that the behavior happened after the trigger, not before it. A simple timing target is: marker within a second of the desired behavior, then food within another second.
Adjust reinforcement rate based on the dog’s success. If the dog is consistently calm in entry zones, you can gradually reduce the rate. If the dog is struggling, increase the rate and shorten the zone.
Mind Map: Walk Structure and Decision Points
Example: Leash Reactivity Near People
Assume the dog notices people at about 20 meters and sometimes lunges at 10 meters.
- Pick a route where you can approach people gradually without sudden crowds.
- Define zones: entry zone from 20–15 meters, trigger zone from 15–10 meters, exit zone from 10–5 meters.
- Plan the replacement behavior: orienting to you and taking a few steps while maintaining a loose leash.
- During entry zones, reward any calm orientation or reduced scanning. If the dog stares hard, shorten the zone and increase reinforcement rate.
- During trigger zones, reward the replacement behavior repeatedly. If the dog crosses threshold, stop advancing and reset at a distance where the dog can succeed.
- During exit zones, reward recovery: slower steps, head lowering, and relaxed body.
Over time, you keep the same route structure but reduce zone size or increase distance slightly, so the dog learns that calm behavior works across the same pattern of movement.
Example: Loose Leash Walking with Check-Ins
For a dog that pulls toward interesting smells:
- Entry zone: when you approach a “smell hotspot,” reward the dog for staying near your leg and glancing up.
- Trigger zone: when the dog reaches the strongest pull point, reward a short sequence of steps with a loose leash, then allow brief sniffing only after the leash is loose.
- Exit zone: reward the dog for returning to your pace after sniffing.
This teaches that the dog gets access to the world after it chooses the walking behavior you want.
Common Mistakes to Avoid
- Reinforcing the wrong behavior: if you reward only after the dog has already reacted, you train the reaction as the “path to treats.”
- Zones that are too long: if you cannot remember what you were reinforcing, the zone is too big.
- Changing routes mid-session: switching environments breaks your timing and makes it harder to interpret progress.
A well-structured walk is consistent enough to teach, flexible enough to adjust, and specific enough that the dog knows what earns the next step.
7.4 Reducing Trigger Access with Leash Setup and Household Routines
Trigger access is the part of behavior management that feels unglamorous but works: you reduce the dog’s opportunities to contact the thing that sets off the problem. Leash setup and household routines do this by controlling distance, movement, and timing—without relying on constant “good behavior” from a dog who is already over threshold.
Core Idea: Control the Dog’s Options
A dog can only practice what it can physically reach. If the dog can reach the trigger, it can rehearse the response. If the dog cannot reach the trigger, you can practice alternative behaviors like orienting to you, settling, or taking treats calmly.
Start with two questions during assessment:
- What exactly counts as “trigger access” in this home? (Doorways, windows, the front gate, the couch edge, the kitchen doorway.)
- What does the dog do right before the problem behavior? (Scan, stiffen, pace, bark, lunge, freeze.)
Then design leash and routine rules that prevent the pre-trigger moment from turning into the full behavior.
Leash Setup: Create Predictable Distance and Movement
Use a leash setup that is safe, low-friction, and consistent. The goal is not to “hold the dog back,” but to keep the dog in a training zone where you can reinforce calm choices.
Common setup patterns
- Leash to you with a short line indoors: Keeps the dog near enough to notice you and take food, while limiting sudden trigger approach.
- Leash to a stable anchor with a long line indoors: Useful when you need the dog to stay in place near a trigger area (like a hallway) without constant handling.
- Leash plus baby gate separation: Lets the dog see the trigger from a distance while you manage the environment.
Practical example A dog barks at people who enter through the front door. Instead of letting the dog roam the living room, you set a baby gate so the dog can see the door from a couch-side “viewing spot.” Indoors, you attach a leash to a harness and keep the dog within that spot. When the door opens, you feed calm treats for looking at you or settling. The dog never gets the chance to sprint to the door and rehearse barking.
Key details that matter
- Use a harness, not a collar, for leash control during arousal.
- Keep leash length consistent so the dog learns the boundaries quickly.
- Avoid wrapping the leash around furniture or legs; tangles create stress and accidental access.
Household Routines: Reduce Trigger Rehearsal Across the Day
Routines are how you prevent “random practice.” If the dog only fails when the family is busy, then the routine is the training variable.
Build routines around three moments
- Arrival and departure: When people move through the home, triggers often spike.
- High-traffic zones: Hallways, doorways, and windows are frequent access points.
- Resource moments: Food prep, trash handling, and toy time can overlap with arousal.
Concrete routine example For a dog that reacts to the sound of the trash truck and then rushes to the window:
- During trash day, you place the dog on a mat in a room with partial window coverage.
- You attach a leash to an anchor so the dog can move to the mat but cannot reach the window.
- You run a short “arrive and settle” routine: mat cue, treat delivery, brief pause, repeat. The dog practices calm while the trigger happens.
Mind Map: Trigger Access Reduction
Systematic Troubleshooting: When Access Still Happens
If the dog reaches the trigger or shows the pre-trigger pattern repeatedly, reduce access further before changing training cues.
- Missed threshold: Shorten leash length or add a barrier.
- Too much freedom: Move the dog to a smaller, predictable area.
- Inconsistent rules: Align all household members on the same setup and timing.
Example adjustment If the dog can still reach the window when someone walks past the viewing room, add a gate at the doorway to that room. Then resume calm reinforcement only after the dog can reliably stay in the viewing spot.
Reducing trigger access is the foundation that makes the rest of training make sense. When the dog’s body can’t reach the problem, your cues and reinforcers can finally do their job.
7.5 Building Predictability With Cues Schedules and Consistent Handling
Predictability is what lets a dog relax enough to learn. When cues, reinforcement timing, and handling routines are consistent, the dog can predict what happens next—and that reduces errors, stress, and “guessing games.” The goal is not to make training robotic; it’s to make it understandable.
Core Idea: Predictability Comes from Three Consistencies
First, the cue must mean the same thing every time. “Sit” should always predict the same outcome: the dog sits, then reinforcement follows according to your plan. Second, reinforcement must follow a reliable schedule. If rewards appear randomly after the dog gets it right, the dog may still learn, but reliability and calmness usually improve when the schedule is planned. Third, handling must be consistent: the same leash setup, the same marker behavior, and the same physical approach reduce confusion.
Cue Schedules That Match the Skill Stage
Use a cue schedule that fits how new the behavior is.
- Early learning stage: reinforce frequently and quickly. If you’re shaping or capturing, reward most correct responses so the dog learns the connection fast.
- Skill building stage: start thinning reinforcement while keeping the marker timing crisp. The dog should still get reinforced often enough to stay engaged.
- Reliability stage: reinforce less often but keep criteria stable. If you raise difficulty, you may need to temporarily increase reinforcement again.
A simple rule: when you change one variable (distance, distraction, duration, environment), consider adjusting the reinforcement rate so the dog has a fair chance.
Consistent Handling That Prevents Accidental Messages
Dogs notice patterns in your body and equipment. Inconsistent handling creates accidental cues.
- Marker consistency: use the same marker sound every time, and deliver it at the same moment relative to the behavior.
- Reinforcement delivery: keep your hand movement and reward location predictable. If you toss treats one day and hand them the next, the dog may start watching your arm instead of listening to the cue.
- Leash and position: if you train sits with the leash slack one day and tight the next, the leash tension becomes a hidden cue.
- Session rhythm: start with easy reps, then progress. Ending with a successful rep helps the dog leave the session with a clear win.
Mind Map: Predictability System
Example: Sit Cue with a Planned Schedule
Start in a low-distraction room.
- Say “Sit,” then wait. If the dog sits within your criteria, mark and reward immediately.
- For the first few correct reps, reinforce about 80–100% of successes.
- After the dog reliably sits, reduce to roughly 60–70% reinforcement while keeping criteria unchanged.
- Add a small challenge, like standing slightly farther away. For that block, increase reinforcement back to around 70–80% so the dog doesn’t interpret the difficulty as “the cue stopped working.”
If the dog starts offering sits less often, don’t punish. Lower difficulty, restore reinforcement rate, and tighten your timing.
Example: Door Manners with Consistent Handling
Door manners often fail because the dog learns a messy routine: sometimes the door opens, sometimes it doesn’t, and sometimes the dog gets attention right as the door moves.
- Use a consistent setup: same door, same leash handling, same starting position.
- Teach “Wait” with a clear sequence: cue “Wait,” mark only when the dog remains in place, then open the door briefly and reinforce calm waiting.
- Keep the door movement predictable in duration and speed during early training.
Once the dog can wait reliably, you can thin reinforcement while keeping the door sequence consistent. If the dog breaks the wait, it usually means the environment or your criteria changed faster than the dog’s learning.
Example: Calm Walking with Cue Timing
For loose-leash walking, predictability comes from how you respond to leash tension.
- Choose one cue or signal for “check in” or “position,” and use it consistently.
- Reinforce the moment the leash becomes loose, not after you’ve already walked past the trigger.
- If you’re using a marker, mark the instant the leash slack appears.
When you increase difficulty—like a busier sidewalk—raise reinforcement frequency temporarily. The dog is not being “spoiled”; it’s being given a clear learning signal.
Troubleshooting Predictability Breaks
If performance drops, check which consistency broke:
- Cue meaning drift: you’re reinforcing a different behavior than before.
- Marker timing drift: you’re marking late or early.
- Handling drift: leash tension, body position, or reward delivery changed.
- Schedule mismatch: you thinned reinforcement too quickly for the new difficulty.
Fix one thing at a time. Predictability is a system, and systems improve best when you adjust the specific part that stopped working.
8. Behavior Modification for Fear Aggression and Anxiety
8.1 Fear Based Behavior Identification and Threshold Concepts
Fear-based behavior is what you see when a dog’s nervous system treats something as a threat, even if humans think the situation is “not that bad.” The goal here is not to label the dog as fearful forever; it’s to identify what reliably triggers fear, how close the dog is to losing control, and what training conditions keep the dog learning instead of reacting.
Core Concepts for Identification
Start with the dog’s pattern, not a single moment. Fear responses tend to be consistent across similar cues: the same trigger, similar distance, similar body language, and similar outcome. Common fear indicators include avoidance, freezing, lip licking that doesn’t seem to be about food, turning the head away, lowering the body, tucked tail, whale eye, and sudden “shut down” where the dog stops offering normal behaviors.
A key distinction is between fear and other emotional states. Fear often comes with a “get away” direction, while frustration often comes with “push harder” energy. Anxiety can look like scanning and uncertainty, but fear is usually more tied to a specific threat cue. Pain can mimic fear, so if a dog suddenly changes behavior, a medical check is part of the identification process.
Thresholds and Why They Matter
A threshold is the point where the dog’s ability to learn drops sharply. Below threshold, the dog can take treats, orient to you, and respond to cues. At or above threshold, the dog’s attention narrows to the trigger, and training becomes less about learning and more about managing distance and arousal.
Think of it as a volume knob. If you turn the trigger exposure up too fast, the dog’s “learning volume” goes down. The practical question is: how much trigger can the dog handle while still taking reinforcement?
Stepwise Assessment Process
- Define the trigger precisely. Instead of “dogs,” use “a dog 20 feet away moving toward us at a walk.”
- Measure distance and duration. Record how far and how long the dog can stay engaged before the first fear indicator appears.
- Track the first sign, not the worst sign. The earliest reliable indicator is your threshold marker. Waiting for barking or lunging is usually too late.
- Check for recovery time. After the trigger passes, how long until the dog can eat and re-engage? Longer recovery suggests a lower threshold.
- Confirm with controlled variation. If you reduce distance or increase movement, does the dog cross the same marker sooner? If yes, you’ve found a meaningful threshold.
Mind Map: Fear Identification and Threshold Work
Practical Examples with Clear Logic
Example 1: Doorway noises. A dog startles at the sound of a delivery knock. Below threshold, the dog looks toward you and takes a treat within one second of the knock. At threshold, the dog freezes, stops taking treats, and stares at the door. Above threshold, the dog backs away and growls when the door opens. Your threshold marker is the first moment the dog stops taking treats. Training starts with a quieter knock from farther away, then gradually reduces distance only when treat-taking stays consistent.
Example 2: Leash reactivity to dogs. On walks, the dog can pass another dog at 30 feet while eating. At 25 feet, the dog’s head turns and the body stiffens; treat-taking drops. That stiffening is your first sign. You don’t practice at 25 feet until the dog is calm there; you practice at 30 feet, then work down in small steps, sometimes changing the other variables first (slower movement, more lateral path, or more time for the dog to notice and reorient).
Example 3: Fear of grooming tools. A dog approaches the brush when it’s on the floor, but flinches when the tool is lifted. Below threshold, the dog sniffs the tool and takes treats while it’s raised slightly. At threshold, the dog pulls away and stops accepting food. The threshold is not “the brush exists,” it’s “the tool is lifted to a certain height and angle.” Your early sessions keep the tool low and brief, then build height only when the dog remains in treat-taking mode.
Common Mistakes That Blur Thresholds
- Using the dog’s worst moment as the baseline. By then, learning is already compromised.
- Changing multiple variables at once. If you reduce distance and increase movement together, you won’t know what pushed the dog over threshold.
- Assuming calm behavior means safety. A dog can appear still while being over threshold; check whether reinforcement is available.
Threshold Concepts Summarized for Use
Fear identification is pattern recognition plus measurement. Threshold work is keeping the dog in a state where reinforcement is possible and the first fear indicator stays below your current training exposure. When you can reliably predict when the dog will cross that marker, you can design sessions that teach instead of merely prevent problems.
8.2 Counterconditioning Protocols Including Value Building for Triggers
Counterconditioning changes what a dog predicts will happen when a trigger appears. Instead of “trigger means danger,” the dog learns “trigger means good things.” Value building is the engine: you teach that the trigger predicts desirable outcomes, then you use that prediction to reduce emotional intensity.
Core Idea and Success Criteria
Start with a clear target: the dog’s emotional response should shift before the dog’s behavior becomes “better.” Success looks like lower stress signs at the same distance, faster recovery after exposure, and increased willingness to approach the trigger area.
A practical success metric is simple: during sessions, record (1) distance to trigger at first stress sign, (2) intensity rating from 0–3, and (3) how quickly the dog returns to baseline after the trigger passes. If those improve, you’re counterconditioning.
Step 1: Choose the Trigger and Define the “Good Thing”
Pick one trigger at a time. Examples: a person in a doorway, a bicycle rolling past, a dog behind a fence.
Then decide the reinforcer that the dog will work for at low stress. Use high-value items for the early stages: tiny pieces of food, a favorite tug, or a brief chase-like game. The reinforcer must be delivered reliably and quickly, because timing is what links the trigger to the good outcome.
Example: For leash reactivity to dogs, use small, soft treats that can be consumed in 1–2 seconds. If the dog needs chewing time, the association becomes fuzzy.
Step 2: Establish Baseline and Threshold Distance
Threshold is the point where the dog can no longer learn effectively. You find it by running short, controlled exposures at varying distances.
Baseline procedure: observe the dog at rest, then present the trigger at a distance where the dog shows mild attention but no escalation. If the dog freezes, pants hard, lunges, or cannot take food, you’re too close.
Rule of thumb: begin at a distance where the dog can take food at least 80% of the time while the trigger is present.
Step 3: Build Value for the Trigger Using Pairings
Counterconditioning starts with pairing the trigger with the good thing, not with asking for obedience.
Protocol:
- Trigger appears.
- Immediately deliver the reinforcer.
- Repeat several times while the trigger remains visible.
- When the trigger moves away, stop feeding.
This creates a prediction: “trigger → good.” Over time, the dog’s emotional response should soften, and food acceptance should increase.
Example: Doorbell fear. At a distance where the dog can eat, ring the bell for one short burst, then feed 3–5 tiny treats in quick succession. Repeat with longer intervals. If the dog starts to bark and cannot eat, increase distance or reduce bell duration.
Step 4: Use Timing and Rate to Keep the Association Clear
Timing matters because the dog learns from what happens right after the trigger appears.
- Deliver the first treat at the moment the trigger becomes noticeable.
- Maintain a steady feeding rate during the trigger’s presence.
- Avoid “waiting for the dog to calm down.” That waiting teaches the dog that calm is required before good things happen.
If the dog’s attention drifts, you’re likely too close or the reinforcer isn’t valuable enough.
Step 5: Add a Simple Behavior Only After Emotional Shift
Once the dog can take food during trigger presence, you can layer a low-pressure behavior to improve control.
Choose behaviors that do not require the dog to “perform through fear,” such as orienting to you, a relaxed sit, or a brief hand touch.
Example: Dog behind a fence. When the dog can eat at the current distance, ask for a single “look” at you. Reward immediately. If the dog stops eating, remove the behavior demand and return to value building.
Step 6: Gradually Reduce Distance with Criteria
Progress is not about pushing; it’s about meeting criteria.
Use a conservative ladder:
- Keep the same distance until intensity ratings drop and food acceptance stays high.
- Then reduce distance slightly (small enough that the dog remains in the learning zone).
- If stress spikes, step back to the last successful distance.
Mind Map: Counterconditioning and Value Building
Worked Example Session Plan
Assume a dog reacts to a person walking past the yard fence.
- Start 30 minutes after a walk so the dog is not overly aroused.
- Begin at a distance where the dog can eat while watching the person.
- Run 8–12 trials: person appears → feed 3–5 treats quickly → person passes out of view → pause.
- If the dog refuses food in a trial, increase distance for the next trial and shorten the person’s visible time.
- After two sessions with stable low intensity, reduce distance slightly and repeat the same structure.
This approach keeps the learning link intact: the trigger predicts good things, and the dog’s nervous system gets fewer reasons to treat the trigger as a threat.
8.3 Desensitization Protocols Including Stepwise Exposure Planning
Desensitization reduces fear or anxiety by changing what the dog experiences when the trigger appears. The key rule is simple: the dog must stay below threshold during exposure, so learning can happen without the body “hitting the alarm system.” If the dog rehearses panic, you are not training; you are strengthening the panic pathway.
Foundational Concepts for Stepwise Exposure
Threshold is the point where the dog can no longer think clearly and starts reacting automatically. You’ll see it as hard staring, freezing, frantic scanning, lunging, barking, or sudden shutdown. Intensity is everything about the trigger moment: distance, duration, speed, angle, volume, and predictability.
A stepwise plan uses three layers:
- Baseline: what the dog does with no trigger or with a neutral version.
- Hierarchy: a ranked list of trigger intensities from easiest to hardest.
- Criteria: the exact conditions that tell you the dog is ready to move up.
Building a Trigger Hierarchy Without Guesswork
Start by listing the trigger components separately. For example, “dog on leash” can be broken into: seeing the dog, hearing movement, the other dog approaching, the other dog making eye contact, and the other dog passing close.
Then create a hierarchy where each step changes only one or two variables. A practical hierarchy might look like this:
- Step 1: Trigger appears far away, stationary, no eye contact.
- Step 2: Trigger appears at a slightly closer distance, still stationary.
- Step 3: Trigger moves slowly across the dog’s field of view.
- Step 4: Trigger moves toward the dog at a slow pace.
- Step 5: Trigger passes at a moderate distance.
- Step 6: Trigger passes close enough to reliably cause tension, but you still keep the dog under threshold.
If you cannot define steps, you cannot control intensity. “Try again next time” is not a plan.
Stepwise Exposure Planning with Clear Criteria
Use a repeatable session structure:
- Warm-up: 3–5 minutes of easy reinforcement with no trigger.
- Exposure block: 3–6 short trials at the current step.
- Recovery: a break long enough for the dog to return to baseline.
- End: stop while the dog is still doing well.
Trial length should be short at first. If the dog reacts at 20 seconds, your early trials might be 5–10 seconds. You can lengthen only after the dog stays calm.
Criteria for moving up should be measurable. For instance:
- Move to the next step after 3 consecutive trials where the dog remains relaxed enough to take food and does not show escalation behaviors.
- If the dog shows threshold signs, drop back one step and shorten duration.
Mind Map: Stepwise Desensitization
Examples That Show the Logic
Example: Leash Reactivity to Another Dog
- Baseline: In a quiet area, the dog can take treats while watching a distant dog without lunging.
- Hierarchy: Start with the other dog visible at a far distance and stationary. Next, keep distance but add slow movement. Then reduce distance slightly while keeping movement slow.
- Criteria: After 3 trials where the dog can eat and looks back to the handler within a few seconds, reduce distance by a small amount.
- Common mistake: letting the other dog approach until the dog is already tense. Fix by ending the trial earlier and stepping back in the hierarchy.
Example: Doorbell Fear
- Trigger components: sound volume, duration of ringing, and whether the dog can see the person.
- Hierarchy: Start with a very low volume recording played briefly from another room. Then increase volume slightly while keeping the sound short. Finally, add a live ring with the handler positioned so the dog is not surprised by sudden movement.
- Criteria: The dog remains able to take treats during the sound and returns to baseline quickly afterward.
- Common mistake: ringing repeatedly at full volume “to get it over with.” That usually teaches the dog that the alarm is coming and it must prepare to panic.
Recording and Interpreting What You See
Track each trial with three notes: step, trial duration, and behavior outcome (calm, mild tension, threshold). If you only record “good” or “bad,” you lose the pattern that tells you how to adjust intensity.
When progress stalls, the fix is usually not “try harder.” It’s reducing intensity, shortening trials, and tightening timing so the dog experiences the trigger without crossing the threshold.
Practical Guardrails
- Keep the trigger predictable during early steps so the dog learns about the trigger itself, not about surprise.
- Use management when needed: barriers, distance, or different routes prevent accidental rehearsal.
- Stop the session after success. Ending on a calm note helps the dog associate the trigger setup with safety rather than endurance.
8.4 Aggression Management Including Safety Plans and Trigger Mapping
Aggression management is not about “stopping the dog.” It’s about controlling risk while you gather information and reduce the chance of rehearsal. A good safety plan works even when training goes imperfectly, because real life includes distractions, misreads, and days when the dog is simply not at their best.
Core Principles Before You Map Triggers
Start with three rules. First, prevent practice of the aggressive response by increasing distance, barriers, and management. Second, keep handling predictable so the dog isn’t forced into sudden, confusing interactions. Third, treat every incident as data: what happened right before the dog escalated, what changed, and what worked to lower intensity.
A practical way to think about intensity is a simple scale from low to high. Low means the dog can notice the trigger and still choose alternative behaviors. High means the dog is committed to the threat response and cannot learn through interaction.
Safety Plan Components That Actually Get Used
A safety plan should fit on one page and be readable during stress. Include:
- Roles and boundaries: Who handles the leash, who manages the environment, and who avoids direct interaction during escalation.
- Equipment and setup: Leash length, harness type, barrier options, and where the dog goes when you need space.
- Distance rules: A clear instruction for “increase distance immediately” when intensity rises.
- Exit routes: Where people stand and how they leave without turning their back on the dog.
- Emergency handling: What to do if the dog breaks a barrier or targets a person.
Example: A dog that lunges at guests is managed by placing a baby gate between dog and entry area. The handler keeps the dog behind the gate and uses a long line only if needed for safe repositioning. If the dog shows rising intensity—hard staring, stiff body, and faster breathing—the plan calls for closing the distance barrier further or moving the dog to a separate room.
Trigger Mapping with Clear, Observable Categories
Trigger mapping turns “the dog hates everything” into a usable list. Build it from repeated observations, not guesses. Use categories that match real decisions you must make.
Common trigger categories:
- Distance: far, mid, close
- Duration: brief pass-by versus lingering presence
- Context: doorway, hallway, yard, car
- Movement: approaching, stationary, sudden motion
- Resource proximity: food, toys, resting spots, people
- Handling factors: leash on, harness adjustment, eye contact, reaching
The goal is to identify the pattern that predicts escalation. For instance, a dog may tolerate a person at the end of the driveway but escalate when the person steps toward the gate while the dog is on leash.
Mind Map: Aggression Management Workflow
Mind Map: Trigger Mapping Details
Stepwise Method for Building Your Map
- Pick one incident type to analyze first, such as leash reactivity toward people.
- Write a short timeline: 30 seconds before, during, and after escalation.
- Mark intensity at each point using your low-to-high scale.
- List the top three variables that were different from calmer moments.
- Test management changes without training: change distance, change angle, or add a barrier.
If management reduces intensity, you’ve found a lever. If it doesn’t, you likely need a different lever, such as changing context or removing resource proximity.
Example Trigger Map Entry
Scenario: Dog escalates at the front door when a delivery person approaches.
- Distance: escalation begins at ~3–5 meters
- Duration: escalation increases if the person pauses near the door
- Context: doorway and entry path only
- Movement: slow approach triggers more than fast pass-by
- Resource proximity: escalation stronger when dog is near the couch where they rest
- Handling factors: intensity rises when handler is between dog and door
Safety response: Move dog to a separate room during deliveries, or use a barrier so the handler is not positioned as a “middle obstacle” between dog and trigger.
Turning Mapping into Safety Decisions
Your map should dictate what you do before escalation. When intensity is low, you can pair the trigger with safe outcomes and teach alternative behaviors. When intensity is high, you switch to management only: increase distance, close barriers, and prevent interaction. Training during high intensity is like trying to teach while the dog is already running a fire drill.
Finally, update the map after every incident. If the dog escalates at a new distance or in a new context, treat it as a change in the pattern, not a mystery. The safety plan becomes stronger when it reflects what you actually observed.
8.5 Case Based Protocols for Common Scenarios Including Doorbell and Leash Reactivity
Professional behavior work starts with a simple question: what does the dog do right before the problem, and what does the dog get right after? Doorbell and leash reactivity are both “trigger → arousal → behavior” patterns, but the trigger and the reinforcement path differ. The protocols below use the same core steps—assessment, threshold setup, systematic exposure, and data checks—while tailoring the details to each scenario.
Foundational Setup for Any Scenario
- Define the target behavior: barking, lunging, freezing, whining, or snapping. Pick one primary behavior so you can measure it.
- Choose a threshold rule: the dog should notice the trigger but remain in a learning state. If the dog is already over threshold, you are practicing the problem.
- Select reinforcers and delivery style: use high-value food or play, delivered quickly and consistently. If the dog can’t take food during the trigger, your setup is too hard.
- Track three numbers: distance to trigger, intensity rating (0–3), and whether the dog took at least one reinforcer during the trigger.
Mind Map: Doorbell Reactivity Protocol
Doorbell Protocol with Concrete Examples
Example setup: A dog barks and charges the door when the doorbell rings. Start in a room with a closed door and play the doorbell sound from a phone at a volume that allows food acceptance.
- Trial structure: Dog is positioned, you cue “ready” (or simply cue calm by your posture), then play the doorbell sound at sub-threshold volume. The moment the dog orients toward you instead of fully escalating, mark and feed.
- What “calm” looks like: head turns toward you, brief pause, lowered body tension, or taking food without snapping.
- Progression: If the dog takes food in 8 out of 10 trials, increase difficulty by one notch—slightly higher volume or slightly closer room. If the dog stops taking food, you went too far; drop back.
Common mistake: waiting until the dog is already barking to start rewarding. That rewards the wrong moment. Your job is to reward the earliest sign of learning: orientation, softening, or food acceptance.
Mind Map: Leash Reactivity Protocol
Leash Reactivity Protocol with Concrete Examples
Example setup: A dog lunges at other dogs on walks. Begin with a long distance where the dog can see the other dog but still takes treats.
- Trial structure: You spot the trigger early. The moment the dog notices (often a head lift or fixation), mark and feed before the dog reaches full escalation. Repeat as long as the dog remains in a learning state.
- Alternative behavior: Teach “look” or “touch” in quiet settings first. During walks, reward the dog for choosing that behavior when the trigger appears.
- Movement rules: If the dog can’t maintain the alternative behavior while you stand still, don’t add walking yet. Once standing is consistent, take one or two steps, then stop and reward.
Progression example: On Monday, you can work at 30 meters. If the dog achieves look-and-eat in most trials, Tuesday you try 28 meters. If you see lunging, you return to 30 meters and tighten your timing rather than forcing distance reduction.
Integration: How to Decide What to Do in the Moment
When the dog escalates, your protocol is not “try harder.” It’s “reduce difficulty.” Use this decision ladder:
- Food acceptance present: reward the earliest sign of orientation or alternative behavior.
- Food acceptance absent but dog is not fully over threshold: increase distance, lower trigger intensity, and shorten sessions.
- Over threshold: stop the interaction, create distance, and resume later at an easier setup.
Data Check and Session Design
End each session with a success set, not a frustration set. For both doorbell and leash reactivity, aim for multiple short wins. If you record that the dog only succeeds when the trigger is far away, your next session should focus on threshold accuracy and timing, not on pushing closer.
Quick Reference Mind Map: Shared Principles

9. Training for Separation Related Issues and House Soiling
9.1 Separation Anxiety Assessment and Differentiation from Boredom
Separation anxiety is not just “missing you.” It is a specific pattern: the dog shows distress when the person leaves, and the distress is tightly linked to separation cues and the dog’s inability to cope. Boredom, on the other hand, often shows up when the dog is left alone but is not strongly tied to the moment of departure or the dog’s access to the owner’s absence.
Core Concepts That Guide the Assessment
Start with two practical ideas.
-
Trigger timing: separation anxiety typically spikes around departure and reunion. Boredom tends to build more gradually and may peak later, depending on the dog’s routine.
-
Coping behavior: anxiety often includes frantic attempts to regain contact, repeated checking of doors, and stress signals. Boredom more often includes repetitive self-entertainment like chewing random items, pacing without clear “searching,” or scavenging when available.
A useful mental model is to treat the problem as a question with three parts: What starts it? What does the dog do during it? What changes when the owner returns?
Mind Map: Differentiation
Stepwise Assessment Process
Step 1: Gather a timeline from the household. Ask for a simple sequence: what happens 10 minutes before departure, during the first 5 minutes after leaving, and in the last 10 minutes before the owner returns. For example, one household reports: “He starts whining the moment the leash comes off, then scratches the door for about 12 minutes, then paces until we come home.” That pattern points toward separation anxiety because the behavior is tightly time-locked to departure.
Step 2: Identify separation cues and compare them to non-separation cues. If the dog reacts to keys and shoes, but ignores other household sounds, the departure cue is likely meaningful. Boredom usually does not show a consistent “departure moment” spike. Example: a dog may chew a couch cushion regardless of whether the owner leaves with keys, without keys, or for a short errand.
Step 3: Separate “stress behavior” from “destructive behavior.” Destruction can occur in both categories. The differentiator is the emotional state around it. Anxiety-linked destruction often appears alongside frantic searching, vocalization, and attempts to reach the owner. Boredom-linked destruction is more likely to be exploratory chewing with fewer stress signals.
Step 4: Use a short, safe observation window. If feasible, record video for one or two departures. Look for repeated door checks, frantic pacing, and whether the dog settles only after the owner has been gone long enough to stop “trying.” Boredom dogs may settle into a routine activity sooner.
Step 5: Check for confounds before labeling. Pain, cognitive changes, and gastrointestinal discomfort can mimic distress. Also consider whether the dog is left in a setup that increases frustration, such as a blocked view of the front door or a crate that is too small. If the dog shows signs of discomfort even when the owner is home but moving around, medical or environmental factors deserve attention.
Practical Differentiation Examples
Example 1: Doorbell of departure. A dog whines within 30 seconds of the owner picking up keys, scratches the door for 10–15 minutes, then stops and lies down. On return, the dog greets normally but immediately seeks the owner’s side. This is consistent with separation anxiety because the behavior is cue-linked and the dog shows a clear “trying then stopping” pattern.
Example 2: Chewing without a departure spike. A dog chews a rug only after the owner has been gone for about an hour, regardless of the departure routine. The dog is quiet at first, then engages in chewing, and returns to normal sleep after the owner arrives. This fits boredom or insufficient alone-time skills more than separation anxiety.
Example 3: Mixed pattern. A dog starts pacing when the owner leaves, but the pacing is mild and the main issue is chewing accessible items. The dog also shows calm lying when given a safe chew. This suggests separation anxiety elements plus management gaps, so assessment should not stop at the first label.
What to Conclude from the Assessment
A separation anxiety label is strongest when the dog’s distress is predictably triggered by departure cues, includes stress-linked behaviors, and shows meaningful change at reunion. Boredom is more likely when behavior is time-based, less cue-locked, and lower in stress indicators, with improvement tied to structured enrichment and skill-building rather than primarily to separation-specific coping.
9.2 Teaching Independent Relaxation With Graduated Departures
Independent relaxation means the dog can settle without constant interaction from the handler. The goal is not “being calm forever,” but building a reliable pattern: dog rests, handler leaves, dog stays within a manageable stress range, then handler returns and the dog’s calm is reinforced.
Core Concepts That Make Graduated Departures Work
Start with two practical ideas. First, you train the dog to tolerate your absence at a level that does not trigger frantic searching, barking, or panic. Second, you reinforce the behavior you want—calm settling—by returning when the dog is still in that state.
A useful way to think about the training is as a ladder. Each rung is a short departure duration plus a predictable routine. If the dog struggles at a rung, you skip back down the ladder and rebuild from a smaller step.
Step 1: Settle Criteria Before You Leave
Before any departures, teach a clear “settle” behavior in the same location where absence training will happen. Use a marker or consistent verbal cue to indicate the moment the dog is relaxed, then reward with something the dog can consume while lying down.
Example: If your dog currently sits and watches you, ask for a down, then reward only when the dog’s body is loose—head lowered, breathing slower, no frantic scanning. If the dog pops up, you wait for the next calm moment and reward that instead.
Step 2: Build a Baseline with Micro-Departures
Begin with departures so short the dog can succeed. Move from “standing up” to “one step away” to “door movement” to “door closed,” each with the same calm criteria.
Example progression for a kitchen setup:
- You stand up and take one step away for 2 seconds.
- You return before the dog escalates.
- You repeat until the dog’s attention settles back onto the resting spot.
If the dog remains calm, increase only one variable at a time: duration first, then distance, then door complexity.
Step 3: Use Graduated Departures with Predictable Timing
A graduated departure is a sequence where the dog experiences your absence in small, measurable increments. The handler’s return is part of the training, not an interruption.
A simple rule: return while the dog is still calm, not after the dog has already rehearsed the problem behavior.
Example: If 10 seconds away causes whining, do 5 seconds for several successful reps. When 5 seconds is consistent, try 7 seconds. When 7 seconds is consistent, try 9 seconds. This keeps the dog learning tolerance instead of practicing distress.
Step 4: Reinforce Calm on Return and Avoid Accidental Training
When you return, keep your arrival low-key. If you rush in and talk excitedly, you may teach the dog that distress leads to high-value attention. Instead, return, wait for a calm moment if needed, then reward.
Example: You leave for 8 seconds. On return, you do not immediately greet. You place a reward near the dog’s resting spot after the dog is lying down again.
Also avoid “rescuing” the dog from distress by opening the door late. If you always return after barking, barking becomes the ticket to your return.
Step 5: Manage Triggers in the Environment
Many dogs react to specific cues: keys, bag zippers, leash hooks, certain hallway sounds. During early training, reduce those triggers or keep them consistent while you practice.
Example: If keys predict your absence, practice a “keys on, sit, settle, then leave for 2 seconds” routine. If the dog gets excited at the keys, do not jump to longer departures until the keys routine reliably ends in calm.
Mind Map: Graduated Departures Training Flow
Example Session Plan for One Week
Use short sessions, repeated often. Aim for multiple successful reps rather than one long attempt.
Example day structure:
- 5 minutes: settle practice and calm rewards.
- 10 minutes: micro-departures with 2–3 second steps.
- 5 minutes: door movement and door closed for the smallest successful duration.
If you get two failures in a row at the same step, reduce difficulty immediately. The dog is telling you the ladder rung is too high.
Troubleshooting Common Failure Patterns
- Dog escalates quickly at the door: reduce to door movement without closing, then rebuild.
- Dog relaxes only after you return: you may be returning too late. Shorten departures and reinforce calm earlier.
- Dog cannot settle before you leave: spend more time on settle criteria and reduce departure complexity until the dog can rest first.
Graduated departures work because they teach tolerance through controlled exposure, clear timing, and reinforcement that matches the calm behavior you want. When the dog can predict that calm leads to a calm return, independent relaxation becomes a learned routine rather than a gamble.
9.3 Managing Predictors Including Bag Keys and Owner Movement Patterns
Predictors are the cues that reliably show up right before a behavior problem. In separation related issues, common predictors include the bag, keys, and the owner’s movement patterns. The goal is not to “remove all triggers,” but to change what the dog learns about what those triggers mean.
Start with a simple rule: if the dog’s behavior reliably increases after a predictor appears, the predictor has become meaningful. For example, if the dog starts pacing the moment the bag comes out, the bag is no longer just an object; it’s a signal that the owner is about to leave.
Foundational Concept: Predictors Become Signals
Dogs learn through repeated pairings. Over time, the sequence “bag appears → owner gets ready → owner leaves” becomes a single event in the dog’s mind. That’s why the dog may react even if the owner does not fully leave. The dog is responding to the learned meaning of the sequence, not to the door itself.
A practical way to confirm this is to track three moments across several days: when the predictor appears, when the owner changes posture or location, and when the dog’s stress behaviors begin. Stress behaviors might include whining, following, digging at doors, barking, or sudden restlessness.
Bag Keys and Movement Patterns as a Single Chain
Treat the predictor chain as a sequence, not separate items. Bag and keys often arrive together, and owner movement patterns provide the “how” of leaving. Movement patterns include walking to the door, putting on shoes, picking up the leash, or turning off lights in a consistent order.
Example: A dog named Milo may not care about keys alone. But when keys are followed by the owner putting on shoes and heading toward the door, Milo’s arousal spikes. That means the keys are part of a chain, and the movement pattern is likely a stronger predictor than the keys by themselves.
Mind Map: Predictor Mapping and Control
Systematic Intervention: Break the Chain Without Creating Confusion
-
Identify the earliest reliable predictor. If the dog reacts to the bag, start there. If the dog reacts only after shoes, begin at the shoe step.
-
Prevent rehearsal of the full chain. Rehearsal strengthens the predictor meaning. If the dog is already over threshold, don’t run “practice exits” that include the full sequence.
-
Create controlled, low-stress exposures. Use short sequences that stop before the dog escalates. For instance, take the bag out, then sit down and do nothing for 30–60 seconds, then put the bag away. Repeat only if the dog stays calm.
-
Pair predictors with calm outcomes. When the dog remains relaxed during the predictor, reinforce that calm state. Reinforcement can be food tossed gently, a calm scatter on the floor, or a quiet chew offered while the owner stays still.
-
Gradually reintroduce the sequence only after stability. Once the dog can tolerate the early steps without escalating, you can add the next movement pattern step while still preventing the full leaving event.
Concrete Examples You Can Run
Example 1: Bag Out, No Exit
- Owner takes out the bag.
- Owner stands still and avoids eye contact.
- Dog is calm: owner tosses a few small treats near the dog.
- Owner puts the bag away.
- If the dog starts pacing, shorten the session and stop earlier next time.
Example 2: Keys Jingle, Owner Sits
- Owner picks up keys.
- Owner returns to a chair and sits for 20–40 seconds.
- Dog remains settled: owner reinforces calm.
- Owner puts keys down and leaves the room only briefly, then returns.
Example 3: Movement Pattern Reset
- Owner begins the usual shoe routine.
- Instead of heading to the door, owner stops mid-routine, sits, and waits for the dog to settle.
- Once settled, owner ends the routine and returns to normal.
Common Mistakes to Avoid
- Starting too late in the chain. If you only manage the door, but the dog reacts to shoes, you’ll keep rehearsing the meaningful steps.
- Using exits as the main training tool. If every predictor sequence ends in leaving, the dog learns “predictor equals separation,” not “predictor can be followed by calm.”
- Reinforcing frantic behavior. If the dog barks and the owner responds by talking, petting, or rushing, the dog may learn that frantic behavior controls the owner’s actions.
Quick Checklist for Each Session
- Earliest predictor identified
- Dog below threshold before you start
- Sequence shortened to prevent rehearsal
- Calm behavior reinforced during predictor presence
- Session ends before escalation
When bag, keys, and movement patterns stop predicting a stressful outcome, the dog’s arousal drops because the learned meaning changes. The dog isn’t “being stubborn” or “being dramatic”; it’s updating expectations based on what you consistently do right after the cues.
9.4 House Soiling Assessment Including Medical Exclusion and Substrate Factors
House soiling is one of those problems that looks simple from the outside and turns complicated fast once you ask the right questions. A solid assessment prevents two common mistakes: assuming it is “just training” when a medical issue is driving the behavior, and assuming it is “just anxiety” when the dog is actually reacting to surfaces, routines, or cleaning products.
Step 1: Confirm the Basics and Collect Reliable History
Start with a timeline. Note when soiling began, whether it changed suddenly, and whether it happens at specific times like after meals, after waking, or during owner departures. Record stool form (firm, soft, watery), frequency, and whether the dog shows urgency (circling, frantic sniffing, sudden squatting) or appears to be “going normally” in the wrong place.
Ask about cleaning. Many dogs keep returning to areas that still smell like urine or feces, even after “deep cleaning.” Also ask about substrate exposure: where the dog can access (tile, carpet, bedding, laundry baskets) and whether the dog has ever been allowed on certain surfaces.
Step 2: Medical Exclusion Before Behavior Assumptions
Behavioral plans work best when the body is not making the rules. Exclude medical causes that can mimic training problems.
Key medical categories to consider:
- Gastrointestinal issues: diarrhea, constipation, inflammatory bowel patterns, parasites.
- Urinary issues: infection, bladder inflammation, stones, incontinence.
- Pain and mobility: arthritis or back pain can reduce the ability to reach the usual elimination spot.
- Hormonal or age-related changes: especially in older dogs.
Practical screening questions:
- Is stool consistently abnormal or does it fluctuate with stress?
- Does the dog strain, leak, or have accidents with no obvious urgency?
- Are accidents increasing despite consistent potty timing?
If any red flags appear, the assessment pauses and a veterinary evaluation takes priority. A behavior plan can run alongside medical care, but you should not treat a medical symptom as a training failure.
Step 3: Determine Elimination Function and Context
Now you sort the “why” into workable buckets. The goal is not to label the dog; it is to identify what reliably predicts the accident.
Consider these functional patterns:
- Timing mismatch: the dog is not getting enough opportunities or the schedule is inconsistent.
- Threshold issues: the dog is too aroused or distracted to eliminate on cue.
- Location preference: the dog chooses a surface that feels right.
- Avoidance: the dog avoids the elimination area due to fear, discomfort, or past unpleasant experiences.
A simple way to test timing mismatch is to compare accident times to meal times and to the last successful elimination.
Step 4: Substrate Factors and Surface Preference
Substrate matters because dogs often generalize “where to go” based on texture and absorbency.
Common substrate drivers:
- Absorbency: carpet, rugs, bedding, and laundry are easier to soil and smell-mark.
- Texture similarity: if the dog’s outdoor area is sandy or grassy, indoor surfaces that feel similar can become substitutes.
- Temperature and comfort: some dogs prefer cooler tile or warmer bedding.
- Access and confinement: if the dog is confined to a small area with soft surfaces, elimination may shift to that area.
A useful assessment move is to map indoor surfaces the dog can reach during the times accidents occur. If accidents cluster on one or two surfaces, you have a strong substrate hypothesis.
Mind Map: House Soiling Assessment Logic
Step 5: Build a Management-First Test Plan
Before changing behavior, reduce opportunities for the wrong choice.
Management tools:
- Increase elimination opportunities based on the dog’s current accident frequency.
- Use confinement when you cannot supervise, with a setup that discourages elimination on soft surfaces.
- Control access to carpeted rooms and bedding until the pattern is stable.
- Clean with an enzymatic approach appropriate for urine/feces residue so scent cues do not keep pulling the dog back.
Training targets should be simple and measurable: take the dog to the correct elimination spot, wait quietly, and reward immediately after elimination. If the dog does not eliminate within a short window, you end the attempt and try again later rather than repeating the same long wait.
Step 6: Examples That Show How Hypotheses Change
Example 1: Soft stool plus urgency A dog has frequent accidents with loose stool and sudden urgency. Even if the dog also seems “nervous,” the assessment prioritizes medical exclusion because stool form and urgency point to GI involvement.
Example 2: Accidents mainly on carpet A dog soils only on rugs and never on tile. The history shows the outdoor area is grass and the dog often lies on the rug. The plan focuses on substrate control (restrict rug access) and outdoor elimination routines, rather than punishment-based “house rules.”
Example 3: Accidents after owner leaves A dog soils within the first hour after departure, with normal stool. The assessment checks timing mismatch and arousal thresholds first, then considers separation-related factors if the pattern persists under consistent potty scheduling and management.
Step 7: Reassess with the Same Questions
After management and a consistent elimination routine begin, reassess using the original timeline: Are accidents decreasing, and are they shifting to different surfaces or times? If accidents persist unchanged, revisit medical exclusion and substrate access. If accidents drop but reappear in a specific context, you refine the trigger hypothesis and adjust the schedule or environment.
A good assessment ends with a clear, testable statement like: “Accidents occur on carpet during times of reduced supervision, with normal stool, and improve when carpet access is blocked and outdoor opportunities increase.” That statement tells you exactly what to change next.
9.5 Clean Up Protocols and Reinforcement Strategies for Elimination Training
House soiling improves fastest when you treat cleanup as part of the training plan, not a separate chore. The goal is twofold: remove odors that can trigger repeat elimination, and prevent accidental reinforcement of the wrong behavior.
Foundational Rules for Cleanup
First, clean promptly. If the dog can smell prior elimination, the location becomes a cue. Second, use an enzymatic cleaner designed for urine and feces so the odor source is actually broken down, not just masked. Third, avoid punishment after the fact. If you discover a mess later, the dog cannot connect your reaction to the earlier act, but the dog can connect your reaction to you, the area, or the act of going to the spot.
A practical mindset: every cleanup is a data point. You’re not only removing waste; you’re updating your understanding of the dog’s timing, triggers, and supervision gaps.
Mind Map: Cleanup and Reinforcement
Step-by-Step Cleanup Workflow
- Interrupt access. If the dog is still in the area, calmly guide them away to a safe spot (crate, pen, or behind a baby gate). This prevents the dog from investigating the same spot again.
- Blot, don’t smear. For liquid, blot with paper towels or a cloth you can wash. Smearing spreads odor deeper into flooring.
- Apply enzymatic cleaner. Saturate the area according to label directions. Let it sit long enough to work; quick wipe-offs often leave odor behind.
- Rinse and dry if required. Some products require rinsing after a dwell time. Follow the product instructions so you don’t create a new scent layer.
- Remove residual cues. If the dog repeatedly targets the same spot, consider additional barriers: a temporary mat removal, furniture block, or a physical barrier until the dog’s success rate stabilizes.
A small but important detail: cleanup should not become a “show.” Keep your voice neutral and your body language calm. Attention can accidentally become part of the dog’s elimination routine.
Reinforcement Strategies That Make Cleanup Pay Off
Cleanup alone doesn’t teach where to go. Reinforcement does.
Reward the correct behavior immediately. When the dog eliminates in the approved area, deliver a high-value reward right after the dog finishes. If you reward while the dog is still searching or sniffing, you may accidentally reinforce the searching behavior rather than the elimination.
Use a consistent potty cue. Say the cue as the dog begins to eliminate, not before. For example, when you take the dog out, wait quietly until you see the typical elimination posture, then say the cue once and reward after.
Reinforce the transition. After elimination, reward calm walking back to the door or into the house. This helps the dog learn that the end of the potty trip is predictable and pleasant.
Adjust the schedule after a miss. If a miss happens, reduce the time between potty trips for the next cycle. Example: if the dog typically goes out every 3 hours but misses at 2 hours, move to 90-minute intervals for a few days while you rebuild timing.
Example Scenarios
Example: Urine on a kitchen tile. You find a puddle at 7:30 a.m. Take the dog to a pen, blot and enzymatically clean the tile, then block access with a gate for the rest of the morning. Next, schedule potty trips every 60–90 minutes until the dog has several consecutive successful eliminations.
Example: Poo near the back door. The dog may be using the door area as a cue. Clean thoroughly, then keep the dog on a tether indoors so you can notice pre-elimination signs. When the dog signals and you take them out, use the potty cue once and reward immediately after elimination.
Example: Multiple small accidents. This can indicate the dog is going out too late or is too distracted to finish. Shorten the time between trips and reduce outdoor distractions during the first phase. Reward completion, not just sniffing.
Documentation That Prevents Repeating the Same Mistake
Write down: time of accident, time since last successful elimination, location, and any obvious triggers (exciting visitors, long car ride, missed morning trip). Over a few days, patterns emerge. If accidents cluster after a particular routine, you can tighten supervision and adjust the schedule for that specific window.
Cleanup is the “reset.” Reinforcement and supervision are the “teaching.” When both are handled consistently, elimination training becomes straightforward: fewer misses, faster learning, and less guesswork for everyone involved.
10. Resource Guarding and Social Conflict Training
10.1 Identifying Resource Guarding Types Including Food Toys and People
Resource guarding is not one behavior with one cause. It’s a family of behaviors that share a theme: the dog believes something valuable is at risk, and the dog tries to prevent loss. The first professional step is classification, because the training plan depends on what the dog is protecting, how the dog communicates, and what the dog learns during management.
Core Concepts That Make Identification Reliable
Start with a simple definition: guarding is any behavior that increases distance or control when a valued item or person is approached. That can look like freezing, staring, lip lifting, growling, snapping, blocking, or rushing. A dog can guard without biting, and a dog can bite without warning if the warning signals have been ignored or the dog is repeatedly pushed over threshold.
Next, separate value from threat. Value is what the dog wants to keep. Threat is what the dog predicts will happen if the approach continues. For example, a dog may value a chew (value), but the threat might be “the chew will be taken” or “my access will be interrupted.”
Finally, identify the guarding trigger pattern. Many dogs guard only when the owner is nearby, only when the dog is eating, only when a specific person approaches, or only when the dog is on a bed or behind a barrier. Those patterns are not minor details; they tell you what the dog is learning.
Mind Map: Guarding Types and What to Look For
Food Guarding Including Chews and Feeding Contexts
Food guarding is the most common category and the easiest to observe. Look for changes in posture when someone approaches: the dog may lower the head, freeze, or move the food to a safer position. A useful example is a dog that eats calmly until a hand appears near the bowl. If the dog then growls and turns the body sideways to block access, the trigger is likely the approach plus the prediction of removal.
A second example is a dog that guards only when the owner is present. The dog may tolerate family members near the bowl but escalate when the owner steps closer. That suggests the owner’s proximity predicts the “take-away” outcome.
Toy Guarding Including Tug and Fetch Items
Toy guarding often shows up during play transitions. A dog may drop a toy briefly, then pick it up again and guard when a person tries to end the game. For instance, a dog that loves tug may growl when the rope is approached while the dog is holding it. The dog may not guard when the toy is on the floor, but will guard when it is in the dog’s mouth. That distinction matters: the dog’s value is highest when the dog controls the toy.
People Guarding Including Owner and Stranger Scenarios
People guarding is frequently misunderstood as “protectiveness.” The practical test is whether the dog’s behavior changes when a person approaches a specific target. Example: a dog lies near the owner and relaxes when a visitor is far away. When the visitor steps closer, the dog moves between them and growls, then keeps position even if the visitor backs up. That pattern indicates the dog is managing access to the person, not reacting to general excitement.
Another example is stranger guarding that appears only at the doorway. The dog may guard the owner’s side during greetings but relax once the person is inside and the dog has settled. That suggests the dog’s threat prediction is tied to the entry routine.
Space and Access Guarding Including Beds Crates and Doorways
Some dogs guard locations rather than objects. If a dog guards a bed, it may allow food to be taken but will growl when someone approaches the bed area. If a dog guards a doorway, it may block passage and escalate when a person tries to pass. Example: a dog sleeps on a couch and tolerates the owner’s movement around the room, but growls when a family member tries to sit down. The “valuable resource” is the couch access and the dog’s preferred position.
Attention and Interaction Guarding Including Petting and Handling
This type can look like “selective affection.” Example: a dog enjoys petting when the owner initiates, but growls when a hand reaches toward the dog during a moment of rest. The dog may be guarding the right to control contact. Another example is a dog that guards during grooming: it may tolerate brushing for a few seconds, then stiffen and snap when the brush enters a specific body area. That often reflects a learned association between reach and discomfort or interruption.
Quick Classification Checklist for Professionals
Use the same observation structure every time:
- What is the resource? Food, toy, person, space, or interaction.
- What is the trigger? Approach, reach, eye contact, owner proximity, or transition from play.
- What is the dog’s communication? Freeze, lip lift, growl, body block, or rush.
- What happens after the dog acts? Does the person back away, stop moving, or remove the trigger?
- How consistent is it? Same pattern across times, people, and locations.
When you can answer those five points, you’re not guessing. You’re mapping the dog’s learned rules, which is the foundation for safe, effective training.
10.2 Safety First Protocols for High Risk Handling Situations
High risk handling is any moment where a dog’s behavior could cause injury to people, other animals, or the dog itself. The goal is not to “win” the session; it’s to keep everyone safe while you collect usable information and reduce the chance of escalation.
Foundational Safety Mindset
Start with three rules that guide every protocol:
- Assume the dog can escalate faster than you can react. Plan for the worst-case timing.
- Control the environment before you control the dog. Barriers, distance, and exits come first.
- Use the least intrusive intervention that still prevents rehearsal of the problem behavior. If you can prevent the trigger from reaching the dog, you usually should.
Risk Triage Before You Touch Anything
Before handling, do a quick triage using observable factors:
- Trigger proximity: How close is the trigger when the dog starts to change?
- Escalation speed: Does the dog go from calm to intense in seconds or minutes?
- Body language clarity: Are there consistent warning signs (stiffening, hard stare, lip lift, freezing, growling)?
- History of contact: Has the dog previously bitten, lunged with contact, or grabbed clothing?
- Resource context: Is the dog guarding food, toys, resting spots, people, or routes?
If you cannot answer these clearly, treat the situation as high risk and manage accordingly.
Safety Roles and Communication
Assign roles so decisions are not made mid-chaos.
- Handler: Manages distance and dog position.
- Assistant: Manages barriers, doors, leashes, and item placement.
- Observer: Tracks warning signs and calls “stop” when thresholds are crossed.
Use one simple communication phrase: “Freeze and reset.” Everyone stops movement, reduces stimulation, and returns to a safer setup.
Core Protocol Steps
- Create a safe buffer. Use gates, crates, baby gates, or a room separation. If you can’t create a buffer, increase distance outside the room.
- Set a clear exit path. You should be able to leave without stepping over the dog or reaching across it.
- Choose equipment that reduces risk. A well-fitted harness and secure leash reduce sudden slips. For very high risk, use a barrier first rather than relying on equipment.
- Reduce competing distractions. Turn off loud distractions and avoid multiple people approaching at once.
- Start below threshold. If the dog shows early warning signs, you are too close or too intense.
- Use short, low-demand interactions. Safety work often means “no touch” and “no surprises,” not long training.
- End the session early if needed. Stopping before escalation is a success.
Mind Map: High Risk Handling
Example 1: Guarding a Food Bowl
Scenario: A dog growls and stiffens when a person approaches the bowl.
- Safety setup: Place a baby gate between handler and dog. Keep the assistant near the door to manage space.
- Triage: The dog escalates in under 10 seconds when approached.
- Protocol: Begin with the dog behind the gate. Toss food away from the bowl so the dog can eat without needing to guard the exact contact point.
- Threshold rule: If the dog freezes and stares hard at the gate, you increase distance and reduce approach speed.
- End condition: If growling intensifies across attempts, you stop and reset to a farther distance for the next session.
Example 2: Guarding a Person During Leash Attachment
Scenario: The dog guards the owner and snaps when the leash is clipped.
- Safety setup: Use a barrier so the leash clip happens from a position where the dog cannot reach the handler.
- Protocol: The observer watches for lip lift, hard stare, and freezing. If those appear, the handler stops and the assistant increases the buffer.
- Low-demand interaction: Clip the leash only when the dog is already calm and the dog’s attention is on a distant reinforcer.
- Reset: If the dog lunges, you do not “try again quickly.” You reset to a safer distance and shorter duration.
Example 3: Multi Dog Space Management
Scenario: Two dogs compete near a doorway; one guards the route.
- Safety setup: Separate dogs with gates and rotate access so only one dog is in the doorway area at a time.
- Protocol: Practice route-related cues with the guarding dog behind a barrier while the other dog is managed elsewhere.
- Threshold rule: If the guarding dog starts scanning and stiffening at the barrier, you reduce proximity and shorten the exposure.
Threshold Management That Prevents Accidents
When warning signs appear, treat it as a signal to change the setup, not to push through.
- Increase distance by moving the dog or moving yourself.
- Lower stimulation by reducing approach speed, number of people, and eye contact.
- Reset the task to something the dog can do safely at that moment.
Safety first is not a delay tactic. It’s the foundation that makes training possible without turning every session into a high-stakes negotiation.
10.3 Counterconditioning and Desensitization for Guarding Triggers
Guarding is often a “protective” behavior that becomes reliable when the dog learns that certain cues predict something valuable is at risk. Counterconditioning and desensitization change that prediction. The goal is not to force calm after the dog is already over threshold; it’s to teach a new emotional response while keeping the dog under threshold long enough to learn.
Foundational Concepts for Guarding Triggers
Start by naming the guarding trigger precisely. “People near the dog” is too broad; “a specific person approaching the couch while the dog has a chew” is specific enough to train. Next, identify the dog’s current response pattern: does the dog stiffen first, growl, lunge, or freeze? Those steps matter because they tell you where threshold likely begins.
Threshold is the point where learning stops being efficient and safety becomes the priority. If the dog is already growling or escalating, counterconditioning won’t land; you’ll mostly be rehearsing the guarding chain. Desensitization reduces the intensity of the trigger so the dog can stay in a learnable state.
Counterconditioning pairs the trigger with something better than the dog expects. For guarding, “better” usually means higher-value food or access to a safe, non-contested resource. The dog should experience the trigger as a reliable predictor of good things, not a predictor of loss.
Mind Map: the Training Logic
Building the Setup Without Creating a Fight
Choose a training environment where you can control distance and movement. Use a barrier if needed so the dog can see the trigger without being able to close the gap. For example, if the trigger is a person approaching the dog while the dog has a chew, place the dog behind a baby gate or on the far side of a room.
Select a safe target location for the dog to stand or lie on. This reduces random movement and makes timing easier. If the dog guards the chew itself, keep the chew present but do not ask for exchanges during early steps. The first phase is emotional change, not negotiation.
Stepwise Desensitization Plan
- Find the starting distance: stand at a distance where the dog notices the trigger but does not escalate. You’re looking for signs like orienting or mild attention, not stiffening that grows stronger.
- Keep the trigger brief: the person approaches only a short distance or for a short duration, then stops. Repeated short exposures are easier for the dog to tolerate than one long session.
- Keep body mechanics consistent: approach speed and angle should match across reps. If the person suddenly moves faster, the dog may jump to a higher intensity level.
- Increase one variable at a time: once the dog stays under threshold for several reps, adjust distance slightly closer or duration slightly longer.
Example: A dog guards a stuffed toy when a household member walks into the room. Start with the member entering from the doorway and stopping at a far corner for two seconds. If the dog remains calm, reduce the distance by a small step and increase to three seconds. If the dog stiffens, you went too far; return to the last successful distance.
Counterconditioning Pairing Rules
During each desensitization rep, deliver high-value food at a predictable moment. The food should arrive while the trigger is present, not after the dog has escalated. A practical rule: start feeding as soon as the dog can detect the trigger at the chosen intensity, then continue until the trigger ends.
Food placement matters. If the dog guards the chew, toss or place food slightly away from the contested item so the dog can eat without needing to “defend” the exact spot. Over time, you can refine placement to support calm proximity, but early reps should reduce conflict.
Example: When the person approaches, the dog receives a stream of small bites delivered from the person’s side of the barrier. The person does not reach toward the chew. The dog learns: “Approach cue happens, food arrives, nothing is taken.”
Criteria, Progression, and Stop Signs
Define success for each step: for instance, “no growl, no lunge, and body stays loose” for five consecutive reps. If the dog shows escalating signs—hard stare, lip lift followed by growl, or sudden forward movement—stop the session, increase distance next time, and reduce duration.
Also watch for “silent escalation.” Some dogs skip obvious vocalizing and go straight to intense stillness. Treat that stillness as a warning sign and adjust immediately.
Common Mistakes That Stall Progress
- Training too close: you get rehearsals of guarding instead of new learning.
- Feeding only after escalation: the dog learns that guarding causes food, which is the opposite of what you want.
- Changing the person’s behavior mid-rep: inconsistent approach speed or reaching motions can spike intensity.
- Trying exchanges too early: asking for trade while the dog is still learning the emotional meaning of the trigger can reset progress.
A Short Integrated Example Sequence
A dog guards a food bowl when a specific person approaches. Start with the person standing at a far distance behind a barrier while the dog is eating. The person approaches slightly and stops; during the approach, the dog receives extra high-value bites placed away from the bowl. After several calm reps, the person approaches a little closer for a slightly longer stop. If the dog stiffens, the next session begins at the previous distance. Only after the dog reliably stays under threshold at closer distances do you consider any handling-related goals, and even then you keep the emotional pairing intact.
This approach turns guarding triggers into predictable signals for good outcomes, while desensitization ensures the dog can actually learn instead of just survive the moment.
10.4 Teaching Trade and Consent Based Exchange Skills
Trade and consent based exchange skills help dogs learn that approaching people and objects is predictable and safe. The core idea is simple: when the dog offers a behavior you can use, you provide a clear outcome, and the dog learns that giving up something valuable is worth it.
Foundational Concepts for Exchange Training
Start with three building blocks.
- Value mapping: Identify what the dog currently values in the moment. It might be a sock, a chew, a person’s attention, or a leash. If you don’t know the value, you can’t set a reliable replacement.
- Clear entry criteria: Decide what the dog must do to earn the exchange. Common options are approaching, turning toward you, dropping the item, or touching a target.
- Consent based timing: You don’t force contact. You wait for the dog to be in a state where the exchange is possible, then you deliver the replacement quickly and calmly.
A useful rule of thumb: if the dog is already escalating, you’re not teaching exchange—you’re managing risk.
Consent Based Setup and Safety Boundaries
Before training, define what “consent” means in your environment.
- Distance first: Begin far enough away that the dog can take the replacement without stiffening, snapping, or freezing.
- No reach for the item: Your hand should not invade the dog’s space to grab the resource.
- Replace, then remove: The dog should receive the better or equal item before the original is taken away.
- Stop criteria: If the dog shows hard eye contact, lip lift, growl, or sudden stillness, end the attempt and reset with more distance or lower value.
This keeps the dog’s learning pathway intact: “I can choose to engage, and good things happen.”
The Trade Sequence That Dogs Can Learn
Use a consistent sequence so the dog doesn’t have to guess.
- Signal: Use a cue like “trade” only after the dog has learned the pattern.
- Offer replacement: Present a high value item at a safe distance.
- Mark the moment of acceptance: If you use a marker, mark when the dog orients to the replacement.
- Remove original after acceptance: Take the original only once the dog has the replacement.
- Return to neutral: End the interaction calmly to avoid lingering conflict.
A practical example: Your dog has a chew. You approach from the side, show a tastier chew, and wait. The moment your dog takes the new chew, you pick up the old one. If the dog ignores the replacement, you step back and try again later.
Mind Map: Exchange Skill Building
Teaching Progression from Easy to Hard
Begin with low stakes and build.
Stage 1: Replacement acceptance
- Dog is near you but not guarding.
- You toss or present a replacement so the dog can take it without conflict.
- Example: Dog is chewing a toy. You calmly offer a small piece of chicken. The dog takes it; you then remove the toy.
Stage 2: Controlled approach
- You ask for a simple behavior that predicts exchange, such as “touch” to your hand or “look.”
- Example: Dog drops the item to sniff your hand. You mark, feed, and then remove the item.
Stage 3: Trading while the dog holds the resource
- You present replacement at a distance where the dog can still accept.
- Example: Dog is carrying a sock. You show a treat near your body, wait for the dog to turn toward you, then deliver the treat and take the sock.
Stage 4: Higher value and real life contexts
- Increase difficulty by changing the resource, location, or distractions.
- Example: Trade a high value chew in the living room, then repeat in the kitchen with the same sequence.
Example Scripts for Clear Timing
Example: Food Bowl Trade
- You stand to the side, not over the dog.
- You offer a tastier piece from the side.
- The moment the dog takes it, you pause and then adjust the bowl.
- If the dog stiffens, you increase distance and reduce the stakes.
Example: Toy Guarding During Play
- You stop play before the dog escalates.
- You offer a replacement toy or treat.
- You mark acceptance, then end the original item’s access.
- You resume play only after calm body language returns.
Troubleshooting Without Guessing
If trades fail, check the most common causes in order.
- Replacement value mismatch: The dog ignores the offer because it’s not worth it.
- Distance too small: The dog feels trapped and chooses avoidance or defense.
- Removal too early: The dog learns that accepting the replacement doesn’t prevent the original from being taken.
- Cue used too soon: The dog doesn’t yet understand the pattern, so the cue becomes noise.
Your goal is not to “win” the exchange. It’s to teach the dog that choosing to engage leads to a safe, predictable outcome.
10.5 Multi Dog Household Strategies Including Space Management and Rotation
Multi-dog homes often fail training for a simple reason: the dogs are learning each other’s habits as much as they’re learning the handler’s cues. The goal of space management and rotation is to control access to triggers, reduce rehearsal of problem behavior, and keep each dog’s learning environment predictable.
Start with a baseline map of the household. Identify where dogs naturally meet, where they can block each other, and where resources are concentrated: food areas, doorways, couches, hallways, and favorite resting spots. Then decide which behaviors you are preventing. Common targets include leash-free rushing, doorway guarding, food-related tension, and attention-seeking that escalates into chasing or snapping.
Space management uses physical and routine structure to lower the chance of conflict. Rotation uses time-based access so each dog gets calm, supervised opportunities to practice desired behaviors without being interrupted by the others.
Mind Map: Space Management and Rotation
Building Zones That Actually Work
Create at least three functional zones: a training zone, a calm resting zone, and a separation zone. The training zone is where one dog practices cues with the other behind a barrier. The calm resting zone is where both dogs can relax without competing for attention. The separation zone is for short resets when arousal rises.
Example: Two dogs, Milo and Juniper, both rush the front door. Install a baby gate at the hallway entrance. Feed and settle them in different areas. When the doorbell rings, neither dog gets to rehearse charging the threshold. Instead, one dog practices a mat cue in the training zone while the other rests in the calm zone.
Rotation That Prevents “Accidental Coaching”
Rotation is not just “separate them.” It is structured access so each dog experiences success more often than conflict.
Use short blocks: 3–8 minutes of active training for one dog, followed by 2–5 minutes of calm time for both. During the training block, the other dog should be behind a barrier or in a separate room with a chew or a stuffed toy. The practicing dog should not have to compete for handler attention.
Example: Juniper guards the couch. For a week, the couch is off-limits unless Juniper is in the calm zone with a long-lasting chew. When Milo trains “down-stay” in the training zone, Juniper is rotated into the separation zone with a predictable routine: chew, settle, then brief marker-based check-ins.
Managing Movement and Doorways
Doorways are high-value choke points. Decide in advance who moves first and how you prevent sudden proximity.
A simple rule set:
- One dog moves at a time through a doorway.
- The other dog is either behind a barrier or on a tether in a safe zone.
- Doors open only when the moving dog is calm enough to accept a marker and a reward.
Example: When bringing in groceries, keep one dog on a tether near the kitchen gate and feed the other a chew in the separation zone. This prevents the “door opens → dogs surge → someone gets corrected → arousal rises” cycle.
Integrating Rotation with Training Goals
Rotation should support the exact skills you want. If your goal is polite greetings, practice greetings with one dog at a time while the other is behind a barrier. If your goal is leash walking without lunging, practice walking with one dog while the other is settled and not allowed to rehearse reactions.
Use mat work as the shared calm behavior. Teach each dog to rest on a mat in the calm zone. Then, during rotation, the non-practicing dog gets rewarded for staying on their mat while the practicing dog works.
Example: Milo learns “place” in the living room. Juniper learns “place” in the same room but at a different spot. During rotation, Milo practices “sit and look” near the gate while Juniper stays on her mat. If Juniper leaves her mat, you end the session early and reset with more separation.
Troubleshooting Thresholds Without Guessing
Track two numbers: how long it takes for each dog to show the first sign of escalation, and what triggers it. Escalation signs might include stiffening, staring, growling, lunging, or frantic pacing.
If a dog escalates during a rotation block, reduce proximity immediately: increase barrier distance, shorten the session, or switch to a lower-demand behavior like “marker then treat” for calm orientation.
A practical reset protocol:
- Stop the session before the dog rehearses the full behavior.
- Separate into the separation zone for a brief calm period.
- Resume with an easier task that the dog can complete with minimal effort.
Quick Checklist for Daily Use
- Zones are set before training starts.
- Rotation blocks are short and predictable.
- Non-practicing dogs are occupied and calm.
- Doorways and resources are controlled.
- Sessions end early when thresholds are reached.
When space management and rotation are consistent, dogs stop treating each other as the main event. Training becomes about the cues you teach, not the chaos they can create.
11. Advanced Skill Generalization and Proofing for Real World Reliability
11.1 Generalization Principles Across People Places and Contexts
Generalization is what happens when a dog performs a learned behavior in new situations without needing the exact same setup as training. If your dog only works in the living room with the same treats and the same person, you don’t have a training problem—you have a generalization problem.
Core Idea: Behavior Is Trained, Not Just Cued
A common mistake is to treat the cue as the whole story. In reality, the dog learns a pattern: cue plus context plus reinforcement history. When the context changes, the dog may still know the cue, but it may not know that the cue should produce the same outcome.
Start by separating three variables:
- Cue: the signal you give (hand motion, word, body position).
- Response: what the dog does (sit, heel, look at you).
- Context: people, place, distance, noise, surfaces, and what the dog can access.
Your goal is to keep the response stable while gradually varying context.
Mind Map: What Changes and What Must Stay
People Generalization Without Confusing the Dog
Dogs often generalize poorly across handlers because they treat each person as a separate “training environment.” Fix this by rotating handlers while keeping the training mechanics consistent.
Example: Teach “sit” with a marker and the same treat type. Then, in short sessions, have three people each deliver the cue the same way and mark the same response. If the dog hesitates with a new person, don’t punish it—reduce difficulty. Move closer, lower distractions, or use a higher-value reinforcer for that person’s first attempts.
A practical rule: when you change the person, keep everything else constant for a few repetitions. After the dog succeeds, you can increase difficulty.
Place Generalization Through Controlled Distance from Training
Places differ in smell, footing, and competing stimuli. The dog may treat “outside” as a different game entirely.
Example: If “leave it” works reliably in the kitchen, test it first in the hallway, then the driveway, then a quiet park. Use the same setup logic each time: start with a low-value target, mark the correct choice, and reinforce quickly. If the dog grabs early, the target is too tempting for that context—switch to an easier version (farther away, less interesting item, or shorter exposure).
Context Generalization Using a Difficulty Ladder
Generalization fails when you jump too far. Build a ladder where each step changes one variable at a time.
Example Ladder for “look at me” during a walk:
- Quiet room, dog on leash, you stand still.
- Quiet room, you take one step.
- Driveway, you take one step.
- Park edge, you take one step.
- Park path, you take three steps.
- Same path, light passing foot traffic at a distance.
At each step, keep the cue and criteria identical. Only change the context variable you’re targeting.
Reinforcement Consistency That Actually Matters
Dogs generalize best when the reinforcement pattern is predictable. Timing is part of the reinforcement. If you mark and then delay delivery in new contexts, the dog may not connect the behavior to the outcome.
Example: When teaching “down-stay,” reinforce the first correct hold immediately in every new location. Later, you can introduce duration. Don’t introduce duration and a new location at the same time.
Advanced Detail: Criteria, Not Just Success
Success in a new context can be misleading. The dog might perform the behavior once, but with sloppy form or inconsistent timing.
Use criteria checks:
- Form: does the dog meet the physical definition every time?
- Latency: how quickly does the dog respond after the cue?
- Stability: does the dog maintain the behavior when the environment shifts slightly?
Example: For “heel,” require the same foot placement or body alignment standard across contexts. If the dog forges ahead outdoors, that’s not “generalization achieved.” It’s “generalization partially achieved,” and you need to adjust criteria or difficulty.
Mind Map: A Simple Decision Loop

Putting It Together in a Reliable Training Plan
When you plan generalization, write it like a checklist: rotate people, then places, then conditions, while holding cue mechanics and response criteria steady. Each session should include a few easy reps to establish the pattern, followed by a small number of targeted reps to test the new context.
If you do this consistently, your dog stops treating training as a single room activity and starts treating it as a skill that works across the real world—without you having to micromanage every moment.
11.2 Proofing Plans Including Variable Reinforcement and Distraction Gradients
Proofing is what turns a skill from “works in this exact setup” into “works when life shows up.” Two tools make that shift reliable: variable reinforcement and distraction gradients. Variable reinforcement prevents the dog from learning a single predictable payoff pattern, while distraction gradients control the difficulty so the dog keeps succeeding as conditions change.
Variable Reinforcement Foundations
Start with a simple truth: dogs notice patterns. If every correct response earns the same reward every time, the dog may perform only when the reward expectation is high and consistent. Variable reinforcement keeps the dog engaged by making the reward rate less predictable while still maintaining a clear connection between the behavior and the outcome.
Use variable reinforcement in a way that does not remove clarity. The dog should still know what earns reinforcement. Only the timing and frequency of reinforcement should vary.
Practical example: Teaching “sit” near a driveway.
- Phase 1: Sit → marker → treat every time for 10–20 reps.
- Phase 2: Sit → marker → treat on average every other rep (some reps get a smaller treat, some get a bigger one, some get a treat after a short pause).
- Phase 3: Sit → marker → treat on a variable schedule (for example, treat roughly 60–70% of correct reps) while keeping the marker consistent.
This approach builds persistence. The dog learns, “Sitting pays off,” not “Sitting pays off only when the treat machine feels generous.”
Distraction Gradients Foundations
A distraction gradient is a planned increase in difficulty. Difficulty can come from distance, duration, movement, noise, people, other dogs, or your own body position. The key is that you increase only one major factor at a time, and you do it at a pace that preserves success.
Define success before you start. For example: “At least 80% correct responses across three short sets.” If performance drops below that, you went too fast or too far.
Practical example: Proofing “leave it” around a dropped snack.
- Level 1: Snack visible but behind a barrier; dog can see it, cannot reach it.
- Level 2: Snack on the floor at a distance where the dog can reliably look away and return to you.
- Level 3: Snack closer, with a person walking past at a slow pace.
- Level 4: Snack closer, with faster movement and mild crowding.
Each level should last long enough to confirm reliability, not just to get a few lucky wins.
Integrated Proofing Workflow
Use variable reinforcement inside each gradient level, not instead of it.
- Choose the behavior and the criterion: what counts as correct.
- Set the gradient level: start where the dog can succeed.
- Apply variable reinforcement: vary treat frequency and size while keeping the marker and criterion stable.
- Add one distraction increment: small changes only.
- Return to the previous level if accuracy drops: reduce difficulty, then rebuild.
This workflow prevents a common mistake: increasing distraction while also changing the reinforcement rules. When both shift at once, you cannot tell what caused the drop.
Mind Map: Proofing with Variable Reinforcement and Distraction Gradients
Example: Proofing Recall Readiness
Recall is often trained with a clean environment, then tested in the real world where distractions multiply. Proofing makes that transition structured.
Setup: Teach “come” with a consistent marker and a reliable reinforcer.
- Gradient Level A: Quiet yard, 10–15 meters. Reinforce variable: treat on about 70% of correct recalls, with occasional higher-value treats.
- Gradient Level B: Same yard, add a person standing still 20 meters away. Keep variable reinforcement, but reduce the distance slightly if accuracy falls.
- Gradient Level C: Add movement: person walks slowly across the far end. Increase success by shortening the recall distance and using a slightly higher reinforcement rate.
- Gradient Level D: Add a mild distraction like a dropped toy in the distance. Only progress if the dog returns quickly and maintains calm body language.
If the dog hesitates at Level C, do not “push through.” Return to Level B for a few sets, then reintroduce the moving person in smaller increments.
Example: Proofing Calm Wait at Doors
Door manners combine duration, context, and impulse control. Proofing should therefore include both time and environmental change.
- Gradient Level 1: Door closed, you move your hand toward the knob without opening. Dog waits for a short duration. Reinforce variable: treat some correct waits immediately, others after a brief pause.
- Gradient Level 2: Door opens a crack. Reinforce variable with a slightly higher rate to protect success.
- Gradient Level 3: Door opens fully while a family member walks past in the hallway. Keep the wait cue consistent and vary reinforcement frequency.
- Gradient Level 4: Busy entryway sounds. If the dog breaks the wait, reduce the distraction level and rebuild duration before increasing distractions again.
The dog learns that waiting pays off even when the environment becomes interesting.
Common Failure Points and Fixes
- Failure: Dog stops responding when reinforcement becomes less frequent. Fix: Increase average reinforcement rate at that gradient level, then reduce gradually.
- Failure: Dog performs well at one distraction level but fails at the next. Fix: Split the next level into two smaller steps and re-check success.
- Failure: You change both distraction and reinforcement rules simultaneously. Fix: Change only one variable per step.
Proofing is not about making the dog tougher through chaos. It is about making success repeatable through controlled difficulty and reinforcement that stays meaningful even when it is not perfectly predictable.
11.3 Training Under Distraction With Controlled Exposure and Criteria Changes
Distraction training is not “more chaos.” It is a planned way to teach a dog that the skill still works when the world gets louder, closer, or more interesting. The core idea is simple: you control exposure intensity, you change criteria gradually, and you keep the dog successful often enough to learn the right pattern.
Foundational Concepts That Make Distraction Training Work
Start with three building blocks.
-
Threshold and distance: Every dog has a point where learning becomes unreliable. If the dog is already over threshold, you are not training; you are just collecting stress.
-
Criteria: Criteria is the minimum standard you require for reinforcement. In distraction work, criteria should start easy and then tighten.
-
Reinforcement rate: When distraction increases, the dog needs more frequent reinforcement for correct responses, at least during the learning phase.
A practical rule: if accuracy drops sharply, you either increased distraction too fast or tightened criteria too quickly.
Controlled Exposure Plan
Use a “ladder” of distractions. Build it from your real environment, not from imagination.
- Level 1: Mild distraction at a distance where the dog can still respond.
- Level 2: Same distraction, closer or more frequent.
- Level 3: Different distraction type, still at a manageable distance.
- Level 4: Multiple distractions at once, with the dog’s attention supported by your setup.
Keep the distraction ladder stable for a session. If you change three variables at once—distance, duration, and criteria—you won’t know what caused the success or failure.
Criteria Changes Without Surprise
Criteria changes should be small and measurable. For example, if you are training a recall cue, you might change criteria in this order:
- Step A: Dog responds to cue while standing still.
- Step B: Dog responds while walking slowly.
- Step C: Dog responds while another person passes at a distance.
- Step D: Dog responds while the passer is closer and moving faster.
For each step, reinforce correct responses immediately and consistently. Only after accuracy improves do you tighten the standard.
Mind Map: Distraction Training Structure
Example: Teaching Sit Under Street Noise
Goal: Sit on cue while cars pass.
-
Warm up: In a quiet area, teach sit with a marker and high-value treats. Confirm the dog can do it reliably.
-
Level 1 exposure: Move to the street but keep the dog far enough that cars are noticeable, not overwhelming. Cue “sit,” mark the moment the dog sits, then deliver the treat.
-
Criteria change: At Level 1, start with “sit” and reinforce quickly. After several correct reps, require a slightly longer sit before reinforcement.
-
Level 2 exposure: Bring the dog a little closer. Keep the longer-sit criteria only if accuracy stays high. If the dog starts to hesitate or look away, return to the previous distance or shorten the sit duration.
-
Recovery: If the dog breaks the sit, do not repeat the cue immediately. Reset by stepping back to an easier distance and run a few successful reps before trying again.
This approach prevents the dog from learning that “street noise means I can ignore cues.”
Example: Recall with a Passing Dog
Goal: Come when cued even when another dog appears.
- Start at a distance where your dog can hear and respond.
- Use a high-value reinforcer and reinforce the first correct response every time during early learning.
- Criteria ladder: first successful recalls when the other dog is far and moving slowly, then closer and faster.
- If your dog freezes, lunges, or fails to respond, reduce difficulty by increasing distance before changing anything else.
A useful detail: after a successful recall, practice a short “finish” routine—turning back toward you and taking the treat—so the dog learns what to do after the hard part.
Decision Rules That Keep Sessions Clean
- Accuracy first: If you cannot maintain correct responses, you are too hard too soon.
- Change one variable: Distance OR criteria OR reinforcement rate, not all at once.
- Short blocks: Work in brief sets, then reset. Long sessions at high distraction often produce fatigue-based mistakes.
Controlled exposure plus gradual criteria changes turns distraction from a threat into a training ingredient. The dog learns that the cue still matters, even when the environment is doing its best impression of a distraction machine.
11.4 Cue Reliability Including Duration Distance and Duration Based Behaviors
Cue reliability means the dog performs the intended behavior when the cue is given, at the right intensity, for the right amount of time, and in the right location or movement context. Reliability is not a personality trait; it’s a training outcome you can measure. The key idea is simple: a cue is only as dependable as the conditions under which it was taught.
What “Reliable” Looks Like in Practice
A cue has four reliability dimensions:
- Topography: the dog does the correct behavior shape (sit vs. half-sit).
- Latency: how quickly the dog starts the behavior after the cue.
- Duration: how long the dog maintains the behavior.
- Distance and movement context: whether the dog can do it while you are farther away or while you move.
If you only train short, close, and fast-to-reward versions, the dog will “work” in that narrow setup and then fall apart elsewhere. The fix is systematic cue engineering.
Duration Based Behaviors as a Separate Skill
Duration based behaviors are not just “hold it longer.” They require the dog to stay in the behavior while reinforcement timing changes. For example, a down-stay at 2 seconds is a different task than a down-stay at 60 seconds because the dog must tolerate the time gap without checking out.
A practical rule: increase duration only when the dog is already successful at the current level with minimal reminders.
Mind Map: Cue Reliability Variables
Building Duration Reliability Step by Step
Start with a behavior that is already easy to perform. Then train duration using a reinforcement plan that matches the dog’s current capacity.
Stage 1: Micro-holds
- Cue: “Down.”
- Setup: dog is already in down or can be placed quickly.
- Reinforcement: reward immediately, then reward again after 1–2 seconds.
- Example: If the dog breaks at 1 second, you’re asking for too much; return to immediate reinforcement and rebuild the 1–2 second step.
Stage 2: Stable holds
- Increase by small increments (often 2–5 seconds at a time).
- Keep the cue consistent and avoid repeating it rapidly. If the dog doesn’t hold, you reset rather than nag.
- Example: At 10 seconds, you might reward at 10 seconds every time for several sessions, then begin to vary reinforcement timing slightly.
Stage 3: Maintenance under changing reinforcement
- Once the dog can hold reliably, you can shift from “reward at the exact end” to “reward within a window.”
- Example: Reward any hold that lasts between 20–25 seconds, which teaches the dog that staying still is valuable even when the reward isn’t perfectly predictable.
Building Distance Reliability Without Creating a New Behavior
Distance changes the dog’s attention and the handler’s influence. Train distance in layers:
- Same room, one step away
- Cue “Sit,” reward while you are still close.
- Then cue “Sit” and take one step away before the reward.
- Two to three steps away
- Keep the dog’s success high by using a shorter duration at first.
- Handler movement
- Train “Sit” while you take a few steps, then stop, then reward.
Example: If your dog breaks the sit when you walk, don’t jump to longer distance. Return to “sit while I’m still,” then add movement in smaller chunks.
Combining Duration and Distance in a Controlled Sequence
Combine variables only after each is reliable on its own. A common failure pattern is increasing distance and duration simultaneously, which makes it impossible to know what caused the breakdown.
A clean sequence:
- First, train duration at close distance.
- Next, train distance with short duration.
- Finally, increase duration while maintaining distance.
Example plan for a down-stay:
- Close distance: down for 30 seconds.
- Distance: down for 5–10 seconds while you step away.
- Combine: down for 20 seconds at the new distance.
Data That Actually Helps
Track three numbers per session for each cue:
- Percent correct: did the dog complete the behavior after the cue?
- Latency: time from cue to behavior start.
- Hold time: duration achieved before breaking.
If percent correct drops, reduce difficulty immediately. If percent correct stays high but hold time drops, adjust duration criteria and reinforcement timing.
Reset Steps That Prevent “Cue Confusion”
When errors happen, avoid repeating the cue as if it’s a suggestion. Use a reset:
- Return to the last level where the dog succeeded.
- Re-establish the reinforcement pattern.
- Reintroduce the cue once the dog is ready.
Cue reliability is built by teaching the dog that cues predict outcomes under specific, gradually changing conditions. When you manage duration, distance, and reinforcement timing together with clear criteria, the cue becomes dependable rather than hopeful.
11.5 Troubleshooting Performance Drops With Data Review And Reset Steps
Performance drops happen when the dog’s learning conditions change, even slightly. The goal of troubleshooting is to identify which condition shifted, then restore the training environment to a level where success is likely again. Think of it as returning to the last reliable “settings,” not as starting over.
Core Concepts for Interpreting Drops
A performance drop usually shows up as one of three patterns: accuracy falls, speed changes, or behavior quality becomes inconsistent. Accuracy is whether the dog does the requested behavior. Speed is how quickly the dog responds. Quality is whether the behavior meets your criteria, like heel position staying in range or a recall landing in a calm finish.
Before changing anything, confirm the drop is real. If you only notice it during high-distraction moments, the behavior may be fine at baseline and only failing under a specific stimulus. If the dog fails across contexts, the issue is more likely to be fatigue, stress, reinforcement value, or a cue clarity problem.
Data Review That Actually Helps
Use a simple session log with four fields: cue, context, outcome, and notes. Outcome can be coded as success, partial, or fail. Context should include distance, duration, and distraction type. Notes capture anything unusual: different handler, new treats, weather, a longer walk before training, or a dog that already had a stressful interaction.
After each session, compare today’s data to the dog’s recent baseline. Look for one of these: a consistent increase in fails at the same distance, a shift from success to partial responses, or a pattern where the dog starts strong then deteriorates. The last pattern often points to fatigue, reinforcement depletion, or increasing arousal over the session.
Mind Map: Performance Drop Diagnosis
Reset Steps That Restore Learning Conditions
A reset is not a punishment and not a lecture. It is a controlled return to easier repetitions with clear feedback and strong reinforcement. Start with the least invasive step and move only as needed.
-
Reduce difficulty immediately. Lower distance, shorten duration, or reduce distraction intensity. If the dog is failing at 10 meters, try 5 meters. If the dog can do the behavior at a standstill but fails while walking, train at a standstill for a few minutes.
-
Rebuild the reinforcement flow. If you have been using smaller rewards, fewer rewards, or longer gaps between rewards, tighten the schedule. For example, if recall used to get a high-value treat every time and now gets it only sometimes, return to consistent reinforcement for a short block.
-
Verify marker timing and criteria. If you use a marker, check that it happens at the correct moment and that your criteria match what you’re marking. A common failure is marking slightly late, which teaches the dog to offer the behavior later than you intend.
-
Shorten the session and end on success. When a dog starts strong then declines, stop earlier. Do a small set of easy successes, then finish. This prevents the dog from learning that “training time” reliably ends in frustration.
-
Check for non-training causes. If the drop is sudden and broad, consider pain, illness, sleep loss, or stress from events outside training. For instance, a dog that suddenly struggles with sit may have discomfort when lowering the body, not a motivation problem.
Mind Map: Reset Step Sequence
Concrete Examples with Clear Reasoning
Example: Heel position gets sloppy after a week of progress. Data shows success was high at close range, but partial responses increased during longer walking segments. Reset: return to stationary heel for two minutes, then walk only a few steps before rewarding. If quality improves, the issue was likely duration-related arousal or criteria drift, not a loss of understanding.
Example: Recall accuracy drops only near the park entrance. Baseline recall at home is strong, but fails cluster at the same location. Reset: train recall at a farther point where the dog can succeed, then gradually move closer in small increments. If you jump back to the entrance immediately, you risk training the dog that recall is followed by a stressful exposure.
Example: Sit becomes inconsistent across all contexts. Session notes show the dog had a rough day, less appetite, and more stiffness. Reset: pause sit shaping, check comfort, and use alternative behaviors that are easier and less physically demanding. If sit improves after comfort is addressed, the “training problem” was actually a body problem.
Practical Troubleshooting Workflow
Use a repeatable order: confirm the pattern, review data by context, choose the simplest reset step that targets the likely cause, then run a short success block. If performance rebounds, keep the new conditions stable for a few sessions before raising difficulty again. If it does not, widen the search to marker timing, reinforcement value, and health or stress factors.
12. Professional Case Management and Practical Session Design
12.1 Building a Training Plan From Intake Notes and Baseline Data
A training plan is not a list of tricks. It’s a structured answer to three questions: What is happening now, what should happen instead, and what will you do differently this week to make that change more likely? Intake notes tell you the story so far; baseline data tells you what the story looks like in measurable terms.
Step 1: Convert Intake Notes into Testable Hypotheses
Start by sorting intake notes into categories that predict behavior. For each category, write a simple hypothesis you can check during baseline.
- Trigger hypothesis: “When the dog sees X from Y distance, the dog will show Z behavior.”
- Motivation hypothesis: “The dog will work for food/toy more reliably in context A than B.”
- Skill gap hypothesis: “The dog fails at cue X because the cue is unclear or reinforcement history is inconsistent.”
- Constraint hypothesis: “The dog’s stress level rises faster indoors than outdoors due to noise or handling patterns.”
Example: A client reports leash reactivity and says the dog “hates bikes.” Your hypothesis might be narrower: “Bikes at close distance increase barking and lunging; the dog can remain calm at farther distances when reinforcement is available.”
Step 2: Collect Baseline Data That Matches the Problem
Baseline should be short, repeatable, and specific. Choose a few target behaviors and measure them the same way every time.
Pick 2–4 target behaviors (not ten). For each, define what counts.
- Reactivity: barking/lunging episodes per 5 minutes.
- Recall readiness: percentage of returns within 3 seconds.
- Calm settling: time spent in a down or on a mat within a 10-minute window.
Pick 2–3 contexts where the problem shows up.
- Indoor hallway vs living room.
- Walk at a quiet street vs near a park entrance.
- Before dinner vs after dinner.
Record simple metrics you can act on:
- Latency to respond to cue.
- Success rate at a given distance.
- Rate of problem behavior.
- Whether the dog can take food during the trigger.
If the dog can’t take food at baseline, your plan must include management and threshold work before you expect learning.
Step 3: Define Clear Outcomes Using Observable Criteria
Outcomes should be written as “when X happens, the dog does Y with Z reliability.” Avoid vague goals like “be less reactive.”
Example outcomes:
- “During controlled exposures, the dog will orient to the trigger and take 80% of offered treats within 2 seconds at 20 meters.”
- “On cue, the dog will perform a 3-second sit within 1 meter of the handler in 8 out of 10 trials indoors.”
- “In the home, the dog will settle on a mat for 5 minutes with no more than one brief reposition in 3 out of 4 sessions.”
Step 4: Build the Plan Around a Weekly Learning Loop
A good plan uses a loop: setup → practice → measure → adjust.
Setup
Choose the easiest version of the task that still resembles real life.
- Use distance, barriers, and timing to keep the dog below threshold.
- Arrange reinforcement so the dog has a reason to engage.
Practice
Use short sessions with consistent criteria.
- 5–10 minutes of focused work beats 45 minutes of frustration.
- Rotate skills so the dog doesn’t fatigue into errors.
Measure
After each session, record:
- Success rate for the target behavior.
- Any escalation signs.
- Whether the dog took reinforcement during the key moment.
Adjust
Change one variable at a time.
- If success drops, increase distance or reduce duration.
- If success is high, gradually raise difficulty (closer distance, longer duration, more distractions).
Step 5: Assign Homework That Matches the Dog’s Real Life
Client homework should be small enough to do consistently.
- Skill practice: 3–5 trials, once or twice daily.
- Management practice: predictable routines that prevent rehearsal of the problem.
- Observation practice: one short note after walks, such as “trigger distance and response.”
Example homework for leash reactivity:
- Practice “look at me” or marker-based engagement at a distance where the dog takes treats.
- Keep the dog on a setup that prevents full rehearsal of lunging.
- Note the closest distance where treats were still accepted.
Mind Map: Intake to Plan
Example: Turning Notes into a Concrete Week
Intake: “Dog barks and lunges at other dogs on walks.”
Baseline choices:
- Measure barking/lunging episodes per 5 minutes.
- Test two distances: 30 m and 20 m.
- Record whether the dog takes treats during the approach.
Outcome for week 1:
- “At 30 m, dog will take treats and orient within 2 seconds on 8/10 trials.”
Plan:
- Setup: walk route with predictable sightlines; use a barrier or wider street when possible.
- Practice: marker + treat for orienting; stop before escalation.
- Measure: closest distance where treats are consistently accepted.
- Adjust: if treats are refused at 30 m, keep distance and reduce exposure duration.
This approach keeps the plan grounded: you’re not guessing what the dog needs—you’re testing it, one controlled variable at a time.
12.2 Designing Sessions With Warm Up Reinforcement Flow and Skill Rotation
A good session starts by making success easy, then gradually earns the right to be harder. Warm up is not “practice without purpose.” It is a controlled ramp that lowers friction, calibrates the dog’s attention, and sets a clear reinforcement rhythm before you ask for tougher behaviors.
Warm Up Reinforcement Flow
Use a short sequence that reliably increases engagement. The dog should experience a pattern like: orient → succeed quickly → earn at a steady rate → settle into the working mood.
Step 1: Arrival and decompression (1–3 minutes). Keep the dog moving through low-demand actions: loose leash steps, a brief sniff allowance in a safe zone, and one or two easy markers for checking in. Example: if the dog tends to jump on arrival, ask for a single “sit for the opener” at a distance from the door, then release to sniff.
Step 2: Engagement warm up (2–4 minutes). Choose one simple skill that the dog already understands and can do in the current environment. Reinforce frequently at first. Example: marker-and-reward for orienting to your face every time the dog looks up within a second of hearing the cue.
Step 3: Skill activation (2–5 minutes). Bring in the session’s target behaviors, but in “starter mode.” Reduce difficulty by shortening distance, lowering duration, or increasing the rate of reinforcement. Example: for “down,” start with down from a stand at arm’s length, not from across the room.
Step 4: Reinforcement rhythm check (throughout). If the dog’s rate of correct responses drops, you likely raised difficulty too fast or thinned reinforcement too early. Return to the last easy criterion for 3–5 reps, then continue.
A practical rule: during warm up, aim for a high success rate (often around 80–95%). Later in the session, you can allow more misses, but only after the dog is clearly engaged.
Skill Rotation Principles
Rotation prevents “one-skill fatigue” and reduces the chance that the dog learns a single pattern like “when I hear that cue, I should disengage.” Rotate across different response types: posture, movement, and interaction.
Rotate by function, not just by cue. For example, alternate:
- Posture: sit/down
- Movement: heel steps or recall to a short target
- Interaction: hand touch or check-in
Keep criteria consistent within a rotation block. If you change distance and duration at the same time, you lose the ability to diagnose what caused errors.
Use short blocks. A block can be 5–10 correct reps, then switch. If the dog is still crisp, you can extend the block by a few reps, but don’t wait for the dog to “get tired of it.”
Mind Map: Session Design Logic
Example Session Plan
Goal: Improve loose leash walking and a reliable “down” on cue.
- Arrival decompression: 2 minutes of calm leash handling and one “sit for the opener,” then release to sniff.
- Engagement warm up: 6–10 reps of marker-and-reward for looking at you while walking 5–10 steps.
- Skill activation for down: 5 reps of “down” from stand at arm’s length, reinforcing quickly for immediate compliance.
- Rotation to loose leash: 3 blocks of 6–8 steps of loose leash with reinforcement every 2–3 steps when the leash stays slack.
- Return to down: 2 blocks of 3–5 reps, increasing only one variable at a time (e.g., add one step of distance before the cue).
- End with an easy win: 3 final reps of the easiest version of down or check-in to close on success.
Troubleshooting Within the Session
If the dog starts offering fewer correct responses, do not “push through.” Reduce difficulty immediately: shorten distance, lower duration, or increase reinforcement rate. Then rebuild criteria after 3–5 correct reps. This keeps the session from turning into a long lesson in frustration.
A final detail that matters: end the session while the dog is still performing well. That preserves motivation for the next practice, and it prevents you from accidentally training “session ends when I fail.”
12.3 Handling Setbacks Including Over Threshold Errors and Regression Protocols
Setbacks usually happen for one of three reasons: the dog is over threshold, the plan is too ambitious for the current context, or the environment changed while the training criteria stayed the same. A professional response is not to “push through,” but to reduce difficulty, restore clarity, and rebuild momentum with measurable steps.
Over Threshold Errors and What They Look Like
An over threshold error is when the dog’s behavior shifts from learning mode to survival mode. You’ll often see a sudden change in speed, intensity, or attention. Examples include:
- Leash reactivity that appears “out of nowhere” during a previously calm session.
- A dog that stops taking treats and starts scanning, freezing, or barking.
- A cue that used to work reliably now produces frantic movement or avoidance.
A simple rule helps: if the dog cannot perform the skill at the current setup, the setup is the problem, not the dog.
Quick Triage Steps During a Session
- Stop adding difficulty. End the current repetition block rather than continuing to “practice.”
- Lower the challenge immediately. Increase distance, reduce duration, shorten the exposure, or switch to a known easy behavior.
- Return to a marker or cue the dog understands. For example, ask for a sit at a comfortable distance and reinforce quickly.
- Track what changed. Note trigger proximity, noise level, time of day, and whether the dog was already aroused before the trigger arrived.
These steps prevent the dog from rehearsing the problem behavior. Rehearsal is how setbacks become habits.
Regression Protocols That Restore Learning
Regression is not failure; it’s a controlled reset. Use a three-phase approach: reduce, rebuild, and reintroduce criteria.
Phase 1: Reduce Difficulty
Choose one lever at a time:
- Distance: Move farther from the trigger.
- Duration: Shorten the exposure window.
- Intensity: Choose quieter times or less crowded routes.
- Rate of reinforcement: Deliver rewards sooner and more frequently.
Example: A dog that lunges at 10 meters during “leave it” is regressing to 20 meters for the first few sessions. The goal is not to “win” at 10 meters; it’s to regain calm, attention, and treat acceptance.
Phase 2: Rebuild Skill Clarity
Return to the simplest version of the behavior:
- Use the same cue, but with easier criteria.
- Keep sessions short and end while the dog is still successful.
- Reinforce the behavior you want, not the absence of the problem.
Example: If recall reliability drops during a walk, practice recall in the yard first, then on a quiet driveway, then at the edge of the usual route. Each step uses the same cue and the same reinforcement pattern.
Phase 3: Reintroduce Criteria Gradually
Once the dog performs reliably at the reduced level, increase one variable slowly. A practical method is to change only one of these per step: distance, duration, or distraction level. If performance slips, revert to the last setup where the dog succeeded at least several times in a row.
Data-Based Decision Rules
Use simple session notes so regression is consistent:
- Success threshold: e.g., 8 out of 10 trials with calm body language and treat acceptance.
- Error threshold: e.g., any trial with sustained staring, freezing, or lunging triggers immediate reduction.
- Reset trigger: if the dog fails twice in a row, stop the skill and switch to an easier behavior.
This keeps you from relying on memory, which is famously unreliable.
Mind Map: Regression Workflow
Regression Workflow Mind Map
Integrated Example: Doorbell Reactivity Reset
A dog that barks at the doorbell during training starts barking sooner than usual after a busy morning. The trainer responds by moving back, lowering the exposure, and switching to a “look at me” cue at a distance where the dog can take treats. After several successful repetitions, the trainer reintroduces the doorbell at a lower volume or from farther away, reinforcing calm attention immediately. If barking appears again, the plan regresses to the last successful distance and shorter exposure window.
The key is that the dog learns two things: the trigger predicts reinforcement, and the trainer can adjust the setup so the dog can succeed.
12.4 Progress Review Using Measurable Outcomes and Client Homework Design
Progress reviews work best when they answer three questions: What changed, how do we know, and what will we do next. “Changed” should be behavior you can see. “How do we know” should be based on counts, durations, or clear pass-fail criteria. “What will we do next” should be a homework plan that matches the dog’s current learning level, not the trainer’s wish list.
Measurable Outcomes That Don’t Lie
Start by choosing one primary outcome per goal and two supporting outcomes. Primary outcomes are the ones you will track every session. Supporting outcomes explain why the primary outcome is moving.
-
Primary outcome examples
- Doorbell: number of calm responses per 5 doorbell rings.
- Leash reactivity: percentage of passes where the dog orients to the handler within 2 seconds.
- Recall: successful returns within 10 seconds under specified distance.
-
Supporting outcome examples
- Latency: time from cue to behavior.
- Recovery: time to return to baseline after a trigger.
- Engagement: number of voluntary check-ins per minute.
Use the same measurement method across weeks. If you switch from “success” to “vibes,” you’ll lose the plot.
A Simple Review Loop
- Collect session data: record the primary outcome and one supporting outcome.
- Compare to the last baseline: not to the best day, not to training fantasy.
- Identify the limiting factor: trigger intensity, cue clarity, reinforcement rate, or dog state.
- Choose one adjustment: change distance, duration, criteria, or reinforcement placement.
- Write homework that mirrors the session: same skill, same rules, different environment.
Mind Map: Progress Review Inputs and Decisions
Homework Design That Builds Consistency
Homework should be short enough to be done well and structured enough to be repeatable. A good default is 3–5 minutes per attempt, 2–4 attempts per day, and no more than one new variable.
Pass-Fail Criteria
Define what “done” looks like. Homework without criteria becomes a guessing game.
- Example: Wait at the door
- Pass: dog stays in a sit for 3 seconds while the handle turns once.
- Fail: dog stands, steps forward, or shows frantic body language before the 3 seconds.
When a fail happens, the next homework session should reduce difficulty: closer to the dog’s comfort zone, fewer repetitions, or less trigger intensity.
Reinforcement Rules for Home
Clients often accidentally change reinforcement. Write rules that prevent that.
- Reinforce immediately for the target behavior.
- Use the same reward type for the first week of homework.
- Keep reward rate steady: if the dog is working, the reinforcement should keep coming.
Mind Map: Homework Components
Concrete Examples for Common Goals
Example: Calm Greeting with a Measurable Outcome
- Primary outcome: calm orientation within 2 seconds of the visitor entering.
- Supporting outcome: recovery time after a slip.
- Homework: 3 practice entries using a helper at a distance.
- Pass: dog faces the handler and remains within arm’s reach for 5 seconds.
- Fail: dog lunges, barks, or spins away for more than 2 seconds.
- Adjustment: if failures occur, increase distance and reduce entry speed.
Example: Leash Reactivity with Threshold-Based Criteria
- Primary outcome: percentage of “look” responses before the dog reaches a set arousal level.
- Supporting outcome: number of resets without handler repeating cues.
- Homework: 4 short walk segments with a fixed route.
- Pass: dog orients to handler and stays engaged for 3 consecutive steps.
- Fail: dog freezes, escalates, or ignores the handler for 10 seconds.
- Adjustment: if fail rate rises, shorten the segment and start farther from triggers.
The Review Notes Clients Can Actually Use
Ask clients to record only what matters: success count, fail count, and one sentence about context (distance, noise, time of day, or who was present). That’s enough to spot patterns without turning homework into paperwork.
End each review with a single homework statement: the skill, the pass-fail criteria, and the one difficulty lever you will adjust next time. That keeps the plan coherent and prevents “we tried everything” from becoming the default explanation.
12.5 Practical Templates for Common Goals Including Reactivity Recall and Calmness
This section gives you plug-and-play session templates you can adapt to different dogs and environments. Each template is built from the same logic: set a clear target behavior, define the success criteria, manage distance and access to triggers, use markers and reinforcement that match the dog’s current state, and end with a win that preserves learning.
Core Setup Rules That Make Templates Work
Start every session with a short warm-up that earns attention without asking for difficult behaviors. Use a “threshold check” before you begin: if the dog is already scanning, lunging, barking, or freezing hard, you are too close or the trigger is too intense. Reduce intensity first, then ask for skills.
Use a simple measurement loop: record the dog’s state at the start, note the number of successful reps, and track the highest arousal level reached. If arousal climbs across reps, you stop training and switch to management or lower-demand work.
Mind Map: Session Flow
Template a Reactivity Training with Recall Under Control
Goal: teach recall as a reliable alternative to reacting, using distance and reinforcement so the dog can succeed.
Target behavior: dog turns toward handler and returns to a designated position when the recall cue is given.
Success criteria: 8 out of 10 reps return within 2 seconds with no reactivity escalation.
Session length: 10–20 minutes for the skill block.
Equipment: long line or controlled environment, high-value food, marker.
Steps
- Warm-up: 3 minutes of easy recalls to a stationary handler position with low distraction.
- Threshold check: place the dog at a distance where the trigger is visible but the dog can take food.
- Reinforcement plan: pre-load food so you can deliver immediately on return. Use a higher rate of reinforcement during the first successful reps.
- Reps: when the trigger appears, wait for the dog to notice, then cue recall before the dog commits to the reaction. Mark and reward on arrival.
- Criteria: start with shorter recall distance and larger reward rate. Gradually reduce distance or increase trigger intensity only after success.
- Cool down: end with calm positioning near you, not with more trigger exposure.
Example: A dog barks at other dogs on walks. You choose a route with a wide sidewalk. At a distance where the dog takes treats while watching, you practice recall when the other dog is still far. After several clean returns, you move slightly closer next session, but you keep the same timing rule: cue recall before the barking starts.
Template B Calmness Training with Predictable Reinforcement
Goal: build a calm default state that shows up during real life, not just in training.
Target behavior: relaxed body posture and voluntary disengagement, measured by fewer scanning bursts and faster settling.
Success criteria: dog maintains relaxed posture for 30–60 seconds across 6 out of 8 trials.
Steps
- Warm-up: scatter small treats on the ground while the dog is already calm.
- Define calm: decide what you will reward—head lowered, soft eyes, loose body, or turning away from the trigger.
- Reinforcement schedule: start with frequent reinforcement for calm. Then shift to variable timing so calm stays meaningful.
- Add mild context: practice near the trigger but at a distance that keeps the dog under threshold.
- End with a win: finish with a short “settle and reward” sequence.
Example: A dog gets restless when the leash comes out. You attach the leash only after the dog is calm, then reward calm standing for a few seconds at a time. If the dog starts to pace, you pause and reduce demand by stepping back or lowering the leash handling intensity.
Template C Combined Goal Reactivity Recall Plus Calmness
Goal: prevent the dog from rehearsing reactivity while teaching a calm alternative.
Mind map for the combined decision rule

Steps
- If under threshold: cue recall early, reward arrival, then immediately reward calm positioning for a few seconds.
- If not under threshold: do not cue recall. Increase distance, change angle, or wait for a calmer moment, then do calm reps.
- Track outcomes: if recall success is high but calm is low, you increase calm reinforcement after arrival. If calm is high but recall is low, you increase recall reinforcement rate and shorten the recall distance.
Example: During a busier walk, a dog starts to stiffen at a passing cyclist. You stop asking for recall, create space, and do two calm reps near you. Once the dog softens, you restart with recall at a safer distance and then reward calm again.
Quick Troubleshooting Template
- Recall works at home but fails outside: reduce outside difficulty by increasing distance and using earlier cue timing.
- Dog returns but immediately re-reacts: add a short calm reward window after arrival and keep the trigger exposure brief.
- Dog escalates across reps: stop, manage intensity, and end with calm reps so the session strengthens the right behavior.
These templates are intentionally repetitive in structure so you can change only one variable at a time: distance, timing, reinforcement rate, or criteria. That’s how you get reliable learning instead of random good days.