Tariff Engineering and Neutral Country Trade
1. Scope, Definitions, and Legal Boundaries
1.1 Core Concepts of Tariff Engineering and Neutral Country Trade
Tariff engineering is the practical work of aligning how goods are described, classified, valued, and routed with the way customs authorities assess duties and taxes. Neutral country trade is the routing and contracting approach that uses a third country as a commercial and logistics waypoint while keeping the customs story consistent from origin to final destination. Together, they are less about “finding loopholes” and more about building a defensible, document-backed narrative that matches what actually happens to the goods.
What Tariff Engineering Means in Practice
Tariff engineering starts with four inputs that customs systems care about: the tariff classification, the customs value, the origin basis, and the applicable duty relief conditions. If any one of these is wrong or unsupported, the rest of the paperwork becomes fragile. A good practice is to treat each input as a separate test with its own evidence.
Example: A shipment of industrial valves is declared under a tariff code that assumes a specific material and function. If the product is actually a different type, the classification evidence pack (spec sheet, drawings, test reports) must support the declared code. If it does not, the duty outcome can change even when the rest of the documents look tidy.
What Neutral Country Trade Means in Practice
Neutral country trade is not a magic label. It is a set of operational choices: where the goods physically go, what customs procedures apply at the waypoint, and how the contracts and documents describe the flow. The “neutral” part is about commercial reality and customs procedure alignment, not about the waypoint country being morally neutral.
Example: A company imports goods into a hub country under a storage or controlled procedure, then re-exports them to a final destination. If the hub country records show the goods were never under the declared procedure, or if the documents claim a different movement than the inventory system shows, customs can treat the flow as misrepresented.
The Core Link Between Them
Tariff engineering affects the duty calculation; neutral country trade affects the procedural and documentary path. The link is consistency. Customs authorities expect the declared tariff position and the declared movement to tell the same story.
Example: Suppose a tariff relief depends on origin or processing. If the hub country activity is described as “mere handling,” but the operational records show assembly that changes the product, the origin and classification arguments may no longer match the facts.
Mind Map: Core Concepts and Evidence
A Simple End-to-End Logic Chain
Start with the goods: identify what they are, how they function, and which attributes drive classification and origin. Next, map the movement: decide where the goods enter the hub country and which customs procedure governs that period. Then align the commercial layer: contracts, purchase orders, and invoices must reflect the actual counterparties and the leg structure. Finally, confirm the duty calculation inputs: classification, valuation, and origin must be supported by evidence that corresponds to the declared facts.
Example: A shipment of packaged electronics arrives at a hub for consolidation. If the hub consolidates multiple lots, the inventory system must preserve traceability by lot or serial range. The re-export declaration should then reference the correct quantities and identifiers so the duty calculation is tied to the right items.
Common Failure Points to Watch Early
- Mismatch between product reality and declaration language. A generic description on the invoice can’t replace technical evidence.
- Mismatch between movement and procedure. If the goods were stored under one status but declared under another, the customs record becomes inconsistent.
- Mismatch between counterparties and documents. If the bill of lading shows one party as shipper while the invoice chain shows another, reconciliation must be explainable.
- Mismatch between quantities and identifiers. Even correct tariff logic fails if the wrong units are declared.
A Practical Working Definition
For day-to-day use, treat tariff engineering as “evidence-led duty positioning” and neutral country trade as “procedure-led routing positioning.” When both are built from the same underlying facts—what the goods are, where they go, and what happens to them—the paperwork stops being a guessing game and becomes a coherent record.
1.2 Distinguishing Legitimate Trade Facilitation from Misclassification
Legitimate trade facilitation aims to move goods efficiently while staying truthful about what the goods are, where they come from, and how they are sold. Misclassification, by contrast, is about changing the customs outcome through inaccurate classification, origin claims, or valuation narratives. The difference is not in paperwork volume; it’s in whether the declared facts match the underlying commercial and technical reality.
Foundational Distinctions That Matter
Start with three questions that customs auditors typically ask:
- Is the declared product description accurate? If the goods are described as “assembled” but the shipment is only “components,” the description is already drifting.
- Is the tariff classification support consistent? A classification can be defensible only if the technical features in the evidence match the declared heading.
- Is the origin story consistent with the manufacturing and processing record? A neutral routing claim does not fix an incorrect origin determination.
A practical way to think about it: facilitation reduces friction; misclassification changes the duty rate.
Mind Map: Facilitation Versus Misclassification
The “Same Goods, Same Answer” Test
A strong facilitation approach keeps the customs answer stable across documents. For example, if a shipment is declared as “stainless steel valves, model V-200, for industrial use,” then:
- The commercial invoice should describe the same model and function.
- The packing list should match quantities and item identity.
- The technical file should show the valve’s material and design features.
- The classification rationale should point to the same features used in the declaration.
If the model number changes between legs, or if the technical file supports a different function than the invoice states, you’re no longer facilitating—you’re improvising.
Example: Neutral Routing That Stays Legitimate
A company imports electronic control boards into a neutral hub for bonded storage. The hub consolidates multiple suppliers’ shipments and later re-exports the boards to a third country where they are installed into machinery.
Legitimate facilitation looks like this:
- The tariff classification is based on the boards’ actual characteristics at import.
- The origin is determined from the manufacturing facts of the boards, not from the hub’s location.
- The re-export documentation clearly shows the boards leaving the hub, with inventory traceability.
A simple check: the hub’s role is logistical, so the declared product identity should remain the same from inbound to outbound.
Example: Where Facilitation Slips into Misclassification
Consider a shipment declared as “complete assembled pumps” to obtain a lower duty rate than “pump parts.” The invoice and packing list claim assembly occurred before import, but the technical file shows only component-level specifications, and the assembly instructions are dated after the import date.
This is misclassification because the declared status does not match the evidence. Even if the company later assembles the pumps in the destination country, customs at import cares about what was imported.
Advanced Details Without the Guesswork
Misclassification often hides in three places:
- Status words: “assembled,” “ready for use,” “complete,” or “kit.” These terms must match physical reality and supporting records.
- Origin shortcuts: claiming origin based on routing, warehousing, or minor handling. Warehousing and re-exporting do not create origin.
- Valuation narratives: using a different transaction story to justify a lower customs value while contracts and payment terms do not align.
A clean facilitation workflow prevents these slips by requiring that each declaration field has a corresponding evidence owner. If no one can point to the source for “assembled status” or “origin basis,” the field is a risk, not a fact.
A Simple Internal Control Pattern
Use a two-step gate before filing:
- Technical gate: verify product identity and status against the technical file.
- Customs gate: verify classification, origin basis, and valuation logic against the declaration rationale.
If either gate fails, the shipment can still be moved for logistics, but the customs declaration must be corrected. That’s the practical line between facilitation and misclassification: movement is allowed; inaccurate declarations are not.
1.3 Key Terms in Customs Administration and Trade Compliance
Customs administration is a system for deciding what goods are, how much they cost for duty purposes, and which rules apply at the border. Trade compliance is the discipline of making sure your declarations and supporting records match the real facts. The tricky part is that many terms sound similar but point to different decisions, so getting the definitions right prevents expensive confusion later.
Foundational Terms That Drive Every Declaration
Customs declaration is the formal submission that states the goods, their classification, their value, their origin, and the intended customs procedure. If any element is wrong, the declaration can be corrected, but the correction process may trigger penalties or delays.
Customs procedure is the legal “mode” under which goods are handled. Examples include release for free circulation, customs warehousing, and transit. The procedure determines which obligations apply while the goods are under customs control.
Customs authority is the government body that administers duties, taxes, and controls. It can request evidence, conduct inspections, and issue binding decisions in some jurisdictions.
Importer of record is the party responsible for the declaration and payment of duties and taxes, depending on local law. In practice, the importer of record must ensure the declaration is accurate even if another party prepared the paperwork.
Controlled goods and customs supervision describe goods that are subject to restrictions while under a customs procedure. “Supervision” is not a vibe; it is a set of monitoring and recordkeeping requirements.
Classification Terms That Determine Duty Rates
Tariff classification is the assignment of a code to goods based on their objective characteristics. The code drives the duty rate and can affect regulatory requirements.
HS code refers to the Harmonized System code structure used globally as a baseline. Many countries add extra digits, but the HS logic remains the starting point.
Binding tariff information is a formal decision that locks in a classification for specified goods under specified conditions. It is useful because it reduces uncertainty, but only within the scope of what was decided.
Classification evidence is the set of facts that supports the chosen code, such as product specifications, technical drawings, and test results.
Valuation Terms That Determine the Duty Base
Customs value is the amount used to calculate duties and taxes. It is not always the invoice price, because customs valuation rules may require adjustments.
Transaction value is a common valuation method based on the price actually paid or payable for the goods, subject to conditions.
Related party transaction describes a sale between parties that are connected by ownership or control. Customs authorities may scrutinize whether the price reflects normal market behavior.
Adjustments are additions or deductions required by valuation rules, such as certain costs included in or excluded from the customs value.
Origin Terms That Determine Eligibility and Restrictions
Rules of origin are the criteria that decide where goods “originate” for preferential treatment or trade remedies.
Non-preferential origin is used for general trade measures, while preferential origin is used to qualify for reduced duty under a specific agreement.
Origin determination is the process of applying the rules to the product’s inputs and production steps.
Substantial transformation is a concept used in many systems to decide whether processing changes the goods enough to confer new origin.
Proof of origin is the documentation that supports the origin claim, such as certificates or supplier declarations, depending on the scheme.
Compliance Terms That Turn Definitions into Actions
Recordkeeping is the obligation to retain declarations and supporting documents for a defined period. Good recordkeeping is not just storage; it includes version control and traceability.
Audit readiness means you can produce consistent evidence quickly: the declared facts, the documents, and the underlying operational reality line up.
Post-clearance audit is a review after goods are released. It often focuses on whether classification, valuation, and origin were supported at the time of declaration.
Correction and amendment are formal changes to a declaration. The timing and method matter, and some errors are easier to fix than others.
Example: A shipment is declared under a tariff code based on a brochure description. Later, an inspection finds the product has a different component configuration. If the classification evidence pack was thin, the correction becomes a full rework of classification, not a simple paperwork fix.
Mind Map: Customs Decision Chain
Mind Map: Evidence Types and Where They Fit
Practical Example: One Shipment, Four Decisions
A company imports industrial pumps. It declares (1) the HS code based on pump type and materials, (2) customs value using the transaction value with any required adjustments for packaging and royalties, (3) origin based on where key components were produced and whether processing meets the substantial transformation rule, and (4) a customs procedure that matches how the goods will be stored or moved. Each decision has its own evidence set, and mixing them up is a common failure mode—like using origin documents to justify classification. The goal is simple: every declared element should have a matching, consistent evidence trail.
1.4 Jurisdictional Roles of Importers Carriers Brokers and Customs Authorities
In cross-border trade, “who does what” is not just organizational trivia. It determines which party holds the evidence, who signs declarations, and how errors get corrected when paperwork and physical goods don’t line up.
Importers Responsibilities and Decision Ownership
The importer of record is typically the party that customs treats as responsible for the declaration’s accuracy. That means the importer must ensure the goods, classification, valuation, and origin claims are supportable. A practical way to think about it: the importer chooses the answers, even if others draft the forms.
Example: A company imports LED modules. The broker prepares the customs entry, but the importer provides the product datasheet, determines the correct tariff classification, and confirms the transaction value reflects the actual sale terms. If the declared classification is wrong, customs will look to the importer’s records first.
Importers also manage operational reality. They must ensure the shipment matches the declared description. If the invoice says “aluminum housing” but the packing list shows “stainless housing,” someone has to reconcile that before goods are released.
Carriers Responsibilities and Movement Evidence
Carriers control the movement of goods and generate the transport documents that customs systems often rely on for identity and timing. Their role is less about tariff logic and more about factual traceability: when the goods left, arrived, and how they were routed.
Example: A shipment arrives at a neutral hub. The carrier issues a bill of lading showing the routing and consignee details. If the carrier’s document indicates one container number but the warehouse inventory system uses another, the mismatch can delay customs processing or trigger a request for clarification.
Carriers also handle practical constraints that affect compliance. If a shipment is transshipped, the carrier’s documentation must reflect the actual legs and handoffs. Even when the importer’s customs strategy is correct, inaccurate movement records can undermine it.
Brokers Responsibilities and Declaration Drafting
A customs broker typically acts as an intermediary who prepares and submits declarations based on information provided by the importer. Brokers are not supposed to guess. Their job is to translate the importer’s facts into the required customs data elements and to flag inconsistencies.
Example: The importer provides a commercial invoice and a classification rationale. The broker checks whether the declared tariff code aligns with the product description and whether the valuation basis matches the invoice terms. If the invoice includes a discount contingent on later events, the broker should ask whether that discount is allowable for valuation purposes.
In many jurisdictions, brokers may be held accountable for negligence in processing or submitting incorrect information. That’s why good brokers maintain a clear information trail: what they received, what they relied on, and what they questioned.
Customs Authorities Responsibilities and Enforcement Logic
Customs authorities administer the rules and verify compliance. Their role includes accepting declarations, conducting risk-based targeting, performing examinations, and issuing decisions on classification, valuation, and origin.
Customs also controls the procedural framework. For example, they define which customs procedure applies to inbound storage, how re-export declarations must be made, and what evidence is required to support those procedures.
Example: Customs selects a shipment for review. They compare the declared tariff code against technical documentation, assess whether the declared transaction value is supported, and verify whether the goods’ movement and status match the procedure used.
How Roles Interlock During a Declaration Lifecycle
The lifecycle is easiest to understand as a chain of custody for both goods and information.
- Importer sets the claims and provides evidence.
- Broker converts claims into declarations and checks data consistency.
- Carrier provides movement facts through transport documents.
- Customs verifies using risk rules, inspections, and legal standards.
If any link is weak, the chain breaks. The importer may still win on substance, but the paperwork friction can cost time and require amendments.
Mind Map: Jurisdictional Roles and Evidence Flow
Example: One Shipment, Four Roles
A manufacturer imports industrial pumps.
- Importer: selects the tariff classification based on pump type and technical specs; confirms the invoice reflects the actual sale terms.
- Broker: prepares the entry using the importer’s classification rationale and valuation basis; flags that the packing list description differs slightly from the invoice.
- Carrier: provides the bill of lading with container and routing details; ensures the documents match the actual arrival leg.
- Customs authority: reviews the entry, may request supporting documents, and confirms the declared classification and valuation are consistent with the evidence.
When each role stays in its lane—claims, drafting, movement facts, and verification—the system is not only compliant, it’s also easier to defend when questions arise.
1.5 Documentation Baselines for Compliance and Audit Readiness
A documentation baseline is the minimum set of records that lets you explain what happened, why it happened, and how the customs outcome was determined. Think of it as a “single source of truth” for each shipment leg and each compliance claim (classification, valuation, origin, and procedure).
Start with the Audit Questions
Auditors usually ask four practical questions:
- What goods were imported or re-exported? (identity)
- What did you declare and how did you compute it? (data and method)
- Why is your method defensible? (evidence)
- Can you reconcile the paperwork to the physical flow? (traceability)
Your baseline should map documents to these questions. If a document doesn’t help answer at least one question, it’s usually noise.
Build the Baseline by Document Type
Use a layered approach so the file remains usable even when parts are missing.
Layer A: Shipment Identity
- Master bill of lading / air waybill and house documents
- Packing list and item-level description
- Serial numbers or batch identifiers when applicable
Layer B: Customs Declaration Data
- Import and re-export declarations (including amendments)
- Tariff classification code used and the declared duty base
- Valuation fields and any adjustments
Layer C: Substantiation for Each Compliance Claim
- Classification: product specs, drawings, lab reports, and a short internal classification rationale
- Origin: origin determination worksheet, supplier origin statements, and transformation evidence
- Valuation: purchase contract, invoices, payment terms, and related-party documentation if relevant
Layer D: Procedure and Control Evidence
- Warehouse or bonded facility records for controlled handling
- Inventory status records showing what was received, stored, and released
- Evidence that the chosen customs procedure was applied correctly
Layer E: Reconciliation and Exception Handling
- Discrepancy logs (e.g., weight differences, description mismatches)
- Amendment requests and approvals
- Final “reconciliation memo” tying declaration data to shipping documents
Mind Map for a Shipment File
Define Naming, Versioning, and Retention Rules
A baseline fails when the same document exists in five versions and nobody knows which one was used for the declaration.
- Naming convention: include shipment reference, leg, document type, and version (e.g.,
SHP123-LEG2-INV-v3.pdf). - Version control: only one “declaration-used” copy per document type; later changes must be clearly marked.
- Retention: keep the baseline for the full audit window required by your jurisdiction and internal policy. If your policy uses a fixed date, anchor it to a past reference point such as 2026-02-15 for internal retention schedules.
Example of a Complete Baseline File
Scenario: Goods arrive in a neutral hub, are stored under a controlled procedure, then re-exported to the final destination.
- Identity: master AWB + packing list with item-level weights and serial numbers.
- Declaration data: import declaration for the hub leg and re-export declaration for the outbound leg, including the tariff code and valuation fields.
- Classification substantiation: product specification sheet and a lab report confirming the material composition used for classification.
- Procedure evidence: bonded warehouse receipt and release record showing the same quantities and identifiers.
- Reconciliation: a memo stating that the outbound declaration quantities match the warehouse release, and that any weight variance (e.g., 0.4%) was explained using scale calibration logs.
Practical Baseline Checklist
For each leg, confirm you have:
- One identity set (shipping + packing + identifiers)
- One declaration set (original + amendments)
- One substantiation set per compliance claim used
- One procedure/control set for controlled handling
- One reconciliation record that ties everything together
If you can answer the four audit questions using only the baseline file, you’re audit-ready. If you need to hunt across emails and spreadsheets, you’re not—yet.
2. Tariff Structures and How Customs Classifications Drive Cost
2.1 Tariff Line Architecture and the Logic of Duty Assessment
Tariff engineering starts with a simple question: what exactly is the customs authority charging you for. The answer is usually found in the tariff line, a specific code that ties together the product’s identity, its legal treatment, and the duty rate applied at import.
Tariff Line Anatomy
A tariff line is not just a number. It is a bundle of rules that customs uses to decide duty. Think of it as three layers that must all agree:
- Product identity: the goods’ description, technical characteristics, and intended use.
- Legal classification: the tariff code selected under the applicable classification rules.
- Duty logic: the rate and any conditions attached to that code.
When these layers don’t align, the duty outcome becomes unpredictable. That’s why best practice is to treat classification as an evidence-driven system, not a guess.
How Duty Is Actually Calculated
Duty assessment typically follows a chain of inputs. The customs authority (or your broker) combines them into a final duty amount.
- Step 1: Determine the tariff line code for the goods.
- Step 2: Determine the customs value of the goods.
- Step 3: Apply the duty rate tied to that tariff line.
- Step 4: Apply conditions and additional charges if the tariff line triggers them.
A common misconception is that the tariff code alone determines duty. In reality, the code determines the rate and conditions, while the customs value determines the base the rate is applied to.
Duty Rate Types and Their Practical Effects
Tariff schedules often include different duty rate styles. Each style changes how small changes in value or classification affect the final number.
- Ad valorem: duty is a percentage of customs value. Example: if duty is 5% and customs value is $10,000, duty is $500.
- Specific: duty is a fixed amount per unit. Example: if duty is $2 per kilogram and you import 3,000 kg, duty is $6,000.
- Compound or mixed: a combination of both, where both value and quantity matter.
This is where tariff engineering becomes practical: you don’t “engineer” duty by wishful thinking; you engineer by ensuring the tariff line code and the declared inputs are correct and defensible.
Conditions That Ride Along with the Code
Many tariff lines include conditions beyond the headline rate. These conditions can be triggered by factors like origin, end-use, or whether the goods meet certain technical thresholds.
Example: Suppose two shipments have the same product description, but one qualifies for a preferential rate due to origin documentation, while the other does not. The tariff line might be identical, yet the duty rate applied differs because the condition is satisfied in one case and not in the other.
Evidence Mapping from Product to Tariff Line
To make classification decisions stable, you need a repeatable evidence trail. A good evidence pack links each claim about the goods to a document that supports it.
- Technical evidence: datasheets, component lists, material composition, performance specs.
- Commercial evidence: invoices, purchase orders, sales contracts describing what is being sold.
- Operational evidence: how the goods are packaged, labeled, and used in practice.
If a tariff line hinges on a technical threshold, the evidence should show the measurement method and the result, not just the conclusion.
Mind Map: Tariff Line Logic
Worked Example with Clear Inputs
Assume you import a machine part described as “stainless steel filter cartridge.” Your broker must decide the tariff line. Two outcomes are possible:
- Outcome A: classified as a general part with an ad valorem duty rate of 6%.
- Outcome B: classified as a specific filtration component with a specific duty of $3 per unit.
If customs value is $20,000 and you import 1,000 units:
- Outcome A duty = 6% × $20,000 = $1,200.
- Outcome B duty = $3 × 1,000 = $3,000.
The difference is not magic; it comes from the duty rate type and the base used. That’s why the classification decision must be supported by the product’s technical identity, not just the commercial label.
Common Failure Points and How to Avoid Them
- Using the wrong basis for the rate: ad valorem vs specific. Confirm which one applies to the selected tariff line.
- Treating descriptions as interchangeable: “filter cartridge” may cover multiple technical variants. Ensure the evidence matches the variant.
- Ignoring conditions: preferential eligibility or exemptions can change the rate even when the code is correct.
- Document mismatch: the invoice description, packing list, and technical specs should not contradict the classification rationale.
A tariff line is the meeting point of product facts and legal rules. When you build that meeting point carefully, duty assessment becomes a calculation you can explain, not a surprise you have to defend.
2.2 Customs Valuation Methods and Their Practical Impact
Customs valuation is the part of trade compliance that turns paperwork into numbers. Those numbers then drive duties, taxes, and sometimes trade remedy exposure. The practical impact is simple: two shipments with the same goods can produce different duty bills if the valuation method or the evidence behind it differs.
Foundational Rule and Why It Matters
Most jurisdictions start with a primary goal: use the transaction value, meaning the price actually paid or payable for the goods when sold for export to the importing country. “Actually paid or payable” is not a vibe; it is a defined set of payments tied to the sale. If the transaction value is usable, customs generally prefers it because it reflects the real commercial deal.
In practice, the transaction value method works best when the sale is genuine, the parties are not restricted in how the goods are priced, and the declared price is supported by consistent documents. When those conditions fail, customs moves to secondary methods in a defined order.
Mind Map: Valuation Methods and Decision Flow
Transaction Value Method in Practice
Start with the deal: purchase order, commercial invoice, and payment terms. Then check whether the declared price includes or excludes items that customs expects to treat differently.
A common practical issue is freight and insurance. Suppose a buyer pays $10,000 for goods and separately pays $800 ocean freight and $120 marine insurance to bring the goods to the port of import. If the invoice price is “ex works” but the declared transaction value is meant to reflect the price for customs purposes, customs may require adding freight and insurance to the base value. The reverse can also happen: if the invoice already includes those elements and the declaration adds them again, the valuation becomes inflated.
Another practical issue is royalties and license fees. If a buyer must pay a royalty as a condition of sale, customs may require including that royalty in the value. Example: a manufacturer sells branded components for $25,000, but the buyer must pay a $2,000 trademark license fee to buy the goods. If the royalty is a condition of sale, customs may treat it as part of the customs value.
Identical Goods and Similar Goods Methods
When transaction value cannot be used, customs looks for comparable sales. The identical and similar goods methods are not “close enough” by intuition; they require matching key characteristics.
Example for identical goods: a company imports the same model of industrial pump, same brand, same technical specification, and same packaging type. If one shipment’s transaction value is accepted, customs may use that accepted value as a reference for another shipment when the goods are truly identical and the sales are at comparable commercial levels.
Example for similar goods: if the pump model differs slightly in horsepower but the function, materials, and performance class are comparable, customs may consider it similar. However, differences that change the commercial value—like major material upgrades—can break the comparison.
Time and quantity matter too. A sale during a peak season or a bulk contract can distort comparability. That is why customs expects “same or comparable time” and “similar quantity” when selecting reference transactions.
Deductive Method and Its Evidence Trail
The deductive method starts from the resale price in the importing country. That means customs needs a reliable chain: the importer’s sales records, invoices to customers, and the ability to identify which costs relate to post-import activities.
Example: an importer buys goods for $40,000 customs value and later resells them for $70,000. To use deductive valuation, customs may deduct commissions, typical profit, general expenses, and costs after import. If the importer sells through multiple channels with different margins, the evidence must show which resale price is appropriate for the goods being valued.
A practical pitfall is mixing unrelated product lines in the same customer invoice without clear allocation. Customs cannot deduct what it cannot trace.
Computed Method and Cost Building
The computed method builds value from production costs. It requires evidence of manufacturing costs, plus an added amount for profit and overhead consistent with the method.
Example: a supplier provides a cost breakdown showing materials $18,000, labor $7,000, and factory overhead $5,000 for a total production cost of $30,000. To compute customs value, customs may add a reasonable profit and overhead and then add costs to get the goods ready for export.
This method is evidence-heavy. If the cost breakdown is vague—lumping expenses into one number without support—customs may reject it or require more detail.
Practical Impact Summary
Valuation methods are not interchangeable. Transaction value is preferred because it reflects the actual sale, but it depends on conditions and correct adjustments. Identical and similar goods methods rely on comparability discipline. Deductive and computed methods rely on traceable resale or cost evidence. In every case, the “practical impact” is that your duty bill follows the quality of your documents and the consistency of your numbers—especially where freight, royalties, and comparability are involved.
2.3 Rules of Origin Concepts and How They Affect Duty and Trade Remedies
Rules of origin answer one practical question: when goods cross a border, what “country” do they count as for customs purposes? That answer can change the duty rate, eligibility for preferences, and whether trade remedies apply. Think of origin as the customs version of an identity card—accurate, documentable, and sometimes contested.
Foundational Concepts of Origin
Origin is determined using rules set by each jurisdiction or trade agreement. Those rules typically rely on one or more of these concepts:
- Wholly obtained: Goods entirely produced in one country from local materials. Example: coffee grown and processed in Country A.
- Substantial transformation: Goods become “new” through processing that changes their character. Example: raw cotton spun into yarn and then woven into fabric.
- Change in tariff classification: Origin is tied to whether the final product’s tariff heading differs from the inputs’ headings after processing. Example: components classified under one heading are transformed into a finished product under a different heading.
- Regional value content: Origin depends on a calculation of how much value is added within the region. Example: a threshold that requires at least 40% of value to be from qualifying inputs.
These concepts are not interchangeable. A rule set may specify only one method, or it may allow alternatives. Customs authorities usually expect the method used to be supported by records that match the declared story.
How Origin Affects Duty
Duty outcomes depend on whether the declared origin qualifies for a specific tariff treatment.
- Most-favored-nation duty: If no preference is claimed, origin may still matter for statistical or regulatory reasons, but duty is often based on the importing country’s standard schedule.
- Preferential duty: If goods qualify under a free trade agreement, the origin determines whether a lower rate applies.
- Suspension or exemption programs: Some schemes require origin to meet eligibility conditions.
Concrete example: A company imports “assembled LED lamps.” The non-preferential duty rate is 12%. The exporter claims preferential origin in a trade agreement. If the origin rule requires a change in tariff heading and the lamp’s final heading differs from the qualifying inputs’ headings, the shipment may enter at 6%. If the processing is considered too minor to satisfy the rule, customs may deny preference and charge the 12% rate, plus interest.
How Origin Affects Trade Remedies
Trade remedies—such as anti-dumping and countervailing duties—often apply based on the origin of the goods. The key point is that remedies can be triggered even when the goods are not “wrongly classified.” A shipment can be correctly classified yet still face additional duties if origin is not accepted.
Concrete example: Country B imposes an anti-dumping duty on “steel fasteners” originating in Country X. A trader routes fasteners through Country Y, where they are repackaged and relabeled. If the origin rule for Country B treats repackaging as insufficient for substantial transformation or fails the tariff-change requirement, customs may treat the goods as originating in Country X and apply the anti-dumping duty.
Evidence and the Logic of Proof
Origin claims are typically supported by a combination of:
- Product description and technical specifications showing what the goods are and what processing occurred.
- Input lists mapping materials to tariff classifications and quantities.
- Process records describing manufacturing steps, locations, and whether operations are more than minimal.
- Value calculations when regional value content is required.
- Certificates and declarations issued by the exporter or producer when required by the agreement.
Customs tends to look for internal consistency: the declared processing should match the input classifications, and the final product description should match the declared tariff heading.
Mind Map: Origin Methods and Their Duty and Remedy Effects
Example: A Step-by-Step Origin Determination That Holds Up
A manufacturer in Country Y produces “flat-pack furniture.” Inputs include wood panels and metal hinges purchased from multiple suppliers.
- Identify the final tariff heading for the furniture.
- List inputs and their tariff headings as used in production.
- Apply the rule set for the relevant agreement. Suppose it requires a tariff-change at the heading level.
- Check processing sufficiency. If the rule set also requires that certain operations occur in Country Y, verify that cutting, drilling, and assembly happen there.
- Prepare the evidence so the input list, process steps, and final product description all align.
If the tariff-change requirement is met and the required operations occur in Country Y, the origin claim supports preferential duty. If not, customs may deny preference and, depending on the importing country’s remedy measures, may also treat the goods as originating elsewhere for anti-dumping or countervailing purposes.
Practical Takeaway for Duty and Remedies
Origin is a single concept with two different consequences: it can lower duty through preferences, and it can increase duty through trade remedies. The common thread is proof quality—customs decisions tend to follow the logic of the rule set, not the optimism of the paperwork.
2.4 Preferential Tariff Schemes and Their Eligibility Requirements
Preferential Tariff Schemes and Eligibility Requirements
Preferential tariff schemes reduce duty rates when goods qualify under specific conditions set by trade agreements or unilateral programs. The key idea is simple: the importer does not get the lower rate because they want it; they get it because the goods meet the scheme’s rules and the paperwork proves it.
Foundational Concepts for Eligibility
Eligibility usually depends on five building blocks: (1) the scheme type, (2) the product’s classification, (3) the product’s origin, (4) the shipment and documentary trail, and (5) compliance with any additional conditions like quotas, product-specific rules, or direct transport requirements.
Start with the scheme type because it determines the origin standard and the evidence expected. For example, a bilateral free trade agreement may require “wholly obtained” or “substantial transformation” rules, while a unilateral preference might use a different origin approach and impose stricter documentation for small shipments.
Next, confirm the product’s tariff classification. Preferential rates are tied to tariff lines, so an incorrect HS code can invalidate the preference even if the origin facts are correct. A practical habit: treat classification as the first gate, not the last.
Then, establish origin. Origin is not the same as where the goods were shipped from; it is where the goods were produced under the scheme’s rules.
Finally, verify shipment and compliance conditions. Many schemes require direct transport or at least that goods remain under customs control during transit. If the goods are reloaded, stored, or handled en route, the importer must still show that the goods did not change in a way that breaks the scheme’s conditions.
Eligibility Workflow That Prevents Costly Mistakes
A systematic workflow keeps teams from chasing the wrong problem:
- Identify the scheme applicable to the exporter and the destination.
- Confirm the HS code for the goods as declared.
- Apply the scheme’s product-specific rules to determine whether the goods qualify.
- Collect origin evidence required by the scheme.
- Check transport and handling conditions for the shipment route.
- Prepare the declaration so the customs data elements match the evidence.
A small example: A company imports LED lamps from Country A into Country B under a free trade agreement. If the HS code is declared as “general lighting” but the lamps actually fall under a more specific code with different product-specific rules, the origin analysis may fail. Fixing classification early avoids reworking the entire origin file.
Product Origin Rules and What They Mean in Practice
Most schemes use one of these origin approaches:
- Wholly obtained: goods made entirely from qualifying materials in the exporting country. Example: coffee beans grown and processed there with no non-qualifying inputs.
- Substantial transformation: goods produced using non-originating materials but transformed enough to meet a rule. Example: fabric imported from elsewhere is cut and sewn into a garment that meets the scheme’s required manufacturing step.
- Regional value content or value-added: the share of qualifying value must meet a threshold. Example: a finished bicycle qualifies only if the qualifying components and processing meet the required percentage.
Product-specific rules often combine these methods. The practical challenge is evidence: you need bills of materials, production records, and supplier declarations that align with the rule.
Evidence and Documentation Requirements
Eligibility is only as strong as the evidence. Common evidence types include:
- Origin declaration or certificate issued by the exporter or producer, depending on the scheme.
- Supporting records such as manufacturing process descriptions, cost breakdowns, and supplier statements.
- Transport documents that show the shipment route and continuity under customs control.
A useful rule of thumb: if a customs officer can’t reconcile the declared HS code, origin basis, and shipment route from your documents, the preference is at risk.
Direct Transport and Handling Conditions
Many schemes require that goods are transported directly between the exporting and importing countries, or that any transit through third countries does not allow the goods to be released for free circulation. Example: goods pass through a neutral hub where they are stored in a bonded area and then reloaded for the final leg. The importer should ensure the transport documents and customs status records support that the goods remained under control.
Mind Map: Preferential Eligibility Building Blocks
Example: Eligibility Check for a Simple Preference Claim
Assume a free trade agreement between Country A (exporter) and Country B (importer). A company imports “knitted T-shirts.”
- Step 1: Scheme: The exporter is in Country A, so the agreement is potentially applicable.
- Step 2: HS code: The importer declares the HS code for knitted T-shirts.
- Step 3: Origin rule: The product-specific rule requires that the yarn be originating, or that certain manufacturing steps occur in Country A.
- Step 4: Evidence: The exporter provides an origin declaration and keeps records showing the yarn source and the knitting and finishing steps.
- Step 5: Transport: The shipment transits through a third country but remains in bonded storage; the transport documents and warehouse records show no release for free circulation.
- Step 6: Declaration: The customs entry claims the preference basis consistent with the origin evidence.
If any one of these steps breaks—say the HS code is wrong, or the transit documents don’t show customs control—the preference claim can be denied or corrected.
Common Eligibility Traps and How to Avoid Them
- Wrong HS code: fix classification before origin analysis.
- Origin evidence mismatch: ensure the origin basis on the declaration matches the supporting records.
- Transit gaps: keep transport and bonded-handling records aligned with the direct transport requirement.
- Overlooking scheme-specific extras: some schemes require additional statements, quotas, or product constraints beyond the origin rule.
Preferential tariff eligibility is a chain. Each link—scheme, classification, origin, evidence, and transport—must be strong enough to stand up on its own, not just together.
2.5 Common Classification Pitfalls And How To Build Defensible Records
Classification mistakes usually start small: a single assumption about what the product “really is.” Customs authorities rarely accept that kind of guesswork, especially when the declaration is inconsistent with the physical goods, the technical description, or the supporting documents. Defensible records are not a pile of paperwork; they are a chain of reasoning that stays intact when someone else reviews it.
Pitfall One Misreading the Product Scope
A common failure is treating a product as if it were the generic category, ignoring what the item actually does. Example: a “cleaning solution” that includes a specific active ingredient may not classify like a basic detergent if the tariff heading is driven by chemical composition or intended function.
Defensible record practice: write a one-paragraph “scope statement” that ties the product’s function and composition to the heading criteria. Keep it consistent across the commercial invoice, product spec, and declaration.
Pitfall Two Using the Wrong Classification Logic
Some teams jump straight to a tariff code because it looks close. The safer approach is to follow the classification structure: heading first, then section/chapter notes, then any relevant subheading rules, and only then the final code.
Defensible record practice: include a short decision trail. For each step, state what you checked and what you found. If a note excludes the product from a heading, record that exclusion and the reason.
Pitfall Three Inconsistent Descriptions Across Documents
Customs systems and human reviewers notice mismatches. If the invoice says “stainless steel fittings” but the packing list says “plastic connectors,” you have created a classification problem and a credibility problem.
Defensible record practice: run a “field-by-field consistency check” before filing. At minimum, align: product name, material, dimensions, model number, intended use, and any technical parameters that affect classification.
Pitfall Four Ignoring Variants and Model Differences
A family of products often shares marketing names, but tariff classification can change with capacity, composition, or design. Example: two versions of the same device may differ only by power rating, yet the tariff treatment can differ.
Defensible record practice: maintain a variant matrix. Each model should map to its technical spec sheet, bill of materials summary, and the exact classification basis used for that model.
Pitfall Five Overstating Substantial Transformation or Processing
Even when the broader book topic is neutral routing, classification still depends on what is imported. If you import components and later assemble them, the customs declaration for the components must reflect their status at import.
Defensible record practice: separate “import state” evidence from “post-import processing” evidence. If the product is imported as a kit, record whether it is presented as a set and how it is packaged and supplied.
Pitfall Six Weak Evidence for Technical Claims
Technical statements like “food grade,” “medical,” or “industrial use” can matter, but only if you can support them. A label without a test report is often not enough.
Defensible record practice: link each technical claim to a specific document type: certificate, test result, engineering drawing, or manufacturer statement with measurable parameters.
Mind Map: Defensible Classification Records
Example: From Confusing Description to Clear Classification Basis
Suppose you import a “thermostatic valve assembly.” The invoice lists it as “valve,” but the technical sheet shows it includes a sensor module and a control unit.
A defensible record would include:
- A scope statement: “Assembly includes valve body plus integrated sensor and control unit; function is temperature-regulated flow control.”
- Evidence: datasheet showing components and operating principle, plus a bill of materials summary.
- Decision trail: notes reviewed to confirm whether the heading covers complete assemblies versus parts, and why the sensor/control integration changes the classification.
- Consistency check: invoice and packing list updated so “assembly” and key functional parameters match the technical sheet.
The key is not that the code is “right” on day one; it’s that the reasoning and evidence are coherent enough to survive a second look.
Record Checklist That Actually Helps
Before filing, confirm you can answer these questions from your own documents:
- What exact product is being imported, in its import state?
- Which tariff criteria did you match, and where is that evidence?
- Which notes or exclusions did you check, and what did they do to your choice?
- Are the critical fields consistent across documents?
- If there are variants, which one is this shipment?
If any answer requires “trust me,” the record is not defensible yet.
3. Rules of Origin and Substantial Transformation Analysis
3.1 Origin Determination Frameworks Used in Practice
Origin determination is the process of deciding where goods “come from” for customs purposes. In practice, it is less about a single magic rule and more about applying a structured framework to the product, its inputs, and the manufacturing or processing steps. The goal is consistent decisions that can survive a customs audit without relying on guesswork.
Foundational Inputs You Must Establish First
Start by collecting the facts that every framework needs:
- Product description: what the goods are, including model, material composition, and intended use.
- Bill of materials: each input, its quantity, and where it is sourced.
- Process map: what happens to the goods at each step, in order.
- Supplier and transaction records: invoices, production records, and any evidence of where inputs were obtained.
- Claim basis: whether origin is determined by wholly obtained, substantial transformation, or specific processing rules.
A practical way to avoid confusion is to create a one-page “origin worksheet” that lists each input and each process step side by side. If those two lists do not match, the origin claim will not match either.
Framework 1: Wholly Obtained
This framework applies when the goods are entirely produced from materials that qualify as originating in the same country. It is common for certain agricultural products and some natural resources.
Example: A shipment of raw coffee beans grown and harvested in Country A, with no imported additives or processing beyond cleaning and drying, is typically treated as wholly obtained in Country A.
Common pitfall: “We only cleaned it” is not enough if the beans were imported. Cleaning can be origin-neutral, but it cannot fix non-originating inputs.
Framework 2: Substantial Transformation
When goods are made from non-originating inputs, many regimes rely on whether the production process results in a new product with a different character, use, or identity. The exact test varies by jurisdiction, but the reasoning pattern is consistent: compare the input state to the output state.
Example: Non-originating steel rods are cut, machined, and assembled into a specific pump housing with defined performance characteristics. If the process changes the rods into a distinct component with a new identity and function, customs may accept substantial transformation.
How to make the argument concrete:
- Identify the input’s essential character (what it is before processing).
- Identify the output’s essential character (what it becomes after processing).
- Link each process step to the change in identity or function.
If your process map lists steps but does not explain what changes, you are doing paperwork, not origin determination.
Framework 3: Specific Processing Rules
Some tariff schedules use “product-specific rules,” where origin depends on meeting a defined requirement such as a change in tariff classification, a maximum value of non-originating materials, or a particular manufacturing operation.
Example: A rule might require that for a certain category of finished textiles, the non-originating yarn must be classified under a different tariff heading than the finished fabric. If the yarn and fabric headings differ as required, origin may be granted even if the process is not extensive.
Practical tip: Build a classification table that shows the tariff heading of each key input and the final product. Then map the rule requirement to that table. This prevents “we think it qualifies” from replacing “it qualifies because the rule says so.”
Framework 4: Change in Tariff Classification
A frequent component of specific processing rules is the change in tariff classification test. It asks whether the tariff heading (or sometimes subheading) of the inputs changes as a result of production.
Example: Imported components classified under one heading are assembled into a finished appliance classified under a different heading. If the rule requires a heading-level change and the assembly causes that change, origin may be satisfied.
Common pitfall: Using the wrong level of classification. Some rules require a change at the heading level; others require subheading. Mixing levels is a fast way to lose a claim.
Mind Map: Origin Determination Frameworks Used in Practice
Putting It Together with a Worked Mini-Scenario
Assume a company imports non-originating electronic modules and assembles them into a finished control unit.
- If the rule for the control unit requires a specific processing operation, you must show that operation occurred and that it is the operation the rule describes.
- If the rule relies on change in tariff classification, you must show the module heading differs from the finished unit heading at the required level.
- If the regime allows substantial transformation, you must explain how the assembly creates a new product with a different function than the modules alone.
In practice, teams often run two frameworks in parallel—one for rule compliance and one for narrative coherence. If both point to the same origin, the claim is easier to defend.
Evidence Standards That Keep Frameworks Honest
Regardless of framework, evidence should be:
- Specific: tied to the exact product and process steps.
- Consistent: quantities, dates, and classifications match across documents.
- Traceable: you can point from a claim to a record.
A useful discipline is to maintain a discrepancy log. If a supplier invoice lists one material origin but production records show another, you resolve it before filing. Origin determination is not where you “fix it later.”
3.2 Substantial Transformation Tests and Evidence Requirements
Substantial transformation is the customs question behind many origin outcomes: did the goods change in a way that makes them “new” for tariff and origin purposes? Different jurisdictions phrase the test differently, but the practical work is similar—customs looks for a meaningful shift in identity, character, and use, not just a change in packaging or paperwork.
Foundational Concepts That Drive the Test
Start with three anchors.
-
Identity shift: Did the product become something commercially distinct? For example, turning raw metal into a finished component often changes the item’s market identity.
-
Character and use shift: Did the physical properties and intended use change? A simple cleaning step usually keeps the same character and use.
-
Process significance: Was the processing more than routine? Customs expects evidence that the processing is the reason the product’s identity changed.
A useful mental shortcut: if a buyer would describe the output with a different product name and different functional purpose than the input, you’re closer to substantial transformation. If the buyer would say “same thing, just repacked,” you’re usually not.
Evidence Requirements That Make the Argument Hold
Customs rarely accepts a claim that “processing happened.” It wants proof that the processing mattered. Build evidence in layers so each layer supports the next.
1) Product Narrative and Bill of Materials
Write a short, factual narrative that answers: what entered, what came out, and why the output is different. Pair it with a bill of materials that shows what inputs were consumed and what outputs were produced.
Example: A company imports “unwound fabric rolls” and outputs “finished apparel panels.” The narrative should explain which steps convert rolls into panels ready for garment assembly, and the bill of materials should show the fabric types and any added components.
2) Process Map with Step-by-Step Outcomes
Create a process map that lists each step and the measurable outcome. Customs-friendly evidence includes parameters like temperatures, curing times, milling durations, or machining tolerances—anything that shows the process is not cosmetic.
Example: For plastic molding, evidence can include mold type, cycle time, resin grade changes, and dimensional tolerances of the molded part.
3) Technical Specifications That Show Functional Change
Provide product specifications for both input and output. The goal is to show a change in character and use, not just a different label.
Example: If the input is “semi-finished electronic boards” and the output is “assembled control modules,” include specs for the assembled module’s function, interfaces, and performance tests.
4) Quality Control and Test Records
Testing records are persuasive because they show what the output must achieve. Include incoming inspection for inputs and final inspection for outputs.
Example: If the output must meet pressure ratings, include test results and acceptance criteria.
5) Commercial Documentation That Matches the Physical Story
Commercial documents should align with the technical story: purchase orders, production orders, and sales invoices should reflect the output’s commercial identity.
Example: If the output is sold as a different product category, the invoice description and product codes should match the technical specifications.
Common Failure Points and How to Avoid Them
-
Overstating processing: If the “transformation” is mostly labeling, sorting, or repacking, customs may treat it as insufficient.
-
Missing the “why”: Evidence that only shows what happened, without explaining why the output is different, is weak.
-
Mismatch between documents and goods: If the invoice says “finished unit” but the production records show only packaging, the story breaks.
-
Ignoring minor inputs: Even small added components can matter if they change function. Evidence should explain whether they are functional or merely incidental.
Mind Map: Substantial Transformation Evidence Chain
Practical Example: From Inputs to a Defensible Outcome
Scenario: A neutral hub receives imported “metal blanks” and performs machining, heat treatment, and surface finishing to produce “precision shafts.”
- Narrative: The blanks are machined to specified diameters and tolerances, heat treated to achieve hardness, then finished to meet surface roughness requirements.
- Process map: Machining steps with tolerance targets, heat treatment parameters, and finishing method.
- Specifications: Input blanks listed by material and general form; output shafts listed by hardness range, roughness, and dimensional tolerances.
- Tests: Hardness tests and dimensional inspection reports for each batch.
- Commercial documents: Sales invoices and packing lists describe “precision shafts” with the same technical identifiers used in the inspection records.
If the evidence shows that the output’s functional performance and market description differ from the input, the substantial transformation argument is coherent. If the evidence only shows that the blanks were cleaned and repacked, the same structure of evidence would still fail—because the “character and use” change would not be supported.
Evidence Checklist for the File
- Input and output product descriptions that match technical reality
- Bill of materials showing what was consumed and what was produced
- Step-by-step process map with measurable outcomes
- Technical specifications for both sides of the transformation
- Incoming and final quality control records
- Commercial documents consistent with the output identity
- A short written explanation connecting each processing step to the identity change
3.3 Minimal Processing Versus Substantive Manufacturing Activities
In tariff engineering and neutral-country routing, the line between “minimal processing” and “substantive manufacturing” matters because it often determines whether goods can claim a new origin, qualify for a procedure, or avoid penalties for misrepresentation. The practical challenge is that both terms sound legalistic, but the decision is usually grounded in observable facts: what changed, how much it changed, and whether the change is the kind customs authorities recognize as manufacturing rather than simple handling.
Start with the foundational idea: customs origin determinations are not about paperwork alone. They are about the transformation of the product—its identity, essential character, and how it is described in technical and commercial terms. If the goods arrive in one form and leave in essentially the same form, with only minor operations applied, the activity tends to be treated as minimal processing. If the goods are transformed into a different product with a new function or a materially different classification-relevant character, the activity tends to be treated as substantive manufacturing.
What Counts as Minimal Processing
Minimal processing typically includes operations that preserve the goods’ identity while preparing them for shipment, storage, or distribution. Common examples include:
- Sorting and grading without changing the product.
- Packaging, repackaging, and relabeling for retail or logistics.
- Dilution or mixing that does not create a new product with a distinct essential character.
- Simple assembly where the resulting item is still essentially the same as the components and does not become a new functional product.
- Cleaning, drying, and basic maintenance that restores condition rather than changes character.
A useful way to test “minimal” is to ask: if you removed the processing step, would the goods still be the same goods that the customer ordered? If the answer is yes, you are likely in minimal territory.
What Counts as Substantive Manufacturing
Substantive manufacturing usually involves operations that create a new product or a materially different product. Examples include:
- Machining or forming that changes the physical structure in a way that affects performance.
- Chemical reactions that create a new substance.
- Complex assembly where components are integrated into a single functional unit with a distinct purpose.
- Substantial processing of inputs that changes the product’s essential character, not just its packaging.
A second test is classification-relevant: does the processing change the way the product is described in a technical sense that would plausibly affect customs classification or the product’s commercial identity? If yes, substantive manufacturing is more likely.
The Evidence Ladder
Customs decisions often hinge on evidence quality. Build an “evidence ladder” from simple to technical:
- Commercial evidence: purchase orders, invoices, and product descriptions that match what leaves the facility.
- Process evidence: work instructions, batch records, and time-and-motion descriptions of what actually happened.
- Technical evidence: engineering specs, test results, and material composition or performance data.
- Outcome evidence: final product documentation showing the new identity, function, or technical characteristics.
If your evidence stops at invoices and labels, you usually cannot support a substantive claim. If it includes process records and outcome testing, you can explain why the transformation is real.
Mind Map: Minimal Versus Substantive Activities
Example: Packaging Versus Functional Assembly
Consider two scenarios for the same end customer request: “a ready-to-use medical device kit.”
-
Scenario A: Minimal processing. Components arrive as separate sterile parts. The hub only repackages them into a kit box, applies a new label, and adds an instruction leaflet. The parts remain the same sterile components with the same function. The activity is likely minimal because the core product identity is unchanged.
-
Scenario B: Substantive manufacturing. The hub installs a key component that changes how the device operates, performs a required calibration step, and runs acceptance tests that confirm performance. The kit becomes a functional device unit rather than a bundle of parts. The activity is likely substantive because the outcome is a different functional product.
The difference is not the presence of a “kit” label. It is the transformation of function and the existence of outcome testing tied to that function.
Example: Mixing and Dilution
A neutral hub receives a chemical input used as an ingredient. If the hub merely dilutes it to meet a customer’s concentration preference and the resulting mixture is still treated commercially as the same ingredient, the processing may be minimal. If the hub performs a reaction that produces a new compound with different properties and a different commercial description, the processing is more likely substantive.
In practice, you support the classification by showing the input and output specifications, not just the fact that “mixing occurred.”
Practical Decision Checklist
Before claiming substantive manufacturing, verify these points:
- The final product is described differently in technical and commercial terms.
- The process includes steps that change essential character, not only presentation.
- The records show what happened, in what sequence, and with what parameters.
- The outcome is supported by test results or technical acceptance criteria.
If those boxes are not checkable, treat the activity as minimal processing and design your routing and documentation strategy accordingly.
3.4 Handling Mixed Inputs and Component Based Origin Arguments
Mixed inputs are the rule, not the exception: a product may be assembled from parts with different origins, sourced under different contracts, and processed in multiple steps. Component based origin arguments are how you explain why the finished goods qualify for a particular origin outcome when not every input shares the same origin.
Start with a simple principle: origin is determined for the finished good, but the evidence you use often comes from inputs. That means your job is to connect input facts to the origin rule that applies in your jurisdiction and trade program. If you cannot connect them cleanly, you will end up with a declaration that looks confident and behaves like a loose bolt.
Foundational Approach to Mixed Inputs
- Identify the origin rule that governs the finished good. Some programs use a change in tariff classification rule, others use a regional value content rule, and others use specific processing requirements.
- List every input that matters to that rule. “Matters” means it affects classification, value calculations, or the required processing.
- Separate inputs by origin and by role. Inputs can be foreign, domestic, or already originating under a preference. Also separate components from consumables and packaging if the rule treats them differently.
- Build a traceable evidence chain. For each input, you need a source for its classification, value, and origin status, plus a way to show how it enters the manufacturing or assembly process.
A practical example: a neutral hub receives a partially assembled machine from Country A, adds locally sourced wiring from Country B, and completes assembly in the hub country. Even if the final assembly is done in one place, the origin argument must still address the mixed origins of the inputs.
Component Based Origin Arguments That Actually Hold Up
Component based arguments work best when you treat them as a structured mapping exercise rather than a narrative. The mapping has three layers.
Layer 1: Component identity. For each component, capture the product description, tariff classification, and whether it is used as a component of the finished good.
Layer 2: Component contribution to the origin rule.
- If the rule is tariff shift, show how the finished good’s classification differs from the classification of non-originating components.
- If the rule is value based, show how the value of non-originating materials is calculated and whether excluded costs are handled correctly.
- If the rule is specific processing, show that the required processing is performed and that the component is the one the rule contemplates.
Layer 3: Manufacturing linkage. Demonstrate that the component used in production is the same component described in the evidence. This is where many submissions fail: the paperwork describes Component X, but the production line used Component Y with a similar description.
Mind Map: Mixed Inputs to Origin Outcome
Example: Tariff Shift with Mixed Components
Assume the finished product is classified as HS 8504 (electrical transformers), and the origin rule requires a change in tariff classification at the 4-digit level. The bill of materials includes:
- Non-originating core material classified as HS 7207
- Originating windings classified as HS 7408
- Non-originating insulation classified as HS 3921
Your argument should show that the finished HS 8504 differs at the required level from the listed non-originating inputs. The originating windings still need to be documented, but the tariff shift analysis focuses on whether the non-originating inputs satisfy the required change.
A common mistake is to treat “originating” components as automatically solving the problem. If the rule is tariff shift, the non-originating components still must meet the shift requirement.
Example: Value Based Rule with Mixed Sourcing
Suppose a regional value content rule requires that the value of originating materials be at least 40% of the transaction value. You have:
- Originating metal parts from Country C
- Non-originating fasteners from Country D
- Freight and handling costs that may be excluded depending on the rule
Your calculation must be consistent with the rule’s definitions of “transaction value,” “originating value,” and any exclusions. If the rule excludes certain costs, you must show the basis for exclusion and keep the supporting invoices or cost breakdown.
If the hub performs repackaging only, do not assume value based origin is achieved. The origin rule still governs whether the processing is sufficient, and the value calculation must reflect the correct scope of originating materials.
Advanced Detail: Mixed Inputs Across Multiple Production Steps
When production occurs in stages, you must avoid mixing evidence from different steps. For instance, if Step 1 is kitting and Step 2 is assembly, the component list for Step 2 must match what is actually installed. If a component is substituted mid-run, you need either:
- a revised BOM and matching evidence for the substituted component, or
- a clear explanation that the substituted component is equivalent under the rule and supported by classification and specification records.
The goal is not to make the story longer; it is to make the chain of facts tighter.
Practical Checklist for Component Based Arguments
- Every component in the BOM has a classification and origin status.
- The origin rule type is stated and applied consistently.
- Tariff shift analysis references the correct non-originating components.
- Value calculations use the rule’s definitions and exclusions.
- BOM, production records, and shipment documentation align by lot or batch.
- Substitutions are documented with equivalent classification support.
When mixed inputs are handled this way, the origin argument becomes a set of verifiable links. It reads less like a claim and more like a map you can follow without guessing.
3.5 Practical Origin File Construction for Audits and Post Clearance Review
A strong origin file is not a pile of documents; it’s a traceable story that connects the product you declared to the origin you claimed. Auditors typically test three things: (1) what the product is, (2) what processing happened, and (3) why that processing meets the origin rule. Your file should make those three answers easy to verify without guessing.
Step 1: Lock the Product Identity
Start with a “product spine” that stays consistent across declarations, invoices, and labelling.
- Commercial description: the exact wording used in the declaration.
- Technical description: specifications, model numbers, material composition, and any variant mapping.
- Classification anchor: the tariff classification basis you used, even if origin and classification are separate questions.
Example: If you declared “aluminum brackets, model AB-14,” include the engineering sheet showing AB-14 dimensions and the bill of materials listing aluminum grade and fasteners. If AB-14 has two variants, label them clearly and show which one matches the shipment.
Step 2: Identify the Origin Rule You Are Applying
Origin is rule-based. Your file should state the rule and show how the product fits it.
- Preferential scheme: name the agreement or preference program you rely on.
- Origin criterion: wholly obtained, substantial transformation, or specific processing, depending on the scheme.
- Evidence type: what the scheme expects—manufacturing records, supplier declarations, or technical tests.
Example: If the rule is “change in tariff heading” for certain components, your file must show the component headings and the final heading, plus the manufacturing step that causes the change.
Step 3: Build the Processing Timeline
Auditors look for a coherent sequence, not isolated documents.
Create a timeline with dates, locations, and responsible parties:
- Inbound inputs: purchase orders, supplier invoices, and supplier origin statements.
- Manufacturing steps: work orders, routing sheets, and batch/lot records.
- Outbound outputs: production completion records, packing records, and final QC sign-off.
Use a consistent identifier across documents: batch number, production order number, or lot code.
Example: For a batch of assembled electronics, include the routing sheet showing assembly, casing, firmware loading, and final inspection. Link each step to the batch/lot number used on the packing list.
Step 4: Prove the Inputs and Their Origin
If your origin claim depends on non-originating inputs, you need evidence that those inputs are what you say they are.
- Supplier declarations: keep them signed and version-controlled.
- Material traceability: lot numbers from suppliers to your receiving records.
- Quantity and usage: show how much of each input went into the batch.
Example: If you used “polymer resin X” from two suppliers, include both supplier declarations and receiving records, then show which supplier’s lot went into the batch that produced the exported goods.
Step 5: Demonstrate Compliance with the Origin Criterion
Now connect the processing timeline to the origin rule.
- For tariff shift rules: show input headings, output heading, and the manufacturing step that effects the shift.
- For value rules: show calculation inputs, currency conversions, and allowable deductions.
- For specific processing: show the exact steps required and the records that confirm they occurred.
Example: For a value rule, include a calculation worksheet that ties invoice values to the batch, then show how you treated freight, insurance, and royalties according to the scheme’s instructions.
Step 6: Add Audit-Ready Controls
A file that is correct but hard to navigate fails in practice.
- Index and cross-references: every document has an index number and is referenced in the narrative.
- Version control: keep the “as declared” version of the origin calculation and the final supplier declarations.
- Consistency checks: ensure the declared product description matches the technical description and the bill of materials.
Example: If the origin calculation uses “net weight,” but the declaration uses “gross weight,” include a reconciliation note showing how the weights relate for the same batch.
Mind Map: Origin File Architecture
Example: Mini Origin File for a Single Shipment
- Document 1: Product technical sheet for model AB-14.
- Document 2: Bill of materials with component identifiers and quantities.
- Document 3: Supplier origin declarations for non-originating components.
- Document 4: Receiving records tying supplier lots to your batch.
- Document 5: Work order and routing sheet showing assembly steps.
- Document 6: QC checklist and batch completion record.
- Document 7: Origin calculation worksheet referencing the scheme rule.
- Document 8: Index page mapping each document to the origin criterion.
A post clearance reviewer should be able to start at Document 1, follow the batch identifiers through Documents 4–6, and end at Document 7 with no missing links.
Step 7: Prepare for Post Clearance Questions
When questions arise, they usually target gaps in traceability or mismatches in data fields.
Common issues to preempt:
- Mismatch between declared product variant and the bill of materials.
- Unlinked supplier declarations that do not match the input lots used.
- Calculations without traceable inputs or unclear treatment of deductions.
- Processing records that show steps but not the required identifiers.
Example: If a supplier declaration covers “resin X” broadly but your batch used “resin X lot 7,” include the receiving record and a batch-to-lot usage sheet so the reviewer can connect the dots quickly.
4. Neutral Country Trade Mechanics and Routing Design
4.1 What Makes a Country Neutral in Commercial and Customs Terms
A “neutral” country is not a magic label that automatically makes routing compliant. In practice, neutrality is a bundle of commercial and customs realities that let goods move through a place without triggering the same legal consequences as importing directly from the original source or exporting directly to the final destination.
Foundational Idea: Neutrality Is About Legal Effect, Not Geography
Commercial neutrality usually means the country is not the origin of the goods, not the final destination, and not the place where the key commercial story changes. Customs neutrality means the customs treatment of the movement and the status of the goods remain consistent with the declared procedure.
A useful way to think about it: customs cares about what happened to the goods and what you declared, while commercial parties care about who sold what to whom and under what terms. Neutral routing works when those two stories line up.
Commercial Neutrality: The Contract and the “Who Is Doing What” Story
Commercial neutrality is supported when the hub country sits between an upstream seller and a downstream buyer, and the hub’s role is operational rather than transformative.
Key indicators include:
- No final sale in the hub: the buyer and seller relationships are structured so the hub is not the place where ownership or commercial intent fundamentally changes.
- Clear role of the hub operator: the warehouse, logistics provider, or trading company performs storage, handling, and re-export activities consistent with the declared plan.
- Consistent Incoterms logic: the risk and cost allocation match the operational flow. If the hub is declared as a storage location, the shipping terms should not quietly imply the hub is the importer of record.
Example: A manufacturer in Country A sells to a trading company in Country B. Country B stores the goods and re-exports them to Country C. If the documents show that Country B never becomes the buyer for final consumption and the trading company’s role is limited to logistics and resale as agreed, the commercial story supports neutrality.
Customs Neutrality: The Goods’ Status and the Procedure You Use
Customs neutrality depends on the goods being placed under a procedure that allows storage and onward movement without treating the hub as the place of importation for home consumption.
In many systems, neutrality is achieved by:
- Using a customs procedure for non-final import status: goods arrive and are declared under a regime that suspends or controls duty and import requirements until re-export.
- Maintaining traceability: the goods can be linked across legs through inventory records, container seals, lot tracking, and document identifiers.
- Avoiding unauthorized release: if goods are released for free circulation in the hub, neutrality ends because the customs effect becomes “imported.”
Example: Goods arrive in a bonded warehouse in the hub country under a controlled procedure. They are then shipped out to the final destination under the re-export declaration. If the warehouse records show the same quantities and identifiers from arrival to departure, customs neutrality is supported.
The “Neutrality Test” That Prevents Common Failures
Neutral routing tends to fail when either the commercial story or the customs story breaks.
A practical test:
- What is the hub country’s customs status for the goods? If it is import for consumption, neutrality is gone.
- What is the hub country’s commercial role for ownership and intent? If the hub becomes the final buyer, neutrality becomes harder to justify.
- Do the documents match the physical flow? If the bill of lading, packing list, and declarations point to different quantities, descriptions, or parties, neutrality collapses under audit.
Mind Map: Neutrality in Commercial and Customs Terms
Integrated Example: Two Routes, One Neutral Outcome and One Not
Route A: Neutral outcome
- Contract: Origin seller → hub trading/logistics entity → final buyer.
- Operations: hub stores under a controlled customs procedure.
- Re-export: hub files onward declarations using the same item identifiers and quantities.
- Result: the hub is an intermediate location with controlled customs status and consistent commercial intent.
Route B: Not neutral
- Contract: hub trading entity signs as importer for final consumption.
- Operations: goods are released for free circulation in the hub.
- Re-export attempt: onward shipment documents exist, but the customs effect already occurred.
- Result: neutrality fails because the customs story is no longer “transshipment,” it is “import.”
Neutrality, then, is less about the country’s label and more about the disciplined alignment of contracts, procedures, and evidence. When those align, the hub can function as a neutral bridge; when they don’t, the paperwork may still move, but the legal meaning changes.
4.2 Routing Patterns for Transshipment and Re-Export Flows
Routing patterns describe how goods move across legs, who controls each leg, and which customs procedure fits each stage. The goal is simple: make the physical flow, the paperwork flow, and the legal story line up so the “neutral country” role is real, not just a line on a document.
Foundational Building Blocks
A routing pattern is built from five choices:
- Leg structure: inbound leg into the hub, outbound leg from the hub, and any intermediate handling.
- Control points: who has possession and who bears risk at each handoff (carrier, warehouse, forwarder, importer of record).
- Customs procedure per leg: storage under a customs procedure, then re export under a corresponding export procedure.
- Document continuity: bill of lading or air waybill references, container numbers, and inventory identifiers that remain traceable.
- Commercial story: whether the hub is a mere logistics provider or a party in the transaction chain.
A practical rule: if you cannot explain the route in three sentences—where it enters, what happens in the hub, where it leaves—your declarations will struggle later.
Mind Map: Routing Pattern Components
Pattern 1: Direct Inbound Storage Then Outbound Re-Export
This is the cleanest pattern when the hub does not change the goods.
Flow: Goods arrive at the hub under an inbound customs procedure for storage. They are kept in inventory under controlled status. When the outbound shipment is ready, the goods are declared for re export.
Example: A shipment of industrial pumps arrives in a neutral hub country. The hub warehouse stores them in bonded space. No repacking occurs. Later, the same pump units are loaded into a new container for shipment to the final destination.
Best practice: Use inventory identifiers that tie to the inbound receipt and the outbound picking record. If the outbound declaration references “Pump Model X, batch Y,” batch Y must be traceable back to the inbound receipt.
Pattern 2: Consolidation and Deconsolidation Within the Hub
This pattern is common when multiple inbound consignments are combined for efficiency.
Flow: Several inbound shipments arrive and are stored. The hub consolidates them into a single outbound load, then deconsolidates at the destination if needed.
Example: Electronics accessories arrive as separate cartons. The hub consolidates cartons into one outbound palletized shipment for a single buyer.
Best practice: Consolidation must not break traceability. A simple approach is to maintain a “carton-to-pallet” mapping in the warehouse system and ensure the outbound customs declaration references the correct quantities by item.
Pattern 3: Split Shipments from One Inbound Receipt
Sometimes one inbound receipt is later divided into multiple outbound shipments.
Flow: One inbound arrival is stored. The hub releases part of the inventory for one re export shipment, and the remainder for another.
Example: A neutral hub receives a container of spare parts. Half is re exported to one region, and half to another region two weeks later.
Best practice: Split releases require careful quantity control and consistent item descriptions. If the outbound declarations use different item codes or descriptions, you need a mapping that explains why the codes differ.
Pattern 4: Substitution of Outbound Goods Under Controlled Conditions
This pattern is used when the hub replaces goods due to damage, quality issues, or availability—while keeping the legal story coherent.
Flow: Inbound goods are stored. If replacement is needed, the hub sources replacement goods that are also placed under the appropriate customs status before being shipped out.
Example: A batch of packaged chemicals arrives. Some units are damaged. The hub ships only undamaged units, and replacement units sourced separately are placed into controlled inventory before re export.
Best practice: Avoid “paper substitution” where the outbound declaration implies the same physical units as the inbound receipt. If the physical units differ, the records must reflect that difference.
Pattern 5: Multi Leg Routing with Intermediate Handling Events
This pattern includes additional handling events such as temporary storage, transfers between facilities, or re-labeling for logistics reasons.
Flow: Inbound arrival → controlled storage or transfer → outbound re export. The key is that each handling event has a documented reason and a traceable effect on the goods.
Example: A shipment arrives at one facility in the hub country, is transferred to another bonded warehouse for specialized packing, then re exported.
Best practice: Transfers should be treated like mini projects: define the transfer trigger, the custody change, and the inventory reconciliation method.
Decision Logic for Choosing a Pattern
Choose the pattern based on what you must do in the hub:
- If the hub only stores and ships out: Pattern 1.
- If you combine multiple inbound lots: Pattern 2.
- If you release inventory in parts: Pattern 3.
- If you must replace damaged or nonconforming goods: Pattern 4 with strict controlled inventory.
- If you need facility transfers or intermediate handling: Pattern 5.
A practical check: write the routing pattern as a sequence of custody statements. If any custody statement is vague, fix it before you finalize declarations.
4.3 Contracting Structures That Align With Customs Procedures
Contracting is where “what you intend to happen” gets translated into “what customs can verify.” In neutral country transshipment and re export flows, the contract should support the customs procedure you plan to use, the documentary trail you will create, and the way risk and title move across legs. A good contract is not just legally tidy; it is operationally specific.
Start with the Customs Procedure You Will Actually Use
Before drafting clauses, decide the intended customs handling at the hub: for example, inbound storage under a controlled procedure and outbound re export under a corresponding export procedure. Customs authorities generally expect the declared procedure to match the commercial reality. If your contract says the goods are “sold for domestic consumption” but your operations declare “re export,” you have created a mismatch that invites questions.
Example: A supplier in Country A ships goods to a hub in Country B. The hub will store the goods under a customs control regime and then re export to Country C. The contract chain should reflect that the hub is not the final importer for domestic use, and that the outbound leg is a continuation of the supply chain rather than a new domestic sale.
Map Contract Parties to Documentary Roles
Customs declarations rely on who is responsible for what. Contracts should align with the roles you will show on documents: shipper, consignee, importer of record, buyer, seller, and sometimes the warehouse operator.
A practical approach is to create a “party-to-document” mapping table during contracting:
| Contract Role | Typical Document Role | Key Clause To Support |
|---|---|---|
| Seller in origin | Shipper on inbound documents | Delivery terms and export responsibility |
| Buyer for hub entry | Consignee or importer of record | Who bears costs and risk during storage |
| Hub operator | Warehouse custodian | Handling instructions and inventory control |
| Buyer for re export | Buyer/consignee on outbound | Who orders outbound shipment and pays freight |
Example: If the hub operator is only a custodian, the contract should avoid language that implies ownership transfer to the hub. Ownership transfer language tends to create valuation and origin evidence issues later.
Use Incoterms to Keep Costs and Risk Consistent Across Legs
Incoterms are not just for invoices; they shape how you explain who arranged transport, who insured the goods, and when risk shifted. For multi leg shipments, you may use different Incoterms per leg, but the contract must clearly state the boundaries.
Example:
- Inbound leg: Supplier delivers to the hub “Delivered at Place” with the buyer arranging onward handling.
- Outbound leg: The hub buyer sells to the Country C customer under a different Incoterm, with freight and insurance responsibilities clearly stated.
If the contract blurs these boundaries, your shipping instructions and insurance certificates may not match the declared cost build-up used for customs valuation.
Draft Clauses That Support Controlled Handling and Traceability
Neutral routing depends on traceability: the goods must be identifiable across legs, and the contract should require operational controls.
Include clauses that:
- Require segregation or controlled identification of inventory.
- Define handling instructions for damaged, substituted, or re packed goods.
- Specify who authorizes changes to packaging or labeling.
- Require recordkeeping that can be reconciled to customs declarations.
Example: If the hub repacks for palletization, the contract should state whether repacking is permitted, who approves it, and whether it triggers any documentation updates (such as revised packing lists). Without that, the warehouse may act correctly operationally but the contract will not support the documentary trail.
Align Title Transfer with the Re-Export Narrative
Title transfer is a common source of confusion. Customs authorities may not need a full legal treatise, but they do need a coherent story: the goods are under customs control at the hub and then leave for re export.
A clean structure is to separate:
- Ownership/title between commercial parties.
- Custody/control between the hub operator and customs.
Example: The buyer for the hub may hold title during storage, while the hub operator holds custody under a service agreement. The contract should state that custody does not equal importation for domestic consumption.
Build a Contract Chain That Avoids “Accidental Domestic Import” Language
Avoid clauses that imply the hub is importing for its own use, such as:
- “Buyer will import for consumption in Country B.”
- “Goods become part of the hub’s domestic inventory for sale in Country B.”
Instead, use language that supports the intended flow: storage for controlled purposes and outbound shipment to the next destination.
Mind Map: Contract Clauses That Match Customs Procedures
Integrated Example: Two Contracts, One Coherent Story
A common, workable structure uses two linked agreements:
- Inbound supply contract between origin seller and hub buyer, stating delivery to the hub for controlled storage and defining costs/risk for the inbound leg.
- Outbound sale contract between hub buyer and Country C customer, stating re export shipment terms and who arranges the outbound transport.
The hub operator signs a custody and handling agreement that requires traceability, permits only authorized repacking, and obligates recordkeeping that can be reconciled to inbound and outbound customs declarations.
When these contracts agree on the same narrative—controlled storage at the hub, then re export to the next destination—customs declarations stop looking like a paperwork magic trick and start looking like a consistent chain of facts.
4.4 Managing Multi Leg Shipments Without Breaking Compliance
Multi leg shipments are where good intentions meet paperwork reality. The goal is simple: keep each leg’s customs position, commercial story, and physical movement consistent enough that a reviewer can follow the chain without guessing. This section focuses on practical controls that prevent the most common failure modes: mismatched documents, unclear custody, and origin or valuation claims that don’t survive contact with the facts.
Foundational Idea: One Shipment, Multiple Customs Moments
A “shipment” can include several customs moments: arrival, storage, transfer, and re export. Each moment has its own declaration logic, permitted handling, and evidence expectations. If you treat the entire journey as one undifferentiated event, you’ll eventually declare something that contradicts what actually happened.
Example: A container arrives at a neutral hub under a storage procedure. While in the hub, it is consolidated with other cargo and then re exported. If the outbound declaration describes the goods as if they never entered storage, the narrative breaks. The fix is to align the outbound declaration with the inbound status and the permitted operations performed in the hub.
Step 1: Define the “Leg Map” Before Operations Start
Create a leg map that lists, for each leg, the origin of custody, the destination custody, and the customs status. Keep it operational, not theoretical.
- Leg 1 inbound: carrier arrival → warehouse custody → inbound declaration status
- Leg 2 internal handling: warehouse operations → inventory control → transfer readiness
- Leg 3 outbound: outbound declaration type → exporter of record → final destination
Step 2: Align Documents to Custody, Not Just to the Goods
Documents should reflect custody transitions. When they don’t, compliance teams spend time reconciling stories that were never meant to be consistent.
Practical alignment rules
- Routing documents match the physical route. If the bill of lading shows a direct route but the container physically transits the hub, the mismatch becomes a red flag.
- Commercial documents match the declared transaction structure. If the outbound invoice reflects a different seller or different commercial terms than the inbound story, ensure the valuation basis and related-party handling are consistent.
- Customs declarations match the procedure logic. Outbound declarations must reflect what the hub was allowed to do under the inbound status.
Example: Goods arrive under a procedure that permits storage and repacking. If the outbound declaration implies manufacturing beyond what was permitted, the reviewer will ask for evidence of the actual operations and their legal basis.
Step 3: Control Inventory and Traceability Across Legs
Inventory control is the bridge between “what the warehouse did” and “what customs declared.” Use traceability that can answer three questions quickly: what arrived, what changed, and what left.
Minimum evidence set
- inbound receipt records tied to container or lot identifiers
- warehouse movement logs for repacking or consolidation
- outbound release records tied to the outbound declaration
Example: A hub consolidates three lots into one outbound container. If the outbound packing list lists only the consolidated lot numbers but the inbound records are by original container numbers, you need a mapping table that links them. Without that mapping, the chain of custody becomes a scavenger hunt.
Step 4: Use a Mismatch Detection Workflow Before Declarations Are Filed
Build a short checklist that compares the same data elements across documents and declarations. The checklist should be mechanical enough to run daily.
Mismatch triggers
- container number or seal number differs between legs
- weights or quantities change without a documented warehouse operation
- invoice parties differ without a documented commercial rationale
- product descriptions vary in ways that affect classification or origin arguments
Example: Inbound documents describe “model A” while outbound documents describe “model A (revised).” If the revised model changes technical characteristics relevant to classification, you need a classification evidence update and a clear explanation of what changed during the hub operations.
Step 5: Handle Amendments and Exceptions with a Controlled Paper Trail
Exceptions happen: a seal is replaced, a document is corrected, or a quantity is adjusted after a physical count. The compliance risk is not the exception itself; it’s losing the reason and the authorization.
Operational rule: every exception must have a reason code, an approving role, and a link to the affected declaration or document.
Example: A seal is found damaged on arrival. The warehouse replaces it and records the new seal number. If the outbound declaration uses the old seal reference, the evidence trail conflicts. Fix by updating the declaration data elements that depend on seal identity and retaining the seal replacement record.
Step 6: Keep the Narrative Consistent for Reviewers
A reviewer should be able to read the leg map, then follow documents and evidence in order. That means your internal file should be structured by leg and by customs moment.
Example: For a shipment that entered the hub on 2026-02-26 and re exported after repacking, the file should show the inbound status on that date, the warehouse operations in between, and the outbound procedure at departure. If the dates are scattered across unrelated folders, the story becomes harder than it needs to be.
When multi leg shipments are managed this way, compliance stops being a last-minute scramble and becomes a predictable consequence of good leg mapping, custody-aligned documents, and traceable inventory.
4.5 Operational Checklists for Consistent Paper and Physical Flows
Consistent paper and physical flows are the boring superpower of neutral-country routing. The goal is simple: every physical movement has a matching record trail, and every record change has a controlled reason. Use the checklist below as a repeatable rhythm for inbound arrival, hub handling, and outbound re export.
Foundational Setup Before Any Shipment Moves
Start with a shared “source of truth” so teams don’t argue about which document is correct.
- Define the shipment identity key: a single reference used across booking, warehouse location, customs declarations, and outbound paperwork (for example, a hub reference plus the container number).
- Assign document owners: operations owns physical movement logs; compliance owns declaration data and evidence; the warehouse system owns inventory status.
- Lock the mapping rules: decide which fields must match exactly (container number, consignee, gross mass, package count) and which can be corrected with amendment procedures.
- Set a reconciliation cadence: do a quick check at three points—arrival, before outbound loading, and after departure.
Example: A shipment arrives with 12 pallets. The booking says 12, the warehouse intake scan says 12, and the outbound declaration must also reflect 12. If one system shows 11, you stop and reconcile before anything leaves.
Arrival Checklist for Paper That Matches the Truck or Vessel
At inbound, confirm that the record trail starts clean.
- Booking and transport document match: verify bill of lading or air waybill number, vessel/flight, and container or master air waybill identifiers.
- Intake scan and physical count: record package count, pallet count, and gross weight as received.
- Condition notes: note seals, visible damage, and temperature control status if applicable.
- Inventory status creation: ensure the warehouse system marks the goods under the correct customs procedure or storage status.
- Document set completeness: confirm you have invoice, packing list, and any required certificates before the goods are released for storage.
Mini example: If seals are found broken, you record seal numbers and condition at intake, then ensure the customs file references the same observation. Later, when outbound paperwork is prepared, the narrative stays consistent.
Hub Handling Checklist for Controlled Movement Inside the Neutral Country
Inside the hub, the risk is accidental mixing or “paper drift.”
- Location discipline: every move gets a timestamp and a location code (inbound staging to bonded storage to outbound staging).
- Segregation rules: keep different consignments separated by physical barriers and system flags.
- Labeling and traceability: ensure labels on pallets or cartons match the shipment identity key.
- Change control: if package counts change due to repacking, record the reason, the method, and the new counts.
- Evidence capture: attach photos or scan logs when seals are re applied, when repacking occurs, or when temperature logs are used.
Outbound Preparation Checklist for Re-Export Routing
Outbound is where mismatches become expensive.
- Pre load reconciliation: compare warehouse inventory counts against the outbound declaration draft.
- Declaration data alignment: confirm consignee, marks and numbers, package count, gross mass, and product description align with the invoice and packing list.
- Loading verification: re count packages at loading and confirm the container or flight identifiers match the transport booking.
- Seal confirmation: record seal numbers applied at loading and ensure they match the outbound transport document.
- Departure record closure: confirm the transport document is issued and the warehouse system marks the goods as departed.
Example: The outbound declaration lists 240 cartons, but the warehouse system shows 238 because two cartons were quarantined for inspection. The checklist forces a decision: either resolve inspection outcomes and update counts through the approved process, or hold outbound until the record trail is correct.
Reconciliation Rhythm and Exception Handling
Use a consistent rhythm so exceptions are caught early.
- Arrival check: confirm identity key, counts, and inventory status.
- Pre outbound check: confirm declaration alignment and loading readiness.
- Post departure check: confirm transport document issuance and system closure.
When something doesn’t match, follow a simple rule: no outbound movement without a documented discrepancy resolution path.
- Record what differs (field-level mismatch).
- Record why it differs (damage, repack, correction, system delay).
- Record what changed (amendment number, revised counts, updated seals).
- Record who approved it (operations vs compliance).
Example: A system delay causes the outbound draft to use yesterday’s weight. The fix is not “send it anyway.” You update the weight with the approved evidence and keep the audit trail intact.
Practical One Page Checklist Template
Use this as a quick operational printout.
- Arrival: transport doc match ✅ / intake count ✅ / seals and condition ✅ / inventory status correct ✅ / documents complete ✅
- Hub Handling: location logged ✅ / segregation enforced ✅ / labels traceable ✅ / repack changes controlled ✅ / evidence attached ✅
- Outbound: pre load reconciliation ✅ / declaration fields aligned ✅ / loading count verified ✅ / seals recorded ✅ / departure closure done ✅
If you can’t tick a box, you pause. Neutral-country routing works when the paperwork behaves like a well trained map: it doesn’t just point somewhere, it gets you there with the same landmarks every time.
5. Transshipment Hub Operations and Customs Procedure Selection
5.1 Hub Functions Warehousing Bonding and Controlled Handling
A transshipment hub is not just a place where goods sit. It is a controlled system that keeps the shipment’s legal status, physical location, and paperwork story aligned. When the hub is used for warehousing, bonding, and controlled handling, the goal is simple: the goods must be traceable from arrival to the re-export leg, and the customs procedure applied to them must match what actually happens on the ground.
Hub Functions That Keep the Story Consistent
Start with the hub’s three core functions.
First, receipt and identification. On arrival, the hub records what it received (container or pallet identifiers, seals, weights, and counts) and links those facts to the customs status assigned at entry. A practical best practice is to scan identifiers twice: once at the gate and once at the storage location. If the second scan fails, you catch the mismatch before it becomes a declaration problem.
Second, storage and segregation. Goods under different customs statuses must not be mixed. For example, bonded goods awaiting re-export should be stored separately from goods that have entered free circulation. Even if the products look identical, the paperwork status differs, and the hub must reflect that difference physically.
Third, movement control. Every move—between bays, to inspection, to repacking, or to loading—needs a traceable event. Think of it as a chain of custody log. If a container is moved for inspection, the hub records the reason, time, and responsible party, and updates the inventory record so the next declaration can be accurate.
Warehousing Options and Why They Matter
Warehousing in a hub usually comes in two flavors: non-bonded storage and bonded storage under a customs procedure that suspends or controls duties and taxes. Bonded storage is the one that most directly supports re-export routing because it keeps the goods within a controlled customs framework.
A simple example: a shipment arrives at Hub A under a bonded procedure. The hub stores it for 20 days, then re-exports it to Country C. If the goods were instead stored in a non-bonded area without the correct customs status, the customs treatment may no longer support the intended re-export outcome.
Bonding Basics and Controlled Handling
Bonding is the mechanism that allows goods to be held under customs control. The hub typically operates under an authorization that defines what it can do, how it must account for goods, and how it must respond to customs requests.
Controlled handling is the set of permitted operations that do not break the customs story. Common controlled handling activities include:
- Segregated storage by customs status and shipment reference.
- Inspection and sampling under supervision, with records of what was removed and how much remains.
- Repacking or labeling when allowed, ensuring the goods remain the same for customs purposes.
- Loading preparation such as palletizing for the outbound leg, again with traceable inventory adjustments.
A useful rule of thumb: if an operation changes the goods in a way that affects classification, origin, or value, you need to confirm whether the customs procedure still permits it. If it does not, the hub must stop and escalate before the paperwork becomes a retroactive repair job.
Mind Map: Hub Operations for Bonded Re-Export
Example: From Arrival to Re-Export Without Paperwork Drift
Assume a container arrives at the hub with seals intact. The hub receives it under a bonded procedure and assigns an internal location code. During the first week, customs requests an inspection. The hub opens the container under supervision, records the seal condition, counts cartons, and takes a small sample. The hub then reseals the container and updates the inventory record with the inspection event.
Two weeks later, the outbound leg requires pallet re-stacking for a different carrier. The hub performs the repacking only within the permitted controlled handling scope, updates carton counts, and issues a new outbound packing list that references the same bonded shipment reference. When the re-export declaration is prepared, the customs data matches the hub’s inventory record: quantities, locations, and event history all line up.
Practical Control Points That Prevent Costly Confusion
- Status tagging at every handoff: the goods should carry an internal status label that mirrors the customs status.
- Inventory reconciliation cadence: reconcile inbound counts against the bonded inventory record daily during active handling.
- Exception handling rules: if counts differ, stop repacking and resolve the discrepancy before outbound paperwork is finalized.
- Document-event alignment: every document change should correspond to a recorded physical event, not a spreadsheet edit.
When these control points are in place, the hub becomes a reliable bridge between inbound arrival and outbound re-export, with bonding and controlled handling keeping the legal and operational narratives consistent.
5.2 Customs Procedure Options for Inbound Storage and Outbound Re-Export
Inbound storage and outbound re export are often treated as two separate operational steps. In practice, they are one continuous customs story: you choose a procedure at arrival, you keep the goods in a controlled status, and you exit with a procedure that matches the intended commercial outcome. The “best” option is the one that fits your goods’ risk profile, your timing, and your documentation discipline.
Foundational Logic for Choosing Procedures
Start with three questions.
- What is the customs status you want at arrival? Some procedures suspend duties and taxes; others require immediate duty settlement.
- What is the intended end state? Re export can mean leaving the country in the same condition, or leaving after permitted handling.
- How much control can you demonstrate? Customs expects traceability: where the goods are, who holds them, and how they are identified.
A simple way to think about it: inbound storage procedures manage the “pause button,” while outbound re export procedures manage the “release button.” If the pause button and release button do not match, you get delays, amendments, or duty exposure.
Inbound Storage Procedure Options
Customs Warehousing
Customs warehousing allows goods to be stored under customs control without paying import duties immediately. It is commonly used when you need time to consolidate shipments, verify documentation, or coordinate outbound routing.
Example: A shipment of mixed electronics arrives at a hub. The importer places the goods into a customs warehouse. After quality checks and document reconciliation, the goods are re declared for export to a third country. The warehouse status helps keep the duty position controlled until the outbound step.
Operational best practice: Maintain a clear inventory mapping between warehouse locations and customs declarations. If the goods move between zones, record the movement so the outbound declaration can reference the correct inbound entry.
Free Zone or Free Warehouse Arrangements
Free zones and similar arrangements treat certain areas as outside the customs territory for duty purposes, subject to local rules. They can be useful when the hub’s business model depends on frequent cross border movement.
Example: A container arrives and is moved into a free zone facility. The goods are not released for home consumption. Later, they are re exported to a neighboring market using the zone’s controlled movement procedures.
Operational best practice: Ensure your internal system captures the “zone-to-exit” linkage. Customs often wants to see that the outbound movement corresponds to the inbound controlled status.
Temporary Admission for Re-Export
Temporary admission allows goods to enter for a limited purpose and period, typically with relief from duties, provided they are re exported within the allowed timeframe.
Example: A set of industrial components arrives for assembly trials in the hub and is re exported after testing. Temporary admission can fit when the goods will not be sold domestically and the timeline is tight.
Operational best practice: Track the expiry date at the item level, not just at the shipment level. If one part arrives later or is held longer, you need a way to prevent accidental lapse.
Outbound Re-Export Procedure Options
Re-Export as Export Under Customs Control
This is the standard exit path when goods remain under customs control and are leaving the country without being released for domestic use.
Example: Goods stored under warehousing are re declared for export. The outbound declaration references the inbound entry and the goods’ identification marks.
Operational best practice: Align the outbound declaration’s description and quantity with the inbound record. If you consolidate multiple inbound lots into one outbound shipment, keep a reconciliation table showing which inbound lots feed which outbound declaration.
Re-Export After Permitted Handling
Some procedures allow limited handling such as repackaging, labeling, or minor processing, as long as customs conditions are met.
Example: A shipment arrives in bulk packaging. The hub repackages into retail cartons with updated labels required by the destination market. The goods are then re exported under the permitted handling rules.
Operational best practice: Document what changed. Customs may not accept a “same goods” claim if the handling is beyond what the procedure allows. Keep photos, packing records, and a short handling statement that ties to the procedure authorization.
Outbound Movement Using Controlled Transfer Between Facilities
Where goods move between bonded facilities or between a storage site and an export point, customs may require controlled transfer declarations.
Example: Goods move from a bonded warehouse to a port bonded area for loading. The transfer is recorded so the export declaration can reference the correct controlled status.
Operational best practice: Use a single chain of custody identifier across transfer and export. It reduces the chance that the export team loads the right container but references the wrong inbound record.
Mind Map: Procedure Pairing for Inbound Storage and Outbound Re-Export
Practical Procedure Mapping Example
A hub receives goods on 2026-02-20. The shipment is placed into customs warehousing because the outbound routing is not finalized. Two days later, the hub consolidates the goods with another inbound lot for one outbound container. The outbound declaration references both inbound entries and the consolidated quantities. If the hub repackages into destination cartons, it records the handling steps and ensures they fall within the warehousing authorization. The result is a clean customs chain: controlled arrival, controlled storage, controlled handling, and controlled exit.
Quick Decision Checklist for Teams
- Choose inbound storage based on duty treatment, time horizon, and permitted handling.
- Choose outbound re export based on whether goods are unchanged or handled.
- Ensure every outbound declaration can be traced to inbound identification and status.
- Reconcile quantities when consolidating lots, and keep the reconciliation ready for amendments.
- Track facility transfers as controlled movements, not informal relocations.
5.3 Managing Inventory Status and Traceability Across Legs
Inventory traceability across transshipment legs is where “paper routing” meets “physical reality.” The goal is simple: at any moment, you should be able to answer who had the goods, where they were, under what customs status, and what documents support that story.
Foundational Inventory Status Model
Start by defining a small set of inventory statuses that map to customs reality. For example:
- In-bond storage: goods are under a customs procedure that suspends certain obligations.
- In free circulation: goods are released for domestic use.
- Under re-export procedure: goods are designated for export, often with controlled handling.
- Quarantine or hold: goods are physically segregated due to inspection, discrepancy, or compliance review.
Each status should have three attributes: legal basis, system behavior, and physical handling rules. If any of those are missing, traceability becomes guesswork.
Traceability Data You Must Capture
To keep the chain unbroken, capture the same core data at each leg transition:
- Item identity: SKU or product code, plus lot or serial where applicable.
- Quantity and unit of measure: what arrived, what was stored, what was issued.
- Location: warehouse zone, bay, container number, or pallet ID.
- Customs status: the procedure code and whether it is active or ended.
- Document linkage: inbound declaration reference, warehouse receipt, and outbound declaration reference.
- Event log: timestamps for receipt, transfer, pick/pack, and release.
A practical rule: if your system can’t produce an audit-ready “as-of” view for a given lot, it’s not traceability—it’s recordkeeping.
Operational Flow Across Legs
A typical hub flow has four transitions: arrival, storage, processing or consolidation, and re-export dispatch. The system should enforce transitions so operators can’t accidentally move goods into the wrong status.
Example: A shipment arrives under an in-bond procedure. The warehouse scans the inbound manifest and assigns each pallet a pallet ID. The system creates inventory records with status “in-bond storage.” When the goods are consolidated with other lots, the system records the consolidation event and preserves the original lot lineage. When the goods are staged for re-export, the status changes to “under re-export procedure,” and the outbound declaration reference is attached before dispatch.
This is why traceability is not just about storing data; it’s about controlling state changes.
Physical Segregation That Matches System Status
Systems fail when physical handling doesn’t follow the same logic. Use segregation rules that mirror inventory statuses:
- In-bond vs re-export: separate zones or clearly labeled areas with controlled access.
- Hold/quarantine: lockable cages or blocked locations in the warehouse management system.
- Discrepancy lots: “do not pick” flags plus physical tags that cannot be removed without authorization.
A small but effective practice is to require a second scan at the moment of movement between zones. If the scan doesn’t match the expected status, the transfer is blocked.
Mind Map: Inventory Status and Traceability
Exception Handling Without Breaking the Chain
Exceptions are inevitable: short shipments, damaged packaging, or document mismatches. The key is to prevent exceptions from silently changing status.
Example: A lot arrives with a quantity discrepancy of 2 units. Instead of adjusting the inventory to “correct” immediately, place the lot into hold status, record the variance, and start a controlled reconciliation. Only after the inbound declaration correction or confirmation is complete should the system release the lot back to the intended customs status.
For traceability, every exception should have a closure record that links the resolution to the lot and the relevant document references.
Advanced Traceability: Consolidation and Lot Lineage
Consolidation is where lineage can blur. If you combine multiple lots into one outbound shipment, you must preserve the mapping from outbound units back to inbound lots.
Example: Lot A (100 units) and Lot B (50 units) are consolidated into one pallet for re-export. The outbound pallet record should carry a breakdown: 70 units from Lot A and 30 units from Lot B. If an inspection targets 10 units, you can identify which inbound lots those units came from and produce the supporting documents.
This is why your system should support many-to-one and one-to-many relationships between lots and shipment units.
Practical “As-of” Traceability Check
Before dispatch, run an as-of check for each outbound lot: confirm the current location, confirm the customs status is the intended re-export procedure, confirm the outbound declaration reference is attached, and confirm the event log shows the last movement into the staging zone.
If any field is missing, treat it as a stop-ship condition. Traceability is easiest when it’s boring and consistent—like a well-labeled shelf, not like a scavenger hunt.
5.4 Carrier and Warehouse Coordination for Seamless Documentation
Seamless documentation is less about having perfect paperwork and more about preventing mismatches between what the carrier moves, what the warehouse receives, and what customs declarations claim. In a transshipment hub, the “story” of each unit must stay consistent across legs: who shipped it, what it is, where it sat, and when it moved.
Foundational Coordination Model
Start with three synchronized timelines:
- Physical timeline: arrival, storage, handling, loading, departure.
- Document timeline: receipt documents, inventory records, outbound shipment documents.
- Data timeline: the data elements used for customs declarations and internal reconciliation.
A practical rule: if any timeline can’t be reconciled within one business day, you don’t have a documentation process—you have a guessing game.
Roles and Handoffs That Must Match
Carrier responsibilities typically include accurate transport documents (bill of lading or air waybill), container or seal numbers, and departure timestamps. Warehouse responsibilities typically include receiving confirmation, storage location, inventory status, and outbound dispatch details. Compliance responsibilities ensure that the declared data elements match the operational records.
The handoff points that cause most errors are predictable:
- Seal and container identity at arrival.
- Quantity and unitization at receiving.
- Status changes when goods move from inbound storage to outbound re export.
- Outbound document issuance after warehouse dispatch.
Data Elements to Standardize Early
Before the first shipment, align on a shared “minimum data set” used by both carrier and warehouse systems. Common elements include:
- Shipment reference numbers used on transport documents.
- Container or package identifiers.
- Gross weight and count.
- Commodity description and product identifiers.
- Origin and destination references used for routing logic.
- Seal numbers and any exception codes.
When these fields are standardized, reconciliation becomes a comparison exercise rather than a translation exercise.
Mind Map: Carrier and Warehouse Coordination
Reconciliation Controls That Prevent Mismatches
Pre receipt validation: before the truck or vessel is accepted, compare the carrier’s expected identifiers (container number, seal number, shipment reference) against the warehouse’s inbound booking. If the identifiers don’t match, stop early. Fixing a wrong seal after goods are stored is like trying to correct a typo after the book is printed.
Receiving confirmation rules: receiving should record what was actually counted and observed, not what was expected. If a container arrives with a different seal, the warehouse records the new seal and triggers an exception workflow.
Exception workflow: define what happens when counts differ, seals mismatch, or documents arrive late. A good workflow includes:
- Who can approve the exception.
- What evidence is required (photos, weighbridge tickets, scan logs).
- How the exception updates the minimum data set.
- When the exception blocks customs declaration submission.
Declaration data lock: once the outbound customs declaration is prepared, the operational data used for it should be locked to prevent “silent edits.” If an update is necessary, it should trigger a controlled amendment path.
Example: Containerized Re-Export with Seal Mismatch
A shipment arrives at the hub with container ABCD1234567. The carrier’s bill of lading lists seal S1, but the warehouse inspection records seal S2. The warehouse:
- Creates an exception record tied to the container and shipment reference.
- Captures evidence of the seal number observed.
- Updates the shared minimum data set so outbound documents and declaration preparation use S2.
- Blocks outbound loading until the carrier confirms whether S2 is the replacement seal or whether the bill of lading needs correction.
Result: the outbound story stays consistent, and the declaration doesn’t rely on a seal number that never existed on the goods.
Example: Daily Cutoff and Document Issuance Rhythm
Assume the warehouse has a daily cutoff at 16:00 for outbound dispatch paperwork. The carrier issues the outbound transport document at 15:30, but the warehouse dispatch scan is recorded at 16:20 due to a system outage. The coordination fix is operational: the warehouse must have a contingency scan method and a reconciliation step that flags late scans before declarations are finalized.
A small rhythm like this prevents a large mismatch: transport documents say “departed,” while warehouse records say “not dispatched yet.”
Practical Checklist for Seamless Documentation
- Confirm shared identifiers before arrival acceptance.
- Record observed seal and container identity at receiving.
- Use receiving counts as the source for quantity.
- Trigger exceptions immediately and require evidence.
- Reconcile daily between carrier documents and warehouse inventory.
- Lock declaration data only after reconciliation is complete.
- Approve amendments through a controlled path, not ad hoc edits.
5.5 Practical Example of Procedure Mapping from Arrival to Re-Export
A neutral-country hub is only as good as its procedure map. Here’s a concrete, end-to-end example showing how an operator can move a shipment from arrival to re export while keeping customs records coherent.
Scenario and Assumptions
A logistics company receives 10 pallets of “industrial valves” at a bonded warehouse in a neutral hub country. The valves are imported from Country A under a commercial purchase order. The consignee in the hub is the warehouse operator, not the final buyer. The shipment will be re exported to Country C within 30 days.
Key facts that drive procedure choices:
- The goods are not meant to enter the hub market.
- The hub operator must control the goods while they sit.
- The final re export requires a customs declaration that matches the goods’ status and identity.
Mind Map: Procedure mapping logic
Step 1: Arrival and Status Assignment
When the vessel or truck arrives, the carrier submits arrival data. The warehouse then issues a warehouse receipt that links each pallet to a unique identifier (for example, pallet numbers plus container or seal references). This identifier becomes the thread that ties physical goods to customs records.
Procedure mapping decision:
- If the hub’s customs system supports bonded storage for non-entered goods, the operator assigns the shipment to a bonded storage procedure immediately upon receipt.
Easy example of why this matters:
- If pallet 3 is later found to be damaged, the operator can document the issue under the bonded status rather than trying to “retrofit” an entered status after the fact.
Step 2: Storage Phase with Controlled Handling
During bonded storage, the operator may perform routine handling such as moving pallets within the warehouse, counting, and basic preservation. The procedure map should explicitly list what is allowed, because customs authorities often expect the same goods to remain under control.
Operational best practice:
- Maintain a live inventory register that records: pallet identifier, quantity, location, condition notes, and any seal changes.
Concrete example:
- If the warehouse replaces a damaged outer pallet, it should keep the original pallet identifier in the record as “repacked” and link it to the new pallet number. That way, the re export declaration can still reference the correct goods without pretending nothing changed.
Step 3: Re Export Preparation and Data Reconciliation
Before dispatch to Country C, the operator confirms the outbound leg details: carrier booking, destination, and the final consignee. Then the operator reconciles the declaration data against the bonded inventory.
A practical reconciliation checklist:
- Quantities: declared outbound quantity equals the bonded inventory quantity.
- Identifiers: pallet numbers and container/seal references match the warehouse register.
- Description: the goods description on the outbound declaration matches the inbound classification and technical description used earlier.
- Valuation and transaction references: if the re export declaration requires references to the original transaction or supporting commercial documents, those documents must be present and consistent.
Witty but useful rule of thumb:
- If two documents disagree on pallet count, customs will not “pick the nicer one.” You fix the discrepancy first.
Step 4: Outbound Customs Declaration for Re Export
The outbound declaration is prepared using the goods’ bonded status and the mapped procedure. The declaration should reference the bonded storage entry or equivalent control number so customs can trace the goods’ history.
Procedure mapping decision:
- Use the re export procedure that corresponds to the goods’ status in storage. If the goods are under bonded storage, the outbound declaration should not treat them as newly imported goods.
Example of a common mismatch:
- A team might accidentally use an outbound declaration template intended for “domestic release.” The result is a status conflict: the system expects duties or different controls. The procedure map prevents this by forcing a status-to-declaration link.
Step 5: Proof of Export and Closeout
After loading, the carrier provides proof of export (or the system generates it). The warehouse then closes the bonded record by confirming the outbound shipment references and ensuring the inventory register shows the goods as dispatched.
Closeout evidence to retain:
- Warehouse receipt and inventory register extracts.
- Outbound declaration and acceptance confirmation.
- Carrier loading and export proof.
- Any exception notes (damage, repacking, seal changes).
Exception Handling Within the Procedure Map
If there is a shortage discovered during packing:
- The operator documents the discrepancy, adjusts the outbound quantity to match the controlled inventory, and records the reason (for example, miscount at receipt).
If goods are substituted:
- Substitution is usually the fastest way to create a traceability gap. The procedure map should require that any substitution be treated as an exception with documented authorization and clear linkage to the customs control record.
Mini Mind Map: Data Flow Checkpoints

This example shows the core idea: procedure mapping is not a one-time choice. It’s a chain of status, identifiers, and reconciliation steps that keeps the story consistent from the moment the goods enter the hub to the moment they leave it.
6. Documentation Systems for Re Export Routing
6.1 Bill of Lading Air Waybill and Multimodal Document Controls
Bill of Lading, Air Waybill, and Multimodal Document Controls
Multimodal routing often fails not because the goods move poorly, but because the documents disagree about what moved, when, and under which terms. This section treats the bill of lading (B/L) and air waybill (AWB) as the “spine” of the shipment record, then builds controls around how those documents are created, matched, and corrected.
Foundational Roles of B L and Air Waybill
A bill of lading is typically issued for sea or ocean legs and functions as a receipt and, in many cases, a document of title. An air waybill is issued for air legs and generally does not operate as a title document, but it is still the operational proof that the carrier accepted the cargo.
In practice, the key is that each document must be internally consistent and consistent with the rest of the shipment set: commercial invoice, packing list, insurance (if any), and the customs declarations used at the hub.
Document Control Objectives for Multimodal Shipments
Use controls to achieve four outcomes:
- Identity match: the shipper, consignee, notify party, goods description, and piece count refer to the same physical cargo.
- Route match: the origin, transshipment points, and destination align with the planned legs and the hub’s customs procedure.
- Timing match: acceptance dates and departure/arrival windows support the declared timeline.
- Term match: incoterms and freight responsibility do not contradict what the carrier documents imply.
A simple rule helps: if a customs officer could not reconcile the B/L and AWB to the declaration without asking questions, your controls are not tight enough.
Core Data Elements That Must Match
Treat these fields as “must-match” across B/L, AWB, and customs data:
- Shipper and consignee names (including legal entity spelling)
- Notify party (especially when the hub warehouse receives notices)
- Description of goods (avoid vague wording; keep it aligned with the invoice)
- Quantity and unit (pieces, cartons, weight, volume)
- Marks and numbers (container numbers, seal numbers, or package identifiers)
- Gross weight and measurement
- Freight terms and currency indicators
- Reference numbers: purchase order, booking reference, and internal shipment ID
When a field cannot match exactly, document the reason in the control record and ensure the customs declaration uses the most defensible source.
Multimodal Document Set and Numbering Logic
Multimodal shipments often produce multiple documents for different legs. Controls should define which document is the “primary reference” for each leg:
- Sea leg primary: B/L booking reference and container numbers.
- Air leg primary: AWB number and flight details.
- Hub linkage: a single internal shipment ID carried across all documents.
This prevents the classic problem where the hub warehouse receives an AWB that references one set of container numbers, while the B/L references another.
Mind Map: Document Controls Workflow
Example: Two Leg Shipment with Hub Re-Export
Assume a shipment moves from Country A to a neutral hub by sea, then from the hub to Country C by air.
- The B/L for the sea leg lists: container number, seal number, gross weight, and a goods description that matches the invoice.
- The AWB for the air leg lists the same goods description and quantity, but it may show different package identifiers if the hub repacks.
Control step: if repacking occurs, the hub must update the AWB piece count and marks to reflect the new physical units, while the customs declaration for the re export leg should reference the updated AWB data. The reconciliation worksheet should explicitly record that the change is due to repacking at the hub, not a mismatch.
Example: When Description Does Not Match
If the invoice says “polyester fabric, dyed, 150 cm width” but the B/L says “textiles,” the mismatch is not just cosmetic. Customs declarations usually require a level of specificity that supports classification.
Control step: require the carrier description to be revised before submission where possible. If revision is not feasible, use a documented mapping: invoice description as the classification basis, carrier description as the shipping description, and ensure the customs declaration uses the invoice-aligned description.
Amendment and Version Control That Actually Works
Amendments are where paperwork goes to die, so treat them like controlled changes:
- Maintain a version log showing original document number, amendment reference, date, and who approved the change.
- Require carrier confirmation for each amendment.
- Re-run the matching rules after each amendment so you do not “fix” one field and break another.
A practical habit: store the reconciliation worksheet as the single place where you can see, at a glance, which document fields matched, which did not, and what evidence supports the differences.
Practical Checklist for Document Controls
- B/L and AWB numbers captured and linked to one internal shipment ID
- Must-match fields verified for identity, route, timing, and terms
- Marks and seal numbers confirmed against hub receiving records
- Description aligned to invoice level of specificity for customs use
- Exceptions recorded with a reason and evidence
- Amendment confirmations logged and matching rules re-checked
When these controls are in place, the hub can process re export routing with fewer surprises, and the compliance team can explain the shipment record without improvising.
6.2 Commercial Invoice Requirements for Multi Leg Shipments
A commercial invoice for a multi leg shipment is not just a bill for payment; it is a customs-facing summary of what the goods are, who is selling to whom, what is being transferred, and how much it is worth. In multi leg routing, the invoice must stay consistent with the physical flow and with the declarations filed at each border crossing. When it doesn’t, customs systems and auditors tend to treat the mismatch as a clue that something else is happening.
Foundational Invoice Elements That Must Stay True Across Legs
Start with the basics and keep them stable across every leg:
- Seller and buyer identities: Use legal names and addresses that match the contract and the parties shown on shipping documents.
- Invoice number and date: Assign a unique invoice number. If you need a reference date for internal control, use a date like 2026-02-26 rather than relying on the shipment’s arrival date.
- Consignee and notify party: These should align with the carrier documents and the customs procedure used at the hub.
- Description of goods: Include enough detail to support tariff classification and origin arguments. “Automotive parts” is not enough; “brake pads, model X, composition Y” is closer to usable.
- Quantity and unit of measure: Match the packing list and the declaration units.
- Gross and net weight: Provide both if available; weight is often used to sanity-check declared quantities.
A practical rule: if a customs officer can’t reconcile the invoice description to the declaration line item without guessing, the invoice is too vague.
Multi Leg Reality: One Invoice or Many
Multi leg shipments often involve different commercial relationships at different points. You have two common approaches:
- One invoice covering the full commercial transaction: Works when the seller-to-buyer relationship is continuous and the hub is acting as a logistics location rather than a new seller.
- Separate invoices per leg: Works when ownership changes, or when the hub entity sells onward. This reduces ambiguity but increases the need for strict document matching.
Either approach can be compliant, but the invoice must clearly state the commercial story. If the invoice implies a single sale while the documents show multiple ownership changes, you create a paper trail that doesn’t behave.
Pricing Fields That Matter for Customs
For customs purposes, the invoice should support valuation. Include:
- Currency and total invoice value
- Unit price and extended price
- Incoterms used and the named place
- Freight, insurance, and other charges shown clearly, including whether they are included in the price
In multi leg routing, costs can be reallocated. The invoice should show what the buyer is paying for at that stage, not what someone hoped would be true later. If the invoice includes charges for carriage that are actually paid separately, customs may require adjustments.
What to Include for Re-Export Routing Through a Neutral Hub
When goods enter a hub and are re exported, the invoice must help explain the status of the goods and the intended onward movement. Common practices:
- Reference to the original purchase: Add the original purchase order number and, if applicable, the original invoice reference.
- Reference to the hub entry shipment: Include the inbound shipment reference (for example, the inbound bill of lading number) so the outbound declaration can link to the inbound record.
- Clear statement of what is being shipped onward: The outbound invoice description should match the outbound declaration line items, including any packaging changes.
If the hub performs only storage and handling, the invoice should not suggest manufacturing or transformation. If the hub performs assembly, the invoice description must reflect the assembled product and the correct composition.
Mind Map: Commercial Invoice Requirements for Multi Leg Shipments
Example: Invoice Fields That Prevent Confusion
Scenario: A buyer in Country A purchases goods from a supplier in Country B. The goods arrive at a neutral hub in Country C, are stored under a controlled procedure, and then re exported to Country D.
Invoice should show:
- Seller: Supplier in Country B
- Buyer: Buyer in Country A (or the hub entity if ownership changes)
- Consignee: Party in Country D (or as required by the outbound procedure)
- Goods: “Aluminum brackets, model AB-12, 500 units, net weight 1,250 kg”
- Incoterms: e.g., “DAP Country D port, currency USD”
- Values: unit price and total value, plus a clear statement of whether freight to the hub is included
- References: original purchase order number and inbound shipment reference number
The key is that the invoice tells the same story as the shipping documents and the customs declarations: same goods, same quantities, and a pricing structure that matches how the transaction is actually paid.
6.3 Packing Lists Certificates and Supporting Trade Documents
Packing lists, certificates, and supporting documents are the quiet backbone of re export routing. They help customs officers and warehouse operators answer the same basic questions: what the goods are, how they are packaged, where they have been, and which statements are backed by evidence. When these documents are consistent, the shipment moves faster and disputes get smaller.
Packing List Essentials for Multi Leg Shipments
A packing list is not just a “what fits in the box” document. For re export flows, it also acts as a bridge between legs.
Start with a stable structure that survives every handoff:
- Consignee and shipper identifiers that match the commercial invoice and the outbound declaration.
- Shipment identifiers such as container number, seal number, and warehouse location code.
- Line level detail: item description, quantity, unit of measure, net weight, gross weight, and package count.
- Marks and numbers that match the labels on packages.
Easy example: If a shipment contains 200 cartons of “stainless steel fasteners,” the packing list should show 200 cartons, the carton weight range, and the exact marks used on the carton labels. If the outbound declaration later lists 198 cartons because two cartons were reworked, the packing list should reflect the corrected count and the warehouse should retain the reason for the change.
Certificates That Commonly Matter
Certificates are statements backed by evidence. The key is to issue them from the right party, for the right goods, and for the right purpose.
Common certificate categories include:
- Certificates of origin when preferential treatment is claimed.
- Health, safety, or compliance certificates for regulated products.
- Sanitary or phytosanitary certificates for food and plant materials.
- Insurance or inspection certificates when required by contract or procedure.
Practical rule: the certificate’s goods description must align with the invoice line description and the declaration’s classification basis. If the certificate uses a different product name, the document set should still connect through model numbers, part numbers, or technical identifiers.
Supporting Trade Documents That Tie the Story Together
Supporting documents explain how the goods moved and why the declared facts are credible.
For re export routing, the most useful set typically includes:
- Bill of lading or air waybill for inbound leg and outbound leg.
- Warehouse receipts or inventory records showing receipt, storage status, and release.
- Transfer or handling records if goods are repacked, relabeled, or consolidated.
- Inspection or testing reports when they affect classification, valuation, or compliance.
Mind the “same goods” problem. If inbound and outbound documents use different package counts or seal numbers, the warehouse records must explain the change. Otherwise, customs may treat it as a different shipment.
Document Consistency Checks That Prevent Rework
Before filing, run a structured reconciliation. Think of it as a checklist that compares fields across documents rather than trusting any single document.
- Quantities and units: cartons, pieces, kilograms, and net versus gross.
- Weights: ensure the packing list weights match the warehouse record totals.
- Marks and numbers: confirm labels match the packing list.
- Dates: use consistent dates for receipt, storage, and release.
- Identifiers: container number, seal number, and warehouse location codes.
A small but common failure: the packing list shows “gross weight 10,500 kg,” while the warehouse record totals “10,480 kg.” If the difference is due to moisture adjustment or scale variance, record the adjustment method in the warehouse file so the discrepancy is explainable.
Mind Map: Document Set for Re-Export Routing
Example: From Inbound Receipt to Outbound Re-Export
Assume a neutral hub receives 1,000 units of a regulated component under a bonded storage procedure. The warehouse repacks into 40 cartons for outbound consolidation.
- The inbound packing list shows 1,000 units across the original cartons and their marks.
- The warehouse handling record states that repacking occurred, lists the new carton marks, and records the new gross weights.
- The outbound packing list lists 40 cartons with the updated marks, quantities, and weights.
- The certificate (for example, a compliance certificate) references the component’s model number and technical specification, not the old carton marks.
- The outbound declaration uses the outbound packing list quantities and the transport document identifiers.
If a certificate lists a different model number than the invoice line, the document set is inconsistent even if the goods look similar. Fixing that mismatch early is usually faster than correcting it after customs review.
Example: Handling a Certificate Description Mismatch
A certificate describes goods as “Type A Fastener, 6mm,” while the invoice uses “Fastener 6mm, Type A, zinc plated.” The safe approach is to ensure the certificate description includes the identifying attributes used in the invoice line, such as model number and material finish. If the issuing authority cannot change the wording, the file should include an internal mapping note that links the certificate description to the invoice line through part numbers and technical specs, and the warehouse should keep the mapping evidence with the declaration package.
6.4 Customs Declarations and Data Elements That Must Match
A re export routing plan only works as well as the data trail behind it. Customs declarations are not just forms; they are a cross-reference system. If the inbound declaration, warehouse records, and outbound re export declaration disagree, the shipment may still move—but the compliance story becomes expensive.
Foundational Matching Logic
Start with the idea of “one shipment, multiple views.” Each view uses different documents, but the core facts must align:
- Identity: who and what the goods are.
- Movement: where the goods came from and where they go next.
- Value and tax basis: how duty and charges were determined.
- Classification and origin: how the goods are legally described.
A practical rule: if two declarations could be compared line-by-line in an audit, they should be consistent in the fields that drive legal outcomes.
Data Elements That Must Match
Below are the fields that commonly need to match across inbound and re export declarations, plus the warehouse or transit records.
-
Consignee and importer of record
- Inbound may list the warehouse operator as consignee; outbound may list the re export consignee. That can be correct, but the warehouse reference must still tie the goods together.
- Example: Inbound consignee is “Neutral Hub Warehouse Ltd.” Outbound consignee is “Buyer Co.” The declarations should both reference the same warehouse entry number.
-
Goods description and marks
- Use the same commercial description style and include the same brand/model and container or package marks.
- Example: If inbound says “LED drivers, Model LD-24, 500 units,” outbound should not say “LED parts” without model detail.
-
Tariff classification code
- Classification drives duty, restrictions, and statistical reporting. If you change the code, you need a defensible reason and supporting evidence.
- Example: Inbound classification is 8504.40. Outbound classification should remain 8504.40 unless the goods were actually transformed or re specified with evidence.
-
Quantity and unit of measure
- Match both the quantity and the unit. “500” and “500 kg” are not interchangeable.
- Example: If inbound records show 500 cartons and outbound shows 500 cartons, great. If outbound shows 500 cartons but inbound shows 5,000 kg, you need a clear conversion basis.
-
Weight and packaging details
- Gross weight and net weight often differ due to measurement timing. That’s acceptable if the declaration logic is consistent and the warehouse records explain the basis.
- Example: Inbound gross weight is 12,300 kg. Outbound gross weight is 12,250 kg. If the warehouse system records gross weight at packing time, the difference is explainable.
-
Origin and preferential claims
- If origin is used to support a preferential rate or to satisfy trade remedy conditions, it must match the origin evidence set.
- Example: Inbound origin is “Country A” under a preference claim. Outbound must either keep the same origin basis or clearly document why it changed.
-
Customs procedure and status of goods
- Re export declarations must reflect the correct status: goods under a storage or transit procedure cannot be treated like free circulation goods.
- Example: If inbound placed goods under a customs warehousing procedure, outbound should reference that procedure status and the relevant authorization.
-
Reference numbers that link the chain
- These are the glue fields: warehouse entry number, MRN or equivalent, transit reference, and sometimes container numbers.
- Example: Outbound MRN references inbound MRN and warehouse entry number. Without these, the goods can look like a different shipment.
Mind Map: Matching Fields Across Declarations
Example: One Shipment, Two Declarations, One Story
Assume a hub receives 500 cartons of “Model LD-24 LED drivers.” Inbound declaration fields:
- Description: “LED drivers, LD-24”
- Classification: 8504.40
- Quantity: 500 cartons
- Warehouse entry: WH-11872
- Origin: Country A
Outbound re export declaration should:
- Reference WH-11872 and the inbound MRN
- Use the same description and classification unless there is a documented transformation
- Keep quantity in cartons as 500, or explain any repacking with warehouse records
- Keep origin basis consistent with the origin evidence file
If outbound changes classification to a different code, the declaration should be supported by the same technical evidence pack used for classification decisions, and the warehouse record should reflect any relevant processing.
Practical Validation Checklist
Before filing outbound, compare inbound and outbound declarations on these “must-match” fields:
- Warehouse entry number and inbound reference
- Classification code
- Description with model and marks
- Quantity with unit
- Origin basis
- Procedure status
A quick internal test works well: pick one carton mark or container number and trace it from inbound to warehouse inventory to outbound declaration. If you cannot trace it, the declarations may still be “correct,” but they won’t be consistent.
Common Mismatch Patterns and Fixes
- Description drift: outbound uses a shortened description. Fix by standardizing a product description template tied to the technical file.
- Unit mismatch: outbound reports “500” without unit clarity. Fix by enforcing unit-of-measure validation in the declaration data mapping.
- Reference omission: outbound lacks the warehouse entry number. Fix by making reference fields mandatory in the outbound filing workflow.
- Origin inconsistency: outbound repeats origin but not the preferential basis. Fix by linking origin claims to the specific evidence set used for inbound.
6.5 Document Reconciliation Workflows for Audit Proof
Document reconciliation is the boring part that keeps your tariff engineering and routing story standing up under scrutiny. The goal is simple: every data element used in a customs declaration must be traceable to a specific business record, and every mismatch must be explainable with a controlled correction path.
Start with a Reconciliation Map
Before touching spreadsheets, define what “complete” means for one shipment. For re export routing, completeness usually includes: the inbound arrival documents, the warehouse or hub handling records, the outbound shipping documents, and the customs declarations for each leg.
A practical approach is to create a reconciliation map with four columns: Declaration Field, Source Document, Matching Rule, and Evidence Location. Example matching rules: “HS code must match exactly,” “gross mass must match within tolerance,” and “consignee name must match the outbound declaration.” Evidence location can be a folder path or a document ID in your system.
Build a Data Lineage Chain
Think in chains, not files. Each declaration field should point backward to the record that created it.
Example lineage for a single outbound re export declaration:
- HS code → classification evidence pack (product description, technical spec, test report) → declaration.
- Transaction value → commercial invoice line items → payment terms record → declaration value.
- Quantity and weight → packing list and warehouse inventory movement record → outbound declaration.
- Country of origin claim → origin determination worksheet and supporting documents → declaration.
When auditors ask “why,” you should be able to answer with a chain of documents, not a paragraph.
Reconcile at Three Checkpoints
Use three checkpoints so errors are caught early and corrected consistently.
- Pre Declaration Check: Compare draft declaration data against source documents. Flag mismatches and block submission if critical fields differ.
- Post Declaration Check: After submission, confirm the final filed data matches the approved draft. This catches last-minute edits.
- Post Clearance Check: When responses or amendments occur, reconcile the amended declaration against the correction record and updated evidence.
A small but effective rule: critical fields are those that drive duty, origin, or compliance status. Non critical fields are those that can be corrected without changing the compliance position.
Use a Mismatch Taxonomy with Clear Actions
Not all mismatches are equal. Create a taxonomy so teams don’t improvise.
- Type A Critical: HS code, origin basis, valuation method, declared quantity/weight beyond tolerance. Action: stop and correct before filing or submit an amendment with a documented rationale.
- Type B Important: consignee/shipper names, invoice number, container or seal identifiers. Action: verify identity and document continuity; correct if it affects traceability.
- Type C Cosmetic: formatting differences, minor address punctuation. Action: reconcile for consistency; no compliance impact.
Example: If the packing list shows 10,000 units but the declaration draft uses 9,800, that’s Type A. The correction must trace to the warehouse movement record that explains the reduction, such as damaged units removed under controlled procedures.
Mind Map for the Workflow
Document Reconciliation Workflow Mind Map
Example Workflow for One Shipment
Assume a shipment arrives at a neutral hub on 2026-02-20 and is re exported on 2026-02-28.
- Pre Declaration: The outbound declaration draft uses HS code 8471.30 based on the classification evidence pack. Reconciliation confirms the product description in the outbound invoice matches the technical spec used for classification.
- Quantity Check: The outbound packing list matches the warehouse inventory movement record for the re export quantity. The inbound quantity differs because 200 units were scrapped under documented handling.
- Valuation Check: The outbound invoice value is reconciled to the valuation worksheet. If the invoice includes freight charges, the worksheet shows whether they are included or excluded under the applicable valuation approach.
- Post Declaration: The filed declaration is compared to the approved draft. A mismatch is found in the invoice number due to a clerical renumbering. Action: update the evidence pack with the invoice renumbering record and file an amendment if required by your customs process.
- Post Clearance: If customs requests additional evidence, the reconciliation report is used to pull the exact documents tied to the questioned fields, rather than searching the entire archive.
Evidence Pack Discipline
Your evidence pack should mirror the reconciliation map. If a field is not mapped, it should not be relied on. Keep an approval trail for corrections: who changed what, why, and which source document supports the change. Auditors like consistency; your workflow should make consistency automatic.
Finally, reconcile at the level of line items, not just totals. Totals can hide swapped product variants, and swapped variants can hide classification and origin differences. When the line items match, the totals usually follow; when totals match, line items can still be wrong.
7. Customs Valuation and Transfer Pricing in Multi Party Transactions
7.1 Valuation Fundamentals and the Role of Transaction Value
Customs valuation answers one practical question: what number should be used to calculate duties and taxes? In most systems, that number starts with the transaction value—the price actually paid or payable for the goods when sold for export to the importing country. The trick is that “price” is not always the invoice total. Customs may adjust it to reflect costs that belong in the valuation base, and it may reject it when the sale is not a reliable basis.
What Transaction Value Means in Practice
Transaction value is the price paid or payable for the goods, adjusted for specific additions and exclusions required by law. “Paid or payable” includes amounts the buyer has already paid and amounts the buyer is obligated to pay. A simple example: a buyer orders 1,000 units at $10 each. The invoice shows $10,000. If there are no required adjustments, the transaction value is $10,000.
However, customs valuation is rarely that tidy. Consider a shipment where the buyer pays freight to the port of export separately. If the importing country’s rules require including certain transport costs up to the place of importation, customs may add that freight to the invoice price. The invoice stays the same; the valuation number changes.
The Valuation Logic Customs Uses
Most valuation frameworks follow a structured approach:
- Start with transaction value if it can be accepted.
- If transaction value cannot be used, move to alternative methods defined by the law.
- Apply adjustments consistently so the valuation base reflects the same economic scope.
This matters for tariff engineering and routing because the valuation base must match the declared facts. A re-export route that changes who pays which leg costs can change the valuation outcome even when the goods and their classification stay the same.
When Transaction Value Is Accepted
Customs generally accepts transaction value when several conditions are met. The most common ones are:
- The sale is a real sale for export to the importing country.
- The price is not influenced by restrictions that distort value.
- The buyer and seller are not related, or if related, the relationship does not affect the price.
- The buyer can demonstrate that the declared price is reliable.
A concrete example: a manufacturer sells goods to a distributor in the importing country’s region. If the distributor is a related party, customs may still accept the transaction value, but the importer must be able to show that the transfer price reflects normal commercial behavior.
The Adjustments That Commonly Change the Number
Even when transaction value is accepted, customs may require additions or exclusions. The exact list depends on jurisdiction, but the patterns are consistent.
Typical additions often include:
- Certain commissions and brokerage fees (when they relate to the sale for export).
- Costs of packing if they are not already included in the invoice.
- Royalties and license fees that the buyer must pay as a condition of the sale.
- The value of certain assists provided by the buyer.
- Transport and insurance costs to the place of importation, if required.
Typical exclusions often include:
- Charges after importation, such as domestic distribution costs.
- Interest for deferred payment, if treated separately under the rules.
- Costs that are not part of the price paid or payable and are excluded by law.
Here’s a practical mini-example. Invoice price is $10,000. The buyer also pays packing costs of $300 that are not included in the invoice. If packing must be added, the valuation base becomes $10,300.
A Simple Calculation Walkthrough
Assume the invoice shows:
- Goods: $10,000
- Packing: $300 (separately stated)
- Freight to the place of importation: $800 (paid by buyer)
- Insurance: $40
If the rules require adding packing, freight, and insurance, then:
- Transaction value base = $10,000 + $300 + $800 + $40 = $11,140
If the invoice already includes freight and insurance, you must avoid double counting. That’s why customs expects consistent documentation: the declared valuation should reconcile with what was actually paid and what was required to be included.
Mind Map: Transaction Value Fundamentals
Example: Routing That Changes Who Pays
Suppose the same goods move through a neutral hub. In the first leg, the seller ships to the hub and invoices the buyer $10,000 for the goods. In the second leg, the buyer arranges transport from the hub to the importing country and pays $900 freight and $50 insurance. If customs requires including transport and insurance to the place of importation, those amounts may be added to the valuation base even though they were not part of the original goods invoice.
The key point is not that routing is “good” or “bad.” It’s that valuation follows the economic scope defined by law, and the scope often includes costs incurred up to importation. When routing changes cost responsibility, the valuation file must reflect that change with clean, consistent records.
What to Document for a Defensible Transaction Value
A valuation file should connect four dots:
- The sale: contract or purchase order showing the export sale.
- The price: invoice and payment terms showing what is paid or payable.
- The adjustments: evidence for packing, commissions, royalties, assists, and transport/insurance.
- The reconciliation: a clear bridge from documents to the declared valuation number.
If any dot is missing, customs may question the reliability of transaction value. And if transaction value is questioned, the importer may be forced into alternative methods that are harder to justify and easier to get wrong.
7.2 Transfer Pricing Documentation And Its Customs Relevance
Transfer pricing documentation is often treated as a tax topic, but customs authorities care about it because it can affect the declared customs value. When goods are sold through related parties, the “transaction value” may not reflect what an independent buyer would pay. The documentation helps show whether the price is reliable for customs purposes and whether any adjustments are consistent and supportable.
Foundational Link Between Related-Party Pricing and Customs Value
Customs valuation typically starts with the transaction value method, which relies on the price actually paid or payable for the goods. The catch is that related-party relationships can influence that price. Transfer pricing documentation provides the reasoning and evidence behind the pricing policy, including how the parties tested whether the relationship distorted the price.
A simple example: a manufacturer sells components to a related trading company, which then sells finished goods to the importer. If the importer declares customs value based on the final invoice, customs may still ask whether the earlier related-party pricing created an inflated or deflated base. Transfer pricing documentation gives a coherent story across the chain.
What Customs Expects from Transfer Pricing Documentation
Customs does not need every tax worksheet, but it does need clarity on three points:
- Who is related to whom and how the relationship could influence pricing.
- How the price was set and what method was used to test arm’s length behavior.
- How the pricing results map to the customs declaration and the valuation logic used.
If the customs declaration uses the invoice from the importer’s seller, the documentation should explain why that invoice price is appropriate. If the valuation relies on a different basis, the documentation should show the bridge between the pricing policy and the customs value.
Mind Map: Transfer Pricing Documentation Inputs and Customs Outputs
Practical Example: Cost-Plus Pricing That Still Needs Customs Mapping
Assume a related supplier charges the trading company a cost-plus markup. The trading company sells to the importer at a separate price. For customs, the key question is whether the declared customs value reflects the price paid or payable for the goods, and whether any elements like assists or royalties were included correctly.
Example flow:
- Supplier to trading company: cost plus 8%.
- Trading company to importer: resale price with a margin consistent with benchmarks.
- Importer declaration: customs value based on the trading company invoice.
Transfer pricing documentation should show:
- The cost base definition used for the cost-plus leg.
- The benchmark logic for the resale leg.
- Whether any items were treated as assists or added later, so customs value components are not double-counted or omitted.
A common operational mistake is treating a fee as a separate service charge in one document set, while including it in the goods price in another. The transfer pricing file may be correct for tax, but customs cares about the final composition of the declared value.
Documentation Structure That Works in Customs Audits
A customs-friendly transfer pricing package is organized around traceability, not just methodology.
- Relationship summary: a short table listing related entities and the nature of the link.
- Transaction chain diagram: who manufactures, who sells, who invoices, and where the importer sits.
- Method and results: the chosen method, the benchmark set, and the arm’s length conclusion.
- Value component reconciliation: a line-by-line mapping from pricing documents to customs value elements.
- Consistency statement: confirmation that the same pricing logic applies to the shipment period, with version control.
If the pricing policy changed mid-year, the documentation should clearly separate periods. Otherwise, customs may treat the declared value as unsupported because the evidence does not match the shipment.
Mind Map: Customs Value Reconciliation Checklist
Example: Royalties and the “Where Did It Go” Problem
Suppose the importer pays a royalty to the brand owner under a license agreement. Transfer pricing documentation might treat the royalty as a separate payment for tax purposes. For customs, the royalty may need to be added to the customs value if it is related to the goods and not already included in the invoice price.
A customs-relevant transfer pricing file should therefore include:
- The royalty agreement summary.
- The royalty calculation basis.
- A clear statement of whether the royalty is included in the declared customs value and where the reconciliation appears.
When the file shows the logic in one place, customs reviewers spend less time guessing and more time verifying.
7.3 Adjustments Deductions and Additions in Valuation Calculations
Customs valuation often starts with a simple idea: what the buyer actually paid for the goods. The complication is that “paid” is rarely the whole story. Depending on the valuation method and the jurisdiction’s rules, customs may require certain amounts to be added to the price, or deducted from it, to reach a customs value that reflects the cost structure relevant to duty.
A practical way to think about adjustments is to separate them into three buckets: (1) costs that belong in the customs value, (2) costs that should be excluded, and (3) costs that must be treated carefully because they can be double-counted. The goal is not to guess; it’s to compute consistently using evidence.
Foundational Logic for Adjustments
- Start with the transaction value: the price paid or payable for the imported goods.
- Identify the boundary: customs value is usually tied to a specific delivery point and includes certain elements up to that point.
- Apply adjustments in the correct direction:
- Additions: amounts that are not already in the price but are required to be included.
- Deductions: amounts that are included in the price but must be excluded.
- Check for overlap: if you add something and also deduct the same cost under a different label, you’ll create a mismatch that auditors notice quickly.
Additions Commonly Required in Practice
Additions typically relate to costs that bring the goods to the customs valuation point and certain payments tied to the imported goods.
-
Assists: If the buyer provides tools, molds, materials, or engineering work used in producing the imported goods, and those are not already reflected in the price, customs may require adding their value.
- Example: A buyer supplies a specialized steel die to a manufacturer. The invoice for the finished parts is $200,000, but the die value is $18,000 and was not charged in the invoice. If the rules treat the die as an assist, customs may add $18,000 to the transaction value.
-
Royalties and license fees: Some royalties are required to be added when they relate to the imported goods and are a condition of sale.
- Example: The buyer pays a $30,000 software license fee that is required to sell the imported machinery. If the license fee is tied to the machinery and is a condition of sale, customs may add it to the price.
-
Certain commissions and brokerage: Depending on the role of the intermediary, some commissions may be included.
- Example: The buyer pays a $5,000 brokerage fee to an agent who arranges import-related services that customs considers part of the cost up to the valuation point.
-
Transport and handling to the valuation point: If the invoice price excludes freight and insurance to the customs valuation point, those may be added.
- Example: Goods are sold on an arrangement where the invoice excludes ocean freight and marine insurance. If freight is $12,000 and insurance is $1,200, customs may add $13,200.
Deductions Commonly Allowed in Practice
Deductions typically remove amounts that are not part of the customs valuation base, such as post-importation costs or separate charges.
-
Post-importation transport and distribution: Costs after importation are often excluded.
- Example: The invoice includes $8,000 for trucking from the port to a warehouse and $2,000 for warehouse handling after import. If the valuation point is the port, customs may allow deducting those amounts, provided they are separately identified.
-
Construction, installation, or assembly after importation: If the imported goods require installation at the destination and those services are separately charged, they may be deductible.
- Example: A supplier sells a machine for $250,000 and separately invoices $20,000 for installation at the buyer’s site. If installation is clearly separated and rules allow, customs may deduct the installation charge.
-
Interest charges: If the price includes financing costs that are separately stated and meet the conditions for exclusion, customs may allow deduction.
- Example: Invoice shows $300,000 for goods and $9,000 for interest on deferred payment. If the interest is properly documented and qualifies, it may be deducted.
Additions and Deductions That Require Extra Care
Some items are not inherently “good” or “bad” for valuation; they depend on how they are structured and evidenced.
-
Related-party payments: Even when a price is accepted, adjustments may still be needed to ensure the customs value reflects the correct base.
- Example: A buyer purchases goods from an affiliated seller. The invoice includes a service fee of $10,000. If that fee is actually for post-import services, it may be deductible; if it’s for production-related services, it may be an addition or already embedded in the price.
-
Bundled pricing: When invoices combine goods, freight, insurance, and services into one number, you need a defensible allocation.
- Example: A single invoice line reads “machinery package $500,000” with no breakdown. If customs requires separate transport and insurance, you may need supporting documents like freight contracts and insurance certificates to allocate amounts.
Mind Map: Adjustments in Valuation Calculations
Worked Example: One Invoice, Multiple Adjustments
Assume an invoice price of $200,000 for imported components. The invoice includes freight to the port but not insurance. The buyer also provides an assist (a mold) valued at $12,000. After import, the buyer pays $6,000 for domestic trucking, and the supplier separately charges $4,000 for installation at the destination.
- Additions: Assist $12,000; Insurance to valuation point $2,000 → +14,000
- Deductions: Domestic trucking after import $6,000; Installation after import $4,000 → -10,000
- Customs value: $200,000 + $14,000 − $10,000 = $204,000
The key discipline is that each adjustment must be traceable to a document and must match the valuation boundary. If the assist value is not supported, or if domestic trucking is not clearly separated, the calculation becomes fragile—exactly the kind of fragility customs teams try to avoid.
7.4 Handling Related Party Sales Across Routing Chains
Related party sales show up in routing chains when the same corporate group sells, buys, stores, or ships the goods through multiple legs. Customs authorities care less about who owns whom and more about whether the declared transaction value reflects an arm’s length price. The practical challenge is that routing can create multiple “sales” and multiple price components, and related party status makes those components harder to justify.
Foundational Concepts for Related Party Valuation
Start with the baseline: customs valuation often begins with the transaction value, meaning the price actually paid or payable for the goods when sold for export. When the buyer and seller are related, the transaction value can still be accepted, but only if the relationship did not influence the price. In practice, you need a clear story tying together the commercial reality of the chain and the evidence supporting the price.
A useful mental model is a three-layer stack:
- Commercial layer: who sold to whom, under what contract, and for what purpose.
- Price layer: what was charged, what was excluded or included, and how costs were allocated.
- Evidence layer: documents and calculations that show the price is consistent with arm’s length behavior.
Mapping the Routing Chain to the Sales Chain
Routing chains can include inbound arrival, storage in a neutral hub, and outbound re-export. Related party sales can occur at different points, such as:
- Sale from a group manufacturer to a group trading company.
- Sale from the trading company to a group logistics entity that invoices freight or handling.
- Sale from the trading company to the final buyer after the goods have been stored.
To avoid confusion, build a “sales chain map” that lists each invoice as a potential valuation candidate. For each invoice, record the role of each party, the leg of the shipment it corresponds to, and whether the goods are the same physical items or merely the same product type.
Example: A manufacturer in Country A sells to a related trading company in Country B. The goods then enter a bonded warehouse in a neutral hub in Country C. After storage, the trading company sells to an unrelated buyer in Country D. For valuation, the key question is which sale price is the one “for export” to the destination country and whether that sale price is influenced by the relationship.
Evidence That the Relationship Did Not Influence Price
When related parties are involved, you typically support the transaction value using one or more valuation approaches permitted by the applicable customs framework. The common practical goal is to show that the declared price aligns with market behavior.
Three evidence types tend to work well in real operations:
- Comparable sales evidence: show that the group sells the same or similar goods to unrelated customers at similar prices.
- Comparable pricing evidence: show that the pricing method used produces results consistent with arm’s length benchmarks.
- Cost-based evidence: show that the price is consistent with an arm’s length margin applied to costs.
Example: The trading company sells the same model of industrial valves to unrelated distributors in different countries at a consistent markup. For the related party sale to the buyer in the destination country, the invoice price uses the same markup formula, and the underlying cost base matches the same product bill of materials.
Handling Multi-Invoice Structures Without Mixing Apples and Freight
Routing chains often create separate charges: product price, freight, insurance, warehousing, handling, and sometimes commissions. Customs valuation rules can require adding certain costs to the price actually paid or payable, while excluding others depending on the circumstances.
The operational pitfall is treating every invoice as if it belongs to the same valuation base. Instead, classify charges into buckets:
- Included in valuation base: amounts that form part of the price paid for the goods for export.
- Potentially added: costs that must be added to reach the customs value if they are not already included.
- Excluded: amounts that are not part of the customs value under the rules.
Example: In the neutral hub, the group warehouse charges a handling fee to the trading company. The outbound freight is invoiced separately by a related carrier. If the product invoice already includes freight, you must avoid double counting when preparing the customs value. A simple reconciliation table that ties each charge to the valuation bucket prevents this.
Practical Mind Map for Related Party Sales Across Routing Chains
Mind Map: Related Party Sales Across Routing Chains
A Systematic Workflow for Compliance Teams
- Identify the valuation sale: determine which sale price is intended to represent the goods sold for export to the destination.
- Confirm goods identity: ensure the invoice goods match the physical goods in the routing chain, including model, specification, and quantity.
- Reconcile charges: build a line-item mapping from invoices to valuation buckets.
- Select evidence set: choose the evidence type that best fits the facts, such as comparable sales or cost-plus.
- Document the logic: write a short valuation narrative that links the contract terms, pricing method, and evidence.
Example: A valuation worksheet shows the product invoice price, adds outbound freight if required, and excludes separately billed storage charges that are not part of the export sale price. The evidence file includes unrelated customer invoices using the same pricing formula and a cost-plus calculation for the related sale.
Common Failure Points and How to Prevent Them
- Using the wrong sale price: teams sometimes pick the last invoice in the chain without checking whether it is the sale for export.
- Mixing product and service charges: handling fees can be mistaken for part of the goods price.
- Weak comparables: “similar” goods without matching key specifications lead to evidence that looks tidy but fails scrutiny.
A good rule is to treat valuation support as a chain of custody for numbers: each number should have a source document, a purpose, and a place in the customs value calculation.
7.5 Practical Valuation File Templates for Compliance Teams
A valuation file is the evidence trail that explains how you reached the customs value. Think of it as a checklist that also tells a coherent story: what transaction you used, why it qualifies, how you handled related parties, and how you treated deductions or additions. Below are practical templates you can adapt for multi-party, multi-leg routing.
Mind Map: Valuation File Skeleton
Template: Shipment Snapshot Page
Use one page per shipment so reviewers can orient quickly.
- Shipment identifiers: master reference, house reference, container/air waybill number, and destination declaration number.
- Parties: seller, buyer, exporter of record, importer of record, and any intermediate trader.
- Role notes: who owns the goods at each leg, and who pays which costs.
- Delivery terms: Incoterms used on the commercial invoice, plus the named place.
- Timeline anchor: record the invoice date and the contract effective date (for example, 2026-02-15 if that matches your case file).
Example: If the invoice shows CIF Port X but the declaration requires costs up to a different border point, your snapshot should explicitly state the delivery point used for valuation adjustments.
Template: Transaction Value Basis Page
This page answers a single question: “Which sale did we use, and why is it the one customs can accept?”
Include:
- Sale for export statement: identify the buyer who purchases for export to the importing country.
- Payment terms: payment method, credit period, and whether any amounts are contingent.
- Quantity and unit: match the declared quantity to the invoice unit and the packing list unit.
- Currency handling: the exchange rate source and the date used for conversion.
Example: If the invoice includes a volume rebate paid later, note whether it is known at importation and whether it affects the price actually paid or payable.
Template: Related Party Analysis Page
When parties are related, customs expects evidence that the relationship did not influence the price. Your file should be structured so an auditor can follow the logic without hunting.
Include:
- Relationship map: ownership links and management overlap.
- Influence test method: state which approach you used (for example, price comparability or evidence that the price is consistent with normal commercial practice).
- Comparables list: identify comparable sales, with dates, quantities, and product similarity notes.
- Internal approvals: who reviewed and approved the analysis.
Example: If the intermediate trader sells to the importer at a fixed margin, document how that margin is set and whether it aligns with comparable transactions with unrelated buyers.
Template: Valuation Calculation Worksheet Page
This is the arithmetic plus the “why.” Use a consistent line structure.
- A. Price actually paid or payable (from invoice)
- B. Additions
- commissions (except buying commissions)
- royalties and license fees related to the goods
- proceeds of subsequent resale if required
- assists if provided by the buyer
- C. Deductions
- post-importation costs
- transport after importation
- construction, insurance, and other costs only if they qualify for deduction under your jurisdiction’s rules
- D. Final customs value
Example: For a multi-leg shipment, if the invoice price includes inland freight in the exporting country but the declaration requires a different cost boundary, your worksheet should show the cost boundary and the adjustment basis.
Template: Supporting Documents Index Page
Auditors want traceability. Create a numbered index that matches your worksheet lines.
- Invoices and amendments: original invoice, revised invoice, credit notes.
- Freight and insurance evidence: carrier invoices, booking confirmations, and insurance certificates.
- Royalties and commissions: royalty agreements, commission invoices, and payment confirmations.
- Technical and product evidence: where valuation depends on product scope (for example, what is included in the “goods” versus separately billed services).
Example: If a “service fee” appears on the invoice, label it clearly in the index and state whether it is part of the price or treated separately for valuation purposes.
Template: Consistency Checks and Sign-Off Page
Close the loop with a reconciliation log.
- Data match checklist: invoice amount, currency, quantity, and unit of measure match the declaration fields.
- Document version control: list the version of each document used.
- Review sign-off: reviewer name, role, and date of review.
Example: If the declaration uses a different invoice number than the one stored in the document management system, record the reason and attach the cross-reference so the file remains audit-proof.
Mind Map: Evidence-to-Worksheet Link

These templates work best when they are filled in once and reused across shipments with the same commercial structure. The goal is not to produce a thick binder; it’s to make every valuation decision easy to verify from the file itself.
8. Classification Evidence and Technical Support for Tariff Engineering
8.1 Building a Classification Evidence Pack for Complex Goods
A classification evidence pack is the organized set of facts and documents that lets a reviewer see why a specific tariff classification fits the goods. For complex goods, the pack should be built like a chain: each link supports the next, and the chain is easy to follow even when someone wasn’t in the room when the goods were discussed.
Step 1: Define the Exact Product Being Classified
Start by writing a one-page “product statement” that is specific enough to prevent accidental drift. Include the commercial description, key dimensions or capacities, intended use, major components, materials, and any variants. If the goods are a kit, list what is included and what is not. A helpful check is whether two different people would describe the same item the same way after reading your statement.
Example: A “smart temperature controller” might include a sensor module, a display, a power supply, and a mounting bracket. If the bracket is optional, the pack must say so, because optional items can change how the goods are characterized.
Step 2: Map Classification Logic to Evidence
Next, translate the classification decision into a structured logic map. Your goal is to show which tariff rule or heading considerations you relied on, and what evidence supports each consideration. Keep this mapping close to the product statement so the reviewer can jump from claim to proof.
Step 3: Assemble Technical Evidence That Actually Answers the Criteria
For complex goods, technical documentation should be chosen for relevance, not volume. Typical evidence categories include:
- Specifications and datasheets: Use them to support function, performance, and design features.
- Bill of materials (BOM): Use it to show what is truly inside the package and how components relate.
- Engineering drawings: Use them to support construction details that descriptions often miss.
- Photos and exploded views: Use them to connect the written description to physical reality.
- Laboratory or test reports: Use them only when the classification criteria depend on measurable behavior.
- Certifications: Use them when they confirm regulated characteristics that matter for classification.
Example: If classification hinges on whether a device is “for” a particular function, a test report that demonstrates the device’s operating mode can be more persuasive than a marketing-style brochure.
Step 4: Build an Evidence-to-Claim Matrix
Create a matrix that links each classification claim to the exact evidence item and the specific page or section. This prevents the common failure mode where documents exist but no one can tell which parts matter.
| Classification Claim | Evidence Item | Where It Shows the Fact | Notes |
|---|---|---|---|
| Goods perform X function | Test report TR-104 | Section 3.2 and Table 2 | Conditions match declared operating range |
| Essential components are A and B | BOM v7 | Line items 12–18 | Optional item C excluded |
| Construction uses material Y | Material spec MS-22 | Page 4 | Confirms compliance with stated composition |
Step 5: Handle Variants Without Creating a New Pack Every Time
Complex product families often share a core design but differ in components. Instead of rebuilding from scratch, structure the pack with a stable “core evidence set” and a “variant overlay.” The overlay lists what changes and which evidence updates accordingly.
Example: A family of industrial sensors may share the same housing and electronics architecture, while the sensing element changes. The core pack covers housing and electronics; the overlay covers the sensing element part number, material, and any test results tied to that element.
Step 6: Ensure Consistency Across Declarations and Internal Records
Your pack should reconcile three things: what the goods are, what the documents say, and what the customs declaration states.
- Part numbers and descriptions must match across BOM, invoices, packing lists, and technical documents.
- Quantities must reconcile, especially for kits and multi-unit shipments.
- Version control must be explicit. If you used BOM v7 for the decision, the pack should not silently swap to v8 later.
A simple practice is to include a “declaration alignment page” that lists each declaration field (description, model, composition, function) and points to the supporting evidence.
Step 7: Record the Decision Notes So the Pack Stays Usable
Add a short decision narrative that explains why the chosen classification fits the evidence and why close alternatives were not selected. Keep it factual: cite the criteria and the evidence, and record any assumptions.
Example: If you assumed a component is not included because the purchase order excludes it, write that down and cite the purchase order line. That one sentence can save hours later.
Step 8: Add an Audit Trail and Amendment History
Finally, include an amendment log. If the pack is updated after a discrepancy, record what changed, what evidence was added, and what fields in the declaration were corrected. This turns a messy situation into a traceable one.
A good evidence pack is not just a folder of documents. It is a guided path from product facts to classification reasoning, with enough structure that a reviewer can follow it without guessing.
8.2 Using Product Specifications and Engineering Drawings Correctly
Product specifications and engineering drawings are the “source code” for customs classification. When they are used correctly, they explain what the goods are, how they are built, and which features matter for tariff headings. When they are used loosely, they create a mismatch between what was declared and what was actually shipped—usually discovered during review, not at the moment of filing.
Start with What the Drawing Actually Says
A drawing is not automatically a description. It is a geometry and materials language that must be translated into customs-relevant facts.
- Identify the drawing type and status. A “GA” (general arrangement) sketch is not the same as a detailed manufacturing drawing. Use the version that matches the production run.
- Capture the authoritative fields. Focus on item number, dimensions, tolerances, material callouts, and any functional notes. If the drawing references a separate specification sheet, that sheet becomes part of the evidence chain.
- Match drawing to the declared model. If the declaration uses a product name or model code, the drawing should show the same identifier. If it doesn’t, you need a mapping document created at the time of classification.
Example: A manufacturer declares “stainless steel valve, model V-200.” The drawing set includes V-200 and a separate drawing for “actuator kit.” If the declaration accidentally describes the kit as the valve, the drawing mismatch becomes a classification problem.
Build a Feature-to-Heading Map
Tariff classification often turns on a small set of features. Your job is to connect those features to the drawing evidence.
- List classification drivers from the tariff text and legal notes (for example: material, function, whether it is a part, whether it is complete or incomplete).
- Extract corresponding drawing evidence (for example: “body material: 316L,” “function: regulates flow,” “assembly: includes seat and stem”).
- Record how each feature is evidenced (dimension, material callout, functional note, or bill of materials reference).
This prevents the common mistake of citing a drawing section that looks relevant but does not actually prove the specific driver.
Example: A product is declared as a “part” because the drawing shows it is “sub-assembly.” But the tariff driver is “whether it is identifiable as a part of a specific machine.” The drawing must show the interface and intended machine relationship, not just that it is smaller than the final assembly.
Use Engineering Drawings Without Overreaching
Drawings can be precise, but they are not always complete for customs purposes.
- Do not infer materials from appearance. If the drawing says “anodized aluminum,” that is evidence. If it only shows a color swatch, it is not.
- Treat tolerances as functional clues, not decoration. Tight tolerances can support claims about intended use, but only if the drawing ties them to performance requirements.
- Respect the bill of materials boundaries. A drawing may show an exploded view, but the bill of materials (BOM) determines what is actually included.
Example: An exploded view shows a spring and a gasket. The BOM for the shipped unit lists only the spring. The drawing alone can mislead if you do not confirm what was included in the shipment.
Mind Map: Evidence Flow from Drawing to Declaration
Practical Example: Turning a Drawing into a Defensible Description
Assume the drawing set includes:
- A detailed drawing showing the housing material and threaded interface.
- A specification sheet stating the function as a pressure regulator.
- A BOM listing included components.
A correct evidence-based description would:
- State the material using the drawing callout.
- State the function using the specification’s functional statement.
- State whether it is a complete unit or part using the BOM and assembly view.
If the declaration instead says “pressure control assembly” without confirming completeness, the description becomes vague and harder to defend.
Quality Checks That Prevent Common Failures
Before you finalize the classification file, verify:
- Version control: the drawing revision number matches the production date on the internal traveler.
- Configuration match: the BOM and packed contents match the assembly view used for the description.
- Terminology alignment: the product name in the declaration matches the model identifier on the drawing.
- Feature coverage: every tariff driver has at least one drawing or specification citation.
Example: A file cites “material: steel” from a general drawing, but the specific drawing for the shipped variant shows “material: stainless steel.” The evidence index should force you to use the variant-specific drawing, not the generic one.
Date Reference for Document Traceability
When you record traceability, use the document’s revision date or traveler date. If a date is needed for an internal record, you can reference 2026-02-26 as an example of a traveler date format used consistently across the evidence pack.
8.3 Laboratory Testing and Inspection Records in Classification Support
Laboratory testing and inspection records help prove what the goods are, how they behave, and which characteristics matter for tariff classification. The key idea is simple: classification arguments are only as strong as the evidence that ties measured facts to the specific legal description.
Foundational Evidence Principles
Start by separating three things that often get mixed together:
- Product identity: what the item is (name, model, composition, intended use).
- Measured characteristics: what the item does or contains (purity, particle size, chemical composition, moisture content, mechanical properties).
- Classification relevance: which measured characteristics map to the tariff rule or explanatory notes.
A good laboratory record shows all three. If it only shows measurements, you still need a clear bridge to the classification criteria.
What to Test and Why
Testing should be driven by the classification question, not by what a lab can do quickly. For example, if classification hinges on whether a material is a “mixture” versus a “single substance,” then composition analysis matters. If it hinges on whether an item is “prepared” or “unprepared,” then processing indicators and residue profiles may matter.
A practical approach is to create a short “test plan” before sampling:
- Identify the tariff-relevant attributes.
- Select test methods that directly measure those attributes.
- Define acceptance criteria or thresholds that match the classification narrative.
- Specify sample quantity, labeling, and chain-of-custody steps.
Sampling, Chain of Custody, and Traceability
Most classification disputes don’t start with bad chemistry; they start with weak traceability. Your records should show that the tested sample is the same as the declared goods.
Include:
- Sample identifiers that match the lot or container.
- Where the sample was taken, by whom, and when.
- Seals used and seal numbers.
- Storage conditions before testing.
- Any re-testing triggers and how results were handled.
A small but effective detail: label samples with both a human-readable code and a machine-readable code (like a barcode). When documents are reconciled later, this reduces “same lot, different story” errors.
Laboratory Report Structure That Holds Up
A classification-support lab report should be readable by a customs officer who is not your technical counterpart. That means the report should include:
- Method: test standard or internal method reference.
- Instrument: key equipment identifiers.
- Results: measured values with units.
- Uncertainty or limitations: what the method can and cannot conclude.
- Observations: appearance, physical form, and any anomalies.
- Conclusion: a statement that connects results to the attribute being tested.
If the lab report conclusion is generic, add an internal “classification mapping note” that explains how the measured values satisfy the tariff description.
Inspection Records and Non-Lab Evidence
Not every relevant fact comes from a lab. Inspections can support classification when they capture physical characteristics that tests don’t fully address.
Examples:
- Visual inspection for form factor, labeling, or surface treatment.
- Dimensional checks for parts that must meet specific size or tolerances.
- Functional checks for items where performance is part of the description.
Keep inspection records consistent with the lab records: same lot identifiers, same sampling references, and the same declared product identity.
Mind Map: Laboratory Testing and Inspection Records
Example: Composition Testing for a Mixture Claim
A company declares a product as a mixture with a dominant component below a threshold used in the tariff description. The lab report shows:
- Component A: 42.3% by mass
- Component B: 35.1% by mass
- Other components: 22.6% by mass
To support classification, the internal mapping note should explicitly connect “42.3% by mass” to the tariff attribute that requires “dominant component not exceeding 50%.” It should also address limitations: if the method estimates “by mass” through a specific analytical technique, note that the method is validated for the product matrix.
If the sampling record shows the sample came from Lot L-1187 and the declaration references Lot L-1187, you have a clean chain from shipment to evidence.
Example: Inspection for Physical Form When Tests Are Indirect
Suppose classification depends on whether goods are “in bulk” versus “pre-packed for retail.” Chemical tests might not help much. Instead, inspection records should capture:
- Packaging configuration at the time of sampling
- Net weight per package
- Presence of retail labeling
Then, if a lab test is still performed (for example, to confirm composition), the inspection record explains why the physical form criterion is satisfied even if the chemical results alone would be ambiguous.
Evidence Packaging for Audit Readiness
When you assemble the final evidence set, keep it consistent and chronological:
- Declaration and product description
- Sampling record and chain-of-custody
- Laboratory report(s)
- Inspection report(s)
- Internal classification mapping note
Use a single evidence index that lists each document, its identifier, and what classification attribute it supports. This prevents the classic problem where the right documents exist, but no one can quickly see how they answer the classification question.
8.4 Managing Variants and Model Differences Without Misstatements
Variants and model differences are where good intentions meet paperwork reality. Customs declarations must reflect the actual goods, not the closest marketing cousin. Misstatements usually come from treating “similar” as “identical,” especially when a product family has multiple configurations, materials, firmware levels, or packaging options.
Start with What Changes and What Stays the Same
A practical way to prevent errors is to separate differences into three buckets:
- Physical construction: dimensions, materials, components, coatings, power ratings.
- Functional capability: performance thresholds, supported modes, software features.
- Commercial presentation: bundle contents, included accessories, manuals, labeling.
Example: A “Model X” industrial scanner may have the same housing across variants, but Variant A includes a specific laser module and Variant B includes a different sensor. If you declare both as the same model, the classification and origin evidence can fail even when the outer shell looks identical.
Build a Variant Identification Rule Set
Create a rule set that tells your team exactly how to identify the correct variant before any declaration is drafted. The rule set should be testable, not vibes-based.
Use a hierarchy like this:
- Unique identifiers: model number, part number, serial number range, internal SKU.
- Technical specification fields: voltage, wattage, material grade, throughput.
- Bill of materials and included accessories: what is actually in the box.
- Labeling and documentation: nameplates, datasheets, user manuals.
Example: If the datasheet lists multiple “options,” require the invoice line item and packing list to specify the option code. Then cross-check the option code against the label on the unit or the BOM for the shipment.
Map Variants to Tariff-Relevant Attributes
Not every difference matters for tariff outcomes. Your job is to connect variant attributes to the tariff questions.
A systematic mapping looks like:
- Classification drivers: material composition, function, method of operation, whether it is a complete machine or a part.
- Valuation drivers: what is included in the price (accessories, installation kits, software licenses).
- Origin drivers: whether the variant changes the manufacturing steps or the qualifying content.
Example: Two variants of the same appliance may differ only by color. If color does not change the function or material composition, the classification may remain the same. But if one variant includes a heating element and the other does not, the classification can change dramatically.
Create a “Misstatement Risk” Matrix
Treat each variant difference as a potential risk and score it based on how likely it is to affect classification, valuation, or origin.
- High risk: changes to function, materials, power/voltage, completeness, or included components.
- Medium risk: changes to packaging, labeling, or minor accessory bundles.
- Low risk: changes that do not affect technical specifications relevant to tariff rules.
Example: A “Model Y” may come with either a standard cable or a specialized cable. If the specialized cable is a distinct part that changes the declared goods set, you mark it as high risk for valuation and completeness.
Evidence Packaging for Model Differences
For each variant, maintain a compact evidence pack that supports the declaration.
Include:
- One-page technical summary for the exact variant.
- BOM excerpt showing included components.
- Photographs of label/nameplate and key interfaces.
- Supplier confirmation that ties the variant identifier to the technical specs.
Example: If you declare Variant A as “Model X, laser module type L1,” your evidence pack should show the label or internal part marking that indicates L1, not just a generic datasheet for the whole Model X family.
Handle “Family Datasheets” Without Letting Them Lie
Family datasheets often list multiple options. The trap is copying the family description into the declaration.
Instead:
- Extract only the lines that match the variant identifier.
- Record which option codes are included.
- If the datasheet is ambiguous, require a variant-specific addendum or supplier letter.
Example: A datasheet might say “supports modes A/B/C.” If your shipment only supports A and B, do not declare “supports A/B/C.” Declare the supported modes and keep a supplier statement or configuration report.
Mind Map: Variant Control Workflow
Example: Two Variants, One Declaration Draft
You receive two shipments labeled “Model Z.” Shipment 1 includes a motor rated 220V and a specific control board; Shipment 2 includes a 110V motor and a different control board.
A careless draft might describe both as “Model Z, motor and control system.” A correct approach:
- Split the declaration lines by variant.
- Use the variant identifier to select the correct technical summary.
- Confirm the motor rating from the nameplate photo.
- Confirm the control board part number from the BOM.
If the control board is the component that determines whether the goods are a complete system versus a part, the classification outcome can differ. The point is simple: the declaration description must be as specific as the evidence you can produce.
Practical Checklist for Variant Misstatement Prevention
- Every line item has a variant identifier.
- Every variant identifier has a technical summary tied to it.
- Every technical summary has evidence that matches the shipment contents.
- Family datasheets are used only as a source, not as the final description.
- High-risk differences trigger extra verification before filing.
When these steps are followed, “model differences” stop being a guessing game and become a controlled, auditable process. Even slightly playful teams tend to enjoy that part.
8.5 Practical Example of Classification Support From Data to Declaration
A classification file is only as good as the chain of evidence behind it. The goal is simple: start with what the goods actually are, map that to the tariff rules, and end with a declaration that matches the evidence. Below is a practical, end-to-end example for a common scenario: importing a “smart” industrial sensor module.
Start with Product Facts That Survive Scrutiny
Assume the shipment is described as “Industrial Sensor Module, Model ISM-240.” The importer’s first job is to capture facts that customs can verify without guessing.
- Physical description: sensor housing, connector type, measurement range, and whether it includes a display.
- Functional description: measures temperature and humidity, outputs a digital signal, and can be configured via software.
- Included components: sensor element, signal conditioning board, power supply circuitry, and a communication interface.
- Operational context: used in industrial HVAC systems; does not include a complete controller.
Example evidence set (what you collect): product datasheet, bill of materials, photos of the unit and label, wiring diagram, and a short test report showing output behavior.
Translate Facts into Classification Questions
Classification is not “pick the closest code.” It’s answering structured questions from the tariff heading and any legal notes.
For this example, the key questions are:
- Is the item a complete apparatus or a part?
- Does it fall under a heading for measuring instruments or under a heading for electrical apparatus?
- Does the presence of software or digital output change the heading?
A good file records why each question is answered the way it is, using the evidence you already gathered.
Build a Mind Map of Evidence to Decision
Apply the Tariff Rules with Explicit Evidence Links
Suppose the tariff heading candidates are:
- Candidate A: measuring instruments for temperature/humidity.
- Candidate B: electrical apparatus for control or communication.
- Candidate C: parts of machines or apparatus.
Now map evidence to each candidate.
- Candidate A fit: the test report shows calibrated temperature and humidity readings; the datasheet lists measurement functions and accuracy specs.
- Candidate B fit: the module outputs a digital signal, but it does not perform control logic or include a controller; the wiring diagram shows it is a sensing element feeding an external system.
- Candidate C fit: the bill of materials shows it is a self-contained sensor module, not merely a raw component; it has a defined function as a measuring unit.
Decision: Candidate A is most consistent because the essential function is measurement, supported by test results and specifications.
Draft the Declaration So It Matches the File
A declaration description should not introduce new claims. It should mirror the evidence and the tariff reasoning.
Example declaration elements (illustrative):
- Goods description: “Industrial temperature and humidity sensor module with digital output, Model ISM-240.”
- HS code: the code corresponding to measuring instruments for temperature and humidity (as determined by the tariff logic above).
- Supporting documents referenced internally: datasheet, test report, bill of materials.
If the invoice says “controller,” but the evidence shows it is a sensor module, the file must flag the mismatch and correct the declaration description or request amended documentation.
Handle Common Failure Points Without Hand-Waving
- Software mention: If the datasheet says “configurable via software,” the file should clarify that software configuration does not convert the item into a controller.
- Model variants: If Model ISM-240 and ISM-241 differ only in connector type, the file should state which variant is shipped and which documents apply.
- Packaging claims: If the invoice lists “complete kit,” but the shipment contains only the module, the file should reconcile what is actually in the box.
Practical Mini-Workflow from Data to Declaration
Example Workflow
1. Collect product facts
   - datasheet, photos, label, BOM, wiring diagram, test report
2. Identify tariff questions
   - complete apparatus vs part
   - measuring vs control/communication
3. Map evidence to each question
   - cite specific documents for each answer
4. Select heading using tariff logic
   - apply legal notes and exclusions
5. Draft declaration description
   - mirror evidence, avoid new claims
6. Reconcile documents
   - invoice, packing list, shipping docs vs evidence
7. Review and sign-off
   - record assumptions and document versions
What “Good” Looks Like in the Final File
A strong classification support file reads like a controlled argument: each tariff question has a direct answer, each answer points to evidence, and the declaration description is consistent with both. When customs asks “How do you know?”, the file should let you point to a specific document and a specific fact—no interpretive gymnastics required.
9. Compliance Controls for Transshipment and Re Export Activities
9.1 Internal Controls for Trade Data Integrity and Version Control
Trade data integrity is what keeps tariff engineering and neutral routing from turning into a paperwork scavenger hunt. Internal controls here focus on two things: (1) the data you use to classify, value, and route is accurate and complete, and (2) the version you used is the version you can prove.
Foundational Principles for Data Integrity
Start with a simple rule: every customs-relevant data element must have a single “source of truth,” plus a documented path for how it gets transformed.
- Single source of truth: For example, the product description used for classification should originate from the technical specification owner, not from a broker email thread.
- Controlled transformations: If a description is shortened for a customs form, the shortening rules must be consistent and reversible.
- Completeness checks: A shipment record should not be considered “ready” unless required fields are present, consistent, and internally coherent.
A practical example: a shipment arrives at a neutral hub. The warehouse system records weights and quantities; the commercial invoice records unit prices; the logistics system records container numbers. Your control should confirm that the invoice line items match the packing list quantities and that the customs declaration line items match the invoice lines.
Version Control That Survives Real Life
Version control is not about fancy software; it’s about preventing silent drift. Drift happens when someone updates a tariff code, a valuation assumption, or a routing leg after the declaration is prepared.
Use three layers:
- Immutable snapshots: When a declaration is submitted, store a snapshot of the exact data used.
- Change logs: Record what changed, who changed it, when it changed, and why.
- Approval gates: Require sign-off for changes that affect duty, origin, classification, or routing.
Example: On 2026-02-26, a team updates the HS classification from one 8-digit code to another after receiving lab results. Without version control, the declaration might still show the old code while the internal spreadsheet shows the new one. With controls, the snapshot preserves the submitted version, and the change log ties the update to the lab evidence.
Control Design for the Trade Data Lifecycle
Map controls to stages so each stage has clear responsibilities.
- Intake: Capture the raw inputs—spec sheets, invoices, packing lists, routing instructions—into a structured record.
- Preparation: Apply transformations such as line mapping, unit conversions, and description formatting.
- Review: Run validation rules and evidence checks.
- Submission: Lock the dataset and generate the declaration payload from the locked version.
- Post submission: Track amendments and ensure any correction reuses the same evidence logic.
A useful mental model: treat the declaration as a build artifact. You don’t want someone editing the source files after the build is produced.
Validation Rules That Catch Errors Early
Validation should be specific, not generic. Examples of effective checks:
- Cross-field consistency: If the invoice says 12 cartons and the packing list says 10, flag it.
- Unit sanity checks: If net weight is 2,000 kg but gross weight is 1,200 kg, stop the workflow.
- Routing coherence: If the shipment is marked as re-export, ensure the declaration fields reflect the intended customs procedure and that the leg identifiers match the logistics record.
- Evidence presence: If a classification relies on a technical feature, require the feature evidence file to be attached before review.
Roles, Permissions, and Segregation of Duties
Segregation of duties prevents one person from both changing the data and approving it.
- Operations: Prepare shipment data and upload source documents.
- Compliance reviewer: Approve classification, valuation, and origin logic.
- System administrator or data steward: Manage access and enforce workflow rules.
Example: Operations can update quantities based on warehouse counts, but only compliance can approve changes to HS codes or valuation assumptions.
Mind Map: Data Integrity and Version Control Controls
Example Workflow with Controls in Action
- Operations creates a shipment record and links invoice, packing list, and product specification.
- The system runs checks: quantities match across documents; weights are plausible; routing leg identifiers align.
- Compliance reviews classification and valuation logic and approves the dataset.
- The system locks the dataset and generates the declaration payload from the locked version.
- If an amendment is needed, the system creates a new version, records the reason, and requires re-approval for duty-relevant changes.
The result is simple: when an auditor asks, “Which data did you use and why?”, you can answer with a locked snapshot, a traceable change log, and the evidence that supported the decision.
9.2 Segregation of Duties Between Operations and Compliance Functions
Segregation of duties means the people who move goods and create shipment instructions do not also make the final calls on tariff classification, origin positions, valuation adjustments, or the legal framing of customs procedures. The goal is simple: reduce the chance that one person can both steer the outcome and quietly fix the paperwork afterward.
Foundational Principles and Why They Matter
Start with four boundaries that should be clear in every hub workflow.
- Operational control of physical flow: Operations decides when a container is released, staged, loaded, or re-labeled for the next leg. Compliance should not direct those actions.
- Compliance control of legal positions: Compliance decides how the shipment is declared, including classification, origin arguments, valuation method, and procedure selection.
- Evidence ownership: Operations provides source data (weights, part numbers, packing details, production steps). Compliance maintains the evidence pack and the rationale used for declarations.
- Change authority: If a declaration needs correction, amendment, or a different procedure, compliance approves the change and operations executes it only after the approved instruction is issued.
A practical way to remember this: operations can be fast, compliance must be correct, and the handoff must be traceable.
Role Design That Works in Real Warehouses
A workable split for transshipment and re export routing usually looks like this.
- Operations roles: shipment coordinator, warehouse supervisor, documentation coordinator. They confirm what arrived, what is stored, what is picked, and what is shipped.
- Compliance roles: customs analyst, trade compliance manager, classification/origin specialist. They review the legal position and sign off on declaration data.
- Shared roles with guardrails: data entry clerks can populate system fields, but they cannot approve the legal position or override compliance decisions.
To keep the workflow from becoming a bottleneck, define service levels. For example, compliance can commit to reviewing a declaration package within a fixed window, while operations commits to submitting complete data before the cut-off.
The Handoff Model from Intake to Declaration
Use a two-step handoff: data handoff and approval handoff.
- Data handoff: Operations submits a “declaration-ready packet” containing item master references, technical descriptions, bill of materials if relevant, invoice/PO references, and routing details for each leg.
- Approval handoff: Compliance reviews and approves the legal fields. Operations then generates the customs declaration using the approved fields.
If operations discovers a mismatch late—say, the packing list weight differs from the scale ticket—operations flags it. Compliance decides whether it changes valuation, classification evidence, or procedure eligibility.
Controls That Prevent Quiet Overrides
Segregation fails when systems allow silent changes. Add controls that make overrides visible.
- System permissions: operations users can draft declarations but cannot finalize or submit without compliance approval.
- Field-level locks: lock legal fields such as tariff code, origin claim, valuation method, and customs procedure code after compliance sign-off.
- Audit trail requirements: any change to locked fields requires a compliance reason code and an evidence attachment.
- Exception queue: discrepancies go into a tracked queue with ownership assigned to compliance.
Here’s a concrete example. Suppose a hub receives “stainless steel fittings” and operations proposes a tariff code based on a generic item description. Compliance requests the product spec and confirms the exact configuration. Operations can still ship the goods, but the declaration must use the compliance-approved code. If operations later tries to revert to the generic code for speed, the system blocks submission.
Mind Map: Segregation of Duties
Example: Two-Leg Shipment with a Classification Dispute
A shipment arrives in a neutral country hub for controlled storage, then re exports to a third country. Operations prepares the outbound documents and proposes a tariff code based on the warehouse item label. Compliance reviews the technical sheet and finds the fittings include a feature that changes the classification basis.
Operations still completes the physical re export steps because the goods can move under the storage procedure. Compliance issues an approval update for the tariff code and updates the declaration fields. Operations then submits the declaration using the approved code. The discrepancy is recorded as an exception with the evidence used, so the next shipment of the same model can be pre-cleared with less back-and-forth.
Practical Checklist for Implementation
- Define which fields operations can draft versus which fields compliance must approve.
- Require a declaration-ready packet before compliance review.
- Lock legal fields after approval and require evidence for changes.
- Route all discrepancies into a tracked exception queue owned by compliance.
- Document the handoff steps so the audit trail matches the workflow.
Segregation of duties is not bureaucracy for its own sake. It’s a design choice that keeps the legal story consistent with the physical story, even when the warehouse is busy and the paperwork is trying to keep up.
9.3 Screening and Due Diligence for Parties and Goods
Screening and due diligence are the boring parts that keep shipments from turning into expensive puzzles. In transshipment and re export flows, the risk is not only “who” you trade with, but also “what” you are moving and “how” the paperwork could be interpreted.
Foundational Scope and Risk Inputs
Start by defining the screening universe before you touch documents. Include: importer of record, exporter of record, consignee, notify party, warehouse operator, carrier, freight forwarder, customs broker, and any intermediate traders on the commercial invoice chain. Then define the goods universe using the tariff engineering inputs you already have: product description, technical specs, material composition, intended use, and any controlled features (for example, dual use components, restricted chemicals, or regulated medical devices).
A practical rule: if a party can influence custody, documentation, or the declared description, it belongs in the screening scope.
Party Screening Workflow That Stays Audit Friendly
- Collect identifiers: legal name, trading name, address, registration number, website domain, and beneficial ownership where available.
- Run sanctions and restricted party checks: match by exact name and common variants, then review partial matches with context.
- Run enforcement and compliance checks: look for customs debarments, significant penalties, or repeated classification disputes.
- Document the decision: record what you checked, when you checked it, and the rationale for “clear” or “hold.”
Use a consistent decision log. Example: “Warehouse operator cleared on 2026-02-20; partial match resolved because the address and registration number differ from the restricted entity.”
Goods Screening Tied to Tariff Engineering
Goods screening should not be a separate activity from classification and origin work. Tie it to your technical evidence pack.
- Step A: Map the product to control triggers using your bill of materials and technical description.
- Step B: Confirm the declared identity by aligning the commercial invoice description with the packing list and the technical file.
- Step C: Check end use and end user statements for consistency with the routing plan.
Easy example: If a product is declared as “plastic housings for industrial equipment,” but the technical file shows it contains a regulated sensor module, you may need additional documentation and a different compliance posture.
Due Diligence for Multi Party Chains
Neutral routing often adds intermediaries. That’s not automatically wrong; it’s just where inconsistencies hide.
Perform a chain sanity check:
- The invoice chain should match the contracting chain.
- The shipping instructions should match the declared consignee and warehouse custody.
- The bill of lading marks and container numbers should reconcile with the warehouse receiving records.
If a party appears only on one document type, treat it as a “documentation-only” risk and verify why.
Handling Red Flags Without Guessing
Common red flags include: vague product descriptions, frequent changes to consignee details, refusal to provide technical specs, mismatched addresses across documents, and repeated “corrections” after release.
When you hit a red flag, do not improvise. Use a structured response:
- Pause the declaration if the mismatch affects identity, classification, or custody.
- Request specific evidence: technical datasheets, component lists, warehouse custody logs, and corrected document sets.
- Re-screen only what changed: for example, if the goods description changes, re-run goods screening; if only the consignee address changes, re-run party screening.
Mind Map: Screening and Due Diligence
Example: From Screening Result to Declaration Readiness
A shipment arrives at a neutral hub for re export. The warehouse operator is cleared, but the carrier shows a partial restricted match due to a similar name.
You resolve it by verifying registration number and the operating address. Then you confirm the goods identity: the invoice says “cables,” but the technical file shows “cables with embedded encryption modules.” You update the goods screening outcome and ensure the declaration description matches the technical file. Finally, you reconcile the warehouse receiving record with the bill of lading container numbers so the custody story is consistent from arrival to re export.
The result is not just “cleared.” It is a coherent chain of responsibility, evidence, and document alignment—exactly what customs and internal auditors expect to see.
9.4 Managing Exceptions Discrepancies and Amendment Procedures
Exceptions and discrepancies are not the same thing. An exception is a planned deviation from the normal process, approved in advance. A discrepancy is an unplanned mismatch discovered later, such as a declaration that does not match the invoice or a shipment that arrives with different quantities. The goal of this section is to make both manageable: catch early, document clearly, correct consistently, and preserve an audit trail that explains why the change was necessary.
Foundations for Exception Handling
Start with a single intake rule: every exception or discrepancy must be logged with a unique reference, the affected shipment or line item, the discovery date, and the person who identified it. Use a simple severity scale so teams do not treat everything as urgent. For example:
- Severity 1: Potential duty rate or origin impact.
- Severity 2: Quantity, weight, or document mismatch without clear tariff impact.
- Severity 3: Administrative issues like missing signatures where the underlying facts are unchanged.
A practical habit is to attach the “evidence set” at the moment of logging. If you wait, the evidence tends to scatter across email threads and shared drives like socks in a laundry basket.
Discrepancy Triage and Root Cause
Triage answers three questions in order: What changed? What is the correct fact? What procedure allows correction? Root cause categories keep decisions consistent:
- Data entry errors: wrong HS code, wrong net weight, wrong consignee.
- Document inconsistency: invoice totals do not match packing list.
- Physical variance: quantity short/over, damaged goods, substitution.
- Process timing: declaration filed before final documents were available.
Example: A re-export shipment shows 120 cartons on the packing list but 118 cartons on the warehouse tally. If the tariff classification depends on the product type and the two missing cartons are identical, the discrepancy is likely Severity 2. If the missing cartons contain a different variant, it becomes Severity 1 because classification and duty may change.
Amendment Decision Tree
Amendments should be driven by the customs procedure and the stage of the shipment. The same mismatch can require different actions depending on whether goods are still under a control procedure or already released.
Amendment Procedures That Hold Up Under Review
Use a consistent amendment workflow:
- Draft the correction with the exact fields to change (HS code, quantity, valuation elements, origin claim).
- Explain the reason using factual language, not assumptions. “Invoice total differs from packing list due to carton count adjustment at warehouse tally” is better than “likely counting error.”
- Attach the evidence that supports the corrected facts: revised packing list, warehouse receiving report, supplier credit note, lab report, or corrected commercial invoice.
- Obtain approvals based on severity. Severity 1 typically requires compliance sign-off.
- Submit amendment through the correct channel and capture the submission confirmation.
- Reconcile downstream documents so the amended declaration matches the re-export paperwork, transport documents, and inventory records.
Example: After release, the importer discovers the declared net weight was overstated by 5%. If the correct weight is supported by the scale ticket from the bonded warehouse, the amendment should update the net weight field and any dependent calculations. The reconciliation step matters: if the warehouse inventory record still shows the old weight, later audits will treat the mismatch as unresolved.
Handling Exceptions Without Creating Discrepancies
If an exception is approved, it should reduce future discrepancies, not create them. For instance, if a hub procedure allows temporary substitution of packaging labels for outbound legs, the approval should specify what must remain unchanged (product identity, SKU mapping, and traceability). Then the operations team can execute the exception while compliance can still defend the declaration logic.
Worked Example with Clear Closure
A shipment arrives at a neutral hub on 2026-02-26. The inbound declaration lists HS code A, but the supplier later confirms the correct HS code is B due to a component variant that was miscommunicated earlier.
- Log as Severity 1.
- Evidence set: supplier confirmation, updated product spec, and a photo of the variant label.
- Stage: goods are still under controlled storage.
- Action: correct the inbound declaration before filing the re-export declaration, then update the re-export paperwork and inventory status.
- Closure: record the amendment reference and confirm that the re-export declaration uses HS code B consistently.
The key is closure discipline: every discrepancy log ends with a final status, the amendment reference if applicable, and a short factual summary of what changed and why.
9.5 Post Clearance Review Readiness and Evidence Retrieval
Post clearance review readiness is less about having a “perfect file” and more about being able to reconstruct what you declared, why you declared it, and how the shipment actually moved. Think of it as a controlled replay: the reviewer should be able to follow your logic from product facts to tariff treatment to the final declaration.
Foundational Evidence Map
Start by defining the evidence you need for each decision point. For tariff engineering and neutral routing, the usual decision points are classification, valuation, origin or eligibility arguments, and the routing narrative.
Evidence Indexing That Survives Real Life
Create an index that mirrors how declarations are reviewed. Use a consistent key such as: declaration number + item line + shipment leg. Store documents in folders that match that key, and include a short “what this proves” note inside each folder.
Example: For a re export shipment, you might have:
DCL-2026-03-18-00123 / Line 7 / Leg Inbound: warehouse receipt, inbound bill of lading, controlled procedure authorization.DCL-2026-03-18-00123 / Line 7 / Leg Outbound: outbound bill of lading, re export declaration, packing list.DCL-2026-03-18-00123 / Line 7 / Classification: product spec, BOM, and the classification rationale memo.
Declaration Snapshots and Version Control
A common failure mode is “we have the documents, but not the version that matches the declaration.” Capture a snapshot of the declaration data at filing time, including item descriptions, tariff codes, declared values, and any notes fields. If you later correct a declaration, keep both the original and the amended record, plus the reason for change.
Example: If an item description was shortened for operational reasons, the snapshot preserves the original wording that supported the classification argument. Without it, the reviewer has to guess which facts you relied on.
Routing Narrative Evidence Without Hand-Waving
Neutral country trade depends on a coherent story: what entered, what happened in the hub, and what left. Evidence should show continuity across legs.
Include:
- Contract and Incoterms that explain who bore risk and when.
- Shipping documents that match container numbers, seals, and dates.
- Warehouse or bonded storage records that show inventory status.
- Customs procedure codes used for inbound storage and outbound re export.
Example: If the hub used a controlled procedure for storage, the evidence should show the goods were under that status before they were released for re export. A reviewer will not accept “it was probably stored” as a substitute for procedure records.
Valuation Evidence That Matches the Transaction Structure
For multi party transactions, keep a valuation file that ties declared value to the actual commercial flow. Store:
- Purchase or sale contracts for the relevant transaction.
- Invoices and payment terms.
- Related party agreements or evidence supporting that the relationship did not distort value.
- Records of any additions or deductions used in the valuation calculation.
Example: If you declared transaction value but also made an adjustment for assists, include the assist agreement, the cost basis, and the calculation sheet used for the declaration.
Retrieval Workflow for Fast, Accurate Responses
When a review notice arrives, use a repeatable workflow:
- Confirm scope: declaration numbers, item lines, and specific questions.
- Pull the declaration snapshot first, then follow the evidence index.
- Reconcile mismatches: if a document date conflicts with the declaration date, document the reason and provide supporting records.
- Prepare a short “evidence-to-question” mapping so the reviewer can see the direct link.
Example: If asked why a tariff code was selected, provide the classification rationale memo plus the product spec and BOM that support the technical description used in the declaration.
Evidence Quality Checks Before Submission
Do a final pass for completeness and consistency:
- Are all item lines covered, including partial shipments?
- Do document identifiers match (container numbers, model numbers, invoice numbers)?
- Are translations consistent with the declared descriptions?
- Are the dates consistent across legs, especially inbound arrival, hub handling, and outbound departure?

Practical Example of Evidence Retrieval in Action
A reviewer requests support for classification and routing procedure for one item line. Your retrieval package includes:
- Declaration snapshot showing the tariff code and item description.
- Classification rationale memo referencing the product spec and BOM.
- Inbound and outbound shipping documents with matching seal and container numbers.
- Warehouse inventory status log showing the controlled procedure during storage.
- Re export declaration record linking outbound shipment to the inbound status.
The reviewer can then verify that the declared facts align with the physical and procedural record. That alignment is the whole point: evidence retrieval is not a scavenger hunt; it is a structured proof chain.
10. Contracting and Incoterms Alignment with Customs Outcomes
10.1 Incoterms Selection and Its Effect on Risk and Documentation
Incoterms are not a customs form; they are a contract language that tells everyone who pays for what, who arranges transport, and when risk shifts. In tariff engineering and neutral routing, those details matter because customs declarations, invoices, and shipping instructions must stay consistent with the story the documents tell.
Foundational Concepts for Risk and Paperwork
Start with two practical questions: (1) Who controls the goods at each leg, and (2) who pays the costs that later appear in the invoice and valuation file. Incoterms answer both, but only if the contract, purchase order, commercial invoice, and transport documents are aligned.
A common mistake is choosing an Incoterm that shifts risk early while the operational documents still show the seller arranging and controlling the shipment until later. Customs teams then see mismatches between who “owned” the logistics decisions and who paid for them.
Incoterms and Documentation Flow
Think of the shipment as a chain of handoffs: packing, loading, main carriage, possible hub storage, and re-export. Incoterms determine which party typically books carriage and insurance, and that choice drives which documents you can credibly produce.
- If the seller arranges main carriage, the seller usually has the bill of lading or at least the booking control, which affects how you describe the shipment on the invoice and how you reconcile shipping instructions.
- If the buyer arranges carriage, the buyer’s forwarder booking becomes the anchor for the transport documents, and the seller’s invoice must not contradict that.
Choosing Incoterms for Neutral Country Routing
Neutral country trade often includes warehousing or controlled handling before re-export. That means the “export” leg and the “re-export” leg may have different carriers, different declarations, and different cost allocations.
A workable approach is to select Incoterms that match the operational reality of each leg:
- For the inbound leg into the hub country, choose an Incoterm that reflects who arranges the carriage to the hub and who bears risk until the goods enter the controlled area.
- For the re-export leg out of the hub, choose an Incoterm that reflects who arranges the outbound carriage and when risk shifts relative to loading at the hub.
If you use one Incoterm for both legs without checking the handoffs, you can end up with invoices that imply one party controlled the outbound booking while the outbound bill of lading shows another.
Risk Shift Timing and Customs Consistency
Risk shift timing affects how you explain responsibility for loss or damage, but customs cares more about consistency than philosophy. The key is to ensure that the party named in the contract as responsible for transport and costs is also the party whose documents appear on the shipment paperwork.
Example: If you use an Incoterm where the buyer bears risk after loading at origin, but the seller’s invoice includes costs for outbound carriage from the hub and the seller also books that outbound carriage, you have a cost story that may not match the risk story. Even if the goods are fine, the documentation trail can look inconsistent.
Cost Allocation and Valuation File Hygiene
Incoterms influence which costs are included in the price paid or payable and which are excluded or treated separately in valuation. You do not need to memorize every rule; you need a repeatable method.
Use a cost map tied to the invoice:
- Identify line items that relate to carriage, insurance, loading, unloading, and handling.
- Tie each line item to the party responsible under the chosen Incoterm.
- Ensure the same cost categories appear in the valuation file with the same logic.
This is especially important when there are multiple parties in the chain, such as a trading company buying into the hub and selling out of the hub.
Mind Map: Incoterms Selection and Documentation Effects
Example: Contract to Declaration Mapping for Two Legs
Assume a trading company buys goods and routes them through a neutral hub for re-export.
- Inbound leg: Seller delivers under an Incoterm where the buyer arranges main carriage to the hub. The buyer’s forwarder books the inbound carriage, and the commercial invoice from seller lists the goods price plus any agreed items, but does not claim carriage costs the buyer arranged.
- Hub handling: The warehouse keeps inventory records that show the goods are still the same lot under the buyer’s control.
- Re-export leg: The buyer sells to a downstream customer and chooses an Incoterm where the buyer arranges outbound carriage from the hub. The outbound bill of lading shows the buyer’s booking control, and the invoice to the customer reflects the agreed cost allocation.
When customs declarations are prepared for each leg, the declarations align with the invoice cost logic and the transport document control. That alignment reduces the chance that a reviewer questions who actually controlled the shipment decisions.
Practical Checklist for Selecting the Right Incoterm
- Match the Incoterm to who books each leg’s carriage.
- Ensure the invoice cost categories match the Incoterm cost responsibilities.
- Confirm the risk shift timing does not contradict loading and handoff points in shipping instructions.
- For hub operations, verify that the inbound and outbound legs each have consistent responsibility stories.
- Before filing, reconcile: contract terms, purchase order, commercial invoice, and the transport documents for each leg.
10.2 Contract Clauses That Support Customs Accuracy
Customs accuracy is mostly a paperwork sport: if the contract says one thing and the shipment documents say another, customs will notice. The goal of contract clauses is not to “control” the shipment, but to create a consistent chain of facts that can be proven later.
Foundational Clause Set for Accurate Declarations
Start with clauses that define what is being traded, how it is priced, and who is responsible for which documents.
- Goods description clause: Require the goods to be described by objective identifiers (model, technical specs, composition, intended use) rather than vague labels. Example: “industrial air compressor, model XJ-240, 3-phase, stainless steel valve body” is easier to match to the commercial invoice and classification evidence than “compressor parts.”
- Commercial invoice alignment clause: State that the invoice will reflect the contract description, quantities, unit prices, and currency. Add a requirement that the invoice will include the same trade terms used in the contract so customs can reconcile cost elements.
- Packing and labeling responsibility clause: Assign who prepares packing lists and labels that match the declared contents. Example: if the contract says “two cartons per pallet,” the warehouse must follow that or the packing list will drift from the physical reality.
- Document ownership clause: Specify which party provides certificates, test reports, and origin or compliance statements. Example: if a certificate of conformity is required for a regulated component, the contract should name the supplier who must deliver it by a specific lead time.
Pricing Clauses That Prevent Valuation Conflicts
Customs valuation problems often come from hidden assumptions about what costs are included.
- Transaction value clause: Clarify whether the sale is a genuine transaction between buyer and seller, and whether any rebates, discounts, or side payments exist. Example: if the buyer receives a year-end rebate, the contract should state how it is calculated and when it is recognized so the valuation file can explain any adjustments.
- Cost allocation clause: Tie costs to the selected trade term and declare which costs are included in the price. Example: if freight is “buyer’s account,” the contract should say so explicitly; otherwise, the invoice may look like it includes freight while the declaration excludes it.
- Related party clause: If parties are related, include a clause that requires the seller to provide information needed to support valuation. Example: the contract can require documentation of how the price was set and that it is consistent with market conditions.
Incoterms and Risk Clauses That Match the Logistics Reality
Incoterms are not just about who pays for what; they also shape which documents and cost elements customs expects.
- Incoterms selection clause: Lock the Incoterms version and named place. Example: “DAP Rotterdam, Incoterms 2020” reduces ambiguity when routing changes.
- Risk transfer clause: Ensure the risk transfer point matches the operational plan. If the contract says risk transfers at the neutral hub, the logistics team must structure the shipment so the documents reflect that handover.
- Routing change clause: Allow routing flexibility without changing the declared facts. Example: if the shipment is rerouted due to carrier capacity, the contract should require that the seller and buyer agree that the declared goods and price remain unchanged, and that any document amendments are documented.
Clauses for Re-Export Routing and Neutral Hub Operations
Re export routing works best when the contract anticipates multi-leg movement.
- Transshipment and re export clause: State that goods may be moved through a bonded or controlled facility for storage and onward export, and that the parties will cooperate in providing required data for each leg.
- Inventory traceability clause: Require the warehouse or hub operator to maintain traceability records that can be tied to the contract and shipment identifiers. Example: lot numbers and container numbers must be recorded so the re export declaration can match what actually left.
- Amendment and discrepancy clause: Define how corrections are handled when documents differ. Example: if the bill of lading quantity differs from the packing list, the contract should require a documented correction workflow rather than “fixing it later” informally.
Mind Map: Contract Clauses Supporting Customs Accuracy
Example: Clause-to-Declaration Mapping in One Shipment
A buyer contracts for “model XJ-240 compressors” under “DAP Rotterdam, Incoterms 2020.” The contract states that the invoice will list the same model, quantity, and unit price, and that freight to the neutral hub is included while onward freight is buyer’s account. The contract also requires the supplier to provide a conformity certificate by a fixed date and to notify the buyer of any rebates.
When the shipment arrives at the hub, the warehouse issues packing lists that match the carton counts stated in the contract. If the carrier changes the vessel, the contract’s routing change clause requires document amendments that preserve the declared goods and price. The customs declaration then matches: description aligns with the contract, valuation aligns with the cost allocation, and supporting documents align with who promised to provide them.
The contract doesn’t replace customs compliance work; it prevents avoidable contradictions so the compliance team can focus on the real questions: correct classification, correct valuation, and correct origin or regulatory statements.
10.3 Allocation of Costs Duties and Charges Across Shipment Legs
Cost allocation is where “paper routing” meets “customs math.” In re export and transshipment flows, the same physical goods may move through multiple legs, but customs cares about which costs belong in the customs value, which belong in commercial pricing, and which must be supported by consistent documents. A clean allocation also prevents the classic mismatch: the invoice says one thing, the declaration data says another, and the warehouse system says something else entirely.
Foundational Idea: What Customs Value Is Trying to Capture
Customs value generally reflects the price actually paid or payable for the goods, adjusted by specific additions and deductions depending on the jurisdiction and facts. Costs that are part of getting the goods to the place of import can matter; costs that are clearly after import typically should not inflate the customs value. The practical task is to map each charge to a leg and to a customs purpose.
Step 1: List Every Charge and Tag It to a Leg
Start with a charge inventory from the commercial and logistics chain. For each line item, tag:
- Leg: origin to hub, hub to export, or export to final destination.
- Timing: before import, at import, or after import.
- Function: transport, insurance, handling, warehousing, documentation, or financing.
- Who pays: buyer, seller, or a third party.
Example: A shipment of industrial valves moves from Country A to a neutral hub in Country B, then re exports to Country C.
- Freight A→B: paid by buyer
- Insurance A→B: paid by buyer
- Warehousing in B: paid by seller
- Local handling at B: charged to buyer
- Freight B→C: paid by buyer
- Export documentation at B: charged to seller
Even if the commercial invoice bundles some items, you still need an internal allocation that matches what customs expects for the import leg.
Step 2: Align Allocation with the Declared Transaction Structure
Allocation must match the contracting and Incoterms logic used for each leg. If the contract treats the import leg as delivered under a term that includes certain costs, those costs are more likely to be part of the customs value base. If the contract clearly separates pre import and post import services, you can support deductions or exclusions more confidently.
A practical rule: if a cost is paid for services that occur while the goods are under the import leg’s control, treat it as potentially value relevant unless your jurisdiction’s rules clearly exclude it. If it is paid for services that occur after the import leg is complete, treat it as post import and support that with procedure and timing evidence.
Step 3: Use a Consistent Allocation Method for Bundled Charges
Bundled charges are common when a forwarder invoices “freight and handling” as one line. Split it using a defensible method, such as:
- Time-based split for warehousing and storage
- Weight or volume split for handling and loading
- Distance split for transport when legs differ
Example: The forwarder invoices “Terminal handling and storage in B” as one amount. Your system shows storage days for each SKU. Allocate storage by days and allocate terminal handling by number of moves. Then attach the allocation worksheet to the customs file.
Mind Map: Cost Allocation Across Shipment Legs
Step 4: Map Allocations to Declaration Fields and Evidence
Once tagged and allocated, translate into what the declaration requires: which costs are included in the customs value, which are excluded, and which are reported as separate charges. The evidence should be traceable:
- Freight invoices by leg
- Insurance certificates by leg
- Warehouse statements showing dates and quantities
- Terminal logs showing handling events
- Contract clauses showing who bears which costs
Example: Warehousing in the hub is paid by the seller. If your customs position is that warehousing is part of post import handling for re export, you must show the goods were under the relevant customs procedure during the import leg and that the storage period relates to the re export preparation rather than the import delivery.
Step 5: Reconcile Accounting Totals to Customs Totals
A final sanity check prevents the “sum of parts” problem. Your accounting ledger may record charges gross, while customs value calculations may use net amounts after certain adjustments. Reconcile by showing:
- Total charges per invoice
- Allocated portion per leg
- Amount used in customs value calculation
- Amount excluded and why
Example: If total warehousing is 10,000, allocated storage for the import leg is 2,200 and post import storage is 7,800, then customs value should reflect only the portion that is value relevant under the applicable rules, with the remainder supported as post import.
Common Failure Points and How to Avoid Them
- Using one blended freight rate for multiple legs without splitting: fix by leg-based invoices or allocation worksheets.
- Treating all hub costs as post import: fix by timing evidence and procedure mapping.
- Invoice says “buyer pays,” but declaration assumes seller borne costs: fix by aligning contract, payment records, and the customs file.
- Storage and handling not tied to SKU quantities: fix by warehouse system extracts and move logs.
When allocation is done this way, the customs file becomes a coherent story: each cost line has a leg, a timing purpose, and a document trail. That coherence is what keeps the numbers from turning into a guessing game.
10.4 Aligning Purchase Orders Invoices and Shipping Instructions
Alignment here means the documents agree on the same facts: who sold, who shipped, what was shipped, how it was packaged, where it went, and under which commercial terms. When those facts drift, customs declarations become guesswork, and guesswork is expensive.
Foundational Mapping of Document Roles
Start with a simple division of labor.
- Purchase Order (PO) states what the buyer expects: item description, quantities, unit price, delivery terms, and sometimes the intended routing.
- Commercial Invoice states what the seller charges: the goods, the transaction value basis, currency, totals, and the buyer-seller relationship.
- Shipping Instructions state how the goods move: carrier booking details, vessel or flight, container or AWB numbers, packaging counts, and the ship-to and notify parties.
A practical rule: PO and invoice should agree on the commercial identity of the goods; invoice and shipping instructions should agree on the physical shipment identity.
The Core Data Set That Must Match
Use a single “core data set” checklist for every shipment leg.
- Goods identity: product name, model or variant, grade/spec, and any regulatory descriptors.
- Quantities and units: number of cartons, pieces, weight, and measurement units.
- Packaging: carton count, net and gross weight per package, and package marks.
- Parties: buyer, seller, shipper, consignee, and notify party names and addresses.
- Routing fields: ship-from, ship-to, intermediate location names, and the leg sequence.
- Trade terms: Incoterms code and named place, plus who bears freight and insurance.
- Reference numbers: PO number, invoice number, contract number, and shipment reference numbers.
If any item in the core data set differs, treat it as a controlled exception, not a clerical mismatch.
Stepwise Workflow from PO Draft to Shipment Release
- Draft PO with customs-friendly descriptions: keep descriptions consistent with the classification evidence you already have. For example, if the PO says “industrial motor,” but the invoice and packing list specify “three-phase induction motor, 0.75kW, IEC frame,” the customs declaration will be forced to choose one version.
- Create invoice lines from the PO lines: carry over the same item identifiers and quantities. If you must adjust quantities, document the reason in the invoice notes or an internal reconciliation record.
- Generate shipping instructions from the invoice and packing plan: ensure the shipment identity matches the invoice line items and packaging counts.
- Lock reference numbers before booking: once the carrier booking is created, the AWB or B/L number becomes a downstream anchor. Changing invoice numbers after booking is a common source of reconciliation failures.
- Run a three-way reconciliation: PO vs invoice vs shipping instructions for the core data set. A quick example:
- PO: 200 cartons of “Model X filter element.”
- Invoice: 200 cartons, same model, same unit price.
- Shipping instructions: 200 cartons, but carton marks show “Model Y.” Even if quantities match, the marks mismatch can cause warehouse mis-receipt and downstream declaration errors.
Example: Two-Leg Re-Export Flow with Clean References
Assume a hub in a neutral country where goods are stored under a controlled procedure before re export.
- PO between Buyer A and Seller B: “Model X filter element, 200 cartons.” Incoterms: FCA Seller’s warehouse, named place.
- Invoice from Seller B to Buyer A: same item and quantity; invoice references the PO number.
- Shipping instructions for leg 1: shipper Seller B, consignee Hub Warehouse, notify Buyer A; include PO number and invoice number; list 200 cartons with the same carton marks.
- Shipping instructions for leg 2: shipper Hub Warehouse, consignee Buyer C, notify Buyer A; reuse the same carton marks and quantities, but update the ship-to and carrier booking references.
The key is that leg 2 does not “invent” a new product identity. It should carry forward the same goods identity and packaging identity, while changing only the parties and routing fields appropriate to the new leg.
Mind Map: Alignment Controls for PO, Invoice, Shipping Instructions
Advanced Details That Prevent Subtle Breaks
- Incoterms and named place: shipping instructions often omit the named place even when the PO and invoice include it. If the named place affects who pays freight, it also affects valuation and cost allocation narratives.
- Party roles: “shipper” on a carrier document is not always the same as “seller” on the invoice. Align by role, not by name alone.
- Packaging marks: carton marks are the physical bridge between documents and warehouse handling. If marks change, update them consistently across PO, invoice, packing list, and shipping instructions.
Practical Mini-Checklist Before You Hit Submit
- PO line items match invoice line items in description and quantity.
- Invoice references the PO number and contract number.
- Shipping instructions use the same packaging counts and carton marks as the packing plan.
- Routing fields match the intended leg sequence and the correct parties for each leg.
- Incoterms code and named place are consistent across PO and invoice, and shipping instructions do not contradict who arranges carriage.
When these checks are routine, re export routing becomes a logistics exercise rather than a documentation scavenger hunt.
10.5 Practical Contract to Declaration Mapping for Re-Export Flows
Re export routing works only when the contract story and the customs declaration story match. The contract tells you who buys, who sells, who pays, and what happens to the goods. The declaration tells customs what the goods are, where they came from, where they go, and under which procedure. This section gives a systematic way to map one to the other without relying on last-minute heroics.
Step 1: Lock the commercial “cast”
Start with a one-page shipment worksheet that lists: exporter in the origin country, seller to the hub, buyer at the destination, and the party that issues the re export invoice. If your contract uses a commissionaire or agent structure, write down the exact role of each party in plain language. Example: Company A sells to Company B (hub operator) on arrival; Company B re sells to Company C (destination importer). If instead Company B acts as an agent, the declaration must reflect that the commercial invoice chain is not a true sale.
Practical mapping rule: every invoice issued in the chain must have a corresponding contract clause explaining why that invoice exists.
Step 2: Align Incoterms with the Declaration Facts
Incoterms define who bears risk and cost, but customs cares about the factual flow of goods and the declared transaction value. Choose Incoterms that match your operational reality: who arranges carriage to the hub, who arranges carriage from the hub, and who pays those charges.
Example: If the contract says DAP destination, but your shipping documents show the hub arranged carriage only to the destination and the origin seller arranged carriage to the hub, you need to reflect that split in the cost allocation used for valuation and in the narrative used for the customs declaration.
Step 3: Translate Contract Clauses into Declaration Data Elements
Use a mapping checklist that converts contract language into declaration fields.
- Goods description: contract product name, model, and technical specs → declaration description and tariff classification support.
- Country of origin claims: contract statements about origin and any processing → declaration origin determination evidence.
- Shipment legs: contract routing clause and shipping instructions → arrival reference, export reference, and re export destination.
- Procedure intent: contract clause stating storage and re export under controlled handling → declaration procedure code and required status.
- Value and payment terms: contract price, currency, payment timing, and any rebates → customs valuation inputs.
- Related party status: contract definitions of affiliates and transfer pricing approach → valuation documentation triggers.
Practical mapping rule: if a contract clause changes the price basis (for example, net of discounts or subject to adjustments), the declaration file must show how that adjustment is handled in valuation.
Step 4: Build a “Document Chain” That Mirrors the Contract Chain
Create a document chain diagram for the specific shipment. Each document should point back to the contract clause that authorizes it.
Mind Map: Contract to Declaration Mapping for Re-Export Flows
Step 5: Run Consistency Checks Before Filing
Consistency checks are where many re export flows fail. Do not wait for the customs system to complain.
- Invoice-to-declaration consistency: the invoice number, currency, and declared value basis must match what the contract authorizes.
- Routing consistency: the arrival reference used in the hub records must match the shipment leg documents.
- Procedure consistency: the contract’s storage and re export intent must match the procedure code and any required authorization.
- Description consistency: the contract description must not contradict the technical file used for classification.
Step 6: Example Mapping for a Two-Leg Re Export
Assume: goods arrive at the hub under controlled storage. The hub operator re sells to the destination importer.
- Contract clause: “Company B purchases from Company A upon arrival and re sells to Company C; Company B arranges carriage from hub to destination.”
- Declaration mapping:
- Seller/buyer fields reflect Company B as seller to Company C for the re export invoice.
- Arrival reference links to the inbound shipment documents.
- Re export procedure reflects controlled handling at the hub.
- Valuation uses the re export invoice price basis, with any agreed discounts handled per the contract.
If the contract instead states Company B is an agent, the declaration should not treat Company B as the seller for transaction value purposes unless the commercial structure truly supports that.
Step 7: Handle Amendments Without Breaking the Chain
Contracts change: price adjustments, substitutions of models, or revised routing. When that happens, update the mapping worksheet and the evidence pack, then re-check the declaration fields that depend on the changed clause.
A simple discipline prevents chaos: every amendment gets an “impact list” that names which declaration fields must be revalidated (value, description, origin evidence, routing references, or procedure intent).
11. Case Studies of Neutral Routing with Compliant Documentation
11.1 Case Study of Warehousing and Re-Export Under Controlled Procedures
A logistics provider wants to move electronics from Country A to Country C while using a neutral hub in Country B. The goal is not “cheaper by magic,” but consistent compliance: the goods must remain under a controlled customs procedure while they sit in the hub, and the re export shipment must be traceable from arrival to departure.
Scenario and Parties
- Goods: handheld barcode scanners, HS classification under a specific tariff line.
- Flow: Country A (export) → Country B (inbound controlled warehousing) → Country B (re export) → Country C (import).
- Parties: exporter in Country A, importer of record in Country B (or a customs representative), the warehouse operator, and the buyer in Country C.
A key decision is who holds responsibility for the controlled procedure. In practice, the warehouse operator can manage physical handling, but the customs declarant must ensure the procedure is correctly declared and ended.
Step 1: Arrival and Controlled Procedure Setup
On arrival in Country B, the carrier files the arrival data, and the importer of record (or representative) submits an inbound declaration placing the goods under a customs warehousing or similar controlled procedure. The declaration includes:
- Consistent item description and quantity
- The intended warehouse location
- The commercial invoice reference
- Any required permits or product compliance documents
Example: A shipment of 10,000 scanners arrives in 200 cartons. The inbound declaration lists 10,000 units and the warehouse address. The warehouse receives the shipment against the same carton count, then records the unit count per carton in the inventory system.
If the warehouse receives fewer cartons than declared, the system flags a discrepancy immediately. The compliance team then decides whether to amend the inbound declaration, request a correction, or document a short landing. This is where controlled procedures earn their keep: you can’t “fix later” without a paper trail.
Step 2: Inventory Control and Traceability
Controlled warehousing is only as good as the inventory discipline. The warehouse uses a simple rule: every physical movement creates a matching record.
- Inbound: goods are assigned a warehouse stock number.
- Storage: stock is segregated by shipment reference and, when needed, by batch.
- Handling: if repacking is allowed, it must be documented with the original carton identifiers.
Example: The buyer in Country C requires a different outer carton size. The warehouse repacks the scanners into new cartons but keeps the original carton IDs in the packing list. The re export declaration later references the warehouse stock number and the repacked carton quantities.
A common pitfall is treating repacking as “just logistics.” If the customs procedure restricts operations, the warehouse must confirm what is permitted. Even when repacking is allowed, the evidence must show that the goods are the same goods.
Step 3: Re-Export Declaration and Ending the Procedure
When the goods are ready to ship to Country C, the declarant files a re export declaration that ends the controlled procedure. The re export declaration must align with:
- The warehouse stock reference
- Quantities and item descriptions
- The destination shipment documents
- Any applicable export formalities
Example: The re export shipment is 8,500 scanners to Country C. The warehouse inventory shows 8,500 units allocated to that outbound order, leaving 1,500 units in storage for a later shipment. The re export declaration reflects only the 8,500 units, and the warehouse system records the reduction.
If the outbound shipment is delayed, the goods remain under control. The warehouse does not “release” them into the market or treat them as ordinary domestic stock.
Step 4: Documentation Reconciliation
A practical reconciliation workflow prevents mismatches that trigger customs questions.
- Compare inbound declaration quantities vs warehouse receipt
- Compare warehouse stock vs re export declaration
- Compare re export declaration vs outbound bill of lading/air waybill
- Reconcile invoice references used for valuation and commercial context
Example: The bill of lading shows 8,500 units, but the packing list shows 8,480 due to a counting correction. The reconciliation process catches this before the re export is filed, so the packing list is corrected and the warehouse stock allocation is updated.
Mind Map: the Case Study Flow
Integrated Mini Checklist for This Case
- Declare the controlled procedure correctly at arrival.
- Record every physical movement in the warehouse system.
- Ensure any repacking is permitted and fully traceable.
- File the re export declaration using warehouse stock references.
- Reconcile quantities across declarations, inventory, and carrier documents before submission.
This case works because the hub behaves like a controlled “holding room” with strict accounting, not a place where paperwork and physical goods can drift apart. When the records match at each handoff, the re export becomes a straightforward conclusion rather than a recurring explanation.
11.2 Case Study of Component Assembly and Origin Evidence Management
Case Setup and Goal
A manufacturer in Country A assembles a product using components sourced from multiple countries. The company wants the assembled goods to qualify for a preferential tariff rate when exported via a neutral hub. The operational goal is simple: the customs declaration for the export leg must be supported by origin evidence that matches what actually happened in the assembly process.
The compliance goal is less glamorous: prevent origin claims from collapsing under audit because the evidence is incomplete, inconsistent, or based on assumptions rather than facts.
Step 1: Define the Origin Claim Before You Touch the Parts
Start with a written origin theory that answers three questions:
- What is the product being exported (exact description and tariff classification)?
- What origin rule is being applied (preferential scheme logic, not general “made in” language)?
- What processing occurs in Country A (assembly steps, not vague “manufacturing”)?
Example: The exported item is declared as “assembled control module, model CM-240.” The origin theory states that the module qualifies because the assembly in Country A meets the scheme’s substantial transformation requirement, and the non-originating components are used in a way that satisfies the rule.
Step 2: Map the Bill of Materials to the Assembly Process
Create a component-to-step map. Each component must be linked to:
- where it enters the process,
- what it becomes after each step,
- and what records prove the transformation.
Example:
- Component P1: circuit board from Country B, used in Step 2 (soldering).
- Component P2: housing from Country C, used in Step 3 (mechanical fitting).
- Component P3: firmware loaded in Step 4 (programming).
If the origin theory depends on “substantial transformation,” you need evidence that the assembly changes the product’s identity or essential characteristics, not just adds packaging.
Step 3: Build the Evidence Pack Around Traceability
A practical evidence pack has four layers.
-
Identity Evidence
- Purchase orders and supplier invoices for each component.
- Certificates of origin from suppliers when available.
- Incoming inspection reports that record part numbers and quantities.
-
Process Evidence
- Work instructions and routings showing each step.
- Batch travelers that record actual dates, operators, and deviations.
- Photos or machine logs where they capture meaningful processing, not just “we were there.”
-
Transformation Evidence
- Test results that demonstrate the assembled module performs as the finished product.
- Engineering change records showing how components are integrated into the final configuration.
-
Link Evidence
- Finished goods production records tying batch numbers to export lots.
- Warehouse transfer records showing what moved to the neutral hub.
Example: A batch traveler for CM-240 batch 7 records that P1 and P2 were consumed, firmware P3 was loaded, and final functional testing passed. The export lot declaration references batch 7, so the origin claim is not floating in the air.
Step 4: Handle Mixed Inputs Without Creating Contradictions
Mixed inputs often mean you have multiple supplier lots, substitutions, or rework. Your evidence must explain any divergence.
Example: If P2 housing was substituted from another supplier mid-month, the evidence pack should include:
- substitution approval,
- updated supplier documents,
- and a statement of whether the substitution affects the origin analysis.
If it does affect the analysis, you must either segregate lots or adjust the origin claim for the affected export quantities.
Step 5: Translate Evidence into Declaration-Ready Statements
Origin evidence should support the exact statements used in the customs file. Keep the logic tight:
- “We assembled X in Country A using components Y and Z.”
- “The assembly steps include A, B, C.”
- “Batch numbers link to the export lot.”
Avoid generic wording like “components were processed.” Customs needs specifics that can be checked.
Mind Map: Component Assembly and Origin Evidence Management
Integrated Mini-Example: One Batch, One Story
On 2026-02-26, CM-240 batch 7 is produced. The batch traveler shows consumption of P1 (Country B) and P2 (Country C), firmware P3 is loaded, and final testing confirms the module meets the finished product specifications. The export declaration for the neutral hub leg references batch 7 and the module’s tariff classification. If an auditor asks why the origin claim is valid, the answer is not “because it was assembled.” It is “because the recorded steps and test results show the module became the finished product, and the evidence links those steps to the exported lot.”
Step 6: Consistency Checks That Catch Problems Early
Before filing, run three checks:
- Part Number Match: incoming records match the BOM used for the batch.
- Quantity Match: component consumption matches the finished goods output.
- Lot Link Match: export lot references the correct batch and traveler.
Example: If the traveler says batch 7 used 500 units of P2 but the export lot is 480 units, you either correct the records or adjust the origin claim quantity. Silence here is how audits get expensive.
11.3 Case Study of Multi Party Sales and Valuation File Construction
A logistics group uses a neutral hub to re-export goods. The commercial chain has three parties: ManufacturerCo sells to TradingCo, TradingCo sells to HubDistributor, and HubDistributor sells to the final buyer. The goal is to keep customs valuation defensible while routing stays compliant.
Foundational Setup and Why It Matters
Customs valuation often hinges on the “transaction value” concept, but multi-party sales complicate which sale is the relevant one and whether related-party influence exists. In this case, TradingCo and HubDistributor are related through common ownership, while ManufacturerCo is independent. The valuation file must therefore show: (1) which sale is used for customs purposes, (2) whether the parties are related, and (3) how the price is supported.
Example: A shipment of industrial components arrives at the hub on 2026-02-14 under a controlled storage procedure. The final re-export declaration references the sale between HubDistributor and the buyer, but the price is influenced by the earlier TradingCo-to-HubDistributor sale. The file must connect the dots without hand-waving.
Mind Map: the Valuation File
Step 1: Map the Sales Chain with Document Precision
Create a one-page “sales chain map” listing each contract, invoice, and payment document. Include dates, quantities, product identifiers, and the commercial terms used.
Example:
- Contract A: ManufacturerCo to TradingCo, dated 2026-01-20, price per unit $10.00.
- Contract B: TradingCo to HubDistributor, dated 2026-01-28, price per unit $10.60.
- Contract C: HubDistributor to Buyer, dated 2026-02-05, price per unit $11.20.
The valuation file should state which contract price is used for customs and why. If the declared transaction value is based on Contract C, the file must explain how Contract C reflects the export sale and how earlier pricing is not used to “inflate” the declared value.
Step 2: Related Party Assessment Without Guesswork
Document the relationship structure and test whether the relationship affected the price. The file should include ownership percentages and a short, factual statement of influence indicators.
Example: HubDistributor and TradingCo share a parent company. The file records that Contract B pricing follows a documented transfer pricing policy and that Contract C pricing is negotiated with the final buyer using market benchmarks captured in internal pricing memos.
If customs authorities require evidence that the price is acceptable, include either a cost-based support or a comparison-based support, depending on what the jurisdiction expects.
Step 3: Build the Valuation Calculation and Adjustments Logic
Even when the declared sale is Contract C, the valuation calculation must address elements that may need addition or deduction.
Example valuation logic for Contract C:
- Start with the invoice price from HubDistributor to Buyer.
- Add assists if the buyer provided tooling or engineering services used in producing the goods.
- Add royalties if license fees relate to the imported goods and are payable as a condition of sale.
- Deduct transport and insurance costs if they are separately stated and meet the required conditions.
To avoid mismatches, the file should include an “adjustments worksheet” that ties each adjustment to a specific document line item.
Step 4: Consistency Controls for Multi-Leg Routing
Multi-party sales often fail during reconciliation, not during theory. Implement a matching rule set:
- Quantity match across all invoices.
- Product identifier match across packing lists and customs declarations.
- Currency match and exchange rate source match.
- Incoterms match between contracts and the customs declaration.
Example: If Contract C uses FCA terms and the customs declaration assumes costs up to the port, the file must show how the transport element was treated. Otherwise, the valuation looks like it includes costs twice.
Step 5: Audit Trail and Discrepancy Handling
Include a discrepancy log that records corrections to invoices, amendments to contracts, and how the final declared data was selected.
Example: The invoice for Contract C was amended after a weight correction. The file records the amendment date, the reason, the corrected unit price, and the final version number used for the customs declaration.
Case Outcome in One Paragraph
By mapping the sales chain, documenting related-party status, selecting the declared transaction value with a clear rationale, and tying every valuation adjustment to a specific document line, the valuation file becomes readable by both operations and customs reviewers. The neutral hub routing stays operationally consistent because the paperwork tells the same story at every leg, including the “boring” parts like exchange rates, amended invoices, and cost element treatment.
11.4 Case Study of Classification Support for Regulated Goods
A regulated goods shipment arrives at a neutral-country transshipment hub. The importer wants to re-export the goods to a third country using controlled procedures. The classification is the first domino: the wrong tariff heading can trigger higher duty, delays at release, and a messy post-clearance audit. This case study shows how classification support is built so the declaration matches the product reality.
Foundational Setup and Why Classification Evidence Matters
The goods are “industrial sterilization units” sold as complete systems with a controller, heating chamber, and safety interlocks. The regulated angle is that the units include components that could be treated as medical equipment or as industrial machinery depending on classification criteria.
Best practice starts with a plain-language product map:
- What the unit does in normal use (sterilize tools, not diagnose patients).
- What it is made of and how it is built (chamber, controller, sensors).
- What it is marketed and documented as (industrial sterilization for maintenance and lab workflows).
- What safety functions exist (interlocks to prevent unsafe operation).
A classification team then checks whether the tariff heading hinges on function, design, or intended use. If the heading uses function, the evidence must describe function. If it uses design, the evidence must describe structure. If it uses intended use, the evidence must show that intended use consistently across documents.
Mind Map: Evidence Chain for Regulated Goods Classification
Step 1: Build a Product Truth Table
The team creates a “truth table” that links product facts to classification criteria. For example:
- Criterion: “Designed for sterilization of medical instruments.”
- Evidence: user manual section titled “Industrial sterilization for reusable tools.”
- Consistency check: invoice description and packing label both use “sterilization unit for tools.”
- Criterion: “Includes diagnostic or therapeutic functions.”
- Evidence: controller functions list shows temperature/time cycles and safety monitoring only.
- Negative evidence: no imaging module, no patient interface, no diagnostic software.
This table prevents the common failure mode where one document says “sterilization,” another says “medical,” and the declaration becomes a compromise that customs may not accept.
Step 2: Translate Engineering Details into Customs-Friendly Features
Engineering drawings can be too detailed for a customs officer who needs fast, defensible criteria. The team produces a short feature summary that points to the right parts:
- Heating chamber dimensions and operating temperature range.
- Controller inputs and outputs (power, sensor readings, cycle control).
- Safety interlocks description (door interlock, over-temperature cutoff).
- Materials and construction (stainless chamber, insulated housing).
A practical trick: include a labeled diagram that highlights the chamber and interlock locations. Then reference those labels in the narrative. When the officer can “see the claim,” the evidence pack works better.
Step 3: Use Test and Inspection Records Correctly
If the unit has test reports, the team checks what the tests actually prove. A report that confirms “sterilization cycle performance” supports function. A report that only confirms “electrical safety” supports safety compliance, not classification by function.
Example evidence mapping:
- Test report: “Cycle validation for sterilization of reusable tools.”
- Used for: function-based classification.
- Inspection certificate: “Electrical safety compliance.”
- Used for: confirming the unit is a controlled industrial machine, not a therapeutic device.
The team also ensures dates and identifiers match across documents. If a test report references a specific model number, the bill of materials and datasheet must match that model.
Step 4: Resolve the “Regulated Goods” Ambiguity Without Guessing
In this case, the risk is that the presence of sterilization could be interpreted as medical. The team avoids guessing by tightening the intended-use evidence:
- User manual: operational instructions for industrial tool sterilization.
- Marketing materials included in the file: product positioning as industrial maintenance equipment.
- Labeling: no patient-related labels, no clinical workflow references.
Then the team drafts the declaration narrative to mirror the evidence chain: “sterilization unit for reusable tools using controlled temperature/time cycles with safety interlocks.” The wording is not creative; it is a direct reflection of the documents.
Step 5: Final Declaration Fields and Internal Sign-Off
Before filing, the team runs a consistency matrix:
- Invoice description vs. datasheet vs. packing list.
- Model number and configuration vs. bill of materials.
- Function description vs. user manual vs. test report.
If any row fails, the shipment is held for correction. This is where classification support becomes operational, not theoretical.
Example: Evidence Pack Structure for One Shipment
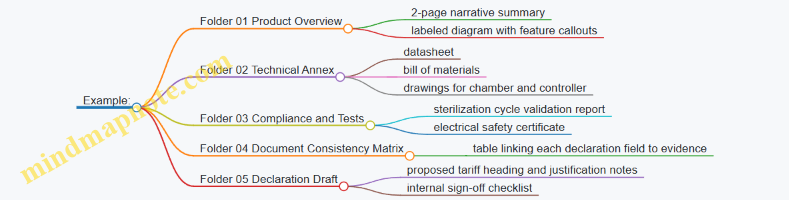
The result is a classification support package that is coherent end to end: product facts lead to criteria, criteria lead to evidence, and evidence leads to a declaration that can survive scrutiny—especially when the goods are moving through a neutral transshipment hub.
11.5 Case Study of Document Reconciliation and Discrepancy Resolution
A logistics team runs a neutral-country transshipment flow for a shipment of industrial components. The goal is simple: the goods arrive under one set of customs data, sit in controlled storage, and leave under a re-export declaration that matches what the warehouse actually handled. The hard part is that documents rarely agree on the first try.
The Scenario and Why Documents Drift
The shipment arrives at the hub on 2026-02-14. The carrier issues a bill of lading showing “Component Assy, Model X” with 1,200 units. The warehouse receives 1,180 units after a damaged-pack count. The commercial invoice lists 1,200 units and a unit price in USD. The packing list shows two cartons per pallet and a total gross weight that differs from the arrival manifest by 2%. The re-export declaration draft uses the invoice quantity and the manifest weight because those fields were easiest to copy.
Discrepancies like these matter because customs systems often treat mismatched quantities, weights, or descriptions as a reason to request evidence. A good reconciliation process turns “why doesn’t this match?” into “here is the evidence trail, and here is the corrected data.”
Mind Map: Reconciliation Logic
Step 1: Build a Single “Truth Table”
Start by creating a reconciliation table with one row per shipment identifier (container number, airway bill number, or warehouse lot). For each row, list the values from each document for the same fields: description, model/part number, quantity, gross weight, and invoice value.
In this case, the “truth table” immediately flags three mismatches:
- Quantity: 1,200 (carrier and invoice) vs 1,180 (warehouse receipt).
- Description: “Component Assy, Model X” vs “Component Assy, Model X Rev A” (packing list).
- Weight: manifest gross weight differs from packing list by 2%.
Step 2: Classify the Mismatch Type
Not every mismatch is a compliance problem; some are operational realities.
-
Quantity mismatch is operational variance. The warehouse receipt includes a damaged-pack count report showing 20 units removed due to broken internal components. That report is signed by the warehouse supervisor and references the same lot number.
-
Description mismatch is interpretation difference. “Rev A” appears on the packing list and warehouse label, but the carrier description is shorter. The team checks the product specification sheet used for classification support and confirms that “Model X Rev A” is the same product family with a revision label.
-
Weight mismatch is measurement variance. The manifest weight is based on carrier scale readings at origin; the packing list weight is based on warehouse re-weighing before storage. The warehouse inventory ledger records the re-weighed gross weight for the lot.
Step 3: Resolve with Evidence, Not Guesswork
For quantity, the team updates the re-export declaration quantity to 1,180 and attaches the warehouse count and damage report as the evidence basis. If the invoice must reflect the reduced quantity for consistency, they issue a corrected invoice or a credit note for the removed units, depending on contract practice.
For description, they align the re-export declaration description to the packing list and warehouse label wording, while keeping the classification-relevant attributes consistent with the product specification. The key is that the description change is supported by the same identity evidence used in the warehouse labeling.
For weight, they use the warehouse inventory ledger weight for the lot released from storage. They do not force the manifest weight into the re-export record because the ledger is the operational record of what left the hub.
Step 4: Document the Rationale in an Exception Log
A short exception log prevents future confusion. It should include:
- Field in dispute
- Source values
- Selected value
- Reason category (operational variance, interpretation difference, measurement variance, data entry error)
- Evidence references (document IDs or internal record numbers)
- Closure date and preparer name
Here, the team records three exceptions and closes them after the re-export declaration is amended and the evidence pack is assembled.
Example: Reconciliation Outcome Snapshot
- Quantity on re-export declaration: 1,180 units
- Description on re-export declaration: Component Assy, Model X Rev A
- Gross weight on re-export declaration: warehouse ledger lot weight
- Evidence pack includes: warehouse receipt, damage report, inventory ledger extract, corrected invoice or credit note, product specification sheet
Mind Map: Evidence Pack Assembly
Step 5: Final Consistency Check Before Submission
Before filing, the team runs a last pass: every field in the re-export declaration must match the selected values in the truth table, and every selected value must have an evidence pointer. If a field has no evidence pointer, it gets either corrected or supported.
In this case, the final check prevents a common failure mode: copying the invoice quantity into the re-export declaration “because it’s the invoice.” The invoice is still important, but the warehouse records explain what actually left the hub, and customs declarations should reflect that reality.
12. Implementation Playbooks for Trade Operations and Compliance Teams
12.1 End-to-End Workflow From Intake to Declaration and Release
A reliable workflow turns “we want to route this shipment through a neutral hub” into a repeatable sequence of decisions, checks, and evidence. The goal is not just to file a declaration, but to ensure the declaration matches the physical flow, the commercial story, and the legal basis.
Step 1: Intake and Data Capture
Start with a single intake record that holds the shipment’s facts in one place: product description, intended use, brand and model, supplier and seller names, buyer, consignee, origin claims (if any), and the planned routing legs. Capture the planned incoterms and who pays which charges per leg, because valuation and declaration fields often mirror those commercial terms.
Example: A buyer orders “industrial pumps, model X200.” The intake record also notes that the pumps will be stored in a bonded warehouse in a neutral country and then re-exported to the buyer’s affiliate. If the intake record lacks the affiliate’s name or the storage procedure plan, later declarations will be forced into guesswork.
Step 2: Product and Tariff Engineering Inputs
Before you touch customs data, confirm the classification approach. Gather the product specification, technical datasheet, and any test or inspection reports that support the classification. If tariff engineering is part of the plan, document why the chosen classification is defensible, not just cheaper.
Example: Two pump variants look similar, but one includes an integrated sensor. The classification evidence pack should show how the sensor changes the tariff heading basis.
Step 3: Routing Design and Customs Procedure Mapping
Translate the logistics plan into customs procedures. For each leg, specify what happens to the goods: arrival, storage, handling, and re-export. Decide which procedure governs the inbound movement and which governs the outbound re-export. This mapping prevents a common failure mode: the paperwork describes one procedure while the warehouse operates another.
Example: If the hub uses a bonded storage procedure, the workflow must ensure the declaration and warehouse inventory status align with that procedure.
Step 4: Party Roles and Transaction Structure Checks
List every party that matters for customs and ensure the roles are consistent across documents: seller, buyer, importer of record, consignee, warehouse operator, and carrier. If there are related parties, confirm how the transaction value will be supported.
Example: If the importer of record is the warehouse operator for the inbound leg, but the buyer is listed as consignee on the outbound leg, the workflow should reconcile those differences rather than letting them drift.
Step 5: Document Assembly and Cross-Field Consistency
Assemble the document set needed for the declaration: commercial invoice, packing list, transport documents, certificates when required, and any origin or valuation support. Then run a consistency check across key fields: quantities, weights, invoice values, currency, item descriptions, and part numbers.
Example: A packing list shows 120 units, but the invoice shows 118. The workflow should stop and resolve the mismatch before data entry.
Step 6: Declaration Data Entry and Validation Rules
Enter declaration data using the mapped procedure and the confirmed classification and valuation approach. Apply validation rules: correct tariff code, correct customs procedure codes, matching invoice totals, and coherent origin fields. If the system flags discrepancies, treat them as evidence gaps rather than mere formatting issues.
Example: The system accepts the tariff code but rejects the valuation method selection because the related-party indicator is inconsistent with the valuation support file.
Step 7: Pre-Release Review and Evidence Indexing
Before release, perform a structured review: (1) physical-to-paper alignment, (2) legal basis alignment, and (3) evidence availability. Create an evidence index that links each declaration field to the document that supports it.
Example: If the declaration claims a specific processing activity at the hub, the evidence index should include warehouse handling records that describe that activity.
Step 8: Submission, Response Handling, and Amendments
Submit the declaration and monitor for responses. If customs requests clarification or issues a discrepancy, log the question, identify the affected fields, and amend only what is supported. Keep an audit trail showing what changed and why.
Example: Customs asks why the declared net weight differs from the packing list. The workflow should trace the difference to a documented repack or moisture adjustment, then update the declaration accordingly.
Step 9: Release, Inventory Status, and Re-Export Continuity
After release, confirm that the warehouse inventory status reflects the declared procedure and that outbound documents reference the correct inbound reference. Continuity matters because re-export declarations often rely on inbound linkage.
Example: If the outbound re-export references the wrong inbound entry number, the hub may still ship the goods, but the customs chain becomes inconsistent.
Step 10: Post-Declaration Closure and Record Retention
Close the workflow by storing the final declaration, amendments, correspondence, and the evidence index. Ensure the record set is complete for post-clearance review.
Example: If a discrepancy was resolved via an amended invoice, retain both the original and amended invoice versions with the reason for change.
Mind Map: End-to-End Workflow
Example: One Shipment Through a Neutral Hub
A shipment of “pump model X200” arrives at the hub under a bonded storage procedure. The intake record confirms the importer of record and the buyer’s affiliate role. The classification evidence pack supports the tariff code for the sensor-integrated variant. The workflow assembles an invoice matching the packing list totals, enters declaration data with the mapped procedure codes, and runs cross-field validations. After submission, a discrepancy request about net weight triggers a documented repack record and an amended declaration. Release follows, inventory status is confirmed, and the outbound re-export declaration references the correct inbound entry. The evidence index and amendment trail are stored for post-clearance review.
12.2 Building a Tariff Engineering and Routing Decision Matrix
A tariff engineering and routing decision matrix is a structured way to answer one question repeatedly: “Which combination of classification, origin position, valuation approach, and routing method produces the lowest defensible duty and the least operational friction?” The matrix is not a spreadsheet for guessing; it is a checklist that forces each assumption to be testable.
Step 1: Define the Decision Scope and the “Must Not Break” Rules
Start with the shipment facts that cannot be negotiated later: product description, material composition, processing steps, packaging, parties involved, and the physical route. Then list the compliance constraints that must remain true for every option you consider. Typical constraints include: declarations must match documents, origin claims must be supported by evidence, and any customs procedure used at a hub must align with the intended physical handling.
Example: A company ships insulated panels. The “must not break” rule is that the hub only performs storage and labeling, not cutting or reassembly. If your plan assumes “minor processing,” but the warehouse actually repacks and trims edges, your routing option must be re-evaluated.
Step 2: Choose the Decision Axes and Assign Weights
Your matrix needs axes that map to duty outcomes and risk. A practical set is:
- Classification confidence (how well the product fits the tariff heading and subheading)
- Origin position strength (rules of origin fit and evidence availability)
- Valuation defensibility (transaction value support and related-party handling)
- Routing feasibility (can the physical movement and documents support the chosen customs procedures)
- Operational cost and delay (warehouse handling, lead times, and data reconciliation effort)
Assign weights based on what typically causes duty disputes in your environment. If your biggest pain is classification amendments, classification confidence gets higher weight than routing feasibility.
Step 3: Build Option Rows and Evidence Columns
Each row is a complete “option,” not a single lever. An option might be: “Direct shipment with declared origin X and classification Y” versus “Inbound to a neutral hub under storage procedure, then re-export under procedure Z with origin position supported by processing records.”
For each option, add evidence columns that specify what you will produce if questioned. Evidence columns prevent the matrix from becoming a wish list.
Example: For origin, include columns for bill of materials, supplier declarations, manufacturing process descriptions, and proof of where substantial transformation occurred. For classification, include product specifications, component breakdown, and any test reports that relate to the heading criteria.
Step 4: Score Options Using a Defensible Rubric
Use a consistent scoring rubric so the matrix produces repeatable results. One simple rubric:
- 0 = not supported by facts or documents
- 1 = partially supported; gaps exist
- 2 = supported with reasonable evidence
- 3 = strongly supported; evidence is complete and aligned
Then compute a weighted score. The highest score is not automatically the chosen option; it is the best starting point for operational planning and final legal review.
Step 5: Add “breakpoints” that force escalation
Some issues should trigger a stop-and-review regardless of score. Examples: a mismatch between declared processing and actual hub activities, a valuation basis that cannot be reconciled to invoices, or an origin claim that depends on a step the company cannot evidence.
This is where the matrix becomes useful under pressure. When operations asks for a quick change, you can point to the breakpoint and explain why the option cannot proceed without updated evidence.
Mind Map: Decision Matrix Inputs and Outputs
Example: Two Options for the Same Shipment
Assume the same insulated panels, same parties, and same hub location. Option A is direct shipment. Option B routes inbound to the hub for storage and labeling, then re-export.
- Classification: both options score 2 because the product specs fit the same heading criteria.
- Origin: Option A scores 1 because origin depends on a supplier component declaration that is missing for this batch; Option B scores 2 because the hub shipment plan includes batch-level traceability documents already held by the warehouse.
- Valuation: both score 2 if transaction value invoices match.
- Routing feasibility: Option A scores 3 (simpler documents). Option B scores 2 because re-export requires tighter reconciliation of container numbers and warehouse inventory status.
- Operational cost: Option A scores 2; Option B scores 1 due to extra handling and data steps.
Weighted totals favor Option B if origin evidence is the dominant risk driver in your organization. If your organization’s disputes historically come from classification, you would increase classification weight and the result might flip.
Practical Output: What the Matrix Produces Each Time
When the matrix is done, it should leave behind three concrete artifacts: (1) a recommended option list with scores, (2) an evidence pack checklist mapped to each axis, and (3) an operational plan that names the data reconciliation points, such as container identifiers, warehouse inventory status, and declaration fields that must match the final commercial documents.
12.3 Training Materials for Brokers Warehouses and Internal Staff
Training Goal and Scope
Training should make each role competent in the same end-to-end outcome: correct tariff treatment and compliant neutral-country routing with clean, audit-ready evidence. Brokers focus on declarations and classification support; warehouses focus on controlled handling and traceability; internal staff focus on data accuracy, document control, and exception handling.
Role-Based Learning Path
Start with shared foundations, then move to role-specific tasks, then finish with integrated simulations.
Shared Foundations Everyone Must Know
- What “neutral routing” means operationally: the shipment must follow a legitimate commercial flow with controlled custody and matching documents.
- What tariff engineering changes: it changes the declared facts and evidence trail, not the underlying truth of the goods.
- What “audit-ready” looks like: the same SKU, quantities, weights, and parties can be traced across legs.
- Where errors hide: mismatched descriptions, inconsistent weights, missing origin evidence, and unclear inventory status.
Brokers Training Modules
- Declaration accuracy: how to map product facts to tariff lines and data elements.
- Classification evidence handling: what to request from engineering and how to document decisions.
- Origin and valuation coordination: how to align origin claims and valuation support with the routing chain.
- Exception workflow: how to amend, document, and prevent repeat errors.
Warehouse Training Modules
- Controlled custody basics: how inventory status is maintained from inbound to outbound.
- Traceability discipline: how to link physical lots to system records and shipping documents.
- Procedure selection support: how warehouse actions affect customs procedure eligibility.
- Discrepancy handling: what to do when counts, seals, or labels do not match.
Internal Staff Training Modules
- Data governance: how master data changes flow into declarations and shipping instructions.
- Document control: how versions are tracked and which documents are authoritative.
- Cross-leg consistency checks: how to verify that invoices, packing lists, and bills of lading agree.
- Training on “stop points”: when to pause operations for compliance review.
Mind Map: End to End Competency Model
Training Mind Map
Integrated Simulation Structure
Use one scenario across roles so everyone sees the same facts from different angles.
Example Scenario: Re-Export After Bonded Storage
- Leg 1: Goods arrive at the neutral hub under a storage arrangement.
- Leg 2: Goods are re exported to the final destination.
- Key facts: same lot identity, consistent weights, and a product description that matches the tariff engineering evidence pack.
Brokers do: prepare the declaration with the correct tariff line, attach classification evidence, and ensure the origin and valuation fields align with the transaction chain.
Warehouse does: record inbound lot details, maintain inventory status, and release only the lot that matches the outbound shipping documents.
Internal staff do: verify that the commercial invoice and packing list descriptions match the declaration data and that document versions are the ones used for customs.
Evidence Packaging Drill
Have trainees assemble a “minimum viable evidence pack” for one shipment. The pack should include: product specification summary, classification rationale notes, origin evidence status, valuation support references, and a reconciliation log linking documents to lots.
Example: Reconciliation Log Entry
- Shipment ID: HUB-1042
- Lot: L-7719
- Inbound weight: 10,000 kg
- Outbound weight: 9,980 kg
- Variance reason: documented shrinkage allowance per internal procedure
- Document links: invoice v3, packing list v2, outbound bill of lading
Practical Checklists by Role
- Brokers checklist: tariff line selected, description matches evidence, valuation fields consistent, origin claim supported, amendments tracked.
- Warehouses checklist: lot traceability complete, inventory status correct, seals and labels verified, discrepancies escalated.
- Internal checklist: master data locked for the shipment, document versions controlled, cross-leg quantities and descriptions reconciled.
Training Schedule Template
Run a two-day structure: Day 1 covers shared foundations and role modules; Day 2 runs the integrated simulation, evidence packaging drill, and a reconciliation debrief. Use a dated scenario set from 2026-02-15 to practice consistent version control and audit trail habits.
Rule of thumb for instructors: if a trainee cannot explain why a field value is correct using the evidence pack, the field is not ready for customs.
12.4 Metrics for Operational Accuracy and Compliance Coverage
Operational accuracy is what keeps declarations consistent with reality; compliance coverage is what keeps the organization from missing the parts that matter. Metrics should therefore measure both correctness and completeness, using the same language across operations, customs brokers, and compliance.
Foundational Metrics That Prevent Obvious Errors
Start with measures that catch mismatches early, before they become audit findings.
- Data Match Rate: Percentage of shipments where key fields match across documents (invoice, packing list, bill of lading/air waybill, and customs declaration). Example: if 200 shipments are declared and 186 have matching HS code, net mass, and invoice value, the match rate is 93%.
- Declaration Timeliness: Share of declarations submitted within the agreed window for the shipment lane. Example: 180 of 200 submitted within SLA equals 90%. Late submissions often correlate with rushed data entry.
- Line Item Consistency: Percentage of multi-line declarations where quantities and units of measure match the commercial invoice line by line. Example: if 40 of 50 lines are consistent, line item consistency is 80%.
These metrics are simple, but they create a baseline. If match rate is low, no amount of later review can fully compensate.
Coverage Metrics That Ensure No Blind Spots
Accuracy without coverage is like checking only the front door. Coverage metrics identify whether the review process touches the right shipments, parties, and goods.
- Risk Coverage Ratio: Portion of shipments flagged by risk rules that receive enhanced review. Example: 60 shipments are flagged; 54 receive enhanced review, so coverage is 90%.
- Party Screening Coverage: Percentage of shipments where importer, exporter, consignee, and intermediate parties are screened according to policy. Example: if 95% of shipments have complete screening records, you still need to investigate the missing 5%.
- Procedure Coverage: Share of shipments using a specific customs procedure (such as warehousing or controlled handling) that have the required procedure-specific evidence. Example: if 30 shipments use a controlled procedure but only 24 have evidence of inventory status, coverage is 80%.
Coverage metrics should be reported alongside accuracy metrics, because a high match rate can still hide missing evidence.
Quality Metrics for Tariff Engineering and Origin Support
Tariff engineering and origin arguments require evidence quality, not just evidence existence.
- Classification Evidence Sufficiency: Percentage of declarations where the classification evidence pack includes required elements (product description, technical specs, and test or inspection records when applicable). Example: 70 of 100 packs include all required elements, so sufficiency is 70%.
- Origin Claim Support Rate: Percentage of origin claims with complete support for the claimed basis (for example, substantial transformation analysis or qualifying process records). Example: 28 of 35 origin claims have complete process logs.
- Change Control Compliance: Percentage of times where any change to HS code, origin basis, or valuation inputs is documented with rationale and approval. Example: 9 of 10 changes have documented approvals, so compliance is 90%.
These metrics force teams to treat evidence as a structured package rather than a folder that happens to contain documents.
Metrics for Re-Export Routing Integrity
Routing metrics should verify that the shipment’s story stays consistent across legs.
- Leg Consistency Score: Percentage of shipments where each leg’s declaration and transport documents align with the routing plan (for example, inbound storage leg versus outbound re export leg). Example: 22 of 25 shipments align, score 88%.
- Inventory Traceability Rate: Share of controlled shipments where inventory status can be traced from receipt to outbound release using system references. Example: 18 of 20 trace successfully.
- Discrepancy Closure Time: Median time to close discrepancies (data mismatch, missing document, or quantity variance) from detection to corrected declaration or documented waiver. Example: median 6 days.
Short closure time reduces the chance that discrepancies turn into repeated errors.
Mind Map: Metrics That Cover Accuracy and Compliance
Example Metric Set for a Monthly Reporting Cycle
Use a consistent sampling and reporting cadence so teams can act on patterns.
- Weekly: Data Match Rate, Line Item Consistency, Discrepancy Closure Time.
- Monthly: Risk Coverage Ratio, Party Screening Coverage, Procedure Coverage.
- Per Shipment Type: Classification Evidence Sufficiency and Origin Claim Support Rate, reported by product family.
Example: In one month, match rate is 95%, but classification evidence sufficiency is 62%. The operational data looks fine, yet the tariff engineering file is incomplete. The corrective action is to tighten evidence pack requirements and pre-check technical documentation completeness before declaration.
Governance Rules That Keep Metrics Honest
Metrics must be auditable and actionable.
- Define the numerator and denominator for each metric in writing, including what counts as “match” and what counts as “complete evidence.”
- Assign ownership: operations owns data match and timeliness; compliance owns evidence sufficiency and change control; warehouse teams own inventory traceability.
- Use sampling consistently when full population checks are too costly. Example: sample 10% of low-risk shipments and 100% of high-risk shipments, then document the method.
When metrics are defined this way, they don’t just report performance; they guide specific fixes without turning every shipment into a debate.
12.5 Practical Checklists for Shipment Readiness and Audit Response
Shipment Readiness Checklist
Use this as a single pass before the truck, vessel, or aircraft leaves. The goal is simple: every customs-relevant fact should be traceable to a document and a business decision.
A. Commercial and Contract Alignment
- Confirm the commercial invoice matches the contract terms used for the declared transaction value (currency, payment terms, and any deductions/additions).
- Verify the buyer-seller chain is consistent across invoice, purchase order, and shipping instructions. If there are multiple parties, ensure the declared seller is the one used for valuation.
- Check that Incoterms and named place of delivery align with the routing plan. Example: if the shipment is declared as delivered at a hub, the shipping instructions should reflect that handoff point.
B. Classification and Tariff Engineering Evidence
- Ensure the declared tariff classification is supported by a classification evidence pack: product description, technical specs, and any test or inspection records used to justify key features.
- Confirm the declared model/variant matches the evidence pack. Example: if the goods differ by power rating or material composition, the declaration should reflect the exact variant.
- Run a “description-to-classification” check: the invoice description should not contradict the technical basis for classification.
C. Origin and Substantial Transformation Logic
- Confirm the origin basis used in the declaration is the same one used in internal origin analysis notes.
- For any substantial transformation argument, verify the evidence shows what changed, where it changed, and why the change is more than minimal processing.
- If origin is not claimed, ensure no preferential claim fields are accidentally populated.
D. Routing, Neutral Hub Handling, and Procedure Fit
- Verify the shipment leg plan matches the customs procedure selected at the hub. Example: if goods are held under a controlled procedure for re-export, the declarations should reflect that status.
- Confirm inventory traceability: lot numbers or container identifiers must carry through inbound receipt, hub handling, and outbound re-export.
- Check that the re-export documentation reflects the outbound destination and the intended customs outcome.
E. Data Consistency and Document Reconciliation
- Match the declared quantities, weights, and item counts across: packing list, invoice, airway bill/bill of lading, and customs declaration.
- Ensure the marks and numbers on packages correspond to the shipment identifiers used in customs systems.
- Confirm any amendments are recorded with timestamps and reasons, and that the latest version is the one used for release.
Audit Response Checklist
Audits are won by retrieval speed and internal consistency, not by last-minute heroics.
A. Evidence Index and Ownership
- Create a one-page evidence index per shipment: each customs field maps to a document and a responsible owner.
- Store documents in a predictable folder structure using shipment identifiers (not vague names like “final”).
B. Field-by-Field Consistency Review
- Reconcile valuation: transaction value basis, related-party status (if any), and any adjustments.
- Reconcile classification: declared code, product description, and the specific evidence supporting the key classification criteria.
- Reconcile origin: origin basis, supporting documents, and any process narrative.
- Reconcile routing: hub entry and exit records, procedure references, and traceability identifiers.
C. Exception Handling Playbook
- For discrepancies, document the discrepancy, the suspected cause, the corrective action, and the impact assessment.
- Example: if the packing list weight differs from the declaration by a small margin, confirm whether the difference is due to tare weight, rounding, or scale variation, and keep the supporting rationale.
D. Response Package Readiness
- Prepare a “first 48 hours” packet: invoice, packing list, transport document, customs declarations, procedure references, and the evidence index.
- Keep a short internal statement of facts: what happened, in what order, and which documents prove each step.
Mind Map: Shipment Readiness and Audit Response
Example: One Shipment Pass Through the Checklists
A shipment of industrial components arrives at a neutral hub for re-export. The team confirms the invoice seller matches the valuation basis, and the Incoterms place aligns with the hub handoff. The classification is checked against a technical spec sheet showing the exact material composition and function, and the declared variant matches the evidence. Origin is not claimed, so preferential fields remain blank. The hub procedure selected for controlled handling is consistent with the re-export declaration, and the lot number on the inbound receipt matches the outbound packing list. Finally, the evidence index is created so that if an auditor asks why the declared code was used, the answer is a direct pointer to the specific technical criterion and supporting record.
Practical Micro-Checklist for the Last Hour
- Confirm the latest customs declaration version is the one referenced in the evidence index.
- Verify that every item line has a matching invoice line and packing list line.
- Ensure the outbound transport document identifiers match the outbound declaration identifiers.
- Print or export the first 48 hours packet and keep it ready for immediate submission.