USCG Merchant Mariner Credential Deck Officer Exam Prep
1. Exam Readiness and Credential Scope
1.1 Understanding Deck Officer Credential Types and Endorsements
Deck officer credentials are basically two things working together: a baseline credential that proves you meet core requirements, and endorsements that authorize specific operations. Think of it like a driver’s license plus add-ons—your license gets you on the road, but the add-ons determine what you’re allowed to drive.
Core Credential Types
Most exam-prep confusion comes from mixing up what the credential itself covers versus what an endorsement adds. A credential typically specifies:
- Vessel class or service you’re qualified to work in (for example, merchant vessels versus certain specialized services).
- Capacity and role you can hold on board (such as deck officer roles tied to watchstanding responsibilities).
- Limits that restrict where and how you can serve.
A practical way to study this is to read the credential language as if it were a set of job instructions. If the wording says you’re authorized to serve as an officer on a certain type of vessel, then your exam questions will assume you can perform the navigation and safety duties that match that role.
Endorsements and What They Authorize
Endorsements are narrower permissions attached to the core credential. They often cover:
- Route or area authorization, such as specific waters or operating regions.
- Vessel characteristics that affect navigation and safety procedures.
- Operational privileges tied to watchstanding, pilotage, or specific equipment.
When you see an endorsement listed on a credential, treat it as a “permission statement.” If a question asks what you may do in a particular scenario, the correct answer usually depends on whether the scenario falls inside the permission statement.
How Credential Language Shows Up in Exam Questions
Exam questions rarely ask you to memorize long credential text. Instead, they test whether you can interpret the meaning. For example:
- If a scenario involves operating in a defined area, the correct choice will align with the endorsement that covers that area.
- If a scenario involves a specific vessel type or service, the correct choice will align with the credential’s vessel/service scope.
- If a scenario involves watchstanding authority, the correct choice will align with the capacity authorized by the credential.
A common trap is choosing an answer that sounds safe but doesn’t match the credential scope. Safety is required, but the question is about what you are authorized to do.
Mind Map: Credential Components and Decision Logic
Example: Matching a Scenario to the Right Authorization
Scenario: You’re assigned to stand a navigation watch on a vessel operating in a region that is explicitly listed on one endorsement but not on another. The question asks what you should do regarding your watchstanding assignment.
Step-by-step reasoning:
- Identify the scenario’s key feature: the operating region.
- Determine which credential component controls region authorization: the endorsement that covers the area.
- Choose the action that respects authorization boundaries. Even if you know the navigation rules, you can’t assume you’re authorized to perform the role outside the endorsement.
The exam answer will align with the endorsement scope, not just with general seamanship knowledge.
Example: Capacity Versus Vessel Type
Scenario: A question describes a vessel type and asks whether you can serve in a particular deck officer capacity. Two candidates might both be “deck officer” credentials, but only one authorizes the specific capacity.
Step-by-step reasoning:
- Separate the two variables: vessel type and capacity.
- Match vessel type to the credential or endorsement that authorizes that vessel/service.
- Match capacity to the credential language that authorizes the officer role.
- If either variable is outside scope, the correct answer will reflect that mismatch.
Building Your Own Permission Statements
To make this stick, convert credential language into short permission statements you can test quickly. For instance:
- “I’m authorized to serve in this deck officer capacity on vessels in this service.”
- “I’m authorized to operate in this area under this endorsement.”
Then practice with mini-scenarios: change one detail at a time (area, vessel type, or capacity) and see which permission statement breaks. That method mirrors how exam questions are written: one key detail determines the correct choice.
Quick Checklist for Answer Selection
- What is the scenario asking you to do: watchstand, navigate, or operate?
- Which credential component controls that action: core scope or endorsement permission?
- Does the scenario fit inside the stated scope, or does it fall outside?
- If two answers are both “safe,” choose the one that is authorized.
This is the foundation for the rest of the study guide: navigation and safety procedures matter, but credential scope determines what you’re allowed to apply in the first place.
1.2 Mapping Exam Topics to Study Priorities and Time Allocation
A good study plan starts with a simple question: “Which topics cost the most points when I miss them?” The trick is to treat the exam like a system, not a pile of chapters. You’ll map topics to priorities, then convert priorities into time blocks you can actually follow during watchstanding and life.
Step 1: Build a Topic Inventory
List every topic you expect to see, then attach three labels to each one:
- Core skill: Does it require a repeatable method (e.g., plotting, calculating, applying rules)?
- Decision skill: Does it require choosing the correct action under constraints (e.g., safe speed, collision avoidance)?
- Memory skill: Does it rely on specific facts or thresholds (e.g., definitions, equipment requirements)?
Example: “Radar range and bearing accuracy” is mostly core skill (you apply geometry and error awareness) with a decision skill layer (how that affects interpretation).
Step 2: Assign Priority Scores
Use a 1–5 scale for each topic:
- Exam weight (how often it appears)
- Error cost (how badly a mistake hurts your answer)
- Your current weakness (based on a quick diagnostic set)
Compute a simple priority score: Priority = (weight + error cost + weakness). Keep it rough; the goal is ordering, not precision.
Example: Suppose “Rules of the Road crossing situations” has weight 5, error cost 5, weakness 3. Priority = 13. “Celestial sight types” might be weight 3, error cost 3, weakness 2. Priority = 8. You study the first topic first because it’s both common and unforgiving.
Step 3: Convert Priority into Time Blocks
Turn scores into time using a fixed weekly structure. A practical approach is to reserve:
- 60% time for the top third of priorities
- 25% time for the middle third
- 15% time for the bottom third
Then split each block into Learn → Practice → Verify:
- Learn: 20–30% of the block (methods, not just facts)
- Practice: 50–60% (timed questions or worked problems)
- Verify: 10–20% (review mistakes and write a one-line rule)
Example schedule for a 6-day study week (adjust as needed):
- Day 1: Top priorities (navigation methods)
- Day 2: Top priorities (rules and safety decisions)
- Day 3: Middle priorities (regulations and documentation)
- Day 4: Top priorities (mixed timed set)
- Day 5: Middle priorities (targeted weak areas)
- Day 6: Full verification day (error log + rework)
Step 4: Use a Mistake-Driven Loop
After each practice set, categorize misses into one of four buckets:
- Method gap: You didn’t know the procedure.
- Setup error: You used the right method but wrong inputs.
- Rule misapplication: You chose the wrong principle.
- Careless slip: Arithmetic, units, or reading the question.
Your next session should address the bucket that dominates. If setup errors dominate, slow down and add a “units check” step before calculations.
Step 5: Allocate Time for Integration
Deck officer exams often test whether you can connect topics. Reserve a portion of practice time for mixed scenarios that combine navigation and safety.
Example integration drill:
- Take a passage-planning question.
- Determine the course and position method.
- Then apply safe speed and lookout logic to the same scenario.
- Finally, verify which rule applies based on vessel interaction.
This prevents the common trap of studying navigation like it’s separate from decision-making.
Mind Map: Topic Prioritization and Time Allocation
Example: Turning Scores into a Two-Week Plan
Assume you’ve scored priorities and grouped topics into three tiers. In the first week, spend most time on the top tier with two mixed timed sets. In the second week, keep the same top-tier focus but shift more time into verification and mistake-driven rework. If your error log shows repeated setup errors in navigation, you don’t “study more navigation”; you practice the setup step until it becomes automatic.
A plan like this keeps your time aligned with points, not with what feels comfortable. Comfort is fine—until it’s the reason you miss the question that was designed to be straightforward for someone who followed the method.
1.3 Interpreting Question Formats and Common Answer Traps
Deck officer exam questions often look similar on the surface, but the “game” changes with the format. Your job is to identify what the question is really asking, then choose the answer that matches the exam’s decision logic—not the one that feels most familiar.
Question Formats You Will See
Multiple Choice With Single Best Answer You get one correct option. The wrong options usually fall into three buckets: partially correct, context-mismatched, or technically correct but not responsive to the question.
Multiple Choice With “All That Apply” More than one option is correct. Traps here include selecting items that are true in general but not true under the scenario’s constraints (location, vessel type, visibility, or timing).
Scenario-Based Questions A short narrative sets conditions. The exam expects you to apply rules to the stated facts, not to the facts you wish were included. If the scenario says “in restricted visibility,” you should treat that as a trigger for specific rule behavior.
Step or Sequence Questions These ask for the correct order: what to do first, second, and so on. A common trap is choosing the right actions but in the wrong sequence, especially when safety communications or watchstanding steps are involved.
Calculation and Rounding Questions Even when the math is straightforward, the exam tests process. Watch for unit conversions, sign conventions (east/west, north/south), and rounding rules. If the answer choices are close, the exam likely expects a specific rounding step.
A Practical Method for Reading the Question
- Underline the action verb: “determine,” “identify,” “state,” “choose,” “what should be,” “which is correct.” This tells you whether you’re selecting a rule, a measurement, or a decision.
- Extract the constraints: vessel type, operating area (inland vs. international), visibility, traffic situation, and timing.
- Check what is being compared: relative motion, bearings, distances, or compliance requirements.
- Eliminate by mismatch: any option that ignores a stated constraint is usually wrong.
- Confirm responsiveness: the correct option should answer the exact question, not a nearby one.
Common Answer Traps and How to Defeat Them
Trap 1: The “True But Not Relevant” Option Example: If the question asks what to do “in restricted visibility,” an option describing general lookout duties may be true but not responsive.
Trap 2: The “Almost Right” Option Example: A rule might be correct except for the trigger condition. If the scenario says “overtaking,” but the option assumes “crossing,” it’s wrong even if the maneuver sounds plausible.
Trap 3: The “Wrong Unit” Option Example: A distance given in nautical miles is compared to a choice in statute miles. The exam often includes one option that looks reasonable until you check units.
Trap 4: The “Rounding Drift” Option Example: If the computed value is 12.6 and choices include 12.5 and 12.7, the exam expects consistent rounding. Use the same rounding approach you’d use on paper.
Trap 5: The “Sequence Swap” Option Example: In an emergency, an option that performs communications after taking a physical action may be incorrect if the scenario implies immediate reporting first.
Trap 6: The “Overgeneralized Rule” Option Example: An option that applies a rule universally may be wrong because the scenario includes a specific exception or condition.
Example: Spotting Relevance and Constraint Mismatches
A question states: “In restricted visibility, what action should the officer take to reduce the risk of collision?”
- Option A: “Maintain a proper lookout.”
- Option B: “Proceed at a safe speed and use radar if available.”
- Option C: “Sound the appropriate signals when in sight of one another.”
A is true in general, but it ignores the restricted-visibility trigger. C mentions “in sight,” which contradicts the scenario. B matches both the constraint and the risk-reduction intent.
Mind Map: How to Read and Answer
Example: Single Best Answer vs. All That Apply
If the question says “choose the correct statement,” treat it as single best answer. If it says “select all that apply,” treat it as a filter problem: each selected option must satisfy the scenario constraints.
For “all that apply,” a good habit is to mark options as Must Match or Nice To Have. If an option is only “nice to have” under the scenario, it’s a trap.
Mini Checklist for Your Answer Review
Before you commit, scan for three things: constraint match, format match, and responsiveness match. If any one fails, the option is likely the trap—even if the rest of it sounds correct.
1.4 Building a Practical Study Plan Using Checklists and Drills
A practical study plan for the Deck Officer exam works best when it behaves like a bridge watch: clear priorities, repeatable routines, and quick correction when something goes off track. The goal is not to “study more,” but to study in a way that produces measurable improvement on navigation, safety, and regulations.
Step 1: Define Your Baseline with a Short Diagnostic
Start with a 45–60 minute diagnostic set that mirrors exam style: mixed topics, short scenarios, and regulation questions that require careful wording. Record three numbers: (1) percent correct, (2) percent of questions you skipped or guessed, and (3) the top two topics you missed. If you missed navigation math, don’t treat it as a single problem; treat it as a cluster of skills (bearing, distance, current, time, or error handling).
Example: If you miss “safe speed” questions, you may be confusing “safe speed for the conditions” with a fixed speed rule. Your baseline tells you which concept to drill, not just which answers to memorize.
Step 2: Build a Checklist for Each Topic Block
Use checklists to prevent the classic failure mode: doing practice problems but not noticing the pattern of mistakes. Create one checklist per topic block (Navigation Fundamentals, Radar, Rules of the Road, Safety Management, Regulations). Each checklist should include:
- Inputs you must read correctly (units, reference points, visibility, vessel status)
- The method you must apply (step order)
- The output you must verify (reasonableness checks)
- The common error you must avoid (the “trap”)
Example checklist for a navigation problem:
- Confirm reference point for bearings (true vs magnetic)
- Convert units if needed (nm vs statute, knots vs mph)
- Apply the correct step order (fix method first, then course/current)
- Verify reasonableness (does the result match the direction implied by the scenario?)
- Note the trap: mixing true and magnetic bearings
Step 3: Turn Checklists into Drills
A drill is a short, repeatable practice loop that targets one skill at a time. Use three drill types:
- Accuracy drills: fewer questions, strict checklist use, immediate feedback.
- Speed drills: timed sets after accuracy improves.
- Error-recovery drills: redo the same type of question after reviewing the explanation.
Example: For Rules of the Road, run an accuracy drill with 8–10 crossing situations. After each answer, ask: “Which vessel is the give-way vessel, and what is the action required?” Then run an error-recovery drill on only the situations you got wrong.
Step 4: Schedule with a Rhythm That Matches Memory
A simple weekly rhythm reduces forgetting without burning out:
- Day A: Learn or review one topic block and complete the topic checklist.
- Day B: Accuracy drill for that block.
- Day C: Mixed practice that includes one earlier block plus one new block.
- Day D: Error-recovery drill using your mistake log.
- Day E: Speed drill and a short regulation-focused set.
- Day F: Light review using only checklists and one-page summaries you create.
- Day G: Rest or a short walk-through of your drill routines.
If you prefer dates, you can anchor the first week to a date like 2026-02-15 and keep the same day-to-day pattern after that.
Step 5: Use a Mistake Log That Forces Specific Fixes
Your mistake log should record four fields:
- Topic
- Question type (e.g., “bearing fix,” “safe speed,” “sound signals”)
- Checklist item you missed
- The corrected rule or step order
Example entry:
- Topic: Radar
- Type: Relative motion
- Missed checklist item: “Confirm whether bearings are relative or true”
- Corrected fix: “Use the correct reference frame before estimating closest point of approach.”
Step 6: Add a Mind Map to Keep the Plan Coherent
Mind Map: Study Plan Loop
Step 7: Run a Two-Stage Review Before the Final Practice Set
Stage 1: checklist-only review. You should be able to explain the step order without doing calculations.
Stage 2: timed mixed set. Afterward, update checklists and mistake logs immediately, then redo only the question types that produced the most errors.
Example: If your timed set shows repeated misses in “timekeeping and time systems,” don’t widen the study area. Narrow it: run a short accuracy drill on time conversions and sight-related time steps until the error rate drops.
A good plan feels structured because it is. Checklists tell you what to do; drills tell you how to practice; the mistake log tells you what to fix. When those three are connected, your study time stops being a pile of questions and becomes a controlled routine.
2. Navigation Fundamentals for Deck Officers
2.1 Chart Reading Skills Including Symbols, Scales, and Projections
Chart reading is a practical skill: you translate what’s on paper into decisions about where the ship is, where it can go, and what hazards to respect. The exam usually tests whether you can interpret chart information correctly and consistently, not whether you can memorize every symbol.
Chart Symbols and What They Mean
Start with the idea that chart symbols are a language with rules. A symbol’s shape, color, and placement all matter.
- Land and shoreline: Coastlines show the boundary between land and water. Pay attention to whether the chart depicts a rocky coast, sandy beach, or tidal flats, because each implies different hazards and operational limits.
- Soundings: Depth numbers indicate water depth, but you must also consider the datum (the reference level used). A sounding that looks “deep enough” can become misleading if you ignore the datum and tidal stage.
- Buoys and beacons: These mark navigational aids. The chart typically shows the aid’s type and characteristics. In practice, you match what you see on the water to what the chart says, then confirm your position.
- Cables, pipelines, and obstructions: These are shown with specific symbols and sometimes with notes about clearance or restrictions. Treat them as “do not assume” items; the chart is telling you there is something you must avoid.
A quick best practice: when you see a symbol you don’t recognize, don’t guess. Instead, locate the chart legend or index and verify the symbol meaning before using it in a navigation decision.
Mind Map: Chart Symbols to Decisions
Scales and Distance Reasoning
A chart scale tells you how distances on the chart relate to real distances. Two common exam traps are (1) confusing scale with accuracy, and (2) using a scale without checking whether the chart is appropriate for the task.
- Graphic scale: A bar scale you can measure with a ruler. It’s forgiving for quick distance estimates.
- Representative fraction: A statement like “1:50,000,” meaning 1 unit on the chart equals 50,000 units on the ground.
To use scale correctly, you must also remember that charts are not perfectly uniform. Scale can vary slightly across a projection, and the chart’s purpose affects how detailed it is.
Example: Converting Chart Distance Using Scale
Suppose the graphic scale indicates that 3.0 cm on the chart equals 1.5 nautical miles. If you measure a route segment as 7.2 cm, then:
- 7.2 cm ÷ 3.0 cm = 2.4
- 2.4 × 1.5 NM = 3.6 NM
This is the kind of arithmetic the exam expects: clear proportional reasoning, not guesswork.
Projections and Why They Matter
A chart is a flattened representation of a curved Earth. That flattening requires a projection, and each projection introduces distortions.
- Mercator projection: Common for navigation because it preserves rhumb line direction as straight lines. The tradeoff is that areas grow larger toward the poles.
- Other projections: Some are better for specific regions or purposes, but they may distort distance, angle, or both.
For deck officer work, the key exam idea is this: projection affects how you interpret lines and distances. If you treat a projection’s distorted geometry as if it were perfectly “true,” you can introduce systematic errors.
Mind Map: Projections to Navigation Use
Putting It Together with a Coherent Workflow
A strong chart-reading workflow is consistent across problems.
- Identify the chart’s coverage and datum context: confirm you’re using the right chart and understand depth references.
- Interpret symbols correctly: verify what each symbol represents before using it.
- Convert distances using the chart scale: use proportional reasoning and the correct units.
- Apply projection-aware thinking: use the appropriate method for the type of line you’re working with.
- Cross-check with position information: match chart features to what you can observe.
Example: Avoiding a Depth Misread
If a chart shows a sounding of 12 m but indicates depths are referenced to a datum that is below the current tide level, then the actual available depth may be greater than 12 m. If you ignore the datum and assume the sounding is “current depth,” you could overestimate risk or, worse, underestimate it depending on the situation. The exam typically rewards the habit of checking the chart’s depth reference.
Quick Self-Check
When you answer a chart question, ask:
- What does the symbol represent, and did I verify it?
- What are the units and references for depth?
- Did I use the correct scale method for the measurement?
- Does the projection imply a straight-line interpretation for the method I’m using?
If you can answer those four questions reliably, you’re reading charts the way the exam expects: accurately, consistently, and with fewer “hope-based” assumptions.
2.2 Position Fixing Methods Using Bearings and Ranges
A position fix using bearings and ranges is basically a controlled way to answer one question: “Where must the vessel be so that the observed directions and distances make sense?” The key is to treat each observation as a geometric constraint, then combine constraints until the intersection (or closest approach) gives a location.
Core Geometry You Can Visualize
A bearing tells you the direction from your vessel to a target. On a chart, a bearing corresponds to a ray starting at your vessel’s assumed position and passing through the target. A range tells you the distance to that target, which corresponds to a circle centered at the target (or centered at your vessel, depending on how the problem is posed).
In exam problems, you’ll usually be given either:
- A known target position with observed bearing and range from your vessel, or
- Your vessel’s assumed position with observed bearings to known targets, or
- Multiple bearings to known targets that intersect.
The practical habit: write down what is known (target coordinates, your assumed position, observed bearings/ranges) and what is unknown (your position). Then choose the method that matches the geometry.
Single Bearing with Range
If you know the target’s charted position, a bearing alone gives a line of position (LOP) for your vessel. Adding a range narrows it to a point, because the vessel must lie on the bearing line and also at the correct distance from the target.
Example: A buoy is at a charted position. You observe a bearing of 045°T to the buoy and a range of 3.2 nautical miles. Draw the 045°T line from the buoy toward the direction your vessel must be located (or draw the reciprocal line from your vessel if the problem states it that way). Then mark the point(s) that are 3.2 NM from the buoy along that line. If two points appear, use additional information like whether the target is ahead or abaft, or whether the range is consistent with the vessel’s likely area.
Two Bearings to Known Targets
Two bearings to two known, charted targets usually produce a clean fix: each bearing is an LOP, and the intersection is your position. In real life, bearings have error, so the lines may not intersect perfectly; the fix is then the best estimate near the crossing.
Example: Target A is at a known coordinate. You measure bearing 120°T. Target B is at a known coordinate. You measure bearing 310°T. Plot the LOP from each target along the measured bearing (again, using the correct direction convention). The intersection gives the fix. If the lines cross with a small gap, treat the gap as an uncertainty and choose the midpoint or the point that best fits both observations.
Bearing Intersections with Range Confirmation
When you have two bearings and also a range to one target, you can use the range as a consistency check. This is a common “exam-friendly” pattern: bearings give the approximate location; range tells you whether the approximate location is plausible.
Example: Bearings to A and B intersect near your expected track. You also have a measured range to A. If the distance from your plotted fix to A is 3.2 NM but your measured range was 3.2 NM, you’re consistent. If it’s 4.1 NM, you likely plotted a reciprocal bearing incorrectly or misread the target identity.
Practical Steps for Plotting and Checking
- Confirm reference: Bearings must be in the same reference system (true vs magnetic). If the problem gives true bearings, don’t mix in magnetic assumptions.
- Use the right direction: A bearing is from your vessel to the target. When plotting from the target, you may need the reciprocal bearing depending on the diagram setup.
- Plot LOPs carefully: Use a straightedge and label each LOP with the target name and bearing.
- Handle non-intersection: If LOPs don’t meet, don’t force it. Use the closest approach area as the fix estimate.
- Check with range: If a range is provided, compute or measure the distance from the candidate fix to the target and compare to the observed range.
Mind Map: Position Fixing with Bearings and Ranges
Common Mistakes That Cost Points
- Mixing true and magnetic: The chart won’t forgive you.
- Reciprocal confusion: Plotting the bearing from the wrong end flips the LOP.
- Ignoring ambiguity: A bearing-plus-range setup can yield two points; the problem usually expects you to choose using given context.
- Forcing intersection: If LOPs don’t meet, the correct response is to use the best estimate near the crossing, not to pretend the lines magically agree.
Worked Reasoning Example Without Heavy Math
Suppose you have two targets A and B with charted positions. Your bearings are 100°T to A and 260°T to B. When you plot the LOPs, they cross with a small separation. You then compute the distance from the midpoint of the crossing area to A and compare it to the observed range to A. If the computed distance matches within the expected plotting tolerance, you accept the fix. If it doesn’t, you revisit the bearing direction and target identity first, because those errors shift the LOPs in a way that range checks will immediately expose.
2.3 Dead Reckoning Including Current and Wind Effects
Dead Reckoning With Current and Wind Effects
Dead reckoning (DR) is the bridge’s “best guess” position between fixes. You start with a known position, apply the vessel’s speed and course, and then correct for forces that bend the track away from the intended heading. When current and wind are present, the key idea is simple: your heading controls where the bow points, but the water and air control where you actually go.
Core DR Workflow with Corrections
- Start with a known fix: use the last reliable position from GPS, radar bearings, or a celestial fix.
- Choose the intended course and time interval: for example, 30 minutes between fixes.
- Compute distance through the water: use speed from the log (often “speed through water”).
- Apply current: convert current to a vector that shifts your track over the interval.
- Apply wind: adjust the course made good by accounting for leeway, which is the sideways drift caused by wind on the hull and superstructure.
- Plot the DR position: from the starting point, plot the corrected track and compute the resulting latitude/longitude.
A practical habit: write your assumptions next to the calculation. If you used “speed through water” and a current set/drift, say so. If you used “speed over ground” instead, don’t mix it with current corrections as if it were through water.
Current Effects as Set and Drift
Current is described by set (the direction the current flows toward) and drift (the speed of that current). To apply it in DR, treat current as a vector acting over your time interval.
-
Step A: Convert drift to distance
- Distance due to current = drift (knots) × time (hours)
- Example: drift = 1.5 kn, time = 0.5 hr → current distance = 0.75 nautical miles.
-
Step B: Plot the current vector
- From your starting point, draw a line in the direction of set for 0.75 NM.
-
Step C: Combine with your vessel’s motion
- Your vessel’s motion through the water gives the “base” track; the current vector shifts it.
- Graphically, you can do this by constructing a parallelogram: one side is your distance through the water, the other is the current distance.
Easy example: You depart from a known fix on a course intended to make 10.0 kn through the water for 30 minutes. Your current is set 045°T at 1.5 kn.
- Vessel distance through water: 10.0 kn × 0.5 hr = 5.0 NM.
- Current distance: 1.5 kn × 0.5 hr = 0.75 NM.
- Plot 5.0 NM along your course made good through water, then shift by the 0.75 NM toward 045°T.
If you’re using a chart, remember that “direction” is measured relative to true north (unless your chart and problem explicitly use magnetic). Mixing true and magnetic directions is a classic way to get a DR position that is confidently wrong.
Wind Effects as Leeway and Course Made Good
Wind affects your track through leeway, which is the sideways angle between the heading and the course made good. In many exam problems, you’re given leeway directly, or you’re given wind direction and a leeway estimate.
- Leeway definition: leeway is the angle you drift sideways due to wind.
- Course made good: the direction you actually make over the ground relative to the water’s intended path.
Example: You steer 090°T at 10.0 kn through the water for 30 minutes. Wind causes 6° of leeway to starboard. Current is set 045°T at 1.5 kn.
- Compute distance through water: 10.0 × 0.5 = 5.0 NM.
- Apply leeway to get course made good through the water:
- If leeway is to starboard, your track shifts to the right of your heading.
- Course made good through water = 090°T + 6° = 096°T.
- Plot 5.0 NM along 096°T.
- Add current vector:
- Current distance = 0.75 NM toward 045°T.
- The resulting DR position is the endpoint of the combined vectors.
A quick check: if leeway is to port, you subtract the leeway angle from the heading to get the course made good through the water.
Combined Vector Method Without Confusion
When both current and wind are present, the clean method is:
- Convert wind to leeway and adjust your course made good through the water.
- Compute and plot the vessel’s distance through the water along that adjusted course.
- Compute and plot the current vector using set and drift.
- Combine to get the final DR position.
This order matters because leeway changes the direction of your through-water track, while current shifts the track afterward.
Mind Map: Dead Reckoning with Current and Wind Effects
Worked Mini-Scenario for Exam Style
Assume: last fix at point A. You steer 120°T, speed through water 12 kn, time 20 minutes (0.333 hr). Current is set 060°T at 2 kn. Wind causes 4° leeway to port.
- Vessel distance through water: 12 × 0.333 = 4.0 NM.
- Course made good through water: 120°T − 4° = 116°T.
- Current distance: 2 × 0.333 = 0.667 NM toward 060°T.
- Plot 4.0 NM from A along 116°T, then shift by 0.667 NM toward 060°T to get the DR position.
If your plotted DR endpoint ends up “behind” the expected general direction of travel, pause and re-check the leeway direction and the speed basis. DR problems reward careful bookkeeping more than cleverness.
2.4 Great Circle and Rhumb Line Concepts for Course Planning
Course planning starts with a simple question: what does “course” mean on a curved Earth? The answer splits into two common models—great circle routes and rhumb line courses. Both are valid tools, but they behave differently, and exams love asking which one matches a given situation.
Foundational Geometry of the Earth Model
Treat the Earth as a sphere for basic navigation problems. A great circle is the intersection of the Earth with a plane that passes through the Earth’s center. It produces the shortest path between two points on the sphere. A rhumb line (loxodrome) is a path that crosses all meridians at the same angle, meaning it keeps a constant true course.
A key practical consequence: a great circle generally changes bearing as you move, while a rhumb line keeps bearing constant. If you’re steering by a compass that holds a constant heading, rhumb line behavior is the closer match.
Great Circle Routes for Shortest Distance
Great circle planning is about distance efficiency. The route’s length is minimal because it follows the sphere’s shortest path. However, the course you would steer is not constant; it “fans” around the Earth as the geometry changes.
In exam problems, you’ll often see prompts like “shortest distance” or “minimum track length.” Those usually point to great circle reasoning.
Example: Two ports are at the same latitude but on opposite sides of the globe. A great circle will cut across higher latitudes, reducing distance. A rhumb line would keep the same bearing and travel a longer way around.
Rhumb Line Courses for Constant Heading
Rhumb line planning is about steering simplicity. Because the course angle relative to meridians stays constant, the navigator can maintain a steady true course (ignoring wind/current). The tradeoff is distance: rhumb lines are not generally shortest.
Rhumb lines are especially convenient in regions where you expect to hold a steady course for long periods, or when the problem statement emphasizes “constant course” or “constant bearing.”
Example: If a problem gives a true course and asks for the next position after a time or distance using that constant course, rhumb line logic is the natural fit.
Course Planning Workflow Using Both Models
A systematic approach prevents mixing concepts:
- Identify the goal: shortest distance suggests great circle; constant course suggests rhumb line.
- Check the given data: if the problem provides a constant true course, rhumb line is implied.
- Compute or interpret: great circle work focuses on distance and changing bearings; rhumb line work focuses on course and position along that course.
- Apply corrections: if the problem includes wind/current, treat them as separate vector effects on top of the chosen Earth model.
Mind Map: Choosing the Right Model
Advanced Details That Show Up on Exams
Initial Course Versus Ongoing Course
Great circle routes have an initial course at the start point, but that course does not remain constant. Rhumb lines avoid this issue by design.
Example: If you compute an initial great-circle bearing and then assume it stays constant for the entire leg, you’ll drift off the intended track. A rhumb line calculation would not suffer from that specific mistake.
High-Latitude Behavior
Near the poles, meridians converge, and small changes in geometry can cause noticeable differences between great circle and rhumb line paths. Exams may test whether you understand that “constant course” does not mean “shortest distance,” especially as latitude increases.
Example: Two routes share the same starting point and end point. If one is described as constant course, it will generally not match the great circle track. The difference grows as you move toward higher latitudes.
Worked Comparison Example with Clear Reasoning
Assume you must travel from Point A to Point B.
- If the question asks for minimum distance, you select a great circle route. You then expect the bearing to change as you go.
- If the question asks for maintaining a constant true course, you select a rhumb line. You then accept that the distance will not be minimal.
This is the exam-friendly logic: the model is chosen by the phrase that describes the navigator’s objective, not by which one “sounds more correct.”
Quick Decision Checklist
- “Shortest distance” → Great circle
- “Constant true course” → Rhumb line
- “Bearing changes” expected → Great circle
- “One steady course” expected → Rhumb line
Use the checklist first, then do the math. It’s less glamorous than memorizing formulas, but it prevents the most common error: choosing the wrong Earth model and then doing everything correctly for the wrong question.
2.5 Practical Navigation Exercises Using Sample Problem Sets
These sample problem sets are built to train the same workflow you’ll use under exam pressure: read the problem, choose the right method, compute carefully, then sanity-check the result. Each set starts with a foundational skill and ends with a more integrated task.
Mind Map: Navigation Problem Set Workflow
Set a Position Fixing with Bearings and Ranges
Problem: A vessel at point A takes a bearing of 045°T to a buoy and a second bearing of 120°T to a lighthouse. The buoy is 3.2 nautical miles from A along the line of bearing. Find the approximate position of the buoy relative to A and describe how you’d plot it on a chart.
Method: Use the bearing as the direction line from A. The range tells you how far along that line to plot.
Worked Example:
- Bearing to buoy: 045°T.
- Range to buoy: 3.2 NM.
- Plot a ray from A at 045°T.
- Measure 3.2 NM along that ray to mark the buoy position.
Sanity Check: A bearing of 045°T points northeast. If your plotted point ends up southwest of A, you flipped the ray or misread the bearing.
Exam Tip: If a question asks for “approximate position,” you’re allowed chart-plotting tolerance. If it asks for a specific coordinate, you must compute or read from the chart scale precisely.
Set B Dead Reckoning with Current Effects
Problem: You depart point P on a course of 090°T at 12.0 knots. After 2.0 hours, the estimated position is found to be 1.5 NM to the east of the DR position due to current. Determine the effect on the ground track and state the corrected course you would use for the next leg.
Method: DR gives you a track based on speed through water and heading. Current shifts the position. Here, the shift is purely eastward.
Worked Example:
- Distance through water: 12.0 kn × 2.0 h = 24.0 NM.
- DR position would be 24.0 NM due east of P only if course is 090°T (east). That matches the setup.
- Current pushes you 1.5 NM east of DR.
- Ground track for the next leg should reflect the new displacement tendency: you’re being set east.
How to Answer Correctly: The question asks for the “effect on the ground track” and a “corrected course.” A clean approach is to compute a small correction angle using the displacement ratio.
- Correction angle ≈ arctan(1.5 / 24.0) ≈ arctan(0.0625) ≈ 3.6°.
- Since the set is eastward, the ground track is slightly more toward east than the heading implies.
- Corrected course for the next leg ≈ 090°T − 0°? In this case, heading is already east; the practical correction is to anticipate that your ground track will be about 3.6° more eastward than the DR assumption. On an eastbound leg, that means “keep course 090°T but expect extra east displacement,” or if the exam expects a course angle, use 090°T − 3.6° only if the reference direction is defined differently. If the problem explicitly defines “corrected course,” state it as 090°T with an east set correction of 1.5 NM over 2 hours.
Sanity Check: The correction angle must be small because 1.5 NM is much less than 24.0 NM.
Set C Integrated Navigation with Passage Planning Logic
Problem: Plan a two-leg passage. Leg 1: from point X to point Y, 18 NM on a rhumb line at 075°T. Leg 2: from Y to point Z, 22 NM on a rhumb line at 110°T. Assume you must arrive at Z within a 1 NM cross-track tolerance. Describe the plotting steps and identify the most likely error that could cause you to miss the tolerance.
Method: Rhumb line planning is chart-based: draw the rhumb line course, measure distance, and mark endpoints. Then check the geometry.
Plotting Steps:
- Mark X.
- Draw a line from X at 075°T.
- Measure 18 NM along that line and mark Y.
- From Y, draw a line at 110°T.
- Measure 22 NM and mark Z.
- Add a cross-track check: draw a perpendicular from the expected track to the target area and confirm it stays within 1 NM.
Most Likely Error: Misreading the course reference (true vs magnetic) or using the wrong chart course line. Another common error is measuring distance along the wrong line segment after the rhumb line is drawn.
Sanity Check: If your Z ends up far from the intended target region, the error is usually course reference or measurement direction, not arithmetic.
Mind Map: Common Mistakes and Quick Fixes
Mini Practice Set with One-Sentence Answers
- If a bearing is 270°T, where is the target relative to your position? West.
- If you travel 10 knots for 0.5 hours, how many nautical miles is that? 5 NM.
- What’s the fastest way to catch a plotting error? Check whether the result lies in the correct quadrant for the given bearing.
Use these sets as a repeatable routine: classify the problem, pick the method, compute in small pieces, then verify direction and magnitude before you commit to the final answer.
3. Celestial Navigation and Timekeeping Essentials
3.1 Celestial Navigation Overview Including Sight Types
Celestial navigation is the practice of using observed positions of celestial bodies—typically the Sun, Moon, planets, and stars—to determine a vessel’s position on Earth. The core idea is simple: you measure the direction and timing of a body in the sky, then convert that observation into a line of position (LOP). Where multiple LOPs intersect, you get a fix. Where one LOP is all you have, you still gain a useful constraint.
The Big Picture Workflow
A complete sight workflow has four stages.
- Prepare: Choose the body, confirm its predicted position, and set up your time and instruments.
- Observe: Measure the body’s altitude (angle above the horizon) and record the exact time of the observation.
- Reduce: Convert the observation into a computed altitude and an LOP using time, location estimates, and sight reduction methods.
- Plot and Fix: Plot the LOP on a chart, then combine with other LOPs or a course estimate to obtain a position.
A practical exam mindset is to treat each stage as a checklist. If a question asks about a “sight type,” it’s usually testing which stage changes and which stays the same.
Sight Types You Must Recognize
Sight types are categorized by what you measure and how you use the result.
Meridian and Azimuth
- Meridian sight: The body crosses your local meridian. You measure altitude at the moment of transit. This is powerful because it reduces sensitivity to timing errors in a specific way.
- Azimuth sight: You measure the azimuth (direction) of the body, often using a compass and a method to relate the body’s bearing to true direction. Azimuth sights are common when you need direction constraints, not just latitude.
Altitude Sights
- Altitude sight: You measure the body’s altitude at a known time. This is the most common sight type in exam problems.
- Two-body altitude: You take sights of two different bodies to generate two LOPs for a fix.
Stars and the Sun
- Star sight: Stars are used for precise navigation because their positions are well-defined. You typically need accurate time and a clear horizon.
- Sun sight: The Sun is bright and easy to see, but you must handle the Sun’s apparent size and atmospheric effects carefully.
What “Reduction” Means in Plain Terms
Reduction turns your raw observation into something you can plot. The reduction process accounts for:
- Time: The exact moment matters because Earth rotates.
- Body position: The body’s predicted location in the sky depends on the date and time.
- Atmosphere and optics: Refraction and parallax affect the apparent altitude.
- Your assumed position: Many reductions start with an estimate, then correct toward the true position.
If you’re unsure which correction applies, look for the clue in the question: Sun sights often trigger discussions of apparent semidiameter and refraction; Moon sights often trigger parallax and more complex correction handling.
Mind Map: Celestial Sight Logic
Celestial Navigation Sight Types Mind Map
Worked Example: Identifying the Sight Type
Suppose a question states: “At 1200 UTC you measure the Sun’s altitude with a sextant and record the time to the nearest second.” That is an altitude sight. The reduction will focus on converting the observed altitude into an LOP.
Now suppose it states: “You observe the moment the star crosses your meridian and record the transit time.” That is a meridian sight. The reduction approach emphasizes the transit condition rather than a general altitude at an arbitrary time.
Finally, if it says: “You measure the Sun’s azimuth relative to true north using a compass method and record the direction at a specific time,” that is an azimuth sight. The plotted result will reflect directional information, not just altitude.
Common Exam Traps and How to Avoid Them
- Mixing sight type with reduction method: A sight type describes what you measured; reduction methods describe how you compute the LOP.
- Assuming all sights are altitude sights: Meridian and azimuth sights are distinct because the observation geometry differs.
- Ignoring time precision: If the question highlights seconds, it’s usually pointing to how sensitive the reduction is to timing.
A good rule for exam questions: identify the measurement first (altitude, azimuth, or meridian transit), then predict what the reduction must produce (an LOP based on altitude, a constraint based on transit, or a direction-based line).
3.2 Time Systems Including UTC Local Time and Time Zones
Timekeeping is the quiet backbone of navigation. If you can’t trust the clock, you can’t trust the fix. Deck officers mainly work with three ideas: a universal reference (UTC), local time at a place, and time zones that explain the difference between the two.
Foundational Time References
UTC (Coordinated Universal Time) is the standard used for schedules, logs, and most navigation calculations. It does not change with daylight saving time. When an exam asks for a time conversion, it usually expects you to start from UTC and then apply a zone offset.
Local time is the time shown by a clock at a specific location. Local time differs from UTC because Earth rotates and because time zones are defined by offsets from UTC.
A practical way to remember this: UTC is the “same everywhere” clock; local time is the “what the ship’s location would read” clock.
Time Zones and Offsets
A time zone is a region that uses a common offset from UTC. The offset is typically an integer number of hours, but some regions use half-hour offsets. For example, if a location is at UTC−5, then local time is five hours behind UTC.
Use this rule consistently:
- Local time = UTC + (UTC offset)
- UTC = Local time − (UTC offset)
Example: If UTC is 18:30 and the vessel is in UTC−4, then local time is 18:30 + (−4) = 14:30.
Daylight Saving Time Without Guesswork
Daylight saving time (DST) shifts local clocks forward or backward relative to standard time. UTC does not shift. On exams, DST usually appears as a stated condition like “DST in effect.” If DST is in effect, the UTC offset changes accordingly.
Example: Suppose a port normally uses UTC−5 but DST is in effect, making it effectively UTC−4. If local time is 09:00, then UTC = 09:00 − (−4) = 13:00.
If the question does not mention DST, assume standard time. That assumption is often the difference between a correct and incorrect answer.
Converting Between UTC and Local Time
Conversion becomes easier when you treat it as arithmetic on hours and minutes.
Example 1: UTC to Local
- UTC: 03:15
- Time zone: UTC+2
- Local time = 03:15 + 2:00 = 05:15
Example 2: Local to UTC with Date Crossing
- Local time: 23:40 on 14 May
- Time zone: UTC+3
- UTC = 23:40 − 3:00 = 20:40 on 14 May
Example 3: Local to UTC Crossing Backward
- Local time: 01:10 on 14 May
- Time zone: UTC+9
- UTC = 01:10 − 9:00 = 16:10 on 13 May
Notice what happened: subtracting hours can push the time into the previous date. Exams love this because it tests whether you track the date, not just the clock.
Local Mean Time and Longitude Connection
Time zones are legal and practical; local mean time is tied to longitude. Earth rotates 360° in 24 hours, which is 15° per hour.
So, for a rough conversion:
- 1 hour corresponds to 15° of longitude
- 1 minute corresponds to 15′ of longitude
Example: If a point is 30° east of the reference meridian for a time zone, then local mean time is about 30° / 15° per hour = 2 hours ahead of that reference.
In practice, navigation problems often use time zones for standard calculations and may use longitude-based reasoning to check whether an answer “feels” right.
Mind Map: Time Systems
Worked Mini-Set for Exam Style
Problem: A ship records local time 22:05 on 10 April. The vessel is operating in UTC−6. Find UTC.
Solution: UTC = Local − (UTC offset) = 22:05 − (−6) = 28:05. Since 28:05 means 24:00 + 4:05, subtract 24 hours to get 04:05 on 11 April.
Answer: 04:05 on 11 April.
This is the same arithmetic idea as earlier; the only new skill is converting “over 24 hours” into the correct clock time and date.
Common Mistakes to Avoid
- Mixing signs: UTC−4 means local time is behind UTC, so you add −4 when converting UTC to local.
- Forgetting DST: If DST is stated, adjust the offset; if not stated, assume standard time.
- Ignoring date changes: Midnight crossings are not optional details; they’re the whole point of several exam questions.
When you keep the conversion rules consistent and track the date carefully, time problems stop being mysterious and start being straightforward arithmetic with a compass attached.
3.3 Sight Reduction Workflow Using Standard Steps
Sight reduction turns a raw observation into a line of position. The standard steps keep you from mixing up time, units, and reference frames—because that’s where most wrong answers are born.
Step 1: Confirm Inputs and Convert Units
Start with the basics: date, time of observation, assumed position (latitude and longitude), height of eye, and the body observed. Convert everything to the units the tables expect. If the tables use minutes and degrees, don’t feed them seconds and decimal degrees unless you’re sure.
Example: You record a Sun sight at 14:20:30 UTC on 2026-02-10, with assumed latitude 34°12.0′ N, longitude 76°45.0′ W, and height of eye 18 ft. You convert height of eye to meters only if your method requires it; otherwise keep it in the units your tables use.
Step 2: Compute Local Apparent Time and Hour Angle
Use the time and longitude to get local apparent time, then compute the hour angle from the body’s position. Hour angle is the bridge between time and geometry.
Example: If your longitude is 76°45.0′ W, you’re 76.75° west of Greenwich. Since Earth rotates 15° per hour, your local time is about 5.12 hours behind UTC. The exact computation uses the standard time-to-angle conversion and the equation of time if required by your workflow.
Step 3: Apply Dip and Refraction to Get the Corrected Altitude
The observed altitude is affected by the curvature of the Earth (dip) and the bending of light through the atmosphere (refraction). Corrected altitude is what you actually use in the sight reduction.
Example: Observed altitude of the Sun is 32°14.0′. If dip is 1.2′ and refraction is 2.0′ (values depend on your method and conditions), then corrected altitude = 32°14.0′ + 1.2′ + 2.0′ = 32°17.2′.
Step 4: Determine the Body’s Declination and Greenwich Hour Angle
From the almanac, extract the declination and the Greenwich hour angle for the time of observation. If your time isn’t exactly on the almanac interval, interpolate using the method your tables specify.
Example: If the almanac gives declination at 14:00 and 15:00 UTC, and your sight is at 14:20 UTC, you interpolate by the fraction of the hour (20/60). Keep sign conventions consistent: north declination is positive, south is negative.
Step 5: Compute the Intercept and Azimuth
Intercept is the perpendicular distance from your assumed position to the line of position. It comes from the difference between the computed altitude (based on assumed position) and the corrected observed altitude.
Azimuth gives the direction of the line of position relative to true north. Many exam questions test whether you can keep azimuth and intercept roles straight.
Example: Suppose your computed altitude from the assumed position is 32°05.0′, and your corrected observed altitude is 32°17.2′. The difference is 12.2′. Convert altitude difference to nautical miles using the standard conversion (1′ of altitude corresponds to 1 nautical mile of arc). If the body is higher than computed, your intercept is “toward” the body.
Step 6: Plot the Line of Position
Plot the assumed position on the chart, then move along the azimuth by the intercept distance. The resulting line is your line of position.
Example: Assumed position is at 34°12.0′ N, 76°45.0′ W. If azimuth is 060°T and intercept is 12.2 NM toward the body, you plot a point 12.2 NM from the assumed position along 060°T and draw the line of position through it.
Step 7: Apply the Fix Logic with Multiple Sights
A single line of position narrows your location but doesn’t fully fix it. Two or more lines from different times or bodies intersect at the fix. If lines don’t intersect cleanly, you check your work: time, corrections, interpolation, and sign conventions.
Example: You take a Sun sight and a star sight. If the star line crosses the Sun line far from where you expect, don’t immediately assume the chart is wrong. Re-check corrected altitude and whether you used the correct declination for the correct date.
Mind Map: Standard Steps for Sight Reduction
Example: End-to-End Mini Walkthrough
You observe the Sun at 14:20:30 UTC with an assumed position and height of eye. You correct the observed altitude for dip and refraction to get corrected altitude. Using the almanac, you obtain declination and Greenwich hour angle, then compute hour angle and the computed altitude for the assumed position. The difference between corrected observed altitude and computed altitude gives the intercept in nautical miles. You compute azimuth, plot the intercept from the assumed position toward the body, and draw the line of position. If you later take a second sight, you intersect lines to get the fix and use the mismatch to spot likely errors.
3.4 Intercept And Fix Determination With Worked Examples
Intercept and fix problems are where navigation stops being “reading numbers” and starts being “making decisions.” You’re given a planned course and speed, plus one or more observations (bearings, distances, or sights). Your job is to determine where the vessel will be at the time of the observation, then use the offset to move to the correct position.
Core Idea of Intercept
An intercept is the planned course change needed to reduce the error between your estimated position and the observed line of position (LOP). The key quantities are:
- Estimated position (EP): Where you think you are at the observation time.
- Observed LOP: The line you get from the observation (for example, a bearing line or a circle of position).
- Intercept distance: How far and in what direction you must move from EP to reach the LOP.
- Time to intercept: How long it takes to travel the intercept distance at your speed.
A simple mental model: EP is your “starting guess.” The LOP is the “truth line.” Intercept is the correction path from guess to truth.
Intercept Direction and the “Toward the LOP” Rule
Intercept direction depends on whether your EP is on the near side or far side of the LOP.
- If the LOP is a circle of position from a known point, then the distance from the known point tells you whether you are inside or outside the circle.
- If the LOP is a bearing line, then the relative bearing tells you which side you must steer toward.
A practical check: after applying the intercept, the corrected position should lie on the LOP. If it doesn’t, you steered the right magnitude but the wrong direction. (It happens. Even to people who label their work neatly.)
Worked Example 1: Distance LOP with Intercept
Given:
- Known point: lighthouse at 40°00.0′N, 70°00.0′W.
- At observation time, your EP is 12.0 NM from the lighthouse.
- The sight gives a distance LOP of 10.0 NM from the lighthouse.
- Speed through water: 12.0 kn.
Step 1: Compute the intercept distance.
- Your EP is 2.0 NM farther than the LOP (12.0 − 10.0).
- Therefore, you must move toward the lighthouse by 2.0 NM along the line of position direction.
Step 2: Convert intercept distance to time.
- Time = distance / speed = 2.0 NM / 12.0 kn = 0.167 hr.
- 0.167 hr × 60 = 10 minutes.
Step 3: Apply the intercept.
- Steer so that, after 10 minutes, your position is 10.0 NM from the lighthouse.
- The resulting point is your fix (assuming no other corrections are required).
Worked Example 2: Bearing LOP with Intercept
Given:
- EP at observation time: 15.0 NM from the reference point.
- Observed bearing from the reference point: 045°T.
- Your EP bearing to the reference point: 040°T.
- Speed: 10 kn.
Step 1: Determine the angular error.
- Bearing error = 045°T − 040°T = 5°.
Step 2: Convert angular error to lateral intercept. For small angles, lateral intercept in NM is approximately:
- Intercept ≈ distance × tan(angle)
- Intercept ≈ 15.0 × tan(5°)
- tan(5°) ≈ 0.0875
- Intercept ≈ 15.0 × 0.0875 = 1.31 NM.
Step 3: Determine intercept time.
- Time = 1.31 NM / 10 kn = 0.131 hr.
- 0.131 hr × 60 = 7.9 minutes.
Step 4: Steer toward the LOP.
- Since the observed bearing is larger, the fix lies on the side that increases the bearing from EP.
- After about 8 minutes of steering correction, plot the corrected position on the bearing line to obtain the fix.
Mind Map: Intercept and Fix Determination
Practical Fix Workflow You Can Repeat
- Plot or compute EP at the observation time.
- Construct the observed LOP from the observation data.
- Measure the error between EP and the LOP using either range difference (distance LOP) or angular difference (bearing LOP).
- Convert the error to an intercept distance and then to time using speed.
- Apply the correction in the correct direction and plot the fix.
If you keep the workflow consistent, the math becomes less of a guessing game and more of a controlled correction process. That’s the whole point of intercept: you’re not just finding a position—you’re steering the solution into place.
4. Radar and Electronic Navigation Systems
4.1 Radar Basics Including Display Interpretation and Controls
Radar is a sensor that turns radio echoes into a picture. Your job as a deck officer is to make that picture trustworthy: know what the display is showing, what it is hiding, and how your control settings change the story.
Radar System Components and Signal Path
A typical shipboard radar system includes an antenna, a transmitter, a receiver, and a display. The antenna rotates and emits short radio pulses. When those pulses hit targets, some energy reflects back. The receiver measures the returned energy, and the display places it at a position based on two ideas: range and bearing.
Range is determined by time-of-flight. If the radar pulse takes twice as long to return, the target is roughly twice as far away. Bearing comes from the antenna’s pointing direction at the moment the echo is received.
Display Basics and How Targets Appear
Most radar displays use a circular sweep. The sweep starts at your own ship and rotates outward. Echo intensity is shown by brightness or color, depending on the model.
Three display features matter immediately:
- Range scale sets the maximum distance shown. If you switch from 6 NM to 12 NM, the same target will occupy less of the screen, so small details become harder to judge.
- Bearing reference tells you whether the top of the display is true north, relative bearing, or something else. In practice, you’ll often use relative bearing for collision-avoidance decisions.
- Echo presentation depends on settings like gain and sea clutter suppression. Two radars with different settings can show different “truth,” even when looking at the same water.
Mind Map: Radar Display Interpretation
Core Controls and Their Practical Effects
Range Scale
Pick a scale that gives you enough detail without forcing you to guess. Example: if you’re approaching a harbor entrance with buoys at about 1–2 NM, using a 6 NM scale spreads them out and makes them easier to confuse with clutter. Using a 2 NM or 3 NM scale usually improves separation.
Gain and Receiver Sensitivity
Gain controls how strongly the receiver treats returned echoes. Too little gain makes weak targets disappear. Too much gain makes noise and clutter look like targets.
Easy check: increase gain until the background “snow” becomes obvious, then reduce it slightly until the background calms while genuine targets remain. You’re aiming for “targets stand out without the whole screen turning into static.”
Sea Clutter Suppression
Sea clutter is the radar’s response to waves and rough water. Sea clutter suppression reduces echoes from the sea surface, but it can also reduce echoes from small or low targets.
Example: on a calm day, sea clutter suppression should be modest because the sea returns are already weak. On a choppy day, you may need more suppression to keep the screen readable, but you should expect that small craft near the surface may become harder to see.
Rain Clutter Suppression
Rain can create broad, patchy returns that hide targets. Weather clutter controls help reduce those returns, but they can also reduce target contrast.
Practical habit: when you adjust rain clutter, re-check that known targets—like a buoy you can visually confirm—still appear clearly on radar.
Tuning and Stability
Some systems include manual tuning or automatic tuning. If tuning is off, echoes can smear or appear at odd intensities. If your radar supports it, ensure tuning is stable before relying on fine judgments like target bearing and relative motion.
Motion Presentation and What It Means
Radar can show targets relative to your own motion or stabilized to ground. Relative motion is common for collision avoidance because it shows how targets move with respect to your ship.
If your display is in relative mode, a target that appears nearly stationary may be close to your own course and speed. If it appears to move steadily across the screen, it likely has a different course or speed.
Example: you keep your heading constant and a vessel’s bearing changes slowly. That suggests the other vessel may be on a similar track, or that your own speed change is small. If bearing changes quickly, the relative geometry is changing more rapidly.
Interpreting Range and Bearing Without Getting Fooled
Range Estimation Errors
Range is accurate in principle, but practical errors come from wrong range scale selection, misreading the sweep position, or confusing echoes from multiple reflections.
Example: if you’re on a 1.5 NM scale and you see a bright echo near the edge, it might be at 1.4–1.5 NM or it might be a clutter patch that happens to line up. Confirm by checking whether the echo persists and moves consistently with other observations.
Bearing Accuracy and Sweep Timing
Bearing is tied to antenna rotation. If you read bearing at the wrong moment, you can be off by a small amount. That matters most when targets are close and you need precise maneuvering.
Best practice: when you need a bearing, read it when the sweep is aligned and repeat the reading after a short interval to confirm consistency.
Quick Control Workflow for a New Situation
- Set the range scale to match the expected distances.
- Verify bearing reference mode.
- Adjust gain to keep clutter manageable while preserving target echoes.
- Apply sea and rain clutter suppression carefully, checking that known targets remain visible.
- Confirm motion mode so you interpret target movement correctly.
Example: Setting Up for a Night Approach
You’re approaching a channel at night with moderate chop. Start with a smaller range scale so buoys and shoreline returns occupy a useful portion of the screen. Increase gain until weak echoes appear, then back off slightly to reduce background noise. Apply sea clutter suppression enough to reduce wave returns, but not so much that small craft vanish. Once the picture is stable, read bearings and note whether targets are moving relative to your own track.
Summary Mind Map
4.2 Target Detection and Tracking Using Relative Motion
Relative motion is the bridge between what the radar screen shows and what you must decide on the bridge. The core idea is simple: the radar display is telling you how the other vessel appears to move relative to your own motion, not how it moves in absolute space.
Foundations of Radar Target Motion
When your ship moves, every target’s apparent motion is a mix of its own movement and your own. If you keep your own course and speed constant, the relative motion becomes easier to interpret. That’s why watchstanders are trained to avoid unnecessary speed changes during evaluation—small changes can make a stable picture look like it’s “jumping around.”
A practical way to think about it: imagine you are standing still and watching the other vessel. In reality you’re moving, but the radar behaves like the “standing still” viewpoint for the relative motion picture.
Relative Motion Components
Relative motion can be treated as two components:
- Relative bearing change: how the target’s direction from your ship changes.
- Relative range change: whether the target is getting closer or farther.
If the target’s relative bearing stays steady, it often means the target is on a collision-relevant geometry where your line of sight is not rotating much. If relative range decreases steadily, the target is closing in.
Detection: From Blips to Usable Tracks
Detection is the moment you decide a return is a real target rather than noise, clutter, or a transient echo. On radar, this is influenced by range scale, gain, sea clutter, and the target’s size and aspect.
A simple best practice: start with a range scale that makes the target occupy a reasonable portion of the screen, then adjust gain so you can see consistent returns without turning every speck into a “maybe.” If you can’t track it for more than a few sweeps, treat it as uncertain and verify with additional observations.
Tracking: Stabilizing the Picture
Tracking is the process of associating successive radar returns to the same physical target. Manual tracking relies on your eyes and plotting tools; automatic tracking relies on the radar’s algorithms.
Either way, the goal is the same: produce a consistent estimate of relative motion parameters such as relative course and speed, and then use those to infer collision risk.
The Relative Motion Triangle
A useful mental model is the “triangle” of motion:
- Your ship’s motion
- The target’s motion
- The resulting relative motion
If you know your own course and speed, and you can estimate the target’s relative motion from radar, you can infer whether the target is likely to cross, overtake, or meet head-on.
Mind Map: Relative Motion Workflow
Worked Example: Crossing Situation
Assume your ship holds course and speed steady. A target appears at a relative bearing of 060° and range of 6.0 NM. Over the next few minutes, the target’s bearing slowly increases toward 090°, while the range decreases to 4.5 NM.
Interpretation:
- Bearing increasing means the target’s line of sight is rotating clockwise.
- Range decreasing means the target is closing.
If the bearing continues to rotate and the range continues to decrease, you should expect a crossing geometry where the target may pass ahead or across your bow depending on the exact crossing angle. The practical step is to estimate whether the target will pass at a safe passing distance and whether the time available is adequate for a Rule-compliant maneuver.
A good bridge habit: don’t wait for the “perfect” plot. Use the early trend to decide whether you need to take action now, then refine the estimate as more data arrives.
Worked Example: Overtaking Clue from Relative Motion
Suppose a target is at 020° relative bearing and 2.0 NM. Over the next several minutes, the relative bearing stays nearly constant near 020°, while the range decreases quickly.
Interpretation:
- Nearly constant bearing suggests the target is not significantly changing its direction relative to you.
- Rapidly decreasing range suggests you are gaining on it.
This pattern is consistent with an overtaking or meeting geometry where your relative speed is high. Even if you cannot immediately classify the situation under the Rules, the relative motion tells you the risk is increasing because the target is getting closer without the line of sight rotating away.
Common Tracking Pitfalls and How to Avoid Them
- Overreacting to clutter: If the return flickers, treat it as uncertain until it persists. A “track” based on a single strong sweep can lead to wrong conclusions.
- Changing your own motion mid-evaluation: Course or speed changes alter the relative motion picture. If you must maneuver, do it based on the best available estimate, then reassess immediately after the change.
- Ignoring bearing trend: Range alone can mislead. A target can be closing now but may soon pass clear if the bearing trend indicates the geometry is changing.
Practical Checklist for Relative Motion Tracking
- Confirm the target is persistent across sweeps.
- Note relative bearing and range, then observe the trend over a short interval.
- Decide whether the bearing is steady, rotating toward, or rotating away.
- Decide whether range is decreasing, increasing, or steady.
- Use the trend to infer crossing, overtaking, or meeting geometry.
- Reassess after any change in your own course or speed.
Relative motion is not magic; it’s disciplined interpretation. When you treat detection as “is this real,” and tracking as “is this consistent,” the relative motion picture becomes a reliable basis for safe, timely decisions.
4.3 Radar Range and Bearing Accuracy Including Common Errors
Radar accuracy is mostly about knowing what the display is doing to your measurements. Range is tied to time-of-flight and system calibration; bearing is tied to antenna rotation and how the display converts that angle into a line you can read. When either chain is off, the error shows up as a consistent bias (always too large or too small) or as scatter (readings that jump around).
Foundations of Range Accuracy
Range on radar is computed from the time it takes a pulse to travel to a target and back. That means range accuracy depends on:
- Correct speed of propagation assumption inside the radar’s processing.
- Proper calibration of the range scale and timing.
- Signal path effects such as antenna height and local clutter that can mask the true return.
A practical way to think about it: if the radar’s timing is off by a small percentage, every measured range is off by about the same percentage. For example, if a system effectively measures 10% too long, a target at a true 2.0 NM will often appear near 2.2 NM.
Foundations of Bearing Accuracy
Bearing accuracy depends on how reliably the antenna’s rotation angle maps to the displayed bearing line. Key contributors include:
- Antenna alignment and heading reference (especially if the radar is slaved to a gyro).
- Antenna rotation speed stability and how the display updates.
- Operator reading error, because bearings are read from a line that has finite thickness.
If the bearing reference is biased by a fixed offset, you’ll see a consistent angular error. If the antenna is wobbling or the display is updating inconsistently, you’ll see scatter.
Common Error Sources and How They Show Up
Range Scale and Calibration Errors
Symptom: Targets appear systematically closer or farther than expected.
Example: You track a buoy that should be about 1.0 NM from your last known position. On the 1/2 NM range scale, it repeatedly lands around 1.1 NM. That pattern suggests a calibration or timing bias rather than random noise.
Best practice: Use a known reference when available. If you can identify a fixed target or charted landmark return, compare radar range readings against expected distances and note whether the error is consistent.
Bearing Reference and Heading Mismatch
Symptom: Bearings are consistently rotated left or right.
Example: A vessel you know is dead ahead by visual bearing appears at 005° instead of 000°. If this repeats across multiple observations, suspect a heading offset or gyro slaving issue.
Best practice: Cross-check bearing against a reliable visual or charted reference when conditions allow. If the offset is stable, you can compensate mentally during practice.
Clutter, Sea Returns, and False Edges
Symptom: The “target” edge looks fuzzy, and the measured point jumps.
Example: In moderate chop, a small craft return may blend into sea clutter. When you try to measure bearing, the cursor hits the brightest patch, which can drift as the sea state changes.
Best practice: Reduce clutter effects by adjusting gain and sea clutter controls appropriately, then re-measure. If the bearing changes dramatically after a small control tweak, you were probably measuring clutter brightness rather than the target’s center.
Range Cell Size and Display Resolution
Symptom: Bearings seem fine, but range readings are “steppy.”
Example: On a longer range scale, the radar’s effective resolution is coarser. A target return may occupy multiple range bins, so your cursor-to-echo measurement lands on the nearest bright bin rather than the true center.
Best practice: When measuring range, aim for the center of the strongest return, not the first faint speck. If the target is weak, increase sensitivity carefully rather than chasing random pixels.
Motion Effects and Relative Motion Interpretation
Symptom: Range and bearing change in a way that doesn’t match your expectations.
Example: If you measure a target’s bearing at two times but ignore that your own ship is turning, the relative motion can make the target’s apparent position shift nonlinearly.
Best practice: For accuracy checks, keep your own course and speed steady during measurement windows. Then compare measured changes against what relative motion should do.
Mind Map: Range and Bearing Accuracy Error Chain
Worked Example: Spotting Bias vs Scatter
Imagine you measure a fixed buoy five times over a short interval while holding course and speed steady. Your bearings read 042°, 041°, 042°, 042°, 041°—tight clustering around 042° suggests bearing scatter is low. Your ranges read 1.00, 1.02, 1.01, 1.03, 1.02 NM—small scatter around a slightly high mean suggests a mild range bias.
Now compare that to a second scenario where bearings read 040°, 047°, 038°, 045°, 041°. That pattern screams clutter blending or unstable echo selection. In that case, the “error” isn’t the radar being wrong in a fixed way; it’s you measuring the wrong part of the picture.
Quick Measurement Checklist
- Confirm the radar is on the correct range scale for the expected distance.
- Set gain and sea clutter so targets are visible without turning clutter into “targets.”
- Measure from the center of the strongest, most stable return.
- If possible, compare against a known reference to detect consistent bias.
- Keep your own ship steady during the measurement window.
When you treat range and bearing as two separate measurement chains—time-based for range, angle-based for bearing—you can diagnose errors faster and avoid the classic trap: blaming the radar for what is really a measurement-choice problem.
4.4 Using Radar for Collision Avoidance and Situational Awareness
Radar helps you answer two questions fast: “Where is the other vessel relative to me?” and “What will it do next?” The trick is to treat radar as a measurement tool, not a guess machine. You start with clean setup, then you build a reliable picture using range, bearing, and motion.
Radar Setup That Makes Collision Avoidance Possible
Before you interpret anything, confirm the display is stable. Set range so the target’s motion is visible without constant zooming. Use the correct gain so weak returns appear without turning the screen into a snow globe. Adjust anti-clutter controls to reduce sea clutter while keeping small targets. If the radar has an echo trail or target tracking, verify it matches what you see manually; automated trails are only as good as the inputs.
A practical habit: pick one known reference point, like a buoy or shoreline feature, and confirm its bearing and relative position stay consistent as you tweak controls. If the reference “walks” around the screen, your setup is drifting, and your collision picture will drift too.
Building Situational Awareness from Relative Motion
Radar returns are relative: the other vessel’s motion is shown against your own movement. That’s useful because collision avoidance is about relative closing and crossing.
Use these steps in order:
- Identify the target by its consistent bearing and range behavior.
- Stabilize the picture by using a consistent range scale and keeping the cursor method or tracking method the same.
- Estimate motion using at least two observations separated by enough time to show change.
- Determine the risk by looking for steady bearing, decreasing range, or a course that suggests crossing with insufficient passing distance.
Easy example: suppose a fishing vessel appears at 2.0 NM on the starboard bow. After 3 minutes, it is still near the same bearing and the range has dropped to 1.6 NM. That pattern suggests a closing situation, even if the target’s speed seems modest.
Using Bearings and Ranges Without Getting Fooled
Bearing is measured from your antenna reference, and it can be affected by antenna rotation rate, display settings, and your own heading accuracy. Range depends on correct speed input and calibration. If your heading input is wrong, the target’s bearing will be wrong; if your speed input is wrong, the target’s relative motion will be misleading.
A simple check: compare radar-derived relative motion with what the bridge team expects from visual lookout. If radar says a target is crossing but the visual impression says it’s holding steady, pause and verify heading and speed inputs.
Collision Avoidance Logic Using CPA and TCPA
Many radar systems compute CPA (Closest Point of Approach) and TCPA (Time to CPA). Treat these as calculations that you must validate.
Use a structured approach:
- Confirm the target is correctly acquired.
- Ensure the system uses the correct reference: your own ship’s course and speed.
- Watch whether CPA/TCPA values change smoothly as you refine the target track.
- If CPA is small and TCPA is short, act early and clearly.
Example: a vessel is tracked with CPA of 0.3 NM and TCPA of 12 minutes. If you change your own course slightly and the CPA increases, that suggests your action is moving you away. If CPA barely changes, your maneuver may not be effective enough, or the track may be unstable.
Interpreting Common Radar Target Behaviors
Targets behave differently depending on aspect and sea state.
- Steady bearing with decreasing range often indicates a risk of collision.
- Changing bearing with decreasing range can still be risky, especially if the motion is crossing and the passing distance is small.
- Sudden range jumps may indicate clutter, multipath reflections, or track swapping.
A practical rule: if the track “snaps” between two echoes, don’t trust the computed CPA/TCPA until you confirm the correct echo is being followed.
Mind Map: Radar Collision Avoidance and Situational Awareness
A Worked Radar Scenario with Clear Decision Steps
Assume you are on a steady course at 12 knots. A target appears at 3.0 NM on the port bow. After 4 minutes, the bearing has shifted toward the bow centerline and the range has reduced to 2.2 NM.
- Risk signal: bearing trending toward your bow plus decreasing range suggests a crossing that may become a head-on or near-crossing.
- Validate motion: confirm the track remains stable and the echo is not a clutter patch.
- Check CPA/TCPA: if the system estimates CPA of 0.4 NM with TCPA of 9 minutes, you have limited time.
- Support maneuver: choose a maneuver that increases passing distance, then re-check CPA/TCPA after the change.
The key is not the exact numbers; it’s the sequence. Setup first, then measurement, then prediction, then reassessment.
Practical Watchstanding Habits That Reduce Errors
- Keep your radar interpretation method consistent across watch periods.
- Use the same time interval for manual bearing/range checks.
- When in doubt, slow down your interpretation, not your lookout.
- After any maneuver, confirm the radar picture matches the intended relative motion outcome.
Radar is at its best when it’s treated like a disciplined process: configure it so it’s readable, measure what you can justify, and act based on relative motion you can explain to the bridge team.
4.5 Practical Radar Scenarios With Step By Step Solutions
These scenarios train the same core skill in different disguises: interpret what the radar is telling you, then choose an action that matches the Rules of the Road. Each solution uses a repeatable workflow—set up, detect, verify, predict, and decide.
Mind Map: Radar Scenario Workflow
Scenario 1: Crossing Target with Steady Bearing
Situation: You are underway in moderate visibility. On radar, a target appears at 2.5 NM on the starboard bow. Its bearing stays nearly constant for several sweeps.
Step by Step Solution
- Confirm setup: Set the range so the target stays on-screen with room to maneuver, typically 3 NM or 6 NM. Adjust gain to show small returns without turning noise into “targets.”
- Detect and record: Note bearing and range at two points in time, for example at sweep intervals. If bearing is steady and range decreases, the target is likely crossing from your right.
- Verify relative motion: Use EBL to lock the bearing and VRM to track range. If the bearing remains stable while range closes, you can treat the encounter as crossing with a likely risk of collision.
- Predict CPA/TCPA: If your radar provides CPA/TCPA, use it; otherwise, estimate using time-based range change. Example: range drops from 2.5 NM to 1.5 NM in 6 minutes. That suggests a closing rate of ~0.17 NM/min. With bearing steady, CPA is near the closest approach at the time when range stops decreasing.
- Decide and act: Under the Rules, a vessel crossing from your right generally has priority. Your action should be clear and early: reduce speed and alter course to starboard or port only if it clearly avoids crossing into their path. After the maneuver, re-check CPA.
Practical check: If your own maneuver makes the target’s bearing start to swing toward you (bearing decreasing toward your bow), you may be turning into the risk. Reassess immediately.
Scenario 2: Overtaking Target with Increasing Bearing
Situation: A faster vessel is behind you. Radar shows a target at 1.2 NM aft of your beam. Its bearing increases (moves toward your port quarter) while range decreases.
Step by Step Solution
- Confirm encounter geometry: Overtaking often shows a target that is initially abaft the beam. Increasing bearing as range decreases suggests the target is moving from your stern toward your side.
- Verify with EBL/VRM: Track bearing and range for 2–3 minutes. If the target remains abaft the beam and you are gaining on it, you are the overtaking vessel; if it is gaining on you, you may be the one being overtaken.
- Predict CPA: Estimate TCPA using range change. Example: range reduces from 1.2 NM to 0.6 NM in 4 minutes, implying ~0.15 NM/min. If bearing continues to move aft-to-side, CPA may occur near the moment it crosses your beam.
- Decide and act: For overtaking, the overtaking vessel must keep clear. A typical solution is to alter course early to create separation and reduce speed if needed. The key is that your action should not rely on “hoping” the target passes.
- Monitor after action: After changing course, the target’s relative bearing should shift in a way that increases CPA. If CPA shrinks, your maneuver is not working.
Practical check: If you turn and the target suddenly appears closer at the same bearing, you may have misread the bearing reference or heading input. Verify heading input and bearing stabilization.
Scenario 3: Head-On Risk with Closing Range and Opposing Bearings
Situation: Two vessels approach. Radar shows a target at 1.8 NM on your heading line. Range decreases steadily and the bearing remains near 000°.
Step by Step Solution
- Setup for accuracy: Use a range scale that gives you at least 2–3 times the expected CPA distance on-screen. Ensure sea clutter is controlled so you don’t confuse small returns with a real target.
- Verify stability: Confirm the target echo is not a transient. Track for several sweeps; head-on risk usually shows consistent bearing and steady closing.
- Compute a simple TCPA estimate: Example: range drops from 1.8 NM to 0.9 NM in 6 minutes. Closing rate ~0.15 NM/min, so TCPA to 0 NM is ~6 minutes. CPA will occur near when the vessels pass, assuming constant courses.
- Apply the Rules: In a head-on situation, both vessels should alter course to starboard. Your decision should be early enough that the maneuver changes the relative bearing and increases CPA.
- Execute and reassess: Make a clear alteration to starboard and then watch whether the target’s bearing moves to your port side (indicating separation). If it doesn’t, adjust.
Practical check: If you wait until the target is very close, radar updates may be too slow to support a safe, confident decision. Early action is not a personality trait; it’s a geometry problem.
Mind Map: Quick Decision Tests During Tracking

Scenario 4: Multiple Targets and Clutter Trap
Situation: In rain, you see several targets near 4 NM. One looks promising, but it might be clutter. Your goal is to identify the one that truly threatens collision.
Step by Step Solution
- Reduce clutter first: Adjust sea/land mode and gain so that true targets stand out from background noise. If everything looks equally bright, you’re not seeing targets—you’re seeing settings.
- Use relative motion cues: Threatening targets tend to show consistent relative motion over multiple sweeps. Clutter often appears to “dance” without coherent bearing/range behavior.
- Confirm with EBL/VRM: Place EBL on each candidate and observe whether range decreases in a way consistent with a real track.
- Prioritize by risk, not by size: A small, stable echo with closing range can be more dangerous than a larger but erratic return.
- Decide with one target at a time: Once you identify the likely threat, apply the same predict-and-act workflow. Keep other targets in view, but don’t let them steal your attention mid-maneuver.
Practical check: If you can’t maintain a stable track, slow down and improve the radar picture before making a course change. A good maneuver is built on a reliable picture, not on wishful interpretation.
5. Rules of the Road and Collision Avoidance
5.1 International and Inland Navigation Rules Overview
Deck officers are expected to apply the correct set of Navigation Rules based on where the vessel is operating. The exam usually tests this indirectly: you’re given a scenario and asked what actions are required, but the real trick is knowing which rule set governs the situation.
Foundational Concepts
Rule Sets You Must Know
There are two main rule sets you’ll see in credential exams:
- International Rules: Used on most international voyages and on waters where they apply.
- Inland Rules: Used on specific inland waters of the United States.
A practical way to remember this is to treat “international” as the default mental model and “inland” as the local modification. When a question mentions inland waters, sounds, or specific inland traffic patterns, assume Inland Rules unless the prompt clearly points elsewhere.
The Structure of the Rules
Both rule sets share a similar logic:
- General duties: Safe navigation, proper lookout, and safe speed.
- Steering and sailing rules: How vessels must act when they meet.
- Lights, shapes, and sound signals: How vessels communicate their status.
- Exceptions and special cases: Situations like restricted visibility.
Even when the wording differs, the exam expects you to recognize the same decision path: identify the situation, confirm visibility/conditions, determine the meeting category, then apply the required action.
Decision Path for Exam Scenarios
When you see a scenario, use this sequence. It prevents the classic mistake of jumping straight to “who has the right of way” without checking the conditions.
- Confirm the operating area: International vs Inland.
- Check visibility: Is it restricted visibility or normal visibility?
- Identify the meeting relationship: Crossing, head-on, overtaking, or special cases.
- Confirm vessel status: Fishing, towing, constrained by draft, etc., if mentioned.
- Apply the action rules: Required maneuvers and sound/light signals.
Example: Correct Rule Set Selection
A question states: “On inland waters of the United States, two vessels approach in restricted visibility.” The prompt signals Inland Rules and restricted visibility. If you instead apply International Rules, you’ll likely choose the wrong required action.
Core Concepts That Drive the Rules
Lookout and Safe Speed
The rules assume you can’t act correctly without information. A proper lookout is not just “someone watching”; it’s a continuous process that includes radar and other sensors when available.
Safe speed is the speed that allows you to take proper and effective action to avoid collision. In exam problems, safe speed is often tested by giving you a speed that is clearly too high for the described conditions.
Restricted Visibility
In restricted visibility, the rules emphasize caution and positive action. The exam often pairs restricted visibility with sound signals and reduced maneuvering options.
Meeting Categories
The rules treat meeting situations differently:
- Crossing: One vessel must keep out of the way.
- Head-on: Both vessels must take action to avoid collision, typically by altering course to starboard.
- Overtaking: The overtaking vessel must keep clear.
- Special cases: Fishing, towing, vessels constrained by draft, and other status indicators.
Mind Map: International and Inland Rules Overview
Integrated Example: From Identification to Action
Scenario: A power-driven vessel on inland waters approaches another vessel. Visibility is normal. The prompt says the other vessel is overtaking.
Step 1: Rule set. Inland waters means Inland Rules.
Step 2: Visibility. Normal visibility means you use the standard steering and sailing framework, not the restricted-visibility emphasis.
Step 3: Meeting category. Overtaking means the overtaking vessel must keep out of the way.
Step 4: Action. The overtaking vessel must take early and substantial action to avoid crossing too close or forcing the other vessel to maneuver.
Step 5: Signals. If the scenario includes lights or sound signals, confirm they match the vessel status described; incorrect signals often appear as a distractor.
Common Exam Traps
- Trap 1: Wrong rule set. The prompt’s location details matter.
- Trap 2: Ignoring visibility. Restricted visibility changes the tone and required caution.
- Trap 3: Misclassifying the meeting. Crossing vs overtaking is a frequent error.
- Trap 4: Skipping vessel status. If fishing or towing is mentioned, don’t treat both vessels as generic power-driven craft.
Quick Self-Check
Before you commit to an answer, verify three items:
- Which rule set applies?
- Is visibility restricted?
- What is the meeting category?
If any of these are uncertain, the safest exam strategy is to re-read the scenario for the exact phrases that indicate area, visibility, and relative motion.
5.2 Lookout Requirements and Safe Speed Determination
A deck officer’s job is not just to steer; it’s to notice early, decide calmly, and act in time. Two exam favorites—lookout requirements and safe speed—work together: a proper lookout makes safe speed possible, and safe speed reduces the consequences when detection is imperfect.
Lookout Requirements That Actually Work
A lookout must be maintained at all times by sight and hearing, and it must be effective. “Effective” means the lookout is positioned, tasked, and supported so that information reaches the bridge decision-maker without delay. In practice, that includes:
- Clear duties: one person is responsible for lookout, not “everyone kind of looking.” If the bridge is busy, rotate roles so the lookout stays fresh.
- Appropriate location: the lookout should be where visibility is best and where sound can be monitored. If the best spot is blocked by weather gear or equipment, fix the setup.
- Active scanning: the lookout should use a scan pattern (for example, systematic sweeps across the horizon) rather than staring at one point.
- Communication discipline: reports should be timely and structured. “Target bearing changing fast” is more useful than “something out there.”
Example: In a narrow channel at night, a lookout spots a light bearing 045° that appears to shift toward 040° over several minutes. The lookout reports bearing, relative motion, and any sound contact. The officer then checks radar and determines whether the change is consistent with a crossing or overtaking situation.
Safe Speed Is Not One Number
Safe speed is the speed at which a vessel can take proper and effective action to avoid collision and stop within a distance appropriate to the prevailing circumstances. Those circumstances include visibility, traffic density, maneuverability, background conditions, and the state of the sea.
Instead of memorizing a single formula, think in layers:
- Detection layer: how soon can you detect a risk? If visibility is poor, detection distance shrinks.
- Assessment layer: how quickly can you interpret what you see? Radar clutter, rain, and glare can slow judgment.
- Action layer: how much time do you need to maneuver and how far will you travel while doing it? Stopping distance and turning response matter.
- Margin layer: keep enough buffer so that late detection or imperfect information doesn’t force last-second maneuvers.
Example: In fog with reduced visibility, a vessel that normally cruises at 12 knots may only be able to detect another vessel at a fraction of that distance. Even if the officer can “see” something at the last moment, the action layer may not allow a safe stop or a safe alteration.
The Practical Bridge Workflow
A systematic approach helps prevent the classic error: deciding speed before you fully understand the risk.
- Step 1: Confirm lookout effectiveness. If the lookout is distracted or visibility is compromised, slow down first.
- Step 2: Evaluate visibility and traffic. Dense traffic and restricted waters demand lower speed because the action layer is shorter.
- Step 3: Consider maneuverability. A vessel with limited steering response or long stopping distance needs additional margin.
- Step 4: Use radar and bearings to test the plan. If a target’s relative motion suggests a close-quarters risk, speed must be adjusted so that a safe alteration remains available.
- Step 5: Reassess continuously. Safe speed is dynamic; it changes as conditions change.
Mind Map: Lookout and Safe Speed
Worked Scenario: Turning Speed into a Decision
Assume a vessel is underway in moderate visibility with moderate traffic. The lookout reports a vessel at a steady bearing that slowly shifts toward the vessel’s bow. The officer checks radar and confirms the target is not simply crossing far off; the relative motion suggests a developing risk.
Safe speed determination becomes a question: What action can we still take comfortably? If the officer waits until the bearing change becomes obvious, the action layer may be too short. The correct response is to reduce speed early enough that a safe alteration or stopping option remains available, while continuing to monitor the target’s motion.
Example: If the officer reduces speed promptly, the vessel’s relative closing rate decreases, giving more time for a controlled alteration and reducing the chance of an abrupt maneuver that could confuse other traffic.
Exam-Ready Takeaways
- A lookout must be effective, not merely present.
- Safe speed is conditional and continuous, not a fixed cruising setting.
- The best speed decision starts with the quality of detection and the time needed for action.
5.3 Conduct of Vessels in Sight of One Another
When two vessels are close enough that each can see the other, the collision-avoidance rules shift from “be prepared” to “be specific.” The key idea is simple: decide what the other vessel is doing relative to your vessel, then take the right action early enough that your maneuver is clear, effective, and not confusing.
Core Concepts That Drive the Right Action
In sight means you can observe. If you can identify the other vessel’s lights, shapes, or general bearing, you are in the “in sight” category. If visibility is so poor that you cannot reliably determine what you’re seeing, you must treat the situation more conservatively and rely on soundings and radar procedures.
Relative bearing determines the rule set. The rules for crossing, head-on, and overtaking are based on where the other vessel lies in relation to your heading. A practical habit: before you act, state your working conclusion out loud or in your notes—“That vessel is on my starboard bow,” or “That vessel is ahead and crossing left to right.” Exams love answers that show you can classify the situation.
Early and clear action beats last-second heroics. A maneuver that only becomes obvious at the last moment is still a maneuver, but it’s a bad one. The rules expect you to act so that the other vessel can understand what you intend.
Mind Map: Conduct of Vessels in Sight of One Another
Crossing Situations with Easy Examples
In a crossing situation, the vessel on your starboard side is the give-way vessel. The stand-on vessel should generally maintain course and speed so the give-way vessel can maneuver predictably.
Example: You are heading 090° and see a vessel bearing 045° that stays on your starboard bow. That vessel is on your starboard side, so it must give way. Your job is to hold your course and speed unless the situation changes (for instance, the other vessel’s actions suggest it is not complying).
Exam-friendly practice: If you are the stand-on vessel and you alter course “just to be safe,” you may force the give-way vessel into an even tighter situation. The better approach is to keep your plan stable, then adjust only if the other vessel’s maneuver is not working.
Head-On Situations with Clear Decision Steps
In a head-on situation, both vessels are approaching each other on reciprocal or nearly reciprocal headings. The rules aim to prevent both vessels from turning toward the same side at the same time.
Example: You see another vessel ahead with lights consistent with a head-on approach and the bearing remains near 000° relative to your bow. If you are uncertain whether it is truly head-on or slightly crossing, treat it as head-on long enough to avoid conflicting turns. The safe exam answer emphasizes coordinated action: each vessel alters to starboard when the head-on nature is established or when doubt exists.
Reasoning check: If both vessels turn to starboard, they pass port-to-port. If one vessel turns to port while the other turns to starboard, you risk a near miss. That’s why “decide early and act consistently” matters.
Overtaking Situations with Practical Clarity
Overtaking is identified by the other vessel being ahead of your beam and then moving toward your stern as you close. The overtaking vessel must keep clear.
Example: You are on a steady course. Another vessel is initially at your port quarter and then gradually shifts toward your stern as you gain. That means you are overtaking. The overtaking vessel must take action to keep clear—typically by altering course to avoid crossing ahead of the vessel being overtaken.
Common mistake: Treating an overtaking situation like a crossing situation. If you misclassify it, you may incorrectly assume the other vessel is give-way when it is actually stand-on.
Execution: From Rule to Maneuver
Once you classify the situation, execution has three steps.
- Act early enough to be understood. A small late turn can be worse than a larger earlier one because it may not change the other vessel’s expectations.
- Monitor the effect. After you maneuver, re-check relative bearing. If the other vessel’s position relative to you is not changing as expected, your maneuver may not be effective.
- Use signals when required. Sound signals and other signaling methods exist to reduce ambiguity. If the rules call for a signal in your scenario, include it in your exam reasoning.
Quick Self-Check for Exam Answers
Before selecting an answer, confirm these three items:
- Classification: crossing, head-on, or overtaking based on relative bearing.
- Give-way status: which vessel must keep clear.
- Maneuver logic: early, clear, and consistent with the other vessel’s likely expectations.
If your answer satisfies all three, you’re usually aligned with what the exam is testing: not just memorization, but correct decision-making under time pressure.
5.4 Crossing Overtaking and Head On Situations With Examples
Crossing, overtaking, and head-on encounters are where exam questions stop being about memorizing rules and start being about applying them under pressure. The key is to identify the encounter first, then apply the correct “who must give way” logic, and finally confirm your actions with sound signals, speed changes, and safe passing distance.
Encounter Identification First
Start with three observations you can usually make quickly:
- Relative bearing changes: Is the other vessel moving from your starboard side toward your bow, or from your bow toward your port side? Crossing patterns show up as bearing changes.
- Relative motion and closure: Are you gaining on the other vessel from behind? That’s overtaking.
- Head-on symmetry: Are you seeing the other vessel roughly ahead on a steady bearing with both vessels closing? That’s head-on.
A practical habit: write “Crossing / Overtaking / Head-on” at the top of your scratch paper before you touch the answer choices. It prevents the classic mistake of applying the wrong rule set to the right scenario.
Crossing Situations with Examples
In a crossing encounter, the vessel that has the other on its own starboard side is the stand-on vessel. The other vessel must give way.
Example 1: Simple crossing
- Your vessel is on a steady course.
- Another vessel appears on your right (starboard) bow and the bearing remains on the right side as you approach.
- Conclusion: The other vessel is the stand-on vessel; you must give way.
- Typical exam action: alter course to starboard or reduce speed so that you pass clear and do not create a new crossing situation.
Example 2: Crossing that becomes confusing
- The other vessel initially appears on your starboard side, but later its bearing shifts toward your bow.
- Conclusion: You still treat it as crossing with the other vessel on your starboard side at the time you first established the encounter.
- Best practice: make an early, clear action. Waiting until the bearing “looks better” is how you end up with a late maneuver and a tight passing.
Overtaking Situations with Examples
You are overtaking when you are approaching from more than 22.5 degrees abaft your own beam. In plain terms: if you’re coming from behind and the other vessel is ahead of your beam, you’re likely the overtaker.
The overtaking vessel must keep clear and generally must take early action if there’s any doubt.
Example 3: Overtaking with a clean pass
- You are closing on a vessel ahead.
- The other vessel’s position is well abaft your beam, and you are gaining.
- Conclusion: You are the overtaker.
- Action: pass at a safe distance with a course change that avoids crossing too close ahead of the other vessel.
Example 4: Overtaking where the other vessel seems to “hold course”
- You are overtaking, but the other vessel’s bearing stays steady.
- Conclusion: Steady bearing doesn’t remove your responsibility.
- Best practice: reduce speed or adjust course so you do not end up alongside at close range. Exams often reward the option that increases separation rather than the one that assumes the other vessel will maneuver perfectly.
Head-On Situations with Examples
In a head-on encounter, both vessels are approaching each other on reciprocal or nearly reciprocal courses, typically with the other vessel appearing ahead.
Both vessels must alter course to starboard to pass port-to-port. If you’re unsure whether it’s truly head-on, treat it as a head-on risk and act early.
Example 5: Head-on with clear starboard alteration
- The other vessel is on your bow, and both vessels are closing.
- Conclusion: head-on.
- Action: both vessels alter course to starboard.
- Exam trap: choosing “turn to port” because it sounds like “more room.” The rules are specific here.
Example 6: Head-on that’s slightly off-center
- The other vessel is ahead but slightly to your port side.
- Conclusion: you may be in a crossing-to-head-on gray area.
- Best practice: if the bearing suggests a head-on risk, choose the option that results in a safe passing with a starboard alteration and clear separation.
Mind Map: Crossing Overtaking and Head on Logic
Encounter Logic Mind Map
Putting It Together Under Exam Pressure
When you see a scenario, do this sequence:
- Classify: crossing, overtaking, or head-on.
- Assign responsibility: who must give way or keep clear.
- Choose the action: course change and/or speed reduction that produces a safe passing.
- Check for consistency: your action should not rely on the other vessel making a perfect maneuver.
A final practical note: the “best” answer is usually the one that is early, clear, and separation-focused, not the one that tries to be clever with late timing.
5.5 Maneuvering Signals And Actions Including Sound Signals
Maneuvering signals are the bridge’s way of saying, “I’m changing my plan,” in a language that works even when you can’t see each other clearly. Sound signals are the part of that language used when visibility, distance, or traffic density makes visual signals unreliable. The goal is simple: communicate early, communicate clearly, and back up the communication with the correct action.
Core Principle of Signal and Action
A signal is not a substitute for maneuvering. If you sound a signal that indicates a planned action, you must then carry out that action in a timely way. A practical habit is to treat each signal as a checklist item: (1) confirm the situation, (2) choose the correct signal, (3) announce the maneuver on the bridge, (4) execute the maneuver, and (5) verify the outcome using radar, bearings, or visual cues.
Example: You are approaching a vessel on a crossing course at close range. You determine you must keep out of the way. You sound the appropriate signal for your intended action, then adjust course and speed early enough that the other vessel can respond.
Sound Signal Basics for Deck Officers
Sound signals are standardized by rule sets and are used for specific maneuvers and visibility conditions. The most common exam focus is matching the correct signal to the correct maneuver, and knowing when sound signals are required.
A useful mental model is to separate signals into three buckets:
- Signals for maneuvering: indicating course or speed changes.
- Signals for restricted visibility: ensuring vessels can still coordinate.
- Signals for special circumstances: such as vessels not under command or constrained by their work.
Even when you know the right signal, you must also consider timing. Sound signals are typically repeated at intervals so that the other vessel has multiple chances to hear and interpret them.
Maneuvering Actions That Must Match the Signal
The action side of the equation is where many candidates lose points. The correct action is usually the one that maintains safe passing and avoids last-second surprises.
- If you are the give-way vessel: you must take early action that results in safe clearance. A common mistake is to signal “I intend to keep course” while actually planning a late turn.
- If you are the stand-on vessel: you should maintain your course and speed unless it becomes clear that the give-way vessel is not taking appropriate action.
- If you are overtaking: you should expect the other vessel to be less able to anticipate your approach. Your maneuver should be decisive enough to prevent a close-quarters situation.
Example: In an overtaking scenario, you identify that you are the overtaking vessel. You plan to pass with safe clearance. You sound the maneuvering signal that matches your intended action, then adjust speed and/or course so the passing distance is not dependent on luck.
Visibility Conditions and When Sound Signals Matter
Sound signals become especially important when visibility is reduced. In restricted visibility, you should assume that visual confirmation is unreliable and rely more heavily on sound signals, radar, and systematic watchkeeping.
A practical bridge routine is to keep a “signal log” during busy periods: note the time you heard a signal, the bearing or relative position, and what maneuver you intend to make. This reduces confusion when multiple vessels are involved.
Mind Map: Maneuvering Signals and Actions
Example Scenarios with Reasoned Decisions
Example: Crossing Situation with Reduced Visibility
You and another vessel are crossing. Visibility is limited, so you cannot reliably judge the other vessel’s intentions by sight. You determine you are the give-way vessel. You select the sound signal that corresponds to your intended maneuver to keep clear, then execute the maneuver early enough to create a safe passing gap. After the maneuver, you verify that the relative bearing is changing in the direction that indicates increasing clearance.
Example: Stand-On Vessel Observes Give-Way Failure
You are the stand-on vessel, and the give-way vessel’s actions do not appear to create safe clearance. You do not wait for the situation to become unavoidable. You take action that reduces risk, and you ensure your sound signals and maneuvering are consistent so the other vessel can adjust.
Example: Overtaking Vessel Passing Safely
You are overtaking and plan to pass on a safe side with adequate clearance. You sound the maneuvering signal that matches your planned action, then adjust speed and/or course so the passing distance is not marginal. You confirm the pass is safe using relative motion and bearings, not just the fact that the other vessel is “behind you.”
Quick Decision Checklist for Exam Questions
- Identify the traffic situation: crossing, head-on, overtaking, or special circumstance.
- Determine who is give-way and who is stand-on.
- Choose the sound signal that matches the maneuver you will actually execute.
- Check timing: early action and appropriate repetition.
- Verify after the maneuver using bearings, radar, or visual cues when available.
When you answer exam questions, treat the correct sound signal as the “announcement” and the correct maneuver as the “proof.” If either side is wrong, the risk is wrong too.
6. Navigation Safety Management and Watchstanding
6.1 Bridge Resource Management Principles for Deck Officers
Bridge Resource Management (BRM) is how a deck officer turns a team of people, tools, and procedures into safe decisions under time pressure. It is not about being the loudest person on the bridge; it is about making sure the right information reaches the right person at the right time.
Foundations of BRM for Deck Officers
BRM starts with shared situational awareness. Everyone on watch should be able to answer, without guessing, what the vessel is doing now, what hazards are nearby, and what the next decision point will be. A practical way to build this is to use a short “plan and confirm” loop at watch turnover and before major evolutions.
Example: Before entering a narrow channel, the officer in charge states the intended track, the expected speed, the planned lookout focus (e.g., fishing activity on one side), and the contingency trigger (e.g., if a target appears inside a set range, reduce speed and prepare to alter course). The helmsman repeats the key actions, not the whole plan.
Roles, Responsibilities, and Communication
Clear roles reduce the chance that two people do the same task while a third task is ignored. On most bridges, the officer of the deck (OOD) or master’s representative coordinates, the helmsman steers, the lookout(s) scan, and the navigator monitors instruments and charts. BRM makes these roles explicit during critical phases like restricted visibility, traffic separation, or pilotage.
Communication should be concise and action-oriented. Use standard terms and avoid mixing “what we think” with “what we will do.” If you are uncertain, say so and specify what observation will resolve the uncertainty.
Example: Instead of “I think that contact is close,” try “Contact bearing 045 relative, range decreasing; I will confirm with radar gain and lookout report. If range drops below 1.0 nm, we will slow to safe speed and prepare a small alteration.”
Decision Making Under Constraints
Deck officers often make decisions with incomplete information. BRM improves decision quality by structuring how information is gathered and how options are compared.
Use a simple sequence:
- Identify the hazard and the decision needed.
- Gather the most reliable inputs first (visual lookout, radar picture, charted hazards).
- Choose an action that reduces risk even if your first assumption is wrong.
- Monitor the outcome and adjust.
Example: In reduced visibility, you may not know whether a target is a vessel or a fixed object. A BRM-friendly response is to reduce speed, increase spacing, and keep maneuver options available rather than committing to a course change that removes your ability to stop or alter.
Workload Management and Task Prioritization
Workload rises when multiple tasks compete: steering, monitoring radar, logging, and communicating with other vessels. BRM treats workload as a safety variable.
A practical technique is “priority stacking.” Put tasks into three levels: immediate safety actions (steer, avoid collision), time-critical monitoring (range/bearing changes, sound signals), and administrative tasks (log entries, routine reports). Administrative tasks move to the next safe moment.
Example: If a close-quarters situation develops, the officer delays a nonessential log update until the maneuver is stabilized, while ensuring the required entries are completed before the next watch change.
Standardization and Checklists
Standard procedures prevent the “we did it differently last time” problem. Checklists also reduce memory load, which matters when stress and noise are high.
Use checklists for recurring bridge activities: watch turnover, radar setup verification, passage plan confirmation, and emergency response drills. The goal is not to read every line robotically; it is to confirm the key items that affect safety.
Example: During radar setup, confirm range scale, tuning stability, anti-clutter settings, and whether the cursor or VRM is being used correctly. Then verify that the lookout knows what to report (bearing, relative motion, and any sound signals).
Mind Map: Bridge Resource Management Flow
Advanced Integration: BRM During Common Scenarios
BRM becomes most visible when the bridge is busy. In traffic, the officer must coordinate speed, course, and lookout focus so that the radar picture and the visual scan agree. In pilotage, the officer maintains authority over safe navigation while using the pilot’s local knowledge; communication should clarify who is responsible for which actions.
Example: When a pilot is aboard, the officer states the vessel’s maneuvering limits, current speed, and the planned maneuver points. The pilot communicates local traffic and channel characteristics, while the officer confirms that the intended actions match the vessel’s handling and the collision-avoidance obligations.
Practical BRM Habits for Exam and Real Watch
A strong BRM answer usually includes three elements: a clear role assignment, a communication method, and a decision sequence tied to monitoring. If you can describe how you would reduce risk step-by-step while keeping the team aligned, you are thinking like a deck officer on a real bridge, not just answering a question.
6.2 Watchstanding Duties Including Relief and Log Requirements
A deck officer’s watch is not just time on the bridge; it’s a controlled process. The goal is continuity: the vessel’s safety-critical decisions should not reset when the relief arrives. Relief is where continuity is most likely to break, so the watchstanding routine must be built to prevent that.
Core Watchstanding Responsibilities
During your watch, you are responsible for maintaining situational awareness and ensuring required actions happen on time. That includes monitoring navigation equipment, maintaining a proper lookout, and verifying that the vessel’s course and speed remain consistent with the passage plan and current conditions.
A practical way to think about it is in three layers. First, you observe: traffic, weather, visibility, and equipment status. Second, you interpret: what those observations mean for collision risk and safe navigation. Third, you act: adjust course or speed, communicate with other vessels, and record what matters.
Relief Planning Before the Relief Arrives
Relief should not be a surprise handoff. Start the handover early enough to allow questions and verification. A good rule is to begin the briefing with enough time for the incoming officer to check the bridge setup, not just listen.
Before the relief arrives, confirm the basics that often cause errors: the current position and track, the active passage plan leg, the radar and AIS settings, and any equipment alarms. If something is degraded—say, a radar channel is unreliable—make sure the incoming officer knows exactly what is affected and what you are doing about it.
The Relief Briefing Structure
Use a consistent order so important items do not get lost. A simple structure is: current situation, planned actions, equipment status, and watch-specific notes.
Current situation covers position, heading, speed, and immediate hazards such as nearby traffic patterns or restricted visibility. Planned actions covers what you intend to do next and what you expect the relief to continue. Equipment status includes radar range/bearing settings, ECDIS/chart mode, gyro or compass status, and any navigation system discrepancies. Watch-specific notes include unusual events, communications made, and any pending tasks.
Example: If you are approaching a traffic separation scheme, tell the relief not only that you are “approaching,” but also what you are watching for: crossing traffic, speed changes by nearby vessels, and whether you have established a safe bearing reference for radar plotting.
Log Requirements and What They Prove
A watch log is evidence of what was known and done. It should be factual, time-referenced, and tied to safety-critical decisions. If an action was taken because of a specific condition, record that condition.
Common log entries include: watch start and end times, weather and visibility, course and speed, position fixes, radar/visual lookout notes, and significant communications. If you make a course alteration to avoid a close-quarters situation, record the time, the reason, and the outcome.
Keep entries readable and consistent. If you use abbreviations, use the same ones every time. The log should allow a reviewer to reconstruct the watch without guessing.
Mind Map: Relief and Log Workflow
Example: Clean Handover with a Small Complication
Assume visibility drops from 3 nautical miles to 1.5 nautical miles during your watch. You reduce speed, increase radar attention, and verify that the lookout remains effective. In the log, record the time of the visibility change, the action taken, and the reason.
When relief arrives, you brief the incoming officer with the same structure. You state the current position and speed, the current visibility, and the radar settings you adjusted. You also mention that you reduced speed because the radar picture showed more targets at shorter ranges than earlier. The relief then confirms the radar settings and repeats the plan for the next segment of the route.
Example: Log Entry That Avoids Ambiguity
A vague entry like “Adjusted course for traffic” is not helpful. A clearer entry includes the time, the bearing or reference used, and the outcome. For instance: “At 1430, altered course 10° to port to increase CPA margin after radar target bearing 045° showed closing; CPA increased and contact stabilized.” This turns the log into a decision record, not a diary.
Advanced Details That Prevent Common Failures
Two failures show up repeatedly: missing the “why,” and skipping verification. The “why” matters because it explains why a decision was safe at the time. Verification matters because the incoming officer must confirm that the bridge setup matches the briefing.
A final practical habit: after the relief takes over, do not disappear mentally. If you remain responsible for the watch until the official handover time, stay available for quick clarification. If the handover is complete, your log should already reflect the state of the watch so the next officer is not forced to reconstruct it from memory.
6.3 Fatigue Management and Human Factors in Navigation
Fatigue is not just “being tired.” In navigation, it shows up as slower decisions, missed details, and weaker monitoring—especially during routine watch periods when nothing dramatic seems to be happening. Human factors is the study of how people actually perform under real conditions, so you can design watch routines that protect performance.
Core Fatigue Mechanisms
Fatigue commonly comes from three sources that often stack together:
- Sleep loss reduces attention and working memory. A deck officer who slept 5 hours instead of 7 may still function, but the margin for error shrinks.
- Circadian disruption shifts the body clock. A night watch that starts late and runs long can make alertness dip even if total sleep time was “okay.”
- Workload and monotony matter too. High mental workload exhausts quickly, while low-stimulation periods can cause vigilance to fade.
A practical way to remember this: sleep loss affects the “capacity,” circadian disruption affects the “timing,” and workload/monotony affects the “attention quality.”
Human Factors in the Bridge Environment
Navigation tasks rely on perception, interpretation, and action. Fatigue tends to degrade each step:
- Perception errors: missing a small change in radar contacts or misreading a light.
- Interpretation errors: believing a track is stable when it’s actually drifting.
- Action errors: delaying a course correction or forgetting a checklist step.
Bridge design and procedures can reduce these failures. For example, standard callouts and consistent scan patterns make it harder for fatigue to “quietly” remove critical checks.
Watchstanding Practices That Reduce Risk
Use a layered approach so one good habit doesn’t have to carry the whole load.
-
Pre-watch readiness
- Eat in a way that avoids heavy, immediate post-meal sluggishness.
- Hydrate early; thirst often masquerades as “just a little tired.”
- If you must take a short rest, keep it brief and timed so you don’t wake into grogginess.
-
Structured monitoring
- Maintain a consistent scan rhythm for radar, visual lookout, and instruments.
- Use “compare and confirm” rather than “assume and move on.” If the radar says one thing and the visual says another, treat it as a problem to solve.
-
Communication discipline
- Make handovers specific: what changed, what is stable, and what is next.
- When workload rises, reduce ambiguity by using clear, repeatable phrases.
-
Breaks that actually help
- A break should change state: stand up, move, and get a different visual focus.
- Avoid “breaks” that are really more of the same mental work.
Mind Map: Fatigue Management and Human Factors
Example: Spotting a Fatigue-Induced Navigation Error
Assume a deck officer is on watch during reduced visibility. Radar contacts appear steady, so the officer’s scan becomes less frequent. Later, a contact’s bearing changes slowly, but the officer interprets it as “noise” because the mind is conserving effort.
A fatigue-aware routine prevents this:
- The scan rhythm stays consistent even when things look calm.
- The officer compares radar bearing trends against the expected motion from course and speed.
- If there’s a mismatch, the officer slows down and verifies rather than trusting the first impression.
The key is not “working harder.” It’s maintaining the same quality checks when the brain would prefer to coast.
Example: A Better Handover Under Rising Workload
During a busy approach, the outgoing officer notes:
- What the radar picture looked like 30 minutes ago.
- Which targets are closest and which are changing.
- Any uncertainties, such as a contact that may be merging.
The incoming officer repeats the plan: scan rhythm, next verification point, and the action trigger if a target’s bearing rate changes. This turns handover from a story into an operational checklist.
Case Study: Managing a Late-Night Dip
On 2026-02-13, a watch starts after a late meal and runs into the early morning hours. The officer notices slower responses during routine plotting. Instead of pushing through, the officer uses a short, timed reset, rehydrates, and returns to the standard scan pattern with explicit callouts for any contact that deviates from expected motion.
The outcome is measurable: fewer “almost” misses, quicker confirmation of contact behavior, and smoother compliance with collision-avoidance monitoring.
Fatigue management works best when it’s boringly consistent: readiness before the watch, structured monitoring during it, and clear communication when conditions change.
6.4 Emergency Communications and Bridge Procedures
Emergency communications on a merchant vessel are less about volume and more about clarity under stress. The bridge needs a shared mental model: who speaks, what gets said, and how information is confirmed. This section builds from the basics of message structure to the bridge procedures that keep actions coordinated.
Core Principles of Emergency Messaging
Start with the goal: reduce confusion, not just increase speed. A good emergency message contains (1) the situation, (2) location, (3) immediate actions taken, and (4) what assistance is needed. If any of those pieces are missing, the next responder has to ask questions, and questions cost time.
Use a consistent order so your brain doesn’t improvise. For example, when reporting a fire in the engine room, you should lead with “Fire in engine room,” then give the location detail (e.g., “aft engine room, port side”), then state what you’ve done (“stopped fuel transfer, activated fixed fire system”), and finally request the next step (“stand by for emergency towing assistance” or “request additional firefighting crew”).
Confirmation matters because radio traffic is noisy and people mishear. After a key instruction is transmitted, the bridge should verify receipt by having the receiving station repeat the essential parts back.
Bridge Roles and Communication Flow
A bridge is a small organization with a chain of communication. Assign roles early so you don’t create a “who’s doing what” problem during the emergency.
- Master or Officer in Charge: directs priorities and authorizes external communications.
- Conning Officer: maintains safe maneuvering and speed control.
- Lookout and Watchstanders: provide observations and verify changes (smoke color, list, water ingress rate).
- Communications Officer: manages radio channels, logs transmissions, and ensures acknowledgments.
A practical flow looks like this: the conning officer keeps the vessel under control while the communications officer transmits the initial emergency report. Meanwhile, the lookout and watchstanders feed updated facts to the officer in charge, who decides whether to escalate, change course, or request additional assistance.
Standard Message Elements for Common Emergencies
Use message templates mentally, not as rigid scripts. The point is to avoid leaving out the “location” or “need” fields.
Medical emergency: patient condition, exact location, hazards (moving machinery, confined space), and whether medical advice or evacuation is requested.
Fire: source area, fuel involvement risk, smoke behavior, whether ventilation is secured, and which firefighting systems are activated.
Man overboard: last known position, time, side of vessel, current and wind estimate, and whether a lifebuoy light or smoke is deployed.
Grounding or collision: nature of event, immediate damage observations, flooding status, and whether assistance is required.
A helpful habit is to include “what changed since the last report.” If the fire spreads from a galley to a ventilation trunk, that single update prevents responders from assuming the situation is static.
Channel Management and Radio Discipline
During emergencies, you often need multiple channels: one for distress or priority traffic, another for internal coordination, and sometimes a third for port or company contacts. The bridge should avoid turning every conversation into a radio broadcast.
A simple rule: only transmit when the message changes decisions or actions. If you’re repeating the same information, switch to internal communication unless the external party needs an update.
If the vessel is using VHF, ensure the correct channel is selected before transmitting. If you’re unsure, pause and verify rather than sending a partial message that lands on the wrong frequency.
Logging and Time Discipline
Logs are not paperwork for its own sake; they are evidence of what was known and when. Record the time of the initial emergency report, key updates, acknowledgments, and actions taken (alarms, shutdowns, muster, evacuation decisions).
For example, if a fire alarm triggers at 14:10 and the fixed system is activated at 14:18, those timestamps help explain why ventilation was or wasn’t secured earlier. Use a consistent time base and write down times as soon as actions occur.
Mind Map: Emergency Communications and Bridge Procedures
Example: Fire Report with Confirmation
Assume a fire starts in the galley. The communications officer transmits: “Fire in galley, main deck, forward. Fixed suppression system activated. Ventilation secured. Request additional firefighting crew and standby for external assistance if smoke increases.” The receiving station repeats the essential elements: “Received fire in galley forward, suppression activated, ventilation secured, requesting additional crew.” The officer in charge then updates internally: “Smoke is increasing; prepare to close watertight boundaries and stand by for muster.” The log records the transmission time and the system activation time.
Example: Man Overboard Position and Search Coordination
A person falls overboard at 09:42 on the starboard side. The lookout reports the last known position and time, and the conning officer immediately adjusts maneuvering to reduce further loss of contact. The communications officer transmits: “Man overboard at 09:42, starboard side, last known position [bearing and distance]. Lifebuoy with light deployed. Request assistance and keep watch for visual contact.” Once the external party acknowledges, the bridge assigns search sectors internally and records the time of lifebuoy deployment.
Example: Medical Emergency with Location Precision
If a crewmember collapses in the aft machinery space, the initial message should include the exact compartment and access constraints: “Medical emergency in aft machinery space, port side, between watertight doors A and B. Patient conscious but deteriorating. Hazards include hot surfaces and limited access. Request medical advice and prepare evacuation route.” The bridge confirms receipt, then coordinates internal access control so responders don’t create additional risk while moving equipment.
Bridge Procedure Integration
Emergency communications work best when they are tied to bridge actions. The officer in charge should treat each confirmed message as a trigger: adjust maneuvering, activate alarms, assign teams, and update the log. When the next update is ready, send it in the same structured order, and include what changed. That consistency is what keeps the bridge from turning into a guessing game.
6.5 Practical Watchstanding Drills Using Checklists
Watchstanding drills work best when they are boringly repeatable. The goal is not to “perform” the watch, but to practice the exact sequence of actions you’ll need under time pressure: confirm the situation, communicate clearly, take the correct safety steps, and document what matters.
Drill Foundations That Make Checklists Useful
Start with a checklist that matches how the bridge actually runs. A good checklist has three traits: it is short enough to finish during the watch, it uses the same terms every time, and it includes the “why” in plain language so you don’t treat it like a magic spell.
A practical drill begins with a baseline scenario. Example: a vessel underway in daylight with moderate traffic, visibility of 3–5 miles, and a planned course change in 30 minutes. The drill clock is simple: you run the checklist at fixed intervals (for example, every 30 minutes) and you also trigger it when something changes (for example, a new radar contact appears or the helmsman reports a speed change).
Mind Map: Watchstanding Checklist Drill Flow
The Checklist You Practice With
Use one master checklist for the watch and smaller “trigger checklists” for events. Keep the master checklist focused on recurring duties.
Master watch checklist (run on a schedule):
- Confirm watch status: who is OOW, who is lookout, and whether relief is properly briefed.
- Verify navigation basics: position fix method, course over ground, speed, and any known set and drift.
- Scan for traffic and hazards: visual scan plus radar sweep; note bearings and ranges of relevant contacts.
- Check collision risk: review relative motion, estimate CPA/TCPA when available, and confirm the action plan.
- Confirm rule compliance: ensure the intended maneuver matches the applicable situation (crossing, head-on, overtaking, or restricted visibility).
- Log what matters: significant contacts, course/speed changes, and any sound signals or emergency actions.
Trigger checklist examples (run when conditions change):
- New radar contact: verify bearing/range, determine if it is a risk, check for consistent motion, and assign lookout attention if needed.
- Course change: confirm the new course, update the planned track, and re-check traffic picture before the turn.
- Reduced visibility: shift to a more conservative scan pattern, confirm sound signaling readiness, and tighten the “safe speed” decision.
Drill Execution with Concrete Examples
Example 1: Course change with a nearby crossing contact
- Setup: You plan a course change to starboard in 30 minutes. Radar shows a contact on the port bow with a steady bearing.
- Drill steps: At the next scheduled checklist run, you verify the position fix and confirm speed. Then you review the contact’s relative motion and estimate whether it is likely to cross ahead.
- Action: Before the turn, you communicate the intended maneuver and confirm whether the crossing situation requires maintaining course and speed or taking early action. You then log the course change time and the reason for your maneuver.
- Debrief focus: Did you re-check the traffic picture immediately before turning, or did you rely on the earlier scan? The drill should expose that gap.
Example 2: Sound signal readiness during a traffic-dense period
- Setup: Visibility is moderate, traffic is heavy, and you expect frequent crossing situations.
- Drill steps: During the master checklist scan, you confirm lookout coverage and verify that the bridge can produce the correct sound signals without scrambling for instructions.
- Action: When a situation develops that requires signaling, you issue the order clearly, confirm the signal is made, and record the time.
- Debrief focus: Did the bridge team use the same phrasing each time? Consistency reduces errors when you’re busy.
Debrief That Improves the Next Drill
After each drill, spend a few minutes on three questions:
- What step took the longest and why? If it’s always the same step, the checklist wording or role assignment likely needs adjustment.
- What was the first missed or delayed action? Fix the earliest failure point, not the last symptom.
- What evidence did you record? If the log entry doesn’t support the decision, the checklist needs a clearer “record this” line.
A final practical rule: if a checklist item is so vague that two people would interpret it differently, rewrite it until it produces the same action every time. That’s how drills turn into competence rather than paperwork.
7. Vessel Safety Equipment and Emergency Preparedness
7.1 Lifesaving Appliances Including Lifeboats Life Rafts and PPE
A deck officer exam expects you to connect three things: what the equipment is, how it’s used, and what you must verify before an emergency. Lifesaving appliances are not just “gear”; they’re a system that depends on correct stowage, readiness, and crew actions.
Lifesaving Appliance Roles and Readiness Checks
Start with the purpose of each category. Lifeboats and life rafts provide survival space when the vessel is abandoned. Personal protective equipment (PPE) helps individuals stay afloat, visible, and protected while awaiting rescue. Readiness is proven by routine checks, not by good intentions.
A practical readiness mindset is: “Can we deploy it quickly, and will it work when it’s wet and chaotic?” For example, if a life raft painter line is tangled during a drill, the problem is not theoretical—deployment time and inflation reliability both suffer.
Before any voyage, verify that:
- Appliances are stowed in their assigned locations and secured for sea conditions.
- Release mechanisms are accessible and not obstructed by cargo or equipment.
- Containers and hydrostatic releases (where fitted) show no obvious damage or corrosion.
- Expiration dates and inspection records are current for items that have service intervals.
- Crew know the donning sequence for PPE, not just where it is stored.
Lifeboats Core Concepts and Practical Use
Lifeboats are designed to carry people and keep them sheltered and afloat. Key exam themes include launch methods, readiness, and basic operational steps.
Think in terms of “before launch, launch, and after launch.”
- Before launch: check that the boat is properly secured, the crew is briefed, and the embarkation route is clear.
- Launch: ensure the boat can be lowered or released without snagging. A common mistake is assuming the lowering system will “figure it out” when lines are misrouted.
- After launch: confirm everyone is aboard, life-saving equipment is accessible, and the boat is oriented for stability and visibility.
Example: During a drill, if a crew member can’t reach the boat’s emergency equipment because it’s stored behind a seat, you’ve found a usability failure. Fix it by adjusting stowage within the approved arrangement and re-train the crew on the access path.
Life Rafts Core Concepts and Practical Use
Life rafts are compact survival craft that inflate and provide flotation. They’re often stowed for rapid deployment, which means the container must be protected and the deployment path must be clear.
Examine life raft use as a sequence:
- Locate the raft container and confirm the correct release method.
- Deploy so the raft can inflate without obstruction.
- Once afloat, distribute persons to maintain stability and reduce free-surface problems.
- Use survival aids appropriately, including signaling and water management.
Example: If a raft is deployed but the painter is fouled around a stanchion, the raft may drift away from the group or fail to maintain a safe position. The best prevention is drill-based: practice the deployment route and identify likely snag points on the vessel.
PPE Essentials Including Lifejackets and Immersion Protection
PPE is the “individual survival layer.” The exam often tests whether you understand that flotation and thermal protection are separate functions.
Lifejackets provide buoyancy and help keep a person’s face up in the water. Immersion suits or thermal protective aids reduce heat loss, which matters because cold water can incapacitate people quickly.
A useful way to remember PPE is to check three questions:
- Can the person don it quickly without assistance?
- Does it fit correctly for the wearer’s size and clothing?
- Is it compatible with other tasks, such as moving to embarkation points?
Example: If a crew member puts on a lifejacket but leaves the straps loose, the buoyancy may not perform as intended. During training, have the crew demonstrate a correct fit by performing a quick “check the straps” routine before leaving the station.
Mind Map: Lifesaving Appliances System View
Integrated Scenarios That Tie It Together
In exam questions, the “best answer” usually shows you can coordinate equipment and people. For instance, if abandonment is ordered, you should think about both group survival craft and individual PPE at the same time.
Example: A question describes a crowded muster area with poor visibility. The correct approach is to ensure PPE is donned promptly, then manage embarkation so lifeboat or raft deployment is not delayed by bottlenecks. If you only focus on the craft and ignore PPE donning, you miss the exam’s emphasis on immediate survivability.
Quick Self-Check Before You Answer
When you see a lifesaving appliance question, confirm these points in your head:
- What appliance is involved and what it’s designed to do.
- What must be verified for readiness.
- What the correct sequence is during deployment and after.
- How PPE supports individual survival while the craft is being launched.
7.2 Firefighting Systems Including Extinguishers Hoses and Drills
A deck officer exam expects you to connect three things: what the fire is, what the system can do, and what you must do right now. Firefighting equipment is only useful when it matches the fire class and when the crew can deploy it quickly without turning the fire scene into a traffic jam.
Fire Classes and Equipment Matching
Start with the basics: extinguishers and fixed systems are designed for specific fuel types. A common exam trap is assuming “any extinguisher works on any fire.” Instead, use a simple match:
- Class A: ordinary combustibles (wood, paper). Water-type agents cool and soak.
- Class B: flammable liquids and gases. Foam or dry chemical smothers; water can spread burning liquid.
- Class C: energized electrical equipment. Use non-conducting agents; de-energize if possible.
- Class D: combustible metals. Specialized agents are required.
- Class K: cooking oils and fats. Wet chemical agents are designed for grease fires.
Example: If a galley pan is flaming, grabbing a water extinguisher is a bad idea because water can splash burning oil. A wet chemical extinguisher is the correct tool because it forms a cooling, sealing layer.
Portable Fire Extinguishers
Portable extinguishers are the first line for small, contained fires. Your job is not to memorize brand names; it’s to understand the operating method and limitations.
Key checks before use:
- Condition: pressure gauge in the operating range, pin present, hose/nozzle unobstructed.
- Access: extinguisher location is reachable without climbing over hazards.
- Approach: keep an exit at your back when possible.
Operating method: use a controlled sweep, aiming at the base of the flames. If the fire grows, stop trying to “win” with the wrong size of response and switch to evacuation and alarm procedures.
Example: A small trash-can fire in a passageway. You can apply a short, sweeping discharge at the base. If the trash can door is hot or the fire spreads to nearby materials, you stop and report—because your extinguisher is not a substitute for the ship’s overall fire response.
Hoses and Fire Main Systems
Hoses are for larger or more sustained firefighting needs, typically connected to a fire main. The exam angle is practical: hose handling, nozzle selection, and maintaining water supply.
Core concepts:
- Hose layout: avoid kinks and ensure the line can reach the target without snagging.
- Nozzle choice: different patterns and flow rates affect cooling and reach.
- Team roles: one person controls the nozzle, another manages the hose line and prevents twists.
Operational best practice: establish a clear command for who advances, who controls the nozzle, and who watches for changing conditions. If you don’t assign roles, the hose line becomes a moving obstacle.
Example: During a drill, the nozzle operator starts spraying before the hose team confirms full flow. The result is a weak stream and wasted time. The fix is a quick “flow confirmed” call before discharge.
Fixed Firefighting Systems
Fixed systems include arrangements that automatically or manually discharge extinguishing agents into protected spaces. You don’t need to recite every design, but you must understand the logic: the system is intended to protect a specific compartment or hazard area.
Exam-relevant reasoning:
- Activation method: know whether the system is manual, automatic, or both.
- Space boundaries: fixed systems work best when the compartment is closed and ventilation is controlled.
- Post-discharge actions: ensure the space is secured and the crew follows re-entry and monitoring procedures.
Example: If a protected machinery space is equipped with a fixed system, the crew should focus on shutting down ventilation and confirming the space is secured before attempting entry. Opening doors too early can undo the agent’s effect.
Drills and Bridge-to-Engine Coordination
Drills are where knowledge becomes usable behavior. A good drill tests communication, roles, and decision points, not just whether someone can pull a pin.
A systematic drill structure:
- Alarm and reporting: who reports, what information is included (location, fuel type if known, smoke/heat indicators).
- Initial actions: isolate power if electrical involvement is suspected, close openings, and establish muster/escape readiness.
- Equipment deployment: extinguisher for small fires; hose/fire main for larger fires; fixed system activation when appropriate.
- Control and reassessment: confirm whether the fire is shrinking or spreading, then adjust the response.
Firefighting Systems Mind Map
Example Drill Scenario with Integrated Decisions
Scenario: Smoke appears in a storage compartment near the engine room. The crew reports location and notes that the smoke is thick and dark.
Integrated response logic:
- Treat it as potentially Class A with possible electrical involvement due to nearby equipment.
- Establish the compartment boundary by closing openings and controlling ventilation.
- Assign roles: one team prepares a portable extinguisher for a small, early-stage fire; another prepares hose deployment if the smoke indicates growth.
- If the compartment is protected by a fixed system, follow the activation procedure and avoid premature re-entry.
Stop and escalate criteria: if heat increases, flames appear beyond the initial compartment, or the hose team cannot maintain a stable line, the response shifts toward evacuation readiness and full shipboard fire response.
Quick Exam-Style Checks
- If you can’t identify the fire class, you still act: isolate, report, and choose the safest initial tool based on likely hazards.
- Extinguishers are for small fires; hoses and fixed systems support larger or compartmented fires.
- Drills should rehearse decision points and communication, not just equipment handling.
7.3 Navigation Lights Shapes and Sound Signaling Equipment
Navigation lights and sound signals are the bridge’s “language” when visibility drops or when vessels need to understand each other’s intentions quickly. The key is not memorizing shapes and colors in isolation, but using them together with Rule of the Road thinking: identify, interpret, and then act.
Foundational Concepts for Visual and Audible Signals
Start with two practical ideas.
First, lights are about position and relative motion. A vessel’s lights tell you where it is in relation to you and whether it is showing the correct configuration for its status.
Second, sound signals are about communication when sight fails. They are timed and patterned, so you must listen for the signal type and the interval, not just the fact that “something is sounding.”
A simple example: if you see a red over green arrangement that looks like a vessel is crossing, you still verify the situation with sound if visibility is limited. If you hear a fog signal, you treat it as a cue to slow down and increase your margin, then confirm with radar and bearings when available.
Navigation Lights Shapes and Meanings
Navigation lights are defined by color, placement, and geometry. The “shape” part matters because it affects how the light appears at distance and angle.
Color and Placement Basics
- Red and green sidelights indicate the vessel’s port and starboard sides.
- White masthead lights indicate the forward direction.
- All-round lights (such as stern lights) are visible from a wider arc.
Placement is tested in real life: if you cannot clearly distinguish which light is which, your first action is to reduce speed and reassess. Misidentifying a masthead light as a stern light is a classic way to end up with the wrong crossing picture.
Shapes and Visibility Considerations
Lights are designed to be seen within specified sectors. That means you should think in “sectors,” not “straight lines.”
Example: you observe a green light but it appears faint and partially blocked by rain. Instead of assuming the vessel is farther away, treat the reduced visibility as a reason to widen your safety buffer and rely on additional cues like radar range and relative bearing.
Common Configurations and How to Read Them
Use a consistent workflow:
- Identify the vessel’s direction of travel from masthead and stern/all-round lights.
- Determine which side lights are visible to you.
- Check whether the overall pattern matches the vessel’s likely status.
Example: if you see a vessel showing sidelights consistent with head-on or crossing, you still confirm whether any additional lights or restricted-visibility signals are present. If you cannot confirm, you assume uncertainty and act conservatively.
Sound Signaling Equipment and Signal Logic
Sound signals are governed by equipment capability and signal patterns. The goal is intelligibility at the range you can reasonably expect in the conditions.
Equipment Types and Practical Use
- Whistle or horn for general signaling.
- Bell for vessels where required.
- Gong for certain vessels and situations.
You should know what you are listening for: a bell is not a substitute for a horn, and a horn’s pattern is not the same as a bell’s cadence.
Example: in fog, you hear a low, periodic sound that you initially mistake for a bell. If you later notice a higher-pitched horn pattern, you correct your interpretation and update your mental model of the other vessel’s status.
Timing and Interval Awareness
Sound signals are not random. The interval between signals is part of the meaning.
A practical listening drill:
- Count the seconds between repeated blasts.
- Note whether the pattern changes.
- Compare what you hear with what you see on radar.
If the pattern does not match your expectation for the situation, treat it as a cue to re-check your assumptions rather than forcing a fit.
Integrated Example for Restricted Visibility
Assume visibility is reduced and you are approaching an area where traffic may be dense.
- Visual scan: confirm whether you can reliably identify sidelights and masthead lights.
- Sound scan: listen for fog signals and note the pattern and interval.
- Action: reduce speed, increase lookout intensity, and prepare for maneuvering.
- Cross-check: use radar to estimate bearing and relative motion, then reconcile with the sound pattern.
Example outcome: if a vessel’s sound pattern indicates it is in a restricted-visibility mode, you should expect less predictable maneuvering and plan your approach accordingly.
Mind Map: Navigation Lights and Sound Signaling
Quick Decision Checklist for the Bridge
When you are unsure, you do not “guess harder.” You slow down, increase lookout, and use every cue you have.
- Can you identify the light colors and sectors reliably?
- Do the lights match the vessel’s likely status?
- Can you identify the sound device and the signal pattern?
- Do visual and audible cues agree with radar bearings and relative motion?
If any answer is “no,” treat it as a reason to increase safety margins and prepare for maneuvering.
7.4 Emergency Readiness Including Muster and Abandon Ship Procedures
Emergency readiness is not a single drill you survive once; it’s a chain of actions that stays reliable when conditions get noisy, dark, or confusing. The goal is simple: get people to the right place, with the right equipment, in the right order—without turning the bridge into a traffic jam.
Foundational Concepts for Muster Readiness
A muster is a planned assembly of crew at designated locations so accountability is fast and accurate. Abandon ship is the later step when the vessel can no longer safely support life aboard. The exam often tests whether you understand the difference between “gather and count” and “leave the vessel,” and what you do first when alarms sound.
Start with three basics:
- Designated mustering stations are pre-assigned and posted.
- Muster signals and instructions tell crew when to move and where.
- Accountability means you can confirm who is present and who is missing.
A practical way to remember the order is: signal → move → check → report. If you skip “check,” you may have people at the right station but still missing from the count.
Muster Procedures Step by Step
When an emergency alarm sounds, the deck officer’s job is to ensure the muster happens in a controlled flow.
Step 1: Confirm the emergency and the muster signal. Verify the alarm source and the nature of the emergency from the bridge or emergency panel. If the signal is ambiguous, use the vessel’s emergency instructions to avoid sending people to the wrong location.
Step 2: Direct movement without creating new hazards. Crew should move using the safest routes, considering smoke, fire spread, and watertight integrity. For example, if a fire is reported in a passageway, the muster route should avoid that area even if it is shorter.
Step 3: Conduct a headcount at the station. The mustering officer or designated leader compares the crew list to the people present. If someone is missing, the report must include last known location and any relevant details.
Step 4: Report status to the command structure. The station leader reports: number present, missing persons, injuries, and any blocked access.
A simple example: during a drill, the muster leader counts 18 present out of 20. Two are missing. The leader reports “2 missing, last seen in engine space corridor, no response to calls.” That report is actionable; it tells the command where to look.
Abandon Ship Readiness and Decision Logic
Abandon ship is not automatic. The decision is based on the vessel’s ability to maintain safe conditions. Your procedures should reflect that logic: you prepare for abandonment while still working to prevent it.
Key readiness actions include:
- Ensuring lifesaving appliances are accessible and not blocked by fire, flooding, or debris.
- Assigning duties for launching, boarding, and supervision.
- Briefing crew on how to board safely and how to use survival equipment.
A common exam trap is mixing up “prepare the boats” with “launch the boats.” Preparation includes checks and readiness; launching happens only when the command decides abandonment is necessary.
Boarding and Launching Practices That Reduce Mistakes
When abandonment is ordered, the process should be orderly and repeatable.
- Assign boarding groups so people don’t crowd the same access point.
- Use clear instructions for donning lifejackets and securing clothing to prevent snagging.
- Maintain calm communication at the embarkation point; short instructions beat long speeches.
Example: If a crew member is struggling with a lifejacket strap, the boarding leader should pause that person briefly to finish the fit rather than pushing them forward. A partially secured lifejacket can fail when the person is in the water.
Survival Equipment Handling and Accountability
After boarding, accountability continues. The goal is to know who is in each boat or raft and to ensure survival equipment is actually available and used.
- Verify lifejackets are worn before launch.
- Confirm emergency equipment is stowed correctly and accessible.
- Record departures so the command can track which groups have left.
If a raft is launched with missing equipment, the problem is not just inconvenience; it can remove the means to signal or stay afloat effectively.
Mind Map: Muster and Abandon Ship Flow
Integrated Example Scenario
Assume a fire alarm indicates smoke in a lower passage. The bridge confirms the emergency and issues the muster signal. Crew move to mustering stations using routes that avoid the smoke area. At the station, the leader counts everyone present and reports two missing persons last seen near the affected passage. The command then assesses whether conditions allow continued safety aboard. If abandonment is ordered, the officer ensures lifeboats or rafts are accessible, assigns boarding groups, and confirms lifejackets are worn before launch. After departure, the officer tracks which groups left and verifies that emergency equipment is aboard and ready.
Quick Self-Check for Exam Questions
When you see a question about muster or abandon ship, ask:
- Is the scenario about assembly and counting or leaving the vessel?
- Does the sequence include signal → move → check → report?
- Are missing persons handled with last known location and clear reporting?
- Are lifejackets and equipment verified before launch, not assumed after?
Answering those four questions usually steers you away from the most common procedural mistakes.
8. Pollution Prevention and Environmental Compliance
8.1 Oil and Hazardous Substance Spill Prevention Basics
Spill prevention starts with a simple idea: most spills are predictable failures of routine. If you can explain how a transfer, storage, or maintenance task is supposed to work, you can also explain how it goes wrong—and what to do before it does.
Core Concepts and Definitions
Oil is broadly treated as a substance that can spread on water and create slicks, residues, or sheen. Hazardous substances include materials that pose risks to people, property, or the environment, even if they are not visibly oily. For exam purposes, focus on the operational takeaway: prevention depends on controlling release pathways, not just reacting to visible contamination.
A useful mental model is the “three barriers” approach:
- Containment: keep the substance inside tanks, lines, hoses, and fittings.
- Control: manage flow rate, pressure, and transfer timing.
- Response readiness: ensure the crew can stop and contain a release quickly.
Where Spills Start in Real Life
Most releases come from a small set of activities:
- Transfer operations: overfilling, loose connections, hose damage, incorrect valve alignment.
- Vent and overflow paths: blocked vents, malfunctioning alarms, missing drip trays.
- Maintenance and repairs: failed seals, worn gaskets, improper lockout of pumps.
- Bunkering and tank cleaning: incorrect procedures, poor hose handling, inadequate monitoring.
Example: During a fuel transfer, a crew member notices the sounding is “a bit off” but keeps going. The spill doesn’t happen because the fuel is mysterious; it happens because the monitoring method stopped matching the actual tank condition.
Prevention Practices That Actually Work
1. Pre-Transfer Checks
- Confirm the correct tank, line, and valve lineup using a checklist.
- Inspect hoses, couplings, gaskets, and clamps for wear or deformation.
- Verify spill containment gear is staged and ready where it will be used, not where it is stored.
Example: If a drip tray is placed under the wrong connection, it becomes a decorative item. The fix is to position it based on the exact coupling that could leak.
2. Control During Transfer
- Use the lowest practical flow rate during connection changes and when approaching full levels.
- Monitor tank levels continuously using the method required by the vessel’s procedures.
- Keep communication tight: one person calls out readings, another watches the physical setup.
Example: Two people reading the same gauge can still disagree if one is reading the wrong scale or transducer. Prevention includes confirming which instrument is authoritative before the transfer begins.
3. Housekeeping and Secondary Containment
- Keep bilges and drip areas clean enough that a small sheen is detectable early.
- Use absorbents and booms where they belong: around likely leak points and within containment zones.
Example: A clean bilge doesn’t prevent a leak, but it turns “maybe something happened” into “we saw it immediately.”
4. Maintenance Discipline
- Replace worn seals and gaskets on schedule, not after they start weeping.
- Ensure alarms and shutoff systems are tested per procedure.
Example: A valve that “usually holds” is still a valve that can fail at the worst time. Prevention treats “usually” as a warning sign.
Mind Map: Oil and Hazardous Substance Spill Prevention
Advanced Details for Exam-Style Reasoning
Spot the failure mode. When a question describes a scenario, identify whether the likely cause is containment failure (leak path), control failure (wrong flow or level monitoring), or human-process failure (missed checklist step).
Choose the prevention action that matches the cause. If the scenario involves overfilling, the best prevention is improved level monitoring and transfer control. If it involves a loose connection, the best prevention is coupling inspection, correct tightening practices, and correct staging of containment.
Use “early detection” as a scoring factor. Many answers are wrong because they focus only on cleanup. Prevention includes making small releases visible and manageable before they spread.
Example: Applying Prevention Logic to a Scenario
Scenario: During a transfer, a crew member notices a small sheen near a hose coupling but the transfer is still running.
Best prevention-aligned response: Stop or slow the transfer per procedure, secure the source, and contain the release immediately using the staged equipment. Then correct the underlying cause (coupling integrity, gasket condition, or connection technique) before restarting.
The key reasoning step is that prevention doesn’t mean “never stop.” It means stopping in a controlled way so the next step is containment and correction, not continued release.
Quick Checklist Mindset
Before any transfer or maintenance involving oil or hazardous substances, ask three questions:
- What is the exact release pathway if something fails?
- What barrier prevents it from reaching the water?
- What will we notice first, and how fast can we act?
If you can answer those questions clearly, you’re studying prevention the way the deck actually uses it.
8.2 Waste Handling and Recordkeeping Requirements
Waste handling on a merchant vessel is mostly about two things: keeping waste streams separated and keeping proof that you did it correctly. The exam questions usually test whether you can match the right action to the right waste type, then connect that action to the required documentation.
Foundational Waste Categories and Why Separation Matters
Start with the basic idea: not all “waste” is treated the same. Oil-contaminated waste, garbage, and sewage-related waste each follow different rules because they carry different risks.
A practical way to remember this is to think in terms of contamination level:
- Clean or minimally contaminated materials go to the garbage stream.
- Oil-contaminated materials go to the oily waste stream.
- Sewage-related waste follows sewage handling requirements.
Example: A rag used to wipe a leaking fitting is not “just trash.” It is oil-contaminated and should be collected in a designated oily waste container so it doesn’t end up in the garbage compactor.
Storage, Segregation, and Labeling Practices
Good storage prevents accidental mixing and makes inspections easier. Use dedicated containers or compartments, keep lids closed, and prevent leaks.
Key best practices:
- Segregate at the source. Don’t wait until the end of the day to sort waste.
- Use clearly marked containers. Labels should match the waste stream used in your ship’s procedures.
- Control odors and leaks. Keep absorbent materials available for small spills.
Example: If you store oily waste in a container that previously held dry cardboard, you risk cross-contamination and a messy cleanup that no one wants during a busy watch.
Handling Garbage and Common Operational Steps
Garbage handling typically includes collection, temporary storage, and proper discharge or disposal methods as allowed by the vessel’s operating area and procedures.
Operational steps you should be able to describe:
- Collect garbage in the correct container.
- Keep it secured to prevent loss overboard.
- Process it only using equipment intended for that waste stream.
- Dispose or discharge only in accordance with applicable requirements.
Example: Food waste should not be treated like packaging waste. If your ship has a macerator or incineration system, the correct use depends on the waste type and the permitted method.
Oily Waste Handling and Recordkeeping Link
Oil-contaminated waste requires extra care because it can create pollution if mishandled. The exam often expects you to connect “how you stored it” with “what you recorded.”
Best practices:
- Store oily waste in containers that prevent leakage.
- Keep waste transfer hoses and deck areas clean.
- Ensure oily waste is transferred to a reception facility or processed only as permitted.
Example: During tank cleaning, oily sludge is collected and stored. When it is transferred ashore, the record should reflect the transfer event, not just the fact that “sludge was generated.”
Recordkeeping Requirements and What Must Be Captured
Recordkeeping is not paperwork for its own sake. It provides traceability: what waste was generated, how it was handled, and where it went.
A systematic record should capture:
- Date and time of the relevant operation.
- Waste type and approximate quantity.
- Method of handling such as storage, processing, or transfer.
- Location or operational status such as onboard storage or transfer to shore.
- Responsible person or watch when required by ship procedures.
Example: If a log entry says only “garbage disposed,” it fails the traceability test. A better entry identifies the waste stream and the disposal method used.
Mind Map: Waste Handling and Records
Example: Turning a Messy Day into a Clean Record
Scenario: A deck officer notices mixed waste after a maintenance job. The crew has used rags, cardboard, and absorbent pads.
Correct approach:
- Separate rags and absorbent pads into the oily waste container.
- Place cardboard into the garbage stream container.
- Ensure containers are labeled and secured.
- Record the waste handling actions with date, waste type, and method.
Why this matters: if the record shows only garbage disposal while oily waste was actually generated, the documentation won’t match the ship’s physical waste history.
Common Exam Traps to Avoid
- Treating “trash” as one category. Waste streams must be distinguished.
- Recording outcomes without the method. “Disposed” is not enough; the handling method must be stated.
- Assuming storage equals compliance. Storage is necessary, but records must show what happened next.
Quick Checklist for the Deck Officer
- Containers are dedicated and labeled for each waste stream.
- Waste is segregated at the source.
- Lids are closed and leaks are controlled.
- Log entries include date, waste type, quantity estimate, and handling method.
- Records match the actual onboard waste handling events.
8.3 Response Planning Including Reporting and Initial Actions
A good response plan does two things at once: it tells you what to do, and it tells you what to do first. For deck officers, “first” usually means stabilizing the situation, protecting people, and preserving evidence for later reporting. The plan should be usable under stress, which is why it must be written as actions, not as feelings.
Foundational Concepts for Response Planning
Start with the response triangle: people, vessel, environment. If you can’t keep those three in view, you’ll either overreact or underreact.
- People: life safety comes before property. If there’s an injury or a person in the water, your plan should immediately assign who coordinates medical care, who manages the deck, and who communicates.
- Vessel: prevent escalation. Many incidents worsen because the crew keeps doing the “normal” job while the abnormal problem grows.
- Environment: contain and stop the source. For spills, the first goal is to prevent spread, not to achieve perfection.
A practical planning habit is to create an “incident snapshot” template for each scenario. It forces clarity on what you must know quickly: location, time, what happened, what’s changing, and what resources are available.
Mind Map: Response Planning Workflow
Initial Actions That Should Happen Every Time
Regardless of whether the incident is a fire, collision, grounding, or pollution event, the first minutes should follow a consistent rhythm.
- Secure the scene: reduce risk by stopping unsafe operations, controlling access, and keeping the bridge informed of what’s happening on deck.
- Account for personnel: muster quickly, then confirm who is present and who is missing. If someone is unaccounted for, treat it as an active emergency.
- Stabilize navigation: maintain safe maneuvering and situational awareness. Even if the incident is “local,” the vessel’s movement can create secondary hazards.
- Control the source: for spills, stop the release; for fires, isolate fuel/oxygen where applicable; for flooding, control openings and manage watertight integrity.
- Start the log immediately: record times, actions, and observations while details are fresh. A log is not paperwork; it’s a memory system.
A simple example: a small fuel sheen is noticed near the stern. The deck officer orders the engine room to check for leaks (source control), assigns a crew member to deploy absorbent materials (containment), and directs the bridge to reduce speed and maintain a safe heading to limit spread (navigation stabilization). Meanwhile, the watchstander records the time the sheen was first observed and the weather and sea state at that moment.
Reporting: What to Report and How to Keep It Accurate
Reporting is easier when you separate facts from assumptions.
- Facts: time, location, vessel particulars, what was observed, and what actions were taken.
- Assumptions: likely cause, estimated quantity, and future outcomes. These should be labeled as estimates or pending confirmation.
Use a “three-pass message” approach for external notifications:
- Pass 1: identify the incident and immediate hazards.
- Pass 2: state current actions and what you need.
- Pass 3: provide updates as measurements or confirmations arrive.
If you must estimate, tie the estimate to a method. For example, “approximately 50–100 gallons” is more useful when it’s based on tank level change or known discharge rate, not a guess from memory.
Example: Collision with Minor Damage and a Small Oil Sheen
Assume a watchstander reports a contact with another vessel at 0215. The deck officer’s first actions are to secure the scene, confirm crew accountability, and ensure safe maneuvering. The crew checks for injuries and assesses watertight integrity. A sheen is observed near a vent line.
Next, the officer assigns containment: absorbent booms or pads are deployed where feasible, and the suspected source is isolated. The bridge logs the time of observation and the vessel’s position. Communications follow in order: internal chain first, then external reporting with facts (time, location, observed sheen, immediate containment actions) and clearly marked estimates (quantity estimate based on tank level change).
Finally, the officer updates the report when the source is confirmed and when the sheen is no longer expanding. That update matters because early reports are often incomplete, but they don’t have to be wrong.
Mind Map: Reporting Content and Evidence
Practical Checklist for the First 30 Minutes
- Muster and accountability started
- Scene secured and hazards controlled
- Navigation stabilized and bridge informed
- Source control attempted or initiated
- Log entries started with time stamps
- External notification drafted with facts separated from estimates
- Updates scheduled when confirmations arrive
A response plan works best when it’s rehearsed with real constraints: limited crew, poor visibility, and the fact that someone will be busy doing the actual work. The plan should help them do that work in the right order, not just describe what should happen in an ideal world.
8.4 Practical Pollution Prevention Scenarios and Correct Responses
Pollution prevention questions on the exam usually test whether you can connect a specific situation to the correct prevention step, then to the correct record or notification action. The trick is to treat each scenario like a short bridge checklist: identify the source, stop the release, contain what you can, and document what you did.
Foundational Logic You Apply Every Time
Start by sorting the problem into one of three buckets:
- Fuel and oil leaks (bilge, machinery spaces, bunkering),
- Garbage and plastics (routine disposal, accidental loss),
- Chemical or hazardous substance releases (spills, incompatible mixing, damaged containers).
Then apply the same sequence: prevent escalation, control the spread, use the correct equipment, notify the right people, and record the event. If you can say what “right people” means for your vessel and operation, you’re already ahead.
Scenario 1: Oily Sheen After a Machinery Space Transfer
A deck officer notices an oily sheen near the overboard discharge outlet after a transfer from a settling tank. The sheen is small but persistent.
Correct response:
- Stop the source by halting the transfer and securing the affected system.
- Prevent discharge by ensuring overboard valves and discharge arrangements are not allowing contaminated water out.
- Contain and clean using absorbent pads or booms where appropriate, then collect contaminated materials for proper disposal.
- Verify bilge handling so the bilge treatment process is used correctly rather than “hoping it clears.”
- Report and record the incident per shipboard procedures, including time, location, suspected source, actions taken, and disposition of recovered materials.
Exam-style reasoning tip: If the question mentions an overboard outlet or discharge arrangement, the best answer almost always includes securing the discharge path immediately.
Scenario 2: Accidental Loss of a Small Quantity of Fuel During Bunkering
During bunkering, a hose connection drips and a small amount of fuel runs into a drip tray area and then toward a scupper.
Correct response:
- Stop the transfer and secure valves.
- Control the path by blocking the scupper/drain route to stop fuel from reaching the water.
- Absorb and recover with appropriate pads/booms, then bag and label waste.
- Inspect the area to confirm no remaining fuel in the bilge or drip tray.
- Document the event and the corrective actions, including whether the spill reached the water and what containment prevented.
Easy example to remember: If fuel can reach a drain, treat the drain like a “fast lane” to the sea. Your first containment step is blocking the route.
Scenario 3: Garbage Disposal Error and Plastic in the Water
A crew member discards a small plastic item overboard during routine operations. The item is noticed shortly after.
Correct response:
- Stop further disposal and secure the area.
- Recover what you can promptly using safe retrieval methods.
- Prevent repeat by correcting the disposal practice and reinforcing the correct segregation and storage.
- Record the incident as required by ship procedures, including what was lost, when, and how it was handled.
Exam-style reasoning tip: The “best” answer usually includes both immediate recovery and a prevention step, not just cleanup.
Scenario 4: Chemical Spill from a Damaged Container in a Storage Locker
A container of cleaning chemical is found leaking after a shift in heavy weather. The spill is contained within the locker but has soaked into absorbent material.
Correct response:
- Stabilize the scene by securing the locker and preventing spread to drains.
- Use compatible absorbents and avoid mixing chemicals that could worsen the situation.
- Isolate waste in labeled containers for proper disposal.
- Check for exposure risks and follow ship safety procedures for PPE and ventilation.
- Report and document the spill, including the product identity, approximate quantity, containment method, and waste disposition.
Easy example: If the question says “damaged container,” the correct response includes identifying the product and managing the waste as chemical waste, not generic trash.
Mind Map: Pollution Prevention Decision Flow
Scenario 5: Bilge Alarm with Uncertain Cause
An alarm indicates bilge level rise. The cause is unclear, and a discharge request is proposed to “get back to normal.”
Correct response:
- Investigate first to determine whether the rise is from normal accumulation, a leak, or contamination.
- Do not discharge until you confirm the bilge water is suitable for the intended handling method.
- Use containment if contamination is suspected.
- Record the investigation and outcome and follow the correct shipboard procedure for bilge treatment and disposal.
This is the exam’s favorite trap: “We need to reduce the level” is not the same as “we can discharge safely.” The correct answer ties the action to the contamination status.
Quick Response Checklist You Can Apply Under Exam Pressure
- What is the likely pollutant? (oil, garbage, chemical)
- What is the escape route? (overboard outlet, scupper, drain)
- What stops escalation? (secure valves, stop transfer, block drains)
- What controls spread? (booms, pads, absorbents)
- What proves you did it right? (records: time, location, actions, waste disposition)
8.5 Environmental Protection Practices During Normal Operations
Normal operations are where most environmental compliance is won or lost. The goal is simple: prevent releases, catch small problems early, and document what you did so the record matches reality.
Core Principle: Prevent Before You Treat
Start with the idea that “cleanup” is a last resort. For example, if a drip tray under a transfer hose is missing, you are not “being efficient”; you are creating a future spill. A good practice is to treat every transfer, maintenance task, and waste movement like it could go wrong, then build barriers that make the wrong outcome harder.
Oil and Fuel Control During Routine Work
Oil control is mostly about containment and housekeeping.
- Transfer operations: Use drip pans or absorbent pads under connection points. Keep hoses supported so they don’t chafe and leak. Example: when topping off a day tank, pause to check the coupling after the first few minutes, not only at the end.
- Bilge management: Keep bilge alarms functional and avoid “workarounds” that bypass them. Example: if a bilge pump cycles unusually often, investigate the source before pumping more out.
- Deck washdowns: Use detergents only as allowed by your procedures and avoid sending oily runoff overboard. Example: if you must wash an area after a minor leak, collect the wash water with absorbents and dispose of it as oily waste.
Garbage Handling That Doesn’t Create New Problems
Garbage rules are easier when you separate waste streams.
- Segregation: Keep plastics, food waste, and other trash in labeled containers. Example: a deck officer notices mixed waste in a single bin; the fix is not “sort later,” it is “sort at the source.”
- Storage: Cover bins to prevent litter from blowing into the water. Example: if wind is strong during cargo operations, add a routine check before and after watch turnover.
- Disposal records: Ensure disposal logs match actual discharge or onboard treatment. Example: if a waste vendor removes containers, record the pickup date and quantity immediately.
Sewage and Gray Water Practices
Sewage and gray water management depends on the system you have and the operating mode you select.
- System operation: Follow the correct mode for the vessel’s status and location. Example: if the treatment unit is in service, confirm indicators show normal operation before continuing routine discharge.
- Avoid bypassing: If a system alarms, treat it as a signal to troubleshoot, not a reason to route around controls.
- Hose and overboard openings: Cap and secure fittings when not in use. Example: after cleaning a drain line, verify caps are seated before leaving the space.
Air Emissions and Engine Room Discipline
Even though this section focuses on water protection, air-related practices often affect environmental compliance because they influence soot, residues, and maintenance.
- Fuel and lube handling: Prevent overboard contamination from leaks during changeovers. Example: during fuel filter changes, keep absorbents ready and dispose of used media as required.
- Maintenance cleanliness: Keep bilges and drip trays clean so leaks are visible. Example: a “clean engine room” is not just pride; it reduces the chance that a small leak becomes a large one.
Spill Response Readiness During Normal Operations
You don’t need a spill to practice spill response. You need readiness.
- Material placement: Keep spill kits accessible and staged with the right absorbents for oil versus general liquids. Example: if your kit is stored behind equipment, you will lose time during an actual release.
- First actions: Stop the source, contain the spread, protect drains, and notify per procedures. Example: if a small hose leak occurs, clamp or shut the valve first, then absorb and bag the material.
- Reporting and documentation: Record what happened, what was contained, and how waste was disposed. Example: write the log entry while the scene is still fresh—before memory turns into “probably.”
Mind Map: Normal Operations Environmental Protection
Example: A Routine Deck Transfer That Stays Compliant
A vessel transfers a liquid to a service tank during a watch. The deck officer assigns one person to monitor the connection point, places absorbent pads under the coupling, and confirms the receiving tank venting is operating normally. After the first few minutes, they re-check the coupling for seepage. When the transfer ends, they wipe the area, bag any used absorbents as oily waste if contamination is present, and record the transfer and waste handling in the log. The key detail is that the officer treats the transfer as a controlled process, not a “set it and forget it” task.
Example: Minor Bilge Alarm with No Overboard Release
During routine steaming, a bilge alarm sounds more frequently than usual. The officer verifies the alarm system is functioning, checks for leaks in likely sources such as pump seals and piping joints, and inspects the bilge for sheen. They correct the source, then confirm normal pump cycling returns. Only after the cause is addressed do they resume routine monitoring, documenting the findings and corrective actions. This approach prevents repeated pumping that could otherwise increase the chance of an improper discharge.
Practical Checklist Mindset for Watch Turnover
Use a short, consistent handoff routine: what was done, what was checked, what waste was generated, and whether any environmental equipment needs attention. Example: if a spill kit was opened for a small absorbent cleanup, note the used items and confirm the kit is restocked before the next watch.
9. Federal Regulations for Merchant Mariner Operations
9.1 USCG Authority and Regulatory Framework Overview
A deck officer doesn’t just navigate water; they operate inside a rules system enforced by the U.S. Coast Guard (USCG). The exam often tests whether you can connect a scenario to the right authority, the right requirement, and the right action on the bridge.
Core Authority and Who Enforces It
USCG authority comes from federal law and is implemented through regulations, guidance, and inspections. In practice, the USCG enforces requirements through:
- Inspections and examinations that verify compliance with safety, equipment, and operational procedures.
- Investigations after incidents to determine what went wrong and whether required actions were taken.
- Port state and vessel compliance activities that focus on whether the vessel is fit to operate.
A useful mental model is: law sets the duty, regulation defines the method, inspection verifies the result.
The Regulatory Stack from Broad Law to Specific Rules
Regulations are not random lists; they form a stack. When you see a question, identify which layer it’s testing.
- Statutes establish broad obligations, such as safe operation and compliance with maritime safety requirements.
- Regulations translate obligations into measurable requirements, like equipment carriage, watchstanding expectations, and reporting.
- Policies and guidance explain how compliance is interpreted during inspections.
- Operational procedures on the vessel translate requirements into daily practice.
If a question asks what you must do immediately, it’s usually pointing to operational procedures grounded in regulations. If it asks what USCG can require or enforce, it’s pointing to the authority layer.
Where Deck Officers Fit in the Framework
Deck officers are not passive passengers in the compliance system. Your responsibilities typically include:
- Ensuring required equipment is available, properly maintained, and ready for use.
- Following bridge procedures that support safe navigation and watchstanding.
- Making required entries in logs and completing required reports.
- Demonstrating knowledge during inspections, including how you would respond to emergencies.
A common exam pattern is to describe a “small” deviation—like an incomplete log entry—and then ask whether it matters. In this framework, small deviations matter because they can show a breakdown in required procedures.
How Regulations Show Up in Real Scenarios
Consider three scenario types and what the exam expects you to do.
Scenario A: Equipment readiness If a question says a required lifesaving appliance is present but not ready for immediate use, you should treat it as a compliance failure. “Present” is not the same as “available and ready,” and inspections focus on readiness.
Scenario B: Operational procedure If a question describes watchstanding without proper lookout practices, it’s testing whether you understand that regulations translate into bridge behavior, not just paperwork.
Scenario C: Reporting and documentation If a question asks what must be reported after an incident, it’s testing the duty to notify and the timing expectations implied by the regulatory framework. Even when details vary by incident type, the exam usually rewards the correct category of action.
Mind Map: USCG Authority and Regulatory Framework
Quick Example: Matching Authority to Action
A question states that a vessel is operating with required safety equipment onboard, but the officer cannot demonstrate that it is maintained according to required standards. The best reasoning path is:
- The scenario is about compliance verification, not just presence.
- That points to regulations implemented through inspections.
- The deck officer’s role is to ensure readiness and maintenance evidence is available.
Quick Example: Matching Procedure to the Right Layer
Another question describes a bridge watch where the lookout is assigned but not maintained as required by procedure. The correct approach is:
- The issue is operational behavior.
- That behavior is the vessel-level translation of regulatory expectations.
- The deck officer’s responsibility is to correct the watchstanding practice immediately.
Practical Takeaway for the Exam
When you read a USCG authority question, don’t hunt for trivia. Identify whether the question is testing what USCG can enforce, what the regulation requires, or what the vessel must do on the bridge. That single sorting step usually turns a confusing scenario into a straightforward answer.
9.2 Manning Requirements and Deck Officer Responsibilities
Manning rules exist for a simple reason: when something goes wrong, the ship needs the right people in the right places, with clear duties and enough rest to perform them. For a deck officer exam, the goal is not memorizing a list; it is recognizing what the rules require and how those requirements show up in watchstanding, safety actions, and documentation.
Core Manning Concepts
Start with three foundational ideas.
-
Minimum safe manning sets the baseline number and qualifications of personnel required for a vessel to operate safely. The baseline is not a suggestion; it is a compliance target.
-
Watch schedules translate minimum staffing into real time coverage. A ship can meet minimum manning on paper and still fail if watches are arranged so that duties overlap or relief is delayed.
-
Deck officer responsibility is tied to the watch. When you are the officer of the watch, you are the person the rules expect to be actively managing navigation and safety.
A practical way to think about it: minimum manning answers “How many people?” while officer responsibilities answer “What must the right people do while they are on watch?”
Officer Responsibilities During Normal Operations
Deck officers are expected to ensure safe navigation and safe ship handling. That expectation shows up in concrete behaviors.
- Maintain an effective lookout appropriate to conditions. If visibility drops, the lookout effort must increase, not just the number of people.
- Keep navigation equipment in working order and use it correctly. A radar display that is on but misinterpreted is still a problem.
- Ensure proper bridge procedures such as helm orders, speed control, and communication between bridge team members.
- Verify that required logs and records are maintained accurately. If a log is missing entries, it is harder to prove what decisions were made.
Example: Watchstanding with Reduced Visibility
Assume a vessel is approaching a narrow channel at night with fog. Minimum manning might be unchanged, but officer responsibilities expand in practice.
- The officer of the watch increases attention to bearings, speed control, and lookout effectiveness.
- The officer ensures radar is used to monitor relative motion and that bearings are recorded consistently.
- The officer confirms that the bridge team understands who is doing what, so the lookout does not become “everyone’s job” and therefore “no one’s job.”
Officer Responsibilities During Abnormal Situations
When conditions worsen, responsibilities shift from routine monitoring to active risk control.
- Collision avoidance actions must be initiated promptly and executed decisively according to the applicable rules.
- Emergency communications must be made without delay, using the correct channels and formats.
- Safety equipment readiness must be confirmed when circumstances indicate increased risk.
- Coordination with the crew matters. Even with the right equipment, poor coordination can turn a manageable incident into a chaotic one.
Example: Engine Trouble While Maintaining a Watch
If propulsion becomes unreliable, the officer of the watch must adjust navigation strategy immediately.
- The officer reduces risk by changing speed and course decisions to match the vessel’s maneuvering limitations.
- The officer ensures the bridge team is aware of the new constraints and that helm and communication remain clear.
- The officer documents key actions and times, because later questions will focus on what was known and what was done.
Manning Compliance and Documentation
Compliance is not only staffing; it is showing that staffing and duties were handled correctly.
- Manning documents define who is required and what qualifications apply.
- Watch schedules show how those people are assigned over time.
- Logs and records show that required duties were performed.
A common exam trap is treating documentation as separate from responsibility. In reality, documentation is the evidence trail of responsibility.
Example: Missing Relief Entry
Suppose a relief officer signs in late, and the log does not reflect the actual timing. Even if the vessel was operated safely, the incomplete record can still be a compliance issue because it obscures whether fatigue and watch continuity were properly managed.
Mind Map: Manning Requirements and Deck Officer Responsibilities
Quick Reasoning Framework for Exam Questions
When you see a scenario, answer in this order.
- What is the watch context? Identify whether the question is about officer of the watch duties.
- What condition changes? Visibility, maneuvering ability, equipment status, or crew availability.
- What responsibility expands? Lookout, speed control, communications, or collision avoidance actions.
- What evidence is expected? Logs, entries, and timing that match the actions taken.
This approach keeps you from getting stuck on “how many people” when the question is really about “what the officer must do with the people on watch.”
9.3 Safety Management Systems and Compliance Expectations
A Safety Management System, or SMS, is the structured way a vessel identifies risks, controls them, and proves the controls actually work. For a deck officer, the exam angle is usually practical: what you must do, what you must document, and what you must verify during watchstanding and operations.
Foundations of SMS
Start with the core logic: hazards exist, risks vary by task, and controls must be both planned and maintained. An SMS typically includes:
- Safety and environmental policy: a short statement that sets expectations for reporting, compliance, and continuous improvement.
- Responsibilities and authority: who can stop an operation, who approves changes, and who ensures training and resources.
- Risk management: a repeatable method to assess hazards and select controls.
- Operational readiness: procedures, checklists, and maintenance that keep equipment reliable.
- Monitoring and measurement: internal checks that catch drift before it becomes an incident.
- Incident reporting and corrective action: a loop that turns lessons into updated procedures.
A useful mental model is “plan, do, check, fix.” If a procedure exists but nobody uses it, the SMS is just paperwork. If a procedure is used but never reviewed, the SMS becomes a fossil.
Risk Management That Shows Up on Deck
Risk management is where SMS becomes real. The process usually follows these steps:
- Identify hazards for the specific operation, not generic ones.
- Assess risk by considering severity and likelihood.
- Select controls that reduce risk to an acceptable level.
- Implement and communicate the controls before the task begins.
- Review during execution if conditions change.
Example: preparing to enter a narrow channel.
- Hazard: reduced visibility and heavy traffic.
- Risk: collision or grounding.
- Controls: confirm bridge team roles, verify radar/ARPA performance, set safe speed, increase lookout effectiveness, and ensure pilotage plan alignment.
The exam-friendly detail is that controls must be specific and observable. “Be careful” is not a control. “Set speed to allow stopping within the available distance under current conditions” is a control.
Compliance Expectations and What Inspectors Look For
Compliance is not only “following rules.” It is demonstrating that the vessel can consistently follow rules under normal and abnormal conditions. Common expectations include:
- Procedures are current and accessible on board.
- Training is completed for tasks tied to the SMS.
- Records are accurate and match actual practice.
- Nonconformities are handled through corrective action rather than ignored.
A practical example: emergency drills.
- If the log shows drills were conducted but the crew cannot explain muster roles, the record is incomplete.
- If the crew can explain roles but the equipment inspection dates are overdue, the SMS is failing at operational readiness.
Documentation Without Becoming a Paper Factory
Documentation should support decisions. Think of records as evidence that risk controls were planned, executed, and verified.
Key record types often include:
- Risk assessments and task authorizations
- Training and competency records
- Maintenance and inspection logs
- Nonconformity reports and corrective action tracking
- Incident and near-miss reports
Example: a near-miss during mooring.
- Good record: what happened, contributing factors, immediate actions, and the corrective action assigned.
- Weak record: “incident occurred, investigated, closed” with no link to a control change.
Monitoring, Internal Checks, and Corrective Action
Monitoring answers one question: “Are we still doing what we said we would do?” Internal audits and inspections typically check:
- procedure adherence during real operations
- effectiveness of controls
- timeliness of corrective actions
- whether recurring issues are treated as systemic, not isolated
Corrective action should be proportionate and traceable. If a control fails, the fix must address the cause, not just the symptom.
Example: repeated checklist omissions.
- Symptom: steps skipped.
- Likely cause: checklist design doesn’t match the actual workflow or bridge team roles aren’t clear.
- Corrective action: revise the checklist layout and reinforce role assignment during watch turnover.
Mind Map: Safety Management System Flow
Example: Applying SMS During a Watch
During a night watch, the officer notices intermittent VHF static affecting communications. A strong SMS response is:
- treat it as a hazard to safe coordination
- assess risk based on traffic density and planned maneuvers
- apply controls such as switching to alternate communication methods and adjusting the plan to reduce reliance on the affected channel
- log the issue and initiate corrective action through the vessel’s reporting process
- verify the effectiveness of the control by confirming communications clarity before resuming normal operations
That sequence ties the SMS loop to a concrete outcome: safer operations supported by evidence, not just good intentions.
9.4 Documentation and Recordkeeping Including Common Forms
Deck officers don’t just navigate; they also document. Good recordkeeping turns “we think” into “we can show,” which matters when questions arise about watchstanding, navigation decisions, safety actions, and regulatory compliance. The goal is simple: capture the right facts at the right time, in a format that another qualified person can interpret.
Foundational Principles of Good Records
Start with three rules. First, record contemporaneously. If you write it later, memories drift and details get fuzzy—especially during busy watches. Second, record decisions and supporting observations, not just outcomes. For example, noting “reduced visibility, safe speed adjusted, extra lookout posted” is more useful than “proceeded safely.” Third, keep entries clear and consistent. Use the same units, abbreviations, and time basis across the log.
A practical habit: before a watch change, scan the log for missing items you would want to see if you were the next officer. If you wouldn’t understand it in five minutes, neither will the person reviewing it later.
Core Recordkeeping Categories for Deck Officers
Most common forms and logs fall into four buckets.
- Watchstanding and bridge activity: bridge log entries, lookout changes, course and speed changes, and significant events.
- Navigation and passage planning: passage plan references, route adjustments, and documentation of key navigational fixes.
- Safety and emergency readiness: drills, equipment checks, and incident reports.
- Regulatory compliance and operational records: required entries tied to inspections, maintenance, and safety management system procedures.
When a question is asked, it should be answerable by one of these buckets. If it isn’t, you likely need a new entry type or a clearer standard for what belongs in the log.
Common Forms and What They Capture
Bridge logs typically capture time-stamped operational facts: watch times, helm orders, course changes, weather observations, and notable actions. If your vessel uses standardized abbreviations, stick to them. If not, write plainly.
Drill and inspection records capture readiness. A drill record should include the date, scenario type, participants or stations, and any corrective actions. Equipment checklists should show the item, the check result, and the person responsible.
Incident and deviation reporting records capture safety-critical events. These entries should state what happened, when it happened, immediate actions taken, and any follow-up required by the vessel’s procedures.
A useful example: during a radar malfunction, the record should show the time, the observed effect (for example, loss of target tracking), the action taken (for example, increased visual lookout and reduced speed), and how you maintained safe navigation until normal operation returned.
How to Write Entries That Survive Review
Use a consistent structure: time, condition, action, result.
- Time: include the watch time or exact time basis used by the vessel.
- Condition: visibility, traffic density, equipment status, or weather.
- Action: what you did and why it was appropriate.
- Result: what changed afterward, including whether the situation stabilized.
Avoid vague phrases like “handled appropriately.” Instead, specify the action and the safety basis. If you adjusted speed due to traffic and visibility, say so.
Mind Map: Documentation Flow
Example Entries You Can Imitate
Example: Watchstanding and navigation adjustment
- 2026-02-13 0200 UTC: Visibility reduced to ~1 nm in rain; traffic moderate; radar performance normal. Increased lookout frequency, reduced speed, maintained safe course with additional visual bearings. Situation stabilized by 0230 UTC.
Example: Equipment issue and safe continuation
- 2026-02-13 0415 UTC: EBL tracking intermittent; target returns inconsistent. Reduced speed, increased visual lookout, used alternative bearings and range estimates, and maintained course until tracking stabilized at 0435 UTC.
Example: Drill record with corrective action
- 2026-02-13 0900 local: Fire drill conducted for assigned stations. Response time met target; one extinguisher nozzle labeled incorrectly. Corrective action: relabel and verify during next equipment check.
Practical Checklist for Common Forms
Before signing, confirm four items: the entry is time-stamped, the facts are specific, the action is linked to the condition, and any required follow-up is recorded. If a form has fields you don’t know, don’t guess—use the vessel’s procedure for obtaining the correct information.
Good documentation is not paperwork for its own sake. It is a safety tool that helps the next officer understand what you saw, what you decided, and how you kept the vessel under control.
9.5 Practical Regulation Questions With Verification Steps
Regulation questions on the deck officer exam usually test whether you can (1) identify the governing rule set, (2) apply the correct requirement to the fact pattern, and (3) verify your answer by checking the exact condition that triggers the rule. A good method is to treat each question like a short inspection: you don’t guess the outcome; you confirm the chain of requirements.
Mind Map: Regulation Question Workflow
Step 1: Identify the Rule Set
Start by sorting the question into one of three buckets: navigation conduct, safety equipment/emergency readiness, or regulatory administration (manning, records, reporting). For example, a question about “what must be on the bridge during watch” is usually safety management and watchstanding; a question about “what signal is required in restricted visibility” is navigation rules.
Step 2: Extract Trigger Facts
Write down the facts that control the rule. Common triggers include: restricted visibility, underway vs at anchor, presence of pilotage, emergency condition, and whether a specific record must be maintained. If the question says “in restricted visibility,” you should immediately treat visibility as a gating condition for the correct navigation rule.
Step 3: Match Requirement Elements
Most exam answers fail because they match the general idea but miss one element: timing, location, or who is responsible. Use a quick checklist in your head:
- Who: master, officer of the deck, lookout, or vessel.
- When: before departure, during watch, immediately upon occurrence.
- What: action, signal, report, or entry in a log.
Step 4: Verify with a Condition Check
Before committing, ask one targeted question: “If the trigger fact were removed, would this requirement still apply?” If the answer is yes, you may have chosen an option that is too broad. If the answer is no, you likely selected the correct conditional requirement.
Example: Restricted Visibility Sound Signals
Scenario: A vessel is underway in restricted visibility. The question asks which sound signal is required.
Verification steps:
- Rule set bucket: navigation conduct.
- Trigger fact: restricted visibility.
- Requirement elements: signal type and frequency depend on whether the vessel is making way, not making way, or at anchor.
- Condition check: if the vessel were not in restricted visibility, the signal requirement would change.
Best answer logic: Choose the option that specifies the correct signal for a vessel underway in restricted visibility, not the one that describes general underway signals without the visibility condition.
Example: Watchstanding Log Entry
Scenario: During a watch, an officer notices a safety-related event and the question asks what must be recorded.
Verification steps:
- Rule set bucket: regulatory administration and safety management.
- Trigger facts: event occurred during watch; question asks about documentation.
- Requirement elements: what record, and whether it must be made immediately or can be deferred.
- Condition check: if the question emphasizes “during the watch,” the correct option usually requires prompt entry rather than a vague “later when convenient.”
Best answer logic: Select the option that names the correct type of entry and the timing consistent with watchstanding responsibilities.
Case Study: Emergency Communications and Reporting
Scenario: A fire breaks out on board. The question asks what the officer must do first and what must be reported.
Verification steps:
- Rule set bucket: emergency preparedness and reporting.
- Trigger facts: active emergency condition.
- Requirement elements: immediate actions to protect life and communicate, followed by required reporting.
- Condition check: if the scenario were a drill, the reporting requirement might differ from a real event.
Best answer logic: Choose the option that places immediate emergency communication and onboard coordination first, then includes the correct reporting obligation tied to an actual incident.
Mind Map: Verification Checklist for Multiple Choice

Practical Tips That Prevent Common Mistakes
When two answers both “sound right,” compare them by elements. If one answer ignores the trigger condition (like restricted visibility or an actual emergency versus a drill), it is usually the wrong one. If one answer specifies a vague action without the required timing or record, it is also usually wrong. Your goal is not to be clever; it’s to be precise enough that the rule’s conditions are satisfied.
10. Maritime Law and Liability Concepts for Deck Officers
10.1 Negligence Standards and Duty of Care in Navigation
A deck officer’s job is not just to “follow rules,” but to exercise reasonable care so the vessel, crew, cargo, and other mariners are not put at undue risk. In navigation, negligence usually means two things: a duty existed, and the officer failed to meet the standard of care that a reasonably competent person would apply under similar conditions.
Duty of Care in Navigation
Duty of care is the obligation to act with the level of caution the law expects. In maritime navigation, duties commonly arise from:
- The role you hold: a deck officer is expected to plan, monitor, and respond.
- The situation you create or control: if you set course, speed, or watch procedures, you influence risk.
- The foreseeability of harm: if a hazard is observable and its consequences are reasonably predictable, you must address it.
A practical way to think about duty is to ask: “If I were not the officer, would a competent person in my position have taken this step?” If the answer is yes, duty likely exists.
The Negligence Standard of Reasonable Care
The standard is typically reasonable care under the circumstances, not perfection. Courts and investigators look for what a competent officer would do given:
- visibility and weather,
- traffic density and maneuvering room,
- vessel characteristics and limitations,
- available equipment and training,
- time to act.
For example, “reasonable” might mean slowing down in restricted visibility, verifying radar performance before relying on it, or confirming a planned passage remains safe after a course alteration.
Breach of Duty and What Counts as Failure
Breach is the gap between what was done and what reasonable care required. Common breach patterns include:
- Inadequate lookout: relying on one sensor or one person when conditions demand more.
- Poor speed management: proceeding at a speed that prevents timely avoidance.
- Failure to monitor: making a decision and then not tracking whether it is working.
- Weak communication: not passing critical information to the bridge team.
A simple example: You observe a target on radar but do not establish whether it is on a collision course, and you keep course and speed until it is too late to maneuver. The failure is not the radar contact itself; it is the lack of timely risk assessment and action.
Causation and How Negligence Becomes Liability
Even if duty and breach exist, negligence must connect to harm. Causation is usually analyzed as:
- Cause-in-fact: “But for” the breach, would the harm likely have been avoided?
- Proximate cause: was the type of harm a foreseeable result of the breach?
Example: If a proper lookout would have detected a small unlit vessel in time to alter course safely, and the collision occurred, causation is easier to establish. If the harm resulted from an unrelated sudden failure that reasonable care could not prevent, causation may be weaker.
Comparative Fault and Shared Responsibility
Maritime incidents often involve multiple contributing factors. If both vessels or multiple parties contributed, liability may be apportioned. This is why “we did everything right” is not always the winning argument; the question becomes whether each party met the reasonable-care standard.
Example: Vessel A maintains a proper lookout but misinterprets a target due to clutter settings, while Vessel B fails to sound required signals. Both can be at fault, and the final allocation depends on how each breach contributed.
Practical Decision Framework for Bridge Actions
Use a structured approach during watchstanding:
- Identify the hazard: what could cause collision, grounding, or injury?
- Assess risk: what is the likelihood and severity?
- Choose a safe action: what change reduces risk without creating a worse one?
- Verify and monitor: does the action work, and are conditions changing?
This framework helps translate “reasonable care” into concrete bridge behavior.
Mind Map: Negligence Standards and Duty of Care
Example: Applying the Framework to a Collision Scenario
Assume you are the deck officer on watch in moderate fog. You detect a target on radar but do not reduce speed or confirm the target’s bearing trend. The vessels later collide.
- Duty: as the officer on watch, you must manage navigation risk.
- Reasonable care: fog increases stopping distance and reduces visual confirmation, so speed and monitoring must be adjusted.
- Breach: failing to verify the target’s motion and failing to manage speed are likely breaches.
- Causation: if earlier speed reduction and clearer tracking would likely have enabled timely avoidance, the breach connects to the collision.
The key takeaway is that negligence analysis is not about hindsight. It is about whether your actions matched what a competent officer would do with the information available at the time.
10.2 Collision Liability Basics and Evidence Considerations
Collision liability is usually decided by two questions: what each vessel did, and what evidence proves it. The exam likes clean logic, so treat every scenario like a checklist: duty, breach, causation, and proof.
Core Liability Framework
Duty of Care in Navigation
Deck officers owe a duty to navigate with reasonable care and skill. “Reasonable” means what a competent officer would do under similar conditions, not what seems convenient after the fact. For example, if visibility is poor, maintaining a proper lookout and adjusting speed are not optional; they are part of the duty.
Breach of Duty
A breach is a failure to meet that duty. Common breach patterns include:
- Not keeping a proper lookout.
- Proceeding at an unsafe speed.
- Failing to take required action under the Rules of the Road.
- Mismanaging communications or signals.
Example: Two vessels approach in restricted visibility. Vessel A reduces speed and uses radar/visual lookout; Vessel B keeps speed and relies on “it looked fine earlier.” If they collide, Vessel B’s breach is easier to argue because the duty changes with conditions.
Causation and Contributing Fault
Causation asks whether the breach caused or contributed to the collision. Many cases involve shared fault. In practice, you’ll often see “both sides contributed” when each vessel made a different navigational mistake.
Example: Vessel A fails to maintain course discipline and drifts toward Vessel B’s track. Vessel B also fails to take early action after detecting the risk. Even if Vessel A’s error is the first domino, Vessel B’s later inaction can still be a contributing cause.
Evidence That Matters Most
Evidence is what turns “it seems” into “it can be shown.” Courts and investigators typically weigh evidence by reliability, completeness, and consistency.
Bridge Logs and Watch Records
Bridge logs, position records, and watch handover notes can show what was known and when. A good log entry is specific: time, position, speed, course, visibility, and actions taken. Vague entries like “proceeded normally” are weak.
Example: A log states that at 1400 the officer observed reduced visibility and reduced speed, then at 1420 the officer detected a target on radar but did not alter course. That timeline supports both duty and causation.
Radar and ECDIS Data
Electronic data can be persuasive when it is contemporaneous and properly preserved. The key is whether the data reflects the actual settings and whether tracks can be reconstructed.
Example: If radar was on but range/bearing settings were changed right before the collision, the defense may argue the track is unreliable. The prosecution side will look for corroboration from other sources.
VDR and Audio Recordings
Voyage Data Recorder information and bridge audio can show helm orders, alarms, and whether required sound signals were made. Audio is especially useful for proving lookout and communication practices.
Example: If audio shows no sound signals during a period when they were required, that supports breach. If audio shows timely orders and execution, it supports reasonable care.
Witness Statements and Visual Observations
Witnesses can help, but they can also conflict. The strongest statements align with objective data like radar plots, AIS, and timing.
Example: One deckhand says “we saw them early,” while the log shows the first visual sighting occurred late. The inconsistency can reduce credibility unless explained by lighting or observer position.
Mind Map: Collision Liability and Proof
Example: Turning Facts into Liability Analysis
Scenario: Vessel A and Vessel B collide at night. Vessel A’s officer claims Vessel B “came out of nowhere.” Vessel B’s officer states Vessel A did not reduce speed despite reduced visibility.
Step 1: Build a timeline from logs and any electronic records.
- Note the first detection time.
- Note speed and course changes.
- Note any sound signals.
Step 2: Identify duties triggered by conditions.
- Reduced visibility increases the duty to reduce speed and maintain lookout.
Step 3: Test breach.
- If Vessel A’s speed stayed high after reduced visibility was recorded, breach is plausible.
- If Vessel B took early action after detection, breach may shift.
Step 4: Test causation.
- Ask whether the collision would likely have been avoided with the required action.
Step 5: Evaluate evidence quality.
- If Vessel A’s log is sparse and radar settings were altered, Vessel A’s story is harder to prove.
- If Vessel B’s audio shows timely orders and signals, Vessel B’s defense strengthens.
The exam answer usually rewards the candidate who can say, “Here is the duty, here is the breach, here is the causal link, and here is the evidence that supports it.” That’s the whole game, just with fewer moving parts than real life.
10.3 Towage and Pilotage Responsibilities
Towage and pilotage are two different ways of getting a vessel safely where it needs to go, but both create shared responsibility between parties. On the exam, the key is to identify who is responsible for what, and what actions are expected when conditions change.
Foundational Concepts of Towage
Towage means one vessel (the tug) assists another (the tow) by pushing, pulling, or otherwise helping movement. The tow may be unmanned or may have its own crew and steering capability. The tug’s role is not “automatic control,” and the tow’s role is not “automatic blame.” Responsibility depends on control, communication, and the specific task being performed.
A practical way to think about it: if the tug is directing the maneuver, the tug’s master must ensure the maneuver is executed safely. If the tow is maintaining steering and speed under its own control, the tow’s master must keep the vessel responsive and follow agreed procedures.
Foundational Concepts of Pilotage
Pilotage means a licensed pilot boards to navigate a vessel through a specific area requiring local knowledge. The pilot’s job is navigation and maneuvering in that area. The vessel’s master does not disappear; the master retains overall command and must support safe operation, including ensuring the pilot is properly informed and that the vessel is ready to execute the pilot’s orders.
A simple exam example: if a pilot orders a turn to avoid shoaling water, the master’s responsibility is to ensure the vessel can safely comply and that essential bridge functions like lookout and communications are maintained.
Responsibility Allocation in Towage
Towage responsibility commonly splits into three practical buckets: control of the maneuver, safety of the tow, and safe seamanship.
- Control of the maneuver: If the tug is leading the movement plan, it must communicate clearly and monitor the results. If the tow is steering independently, it must respond promptly and maintain safe speed and heading.
- Safety of the tow: The tug must consider tow handling risks such as slack, towline tension changes, and the effect of current and wind on the tow’s behavior.
- Safe seamanship: Both vessels must maintain lookout, comply with navigation rules, and avoid creating hazards for each other.
A concrete scenario: a tug and tow are making a turn in a narrow channel. If the tug orders a change in speed but the tow fails to adjust rudder promptly, the tow’s master has contributed to the unsafe outcome. If the tug orders a maneuver without accounting for a strong cross-current, the tug has contributed by failing to plan for known forces.
Responsibility Allocation in Pilotage
Pilotage responsibility is often tested through the relationship between pilot orders and master oversight.
- Pilot responsibilities: plan and execute navigation and maneuvering in the pilotage area, using local knowledge and current conditions.
- Master responsibilities: maintain command, ensure safe bridge watchstanding, provide accurate information to the pilot, and ensure the vessel can safely carry out orders.
A practical example: the pilot requests a specific engine order. If the engine response is delayed due to a known equipment issue that the master failed to disclose, the master’s responsibility increases. If the master disclosed the issue and the vessel still cannot comply safely, the master must communicate constraints and propose safe alternatives.
Communication and Bridge Team Expectations
Both towage and pilotage depend on communication that is specific, timely, and confirmable.
- Use clear orders: “Increase ahead to X RPM” is better than “slow down.”
- Confirm critical actions: repeatback for engine orders and heading changes reduces errors.
- Maintain lookout: neither tug nor tow can rely on the other’s attention.
A quick example: during a towline adjustment, if the tug’s bridge assumes the tow’s crew is monitoring line tension but the tow is focused elsewhere, the risk of sudden slack or surge rises. The fix is simple: agree on who monitors what, and when to pause.
Operational Details That Exams Love
Exams often reward candidates who connect responsibilities to operational details.
- Towline handling: the tug must manage towline forces and anticipate slack/surge; the tow must avoid actions that worsen line behavior.
- Maneuver planning: both parties should consider channel width, traffic density, current, wind, and stopping distances.
- Sound signals and navigation rules: the presence of a tug or pilot does not excuse compliance.
Example: In restricted visibility, a pilot may still be navigating, but the vessel must maintain required signals and safe speed. If the pilot’s plan assumes visibility that does not exist, the master and pilot must adjust the plan using actual conditions.
Mind Map: Towage and Pilotage Responsibilities
Example: Matching Responsibility to an Outcome
A tug is pushing a barge into a bend. The tug orders a speed reduction, but the barge does not reduce speed as agreed, causing the tow to swing wide and nearly contact a bank. The tug communicated the maneuver, and the barge failed to respond. The barge’s master bears greater responsibility for the unsafe outcome, though the tug still must ensure orders are reasonable for local conditions.
Example: Pilot Orders and Vessel Constraints
A pilot orders a turn to avoid shallow water. The master knows the vessel’s steering response is degraded due to a recent defect but did not report it. The vessel overshoots the intended track. The master’s failure to provide accurate information increases the master’s responsibility, even though the pilot gave the navigation order.
10.4 Reporting Requirements After Incidents Including Timelines
When something goes wrong at sea, the first goal is safety, and the second goal is accurate reporting. Timelines matter because they determine which authority receives the information while details are still fresh and verifiable. For deck officers, the practical skill is knowing what to report, to whom, and how quickly—without turning the bridge into a paperwork factory.
Foundational Concepts for Incident Reporting
Start with three building blocks: (1) what counts as an “incident,” (2) who must be notified, and (3) what information must be included. In exam questions, the “what” is usually tied to outcomes such as death, serious injury, pollution, or damage to a vessel or property. The “who” is usually tied to the nature of the event and the geographic area, often involving the Coast Guard and, when applicable, port authorities or other response organizations.
A useful mental model is the “safety-first triad”: notify for immediate response, preserve evidence, and document actions taken. If you can explain your timeline in that order, you’re usually answering the question the way it’s intended.
Timelines That Drive Correct Actions
Timelines are not one-size-fits-all. They depend on severity and whether the event involves pollution, injury, or significant damage. In practice, you should treat the earliest notification as the one that triggers response coordination.
Use these exam-friendly rules of thumb:
- Immediate notification: when there is loss of life, serious injury, or a pollution threat that requires rapid action.
- Prompt notification: when there is significant property damage, a grounding, or an event that could affect navigation safety.
- Follow-up reporting: when additional details become available, such as casualty circumstances, measurements, or statements.
If a question gives you a scenario with a time delay, assume the examiner wants you to choose the earliest required action first, then the next required update.
What Information Must Be Included
Reports should be specific enough that someone who wasn’t on your bridge can understand what happened. A strong incident report typically includes:
- Vessel identity and voyage details
- Time and location of the incident
- Nature of the incident and immediate hazards
- Casualties and medical status, if any
- Actions taken to ensure safety and mitigate harm
- Observations that support causation, such as weather, visibility, and navigational conditions
A common mistake is focusing only on the “story” and forgetting the “operational facts.” If you can’t state the time, position, and immediate actions, your report is incomplete even if your narrative is accurate.
Mind Map: Reporting Requirements and Timelines
Example: Collision with Minor Damage and No Injuries
Scenario: A merchant vessel makes contact with another vessel at 0200. There are no injuries, but both vessels have visible damage. Visibility was moderate, and both vessels were maneuvering in a narrow channel.
A correct approach is to notify promptly because the event involves collision and navigational safety implications, even if injuries are absent. Your initial report should include vessel identities, time, position, and a clear description of the circumstances. Then you provide follow-up details once you confirm damage extent, any water ingress, and whether there is any pollution risk.
Exam logic: the “no injuries” detail reduces casualty reporting content, but it does not erase the need for timely notification when collision occurred.
Example: Grounding with Potential Pollution
Scenario: At 2315, a vessel grounds. The crew suspects a fuel leak because of an odor and sheen near the stern. The vessel remains afloat but is taking on water slowly.
Here, timeline priority shifts toward immediate notification. The suspected pollution and the possibility of worsening conditions mean response coordination can’t wait for a full damage assessment. Your report should state the grounding time and position, the observed sheen or odor, the vessel’s condition, and the immediate mitigation actions taken.
Exam logic: when pollution is suspected, treat the report as time-critical even if the discharge is not yet confirmed.
Case-Style Checklist for Timelines
Use this sequence when answering questions:
- Identify the trigger: death, serious injury, pollution, or significant damage.
- Select the earliest required notification category: immediate vs prompt.
- List minimum report facts: time, position, vessel identity, and what you observed.
- Add follow-up items: damage extent, measurements, and updated casualty details.
Practical Officer Workflow with a Concrete Timeline
Assume an incident occurs on March 1, 2026 at 2100.
- 2100–2110: Ensure safety actions are underway, then initiate the required notification using the best available time and position.
- Within the next reporting window: Provide a concise incident description and hazards.
- Later follow-up: Submit updated information once you confirm damage, casualty status, and any pollution findings.
The key is consistency: your follow-up should not contradict your initial report; it should refine it. If you later learn a detail was wrong, report the correction clearly rather than trying to rewrite history.
10.5 Practical Case Style Questions With Correct Reasoning
Case-style questions test whether you can connect facts to rules, then choose the safest, most defensible action. The trick is not memorizing more text; it’s building a repeatable reasoning path. Use this workflow every time: identify the situation, list the relevant constraints, apply the rule set in the correct order, then sanity-check the answer against what a deck officer would actually do on the bridge.
Reasoning Framework You Can Reuse
- State the scenario in one sentence. Example: “Two vessels are approaching in reduced visibility; one is crossing.”
- Classify the encounter. Use relative motion: crossing, head-on, overtaking, or stand-on/give-way.
- Check the visibility and speed constraints. “Safe speed” is not a vibe; it’s a requirement tied to conditions and stopping distance.
- Apply the navigation rules in the right layer. First determine the encounter and obligations, then choose maneuvers and signals.
- Confirm with a practical bridge action. If the answer says “do nothing,” verify it matches stand-on duties and safe speed.
Mind Map: Case Question Reasoning Path
Example Case 1: Crossing Situation with Sound Signals
Question: A power-driven vessel A sees vessel B crossing from starboard. Visibility is moderate. Both vessels are making way. What is the most correct action for vessel A?
Reasoning:
- Scenario summary: A and B are approaching with a crossing relationship.
- Encounter classification: If B is crossing from starboard to A, then A is the give-way vessel.
- Constraint check: Moderate visibility means you must still maintain safe speed and be ready to maneuver early.
- Rule application: Give-way means you must take early and substantial action to avoid collision. Stand-on duties belong to the vessel that has the other on its starboard side.
- Sanity check: “Small course changes at the last moment” fail the “early and substantial” idea.
Best answer choice: Vessel A should take early action to avoid collision, typically by altering course to starboard or reducing speed as needed, and it should be prepared to use appropriate sound signals consistent with its maneuver.
Example Case 2: Head-On with Reduced Visibility
Question: Two vessels approach head-on in fog. Each vessel reports the other on the same bearing with closing speed. What should each vessel do?
Reasoning:
- Scenario summary: Head-on encounter with reduced visibility.
- Encounter classification: Head-on.
- Constraint check: Reduced visibility increases the need for safe speed and early maneuvering.
- Rule application: In a head-on situation, both vessels have responsibilities to avoid collision by altering course to starboard and maintaining safe speed.
- Sanity check: If one vessel tries to “hold course and hope,” it contradicts the collision-avoidance purpose.
Best answer choice: Both vessels should alter course to starboard and proceed at a safe speed, using sound signals appropriate to their status and conditions.
Example Case 3: Overtaking with Ambiguity
Question: Vessel A is gaining on vessel B from aft at an angle. A’s radar shows B’s bearing slowly changing from abaft the beam toward the beam. Who is the overtaking vessel, and what should A do?
Reasoning:
- Scenario summary: A is gaining from behind; bearing change suggests the relative position is moving forward.
- Encounter classification: Overtaking is determined by whether A is approaching from more than 22.5 degrees abaft the beam of B. The bearing trend indicates A may be transitioning toward the beam.
- Constraint check: Ambiguity means you must act conservatively.
- Rule application: Treat A as the overtaking vessel until you can confidently classify otherwise. Overtaking requires clear action to avoid interfering with B’s course.
- Sanity check: If you wait for perfect certainty, you may arrive too close.
Best answer choice: Vessel A should act as the overtaking vessel by taking early action to avoid collision, such as altering course and/or reducing speed, and it should be ready to adjust again if the classification changes.
Mind Map: Common Traps and How to Avoid Them
Quick Case Checklist for Answer Selection
- Does the answer match the correct role: give-way or stand-on?
- Does it require early action, not delayed reaction?
- Does it account for safe speed under the stated conditions?
- Does it include maneuver logic consistent with the encounter type?
- If the scenario is ambiguous, does the answer choose the safer conservative interpretation?
When you apply this checklist, the correct option usually stops looking like a “best guess” and starts looking like the only choice that holds together under scrutiny.
11. Meteorology and Passage Planning for Safe Voyages
11.1 Weather Elements Including Wind Visibility And Pressure
Weather elements are the raw inputs you translate into safe decisions: wind affects your course and speed, visibility affects your ability to detect hazards, and pressure helps you anticipate how conditions may change. In exam questions, the trick is usually not memorizing definitions—it’s applying the element to a navigation consequence.
Wind
Wind is described by direction and speed, and it matters because it changes your track over the ground.
Direction is where the wind comes from. If the wind is from 270° at your position, it blows toward 090°. A quick check: if you’re heading east and the wind is from the west, you’ll likely get a tailwind and a higher ground speed.
Speed is commonly given in knots. For practical deck work, you connect wind speed to effects:
- Drift: wind pushes the vessel sideways.
- Set and leeway: the vessel’s actual path differs from the planned track.
- Sea state: stronger winds increase wave height and can reduce steering effectiveness.
Example: You plan to make 12 kn over ground on a steady course. Actual wind is from 240° at 25 kn. If the wind is mostly on the bow, you expect reduced speed through the water and increased leeway, so your track may cross the intended line. In a question, look for answers that adjust course or account for drift rather than just restating the wind direction.
Visibility
Visibility is how far you can see, and it directly controls lookout effectiveness and collision-avoidance margins.
Visibility is often reported as distance (e.g., statute miles or nautical miles) and may be qualified by phenomena such as fog, mist, rain, or snow. The key is that visibility can be reduced even when wind is light.
Why it matters:
- Lookout range shrinks: targets appear later.
- Radar becomes more important: but radar performance depends on sea clutter, rain clutter, and antenna settings.
- Sound signals become more critical: when visual detection fails, you rely on audible cues.
Example: Visibility drops to 1 mile in fog. Even if your charted route is clear, you must assume that another vessel may be detected too late for a safe crossing. Exam answers typically emphasize reduced speed, increased vigilance, and readiness to take early action.
Pressure
Atmospheric pressure is measured in millibars (mb) or inches of mercury (inHg). Pressure alone doesn’t tell you the weather; the trend and the pressure pattern do.
How to use pressure in practice:
- Falling pressure often indicates approaching unsettled conditions.
- Rising pressure often indicates improving or more stable conditions.
- Pressure gradients (big pressure difference over a short distance) correlate with stronger winds.
Example: A barometer reading drops steadily over several hours while wind increases and visibility worsens. The most consistent interpretation is that the system is moving toward you and conditions are deteriorating. In exam problems, choose the option that links falling pressure to worsening conditions rather than treating pressure as a standalone fact.
Integrating Wind, Visibility, and Pressure
Good navigation decisions combine elements instead of treating them as separate trivia.
- Wind + Visibility: strong wind often worsens visibility through spray, rain, or blowing mist.
- Wind + Pressure: a tight pressure gradient supports stronger winds.
- Visibility + Pressure: reduced visibility frequently accompanies weather systems that also shift pressure.
Example: Wind increases from the same general direction as pressure falls, and visibility decreases. The integrated conclusion is that a weather system is likely affecting your area, so you should adjust speed, maintain enhanced lookout, and plan for reduced detection range.
Mind Map: Weather Elements for Deck Officer Decisions
Quick Practice Scenarios
Scenario 1: Wind from 060° increases from 10 to 20 kn, visibility falls from 5 to 2 miles, and pressure is falling. The best response is to reduce speed, increase lookout intensity, and anticipate that detection range is shrinking.
Scenario 2: Wind is steady at 5 kn, visibility is 10 miles, and pressure is rising. The most consistent interpretation is stable conditions, so you still maintain normal watchstanding but without the same urgency implied by deteriorating trends.
Key Takeaways
Wind changes your track, visibility changes your ability to detect hazards, and pressure trend helps you interpret whether conditions are likely to worsen or improve. On the exam, the correct answer usually connects the element to an operational consequence, not just its definition.
11.2 Interpreting Weather Reports and Forecasts
Weather reports and forecasts are only useful if you can translate them into decisions: what to expect, how confident you should be, and what to do about it. The trick is to read them in a consistent order, then cross-check the numbers against what you already know from the voyage.
Step 1: Identify the Source and Time Validity
Start by locating the issuing authority and the observation or forecast time. A forecast that starts in three hours is not the same as one that starts in three days, even if the wind speed looks similar. Also note whether the text is an observation, a trend, or a forecast for a specific period. When a report mixes “current conditions” with “expected conditions,” treat them as separate layers and don’t average them in your head.
Example: If a bulletin says “visibility 2 miles in fog” and later “visibility improving to 5 miles,” you should plan for reduced visibility during the first window, then adjust watchstanding procedures after the improvement time.
Step 2: Read the Wind Like a Navigation Input
Wind affects course, speed through water, and sea state. For marine use, focus on direction relative to your intended track and the stated wind speed range. If the report gives gusts, treat gusts as the part that will surprise you.
Practical method: convert wind direction into a simple relative category—headwind, following, or beam. Then estimate whether the wind will push you off track enough to matter for your next fix interval.
Example: If you plan a 30-minute leg and the wind is described as “variable 15–20 knots with gusts,” assume the higher end during the leg unless the report clearly limits gust timing.
Step 3: Translate Visibility and Precipitation into Operational Limits
Visibility and precipitation determine whether you can maintain normal lookout and whether radar and sound signals will be your primary tools. When visibility is given in miles or meters, connect it to safe speed and spacing. If the report mentions fog, mist, or haze, expect persistence near coasts and low-lying areas.
Precipitation type matters too. Rain can reduce visibility but may also be patchy; snow can reduce visibility and increase icing risk depending on temperature and vessel exposure.
Example: A forecast of “rain, visibility 1–3 miles” suggests you should tighten your collision avoidance habits and be ready for frequent speed adjustments, not just one slow-down.
Step 4: Use Pressure and Weather Tendency Carefully
Pressure values and trends help you anticipate changes, but they are not magic. A falling pressure trend often aligns with increasing wind and deteriorating conditions, while rising pressure can align with improvement. The key is to look for the trend statement rather than fixating on a single number.
Example: If a report notes “pressure falling” alongside “increasing wind,” treat it as a confirmation that the wind shift and sea state may worsen before they improve.
Step 5: Interpret Cloud Cover and Ceiling Information
Cloud cover influences visibility indirectly and affects lighting and contrast. A low ceiling can also signal that fog or low stratus may persist. If the forecast includes “broken” or “overcast” with low bases, expect reduced horizon distance even when precipitation is light.
Example: “Overcast with low bases” plus “visibility 4 miles” can still mean you’ll lose visual cues sooner than you expect, especially at night.
Step 6: Understand Sea State and Swell Versus Wind Waves
Sea state descriptions often separate wind waves and swell. Wind waves respond quickly to local wind changes; swell can arrive from distant weather systems and linger after conditions seem to improve.
Operational takeaway: if swell direction differs from your wind direction, you may get uncomfortable rolling even when the wind eases.
Example: A forecast with “swell 8 seconds from the northwest” while your wind is from the east suggests the motion problem may not track the wind one-to-one.
Step 7: Read Uncertainty Signals Without Panicking
Forecasts often include ranges, probabilities, or wording that implies confidence. Treat “isolated” as less certain than “widespread,” and treat broad time windows as a cue to plan for multiple scenarios.
Example: If thunderstorms are described as “possible,” you still plan for lightning safety and sudden visibility drops, but you don’t assume every minute will be affected.
Mind Map: Interpreting Weather Reports and Forecasts
Integrated Example: Turning a Forecast into Watchstanding Actions
Assume a forecast window for your next two hours states: wind 20 knots from the southwest with gusts to 28, visibility 2–4 miles in rain, pressure falling, and broken low clouds with a swell from the northwest.
- Wind: southwest wind likely gives a crosswind component. Expect speed-through-water changes and plan for a slightly tighter track-keeping routine.
- Visibility and rain: reduce speed to match reduced visual range and increase reliance on radar and sound signals as appropriate.
- Pressure falling: treat it as confirmation that conditions may worsen before they stabilize.
- Low clouds: expect reduced horizon cues even when rain intensity varies.
- Swell from northwest: anticipate rolling even if rain patches improve.
The result is a coherent plan: adjust speed and spacing for reduced visibility, keep a close eye on track via frequent fixes, and prepare for motion that may not correlate with wind changes.
11.3 Passage Planning Including Route Selection and Risk Controls
Passage planning is the bridge officer’s way of turning “we’ll be fine” into “we can explain why.” The goal is not to produce a perfect route on paper; it’s to produce a route that stays workable when conditions change, and to document the decisions that keep the ship within safe limits.
Foundations of Passage Planning
A solid plan starts with inputs, then moves to decisions, then to controls.
Inputs to collect before choosing a route
- Voyage details: departure and destination, intended speed, tide windows, and any traffic constraints.
- Vessel constraints: draft, maneuvering limits, steering gear performance, and any equipment limitations.
- Environmental factors: wind, current, visibility, sea state, and seasonal hazards.
- Regulatory and traffic considerations: separation schemes, restricted areas, reporting requirements, and local rules.
Core planning outputs
- A primary route with waypoints and intended courses.
- Alternative routes that can be used without starting over.
- Risk controls tied to specific hazards, not generic “be careful.”
Route Selection with Clear Tradeoffs
Route selection is choosing where to spend risk. Shorter routes often concentrate risk in narrow channels or busy traffic; longer routes may reduce congestion but increase exposure to weather.
Step-by-step Route Selection Method
- Plot the broad corridor first. Identify safe water, avoid obvious hazards, and keep enough margin for set and drift.
- Refine with constraints. Add areas that require special handling: traffic lanes, restricted zones, and known shoals.
- Check maneuvering feasibility. Ensure the ship can safely make turns, maintain safe speed, and comply with collision-avoidance requirements.
- Evaluate environmental effects. Use current and wind to estimate drift and required course adjustments.
- Confirm navigation accuracy needs. If the route requires frequent close-quarters fixes, plan for the fix method and update frequency.
Example: Choosing Between Two Corridors
Assume two possible routes between the same departure and arrival.
- Route A: shorter, but passes near a narrow channel with heavy inbound traffic.
- Route B: longer, but stays in wider water with fewer crossing points.
If your planned watch schedule limits how often you can take reliable fixes, Route B is often the safer choice because it reduces the consequences of a delayed or degraded fix. If Route A is still selected, the risk controls must explicitly address traffic density and the need for timely position updates.
Risk Controls That Match the Hazard
Risk controls are actions that reduce either the likelihood of an unsafe event or the severity if it occurs. They should be specific enough that a different officer could follow them and reach the same intent.
Common Risk Controls for Passage Planning
- Speed and spacing controls: adjust speed to maintain safe maneuvering room and effective lookout.
- Waypoint and track controls: choose waypoint spacing that supports accurate steering and timely course corrections.
- Fixing and monitoring controls: define when and how you will take position checks, especially after course changes.
- Contingency triggers: specify what conditions require action, such as reduced visibility, unexpected traffic density, or equipment degradation.
- Communication controls: define who communicates with traffic services or internal teams and when.
Mind Map: Passage Planning Logic
Execution and Monitoring Without Losing the Plot
A plan that cannot be executed is just decoration. During the passage, you should continuously compare actual conditions to planned assumptions.
Practical monitoring habits
- After each major change: verify position, course, and speed against the plan.
- When conditions drift: update the risk controls, not just the heading.
- When you deviate: record the reason and the new control measures. This matters for both safety and accountability.
Example: Visibility Trigger and Action
Suppose the plan assumes visibility sufficient for safe visual bearings and buoy identification. If visibility drops below that assumption, the risk control might require:
- increasing the frequency of position checks,
- reducing speed to maintain maneuvering room,
- and switching to an alternative route segment that avoids tight navigation.
The key is that the trigger is tied to a control you can actually implement immediately.
Advanced Details That Prevent Common Planning Failures
- Assuming currents are constant. Currents vary across time and space; plan for set and drift and re-check after passing key points.
- Waypoint spacing that ignores steering reality. If the ship’s turning characteristics require longer lead time, place waypoints accordingly.
- Fix method mismatch. If your route depends on a fix method that becomes unreliable in certain conditions, plan an alternate method or alternate corridor.
- Alternatives that are not operational. An alternative route should be pre-checked for safe water, traffic implications, and maneuvering feasibility.
Mind Map: Risk Controls by Hazard Type
A good passage plan reads like a set of decisions with reasons. When you can point to the hazard, the control, and the trigger, you’re not just preparing for the exam—you’re preparing for the watch.
11.4 Planning for Reduced Visibility and Adverse Conditions
Reduced visibility turns “good seamanship” into “good planning with receipts.” The goal is to prevent surprises by tightening the chain from route choice to watchstanding actions. Start with what changes first: detection range, stopping distance, and the reliability of your bearings, soundings, and radar picture.
Foundations for Visibility Planning
Begin by classifying the situation using three practical questions: What can you see? What can you hear? What can you measure? In fog, you may lose visual navigation marks but gain radar returns if sea clutter is manageable. In heavy rain, radar may work yet bearings can jitter, and sound signals become harder to interpret due to background noise. In snow or blowing spray, both visibility and sensor performance can degrade at the same time.
Next, translate “reduced visibility” into operational limits. Use conservative assumptions for stopping distance and maneuvering room, because you cannot rely on last-second visual confirmation. A simple rule of thumb for planning: if you would normally wait to confirm a target visually, you must instead confirm earlier using the best available sensor and a clear action trigger.
Passage Planning Adjustments
A reduced-visibility plan should be more structured than a fair-weather plan. Consider these adjustments in order:
- Route selection and risk spacing. Prefer routes with fewer close-quarters hazards and wider margins between traffic lanes, shorelines, and shallow areas. If you must pass near hazards, plan extra distance so you can slow and turn without running out of water.
- Waypoints and checkpoints. Add checkpoints where you can verify position with multiple cues. In fog, a single bearing line is less comforting than a fix that uses bearing plus depth plus radar range.
- Speed and time. Reduce speed early enough that your planned maneuver fits within the visibility you actually have. If your plan assumes you can stop within the distance you can see, you are planning with optimism.
- Contingency actions. Define what you do if you lose a sensor, if radar picture quality drops, or if you cannot maintain a safe track. The plan should say who decides and what the immediate action is.
Watchstanding and Bridge Procedures
Visibility reduction increases the workload on the bridge, so the plan must specify how tasks are split. Assign roles for lookout, radar plotting, and communications. Keep the lookout count realistic: one person cannot simultaneously scan visually, monitor radar, and handle radio traffic without missing something.
Use a “trigger-and-respond” mindset. For example, if radar contacts merge or bearings become unstable, treat it as a cue to slow, increase spacing, and verify your own position before attempting complex maneuvers.
Sound signals matter more than people expect. Plan for consistent interpretation: know which signals you expect to hear in your operating area and ensure the bridge team can repeat the meaning back clearly.
Practical Examples for Common Adverse Conditions
Example: Dense Fog Near a Channel Entrance
- Plan to approach at a speed that allows a safe stop within the distance you can reliably detect channel markers or radar landmarks.
- Add a checkpoint at the last reliable position fix before the entrance.
- If radar clutter rises, reduce speed and increase the interval between course changes so the radar picture can stabilize.
Example: Heavy Rain With Good Radar but Poor Visual Marks
- Treat visual aids as “optional,” not primary navigation.
- Use radar range and bearings to maintain track, but cross-check with depth where possible.
- If bearings drift, slow and re-fix rather than continuing on a potentially wrong line.
Example: Snow and Blowing Spray Reducing Both Visibility and Sensor Confidence
- Assume both visual and radar performance may degrade together.
- Increase spacing from hazards and consider altering the plan to reduce close-quarters exposure.
- Keep communications simple and frequent: confirm course, speed, and intended next action at watch handovers.
Mind Map: Reduced Visibility Planning
Putting It Together with a Simple Checklist
Before departure, confirm that your plan includes: (1) the visibility-based speed choice, (2) the checkpoints and how you will fix position, (3) the bridge roles, and (4) the immediate actions if radar or bearings become unreliable. If any of those are missing, the plan is incomplete—like a chart without a scale, it might look fine until you actually need it.
11.5 Practical Passage Planning Exercises With Worked Examples
A good passage plan is not a list of facts; it is a chain of decisions you can defend. Start with the basics—route, distances, and constraints—then add safety margins, then test the plan against realistic conditions. The exercises below use the same workflow so you can practice the thinking, not just the math.
Passage Planning Workflow with Worked Logic
-
Define the voyage and constraints
- Example: Depart 10 May 2024 from Port A to Port B. You must maintain a safe speed, comply with traffic separation where applicable, and be ready for reduced visibility.
- Practice habit: Write constraints as checkboxes. If a question asks “what must you do,” you should be able to point to a checkbox.
-
Select route options and identify hazards
- Example: Two routes: Route 1 is shorter but passes closer to a shoal; Route 2 is longer but stays in deeper water.
- Practice habit: For each hazard, note the consequence of being wrong. A shoal error is grounding risk; a narrow channel error is loss of maneuvering room.
-
Compute distances and estimate time
- Example: Distance 48 NM. Planned speed 12.0 kn. Estimated time = 48 / 12 = 4.0 hours.
- Add a margin: If currents are uncertain, add 10–15 minutes and plan a checkpoint.
-
Plan for navigation control points
- Example: Choose three control points: CP1 at 15 NM from departure, CP2 at the first safe-water waypoint, CP3 at the approach boundary.
- Practice habit: Each control point should have a method to verify position (bearing, range, radar fix, or visual landmarks).
-
Build the safety buffer into the plan
- Example: If visibility could drop, reduce speed and increase the distance from hazards. If you cannot increase distance, you must increase verification frequency.
-
Test the plan with “what if” checks
- Example: What if the current sets 20° off and reduces speed over ground by 1 kn? Recompute ETA to CP2 and check whether you still have enough time to slow down and verify.
Mind Map: Passage Planning Decision Chain
Example 1: Current Set and Drift with Control Point Timing
Scenario: You plan to pass CP2 at 13:30. Distance from the last fix to CP2 is 24 NM. Planned speed through water is 12 kn. Current is 2 kn set 030° with your course 060°.
Step 1: Estimate effect on speed over ground.
- If the current has a component against your track, your speed over ground drops. A quick exam-style approach is to treat the current as reducing progress along track by its along-track component.
- Along-track component ≈ 2 kn × cos(30°) ≈ 1.73 kn.
- Approximate speed over ground along track ≈ 12 − 1.73 = 10.27 kn.
Step 2: Recompute time to CP2.
- Time ≈ 24 / 10.27 ≈ 2.34 hours (about 2 h 20 min).
- If your last fix time was 11:05, arrival estimate ≈ 13:25.
Step 3: Decide whether the plan still works.
- If CP2 requires a slow-down and radar verification, arriving 5 minutes early is usually fine, but arriving late is not.
- Practice habit: If you are within a small timing window, add an earlier verification at a point you can reach before the critical maneuver.
Example 2: Reduced Visibility Route Control with Verification Frequency
Scenario: Visibility drops to 1–2 NM near a narrow channel entrance. Your plan assumes 5 NM visibility.
Step 1: Identify what changes.
- The main change is that you may not see visual marks reliably, so you must rely more on radar and earlier fixes.
Step 2: Adjust the plan.
- Reduce speed to increase reaction time.
- Increase fix frequency: instead of one fix every 30 minutes, plan one every 15–20 minutes near the channel.
- Increase separation from hazards if the channel width allows.
Step 3: Use a simple verification rule.
- If your next planned fix is after the point where you must commit to the turn, move that fix earlier.
- Practice habit: Any “commitment point” must have a verification method available before you commit.
Example 3: Worked Route Option Comparison
Scenario: Route 1 is 42 NM at 13 kn but passes close to a shoal. Route 2 is 48 NM at 12 kn but stays farther offshore.
Compute ETAs.
- Route 1 ETA ≈ 42 / 13 ≈ 3.23 h.
- Route 2 ETA ≈ 48 / 12 = 4.00 h.
Decide based on risk control, not just time.
- If Route 1 requires tighter margins and more frequent fixes to avoid the shoal, the “time saved” can disappear when you slow down for verification.
- Practice habit: When comparing routes, include the operational effect of safety actions (slower speed, more frequent fixes, or extra checkpoints).
Mind Map: Worked Example Checklist
Practice Set Template You Can Reuse
Use this structure for each practice question:
- State the voyage constraints as checkboxes.
- Choose the route option and list the top two hazards.
- Compute ETA to the first control point.
- Apply one realism factor (current, wind, or reduced visibility).
- Recompute ETA and decide whether you must add an earlier verification.
If you can produce that sequence consistently, you are practicing the same skill the exam tests: turning navigation knowledge into a defensible plan.
12. Final Review Practice and Exam Day Execution
12.1 High Yield Review of Navigation Safety and Regulations
This section is a fast, structured sweep of what deck officers must do correctly under pressure: keep the vessel safe, keep the watch informed, and apply the rules consistently. Think of it as a mental checklist you can run while answering exam questions—because the exam usually tests whether you can connect a scenario to the right rule, then to the right action.
Core Safety Logic You Must Apply
Start with the exam’s hidden pattern: most “what should you do” questions reduce to three steps.
- Identify the situation: vessel traffic type, visibility, and whether you are in or approaching a restricted area.
- Apply the rule set: Navigation Rules (COLREGS/Inland where applicable), safety management expectations, and required bridge procedures.
- Choose the action that prevents collision or harm: safe speed, proper lookout, early and substantial maneuvers, and correct communications.
A good way to practice is to translate each scenario into a single sentence: “In this visibility and traffic setup, the rules require X, so the safe action is Y.” If you can’t write that sentence, you’re not ready for the question.
Mind Map: Navigation Safety and Regulations
High-Yield Rules of the Road
Most exam errors come from mixing scenarios. The rules are scenario-specific, so your first job is classification.
Crossing: the vessel with the other on her own starboard side generally has the right of way. The key action is not “do nothing,” but “maintain your course and speed if you are the give-way vessel’s counterpart, and take early action if you are the give-way vessel.”
Overtaking: if you are approaching from more than 22.5 degrees abaft the beam, you are the overtaking vessel. The overtaking vessel must keep clear and should not assume the other vessel will maneuver.
Head-on: both vessels must take action to avoid collision. In restricted visibility, the emphasis shifts toward safe speed and sound signals.
Restricted Visibility: the exam often expects you to reduce speed to a level that allows safe stopping, use sound signals appropriately, and rely on radar and lookout together. Radar alone is not a substitute for lookout; it’s a tool that needs verification.
Example: Turning Rules into Actions
Example: A vessel is approaching another on a crossing track in clear visibility. You determine the other vessel is on your starboard side.
- Rule application: you are the give-way vessel.
- High-yield action: take early and substantial action to keep well clear. In practice, that means altering course and/or reducing speed early enough that your maneuver is obvious and effective.
If the answer choices include “maintain course and speed until the last moment,” that is usually wrong. The rules reward early action because it reduces uncertainty for the other vessel.
Example: Safe Speed with a Concrete Test
Example: Visibility drops to a few miles, traffic is moderate, and your vessel’s stopping distance is longer than the distance you can comfortably see.
- Rule application: safe speed must reflect your ability to take effective action.
- High-yield action: reduce speed so you can stop within the distance you can assess as safe, and increase vigilance using both visual and electronic means.
A common trap is treating “safe speed” as a fixed number. The exam expects you to tie speed to stopping ability, traffic, and visibility.
Watchstanding and Bridge Discipline That Shows Up in Questions
Even when a question looks like a navigation rule, the correct answer often depends on bridge behavior.
- Lookout discipline: one person staring at radar while ignoring the horizon is not a proper lookout.
- Handover clarity: if the watch is relieved without key information (traffic changes, radar settings, planned maneuvers), the next watch cannot apply the rules correctly.
- Log and communications: exam scenarios may ask what must be recorded or what should be communicated immediately. The safe answer is the one that supports continuity and accountability.
Quick Self-Check Before You Move On
When you see a scenario, answer these in order:
- What is the traffic situation and visibility condition?
- Which rule category applies (crossing, overtaking, head-on, restricted visibility)?
- What is the give-way or stand-on responsibility?
- What is the early, substantial action that keeps clear?
- What bridge procedure supports safe execution (lookout, communications, handover)?
If you can do those five steps consistently, you’re not just memorizing rules—you’re applying them the way the exam is written.
12.2 Timed Practice Sets With Answer Review Methods
Timed practice works best when you treat it like watchstanding: you move steadily, you verify, and you document what you would do next time. This section gives you three practice sets that build from basics to mixed scenarios, followed by a repeatable answer review method.
Set One: Navigation Safety Basics
Goal: Correctly apply core navigation and collision-avoidance logic under time pressure.
How to run it: 12 minutes total. Answer first, then review. Don’t stop to calculate during the first pass.
Questions (answer A–D):
- You are on a steady course in restricted visibility. What is the most important action for maintaining safe navigation?
- A. Increase speed to reduce time in the area
- B. Maintain a proper lookout and use radar/other means as available
- C. Rely only on visual sightings
- D. Assume other vessels will avoid you
- Two vessels are approaching head-on in clear visibility. What is the primary rule for avoiding collision?
- A. Both vessels alter course to starboard
- B. Both vessels maintain course and speed
- C. Each vessel should alter course to avoid crossing paths
- D. The larger vessel decides and the smaller vessel follows
- A bearing-only fix is taken. What is the key limitation?
- A. It always gives an exact position
- B. It provides a line of position but not a unique point
- C. It requires celestial observations
- D. It cannot be used with charts
Answer review method: For each wrong answer, write one sentence starting with “I missed that…” and include the rule or concept that would have guided you.
Set Two: Timed Navigation Calculations
Goal: Convert common exam math into quick, checkable steps.
How to run it: 18 minutes total. Use rounding consistently and show intermediate values in your scratch work.
Questions:
- A vessel travels 10.0 knots for 1 hour. What is the distance made good if there is no current?
- A. 6.0 nm
- B. 10.0 nm
- C. 11.0 nm
- D. 15.0 nm
- You plot two lines of position from different times. What does the intersection represent?
- A. The course to steer
- B. The vessel’s estimated position at the time of the second observation
- C. A single bearing that never changes
- D. The speed through water
- Current is set at 030°T at 2 knots. Your course through water is 060°T at 10 knots. Which statement is most accurate?
- A. Ground track equals course through water
- B. Ground track differs because current changes the resultant
- C. Current only affects speed, not direction
- D. Current direction is irrelevant
Answer review method: After each question, do a “sanity check” in one line. Example: “If current is present, ground track should not equal course through water.”
Set Three: Mixed Watchstanding and Regulation Scenarios
Goal: Choose the safest action when multiple requirements compete.
How to run it: 20 minutes total. Read the scenario twice: first for facts, second for the decision rule.
Scenario Questions:
- During a night watch, radar shows a target with changing bearing. You also have limited visual contact. What should you do first?
- A. Ignore the radar until visual contact improves
- B. Establish relative motion and determine whether a risk of collision exists
- C. Assume the other vessel sees you
- D. Reduce lookout to avoid distraction
- You must record watchstanding actions. What is the best practice?
- A. Record only when something goes wrong
- B. Record key decisions and observations that affect navigation safety
- C. Use vague notes to save time
- D. Skip entries if the log is already full
- A safety-related equipment issue is discovered. What is the safest exam-style response?
- A. Continue operations because the issue is minor
- B. Take appropriate action consistent with safety procedures and notify the proper parties
- C. Wait until the next watch to address it
- D. Remove the equipment without documentation
Answer review method: For each scenario, underline the “decision trigger” in the prompt (visibility, radar indication, risk, documentation need). Then compare your chosen answer to the trigger.
Mind Map: Timed Practice Workflow
Mind Map: Answer Review Triggers
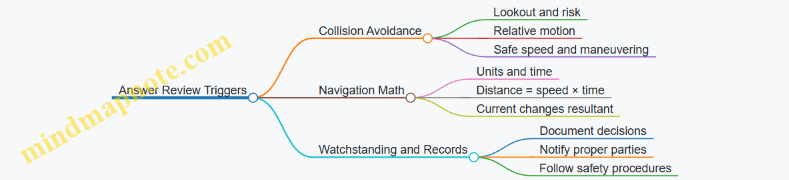
Example Review Notes You Can Copy
-
Wrong: “I chose B because it sounded reasonable.”
- I missed that: In restricted visibility, the key is maintaining lookout and using available electronic means to assess risk.
- Reminder: If visibility is limited, the decision must rely on more than sight.
-
Wrong: “I assumed ground track equals course through water.”
- I missed that: Current changes the resultant vector, so direction and speed over ground differ.
- Reminder: Current affects the ground track, not just the speed.
Timing Rules That Prevent Common Mistakes
Use these constraints so you don’t “study yourself into a corner.” If a question needs heavy calculation, cap your scratch work at two lines before switching to a best-choice answer and marking it for review. If you’re unsure between two options, pick the one that directly addresses the decision trigger you underlined. That single habit usually turns a vague guess into a defensible choice.
12.3 Error Analysis Using Topic Tags and Missed Concept Logs
A good error log does two jobs: it explains why you missed a question, and it tells you exactly what to practice next. Topic tags keep the “what” organized; missed concept logs capture the “why” in a way you can act on during the next study session.
Step 1: Tag the Error with a Topic Label
Start by tagging each missed item with one primary topic and one secondary topic. Keep the primary tag broad enough to be useful, but specific enough to guide practice.
Use a simple tag set like:
- Navigation (chart work, bearings, fixes, DR)
- Celestial (time systems, sight reduction, intercept)
- Radar (range/bearing accuracy, tracking, interpretation)
- Rules of the Road (COLREGs, inland rules, sound signals)
- Safety Management (watchstanding, bridge procedures, fatigue)
- Regulations (documentation, responsibilities, compliance)
- Math and Units (conversions, rounding, sign errors)
Example: You miss a question about determining a position fix from bearings. Primary tag: Navigation. Secondary tag: Math and Units if the error was a unit conversion or rounding mistake.
Step 2: Write a Missed Concept Log That States the Failure Mode
A missed concept log should include four lines: the concept, the rule you applied, what you actually did, and the correction.
Use this template:
- Concept: What the question required
- Rule You Used: The method you thought you were applying
- What You Did: The specific step that went wrong
- Correction: The corrected step and a quick example
Example log entry:
- Concept: Dead reckoning with current
- Rule You Used: “Apply current directly to course”
- What You Did: Added current to speed instead of adjusting the set and drift effect on the track
- Correction: Treat current as a vector that shifts the resulting position; if set is 030° at 2 kn for 1 hour, the drift is 2 nm toward 030°, then combine with your own motion vector.
This format prevents the common trap of writing “I forgot” or “I was careless.” Those are feelings, not fixes.
Step 3: Classify Errors into Three Buckets
Most exam misses fall into one of these buckets. Tagging the bucket helps you choose the right remedy.
- Concept Gap: You don’t know the method or rule.
- Procedure Slip: You know it, but a step was skipped, reversed, or misread.
- Execution Error: The method was right, but arithmetic, units, or sign conventions failed.
Example: A radar question where you misread relative motion as true motion is a Concept Gap. A question where you tracked correctly but used the wrong range scale is an Execution Error. A question where you used the right formula but forgot to apply the correct bearing reference is a Procedure Slip.
Step 4: Turn Logs into a Practice Plan
After tagging and logging, group misses by primary topic and bucket. Then pick one targeted drill per group.
- For Concept Gaps, do short “method-only” practice: write the steps without numbers first.
- For Procedure Slips, do “step-order” practice: cover the steps, then reconstruct them in order.
- For Execution Errors, do “units and checks” practice: add a final sanity check like direction quadrant, magnitude reasonableness, or sign.
A practical example: If you missed three navigation items due to sign errors, your next session includes five problems where you explicitly write “east is +, west is −” and “north is +, south is −” before calculating.
Mind Map: Error Analysis Workflow
Step 5: Use a “Rework Rule” Instead of Re-reading
When you rework a missed question, do it in two passes.
- Pass A: Rebuild the method using your log’s correction. Stop before calculations if you can’t justify each step.
- Pass B: Recalculate with a check. For navigation and celestial, include a quick magnitude check (does the result make sense for the time/distance?). For rules questions, restate the applicable rule in plain language before choosing an option.
Example: If a rules question asks for actions in a crossing situation, your rework should begin with: “Identify crossing vs overtaking vs head-on, then apply the correct give-way/stand-on action.” Only after that should you select the answer.
Step 6: Keep the Log Small but Consistent
A log that’s too long becomes a museum. Aim for one page of entries per practice set, then summarize patterns.
At the end of the set, write three bullets:
- Most frequent primary tag
- Most frequent error bucket
- One drill to run next
That summary is what turns scattered mistakes into measurable improvement.
12.4 Exam Day Procedures Including Materials and Time Management
Exam day is mostly logistics plus disciplined thinking. The goal is simple: arrive ready, start calm, and use your time so every question gets a fair shot. If you treat the exam like a watchstanding routine—check your tools, follow a plan, and document decisions—you’ll spend less energy on surprises.
Materials Checklist and Setup
Before you leave, confirm you have what you’re allowed to use. Most candidates lose points to avoidable friction: missing pencils, a calculator that won’t work, or a chart tool that isn’t permitted.
Use this setup sequence:
- Confirm permitted tools: calculator, pencils, eraser, ruler, protractor, and any approved reference materials.
- Prepare your calculator: clear memory, test basic functions, and ensure it’s in the correct mode.
- Bring a clean scratch workflow: a few blank pages labeled “Nav,” “Rules,” and “Math.” This prevents mixing work and losing track.
- Plan your writing speed: practice writing bearings, courses, and units clearly. Sloppy notation costs time when you review.
A practical example: if a question asks for a true course and you start writing “TC” without stating whether it’s true or magnetic, you may waste time later correcting yourself. Write the unit and reference once, then reuse it.
Time Management Framework
Time management works best when it’s structured, not motivational. Use a three-pass method.
Pass One: Triage
Answer questions you can complete quickly and confidently. Mark uncertain items with a clear symbol (for example, a small triangle) so you can find them later.
Example: If a navigation question asks for a position fix using two bearings, and you know the method, do it immediately. If it asks for a multi-step reduction and you’re missing one value, skip and return.
Pass Two: Solve and Recover
Return to marked items. Spend time only on the parts that move you forward.
A useful rule: if you can’t identify what the question is asking within 30 seconds, re-read the stem and underline the target output (course, speed, distance, bearing, or rule citation).
Pass Three: Review for Avoidable Errors
Use the final minutes to catch the common mistakes:
- Units: knots vs. mph, degrees vs. radians, nautical miles vs. statute miles.
- Sign errors: east/west and north/south reversals.
- Rule misreads: “in sight of one another” vs. “not in sight,” or “overtaking” vs. “crossing.”
Example: A radar question might give a relative bearing and ask for true bearing. If you forget to apply the ship’s heading, your answer will be consistently wrong. Review by checking whether the question requires a conversion from relative to true.
A Simple Minute Plan
If the exam provides a total time, divide it into three blocks: triage, solve, review. If it doesn’t, still allocate by behavior: early confidence, middle effort, late verification.
A concrete approach:
- First 40%: triage and quick wins.
- Middle 50%: full solutions and marked returns.
- Last 10%: review only.
This prevents the classic failure mode: spending too long on one hard problem and then rushing the rest.
Mind Map: Exam Day Workflow
Mind Map: Time Management Signals
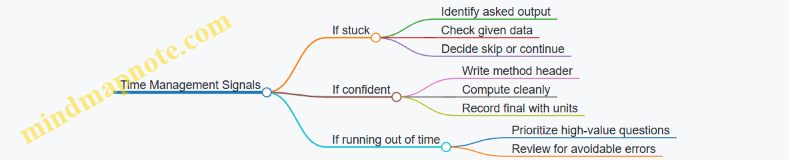
Example: Applying the Plan to a Mixed Set
Imagine a short sequence: one navigation calculation, one rules-of-the-road scenario, then a safety equipment question.
- Triage: do the safety equipment question first if it’s direct. Then do the rules scenario if you can cite the correct action. Save the navigation calculation if it requires multiple conversions.
- Solve: return to navigation and write a mini checklist: “What is the reference? What is the output? What conversion is needed?”
- Review: verify the final navigation answer includes the correct reference (true/magnetic) and the rules answer matches the situation type.
Final Execution Habits
Keep your scratch work readable and your final answers easy to locate. When you finish a problem, stop and write the final answer once, with units. Then move on. Your future self will thank you during the review pass.
On the last minutes, do not start new methods. Only correct what you can verify quickly: units, headings, and rule wording.