FAA Part 107 Advanced Drone Operations Exam Prep
1. Advanced Exam Foundations and Operational Standards
1.1 Part 107 Knowledge Test Structure and High Yield Topic Mapping
The FAA Part 107 knowledge test is designed to check whether you can apply rules safely, not just recognize them. Questions typically mix operational scenarios with specific regulatory constraints, so your study method should train you to translate a plain-English situation into the correct rule category.
How the Test Is Structured
Start by thinking in layers. First, you need the baseline Part 107 concepts: what the rules cover, who must comply, and what “small unmanned aircraft system” operations mean. Second, you need operational limits that show up repeatedly: altitude, speed, airspace permissioning, and line-of-sight requirements. Third, you need decision-making under uncertainty: weather minimums, emergency actions, and how to respond when conditions change.
A practical way to map the test is to group topics by the job they support during a mission:
- Plan: airspace, weather, and mission constraints.
- Prepare: aircraft condition, preflight checks, and required roles.
- Operate: control, observers, and maintaining required visibility.
- Respond: emergencies, lost link, and safety priorities.
High Yield Topic Mapping Mind Map
Foundational Concepts You Should Anchor First
Before memorizing details, anchor the definitions and responsibilities. If you can’t tell what the question is asking—remote pilot duties versus aircraft requirements—you’ll waste time. For example, if a scenario says you are the person manipulating the controls, treat it as a remote pilot responsibility question, then look for the rule that governs what you must ensure before and during flight.
Next, anchor the “hard limits” mindset. Some rules act like gates: if the scenario violates them, the correct answer will usually reflect that violation. A common exam pattern is to include multiple correct-sounding statements, but only one respects the controlling limit.
Operational Limits That Reappear in Different Clothing
Altitude and visual line of sight are frequent because they are easy to test with scenarios. A question might describe an intended flight path, then ask whether the operation is compliant given distance, height, and visibility.
Example: You plan a mapping flight at 400 feet AGL over a rural area with clear visibility. The question asks what you must maintain. The high-yield move is to identify the controlling category: operational limits. Then you check the scenario against the line-of-sight requirement and altitude constraint. If the scenario later adds that you will fly beyond visual line of sight, the correct answer will reflect that you cannot do that under standard Part 107 conditions.
Airspace and Authorization Mapping Without Guessing
Airspace questions often test whether you can distinguish between “where you are” and “what permission you have.” The scenario may mention a location near an airport, then ask what you must do before takeoff. The high-yield approach is to treat airspace as a planning gate: determine the airspace type, then determine whether authorization is required for the planned operation.
Example: You want to fly near a controlled airport. The question provides that you have an authorization for the requested altitude and time window. The best answer will confirm that you must operate within the authorization conditions, not just “have authorization.” If the scenario changes the altitude or moves outside the approved window, the compliant action is to adjust the plan or not conduct the operation as described.
Weather and Decision Logic
Weather questions usually test whether you understand what “go/no-go” means in rule terms. Instead of treating weather as a vibe, treat it as constraints that affect visibility and safe operation.
Example: The scenario says clouds are present below the planned altitude and visibility is reduced. The question asks whether the operation is allowed. The high-yield move is to identify the weather constraint category and then select the answer that matches the rule-based limitation, not the answer that suggests “use caution.”
Emergency and Safety Questions That Reward Calm Reading
Emergency questions are less about memorizing a single action and more about prioritizing safety. Lost link, unexpected control issues, and collision avoidance are common themes.
Example: The scenario describes a loss of control link shortly after takeoff. The question asks what you should do. The correct answer will align with immediate risk reduction and the required contingency mindset, not with continuing the mission as if nothing happened.
A Simple High-Yield Answering Routine
- Classify the rule category: planning, operational limits, airspace authorization, weather, or emergency.
- Find the controlling constraint: altitude, line of sight, permission conditions, or weather limitation.
- Eliminate answers that break the gate: if an option violates a hard limit, it’s usually wrong even if other parts sound reasonable.
- Match scenario details: authorization conditions, time windows, and operational specifics matter.
This routine turns the test from a memorization contest into a structured rule-application exercise. The questions are written to reward that habit.
1.2 Core Operational Rules for Small Unmanned Aircraft Systems Under Part 107
Part 107 is mostly about keeping operations predictable: the aircraft is small, the pilot is accountable, and the flight stays within defined limits. The exam questions usually test whether you can translate the rule language into a practical decision before you take off.
The Core Operating Baseline
A remote pilot must operate the small unmanned aircraft system (sUAS) in a way that matches the operating limitations of Part 107. That starts with the aircraft and ends with what you do when conditions change.
Key baseline ideas you should treat like “always-on” constraints:
- You must maintain control of the aircraft during the flight, including the ability to respond to normal and abnormal situations.
- You must keep the flight within the approved operating area for your mission type, including airspace permissions handled through the required authorization process.
- You must operate safely with respect to people and property, meaning you avoid reckless behavior and plan for realistic contingencies.
- You must follow the operational limits tied to your specific mission, such as altitude limits and visibility requirements.
Altitude and Speed Limits
Most Part 107 flights are built around the altitude ceiling and the need to keep the aircraft controllable. The common exam pattern is: “Given these conditions, which action keeps the operation within the rule?”
- Altitude: The standard limit is 400 feet above ground level. If you’re flying over uneven terrain, “above ground” matters, not just the height above a flat reference.
- Speed: The aircraft must be operated in a manner that remains controllable and safe; exam questions often pair speed with loss-of-control risk.
Example: You plan a mapping flight at 350 feet AGL over a hillside. Mid-mission, the terrain rises and your GPS altitude stays the same. If the aircraft is now closer to 400 feet AGL than you planned, you should adjust the flight profile so the aircraft remains at or below the limit.
Visual Line of Sight and Control
Part 107 requires visual line of sight for most operations. “Visual” means you can see the aircraft with your unaided vision (or as allowed by the rule structure), and you can determine its position relative to your flight path.
- You must be able to see the aircraft to maintain situational awareness.
- You must be able to control the aircraft throughout the flight.
Example: You’re flying a short inspection route and the aircraft is still within range, but a tree blocks your view for 10 seconds. Even if the controller link is fine, losing the required visual reference is the exam-style problem. The correct action is to adjust the route so you regain and maintain visual line of sight.
Operations over People
Operations over people are a frequent exam focus because they involve additional risk management. The rule logic is: determine whether the flight is over people, then apply the correct operational category.
- If people are present below, you must treat the mission as an operations-over-people scenario.
- Risk mitigation matters, including how you plan the flight path and how you manage the likelihood and severity of harm.
Example: A contractor requests a roof inspection while workers are on the ground near the landing zone. If the planned route passes over them, you must evaluate the operations-over-people requirements rather than assuming “it’s only a quick pass.”
Yielding and Right-of-Way Mindset
Even though Part 107 is not an air traffic control job, you still must operate with safety in mind. The exam often asks what you should do when another aircraft or hazard appears.
- Avoid collisions by maintaining awareness and taking timely action.
- Do not continue a plan that creates unacceptable risk when you can reduce it.
Example: While flying near a small airport boundary, you notice a manned aircraft entering your vicinity. The correct response is to prioritize collision avoidance and adjust your flight path immediately rather than “finishing the shot.”
Preflight Responsibility and In-Flight Monitoring
A good Part 107 operation is planned before takeoff and monitored during flight.
- Preflight: Verify the aircraft is in a condition for safe operation and that your plan matches the rules.
- In-flight: Monitor conditions and aircraft behavior so you can respond if something changes.
Example: Your plan assumes steady wind, but gusts increase after takeoff. If the aircraft becomes harder to control or the mission can no longer be conducted safely within limits, you should terminate or adjust the operation.
Mind Map: Core Operational Rules
Quick Decision Workflow
When you see an exam scenario, use this order:
- Identify the mission type (standard flight vs operations over people).
- Check the hard limits (altitude and required visual reference).
- Confirm airspace permission logic matches the location.
- Apply safety priorities if hazards appear.
- Choose the action that keeps the operation within the rules rather than the action that merely “finishes the task.”
Example: A question describes a flight that stays under 400 feet AGL but loses visual line of sight briefly. Even if the aircraft is controllable and the airspace is permitted, the best answer is the one that restores and maintains the required visual reference.
1.3 Remote Pilot Responsibilities for Preflight Planning and in Flight Conduct
Remote pilot responsibility is not a checklist vibe; it’s a chain of decisions that starts before takeoff and keeps working when conditions change. The goal is simple: ensure the operation stays within the rules and within the aircraft’s limits, while you can still explain what you did and why.
Preflight Planning Responsibilities
Start with the mission facts. Confirm the aircraft is eligible for Part 107 use, including weight and configuration, and verify the remote pilot certificate is current for the operation you’re conducting. Then shift to airspace and location: identify whether the planned area is controlled airspace, whether authorization is required, and whether any restrictions apply to your planned altitude and time.
Next, build a safety picture from three inputs: airspace, weather, and performance. Weather is not just “VFR or not.” Wind affects ground speed and control authority; gusts can push you off a planned track; low visibility can reduce your ability to maintain visual line of sight. Performance matters because small aircraft have real limits: battery capacity, climb rate, and how payload weight changes endurance and handling.
Now add the “human factors” layer. Decide who is doing what before you launch. If you use a visual observer, define their responsibilities and communication method. If you are flying alone, plan how you will scan for traffic and obstacles while still monitoring flight controls and telemetry.
Finally, run a compliance check that ties the plan to the rules. For example, if your plan includes flying near people or property, confirm which operational category applies and what safety measures you must follow. If your plan includes night operations, verify lighting and visibility requirements are met before you ever move the aircraft.
In Flight Conduct Responsibilities
Once airborne, your job becomes continuous monitoring and timely correction. Maintain control of the aircraft at all times, which means you should be actively managing flight path, altitude, and speed rather than “watching and hoping.” Keep the aircraft within the planned operating area and within the limits you verified during preflight.
Situational awareness is a skill, not a mood. Scan for other aircraft, obstacles, and changes in ground conditions. If wind shifts or visibility drops, adjust your plan early. Waiting until you are already behind the aircraft’s control margins is how small problems become rule problems.
If something deviates from the plan—like a route change due to obstacles, or a need to land early due to battery—your responsibility is to make the safest choice that still preserves compliance. That often means returning to a safe landing area sooner rather than trying to “finish the shot.”
Communication and coordination also remain your responsibility. If you have an observer, keep instructions clear and short. If you lose link or control, follow your emergency procedures immediately and prioritize risk reduction over mission completion.
Mind Map: Preflight to in Flight Responsibility Flow
Example: Controlled Airspace with Wind Shift
You plan a mapping flight in controlled airspace with an authorization that allows operation up to 200 feet. Preflight shows steady wind at 8–10 mph, and your battery estimate includes a comfortable reserve. During climb-out, you notice gusts increasing and your ground track drifting toward a nearby obstacle line.
Your responsibility is to act before the drift becomes a constraint. You adjust the route to re-center the operating area, reduce speed to improve control response, and increase your landing priority. If the battery reserve is now smaller than expected, you shorten the mission and land at the nearest safe point rather than trying to complete the last segment.
Example: Observer Coordination During Obstacle Avoidance
You assign a visual observer to watch for traffic and obstacles ahead of the aircraft. Before takeoff, you agree on a simple communication rule: the observer calls out “traffic” or “obstacle” immediately, and you acknowledge with a short confirmation. During the run, the observer spots a new obstacle not present in your initial visual scan.
You respond by changing altitude or lateral position to keep safe separation. The key responsibility is that the observer’s information becomes part of your control decisions, not a separate stream of data you ignore until it’s too late.
Example: Lost Link Decision Making
If control link degrades unexpectedly, your responsibility is to follow your emergency procedures promptly. That typically means initiating the aircraft’s predefined behavior such as return-to-home or landing, depending on your setup and conditions, while you maintain awareness of airspace and obstacles.
After the event, you document what happened and why your actions were consistent with safety and compliance. The point is not to assign blame; it’s to ensure the next flight starts with better margins and clearer decision thresholds.
1.4 Common Exam Traps and How to Eliminate Wrong Answers Using Rule Language
Part 107 questions often look like they’re testing “what you feel is safe.” In reality, they test whether you can translate rule language into a concrete decision. The fastest way to eliminate wrong answers is to treat each option as a claim about a specific requirement, then check whether that claim matches the rule’s trigger and limit.
Start with the Rule Skeleton
Every good answer can be traced to a rule skeleton with three parts: trigger, permission or prohibition, and limit. If an option changes any part, it’s usually wrong.
- Trigger: What condition starts the rule? Examples include “in controlled airspace,” “over people,” “night,” “lost link,” or “visual line of sight.”
- Permission or prohibition: Does the rule allow the operation, require additional conditions, or forbid it?
- Limit: What boundary must you stay within? Examples include altitude, speed, distance, visibility, or required actions.
Example: If a question says you are operating in controlled airspace, any option that ignores authorization requirements is claiming permission without the trigger’s conditions. That’s a trap.
Trap 1: Answer Options That Swap Trigger Conditions
Wrong answers often use a “nearby” trigger. You might be in controlled airspace, but the option behaves as if you’re in uncontrolled airspace. Or you might be over people, but the option treats it like it’s just near people.
How to eliminate: Underline the trigger phrase in the question, then scan each option for the same trigger. If the option uses a different trigger, it’s not just slightly off—it’s a different rule.
Trap 2: Answer Options That Confuse “May” With “Must”
Exam questions sometimes offer options that sound helpful but quietly change obligation level. “May” options suggest optional behavior, while the rule may require an action.
How to eliminate: Look for modal verbs: must, shall, required versus may, can, should. If the option uses the wrong modal verb, it’s usually wrong.
Example: If the question asks what you must do before flight, an option that says you can do it “if convenient” is not matching the rule’s obligation.
Trap 3: Answer Options That Ignore Limits After Permission
Another classic trap: the option correctly identifies permission but then violates the limit. Think of it like getting a ticket to enter a room, then choosing to stand in a restricted corner.
How to eliminate: For each option, verify both permission and limit. If either fails, eliminate.
Example: If an option says an operation is allowed but then proposes an altitude or distance that exceeds the stated limit, it’s wrong even if the permission part is right.
Trap 4: Answer Options That Replace “Operational” With “Administrative”
Some options focus on paperwork while the question is about in-flight conduct, or vice versa. The exam likes to test whether you can separate operational requirements from documentation requirements.
How to eliminate: Ask: “Is the question asking what you do in the air, or what you prepare on the ground?” If the option answers the other category, it’s a mismatch.
Trap 5: Answer Options That Use Vague Safety Language
Phrases like “take extra care” or “avoid risk” can appear in wrong answers because they sound sensible but don’t map to a specific rule requirement.
How to eliminate: If an option doesn’t name a rule condition, a required action, or a measurable limit, it’s likely not the correct choice.
Mind Map: Rule Language to Decision
Mind Map: Eliminating Wrong Answers Fast
Example: A Clean Elimination Walkthrough
Question premise: You are planning a Part 107 operation in controlled airspace. You want to know what must be true before you fly.
- Option A: “You can fly as long as you stay below the altitude limit.”
- Fails trigger match: it ignores controlled airspace authorization.
- Option B: “You must obtain authorization for the operation.”
- Matches trigger and permission structure.
- Option C: “You only need to file a flight plan.”
- Administrative mismatch: the question is about authorization for controlled airspace.
- Option D: “You should request permission if you feel unsure.”
- Modal verb trap: “should” instead of required authorization.
The correct option is the one that matches the trigger, uses the correct obligation level, and includes the required condition.
A Practical Rule-Language Checklist
Before choosing an answer, run this quick sequence: trigger match → obligation match → permission and limit both present → correct category → rule-relevant specificity. If any step fails, eliminate the option. If you’re down to two choices, compare them for exactly one difference: trigger, modal verb, limit, category, or specificity. That difference is usually the whole question.
1.5 Practical Scenario Drills for Rule Application Under Time Pressure
Time pressure in the FAA Part 107 knowledge test is mostly about disciplined reading. You are not trying to “guess the intent”; you are matching the fact pattern to the rule trigger, then selecting the answer that preserves compliance. Use the drills below as a repeatable routine.
Drill Mindset and Timing
Start each question with a 10-second scan: identify (1) airspace or location cues, (2) time cues like night, (3) people cues, (4) visibility cues, and (5) aircraft control cues like observers or VLOS. Then spend 20–30 seconds on the rule trigger and 10 seconds on eliminating wrong answers. If you can’t name the trigger, you can’t reliably pick the correct option.
Mind Map: Rule Trigger to Correct Action
Drill 1: VLOS with an Observer
Scenario: You plan a Part 107 flight where the remote pilot cannot maintain direct line of sight, but a visual observer will track the aircraft. The question asks what you must do to remain compliant.
Rule trigger: VLOS requirement and observer role. The correct choice will not treat the observer as a substitute for losing control. The remote pilot still must be able to operate the aircraft safely and maintain required control, while the observer supports situational awareness.
How to answer fast:
- If the option says “observer replaces VLOS,” eliminate it.
- If the option says “remote pilot must maintain required control and use observer to assist,” keep it.
Example wrong answer pattern: “The observer can maintain VLOS for the remote pilot.”
Drill 2: Operations over People
Scenario: A small UAS will fly above a group of people at an event. The question asks which condition makes the operation compliant.
Rule trigger: Operations over people category. The correct answer will tie compliance to the specific category and required risk mitigation, not just to “being careful.”
How to answer fast:
- Look for language about “over people” versus “near people.”
- Eliminate answers that treat “no contact” as the only requirement.
Concrete example: If the option claims you can fly over people without meeting the applicable operational category, it’s wrong even if the aircraft is small and slow.
Drill 3: Controlled Airspace and Authorization
Scenario: You have a planned flight in controlled airspace. The question asks what you must have before takeoff.
Rule trigger: Authorization requirement for the airspace operation. The correct option will require the appropriate authorization or permission consistent with the system used.
How to answer fast:
- If an option says “you can fly as long as you stay below a certain altitude,” eliminate it.
- If an option says “you must obtain the required authorization before operating,” keep it.
Example wrong answer pattern: “Altitude alone makes controlled airspace unrestricted.”
Drill 4: Night Operations and Lighting
Scenario: The question describes a flight after sunset and asks what operational requirement applies.
Rule trigger: Night operations requirements, including lighting and visibility expectations. The correct answer will focus on what must be true for the aircraft and operation at night.
How to answer fast:
- If an option treats night like daytime, eliminate it.
- If an option references lighting/visibility compliance, it’s likely the correct mapping.
Drill 5: Weather and Go/No-Go Logic
Scenario: The question provides wind and visibility details and asks whether the operation is allowed.
Rule trigger: Weather and visibility limits tied to safe operation and VFR conditions. The correct choice will not ignore the provided visibility or wind cues.
How to answer fast:
- If an option says “the rules don’t care about visibility,” eliminate it.
- If an option says “you must be able to operate safely within the required visibility and control constraints,” keep it.
Rapid-Response Checklist for Any Scenario
Use this in the last 15 seconds:
- What is the single trigger fact?
- What limitation does that trigger activate?
- Does the answer preserve compliance with that limitation?
- Does the answer contradict any explicit scenario detail?
Mini Case Study: One Question, Three Eliminations
Scenario: “You will fly in controlled airspace. You have not requested authorization. An observer will help you maintain situational awareness. The question asks what is required before takeoff.”
Eliminate:
- Any answer that focuses only on observer use.
- Any answer that claims altitude or caution replaces authorization.
- Any answer that suggests you can request authorization after takeoff.
Keep: The option that requires the appropriate authorization before operating.
This is the core exam skill: the correct answer is the one that respects the trigger, not the one that sounds most “helpful.”
2. Airspace Classification and Controlled Airspace Operations
2.1 Airspace Classes and What They Mean for Part 107 Operations
Airspace classes tell you what level of control exists and what permissions or procedures you must follow. For Part 107, the exam focus is simple: identify the airspace class, then match it to the operational requirements you must meet before you fly. Think of it as a checklist that starts with “Where am I?” and ends with “What must I do to be legal?”
The Big Picture
Airspace is managed in layers. The class (A through G) describes how traffic is controlled and what rules apply. For drones under Part 107, the most testable classes are typically B, C, D, E, and G, plus the idea that some areas are controlled even if you don’t see a tower.
A useful mental model is:
- Classes B, C, D: controlled environments around busy airports; you usually need authorization and must follow specific procedures.
- Class E: controlled airspace without a tower’s constant presence; you still may need to comply with controlled-airspace rules.
- Class G: uncontrolled airspace; fewer formal constraints, but you still must avoid hazards and follow Part 107 basics.
Mind Map: Airspace Classes to Part 107 Actions
Class B Operations
Class B airspace is the “most structured” category you’ll commonly see on charts near major airports. It’s designed to manage dense traffic with defined vertical and lateral limits. On an exam question, if the scenario places your planned flight inside Class B, the correct reasoning usually goes: you are in controlled airspace that requires authorization, and you must operate within the limits tied to that authorization.
Example: You plan a mapping flight at 300 feet AGL within the lateral boundaries of Class B. The question asks what you must do before takeoff. The best answer points to obtaining the required authorization and then flying only as permitted by that authorization.
Class C Operations
Class C airspace surrounds airports with an operating control tower and approach control. The key difference from Class B is not that it’s “easy,” but that the structure and procedures differ. For Part 107, the exam typically tests whether you recognize that Class C is controlled airspace and therefore triggers authorization and compliance steps.
Example: Your drone route crosses a Class C area at 400 feet AGL. The question asks whether you can simply fly because you’re below a certain altitude. The correct approach is to treat Class C as controlled airspace requiring authorization and adherence to any conditions.
Class D Operations
Class D airspace is controlled around airports with a tower that is operating. When the tower is not operating, the airspace may behave differently, but exam questions usually keep it straightforward: if the chart indicates Class D, you treat it as controlled airspace for planning.
Example: A scenario places your takeoff point inside Class D airspace during tower operating hours. The question asks what you must do. The correct reasoning is to obtain authorization and follow the required procedures associated with that airspace.
Class E Operations
Class E is controlled airspace that does not have the same “B/C/D around airports” framing. It can exist in different vertical segments, and the exam often tests altitude awareness: the same location can be Class E at one altitude and something else at another. For Part 107, the practical takeaway is to verify both the airspace class and the altitude band you plan to use.
Example: You are planning at 500 feet AGL and the chart shows Class E at that altitude. The question asks what matters most. The best answer emphasizes confirming the controlled-airspace status at your planned altitude and then applying the authorization and compliance requirements that follow.
Class G Operations
Class G is uncontrolled airspace. That doesn’t mean “anything goes.” You still must follow Part 107 operational rules: maintain control, avoid hazards, and comply with any applicable restrictions that are not tied to airspace class alone.
Example: Your planned flight is entirely in Class G at 250 feet AGL. The question asks what you must do regarding controlled-airspace authorization. The correct reasoning is that controlled-airspace authorization is typically not the main requirement for Class G, while Part 107 baseline rules still apply.
Exam-Ready Decision Logic
When you see an airspace question, use this sequence:
- Locate the airspace class on the chart (B, C, D, E, or G).
- Confirm the altitude band matches your planned flight.
- Determine whether authorization is required based on controlled-airspace status.
- Apply operational limits tied to the authorization or the airspace’s structure.
Example: A question says your flight is in controlled airspace but doesn’t mention the class. The correct answer approach is to identify the class from the chart information provided, because the authorization requirement logic depends on the class.
Quick Summary
- B/C/D: controlled airport environments; expect authorization and strict compliance.
- E: controlled airspace without the B/C/D airport framing; altitude matters.
- G: uncontrolled airspace; fewer controlled-airspace steps, but Part 107 rules still govern safety and legality.
2.2 Controlled Airspace Boundaries and How to Verify Them
Controlled airspace is where the FAA expects you to follow specific rules because other aircraft may be operating with predictable routes and separation. For Part 107, the exam focus is not memorizing every boundary shape; it’s verifying whether your planned operation is inside controlled airspace and then applying the correct authorization or waiver path.
What “Boundary” Means in Practice
A controlled airspace boundary is a defined geographic limit, usually expressed as a lateral area (horizontal shape) and an altitude range (vertical limits). Your job is to confirm both:
- Lateral position: Is the takeoff-to-landing area, and the route you plan to fly, within the controlled area?
- Vertical position: Even if you’re laterally outside, could your altitude bring you into the controlled airspace layer?
A common exam trap is treating “near” as “outside.” If your planned flight line crosses the boundary, you’re operating in controlled airspace for that portion of the flight.
Step 1: Verify Your Planned Geometry
Start with your mission shape, not just a single point.
- Mark takeoff point, intended track/route, and landing point.
- Add any turns, loitering, and camera sweeps that change your track.
- Include the area you might drift due to wind or control limits.
Example: You plan a straight line 1,000 feet long, but you also plan two 90-degree turns to capture side angles. If the turns bring the aircraft closer to the boundary, the “straight line” check alone is insufficient.
Step 2: Confirm the Airspace Layer You Care About
Controlled airspace is often stacked. Your authorization decision depends on the altitude band relevant to your operation.
- If the controlled airspace has a floor, compare your planned altitude to that floor.
- If it has a ceiling, compare your planned altitude to that ceiling.
Example: You intend to fly at 250 feet AGL. If the controlled airspace floor is defined in MSL terms, you must translate your planned altitude into the correct reference frame used by the airspace description.
Step 3: Use the Right Verification Method
For exam purposes, the “how” matters: you verify using the tools and data sources that reflect current airspace definitions.
- Use the official airspace depiction that shows boundaries and altitude limits.
- Cross-check with airport proximity when the mission is near controlled airspace associated with airports.
Best practice: treat your verification as a checklist item, not a one-time glance. If you change the route, altitude, or takeoff location, you re-verify.
Step 4: Interpret Boundary Crossings Correctly
If your route intersects a boundary, you don’t get to “average it out.” You must treat the intersecting segment as controlled airspace operation.
Example: Your planned path starts outside controlled airspace, crosses into it for 30 seconds, then exits. The correct approach is to plan authorization coverage for the controlled segment, not to assume the short duration makes it irrelevant.
Step 5: Apply Authorization Logic Without Guessing
Once you determine you’re in controlled airspace, the exam expects you to connect that fact to the next step:
- If authorization is required, you must have it before the flight.
- If authorization is not required for your specific scenario, you still must comply with the applicable operational constraints.
A practical way to avoid wrong answers: identify the controlled airspace type and then match it to the authorization requirement described in the question. Don’t infer based on “it’s just a small drone.”
Mind Map: Controlled Airspace Verification
Example: Boundary Check with a Route Change
You initially plan a flight that stays outside controlled airspace. After reviewing wind, you adjust the route to include an extra 200-foot lateral offset. The correct exam mindset is to re-run the boundary verification with the updated track. If the new offset causes the route to enter controlled airspace, you must treat the mission as controlled airspace operation for that segment and handle authorization accordingly.
Quick Decision Checklist
- Did you verify route and turns, not only a single point?
- Did you verify the altitude band for the controlled airspace layer?
- If the route crosses the boundary, did you treat the crossing segment as controlled airspace?
- If authorization is required, is it in place before the flight?
That’s the whole game: accurate boundary verification in both dimensions, then correct compliance actions based on what the boundary check reveals.
2.3 Operating Near Airports and Understanding Approach and Departure Paths
When you operate near an airport, the exam wants you to think in layers: airspace rules first, then where aircraft are likely to be, then how your small UAS operation fits without creating conflict. Part 107 doesn’t give you a “drone-only” bubble around runways, so your planning has to respect the same traffic patterns used by manned aircraft.
Foundational Concepts for Airport Proximity
Start with the idea that approach and departure paths are not random. They are designed to move aircraft between en route airspace and the runway environment while maintaining separation and predictable trajectories. For a drone pilot, the practical takeaway is simple: if your operation is near the runway environment, you must assume aircraft will be flying predictable paths at predictable altitudes and speeds.
Next, remember that “near” is not a single number in Part 107. The test questions typically expect you to use charted information and airspace boundaries to determine whether you are in controlled airspace and whether authorization is required. Even if you are technically allowed to fly, you still need to avoid interfering with aircraft.
Finally, treat runway operations as a time-dependent problem. A runway can support multiple arrival and departure directions depending on wind and traffic flow. Your planning should therefore be based on what the airport is likely doing during your planned window, not what it did last week.
Approach Paths and What They Mean for Drones
An approach path is the route aircraft follow to line up with the runway for landing. In many cases, aircraft descend while moving laterally toward the runway centerline. For your planning, that means your risk is not only “directly over the runway.” It can also be offset laterally where aircraft are descending toward the final approach.
A common exam trap is assuming that because you are not on the runway, you are safe. If you are under a likely final approach segment, you may be in the same airspace volume where aircraft are configuring for landing and may have limited ability to maneuver.
A good best-practice habit is to identify the runway in use and then visualize the approach corridor as a funnel: wider farther out, narrowing as aircraft get closer to touchdown. Your mission should be outside that corridor, or you should plan an altitude and location that keeps you well clear of where aircraft are expected to be.
Departure Paths and What They Mean for Drones
A departure path is the route aircraft follow after takeoff to climb away from the runway environment and rejoin the rest of the airspace system. Departures often include a climb segment that moves aircraft away from the airport, sometimes with turns that can place aircraft over areas that look “sideways” from the runway.
For drones, the key nuance is that departures can cross over your planned location shortly after takeoff. If you plan a mission that is close to the airport but not directly aligned with the runway, you still need to consider whether a departure route turns toward your area.
A practical example: you plan to fly near an airport boundary where the runway is oriented north-south. You assume aircraft will climb straight up and away. But if the departure procedure includes a turn to the east, your location could be under the climb-and-turn segment. The correct planning response is to use the charted procedure geometry to confirm whether your area lies under that segment.
How to Use Charts and Airspace Information Without Guessing
Your planning workflow should be consistent:
- Identify the airport and the runway(s) that could be in use.
- Determine whether your operation is in controlled airspace and whether authorization is required.
- Use charted approach and departure information to map likely aircraft paths.
- Choose a mission location and altitude that avoids those paths, not just the runway surface.
- Re-check before takeoff because runway use can change with wind and traffic.
If you do this, you avoid the “I looked at the runway once” problem that shows up in many wrong answers.
Mind Map: Airport Proximity Planning
Example: Choosing a Safe Location Near a Runway
Scenario: You want to fly a small quadcopter 1 mile east of an airport at 200 feet AGL. The runway in use is oriented north-south.
Step 1: You check airspace and confirm whether you need authorization.
Step 2: You review likely approach and departure directions. You notice that arrivals are expected from the north and that final approach tracks pass near the eastern side of the airport as aircraft descend.
Step 3: You compare your planned location and altitude to that approach corridor. Even though you are not over the runway, your position could be within the descending path.
Best-practice outcome: either move farther away from the approach corridor, adjust altitude to maintain clear separation from expected aircraft altitudes, or postpone until the runway configuration changes.
Example: Avoiding a Departure Turn Conflict
Scenario: You plan a mapping flight 0.8 mile south of the airport at 300 feet AGL. The runway is east-west.
You assume departures will climb straight east or west. Charted information shows a departure procedure that includes a turn after takeoff toward the south.
Best-practice outcome: you do not treat “not directly under the runway” as sufficient. You relocate the mission area to avoid the turn segment or choose a different time when the departure direction is less likely to cross your planned location.
Quick Decision Checklist for Exam-Style Questions
- Am I in controlled airspace and do I have authorization if required?
- Which runway is likely in use during my planned time?
- Could an approach corridor pass near my location even if I’m not over the runway?
- Could a departure route turn toward my location shortly after takeoff?
- Did I verify the geometry using charted information rather than assumptions?
2.4 Exam Ready Decision Trees for Controlled Airspace Requirements
Controlled airspace is where Part 107 questions stop being “memorize a rule” and start being “choose the right permission path.” The exam typically tests whether you can (1) identify the airspace type, (2) determine whether you need authorization, and (3) apply the authorization limits correctly.
Step 1: Identify the Airspace You’re Actually In
Start with the simplest question: what controlled airspace surrounds your planned operation? Use the chart and planning tool output to classify the area (for example, Class B, Class C, Class D, or Class E with controlled status). Then ask: is the operation inside controlled airspace, or just near it?
A common exam trap is treating “near an airport” as “in controlled airspace.” If your planned takeoff and landing points are outside the controlled boundary, you may avoid the authorization requirement. If any part of the flight path enters controlled airspace, you must treat the mission as entering it.
Step 2: Determine Whether Authorization Is Required
For Part 107, the exam usually expects you to know that authorization is required to operate in controlled airspace where permission is needed. The decision tree should branch on the controlled airspace class and the presence of an authorization system workflow.
If you’re in Class B or Class C, assume you will need authorization through the appropriate system. For Class D and certain Class E situations, the requirement can still apply depending on the specific airspace and the operation details.
Step 3: Match Your Operation Details to the Authorization Limits
Authorization is not a blank check. The exam often tests whether you can spot a mismatch between what you requested and what you plan to do.
Key details that frequently control the outcome:
- Altitude: Are you staying within the authorized ceiling?
- Time window: Are you operating within the approved time range?
- Location and route: Are you staying within the approved geographic area?
- Aircraft and operation type: Are you consistent with the authorization assumptions?
A practical way to avoid mistakes is to treat authorization as a “mission contract.” If your plan changes after authorization, you must re-check whether the change still fits the contract.
Mind Map: Controlled Airspace Decision Flow
Diagram: Exam Ready Decision Tree
    flowchart TD
  A[Start with planned takeoff point and route] --> B{Is any part of the operation in controlled airspace?}
  B -- No --> C[You are not subject to controlled-airspace authorization requirements]
  B -- Yes --> D{What controlled airspace class?}
  D -- Class B --> E[Authorization required]
  D -- Class C --> E
  D -- Class D --> F[Authorization may be required based on the specific setup]
  D -- Controlled Class E --> F
  F --> G[Submit authorization request with correct altitude, time, and location]
  E --> G
  G --> H[Review authorization for limits and conditions]
  H --> I{Will the mission stay within every approved limit?}
  I -- Yes --> J[Fly the approved operation]
  I -- No --> K[Do not fly as planned; adjust plan or update authorization]
Example: Altitude Mismatch That Triggers the Wrong Answer
You plan to operate at 400 ft AGL in a controlled area. The authorization ceiling shown is 350 ft. The exam answer is not “fly anyway but be careful.” The correct reasoning is that exceeding the authorized ceiling violates the authorization limits, so you must adjust the plan to stay at or below the approved altitude.
Example: “Inside the Boundary” vs “Near the Boundary”
Your takeoff point is outside controlled airspace, but your route briefly crosses into it. The exam expects you to treat the mission as entering controlled airspace because the operation includes that segment. Therefore, you should follow the authorization path.
Example: Time Window Confusion
Authorization is approved for a specific time window. If you plan to launch 20 minutes early, you are outside the approved time. The correct approach is to align the launch and flight with the authorization window or update the authorization.
Step 4: Use a Consistent Exam Strategy
When you see a question, don’t jump straight to “what class is it?” First determine whether the operation is inside controlled airspace at all. Then branch by class, and finally verify that the mission details match the authorization limits. This order mirrors how the exam tries to catch you: it rewards correct classification and punishes “close enough” thinking.
2.5 Practical Examples of Airspace Checks Using Common Planning Workflows
Airspace checks are easiest when you treat them like a repeatable workflow: identify the operation, verify the airspace, then confirm what permission or restrictions apply. The exam loves questions where one small mismatch—wrong altitude, wrong boundary, or missing authorization—turns a “looks fine” plan into a no-go.
Foundational Workflow You Can Reuse
- Define the mission envelope: takeoff point, planned route or area, maximum altitude, and time window.
- Identify the airspace type: controlled vs. uncontrolled, and whether you’re near an airport environment.
- Check authorization requirements: if controlled airspace is involved, determine whether you need LAANC authorization or a waiver.
- Validate constraints: altitude ceilings, time limits, and any operational conditions.
- Run a final consistency check: confirm your planned altitude never exceeds the authorized limit and that your operation stays within the approved geography.
A good habit is to write down your “hard limits” in plain language: “Max altitude is 200 ft AGL” and “Operation stays within this polygon.” When questions get tricky, you’re less likely to accidentally drift into an unauthorized altitude.
Mind Map: the Planning Workflow
Airspace Check Workflow Mind Map
Example 1: Controlled Airspace Near an Airport
Scenario: You plan a small UAV flight at 150 ft AGL over a warehouse area 2 miles from an airport. You intend to fly straight lines within a small rectangle for 20 minutes.
Workflow application:
- Mission envelope: max altitude 150 ft AGL; fixed area; specific time.
- Airspace identification: because you’re near an airport, you check whether the location falls inside controlled airspace.
- Authorization decision: if the area is within controlled airspace that supports LAANC, you request authorization for the exact altitude and geography.
- Constraint verification: you confirm the authorization ceiling is at least 150 ft AGL for the approved area.
- Final consistency check: you ensure your rectangle doesn’t extend beyond the approved boundary.
Exam-style takeaway: If an answer choice says you can fly at 150 ft AGL without authorization simply because you’re “not going high,” that’s wrong. The key is whether you’re in controlled airspace, not how high you feel like going.
Example 2: Crossing from Uncontrolled to Controlled Airspace
Scenario: You plan a linear route from a rural field into a nearby town. The route passes near the edge of controlled airspace. Your max altitude is 120 ft AGL.
Workflow application:
- Mission envelope: route line plus max altitude.
- Airspace identification: you determine which segments intersect controlled airspace.
- Authorization decision: you request authorization for the controlled segment, but you still must ensure the entire route is consistent with the approved geography.
- Constraint verification: you confirm the authorized altitude applies to the portion inside controlled airspace.
- Final consistency check: you adjust the route if needed so you don’t inadvertently include a segment that lacks authorization.
Exam-style takeaway: A common wrong answer is treating authorization as “global” for the whole flight. Authorization is tied to the approved area and conditions, so route geometry matters.
Example 3: Altitude Ceiling Mismatch
Scenario: You request authorization for 200 ft AGL, but the system returns an authorization ceiling of 150 ft AGL for your selected area. Your plan was to fly at 180 ft AGL.
Workflow application:
- Mission envelope: planned max altitude 180 ft AGL.
- Airspace identification: controlled airspace confirmed.
- Authorization decision: authorization granted, but with a ceiling.
- Constraint verification: you compare your planned altitude to the authorized ceiling.
- Final consistency check: you either lower the mission altitude to 150 ft AGL or revise the plan to an area where the authorization supports 180 ft AGL.
Exam-style takeaway: If you “keep flying at 180 because it’s close,” you’ve created the violation. The correct action is to align the mission altitude with the authorized ceiling.
Example 4: Time Window and Operational Consistency
Scenario: Your authorization is valid for a specific time window. You plan to start early, then extend the flight if conditions look good.
Workflow application:
- Mission envelope: intended start time and planned duration.
- Airspace identification: controlled airspace confirmed.
- Authorization decision: authorization exists but is time-limited.
- Constraint verification: you ensure the entire operation occurs within the authorization window.
- Final consistency check: you set a hard stop time before the authorization expires.
Exam-style takeaway: The exam often tests whether you understand that “authorization exists” is not the same as “authorization covers your actual operation.” Time alignment is part of the airspace check.
Quick Self-Check Before You Answer Exam Questions
When you see an airspace question, ask three fast questions:
- Is the location inside controlled airspace? If yes, authorization rules matter.
- Does the plan exceed the authorized ceiling or approved area? If yes, it’s wrong.
- Does the plan fit the authorization conditions, including time? If no, it’s wrong.
This is the difference between reading the question and actually preventing the violation.
3. Sectional Charts and Aeronautical Information for Drone Pilots
3.1 Reading Sectional Charts for Airspace Features and Constraints
Sectional charts are the “big picture” map for U.S. airspace. For Part 107 planning, your goal is not to memorize every line; it’s to quickly identify what could constrain your flight: controlled airspace boundaries, airport-related areas, and any charted features that affect where you can legally operate.
Start with Chart Logic Before Details
A sectional chart is built from layers of information. Think in three passes:
-
Pass one: geography and orientation. Confirm the area you’re planning to fly, the nearest city, and the direction of travel. If you can’t confidently locate the mission area on the chart, everything else becomes guesswork.
-
Pass two: airspace boundaries. Look for the bold outlines and labeled airspace names or class letters. These boundaries are what typically drive Part 107 permissions.
-
Pass three: constraints and operational cues. Identify airports, runways, and charted features that hint at controlled airspace shapes around them.
A good habit is to circle your takeoff point and then trace outward to see which airspace boundary it intersects. If your planned route crosses a boundary, you’ve already found the main exam-worthy issue.
Identify Airspace Features That Matter for Part 107
On sectional charts, controlled airspace is commonly shown with class letters and boundary lines. For exam purposes, focus on how the chart communicates “where the rules change.”
- Class B, C, and D areas are typically associated with airports and are the most likely to require authorization steps for drone operations.
- Class E often covers larger regions and may start at specific altitudes, which matters when questions mention ceilings or “above/below” language.
- Class G is the “no controlled airspace” baseline, but it can still have nearby controlled airspace that begins at a boundary you might cross.
When you read a boundary, don’t just note the class letter. Also note the altitude depiction if present. Many exam questions hinge on whether the operation is above or below a stated floor.
Use Airports and Runways as Anchors
Airports are the chart’s strongest navigation anchors. Even if you’re not flying near the runway, the airspace around the airport is often what creates constraints.
- Find the airport symbol and then locate the runway orientation.
- Look for surrounding airspace depictions that wrap around the airport.
- If the question describes a drone mission “near the airport” or “within the vicinity,” your job is to determine whether the mission area is inside the charted controlled airspace boundary.
A practical example: suppose your takeoff is 2 miles from an airport symbol, and the chart shows a controlled airspace boundary that encloses that airport. If your circle around the takeoff point touches or lies within the boundary, treat it as inside that controlled airspace for planning.
Read Boundary Lines Like They Are Legal Text
Chart boundaries are drawn with consistent line styles. Your exam strategy is to treat them as “hard edges.” If a mission route crosses a boundary, you should expect a change in requirements.
Here’s a systematic way to answer boundary questions:
- Locate the mission area on the chart.
- Check whether the takeoff point is inside or outside the boundary.
- Check the route path for crossing.
- Match the class letter and altitude floor to the question’s described altitude.
If the question says “operate at 300 feet AGL” and the chart indicates a controlled airspace floor at a specific altitude, you must compare the described operating altitude to that floor depiction.
Mind Map: Sectional Chart Reading Workflow
Example: Boundary Crossing with Altitude Mention
Imagine an exam scenario: you plan a mapping flight at 400 feet AGL. The chart shows a controlled airspace area with a stated floor. Your takeoff point is outside the boundary, but the planned route passes through the boundary.
Correct reasoning steps:
- The takeoff point being outside doesn’t end the problem, because the route crosses.
- The altitude mention forces you to compare your planned operating altitude to the charted floor.
- If your altitude is below the floor, you may still be constrained depending on how the question frames the operation relative to the airspace. If it’s at or above the floor, you should assume the controlled airspace rules apply during the crossing segment.
The key is that sectional charts tell you where constraints exist; the question tells you how your mission intersects them.
Example: Airport Vicinity Without Flying over the Runway
Another common trap: a question says “near the airport” but not “over the runway.” Sectional charts often show controlled airspace that extends beyond the runway area. If your mission point lies within the charted boundary, you treat it as inside the controlled airspace regardless of runway proximity.
A quick check: find the airport symbol, then look outward for the boundary shape. If your mission circle overlaps that shape, the runway distance is a distraction.
Quick Self-Test Before You Move On
Before answering any exam question, verify three things:
- You can point to the mission location on the chart.
- You can state whether the takeoff point and route are inside or outside each relevant boundary.
- You can compare the described altitude to any charted altitude floor.
If any of these are unclear, the safest exam move is to re-read the chart features rather than guess. Sectional charts are consistent; your interpretation should be too.
3.2 Interpreting Airports, Runways, and Surface Area Details
Airports show up on charts as more than a place name. For Part 107 planning, the key is translating chart symbols into operational constraints: where you can fly, what you must avoid, and how you’ll recognize the right runway environment when you’re looking at the real world.
Airport Layout Basics That Matter for Drone Planning
Start with the airport’s “shape language.” On sectional charts, the airport boundary and airport symbol tell you the location and general extent of the airport surface. Then focus on three layers:
- Runway system: runway numbers, lengths, and orientations.
- Movement areas: taxiways and other paved paths that aircraft use.
- Surrounding surface features: approach/departure corridors, runway end safety areas, and nearby obstacles.
A practical habit: when you see an airport symbol, immediately ask, “Which runway ends could a pilot be using for takeoff or landing from my position?” That question drives the rest of your interpretation.
Runway Numbers and Orientation Without Guesswork
Runway numbers are magnetic headings rounded to the nearest 10 degrees, with the last digit dropped. For example, runway 18 points roughly toward 180°. The opposite end is runway 36 (180° + 180°).
Example: If you’re planning a mission north of an airport and you see runway 09/27, runway 09 points east (about 090°) and runway 27 points west (about 270°). If your planned flight path crosses the runway approach area toward the east end, you treat that end as the relevant runway environment.
Runway orientation also helps you predict which end is likely in use. You don’t need to guess perfectly for the exam; you need to recognize that runway use aligns with wind and that approach paths align with runway headings.
Runway Length and Width as Risk Indicators
Charts often show runway length and sometimes width or surface type. For drones, the exam logic is usually about proximity and airspace context, not about aircraft performance. Still, runway length matters because longer runways typically support higher traffic and more frequent operations.
Best practice: If your planned operation is near the runway end, treat the entire runway environment as “busy airspace” even if your drone is small. The exam tends to reward conservative interpretations of proximity.
Surface Area Details Beyond the Runway Stripe
Runways are the obvious part, but the surface area includes:
- Taxiways: paved connectors between runways and terminals.
- Aprons: areas where aircraft park, load, or refuel.
- Terminal and hangar areas: often shown as clusters of symbols.
These features matter because they indicate where aircraft are likely to be moving at low altitude and where visual cues on the ground may be dense.
Example: If your mission is planned near a terminal apron, you should expect aircraft to be maneuvering on taxiways and possibly crossing near runway entrances. Even if you remain outside the runway itself, your operational risk increases because aircraft are not confined to the runway centerline.
Identifying Runway Ends and Approach/Departure Corridors
Runway ends are where aircraft transition between ground movement and climb or descent. On charts, runway ends are identified by the runway numbers and the physical ends of the runway symbol.
For planning, you should treat runway ends as anchor points for your mental model:
- Approach corridor: the area aligned with the runway heading where aircraft descend.
- Departure corridor: the area aligned with the runway heading where aircraft climb.
Exam-style reasoning: If a question places your drone near the extended centerline of a runway end, the correct choice usually involves recognizing that aircraft are operating in that direction during approach or departure.
Putting It Together with a Simple Planning Workflow
Use a repeatable sequence:
- Locate the airport on the chart.
- Identify the runway pair by reading the numbers.
- Determine which runway end is closest to your planned route.
- Check for nearby taxiways and aprons that suggest aircraft movement density.
- Translate proximity into your operational plan: adjust route, altitude, or timing to reduce conflict.
This workflow keeps you from treating the airport as a single blob. Airports are systems, and your plan should respect that.
Mind Map: Airport, Runway, and Surface Area Interpretation
Example: Reading a Runway Environment from Your Position
You’re planning a flight 1,000 feet from an airport boundary. On the chart you see runway 09/27. Your planned path runs generally east-west, and the east end of the runway is closer to your route.
Step-by-step interpretation:
- Runway 09 points east, so the east end is the runway end closest to your route.
- Because your route aligns toward that end, you treat the approach/departure corridor for runway 09 as relevant.
- If the chart shows taxiways connecting to an apron near the east side, you expect aircraft movement density near your area.
- The exam-friendly conclusion is to reduce conflict by adjusting your route so you are not aligned with the runway end corridor and not operating near dense movement areas.
That’s the core skill: convert chart symbols into a clear picture of where aircraft are likely to be operating, then make your plan match that picture.
3.3 Using Aeronautical Information Publications to Support Planning
Aeronautical Information Publications (AIPs) are the FAA’s structured way of publishing what pilots need to know: where airspace is, what procedures exist, and what constraints apply. For Part 107 planning, the goal is not to memorize every line; it’s to translate published information into operational decisions—especially when you’re near controlled airspace, airports, or complex terrain.
Start with the foundational idea: AIPs are authoritative text, but they are not automatically “drone-ready.” You must convert their language into your mission limits. A good workflow is: identify the mission area, determine the relevant airspace and facilities, extract the constraints, then verify how those constraints affect your planned altitude, route, and timing.
Step 1: Identify What Publications Matter
AIPs typically include information that affects airspace status, procedures, and operational considerations. For a drone mission, the most relevant items usually fall into three buckets:
- Airspace structure: where controlled airspace begins and ends, and what special use areas exist.
- Airport and procedure context: runway-related details and any procedure notes that affect how aircraft move.
- Operational notes: anything that changes how you should plan or communicate.
Example: You plan to fly 3 miles from an airport. The AIP text may describe controlled airspace boundaries and any procedure notes. Your job is to map those boundaries to your planned takeoff point and maximum altitude so you don’t accidentally plan a route that crosses into a restricted area.
Step 2: Extract Constraints in Plain Operational Terms
AIPs often describe constraints using aviation conventions. Convert them into operational terms you can apply:
- Altitude limits become “maximum AGL or MSL you can use” for your mission.
- Time or activity notes become “when the constraint applies” and whether you need to adjust the mission window.
- Procedure references become “what traffic patterns exist” so you can plan a route that avoids unnecessary conflict.
Best practice: write a one-sentence constraint summary after each relevant AIP section. If you can’t summarize it, you probably haven’t extracted the right detail.
Example: An AIP note indicates a procedure area where aircraft may be operating. Even if your drone is not required to follow those procedures, you should treat the area as higher-risk and plan a route that minimizes time spent near likely traffic paths.
Step 3: Cross-Check with Your Chart-Based Planning
AIPs and charts complement each other. Charts show geometry; AIPs explain meaning. Use both:
- Use charts to confirm the physical location of airspace boundaries.
- Use AIPs to confirm the operational implications of those boundaries.
If they disagree, don’t “pick a favorite.” Instead, re-check the chart legend, the referenced facility, and the exact boundary description in the AIP text.
Example: Your chart suggests a boundary is just beyond your planned route, but the AIP text references a different lateral extent or includes an exception. Reconcile the two before finalizing your route.
Step 4: Translate into a Part 107 Mission Plan
Once constraints are extracted, translate them into the three mission elements that most often cause exam mistakes:
- Where you will fly: route and lateral boundaries.
- How high you will fly: maximum altitude and any ceiling constraints.
- How you will manage risk: traffic awareness, contingency planning, and operational category decisions.
Example: Your plan includes a climb to a high point on a ridge. AIP notes may indicate controlled airspace above a certain altitude. Your operational translation might be: “Limit climb to an altitude that stays below the controlled airspace ceiling at the ridge location.”
Step 5: Use AIP Notes to Avoid Common Planning Errors
Common errors happen when pilots treat AIP information as optional trivia. Instead, treat it as decision input:
- Assuming boundaries are “about there”: AIPs provide exact descriptions; use them to confirm whether your takeoff point is inside or outside.
- Ignoring procedure context: Even when you’re not flying the same procedure, traffic patterns still affect risk.
- Forgetting that mission timing matters: If an AIP note indicates activity-dependent conditions, your plan must match the intended time.
Mind Map: Aeronautical Information Publications Planning Flow
Example: Turning AIP Text into a Decision
Scenario: You want to fly near an airport and plan to operate at a fixed altitude. The AIP text indicates controlled airspace begins at a certain lateral boundary and includes an altitude ceiling. Your decision process should look like this:
- Confirm whether your takeoff point and route stay outside the lateral boundary.
- If the route approaches the boundary, adjust the route rather than assuming “it’s close enough.”
- If you must fly near the boundary, set your maximum altitude so you remain below the ceiling where you will be operating.
- Document the constraint summary so you can explain your plan if questioned.
This is how AIP information becomes exam-ready reasoning: you’re not just reading; you’re converting published constraints into a mission that matches the rules and the airspace reality.
3.4 Converting Chart Information into Operational Limits and Go No Go Checks
Charts are not rules by themselves; they’re the evidence you use to decide what you can do. The goal of this section is to turn chart details into operational limits you can apply before takeoff, and then into a Go/No Go check you can run consistently.
From Chart Symbols to Operational Meaning
Start by separating what the chart shows from what you must do. A sectional chart might show airspace boundaries, airport locations, and terrain cues. Your job is to translate those into constraints on altitude, location, and required permissions.
A practical way to do this is to build a “constraint list” with three columns in your head:
- Where you plan to fly (route, takeoff/landing points, and any planned turns)
- What altitude you plan to use (planned AGL and any ceiling you must respect)
- What permission or procedure applies (controlled airspace, special use areas, or any authorization requirement)
Example: If your route crosses a controlled airspace boundary, the chart tells you the boundary exists. Your operational limit is that you cannot proceed as planned unless you have the required authorization and you stay within the approved altitude and time window.
Converting Airspace Boundaries into Route Constraints
Airspace boundaries on charts are drawn as lines with labels. The key is to treat them as “no surprises” boundaries.
- Mark the crossing points: Identify where your planned line intersects an airspace boundary.
- Assign an altitude ceiling: Use the chart’s depiction and the airspace class context to determine whether your planned altitude is even eligible.
- Plan a fallback: Decide what you will do if the authorization is not available for the exact crossing segment.
Easy example: You plan a straight line from a warehouse to a rooftop inspection point. The chart shows the route passes near an airport’s controlled airspace. Your operational limit becomes: either adjust the route to avoid the boundary, or plan to request authorization for the exact corridor and altitude you intend to fly.
Translating Airport and Procedure Clues into Risk Controls
Charts often include airport-related information that affects how you should think about traffic density and approach paths. Even when you are not required to follow manned aircraft procedures, you still need to avoid creating conflicts.
Use a simple rule: if the chart indicates you’re operating near an airport environment, treat it as a higher-complexity area for monitoring and contingency planning.
Example: Your mission is 2 miles from an airport. The chart shows runways and airport layout. Your operational limit is not “avoid the airport entirely,” but “increase monitoring discipline”: keep a tighter scan pattern, reduce unnecessary altitude changes, and ensure your contingency landing options remain feasible if you must stop early.
Turning Terrain and Obstacle Information into Performance Limits
Charts also help you anticipate obstacles and terrain changes. For Part 107 planning, the practical conversion is to ensure your planned altitude above ground level remains safe relative to what the chart suggests.
A systematic method:
- Identify the highest likely ground/terrain along the route.
- Choose a planned altitude that preserves a safety margin above that ground.
- Confirm that your aircraft can maintain that altitude with expected wind and battery limits.
Example: You plan to fly at a constant AGL over a route that crosses a ridge. The chart shows higher terrain. Your operational limit becomes: you cannot assume “constant AGL” is safe unless you’ve accounted for the ridge height and the aircraft’s ability to hold altitude.
Building a Go No Go Check from Chart-Derived Limits
A Go/No Go check should be short enough to run every time, but complete enough to catch the common mistakes.
Use this checklist logic:
- Airspace eligibility: Does the route intersect any controlled or special airspace that requires permission?
- Altitude eligibility: Does your planned altitude stay within the limits implied by the chart and any authorization conditions?
- Permission status: If permission is required, is it approved for the exact location, altitude, and time window?
- Route feasibility: If you must stop early, do you have a safe landing option within your operational area?
- Obstacle and terrain safety: Does the chart-based terrain/obstacle picture match your planned AGL and performance margin?
Example scenario: Your authorization is approved for a corridor, but your preflight route review shows you drifted 300 feet laterally due to a waypoint misplacement. Your Go/No Go result should be No Go because the chart-based boundary crossing no longer matches the approved corridor.
Mind Map: Chart to Limits to Go No Go
Example: One Mission, Two Different Outcomes
You plan a mapping flight over a mixed residential and light industrial area.
- Plan A: You choose a route that stays clear of controlled airspace boundaries shown on the chart. Your Go/No Go check passes because airspace eligibility is straightforward, and your altitude plan matches the terrain picture.
- Plan B: You choose a shorter route that crosses a controlled airspace boundary. Your Go/No Go check fails unless you have approved permission for the exact corridor and altitude. If permission is missing or the approved altitude is lower than your planned AGL target, you must revise the plan before takeoff.
The point is consistency: chart details become operational limits, and those limits become a repeatable Go/No Go decision that prevents “we thought it was fine” moments.
3.5 Practical Chart Based Exercises for Exam Style Questions
These exercises train the exact skill the exam tests: turning chart information into a yes-or-no operational decision. You will practice a repeatable workflow—find the right chart features, interpret constraints, then apply the Part 107 rule logic to a concrete mission.
Exercise 1: Controlled Airspace Boundary Spot Checks
Start with a simple scenario: a 400 ft AGL Part 107 flight planned 2 miles from a nearby airport. Your job is to determine whether controlled airspace is involved.
Workflow
- Identify the airport and locate the controlled airspace depiction on the sectional.
- Confirm the airspace type (for exam questions, the key is whether it is controlled and what authorization is typically required).
- Compare the planned operation area to the depicted boundary.
- Decide: “controlled airspace involved” or “not involved,” then choose the matching answer.
Example
- Plan: takeoff at a point labeled on the map, fly a straight line to a target, then return.
- Chart reading: the target lies inside the controlled airspace boundary.
- Exam-style decision: controlled airspace is involved, so you should expect authorization requirements rather than assuming “it’s just nearby.”
Exercise 2: Runway Proximity and Surface Area Reasoning
Now focus on how airports and runways appear on charts and how that affects planning.
Workflow
- Locate runways and note their orientation.
- Identify nearby surface features that indicate where operations might be constrained.
- Use the chart to estimate whether your operation is near airport movement areas.
- Apply the exam logic: proximity to airports often triggers additional planning steps, even when the flight altitude seems modest.
Example
- Plan: 200 ft AGL over an open field 1 mile from the airport boundary.
- Chart reading: the field is within the airport’s depicted area.
- Exam-style decision: treat it as an airport-adjacent operation and select the answer that emphasizes checking airspace permissions and operational constraints.
Exercise 3: Chart Feature to Operational Limit Mapping
This exercise forces you to translate chart symbols into operational consequences.
Workflow
- Pick one chart feature per question (airport, controlled boundary, waterway, or terrain depiction).
- Translate it into an operational question: “Does this change my airspace status?”
- Eliminate answers that change the wrong variable.
- Choose the answer that matches the chart feature’s operational impact.
Example
- Plan: fly along a river corridor.
- Chart reading: the corridor crosses into controlled airspace.
- Exam-style decision: the correct choice is the one that accounts for the controlled airspace portion of the route, not the portion that stays outside.
Exercise 4: Multi-Step Route with One Boundary Crossing
This is the most common exam pattern: a route that starts outside controlled airspace, crosses into it, then returns.
Workflow
- Mark the start point, end point, and the straight-line path.
- Identify the exact segment where the path intersects the controlled boundary.
- Decide whether the operation “involves” controlled airspace at any point.
- Select the answer that reflects the intersection, not the majority of the route.
Example
- Plan: 0.5 mile outside controlled airspace, then a diagonal line crosses the boundary for 0.2 mile.
- Exam-style decision: controlled airspace is involved because part of the operation occurs within it.
Mind Map: Chart-to-Decision Workflow
Exercise 5: Timed “One Chart, One Rule” Drills
Use a timer for realism. Each drill should take 2–3 minutes.
Drill Format
- You get a chart excerpt and a short mission description.
- You must answer one question: “Is controlled airspace involved?” or “Is the operation airport-adjacent enough to require extra planning steps?”
Example Drill
- Mission: 350 ft AGL, direct flight to a point that appears just inside a controlled boundary.
- Correct reasoning: the boundary is the deciding factor; “just outside” is not the same as “outside.”
Case Study Mind Map: Common Wrong Answer Patterns
Quick Self-Check Before You Commit to an Answer
Ask yourself three questions: “What chart feature is the question testing?” “Does my route or target actually cross into the depicted constraint?” “Which answer choice changes the same variable the chart changes?” If you can answer those in one breath, you’re doing the exam’s job for it.
4. LAANC, Authorization Workflows, and Airspace Permissioning
4.1 Understanding LAANC Concepts and What Authorization Covers
LAANC is the system that helps you get permission to operate in controlled airspace under Part 107. Think of it as an airspace “yes/no plus limits” tool: it doesn’t change the rules of Part 107, and it doesn’t replace your responsibility to plan safely. Your authorization is only valid when you follow the exact conditions shown in the approval.
What LAANC Is and What It Is Not
LAANC stands for Low Altitude Authorization and Notification Capability. It is used to request authorization for operations in certain controlled airspace areas, typically near airports. The key idea for exam questions is scope: LAANC authorization applies to the airspace permission portion of your mission, not to every Part 107 requirement.
A common mistake is treating LAANC as a blanket pass. If your authorization says you may fly at 200 feet, that does not automatically mean you can fly over people, fly at night without meeting night requirements, or ignore weather minima. Those obligations still come from Part 107 and any other applicable rules.
What Authorization Covers
LAANC authorization generally covers:
- Airspace permission for operating in controlled airspace where authorization is required.
- Altitude limits and sometimes other operational constraints tied to that airspace.
- Time window during which the authorization is valid.
- Location defined by the approved operation area or coordinates.
It does not cover:
- Your compliance with Part 107 operating rules like remote pilot responsibilities, aircraft condition, and operational conduct.
- Whether your mission is allowed under other Part 107 categories such as operations over people.
- Any requirement to obtain a waiver if your mission exceeds what Part 107 allows.
How Authorization Works in Practice
Most LAANC workflows follow a simple logic: you provide the operation details, the system checks them against the airspace constraints, and you receive an approval or a denial/limitation. The exam-friendly mindset is to treat the authorization like a contract with specific fields.
When you receive approval, verify these fields before you launch:
- Approved altitude matches your planned maximum.
- Approved time window matches your actual mission schedule.
- Approved area matches your planned takeoff and flight path.
- Any stated conditions are understood and can be followed.
If any field doesn’t match, you’re not “close enough.” You either adjust the plan to fit the authorization or request a new authorization.
Mind Map: LAANC Authorization Scope
Example: Altitude Mismatch
You request a LAANC authorization for controlled airspace at 400 feet. The approval shows ceiling 300 feet for your specific area and time. Your plan was to climb to 400 feet to clear a tree line.
Correct action: lower the maximum altitude to 300 feet or less and keep the rest of your plan consistent with the approved area and time. Incorrect action: “I’ll just go a little higher.” The authorization ceiling is the limit you must obey.
Example: Time Window Confusion
Your authorization is approved from 10:00 to 10:30. You launch at 10:28 but expect to finish at 10:45.
Correct action: plan so the operation is completed within the approved window, or request an updated authorization if your operation truly needs the later time. Incorrect action: continuing after the authorization window ends because the aircraft is already airborne.
Example: LAANC Approval Without a Waiver
Your mission involves flying over people in a way that requires a waiver under Part 107. You obtain LAANC authorization for controlled airspace.
Correct action: treat LAANC as airspace permission only. If the mission requires a waiver, you must have the waiver and comply with its conditions as well. Incorrect action: assuming LAANC approval replaces the waiver requirement.
Exam-Ready Checklist Mindset
When a question mentions LAANC, identify what the authorization is granting: airspace permission with specific limits. Then confirm what else still applies: Part 107 operational rules and any waiver needs. If the scenario changes altitude, time, or location beyond the approved fields, the correct answer is usually to adjust the plan or request a new authorization rather than improvising.
4.2 Step by Step Authorization Requests for Typical Part 107 Missions
Authorization is the part of the workflow where “I planned it” becomes “I’m allowed to do it.” For typical Part 107 missions, the goal is to submit the right information the first time, then operate exactly within the approved parameters.
Start with Mission Facts That Drive Authorization
Before you touch any authorization system, write down the mission facts that will later appear in the request. Keep them consistent across every step.
- Location: Use precise coordinates or a clearly defined area.
- Altitude: State the maximum altitude you intend to fly.
- Time window: Provide start and end times that match your plan.
- Airspace context: Identify whether you’re in controlled airspace and which facility area matters.
- Aircraft and operation: Confirm the aircraft category and whether you will operate over people or near airports.
A practical habit: create a one-page “authorization sheet” with these fields. When you copy them into the request, you reduce the chance of mismatched numbers.
Identify the Authorization Path
Not every mission needs the same type of permission. Your planning should determine which path applies.
- If you are operating in controlled airspace, you typically need airspace authorization.
- If your operation requires something beyond standard Part 107 allowances, you may need a waiver as well.
For exam purposes, the key reasoning step is this: authorization is about airspace permission; waivers are about rule exceptions. If you mix them up, you’ll answer the wrong question.
Prepare the Request Inputs
Most authorization submissions require structured inputs. Gather them in a consistent format.
- Geography: A point location or a defined area polygon.
- Vertical limits: Maximum altitude and, if asked, minimum altitude.
- Operational details: Whether you will fly from a fixed point or along a route.
- Contact and operator info: Use the same remote pilot details you will use for the mission.
Example: You plan to inspect a warehouse roof. You choose a single takeoff point, fly a grid pattern, and keep the aircraft at 200 ft AGL. Your request should reflect the same maximum altitude and the same general operating area.
Submit the Authorization Request
When you submit, treat the form like a checklist, not a creative writing exercise.
- Double-check coordinates and altitude before sending.
- Confirm the time window includes your actual planned operation plus a small buffer for setup.
- Ensure the request matches your operational intent: if you plan to remain within a defined area, don’t describe it as a route.
A common mistake is copying a planning altitude from a different document. If your request says 200 ft and your plan says 250 ft, your authorization compliance becomes a math problem you don’t want.
Review the Authorization Response Carefully
The response may include limitations that are easy to overlook. Read it like you’re about to fly under a contract.
- Approved altitude: Use the maximum approved value.
- Approved time: Do not operate outside the window.
- Approved area: Stay within the permitted geography.
- Any special conditions: Follow them exactly.
If the authorization includes a ceiling or boundary, your mission plan should be adjusted before takeoff. “I’ll try to stay under it” is not a plan.
Build a Compliance Checklist for Mission Day
Turn the authorization into a short, usable checklist.
- Confirm the aircraft is configured as planned.
- Confirm the takeoff time is within the approved window.
- Confirm the flight stays within the approved area.
- Confirm the maximum altitude is not exceeded.
- Confirm any required monitoring or safety steps are ready.
Example: For a bridge inspection, you receive approval for a specific corridor and altitude. On site, you verify the takeoff point is within the permitted area and that your route stays inside the corridor boundaries.
Handle Denials and Revisions Without Violations
If you cannot meet the approved parameters, you do not “wing it.” You either revise the request or change the mission.
- If the authorization is denied, stop and reassess the mission plan.
- If you need different altitude or timing, submit a revised request that matches the new plan.
- If you cannot obtain authorization, choose an alternative location, time, or operational approach that fits standard rules.
The exam logic is straightforward: operating without required authorization is a compliance failure, even if your intent was good.
Mind Map: Authorization Request Workflow for Typical Part 107 Missions
Example: Typical Controlled Airspace Request for a Roof Inspection
You plan a daytime inspection of a building near an airport. Your authorization sheet lists: coordinates for the building footprint, maximum altitude 200 ft AGL, and a 90-minute time window. You submit the request with the same coordinates and altitude, then review the response to confirm the approved area and ceiling. On mission day, you verify the takeoff point and ensure your grid pattern stays inside the approved boundary while maintaining the maximum altitude limit. If the authorization window starts later than your planned launch, you wait rather than depart early.
Example: Revising a Request After a Planning Change
You initially request 200 ft AGL for a line-of-sight survey. After site review, you realize you need 230 ft to clear an obstacle. Since the authorization ceiling is 200 ft, you revise the request to match the new maximum altitude and update the time window if needed. You do not attempt the higher altitude until the revised authorization is approved.
4.3 Interpreting Authorization Results and Managing Operational Compliance
Authorization is only half the job. The other half is reading what you were actually approved to do—and then running the mission so reality matches the approval. Think of the authorization result as a contract written in plain language plus a few operational constraints.
What the Authorization Result Usually Tells You
Most authorization outcomes include three categories of information:
- Airspace permission scope: where the operation is allowed (often tied to a geographic area or altitude band).
- Operational limits: conditions you must follow, such as maximum altitude, time windows, and any special restrictions.
- Compliance expectations: what you must do to remain within the approved plan, including how you handle changes.
A practical way to read the result is to convert it into a short checklist before you ever power on the aircraft.
Quick Compliance Checklist
- Where: confirm the approved area matches your planned route and takeoff/landing points.
- How high: verify the maximum altitude in the authorization matches your mission plan.
- When: confirm the time window covers your planned operation plus a buffer for delays.
- Any extra conditions: look for wording that adds constraints beyond the standard Part 107 rules.
If any item doesn’t match, treat it as a “no-go until corrected,” not a “close enough.” Exams love answers that assume you can improvise within an authorization.
Interpreting Common Authorization Outcomes
Authorization results can range from straightforward approvals to constrained permissions. The key is to map the outcome to an operational decision.
Approved with Limits
You may receive an approval that includes specific limits. Example: your plan is to fly at 400 feet AGL, but the authorization states a lower ceiling for part of the area. Your mission must follow the lowest applicable limit. A good habit is to annotate your route with altitude boundaries before launch.
Example: You plan a straight-line inspection across a corridor. The authorization allows 400 feet in one segment and 300 feet in another. You adjust the flight plan so the aircraft climbs only where permitted and stays at or below 300 feet in the restricted segment.
Partially Approved or Constrained Area
Sometimes the approved area doesn’t fully cover your intended route. In that case, you either revise the route to stay inside the approved boundaries or you don’t fly the portion outside the approval.
Example: Your target building sits near the edge of the approved polygon. You planned to orbit the building with a wider radius. The authorization polygon covers only the inner portion. You reduce the orbit radius so the aircraft remains inside the approved area.
Denied or Not Authorized
A denial means you do not have permission for the requested operation as described. You can’t “make it work” by flying less if the approval was denied for the specific request. You must change the request parameters and obtain a new authorization.
Example: You request a higher altitude than allowed by the airspace constraints and receive a denial. Lowering altitude without obtaining a new authorization is not a compliant workaround.
Managing Operational Compliance During the Mission
Compliance isn’t just preflight; it’s what you do when conditions change.
Change Control That Keeps You Inside the Approval
Create a simple rule: if the change affects where, how high, or when, you stop and reassess.
- Where changes: rerouting around obstacles can move you outside the approved area.
- How high changes: wind or performance issues can tempt you to climb to maintain clearance.
- When changes: delays can push you outside the authorization time window.
Example: A gusty afternoon causes you to drift toward the edge of the approved area. You correct promptly using heading adjustments that keep the aircraft within the polygon. If you can’t maintain the boundary, you end the operation rather than “hoping” the drift stays acceptable.
Monitoring and Documentation Habits
During flight, keep your attention on the three compliance pillars: position, altitude, and time. After the flight, record what you did so you can explain it clearly if questions arise.
Example: You log takeoff time, maximum altitude, and the general route you flew. If your planned route was revised due to a safe obstacle avoidance maneuver, you note the reason and confirm the revised path stayed within the authorization.
Mind Map: Authorization Result to Action
Exam-Style Scenario Walkthrough
Scenario: You receive an authorization for a 30-minute window and a maximum altitude of 400 feet. During preflight, you plan to start at minute 10. At minute 18, you notice a temporary obstacle on your route and you want to detour.
Correct reasoning: The detour changes “where.” You must ensure the detour stays inside the approved area. If it does, continue. If it would move you outside the approved boundary, you revise the plan to remain within the approval or end the operation. The time window still matters: if delays push you beyond the authorization window, you stop.
Common wrong answer pattern: “I’ll just fly a little differently to stay safe.” Safety is the goal, but compliance is the constraint. The right choice is the one that keeps the mission inside the authorization.
4.4 Handling Denials, Limitations, and Revisions Without Violations
When an authorization request doesn’t go the way you hoped, the goal is simple: keep the operation inside the rules you actually have. That means you treat every denial, limitation, or revision as a new constraint set, not as a speed bump you can muscle through.
Denials First, Then Facts
A denial usually means the system or the authority can’t approve the requested operation as described. Before you change anything, capture the exact reason text from the authorization response. Then compare three things:
- Your planned operation (location, altitude, time window, and airspace category).
- The authorization outcome (approved, limited, or denied).
- The operational rule you’re relying on (Part 107 baseline vs. waiver vs. airspace authorization).
A common mistake is assuming “denied” means “no drones anywhere.” In practice, it often means “not as requested.”
Example: Denial from an Overly Specific Time Window
You request 10:00–12:00 local time, but your mission is flexible. If the denial message indicates a conflict with the requested window, revise the request to a narrower, conflict-free period. Keep your flight plan consistent with the revised authorization.
Limitations Mean “Approved with Boundaries”
Limitations are not partial permission to improvise. They are the permission boundaries you must fly within. Treat limitations like a checklist of hard limits.
Example: Altitude Limitation
You plan to fly at 400 ft AGL, but the authorization limits you to 200 ft AGL. Your mission plan must change: adjust the target altitude, update any obstacle clearance assumptions, and re-check that your payload still works at the lower height.
Example: Geographic or Route Restriction
If the authorization restricts the operation to a defined area, don’t “just take a quick detour” to get a better angle. Re-route within the approved area or request a revision.
Revisions Without Violations
Revisions are how you correct the mismatch between what you want to do and what you can do. The key is to revise the request and then revise the plan.
Step-by-Step Revision Workflow
- Identify the mismatch: altitude, time, location, or aircraft/operation description.
- Decide whether the change is operational or administrative:
- Operational changes affect how you fly (altitude, route, people proximity).
- Administrative changes affect how you describe the mission (formatting, coordinates, time zone clarity).
- Submit a revised request when the authorization outcome depends on those details.
- Update your mission checklist so the flight crew uses the revised constraints.
- Verify the revised authorization text before launch.
Example: Administrative Fix That Prevents a Denial
You entered coordinates in the wrong format, placing the operation outside the intended area. The authorization response denies the request due to location mismatch. Correct the coordinates and submit a revised request that matches your actual takeoff point and planned track.
Mind Map: Denials, Limitations, and Revisions
Practical Decision Rules for Exam Scenarios
- If the authorization is denied, you don’t “fly anyway.” You either revise and re-request or change the operation so it fits what’s permitted.
- If the authorization is limited, you fly within the limits. Any plan element outside the limits is a violation waiting to happen.
- If you revise, you revise the plan too. A revised request without a revised flight plan is just paperwork with extra steps.
Example: Limited Authorization with a Safety-Driven Altitude Change
You receive an authorization limited to 250 ft AGL. During preflight you discover a new obstacle closer than expected. You reduce altitude to 200 ft AGL to maintain clearance. That’s consistent with the limitation, so it’s acceptable as long as the rest of the mission stays within the authorized constraints.
Quick Checklist for the Moment Before Launch
- Authorization outcome is approved or limited for the exact time and area.
- Your plan matches the authorization constraints line by line.
- Any revision has been reflected in the mission checklist.
- You can explain the “why” for each constraint in one sentence.
If you can’t, that’s not a moral failing. It’s a sign the plan and the authorization are out of sync, and the fix is to align them before the aircraft leaves the ground.
4.5 Practical Examples for Building a Compliant Mission Authorization Plan
A compliant authorization plan is basically a chain of evidence: you show what you want to do, where you will do it, under what constraints, and how you will keep the operation inside the approved limits. The exam loves plans that are internally consistent, so each example below follows the same logic from inputs to final go/no-go.
Example 1: Small UAS Mapping in Controlled Airspace Using LAANC
Mission goal: Capture aerial imagery for a roof inspection.
Step 1: Define the operational envelope. You write down: takeoff location, planned flight area polygon, maximum altitude, and flight duration. Example: “Operate within a 0.5-mile radius of the launch point, max 200 ft AGL, daylight, single operator.”
Step 2: Identify the airspace permission requirement. You check the sectional/airspace layer and determine the operation sits inside controlled airspace where authorization is required. If the planned altitude is near a boundary, you note the exact altitude you will request.
Step 3: Build the authorization request to match the envelope. Your request uses the same coordinates and the same maximum altitude you wrote in Step 1. If you plan to fly at 180 ft AGL but request 200 ft AGL, you still must operate within the authorization; the mismatch is a common exam trap because it hides uncertainty.
Step 4: Interpret the authorization result. Suppose LAANC returns “Approved up to 200 ft AGL.” Your plan now includes a hard ceiling: 200 ft AGL, plus a buffer you choose for safety and GPS drift.
Step 5: Add operational controls that prove compliance. You include: preflight check, battery margin for the planned duration, and a procedure to stop ascent if the aircraft approaches the ceiling. A simple line in the plan helps: “If altitude exceeds 195 ft AGL, immediately reduce throttle and verify barometer/GNSS readings.”
Step 6: Go/no-go logic. You add: “If authorization is not active for the planned time window, do not launch.”
Mind Map: Authorization Plan
Example 2: Waiver-Backed Operation over People with Clear Conditions
Mission goal: Film a small event with a flight path that passes near a crowd.
Step 1: Determine the operational category. You identify whether the operation is “over people” and whether any people are directly under the flight path. The plan must state the category you are operating under.
Step 2: Translate the waiver into operational limits. If the waiver allows a specific altitude and requires specific safety measures, those become checklist items. Example: “Maintain speed under X, keep distance from the crowd boundary, and use a defined contingency landing zone.”
Step 3: Write the plan so it can be audited. You include measurable constraints: maximum altitude, minimum distance to the crowd boundary, and the exact route shape (even if simplified). Vague language like “stay away” is not enough for exam-style compliance.
Step 4: Add contingency procedures. You specify what happens if the aircraft drifts toward the crowd boundary: immediate lateral correction, then reassess. If the aircraft cannot maintain the required separation, the plan says to land at the nearest safe point.
Step 5: Match the authorization timeline. If the waiver is valid only for a particular date range, you ensure the mission time is inside that window. Using a date like “2026-02-15” in your plan is fine as long as it matches your actual paperwork.
Mind Map: Waiver Plan
Example 3: Mixed Constraints with a Single Coherent Plan
Mission goal: Fly in controlled airspace, during twilight, with an observer team.
Common failure mode: People treat each constraint separately and end up with contradictions. The fix is to build one envelope and let every constraint reference it.
Step 1: Create one master envelope. Example: “Max 400 ft AGL, flight area polygon, start time 30 minutes before official end of daylight, observer assigned, controlled airspace authorization required.”
Step 2: Confirm each requirement references the same numbers. If authorization limits altitude to 300 ft AGL, your master envelope max becomes 300 ft AGL, not 400 ft AGL. If night rules apply, your lighting and visibility controls must be consistent with the same time window.
Step 3: Observer roles tied to compliance. You specify: observer monitors traffic and maintains awareness of the aircraft’s position relative to the planned area and ceiling. You also specify communication triggers, like “call out when within 50 ft of the ceiling.”
Step 4: Final audit before launch. You run a quick checklist: authorization active, waiver conditions met (if any), altitude ceiling set in the aircraft plan, weather within VFR limits, and contingency landing zone available.
Practical Checklist for Any Authorization Plan
- One operational envelope with coordinates, max altitude, time window, and route shape.
- Airspace permission request matches the envelope exactly.
- Authorization results become hard limits in the plan.
- Waiver conditions become checklist items with measurable triggers.
- Go/no-go rules include “authorization not active” and “limits cannot be maintained.”
If you can read your plan and answer “What is the maximum altitude, where exactly do we fly, and what stops the flight?” in under a minute, you’re doing it the exam’s way.
5. Waivers Under Part 107 and How to Apply Them Correctly
5.1 Waiver Eligibility and Common Waiver Categories for Part 107
A Part 107 waiver is permission to operate in a way that would otherwise not meet a specific rule. Eligibility is not about “wanting” to fly differently; it’s about whether the operation you’re proposing fits the waiver’s scope and whether you can meet the conditions you’ll be required to follow.
Core Eligibility Logic
Start with three questions that show up in almost every waiver scenario:
- Which rule are you asking to change? A waiver is tied to a particular requirement, not a general “permission to be flexible.”
- What exact operation will you conduct? The FAA expects a concrete description: location type, altitude, time, aircraft behavior, and how you’ll manage risk.
- What mitigations will you use? Your plan must explain how you’ll operate safely despite the waived limitation.
A practical way to think about it: eligibility is the match between your mission constraints and the waiver category’s purpose, plus your ability to show you can operate safely under the waiver’s conditions.
Common Waiver Categories and What They Cover
Below are the waiver categories that most often appear in Part 107 exam questions and real-world planning. Each category is essentially a “rule exception with guardrails.”
Operations over People
This waiver category is for flights where the aircraft may operate over people who are not directly participating in the operation. Eligibility hinges on how you define “over people,” how you manage risk, and what safety measures you can credibly apply.
Example: You’re filming a small event in a public park. If people will be beneath the flight path and not part of the crew, you’re likely in this category. Your mitigation might include limiting altitude, using a route that avoids dense areas, and ensuring the aircraft has appropriate reliability.
Operations at Night
Night operations often require a waiver when you cannot meet the standard conditions. Eligibility depends on your ability to maintain control and visibility, including lighting and procedures that support safe operation in low-light conditions.
Example: You need to inspect a rooftop at night for a utility. If your plan relies on operating when visual cues are limited, you must show how you’ll maintain safe control and situational awareness.
Beyond Visual Line of Sight
BVLOS waivers are among the most scrutinized because the remote pilot cannot rely on direct unaided visual observation of the aircraft for the entire flight. Eligibility depends on the system’s ability to maintain safe separation and on procedures for monitoring and contingency handling.
Example: You’re surveying a long corridor where the aircraft would quickly move beyond the pilot’s direct view. Your waiver request must explain how you’ll monitor the aircraft and prevent unsafe encounters.
Extended Visual Line of Sight
EVLOS is a step beyond standard VLOS, typically using additional support such as observers or other methods to maintain awareness. Eligibility focuses on how you’ll ensure the aircraft remains observable under the EVLOS definition.
Example: You’re mapping a large construction site where the aircraft will frequently move farther than typical VLOS. You might use an observer team and defined communication procedures to keep the aircraft within the required observation framework.
Flying in Controlled Airspace Without Standard Authorization
Some operations require a waiver when they cannot be accomplished through standard airspace authorization workflows alone. Eligibility depends on the specific airspace constraints and your ability to comply with any additional operational requirements.
Example: You need to operate in a controlled area where the planned altitude or timing doesn’t fit the usual authorization limits. Your request must clearly state the airspace context and how you’ll maintain compliance with separation and communication expectations.
Moving Aircraft Operations
This category addresses operations where the aircraft is launched from or operated in relation to a moving platform. Eligibility depends on how you’ll manage stability, control, and safety during the relative motion.
Example: You’re conducting a mission from a moving vehicle for a time-sensitive inspection. Your plan must describe how the aircraft will be controlled during the launch and how you’ll prevent loss of control due to platform motion.
Mind Map: Waiver Eligibility and Categories
Example: Matching a Mission to the Right Category
Imagine a mission: a drone captures footage over a crowd at dusk, and the flight path crosses a controlled airspace boundary at a low altitude.
Step 1: Identify the rule conflicts. Over people suggests an operations-over-people waiver. Dusk-to-night conditions suggest a night-related requirement. Controlled airspace constraints may require additional authorization or a waiver depending on what standard authorization can cover.
Step 2: Decide what you’re actually requesting. You don’t combine everything into one vague request. You map each conflict to the waiver category that corresponds to the underlying rule limitation.
Step 3: Write mitigations that match the risk. If people are involved, your mitigations focus on limiting exposure and managing failure modes. If visibility is limited, your mitigations focus on lighting and procedures that preserve control.
That mapping discipline is what turns “we want to fly this way” into an eligibility-ready waiver request.
5.2 Operational Limitations That Typically Require Waivers
Part 107 waivers exist for one reason: your planned operation doesn’t fit inside the standard rule limits. The exam tends to test whether you can spot the mismatch quickly, then describe what you must do next. A good mental model is simple: first identify the limiting rule category, then determine whether the operation can be made compliant by changing the plan. If you can’t, a waiver is the tool.
Core Limitation Categories
Most waiver-relevant questions fall into a few operational buckets. Think of them as “rule constraints” that affect altitude, speed, location, people, and the way you maintain control.
-
Altitude and airspace constraints
- Standard Part 107 limits altitude to 400 feet AGL, and airspace permissioning may restrict where you can fly.
- If your mission requires operating above 400 feet AGL, you’re looking at a waiver path. If the issue is controlled airspace access, that’s often handled through authorization workflows rather than a waiver.
-
Operations over people
- If your flight plan places the aircraft over people not covered by the rule’s “allowed” categories, you may need a waiver.
- The key exam move is to distinguish “over people” from “near people.” Being close is not the same as being over them.
-
Beyond visual line of sight and observer-dependent operations
- Part 107 generally expects you to maintain visual line of sight (VLOS) with the aircraft.
- If your mission requires flying beyond VLOS, you typically need a waiver, and you must be able to explain how you will maintain safety without direct unaided visual tracking.
-
Night operations
- Night flying is allowed under Part 107, but the standard conditions can still create limitations depending on aircraft equipment and operational setup.
- Exam questions often test whether you can meet the standard requirements without a waiver, versus when the plan exceeds what the baseline rule permits.
-
Speed and aircraft performance limits
- Some missions require operating in ways that stress standard operational assumptions, such as unusual flight profiles.
- The exam usually frames this as “your plan exceeds the standard operational limitations,” pushing you toward waiver logic.
How to Decide if a Waiver Is Needed
Use a three-step decision process.
-
Identify the exact rule limit you would violate
- Example: “We want 600 feet AGL for a tall structure inspection.” That’s a direct altitude limit conflict.
-
Check whether the plan can be adjusted to comply
- Example: If you can capture the needed imagery from 400 feet AGL by changing camera settings, lens choice, or flight path, you may avoid a waiver.
-
If adjustment fails, treat it as a waiver candidate
- Example: If the structure’s geometry requires 600 feet AGL to achieve required resolution, you can’t “schedule your way out” of the altitude limit.
Mind Map: Waiver Triggers and Decision Logic
Integrated Examples
Example 1: Altitude conflict A remote pilot plans a mapping flight at 500 feet AGL to reduce the number of passes over a busy road. The plan violates the 400-foot AGL standard. If the required ground sampling distance can’t be achieved at 400 feet AGL, the correct exam response is that a waiver is typically required for the altitude limitation.
Example 2: People on the ground A contractor requests a roof inspection while workers are standing on the ground near the building. The aircraft will pass directly over the workers during the approach. Even if the aircraft is only overhead for a short time, “over people” is the issue. If the workers are not in an allowed category, the operation typically requires a waiver.
Example 3: Beyond VLOS planning A survey requires the aircraft to follow a long corridor where the pilot’s line of sight will be blocked by terrain. The pilot proposes using an observer, but the observer cannot maintain direct unaided visual contact with the aircraft for the entire route. That mismatch points to a beyond-VLOS limitation, which typically requires a waiver.
Common Exam Confusions
- Authorization vs waiver: Controlled airspace access may require authorization, but that’s not automatically a waiver. A waiver is for operational limitations that the baseline rule doesn’t permit.
- Near vs over: Being close to people is not the same as flying over them.
- “We can be careful”: Careful flying doesn’t remove the rule limit. If the plan violates the operational constraint, you need the correct compliance mechanism.
By the end of this section, you should be able to read a mission description, identify the limiting category, and choose between redesigning the plan or treating the limitation as a waiver candidate—without guessing based on vibes.
5.3 Preparing a Waiver Request With Clear Operational Descriptions
A waiver request succeeds when the reviewer can map your words to specific regulatory requirements and then verify that your plan reduces risk. The trick is to write like an inspector: concrete, measurable, and consistent across every section.
Start with the Waiver Goal and the Exact Constraint
Begin by stating what you want to do and what rule you cannot meet as written. Keep it tight: “Request authorization to operate at X altitude in controlled airspace” is clearer than “We need permission for a mission.” Then list the specific constraint you are waiving, using the same language you expect to see in the waiver conditions.
Example: If your mission requires flying above the standard altitude limit, your operational description should explicitly include the requested altitude and the geographic area where that altitude applies.
Define the Operation in Plain, Verifiable Terms
Your operational description should answer six questions in order:
- Where: Provide the launch and recovery area, the route or pattern, and the airspace area boundaries you expect to operate within.
- When: Include date, local time window, and whether the plan depends on a specific event (like a scheduled inspection window).
- How: State the aircraft type, maximum takeoff weight, and whether you will use any special equipment (like lights for night operations).
- How High: Give altitude limits in feet AGL and clarify whether altitude is constant or changes along the route.
- How Fast: Provide speed limits or maximum groundspeed if your system can vary.
- How Close: Describe proximity to people, vehicles, structures, and controlled airspace boundaries.
If you cannot measure something, you cannot defend it. Replace vague phrases like “near” with distances such as “within 0.5 nautical miles.”
Specify the Airspace Context and Your Compliance Path
Waiver reviewers care about the interaction between your flight and the airspace system. Describe the airspace class, the relevant facility or airport environment, and how you will ensure separation from other traffic where applicable.
Example: If operating in controlled airspace, include the planned entry and exit points, the altitude you will use while inside, and how you will avoid restricted areas or other prohibited volumes.
Add Operational Controls That Match the Waiver Conditions
A clear description doesn’t just ask for permission; it shows how you will comply with the conditions you receive. For each likely condition, include the control that makes it real.
Common condition categories include:
- Altitude and route adherence: how you will prevent deviations.
- Time window compliance: how you will handle delays.
- Crew roles: who is the remote pilot in command, who is the visual observer (if used), and what each person monitors.
- Communications: how you will maintain required contact or monitoring.
- Emergency actions: what you will do if the plan breaks.
Example: If you will operate with a visual observer, state the observer’s responsibilities: scanning for traffic, confirming aircraft position relative to the planned route, and immediately reporting any loss of situational awareness.
Use a Consistent Structure Across the Request
Inconsistency is a common failure mode. The altitude you mention in the summary should match the altitude in the operational description and the altitude implied by your route. Use the same units, the same time zone basis, and the same geographic references.
A practical approach is to write your operational description as a checklist narrative:
- Mission overview
- Airspace and location
- Altitude and route
- Timing
- Crew and roles
- Safety mitigations
- Emergency procedures
Mind Map: Waiver Request Operational Description
Waiver Request Operational Description Mind Map
Example: Clear Operational Description for a Controlled Airspace Waiver
Operational description draft (example):
On 2026-02-15, between 0900 and 1030 local time, we request authorization for a small unmanned aircraft system to operate in controlled airspace near [airport name]. The mission launches from [lat/long or address], follows a planned route from [entry point] to [turn point] and then to [exit point], and recovers at [recovery location].
The aircraft will operate at a maximum altitude of 400 ft AGL while within the requested airspace segment, maintaining a constant altitude along the route. Maximum groundspeed will not exceed [value]. A remote pilot in command will conduct flight control and navigation. A visual observer will assist by monitoring for traffic and obstacles and will communicate any deviation from the planned route immediately.
We will maintain compliance with the authorization conditions by adhering to the specified time window, altitude limit, and route. If weather reduces visibility below [threshold] or wind exceeds [threshold], we will delay or cancel the operation. In the event of a lost link, the aircraft will execute the preplanned lost-link procedure to minimize risk and return to the recovery area.
This example works because every claim is measurable: date and time window, specific locations, altitude limit, speed limit, crew roles, and concrete safety triggers.
Quick Self-Check Before Submitting
Before you submit, verify that a reviewer can answer these without guessing: “Where exactly will the aircraft fly?”, “What altitude will it use and where?”, “When will it happen?”, “Who is watching what?”, and “What happens if the plan fails?” If any answer requires interpretation, rewrite it until it doesn’t.
5.4 Reading and Following Waiver Conditions During Mission Execution
A waiver is not a free pass; it’s a set of conditions you must treat like operating limits. During execution, the goal is simple: fly the mission exactly as authorized, and if reality changes, stop or adjust in a way that still matches the authorization.
Start with the Waiver Document Like It’s a Checklist
Read the waiver in three passes. First, identify the authorization scope: what operation type it covers, the aircraft category, and the geographic or airspace limits. Second, extract every operational condition into plain language. Third, note any administrative constraints such as reporting requirements or expiration.
A practical habit: rewrite each condition as a “must” statement. Example: “Maintain a maximum altitude of 400 ft AGL” becomes “I will not exceed 400 ft AGL at any point.” If the waiver includes multiple conditions, number them so you can cross-check during the mission.
Convert Conditions into Flight-Ready Constraints
Waiver conditions often map to four operational areas: airspace, altitude and routing, aircraft behavior, and safety mitigations.
- Airspace and timing constraints: Some waivers limit when and where you can operate. Treat these like gates. If the authorization is for a specific time window, your plan should include a buffer so you’re not still climbing when the window ends.
- Altitude and distance limits: If the waiver specifies maximum altitude, lateral boundaries, or separation distances, program your mental model around those numbers. “Near the boundary” is not a number; the waiver usually provides one.
- Aircraft behavior limits: Conditions may restrict speed, flight profile, or how you handle contingency events. If a condition mentions specific procedures, rehearse them before takeoff.
- Safety mitigations: Some waivers require additional observers, specific risk controls, or defined procedures for maintaining control.
Mind Map: Waiver Conditions into Execution Actions
Waiver Execution Mind Map
Use a Condition-by-Condition Monitoring Method
During flight, you need more than “I think I’m compliant.” Use a monitoring cadence tied to the waiver’s critical limits.
A simple method is to group conditions into “always” and “event-driven.”
- Always conditions apply continuously, like maximum altitude or maintaining a specified separation.
- Event-driven conditions apply when something happens, like entering a defined area, switching operating modes, or initiating a contingency procedure.
Example: If your waiver requires a specific observer setup when operating near a boundary, that’s event-driven. You should confirm observer positions before reaching the boundary, not after.
Brief the Team with the Waiver, Not Just the Plan
If you have a visual observer, a safety spotter, or a ground team, brief them on the waiver conditions that affect their actions. A good brief links each person to a specific responsibility.
Example: If the waiver requires maintaining a particular separation distance, assign the observer to watch the separation criterion and call out when you approach the limit. If the waiver requires a specific contingency procedure, assign the remote pilot and observer roles so the response is consistent.
Handle Deviations Without Guessing
If you realize you can’t comply with a condition, don’t “wing it” to see what happens. Decide quickly whether you can return to compliance safely.
Use a two-step decision rule:
- Can I regain compliance immediately and safely? If yes, adjust and continue.
- If not, do I stop the operation? If the waiver condition is fundamental (like an altitude cap or required airspace boundary), stopping is often the correct move.
Document what happened and why. If the waiver includes reporting requirements, follow them exactly. Even when reporting isn’t specified, internal documentation helps you correct process gaps for future missions.
Example: Reading Conditions into a Real Mission Flow
Waiver condition set (simplified):
- Operate within a defined polygon area.
- Do not exceed 400 ft AGL.
- Maintain required visual observation coverage.
- Follow a specified contingency procedure if control is lost.
Execution flow:
- Preflight: confirm the polygon on your map, set altitude limits in your planning tools, and brief the observer on the “required coverage” trigger.
- Takeoff and climb: monitor altitude continuously; if you approach 400 ft AGL, stop further climb.
- Route: fly the planned path that stays inside the polygon; if you drift toward the boundary, correct early.
- Contingency: if control is lost, execute the waiver-specified procedure rather than improvising.
- Postflight: record any deviations, including time and location, and confirm whether any reporting is required by the waiver.
Quick Compliance Habits That Prevent Most Mistakes
- Keep the waiver conditions visible during planning and preflight brief.
- Translate every numeric limit into a “do not exceed” or “must maintain” rule.
- Assign callouts for the most critical limits so you’re not relying on memory.
- If you can’t comply, stop or adjust to regain compliance rather than continuing “close enough.”
Following waiver conditions is mostly disciplined reading and disciplined monitoring. The paperwork becomes operational when you turn each condition into a constraint you can actually watch in real time.
5.5 Practical Case Study Style Workflows for Waiver Planning and Compliance
Case Study Setup and Goal
A remote pilot plans a commercial inspection flight in a controlled airspace area that includes a short segment near an airport surface area. The mission requires operating at night and flying beyond the standard visual line of sight limits for a specific segment due to terrain shielding. The pilot’s goal is to obtain the correct waiver(s), build a compliant operating plan, and avoid the classic exam mistake: assuming that “authorization” and “waiver” are interchangeable.
Foundational Distinctions That Drive the Workflow
- Authorization typically addresses airspace permission for the operation.
- Waiver addresses specific regulatory limitations that cannot be met as written.
- Conditions in the waiver are not suggestions; they are operational constraints you must follow during execution.
Mind Map: Waiver Planning Workflow
Step-by-Step Workflow with an Integrated Example
Step 1: Write the Mission in Plain Language
Draft a short mission statement that includes what you will do, where, when, and why. Example: “Conduct a night roof inspection of a warehouse complex located within controlled airspace, using a fixed route that includes a terrain-shielded segment where direct visual contact is intermittently reduced.” This sentence becomes the backbone of both the waiver narrative and the final checklist.
Step 2: Identify Which Standards You Cannot Meet
Create a two-column list: Standard requirement vs How the mission conflicts.
- If the mission is at night, confirm whether the standard night limitations are met by your lighting and operational setup.
- If the mission requires operating beyond standard visual line of sight, note exactly which segment and why.
- If people are involved, determine whether the operation qualifies as “over people” and whether the mission design avoids it.
Step 3: Map Each Gap to the Correct Waiver Category
Treat this like matching keys to locks. If your conflict is about operating at night, you need the waiver path that corresponds to that limitation. If your conflict is about visual line of sight, you need the waiver path that corresponds to that limitation. Do not combine them into one vague request; exam questions reward specificity.
Step 4: Build the Waiver Request Narrative
A strong request includes:
- Operational description: route, altitude, timing, and the exact portion that triggers the waiver.
- Safety mitigations: how you reduce risk (for example, speed limits, altitude buffers, and contingency procedures).
- Compliance procedures: what you will do before takeoff and what you will do if conditions change.
Example: Safety Mitigations That Are Easy to Verify
- Maintain a conservative altitude buffer above obstacles along the terrain-shielded segment.
- Use a defined observer role with a clear communication plan.
- Set an abort trigger tied to measurable cues (for example, loss of required visual cues or inability to maintain the planned route).
Step 5: Convert Waiver Conditions into a Preflight Checklist
Take each waiver condition and rewrite it as a yes/no item.
- “Will you operate within the specified altitude range?”
- “Will you follow the required observer procedures during the waived segment?”
- “Will you use the required lighting configuration for night operations?”
This is where many pilots slip: they read the waiver once, then fly from memory. The checklist prevents that.
Mind Map: Compliance Controls During Execution

Case Study Execution Example with Decision Points
During the terrain-shielded segment, the pilot notices the observer cannot maintain the required cues due to unexpected glare. The pilot compares the situation to the abort trigger defined in the waiver-aligned plan. The correct action is to abort or adjust the operation to remain within waived conditions, rather than continuing and hoping the rest of the route “still works out.”
Quick Compliance Summary for the Exam
- Waiver planning starts with mission inputs, then identifies regulatory gaps.
- Each gap maps to a specific waiver category.
- Waiver conditions become checklist items and in-flight abort triggers.
- Authorization and waiver are different tools; both must be satisfied for the mission to be compliant.
6. Operations over People and Risk Management Requirements
6.1 Understanding Operations over People and How Risk Is Defined
Operations over people is one of those Part 107 topics where the exam questions feel picky because the rules are picky. The key is to separate three ideas: what “over people” means, what “risk” means, and how the rule changes based on the category of operation.
What “Over People” Means in Practice
“Over people” is not about whether you can see a person clearly or whether they are “in the way.” It is about the aircraft being operated over human beings, including situations where people are not directly under the flight path at takeoff but could be under the path during the mission.
A helpful exam habit: treat “over” as “the aircraft’s flight path could place the aircraft above people.” If your planned route crosses a sidewalk, a crowd area, or a group of workers standing nearby, you should assume the operation is over people unless you have a specific reason the people are not part of the operation.
Example
You’re filming a roof inspection. The drone will travel from the driveway to the roof edge and back. If the crew members are standing in the yard, and the flight path passes above them, the operation is over people. If the crew is behind a barrier and the drone never passes above them, you may not be operating over people. The exam expects you to focus on the planned flight path, not on whether the people are “careful.”
How Risk Is Defined for Part 107
Risk in this context is not a vague feeling of danger. It is tied to the likelihood and severity of harm if something goes wrong. The FAA frames this through the concept of whether the operation is conducted in a way that reduces the chance of injury and limits the potential harm.
For exam purposes, risk is evaluated through operational factors such as:
- Where the people are relative to the aircraft’s path
- How likely the aircraft is to contact them
- What happens if contact occurs (for example, the consequences of a small aircraft falling or impacting)
- Whether the operation is structured to reduce exposure
Think of risk as a simple equation: exposure × consequence. If exposure is high, you need stronger controls. If exposure is low, the same controls may be sufficient.
Example
Two missions use the same drone and camera.
- Mission A: The drone flies directly over a group of bystanders for several minutes.
- Mission B: The drone flies along a route that stays well away from bystanders, with only brief proximity. Even if the drone is identical, Mission A has higher exposure, so the risk is higher.
Categories That Change What You Must Do
Part 107 treats operations over people differently depending on the category of the operation. The exam often tests whether you recognize the category and then apply the correct limitations.
A practical way to approach this is to ask three questions in order:
- Are you operating over people? If no, the special limitations don’t apply.
- Are the people part of the operation in a way that changes how exposure is managed?
- What category best matches your planned setup and safeguards?
Example
You plan a short inspection over a small group of workers who are actively involved and positioned to minimize exposure. The operation may fall into a category that allows it only if you meet the specific conditions for that category. If you treat it like a general “over people” scenario without those conditions, you’ll pick the wrong answer.
Mind Map: Operations over People and Risk Definition
Putting It Together with a Clean Decision Example
Suppose you’re asked: “Can you fly over a small group of people to capture footage of a building facade?”
A correct reasoning path looks like this:
- Identify whether the planned route places the aircraft above the group.
- Estimate exposure: how long and how directly the aircraft passes over them.
- Estimate consequence: what harm could occur if the aircraft contacts them.
- Determine whether your planned operation fits a category that allows it only under specific conditions.
If your plan keeps the aircraft away from the group, exposure drops. If your plan requires passing directly over them, exposure rises and you must rely on the category-specific conditions rather than hoping the situation “feels safe.”
That’s the exam’s logic: it rewards structured thinking, not optimism.
6.2 Determining When Operations Over People Apply to Your Mission
Operations over people under Part 107 is not a vibe check; it’s a rule trigger. Your job is to determine whether the mission involves people on the ground or in a way that the rule treats as “over.” The exam typically tests whether you can classify the scenario correctly before you worry about how to fly it.
Start with the Rule Trigger
A Part 107 operation is “over people” when the remote pilot’s aircraft is operating over people who are not directly participating in the operation. The key exam move is to separate “people present” from “people participating.” If the people below are not participating, the operation is over people even if you’re careful with altitude and speed.
A practical way to think about it: if someone could reasonably be considered a bystander to your flight, they usually count as “over people.” If they are actively involved in the mission in a way that aligns with participation, they may not.
Identify Who Is Below You
First, list every person who could be under the flight path during the time the aircraft is overhead. Then classify each person:
- Participating: Individuals performing tasks that are part of the operation (for example, assisting with the mission in a direct, role-based way).
- Not participating: Anyone else, including the general public, customers waiting nearby, or coworkers who are simply present.
Example: You’re filming a roof inspection. Two workers are on ladders and coordinating with you to capture specific angles. They are participating. A third person stands in the yard watching and occasionally asks questions. That watcher is not participating, so the flight portion over the yard is over people.
Determine Whether the Aircraft Is “Over” Them
Next, decide whether the aircraft is actually operating over those non-participating people. “Over” is about the vertical relationship during the operation, not about whether you planned to be “near” them.
Example: You plan a route that keeps the drone laterally away from a crowd, but the planned track still passes above the crowd’s location at any point. That counts as over people for the portion of the route where the aircraft is above them.
Use a Decision Flow That Matches Exam Logic
Here’s a systematic approach you can apply to most exam scenarios.
1) Are there people below during the flight?
   - No -> Not operations over people.
   - Yes -> Continue.
2) Are those people participating in the operation?
   - Yes -> They may not trigger the rule.
   - No -> Continue.
3) Is the aircraft operating over the non-participating people?
   - Yes -> Operations over people applies.
   - No -> It may not apply.
4) If unsure, assume the conservative interpretation for the exam.
Mind Map: Operations over People Determination
Examples That Train Your Eye
Example 1: Private Property With a Watching Neighbor You fly a small mapping job in a backyard. The homeowner is participating and directs the capture. The neighbor watches from the fence line and does not assist. If the drone’s path passes above the neighbor’s position, operations over people applies.
Example 2: Team Members Who Are Not Actually Participating A contractor team is on site. Only one person is coordinating the drone shots. Others are present but not performing mission tasks. If those non-participating team members are under the flight path, the operation is over people.
Example 3: Short Hover Over a Non-Participating Area You briefly hover above a walkway where a passerby stands waiting. Even if the hover is short, the aircraft is still operating over a non-participating person. The trigger is about what happens during the operation, not how long it takes.
Common Exam Traps
- Assuming “private” means “safe from the rule”: Location doesn’t automatically change participation status.
- Confusing “near” with “over”: If the aircraft passes above them, it counts.
- Overlooking timing: People who enter the area mid-flight can change the classification for the remaining portion of the operation.
Quick Self-Check Before You Pick an Answer
When you see an exam question, force yourself to answer three things in order: who is below, who is participating, and whether the aircraft is operating over the non-participating people. If you can’t confidently answer one of those, the conservative interpretation is usually the correct exam strategy.
6.3 Exam Focused Rules for Remote Pilot Conduct and Safety Measures
Remote pilot conduct under Part 107 is less about memorizing slogans and more about making consistent safety choices when the exam asks, “What should you do next?” The test tends to reward answers that (1) reduce risk immediately, (2) keep the operation within authorization and operating limitations, and (3) maintain control and situational awareness.
Core Conduct Principles That Drive Exam Answers
Start with the baseline: you must operate the small unmanned aircraft system in a manner that does not endanger the aircraft, people, or property. On the exam, that usually means selecting the option that prevents a foreseeable hazard rather than the option that merely reacts after something goes wrong.
Next, remember the control concept. You must maintain control of the aircraft during flight, including the ability to stop or change the flight path when needed. If an answer choice suggests “hoping it works out” or “continuing because it’s almost done,” treat it as a trap.
Finally, the exam expects you to respect operational boundaries. If the scenario implies you are outside the permitted altitude, distance, or airspace permission, the correct response is to adjust the plan or terminate the flight. “Proceed anyway” is rarely the right answer.
Safety Measures You Should Apply Before and During Flight
Before takeoff, safety measures are about preventing surprises. Confirm the aircraft is airworthy for the intended operation, verify the remote pilot’s ability to maintain control, and ensure the mission plan matches the authorization and the conditions. If the scenario includes a mismatch—like a planned operation that requires a waiver but none is in place—your safest choice is to modify the operation to fit the rules or cancel.
During flight, safety measures focus on monitoring and decision-making. Maintain situational awareness of airspace, weather changes, and nearby hazards. If the scenario includes loss of link, abnormal behavior, or an unexpected obstacle, the correct answer emphasizes immediate risk reduction and following your procedures.
Mind Map: Remote Pilot Conduct and Safety Measures
Example: Choosing the Safer Action Under Exam Pressure
Example: You are conducting a Part 107 mission near a controlled airport area. Your authorization allows operation up to a specific altitude and within a defined time window. Mid-flight, you notice you are approaching the altitude limit earlier than expected due to a slower-than-planned climb profile.
A correct exam-style response is to reduce risk by adjusting the flight plan to remain within the authorized altitude. The wrong answers typically suggest continuing because the aircraft is stable, or “fixing it later,” which delays compliance and increases the chance of exceeding the limit.
Example: When Weather Changes the Correct Conduct
Example: You launched under VFR conditions with good visibility. During the mission, visibility drops due to fog or precipitation, and you can no longer clearly maintain the required visual references for safe operation.
The best choice is to terminate or adjust the operation to maintain safe conduct. The exam logic is simple: if you cannot maintain the safety basis you started with, you do not keep going and hope conditions improve.
Example: Lost Link and Safety Priorities
Example: While tracking a planned route, the control link degrades and you lose command and control. You have a preplanned lost-link procedure.
The correct approach is to follow the lost-link procedure designed to reduce risk and regain control as applicable. Answers that recommend “keep flying manually” without control, or “ignore it because the aircraft is still moving,” are inconsistent with the requirement to maintain control and prioritize safety.
Quick Exam Checklist for Remote Pilot Conduct
- Does the answer reduce risk immediately?
- Does it keep the operation within authorization and operating limits?
- Does it maintain control and situational awareness?
- Does it follow the scenario’s abnormal-event procedure rather than improvising?
If you can justify your choice using those four questions, you’re usually aligned with what the exam is testing.
6.4 Practical Methods for Planning Safer Routes and Recovery Options
Safer routing starts with a simple idea: plan the flight so that the most likely problems have the easiest fixes. In Part 107, that means you don’t just pick a path; you pick a path plus a set of “if this happens, then that happens” responses.
Foundational Route Safety Inputs
Begin by listing the constraints that actually affect your route:
- Airspace permission status: LAANC authorization limits where you can fly and when.
- Operational limits: altitude ceiling, distance from people, and any waiver conditions.
- Environment: wind direction and speed, visibility, precipitation, and sun angle.
- Obstacles: power lines, towers, trees, building edges, and moving hazards like vehicles.
- Control link confidence: expected interference sources such as dense urban structures.
A practical habit is to convert these into two checklists: route constraints (what the route must respect) and recovery constraints (what the recovery maneuver must respect). If you can’t describe both, you’re guessing.
Safer Route Construction Methods
Use these methods in order, because each one reduces a different kind of risk.
-
Start with a “safe corridor” Pick a corridor that keeps the aircraft away from the most unforgiving obstacles. For example, if you’re mapping a property edge, route parallel to the fence line but keep a buffer from trees and utility lines rather than hugging the boundary.
-
Prefer predictable geometry Straight legs with clear turn points are easier to fly accurately than constant-curvature paths. Example: instead of a diagonal sweep across a yard, fly two perpendicular legs with a planned turn area that has open space.
-
Build in an escape direction For each segment, decide where you can go if you lose the ability to continue the mission as planned. Example: if you’re flying toward a narrow alley, don’t place the “escape” behind you into the same alley; place it toward open ground.
-
Use altitude as an obstacle management tool Altitude changes can reduce obstacle encounters, but they must remain within authorization and performance limits. Example: when crossing over a driveway with nearby trees, climb to a safe clearance before crossing, then descend after you’re past the obstacle cluster.
-
Avoid single-point failure routes A route that depends on one perfect condition is fragile. Example: if your plan assumes calm wind to maintain a tight line near power lines, widen the lateral buffer or add a higher-clearance segment.
Recovery Options That Match Likely Problems
Recovery planning should include at least three actions, ordered by how quickly they reduce risk.
-
Option A: Continue to a safe landing area Choose a landing zone that is reachable from multiple points along the route. Example: keep a clear patch of grass or a paved area within the same general direction as your escape.
-
Option B: Return to a known safe point If your aircraft supports it, define a “known safe point” such as the takeoff area or another preselected open area. Example: if the mission is a perimeter inspection, set your safe point near the center of the property rather than at the far corner.
-
Option C: Immediate risk reduction If the situation becomes unsafe, prioritize actions that reduce collision risk even if they end the mission. Example: if wind suddenly increases and you’re drifting toward a line of trees, stop the lateral progress and move toward open space.
A key best practice is to ensure your recovery options do not require you to violate authorization limits or fly through the same obstacle cluster you were trying to avoid.
Mind Map: Safer Routes and Recovery Options
Example: Perimeter Inspection with a Clear Escape Plan
You’re inspecting a warehouse perimeter with a route that runs along the building edge. Start by identifying obstacles: a row of trees on one side and a utility line near the far corner. Your safe corridor keeps the aircraft farther from the trees and uses a slightly higher altitude during the corner pass.
For recovery, you preselect two areas: a landing zone near the takeoff point and an alternate open area near the opposite side of the building. During planning, you assign an escape direction for each leg: if you drift toward the trees, you move laterally toward the building side that has the open alternate landing zone. If you lose control link confidence, you switch to the recovery option that leads to the nearest safe area without requiring a tight turn near the utility line.
Example: Wind Shift During a Short Survey
During a short survey over open ground, wind increases and pushes the aircraft off the intended line. Your plan already includes a recovery trigger: when drift exceeds your comfortable control margin, you stop trying to hold the exact track and instead move toward the preselected landing zone. The route becomes less “perfect” and more “safe,” which is exactly the trade you want when conditions change.
Practical Checklist for the Exam and Real Flights
- For every route segment, name the escape direction.
- For every recovery option, confirm it stays within authorization and altitude limits.
- Ensure the recovery path does not require flying through the same obstacle cluster.
- Preselect landing areas that are reachable from multiple points, not just one.
- Practice the decision order: risk reduction first, mission completion last.
6.5 Scenario Drills for Selecting the Correct Operational Category
This drill section trains you to pick the right “operations over people” category by using the same logic the exam expects: identify who counts as a person, determine whether the operation is directly over people, and then match the scenario to the correct operational category and limitations. The goal is not memorization; it’s disciplined classification.
Step 1: Classify the People Involved
Start by separating “people on the ground” from “people who are near the flight path.” For Part 107 exam questions, the wording usually signals whether the people are within the area where the aircraft could reasonably fall or pass overhead.
Example: A crew member stands 20 feet from the planned takeoff point while you fly a straight line 30 feet above the ground. If the question says the aircraft will pass over that crew member, treat it as “over people.” If it says the crew member is outside the area of flight and not under the path, you may be dealing with operations not directly over people.
Step 2: Determine Whether the Operation Is over People
“Over people” is about the aircraft’s position relative to people during the operation, not about your intentions. If the scenario includes a route that places the aircraft above people, you must treat it as over people.
Example: You plan a mapping flight over a parking lot where employees are walking between cars. Even if you keep altitude constant, the aircraft is still over people at times. That pushes you into the operations-over-people decision path.
Step 3: Identify the Category Trigger
Once you know you are over people, the exam typically tests whether the scenario includes conditions that change the category, such as:
- Whether the operation is over people who are part of the operation (for example, certain crew roles)
- Whether the aircraft is designed and operated to reduce risk in ways the rules recognize
- Whether the scenario includes “open” areas versus controlled, managed areas
Example: You are filming a roof inspection with a small team. The remote pilot and visual observer are positioned to manage the scene, and the question states the people are part of the operation and are briefed. That language often signals a different category than a public sidewalk scenario.
Step 4: Apply the Correct Limitations
After selecting the operational category, you must apply the matching limitations. The exam often pairs category selection with a “what can you do next” question.
Example: The scenario says you are over people and you selected the category that allows operations with specific risk controls. The follow-up asks whether you can fly higher to “make it safer.” Higher altitude alone usually does not replace the required risk controls. You must follow the category’s limitations, not improvise.
Step 5: Use a Repeatable Decision Drill
Run each scenario through a fixed checklist. If you can’t answer a step, you don’t guess; you re-read the scenario for the missing clue.
Mini Drill:
- Are there people? (Yes/No)
- Are they under the aircraft’s path at any time? (Yes/No)
- Are they part of the operation as described? (Yes/No)
- Which category matches the described conditions? (Pick one)
- Which limitation applies to that category? (State it)
Mind Map: Operational Category Selection
Example: Full Scenario Walkthrough
Scenario: You plan a 6-minute inspection flight along a street. The question states that pedestrians will be present on the sidewalk during the flight, and your route places the aircraft directly above the sidewalk for several passes. A crew member is present to coordinate access, but the scenario does not say pedestrians are controlled or part of the operation.
Classification:
- People exist: pedestrians on the sidewalk.
- Over people: your route places the aircraft above the sidewalk during passes.
- Category trigger: pedestrians are not described as part of the operation with managed access.
- Limitation application: you must use the operational category that corresponds to over-people conditions with the described level of control. If the scenario lacks the required conditions for a more permissive category, you should not assume you can proceed.
Example: Common Wrong Answer Pattern
Scenario: The aircraft will fly over a small group of workers who are standing near the worksite. The question asks if you can treat them as “not over people” because they are “working.”
Why it’s wrong: The exam expects you to focus on whether the aircraft is over them, not whether they are busy. “Working” does not remove them from the “people” definition. If the aircraft passes over them, you must classify it as over people and then apply the correct category.
Drill Format You Can Repeat Under Exam Pressure
For each practice question, write one line for each checklist step. If you can’t justify a step from the scenario text, treat that as a signal to re-read. This method keeps you from letting familiar assumptions do the thinking for you—an exam habit worth breaking early.
7. Night Operations and Low Visibility Planning Under Part 107
7.1 Night Operations Requirements and What Counts as Night
Night operations under Part 107 are mostly about one thing: visibility. The rules treat “night” as a specific time window, and they expect you to plan so you can see and be seen while still maintaining control.
What Counts as Night
Under Part 107, “night” means the time between the end of evening civil twilight and the beginning of morning civil twilight. In plain terms, it’s when the sun is below the horizon enough that normal daylight cues fade, but it’s not yet “fully dark” in every location. Because twilight timing varies by location and date, you should not rely on a fixed clock time.
A practical habit: check the local twilight times for your operation area on the day you plan to fly, then treat the entire window as night. If your mission starts before the end of evening civil twilight, you’re not in the night window yet; if it continues after that point, the portion after the cutoff is night operations.
Why the Rule Cares About Twilight
Twilight is when lighting conditions change quickly. The aircraft’s ability to maintain orientation, the remote pilot’s ability to track the aircraft visually, and the observer’s ability to judge distance and speed all become harder. The exam questions often test whether you understand that “night” is not just “after sunset,” and that the operational burden increases once you cross into the twilight-defined window.
Core Night Requirements You Must Plan For
Night operations require:
- Anti-collision lighting on the small unmanned aircraft system that is visible to other airspace users.
- Operational lighting that supports safe control and situational awareness.
- A plan for maintaining visual contact with the aircraft, either directly by the remote pilot or with the help of a visual observer, depending on your operational setup.
Even if your aircraft has lights, the exam mindset is: lights help others see you, but you still must be able to see the aircraft and judge its motion. If your plan depends on “the lights will make it easy,” you’re likely missing the point.
Lighting Best Practices with Easy Examples
Example 1: Short flight near a streetlight. You launch at 6:40 p.m. and the aircraft’s anti-collision light is bright, but the background is also bright. Your visual tracking is stable because you can still distinguish the aircraft’s position relative to the ground features. This is a good sign: the lighting supports your control.
Example 2: Same aircraft, open field, no ground references. The anti-collision light is visible, but the aircraft’s position relative to the terrain is harder to judge. Your plan should include a route that keeps the aircraft over identifiable landmarks or uses an observer to maintain reliable tracking.
Example 3: Windy night with glare. Headlights from vehicles or reflective surfaces can create glare. If you notice that glare reduces your ability to track the aircraft, you should adjust the plan before takeoff—such as changing the flight path, selecting a different launch point, or postponing.
Operational Planning Steps That Prevent Mistakes
- Confirm the night window using the twilight definition for your location and date.
- Verify lighting before takeoff: check that anti-collision lighting is functioning and that any additional lighting supports your ability to see the aircraft.
- Choose a control strategy: decide whether the remote pilot alone can maintain visual reference or whether a visual observer is needed for your specific environment.
- Define go/no-go triggers: if you cannot maintain reliable visual tracking after takeoff, treat that as a reason to end the flight safely.
- Keep the mission simple: night tasks should reduce complexity in navigation and reduce the number of times you must reorient.
Mind Map: Night Operations Requirements
Example: Applying the Definition Correctly
Suppose your local end of evening civil twilight is at 7:12 p.m. You schedule takeoff at 7:05 p.m. and plan a 10-minute flight. The first 7 minutes occur before the night window, but the last 3 minutes occur after 7:12 p.m., so the latter portion is night operations. The safe exam answer is to plan the entire mission as if it will include night conditions, because your operation crosses the boundary.
Quick Self-Check Before You Answer Exam Questions
- Did you use the twilight-based definition, not a guess based on sunset?
- Did you connect lighting requirements to the ability to maintain control?
- Did you account for the environment affecting your ability to track the aircraft?
If you can answer those three questions consistently, you’re thinking like the test expects: definition first, then operational consequences, then practical execution.
7.2 Lighting, Visibility, and Aircraft Configuration Considerations
Night operations under Part 107 hinge on one idea: you must be able to see and be seen well enough to fly safely, while your aircraft is set up to operate reliably in low-light conditions. The exam questions usually test whether you understand what “night” changes in practice—especially visibility, lighting requirements, and how configuration affects control.
Foundational Concepts for Night Lighting and Visibility
First, treat lighting as part of your control system, not just a compliance checkbox. If you cannot reliably identify the aircraft’s position and orientation, you cannot maintain safe control or separation. Second, visibility is not only about distance; it includes how well you can distinguish features like terrain edges, wires, and obstacles. In low light, contrast drops, glare increases, and shadows can hide hazards.
A practical way to think about it: lighting determines what you can perceive, while configuration determines what the aircraft can do. If either one fails, your risk rises.
Aircraft Lighting Requirements and What They Imply
Your aircraft must display anti-collision lighting when operating at night. The exam logic is straightforward: anti-collision lighting helps others detect your aircraft, and it helps you confirm that the aircraft is actually powered and operating as expected.
Best practice: before takeoff, verify the lighting system in a controlled environment. For example, power on, confirm the anti-collision light activates, then do a brief hover test at a safe altitude to confirm you can visually track the aircraft against the background.
If you cannot clearly see the aircraft’s lights from your planned control position, adjust your plan. Move to a better vantage point, reduce background glare, or change the mission layout so you are not relying on guesswork.
Visibility Planning for Low-Light Obstacles
Visibility planning means identifying what you will use to navigate and avoid hazards. In daylight, you might rely on visual landmarks; at night, you often rely on lighting cues and the aircraft’s position relative to the ground.
Concrete example: you plan a small inspection over a parking lot. Daytime cues include painted lines and building edges. At night, those cues may be dim or washed out by streetlights. Your safer plan is to choose a route that keeps the aircraft over darker, open areas when possible, and to avoid flying directly over unlit areas where you cannot judge height relative to poles or fences.
Exam-style reasoning: if the question describes poor visibility conditions and asks what you should do, the correct answer is typically to adjust the operation to maintain safe control, which may mean postponing or changing the route—not continuing as if nothing changed.
Aircraft Configuration Considerations That Affect Control
Configuration is about more than “it flies.” At night, small differences in aircraft behavior matter because your visual feedback is weaker.
Key configuration checks:
- Stabilization and control modes: Ensure the aircraft is in the intended mode for stable flight. If the aircraft behaves differently at night due to sensor performance or lighting conditions, you need to know before you commit.
- Camera and gimbal settings: If you use a camera feed to maintain orientation, confirm the exposure and contrast settings produce a usable image. A feed that looks bright on the screen can still hide obstacles in the real world.
- Propulsion and power health: Low-light missions often tempt longer focus on the screen. If power is marginal, performance can degrade, and the aircraft may not respond as expected.
Easy example: you set up for a night survey and notice the live feed is overexposed, making the ground look flat. The correct action is to adjust settings so you can distinguish obstacles and terrain texture, then re-check that you can maintain orientation without relying on a single “bright spot.”
Mind Map: Lighting, Visibility, and Configuration
Integrated Example for Exam Readiness
Scenario: You plan a night inspection near a building with bright exterior lights and a dark alley. The aircraft has anti-collision lighting, but from your planned position you can only intermittently see the aircraft’s lights due to glare.
Integrated best response: adjust the launch and control position or revise the route so you maintain reliable visual tracking and obstacle awareness. Then confirm camera settings provide a usable view with enough contrast to detect hazards. If you cannot achieve reliable tracking and hazard awareness, the safest compliant choice is to postpone rather than proceed with uncertain control.
This is the exam pattern: lighting and visibility are treated as operational capabilities, and configuration is treated as the tool that preserves those capabilities during the flight.
7.3 Preflight Checks for Night Reliability and Control Link Confidence
Night operations add two exam-friendly complications: you see less, and your aircraft still needs the same reliable control link. Preflight checks should therefore be organized around three questions: Can you see what matters, can the aircraft control itself as planned, and can you maintain command and telemetry through the whole profile.
Night Readiness Basics You Can Verify Before Power-Up
Start with the items that affect both safety and exam answers.
- Lighting plan and verification: Confirm the aircraft’s anti-collision and navigation lights are installed and functional. If your plan depends on a strobe pattern for identification, check it on the ground so you are not guessing later.
- Crew roles and communication: If you use a visual observer, confirm who calls traffic, who calls aircraft status, and what phrase ends the launch sequence. Consistency matters more than clever phrasing.
- Area assessment for night visibility: Identify the darkest obstacles first, such as wires, poles, and unlit structures. If you cannot reliably spot them at your planned altitude, adjust the plan before you fly.
Control Link Confidence Checks That Prevent “It Worked Yesterday” Problems
Your goal is to reduce uncertainty about command and telemetry.
- Battery condition and power stability: Verify battery charge and inspect connectors for secure seating. A marginal connection can show up as intermittent telemetry, which is the kind of issue that turns a calm flight into a scramble.
- Firmware and configuration consistency: Confirm the aircraft and controller are configured for the intended operation mode. If you changed settings for a different mission earlier, treat that as a reason to re-check.
- Antenna orientation and placement: Ensure antennas are positioned as recommended for your system. During preflight, do a quick “walk-around” visual check to confirm nothing blocks antennas with your body, clothing, or nearby equipment.
Range and Link Behavior Checks Using Ground-Based Logic
You do not need to perform a full range test to think like an examiner. You need to know what “good” looks like.
- Establish a baseline: With the aircraft powered and ready, observe signal quality and telemetry indicators at the launch point. Record the general level in your head, not because you will quote it later, but because it helps you notice drift.
- Check for interference sources: Look for nearby transmitters, large metal structures, or dense equipment that could affect link quality. If you see a likely interference source, reposition the takeoff point rather than hoping.
- Confirm failsafe expectations: Review what your system does on lost link, including whether it returns to a programmed location or holds position. The correct preflight mindset is: you should be able to describe the behavior in one sentence.
Preflight Checklist Flow That Matches How You Will Be Tested
Use a sequence that mirrors how decisions are made.
- Lighting and visibility: Can you identify the aircraft and key obstacles?
- Aircraft condition: Are lights, propellers, and mounting secure?
- Control link readiness: Are batteries stable, antennas unobstructed, and telemetry present?
- Failsafe and recovery plan: Do you know what happens if link degrades?
- Launch and recovery triggers: Are you clear on go/no-go criteria?
Mind Map: Night Reliability and Control Link Confidence
Example: Spotting a Link Confidence Issue Before Launch
You power up, and telemetry appears normal. Then you notice the controller’s signal indicator drops slightly when you step behind a metal trailer. Instead of launching, you reposition the launch point so your body and the trailer are no longer between you and the aircraft’s expected flight path. You then re-check telemetry stability at the new position. This is the kind of “small correction now, big problem avoided later” move that fits both safe operations and exam logic.
Example: Failsafe Clarity During Preflight
Before takeoff, you state your expected lost-link behavior: the aircraft will execute its programmed recovery action and you will not attempt to override it during the failsafe sequence. You also confirm the recovery location is clear of obstacles and aligns with your planned airspace limits. If you cannot describe this clearly, you are not ready to fly at night.
Common Exam-Style Mistakes to Avoid
- Skipping light checks because the aircraft “looks fine” in daylight.
- Assuming telemetry equals control without confirming link behavior and failsafe expectations.
- Treating observer communication as optional when it directly affects how you maintain situational awareness in low visibility.
A strong night preflight is not about adding more steps; it is about making sure each step reduces a specific uncertainty: what you can see, what the aircraft will do, and how reliably you can command it.
7.4 Exam Ready Guidance for Night Mission Decision Making
Night operations under Part 107 are mostly about one thing: making sure the aircraft and the crew can see, be seen, and respond correctly when visibility drops. The exam questions usually test whether you can translate that idea into specific, rule-based decisions.
Foundational Night Concepts That Drive Every Choice
Start with the definition of night: it begins at the end of civil twilight and ends at the start of civil twilight. If the mission time straddles twilight, treat it as night for planning purposes because the exam often expects conservative interpretation.
Next, connect night to visibility and control. At night, you rely more on lighting and less on ambient cues. That means your preflight must confirm the aircraft’s lighting is functional and that your plan supports maintaining control without guessing.
Finally, remember that Part 107 still requires you to operate safely and within the operational limits you’re authorized for. If your plan depends on an assumption like “we’ll be able to see the ground clearly,” the exam will punish that assumption.
Decision Inputs You Should Check Before You Even Think About Launch
Use a simple checklist mindset: time, airspace, lighting, and crew roles.
- Time and twilight: Confirm whether the planned takeoff and landing occur during night. If you can’t confidently determine it, the exam expects you to treat it as night.
- Airspace permission: If you need authorization for controlled airspace, it must be in place before you operate. Night doesn’t reduce that requirement.
- Aircraft lighting: Verify the aircraft has the required anti-collision lighting and that it’s working as intended. If lighting is questionable, you do not “test it in the air.”
- Crew roles and communication: If you use a visual observer, define who watches what and how you’ll communicate. At night, unclear roles become a control problem.
In-Flight Decision Making When Conditions Change
Night missions often fail exams because the pilot response is too slow or too vague. The correct approach is to reduce risk immediately and then re-evaluate.
If you notice reduced visibility, glare, or difficulty maintaining orientation, the first decision is whether you can continue safely while maintaining control. If not, you should adjust the plan to regain a stable reference—often by changing altitude, slowing the aircraft, or returning toward a known visual reference.
If the aircraft’s lighting appears dim, inconsistent, or off, treat it as a control and conspicuity issue. The exam expects you to stop the mission and land or return in a way that prioritizes safety.
If you lose situational awareness because you cannot see obstacles or the aircraft clearly, the correct action is to terminate the mission rather than “press on and hope.” The exam writers like answers that explicitly connect the action to regaining control.
Exam-Style Reasoning Patterns You Can Reuse
When you see a question, look for which input is missing. Then pick the answer that fixes the missing input without violating other requirements.
- Missing twilight determination → choose the option that treats the operation as night or delays until you can confirm.
- Lighting uncertainty → choose the option that grounds the mission or lands before continuing.
- Observer confusion → choose the option that clarifies roles and communication before proceeding.
- Airspace authorization not addressed → choose the option that requires authorization before flight.
Mind Map: Night Mission Decision Making
Night Mission Decision Making Mind Map
Example: Choosing the Correct Response to a Night Lighting Issue
Scenario: You planned a short inspection at night. During preflight, the anti-collision light looks dim, and you’re not sure whether it’s a battery issue or a faulty LED. The question asks what you should do.
A correct exam-style answer is to do not launch. The reasoning is straightforward: night operations depend on lighting for conspicuity and situational awareness, and you cannot verify safe operation once airborne. If you can’t confirm the lighting is functioning properly before flight, the safest decision is to ground the mission or troubleshoot per your maintenance and inspection procedures before attempting another launch.
Example: Observer Communication Breakdown During Night Flight
Scenario: You’re using a visual observer at night. Mid-mission, the observer says they can’t see the aircraft clearly, but they don’t specify whether they lost it due to glare, distance, or obstruction. The question asks what you should do.
The best answer is to prioritize regaining control and clarity. That means you should slow down, adjust the aircraft to improve visibility, and coordinate immediately to re-establish a reliable visual picture. If you cannot restore that picture quickly, the correct move is to terminate the mission and land safely.
Quick Decision Checklist for the Exam
- Is the operation during night by twilight timing?
- Is controlled airspace authorization handled if required?
- Is required lighting confirmed before launch?
- Are observer roles and communication clear?
- If control or visibility degrades, do you terminate or regain control immediately?
If you can answer those five questions consistently, you’ll recognize the exam’s “gotchas” quickly—and you’ll pick the option that matches both the rules and the practical reality of night flying.
7.5 Practical Examples for Night Flight Planning and Compliance Verification
Night operations under Part 107 hinge on two things: meeting the rule conditions before takeoff, and staying inside the authorization and operational limits while you fly. The examples below use a consistent workflow so you can practice the same mental checklist on exam questions.
Foundational Night Planning Checklist
Start with a quick preflight logic chain:
- Confirm the operation is actually “night” for your mission timing.
- Verify airspace permission needs and whether you have LAANC or waiver coverage.
- Confirm aircraft lighting and visibility expectations for safe operation.
- Validate operational limits: altitude, speed, distance, and observer needs.
- Plan communications and contingency actions before you launch.
A practical habit: write the checklist as “If-Then” statements. Example: “If I cannot maintain required visual reference, then I do not launch.” That phrasing matches how exam answers are often structured.
Example 1: Controlled Airspace Near an Airport
Scenario: You plan a mapping flight at 200 ft AGL at night, 2 miles from an airport with controlled airspace. You intend to use a spotter.
Planning steps:
- Airspace check: Identify the controlled airspace type and the relevant grid or authorization area. If LAANC authorization is required, request it before takeoff.
- Authorization verification: Confirm the authorized altitude matches your plan. If your plan exceeds the authorized ceiling, adjust the mission or you fail the compliance check.
- Lighting: Ensure the aircraft has the required anti-collision lighting and that it is functioning preflight.
- Observer role: Assign the spotter to help maintain situational awareness, not to replace your responsibility for control.
Compliance verification during the exam-style decision:
- If the question states you have authorization for 200 ft AGL, you can proceed.
- If it states you only have authorization for 100 ft AGL, the correct action is to reduce altitude to the authorized limit or not fly as planned.
Example 2: Operation over People with Night Lighting Constraints
Scenario: You want to film a small event at night. People will be present in the area below the flight path.
Planning steps:
- Determine whether the operation is “over people” based on where people are located relative to the aircraft’s path.
- If the scenario indicates people are under the flight path, you must apply the correct operational category and any waiver requirements.
- Lighting and visibility: Night operations increase the importance of maintaining control and avoiding unexpected loss of visual reference.
Compliance verification logic:
- If the scenario says the operation is over people and no waiver or allowed category is provided, the correct answer is not “fly carefully.” It is “do not conduct the operation as described.”
- If the scenario provides the correct waiver/conditions and your plan matches them, then you proceed with the remaining night checklist.
Example 3: Low Visibility Edge Case Without Changing the Rule
Scenario: It is night, and the forecast includes reduced visibility. You still want to fly at 150 ft AGL.
Planning steps:
- Weather review: Use the provided visibility and cloud information to judge whether you can maintain the required visual reference.
- Go/no-go decision: If the scenario indicates you cannot maintain visual line of sight due to visibility constraints, you should not launch.
- Contingency: Decide in advance what you will do if visibility drops after takeoff. A common compliant answer is to land promptly rather than “push through.”
Compliance verification logic:
- If the question focuses on whether you can maintain control and visual reference, the correct choice is tied to what the scenario says about visibility.
- If the question focuses on altitude or airspace but the scenario already fails the visual reference condition, the visual reference failure is the earlier stop sign.
Mind Map: Night Flight Planning and Compliance Verification
Mind Map: Exam-Style Decision Flow
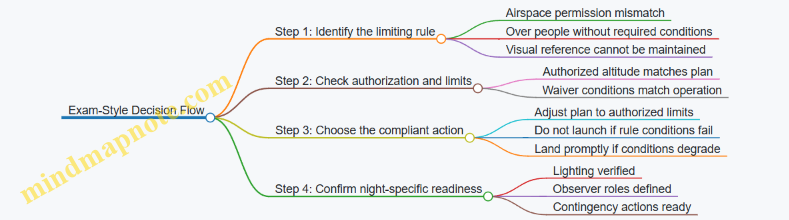
Practical Takeaway for Your Next Practice Set
When you see a night scenario on an exam, treat it like a stack: airspace permission and over-people conditions sit at the top, visual reference sits next, and lighting supports the whole stack. If any top layer fails, the correct answer is usually “do not conduct the operation as described,” even if the rest of the plan looks tidy.
8. Visual Line of Sight, Extended Visual Line of Sight, and Observers
8.1 Visual Line of Sight Requirements and Common Misinterpretations
Visual Line of Sight (VLOS) under Part 107 is not a “camera view” requirement; it is a requirement that the remote pilot can see the aircraft with unaided vision (except for corrective lenses). In exam questions, the key is to separate what the rules require from what your screen happens to show.
What VLOS Means in Practice
Start with the simplest test: if you can’t see the aircraft directly, you are not meeting VLOS. “Directly” matters because a live video feed is not the same as unaided visual contact. If you rely on a zoomed display to identify the aircraft, you may still be able to describe its position, but you are not satisfying the VLOS standard.
Next, consider the environment. VLOS is affected by obstacles and terrain. A tree line, a building, or a ridge can block your view even if the aircraft is still within the allowed distance. In other words, distance alone does not guarantee VLOS.
Finally, remember that VLOS is about the aircraft’s position relative to your eyes, not about the aircraft’s ability to “stay visible” on a screen. If your view is blocked, the mission is not compliant even if the aircraft is flying normally.
Common Misinterpretations That Show Up on Exams
Misinterpretation 1: “If I can see it on the monitor, I’m good.” The monitor is not the required method of seeing. The exam expects you to choose the option that explicitly ties visibility to unaided visual observation.
Misinterpretation 2: “If the aircraft is within a certain distance, VLOS is automatic.” Distance helps, but it does not override line-of-sight obstructions. A short flight behind a wall can fail VLOS.
Misinterpretation 3: “Observers can replace VLOS.” Observers can help maintain situational awareness, but the remote pilot’s VLOS requirement is not satisfied by delegating the visual check entirely. If the remote pilot cannot see the aircraft, the operation is not compliant.
Misinterpretation 4: “If I can see it sometimes, that counts.” VLOS is a continuous condition during flight. If the aircraft becomes obscured for any portion of the flight, you must treat that as a failure of VLOS for that period.
A Systematic Decision Process
Use this step-by-step logic when answering exam scenarios:
- Identify the visibility method in the answer choice: unaided vision vs. monitor.
- Check for obstructions: buildings, trees, terrain, or anything that blocks your view.
- Confirm who is seeing: remote pilot vs. observer vs. both.
- Assess continuity: is the aircraft visible throughout the relevant segment?
- Match the scenario to the rule language: if the choice only mentions a screen, it’s usually wrong.
Mind Map: Visual Line of Sight Essentials
Examples That Train Your Eye
Example 1: The screen fix You fly a small quadcopter over a field. The aircraft is visible to you at takeoff, but as it moves behind a parked trailer, you cannot see it directly. You still see it clearly on your controller screen. The correct exam-style conclusion is that VLOS is not met during the behind-trailer segment because direct unaided visibility is blocked.
Example 2: Distance without visibility You keep the aircraft close, well within typical operational comfort, but you fly it behind a low hill. The aircraft remains within a short horizontal distance, yet your view is blocked by terrain. The correct conclusion is that VLOS fails due to obstruction.
Example 3: Observer assistance limits An observer can see the aircraft when you cannot, and they call out headings and relative position. Even with good communication, the remote pilot’s VLOS requirement is not satisfied if you cannot see the aircraft directly. The best answer emphasizes that observer sighting does not replace the remote pilot’s required visibility.
Quick Self-Check Before You Commit to a Flight
If you can’t answer “Yes” to all three questions—Can I see the aircraft directly? Is my view blocked by anything? Will it stay visible for the whole flight segment?—then the scenario is likely designed to test a VLOS failure.
And yes, the controller screen can be useful for navigation and confirmation, but it is not the compliance substitute the exam is looking for.
8.2 Using a Visual Observer and Defining Roles and Communication
A Visual Observer (VO) helps you maintain situational awareness while you operate under Visual Line of Sight. The VO does not replace your responsibility to see and avoid; instead, the VO expands the “eyes on the scene” so you can make faster, cleaner decisions. Think of the VO as a structured second set of eyes with a defined job, not a helpful bystander who happens to watch.
Foundational Roles and Responsibilities
Remote Pilot In Command (RPIC) remains responsible for the flight path, control inputs, and final “go/no-go” decisions. The RPIC also decides when to pause, stop, or reposition based on what the VO reports.
Visual Observer watches for traffic, obstacles, and anything that could affect safe operation. The VO’s primary focus is outside the aircraft’s immediate viewpoint—where the RPIC might not be looking at every moment.
Optional Spotter or Safety Assistant may handle non-flight tasks like keeping the takeoff area clear or managing ground hazards. If you use one, keep the VO focused on visual scanning so the VO’s attention does not get split.
A practical best practice is to assign roles before you power up. For example, if you’re doing a roof inspection, you can brief: “I fly and control altitude and lateral movement. You watch for people, vehicles, and nearby aircraft. If you see anything, you call it out immediately and keep watching until I confirm the action.”
Communication That Works Under Stress
Good communication is short, consistent, and actionable. The goal is not to describe everything the VO sees; it’s to provide the information the RPIC needs to act.
Use a simple call-and-response style:
- VO calls: what it is, where it is relative to the aircraft, and whether it is moving toward your flight path.
- RPIC confirms: what action you will take (e.g., “Hold position,” “Climb 10 feet,” “Turn left,” “Stop and land”).
Keep calls standardized so you don’t waste time translating. For instance, if the VO sees a person walking into the area, the call should be specific: “Person entering from left, moving toward us.” Then the RPIC responds: “Stop and hold. I’m backing up.”
Defining Scan Patterns and Coverage
A VO should not stare at one spot. A scan pattern prevents “tunnel vision,” especially when the aircraft is moving or when the background is busy.
Common scan patterns include:
- Sector scan: VO divides the area into sectors (front, left, right, behind) and rotates attention.
- Altitude scan: VO checks for traffic at the aircraft’s altitude and also above/below, since aircraft can appear suddenly.
- Ground-to-air scan: VO alternates between near-field obstacles (trees, poles, vehicles) and distant traffic.
Example: During a linear inspection along a road, the VO can scan the direction of travel plus a buffer to the sides. If the aircraft is moving forward, the VO’s scan should lead slightly ahead of the aircraft’s path so hazards are noticed before they become urgent.
Clear Triggers for Immediate Calls
To avoid missed hazards, define triggers that require an immediate call. Examples include:
- Any unplanned person or vehicle entering the operating area.
- Any aircraft appearing in the vicinity, especially if it could intersect your path.
- Any obstacle that could conflict with your planned route, including wires, poles, and branches.
- Any loss of visual clarity (e.g., glare, smoke, heavy shadows) that reduces the VO’s ability to maintain awareness.
A useful rule: if the VO would want the RPIC to change something right now, the VO calls right now.
Mind Map: Visual Observer Workflow
Example: Two-Person Team Briefing and Execution
Before takeoff, you and the VO agree on three things: role boundaries, call format, and what actions you will take.
Briefing example
- RPIC: “I control the aircraft. If you see traffic or an obstacle, call it immediately with left/right and whether it’s moving toward us.”
- VO: “I’ll scan in sectors and keep watching until you confirm the action.”
- Both: “If you call a hazard, we pause the maneuver until we’re clear.”
In-flight example The aircraft is moving laterally to frame a building sign. The VO sees a small aircraft appear behind and slightly above your path. The VO calls: “Aircraft behind, slightly above, moving toward our line.” The RPIC responds: “Hold position. I’m turning left to increase separation.” The VO continues scanning to ensure no additional traffic enters the area.
Example: Preventing Common Communication Failures
-
Vague calls: “Something’s there.” Fix it by requiring location and movement: “Vehicle on right, moving toward the flight path.”
-
Too much detail: “It’s a red car with a white trailer…” Fix it by focusing on action: “Vehicle entering from right.”
-
No confirmation: VO calls, RPIC doesn’t respond. Fix it by using a confirmation step: “Hold” or “Proceed with the next segment.”
When roles and communication are defined, the VO becomes a reliable safety layer rather than an extra voice. That reliability is what helps you stay compliant and calm—especially when the scene changes faster than your first plan.
8.3 Managing Situational Awareness for Complex Terrain and Crowds
Situational awareness is not a single skill; it’s a chain of small checks that keep you from being surprised. In complex terrain and near crowds, the chain has more links because your view can be blocked, your ground speed can change, and people create unpredictable movement.
Foundational Model for Awareness
Start with a simple loop: See → Understand → Decide → Act → Recheck. “See” means you confirm what’s in front of you and what’s behind you. “Understand” means you translate what you see into risk: obstacles, people, and airspace constraints. “Decide” means you choose the next control action and the next scan point. “Act” means you execute smoothly and within your aircraft limits. “Recheck” means you verify the result before you move on.
A practical rule: if you cannot describe the next 10 seconds of flight in plain language, you are not ready to commit to a maneuver.
Terrain Awareness: Occlusion and Closure Rates
Complex terrain creates two common problems: occlusion and closure rate.
- Occlusion happens when hills, buildings, trees, or even the aircraft’s own attitude hide parts of the scene. If you lose sight of a landing zone behind a ridge, you may also lose sight of people who move into that zone.
- Closure rate is how quickly two objects approach each other in your field of view. A crowd moving toward a fixed point can close faster than you expect, especially if you’re flying low and slow.
Best practice: plan your route so that your “primary view” stays clear. If you must fly behind an obstruction, do it briefly and with a preplanned recovery action, such as a turn to restore line of sight.
Crowd Awareness: Movement Patterns and Safe Margins
Crowds don’t move like a spreadsheet. People cluster, split, and surge. Treat the crowd as a dynamic boundary rather than a static target.
Use two layers of spacing in your head:
- Operational spacing: the distance you need to keep from entering unsafe proximity.
- Visual spacing: the distance that keeps you able to track people without losing them behind your own aircraft angle.
Easy example: if you’re filming a walkway and you notice people drifting toward your planned path, shift your flight line laterally rather than continuing forward and hoping they “stay put.” Lateral movement usually preserves your ability to see the crowd edge.
Scan Strategy That Works in Real Life
A scan plan prevents “tunnel vision.” Use a repeating pattern:
- Primary scan: aircraft attitude and flight path.
- Secondary scan: the nearest obstacle line and the crowd boundary.
- Tertiary scan: the far end of the route and any escape direction.
Keep the scan pattern consistent. Consistency reduces the chance that you forget to check one category when workload rises.
Mind Map: Situational Awareness for Complex Terrain and Crowds
Situational Awareness Mind Map
Example: Ridge Line Survey with a Crowd Below
Scenario: You’re mapping a hillside with a ridge line in front of you, and a small crowd is gathered below near a trailhead.
- Before takeoff, identify the ridge segments that will block your view of the crowd. Choose a flight line that keeps the crowd edge visible for the majority of the pass.
- During the pass, use the scan loop. Primary scan stays on aircraft path; secondary scan checks the crowd edge; tertiary scan checks your escape direction if the crowd shifts.
- When you see the crowd edge drift toward your projected path, don’t continue forward. Decide to shift laterally to re-establish visual spacing and operational spacing.
- If the ridge blocks the crowd edge entirely, treat that as a decision trigger. Stabilize, turn to restore line of sight, and resume only when you can again describe the next 10 seconds clearly.
Example: Low Pass over Uneven Ground
Scenario: You’re flying low over uneven ground near people standing along a fence.
The risk isn’t just obstacles; it’s that uneven terrain can change your attitude and your camera angle, which changes what you can see. If you notice the fence line disappearing from your secondary scan, slow down and level out before continuing. A stable attitude is a visibility tool, not just a comfort feature.
Decision Triggers and Clean Responses
Use a short list of triggers so you don’t improvise under pressure:
- You cannot clearly identify the crowd edge.
- You lose the nearest obstacle line from your secondary scan.
- Your planned route would require you to fly through an occluded area longer than you intended.
- You feel uncertain about your aircraft orientation relative to the terrain.
Clean responses are usually the same: stabilize, reduce speed, restore line of sight, and then choose the next move. If you can’t restore line of sight quickly, abort and land. That’s not failure; it’s the most reliable way to keep the awareness chain intact.
8.4 Exam Style Questions for Maintaining Control and Compliance
Exam questions usually test whether you can apply the rules while staying in control of the aircraft. The trick is to treat each question like a mini checklist: identify the rule being tested, confirm the limiting condition, then choose the action that keeps the operation compliant and controllable.
Core Control Concepts You Must Apply Under Exam Pressure
Start with the idea that “maintaining control” is not just about flying smoothly. It means you can still maneuver to avoid hazards, stop or slow the aircraft’s movement relative to the environment, and comply with operational limits. In Part 107 terms, that shows up as correct use of visual line of sight, correct observer support, and correct responses to changing conditions.
Next, remember that compliance is conditional. Many answers hinge on whether a condition is present: controlled airspace, operations over people, night requirements, or whether the aircraft is still within the required operational boundaries. If the question implies a condition exists, you must assume it matters unless the question explicitly removes it.
How to Read Exam Questions Like a Pilot
- Underline the constraint. Look for phrases like “in controlled airspace,” “over people,” “night,” “lost link,” or “cannot maintain visual line of sight.”
- Identify the required action. The exam often asks what you must do next, not what you could do.
- Check the “control first” logic. If two choices both sound legal, pick the one that preserves the ability to maneuver and avoid hazards.
- Avoid “paper compliance.” An answer that satisfies a rule on paper but ignores immediate control (for example, continuing toward a hazard) is usually wrong.
Mind Map: Control and Compliance Decision Flow
Exam Style Example 1: Visual Line of Sight with an Observer
Scenario: You are flying a small UAS and you lose the ability to maintain visual line of sight with the aircraft. You have a visual observer who can see the aircraft.
Best answer logic: The correct choice is the one that restores the ability to maintain the required visual reference through proper observer use, not one that continues as-is. If the question implies you cannot maintain VLOS, you should not “hope” the aircraft stays safe. Instead, you should take the action that reestablishes control and compliance—typically by using the observer to support maintaining the required visual reference and adjusting flight to remain within the operational concept.
Common wrong answer pattern: Continuing the flight while claiming the observer “will tell you where it is,” without addressing that you still must be able to maintain the required visual reference for safe operation.
Exam Style Example 2: Controlled Airspace and Authorization Timing
Scenario: You plan to operate near an airport in controlled airspace. The question states that authorization has not been received yet.
Best answer logic: The compliant action is to not conduct the operation as planned until authorization requirements are satisfied. If the question asks what you should do before takeoff, the answer is about waiting or revising the plan to avoid the controlled airspace requirement.
Common wrong answer pattern: Proceeding because the flight is short, low altitude, or “away from runways.” The exam treats controlled airspace compliance as a gating requirement.
Exam Style Example 3: Lost Link Priorities
Scenario: During a mission, the aircraft loses command and control link.
Best answer logic: The correct response prioritizes immediate safety and risk reduction. You should follow the aircraft’s lost link procedure and take actions within your control to manage the situation, such as ensuring you are not creating additional hazards. The exam expects you to avoid actions that increase risk while the aircraft is not under reliable control.
Common wrong answer pattern: Attempting to “override” the situation with unsafe maneuvers or ignoring the lost link state.
A Practical Mini Drill for Multiple-Choice
For each practice question, write a one-line decision rule before choosing:
- “If VLOS is not maintained, the next step must restore compliant visual reference and control.”
- “If authorization is missing for controlled airspace, the next step must prevent the operation.”
- “If link is lost, the next step must reduce risk using the lost link procedure and safe pilot actions.”
This keeps you from getting trapped by tempting but incorrect answers that sound reasonable while violating the condition the question is testing.
8.5 Practical Observer Based Mission Walkthroughs With Checklists
This section turns observer rules into repeatable actions. The goal is simple: when the aircraft is moving, the observer’s job is to keep the remote pilot’s attention on control and compliance, while the observer manages what the pilot cannot reliably see.
Observer Roles That Actually Matter
Start with a clean division of labor. The remote pilot maintains control inputs, monitors flight telemetry, and ensures the aircraft stays within operational limits. The observer watches for traffic, obstacles, and anything that could break the mission’s visual requirements.
A common mistake is treating the observer as a “spotter who also flies.” Instead, the observer should provide short, specific calls that help the pilot decide. If the observer cannot see the aircraft clearly, they should say so immediately—because “I think it’s fine” is not a safety status.
Preflight Walkthrough with Checklist
Use this walkthrough every time, even for familiar locations.
Preflight Checklist
- Confirm observer assignment: One observer is designated, or multiple observers are assigned with clear handoffs.
- Brief communication method: Decide on call signs and phrase structure (for example, “Traffic left,” “Obstacle ahead,” “Aircraft lost”).
- Verify line of sight plan: Identify where the observer will stand so they can see the aircraft without being blocked by terrain, vehicles, or structures.
- Set scan pattern: Agree on a scan sequence (near field to far field, then back) so the observer is not randomly looking.
- Review mission boundaries: Know the planned altitude, lateral limits, and any “no-go” zones like people or restricted areas.
- Practice a quick lost-link response: The observer should know what to do if the aircraft disappears from view or the pilot calls for immediate action.
Easy Example
You plan a mapping flight near a warehouse. Before takeoff, the observer stands on the side with the clearest view of the flight path. During briefing, you agree that the observer will call “Obstacle ahead” if a crane boom enters the aircraft’s projected path, not after the aircraft has already passed it.
In-Flight Walkthrough with Checklist
During flight, the observer’s job is continuous. The pilot’s job is also continuous. The checklist keeps both jobs from drifting.
In-Flight Checklist
- Before takeoff: Observer confirms aircraft is visible and can be tracked.
- During climb and maneuvering: Observer scans for traffic and obstacles, especially during turns.
- During steady segments: Observer maintains aircraft tracking while scanning the surrounding area.
- When conditions change: If wind pushes the aircraft toward obstacles, the observer calls the direction and urgency.
- If the aircraft is lost from view: Observer immediately reports “Aircraft lost,” and the pilot initiates the appropriate recovery behavior.
- If people enter the area: Observer calls “People entering,” including approximate direction and distance.
Easy Example
Midway through a survey, a small bird or a glinting object appears near the flight path. The observer does not guess. They state what they see: “Possible bird near left of path, distance about 30 meters.” The pilot can then slow, adjust altitude if permitted, or pause the mission.
Post-Flight Walkthrough with Checklist
After landing, the observer and pilot should close the loop. This is where small errors become repeatable improvements.
Post-Flight Checklist
- Confirm mission completion status: Did the aircraft remain within the planned area and altitude?
- Log key calls: Note any traffic, obstacles, or visibility issues and whether the response was timely.
- Debrief communication: Were calls short and actionable? If not, adjust phrase structure for next time.
- Assess observer positioning: If the observer had to move to keep the aircraft in view, revise the stand location or flight path.
Easy Example
After a flight, you realize the observer’s view was blocked during a turn because a parked truck shifted into the line of sight. Next time, you reposition the observer or adjust the turn timing so the aircraft stays visible.
Mind Map: Observer Based Mission Workflow
Observer Based Mission Walkthrough Mind Map
Mind Map: Callouts That Lead to Decisions
Observer Callouts Mind Map
Quick Integrated Scenario Walkthrough
On 2026-02-13, you run a short inspection flight over a parking lot with an observer. Preflight: you brief scan pattern and agree that the observer will call “People entering” if anyone approaches the edge of the work area. In flight: during a left turn, the observer spots a pedestrian stepping into the projected path and calls direction and distance. The pilot pauses the maneuver and repositions the aircraft to keep the mission within the planned boundaries. Postflight: you note that the observer’s scan was strongest when standing slightly forward of the pilot’s position, so you adjust stance for the next run.
This walkthrough style keeps the observer’s actions measurable: visibility, scanning, and callouts that support immediate pilot decisions.
9. Weather, Wind, Performance Limits, and Go No Go Decisions
9.1 Interpreting METAR and TAF for Drone Mission Planning
METAR and TAF are the weather’s “current status” and “near-term plan.” For Part 107 planning, you use them to decide whether the mission can be conducted safely within your operational limits, especially visibility, wind, and precipitation.
METAR Basics for Drone Pilots
A METAR is a snapshot issued regularly (often hourly). It includes wind, visibility, clouds, temperature/dew point, and weather phenomena. When you read it, treat it like a checklist: if any item would break your plan, you either adjust the plan or postpone.
Key fields to focus on:
- Wind: direction and speed, plus gusts if present. For drones, wind affects control margins and battery endurance.
- Visibility: the horizontal distance you can see. Low visibility can reduce your ability to maintain situational awareness.
- Ceiling: derived from the lowest cloud layer reported as broken/overcast (or vertical visibility in some cases). Ceiling matters because it often correlates with how “low” the sky is.
- Weather: rain, drizzle, fog, mist, snow, thunderstorms. These can reduce visibility and complicate operations.
- Temperature and Dew Point: used to infer fog/frost risk and icing risk. Even if icing isn’t your main concern, a small spread between temperature and dew point can signal moisture problems.
Example METAR Interpretation
METAR: KXYZ 1512Z 21012G20KT 5SM -RA BR BKN008 OVC015 10/9 A2992
- Wind: 210° at 12 kt, gusting 20 kt. Expect control challenges during takeoff/landing and higher battery drain.
- Visibility: 5 statute miles. That’s not “zero,” but it’s limited for maintaining clear visual reference.
- Weather: -RA (light rain) and BR (mist). Mist can make the air look “hazy” even when visibility seems borderline.
- Clouds: BKN008 (broken at 800 ft AGL) and OVC015 (overcast at 1,500 ft AGL). The ceiling is 800 ft.
- Temp/dew point: 10°C/9°C. The small spread suggests moisture is close to saturation.
A practical planning response: if your mission requires clear visual tracking and you have limited margin for wind and haze, you might reduce altitude, change the route, or delay.
TAF Basics for Drone Pilots
A TAF is a forecast for a longer window (commonly 24–30 hours). It’s structured in periods with expected changes. The trick is to read it as a timeline, not a single forecast.
Key fields to focus on:
- Wind changes: direction shifts and gust expectations.
- Visibility and ceiling trends: whether conditions improve or deteriorate.
- Cloud layer changes: especially when a ceiling is expected to drop below your comfort threshold.
- Weather onset and duration: when rain/fog/mist is expected to start and stop.
Example TAF Interpretation
TAF: KXYZ 1511/1611 21010KT 6SM BKN010 FM1518 23015G22KT 4SM -RA BR OVC008 TEMPO 1520/1524 2SM +TSRA FM1600 20012KT 5SM SCT012
Read it like this:
- 1511–1518Z: BKN010 at 1,000 ft AGL, visibility 6SM, wind 210/10.
- From 1518Z: wind increases and shifts, visibility drops to 4SM, rain/mist begins, and ceiling lowers to OVC008.
- Tempo 1520–1524Z: visibility can drop to 2SM with thunderstorms. Even if your drone is not flying in the storm core, the visibility reduction and turbulence risk can be disqualifying.
- From 1600Z: conditions improve to 5SM and SCT012.
For planning, you’d align your mission window with the best period and build a go/no-go trigger for the transition at 1518Z.
Mind Map: Turning METAR and TAF into Decisions
Practical Planning Workflow
- Start with the METAR: confirm what’s happening right now. If visibility is already below your operational comfort level or the ceiling is too low, don’t rely on a “maybe it improves” forecast.
- Scan the TAF for changes: find the time blocks where visibility drops, ceiling lowers, or weather begins.
- Pick your mission window: schedule the operation during the most favorable period, not the average one.
- Define go/no-go triggers: for example, if wind gusts exceed your control margin or if visibility drops below your minimum, you stop.
- Re-check close to launch: conditions can shift faster than forecasts, especially around precipitation and fog.
Example: Choosing Between Two Launch Times
You have two potential launch times separated by 2 hours.
- METAR at 1400Z: wind 18010KT, 7SM, BKN020, no precipitation.
- TAF indicates: from 1500Z, visibility drops to 4SM with mist and ceiling lowers to OVC010.
Best choice: launch at 1400Z if your mission can be completed before 1500Z. If you wait for 1500Z, you’re planning around degraded visibility and a lower ceiling, which increases the chance you’ll need to terminate mid-mission.
Common Exam Traps
- Treating TAF like a single value: exam questions often expect you to use the forecast period that overlaps the operation time.
- Ignoring gusts: wind speed alone can look acceptable while gusts make control margins unsafe.
- Confusing visibility with ceiling: low ceiling can still exist with decent visibility, and vice versa; both matter.
- Overlooking TEMPO groups: “temporary” conditions can still occur during your flight window.
9.2 Wind, Gusts, and Density Altitude Effects on Small UAS Performance
Wind and gusts change how your aircraft moves through the air, while density altitude changes how well it can generate lift and thrust. Together, they determine whether you can hold altitude, maintain control authority, and climb when you need it. The exam questions usually test whether you can connect the scenario to the correct performance consequence.
Foundational Concepts You Need First
Wind vs. Gusts
Wind is the steady component of airflow. Gusts are short, rapid increases or decreases in wind speed, often with shifting direction. For small UAS, gusts matter because they can momentarily exceed the control authority you planned for.
Example: If the forecast wind is 15 kt and your aircraft’s control system is trimmed for that, you might still be fine—until a gust spikes to 25 kt for a few seconds. During that spike, the aircraft may drift, require more control input, or temporarily lose the ability to hold a precise track.
Density Altitude
Density altitude is a way to express how “thick” the air effectively is for performance. Higher density altitude means lower air density, which reduces propeller thrust efficiency and reduces lift for a given airspeed. Even if the weather report lists a temperature and pressure, the performance impact is tied to density altitude.
Example: A 90°F day with lower pressure can produce a density altitude that behaves like a much higher elevation. The aircraft may feel “lazy”: it needs more distance to climb and may struggle to maintain altitude at the same throttle setting.
Wind Effects on Control and Track
Groundspeed vs. Airspeed
Most performance rules in Part 107 contexts assume you care about airspeed for lift and control. Wind changes groundspeed, so you can see a slow or fast ground track without changing the aircraft’s lift-producing airspeed.
Example: With a headwind, your groundspeed drops but your airspeed can remain stable. With a tailwind, groundspeed increases, which can trick you into thinking the aircraft is performing better than it is.
Drift and Heading Control
Crosswinds create drift. If you fly a straight line over the ground without correcting, the aircraft will slide sideways. The correct response is to maintain the required heading or track using the control system and any guidance mode you’re using.
Example: You plan a survey line parallel to a road. A crosswind pushes the aircraft off-line. If you keep the same heading, you’ll drift; if you adjust heading to counter drift, you can hold the intended track.
Gust Effects on Stability and Margin
Why Gusts Are More Than “Extra Wind”
Gusts can cause rapid changes in the forces acting on the aircraft. That can lead to altitude excursions, speed changes, or control saturation. The key exam idea is that gusts reduce your margin because they can force larger control inputs than steady wind.
Example: You plan a hover at a location with steady wind 10 kt. If gusts reach 20 kt, the aircraft may require more thrust to counter the gust-induced tilt or lateral force. If your throttle margin is thin, altitude hold can degrade.
Practical Planning Response
Use gusts to set conservative expectations for track-keeping and climb performance. If the mission requires precise positioning, treat gusts as a reason to increase buffer distance from obstacles and people, and to avoid tight maneuvers.
Example: For an inspection requiring consistent framing, you might choose a wider approach path and slower lateral transitions when gusts are forecast, so the aircraft doesn’t overshoot the target during gust-induced drift.
Density Altitude Effects on Climb and Hover
Reduced Climb Capability
Lower air density reduces available lift and thrust. The aircraft may still fly, but it will climb more slowly and may not reach the planned altitude if you start too high or if you demand a rapid climb.
Example: You launch at a field at 2,000 ft MSL on a hot day. The aircraft’s climb rate is reduced. If you attempt to reach a target altitude immediately, you may not get there before you reach the operational area.
Hover Power Margin
If your aircraft must hover or maintain a low-speed profile, density altitude can push it closer to maximum power. That reduces the ability to recover from disturbances like gusts.
Example: In warm, high-density-altitude conditions, a gust that would normally be corrected with small control inputs may require near-maximum thrust. The result can be a noticeable altitude drop or a slower recovery.
Integrated Scenario Reasoning for Exam Questions
When a question mentions wind and gusts, think “control authority and track stability.” When it mentions high temperature, high elevation, or low pressure, think “reduced performance margin.” When both appear, treat the mission as having compounded risk: gusts demand control effort, while density altitude limits the aircraft’s ability to supply that effort.
Example Scenario: Wind 18 kt with gusts to 28 kt, temperature 95°F, and launch at a higher-elevation site. The correct reasoning is that gusts can cause drift and altitude excursions, while density altitude reduces climb and hover margin. A safe answer typically involves conservative positioning, avoiding tight timing, and ensuring you can maintain altitude and control authority.
Mind Map: Wind, Gusts, and Density Altitude Performance Links
Quick Check Examples You Can Use While Studying
- Steady headwind 12 kt, no gusts: Expect slower groundspeed but stable airspeed if you maintain the same control inputs.
- Crosswind with gusts: Expect drift and possible lateral overshoot; plan wider margins for positioning.
- Hot day at higher elevation: Expect reduced climb and hover margin; avoid assuming the aircraft will reach altitude on the same timeline as on cooler days.
- Hot day plus gusts: Treat as compounded risk; prioritize altitude and control authority over tight maneuvering.
9.3 Visibility, Ceiling, and Precipitation Considerations for VFR Operations
VFR planning for Part 107 starts with a simple idea: if you can’t see what you need to see, you can’t safely maintain control. “Visibility” and “ceiling” are the two numbers that most directly affect whether you can keep the aircraft in sight and avoid hazards like wires, vehicles, and terrain features.
Visibility Fundamentals for Keeping the Aircraft in Sight
Visibility is how far you can see in the atmosphere. In practice, you use it to judge whether the drone will remain visually identifiable against the background. Light haze can reduce contrast even when the aircraft is technically “there,” and that matters for judging distance and speed.
A useful exam mindset is to connect visibility to tasks:
- Tracking the aircraft: Can you keep it in sight without straining?
- Detecting hazards: Can you spot obstacles along the route?
- Maintaining orientation: Can you tell which direction the aircraft is moving?
Example: Visibility reported as 5 miles with scattered clouds at mid-level. You plan a short inspection along a straight corridor. The drone stays over open ground, and you can track it easily. That’s consistent with safe visual operations because the background is not cluttered and contrast remains adequate.
Example: Visibility reported as 1 mile in fog. Even if the drone is flying at a modest altitude, you may lose the aircraft quickly and misjudge its position. For VFR operations, that’s a strong indicator that the mission should not proceed.
Ceiling Basics and Why It Changes Your Risk
Ceiling is the height of the lowest layer of clouds or obscuring phenomena reported as broken or overcast. For VFR planning, ceiling affects how much of the sky is “available” for visual tracking and how likely you are to fly into obscured air.
A lower ceiling can force you to fly closer to the ground to stay clear of cloud layers, but that increases obstacle density and makes wire avoidance harder. It also reduces the time you have to react if the aircraft drifts toward the edge of the visible area.
Example: Ceiling 800 feet AGL with broken clouds. If your planned route crosses near trees, poles, or rooftops, flying low to remain below the cloud layer compresses your margin for error. The exam logic is to treat low ceiling as a constraint that can increase workload and hazard exposure.
Precipitation Types and Their Operational Effects
Precipitation affects visibility, aircraft performance, and control quality. For exam purposes, focus on how precipitation changes what you can see and how stable the flight feels.
- Rain: Often reduces visibility and can create glare on the ground and on the aircraft body.
- Snow: Can reduce visibility and may accumulate on surfaces, affecting control response.
- Drizzle and mist: Can be deceptively bad because visibility can drop while cloud layers still look “not too low.”
- Thunderstorms: Not just weather; they imply rapidly changing conditions and strong turbulence risk.
Example: Light rain with visibility 3 miles and ceiling 1,500 feet. If the route is open and you can maintain clear sightlines, the mission may still be feasible. The key is that the reported visibility supports visual tracking.
Example: Mist with visibility 1 mile and ceiling 400 feet. Even if the drone is small and slow, the combination of low ceiling and reduced visibility makes it easy to lose the aircraft or fail to detect obstacles in time.
Turning Reports into Decisions
VFR planning is not about memorizing numbers; it’s about matching conditions to what you must do visually. Use a decision checklist that ties each weather element to a specific operational requirement.
- Visibility supports continuous visual contact along the entire route.
- Ceiling does not force you into cluttered airspace where obstacles are harder to see.
- Precipitation does not degrade contrast or create obscuring layers.
- You can maintain a safe buffer for unexpected drift, especially near obstacles.
Example: Visibility 2 miles, ceiling 900 feet, light drizzle. If your route is over a busy industrial area with many vertical obstacles, the drizzle’s effect on contrast plus the low ceiling’s effect on where you must fly can make the mission unsafe even though the drone is within typical altitude limits.
Mind Map: Visibility, Ceiling, and Precipitation for VFR
Practical Scenario Walkthrough
Scenario: You receive a report showing visibility 4 miles, ceiling 2,000 feet, and light rain. Your route is a straight line over open fields with a single crossing near a utility corridor.
- Visibility check: 4 miles supports tracking the aircraft against a relatively uniform background.
- Ceiling check: 2,000 feet gives room to avoid cloud layers without flying extremely low near clutter.
- Precipitation check: Light rain may reduce contrast, but the route’s openness limits how often you must identify small obstacles.
- Risk buffer: You plan extra lateral spacing from the utility corridor and keep the flight path simple.
This is the integrated logic the exam expects: weather elements are not separate facts; they combine into whether you can see, avoid, and control for the entire mission.
9.4 Building a Go No Go Decision Framework Using Measurable Criteria
A good Go/No-Go framework turns “I think it’ll be fine” into a checklist of measurable conditions. For Part 107, your goal is not to predict the future; it’s to confirm that the mission you planned still fits the rules and the aircraft can safely do the job.
Step 1: Define the Mission Envelope in Numbers
Start with the limits that matter for your specific operation.
- Airspace permission: authorization status and altitude ceiling.
- Weather: wind speed and gust tolerance, visibility, and precipitation.
- Aircraft performance: max takeoff weight, battery endurance, and climb margin.
- Operational geometry: planned distance to obstacles and people, and whether you can maintain control.
Example: You plan a 20-minute mapping flight at 300 ft AGL near a controlled airport. Your envelope might include “wind ≤ 18 mph sustained, gusts ≤ 25 mph” and “ceiling ≥ 1,500 ft AGL with no rain.” Those thresholds become your decision inputs.
Step 2: Convert Rules into Decision Gates
Many exam questions boil down to whether a condition violates an operational requirement. Turn those into gates you can check quickly.
- Gate A: Airspace permission
- If you do not have the required authorization for the planned altitude/area, it’s No-Go.
- Gate B: Visual operation requirements
- If you cannot maintain required visual reference and control, it’s No-Go.
- Gate C: People and risk category
- If your planned operation over people does not match the allowed category, it’s No-Go.
- Gate D: Night or lighting
- If it’s night and you cannot meet the lighting/visibility requirements, it’s No-Go.
A practical trick: write each gate as a yes/no statement that you can answer in under 30 seconds.
Step 3: Use a Measurable Weather Model
Weather decisions should be based on what you can observe and what you can measure.
- Wind: use sustained wind and gusts from the source you trust, then compare to your aircraft’s tested tolerance.
- Precipitation: treat rain or active precipitation as a hard stop unless your aircraft and mission plan explicitly allow it.
- Visibility and ceiling: if you can’t maintain the required visual reference, the exact ceiling number matters less than the operational effect.
Example: METAR shows wind 16G24 kt. Your threshold is gusts ≤ 25 mph (about 22 kt). Even if sustained wind is acceptable, the gusts exceed your limit, so you choose No-Go before launch.
Step 4: Build a Scoring System for “Borderline” Conditions
Not every mission fails because of one obvious violation. For borderline cases, use a simple scoring approach that forces consistency.
- Assign Green (Pass), Yellow (Caution), Red (Stop) for each category: airspace, weather, aircraft readiness, and operational geometry.
- Go only if you have no Red items.
- If you have Yellow items, require at least one mitigation that keeps you within limits.
Mitigation examples:
- Reduce altitude to stay under an authorization ceiling.
- Shorten route to maintain obstacle clearance.
- Delay launch to wait for gusts to drop.
- Swap to a different takeoff point to improve line-of-sight.
Step 5: Lock in Aircraft Readiness with Objective Checks
Your framework should include aircraft-specific gates that don’t depend on feelings.
- Battery health and charge level sufficient for reserve margin.
- Propellers intact, no visible damage.
- Compass/GNSS status appropriate for the mission.
- Firmware and controller settings consistent with your planned operation.
Example: You planned a 12-minute outbound leg plus 8-minute return. Battery estimate shows 18 minutes with a 20% reserve. If preflight shows battery voltage sag or unusually high current draw, you reduce the mission length or cancel. If you can’t restore the reserve margin, it’s No-Go.
Step 6: Decide and Document with a Single Pass
Before takeoff, run the framework once, then again after any major change (new wind reading, updated authorization, or a change in route).
Integrated Example: One Mission, Three Outcomes
You’re flying a 25-minute inspection at 250 ft AGL.
- Airspace: authorization granted up to 300 ft AGL for the exact area. Gate A = Pass.
- Weather: wind 14 mph sustained, gusts 28 mph. Your gust limit is 25 mph. Gate B = Red via weather model.
- Aircraft: battery reserve margin is fine.
Result: No-Go because the weather gate fails, even though airspace and aircraft readiness pass.
Now change only one variable: gusts drop to 22 mph while everything else stays the same. Gate B becomes Pass, and you can Go—assuming your visual reference remains stable during takeoff and the route stays within your obstacle clearance plan.
Finally, keep the weather acceptable but change the route to pass closer to a tall structure than planned. Operational geometry becomes Red, so you either re-plan to restore clearance or cancel.
A framework like this keeps your decisions consistent under pressure. It also makes exam-style questions easier, because you’re already trained to ask: which gate fails, and what measurable condition caused it?
9.5 Practical Weather Scenario Exercises With Correct Rule Based Actions
These exercises train you to translate weather reports into Part 107 decisions. The goal is simple: if the weather makes the mission unsafe or noncompliant, you stop. If it stays compliant, you proceed with a plan that matches the conditions.
Foundational Weather Inputs You Must Convert into Decisions
Start by identifying the three things weather affects most for drones: (1) visibility for maintaining visual reference, (2) wind for control and safe ground handling, and (3) precipitation and cloud base for VFR conditions and operational risk. Then convert raw reports into operational limits.
Quick conversion mindset:
- Visibility: Can you reliably see the aircraft and any required visual references?
- Wind: Can you maintain control margins, especially during takeoff, landing, and any hover or low-speed segments?
- Ceiling and precipitation: Are you staying within VFR expectations and avoiding conditions that degrade control or visibility?
Mind Map: Weather to Rule Based Actions
Exercise 1: Visibility Drop Near the Target
You plan a daytime inspection 1 mile from the launch point. METAR shows: visibility 6 miles, wind calm, scattered clouds at 3,500 feet AGL. Ten minutes later, local observation reports haze and the target area looks washed out.
Correct rule based action: Modify or no-go based on your ability to maintain visual reference. If you cannot reliably see the aircraft and the required references, you do not continue. A common mistake is assuming “6 miles” means “good everywhere.” Weather can vary across short distances.
Best practice example: If you still have clear sight of the aircraft but the target is hard to distinguish, you can reduce exposure by shortening the mission segment and returning to a point where visual reference is stable.
Exercise 2: Wind with Gusts During Takeoff and Landing
METAR reports wind 18 knots from the west with gusts to 28 knots. Your aircraft manual lists a maximum steady wind limit of 25 knots, but gusts are the real problem because control margins shrink during transitions.
Correct rule based action: No-go unless your safe operating plan explicitly accounts for gusts and you can maintain control during takeoff, hover, and landing. If your plan depends on “it’ll probably calm down,” you’re making an assumption, not a decision.
Best practice example: If you must proceed for operational reasons, you can modify the plan by launching and landing into the wind only if your aircraft can handle gusts safely at those phases. If you cannot verify that, you stop.
Exercise 3: Ceiling and Cloud Layers Affecting VFR Expectations
Suppose METAR shows broken clouds at 1,200 feet AGL and visibility 5 miles in light rain. Your mission is planned at 300 feet AGL with a route that would place you near the cloud layer edge.
Correct rule based action: No-go if precipitation and cloud conditions reduce your ability to maintain visual reference or if the operational environment makes control unreliable. Even when your planned altitude is below a cloud layer, the edge effects and rain can reduce contrast and visibility.
Best practice example: If the rain is light and visibility remains stable, you may modify by staying farther from the cloud edge and reducing time in the affected area. If visibility degrades, you return early.
Exercise 4: Timing from TAF Trend
TAF indicates a deterioration window starting at 14:30 local time, with reduced visibility and increasing wind. Your mission window is 13:45 to 15:00.
Correct rule based action: Modify the schedule so the mission completes before the deterioration begins, or no-go if you cannot finish early enough. This is where planning beats hope: you’re not just reading weather, you’re using it to set a decision deadline.
Best practice example: Set a “turn-back time” before the forecast change. If you’re behind schedule, you return rather than pushing into the forecast deterioration.
Exercise 5: Integrated Decision Drill with a Simple Checklist
Use this sequence every time:
- Confirm visibility supports reliable visual reference for the entire mission segment.
- Confirm wind and gusts are within your safe control margins for takeoff, route, and landing.
- Confirm precipitation and cloud conditions do not degrade visibility or control.
- Decide: Go, Modify, or No-go.
Example decision: If visibility is marginal and gusts are high, you choose No-go. If visibility is solid but wind is near your limit, you choose Modify by shortening the route and tightening the return deadline.
Common Exam Traps and How to Avoid Them
- Treating a single METAR value as uniform across the entire mission area.
- Ignoring gusts because the steady wind looks acceptable.
- Continuing when you can’t maintain reliable visual reference, even if the aircraft is still “technically” within planned altitude.
Final Practice Set with Answers in Mind
For each scenario, state your action (Go, Modify, No-go) and the single weather factor that drives it. If you can’t name that factor in one sentence, you’re not ready to commit to the mission.
10. Flight Planning for Complex Missions and Mission Execution
10.1 Building a Mission Plan From Objectives to Airspace and Weather Checks
A mission plan is not a formality; it is a chain of decisions that keeps you inside the rules while still accomplishing the job. Start with the objective, then translate it into a flight profile, then verify airspace permission and weather feasibility. If any link breaks, you adjust the plan before you launch.
Define Mission Objectives into Measurable Requirements
Write the objective as a task you can verify after the flight. For example, “inspect a roof” becomes “capture 0.5-inch ground sample distance imagery of the north roof plane, with at least 70% overlap.” From there, derive operational requirements:
- Area and geometry: boundaries, target altitude above ground level, and required camera angles.
- Time and duration: how long you need to cover the area and how that fits within battery limits.
- Data quality constraints: wind limits that affect image blur, and lighting needs for consistent exposure.
Best practice: convert vague goals into numbers early. If you cannot state a number, you cannot test whether the plan still works when conditions change.
Translate Requirements into a Flight Profile
Now turn requirements into a practical route and operating parameters.
- Altitude selection: choose an altitude that meets image resolution while respecting any airspace limits and obstacle clearance.
- Route structure: decide between grid, line, or perimeter patterns based on the shape of the area.
- Speed and spacing: set speeds and camera trigger intervals so overlap targets are met.
- Failsafe behavior: confirm what the aircraft will do if control is lost, and ensure the behavior still avoids hazards.
Example: If the roof is narrow, a grid may waste battery on empty space. A perimeter plus a short interior pass can achieve coverage with less time in wind.
Perform Airspace Checks Before You Commit
Airspace verification happens before you finalize the route. The goal is to determine whether you need authorization and what constraints apply.
- Identify the operating area: use your planned takeoff point and the furthest point of flight.
- Determine controlled airspace involvement: if your area intersects controlled airspace, you must check the relevant authorization process.
- Record constraints: altitude ceilings, time limits, and any conditions tied to the authorization.
Best practice: treat airspace checks as a gate. If you cannot confirm permission and constraints, you do not “plan around it” in the air; you revise the mission on the ground.
Build the Weather Checks into the Same Decision Loop
Weather is not just “VFR or not.” It affects control, visibility, and the ability to maintain safe margins.
- Wind: check sustained wind and gusts, then compare them to your aircraft’s handling and your mission’s stability needs.
- Visibility and precipitation: ensure you can maintain the required visual references and avoid reduced control.
- Ceiling and cloud base: confirm you can operate without inadvertently entering conditions that conflict with your planned flight profile.
Example: If you need steady hover for close inspection, a gusty forecast can force a lower speed, a different route, or a postponed mission. The plan should reflect the decision you will make when gusts exceed your threshold.
Use a Go/No Go Framework That Matches Your Plan
A good plan includes explicit thresholds so you do not improvise under time pressure.
- Preflight thresholds: wind/gust limits, visibility minimums, and acceptable battery reserve.
- In-flight triggers: what you do if conditions drift, such as slowing down, shortening the route, or landing early.
Final Verification Before Launch
Before takeoff, verify that the route you intend to fly still matches the constraints you confirmed.
- Airspace vs route: confirm the planned altitude and lateral boundaries fit the authorization constraints.
- Weather vs flight profile: confirm wind and visibility still support the chosen speed, pattern, and camera settings.
- Aircraft readiness vs plan: confirm battery state, firmware status, and sensor readiness align with your expected duration.
Example: If your authorization limits altitude to a ceiling lower than your original plan, adjust the route or camera trigger settings on the ground. Do not “hope” the imagery will still meet the resolution requirement.
Integrated Example from Start to Finish
Objective: capture inspection imagery of a rectangular warehouse roof with 80% overlap and consistent angles.
- Requirements: target GSD, altitude above ground, and coverage boundaries.
- Flight profile: choose a grid pattern sized to the roof dimensions, set speed and trigger interval to meet overlap.
- Airspace: check whether the roof area intersects controlled airspace; if authorization is required, record the altitude ceiling and any time limits.
- Weather: verify wind and gusts are within your stability threshold for the camera setup; confirm visibility supports maintaining required visual reference.
- Go/No Go: if gusts exceed the threshold or visibility drops below your minimum, abort or shorten the route.
- Final verification: confirm the adjusted route stays within authorized altitude and the battery reserve supports the shortened plan.
A mission plan built this way turns “rules and conditions” into concrete decisions. You are not just preparing to fly; you are preparing to make the right call when the real world refuses to cooperate exactly as forecast.
10.2 Route Planning for Obstacles, Terrain, and Controlled Airspace Constraints
Route planning for Part 107 missions is where “it should fit” becomes “it fits, and you can explain why.” The goal is to build a route that stays within operational limits while avoiding obstacles, accounting for terrain effects, and respecting controlled airspace permissions.
Start with the Mission Geometry
Begin by translating the job into geometry: takeoff point, target area, required coverage pattern, and landing point. If you need a straight-line inspection, your route is mostly a corridor. If you need mapping, your route becomes a set of parallel passes with planned turns.
A practical habit: write down three distances before you touch airspace. First, the maximum planned horizontal distance from the takeoff point. Second, the farthest point from the aircraft during the mission. Third, the maximum altitude above ground level you intend to use. These numbers later help you sanity-check whether your route accidentally pushes into a boundary you didn’t mean to cross.
Build an Obstacle and Terrain Buffer
Obstacles aren’t just towers and trees; they include wires, rooftops, and even terrain rises that reduce your clearance margin. Use a layered buffer approach:
- Baseline clearance: choose a conservative vertical margin above the highest relevant obstacle or terrain feature along the route.
- Horizontal tolerance: assume you may drift laterally during turns, wind gusts, or GPS inaccuracies.
- Operational margin: keep extra room for contingency actions like slowing down, changing altitude, or reversing course.
Example: You plan a corridor route along a river valley. The valley floor is low, but the far bank rises into a ridge. Even if the route stays “level” relative to your starting point, the ridge can shrink your effective clearance. The fix is to either adjust altitude relative to terrain or shift the route to avoid the steep rise.
Map Controlled Airspace Constraints into the Route
Controlled airspace constraints are not abstract; they are route-shaping rules. Treat them like gates your route must pass through.
- If the route crosses controlled airspace, you need to ensure authorization covers the specific operation area and time window.
- If the route stays outside controlled airspace, you still must verify that your planned path and contingency paths do not drift into it.
A useful method is to mark three zones on your plan: the planned route, the likely drift zone (based on wind and maneuvering), and the contingency zone (where you might go if you need to land early or avoid an unexpected obstacle). If any of those zones intersect controlled airspace without permission, you adjust the route or the mission plan.
Use a Constraint-First Route Construction Workflow
Build the route in this order to avoid rework:
- Airspace first: outline the operation area and identify where controlled airspace boundaries intersect your intended path.
- Terrain and obstacles next: for each segment, identify the highest relevant obstacle/terrain feature and set an altitude that preserves clearance.
- Pattern and turns last: turns are where you can accidentally violate both obstacle clearance and airspace boundaries. Plan turn radii and ensure the aircraft remains within the clearance buffer during the maneuver.
Example: Your mapping pattern requires tight turns near a building. If you simply draw the straight passes, you may discover during the turn that the aircraft would pass closer to the building than the straight-line clearance assumed. Re-draw the pattern with wider turn arcs or shift the pattern footprint.
Mind Map: Route Planning Logic
Segment-Level Verification with Simple Rules
Do a quick “segment audit” for every leg of the route:
- Leg altitude: confirm the altitude you plan is still safe over the highest obstacle/terrain point within that leg.
- Leg lateral position: confirm the leg stays far enough from obstacles that could intrude into your drift zone.
- Turn behavior: confirm the aircraft remains within the clearance buffer and does not cross into unauthorized airspace during the turn.
Example: You plan a leg that is clear at your chosen altitude, but the next leg passes near a treeline. During the turn, the aircraft may swing toward the treeline. The fix is to either increase the clearance buffer for the turn segment or redesign the pattern so the turn occurs over a safer area.
Integrated Example: Corridor Inspection Near Controlled Airspace
You are inspecting a utility corridor that runs near a controlled airspace boundary. Your route plan includes:
- A corridor route with planned altitude set to clear the tallest nearby structure and terrain rise.
- A drift zone that accounts for wind during cross-corridor segments.
- A contingency zone that covers a safe landing path if you need to stop early.
If the planned route crosses controlled airspace, you ensure authorization covers the operation area and the time window that includes the entire corridor segment and any contingency landing path. If authorization does not cover the contingency zone, you adjust the route footprint so the contingency zone remains outside controlled airspace or you modify the mission so the contingency action stays within authorized limits.
That’s the whole trick: route planning is not just drawing a line. It’s drawing a line plus the space around it, then proving the aircraft can stay inside that space while meeting obstacle clearance and airspace permission requirements.
10.3 Preflight, Launch, and Recovery Procedures for Operational Consistency
Operational consistency is what turns “it worked last time” into “it will work today.” The goal is not to memorize a ritual; it’s to run the same decision path every flight so you catch the same kinds of errors before they become problems.
Preflight Procedures That Prevent Repeat Mistakes
Start with a preflight checklist that mirrors how the exam questions think: verify, confirm, and then commit.
-
Mission brief in plain language: State the objective, the takeoff point, the intended flight area, and the landing point. If you can’t describe the plan in one minute, you probably can’t execute it under time pressure.
-
Airspace and authorization confirmation: Verify your operating location against the authorization or waiver conditions you plan to follow. A common exam-style trap is assuming “near the boundary” means “close enough.” Treat boundaries as hard limits.
-
Aircraft condition and configuration: Confirm battery condition, prop integrity, firmware status, and that the aircraft is configured for the intended operation (for example, correct flight mode and return-to-home settings). If your return-to-home altitude is set too low for nearby obstacles, the aircraft may “return” into trouble.
-
Control link and failsafe readiness: Perform a range or link check per manufacturer guidance. Then verify what happens on link loss: does it hover, land, or return? Your plan should match the behavior you will actually see.
-
Weather and performance sanity check: Confirm wind direction and speed relative to your takeoff and landing. If gusts are near your comfort limit, plan for a slightly longer landing approach and a more conservative first leg.
-
Crew roles and communication: If you have a visual observer, define who calls traffic, who calls airspace issues, and what phrase means “stop.” Consistency matters more than clever wording.
Launch Procedures That Keep the First Minute Predictable
The first minute is where small errors compound. Use a repeatable sequence.
-
Site setup: Clear the takeoff and landing zones of loose debris. Confirm you have a safe, unobstructed path for the initial climb.
-
Final pre-launch scan: Look for people, vehicles, and obstacles that could enter the flight path during spool-up. Then check that the aircraft orientation matches your control inputs.
-
Arming and takeoff: Arm only when you are ready to lift. If you need to pause, disarm or hold according to your aircraft’s procedure rather than improvising.
-
Stabilize before moving: After takeoff, hover or climb to your planned altitude and only then start the mission route. This prevents “route planning while still correcting” behavior.
-
First-leg verification: Confirm heading, altitude, and speed match expectations. If they don’t, fix it immediately while you still have room to maneuver.
Recovery Procedures That Avoid Last-Second Surprises
Recovery is not “landing when you feel like it.” It’s a controlled end to the mission.
-
Define the landing trigger: Use a measurable trigger such as remaining battery percentage or time-on-task. Don’t wait for the aircraft to warn you.
-
Return-to-home alignment with reality: If you rely on return-to-home, ensure the route won’t cross obstacles or people. If the aircraft will return at a fixed altitude, that altitude must be safe for the site.
-
Approach planning: Choose a landing direction that accounts for wind and rotor wash. A crosswind landing is where many “it was fine until the end” incidents happen.
-
Landing and post-landing actions: After touchdown, disarm and secure the aircraft. Then document any anomalies (unusual vibrations, unexpected behavior, or control issues) while details are fresh.
Mind Map: Preflight, Launch, and Recovery Consistency
Example: Consistent Workflow for a Controlled Airspace Mission
You plan a mapping flight near a controlled airspace boundary with an authorization that limits altitude and requires staying within a defined area.
- Preflight: You confirm the authorization limits, set return-to-home altitude above the nearest obstacle, and verify wind is within your operational comfort range. You also confirm your observer knows the stop phrase.
- Launch: You take off, climb to the planned operating altitude, hover briefly to confirm heading and altitude, then begin the route inside the authorized area.
- Recovery: You set a battery trigger before the first leg ends, then return using the same route logic you used for departure. On approach, you land into the wind and disarm only after touchdown.
Example: When the Plan Meets Reality
During launch, you notice the aircraft’s climb is slower than expected due to a heavier-than-usual battery or slightly higher wind.
- You do not start the mission route early.
- You re-check altitude and speed against your expected profile.
- If you can’t reach the planned operating altitude safely within your site constraints, you abort and recover using your landing trigger logic.
Consistency means you respond to deviations with the same structured steps every time: verify, stabilize, and then decide.
10.4 In Flight Monitoring Requirements and How to Respond to Deviations
In-flight monitoring is where rules become real. Part 107 expects the remote pilot to keep the aircraft under control, maintain required visual conditions, and respond promptly when conditions change. The exam questions usually test whether you notice the change early enough and choose the action that restores compliance without creating a new hazard.
Core Monitoring Responsibilities
Start with the basics you must continuously satisfy: maintain control of the aircraft, keep the aircraft within the required operational limits, and ensure the flight remains safe for the environment around you. Practically, that means you are not “hands off” after takeoff. You actively scan for traffic, obstacles, and changes in weather or visibility.
A good monitoring rhythm is: (1) confirm aircraft state, (2) confirm environment, (3) confirm mission constraints. Aircraft state includes altitude, speed, battery level, link quality, and flight mode. Environment includes nearby people, vehicles, structures, and airspace cues you planned for. Mission constraints include the planned route, maximum distance, and any authorization or waiver limitations.
What to Monitor During the Flight
Altitude and vertical profile. Small UAS drift is common in wind. If your planned altitude is 200 ft AGL and you notice you’re creeping upward, correct early rather than waiting until you’re clearly out of tolerance.
Position relative to planned route. If you planned a straight line survey and you start deviating laterally, you may still be within altitude limits but you could be drifting toward obstacles or restricted areas.
Battery and power margin. Battery monitoring is not just about landing before empty. It’s about having enough margin to execute a safe landing or contingency if conditions worsen.
Control link and control responsiveness. If you see intermittent latency, delayed control response, or frequent failsafe triggers, treat it as a compliance and safety issue. The correct response is to reduce complexity: slow down, increase separation from hazards, and prepare to land.
Visual line of sight and situational awareness. If you lose the aircraft in clutter, glare, or terrain, you must regain the ability to see it. “I can still fly by GPS” is not a substitute for required visual conditions.
Deviation Triggers and Immediate Response Logic
A deviation is any change that threatens compliance or safety. The exam-friendly way to answer is to identify the deviation type, then choose the action that restores compliance with the least additional risk.
Deviation types you should recognize:
- Airspace or authorization mismatch: you are entering an area you were not authorized to operate in.
- Altitude or distance mismatch: you exceed planned limits.
- Weather or visibility deterioration: you can no longer maintain required visual conditions.
- Loss of control link quality: control responsiveness degrades.
- Obstacle or people proximity: you are closer than planned or than safe.
Response priorities:
- Maintain separation from hazards (people, obstacles, terrain).
- Restore compliance (altitude, route, visibility, authorization conditions).
- Stabilize the aircraft before making fine adjustments.
- Land or terminate the mission when restoration is not achievable safely.
Mind Map: Monitoring and Deviations
In-Flight Monitoring and Deviations Mind Map
Example: Altitude Drift and Route Correction
You launch for a mapping pass planned at 150 ft AGL. After two minutes, wind increases and the aircraft slowly climbs. You notice the climb while still maintaining visual contact.
Correct response: reduce throttle or adjust pitch to bring the aircraft back to the planned altitude, then re-center on the planned route. You should not continue the mission pattern while out of the intended altitude profile, because that increases the chance of obstacle conflict and violates the operational intent.
Example: Visibility Drop During a Survey
You begin a line scan in good visibility. Midway, haze thickens and the aircraft becomes harder to track against the background.
Correct response: stop complex maneuvers, move to a position where you can clearly see the aircraft, and consider terminating the mission if you cannot maintain required visual conditions. Continuing because the GPS track still looks fine is not the right approach.
Example: Control Link Degradation Near Obstacles
While approaching a building edge, you see intermittent latency and the aircraft responds more slowly to commands.
Correct response: increase separation from obstacles immediately, stabilize the aircraft, and prepare to land or return using the safest available option. If the link quality continues to worsen, mission continuation becomes the wrong choice.
Practical Checklist for In-Flight Monitoring
Before you fly the next segment, do a quick mental check: “Where am I, how high am I, what’s my battery margin, can I clearly see the aircraft, and am I still within the planned constraints?” If any answer is “no” or “not sure,” treat it as a deviation and act early.
10.5 Practical End to End Mission Plans for Commercial Drone Tasks
A strong mission plan is not a document you admire; it is a sequence of decisions you can defend. For Part 107, the goal is to connect your objective to airspace permissioning, aircraft limits, weather, and the exact way you will fly. Below is a systematic workflow you can reuse for common commercial tasks.
Step 1: Define the Task and the Operating Envelope
Start with three facts: what you will capture, where you will fly, and what “done” means. Then translate those facts into operational limits.
Example: Roof inspection for a 2-story building.
- Objective: capture high-resolution imagery of shingles and gutters.
- Area: a rectangle roughly 120 m by 60 m.
- Done: complete a set of overlapping passes covering both roof planes.
Best practice: write the envelope in measurable terms—maximum altitude, maximum distance from the takeoff point, and the planned flight path shape. If your plan says “stay close,” the exam will treat that as a problem.
Step 2: Build the Airspace Permission Plan
Treat airspace as a gate you must pass before you start thinking about camera settings. Verify whether you need LAANC authorization or a waiver.
Example: The site is near a controlled airport.
- Action: check the airspace class and the nearest controlled facility.
- If controlled airspace: request authorization for the specific altitude and time window.
- If authorization is limited: adjust the mission altitude or route to match the approved conditions.
Best practice: align your planned altitude with the authorization ceiling. If you plan 400 ft but authorization allows 300 ft, you do not have a “minor mismatch.” You have a noncompliant plan.
Step 3: Confirm Aircraft Readiness and Performance Limits
Your aircraft is part of the compliance chain. Verify that the aircraft can safely do the mission within the planned wind, weight, and battery constraints.
Example: Same roof inspection, but with a gusty afternoon.
- Action: check wind forecast and compare to your aircraft’s controllability margins.
- Confirm battery capacity supports the full route plus a buffer.
- Ensure the takeoff weight is within limits for stable hover and climb.
Best practice: plan a conservative battery reserve. If your route is 18 minutes and you have 20 minutes of usable time, you are not planning—you are hoping.
Step 4: Translate Weather into Go No Go Criteria
Weather decisions should be rule-based and measurable. Use visibility, cloud clearance, wind, and precipitation as explicit thresholds.
Example: Overcast with low ceiling.
- Action: confirm you can maintain required visibility and remain clear of clouds as applicable.
- If conditions reduce controllability or visibility: delay or modify the plan.
Best practice: write down your decision triggers before you launch. During the mission, you should be executing the plan, not inventing it.
Step 5: Plan the Flight Path and Control Strategy
Now connect the objective to how you will fly. For most commercial tasks, you need repeatable coverage and predictable turns.
Example: Roof inspection flight path.
- Use parallel passes over each roof plane.
- Keep a consistent standoff distance for image overlap.
- Plan turn points so you do not drift toward obstacles during yaw and bank.
Best practice: decide where you will be when you lose situational awareness. If you cannot describe your “safe recovery posture,” you are missing a key part of the plan.
Step 6: Preflight Briefing and Roles
If you use a visual observer, define communication and responsibilities. If you do not, your plan still needs a clear scan pattern and a defined method for obstacle awareness.
Example: One remote pilot, one visual observer.
- Pilot: maintains control and navigates the route.
- Observer: watches for traffic and obstacles, calls out deviations early.
- Communication: short, standardized calls like “traffic left,” “obstacle ahead,” “altitude stable.”
Best practice: rehearse the briefing in under five minutes. If it takes longer, it will fail under field conditions.
Step 7: Execute, Monitor, and Adjust Without Breaking Compliance
Execution is where plans either hold or collapse. Monitor altitude, speed, battery state, and authorization constraints.
Example: Mid-mission battery drops faster due to headwind.
- Action: shorten the remaining passes.
- Maintain compliance: do not exceed authorized altitude or enter restricted areas.
- End state: land with the aircraft in a controlled manner, not a last-second scramble.
Best practice: define an “abort point” tied to battery percentage or time remaining.
Step 8: Closeout and Documentation
After landing, document what matters: mission time, any deviations, and any safety-related notes. Keep records consistent with your operational requirements.
Example: You had to skip one roof plane due to wind.
- Record the reason and the exact portion not completed.
- Note any corrective action for the next attempt.
Best practice: deviations should be traceable. If you cannot explain it in one sentence, it is not documented.
Mind Map: End to End Mission Planning Flow
Example: One Mission, Two Common Variations
Variation A: Same roof inspection, but authorization allows only 250 ft.
- Adjust the standoff distance and camera settings so image quality remains acceptable at the lower altitude.
- Keep the same coverage plan shape, but recalculate pass spacing to preserve overlap.
Variation B: Same site, but you must operate closer to obstacles due to access constraints.
- Re-plan turn points to avoid swinging toward trees or power lines.
- Increase your obstacle scan frequency during turns and reduce speed to maintain control margins.
The exam often tests whether you can keep compliance while adapting the plan. Your best defense is a plan that already separates “what must not change” (authorization, limits, safety) from “what can change” (route geometry, pass spacing, timing).
11. Emergency Procedures, Lost Link, and Safety Critical Decision Making
11.1 Emergency Categories and What Triggers Immediate Action
Emergency handling under Part 107 is less about memorizing dramatic labels and more about recognizing the moment when “normal control” stops being reliable. The FAA frames emergencies around conditions that require immediate action to reduce risk to people, property, and the aircraft.
Start with a simple mental model: an emergency is any situation where you cannot reasonably maintain safe flight using your planned procedures. That includes loss of control, loss of required link, or a condition that makes collision avoidance or safe landing unlikely. Your first job is to stabilize the situation, then decide what action best reduces harm.
Emergency Categories You Should Expect on the Exam
-
Aircraft Control Problems These include situations where the aircraft is not responding as expected, is drifting uncontrollably, or is behaving in a way that suggests a control system issue. A key trigger is “control is not what it should be,” not “I feel nervous.”
-
Lost Link and Communication Failures Lost link is a classic trigger because it removes your ability to command the aircraft. If you lose control link and cannot re-establish it quickly, you must treat the situation as an emergency even if the aircraft appears stable.
-
Flyaway or Uncommanded Movement A flyaway is when the aircraft continues away from your intended area without your ability to correct it. The trigger is the combination of uncommanded movement and inability to regain effective control.
-
Collision Risk and Immediate Avoidance Needs If another aircraft, vehicle, or person enters a path where a collision is likely, the emergency is the risk itself. The trigger is not the moment of impact; it is the moment you determine that continued flight as planned is unsafe.
-
In-Flight Malfunctions That Affect Safety Examples include unexpected power loss, abnormal flight characteristics, or indications that the aircraft cannot maintain safe altitude or attitude. The trigger is a safety-relevant malfunction that prevents you from continuing the mission safely.
What Triggers Immediate Action
Immediate action means you stop debating and start reducing risk. Use three triggers that show up repeatedly in exam questions:
- Loss of ability to control the aircraft: commands do not produce expected response.
- Loss of ability to maintain separation: you cannot keep the aircraft away from hazards.
- Loss of ability to safely continue or land: the aircraft cannot be managed to a controlled outcome.
A practical way to apply this is to ask: “If I keep doing what I was doing for the next 10 seconds, does risk increase?” If yes, you act now.
Immediate Actions in a Safe Order
When an emergency triggers, your actions should follow a consistent priority order:
-
Acknowledge the emergency and stop mission tasks If you are recording data, stop focusing on the camera and focus on control and separation.
-
Reduce risk through control and positioning If you have control, maneuver to increase distance from hazards and move toward a safer landing area.
-
Use your aircraft’s emergency behavior if applicable Many aircraft have predefined behaviors for lost link. The exam expects you to follow the aircraft’s programmed response while still monitoring for opportunities to regain control.
-
Prepare for recovery or termination Recovery means returning to a safe landing zone. Termination means landing as soon as it is safe to do so, even if it ends the mission.
-
After the immediate risk is reduced, handle reporting and documentation The emergency response doesn’t end when the aircraft lands. You must be ready to document what happened and comply with reporting requirements when applicable.
Mind Map: Emergency Categories and Triggers
Example: Lost Link That Looks “Okay”
You are flying a small inspection route at a steady altitude. At 300 feet AGL, the control link drops. The aircraft continues straight for a few seconds and appears stable. The exam logic still treats this as an emergency trigger because you cannot command it. Immediate action is to treat the situation as lost link, monitor for re-linking, and be ready to respond according to the aircraft’s lost-link behavior and your available options.
Example: Collision Risk from a Ground Vehicle
A ground vehicle suddenly drives into your planned flight path near a construction site. You estimate that continuing the route will bring the aircraft into a collision course. The emergency trigger is collision risk, so immediate action is to maneuver to increase separation and move toward a safer area for continued flight or landing.
Example: Control Issue During a Low Pass
You notice the aircraft responds sluggishly to control inputs during a low pass near a structure. You cannot confidently maintain clearance. The trigger is loss of ability to control safely, so immediate action is to stop the mission plan, maneuver to reduce risk, and prioritize a safe landing rather than completing the intended shot.
Emergency categories are the labels; triggers are the moment you act. If you can identify the trigger quickly and follow a consistent priority order, you’ll answer the exam questions correctly and, more importantly, reduce real-world risk.
11.2 Lost Link, Fly Away, and Return to Home Behavior Considerations
A “lost link” is not just an inconvenience; it’s a control problem. Under Part 107, your job is to ensure the aircraft remains controllable and that your procedures reduce the chance of harm when communications degrade. Many exam questions test whether you can identify the correct priority: regain safe control, prevent uncontrolled flight, and follow the aircraft’s programmed failsafe behavior.
Foundational Concepts and What “Lost Link” Means
Lost link typically occurs when the remote controller can no longer exchange commands or telemetry with the aircraft. That can happen due to range limits, interference, antenna orientation, or obstructions. The key exam idea is that “lost link” triggers the aircraft’s failsafe logic, which may include actions like hover, land, or return-to-home.
Fly away is closely related but not identical. A fly away is when the aircraft continues moving away from the intended area due to loss of control inputs, navigation errors, or failsafe behavior that does not match the environment. In practice, fly away risk rises when GPS is weak, obstacles block sensors, or the aircraft’s return path crosses hazards.
Return to Home behavior is the aircraft’s attempt to navigate back to a predefined point, usually the takeoff location. The exam focus is not on memorizing brand-specific features; it’s on understanding what return-to-home generally does and what you must verify before flight.
Mind Map: Lost Link, Fly Away, and Return to Home
Preflight Checks That Prevent Bad Failsafe Outcomes
Before takeoff, confirm the aircraft’s failsafe settings match the mission environment. If return-to-home is enabled, verify the home point is correct and that the return altitude will clear nearby obstacles. A common mistake is assuming “return to home” automatically avoids everything. Many systems do not guarantee obstacle avoidance during failsafe; they may simply follow a route at a set altitude.
Also consider wind. If you expect strong gusts, a return-to-home climb or descent can drift enough to change the landing or pass over location. The exam-friendly reasoning is simple: failsafe behavior is deterministic, but the environment is not.
In-Flight Behavior When Link Is Lost
When you notice lost link indications, your first step is to attempt to regain control within safe limits. That means moving the controller position to improve antenna orientation and line of sight, if doing so does not increase risk to people or property. If the aircraft is already executing failsafe, you should monitor its path rather than chase it blindly.
If return-to-home is active, watch for two things: whether the aircraft is climbing to the programmed altitude and whether that altitude is sufficient for the area around the home point. If the return path would cross controlled airspace boundaries or obstacles, your preflight planning should have addressed it. The exam expects you to recognize that you cannot “fix” a poor return-to-home plan after the aircraft is already committed.
Example: Lost Link over a Parking Lot
You launch from a small lot near a warehouse. The aircraft is set to return-to-home at 120 feet AGL. During the mission, telemetry drops and the aircraft enters return-to-home. You see it climb and then head back toward the takeoff point. The warehouse roof is 90 feet high, so the return altitude provides clearance. You reposition the controller to improve link quality, and the aircraft continues its return. The correct operational takeaway is that the failsafe action was predictable and the return altitude matched the obstacle environment.
Example: Fly Away Toward a Restricted Area
You fly near a boundary and the aircraft loses link. Instead of returning, it drifts due to weak navigation inputs and wind, effectively moving away from the intended area. This is a fly-away scenario: the aircraft’s behavior is not keeping it within your planned safety envelope. The exam logic is that your preflight verification of home point quality, failsafe mode, and expected wind effects would reduce this risk.
Practical Decision Checklist
- Know your aircraft’s failsafe action for lost link.
- Confirm home point accuracy before takeoff.
- Ensure return-to-home altitude clears nearby obstacles.
- Account for wind that can shift the aircraft during failsafe.
- During the event, attempt link recovery safely and monitor the aircraft’s path.
Post-Event Considerations Without Guessing
After the aircraft lands or the link is restored, document what you observed: when the link degraded, what the aircraft did, and what conditions were present (wind, obstructions, controller position). This is not about assigning blame; it’s about identifying which part of the chain—planning, settings, or environment—failed so the next flight’s risk is lower.
11.3 Collision Avoidance Priorities and Immediate Risk Reduction Steps
Collision avoidance in Part 107 is less about memorizing a single “magic rule” and more about using a clear priority order when something feels off. The exam expects you to recognize the correct first action, then the next action, while staying within the operational limits you already planned for.
Foundational Priorities for Immediate Action
Start with the idea that collision risk is time-critical and information-limited. You may not know the other aircraft’s altitude, speed, or intent, so your job is to reduce the chance of contact using the most reliable cues you have.
Priority 1: Prevent immediate contact. If you detect a potential conflict, your first goal is to create separation. Separation can be horizontal, vertical, or both, but the practical choice depends on what you can do safely while maintaining control.
Priority 2: Maintain control and aircraft stability. A sudden maneuver that causes loss of control is not “risk reduction.” The correct action is the one that both reduces collision risk and keeps the drone controllable.
Priority 3: Avoid making the situation worse. Some actions increase uncertainty. For example, climbing into a layer of traffic you didn’t scan, or turning in a way that removes your visual reference to the conflict.
Priority 4: Resume safe operation only after the conflict is resolved. Once separation is established, you can return to the planned route or a safer loiter point.
Immediate Risk Reduction Steps You Can Apply Under Pressure
Use a short sequence so you don’t freeze when the question gets specific.
-
Confirm the cue, then commit. If you see a moving aircraft, don’t spend time re-checking settings. Confirm it’s a real contact (not a glare, not a reflection), then act.
-
Increase separation using the most available control input. If you have clear lateral space, a controlled lateral move is often the fastest way to create distance. If vertical separation is clearly available and you can maintain stable control, a climb or descent may be appropriate.
-
Prioritize smooth, predictable control. Sudden oscillations make it harder for you to track the other object and harder for anyone else to anticipate your path.
-
Re-scan the airspace around the new position. After the maneuver, look again. The conflict may have been one of multiple contacts.
-
If you cannot maintain safe separation, treat it as an emergency. The exam logic is simple: if you can’t reduce risk through normal maneuvering, you must switch to the safest available outcome, including returning to a safer location or initiating an emergency procedure consistent with your system.
Mind Map: Collision Avoidance Workflow
Example: Two Aircraft Cross Paths Near Your Route
You’re flying a mapping line at 200 feet AGL. While tracking a waypoint, you notice a small aircraft crossing your path from left to right at a higher altitude. Your first instinct might be to “hold course and hope.” The exam expects you to reduce risk immediately.
Correct approach:
- Create separation first by moving laterally away from the crossing path while maintaining stable control.
- After the lateral move, re-scan to ensure there isn’t another contact forming a new conflict.
- Only then decide whether to continue the mission line or reposition.
Why this matches the priorities: you prevent immediate contact, you keep control, and you avoid a maneuver that removes your ability to track the aircraft.
Example: Observer Calls a Conflict You Can’t See Yet
An observer reports an aircraft approaching from behind your right shoulder, but you can’t visually confirm it immediately due to sun angle and your current camera orientation.
Correct approach:
- Reduce risk by adjusting your flight path in a controlled way that increases separation from the reported direction.
- Once you can confirm the cue, refine the separation maneuver.
- Avoid abrupt control inputs that could cause loss of control or make the observer’s job harder.
Key exam idea: you don’t wait for perfect information if the observer’s cue indicates a real risk.
Example: You Realize Your Planned Route Creates a Conflict
Halfway through a corridor flight, you notice that your route will pass close to a known approach path you previously checked. The conflict is not immediate contact yet, but the spacing is shrinking.
Correct approach:
- Don’t “stick to the plan” if the plan is now unsafe.
- Adjust early to restore safe separation, then re-scan.
- If you can’t restore safe spacing without unsafe maneuvering, terminate or reposition.
Quick Self-Check for Exam Questions
When a question asks what you should do “first,” choose the action that:
- reduces collision risk immediately,
- keeps the drone controllable,
- and doesn’t increase uncertainty.
If the answer choice requires you to ignore the conflict until later, it’s usually wrong. If it requires you to maintain control while creating separation, it’s usually right. And yes, the drone can be grounded without being dramatic.
11.4 Post Incident Actions Including Reporting and Documentation Requirements
When something goes wrong, the goal is not to guess what happened. It’s to stabilize the situation, preserve evidence, and produce a clear record that matches what you actually observed. Think of post-incident actions as three tracks running in parallel: safety, documentation, and required reporting.
Foundational Priorities After an Incident
Start with immediate safety steps. If the aircraft is still in a hazardous position, keep people clear and avoid creating new risks while you assess. If there is any chance of injury, treat it as a first-order concern and follow your local emergency response procedures.
Next, secure the scene. Move only what you must to prevent further harm. If you can do so safely, note the aircraft’s position, visible damage, and any environmental factors like wind direction, lighting conditions, or obstacles near the flight path.
Finally, preserve information. Capture screenshots from the flight controller app or remote ID interface if available, record GPS time stamps shown in logs, and save any relevant telemetry files. This is the part that often gets skipped because people want to “fix it later.” Later is where details evaporate.
What to Document Systematically
A good incident record is structured enough that someone else could reconstruct the sequence without guessing. Use a consistent format and include the following categories.
- Who: Remote pilot name, any visual observers, and other involved personnel.
- What: Aircraft make/model, serial number if available, and payload details.
- Where: Exact location description, nearest landmark, and any relevant airspace context you used during planning.
- When: Date and local time, plus the time stamps from flight logs.
- How: A timeline of events from takeoff to the incident, including control inputs and system alerts.
- Conditions: Wind, visibility, precipitation, and lighting; include what you observed rather than what you assume.
- Damage or Injury: Describe what you see, not what you think caused it.
- Actions Taken: What you did immediately after the incident and why.
If you need a date, use one like 2026-02-15 for your example record below.
Reporting Triggers and Practical Threshold Thinking
Reporting requirements depend on what happened, not on how dramatic it felt. The exam logic typically points you toward the idea that certain outcomes require prompt reporting and that “no one was hurt” does not automatically mean “no report.”
In practice, your decision process should ask two questions:
- Was there injury or significant property damage? If yes, treat reporting as urgent and prioritize accurate facts.
- Was the aircraft involved in an event that indicates a safety risk beyond a minor malfunction? If yes, document thoroughly and follow the applicable reporting path.
Even when you’re not sure, your documentation should be detailed enough to support the determination.
Example Incident Record
Incident Summary: On 2026-02-15, during a Part 107 mapping flight, the aircraft experienced a sudden loss of control indications and descended rapidly before recovering partial control. No injuries were observed.
Timeline:
- 14:02:10 Takeoff completed; aircraft climbed to planned altitude.
- 14:05:33 Control link warning appeared; pilot initiated standard recovery actions.
- 14:05:41 Aircraft deviated from planned route; pilot attempted corrective inputs.
- 14:05:55 Aircraft impacted a grassy area off the intended flight line.
Location: Field near a named road intersection; coordinates recorded from flight log.
Conditions: Wind observed at takeoff; visibility clear; no precipitation.
Damage: Propeller blades bent; landing gear scuffed; payload mount intact.
Actions Taken: Maintained distance from the aircraft, ensured no bystanders approached, powered down after confirming safe conditions.
Evidence Preserved: Flight log file saved, app screenshots captured, and photographs taken from multiple angles.
This format helps you avoid the common mistake of writing a narrative that’s hard to verify.
Mind Map: Post Incident Actions and Documentation
Documentation Quality Checks
Before you submit anything, do a quick consistency pass. Confirm that your timeline matches the log time stamps, that your location description aligns with recorded coordinates, and that your “what you observed” statements are not replaced by “what you think happened.” If you used a visual observer, include their observations as separate entries so the record doesn’t blur into one blended story.
The best post-incident documentation reads like a set of verified observations with a clear sequence. It’s not meant to be persuasive; it’s meant to be accurate.
11.5 Practical Emergency Scenario Drills With Correct Compliance Responses
Emergency drills work best when they are boringly repeatable: identify the trigger, stop the bleeding, keep control, and only then sort out paperwork. The goal is not to “win” the scenario; it’s to choose the correct action sequence that matches Part 107 expectations and keeps people and property safer.
Drill 1: Lost Link with Controlled Descent Plan
Start with the foundational question: what does your aircraft do when the link drops? Before any scenario, confirm your failsafe settings (lost link behavior, return-to-home altitude, and geofence behavior if used). Then run the drill.
Scenario: You are 300 feet AGL over a field. At 2 miles out, the video freezes and telemetry degrades.
Correct compliance response:
- Maintain aircraft control if possible. If control link remains partially available, adjust to reduce risk and prepare for recovery.
- If control is not reliable, prioritize safe termination of the hazard. Use the aircraft’s programmed lost-link behavior, but ensure it does not create a new risk (for example, returning over a road full of vehicles).
- Keep the aircraft within the intended operating area when feasible. If your return path would violate airspace permissions or altitude limits, the safer move is to avoid forcing a risky manual override.
- After stabilization, land and secure. Do not keep flying “to see what happens.”
Easy example: If your RTH altitude would pass through a nearby controlled airspace boundary, you should have planned an RTH altitude that clears obstacles while staying within your permitted operating constraints.
Drill 2: Fly-Away Near Obstacles with Immediate Risk Reduction
Fly-aways are often caused by wind, GPS issues, or control input errors. The compliance-minded response is to reduce risk first, not to chase the aircraft.
Scenario: During a mapping run near a warehouse, the aircraft drifts laterally and begins climbing toward a crane.
Correct compliance response:
- Stop the mission. Treat the situation as an emergency, not a “minor deviation.”
- Use the safest available control inputs. If you can regain stable control, command a descent or lateral move that increases separation from obstacles.
- Avoid overcorrecting. Oscillation can increase collision risk, especially in gusty wind.
- If you cannot regain control quickly, prioritize separation. Let the aircraft follow its safest programmed behavior and prepare for a safe landing area.
Easy example: If the wind gusts are pushing the aircraft toward the crane, a controlled retreat to a pre-identified open area is safer than continuing the planned route.
Drill 3: Collision Avoidance with Traffic-Like Intrusion
Part 107 expects you to see and avoid. In drills, you simulate “traffic” using a spotter or a known moving object on the ground.
Scenario: A person on a nearby access road walks into your planned flight path.
Correct compliance response:
- Immediate action to increase separation. Adjust altitude or lateral position to create distance.
- Do not rely on recording. Video review is not an avoidance strategy.
- Resume only after the risk is cleared. If separation cannot be maintained, land.
Easy example: If the person keeps moving toward the aircraft’s projected path, you should change the flight path right away rather than waiting for the “next waypoint.”
Drill 4: Emergency Landing with People Nearby
This drill focuses on operational restraint. If people are near the landing zone, your job is to keep the aircraft from becoming the problem.
Scenario: You must land quickly due to a power anomaly, but the landing area has a small group within the approach path.
Correct compliance response:
- Choose the safest landing option available. If you can land without passing over people, do so.
- Use a controlled approach. Avoid steep descents that can cause drift or unstable touchdown.
- Secure the area before shutdown. Keep the aircraft stable until it is safe to approach.
Easy example: If you have a clear alternate landing spot 50 feet away, landing there is usually safer than trying to “thread the needle” over people.
Mind Map: Emergency Decision Flow for Part 107
Drill 5: Post-Incident Documentation Without Guesswork
Documentation should be factual and consistent with what you observed and what the aircraft recorded.
Scenario: After a lost-link event, the aircraft lands safely in an open area. You must prepare your incident notes.
Correct compliance response:
- Record the timeline. Note when the trigger occurred, when control was lost, and when the aircraft stabilized.
- Record conditions. Wind, visibility, and any unusual factors you observed matter because they explain why the event happened.
- Record system behavior. Include what the aircraft did in failsafe mode and whether it matched your preflight expectations.
- Record outcomes. Confirm no damage to people or property and note the landing location.
Easy example: If you wrote “video froze” at 10:14 and “telemetry recovered” at 10:16, keep those times consistent with your logs.
Drill Practice Template for Repetition
Use the same structure every time so your brain doesn’t improvise under stress.

A good drill ends with a clean landing and a clean record. If you can’t explain your actions in plain language afterward, the drill didn’t teach you the right sequence.
12. Commercial UAV Mission Compliance and Documentation for Part 107
12.1 Remote Pilot Documentation Requirements and Record Keeping Practices
Remote pilot documentation is less about collecting paper and more about proving you followed the rules when someone asks. For Part 107, the core idea is simple: you must be able to show your identity, your authorization status, and the basic facts of the operation—especially if something goes wrong.
What You Must Carry and Show
Start with the minimum “show it on request” items. During operations, you should be prepared to present:
- Your FAA remote pilot certificate (or student certificate if applicable).
- Your FAA registration for the aircraft, if required for that aircraft.
- Any required authorizations for the airspace you’re using, such as LAANC permissions or other approvals.
A practical habit: keep these items in a single, consistent location on your phone and in a backup form. If your phone dies mid-mission, you still want a quick way to verify what you can.
What You Must Keep as Records
Part 107 record keeping is often misunderstood as “save everything forever.” In reality, you’re building a defensible trail for the operations you conducted. Typical record categories include:
- Operational logs: date, location, time, aircraft ID, and a short description of the mission.
- Preflight and condition notes: what you checked and any anomalies you observed.
- Maintenance and inspection records: evidence that the aircraft was maintained and inspected according to your procedures.
- Training and currency evidence: proof you meet the requirements to act as a remote pilot.
- Incident and safety reporting documentation: notes and reports created after any required event.
A good rule of thumb is to record what you would need to answer: “What did you do, where did you do it, and what condition was the aircraft in?”
Building a Record Keeping System That Actually Works
Your system should match how you operate. If you fly one-off missions, a lightweight log is enough. If you run repeat jobs, you want templates.
Use a consistent structure for each flight entry:
- Mission header: date, location (or nearest intersection), and purpose.
- Aircraft and remote ID details: aircraft identifier and registration reference.
- Operational parameters: takeoff/landing times, maximum altitude, and whether you used an observer.
- Airspace authorization reference: the authorization ID or a note that it was not required.
- Preflight summary: battery status, airframe condition, and any deviations.
- Outcome: normal completion, any issues, and corrective actions.
This structure prevents the common failure mode: you remember the mission details, but the paperwork doesn’t.
Mind Map: Documentation and Record Keeping
Examples of Integrated Documentation
Example: One Day, Multiple Flights
You run three short flights for the same client. Instead of separate scattered notes, create one mission folder for the day and three flight entries inside it. Each entry includes the authorization reference and the preflight summary. If a question arises about one flight, you don’t have to reconstruct the day from memory.
Example: Preflight Anomaly and Corrective Action
During preflight, you notice a battery cell voltage imbalance. You do not launch. You record the observation, the corrective action (battery removed from service), and the replacement used. This turns a “near miss” into a clear, factual record of responsible decision-making.
Example: Observer Involvement
If you use a visual observer, document the observer’s role and the communication method you used. Your flight log should reflect that the observer was actively supporting situational awareness, not just standing nearby.
Record Retention and Organization Practices
Keep records organized so you can retrieve them quickly. Use consistent file naming such as YYYY-MM-DD_Location_AircraftID_MissionType. Store digital records in at least two places. For paper, keep a single binder or folder per month or per project.
If you ever need to reconstruct a mission, you want the answer in minutes, not hours. Documentation is not a chore; it’s your operational memory.
Quick Checklist for Each Flight Entry
- Certificate and authorization references available
- Flight date, location, and purpose recorded
- Aircraft identifier recorded
- Operational parameters recorded
- Preflight condition summary recorded
- Outcome and any issues recorded
- Any required incident notes recorded
12.2 Aircraft Maintenance, Inspection, and Preflight Documentation Standards
Aircraft maintenance and documentation are not separate from safe operations; they are the evidence trail that your aircraft is airworthy and your decisions are traceable. For Part 107, the exam focus is practical: what you must check, what you must record, and how documentation supports operational compliance.
Foundational Concepts for Airworthiness Evidence
Start with three ideas that show up repeatedly in questions and real missions:
- Airworthiness is a condition, not a feeling. If the aircraft is damaged, modified, or operating outside limits, it is not “good enough” because it flies.
- Inspection is a process with scope. You inspect what the manufacturer and your operating procedures require, not whatever looks interesting.
- Documentation is the proof. Records show that inspections happened, maintenance occurred when required, and recurring issues were addressed.
A simple way to remember the flow is: maintain → inspect → document → operate. If any link is missing, the chain is weaker.
Preflight Documentation Standards That Matter
Preflight documentation typically includes the aircraft’s current status and the checks you performed before takeoff. A strong standard has four parts:
- Aircraft identity and status. Record the aircraft ID or serial reference used in your program, plus the current condition (e.g., “no known defects” or “defect corrected”).
- Maintenance and inspection references. Note the date of the most recent required inspection or maintenance action and what it covered.
- Preflight inspection results. Capture the outcome of your preflight checklist items, including any anomalies.
- Operational readiness decision. Document that you determined the aircraft was safe to operate based on the inspection results.
Example: If your checklist includes propeller condition, you don’t just “look.” You record whether props are cracked, chipped, or loose, and you note the action taken if you found a problem.
Inspection Scope and What to Record
Inspections should be aligned with your manufacturer’s instructions and your internal procedures. For exam-style thinking, categorize inspection items into four buckets:
-
Structure and airframe integrity
- Look for cracks, loose fasteners, damaged landing gear, or bent arms.
- Record the specific issue and whether it was corrected.
-
Propulsion and control components
- Check prop condition, motor mounts, and control linkages.
- Record any abnormal vibration, unusual motor behavior, or calibration needs.
-
Power system and energy management
- Verify battery condition indicators, secure mounting, and connector integrity.
- Record battery serial reference and any out-of-tolerance findings.
-
Navigation, sensors, and safety systems
- Confirm firmware status per your procedure, sensor health, and failsafe behavior checks.
- Record pass/fail outcomes for required preflight checks.
A useful rule for documentation quality: write down what would change your decision. If an item is normal and routine, a brief “OK” is enough. If it affects airworthiness, it must be specific.
Maintenance Records That Support Operational Decisions
Maintenance records should show what was done, when it was done, and why it was done. Keep them consistent with your maintenance plan. Common record elements include:
- Work performed (e.g., prop replacement, firmware update per procedure, motor mount inspection)
- Date and time frame (use the date format your program standardizes)
- Parts used (at least part identifier or reference)
- Inspection follow-up (what you checked after maintenance)
- Sign-off (who performed or verified the work)
Example: On 2026-02-13, a motor was replaced due to intermittent startup. Your record should note the replacement, the post-maintenance checks completed, and the outcome. If the post-checks were skipped, the record is incomplete even if the replacement was correct.
Mind Map: Maintenance, Inspection, and Documentation
Integrated Example: From Finding a Defect to Documenting the Fix
Imagine you notice a propeller chip during preflight. A compliant workflow looks like this:
- Stop and assess. You do not launch “to see what happens.”
- Determine impact on airworthiness. A chipped prop can affect balance and thrust, so it is a defect that changes the decision.
- Correct before flight. Replace the prop per your procedure.
- Update records. In your preflight documentation, note the defect, the corrective action, and that the aircraft is now ready.
- Confirm follow-up checks. If your procedure requires a post-replacement check, record that outcome.
This pattern is exactly what exam questions test: the right action is the one that prevents operating with an unresolved condition and leaves a clear record of what changed.
Common Exam Pitfalls
- Recording only that you “checked.” The record must reflect results, especially for items that affect readiness.
- Mixing maintenance and inspection dates. Maintenance records and preflight records serve different purposes; keep them distinct.
- Ignoring unresolved defects. If a defect is found and not corrected, the aircraft is not ready, and the documentation should reflect that.
A good documentation standard is boring in the best way: it makes your decision defensible, your aircraft status clear, and your operations consistent.
12.3 Managing Operations With Contractors And Ground Teams Without Violations
When you hire contractors or coordinate a ground team, the goal is simple: everyone helps you run a Part 107-compliant operation, and nobody accidentally creates a violation. The exam tests your ability to connect roles, procedures, and communication to the rules.
Foundational Roles and Responsibility Boundaries
Under Part 107, the remote pilot in command remains responsible for the operation. Contractors can perform tasks like staging equipment, setting up a landing zone, or managing a perimeter, but they do not replace the remote pilot’s duties.
A practical way to think about it: the remote pilot owns the “flight and compliance decisions,” while the ground team owns “physical support tasks.” If a contractor starts giving flight instructions, you have a mismatch in responsibility.
Example: You hire a survey crew. The crew leader asks to “send it lower over the crowd to get better detail.” You must refuse that request unless the operation is authorized and compliant for the specific scenario. The ground crew can suggest, but you decide.
Pre-Task Planning That Prevents Rule Confusion
Before anyone touches equipment, define three things in plain language: the mission boundaries, the communication method, and the stop conditions.
- Mission boundaries: where the aircraft will operate (altitude, lateral limits, and any airspace constraints you already verified).
- Communication method: who talks to whom, and how you confirm critical calls.
- Stop conditions: what triggers an immediate pause or abort, such as unexpected people entering the area, loss of visual reference, or a change in weather.
Example: Your ground team is told, “If you see people walking into the takeoff/landing area, call ‘HOLD’ immediately.” During the mission, someone steps into the approach path. You pause, re-establish safety, and only resume when the area is clear.
Ground Team Procedures That Support Visual Line of Sight
Part 107 requires you to maintain control and comply with visual line of sight requirements. A ground team can help you keep track of the aircraft by acting as your eyes and ears, but they cannot replace your responsibility to see and manage the flight.
Best practice: assign a single observer role if you need one, and specify what they report. Use short, unambiguous calls: “Aircraft left,” “Aircraft descending,” “Obstruction ahead,” or “Visual lost.”
Example: In a wooded area, the aircraft briefly disappears behind trees. The observer calls “VISUAL LOST.” You stop maneuvering that depends on visual reference, adjust to regain sight, and avoid continuing a planned route that assumes uninterrupted visibility.
Controlled Airspace and Authorization Handling with Contractors
If your operation requires authorization (such as controlled airspace permission), contractors must not treat authorization as “their job.” Your team should understand that authorization is tied to the operation you planned.
Best practice: brief the ground team on what they can and cannot change. They may move equipment within the designated area, but they should not change the flight path, altitude, or timing without your approval.
Example: A contractor wants to “start earlier” because the client is ready. Earlier start means different airspace conditions or a different time window. You either confirm the authorization still covers the revised plan or you delay until it does.
Operations over People and Perimeter Control
If your mission involves people near the aircraft, you must ensure the operation category and safety measures match the rules. Ground teams often manage the perimeter, but they must do it in a way that supports compliance.
Best practice: define the perimeter as a physical boundary with clear entry rules. If people must be kept out, the ground team enforces it. If people are allowed under a specific operational category, the ground team still prevents unexpected changes that would move you into a different category.
Example: You plan a route that keeps the aircraft away from bystanders. Mid-mission, a contractor opens a gate “just for a minute.” That minute can turn into an unplanned people exposure. The correct response is to stop the flight, secure the boundary, and resume only when the situation matches the plan.
Communication Protocols That Reduce Human Error
Use a simple call-and-response structure for critical events. The remote pilot confirms actions; the ground team reports observations.
- “READY” confirms the area is set.
- “HOLD” pauses operations due to a safety or compliance issue.
- “RESUME” confirms the condition is corrected.
Example: The observer reports “OBSTRUCTION ENTERING.” You call “HOLD.” The ground team moves the obstruction away and calls “RESUME.” You then re-check the aircraft’s position and continue.
Mind Map: Contractor and Ground Team Management Without Violations
Case-Style Example: The “Small Change” That Becomes a Violation
You authorized a mission at a specified altitude and route. The ground team learns the client wants a different angle and asks to adjust the flight path while you’re still on site.
Correct approach: stop and re-evaluate. If the change affects airspace permission, altitude, or people exposure, you cannot treat it as a minor tweak. You either revise the plan to match the authorization and safety boundaries or you end the operation.
The exam-friendly takeaway is consistent: contractors can help you execute the plan, but only you can ensure the executed plan still matches the compliance requirements.
12.4 Privacy, Data Handling, and Operational Conduct Requirements for Missions
Privacy and data handling aren’t separate from “how you fly.” They’re part of the same operational discipline: decide what you will collect, why you will collect it, how you will protect it, and how you will behave around people and property. Part 107 expects you to operate safely and responsibly; privacy and conduct requirements help you do that in the real world where cameras and microphones turn “incidental” into “evidence.”
Privacy Fundamentals for Drone Missions
Start with the simplest question: what does your mission capture? If your aircraft can record identifiable people, license plates, private property, or interior spaces through windows, treat the mission as privacy-sensitive. A practical best practice is to define “privacy boundaries” during planning: the areas you will avoid, the angles you will not use, and the times you will not fly when people are likely to be in view.
Example: You’re inspecting a warehouse roof. If the route passes over a parking lot, plan an approach that keeps the camera pointed downward and away from faces. If you must pass near vehicles, use zoom and framing to focus on the roofline rather than the people.
Data Handling Principles from Capture to Storage
Data handling is a chain. If any link is weak, you end up with accidental disclosure, lost evidence, or compliance headaches.
- Minimize collection. Only record what you need for the deliverable. If still images are sufficient, avoid continuous video.
- Control access. Limit who can view raw footage and who can export final products.
- Protect storage. Use encrypted storage where possible, and avoid leaving files on shared devices.
- Track retention. Decide how long you keep raw data and when you delete it. Keep final deliverables longer if your contract requires it.
- Document handling steps. Keep a simple internal log: when data was captured, where it was stored, and who accessed it.
Example: After a bridge inspection, you store raw footage in a folder labeled with the mission ID, then export only the annotated stills needed for the report. You delete the raw video after the retention window unless the client requests it.
Operational Conduct Around People, Property, and Information
Operational conduct covers how you behave while flying and while handling what you collected.
- Maintain respectful distance from people and avoid hovering over individuals when you can reposition safely.
- Use observers when your mission requires it, and ensure they can help manage both safety and privacy boundaries.
- Do not use the aircraft to intrude into areas where people have a reasonable expectation of privacy.
- Treat any audio or video as sensitive. Even if you did not “intend” to capture someone, your system may.
Example: A homeowner asks you to “just get one more shot” of their backyard. If the shot would include identifiable faces or private activities, you can offer an alternative framing that captures the target feature without filming people.
Mind Map: Privacy, Data Handling, and Conduct
Integrated Example Workflow for a Privacy-Sensitive Mission
Assume you’re filming a small construction site for progress documentation.
- Planning: You confirm the camera can capture workers’ faces from your planned altitude and angle. You adjust the route to keep faces out of frame and set the camera to capture short clips only when key progress milestones occur.
- Preflight: You assign an observer to watch for both safety and privacy boundaries, including when people move into the camera’s field of view.
- During Flight: If workers step into view, you pause recording and reposition rather than continuing to film.
- After Flight: You store raw clips under the mission ID, restrict access to the project lead, and export only the time-stamped clips needed for the client.
- Retention: You delete raw clips after the agreed retention period, keeping only the exported deliverables.
This workflow keeps your mission compliant with operational expectations while also reducing the chance that you collect more personal information than necessary. It’s not about being paranoid; it’s about being precise.
Quick Checklist for Mission Execution
- Privacy boundaries defined before takeoff
- Recording type chosen based on deliverable needs
- Observer role includes privacy awareness
- Raw data stored with restricted access
- Exports limited to what the client requires
- Retention and deletion performed on schedule
- Internal log maintained for traceability
12.5 Practical Exam Review Sets With Integrated Mission Compliance Questions
This section uses short, realistic review sets that mix Part 107 compliance with the kind of decision-making the exam tests. Each set starts with a simple scenario, then forces you to apply the correct rule language to the mission details.
Review Set 1: Documentation and Operational Boundaries
Scenario: You’re hired to inspect a warehouse roof. The remote pilot will fly at 250 feet AGL, over a parking lot, and record video for the client.
Questions:
- What documentation must be available for the remote pilot during the operation?
- Which operational limit is most directly tied to the aircraft’s altitude?
- If the mission includes recording people in the parking lot, what compliance focus should guide your planning?
Integrated best-practice reasoning:
- Keep your remote pilot certificate and any required operational documentation ready before you move the aircraft. The exam often frames “available” as “you can produce it when asked,” not “you wrote it somewhere.”
- Altitude limits are tied to the operation itself, so your planning should explicitly state the planned AGL and how you will verify it.
- For privacy and data handling, the exam expects you to treat recording as part of mission conduct: plan where the camera points, minimize unnecessary capture, and ensure your workflow doesn’t create avoidable misuse.
Example: If your plan says “about 300 feet,” you’re not giving yourself a compliance target. Rewrite it as “250 feet AGL maximum,” and confirm your aircraft’s altitude display and any geofencing behavior before takeoff.
Review Set 2: Preflight, Maintenance Mindset, and Launch Readiness
Scenario: Your aircraft has a new battery installed. The last preflight inspection was completed two days ago. You’re ready to launch for a short mapping flight.
Questions:
- What must you do before flight that is not satisfied by “it flew fine last time”?
- How should you treat aircraft condition checks when a component was changed?
- What is the exam’s typical trap around “inspection” versus “preflight”?
Integrated best-practice reasoning:
- Preflight is about current condition, not historical luck. The exam likes answers that separate “maintenance records” from “before you fly, verify the aircraft is safe to operate.”
- A battery change means you should verify secure installation, correct connection, and expected behavior during startup.
- The trap is choosing an answer that only references paperwork. The correct approach includes both: confirm documentation where required and perform the operational checks that ensure safe flight.
Example: If you see a loose battery latch during preflight, you don’t “send it for a quick test.” You fix the issue first, because the exam assumes you will not launch with known unsafe conditions.
Review Set 3: Operations over People and Risk Controls
Scenario: You plan to film a small event. The flight path will pass near spectators, but you intend to keep the aircraft away from them.
Questions:
- What determines whether the operation is considered over people?
- If people are present under the flight path, what compliance category logic should you apply?
- What should you do if your plan changes and people end up closer than expected?
Integrated best-practice reasoning:
- “Over people” is about the aircraft’s position relative to people during the operation, not your intent. The exam often rewards answers that focus on the actual flight geometry.
- If people are under the flight path, you must treat the mission as over people and apply the correct compliance requirements.
- If the environment changes, you adjust the operation to remain compliant. That can mean rerouting, delaying, or canceling.
Example: If you planned a route that clears the crowd but wind pushes you laterally, you must treat that as a compliance risk. The correct move is to stop and re-evaluate rather than hope the next minute stays the same.
Review Set 4: Integrated Scenario: One Mission, Multiple Compliance Checks
Scenario: A contractor requests a night inspection of a billboard. The flight will be in controlled airspace. You will use a visual observer.
Questions:
- What two compliance areas must be verified before you even consider takeoff?
- What does the observer role require for effective compliance?
- How do you handle authorization constraints if the airspace permission is limited?
Integrated best-practice reasoning:
- Before takeoff, verify authorization/airspace permission and confirm night operational readiness. The exam expects you to treat these as gating items.
- An observer supports situational awareness, but compliance depends on clear communication and defined responsibilities.
- If authorization limits your altitude, time, or location, your mission plan must match those limits exactly. “Close enough” is not a compliance strategy.
Example: If authorization allows a specific time window, you schedule your launch so the flight occurs within that window. If you’re late, you don’t “stretch” the operation.
Mind Map: Mission Compliance Checklist Flow
Mind Map: Exam Question Strategy for Compliance
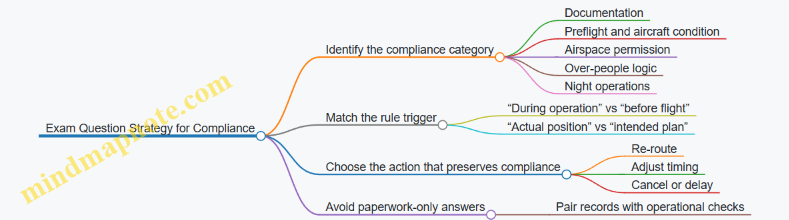
Case-Style Wrap-Up Questions
- Which compliance item is most likely to be tested as a “before flight” requirement: authorization, preflight checks, or post-flight reporting?
- If your plan says “no people under the path” but spectators drift into the area, what is the most exam-consistent response?
- When authorization includes constraints, what should your mission plan do with those constraints: ignore them, approximate them, or align exactly?