Personal Finance for Millennials in the Digital Economy
Chapter 1: Foundations of Personal Finance in the Digital Age
1.1 Understanding Personal Finance: Core Concepts and Terminology
Personal finance is the management of your money and financial decisions throughout your life. It covers everything from earning and saving to spending, investing, and protecting your assets. The goal is to make informed choices that help you meet your financial needs and goals.
Core Concepts
- Income: The money you receive, usually from work, but also from investments, gifts, or side hustles.
- Expenses: The money you spend on goods, services, bills, and other costs.
- Saving: Setting aside a portion of your income for future use rather than spending it immediately.
- Investing: Using money to buy assets like stocks or bonds with the expectation that they will generate returns over time.
- Debt: Money you owe to others, often with interest, such as loans or credit card balances.
- Budgeting: Planning how to allocate your income across expenses, savings, and debt repayment.
- Net Worth: The difference between what you own (assets) and what you owe (liabilities).
Mind Map: Personal Finance Basics
Examples to Illustrate Concepts
-
Income: If you work a job earning $3,000 a month and also freelance on weekends for $500, your total monthly income is $3,500.
-
Expenses: Your rent might be $1,000 monthly (fixed), groceries $300 (variable), and streaming subscriptions $30 (variable).
-
Saving: If you decide to save $500 each month into a savings account, you’re building a financial cushion for unexpected costs.
-
Investing: Buying shares of a company means you own a small part of it. If the company grows, the value of your shares may increase.
-
Debt: Using a credit card for a $200 purchase means you owe that amount to the card issuer, usually with interest if not paid off promptly.
-
Budgeting: Allocating $1,000 for rent, $500 for food, $500 for savings, and $1,500 for other expenses ensures your income matches your spending and saving goals.
-
Net Worth: If you own a car worth $10,000 and have $5,000 in savings but owe $7,000 on a student loan, your net worth is $8,000 ($10,000 + $5,000 - $7,000).
Important Terminology
- Assets: Anything you own with value, like cash, property, or investments.
- Liabilities: Debts or obligations you owe.
- Liquidity: How quickly an asset can be converted to cash without losing value.
- Interest Rate: The cost of borrowing money or the return on investment, expressed as a percentage.
- Inflation: The rate at which prices for goods and services rise, reducing purchasing power.
Mind Map: Financial Terms
Understanding these basics sets the stage for managing your money effectively. Each term and concept connects to practical decisions you’ll make daily, from how you spend to how you plan for the future.
1.2 The Digital Economy: How It Shapes Millennial Finances
The digital economy refers to the way economic activities are conducted through digital technologies, primarily the internet. For millennials, who grew up alongside this shift, the digital economy shapes how they earn, spend, save, and invest money. Understanding this influence is essential for managing personal finances effectively.
Key Features of the Digital Economy Impacting Millennial Finances
Income: New Ways to Earn
The digital economy has expanded income opportunities beyond traditional 9-to-5 jobs. Gig work platforms like Uber, Fiverr, or TaskRabbit allow millennials to earn on their own schedules. Remote work, enabled by digital communication tools, has become common, offering flexibility but sometimes irregular pay.
Example: Sarah, a graphic designer, supplements her full-time job by freelancing on an online platform. She tracks her freelance income separately using a budgeting app, which helps her manage taxes and savings.
Spending: Convenience and Complexity
Online shopping and mobile payments make spending easier but can also lead to less visible expenses. Subscription services for streaming, software, or meal kits often renew automatically, quietly adding to monthly costs.
Example: Jake noticed his monthly expenses were higher than expected. After reviewing his bank statements, he found several forgotten subscriptions. Canceling unused services freed up $30 monthly, which he redirected to savings.
Saving and Investing: Technology-Driven Access
Digital tools have lowered barriers to saving and investing. Robo-advisors automate portfolio management with low fees, while micro-investing apps let users invest small amounts regularly. Cryptocurrencies offer alternative investment options, though they come with higher risk.
Example: Mia started investing $5 a day through a micro-investing app that rounds up her purchases and invests the spare change. Over time, this small habit grew into a meaningful portfolio.
Debt: New Sources and Management Tools
Online lending platforms and peer-to-peer loans provide alternatives to traditional banks but require careful evaluation. Credit card usage remains prevalent, with digital tools helping track balances and payments.
Example: Tom consolidated his credit card debt using an online personal loan with a lower interest rate. He used an app to set payment reminders, avoiding late fees and improving his credit score.
Financial Management: Automation and Integration
Budgeting apps, automated bill payments, and digital wallets help millennials manage their finances efficiently. These tools provide real-time tracking and alerts, reducing the chance of missed payments or overspending.
Example: Emily uses a budgeting app that links to all her accounts, categorizes expenses automatically, and sends alerts when she approaches her budget limits.
Summary Mind Map
In short, the digital economy offers millennials a range of financial tools and opportunities that require new habits and awareness. Recognizing how income sources, spending patterns, saving options, debt management, and financial tools have evolved helps in making informed decisions and building financial stability.
1.3 Setting Financial Goals: Short-term, Mid-term, and Long-term
Setting financial goals is a practical way to give your money a purpose. It helps you prioritize spending, saving, and investing by breaking down your financial ambitions into manageable chunks. These goals generally fall into three categories: short-term, mid-term, and long-term. Each has its own timeline, focus, and strategies.
Short-term Goals
Short-term goals are objectives you want to achieve within a year or less. These often include building an emergency fund, paying off small debts, or saving for a vacation. Because the timeline is brief, these goals usually require conservative approaches to avoid risk.
Example: You decide to save $1,200 for a new laptop within 12 months. That means setting aside $100 each month. Using a high-yield savings account or a dedicated savings app can help you track and automate this.
Mid-term Goals
Mid-term goals span from one to five years. They often involve larger purchases or financial milestones, such as buying a car, funding a wedding, or accumulating a down payment for a home. These goals require a balance between growth and safety.
Example: You want to save $15,000 for a car down payment in three years. This breaks down to about $417 per month. You might choose a mix of savings accounts and low-risk investments to reach this target.
Long-term Goals
Long-term goals extend beyond five years and usually focus on retirement, paying off a mortgage, or funding a child’s education. These goals benefit from compound growth and typically involve investing in stocks, bonds, or retirement accounts.
Example: Planning to retire at 65, you start investing $300 monthly in a retirement account at age 30. Over 35 years, this habit can grow substantially thanks to compound interest.
Mind Map: Financial Goals Overview
Mind Map: Setting a Short-term Goal Example
Mind Map: Mid-term Goal Planning
Mind Map: Long-term Retirement Goal
Tips for Setting Effective Financial Goals
- Be Specific: Instead of “save money,” say “save $5,000 for a vacation by December.”
- Make Goals Measurable: Assign numbers and deadlines.
- Keep Goals Realistic: Align your goals with your income and expenses.
- Break Down Large Goals: Divide big goals into smaller, actionable steps.
- Review and Adjust: Life changes, so revisit goals regularly.
Practical Example: Combining Goals
Suppose you want to build an emergency fund of $3,000 (short-term), save $10,000 for a wedding in 2 years (mid-term), and start investing for retirement (long-term). You might allocate your monthly savings like this:
- Emergency fund: $250/month (completes in 12 months)
- Wedding fund: $417/month (over 24 months)
- Retirement: $200/month (ongoing)
By automating these contributions and tracking progress monthly, you maintain clarity and motivation.
Setting financial goals with clear timelines and actionable steps turns abstract money management into a structured plan. It helps you stay focused, measure progress, and adapt as your priorities evolve.
1.4 Budgeting Basics: Creating a Digital-Friendly Budget
Budgeting is the cornerstone of personal finance. It’s the process of planning how you allocate your income to cover expenses, save, and invest. A digital-friendly budget means using tools and methods that fit into your tech-driven lifestyle, making it easier to track and adjust your finances in real time.
Why Budget Digitally?
Managing money with pen and paper or spreadsheets can work, but digital tools offer automation, reminders, and instant updates. They reduce manual errors and help you see the bigger picture quickly.
Core Components of a Digital Budget
- Income: Your total take-home pay, side gigs, freelance earnings, and any other cash inflows.
- Fixed Expenses: Regular, predictable bills like rent, subscriptions, and loan payments.
- Variable Expenses: Costs that fluctuate, such as groceries, dining out, and entertainment.
- Savings & Investments: Money set aside for emergencies, goals, or growth.
- Debt Payments: Any repayments toward credit cards, student loans, or other debts.
Step-by-Step Guide to Creating Your Digital Budget
-
List All Income Sources
- Include your salary after taxes, freelance income, and any passive income.
-
Track Your Expenses for a Month
- Use a budgeting app or bank statements to categorize spending.
-
Set Spending Limits
- Assign realistic amounts for each category based on past spending and goals.
-
Automate Where Possible
- Set up automatic transfers to savings and bill payments.
-
Review and Adjust Weekly
- Check your app or tool to see if you’re within limits and tweak as needed.
Mind Map: Digital Budget Structure
Example: Creating a Simple Monthly Budget Using a Mobile App
Imagine you earn $3,500 monthly after taxes. You use a budgeting app that connects to your bank accounts and categorizes transactions automatically.
- Income: $3,500
- Fixed Expenses:
- Rent: $1,200
- Utilities: $150
- Subscriptions (streaming, software): $50
- Variable Expenses:
- Groceries: $300
- Dining Out: $150
- Entertainment: $100
- Savings:
- Emergency Fund: $300
- Retirement Account: $200
- Debt Payments:
- Credit Card: $200
The app shows you spending trends and alerts if you approach your dining out limit. You set an automatic transfer of $300 to your emergency fund right after payday. Weekly reviews help you notice you’re consistently under budget on entertainment, so you reallocate $50 to savings.
Mind Map: Monthly Budget Example
Tips for Maintaining a Digital Budget
- Keep Categories Simple: Too many categories can make tracking tedious.
- Use Notifications: Let your app remind you of upcoming bills or overspending.
- Regularly Sync Accounts: Ensure your app has the latest data.
- Adjust for Irregular Expenses: Account for quarterly bills or annual subscriptions by setting aside monthly amounts.
A digital-friendly budget is less about strict rules and more about clear visibility and flexibility. It helps you make informed choices without guesswork, fitting your financial life into your digital routine.
1.5 Practical Example: Building Your First Budget Using Mobile Apps
Building your first budget using mobile apps is a practical step toward gaining control over your finances. The process involves understanding your income, tracking your expenses, setting spending limits, and reviewing your progress regularly. Mobile apps make these tasks easier by automating calculations and providing visual summaries. Let’s break down the process with clear steps and examples.
Step 1: Gather Your Financial Information
Before opening any app, collect your financial details:
- Monthly income (salary, freelance, side gigs)
- Fixed expenses (rent, utilities, subscriptions)
- Variable expenses (groceries, entertainment, dining out)
- Debt payments (credit cards, loans)
- Savings goals
Step 2: Choose a Budgeting App
Select an app that suits your needs. Most apps allow you to link bank accounts or enter transactions manually. For this example, imagine using a generic app called “BudgetBuddy”.
Step 3: Set Up Income and Expense Categories
Organize your finances into categories. Here’s a simple mind map to visualize this:
Step 4: Input Your Income and Expenses
Enter your monthly income and fixed expenses first. For example:
- Income: $3,500 (salary), $500 (freelance)
- Fixed Expenses: $1,200 (rent), $150 (utilities), $50 (streaming services)
Next, estimate variable expenses based on past months or bank statements. For instance:
- Groceries: $300
- Transportation: $100
- Entertainment: $150
- Dining Out: $100
Step 5: Set Spending Limits
Using the app, assign limits to each category. For example, you might set:
- Groceries: $350
- Entertainment: $150
- Dining Out: $100
The app will track your spending against these limits.
Step 6: Track Your Spending
Throughout the month, log your expenses. Many apps sync with your bank to do this automatically. For example, if you spend $40 on groceries, the app deducts this from your $350 limit.
Step 7: Review and Adjust
At the end of the month, review your spending. Did you overspend on dining out? Did you save more than expected? Adjust your budget accordingly.
Practical Example Walkthrough
Imagine Sarah, a millennial starting her budget:
- Sarah earns $4,000 monthly.
- Fixed expenses: $1,500 rent, $200 utilities, $60 subscriptions.
- She estimates $400 for groceries, $150 for transportation, $200 for entertainment, and $150 for dining out.
- She sets a savings goal of $500 per month.
Sarah inputs these into BudgetBuddy. Mid-month, she notices she’s spent $180 on dining out, exceeding her $150 limit. She decides to cook more at home for the rest of the month to stay on track.
Mind Map: Sarah’s Budget Overview
Tips for Success
- Be realistic: Overly strict budgets can be discouraging.
- Use notifications: Let the app alert you when nearing limits.
- Update regularly: Adjust categories as your spending habits change.
- Include irregular expenses: Plan for quarterly bills or annual subscriptions.
By following these steps and using a budgeting app, you create a clear picture of your finances. This clarity helps you make informed decisions, reduce unnecessary spending, and build savings steadily.
Chapter 2: Income Management and Maximizing Earnings
2.1 Multiple Income Streams: Side Hustles and Gig Economy Opportunities
In today’s digital economy, relying on a single source of income is less common than it used to be. Millennials often pursue multiple income streams to increase financial stability, pay down debt faster, or save for specific goals. This section breaks down practical ways to generate additional income through side hustles and gig work, with clear examples and mind maps to organize ideas.
What Are Multiple Income Streams?
Multiple income streams mean earning money from more than one source. This could be a full-time job plus freelance work, or rental income alongside an online store. The goal is to diversify earnings so that if one source slows down, others can help maintain cash flow.
Why Consider Side Hustles and Gig Work?
- Flexibility: Many gigs allow you to choose when and how much you work.
- Skill Development: Side jobs can build skills useful for your main career or future ventures.
- Extra Cash: Additional income can accelerate savings or debt repayment.
Categories of Side Hustles and Gig Opportunities
Multiple Income Streams Mind Map
Examples of Side Hustles
-
Freelance Writing: Sarah, a marketing professional, writes blog posts on weekends. She uses platforms like Upwork to find clients. Her side income adds $500 monthly, which she directs entirely to her emergency fund.
-
Ride-Sharing Driver: Mike drives for a ride-sharing service two evenings a week. He enjoys the flexibility and uses the extra income to pay down credit card debt faster.
-
Online Store Owner: Priya sells handmade jewelry on Etsy. She started small, reinvested profits, and now earns a steady $800 monthly, supplementing her main income.
-
Task-Based Gig Worker: Alex uses TaskRabbit to help with moving and home repairs. This side hustle fits his schedule and pays well for the hours he puts in.
Organizing Your Side Hustle Ideas
Side Hustle Planning Mind Map
Practical Steps to Start a Side Hustle
- Assess Your Skills and Interests: Choose something you can do well and won’t dread.
- Research Platforms: Find where your services or products fit best.
- Set Clear Goals: Define how much time and money you want to invest and earn.
- Start Small: Test the waters before scaling up.
- Track Earnings and Expenses: Keep records for budgeting and taxes.
Example: Starting a Freelance Graphic Design Side Hustle
- Step 1: Maria identifies her skill in graphic design.
- Step 2: She creates profiles on Fiverr and Upwork.
- Step 3: She sets a goal to earn $300/month.
- Step 4: Maria dedicates 5 hours a week to client projects.
- Step 5: She tracks income and expenses using a spreadsheet.
This approach helps Maria supplement her income without overwhelming her schedule.
Managing Multiple Income Streams
Balancing several income sources requires organization:
- Use calendar reminders for deadlines.
- Automate invoicing and payments where possible.
- Separate bank accounts or budgeting categories for each stream.
- Regularly review profitability and time investment.
Summary
Multiple income streams through side hustles and gig work offer practical ways for millennials to improve financial resilience. By evaluating skills, managing time, and using digital platforms, it’s possible to create meaningful supplementary income. The key is to start with manageable goals and maintain clear records to ensure the effort translates into financial progress.
2.2 Negotiating Salary and Benefits in a Digital Workplace
Negotiating salary and benefits in a digital workplace requires a clear understanding of your value, the company’s compensation structure, and the unique aspects of remote or hybrid work environments. Unlike traditional office settings, digital workplaces often offer more flexibility but may also have less transparent pay scales. Approaching negotiations with preparation and a strategic mindset is essential.
Understanding Your Value
Start by assessing your skills, experience, and the market demand for your role. Use salary data from reputable sources to benchmark your expected pay. Consider the full compensation package, including benefits, bonuses, and non-monetary perks.
Key Components to Negotiate
- Base Salary: The fixed annual amount.
- Bonuses: Performance-based or signing bonuses.
- Equity: Stock options or shares, common in startups.
- Benefits: Health insurance, retirement plans, paid time off.
- Work Flexibility: Remote work options, flexible hours.
- Professional Development: Budget for courses, conferences.
Mind Map: Negotiation Preparation
Timing and Approach
Initiate salary discussions after receiving a job offer or during performance reviews. Express enthusiasm for the role before discussing compensation. Use clear, confident language and provide evidence for your requests.
Example: Salary Negotiation Email
Dear [Hiring Manager],
Thank you for the offer to join [Company]. I’m excited about the opportunity and believe my skills in [specific area] will add value. Based on my research and experience, I was expecting a salary in the range of [$X - $Y]. Is there flexibility to discuss this?
I’m also interested in understanding more about the benefits package and opportunities for professional development.
Looking forward to your thoughts.
Best regards,
[Your Name]
Negotiating Benefits
In digital workplaces, benefits can be as important as salary. For example, remote work stipends, home office equipment budgets, or wellness programs can add significant value.
Mind Map: Benefits Negotiation
Example: Negotiating Remote Work Stipend
If the company does not offer a remote work stipend, you might say:
I understand the company supports remote work. To maintain productivity, I’d like to discuss a monthly stipend to cover internet and office supplies. Would this be possible?
Handling Counteroffers
If the employer cannot meet your salary request, explore other areas for negotiation. This might include additional vacation days, flexible hours, or a signing bonus.
Mind Map: Negotiation Alternatives
Final Tips
- Keep the tone professional and collaborative.
- Avoid ultimatums; focus on mutual benefit.
- Document agreed terms in writing.
- Practice your negotiation conversation to build confidence.
Negotiating salary and benefits in a digital workplace is about balancing your needs with the company’s constraints. Clear communication, backed by data and a willingness to find common ground, leads to better outcomes.
2.3 Managing Freelance and Contract Income: Taxes and Record-Keeping
Freelance and contract work offer flexibility but come with responsibilities, especially around taxes and record-keeping. Unlike traditional employment, taxes are not automatically withheld from your payments. This means you must track income, expenses, and tax obligations yourself.
Understanding Your Tax Obligations
When you work as a freelancer or contractor, you are considered self-employed. This status changes how you handle taxes:
- Self-Employment Tax: Covers Social Security and Medicare contributions, typically around 15.3% of your net earnings.
- Income Tax: You pay this based on your total taxable income, including freelance earnings.
- Estimated Taxes: Since taxes aren’t withheld, you usually pay quarterly estimated taxes to avoid penalties.
Mind Map: Tax Responsibilities for Freelancers
Keeping Accurate Records
Good record-keeping simplifies tax filing and helps track your business health. Key practices include:
- Separate Bank Account: Use a dedicated account for freelance income and expenses.
- Track All Income: Record every payment received, noting the client, date, and amount.
- Document Expenses: Save receipts and invoices for deductible costs like software subscriptions, office supplies, and travel.
- Use Accounting Software: Tools like QuickBooks, FreshBooks, or even spreadsheets can organize your finances.
Mind Map: Record-Keeping Essentials
Example: Tracking Income and Expenses
Imagine you completed three projects in a month:
- Project A: $1,200 paid via PayPal on March 5
- Project B: $800 paid by bank transfer on March 15
- Project C: $500 paid in cash on March 28
You record each payment in your accounting software, tagging them with client names and payment dates. You also log expenses:
- Software subscription: $50
- Office supplies: $30
- Internet bill (portion used for work): $40
At month-end, you review your records to calculate net income ($2,500 income minus $120 expenses = $2,380 net).
Managing Estimated Taxes
Since taxes aren’t withheld, you pay estimated taxes quarterly. Calculate these by:
- Estimating your annual income.
- Subtracting expected deductions.
- Applying tax rates to estimate your tax liability.
- Dividing by four to get quarterly payments.
Paying on time avoids penalties. The IRS deadlines are typically April 15, June 15, September 15, and January 15 of the following year.
Example: Calculating Estimated Taxes
If you expect $30,000 net income and estimate $4,500 in taxes for the year, you’d pay about $1,125 each quarter. Adjust payments if your income fluctuates.
Organizing Tax Documents
Keep these documents handy:
- 1099 forms from clients (if applicable)
- Receipts and invoices
- Bank statements
- Records of estimated tax payments
Organizing these documents digitally or physically will make tax season less stressful.
Summary
Managing freelance income requires discipline in tracking payments and expenses, understanding tax obligations, and making timely estimated tax payments. Using dedicated tools and maintaining organized records will save time and reduce errors when filing taxes.
2.4 Practical Example: Using Online Platforms to Track and Optimize Income
Tracking and optimizing income is a key step toward financial clarity and growth, especially for millennials juggling multiple income streams. Online platforms simplify this process by consolidating data, automating calculations, and offering insights that help you make informed decisions. This section walks through practical ways to use these tools effectively.
Why Use Online Platforms?
Managing income manually can be tedious and error-prone. Online platforms help by:
- Aggregating income from various sources (salary, freelance gigs, side hustles)
- Categorizing income types automatically
- Providing visual summaries and reports
- Offering alerts for payment dates or discrepancies
Mind Map: Income Tracking Workflow
Step 1: Consolidate Income Sources
Start by linking your bank accounts, payment apps (like PayPal or Venmo), and freelance platforms to a single online platform or app. This centralizes your income data, reducing the need to check multiple places.
Example: Sarah works a full-time job and freelances on weekends. She connects her payroll account and freelance platform to an income tracking app. The app automatically imports her payments, tagging them as “Salary” and “Freelance” respectively.
Step 2: Categorize Income
Most platforms auto-categorize income, but you can customize categories to fit your situation. Clear categories help you understand which sources contribute most.
Example: Sarah adds a new category called “Passive Income” for occasional earnings from a blog. This helps her see how much she earns beyond active work.
Step 3: Analyze Income Patterns
Use the platform’s reports to identify trends. Look for:
- Which income source is most consistent?
- Are there seasonal fluctuations?
- Are payments arriving on time?
Example: Sarah notices her freelance income spikes in December but dips in summer. She plans to save more during peak months to cover slower periods.
Mind Map: Income Optimization Focus Areas
Step 4: Optimize Income Streams
With insights in hand, you can take steps to improve your income situation:
- Follow up on late payments
- Negotiate higher rates for freelance work
- Explore opportunities to diversify income
- Automate transfers to savings or investment accounts
Example: Sarah sets up automatic reminders for clients who pay late and schedules monthly transfers of 20% of her freelance income into a high-yield savings account.
Step 5: Monitor and Adjust Regularly
Income tracking is not a one-time task. Schedule monthly reviews to adjust categories, update income sources, and refine your optimization strategies.
Example: After three months, Sarah realizes her blog income is growing steadily. She creates a new budget line for reinvesting in blog content to support this growth.
Summary Table: Sample Income Tracking Data
| Source | Monthly Income | Payment Frequency | Notes |
|---|---|---|---|
| Full-time Job | $3,500 | Biweekly | Stable, direct deposit |
| Freelance | $800 | Variable | Peaks in December |
| Blog | $150 | Monthly | Growing passive income |
Using online platforms to track and optimize income provides clarity and control. It helps you spot opportunities, avoid surprises, and make your money work smarter for you.
2.5 Automating Income Management: Direct Deposits and Digital Wallets
Automating income management simplifies how you handle money coming in, reducing manual effort and minimizing errors. Two key tools for this are direct deposits and digital wallets. Both help ensure your earnings land where you want them, on time, and ready for your next financial move.
Direct Deposits
Direct deposit means your paycheck or other income is electronically transferred straight into your bank account. This eliminates the need to physically deposit checks, speeds up access to funds, and reduces the risk of lost or stolen checks.
Mind Map: Direct Deposit Components
Example: Sarah works at a tech startup and submits her bank details to HR. Every two weeks, her salary is deposited directly into her checking account. She doesn’t have to visit the bank or wait for a physical check to clear.
Digital Wallets
Digital wallets store your payment information and can receive money digitally. They often link to your bank account or credit cards, allowing quick transfers, payments, and sometimes even holding balances.
Mind Map: Digital Wallet Features
Example: Alex freelances and receives payments via PayPal. His clients send money directly to his PayPal wallet, which he can either use for online purchases or transfer to his bank account with a few taps.
Combining Direct Deposit and Digital Wallets
You can set up your paycheck to go directly into your bank account and then automate transfers to your digital wallet for specific uses, like budgeting for entertainment or paying freelancers.
Mind Map: Automating Income Flow
Example: Jamie’s paycheck is deposited into her checking account. She has set up an automatic weekly transfer of $100 to her digital wallet for online shopping and $300 monthly to her savings account. This way, she doesn’t have to think about moving money manually.
Benefits of Automating Income Management
- Time-saving: No need to manually deposit checks or transfer funds.
- Consistency: Regular transfers help maintain budgets and savings goals.
- Security: Reduces handling of physical checks and cash.
- Tracking: Electronic records make it easier to monitor income and spending.
Practical Tips
- Verify your bank details carefully before setting up direct deposit.
- Use digital wallets that offer strong security features.
- Schedule transfers to align with your bill due dates and spending habits.
- Regularly review automated transfers to ensure they still match your financial goals.
Automating income management is a straightforward way to keep your finances organized and reduce the mental load of managing incoming money. Setting up direct deposits and linking digital wallets can create a smooth, reliable flow from paycheck to spending and saving.
Chapter 3: Smart Budgeting and Expense Tracking
3.1 Expense Categorization: Needs vs Wants in the Digital Context
Understanding the difference between needs and wants is a fundamental step in managing your expenses effectively. This distinction becomes particularly important in the digital economy, where subscription services, online shopping, and instant access to goods and services can blur the lines.
What Are Needs?
Needs are expenses essential for your basic survival and well-being. These include housing, utilities, groceries, healthcare, transportation, and minimum debt payments. In the digital world, needs might also include internet service, which is often necessary for work or education.
What Are Wants?
Wants are expenses that enhance your lifestyle but are not essential. Examples include streaming subscriptions beyond basic entertainment, dining out, premium app features, or the latest gadgets. Wants are discretionary and can be adjusted or eliminated without threatening your basic needs.
Mind Map: Expense Categorization
Digital Context Nuances
Some expenses may appear as wants but can have elements of needs depending on your situation. For example, a smartphone is often a want, but if your job requires constant connectivity, it leans toward a need. Similarly, a basic streaming service might be a want, but if it provides educational content or professional development, it could be considered a need.
Example: Categorizing Streaming Services
- Need: A subscription to an online course platform required for your job skills.
- Want: Multiple entertainment streaming subscriptions used primarily for leisure.
Practical Example: Monthly Expense Breakdown
Imagine you spend $300 on various subscriptions monthly. Here’s how you might categorize them:
| Subscription | Cost | Category | Reasoning |
|---|---|---|---|
| Internet Service | $60 | Need | Required for work and communication |
| Basic Streaming (e.g., Netflix) | $15 | Want | Entertainment, not essential |
| Online Learning Platform | $30 | Need | Job-related skill development |
| Premium Music Service | $10 | Want | Leisure activity |
| Cloud Storage | $20 | Need | Backup for work and personal documents |
This breakdown helps you see where you might trim wants to save money without affecting essentials.
Mind Map: Decision Process for Categorizing Expenses
Tips for Managing Needs and Wants
- Track your expenses: Use budgeting apps to categorize and monitor spending.
- Review subscriptions regularly: Cancel unused or unnecessary services.
- Set spending limits: Allocate a fixed amount for wants to avoid overspending.
- Prioritize needs: Ensure all essential expenses are covered before spending on wants.
By clearly separating needs from wants, you gain control over your spending habits and can make informed decisions that support your financial goals.
3.2 Leveraging Budgeting Apps: Features and Best Practices
Budgeting apps have become essential tools for managing personal finances, especially for millennials navigating the digital economy. These apps simplify tracking income and expenses, categorize spending automatically, and provide insights that help users make informed decisions. Understanding the core features and best practices for using budgeting apps can make the difference between a cluttered financial mess and a clear, actionable plan.
Key Features of Budgeting Apps
- Automatic Expense Tracking: Many apps link directly to bank accounts and credit cards, pulling transactions in real time. This reduces manual entry and helps maintain up-to-date records.
- Categorization: Transactions are sorted into categories like groceries, rent, entertainment, and utilities. Some apps allow customization of categories to fit personal spending habits.
- Budget Creation and Alerts: Users can set spending limits for each category. The app notifies when spending approaches or exceeds these limits.
- Goal Setting: Apps often include features to set savings goals or debt repayment targets, tracking progress visually.
- Reports and Insights: Visual charts and summaries help users understand where their money goes over days, weeks, or months.
- Synchronization Across Devices: Data syncs between smartphones, tablets, and computers, ensuring access anywhere.
- Security Measures: Encryption and biometric logins protect sensitive financial data.
Best Practices for Using Budgeting Apps
-
Choose an App That Matches Your Needs: Some apps focus on simplicity, others on detailed analytics. Pick one that fits your comfort level and financial goals.
-
Regularly Review and Adjust Categories: Spending habits change. Periodically update categories to reflect new expenses or priorities.
-
Set Realistic Budgets: Avoid setting overly strict limits that are hard to maintain. Budgets should challenge but not frustrate.
-
Use Alerts Wisely: Enable notifications to stay informed but avoid alert fatigue by customizing alert thresholds.
-
Combine Automation with Manual Checks: While automation saves time, occasionally review transactions to catch errors or miscategorized items.
-
Leverage Goal Features: Actively use savings or debt goals to stay motivated and track progress.
-
Secure Your Data: Use strong passwords and enable two-factor authentication if available.
Mind Map: Budgeting App Features
Mind Map: Best Practices for Budgeting Apps
Practical Example: Using a Budgeting App
Imagine Sarah, a millennial freelancer, who starts using a budgeting app to manage her irregular income. She links her checking account and credit card to the app, which automatically imports transactions. The app categorizes her spending into essentials like rent and groceries, and non-essentials like dining out and subscriptions.
Sarah sets monthly budgets: $1,200 for rent, $400 for groceries, $150 for dining out, and $50 for subscriptions. She enables alerts to notify her when she reaches 80% of any category budget. The app also helps her set a savings goal of $3,000 for an emergency fund.
Each week, Sarah reviews the app’s reports, noticing she consistently overspends on dining out. She adjusts her budget and sets a stricter limit. The app’s visual progress bar for her emergency fund motivates her to transfer money regularly.
By combining automation with active review, Sarah gains control over her finances without spending hours on spreadsheets.
Summary
Budgeting apps offer a practical way to track and manage money with minimal hassle. Understanding their features and applying best practices ensures these tools serve as effective allies in financial planning. Regular engagement, realistic goal-setting, and security awareness maximize the benefits of digital budgeting.
3.3 Reducing Digital Subscriptions and Hidden Costs
Reducing digital subscriptions and hidden costs is a practical way to free up money without sacrificing convenience or enjoyment. Many people sign up for multiple services—streaming, software, apps, cloud storage—and often forget about them or underestimate their cumulative expense. The first step is awareness: knowing what you pay for and how often.
Mind Map: Identifying Digital Subscriptions
Start by listing all your active subscriptions. Check your bank statements or credit card bills for recurring charges. Many banks and financial apps now highlight recurring payments, making this easier.
Mind Map: Common Hidden Costs
A common hidden cost is the automatic renewal of free trials. For example, you might sign up for a 30-day trial of a music streaming service and forget to cancel, resulting in a monthly charge. Another example is subscribing to multiple similar services—like two video streaming platforms—when one would suffice.
Practical Example: Subscription Audit
Imagine Sarah, a millennial who subscribes to three streaming services, two cloud storage plans, and a meditation app. She spends $50 monthly on these. After reviewing her usage, she realizes she only regularly uses one streaming service and one cloud storage account. By canceling the others, she saves $30 a month.
Steps to Reduce Digital Subscription Costs
- Audit Your Subscriptions: List all services, their costs, and usage frequency.
- Evaluate Necessity: Ask if you really use or need each service.
- Consolidate Services: Choose plans that cover multiple needs or family plans.
- Cancel Unused Services: Stop subscriptions that provide little value.
- Set Reminders: For trial periods and renewal dates to avoid unwanted charges.
- Negotiate or Downgrade: Contact providers for discounts or switch to cheaper plans.
Mind Map: Strategies to Reduce Costs
Example: Using Technology to Manage Subscriptions
Apps like Truebill or Bobby help track subscriptions and alert you about upcoming charges. For instance, John used one such app to discover he was paying for a VPN service he hadn’t used in months. Canceling it saved him $12 per month.
Hidden Cost: Overlapping Services
Sometimes, you pay for similar services without realizing it. For example, you might have both Apple Music and Spotify subscriptions active. Choosing one based on your preferred features and ecosystem can cut costs.
Example: Family Plans
Family or group plans often reduce per-person cost. If you’re paying individually for multiple services, consider combining with family or friends. For example, a Netflix family plan costs $20 but supports multiple users, reducing individual expense.
Final Tip: Regular Review
Subscriptions can creep up unnoticed. Schedule a quarterly review of your digital expenses to keep them in check. This habit prevents unnecessary spending and keeps your budget aligned with your current needs.
3.4 Practical Example: Monthly Expense Review Using Automated Tools
Performing a monthly expense review is a practical habit that helps you understand where your money goes and spot opportunities to save. Automated tools simplify this process by collecting and categorizing your transactions, giving you a clear picture without manual entry. Let’s walk through how to conduct a monthly expense review using these tools, with examples and mind maps to organize your approach.
Step 1: Choose Your Automated Expense Tracking Tool
Most budgeting apps or financial aggregators link to your bank accounts and credit cards. They automatically import transactions and sort them into categories like groceries, utilities, entertainment, and subscriptions. For example, an app might label a Netflix charge as “Entertainment” and your grocery store purchase as “Food.”
Step 2: Review and Adjust Categories
Automated categorization is helpful but not perfect. Some transactions may be misclassified or lumped into generic categories. Spend a few minutes each month reviewing these categories and reassigning any miscategorized expenses. This ensures your data reflects your spending habits accurately.
Step 3: Analyze Spending Patterns
Look at the total spent in each category. Identify which areas consume the most of your budget and which are flexible. For instance, if “Dining Out” is higher than expected, you might decide to cook more at home.
Step 4: Set Goals and Limits
Based on your analysis, set spending limits for categories where you want to cut back. Automated tools often allow you to set these targets and will alert you when you approach or exceed them.
Step 5: Reflect and Plan
Use the insights gained to plan the next month’s budget. Adjust your goals, allocate funds differently, or decide to maintain your current habits if they align with your financial objectives.
Mind Map: Monthly Expense Review Workflow
Example: Reviewing March Expenses Using an App
Imagine you use an app that automatically imports your transactions. In March, the app shows:
- Groceries: $450
- Dining Out: $320
- Utilities: $150
- Subscriptions: $60
- Transportation: $100
- Entertainment: $90
You notice that “Subscriptions” includes a $30 charge labeled “Miscellaneous.” Upon review, you realize it’s a gym membership that the app misclassified. You reassign it to “Health & Fitness.”
Looking at “Dining Out,” you see it’s higher than your usual $200. You recall attending several social events this month. You decide to set a $250 limit for April and enable alerts.
You also spot a recurring $15 monthly charge for a service you no longer use. Canceling it will save you $180 annually.
Mind Map: Expense Category Review Example
Tips for an Effective Monthly Review
- Consistency: Schedule a fixed time each month for your review.
- Detail Orientation: Don’t ignore small charges; they add up.
- Use Visuals: Many apps provide charts and graphs—use them to spot trends quickly.
- Adjust as Needed: Your budget isn’t static; life changes, so should your spending plan.
Automated tools turn a potentially tedious task into a manageable routine. By regularly reviewing your expenses, you maintain control over your finances and make informed decisions that support your goals.
3.5 Adapting Your Budget for Variable Income and Expenses
Adapting your budget for variable income and expenses is essential for maintaining financial stability when your cash flow isn’t consistent. Many millennials face this challenge, especially those working freelance, gig jobs, or commission-based roles. Even if you have a steady salary, unexpected expenses or irregular bonuses can disrupt your financial plan. The key is flexibility paired with discipline.
Understanding Variable Income and Expenses
Variable income means your earnings fluctuate month to month. For example, a freelance graphic designer might earn $3,000 one month and $5,000 the next. Variable expenses are costs that change regularly, such as utility bills, groceries, or medical expenses.
Why a Fixed Budget Doesn’t Work Well
A fixed budget assumes steady income and predictable expenses. When income dips or expenses spike, a rigid budget can lead to overspending or stress. Instead, a dynamic budget that adjusts based on actual income and priorities helps you stay on track.
Mind Map: Adapting Your Budget for Variable Income and Expenses
Step 1: Track Your Income Over Time
Start by recording your income for at least three to six months. This gives you a realistic picture of your earning patterns. Calculate your average monthly income and identify the lowest amount you earned in that period. This lowest figure is crucial for planning your minimum budget.
Example:
- Month 1: $3,200
- Month 2: $4,500
- Month 3: $2,800
- Month 4: $3,900
- Month 5: $4,200
- Average Income = ($3,200 + $4,500 + $2,800 + $3,900 + $4,200) / 5 = $3,920
- Minimum Income = $2,800
Step 2: Categorize Your Expenses
Divide your expenses into three groups:
- Fixed expenses: Rent, insurance, subscriptions.
- Variable expenses: Groceries, transportation, entertainment.
- Irregular expenses: Medical bills, car repairs, gifts.
Knowing which expenses you can adjust helps when income fluctuates.
Step 3: Prioritize Essential Expenses
Essentials like housing, utilities, and food should come first. When income is low, discretionary spending like dining out or entertainment can be reduced or paused.
Step 4: Build a Buffer or “Safety Net” Savings
Aim to save enough to cover at least one to three months of essential expenses. This buffer cushions months when income is lower than expected.
Step 5: Use Percentage-Based Budgeting
Instead of fixed dollar amounts, assign percentages of your income to categories. For example:
- Essentials: 50%
- Savings: 20%
- Discretionary: 30%
When your income changes, these percentages adjust automatically.
Example: If you earn $3,000 one month:
- Essentials: $1,500
- Savings: $600
- Discretionary: $900
If you earn $4,000 the next month:
- Essentials: $2,000
- Savings: $800
- Discretionary: $1,200
Step 6: Adjust Discretionary Spending First
When income dips, cut back on non-essential expenses first. This keeps your essentials and savings intact.
Step 7: Track and Review Monthly
Regularly review your budget and actual spending. Adjust your plan as needed. Use budgeting apps or spreadsheets that allow easy updates.
Practical Example: Freelance Writer’s Budget Adaptation
Scenario: Jamie earns between $2,500 and $5,000 monthly.
- Jamie tracks income for 6 months and finds an average of $3,800 and a minimum of $2,500.
- Fixed expenses: $1,200 (rent, utilities, insurance).
- Variable expenses: $800 (food, transport).
- Savings goal: 20% of income.
Budgeting Approach:
- Essentials (fixed + variable): $2,000 minimum.
- Savings: 20% of actual income.
- Discretionary: remainder.
Month with $2,500 income:
- Essentials: $2,000
- Savings: $500
- Discretionary: $0 (Jamie pauses entertainment and dining out)
Month with $4,500 income:
- Essentials: $2,000
- Savings: $900
- Discretionary: $1,600 (Jamie allows more flexibility)
Jamie uses a budgeting app to track and adjust categories monthly, ensuring essentials and savings are prioritized.
Mind Map: Budget Adjustment Process
Tips for Success
- Automate savings: Set transfers based on income percentage.
- Keep a separate account for essentials: Helps prevent overspending.
- Use alerts: Budgeting apps can notify you when spending limits are near.
- Plan for irregular expenses: Set aside a small monthly amount to cover these.
Adapting your budget to variable income and expenses takes effort but creates financial resilience. By focusing on essentials, using percentage-based allocations, and regularly reviewing your finances, you can navigate income swings without losing control.
Chapter 4: Saving Strategies for Millennials
4.1 Building an Emergency Fund: How Much and Where to Keep It
An emergency fund is a stash of money set aside to cover unexpected expenses or financial disruptions. It acts as a buffer, preventing you from relying on credit cards or loans when life throws a curveball. But how much should you save, and where should you keep this fund? Let’s break it down.
How Much to Save
The general rule of thumb is to save enough to cover three to six months’ worth of essential living expenses. Essential expenses include rent or mortgage, utilities, groceries, transportation, insurance, and minimum debt payments. The exact amount depends on your personal situation, such as job stability, income variability, and family obligations.
Example:
- Monthly essential expenses: $2,500
- Emergency fund target: 3 to 6 months
- Total fund needed: $7,500 to $15,000
If you have a stable job with steady income, aiming for three months might suffice. If your income fluctuates or you have dependents, six months or more is safer.
Mind Map: Determining Emergency Fund Size
Where to Keep Your Emergency Fund
The emergency fund needs to be accessible, safe, and ideally earn some interest. Here are common options:
-
High-Yield Savings Account: Offers easy access and better interest rates than regular savings accounts. Funds are liquid and FDIC insured.
-
Money Market Account: Similar to high-yield savings but may offer check-writing privileges. Slightly higher interest rates but sometimes with minimum balance requirements.
-
Short-Term Certificates of Deposit (CDs): Provide higher interest but lock your money for a fixed term. Not ideal for emergencies unless you ladder CDs to maintain liquidity.
-
Cash: Keeping cash at home is accessible but risky due to theft or loss and does not earn interest.
Example:
Sarah has $10,000 in her emergency fund. She keeps $7,000 in a high-yield savings account for quick access and $3,000 in a 6-month CD laddered to mature every two months, balancing interest earnings and liquidity.
Mind Map: Emergency Fund Storage Options
Practical Considerations
-
Start Small: If saving six months’ expenses seems daunting, start with $500 or $1,000 to cover minor emergencies. Build up gradually.
-
Automate Savings: Set up automatic transfers to your emergency fund to build it consistently without relying on willpower.
-
Separate Account: Keep your emergency fund separate from your regular checking to avoid accidental spending.
-
Avoid Using for Non-Emergencies: Define what qualifies as an emergency (e.g., job loss, medical bills, urgent home repairs) to prevent depletion.
Example Scenario
Jake earns $4,000 a month but has variable income from freelance work. His essential expenses average $2,800 monthly. Given his income variability, he targets a six-month emergency fund of $16,800. He starts by saving $300 monthly in a high-yield savings account and plans to reach his goal in about 56 months. Meanwhile, he keeps $1,000 as a starter emergency fund for immediate needs.
In summary, an emergency fund is your financial safety net. Determine the right size based on your expenses and personal risk factors, then choose a storage method that balances accessibility, safety, and returns. Building it steadily and keeping it separate helps ensure it’s there when you really need it.
4.2 High-Yield Savings Accounts and Online Alternatives
High-yield savings accounts (HYSAs) offer a straightforward way to earn more interest on your savings compared to traditional savings accounts. These accounts typically provide interest rates several times higher than the national average for standard savings accounts. The main appeal is that your money remains safe, liquid, and accessible, while growing at a faster pace.
What Makes a High-Yield Savings Account Different?
- Interest Rate: The defining feature is a higher annual percentage yield (APY). While a traditional savings account might offer 0.01% to 0.10% APY, HYSAs often range from 3% to 5% APY or more.
- FDIC Insurance: Like regular savings accounts, HYSAs are usually insured by the FDIC up to $250,000 per depositor, per bank, providing security for your funds.
- Accessibility: Funds can typically be withdrawn or transferred easily, though some accounts limit certain types of withdrawals to six per month due to federal regulations.
Online Banks vs. Traditional Banks
Most high-yield savings accounts are offered by online banks or financial institutions without physical branches. This allows them to cut overhead costs and pass savings to customers through higher interest rates.
Mind Map: High-Yield Savings Accounts
Online Alternatives to High-Yield Savings Accounts
Besides traditional HYSAs, there are digital alternatives that serve similar purposes:
- Money Market Accounts (MMAs): These often offer competitive rates and check-writing privileges but may require higher minimum balances.
- Cash Management Accounts: Offered by fintech firms, these combine features of checking and savings accounts, often with competitive interest rates and easy digital access.
- Certificates of Deposit (CDs): While not as liquid, CDs offer fixed rates that can be higher than HYSAs if you lock in your money for a set term.
Mind Map: Online Alternatives
Practical Examples
Example 1: Comparing Interest Earnings
Imagine you have $10,000 saved. With a traditional savings account at 0.05% APY, you’d earn about $5 in interest over a year. With a high-yield savings account offering 4% APY, you’d earn approximately $400 in the same period.
Example 2: Using an Online Bank HYSA
Sarah opens a high-yield savings account with an online bank offering 3.8% APY. She sets up automatic monthly transfers of $500 from her checking account. Over time, her savings grow faster due to the higher interest, and she can access her funds digitally whenever needed.
Example 3: Choosing Between an HYSA and a CD
John has $5,000 he won’t need for a year. He compares a 12-month CD at 4.5% APY with an HYSA at 4%. The CD offers slightly higher interest but requires locking the money in. John opts for the CD to maximize returns, accepting the trade-off of reduced liquidity.
Key Considerations When Choosing an HYSA or Alternative
- Interest Rate: Look for the highest APY but verify if it’s introductory or ongoing.
- Fees: Some accounts charge maintenance or withdrawal fees that can erode earnings.
- Minimum Balance: Check if there’s a minimum balance to earn the advertised rate.
- Access and Convenience: Consider how easy it is to deposit and withdraw money.
- FDIC Insurance: Confirm the account is insured to protect your funds.
Mind Map: Choosing the Right Account
In summary, high-yield savings accounts and their online alternatives provide accessible ways to grow your emergency fund or short-term savings with minimal risk. By comparing rates, fees, and features, you can select an option that fits your financial habits and goals while taking advantage of the digital economy’s efficiencies.
4.3 Automating Savings: Setting Up Recurring Transfers
Automating your savings through recurring transfers is a straightforward way to build your financial cushion without relying on willpower every month. The idea is simple: set up your bank account to automatically move a fixed amount of money from your checking to your savings account on a regular schedule. This removes the need to remember or manually transfer funds, making saving a consistent habit.
Why Automate Savings?
- Consistency: Regular transfers ensure you save steadily, regardless of your mood or distractions.
- Discipline: Automation acts as a forced saving mechanism, reducing the temptation to spend what you might otherwise save.
- Convenience: Once set, it requires minimal effort and oversight.
How to Set Up Recurring Transfers
- Choose the Amount: Decide on a realistic sum that won’t strain your monthly budget. Even small amounts add up over time.
- Select Frequency: Common options include weekly, biweekly, or monthly. Align this with your pay schedule for smoother cash flow.
- Pick the Date: Schedule transfers shortly after your paycheck clears to ensure funds are available.
- Set Up Through Your Bank or App: Most banks and financial apps offer easy interfaces to schedule recurring transfers.
Mind Map: Automating Savings Setup
Example 1: Monthly Transfer
Sarah earns her salary on the 1st of each month. She decides to transfer $200 automatically to her savings account on the 3rd. This timing ensures her paycheck has cleared and bills are mostly paid. Over a year, this adds up to $2,400 saved without her having to think about it.
Example 2: Weekly Transfer
Mike gets paid every two weeks. He sets up a $50 transfer every Friday from his checking to his savings. This smaller, more frequent transfer fits his cash flow and helps him steadily build savings without a big hit on any single paycheck.
Tips for Effective Automation
- Start Small: If you’re new to saving, begin with an amount that feels comfortable and increase it over time.
- Review Periodically: Check your transfers every few months to adjust amounts based on changes in income or expenses.
- Avoid Overdrafts: Ensure your checking account has enough funds to cover transfers to prevent fees.
- Use Multiple Savings Goals: Some banks allow splitting transfers into different savings buckets (e.g., emergency fund, vacation). This helps keep goals organized.
Mind Map: Best Practices for Automated Savings
Automating your savings is less about the amount and more about the habit. By setting up recurring transfers, you make saving an effortless part of your financial routine. Over time, these small, automatic moves can create a meaningful financial buffer without requiring constant attention or willpower.
4.4 Practical Example: Using Round-Up Features on Payment Apps to Save
Using round-up features on payment apps is a simple way to save money without feeling the pinch. The idea is straightforward: when you make a purchase, the app rounds up the amount to the nearest dollar and transfers the difference into a savings account or investment fund. Over time, these small increments add up.
How Round-Up Savings Work
Example Scenario
Imagine you buy a coffee for $3.45. The app rounds this up to $4.00, moving $0.55 to your savings. Later, you buy lunch for $7.80, rounded to $8.00, adding $0.20 more. By the end of the day, you’ve saved $0.75 without consciously setting aside money.
Setting It Up
Most popular payment apps or digital banks offer this feature. You link your checking account or debit card, enable round-ups, and select the destination for your savings. Some apps let you choose between a savings account, an investment account, or even charitable donations.
Practical Mind Map for Setup
Variations and Customizations
- Round-up to nearest dollar: The most common setting.
- Round-up to nearest 5 dollars: Some apps allow rounding up to a higher increment for faster savings.
- Multiplier options: You can multiply the round-up amount by 2 or 3 to boost savings.
Example with Multiplier
If your purchase is $4.20, rounding up to $5.00 saves $0.80. With a multiplier of 3, you save $2.40 instead. This accelerates savings but requires a bit more discipline.
Mind Map of Variations
Tracking Progress
Most apps provide dashboards showing how much you’ve saved through round-ups. This transparency helps maintain motivation. You can also set goals, like saving for a vacation or emergency fund, and watch your round-ups contribute.
Example Summary
| Purchase Amount | Rounded Amount | Saved Amount | Multiplier | Total Saved |
|---|---|---|---|---|
| $3.45 | $4.00 | $0.55 | 1 | $0.55 |
| $7.80 | $8.00 | $0.20 | 1 | $0.20 |
| $12.30 | $13.00 | $0.70 | 3 | $2.10 |
Total saved from these three transactions: $2.85.
Advantages
- Effortless: No need to remember to save.
- Psychologically easier: Small amounts feel less painful.
- Builds habit: Encourages a saving mindset.
Considerations
- Watch for fees: Some apps charge for round-up features.
- Link to accounts with no overdraft risk: Avoid overdraft fees.
- Review periodically: Adjust multiplier or pause if necessary.
In summary, round-up features turn everyday spending into a steady savings stream. By automating the process, you save without changing your lifestyle, making it a practical tool for millennial savers in the digital economy.
4.5 Saving for Specific Goals: Travel, Home, and Education
Saving for specific goals is a practical way to keep your finances organized and motivated. Whether you’re aiming for travel, buying a home, or funding education, having a clear plan helps you allocate money efficiently and track progress. Let’s break down how to approach each goal.
Travel Savings
Travel often requires a lump sum for flights, accommodation, activities, and daily expenses. Start by estimating the total cost realistically. Include airfare, lodging, meals, transport, and a buffer for unexpected costs.
Mind Map: Travel Savings
Example: Suppose you want to take a 10-day trip to Spain in 12 months. Flights might cost $600, accommodation $100 per night ($1,000 total), daily expenses $50 ($500 total), and activities $300. Add a $200 buffer. Total: $2,600. Divide by 12 months, you need to save about $217 per month.
Automate transfers to a dedicated travel savings account or use apps that round up purchases and funnel the change into your travel fund.
Home Purchase Savings
Buying a home is a significant financial goal that requires saving for a down payment, closing costs, and moving expenses. The down payment often ranges from 5% to 20% of the home’s price.
Mind Map: Home Purchase Savings
Example: If you aim to buy a $300,000 home in 3 years with a 10% down payment, you need $30,000 plus approximately $5,000 for closing and moving. Total savings goal: $35,000. Monthly savings target: about $972.
Consider separate accounts for down payment and other costs to avoid mixing funds. Use high-yield savings accounts or certificates of deposit (CDs) for better interest while keeping funds accessible.
Education Savings
Education costs vary widely depending on the institution and program. Whether saving for yourself or a family member, factor in tuition, books, supplies, and living expenses if applicable.
Mind Map: Education Savings
Example: Planning for a 4-year degree costing $20,000 per year, including tuition and living expenses, totals $80,000. If you have 10 years, save $8,000 annually or about $667 monthly.
Tax-advantaged accounts like 529 plans can help grow savings faster and offer tax benefits. Even if not using these, a dedicated savings account keeps funds separate and focused.
General Tips for Saving for Specific Goals
- Set clear deadlines: Knowing when you need the money helps determine how much to save monthly.
- Break down goals: Divide total amounts into manageable monthly targets.
- Automate savings: Automate transfers to avoid the temptation to spend.
- Track progress: Regularly review your savings to stay motivated.
- Adjust as needed: Life changes may require tweaking your plan.
Combined Mind Map Overview
By tailoring your savings strategy to each goal, you avoid the trap of lumping all savings into one pot and losing sight of priorities. This clarity makes it easier to stay disciplined and celebrate milestones along the way.
Chapter 5: Understanding and Managing Debt
5.1 Types of Debt: Good Debt vs Bad Debt Explained
Debt is often painted as a villain in personal finance, but not all debt is created equal. Understanding the difference between “good” debt and “bad” debt helps you make smarter decisions about borrowing and managing your money.
What Is Good Debt?
Good debt is borrowing that helps you build value or increase your earning potential over time. It’s an investment in your future rather than a drain on your present.
Examples of Good Debt:
- Student Loans: Borrowing to pay for education can increase your skills and earning power.
- Mortgage Loans: Buying a home can build equity and provide long-term stability.
- Business Loans: Financing a business that generates income.
Good debt usually has relatively low interest rates and favorable terms because lenders view it as less risky. It’s debt that ideally pays for itself or appreciates in value.
What Is Bad Debt?
Bad debt is borrowing to buy things that lose value quickly or don’t generate income. It often comes with high interest rates and can trap you in a cycle of payments.
Examples of Bad Debt:
- Credit Card Debt: Especially when used for everyday expenses or non-essential items without paying off the balance monthly.
- Payday Loans: Short-term, high-interest loans that can escalate quickly.
- Auto Loans for Expensive Cars: Cars depreciate rapidly, so borrowing large sums for luxury vehicles can be risky.
Bad debt typically drains your resources without building wealth or improving your financial situation.
Mind Map: Understanding Debt Types
How to Tell Them Apart
The key questions to ask before taking on debt are:
- Does this debt help me build an asset or increase my income?
- What is the interest rate and repayment term?
- Could I afford to pay this off quickly if needed?
If the answer to the first question is no, or if the interest rate is high, it’s likely bad debt.
Practical Example
Imagine you want to buy a laptop. You could:
- Use a credit card and pay it off quickly (low or no interest if paid in full).
- Take a 12-month financing plan with 0% interest.
- Take a high-interest personal loan.
If the laptop is for work or education, financing it with a low or zero-interest plan might be considered good debt because it supports your income or skills. Using a high-interest loan for a luxury gadget that doesn’t improve your earning potential is bad debt.
Mind Map: Decision Process for Taking Debt
Summary
Good debt is a tool for building wealth or improving your financial position. Bad debt is a liability that can hinder your progress. Recognizing the difference helps you borrow wisely and avoid unnecessary financial stress.
5.2 Student Loans: Repayment Plans and Forgiveness Programs
Student loans can feel like a heavy backpack on your financial journey. Understanding repayment options and forgiveness programs can help lighten the load and make a clear path forward.
Types of Federal Student Loan Repayment Plans
Federal student loans offer several repayment plans designed to fit different financial situations. Here’s a mind map to organize the main types:
Standard Repayment Plan is straightforward: you pay a fixed amount every month for up to 10 years. It usually results in higher monthly payments but less interest paid over time.
Graduated Repayment Plan starts with lower payments that increase every two years. This can be helpful if you expect your income to grow steadily.
Extended Repayment Plan stretches payments over up to 25 years, lowering monthly costs but increasing total interest.
Income-Driven Repayment Plans adjust your monthly payment based on your income and family size, often capping payments at 10-20% of discretionary income. These plans can extend repayment to 20-25 years, after which any remaining balance may be forgiven.
Income-Driven Repayment Plans Breakdown
Example: Choosing a Repayment Plan
Imagine Sarah, who graduated with $40,000 in federal student loans. She earns $45,000 a year and expects moderate raises.
- Under the Standard Plan, her monthly payment is about $460, paid off in 10 years.
- With Graduated Repayment, she starts at $300/month, increasing every two years, still finishing in 10 years.
- If she chooses an Income-Driven Plan like PAYE, her monthly payment might be around $200, based on her income, with potential forgiveness after 20 years if she still owes a balance.
Sarah’s choice depends on her current cash flow and long-term goals. Lower payments free up money now but may increase total interest.
Student Loan Forgiveness Programs
Forgiveness programs cancel some or all of your student loan debt under specific conditions. Here’s a mind map outlining key forgiveness options:
Public Service Loan Forgiveness (PSLF) is popular among those working in qualifying public service jobs. You must make 120 qualifying monthly payments (10 years), while working full-time for a qualifying employer.
Teacher Loan Forgiveness offers up to $17,500 forgiveness for teachers working five consecutive years in low-income schools.
Perkins Loan Cancellation applies to specific professions, with partial forgiveness each year of service.
Income-Driven Repayment Forgiveness cancels remaining debt after 20 or 25 years on an IDR plan, but the forgiven amount may be taxable.
Example: Public Service Loan Forgiveness
John works for a nonprofit hospital and has $50,000 in federal loans. He enrolls in an Income-Driven Repayment Plan, paying $250/month. After 10 years and 120 qualifying payments, the remaining balance is forgiven tax-free under PSLF.
Important Considerations
- Only federal student loans qualify for most repayment plans and forgiveness programs.
- Private loans generally do not offer these options.
- Forgiveness programs often require careful documentation and timely paperwork.
- Forgiven amounts under IDR plans may be considered taxable income.
Summary Mind Map
Understanding these options can help you tailor your repayment strategy to your financial reality. The key is to review your loan details, income, and career path regularly to make informed decisions.
5.3 Credit Cards: Responsible Usage and Avoiding Common Pitfalls
Credit cards are a common financial tool for many millennials, offering convenience and rewards but also carrying risks if not managed carefully. Responsible usage means understanding how credit cards work, using them to your advantage, and avoiding common mistakes that can lead to debt or damage to your credit score.
How Credit Cards Work
A credit card allows you to borrow money from a lender up to a certain limit to make purchases or withdraw cash. Each month, you receive a statement listing your charges, minimum payment due, and due date. Paying the full balance avoids interest charges; paying less than the full balance accrues interest on the remaining amount.
Key Concepts
- Credit Limit: The maximum amount you can borrow.
- Statement Balance: Total amount owed at the end of the billing cycle.
- Minimum Payment: The smallest amount you must pay to keep the account in good standing.
- APR (Annual Percentage Rate): The interest rate charged on unpaid balances.
Responsible Usage Mind Map
Avoiding Common Pitfalls Mind Map
Practical Examples
Example 1: Paying Only the Minimum Payment Imagine you have a $1,000 balance with a 20% APR. The minimum payment is 3% of the balance or $30. If you pay only $30 monthly, it could take years to pay off the debt, and you might pay hundreds in interest. Paying the full balance or more than the minimum reduces interest and shortens repayment time.
Example 2: Credit Utilization Impact Your credit limit is $5,000. If you carry a $4,500 balance (90% utilization), your credit score may drop because lenders see you as a higher risk. Keeping utilization below 30% ($1,500) is generally better for your credit score.
Example 3: Using Rewards Effectively If your card offers 1.5% cashback, spending $1,000 monthly earns $15 back. However, if you carry a balance and pay interest, the cost outweighs rewards. Use rewards cards only if you pay balances in full.
Tips for Responsible Credit Card Use
- Always pay your statement balance in full and on time.
- Set up alerts or automatic payments to avoid missed due dates.
- Regularly review your statements to spot errors or fraudulent charges.
- Keep your credit utilization low by not maxing out your cards.
- Avoid cash advances; they often have high fees and start accruing interest immediately.
- Use rewards cards strategically, not as an excuse to spend more.
- Limit the number of credit cards to what you can manage responsibly.
By understanding how credit cards work and following these practices, you can use them as a helpful financial tool without falling into common traps.
5.4 Practical Example: Creating a Debt Repayment Plan Using the Snowball Method
The snowball method is a straightforward way to pay off debt by focusing on the smallest balance first while making minimum payments on the rest. Once the smallest debt is cleared, you roll that payment amount into the next smallest debt, creating momentum—like a snowball rolling downhill, gaining size and speed.
Step 1: List Your Debts
Start by listing all your debts with their balances, minimum monthly payments, and interest rates. For example:
| Debt Type | Balance | Minimum Payment | Interest Rate |
|---|---|---|---|
| Credit Card A | $500 | $25 | 18% |
| Credit Card B | $1,200 | $40 | 20% |
| Student Loan | $5,000 | $60 | 5% |
| Personal Loan | $2,000 | $50 | 10% |
Step 2: Order Debts by Balance
Arrange debts from smallest to largest balance:
- Credit Card A: $500
- Credit Card B: $1,200
- Personal Loan: $2,000
- Student Loan: $5,000
Step 3: Allocate Extra Payment Amount
Decide how much extra money you can put toward debt each month beyond minimum payments. Suppose you can add $100 extra monthly.
Step 4: Make Payments
Pay minimums on all debts except the smallest. For the smallest debt, pay the minimum plus the extra amount. In this example:
- Credit Card A: $25 (minimum) + $100 (extra) = $125
- Credit Card B: $40
- Personal Loan: $50
- Student Loan: $60
Step 5: Pay Off and Roll Over
Once Credit Card A is paid off, take the $125 you were paying and add it to the minimum payment of the next smallest debt (Credit Card B). Now, Credit Card B payment becomes $40 + $125 = $165 monthly.
Repeat this process until all debts are cleared.
Mind Map: Snowball Method Workflow
Example Calculation
Let’s calculate how long it takes to pay off Credit Card A with $500 balance, $25 minimum payment, and $100 extra payment.
- Monthly payment: $125
- Interest rate: 18% annual (approx. 1.5% monthly)
Month 1:
- Interest: $500 × 1.5% = $7.50
- Principal paid: $125 - $7.50 = $117.50
- New balance: $500 - $117.50 = $382.50
Month 2:
- Interest: $382.50 × 1.5% = $5.74
- Principal paid: $125 - $5.74 = $119.26
- New balance: $382.50 - $119.26 = $263.24
Month 3:
- Interest: $263.24 × 1.5% = $3.95
- Principal paid: $125 - $3.95 = $121.05
- New balance: $263.24 - $121.05 = $142.19
Month 4:
- Interest: $142.19 × 1.5% = $2.13
- Principal paid: $125 - $2.13 = $122.87
- New balance: $142.19 - $122.87 = $19.32
Month 5:
- Interest: $19.32 × 1.5% = $0.29
- Principal paid: $19.32 + $0.29 = $19.61 (final payment)
Credit Card A is paid off in 5 months.
Mind Map: Payment Allocation Example
After Paying Off the Smallest Debt
Once Credit Card A is paid off, the $125 payment moves to Credit Card B:
- Credit Card B payment: $40 + $125 = $165
- Personal Loan: $50
- Student Loan: $60
This accelerates Credit Card B payoff, then the process continues with the Personal Loan and Student Loan.
Why the Snowball Method Works
- Psychological Boost: Paying off smaller debts quickly provides a sense of accomplishment.
- Simplifies Focus: Concentrating payments on one debt at a time reduces complexity.
- Builds Momentum: Freed-up payments snowball into larger amounts for subsequent debts.
While it may not always minimize interest paid compared to other methods, the snowball method’s behavioral advantages often lead to better adherence and faster overall payoff.
This example shows how to build a clear, manageable debt repayment plan using the snowball method, combining simple math and consistent payments to steadily reduce debt.
5.5 Digital Tools for Debt Tracking and Management
Managing debt effectively requires consistent tracking and clear organization. Digital tools designed for debt tracking and management can simplify this process, helping you stay on top of payments, understand your debt structure, and plan repayment strategies. This section outlines key features of such tools, practical examples, and mind maps to visualize how they fit into your financial routine.
Key Features of Digital Debt Management Tools
- Debt Overview Dashboard: A central place showing all debts, balances, interest rates, and due dates.
- Payment Reminders: Alerts to avoid missed payments and late fees.
- Repayment Planning: Options to simulate different payoff strategies like snowball or avalanche.
- Progress Tracking: Visual charts showing how much debt is paid off over time.
- Integration: Syncing with bank accounts or credit cards for automatic updates.
Mind Map: Core Components of Debt Management Tools
Practical Example: Using a Debt Tracker App
Imagine you have three debts:
- Credit card debt: $3,000 at 18% APR
- Student loan: $15,000 at 5% APR
- Personal loan: $5,000 at 10% APR
A debt management app lets you input these details and then:
- Shows the total debt and individual balances.
- Sets reminders for each payment due date.
- Allows you to choose a repayment strategy. For example, the snowball method suggests paying off the $3,000 credit card first because it’s the smallest balance.
- Tracks your payments and updates balances automatically.
Mind Map: Example Debt Repayment Workflow
Features to Look for in Debt Management Tools
- User-Friendly Interface: Easy to navigate and update.
- Customization: Ability to add extra payments or adjust interest rates.
- Security: Strong encryption and privacy policies.
- Export Options: Download reports for personal records or tax purposes.
Example: Manual Tracking with Spreadsheets
If you prefer not to use an app, a well-structured spreadsheet can serve as a digital debt tracker. Columns might include:
- Debt Name
- Original Balance
- Current Balance
- Interest Rate
- Minimum Payment
- Due Date
- Extra Payment
- Notes
You can create formulas to calculate remaining balances after payments and visualize progress with charts.
Mind Map: Spreadsheet Debt Tracker Structure
Summary
Digital tools for debt tracking and management help organize your debts, remind you of payments, and visualize your progress. Whether using dedicated apps or spreadsheets, the key is consistent updating and reviewing. This approach reduces stress, prevents missed payments, and supports informed decisions about repayment strategies.
Chapter 6: Credit Scores and Reports
6.1 What Is a Credit Score and Why It Matters
A credit score is a three-digit number that summarizes your creditworthiness based on your financial history. Lenders use it to decide how risky it is to lend you money. The higher the score, the more likely you are to be approved for loans or credit cards, often with better interest rates. Conversely, a low score can mean higher costs or outright denial.
What Makes Up a Credit Score?
Here’s a simple mind map to break down the main components:
Example: Imagine two friends, Alex and Jamie. Alex always pays credit card bills on time and keeps balances low, while Jamie often misses payments and maxes out cards. Alex’s payment history and low credit utilization will boost their score, while Jamie’s late payments and high balances will drag theirs down.
Why Credit Scores Matter
Credit scores influence more than just loan approvals. They can affect:
- Interest rates on loans and credit cards
- Rental applications
- Insurance premiums
- Utility service deposits
Example: Sara wants to rent an apartment. The landlord checks her credit score and sees a solid history with no missed payments. Sara gets approved quickly and pays a lower security deposit than someone with a weaker credit profile.
How Scores Are Calculated
Credit bureaus collect data from lenders and calculate scores using formulas like FICO or VantageScore. Though the exact formulas differ, the factors in the mind map above generally hold true. Scores usually range from 300 to 850.
Practical Example: Understanding Your Score
Suppose your credit score is 720. This generally means you have a good credit history with mostly on-time payments, moderate debt levels, and a mix of credit types. If you want to improve it, focusing on paying down credit card balances and avoiding opening multiple new accounts at once can help.
Mind Map: Impact of Credit Score on Financial Life
In summary, your credit score is a snapshot of how reliably you manage borrowed money. It affects many parts of your financial life, so understanding it helps you make smarter decisions about borrowing, spending, and saving.
6.2 How to Check Your Credit Report for Free
Checking your credit report is a crucial step in understanding your financial health. It shows the details lenders see when they evaluate your creditworthiness. Fortunately, you can access your credit report for free, and doing so regularly helps catch errors or signs of identity theft early.
What Is a Credit Report?
A credit report is a detailed record of your credit history. It includes information such as:
- Personal details (name, address, Social Security number)
- Credit accounts (credit cards, loans, mortgages)
- Payment history (on-time payments, late payments)
- Credit inquiries (who has checked your credit)
- Public records (bankruptcies, liens)
This report is compiled by credit bureaus from information provided by your creditors.
Why Check Your Credit Report?
- Verify accuracy: Mistakes can lower your score or cause loan denials.
- Detect fraud: Unrecognized accounts or inquiries could indicate identity theft.
- Understand your credit standing before applying for new credit.
How to Get Your Free Credit Report
In the United States, federal law grants you the right to one free credit report from each of the three major credit bureaus—Equifax, Experian, and TransUnion—every 12 months. You can access these reports through a centralized website.
Step-by-Step Process
- Visit the official site designated for free credit reports.
- Provide your personal information: full name, address, Social Security number, and date of birth.
- Answer security questions based on your credit history to verify your identity.
- Choose which credit bureau report(s) to view.
- Download, print, or save your report for review.
Mind Map: Steps to Access Your Free Credit Report
Reviewing Your Credit Report
Once you have your report, look for:
- Personal Information: Confirm your name, address, and employer details are correct.
- Account Information: Check each account’s status, balance, and payment history.
- Inquiries: Review who has accessed your credit and whether you recognize them.
- Public Records: Ensure there are no unexpected bankruptcies or liens.
Example: Spotting an Error
Suppose your report shows a credit card account you never opened. This could be a sign of identity theft or a clerical error. You should dispute this immediately with the credit bureau.
Mind Map: What to Check in Your Credit Report
Frequency of Checking
While you get one free report per bureau annually, you can stagger requests every four months to monitor your credit year-round. Some states and credit card companies also offer free credit report access more frequently.
Example: Staggered Checking Schedule
- January: Request report from Equifax
- May: Request report from Experian
- September: Request report from TransUnion
This approach helps you keep an eye on your credit without waiting a full year.
Additional Tips
- Always use the official website to avoid scams.
- Keep your reports in a secure place.
- If you find errors, file disputes promptly with the credit bureau.
Checking your credit report is straightforward and provides valuable insight into your financial profile. Making it a regular habit helps you stay informed and in control.
6.3 Improving Your Credit Score: Best Practices
Improving your credit score is a practical process that involves understanding the factors that influence it and taking consistent actions to address them. Credit scores are calculated based on several key components, each contributing a different weight to your overall score. Here’s a mind map illustrating the main factors:
Each of these areas offers opportunities for improvement. Let’s explore best practices with examples.
1. Maintain a Consistent On-Time Payment Record Your payment history has the largest impact on your credit score. Paying bills late, even by a few days, can lower your score. Setting up automatic payments or calendar reminders helps avoid missed payments.
Example: If you have three credit cards, schedule automatic payments for at least the minimum amount due a few days before the due date. This prevents accidental late payments and keeps your payment history clean.
2. Keep Credit Utilization Low Credit utilization is the percentage of your available credit that you are using. Lower utilization signals responsible credit management. Aim to keep this ratio below 30%, and ideally under 10% for the best impact.
Example: If your total credit limit across cards is $10,000, try to keep your combined balances below $3,000. If you notice your balance creeping up, consider paying down balances before the statement closing date to reduce reported utilization.
3. Lengthen Your Credit History Older accounts contribute positively because they show a longer track record. Avoid closing old credit cards, even if you don’t use them often, as this can shorten your average account age.
Example: If you have a credit card opened in college that you rarely use, keep it open and use it occasionally for small purchases, paying it off immediately. This keeps the account active and lengthens your credit history.
4. Limit New Credit Applications Each time you apply for new credit, a hard inquiry appears on your report, which can lower your score temporarily. Opening multiple accounts in a short period signals risk.
Example: If you plan to apply for a mortgage, avoid opening new credit cards or loans in the months leading up to your application to prevent unnecessary inquiries.
5. Maintain a Diverse Credit Mix Having different types of credit (credit cards, installment loans, mortgages) can improve your score, but only if you manage them responsibly.
Example: If you only have credit cards, responsibly taking out a small personal loan and repaying it on time can add diversity to your credit profile.
Mind Map: Best Practices to Improve Credit Score
Additional Tips:
- Regularly check your credit report for errors and dispute inaccuracies promptly.
- If struggling with debt, consider debt repayment strategies like the snowball or avalanche methods to reduce balances faster.
- Avoid maxing out credit cards; even if you pay on time, high balances can hurt your utilization ratio.
Example Scenario:
Imagine Sarah has two credit cards with $5,000 total credit limits and a $2,000 balance on one card. Her utilization is 40%, which is high. She decides to pay down $1,500 before the statement closes, reducing utilization to 10%. She also sets up autopay for all bills. Over the next few months, her score improves as payment history stays clean and utilization drops.
Improving your credit score takes time and steady habits. Focus on these core areas, monitor your progress, and adjust your financial behaviors accordingly.
6.4 Practical Example: Disputing Errors on Your Credit Report
Disputing errors on your credit report is a practical step to ensure your financial profile accurately reflects your history. Mistakes can lower your credit score, affecting loan approvals or interest rates. Here’s a clear, step-by-step guide to help you through the process, with examples and mind maps to organize your approach.
Understanding the Dispute Process
Before you start, know that the Fair Credit Reporting Act (FCRA) requires credit bureaus to investigate disputes, usually within 30 days. You can dispute errors with the three major credit bureaus: Equifax, Experian, and TransUnion.
Step 1: Obtain Your Credit Reports
Request your free credit reports from each bureau. Review them carefully for inaccuracies such as:
- Incorrect personal information (name, address)
- Accounts that don’t belong to you
- Wrong account status (e.g., reported as late or in collections when paid)
- Duplicate accounts
- Incorrect balances or credit limits
Example: You notice a credit card account listed as “delinquent” but you have proof of on-time payments.
Step 2: Identify and Document Errors
Create a list of errors with details such as account name, reported issue, and why it’s incorrect. Gather supporting documents like payment receipts, bank statements, or correspondence.
Mind Map: Identifying Errors
Step 3: File Your Dispute
You can dispute online, by mail, or by phone. Written disputes by certified mail are often recommended for record-keeping.
What to Include in Your Dispute Letter:
- Your full name, address, and contact info
- A clear identification of each item you dispute
- An explanation of why the information is incorrect
- Copies (not originals) of supporting documents
- A request to correct or remove the inaccurate information
Example Letter Excerpt:
“I am writing to dispute the delinquent status reported on my XYZ credit card account (Account #123456). I have attached copies of my payment receipts showing all payments were made on time. Please investigate and correct this error.”
Step 4: Wait for the Investigation
The credit bureau will contact the creditor reporting the information. They must investigate and respond, usually within 30 days. If the creditor confirms the error, the bureau will update your report.
Mind Map: Dispute Process Flow
Step 5: Review the Outcome
Once the investigation is complete, you’ll receive the results. If the error is corrected, check your updated credit report to confirm. If the dispute is denied, you can:
- Contact the creditor directly for further clarification
- Add a statement of dispute to your credit report
- Consider seeking help from a consumer protection agency
Example: Your dispute about the late payment was accepted, and the status changed to “paid on time.” Your credit score improves accordingly.
Tips for a Successful Dispute
- Keep copies of all correspondence and documents
- Be specific and concise in your explanations
- Dispute errors with each credit bureau separately if the error appears on multiple reports
- Follow up if you don’t receive a response within the expected timeframe
Summary Mind Map: Disputing Credit Report Errors
Disputing errors may seem tedious, but it’s a direct way to protect your credit health. Accurate credit reports mean fairer access to credit and better financial opportunities.
6.5 Using Credit Wisely in the Digital Economy
Using credit wisely in the digital economy means understanding how credit works, managing it responsibly, and leveraging the tools available to maintain or improve your financial health. Credit is a powerful financial tool, but it requires careful handling, especially when so many transactions and accounts are managed online.
Understanding Credit in the Digital Economy
Credit is essentially trust extended by lenders, allowing you to borrow money or make purchases now and pay later. In the digital economy, credit is often linked to online accounts, digital wallets, and instant approvals, which can make it easier to spend but also easier to lose track of balances.
Key Principles for Using Credit Wisely
- Keep Balances Low Relative to Limits: Your credit utilization ratio—the amount of credit you use compared to your total available credit—should ideally stay below 30%. High utilization can hurt your credit score.
- Pay On Time, Every Time: Timely payments are the most significant factor in your credit score. Digital reminders and automatic payments can help.
- Monitor Your Accounts Regularly: Use apps or online banking to track spending and detect any unauthorized activity quickly.
- Understand Your Billing Cycle: Knowing when your billing cycle starts and ends helps you plan payments and avoid interest.
- Avoid Opening Too Many Accounts at Once: Each credit inquiry can slightly lower your score, and multiple new accounts can signal risk.
Mind Map: Using Credit Wisely
Practical Examples
Example 1: Managing Credit Utilization Sarah has two credit cards with limits of $3,000 each. She keeps her balances under $500 on each card. This means her utilization is roughly 8%, well below the 30% threshold. She uses a budgeting app that alerts her when balances approach $1,000, helping her avoid high utilization.
Example 2: Automating Payments to Avoid Late Fees James sets up automatic payments for his credit card bills to cover the minimum amount due. He also schedules a calendar reminder a week before the due date to review his statement and pay extra if possible. This habit keeps his payment history clean and his credit score healthy.
Example 3: Monitoring Accounts for Fraud Lena receives push notifications from her bank every time a transaction occurs on her credit card. One evening, she notices a charge she doesn’t recognize and immediately contacts her bank to freeze the card and dispute the charge. Early detection saved her from potential financial loss.
Mind Map: Credit Account Monitoring
Tips for Digital Credit Management
- Use credit card apps to set spending limits and alerts.
- Regularly check your credit report for errors or unfamiliar accounts.
- Avoid using credit for everyday expenses unless you can pay the balance in full each month.
- When shopping online, use secure payment methods and avoid saving card details on multiple sites.
Mind Map: Digital Credit Management Tips
Using credit wisely in the digital economy is about balance and awareness. It’s about leveraging technology to stay informed and in control, while avoiding the traps of overspending or neglecting payments. With practical habits and the right tools, credit can support your financial goals rather than hinder them.
Chapter 7: Investing Basics for Millennials
7.1 Introduction to Investing: Stocks, Bonds, and Mutual Funds
Investing is a way to put your money to work with the goal of growing it over time. For many millennials, understanding the basics of investing is a key step toward financial independence. This section covers three common investment types: stocks, bonds, and mutual funds. Each has its own characteristics, risks, and potential rewards.
Stocks
Stocks represent ownership shares in a company. When you buy a stock, you become a partial owner of that company. Stocks can offer growth through price appreciation and sometimes dividends, which are portions of a company’s profits paid to shareholders.
- Risk and Reward: Stocks tend to be more volatile than other investments. Their prices can rise and fall sharply based on company performance, market conditions, and economic factors.
- Example: Imagine buying 10 shares of a tech company at $50 each. If the price rises to $60, your investment increases in value by $100 (10 shares × $10 gain). If the company pays a $1 dividend per share, you also earn $10 in dividends.
Mind Map: Stocks
Bonds
Bonds are loans you give to governments, municipalities, or corporations. In return, they pay you interest over a fixed period and return the principal at maturity.
- Risk and Reward: Bonds are generally less risky than stocks but offer lower returns. The main risks include interest rate changes and the issuer’s ability to repay.
- Example: Buying a $1,000 bond with a 5% annual interest rate means you receive $50 per year until the bond matures, at which point you get your $1,000 back.
Mind Map: Bonds
Mutual Funds
Mutual funds pool money from many investors to buy a diversified portfolio of stocks, bonds, or other assets. They are managed by professional fund managers.
- Risk and Reward: Mutual funds offer diversification, which can reduce risk compared to owning individual stocks or bonds. Returns depend on the fund’s holdings and market performance.
- Example: Investing $1,000 in a mutual fund that holds 60% stocks and 40% bonds spreads your risk. If stocks rise but bonds fall, the overall impact may be balanced.
Mind Map: Mutual Funds
Comparing the Three
| Investment Type | Ownership | Risk Level | Typical Returns | Liquidity | Example Use Case |
|---|---|---|---|---|---|
| Stocks | Partial ownership in companies | High | Higher potential returns | High | Growth over long term |
| Bonds | Lending money to issuer | Moderate | Moderate, fixed income | Moderate | Income and capital preservation |
| Mutual Funds | Pooled investments | Varies | Varies by fund type | High | Diversification for beginners |
Practical Example: Choosing an Investment
Suppose you have $5,000 to invest and want a balanced approach. You might put $2,500 in a diversified stock mutual fund, $1,500 in bonds, and keep $1,000 in a high-yield savings account for emergencies. This mix offers growth potential while managing risk.
Understanding these basics helps you make informed decisions about where to put your money. Each investment type plays a role in a well-rounded portfolio, depending on your goals, risk tolerance, and time horizon.
7.2 Understanding Risk and Diversification
Investing always involves some level of risk—the chance that your investment’s value will fluctuate or that you might lose money. Understanding risk and how to manage it is essential for building a portfolio that suits your financial goals and comfort level.
What Is Risk?
Risk in investing refers to the uncertainty about the returns you will get. It can come from various sources:
- Market Risk: The overall market can go up or down due to economic changes, political events, or other factors.
- Company Risk: A specific company’s performance might falter due to poor management, competition, or scandals.
- Interest Rate Risk: Changes in interest rates can affect bond prices and borrowing costs.
- Inflation Risk: Inflation reduces the purchasing power of your returns.
Each type of risk affects investments differently. Stocks tend to have higher market and company risk but offer higher potential returns. Bonds usually have lower risk but also lower returns.
Measuring Risk
Risk is often measured by volatility, which is how much an investment’s price fluctuates over time. A highly volatile stock might jump 10% one day and drop 8% the next. A bond’s price is usually steadier.
Diversification: The Core Risk Management Tool
Diversification means spreading your investments across different assets to reduce risk. The idea is simple: don’t put all your eggs in one basket.
Mind Map: Diversification Basics
By investing in different asset classes, sectors, and geographic regions, you reduce the impact if one area performs poorly.
Example: Why Diversify?
Imagine you invest all your money in a single tech stock. If that company faces a setback, your entire investment could suffer. But if you spread your money across tech stocks, healthcare stocks, bonds, and international funds, a problem in one area won’t wipe out your portfolio.
Correlation and Its Role
Correlation measures how investments move relative to each other. If two assets move in the same direction at the same time, they have a high positive correlation. If they move in opposite directions, they have a negative correlation.
Good diversification involves combining assets with low or negative correlations to smooth out returns.
Mind Map: Correlation in Diversification
Example: Correlation in Practice
When the stock market drops, bonds often hold steady or rise, helping to balance losses. If your portfolio only had stocks, you’d feel the full impact of the drop.
Diversification in the Digital Economy
Digital platforms make diversification easier. Robo-advisors automatically spread investments across various assets based on your risk tolerance. Exchange-traded funds (ETFs) let you buy a basket of stocks or bonds in one trade.
Practical Example: Building a Diversified Portfolio
Suppose you have $10,000 to invest. You might allocate:
- 50% in a total stock market ETF (covering many companies and sectors)
- 30% in a bond ETF (providing stability)
- 10% in an international stock ETF (adding geographic diversity)
- 10% in a real estate investment trust (REIT) ETF (exposure to real estate)
This mix balances growth potential with risk management.
Risk Tolerance and Diversification
Your personal risk tolerance—how much ups and downs you can comfortably handle—should guide your diversification. Younger investors might accept more risk for higher returns, so they lean toward stocks. Those closer to retirement often prefer bonds and stable assets.
Mind Map: Aligning Diversification with Risk Tolerance
Summary
Risk is an inherent part of investing, but diversification helps manage it by spreading exposure across different assets, sectors, and regions. Understanding how different investments behave and correlate allows you to build a portfolio that fits your financial goals and comfort level. Using digital tools and ETFs makes diversification accessible and straightforward for millennial investors.
7.3 Digital Investment Platforms: Robo-Advisors and Brokerage Apps
In the digital economy, investing has become more accessible thanks to technology-driven platforms. Two main categories dominate this space: robo-advisors and brokerage apps. Both offer different approaches to managing investments, catering to varying levels of experience, time commitment, and financial goals.
Robo-Advisors
Robo-advisors are automated platforms that create and manage investment portfolios based on your risk tolerance, goals, and timeline. They use algorithms to select and rebalance assets, typically focusing on low-cost index funds or ETFs.
How Robo-Advisors Work:
- You complete a questionnaire covering your financial goals, risk appetite, and investment horizon.
- The platform builds a diversified portfolio tailored to your profile.
- Investments are automatically managed, including rebalancing and dividend reinvestment.
- Some offer tax-loss harvesting to optimize tax efficiency.
Example: Imagine Sarah, a millennial with limited investing knowledge and little time to monitor markets. She uses a robo-advisor that asks about her comfort with risk and her goal to save for a house in 10 years. The platform builds a portfolio weighted towards stocks but includes bonds for stability. Sarah deposits money monthly, and the robo-advisor adjusts her portfolio automatically.
Brokerage Apps
Brokerage apps provide a platform for investors to buy and sell individual securities like stocks, bonds, ETFs, and mutual funds. They offer more control but require more involvement and knowledge.
Features of Brokerage Apps:
- Access to a wide range of investment products.
- Tools for research, charting, and analysis.
- Options for fractional shares, allowing investment with small amounts.
- Some offer commission-free trades.
- Ability to set up recurring investments or alerts.
Example: John enjoys researching companies and prefers to pick individual stocks. Using a brokerage app, he buys fractional shares of several tech companies and sets alerts for price changes. He also invests in ETFs to diversify. John spends time weekly reviewing his portfolio.
Mind Map: Digital Investment Platforms Overview
Choosing Between Robo-Advisors and Brokerage Apps
| Factor | Robo-Advisors | Brokerage Apps |
|---|---|---|
| Investment Knowledge | Minimal required | Moderate to advanced |
| Time Commitment | Low (hands-off) | Higher (active management) |
| Control Over Choices | Limited to portfolio options | Full control over individual assets |
| Fees | Typically a small percentage of assets | Often commission-free or low fees |
| Suitability | Beginners or those preferring automation | Experienced investors or active traders |
Practical Example: Combining Both Approaches
Emma wants a balanced approach. She uses a robo-advisor for her retirement account, appreciating the automation and diversification. For her personal investing, she uses a brokerage app to buy shares in companies she follows closely.
Mind Map: Example Portfolio Setup
Summary
Digital investment platforms simplify access to the markets. Robo-advisors suit those who prefer a hands-off approach with automated management, while brokerage apps offer flexibility for those who want to pick their own investments. Both can be used together to meet different financial goals and comfort levels.
7.4 Practical Example: Starting a Low-Cost Investment Portfolio
Starting a low-cost investment portfolio can feel like stepping into a maze, but breaking it down into manageable steps helps make the process straightforward and approachable. The goal is to build a diversified portfolio without spending a fortune on fees or complicated products.
Step 1: Define Your Investment Goal
Before investing, clarify what you want to achieve. Are you saving for retirement, a down payment on a home, or just building wealth over time? Your goal influences your risk tolerance and investment choices.
Step 2: Choose an Investment Account
For most beginners, a brokerage account or a retirement account like an IRA is the starting point. Brokerage accounts offer flexibility, while retirement accounts provide tax advantages.
Step 3: Select Low-Cost Investment Options
Index funds and exchange-traded funds (ETFs) are popular low-cost options. They track a market index and offer broad diversification with minimal fees.
Step 4: Determine Asset Allocation
Decide how to split your investments between stocks, bonds, and other assets. Younger investors often lean more heavily into stocks for growth, while bonds add stability.
Step 5: Automate Contributions
Set up automatic transfers from your bank to your investment account. This enforces discipline and takes advantage of dollar-cost averaging.
Step 6: Monitor and Rebalance Periodically
Check your portfolio at least once a year to ensure your asset allocation still matches your goals. Rebalance by buying or selling assets to maintain your target mix.
Mind Map: Starting a Low-Cost Investment Portfolio
Example: Building a Simple Portfolio
Imagine Sarah, a 28-year-old with a moderate risk tolerance and a goal to save for retirement. She opens a Roth IRA with an online brokerage that offers commission-free ETFs.
- She decides on a 70% stock and 30% bond allocation.
- For stocks, she picks a total market ETF that covers U.S. companies broadly.
- For bonds, she selects a total bond market ETF.
- She sets up an automatic monthly contribution of $200.
This approach keeps costs low, provides diversification, and fits her risk profile.
Mind Map: Sarah’s Portfolio Example
Example: Starting with Even Less
John wants to start investing but only has $50 a month to spare. He chooses a brokerage that allows fractional shares, so he can buy portions of expensive stocks or ETFs.
- He selects a broad market ETF.
- He sets up automatic purchases of fractional shares monthly.
This method removes the barrier of high share prices and still builds a diversified portfolio over time.
Mind Map: John’s Fractional Share Approach
Key Points to Remember
- Keep fees low by choosing index funds or ETFs with low expense ratios.
- Diversify to reduce risk; don’t put all your money in one stock or sector.
- Automate contributions to maintain consistency.
- Start with what you can afford; even small amounts grow over time.
- Review your portfolio periodically but avoid overreacting to short-term market changes.
Starting a low-cost investment portfolio is less about timing the market and more about time in the market. By following these steps and examples, you can build a solid foundation for your financial future without unnecessary complexity or cost.
7.5 Dollar-Cost Averaging and Automated Investing
Dollar-cost averaging (DCA) is an investment strategy where you invest a fixed amount of money at regular intervals, regardless of the asset’s price. This approach spreads out your purchases over time, reducing the risk of investing a large sum at an inopportune moment. It’s particularly useful in volatile markets, where prices fluctuate frequently.
How Dollar-Cost Averaging Works
Imagine you decide to invest $200 every month into a stock or fund. Some months the price per share is high, other months it’s low. When prices are high, your $200 buys fewer shares; when prices are low, it buys more. Over time, this balances out the average cost per share you pay.
Here’s a simple mind map to illustrate the concept:
Example: Monthly Investment in a Mutual Fund
| Month | Share Price | Investment Amount | Shares Purchased |
|---|---|---|---|
| 1 | $50 | $200 | 4.00 |
| 2 | $40 | $200 | 5.00 |
| 3 | $25 | $200 | 8.00 |
| 4 | $20 | $200 | 10.00 |
| 5 | $30 | $200 | 6.67 |
Total invested: $1,000
Total shares: 33.67
Average cost per share: $29.70
If you had invested the entire $1,000 at the start when the price was $50, you would have bought only 20 shares. DCA allowed you to buy more shares at lower prices, lowering your average cost.
Benefits of Dollar-Cost Averaging
- Reduces Timing Risk: You don’t have to guess the best time to invest.
- Encourages Discipline: Regular investing builds good financial habits.
- Simplifies Decision-Making: You focus on consistent contributions rather than market timing.
Automated Investing
Automated investing takes dollar-cost averaging a step further by using technology to handle your investments for you. You set up recurring contributions, and the platform automatically invests your money according to your chosen strategy.
Here’s a mind map outlining automated investing:
Practical Example: Setting Up Automated Investing
- You decide to invest $150 every two weeks.
- You select a diversified portfolio aligned with your risk tolerance.
- The platform deducts $150 from your bank account every two weeks.
- It purchases shares or fund units automatically.
- Periodically, the platform rebalances your portfolio to maintain your target allocation.
This process removes the need to manually track market prices or execute trades. It also helps maintain your investment plan even during busy or uncertain times.
Combining Dollar-Cost Averaging and Automation
Automated investing is essentially dollar-cost averaging on autopilot. By committing to regular investments, you benefit from:
- Consistent market participation
- Reduced emotional decision-making
- Time savings
Things to Keep in Mind
- DCA does not guarantee profits or protect against losses in declining markets.
- It’s most effective over longer time horizons.
- Automated investing platforms may charge fees; understand them before committing.
- Regularly review your investment goals and risk tolerance to ensure your automated plan still fits.
Summary Mind Map
By using dollar-cost averaging and automated investing together, millennials can build a steady investment habit that fits into their digital lifestyle without requiring constant attention or market expertise.
Chapter 8: Retirement Planning in a Digital World
8.1 Importance of Early Retirement Planning
Retirement planning is the process of determining retirement income goals and the actions and decisions necessary to achieve those goals. Starting early means you have more time to build a financial cushion, which reduces pressure later in life. The earlier you begin, the more you benefit from compound interest, which is essentially earning interest on your interest.
Consider this mind map to organize the key reasons for early retirement planning:
Compound Interest in Action
Imagine two friends, Alex and Jamie. Alex starts saving $200 a month at age 25, while Jamie waits until 35 to start the same monthly savings. Assuming a 7% annual return, by age 65, Alex will have about $430,000, while Jamie will have roughly $200,000. The extra 10 years of contributions and growth nearly doubles Alex’s retirement savings.
Managing Risks Over Time
Starting early gives you room to take calculated risks with your investments. If the market dips, you have time to recover. For example, if your portfolio drops 20% in one year, a longer timeline allows you to wait out the downturn rather than selling at a loss.
Lifestyle Flexibility
Early planning can mean retiring earlier or having the freedom to change careers later in life. For instance, if you start saving early and build a solid nest egg, you might choose to retire at 60 instead of 67, or take a sabbatical to learn a new skill.
Inflation and Purchasing Power
Inflation reduces the value of money over time. Early retirement planning means investing in assets that grow faster than inflation. For example, if inflation averages 2% per year, your money needs to grow at least that much to maintain buying power.
Debt Reduction
Early planning often includes strategies to reduce or eliminate debt before retirement. Paying off high-interest debt early frees up more money for savings and reduces financial stress later. For example, paying off a credit card balance early avoids accumulating interest that could otherwise be invested.
Summary Mind Map
Starting retirement planning early is less about rushing and more about giving your money time to work for you. It creates a foundation that can support your goals and adapt to life’s changes.
8.2 Understanding 401(k), IRA, and Roth IRA Accounts
When planning for retirement, understanding the main types of tax-advantaged accounts is essential. Among the most common are the 401(k), Traditional IRA, and Roth IRA. Each has distinct rules about contributions, taxes, and withdrawals, which influence how and when you benefit from them.
401(k) Accounts
A 401(k) is an employer-sponsored retirement savings plan. It allows employees to contribute a portion of their paycheck before taxes are taken out, which lowers taxable income for the year. Employers often match contributions up to a certain percentage, which is essentially free money toward your retirement.
- Contribution Limits: For 2024, you can contribute up to $23,000 if you’re under 50, or $30,500 if 50 or older (including catch-up contributions).
- Tax Treatment: Contributions reduce your taxable income now, but withdrawals during retirement are taxed as ordinary income.
- Withdrawal Rules: Withdrawals before age 59½ usually incur a 10% penalty plus taxes, with some exceptions.
Example: Sarah earns $60,000 annually and contributes 10% ($6,000) to her 401(k). This reduces her taxable income to $54,000. Her employer matches 50% of her contribution up to 6% of her salary, adding $1,800 to her account. Over time, this match significantly boosts her savings.
Traditional IRA (Individual Retirement Account)
A Traditional IRA is an individual retirement account you open independently of your employer. Contributions may be tax-deductible depending on your income and whether you or your spouse are covered by a workplace retirement plan.
- Contribution Limits: For 2024, the limit is $7,000 if under 50, or $8,000 if 50 or older.
- Tax Treatment: Contributions may be deductible, reducing taxable income. Withdrawals in retirement are taxed as ordinary income.
- Withdrawal Rules: Similar to 401(k)s, early withdrawals before 59½ typically face penalties and taxes.
Example: Mark, who doesn’t have a 401(k) at work, contributes $6,000 to a Traditional IRA. Since he meets income requirements, he deducts this amount from his taxable income, lowering his tax bill for the year.
Roth IRA
A Roth IRA is also an individual retirement account but with different tax advantages. Contributions are made with after-tax dollars, so they don’t reduce your taxable income now. However, qualified withdrawals during retirement are tax-free.
- Contribution Limits: Same as Traditional IRA.
- Tax Treatment: No immediate tax benefit, but withdrawals of contributions and earnings are tax-free if certain conditions are met.
- Withdrawal Rules: Contributions (not earnings) can be withdrawn anytime without penalty or taxes. Earnings can be withdrawn tax-free after age 59½ and if the account has been open for at least five years.
Example: Emily contributes $7,000 to her Roth IRA. She pays taxes on her income now but knows that in retirement, she can withdraw both her contributions and earnings without paying taxes.
Mind Map: Retirement Accounts Overview
Mind Map: Tax Treatment Comparison
Mind Map: Contribution Limits (2024)
Key Differences Summarized
| Feature | 401(k) | Traditional IRA | Roth IRA |
|---|---|---|---|
| Who sponsors | Employer | Individual | Individual |
| Contribution type | Pre-tax | Possibly deductible | After-tax |
| Tax on withdrawals | Taxed as income | Taxed as income | Tax-free (if qualified) |
| Early withdrawal penalty | Yes (usually 10%) | Yes (usually 10%) | Contributions no penalty; earnings penalty applies if early |
| Employer match | Often available | No | No |
Understanding these accounts helps you choose the right mix for your retirement goals. For example, if you expect to be in a higher tax bracket in retirement, a Roth IRA’s tax-free withdrawals might be preferable. Conversely, if you want to reduce your taxable income now, a 401(k) or Traditional IRA could be better.
In practice, many people contribute to both a 401(k) and an IRA to diversify tax advantages and maximize savings. The choice depends on your current income, tax situation, and retirement plans.
8.3 Using Digital Tools to Monitor and Adjust Retirement Plans
Monitoring and adjusting your retirement plan is essential to ensure your savings grow in line with your goals and changing circumstances. Digital tools simplify this process by providing real-time data, projections, and alerts, making it easier to stay on track without needing a finance degree.
Why Use Digital Tools?
Digital tools offer several advantages:
- Accessibility: Check your retirement accounts anytime, anywhere.
- Automation: Set up automatic contributions and rebalancing.
- Visualization: See your progress with charts and graphs.
- Scenario Planning: Test “what-if” situations to understand potential outcomes.
Types of Digital Tools for Retirement Planning
- Retirement Calculators: Estimate how much you need to save based on your current savings, expected retirement age, and lifestyle.
- Portfolio Trackers: Monitor the performance of your investments.
- Budgeting Apps: Help you allocate funds toward retirement savings.
- Robo-Advisors: Automatically manage and adjust your portfolio based on your risk tolerance and goals.
Mind Map: Key Features of Retirement Planning Tools
Using Digital Tools to Monitor Your Plan
Start by linking your retirement accounts to a single platform or app. This consolidation provides a comprehensive view of your savings and investments. For example, an app might show that your 401(k) balance has grown by 5% over the last quarter but also highlight that your asset allocation is now more aggressive than your risk preference.
Regularly review the following:
- Account Balances: Are your balances growing as expected?
- Contribution Rates: Are you contributing enough to meet your goals?
- Investment Performance: Are your investments aligned with your risk tolerance?
Mind Map: Monitoring Checklist
Adjusting Your Retirement Plan
Adjustments may be necessary due to life changes, market shifts, or goal updates. Digital tools often allow you to:
- Change Contribution Amounts: Increase contributions after a raise or decrease temporarily during tight budgets.
- Rebalance Portfolio: Shift investments to maintain your desired risk level.
- Update Retirement Goals: Modify your retirement age or expected expenses.
For example, if a tool alerts you that your portfolio is overweight in stocks after a market rally, you can rebalance by selling some stocks and buying bonds to reduce risk.
Mind Map: Adjustment Actions
Practical Example
Imagine Sarah, a 30-year-old millennial using a retirement app. The app shows her current savings, projects her retirement income, and sends reminders to increase contributions annually. When the app notifies her that her portfolio is now 80% stocks, exceeding her 70% target, she uses the app’s rebalancing feature to adjust her investments. She also updates her retirement age from 65 to 67 after deciding to work longer, and the app recalculates her savings needs accordingly.
Tips for Effective Use
- Schedule monthly or quarterly reviews using your digital tool.
- Set realistic alerts to avoid constant notifications.
- Use scenario planning features to understand the impact of changes.
- Keep your personal information secure by using strong passwords and two-factor authentication.
In summary, digital tools provide a practical way to keep your retirement plan aligned with your goals. Regular monitoring combined with timely adjustments can help you maintain control over your financial future without unnecessary complexity.
8.4 Practical Example: Calculating Retirement Needs with Online Calculators
Calculating your retirement needs is a practical step that helps you understand how much money you’ll require to maintain your lifestyle once you stop working. Online retirement calculators simplify this process by asking for a few key inputs and then estimating the amount you should aim to save. Let’s walk through how to use these calculators effectively, with examples and mind maps to clarify the concepts.
Key Inputs for Retirement Calculators
Most calculators ask for the following information:
- Current Age: Your starting point.
- Expected Retirement Age: When you plan to stop working.
- Life Expectancy: How long you expect to live (or plan for).
- Current Savings: What you already have saved.
- Annual Savings: How much you plan to add each year.
- Expected Rate of Return: The average annual growth rate on your investments.
- Annual Retirement Spending: How much money you expect to spend each year during retirement.
- Inflation Rate: To adjust future spending needs.
Mind Map: Inputs to Retirement Calculator
Step-by-Step Example
Imagine Sarah, age 30, plans to retire at 65 and expects to live until 90. She currently has $20,000 saved and can save $5,000 annually. She estimates her investments will grow at 6% per year, and she wants $40,000 per year in retirement, adjusted for 2% inflation.
-
Input Sarah’s data into the calculator:
- Current Age: 30
- Retirement Age: 65
- Life Expectancy: 90
- Current Savings: $20,000
- Annual Savings: $5,000
- Rate of Return: 6%
- Annual Retirement Spending: $40,000
- Inflation Rate: 2%
-
Calculator estimates:
- Total amount needed at retirement to fund 25 years of spending.
- Whether current savings and planned contributions are sufficient.
Mind Map: Calculation Process
Breaking Down the Calculation
- Future Value of Current Savings: How much $20,000 grows over 35 years at 6%.
- Future Value of Annual Contributions: The sum of $5,000 saved each year, growing at 6%.
- Required Retirement Fund: The lump sum needed at retirement to cover $40,000 per year for 25 years, accounting for inflation.
Example Calculation (Simplified)
-
Future Value of $20,000: \[ FV = 20,000 \times (1 + 0.06)^{35} \approx 20,000 \times 7.686 = 153,720 \]
-
Future Value of Annual Contributions: Using the future value of an annuity formula: \[ FV = 5,000 \times \frac{(1 + 0.06)^{35} - 1}{0.06} \approx 5,000 \times 122.03 = 610,150 \]
-
Total Savings at Retirement: \[ 153,720 + 610,150 = 763,870 \]
-
Required Retirement Fund:
Adjust $40,000 for 25 years of retirement spending, increasing annually by 2% inflation, discounted by 6% return.
This calculation is more complex but the calculator handles it. If the required fund is less than $763,870, Sarah is on track; if more, she needs to save more or adjust expectations.
Mind Map: Interpreting Results
Tips for Using Online Calculators
- Be realistic with assumptions: Overly optimistic rates of return or underestimating expenses can mislead.
- Adjust inputs to see impact: Try different retirement ages or savings rates to understand effects.
- Consider inflation carefully: Even small changes affect long-term needs.
- Use multiple calculators: Different tools may use slightly different methods.
Summary
Calculating retirement needs with online tools involves entering personal and financial data to estimate how much money you’ll need and whether your current savings plan is sufficient. Understanding the inputs and outputs helps you make informed decisions about saving and spending. Visualizing the process with mind maps clarifies the relationships between your age, savings, returns, and retirement goals.
8.5 Employer-Sponsored Plans vs Personal Retirement Accounts
When planning for retirement, millennials often face a choice between employer-sponsored retirement plans and personal retirement accounts. Both have distinct features, advantages, and limitations. Understanding these differences helps you make informed decisions about where to put your money for the long haul.
Employer-Sponsored Retirement Plans
These are retirement savings plans offered by your employer. The most common types include 401(k) plans in the private sector and 403(b) plans for certain nonprofits and public education employees.
- Contributions: Typically deducted directly from your paycheck, often pre-tax, which lowers your taxable income for the year.
- Employer Match: Many employers match a portion of your contributions, which is essentially free money. For example, if your employer matches 50% of your contributions up to 6% of your salary, contributing at least 6% maximizes this benefit.
- Contribution Limits: For 2024, the IRS allows up to $23,000 in employee contributions if you’re under 50, with additional catch-up contributions allowed if you’re older.
- Investment Options: Usually limited to a selection of mutual funds or target-date funds chosen by the plan administrator.
- Withdrawals: Generally, withdrawals before age 59½ incur penalties and taxes, except in specific circumstances.
Example:
Sarah earns $60,000 per year and contributes 6% ($3,600) to her 401(k). Her employer matches 50% of her contribution up to 6%, adding $1,800. Sarah effectively saves $5,400 annually toward retirement, with tax advantages on the $3,600 she contributes.
Personal Retirement Accounts
These are accounts you open and manage independently of your employer. The most common types are Traditional IRAs and Roth IRAs.
- Contribution Limits: For 2024, the limit is $7,000 per year (including catch-up contributions if you’re 50 or older).
- Tax Treatment:
- Traditional IRA: Contributions may be tax-deductible, but withdrawals in retirement are taxed as income.
- Roth IRA: Contributions are made with after-tax dollars, but qualified withdrawals are tax-free.
- Investment Freedom: You can invest in a wide range of assets, including stocks, bonds, ETFs, and mutual funds.
- Eligibility: Income limits apply for Roth IRA contributions, and deductibility for Traditional IRAs may be limited if you or your spouse have a retirement plan at work.
- Withdrawals: Roth IRAs allow contributions to be withdrawn anytime tax- and penalty-free; earnings can be withdrawn tax-free after age 59½ and meeting the 5-year rule.
Example:
James, a freelancer, opens a Roth IRA and contributes $6,000 annually. He invests in a mix of index funds and bonds. Since contributions are after-tax, he won’t owe taxes on qualified withdrawals, which is helpful if he expects to be in a higher tax bracket later.
Mind Map: Employer-Sponsored Plans vs Personal Retirement Accounts
Combining Both for Maximum Benefit
Many millennials benefit from contributing to both types of accounts. Start by contributing enough to your employer-sponsored plan to get the full match—it’s an immediate 50% or 100% return on your contribution, depending on the match rate. After that, consider funding a Roth IRA for tax diversification and investment flexibility.
Practical Example:
Emily contributes 5% of her $70,000 salary to her 401(k) and receives a 4% employer match. She then contributes $6,500 to her Roth IRA. This strategy maximizes employer benefits while giving her control over investment choices and tax treatment.
Key Considerations
- Liquidity and Access: Employer plans generally restrict early withdrawals more than IRAs.
- Fees: Employer plans may have higher administrative fees; IRAs allow you to shop for low-cost providers.
- Tax Strategy: Balancing pre-tax (401(k), Traditional IRA) and post-tax (Roth IRA) accounts can optimize tax outcomes in retirement.
In summary, employer-sponsored plans offer convenience and employer contributions but limited investment choices. Personal retirement accounts provide flexibility and tax strategy options but require more active management. Using both strategically can help build a more robust retirement portfolio.
Chapter 9: Tax Planning and Optimization
9.1 Basics of Taxation for Millennials
Taxes can feel like a maze, but understanding the basics helps you navigate it without getting lost. For millennials, who often juggle multiple income sources and digital transactions, grasping taxation fundamentals is essential.
What Are Taxes?
Taxes are mandatory contributions to government revenue, collected to fund public services like roads, schools, and emergency services. In the U.S., taxes come in various forms, but the most relevant for individuals are income taxes, payroll taxes, and sometimes self-employment taxes.
Types of Taxes Millennials Encounter
- Federal Income Tax: Charged on your earnings by the federal government.
- State Income Tax: Depending on where you live, states may tax your income.
- Payroll Taxes: These fund Social Security and Medicare, automatically deducted from paychecks.
- Self-Employment Tax: For freelancers and gig workers, covering Social Security and Medicare contributions.
How Income Tax Works
Your income tax depends on how much you earn and your filing status (single, married filing jointly, etc.). The U.S. uses a progressive tax system, meaning higher income portions are taxed at higher rates.
Mind Map: Income Tax Components
Taxable vs. Non-Taxable Income
Not all income is taxable. For example, gifts and inheritances generally aren’t taxed as income. Some benefits, like employer-provided health insurance, may also be excluded.
Deductions and Credits
Deductions reduce your taxable income, while credits reduce your tax bill directly. For example, the standard deduction for a single filer in 2023 is $13,850, meaning you subtract that from your income before calculating tax.
Example: Calculating Taxable Income
If you earned $50,000 and take the standard deduction of $13,850, your taxable income becomes $36,150.
Filing Status
Your filing status affects your tax brackets and standard deduction. For instance, ‘Head of Household’ offers a higher standard deduction than ‘Single’ and is available if you support a qualifying person.
Payroll Taxes
These are separate from income tax and fund Social Security and Medicare. Typically, 7.65% is withheld from your paycheck, matched by your employer. If self-employed, you pay both portions (15.3%).
Example: Payroll Tax for a Freelancer
If you earn $40,000 freelancing, you owe approximately $6,120 in self-employment tax (15.3% of $40,000), though half can be deducted when calculating income tax.
Tax Withholding and Estimated Payments
Employers withhold taxes from paychecks based on your W-4 form. If you have other income sources, like freelance work, you might need to make quarterly estimated tax payments to avoid penalties.
Mind Map: Tax Payment Methods
Filing Your Tax Return
Each year, you file a tax return (Form 1040 in the U.S.) to report income, deductions, and credits. This determines if you owe more tax or get a refund.
Practical Example: Tax Scenario for a Millennial
Sarah works a full-time job earning $60,000 and freelances on the side, making $10,000. Her employer withholds taxes on the $60,000, but she must pay estimated taxes on the $10,000 freelance income. She claims the standard deduction and qualifies for a small tax credit for education expenses. After filing, she owes additional tax on her freelance income but avoids penalties by making estimated payments.
Understanding these basics helps you plan better, avoid surprises, and make informed decisions about your money. Taxes aren’t just a year-end chore; they’re part of your financial picture all year round.
9.2 Digital Tax Filing: Choosing the Right Software
Filing taxes digitally has become the norm for many, especially millennials comfortable with online tools. Choosing the right software can simplify the process, reduce errors, and sometimes save money. But with many options available, how do you pick the one that fits your needs?
Key Factors to Consider When Choosing Tax Software
- Complexity of Your Tax Situation: Simple returns with just W-2 income and standard deductions require less robust software than those with investments, freelance income, or rental properties.
- Cost: Some software offers free filing for basic returns, while others charge fees for additional forms or state returns.
- User Interface and Support: Easy navigation and access to help (chat, phone, or email) can make the process less stressful.
- Accuracy Guarantees and Audit Support: Some providers offer guarantees against errors and assistance if audited.
- Integration with Financial Accounts: Ability to import data from banks, employers, or investment accounts can save time.
Mind Map: Choosing Tax Software
Examples of Tax Situations and Suitable Software Choices
-
Example 1: Recent Graduate with W-2 Income Only
- Needs: Simple filing, possibly free.
- Suitable: Software offering free federal and state filing for basic returns.
- Benefit: No cost, straightforward interface.
-
Example 2: Freelancer with Multiple 1099s and Expenses
- Needs: Ability to report self-employment income, deduct expenses.
- Suitable: Software with self-employment support, expense tracking, and Schedule C forms.
- Benefit: Helps maximize deductions, reduces errors.
-
Example 3: Investor with Stocks and Dividends
- Needs: Reporting capital gains, dividends, and possibly foreign investments.
- Suitable: Software that imports brokerage data and handles complex investment forms.
- Benefit: Accurate reporting, time-saving data import.
Mind Map: Matching Tax Software to User Profile
Additional Considerations
- State Returns: Some software includes state filing for free; others charge extra.
- Mobile Access: Filing on mobile devices can be convenient but may limit features.
- Security: Ensure the software uses encryption and secure login methods.
Practical Example: Comparing Two Software Options
Imagine you are a millennial freelancer with moderate investment income. You compare two popular tax software options:
- Option A: Offers free federal filing for simple returns but charges $70 for self-employment forms and $40 per state return.
- Option B: Charges $50 flat for federal filing including self-employment support and includes one free state return.
In this case, Option B might be more cost-effective and simpler, especially if you file in one state.
Mind Map: Cost Comparison Example
Choosing the right digital tax filing software depends on your personal financial situation, comfort with technology, and budget. Taking time to assess these factors can make tax season less daunting and help you avoid unnecessary expenses or mistakes.
9.3 Maximizing Deductions and Credits
Maximizing deductions and credits is a practical way to reduce your tax bill by legally lowering the amount of income subject to tax or directly reducing the tax owed. Understanding the difference between deductions and credits is key: deductions reduce taxable income, while credits reduce the tax itself.
Mind Map: Tax Deductions vs Tax Credits
Common Deductions for Millennials
-
Student Loan Interest Deduction: You can deduct up to $2,500 of interest paid on qualified student loans. For example, if you paid $1,200 in interest last year, that amount reduces your taxable income.
-
Charitable Contributions: Donations to qualified charities can be deducted if you itemize. Suppose you donated $500 to a nonprofit; that amount can reduce your taxable income.
-
Mortgage Interest Deduction: If you own a home and pay mortgage interest, you may deduct the interest paid, which can be significant in the early years of a mortgage.
-
Medical Expenses: Only expenses exceeding 7.5% of your adjusted gross income (AGI) qualify. For example, if your AGI is $50,000, only medical costs above $3,750 can be deducted.
Common Tax Credits
-
Earned Income Tax Credit (EITC): Designed for low to moderate-income workers, this credit varies based on income and number of children. For instance, a single parent with two children might qualify for a credit of several thousand dollars.
-
Child Tax Credit: Provides up to $2,000 per qualifying child under 17. If you have two children, this could reduce your tax bill by up to $4,000.
-
Education Credits:
- American Opportunity Credit: Up to $2,500 per student for the first four years of higher education.
- Lifetime Learning Credit: Up to $2,000 per tax return for qualified tuition and related expenses.
-
Energy-Efficient Home Improvement Credits: Installing solar panels or energy-efficient windows can qualify for credits that reduce your tax owed.
Mind Map: Examples of Maximizing Deductions and Credits
Practical Example: Combining Deductions and Credits
Consider Sarah, a 28-year-old millennial who paid $1,800 in student loan interest, donated $600 to charity, and has two children under 17. She also paid $3,000 in qualified tuition for a certification course.
-
Deductions:
- Student loan interest: $1,800 reduces taxable income.
- Charitable donations: $600 reduces taxable income.
-
Credits:
- Child Tax Credit: 2 children × $2,000 = $4,000 credit.
- Lifetime Learning Credit: 20% of $3,000 tuition = $600 credit.
Sarah’s taxable income is lowered by $2,400 from deductions, and her tax owed is reduced by $4,600 from credits. This combination significantly lowers her overall tax liability.
Tips for Maximizing Deductions and Credits
- Keep detailed records: Receipts, statements, and payment confirmations are essential.
- Itemize only if beneficial: Sometimes the standard deduction is higher; compare both.
- Review eligibility annually: Life changes like marriage, children, or education affect what you can claim.
- Use tax software or consult professionals: They can help identify less obvious deductions and credits.
By understanding and applying these deductions and credits thoughtfully, millennials can keep more of their earnings while staying compliant with tax laws.
9.4 Practical Example: Organizing Digital Receipts and Documents for Tax Season
Organizing digital receipts and documents for tax season is a practical task that can save time and reduce stress when filing taxes. The goal is to create a system that is easy to maintain throughout the year and straightforward to access when needed.
Why Organize Digital Receipts?
Receipts and documents are proof of expenses, income, and deductions. Without proper records, you risk missing out on tax deductions or facing difficulties if audited. Digital organization helps avoid piles of paper and lost files.
Step 1: Collecting Receipts and Documents
Start by gathering all digital receipts and tax-related documents as soon as you receive them. These can come from email, apps, websites, or scanned paper receipts.
Examples:
- Email confirmations for online purchases
- PDFs of utility bills
- Screenshots of payment confirmations
- Digital invoices from freelance work
Step 2: Choosing Storage Solutions
Select a cloud storage service or a dedicated folder on your computer for tax documents. Cloud storage like Google Drive, Dropbox, or OneDrive allows access from multiple devices and adds a layer of backup.
Step 3: Creating a Folder Structure
Organize your storage with clear, consistent folders. A simple hierarchy might look like this:
This structure separates income types, expenses, and official tax forms, making retrieval easier.
Step 4: Naming Conventions
Use descriptive and consistent file names that include dates and categories. For example:
- 2024-03-15_Amazon_OfficeSupplies.pdf
- 2024-02-10_FreelanceInvoice_ClientX.pdf
- 2024-01-30_CharityDonation_RedCross.pdf
This approach helps in searching files quickly.
Step 5: Tagging and Metadata
If your storage system supports tags or metadata, use them to add keywords like “medical,” “business,” or “deduction.” This adds another layer of searchability.
Step 6: Automate Where Possible
Use apps or email filters to automatically forward receipts to a dedicated folder or label. For example, set an email filter to move all receipts from Amazon to a “Receipts” folder.
Step 7: Regular Maintenance
Schedule a monthly or quarterly review to move new documents into the correct folders and delete duplicates or irrelevant files.
Mind Map: Organizing Digital Tax Documents
Example Workflow
- Receive an email receipt for a business lunch.
- Email filter moves it to the “Receipts” folder.
- At month-end, review the folder and move the receipt to “Expenses > Business” with a proper filename like “2024-04-12_RestaurantName_BusinessLunch.pdf”.
- Tag the file with “meal” and “deduction” if your system allows.
Step 8: Backup
Ensure your digital files are backed up. Cloud storage usually handles this, but consider an additional external hard drive backup for critical documents.
Step 9: Preparing for Tax Filing
Before filing, gather all folders into one place or share access with your tax preparer. Having everything organized reduces errors and speeds up the process.
Summary
Organizing digital receipts and tax documents involves consistent collection, clear folder structures, descriptive naming, and regular maintenance. Automating parts of the process and backing up files further ensures your tax season runs smoothly.
9.5 Planning for Estimated Taxes as a Freelancer or Gig Worker
Freelancers and gig workers don’t have an employer withholding taxes from their paychecks. Instead, they must estimate and pay taxes quarterly to avoid penalties and large bills at tax time. Planning for estimated taxes means understanding your income, expenses, and tax obligations well enough to send the IRS the right amount throughout the year.
Why Estimated Taxes Matter
If you earn income that isn’t subject to withholding—like freelance payments, gig work, or side hustles—you’re responsible for paying both income tax and self-employment tax (which covers Social Security and Medicare). The IRS expects you to pay taxes as you earn, not just once a year.
Failing to pay estimated taxes can lead to penalties and interest. Paying too much means you’re giving the government an interest-free loan. Planning helps you strike a balance.
Mind Map: Estimated Taxes Planning Overview
Step 1: Track Your Income and Expenses
Start by keeping detailed records of every payment you receive. Use spreadsheets, accounting software, or apps designed for freelancers. Include all sources: client payments, platform earnings, tips, and bonuses.
Next, track business expenses. Legitimate deductions reduce your taxable income. Examples include:
- Office supplies
- Software subscriptions
- Internet and phone costs (proportion used for work)
- Mileage or transportation related to work
Example: Sarah, a freelance graphic designer, earned $40,000 last year. She spent $5,000 on software, equipment, and internet. Her taxable income is $35,000.
Step 2: Calculate Your Estimated Tax Liability
You need to estimate both:
- Income tax: Based on your tax bracket
- Self-employment tax: Covers Social Security and Medicare, roughly 15.3% of net earnings
Example: Using Sarah’s $35,000 taxable income:
- Self-employment tax: 15.3% of $35,000 = $5,355
- Income tax: Suppose her marginal tax rate is 12%, so 12% of $35,000 = $4,200
- Total estimated tax: $5,355 + $4,200 = $9,555
Step 3: Divide Your Estimated Tax into Quarterly Payments
The IRS expects payments roughly every three months:
- April 15
- June 15
- September 15
- January 15 (of the following year)
Divide your total estimated tax by four. Sarah would pay about $2,389 each quarter.
Step 4: Make Payments on Time
Use IRS Direct Pay, Electronic Federal Tax Payment System (EFTPS), or mail in Form 1040-ES with your payment. Keep confirmation receipts.
Step 5: Adjust Payments as Needed
Income can fluctuate. If you earn more or less than expected, recalculate your estimated taxes and adjust payments accordingly. This prevents underpayment penalties or overpaying.
Example: If Sarah lands a big project mid-year, increasing her income by $10,000, she should recalculate and increase her remaining payments.
Mind Map: Quarterly Estimated Tax Payment Process
Practical Example: Tracking and Paying Estimated Taxes
Imagine Alex, a rideshare driver earning variable income:
- January to March: $8,000
- April to June: $12,000
- July to September: $10,000
- October to December: $15,000
Alex estimates expenses at 20% of income.
-
Calculate net income per quarter:
- Q1: $8,000 - 20% = $6,400
- Q2: $12,000 - 20% = $9,600
- Q3: $10,000 - 20% = $8,000
- Q4: $15,000 - 20% = $12,000
-
Estimate tax per quarter (assuming 15.3% self-employment tax + 12% income tax = 27.3% total):
- Q1: 27.3% of $6,400 = $1,747
- Q2: 27.3% of $9,600 = $2,621
- Q3: 27.3% of $8,000 = $2,184
- Q4: 27.3% of $12,000 = $3,276
-
Pay estimated taxes quarterly based on these calculations.
If income changes, Alex recalculates the remaining payments to avoid penalties or overpayment.
Tips for Staying on Top of Estimated Taxes
- Set reminders for payment deadlines.
- Use accounting software that estimates taxes automatically.
- Keep a separate bank account for tax savings.
- Consult a tax professional if your income or deductions are complex.
Planning estimated taxes is a straightforward process once you establish good habits. It keeps you in control of your finances and avoids surprises when tax season arrives.
Chapter 10: Protecting Your Finances and Digital Identity
10.1 Cybersecurity Basics for Financial Accounts
Managing your finances online means your financial accounts are prime targets for cyber threats. Understanding the basics of cybersecurity helps protect your money and personal information.
What Makes Financial Accounts Vulnerable?
- Sensitive Data: Bank accounts, credit cards, and investment platforms contain personal and financial details.
- Access Points: Mobile apps, websites, and email are gateways that hackers can exploit.
- Human Factor: Phishing and social engineering tricks prey on users’ trust or inattention.
Core Principles of Cybersecurity for Financial Accounts
Passwords: Your First Line of Defense
Use passwords that are hard to guess but easy for you to remember. Avoid common words, birthdays, or sequences like “123456”. A good method is to create a passphrase combining unrelated words, such as “CoffeeTableRocket42!”. Use a password manager to generate and store unique passwords for each account.
Example:
- Weak password: “password123”
- Strong password: “BlueFish!7Carrot$”
Two-Factor Authentication (2FA)
2FA adds a second step to verify your identity, usually a code sent to your phone or generated by an app. This means even if someone steals your password, they still need the second factor to access your account.
Example:
- Logging into your bank app requires your password plus a code from Google Authenticator.
Secure Connections
Always check for “https://” at the start of a website’s URL before entering sensitive information. The “s” indicates the site encrypts data between your device and their servers.
Avoid using public Wi-Fi for banking or investment transactions. If you must, use a trusted Virtual Private Network (VPN) to encrypt your internet traffic.
Keep Software Updated
Updates often include security patches. Running outdated software or apps can leave vulnerabilities open for hackers.
Example:
- Your phone prompts you to update the banking app; ignoring it might expose you to known security flaws.
Recognizing Phishing Attempts
Phishing is when attackers send fake emails or messages pretending to be your bank or financial service to steal your credentials.
Signs to watch for:
- Unexpected requests for personal info
- Poor grammar or spelling mistakes
- Links that don’t match the official website URL
Example: An email claiming “Your account will be locked unless you verify your password” with a suspicious link is likely phishing.
Mind Map: Protecting Financial Accounts from Cyber Threats
Monitoring Your Accounts
Set up alerts for unusual transactions or logins. Many banks and investment platforms offer notifications via text or email. Regularly review your account statements to catch unauthorized activity early.
Example: Receiving a text alert about a purchase you didn’t make allows you to quickly contact your bank and freeze your card.
Summary
Protecting your financial accounts online requires a combination of strong passwords, two-factor authentication, secure connections, software updates, and vigilance against phishing. Regular monitoring and quick responses to alerts add an extra layer of security. These steps reduce the risk of unauthorized access and help keep your money safe.
10.2 Recognizing and Avoiding Online Scams and Fraud
Online scams and fraud are common risks in the digital economy. Understanding how these scams work and what to watch for can help you protect your money and personal information.
Common Types of Online Scams
- Phishing: Fraudsters send emails or messages pretending to be legitimate companies to steal login credentials or financial information.
- Fake Online Stores: Websites that look real but sell counterfeit or no products at all.
- Investment Scams: Promises of high returns with little risk, often involving fake cryptocurrencies or Ponzi schemes.
- Tech Support Scams: Calls or pop-ups claiming your device is infected and charging for unnecessary services.
- Romance Scams: Scammers build fake relationships to gain trust and then ask for money.
Mind Map: Types of Online Scams
How to Spot a Scam
- Check the sender’s email or URL: Scammers often use addresses that look similar but have subtle differences.
- Look for poor grammar or spelling: Legitimate companies usually proofread their communications.
- Beware of urgent or threatening language: Scammers try to rush you into action.
- Verify offers that seem too good to be true: High returns or deep discounts are red flags.
- Avoid unsolicited contact: Be suspicious of unexpected calls or messages asking for personal info.
Mind Map: Scam Warning Signs
Practical Examples
-
Phishing Email Example: You receive an email claiming to be from your bank asking you to “verify your account” by clicking a link. The link leads to a website that looks like your bank’s but the URL is slightly off, such as “bank-secure-login.com” instead of the official “bank.com”.
-
Fake Online Store Example: A website advertises high-end electronics at 70% off. The site has no physical address listed, and reviews are either missing or suspiciously positive. After purchase, the item never arrives.
-
Investment Scam Example: An unsolicited message invites you to invest in a new cryptocurrency promising 100% returns in a week. The platform requires upfront payment and no verifiable information is available.
Steps to Avoid Scams
- Verify the source: Contact companies directly using official contact information.
- Use strong, unique passwords: Protect accounts with different passwords and two-factor authentication.
- Keep software updated: Security patches reduce vulnerability.
- Avoid clicking on unknown links: Hover over links to check URLs before clicking.
- Monitor accounts regularly: Look for unauthorized transactions.
- Report suspicious activity: Notify your bank or platform immediately.
Mind Map: Scam Prevention Steps
By staying alert and following these guidelines, you can reduce the risk of falling victim to online scams. Remember, scammers rely on catching you off guard. Taking a moment to verify and think critically can save you from financial loss.
10.3 Using Two-Factor Authentication and Password Managers
In the digital economy, securing your online accounts is more important than ever. Two key tools to help protect your personal finance information are two-factor authentication (2FA) and password managers. Both add layers of security that make unauthorized access much harder.
Two-Factor Authentication (2FA)
Two-factor authentication requires you to provide two different types of information before gaining access to an account. Usually, this means something you know (a password) and something you have (a phone or hardware token).
Mind Map: Two-Factor Authentication Components
Example: When logging into your online banking, after entering your password, the bank sends a code to your phone via SMS or generates one through an authenticator app. You enter this code to complete the login.
This extra step reduces the risk of someone accessing your account even if they have your password. SMS codes are common but can be vulnerable to SIM swapping attacks. Authenticator apps like Google Authenticator or Authy generate time-sensitive codes that are generally safer.
Password Managers
Password managers store and organize your passwords securely. They generate strong, unique passwords for each account, so you don’t have to remember them all. This reduces the temptation to reuse passwords, which is a common security risk.
Mind Map: Password Manager Features
Example: You sign up for a new investment platform. Instead of creating a simple password, your password manager generates a 16-character password with letters, numbers, and symbols. It saves this password securely and fills it automatically when you return.
How 2FA and Password Managers Work Together
Using a password manager helps you create strong, unique passwords, while 2FA adds a second layer of protection. Even if your password is compromised, 2FA can block unauthorized access.
Mind Map: Combined Security Approach
Practical Tips
- Always enable 2FA on financial accounts, email, and any service that supports it.
- Prefer authenticator apps over SMS for 2FA when possible.
- Choose a reputable password manager and set a strong master password.
- Use biometric unlock (fingerprint or face recognition) for convenience on mobile devices.
- Regularly update your master password and review saved passwords for outdated or weak entries.
Common Questions
Q: What if I lose access to my 2FA device?
A: Most services provide backup codes or alternative verification methods. Store backup codes securely, separate from your phone.
Q: Are password managers safe?
A: When using well-known password managers, your data is encrypted locally and only decrypted with your master password. The security depends on the strength of your master password and the manager’s design.
Summary
Two-factor authentication and password managers are practical tools that significantly improve your online security. They work best together: password managers handle complex passwords, and 2FA adds an extra verification step. Implementing both is a straightforward way to protect your digital financial life.
10.4 Practical Example: Setting Up Secure Digital Banking
Setting up secure digital banking is an essential step to protect your money and personal information in today’s online world. This practical example walks through the key steps and considerations to establish a secure digital banking environment.
Step 1: Choose a Reputable Bank or Credit Union
Start by selecting a financial institution with strong security protocols and a good track record. Look for banks that offer:
- Two-factor authentication (2FA)
- Encryption of data
- Fraud monitoring services
Step 2: Register Your Online Banking Account
When signing up, use a strong, unique password. Avoid common phrases or easily guessable information like birthdays or pet names.
Step 3: Enable Two-Factor Authentication (2FA)
2FA adds a second layer of security by requiring a code sent to your phone or generated by an app, in addition to your password.
Step 4: Set Up Account Alerts
Configure alerts for transactions, logins, or changes to your account. This helps you spot unauthorized activity quickly.
Step 5: Use a Password Manager
A password manager can generate and store complex passwords securely, so you don’t have to remember them all.
Step 6: Secure Your Devices
Keep your phone, tablet, or computer updated with the latest security patches. Use antivirus software and avoid public Wi-Fi when accessing your bank.
Step 7: Regularly Monitor Your Accounts
Check your transaction history frequently to catch any suspicious activity early.
Mind Map: Secure Digital Banking Setup
Example: Creating a Strong Password
Suppose you want a password that’s easy to remember but hard to guess. Instead of “Summer2024”, try combining unrelated words and numbers, like “Blue7Carrot!19”. This mix of uppercase, lowercase, numbers, and symbols improves security.
Example: Setting Up 2FA
After logging into your bank’s website, navigate to security settings and select “Enable Two-Factor Authentication.” Choose to receive codes via an authenticator app rather than SMS for better security. When you log in next time, you’ll enter your password and then a code from the app.
Example: Configuring Alerts
Set an alert to notify you immediately when a transaction over $50 occurs. This way, if someone uses your account without permission, you’ll know right away.
Mind Map: Daily Secure Banking Habits
By following these steps and habits, you create a secure digital banking setup that minimizes risks and keeps your finances safer. The key is combining strong credentials, active monitoring, and cautious device use.
10.5 Identity Theft Protection and Recovery Steps
Identity theft happens when someone uses your personal information without permission, often to commit fraud. Protecting yourself requires a combination of vigilance, good habits, and knowing what to do if your identity is compromised.
Protecting Your Identity
Start with the basics: keep your personal information private. This includes your Social Security number, bank account details, and passwords. Avoid sharing sensitive data over email or phone unless you initiated the contact and trust the recipient.
Use strong, unique passwords for each online account and enable two-factor authentication whenever possible. This adds a second layer of security, making it harder for thieves to access your accounts even if they get your password.
Be cautious about what you share on social media. Personal details like your birthdate, address, or pet names can be clues for hackers trying to guess your passwords or answer security questions.
Regularly monitor your financial statements and credit reports. Early detection of suspicious activity can limit damage and speed up recovery.
Steps to Take if You Suspect Identity Theft
- Confirm the Theft: Look for unusual charges, new accounts you didn’t open, or unexpected bills.
- Report to Financial Institutions: Contact your bank, credit card companies, or lenders immediately to freeze or close compromised accounts.
- Place Fraud Alerts: Contact one of the major credit bureaus to place a fraud alert on your credit report. This warns lenders to verify identity before issuing credit.
- File a Police Report: Documenting the crime with law enforcement can help with disputes and investigations.
- Report to the Federal Trade Commission (FTC): Filing a report creates an official record and provides a recovery plan.
- Change Passwords and Secure Accounts: Update passwords on all your accounts, especially those linked to financial or personal information.
- Check Your Credit Reports: Review all three major credit bureaus for new fraudulent accounts or inquiries.
- Consider a Credit Freeze: This restricts access to your credit report, preventing new accounts from being opened without your permission.
Mind Map: Identity Theft Protection
Mind Map: Identity Theft Recovery Steps
Example: Detecting and Responding to Identity Theft
Imagine you notice a charge on your credit card statement for a purchase you didn’t make. The first step is to call your credit card issuer to report the unauthorized transaction and freeze the card. Next, you check your credit report and find a new credit card account opened in your name. You place a fraud alert with one of the credit bureaus, file a police report, and submit a complaint to the FTC. Then, you change all your online banking and shopping passwords, enabling two-factor authentication where available. Finally, you consider placing a credit freeze to prevent further unauthorized accounts.
This process might seem overwhelming, but acting quickly can limit financial loss and stress.
Final Notes
Identity theft protection is about layering your defenses and staying alert. No single step is foolproof, but combining good habits with prompt action creates a strong safety net. Remember, the sooner you detect and respond to suspicious activity, the easier it is to recover.
Chapter 11: Smart Spending and Consumer Habits
11.1 Evaluating Needs Before Purchases in an Online Marketplace
When shopping online, the first step is to clearly identify whether the purchase is a need or a want. Needs are essentials—items necessary for daily living or work—while wants are extras that enhance comfort or enjoyment but are not essential. This distinction helps prevent impulse buying and keeps your budget on track.
Mind Map: Evaluating Needs vs Wants
Once you categorize the item, consider the urgency and frequency of the need. For example, replacing a worn-out winter coat is more urgent than buying a new pair of sneakers for fashion.
Mind Map: Assessing Urgency and Frequency
Next, evaluate alternatives. Can the item be borrowed, rented, or substituted with a less expensive option? For instance, instead of buying a high-end blender, could a basic model suffice for your needs?
Mind Map: Exploring Alternatives
Consider the total cost of ownership, not just the sticker price. This includes shipping fees, taxes, maintenance, and any accessories needed. For example, a cheap printer might have expensive ink cartridges, increasing long-term costs.
Mind Map: Total Cost of Ownership
Example: Sarah wants to buy a new laptop. She asks herself:
- Do I need it now or can my current laptop last a few more months? (Urgency)
- Is it essential for work or just for entertainment? (Need vs Want)
- Can I borrow one from a friend or use a library computer? (Alternatives)
- What are the extra costs like software, warranties, or accessories? (Total cost)
By answering these questions, Sarah realizes her current laptop meets her work needs for now, so she postpones the purchase and saves money.
Another example: Mike is considering buying a fitness tracker. He evaluates:
- Is tracking my activity essential or just a nice-to-have? (Need vs Want)
- Can I use my phone’s built-in health app instead? (Alternatives)
- What is the price including shipping and any subscription fees? (Total cost)
Mike decides the phone app suffices, avoiding an unnecessary expense.
In summary, evaluating needs before online purchases involves clear categorization, urgency assessment, exploring alternatives, and calculating total costs. This structured approach helps maintain financial discipline and avoid buyer’s remorse.
11.2 Using Cashback, Rewards, and Discount Apps Effectively
Using cashback, rewards, and discount apps effectively means understanding how each type of app works, where they overlap, and how to combine them without complicating your spending habits. These apps can save money on everyday purchases, but only if used thoughtfully.
Types of Apps and How They Work
- Cashback Apps: These apps give you a percentage of your purchase back as cash or credit. They often partner with specific retailers or brands. Example: You buy groceries through a cashback app and get 2% back.
- Rewards Apps: These accumulate points for purchases, which you can redeem for products, discounts, or gift cards. Example: A coffee shop app that gives you a free drink after 10 purchases.
- Discount Apps: These provide coupons, promo codes, or instant discounts at checkout. Example: An app that applies a 10% discount on your online shopping cart.
Mind Map: Types of Savings Apps
How to Use Them Together
-
Stacking Savings: Use discount codes first, then pay through a cashback app or card to maximize savings. For example, apply a 15% off coupon on an online order, then pay using a cashback app that offers 3% back.
-
Avoid Overcomplication: Don’t try to use every app for every purchase. Pick a few that cover your most frequent spending categories.
-
Track Expiration and Terms: Some rewards expire or have minimum redemption thresholds. Keep an eye on these to avoid losing benefits.
Mind Map: Effective Usage Strategy
Practical Examples
-
Groceries: Use a discount app to find coupons for your preferred store. Then, pay with a linked cashback app or card. If your grocery store has a rewards program, link it to your account to collect points.
-
Online Shopping: Before checkout, check discount apps for promo codes. Apply the best one, then use a cashback app or browser extension to earn a percentage back.
-
Dining Out: Some restaurants have their own rewards apps. Use those for points, and if you pay with a credit card offering dining cashback, you get double benefits.
Mind Map: Example Workflow for a Purchase
Tips to Avoid Pitfalls
- Don’t Overspend: Only buy what you need. Rewards don’t justify unnecessary purchases.
- Watch for Fees: Some cashback cards or apps have fees that might outweigh benefits.
- Privacy Considerations: Some apps collect data on your spending habits. Review privacy policies.
Summary
Using cashback, rewards, and discount apps effectively is about combining them smartly without letting the process become a chore. Pick apps that fit your spending patterns, stack discounts and cashback when possible, and keep track of your rewards to make sure you’re actually saving money.
11.3 Avoiding Impulse Buying with Digital Tools
Impulse buying is a common challenge, especially in the digital economy where purchases are just a click away. Digital tools can help curb this behavior by introducing pauses, reminders, and better visibility into spending habits. Here’s how you can use them effectively.
Understanding Impulse Buying
Impulse buying happens when you purchase something without prior planning, often triggered by emotions or convenience. Online shopping platforms use techniques like limited-time offers and personalized ads to encourage quick decisions.
Digital Tools to Avoid Impulse Buying
- Budgeting Apps with Spending Alerts: These apps notify you when you’re close to your budget limit, making you think twice before buying.
- Wishlist and Cart Delay Features: Instead of buying immediately, add items to a wishlist or cart and revisit them after a set time.
- Browser Extensions for Price Tracking: These tools show price history and alert you to better deals, discouraging impulsive purchases at full price.
- Subscription Management Apps: They help identify recurring charges that might be impulse-driven or unnecessary.
- Payment Method Controls: Using prepaid cards or limiting saved payment methods can slow down impulse purchases.
Mind Map: Digital Tools to Avoid Impulse Buying
Practical Examples
-
Using a Wishlist to Delay Purchases Imagine you see a pair of headphones on sale. Instead of buying immediately, you add them to your wishlist. After 48 hours, you revisit the list and realize you don’t really need them right now. This delay helps prevent impulse buys.
-
Spending Alerts in Budgeting Apps A budgeting app sends you a notification: “You’ve spent 90% of your entertainment budget this month.” This alert prompts you to reconsider adding that new streaming service subscription.
-
Price Tracking Browser Extension Before buying a gadget, a price tracker shows that the current price is at its highest in three months. This information encourages waiting for a better deal rather than buying impulsively.
-
Limiting Payment Methods Removing saved credit card information from online stores adds a small friction step. Having to enter card details each time makes you pause and reconsider whether the purchase is necessary.
Mind Map: Steps to Implement Impulse Buying Controls
Final Thoughts
Impulse buying isn’t about willpower alone; it’s about creating an environment that encourages thoughtful spending. Digital tools can introduce the necessary pauses and awareness to help you stick to your financial goals without feeling deprived.
11.4 Practical Example: Planning a Major Purchase Using Price Tracking Websites
When planning a major purchase, such as a laptop, smartphone, or home appliance, price tracking websites can be a valuable tool to ensure you pay a fair price. These websites monitor price changes over time and alert you when prices drop, helping you avoid impulsive decisions or overpaying.
Step 1: Define Your Purchase Criteria
Before using price tracking tools, clarify what you want:
- Product model and specifications: Know the exact model or features you need.
- Budget range: Set a realistic maximum price.
- Timeframe: Decide if you need the item immediately or can wait for a better deal.
Step 2: Identify Suitable Price Tracking Websites
Choose platforms that cover the stores you prefer and offer reliable price history data. Examples include CamelCamelCamel for Amazon or Honey for multiple retailers.
Step 3: Monitor Price History
Use the website to view the product’s price history chart. This shows fluctuations over weeks or months, helping you understand typical price ranges and seasonal discounts.
Step 4: Set Price Alerts
Configure alerts to notify you when the price drops below your target. This automation prevents constant manual checking.
Step 5: Compare Across Retailers
Some price trackers aggregate prices from different sellers. Compare these to find the best deal, factoring in shipping costs and return policies.
Step 6: Time Your Purchase
If your timeframe allows, wait for a price dip indicated by the tracker. For example, electronics often have discounts during holidays or sales events.
Mind Map: Planning a Major Purchase Using Price Tracking Websites
Example: Buying a Laptop
Suppose you want a specific laptop model priced around $1,000. You check a price tracking site and see the price fluctuates between $950 and $1,150 over six months, with dips during Black Friday and back-to-school sales.
You set an alert for $980. Two weeks later, you receive a notification that the price dropped to $975. You verify the deal on the retailer’s site, confirm shipping costs, and make the purchase.
This approach saved you about $75 compared to buying immediately and avoided the risk of paying full price during a non-sale period.
Example: Purchasing a Smartphone
For a new smartphone model, prices tend to drop gradually after launch. Using a price tracker, you observe a steady decline from $800 to $650 over four months.
You decide your budget is $700. Setting an alert helps you wait until the price hits your target, avoiding early purchase regret.
Summary
Price tracking websites help you make informed decisions by:
- Showing historical price data
- Allowing you to set alerts
- Comparing prices across sellers
This method encourages patience and research, reducing the chance of buyer’s remorse and improving your financial discipline when making significant purchases.
11.5 Sustainable and Ethical Spending Choices
Sustainable and ethical spending means making purchasing decisions that consider environmental impact, social responsibility, and long-term effects on communities and the planet. For millennials navigating the digital economy, these choices can align personal values with financial habits without sacrificing practicality or budget.
Why Consider Sustainable and Ethical Spending?
- Environmental impact: Many products contribute to pollution, resource depletion, or waste. Choosing sustainable options helps reduce your ecological footprint.
- Social responsibility: Ethical spending supports fair labor practices, avoids exploitation, and promotes companies with transparent supply chains.
- Long-term value: Sustainable products often last longer or have better quality, potentially saving money over time.
Key Principles of Sustainable and Ethical Spending
- Buy less, choose well: Prioritize quality over quantity to reduce waste.
- Support local and small businesses: This often means shorter supply chains and better community impact.
- Consider product lifecycle: From production to disposal, think about the environmental and social costs.
- Transparency: Favor brands that openly share sourcing and manufacturing practices.
Mind Map: Sustainable and Ethical Spending Choices
Examples of Sustainable and Ethical Spending
-
Clothing: Instead of buying fast fashion items that wear out quickly and often come from questionable labor conditions, opt for brands that use organic cotton or recycled materials and pay fair wages. Alternatively, shopping at thrift stores or online resale platforms extends the life of garments and reduces demand for new production.
-
Food: Choosing locally sourced, organic produce reduces transportation emissions and supports farmers who use environmentally friendly practices. Meal planning to avoid food waste is another practical step.
-
Electronics: When upgrading gadgets, consider devices designed for easy repair or with longer warranties. Selling or donating old electronics keeps them out of landfills.
-
Household Products: Select cleaning supplies with biodegradable ingredients and minimal packaging. Bulk buying reduces packaging waste and often costs less per unit.
Mind Map: Practical Steps to Ethical Spending
Balancing Budget and Values
Sustainable choices don’t always mean higher costs. For example, buying a durable pair of shoes may cost more upfront but saves money over time compared to replacing cheaper pairs frequently. Using digital tools to track spending can help allocate funds toward ethical purchases without overspending.
Example: Choosing Between Two Coffee Brands
- Brand A sells coffee at $10 per bag, sourced from farms with fair labor practices and uses compostable packaging.
- Brand B sells coffee at $7 per bag but lacks transparency about labor conditions and uses plastic packaging.
Choosing Brand A supports ethical labor and reduces plastic waste. If the budget is tight, buying Brand A less frequently or in bulk can balance cost and values.
Summary
Sustainable and ethical spending is about making informed choices that reflect personal values and financial realities. It involves considering environmental and social impacts, prioritizing quality and longevity, and supporting transparent and responsible businesses. Small, consistent decisions add up to meaningful change without requiring drastic lifestyle shifts.
Chapter 12: Leveraging Technology for Financial Growth
12.1 Overview of Financial Apps and Tools for Millennials
Financial apps and tools have become essential for managing money efficiently, especially for millennials who often juggle multiple income sources, expenses, and financial goals. This section provides an overview of the main categories of financial apps and tools, explaining their purpose and offering examples to illustrate how they can fit into everyday money management.
Categories of Financial Apps and Tools
Budgeting Apps
Budgeting apps help users categorize income and expenses, making it easier to see where money goes each month. They often connect to bank accounts and credit cards, automatically importing transactions. For example, Mint allows users to create budgets, track bills, and receive alerts when spending exceeds limits. A practical use case is setting a monthly dining out budget and getting notified when approaching the limit, which helps curb overspending.
Saving Apps
Saving apps often automate the process of setting money aside. Some use round-up features, where purchases are rounded to the nearest dollar and the difference is saved. Digit, for instance, analyzes spending patterns and transfers small amounts to a savings account without requiring manual input. This method suits those who find it hard to save regularly but want a gradual buildup of emergency funds.
Investing Apps
Investing apps range from simple robo-advisors to platforms that allow direct stock trading. Acorns rounds up purchases and invests the spare change in diversified portfolios. This lowers the barrier to entry for new investors by requiring minimal initial knowledge and capital. Another example is Robinhood, which offers commission-free trading, appealing to millennials interested in managing their own portfolios.
Debt Management Tools
Managing multiple debts can be confusing. Apps like Undebt.it help users organize debts by interest rate, balance, or payoff date. They provide visual payoff plans using methods like the snowball or avalanche approach. For example, a user can prioritize paying off a high-interest credit card first while making minimum payments on others, with the app tracking progress.
Credit Monitoring Apps
Maintaining a good credit score is important for loans and renting. Credit Karma offers free credit score monitoring and alerts users to changes or potential fraud. It also provides personalized tips to improve credit. For instance, if a user’s credit utilization spikes, the app might suggest paying down balances to avoid score drops.
Bill Management Apps
Keeping track of bills and due dates prevents late fees and credit damage. Prism aggregates bills and sends reminders. It can also automate payments, reducing the risk of missed deadlines. A user might link utility, phone, and subscription bills to Prism, receiving a consolidated view and scheduling payments in one place.
Financial Planning Tools
Apps like Personal Capital combine budgeting, investing, and retirement planning features. They offer dashboards showing net worth, asset allocation, and projected retirement income. For example, a millennial can input their current savings, expected contributions, and retirement age to see if they are on track.
Example Mind Map: Using Multiple Apps Together
Using a combination of these apps can cover most aspects of personal finance. For example, a user might track daily expenses with Mint, automate savings with Digit, invest with Acorns, manage debt using Undebt.it, monitor credit through Credit Karma, keep bills organized with Prism, and plan for retirement with Personal Capital. This layered approach allows each app to focus on its strength while providing a comprehensive financial picture.
Practical Example
Consider Sarah, a 28-year-old freelancer. She uses Mint to keep an eye on irregular income and variable expenses. Digit helps her save small amounts automatically, which she wouldn’t otherwise set aside. She invests spare change through Acorns to build a retirement fund gradually. Undebt.it helps her prioritize paying off a credit card with a high interest rate. Credit Karma alerts her to changes in her credit score, and Prism ensures she never misses a bill payment. Finally, Personal Capital gives her a snapshot of her overall financial health and retirement readiness.
This example shows how combining apps can simplify complex financial tasks and encourage disciplined habits without requiring extensive manual tracking or financial expertise.
12.2 Integrating Multiple Financial Accounts for Holistic Management
Integrating multiple financial accounts into a single management system helps you see the full picture of your finances without flipping between apps or statements. It’s about consolidating your checking, savings, credit cards, loans, investments, and even digital wallets into one dashboard. This approach reduces the mental load of tracking money scattered across platforms and improves decision-making.
Why Integrate?
- Comprehensive View: You can quickly assess your net worth and cash flow.
- Simplified Budgeting: Knowing all your expenses and income streams in one place helps create realistic budgets.
- Better Tracking: Spot unusual transactions or fees faster.
- Goal Alignment: See how your spending and saving align with your financial goals.
How to Integrate Multiple Accounts
Most financial management apps and platforms allow you to link various accounts securely. The process usually involves:
- Selecting a Platform: Choose an app or service that supports multiple account types.
- Authentication: Use your login credentials or OAuth connections to link accounts.
- Categorization: Assign categories to transactions for clarity.
- Synchronization: Accounts update automatically or on demand.
Mind Map: Account Integration Workflow
Example: Integrating Bank and Credit Card Accounts
Imagine you have a checking account at Bank A, a savings account at Bank B, and two credit cards from different issuers. Without integration, you check each app or website separately. By linking all accounts to a single app:
- Your checking account shows your paycheck deposits and daily expenses.
- Your savings account reflects your emergency fund balance.
- Credit card accounts display recent purchases and outstanding balances.
The app aggregates this data, showing your total cash available, upcoming bills, and recent spending trends.
Mind Map: Example Account Types
Practical Tips
- Security First: Use platforms with strong encryption and two-factor authentication.
- Regular Review: Check your integrated dashboard weekly to catch errors or fraud.
- Customize Categories: Tailor spending categories to your lifestyle for clearer insights.
- Set Alerts: Many apps let you set notifications for low balances or large transactions.
Example: Managing Loan and Investment Accounts Together
You might have a student loan and a retirement account. Integrating these allows you to:
- See how much you owe versus how much you’re investing.
- Decide if extra payments toward the loan or additional investments make more sense.
Mind Map: Decision Factors When Managing Multiple Accounts
Wrapping Up
Integrating your financial accounts doesn’t just save time; it sharpens your understanding of where your money is and where it’s going. The clearer your financial snapshot, the better your choices. Start small by linking a couple of accounts, then expand as you get comfortable. The goal is a holistic, manageable view—not an overwhelming data dump.
12.3 Using AI and Analytics to Understand Spending Patterns
Using AI and analytics to understand spending patterns means applying software tools that analyze your transaction data to reveal where your money goes, how often you spend, and where you might save. These tools use algorithms to categorize expenses, detect trends, and highlight anomalies without requiring you to sift through every receipt or bank statement manually.
At its core, AI-driven spending analysis breaks down your expenses into categories like groceries, entertainment, bills, and dining out. It then tracks how much you spend in each category over time, making it easier to spot habits or shifts in your financial behavior.
Mind Map: Components of AI-Driven Spending Analysis
For example, suppose you notice your dining out expenses have crept up from $150 a month to $300 over six months. An AI tool can highlight this increase and suggest setting a budget or finding cheaper alternatives. It can also detect if a one-time large purchase, like a new laptop, skews your electronics spending for the month.
Mind Map: Example Spending Pattern Insights
A practical example: a budgeting app uses AI to scan your transactions and flags recurring charges you might have forgotten, such as a trial subscription that converted to a paid plan. It can also group small purchases, like daily coffee runs, to show how these add up over time.
Another example is predictive analytics. If your spending on utilities spikes every winter, the AI can remind you to expect higher bills and plan accordingly. It can also identify irregularities, such as a sudden charge from a merchant you don’t recognize, prompting you to verify the transaction.
Mind Map: Benefits of AI in Spending Analysis

Using these tools requires linking your bank or credit card accounts to the app, which then accesses your transaction data securely. The AI processes this data continuously, updating your spending profile and providing real-time feedback.
In summary, AI and analytics turn raw financial data into actionable insights. They help you understand your spending habits without manual effort, making it easier to adjust your behavior, avoid overspending, and meet your financial goals.
12.4 Practical Example: Setting Financial Alerts and Notifications
Setting financial alerts and notifications is a practical way to stay on top of your money without constant manual checking. These alerts can notify you about account balances, bill due dates, unusual activity, or spending limits. They help prevent overdrafts, missed payments, and fraud, while encouraging better budgeting habits.
Why Use Financial Alerts?
- Timely reminders prevent late fees and interest charges.
- Spending awareness helps control impulsive purchases.
- Fraud detection alerts you to suspicious transactions early.
- Goal tracking keeps savings and investment targets in focus.
Types of Financial Alerts
Here’s a mind map outlining common categories of financial alerts:
Setting Up Alerts: Step-by-Step Example
Imagine you want to avoid overdraft fees and keep your dining out budget in check. Here’s how you might set up alerts using a typical banking app:
- Low Balance Alert: Set a notification to trigger when your checking account falls below $200. This gives you a buffer to avoid overdrafts.
- Category Spending Alert: Configure a monthly alert when dining expenses exceed $150. This helps you monitor discretionary spending.
- Bill Payment Reminder: Enable alerts three days before your credit card payment is due to avoid late fees.
Example Alert Messages
- “Your account balance has dropped below $200. Consider transferring funds to avoid overdraft fees.”
- “You’ve spent $150 on dining this month. Review your budget to stay on track.”
- “Reminder: Your credit card payment of $500 is due in 3 days.”
Mind Map: Alert Setup Workflow
Practical Tips
- Use push notifications for urgent alerts like suspicious activity.
- Opt for daily or weekly summaries for spending reviews to avoid alert fatigue.
- Combine alerts with automated actions when possible, such as automatic transfers to savings when balance is low.
- Regularly review and adjust alert thresholds as your financial situation changes.
Example: Combining Alerts for Better Control
Suppose you want to manage freelance income and expenses:
- Set alerts for deposits over $1,000 to track client payments.
- Receive notifications when business expenses exceed $500 monthly.
- Get reminders for quarterly estimated tax payments.
This layered approach keeps you informed without overwhelming you.
In short, financial alerts are simple tools that turn your phone or email into a financial assistant. They provide timely nudges that help you avoid mistakes and stay aligned with your money goals.
12.5 Staying Updated on Security and App Features
Staying updated on security and app features is a practical necessity in managing your finances digitally. Apps evolve regularly, fixing vulnerabilities and adding tools that can improve your experience or protect your data. Ignoring updates can leave you exposed to risks or missing out on helpful functions.
Why Updates Matter
- Security patches: Developers fix bugs and close loopholes that hackers might exploit.
- Feature improvements: New or enhanced tools can simplify tasks like budgeting or investing.
- Compatibility: Updates ensure apps work smoothly with your device’s operating system.
How to Stay Informed
- Enable automatic updates: This reduces the chance of running outdated versions.
- Read update notes: They often summarize what’s new or fixed.
- Follow app notifications: Some apps alert you about important changes.
Mind Map: Staying Updated on Security and App Features
Best Practices for Managing Updates
-
Backup your data before updating. Sometimes updates can cause unexpected issues. Having a backup means you can restore your information if something goes wrong.
-
Review app permissions after updates. Occasionally, updates request new permissions. Check if these are necessary and reasonable.
-
Test new features carefully. Don’t rush into using new tools without understanding them. For example, a new investment feature might have different risk settings.
Example: Managing Updates in a Budgeting App
Imagine you use a popular budgeting app that just released an update introducing a new subscription tracking feature. Before updating, you back up your budget data. After updating, you notice the app asks for permission to access your calendar. You check and decide it’s needed to sync subscription due dates. You enable it, then explore the new feature slowly, adding a few subscriptions to see how it works before fully relying on it.
Mind Map: Example Workflow for App Updates
Keeping Security in Focus
Security updates are often urgent. If your financial app announces a critical security patch, prioritize installing it immediately. Delaying can expose your accounts to unauthorized access. For example, a patch might fix a flaw that allowed hackers to intercept login credentials.
Example: Responding to a Security Update
Your investment app sends a notification about a security update fixing a vulnerability in the login process. You stop what you’re doing and update the app right away. After updating, you change your password and enable two-factor authentication if you hadn’t already. This sequence reduces your risk effectively.
Mind Map: Security Update Response
Summary
Regularly updating your financial apps and paying attention to security notices is a simple but powerful habit. It protects your money and personal information while giving you access to tools that can make managing your finances easier. Treat updates as part of your financial routine, like balancing your budget or reviewing your credit score.
Chapter 13: Financial Literacy and Continuous Learning
13.1 Importance of Ongoing Financial Education
Financial education is not a one-time event but a continuous process. The financial world changes regularly—new products, regulations, technologies, and economic conditions emerge. Staying informed helps you make better decisions and avoid costly mistakes. For millennials navigating the digital economy, ongoing education is especially important because the tools and options available evolve rapidly.
Understanding basic concepts like budgeting, saving, investing, and debt management is essential, but revisiting these topics periodically ensures your knowledge stays relevant. For example, a budgeting method that worked a few years ago may need adjustment if your income fluctuates or if you start using new financial apps.
Continuous learning also builds confidence. When you understand how interest rates affect loans or how taxes impact your investments, you can plan with more certainty. This confidence reduces anxiety around money and encourages proactive behavior.
Here’s a mind map outlining the key reasons ongoing financial education matters:
Consider the example of credit cards. A few years ago, you might have chosen a card based solely on rewards. With ongoing education, you learn to factor in interest rates, fees, and credit score impact. This knowledge helps you pick a card that fits your spending habits and financial goals, not just one with flashy perks.
Another example is investing. Initially, you might start with a simple index fund. Over time, learning about diversification, tax-advantaged accounts, and risk tolerance can refine your strategy. This ongoing process helps you avoid panic selling during market dips or chasing high-risk investments without understanding the consequences.
Here’s a mind map showing how ongoing education influences financial behaviors:
In practice, ongoing education means reviewing your financial situation regularly, asking questions, and seeking clarity when new terms or products appear. It also means reflecting on past decisions to learn what worked and what didn’t.
To summarize, ongoing financial education keeps you equipped to handle changes, make informed choices, and maintain control over your money. It’s a habit that pays off by reducing mistakes and increasing your ability to meet financial goals.
13.2 Recommended Online Courses, Podcasts, and Books
When building financial knowledge, choosing the right mix of courses, podcasts, and books can make the process more manageable and enjoyable. Each format offers unique advantages: courses provide structured learning, podcasts offer ongoing insights and diverse perspectives, and books deliver depth and detail. Below is a breakdown of recommended options with examples and mind maps to clarify their focus areas.
Online Courses
Online courses often break down complex topics into digestible lessons, combining theory with practical exercises. For millennials navigating the digital economy, courses that emphasize budgeting, investing basics, and debt management are particularly useful.
Example Course Structure Mind Map:
Courses that follow this structure help learners build a solid foundation and apply concepts immediately. For example, a budgeting module might include exercises where learners create a sample budget using their own income and expenses.
Podcasts
Podcasts bring financial topics into everyday life, often through interviews, Q&A, or storytelling. They are ideal for staying updated and hearing real-world examples.
Example Podcast Content Mind Map:
A podcast episode might feature a guest sharing how they paid off $30,000 in debt using the snowball method, providing listeners with relatable steps and motivation.
Books
Books allow for comprehensive exploration of topics and often include case studies, worksheets, and detailed explanations.
Example Book Content Mind Map:
For instance, a chapter on investing might explain dollar-cost averaging with a clear example: investing $200 monthly regardless of market fluctuations, reducing risk over time.
Integrated Example: Learning Path
Combining these formats can reinforce understanding. For example, after completing a budgeting course module, a listener might tune into a podcast episode discussing common budgeting mistakes, then read a book chapter on automating savings to deepen knowledge.
Learning Path Mind Map:
This approach uses different media to present the same topic from multiple angles, improving retention and practical application.
In summary, selecting a blend of structured courses, ongoing podcast content, and detailed books offers a balanced way to build financial literacy. Each format supports different learning styles and provides examples that make abstract concepts concrete and actionable.
13.3 Joining Online Communities and Forums for Support
Joining online communities and forums can be a practical way to enhance your financial knowledge and gain support from peers who share similar goals or challenges. These platforms offer a space to ask questions, share experiences, and learn from real-life examples. The key to benefiting from these communities is active participation and critical evaluation of the advice you encounter.
Why Join Online Financial Communities?
- Access to Diverse Perspectives: Members come from various backgrounds and financial situations, providing a broad range of insights.
- Real-Time Problem Solving: You can get quick feedback on specific financial questions or dilemmas.
- Accountability and Motivation: Sharing goals and progress can encourage consistent financial habits.
- Resource Sharing: Members often share tools, templates, and strategies that have worked for them.
Types of Communities
- General Personal Finance Forums: Cover budgeting, saving, investing, and debt management.
- Niche Groups: Focus on specific topics like student loans, early retirement, or cryptocurrency.
- Local or Regional Groups: Tailored advice considering local laws and economic conditions.
How to Engage Effectively
- Observe Before Participating: Spend time reading threads to understand community norms and quality of advice.
- Ask Clear, Specific Questions: This increases the chance of receiving helpful responses.
- Contribute When Possible: Sharing your experiences adds value and builds rapport.
- Verify Advice: Cross-check suggestions with trusted sources or professionals.
Mind Map: Joining Online Financial Communities
Example 1: Seeking Debt Repayment Advice
Suppose you want to pay off credit card debt faster but aren’t sure which method suits you best. Posting your situation in a debt-focused forum can yield suggestions like the snowball or avalanche methods, with community members sharing their timelines and emotional experiences. This real-world feedback helps you choose a strategy aligned with your personality and finances.
Example 2: Sharing Budgeting Tools
After discovering a budgeting app that simplifies tracking subscriptions, you share this tip in a general personal finance group. Others respond with their favorite apps, creating a thread of practical tools. This exchange can save time and improve budgeting efficiency for many members.
Mind Map: Example Interaction in a Forum
Tips for Choosing the Right Community
- Look for active moderation to maintain quality and civility.
- Check the frequency of posts and responses to ensure engagement.
- Prefer communities that encourage evidence-based advice.
In summary, online financial communities can be valuable for learning and support if you approach them thoughtfully. They offer a chance to connect with others navigating similar financial paths, exchange practical tips, and stay motivated. The key is to participate actively, question advice critically, and contribute your own experiences when possible.
13.4 Practical Example: Creating a Personal Finance Learning Plan
Creating a personal finance learning plan helps you organize your efforts and track progress in understanding money management. It breaks down a broad topic into manageable steps and keeps you focused on your goals. Here’s a straightforward approach to building your plan.
Step 1: Identify Your Learning Goals
Start by listing what you want to achieve. These goals should be specific and relevant to your current financial situation. Examples include:
- Understanding budgeting basics
- Learning how to invest in stocks
- Managing and reducing debt
- Planning for retirement
Step 2: Break Down Topics into Subcategories
Each goal can be divided into smaller topics. This makes learning less overwhelming and helps you prioritize. For example, under “Understanding budgeting basics,” you might have:
- Tracking income and expenses
- Categorizing spending
- Using budgeting tools
Step 3: Set a Timeline
Assign realistic deadlines for each topic or subtopic. This keeps your learning structured and prevents procrastination. For instance, you might decide to master budgeting basics within two weeks.
Step 4: Choose Learning Methods
Decide how you will study each topic. Options include reading articles, watching videos, practicing with apps, or discussing with peers. Mixing methods can improve retention.
Step 5: Schedule Regular Reviews
Set times to revisit what you’ve learned. This reinforces knowledge and helps you adjust your plan as needed.
Mind Map: Personal Finance Learning Plan Overview
Example: Applying the Plan
Suppose your primary goal is to get better at managing debt. Your plan might look like this:
- Goal: Understand and reduce credit card debt.
- Subtopics: Types of credit card debt, interest rates, repayment methods.
- Timeline: Two weeks.
- Learning Methods: Read articles on debt types, watch videos on repayment strategies, use a debt calculator app.
- Review: After two weeks, assess your understanding and create a repayment plan.
Mind Map: Debt Management Learning Plan
Step 6: Track Your Progress
Keep a simple journal or spreadsheet noting what you’ve completed and what you found challenging. This helps maintain momentum and highlights areas needing more attention.
Step 7: Adjust as Needed
Your plan isn’t set in stone. If a topic takes longer than expected or you discover new interests, update your timeline and goals accordingly.
Final Thoughts
A personal finance learning plan turns a large topic into clear, actionable steps. It encourages consistency and helps you build confidence with money concepts. By mapping out your goals, breaking them down, and scheduling your learning, you create a practical path toward financial knowledge.
13.5 Evaluating Financial Advice and Avoiding Misinformation
Evaluating financial advice critically is essential to avoid misinformation that can lead to poor money decisions. The sheer volume of advice available online, from social media posts to blogs and videos, makes it necessary to develop a structured approach to assess credibility and relevance.
Mind Map: Evaluating Financial Advice
Source Credibility
Start by checking who is giving the advice. Financial professionals typically hold certifications like CFP (Certified Financial Planner) or CFA (Chartered Financial Analyst). While not all good advice comes from certified experts, credentials provide a baseline for trustworthiness. Look for transparency about qualifications and experience. For example, a blogger who openly shares their background and limitations is more trustworthy than someone anonymous or evasive.
Reputation matters. Reviews, testimonials, or peer recognition can help gauge reliability. Beware of sources that seem to push products or services without clear disclosure of incentives.
Content Quality
Good advice explains the reasoning behind recommendations and acknowledges risks. For instance, an article suggesting investing in stocks should mention market volatility and the possibility of losses. Beware of advice that promises quick, guaranteed profits or uses vague language like “you can’t lose”.
Clear, jargon-free explanations that help you understand why a strategy works are signs of quality content. If the advice is full of buzzwords without substance, it’s a warning sign.
Relevance
Financial advice is not one-size-fits-all. Consider whether the advice applies to your income level, debt situation, risk tolerance, and financial goals. For example, aggressive investment strategies might suit someone with a long time horizon but not a recent graduate with high student loans.
Also, check if the advice considers current economic conditions. Strategies that worked in a low-interest environment might not be suitable during inflation.
Cross-Verification
Don’t rely on a single source. Compare advice across multiple reputable platforms. If several independent sources agree, it’s more likely to be sound. Fact-check numbers, claims, and recommendations.
For example, if a social media post claims a particular stock will double in a month, verify this with trusted financial news or data sites.
Red Flags
Watch out for advice that includes:
- Guaranteed returns: No investment is without risk.
- Pressure tactics: Urgency to act immediately is often a sign of scams.
- Lack of disclosure: If the advisor doesn’t reveal conflicts of interest, be cautious.
Practical Example
Imagine you come across a YouTube video recommending a new cryptocurrency as a “can’t miss” investment. Applying the mind map:
- Source Credibility: The creator has no listed credentials and promotes multiple paid products.
- Content Quality: The video promises huge returns but doesn’t discuss risks.
- Relevance: The advice is broad and doesn’t consider your financial situation.
- Cross-Verification: Other reputable sources warn about the volatility and risks of this crypto.
- Red Flags: The video urges you to buy immediately to “get in early.”
Based on this evaluation, it’s wise to be skeptical and avoid acting on the advice without further research.
Mind Map: Red Flags in Financial Advice
By systematically applying these criteria, you can filter out poor advice and focus on information that supports your financial well-being. Remember, good financial advice empowers you to make informed decisions, not to follow blindly.
Chapter 14: Building Wealth and Financial Independence
14.1 Principles of Wealth Building for Millennials
Building wealth is less about sudden windfalls and more about steady, thoughtful habits. For millennials navigating the digital economy, understanding core principles of wealth building can make the difference between financial stress and security.
Mind Map: Core Principles of Wealth Building
Income Management
Your ability to build wealth starts with how much you earn and how well you manage that income. Increasing your income can come from negotiating raises, switching jobs, or creating side income streams. Controlling expenses is equally important; spending less than you earn creates the surplus necessary for saving and investing.
Example: Sarah works a full-time job and freelances on weekends. She tracks her income from both sources using a budgeting app, ensuring she knows exactly how much she can allocate to savings each month.
Saving
Saving is the foundation of wealth building. It begins with establishing an emergency fund—typically three to six months’ worth of living expenses—to protect against unexpected costs. Beyond that, saving for specific goals like a home, education, or travel helps maintain focus and motivation.
Example: Alex sets up automatic transfers of $200 monthly into a high-yield savings account dedicated to an emergency fund. Once that goal is met, he redirects the transfers toward a down payment fund.
Investing
Investing allows your money to grow beyond what saving alone can achieve. Diversification—spreading investments across different asset types—reduces risk. A long-term focus helps ride out market fluctuations without panic selling.
Example: Priya invests in a mix of index funds and bonds through a robo-advisor platform. She contributes regularly, regardless of market ups and downs, benefiting from dollar-cost averaging.
Debt Management
Not all debt is equal. Avoiding high-interest debt like credit cards is crucial, while some debt, such as student loans or mortgages, can be strategic if managed well. Prioritizing repayment of expensive debt frees up money for saving and investing.
Example: Mark uses the debt snowball method, paying off his smallest credit card balance first while making minimum payments on others. This approach keeps him motivated and reduces interest costs over time.
Financial Education
Wealth building requires ongoing learning. Staying informed about personal finance basics and adapting to changes in the digital economy ensures decisions remain sound.
Example: Emma dedicates 15 minutes weekly to reading financial news and reviewing her budget and investments, adjusting as needed.
Mind Map: Practical Steps to Wealth Building
Summary
Wealth building is a process grounded in consistent income management, disciplined saving, informed investing, careful debt control, and continuous education. Millennials who apply these principles with patience and clarity can build a financial foundation that supports their goals without relying on luck or shortcuts.
14.2 Passive Income Streams in the Digital Economy
Passive income streams refer to earnings that require minimal ongoing effort after the initial setup. In the digital economy, these streams have become more accessible to millennials through various platforms and technologies. Understanding the types of passive income and how to implement them can help build financial stability and diversify income sources.
Types of Passive Income Streams in the Digital Economy
Digital Products
Creating digital products like eBooks, online courses, or stock photos involves upfront work but can generate ongoing sales without additional effort. For example, a millennial graphic designer might create a set of templates and sell them on platforms like Etsy or Creative Market. Once uploaded, these products can sell repeatedly.
Affiliate Marketing
Affiliate marketing involves promoting products or services and earning commissions on sales through referral links. A blogger writing about tech gadgets can include affiliate links to products on e-commerce sites. When readers purchase through those links, the blogger earns a percentage. This requires consistent content creation initially but can become more passive as content accumulates.
Investment Income
Investing in dividend-paying stocks or peer-to-peer lending platforms provides regular income without daily management. For example, a millennial investor might purchase shares in companies that pay quarterly dividends. Cryptocurrency staking is another option where digital assets are held to support network operations, earning rewards over time.
Rental Income
Beyond physical properties, digital real estate such as websites or domain names can generate rental income. Vacation rentals managed through platforms like Airbnb can also be a source of passive income if outsourced to property managers.
Automated Services
Dropshipping and print-on-demand businesses allow selling products without holding inventory. The seller sets up an online store, and when a customer orders, the supplier ships the product directly. This reduces hands-on involvement after initial setup.
Practical Examples
-
Example 1: Creating an Online Course A millennial with expertise in photography records video lessons and uploads them to an online course platform. After promotion, students enroll and pay for access. The creator updates content occasionally but earns income continuously.
-
Example 2: Dividend Stock Portfolio Investing $10,000 in a mix of dividend stocks yielding 4% annually can generate $400 in passive income per year. Reinvesting dividends compounds returns over time.
-
Example 3: Affiliate Blog A blog focused on fitness gear includes affiliate links to products. With steady traffic, the blogger earns commissions without needing to create new content daily.
Considerations for Building Passive Income
- Initial effort and expertise are often required.
- Income may start small and grow gradually.
- Diversification across multiple streams can reduce risk.
- Monitoring and occasional updates keep income reliable.
Summary Mind Map
By understanding these passive income streams and applying practical examples, millennials can create additional financial buffers and work towards greater financial independence.
14.3 Real Estate Investing: Digital Platforms and Crowdfunding
Real estate investing has traditionally required significant capital, deep market knowledge, and hands-on management. However, digital platforms and crowdfunding have lowered these barriers, allowing millennials to participate with smaller amounts of money and less direct involvement. This section explains how these tools work, their advantages and risks, and offers examples to clarify the concepts.
What Is Real Estate Crowdfunding?
Real estate crowdfunding pools money from multiple investors to fund property purchases or developments. Instead of buying an entire property, investors buy shares or units in a project. This model uses online platforms to connect investors with real estate opportunities.
How Digital Platforms Work
Digital real estate platforms act as intermediaries. They list available projects, provide details like expected returns, timelines, and risks, and handle transactions and legal paperwork. Investors can browse projects, invest amounts as low as a few hundred dollars, and track their investments online.
Mind Map: Real Estate Crowdfunding Structure
Types of Investments on These Platforms
- Equity Investments: Investors own a share of the property and receive a portion of rental income and profits from sales.
- Debt Investments: Investors lend money to property owners or developers and receive fixed interest payments.
Example: Equity Investment
Suppose a platform lists a residential building project requiring $1 million. You invest $1,000, owning 0.1% of the project. If the property generates $50,000 in rental income annually, your share is $50. If the property sells for a profit, you receive your share of the capital gains.
Example: Debt Investment
A developer needs $500,000 to renovate an office building and offers a 7% annual return over two years. You invest $1,000 as a lender. You receive $70 per year in interest, plus your original $1,000 back at the end of the term.
Advantages of Digital Real Estate Investing
- Lower Entry Barriers: You can start with small amounts, unlike traditional real estate requiring tens of thousands.
- Diversification: Spread investments across multiple properties and locations.
- Passive Income: No need to manage tenants or maintenance.
- Transparency: Platforms provide detailed information and regular updates.
Risks and Considerations
- Illiquidity: Investments are often locked for months or years.
- Platform Risk: Dependence on the platform’s reliability and security.
- Market Risk: Property values and rental income can fluctuate.
- Fees: Platforms charge fees that reduce returns.
Mind Map: Pros and Cons

Practical Example: Using a Platform
Imagine you choose a platform that offers a commercial property investment with a minimum of $500. You invest $1,000 split between two projects: a retail space and a warehouse. Over the year, you receive quarterly updates showing rental income and expenses. One project pays steady dividends, while the other is under renovation, delaying returns. This mix illustrates diversification benefits and the importance of patience.
How to Evaluate Opportunities
- Project Details: Understand location, property type, and condition.
- Financial Projections: Review expected returns, timelines, and assumptions.
- Sponsor Reputation: Check the track record of developers or property managers.
- Legal Structure: Know your rights and how profits are distributed.
Mind Map: Evaluation Checklist
In summary, digital platforms and crowdfunding have made real estate investing more accessible. By understanding the types of investments, evaluating risks, and using examples like those above, millennials can make informed decisions that fit their financial goals and risk tolerance.
14.4 Practical Example: Creating a Wealth-Building Action Plan
Creating a wealth-building action plan is about setting clear steps that align with your financial situation, goals, and risk tolerance. It’s a practical roadmap to grow your assets steadily rather than relying on luck or vague intentions. Here’s how to approach it with concrete examples and a few mind maps to organize your thinking.
Step 1: Assess Your Current Financial Position
Start by listing your income, expenses, debts, savings, and investments. This snapshot helps identify where you stand and what resources you can allocate toward building wealth.
Step 2: Define Specific Financial Goals
Wealth-building needs targets. Examples include paying off debt, saving for a home, or growing an investment portfolio. Make goals measurable and time-bound.
Step 3: Prioritize Actions Based on Impact and Feasibility
Not all steps carry equal weight. Paying off high-interest debt often takes precedence over investing small amounts. Use a simple matrix to decide what to tackle first.
Step 4: Build Incremental Habits
Small, consistent actions add up. For example, decide to save 10% of every paycheck or invest $50 monthly through a robo-advisor.
Step 5: Monitor and Adjust Regularly
Track progress monthly or quarterly. Adjust contributions or goals based on changes in income, expenses, or priorities.
Example Action Plan Summary
This structured approach breaks down wealth-building into manageable steps. The mind maps help visualize your current status, goals, priorities, habits, and monitoring routines. By following this plan, you create a clear path that balances paying down debt, saving, and investing without overcomplicating the process.
14.5 Avoiding Common Pitfalls on the Path to Financial Independence
Avoiding common pitfalls on the path to financial independence requires clear awareness of typical mistakes and practical strategies to steer around them. Below is a detailed exploration of these pitfalls, paired with mind maps and examples to clarify the concepts.
Underestimating Expenses and Overestimating Returns
Many aspiring financially independent individuals misjudge how much money they need to sustain their lifestyle. This often happens because they underestimate ongoing expenses or assume investment returns will be consistently high.
- Mind Map: Expense and Return Miscalculations
Example: Sarah planned to retire early assuming a 10% annual return on her investments but did not account for market downturns or inflation. After a few years, her portfolio’s real value was much lower than expected, forcing her to delay retirement.
Neglecting Emergency Funds
Skipping or skimping on an emergency fund can derail financial independence plans. Unexpected expenses can force withdrawals from investment accounts, triggering penalties or losses.
- Mind Map: Emergency Fund Importance
Example: James invested aggressively but had no emergency savings. When his car broke down, he had to sell stocks at a loss to cover repairs, setting back his progress.
Ignoring Debt or Mismanaging It
Carrying high-interest debt while pursuing financial independence slows progress. Some may also fall into the trap of using debt to fund lifestyle inflation.
- Mind Map: Debt Pitfalls
Example: Lisa continued using credit cards for daily expenses without paying off balances, accumulating interest that outpaced her investment gains.
Lack of Diversification
Putting all money into a single asset or sector increases risk. Diversification helps smooth returns and reduce vulnerability to market swings.
- Mind Map: Diversification Risks
Example: Mike invested heavily in a tech startup that failed. His lack of diversification wiped out a significant portion of his savings.
Emotional Decision-Making
Reacting emotionally to market fluctuations can lead to poor choices, such as panic selling during downturns or chasing hot investments.
- Mind Map: Emotional Traps
Example: During a market dip, Emma sold her investments to avoid losses, missing the subsequent recovery and reducing her long-term gains.
Overlooking Tax Implications
Ignoring how taxes affect investment returns and withdrawals can reduce net gains and complicate financial plans.
- Mind Map: Tax Pitfalls
Example: Tom withdrew funds early from his retirement account without understanding penalties, losing a chunk of his savings to taxes.
Setting Unrealistic Timelines
Expecting rapid progress without accounting for income, expenses, and market variability can cause frustration and poor decisions.
- Mind Map: Timeline Issues
Example: Anna aimed to retire in five years but did not adjust her spending or savings rate realistically, leading to disappointment.
Neglecting Continuous Monitoring and Adjustment
Financial independence is not a set-it-and-forget-it goal. Life changes, market conditions, and personal priorities require ongoing review.
- Mind Map: Monitoring and Adjustment
Example: David stuck to his original plan without revisiting it for years, missing opportunities to optimize his investments and savings.
Summary Mind Map: Avoiding Pitfalls on the Path to Financial Independence
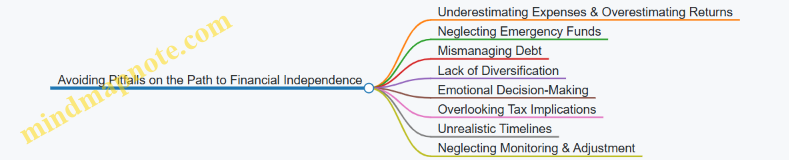
By recognizing these common pitfalls and applying practical strategies—such as maintaining an emergency fund, diversifying investments, managing debt responsibly, and reviewing plans regularly—millennials can improve their chances of reaching financial independence without unnecessary setbacks.
Chapter 15: Giving Back and Financial Responsibility
15.1 The Role of Philanthropy in Personal Finance
Philanthropy, simply put, is the act of giving time, money, or resources to causes that matter to you. In personal finance, philanthropy plays a role beyond generosity—it can be a deliberate part of managing your money and values together.
Why Philanthropy Matters in Personal Finance
Philanthropy connects your financial decisions with your personal beliefs and community impact. It encourages thoughtful budgeting, prioritization, and can even influence your financial goals. Giving doesn’t have to be grand or complicated; even small, consistent contributions can make a difference and foster a sense of purpose.
Mind Map: The Role of Philanthropy in Personal Finance
Integrating Philanthropy into Your Budget
Including philanthropy in your budget is a practical step. For example, if you earn $3,000 a month, you might allocate 2-5% for charitable giving. This could be $60 to $150 monthly. Treat it like any other recurring expense to ensure consistency.
Example: Sarah budgets $100 monthly for donations. She sets up an automatic transfer to a charity she supports. This automation helps her avoid skipping donations during busy months.
Emotional and Social Dimensions
Giving can improve your well-being by creating a sense of connection and purpose. It also encourages reflection on what matters most to you, which can clarify other financial priorities.
Mind Map: Emotional and Social Benefits
Different Ways to Give
Philanthropy isn’t limited to writing checks. Volunteering your time or skills can be equally valuable and cost-effective. Donating items you no longer need reduces waste and helps others.
Example: Mark volunteers two hours a week teaching financial literacy at a local nonprofit. This fits his schedule and leverages his expertise without impacting his cash flow.
Tax Considerations
In many countries, charitable donations can reduce your taxable income. Keeping receipts and records is important if you itemize deductions. However, tax benefits should not be the sole reason to give; the primary motivation should be your values.
Mind Map: Tax and Practical Considerations
Impact on Financial Goals
Philanthropy can influence your spending habits by encouraging mindful consumption. When you allocate funds for giving, you may become more conscious of unnecessary expenses.
Example: After committing to monthly donations, Lisa noticed she cut back on impulse buys to maintain her giving budget.
Summary
Philanthropy in personal finance is about aligning your money with your values. It involves planning, consistency, and reflection. Whether through money, time, or resources, giving can enrich your financial life and personal satisfaction.
15.2 Charitable Giving Through Digital Platforms
Charitable giving has evolved significantly with the rise of digital platforms, making it easier and more transparent for individuals to contribute to causes they care about. Digital platforms serve as intermediaries that connect donors with nonprofits, streamlining the donation process and often providing additional features such as impact tracking and tax documentation.
How Digital Platforms Work for Charitable Giving
Digital platforms typically operate by listing various charities and causes, allowing users to browse, select, and donate directly through the platform. Many platforms support multiple payment methods, including credit cards, digital wallets, and even cryptocurrencies. Some also enable recurring donations, letting donors automate their giving on a schedule that fits their budget.
Mind Map: Components of Charitable Giving Through Digital Platforms
Examples of Digital Giving in Practice
Example 1: One-Time Donation via a Charity Platform Sarah wants to support environmental conservation. She visits a dedicated charity platform where she can read about various projects. After selecting a reforestation initiative, she donates $50 using her credit card. The platform immediately sends her a receipt for tax purposes and updates her on the project’s progress via email.
Example 2: Recurring Donations with Impact Updates John prefers to support education consistently. He sets up a monthly $25 donation through a digital platform that partners with schools. Each month, he receives a brief report showing how his contributions are being used, including stories from students and photos.
Example 3: Social Media Fundraiser Emily creates a fundraiser on a social media platform to help a local food bank. She shares the fundraiser with her network, and friends contribute directly through the platform. The platform aggregates donations and transfers the total to the food bank, providing Emily with updates on the campaign’s success.
Mind Map: Benefits and Considerations
Practical Tips for Using Digital Platforms
- Research the Platform: Check if the platform is reputable and transparent about fees.
- Verify the Charity: Confirm the charity’s registration and mission to avoid scams.
- Use Secure Payment Methods: Prefer platforms that use encryption and secure gateways.
- Keep Records: Save receipts for tax filing and personal tracking.
- Leverage Recurring Donations: Automate giving to maintain consistent support without extra effort.
Digital platforms have lowered barriers to charitable giving, allowing millennials to integrate philanthropy into their financial habits with ease and clarity. By understanding the mechanics and features of these platforms, donors can make informed decisions that align with their values and financial goals.
15.3 Budgeting for Giving: How to Include Donations in Your Plan
Incorporating charitable giving into your budget is a way to align your finances with your values without jeopardizing your financial stability. It requires planning, prioritization, and a clear understanding of your financial picture.
Why Budget for Giving?
Budgeting for donations ensures that your generosity is sustainable. It prevents impulse giving that might disrupt your essential expenses or savings goals. When planned, giving becomes a consistent habit rather than a sporadic event.
Mind Map: Budgeting for Giving
Step 1: Assess Your Financial Situation
Before deciding how much to give, review your income, essential expenses, debt obligations, and savings targets. This assessment helps you understand what portion of your budget is flexible.
Example: If your monthly income is $4,000, and your essential expenses plus savings amount to $3,200, you have $800 available for discretionary spending, which can include donations.
Step 2: Set Giving Goals
Decide how much you want to allocate to donations. Common approaches include:
- Percentage of Income: Many people choose 1-5% of their income. For instance, 2% of a $4,000 monthly income is $80.
- Fixed Amount: A set dollar figure, such as $50 per month.
- Cause Prioritization: Allocate different amounts to different causes based on personal importance.
Example: You might decide to give $50 monthly to a local food bank and $30 quarterly to an environmental charity.
Step 3: Choose Giving Frequency
Decide how often you want to donate. Regular giving can be automated for convenience and consistency.
- Monthly: Aligns well with budgeting cycles.
- Quarterly or Annually: Useful for larger, less frequent donations.
Example: Automate $25 monthly donations to a charity and plan a $100 annual gift to another.
Step 4: Track Donations
Keep a record of your donations for budgeting and tax purposes.
- Use budgeting apps that support tracking charitable expenses.
- Maintain a simple spreadsheet or journal.
Example: Using a budgeting app, you tag all donations under “Charity” to monitor total yearly giving.
Step 5: Adjust as Needed
Life changes, and so should your giving plan. If your income increases, you might increase donations; if expenses rise, you might temporarily reduce them.
Example: After a raise, you increase your monthly donation from $50 to $75. Conversely, during a period of higher rent, you reduce donations to $40 temporarily.
Practical Example: Creating a Giving Budget
- Calculate Available Funds: Monthly income $4,000 minus $3,200 (expenses and savings) = $800 discretionary.
- Decide Giving Amount: Choose 5% of income = $200.
- Allocate Donations: $100 monthly to education charities, $50 monthly to health causes, $50 quarterly to animal welfare.
- Set Up Automation: Schedule monthly payments via bank or charity websites.
- Track and Review: Use a budgeting app to monitor donations and adjust quarterly if needed.
By integrating giving into your budget, you maintain control over your finances while supporting causes you care about. This approach turns generosity into a manageable, rewarding part of your financial life.
15.4 Practical Example: Setting Up Recurring Donations Online
Setting up recurring donations online is a straightforward way to contribute regularly to causes you care about without having to remember to give each time. It also helps you budget your charitable giving by spreading it evenly over the year. Here’s a step-by-step guide with examples and mind maps to clarify the process.
Step 1: Choose Your Cause and Organization
Before setting up a recurring donation, decide which cause or organization you want to support. This could be a local food bank, an international relief agency, an animal shelter, or any nonprofit that aligns with your values.
Step 2: Visit the Organization’s Donation Page
Most nonprofits have a dedicated donation page on their website. Look for options like “Donate,” “Give,” or “Support Us.”
Step 3: Select Recurring Donation Option
When you reach the donation form, choose the option for recurring or monthly donations. This is often a checkbox or a dropdown menu.
Step 4: Set the Amount and Frequency
Decide how much you want to give each time and how often. Monthly is the most common frequency, but some organizations allow weekly or quarterly donations.
Step 5: Enter Payment Information
Provide your payment details. Most sites accept credit/debit cards and sometimes PayPal or bank transfers.
Step 6: Confirm and Save
Review your donation details and confirm. You may receive a confirmation email with details about your recurring donation.
Mind Map: Setting Up Recurring Donations Online
Example 1: Monthly Donation to a Food Bank
Sarah wants to support her local food bank. She visits their website, clicks on “Donate,” and selects “Monthly Donation.” She chooses $25 per month, enters her credit card information, and confirms. Now, every month, $25 is automatically donated without her needing to take any action.
Example 2: Quarterly Donation to an Animal Shelter
Mark prefers to give less frequently but in larger amounts. On the animal shelter’s donation page, he selects “Quarterly” recurring donations and sets $100 per quarter. He uses PayPal for payment. This setup helps him manage his budget while supporting the shelter regularly.
Tips for Managing Recurring Donations
-
Track Your Donations: Keep a record of your recurring donations in your budgeting app or spreadsheet to monitor your cash flow.
-
Set Reminders to Review: Every 6-12 months, review your donations to ensure they still fit your budget and values.
-
Adjust or Cancel Easily: Most organizations allow you to change or stop recurring donations online or by contacting their support.
-
Tax Considerations: Save confirmation emails or receipts for tax deduction purposes.
Mind Map: Managing Recurring Donations

Setting up recurring donations online is a practical way to support causes consistently without extra effort each time. By choosing the right amount and frequency, and keeping track of your contributions, you can make charitable giving a regular part of your financial routine.
15.5 Teaching Financial Responsibility to Family and Community
Teaching financial responsibility to family and community is a practical way to reinforce your own money habits while helping others build a solid foundation. It starts with clear communication and age-appropriate lessons tailored to the needs of children, teens, or adults. The goal is to make financial concepts relatable and actionable.
Mind Map: Teaching Financial Responsibility
Teaching Children
Start simple. Use physical tools like jars or envelopes labeled “Spend,” “Save,” and “Give.” This visual approach helps kids grasp the idea that money has different purposes. For example, giving a child a small weekly allowance tied to simple chores teaches the link between work and reward. Encourage them to decide how to divide their money among the jars. This practice builds early budgeting skills and a sense of control.
Teaching Teens
Teens can handle more complex concepts. Opening a checking account with a debit card introduces them to digital money management. Encourage them to track their spending using a spreadsheet or an app. Discuss the difference between debit and credit, emphasizing the importance of paying credit card balances in full to avoid interest. Use real-life examples, like comparing the cost of buying coffee daily versus making it at home, to highlight how small habits affect finances.
Teaching Adults
For adult family members, focus on practical steps like creating a budget or managing debt. Share your own budgeting method or debt payoff plan as a case study. For instance, explain how you use the snowball method to pay off credit cards, starting with the smallest balance first to build momentum. Discuss investing basics in simple terms, such as the idea of putting money into a diversified portfolio to grow wealth over time.
Mind Map: Practical Examples
Teaching in the Community
Extend financial education beyond the family by organizing or participating in community workshops or discussion groups. These can be informal gatherings where people share tips, challenges, and successes. For example, a neighborhood group might meet monthly to discuss budgeting strategies or ways to save on utilities. Sharing resources like budgeting templates or lists of local financial services can also help.
Example: Hosting a Budget Workshop
Plan a simple workshop where participants bring their monthly income and expenses. Guide them through creating a basic budget, identifying areas to cut back, and setting savings goals. Use relatable examples, such as how reducing dining out by one meal a week can add up over a month. Encourage questions and peer advice to foster a supportive environment.
Encouraging Accountability
Whether at home or in the community, accountability helps maintain good habits. Set up regular check-ins or progress reviews. For example, a family might have a monthly money talk to review budgets and goals. Community groups can create accountability partners who check in on each other’s progress.
Mind Map: Accountability and Support
Teaching financial responsibility is about making money management a shared, ongoing conversation. By using clear examples and practical tools, you help others build confidence and skills that last. This approach benefits both the teacher and the learner, creating a cycle of financial awareness and empowerment.