Practical Guide to Regenerative Gardening
1. Regenerative Gardening in Plain Terms and Clear Goals
1.1 What makes gardening regenerative instead of merely sustainable
Sustainability is about doing less harm and keeping things going. Regenerative gardening goes a step further: it aims to improve the living systems you’re working with—especially soil—so the garden gets better over time, not just “maintained.” The difference is easier to see when you compare what each approach tries to optimize.
The practical difference: maintenance vs. improvement
A sustainable garden might focus on reducing inputs (less fertilizer, less water, fewer chemicals) while keeping yields steady. A regenerative garden focuses on building the conditions that make yields easier to produce with fewer external inputs. That means the garden’s baseline—soil structure, water infiltration, nutrient cycling, and habitat—moves in a positive direction.
A useful way to think about it:
- Sustainable: “Don’t make it worse.”
- Regenerative: “Make it better, using the garden’s own processes as much as possible.”
This doesn’t mean you never add anything. It means you add in ways that strengthen the system rather than temporarily patching problems.
Mind map: sustainability vs. regeneration in garden terms
Mind map: Sustainability vs. Regenerative Gardening
What “regenerative” looks like in everyday choices
1) Soil: from “feed plants” to “feed the soil food web”
In many gardens, soil is treated like a medium for roots. Regenerative gardening treats soil like an ecosystem. That changes the priority order.
- Sustainable example: You add compost occasionally and mulch to reduce evaporation.
- Regenerative example: You keep soil covered most of the year, add compost regularly, and use cover crops or living mulches so there’s always something growing or decomposing. The goal is to increase soil aggregation and biological activity, which improves water infiltration and nutrient availability.
Concrete sign you’re moving toward regeneration: after a few seasons, water soaks in faster and you see fewer crusty, compacted patches after rain.
2) Water: from “use less” to “make water behave better”
Sustainable gardening often focuses on efficient irrigation. Regenerative gardening also does that, but it adds a structural goal: reduce runoff and keep water in the root zone.
- Sustainable example: Drip irrigation with a timer.
- Regenerative example: Drip irrigation plus thick mulch, improved soil structure, and gentle grading or swales so water slows down and infiltrates where it lands.
A simple test: after watering or rain, check whether water pools and runs off the bed edges. Regenerative systems tend to show less pooling and fewer dry rings around plants because the soil can absorb and hold water.
3) Nutrients: from “replace what you remove” to “cycle what you have”
Sustainability can mean balancing inputs and outputs. Regeneration means increasing the garden’s capacity to cycle nutrients internally.
- Sustainable example: You fertilize according to plant needs and remove weeds before they seed.
- Regenerative example: You compost kitchen scraps and yard trimmings, return leaf litter where appropriate, and grow legumes or other cover crops to support nitrogen cycling. You also avoid bare soil so nutrients aren’t lost to erosion or leaching.
Concrete example: instead of buying fertilizer because beds look pale in mid-season, you improve residue management and cover crop timing so the soil releases nutrients when plants need them.
4) Disturbance: from “tidy and reset” to “disturb less, but not never”
A sustainable garden may reduce tilling. Regenerative gardening is more specific: it aims to protect soil structure and the organisms that build it.
- Sustainable example: Light tilling once a year.
- Regenerative example: Minimal disturbance in established beds, with compost and mulch layered on top and planting done through residue or with targeted soil opening.
This isn’t about never touching the soil. It’s about avoiding repeated disruption that breaks down soil aggregates and exposes organic matter to rapid decomposition.
A simple “regenerative check” you can use while planning
When you’re deciding between two methods, ask three questions:
-
Does this practice improve soil function over time?
- Example: mulching and cover crops that increase infiltration vs. leaving soil bare.
-
Does it strengthen internal cycles (organic matter, water movement, nutrient cycling)?
- Example: composting and returning residues vs. relying mainly on purchased inputs.
-
Does it reduce the need for future fixes?
- Example: building drainage and soil structure so you don’t have to constantly rework problem areas.
If a practice scores well on these, it’s likely regenerative in effect, even if it’s not labeled that way.
Mind map: the regenerative “loop”
Mind map: The regenerative loop
Putting it together with one clear scenario
Imagine two gardeners both want tomatoes.
- Sustainable approach: They use compost at planting, mulch lightly, and water with drip. The goal is good yields with fewer chemicals.
- Regenerative approach: They start by improving soil structure with compost and cover crops the season before, keep soil covered between tomato plantings, and manage residue so the bed stays biologically active. They still use drip if needed, but the bed’s improved infiltration reduces stress during hot spells.
Both can grow tomatoes. The regenerative version is designed so the bed becomes easier to grow in each year, because the soil system is getting stronger.
Regenerative gardening isn’t a different kind of gardening so much as a different priority: instead of treating soil and water as background conditions, you treat them as the main work you’re doing.
1.2 The core outcomes to design for: soil life, water cycling, biodiversity, and resilience
The core outcomes to design for
Regenerative gardening is easiest to understand as a set of outcomes you can design for. You’re not chasing a single “right” technique; you’re building conditions where soil, water, plants, and organisms can do their jobs with less effort from you.
1) Soil life: more than “healthy dirt”
Soil life is the living workforce that turns organic matter into plant-available nutrients, builds stable soil structure, and helps roots access water. When soil life is active, you typically see:
- Better aggregation: soil clumps resist crusting and erosion.
- Faster infiltration: water soaks in instead of running off.
- More consistent plant growth: fewer swings between “starving” and “overfed.”
A practical way to design for soil life is to focus on three inputs: food, habitat, and time.
- Food: compost, mulch, and cover crops feed microbes and soil animals.
- Habitat: minimal disturbance, living roots, and a protected surface keep the environment stable.
- Time: biology responds gradually; improvements compound across seasons.
Example (raised bed, beginner-friendly):
- Add a 2–3 inch layer of compost on top of existing soil.
- Cover it with mulch (leaf mold, straw, or shredded leaves).
- Plant a cover crop in fall (or keep a winter mulch if you can’t sow).
- Avoid deep digging; loosen only where you plant.
In a few weeks you may not “see” earthworms multiply, but you’ll often notice the soil surface staying crumbly and less prone to drying out.
Mind map: Soil life outcomes and design levers
2) Water cycling: keep water where it falls
Water cycling is about slowing, soaking, and storing water in the root zone. In many gardens, the problem isn’t lack of water—it’s water moving too fast. When water runs off, it carries away nutrients and leaves soil dry between irrigations.
Designing for water cycling means you aim for:
- Reduced runoff: water stays on-site.
- Infiltration: water enters the soil rather than pooling.
- Storage: soil holds moisture for later use.
- Reuse: water you capture (rain, runoff from paths) is directed to plants.
Example (small urban garden with compacted soil):
- Spread mulch 2–4 inches thick across beds and paths.
- Create shallow basins around plantings (a gentle ring or shallow depression) to catch water.
- Use drip or soaker hoses placed under mulch so water goes straight to roots.
- If the soil is hard, loosen only the planting rows or holes first; repeated deep tilling often worsens compaction.
A simple check: after watering, look at the soil surface after 30–60 minutes. If you see a dry crust and puddles elsewhere, your system is still sending water away from the root zone.
Mind map: Water cycling outcomes and design levers
3) Biodiversity: more kinds of life, more stable function
Biodiversity in a garden isn’t about collecting rare species. It’s about building a system where different organisms support each other: pollinators, predators of pests, decomposers, and plants with different root depths.
Biodiversity helps because it reduces single-point failures. If one pest or disease hits, a mixed system is less likely to collapse completely.
Design for biodiversity by combining:
- Plant diversity: different families and growth habits.
- Habitat diversity: flowers, ground cover, and undisturbed spots.
- Resource timing: something flowering or feeding across the season.
Example (vegetable bed that also feeds beneficials):
- Plant a main crop (like tomatoes or brassicas).
- Add a strip of flowering plants (even a small row) that blooms while the main crop is growing.
- Include a ground cover between rows (low-growing clover, thyme, or a managed cover crop) so the soil isn’t bare.
- Leave a small corner with leaf litter under mulch to support decomposers.
You’re aiming for a garden where beneficial insects have food and shelter, not just a garden where pests have fewer places to hide.
Mind map: Biodiversity outcomes and design levers
4) Resilience: the garden’s ability to handle stress
Resilience is what you feel when the garden doesn’t fall apart after a hot week, a heavy rain, or a minor pest surge. A resilient garden can absorb shocks because the underlying conditions—soil structure, moisture stability, and biological activity—are already doing the work.
Resilience is not a single trait. It’s the combined effect of:
- Soil structure that buffers drought and heavy rain.
- Continuous cover that protects the surface.
- Plant diversity that reduces uniform failure.
- Nutrient cycling that avoids sudden shortages.
Example (same crop, two different bed styles):
- Bed A: bare soil between plants, frequent hoeing, and quick fertilizer-only feeding.
- Bed B: mulch + compost top-dressing + cover crop in off-season.
When a dry spell hits, Bed B usually holds moisture longer and shows less dramatic wilting. When a heavy rain hits, Bed B is less likely to crust and run off.
Mind map: Resilience outcomes and design levers
Putting it together: a simple design checklist
Use these outcomes as a design loop. For each bed or container, ask four questions:
- Soil life: What food and habitat will soil organisms get this season?
- Water cycling: How will water slow down, soak in, and stay in the root zone?
- Biodiversity: What plants and habitat will support beneficial organisms and varied roots?
- Resilience: What stress should the system handle better than last season?
If you can answer all four, you’re designing outcomes rather than collecting disconnected tips. The garden becomes easier to manage because the “why” is built into the “what.”
1.3 Regenerative principles you can apply immediately in beds, containers, and rooftops
Regenerative gardening is less about a special ingredient and more about a few repeatable design choices. The goal is to keep soil covered, feed soil life, and manage water so it soaks in instead of running off. You can start today with small changes that work in ground beds, pots, and rooftop planters.
The 5 principles (and what they look like right away)
- Keep living cover on the ground
- Why it matters: Bare soil heats up, crusts over, and loses moisture. Cover protects structure and gives soil organisms a steady routine.
- Bed example (easy): After harvesting lettuce, sow a quick cover like clover or buckwheat. If you can’t sow immediately, cover with shredded leaves or straw and plan to seed the next week.
- Container example: Don’t leave pot tops bare. Plant a low edible (like thyme in a sunny pot) or use a thin mulch layer (leaf mold or fine compost) around the plant.
- Rooftop example: Use a consistent top layer across planters—mulch or compost—because wind dries rooftop soil fast.
- Feed the soil, not just the plant
- Why it matters: Plants grow better when soil biology turns organic matter into usable nutrients.
- Bed example: Add compost as a top-dressing before planting, then mulch. You’re not trying to “fertilize once”; you’re setting up a slow, ongoing system.
- Container example: Mix compost into the top 2–3 cm of potting mix, then top with a light mulch. This reduces nutrient swings from frequent watering.
- Rooftop example: Choose a potting mix that includes compost or well-decomposed organic matter, then refresh the top layer mid-season.
- Minimize soil disturbance
- Why it matters: Frequent digging breaks fungal networks and exposes organic matter to rapid breakdown.
- Bed example: Instead of turning soil, add compost on top and plant through mulch. If you must loosen compacted areas, do it once and only where needed.
- Container example: Avoid frequent repotting. When plants outgrow their pots, top-dress and prune roots only if necessary.
- Rooftop example: Treat planters like long-term systems. Replacing soil every season resets the biology you worked to build.
- Manage water so it soaks in
- Why it matters: Water that runs off carries nutrients away and reduces infiltration.
- Bed example: Build a shallow basin around plants (a simple ring of mulch and soil) to slow runoff. Pair it with mulch so water doesn’t hit bare ground.
- Container example: Use saucers or drip trays to catch excess, then empty them after a few hours to prevent root rot.
- Rooftop example: Check drainage paths. If planters sit on impermeable surfaces, ensure water can move out without pooling.
- Increase diversity and habitat
- Why it matters: Mixed plantings support beneficial insects and reduce the odds that one pest or disease wipes out a whole crop.
- Bed example: Mix families where you can—greens with flowering herbs, or tomatoes with basil and marigolds—so the garden isn’t a single-flavor buffet.
- Container example: Use “one pot, two jobs”: a main crop plus a small companion like nasturtium for ground cover.
- Rooftop example: Add a few flowering plants that bloom at different times to keep pollinators around.
Mind map: Regenerative actions you can do today
Mind Map: Immediate Regenerative Moves
Practical “do this, then that” examples
A. Ground bed reset (one weekend + ongoing habits)
- Step 1 (Saturday): Remove weeds by cutting at the soil surface rather than pulling up everything with roots.
- Step 2: Spread 1–2 cm of compost over the bed and cover with mulch. If you’re planting immediately, leave small planting holes.
- Step 3 (Sunday): Plant a mix: one main crop and one supporting plant (herb, flower, or nitrogen-fixing option where appropriate).
- Ongoing: Water deeply when needed, but keep the soil covered at all times.
B. Container system that doesn’t collapse after a week of heat
- Step 1: Choose a pot size that matches the crop’s root needs. Small pots dry out and force constant watering.
- Step 2: Top-dress with compost and add a thin mulch layer. This reduces evaporation and nutrient washout.
- Step 3: Add a companion plant or edible ground cover to shade the pot surface.
- Ongoing: Water until it runs out, then wait. Don’t water again just because the top looks dry; check moisture a few centimeters down.
C. Rooftop planters: wind-proofing and water control
- Step 1: Use a consistent top layer (mulch or fine compost) across all planters.
- Step 2: Group planters by water need so you’re not constantly adjusting.
- Step 3: Add a few flowering plants with different bloom times to support beneficial insects.
- Ongoing: Inspect drainage after heavy rain. If water pools, adjust planter placement or add a drainage layer where appropriate.
A simple checklist you can reuse
- Is the soil covered today? If not, cover it (mulch, compost, or a living plant).
- Did I add compost recently? If not, top-dress where plants allow.
- Did I disturb the soil more than necessary? If yes, switch to planting through mulch next time.
- Does water soak in? If water runs off, slow it with mulch and basins.
- Is there more than one plant type? If the bed is monoculture, add a supporting plant.
These principles are intentionally small. Each one reduces a specific problem—dryness, nutrient loss, disturbance, runoff, or low habitat—so the garden becomes easier to manage while improving the soil over time.
1.4 A practical baseline assessment: what to measure before you change anything
Before you add compost, sow cover crops, or redesign beds, take a short snapshot of what’s happening now. Regenerative gardening is mostly about changing the system, not just swapping inputs. A baseline assessment keeps you from “fixing” the wrong thing and helps you notice improvements that don’t look dramatic at first.
What you’re trying to learn
Think of your garden as four interacting parts: soil, water, plants, and people/management. Your measurements should answer: Where is the garden struggling? What’s working already? What constraints are real (shade, compaction, drainage, foot traffic)?
A simple mind map for your baseline
Mind Map: Baseline Assessment (Regenerative Garden)
The “no-lab” measurement set (what to do in 60–90 minutes)
Pick a few spots that represent your garden: one bed that’s doing okay, one that’s struggling, and one that gets the most sun or foot traffic. If you only have time for one spot, choose the area you most want to improve.
1) Soil surface condition (5 minutes)
Record what you see at the top 2–5 cm.
- Bare soil vs. covered soil: note percentage of exposed ground.
- Mulch thickness: rough estimate in cm.
- Residue presence: do you see leaf litter or mostly bare dirt?
- Compaction signs: crusting after rain, footprints that stay visible, or soil that breaks into hard clods.
Example: If a bed has 40% bare soil and a thin mulch layer, you’re likely dealing with water loss and temperature swings even if plants look “fine” today.
2) Infiltration test (15 minutes)
This is one of the most useful baseline checks because it connects soil structure to water behavior.
- Use a cup or small container to pour about 1 liter of water into a small area (roughly 20–30 cm across).
- Start a timer.
- Note how long it takes for the water to soak in and whether it runs off.
Record two numbers:
- Soak time: “water disappears in ~X minutes”
- Runoff behavior: “mostly absorbs” or “runs to the edge”
Example: If water runs off quickly, adding compost alone may not solve the issue. You may need to reduce disturbance, increase cover, and improve structure gradually.
3) Soil texture and structure check (10 minutes)
Take a small handful from 0–15 cm.
- Feel: does it crumble, smear, or form a tight ball?
- Ribbon test (optional): if you can form a ribbon longer than ~2–3 cm, you likely have more clay behavior.
- Smell: healthy soil often smells earthy, not sour or stagnant.
Example: Smearing and long ribbon formation suggests compaction or clay-dominant texture. In that case, frequent tilling can make things worse by breaking aggregates and leaving soil bare.
4) Earthworm and residue observation (5 minutes)
Look for:
- Earthworms on the surface (especially after rain)
- Worm holes or castings
- Visible fungal threads or stable aggregates (not required, but helpful)
Example: If you see almost no earthworm activity and the soil smells “off,” start with cover and organic matter inputs before expecting quick plant performance.
5) Plant vigor and stress map (20 minutes)
Choose 10–20 plants (or a representative patch) and record:
- Leaf color: consistent green, pale, yellowing, or patchy
- Leaf size and density: small and sparse vs. full canopy
- Growth uniformity: even growth vs. “hot spots”
- Stunting patterns: along edges, in low spots, or where water pools
Make a quick sketch of the bed and mark zones:
- “best growth”
- “weak growth”
- “bare soil”
- “pest/disease spots”
Example: If weak growth clusters in the same low area, the baseline is pointing to drainage or waterlogging rather than a nutrient deficiency.
6) Water flow and irrigation pattern (10 minutes)
Walk the garden during or right after watering/rain.
- Identify where runoff starts.
- Identify where it ends (gutters, paths, low corners).
- Note whether irrigation is wetting the whole bed or only the center.
Example: If water consistently runs off the top of a slope, you’ll want to slow it down with cover and micro-catchments before you add more inputs.
A quick “before” scorecard (useful, not fancy)
Rate each category from 0–3. Write down the numbers so you can compare later.
| Category | 0 (needs work) | 1 (mixed) | 2 (working) | 3 (strong) |
|---|---|---|---|---|
| Soil cover | Mostly bare | Some cover | Mostly covered | Always covered |
| Infiltration | Slow/ponding/runoff | Mixed | Soaks fairly well | Soaks quickly |
| Plant vigor | Patchy/stunted | Uneven | Mostly healthy | Consistently healthy |
| Disturbance | Frequent tilling/hoe | Occasional | Minimal | Rare |
| Water management | Runoff common | Some pooling | Controlled | Mostly captured/soaked |
Example: A bed scoring 0–1 on cover and infiltration but 2 on plant vigor might still be worth improving, because the plants may be “getting by” while the soil system is struggling.
Mind map for turning observations into decisions
Mind Map: From Measurements to Actions
What to record (so you can actually use the baseline)
Use a single page per garden area.
- Date and weather (especially if you tested infiltration after rain)
- Bed size and orientation (sun/shade notes)
- Infiltration soak time and runoff notes
- Cover percentage estimate
- Plant vigor notes (color, density, uniformity)
- A sketch with zones
- Your current management routine (how often you water, weed, or disturb)
Example: If you note “infiltration ~8 minutes with runoff to the path” and “weeding every 7–10 days,” you’ll know why the soil stays exposed and why water doesn’t stay put.
Common mistakes to avoid
- Testing only the best-looking spot: it hides the real constraints.
- Changing everything at once: you won’t know which change helped.
- Ignoring patterns: “yellow leaves” is less useful than “yellow leaves in the low corner after watering.”
A baseline assessment isn’t about collecting perfect data. It’s about building a clear picture of how your garden behaves today—so your next steps target the system, not just the symptoms.
1.5 Turning principles into a simple garden plan and success criteria
Regenerative gardening can sound like a philosophy you need a weekend retreat to apply. You don’t. You need a plan that connects actions to outcomes, plus a few success criteria you can check without a microscope.
Step 1: Pick one “system” to improve first
Start with the biggest bottleneck in your garden right now. Choose only one for the first cycle (often 8–16 weeks):
- Soil cover (bare ground, crusting, erosion)
- Soil structure (compaction, poor infiltration)
- Water handling (runoff, dry beds, inconsistent moisture)
- Biodiversity (few pollinators, low beneficial insect presence)
Example: If your bed dries out fast and you see runoff after rain, your first system is water handling, supported by soil cover.
Step 2: Translate principles into “doable moves”
Use this pattern: Principle → Garden move → What you’ll notice.
- Principle: Keep soil covered → Move: mulch 5–8 cm (2–3 in) and plant a cover crop where you can → Notice: fewer weeds, less crusting, soil stays cooler.
- Principle: Feed biology, not just plants → Move: add compost to the top layer and avoid mixing it deep → Notice: earthworms increase, soil smells earthy, plants look steadier.
- Principle: Reduce disturbance → Move: use cut-and-drop cover crops instead of frequent digging → Notice: fewer bare patches and less “resetting” of soil structure.
Keep each move small enough that you can repeat it. If you can’t do it twice, it’s too big for a first plan.
Step 3: Build a simple plan using a 3-zone layout
Most gardens behave better when you stop treating everything as one uniform surface. Split your space into three zones:
- Production zone (where you grow food): vegetables, herbs, fruiting plants.
- Support zone (where you build soil): compost area, cover-crop strips, mulch staging.
- Perimeter and habitat zone (where you host life): flowering edges, trellises, leaf-litter corners.
Example layout for a small urban plot:
- Production zone: 2 raised beds for leafy greens and roots.
- Support zone: one narrow strip between beds for a cover crop and compost top-dressing.
- Habitat zone: a 60–90 cm (2–3 ft) border with mixed flowering plants and a trellis for climbing legumes.
Step 4: Create a “week-by-week” action rhythm
Regenerative gardens don’t require constant work; they require consistent attention. Use a repeating rhythm:
- Weekly (15–25 minutes): check moisture, look for pests/disease early, spot bare soil.
- Every 2–4 weeks: top up mulch, scout more thoroughly, adjust irrigation.
- Every 6–12 weeks: add compost, manage cover crop growth, replant gaps.
Example rhythm for a bed that’s currently bare:
- Week 1: cover with mulch, sow a quick cover crop in open areas.
- Week 2: thin seedlings if needed, remove weeds only where they compete with young plants.
- Week 4: top up mulch and add compost around (not into) plant stems.
- Week 6–8: cut-and-drop cover crop residue and re-mulch.
Mind map: Principles → Moves → Checks
Step 5: Define success criteria that are specific and observable
Success criteria should answer: “What will be different, and how will I know?” Use a mix of soil, plant, and management indicators.
Soil indicators (choose 2–3)
- Infiltration: After watering or rain, water should soak in within a reasonable time instead of pooling.
- Surface condition: Less crusting and fewer bare patches.
- Soil feel: When you grab a handful, it should crumble rather than form a hard clod.
Plant indicators (choose 2–3)
- Uniform growth: Plants establish without frequent stalling.
- Leaf color and vigor: Not perfect, but not consistently pale or weak.
- Pest pattern: You see pests, but damage stays localized and doesn’t escalate quickly.
Management indicators (choose 1–2)
- Weeding time: You spend less time removing weeds because cover does the work.
- Irrigation frequency: You water less often or with less runoff.
Example success criteria set (for a water-and-cover priority)
- Soil cover: At least 90% of the bed surface is covered (mulch or living plants) within 4 weeks.
- Runoff reduction: After a typical rain, fewer puddles form and water soaks in rather than running off.
- Plant steadiness: Leafy greens maintain consistent growth with no repeated wilting during the same weather pattern.
- Weeding effort: Weeding time drops by about half compared to the previous month.
Step 6: Turn it into a one-page plan
A one-page plan prevents the “I did a lot of things” problem. It forces you to connect actions to outcomes.
One-page regenerative plan (example)
Priority system: Water handling + soil cover
Zone actions
- Production bed: 6 cm (2–3 in) mulch + compost top-dress around plants
- Support strip: sow cover crop; cut-and-drop at 20–30 cm (8–12 in)
- Habitat edge: add 2–3 flowering patches and keep leaf litter in a corner
Weekly checks (15–25 min)
- Look for bare soil; re-mulch immediately
- Check moisture at 5–10 cm (2–4 in) depth
- Scout pests on the underside of leaves
Success criteria (8–12 weeks)
- ≥90% soil cover
- Less runoff/pooling after rain
- More consistent plant growth
- Weeding time reduced
Step 7: Add a “small adjustment rule”
Plans fail when gardeners change everything at once. Use a rule like this:
- If soil cover is below target, fix cover first.
- If cover is good but plants struggle, adjust watering placement and compost timing.
- If plants look fine but pests spike, increase scouting frequency and improve habitat diversity rather than reaching for broad interventions.
Example: If your bed stays weedy even with mulch, you likely have thin coverage or gaps near plant stems. The adjustment is to thicken mulch and close gaps, not to dig up everything.
Mind map: Success criteria checklist

A practical example you can copy
Suppose you have a raised bed that’s been bare between crops.
- Priority: soil cover
- Moves: mulch immediately after harvest; sow a cover crop in the open space; top-dress compost before replanting.
- Checks: weekly bare-soil scan; moisture check at 5–10 cm depth.
- Success criteria: 90% cover within 4 weeks, fewer weeds by week 8, and no repeated stalling when you replant.
That’s it. Principles become a plan when you can point to the move, the observation, and the target. When those three line up, you’re not guessing—you’re steering.
2. Soil as the Main System: Build It Before You Chase Inputs
2.1 Soil structure, organic matter, and aggregation explained for gardeners
If you’ve ever added compost and watched plants respond, you’ve already seen the “soil system” at work. The trick is understanding what compost changes: it helps soil particles clump into stable aggregates, which creates pores for air and water, and that supports the biology that keeps the whole system running.
Soil structure: what it is and why it matters
Soil structure is how mineral particles (sand, silt, clay) are arranged into units called aggregates. Between those aggregates are pores—tiny spaces that fill with air or water.
Good structure means:
- Water enters and moves through instead of pooling.
- Roots can grow without hitting a hard, compact layer.
- Air reaches deeper zones, so roots and microbes can do their jobs.
- Soil resists crusting after rain or irrigation.
Poor structure often looks like this: a bed that forms a crust, drains slowly, or dries into a powdery top layer while staying dense underneath. That combination usually means aggregates are weak or missing.
Organic matter: the “glue and food,” not just the bulk
Organic matter includes decomposing plant residues, compost, and living microbial biomass. It affects soil structure in two main ways.
-
Aggregation support (glue): As organic materials break down, they help form sticky substances that bind particles together. This is one reason compost can improve structure even when you don’t add much volume.
-
Biological activity (food and maintenance): Microbes and soil fauna consume organic matter and produce byproducts that help stabilize aggregates. When organic matter is consistently available, the soil tends to maintain its structure rather than slowly slipping back.
Organic matter is not a permanent coating. It breaks down over time, so the goal is steady inputs and good protection (especially keeping soil covered).
Aggregation: how clumps form and stay together
Aggregation is the process of forming and maintaining aggregates. Think of it as a cycle:
- Fresh organic inputs feed microbes.
- Microbes and their byproducts help bind particles.
- Roots grow through aggregates and physically reinforce them.
- When aggregates are protected from repeated disturbance and heavy raindrop impact, they persist.
Aggregation can be disrupted by:
- Frequent tilling (especially when soil is wet).
- Bare soil exposed to heavy rain.
- Compaction from foot traffic, equipment, or working the bed when it’s too wet.
A useful gardener’s mental model: aggregates are like “soil bricks.” You can make bricks (add organic matter and encourage biology), but if you keep knocking the wall apart (tilling and leaving soil bare), the bricks won’t stay in place.
Mind map: the relationships in one view
Mind map: Soil structure, organic matter, and aggregation
What aggregation looks like in real gardens
You don’t need lab tests to see structure differences. Here are practical observations.
1) The “squeeze test” (quick and imperfect, but useful):
- Take a handful of soil from the top few inches.
- If it crumbles easily when dry and forms a loose ball when slightly moist, that often indicates decent structure.
- If it forms a sticky, smeary mass that stays together, clay-dominant soils may be compacted or lacking stable aggregates.
2) The “rain test” (watch what happens after watering):
- On well-structured soil, water soaks in and spreads gradually.
- On weak structure, you’ll see runoff or a crust forming within minutes.
3) The “spade slice” (best done when soil isn’t wet):
- Cut a vertical slice and look at how the soil breaks.
- Stable aggregates break into chunks.
- Poor structure breaks into smeary layers or fine dust.
Examples: how gardeners can apply this understanding
Example A: Compost added, but structure doesn’t improve much A common scenario: compost is spread once, then the bed is tilled repeatedly and left bare between plantings. Compost provides organic matter, but aggregation can’t stabilize because disturbance breaks clumps apart and raindrops hit bare soil.
What to change:
- Stop frequent tilling; use shallow disturbance only where planting requires it.
- Keep soil covered with mulch or a cover crop so organic matter stays in place.
- Add compost as a top-dress rather than mixing it deeply every time.
Example B: Raised bed with great plants, but it dries fast Sometimes a bed has visible organic matter and healthy plants, yet it dries quickly. That can happen when the soil is mostly fine particles with weak structure, so water drains through pores too quickly or the surface crusts and prevents infiltration.
What to change:
- Increase surface protection (mulch) to reduce crusting.
- Add organic residues consistently (compost plus cover crop roots).
- Avoid working the bed when it’s wet; compaction can reduce pore continuity.
Example C: Heavy clay that turns into bricks after rain Clay can be naturally sticky, but it becomes worse when aggregates are repeatedly broken down. If you see cracking after drying and a slick layer after rain, the soil likely lacks stable aggregates.
What to change:
- Use cover crops to keep roots actively reinforcing structure.
- Add compost and keep it covered so organic matter isn’t rapidly lost.
- Minimize traffic and avoid tilling when the soil is workable but not wet.
A simple “cause → effect” checklist
When you’re deciding what to do next, match the symptom to the likely cause.
- Symptom: water runs off → likely weak surface aggregates or bare soil impact.
- Symptom: crust forms after watering → likely poor aggregation at the surface.
- Symptom: roots stall in a dense layer → likely compaction and disrupted pore continuity.
- Symptom: soil feels dusty and lifeless → likely low organic matter inputs and lack of continuous cover.
Key takeaway
Soil structure, organic matter, and aggregation are tightly linked. Organic matter feeds and supports the processes that form stable aggregates, and stable aggregates create the pore network roots need. Your job is to provide steady organic inputs and protect the soil from repeated disturbance—then let biology and roots do the binding work.
2.2 How to diagnose soil problems with simple field tests
Soil problems rarely announce themselves with a neon sign. More often, you notice symptoms: plants that stall, leaves that yellow, water that pools, or weeds that thrive while your crops sulk. The goal of field tests is to connect those symptoms to likely causes—so you can fix the right thing instead of throwing amendments at the problem like darts.
A quick diagnostic mindset
Start with three questions:
- What changed? (new bed, new mulch, compaction from foot traffic, drought, heavy fertilizer use)
- Where is the symptom showing up? (surface only, root zone, whole bed, low spots)
- What’s the pattern? (fast wilting vs. constant yellowing; patchy vs. uniform)
Then run a small set of tests. You don’t need to test everything every time. Pick tests that match the symptom.
Mind map: soil problem → likely causes → field checks
Test 1: The “squeeze and crumble” structure check
What you do: Grab a handful of soil from the top 6–10 cm (2–4 in). Moisten if it’s bone dry. Squeeze firmly into a ball, then gently poke it.
What to look for:
- Ball holds together like modeling clay → likely fine particles and/or compaction. Water may move slowly.
- Ball crumbles easily into crumbs → good structure. Roots can explore and water can infiltrate.
- Ball forms but won’t crumble and feels dense → compaction or heavy clay with poor aggregation.
- Ball falls apart immediately and feels gritty → likely low organic matter or sandy texture.
Example: In a raised bed, tomatoes show slow growth and the soil stays wet for days after watering. The squeeze test forms a tight ball that resists crumbling. That points to structure/compaction issues. Your first fix is improving aggregation and reducing traffic, not adding more fertilizer.
Test 2: The infiltration test (bucket or ring method)
What you do: Dig a small depression or use a ring (even a cut plastic container works). Fill with water once, then observe how quickly it disappears.
How to interpret (practical ranges):
- Water sits for a long time (e.g., many minutes) → infiltration is poor.
- Water disappears quickly (within a minute or two) → infiltration is likely fine.
Example: A community plot has patchy growth. The low spots stay wet and seedlings damp off. Infiltration is slow only in those areas. That suggests drainage/compaction differences across the bed. You can address the low spots with better soil cover, gentle loosening, and improved bed shaping.
Test 3: The “worm and root” reality check
What you do: Dig a small hole near the symptom area. Look at roots and soil life signs.
What to look for:
- Roots are thick, pale, and branching → soil is supporting growth.
- Roots are brown, stubby, or circling → root restriction, often from compaction, waterlogging, or poor structure.
- Few roots in the top layer but some below → surface crusting or dryness.
- Earthworms present and soil smells earthy → biology is active.
- Soil smells sour, rotten, or “stagnant” → oxygen is limited; drainage or compaction is likely.
Example: Carrots in one section are forked and short. The root inspection shows roots hitting a dense layer around 10–15 cm (4–6 in). That’s a compaction layer or persistent hardpan. You’ll want to focus on loosening and building structure in that zone, plus keeping the surface covered to avoid re-compaction.
Test 4: Texture and ribbon test (quick estimate)
What you do: Take a moist sample. Roll it into a ball, then try to make a ribbon by pressing and stretching between your fingers.
What to look for:
- No ribbon forms; it crumbles → sandy or very low clay.
- Short ribbon forms (a little) → loam or moderate clay.
- Long ribbon forms and stays intact → higher clay content.
Why it matters: Texture doesn’t mean “good” or “bad,” but it changes what fixes work. Clay-heavy soils often need structure-building and drainage improvements. Sandy soils often need organic matter and water-holding cover.
Example: A balcony grower uses a very light potting mix and plants wilt quickly. The ribbon test shows almost no ribbon and the squeeze test crumbles instantly. The issue is likely water retention and organic matter, not a mysterious nutrient deficiency.
Test 5: The soil smell test (oxygen and biology clues)
What you do: After digging, smell the soil right away.
What to look for:
- Earthy, forest-like smell → generally healthy oxygen and biology.
- Sour, swampy, or rotten smell → likely waterlogged conditions or anaerobic pockets.
- No smell and very dry → biology is dormant due to dryness.
Example: Lettuce in a shaded bed develops persistent yellowing and the soil smells sour after watering. That points to oxygen limitation. Improve drainage and reduce overwatering before adding amendments.
Test 6: The “surface crust” check
What you do: Lightly scratch the surface. Note whether it forms a hard crust that resists penetration.
What to look for:
- Crust that breaks into hard plates → likely compaction at the surface, low organic matter, or repeated wetting without cover.
- Surface that stays crumbly → better infiltration and less runoff.
Example: After rain, water runs off the bed edges and seedlings struggle to emerge. The surface crust check shows a hard layer. Adding mulch and maintaining cover can reduce crusting and help seedlings.
Mind map: symptom → tests to run first
A simple decision workflow (use it like a checklist)
- Start with the symptom location: low spots, surface only, or whole bed.
- Run one structure test (squeeze) and one water test (infiltration).
- Inspect roots in the problem area.
- Use smell to confirm oxygen limitation vs. dryness.
- Estimate texture if you’re unsure whether the soil holds or sheds water.
Concrete examples: diagnosing without guessing
Example A: “My bed stays wet and plants look tired.”
- Squeeze test: tight ball, slow crumble.
- Infiltration: water sits.
- Smell: sour after watering.
- Root inspection: short, brown roots. Likely cause: compaction and poor drainage causing low oxygen. Next action: improve structure and drainage in the root zone, keep the surface covered, and avoid heavy traffic.
Example B: “My plants wilt even when I water.”
- Texture/ribbon: sandy, no ribbon.
- Squeeze test: crumbles instantly.
- Surface crust: minimal, but soil dries fast.
- Root inspection: roots are present but the bed dries between waterings. Likely cause: low water-holding capacity and insufficient organic matter/cover. Next action: increase soil cover and organic matter inputs, and adjust watering frequency to match infiltration and retention.
Example C: “Yellow leaves show up in patches.”
- Infiltration: normal overall, but low spots infiltrate slowly.
- Smell: sour only in patches.
- Root inspection: weak roots in those patches. Likely cause: localized waterlogging stressing roots, which can mimic nutrient issues. Next action: fix the wet spots first; then reassess nutrient needs.
What to avoid during diagnosis
- Don’t start with fertilizer. Nutrients can’t compensate for roots that can’t access water or oxygen.
- Don’t rely on one test. A squeeze test alone can’t tell you whether the issue is compaction, texture, or both.
- Don’t test only the “worst-looking” spot. Compare with a nearby healthy area so you can see what’s truly different.
When you treat field tests as a small set of clues rather than a verdict, the soil starts to make sense. You’ll spend less time guessing and more time making targeted changes that plants can actually use.
2.3 Compost, mulch, and cover crops: what each does and when to use them
Regenerative gardening is less about picking one “magic” input and more about matching the right tool to the job. Compost, mulch, and cover crops all support soil life, but they work on different timelines and in different ways.
What compost does (and when it’s the right move)
Compost is a soil amendment: you add it to change what’s available in the soil—nutrients, organic matter, and microbes—so plants can grow and soil organisms can do their work.
Key roles
- Feeds soil biology with partially decomposed organic material.
- Improves soil structure over time by adding stable organic matter.
- Adds nutrients gradually, especially when combined with living roots and mulch.
When to use compost
- Before planting: mix into the top layer of beds where you’ll plant soon.
- As a top-dressing: apply a thin layer on established plants, then cover with mulch if needed.
- For soil “recovery”: when beds have been bare, compacted, or repeatedly weeded down to dirt.
Practical example
- You’re starting a new vegetable bed after removing sod. Spread 1–2 inches (2.5–5 cm) of compost and lightly incorporate it into the top 4–6 inches (10–15 cm). Then plant. The compost jump-starts biology and structure, while mulch and cover crops handle ongoing protection.
Common mistakes
- Using too much: thick compost layers can smother soil surface life and create uneven moisture.
- Relying on compost alone: compost doesn’t replace the need for continuous cover. If the soil is bare, nutrients and moisture still escape.
What mulch does (and when it’s the right move)
Mulch is a protective layer on the soil surface. It reduces evaporation, moderates temperature swings, and shields soil from beating rain.
Key roles
- Moisture management: slows evaporation so roots get steadier access to water.
- Erosion control: keeps soil in place.
- Weed suppression: blocks light and interrupts germination.
- Organic matter input: as it breaks down, it contributes carbon and supports soil organisms.
When to use mulch
- After planting: once seedlings are established or after transplanting.
- Between crops: keep beds covered during gaps.
- Around perennials and shrubs: maintain a consistent surface layer.
Practical example
- In a tomato bed, lay 2–3 inches (5–8 cm) of straw or shredded leaves around the plants, keeping mulch a couple inches away from stems. This reduces watering frequency and helps prevent soil splash that can spread leaf diseases.
Mulch choices and what they imply
- Straw: good for vegetable beds; breaks down slowly.
- Shredded leaves: excellent for building organic matter; often available in fall.
- Wood chips: useful for paths and long-lived plantings; break down slower and can be less ideal for annual vegetable beds if applied too thickly.
Common mistakes
- Mulching too close to stems: can invite rot and pest hiding spots.
- Using fresh, high-carbon material without a plan: thick, uncomposted wood chips can temporarily tie up nitrogen. If you use them, keep them on paths or use lighter layers in beds.
What cover crops do (and when they’re the right move)
Cover crops are living plants grown for soil benefit. They protect the soil surface, feed soil life through root exudates, and can add or mobilize nutrients.
Key roles
- Continuous living cover: reduces erosion and prevents bare-soil weed pressure.
- Root-driven soil improvement: roots create channels and add organic inputs below the surface.
- Nutrient management: legumes can add nitrogen; other species can capture nutrients and reduce leaching.
- Soil structure support: different root types create different effects.
When to use cover crops
- During off-season gaps: after harvest until the next planting.
- Between crop cycles: where you can’t keep mulch alone (for example, long periods without planting).
- To address specific problems: compaction, erosion, or nutrient loss.
Practical example
- After harvesting early greens, sow a cover crop like clover or vetch (legume) if your goal is nitrogen support. Let it grow until it’s time to plant the next crop, then terminate it by cutting and using the residue as mulch.
Termination timing matters
- Terminate cover crops before they go to seed (so they don’t become weeds).
- For many systems, cutting and leaving residue on the surface works well because it combines the benefits of cover crops (roots) and mulch (surface protection).
How they fit together: a simple decision guide
Use this mental model: compost changes the soil, mulch protects the soil, and cover crops keep the soil working.
Mind map: “Which tool for which job?”
Integrated examples you can copy
Example 1: Spring bed setup (urban or backyard)
- Compost: mix a thin layer into the top 4–6 inches before planting.
- Plant: keep seedlings spaced so airflow is possible.
- Mulch: add straw or shredded leaves after plants are established.
- Cover crop: if you have a gap after early harvest, sow a cover crop instead of leaving soil bare.
Result: compost jump-starts fertility, mulch stabilizes moisture, and cover crops prevent bare-soil downtime.
Example 2: After a heavy harvest (late summer)
- Stop bare soil: lay mulch immediately if you can’t sow cover crops right away.
- Sow cover crop: once you’re ready, plant a cover crop to keep roots active.
- Terminate and mulch: cut it down before it seeds, then leave residue as mulch for the next planting.
Result: you keep the soil covered and keep organic matter cycling without relying on repeated compost additions.
Quick “when to choose what” checklist
- Soil feels tired or compacted? Add compost and keep mulch on top.
- Soil dries out fast or weeds explode? Increase mulch coverage and reduce bare intervals.
- You have time between crops? Use cover crops to keep roots feeding the soil.
- You want the simplest system? Compost lightly, mulch consistently, and use cover crops during gaps.
A practical rule of thumb
If the soil surface is bare, it’s not doing its job. Compost helps the soil work better, mulch helps the soil stay protected, and cover crops help the soil keep working even when you’re not actively planting.
2.4 Soil amendments that support biology: rock dust, biochar, and mineral sources
Healthy soil biology doesn’t need a magic additive; it needs conditions that let microbes and soil fauna do their jobs. Amendments can help by improving nutrient availability, buffering pH, and providing surfaces for microbial colonization. The trick is matching the amendment to the soil’s actual needs and using it in a way that doesn’t overwhelm the system.
What “support biology” means in practice
Soil organisms respond to three main things:
- Food and energy: mostly from compost, mulch, and plant residues.
- Habitat: stable aggregates, moisture, oxygen, and protected micro-sites.
- Chemistry: pH, salinity, and the availability of minerals that microbes use.
Rock dust, biochar, and mineral sources mainly influence the chemistry and habitat side. They work best when the biology already has a steady supply of organic matter.
Mind map: choosing amendments by soil need
Rock dust: slow mineral additions without the quick-fix mindset
Rock dust is finely ground mineral material (often basalt or similar). It’s not a fertilizer in the usual sense; it’s a longer-term mineral supply. Microbes and plant roots can access some nutrients as particles weather over time.
How it helps biology
- Provides trace elements that support enzyme function and plant growth.
- Can contribute to pH buffering depending on the rock type.
- Adds mineral surfaces that can host microbial communities.
When rock dust makes sense
- Your soil test shows low or borderline micronutrients, or you’re building soil in a consistently low-input system.
- Your soil is stable enough that you’re not constantly disturbing it (because dust is easier to manage when it stays where you put it).
When to pause
- If your pH is already in a good range, adding more mineral dust may not change much.
- If you’re dealing with a clear nutrient deficiency (like potassium), a targeted mineral source is usually more direct.
Easy example (raised bed, sandy soil) You’ve been mulching and adding compost, but plants still look “thin” and growth is uneven after dry spells. A soil test suggests low magnesium and borderline micronutrients. You incorporate a modest amount of rock dust into the top layer during a compost refresh, then keep mulch coverage consistent. The goal is not to force a dramatic change in a week; it’s to reduce the chance that trace elements become a bottleneck.
Practical use tips
- Apply as a small, consistent input, not a one-time heavy dose.
- Mix into the top few inches when you’re already adding compost, so it doesn’t sit as a dusty layer.
- Avoid applying in windy conditions; fine dust is a respiratory nuisance.
Biochar: porous habitat plus nutrient holding (when used correctly)
Biochar is charcoal produced by heating biomass in low-oxygen conditions. Its value for soil biology comes from its porous structure and its ability to hold nutrients and water.
How it helps biology
- Creates micro-habitats where microbes can attach.
- Reduces nutrient loss by adsorption, which can help plants between compost applications.
- Improves water retention in sandy soils by increasing the soil’s ability to hold moisture.
The “don’t overdo it” part Biochar can be very adsorptive. If you add a large amount of fresh biochar without organic matter, it may temporarily bind nutrients that plants and microbes need. The fix is simple: pair biochar with compost or nutrient-rich material.
Mind map: biochar workflow that avoids common mistakes

Easy example (container tomatoes) Your balcony containers dry out quickly, and you’re using compost but still see frequent wilting. You add a small amount of biochar mixed into the potting mix (not a thick layer at the bottom). Over time, the soil holds moisture longer, and you notice steadier growth between waterings. The biochar isn’t replacing compost; it’s helping the mix behave more consistently.
Practical use tips
- Use small amounts and let the system respond.
- Mix biochar into compost or potting media so it’s not “empty” when it enters the soil.
- Keep it covered with mulch; exposed biochar can be less effective than biochar integrated into the soil surface layer.
Mineral sources: targeted corrections that prevent biology from stalling
Mineral sources are amendments that supply specific nutrients or adjust chemistry more directly than rock dust. Examples include calcium sources, magnesium sources, potassium sources, and micronutrient products.
How they help biology
- Correcting nutrient gaps prevents plants from underperforming, which in turn supports root exudates that feed microbes.
- Adjusting pH or calcium availability can improve aggregate stability, giving organisms better habitat.
The key principle: match the symptom to the cause Leaf color changes can come from multiple issues. A soil test helps, but you can also use basic observation:
- Chlorosis (yellowing) with green veins often points to iron availability issues, which can be pH-related.
- Older leaves yellowing can indicate mobile nutrient deficiencies like nitrogen or magnesium.
- Stunted growth with weak stems can be nutrient imbalance or root stress.
Easy example (community garden plot, compacted edge beds) A plot has been repeatedly walked on, and plants near the path look weaker than those deeper in the bed. You improve soil structure with compost and mulch first, then address a soil-test-identified potassium shortfall with a mineral source applied at the recommended rate. After the soil is less stressed and nutrients are available, plants show more consistent vigor. The mineral didn’t fix compaction; it supported growth once the habitat improved.
Practical use tips
- Apply mineral sources at rates based on soil test results.
- Split applications when appropriate (especially for nutrients that can leach or cause salt stress).
- Avoid stacking multiple amendments blindly; it’s easy to overshoot.
How to combine them without creating a chemistry mess
A simple, biology-friendly approach is:
- Start with organic matter (compost and mulch) so microbes have food.
- Add one amendment at a time when possible, especially if you’re experimenting.
- Use modest doses and observe plant response and soil moisture behavior.
- Reassess after a season using the same observations you started with.
Quick decision guide
- If your soil is low in organic matter and structure: prioritize compost and mulch first; biochar can help later.
- If you need slow trace mineral input: rock dust can be a steady background amendment.
- If you have a specific nutrient deficiency: mineral sources are the direct tool.
Safety and handling notes that actually matter
- Wear a mask when handling fine rock dust.
- Keep amendments off foliage to reduce residue and uneven effects.
- Store mineral products dry and sealed to prevent clumping and accidental over-application.
Bottom line
Rock dust, biochar, and mineral sources support soil biology by improving the chemical environment and, in biochar’s case, adding habitat. They work best when paired with consistent organic matter inputs and applied in measured amounts that match what your soil is already telling you.
2.5 Creating a year-round soil cover strategy for beds and paths
Bare soil is like an open invitation: it invites erosion, crusting, weed seeds, and moisture loss. A year-round cover strategy keeps the soil protected while still letting you grow food. The trick is to match cover type to the season and the job the soil needs done.
What “year-round cover” actually means
Aim for continuous coverage on:
- Bed soil (where you plant): keep living roots or mulch on the surface between plantings.
- Path soil (where you walk): keep it covered so it doesn’t become a weed nursery.
In practice, you’ll use a mix of living cover (cover crops, living mulches) and non-living cover (mulch, compost, leaf mold). You’re not trying to keep the soil covered with the same material forever; you’re trying to keep it covered with something.
Decide your cover “roles”
Different covers do different work. Use this quick role list when planning.
- Erosion control: thick mulch or dense cover crop.
- Weed suppression: continuous ground cover, thick residue, or smothering layers.
- Soil building: compost, leaf mold, well-managed cover crop residue.
- Moisture management: mulch to reduce evaporation; living roots to stabilize soil moisture.
- Traffic control (paths): durable mulch or groundcover that tolerates footfall.
Mind map: cover strategy overview
Bed cover plan by season (with concrete examples)
Late fall to winter: cover the “off” time
Goal: protect soil from rain impact and keep it from going bare.
Option A: Winter cover crop (living cover)
- Example: After harvesting tomatoes in October, sow rye (fast cover) with a legume like vetch if your climate allows it.
- How it helps: roots hold soil in place; residue feeds soil when you terminate.
- Termination: about 2–3 weeks before spring planting, cut and lay residue on the surface, then plant through it.
Option B: Leaf mulch (non-living cover)
- Example: If you can’t sow cover crops, rake shredded leaves over beds to a depth of 2–4 inches.
- How it helps: leaves buffer temperature swings and reduce erosion.
- Management: in spring, pull back the top layer to plant, then leave a thinner mulch layer around seedlings.
Winter to early spring: keep soil covered while you wait
Goal: prevent crusting and reduce weed germination.
- If you have a winter cover crop, keep it in place until you’re ready to plant.
- If you’re using leaf mulch, avoid letting it mat into a thick, impenetrable layer. A light raking or mixing with a bit of compost can keep it workable.
Example workflow (small bed):
- Leave cover crop or leaves until soil is workable.
- Terminate/cut cover crop.
- Plant immediately.
- Add a thin top-dress of compost and a light mulch ring if needed.
Spring to early summer: cover between harvests
Goal: maintain soil protection even when you’re rotating crops.
Option A: “Cut-and-drop” cover crops
- Example: Sow oats or buckwheat in a bed that will be empty for a few weeks.
- When it reaches a manageable height, cut it and lay it on the soil.
- Plant your next crop after the surface is settled.
Option B: Mulch after planting
- Example: For crops like carrots or brassicas, apply straw or leaf mulch once seedlings are established.
- Keep mulch off the stem to reduce rot risk.
Mid-summer: manage heat and moisture without smothering
Goal: reduce evaporation and keep soil life active.
- In hot spells, mulch thickness matters. Too thin and it dries out; too thick and it can slow warming or trap excess moisture.
Example:
- For leafy greens in July, use 1–2 inches of straw mulch after establishment.
- For beds that stay bare longer, use a thicker layer or a living cover crop like clover where appropriate.
Late summer to fall: reset the cycle
Goal: get cover established quickly after harvest.
- Plan harvest dates so you can sow cover crops promptly.
- If you’re short on time, use a fast cover (like oats) and accept that it may be terminated earlier.
Example:
- Harvest beans in August.
- Sow oats immediately.
- In October, cut and lay residue, then either plant a winter crop or add leaf mulch.
Paths: cover that survives footsteps
Paths are often overlooked, then become weed sources. A path cover strategy should be durable and easy to maintain.
A simple path system that works
- Step 1: Remove weeds and loosen the top layer.
- Step 2: Add a cardboard layer (overlapping seams).
- Step 3: Cover with 3–6 inches of wood chips or coarse mulch.
Example:
- A narrow side path between raised beds: cardboard underlayment plus wood chips. Top up once or twice a year.
Wood chips vs. leaf mulch on paths
- Wood chips: last longer and handle traffic well.
- Leaf mulch: breaks down faster; great for beds, but paths may need more frequent topping.
If you use wood chips near vegetable beds, keep a small buffer so you’re not pulling chips into the planting zone.
Thickness and timing: the two knobs you control
Thickness guidelines (practical ranges)
- Beds (mulch): often 1–3 inches depending on material and season.
- Beds (leaf mulch): often 2–4 inches when used as the main cover.
- Paths: often 3–6 inches for durable weed suppression.
If you see persistent weeds through mulch, increase thickness or improve the base layer (especially on paths).
Timing rules that prevent common problems
- Terminate living cover before it competes with your crop.
- Avoid burying seedlings under thick residue.
- Don’t leave soil bare while you’re between tasks; cover immediately after cutting or harvesting.
Managing residue so it feeds soil, not just sits there
Residue is useful when it’s in contact with soil and gradually breaks down.
- For cut cover crops: lay residue on the surface and keep it from blowing away.
- For thick mulch layers: if planting is slow, thin the mulch where seeds will go.
- For compost top-dress: use a light layer to support soil biology without smothering.
Example:
- After terminating rye, you might see a dense mat. Rake a planting strip, plant, then re-cover with a thinner layer of residue around the crop.
Mind map: bed vs. path decisions
A one-page “cover calendar” you can actually follow
| Time of year | Bed cover goal | What to do | Path cover goal | What to do |
|---|---|---|---|---|
| Late fall | Protect from erosion | Sow winter cover or add leaf mulch | Stop weeds | Top up chips if thin |
| Winter | Keep soil covered | Leave cover crop/leaf layer | Keep barrier intact | Check for gaps |
| Early spring | Ready soil for planting | Terminate cover crop; plant through residue | Reduce early weeds | Refresh chips where needed |
| Spring to early summer | Cover between harvests | Cut-and-drop or mulch after seedlings | Maintain weed suppression | Spot-check and top up |
| Mid-summer | Reduce drying | Use 1–2 in mulch; manage thickness | Keep paths clean | Rake and re-level |
| Late summer to fall | Establish next cycle | Sow fast cover after harvest | Prevent fall weeds | Add chips before weeds set |
Quick troubleshooting (because reality happens)
- Weeds in beds: mulch too thin, cover crop terminated too late, or soil was left bare between tasks.
- Soil stays wet and plants struggle: mulch too thick or applied too early; thin around seedlings.
- Slugs increase under mulch: reduce mulch thickness near vulnerable crops and keep mulch pulled back from stem bases.
- Paths get weedy anyway: cardboard gaps, insufficient depth, or chips washed away—top up and patch seams.
A good year-round cover strategy is less about perfection and more about consistency. If you can keep soil covered during the gaps—between harvest and planting, between seasons, and along paths—you’ll usually see fewer weeds, steadier moisture, and soil that’s easier to work with.
3. Composting That Actually Works: From Kitchen to Garden
3.1 Choosing a compost method for your space: pile, tumbler, worm bin, or bokashi
Composting is less about picking the “best” system and more about matching a method to your space, your time, and what you’re willing to manage. The right choice makes composting feel like a routine instead of a project.
Quick decision guide (use this first)
- Pile (hot or cold compost): Best if you have outdoor space and can tolerate occasional turning or waiting.
- Tumbler: Best if you want faster composting and easier turning, and you don’t mind a bit of extra setup.
- Worm bin (vermicompost): Best for apartments, small kitchens, and people who want odor control and steady output.
- Bokashi: Best if you want to process scraps quickly indoors and you’re okay with a two-step system (ferment first, then finish in soil or another compost stage).
Mind map: compost method selection
Pile compost (hot or cold): the classic workhorse
A compost pile is a managed heap of organic material. You can run it as a hot pile (faster, needs more attention) or a cold pile (slower, needs less).
What it’s good at
- Handling yard waste (leaves, stems, grass clippings) plus kitchen scraps.
- Producing bulk compost for garden beds.
What it needs
- A place outdoors with decent drainage.
- A balance of “greens” (nitrogen-rich scraps) and “browns” (carbon-rich dry materials).
Easy example setup (small backyard)
- Start with a base layer of dry leaves or shredded cardboard.
- Add kitchen scraps in thin layers, then cover with browns.
- If you want faster results, turn every 1–2 weeks and keep it moist like a wrung-out sponge.
Common failure mode and fix
- Smell or sliminess: usually too wet and too many scraps. Add dry browns and mix.
- No heat / slow breakdown: often too dry or too carbon-heavy. Add greens or water and mix.
Best fit for gardeners If you’re already collecting leaves, pruning debris, or grass clippings, a pile is the most straightforward way to convert them into soil amendments.
Tumbler compost: controlled mixing with less mess
A tumbler is a rotating container that mixes materials as you turn it. It’s designed to make aeration and turning easier.
What it’s good at
- Faster composting than a typical cold pile.
- Cleaner handling than an open heap.
What it needs
- Consistent material input and regular turning.
- Chopping or shredding helps because smaller pieces break down faster.
Easy example setup (small yard or patio)
- Add a mix of shredded leaves/cardboard (browns) and chopped kitchen scraps (greens).
- Turn the tumbler every few days at first, then adjust based on how quickly it’s breaking down.
- Keep moisture steady; tumblers can dry out faster than piles.
Common failure mode and fix
- Too dry: compost looks crumbly and doesn’t warm. Add water and mix.
- Too wet: it smells and clumps. Add browns and keep turning.
Best fit for urban growers If you want compost for raised beds but don’t want an open pile, a tumbler can be a practical middle ground.
Worm bin (vermicompost): indoor composting with steady rhythm
A worm bin uses red wigglers (or similar composting worms) to break down organic matter. The output is typically a mix of worm castings and partially processed material.
What it’s good at
- Indoor composting with minimal odor when managed correctly.
- Turning kitchen scraps into compost on a regular schedule.
What it needs
- Bedding (shredded paper, cardboard, coconut coir if used appropriately).
- Moisture control and feeding in manageable amounts.
- Avoiding certain foods that can cause problems.
Easy example setup (apartment-friendly)
- Line the bin with damp shredded cardboard.
- Bury chopped scraps under fresh bedding each feeding.
- Start with small amounts and increase only after the worms are actively consuming.
Feeding rules that prevent most issues
- Chop scraps smaller than you think you need; it speeds up processing.
- Keep bedding consistently damp but not dripping.
- If the bin smells strongly, reduce food and add more dry bedding.
Common failure mode and fix
- Fruit flies: usually from exposed scraps. Always bury food under bedding.
- Sour smell: often too wet or too much food. Add dry bedding and slow feeding.
Best fit for people who want convenience Worm bins work well when you can feed them regularly and you want composting that doesn’t depend on outdoor space.
Bokashi: ferment first, finish later
Bokashi uses a bran inoculated with beneficial microbes to ferment kitchen scraps in an airtight container. The result is a fermented material that you then bury in soil or add to another compost system to finish breaking down.
What it’s good at
- Processing scraps quickly indoors.
- Handling a wide range of kitchen scraps, including items that are harder in traditional composting.
What it needs
- An airtight bucket system.
- A second step: burying or mixing into soil/compost to complete decomposition.
Easy example setup (kitchen counter to garden bed)
- Add a layer of bokashi bran, then add chopped scraps, then cover with bran again.
- Press down to remove air and seal.
- Drain liquid (if your system includes a drain) and use it carefully according to your local guidance.
- When the bucket is full, bury the contents in a trench or directly into a bed and cover with soil.
Common failure mode and fix
- Bad odor: usually indicates poor sealing or too much liquid. Check the lid seal and drain if needed.
- Slow fermentation: often from not enough bran coverage. Ensure scraps are fully covered.
Best fit for gardeners with limited time Bokashi is a good match when you want to handle scraps immediately and you’re comfortable doing a periodic “finish” step in the garden.
Choosing by your garden reality: four scenarios
- Raised beds + lots of leaves: Choose pile or tumbler. You’ll have plenty of browns to balance kitchen scraps.
- Balcony + small kitchen scraps: Choose worm bin if you want steady indoor processing and minimal odor.
- Apartment + frequent food scraps + no outdoor space: Choose bokashi if you can do the burying step when you have access to soil.
- Backyard + you like hands-on routines: Choose hot pile or tumbler for faster results and more control.
A simple “first month” approach
Pick a method and run it for a month with small, consistent inputs. If you keep seeing the same problem—too wet, too dry, smells, or slow breakdown—adjust one variable at a time (usually moisture, carbon coverage, or feeding amount). Composting rewards steady correction more than dramatic overhauls.
Bottom line
- Pile: best for bulk compost and outdoor space.
- Tumbler: best for easier turning and faster composting.
- Worm bin: best for indoor convenience and controlled odor.
- Bokashi: best for quick indoor fermentation with a soil-finish step.
Choose the method that fits your constraints, then make it consistent. Your compost will follow.
3.2 The carbon to nitrogen balance and how to fix common compost failures
Compost is mostly a controlled breakdown process. The carbon-to-nitrogen balance helps you steer it. Carbon (often “browns”) is the energy and structure source. Nitrogen (often “greens”) is the protein-like material that drives faster microbial growth. When the balance is off, you usually see predictable symptoms—then you can correct the recipe instead of guessing.
The practical target (without lab equipment)
A common starting point is about 2–3 parts carbon to 1 part nitrogen by volume. That’s not a law of physics; it’s a useful rule of thumb for home composting.
A simple way to think about it:
- If your pile smells strongly sour/ammonia-like, you likely have too much nitrogen (not enough carbon or not enough airflow).
- If your pile is dry, slow, and not heating, you likely have too much carbon (or it’s too dry).
- If it’s damp like a wrung-out sponge and smells earthy, you’re usually close.
Mind map: carbon, nitrogen, and what they cause
How to “read” your pile like a mechanic
Use three observations: smell, moisture, and texture.
- Smell
- Earthy/forest floor: generally good.
- Ammonia or sharp urine smell: too much nitrogen and/or too little oxygen.
- Rotten/putrid: often too wet and compacted; nitrogen is usually involved, but airflow is the bigger issue.
- Moisture
- Wring-out sponge: ideal.
- Dripping wet: add carbon and improve aeration.
- Dust-dry: add water and nitrogen-rich material.
- Texture
- Mushy and slimy: too wet and too nitrogen-heavy.
- Dry, fluffy, and unchanged: too carbon-heavy or too dry.
- Mixed, crumbly, and partially broken down: on track.
Common compost failures and fixes
Failure 1: Ammonia smell (too much nitrogen)
What it looks like: A sharp, unpleasant smell; wet clumps; sometimes a pile that looks “green and angry” rather than decomposing.
Why it happens: Nitrogen-rich scraps break down quickly. If there isn’t enough carbon to absorb moisture and provide structure, and if oxygen is limited, microbes produce more pungent byproducts.
Fix (do this in order):
- Stop adding greens for a moment.
- Add browns: dry leaves, shredded cardboard, straw, or paper.
- Mix or turn to restore airflow. If it’s a sealed tumbler, rotate thoroughly; if it’s a pile, fork it through.
- Check moisture after mixing. If it still feels wet, add more browns rather than more water.
Easy example: You toss in a week of kitchen scraps and grass clippings. The pile smells like ammonia. Next time, add a thick layer of dry leaves or shredded cardboard each time you add scraps. If it’s already wet, mix in dry browns until the pile stops feeling soggy.
Failure 2: Slimy, compact pile (nitrogen + poor airflow)
What it looks like: A dense, wet mass with little structure; decomposition seems stuck.
Why it happens: Greens can mat together. Without air pockets, microbes shift toward slower, less pleasant pathways.
Fix:
- Add coarse carbon (straw, shredded stalks, dry leaves) to create air channels.
- Break up the clumps by turning.
- Avoid over-watering. Moisture should be damp, not pooled.
Easy example: A bin filled with chopped vegetable scraps becomes a wet paste. Add shredded cardboard and dry leaves, then mix thoroughly. The goal is to restore a “layered, breathable” structure.
Failure 3: No heat and slow breakdown (too much carbon or too dry)
What it looks like: Little change after a couple of weeks; pile stays cool; materials look recognizable.
Why it happens: Carbon-rich inputs like dry leaves and cardboard need nitrogen and moisture to get moving. If the pile is dry, microbes can’t work.
Fix:
- Add nitrogen: fresh grass clippings, vegetable scraps, or a small amount of manure (if you use it).
- Add water gradually while turning. Aim for wrung-out sponge moisture.
- Chop or shred bulky browns so they have more surface area.
Easy example: You build a compost pile mostly from dry leaves. It stays cool and dry. Turn it, sprinkle water, then mix in a layer of kitchen scraps or grass clippings. If you can’t add greens, add a smaller amount of nitrogen-rich material and keep moisture consistent.
Failure 4: Dry, dusty pile that won’t start (carbon-heavy + moisture problem)
What it looks like: The pile is light, dry, and doesn’t smell much.
Why it happens: Dry carbon acts like insulation. Microbes need moisture to move and enzymes need water.
Fix:
- Moisten the pile evenly. Don’t dump a bucket on one spot.
- Turn to distribute moisture.
- Add greens in small amounts to kickstart activity.
Easy example: A balcony compost bin dries out between additions. When you add scraps, also add a measured amount of water and enough browns to keep it damp, not dry.
Failure 5: Too much wetness from “juicy” scraps (nitrogen-heavy + waterlogged)
What it looks like: Pile is wet, sometimes with a sour smell; scraps are visible.
Why it happens: Some kitchen scraps are high in water. If you add them without enough dry carbon, the pile becomes waterlogged.
Fix:
- Bury scraps under browns rather than placing them on top.
- Add dry carbon immediately after adding wet scraps.
- Turn more often if your system is prone to compaction.
Easy example: You add watermelon rinds and cooked leftovers. The pile turns wet. Next time, chop and bury them under shredded cardboard and dry leaves, then mix if the bin tends to stay compact.
A simple “balance correction” method you can repeat
When something goes wrong, use a two-step correction:
- Adjust carbon (browns) if the pile is wet, slimy, or ammonia-smelling.
- Adjust nitrogen and moisture if the pile is dry, cool, or unchanged.
A quick rule of thumb for corrections:
- If you’re seeing ammonia or wet sliminess, add about 2–3 handfuls of browns per handful of problematic greens, then mix.
- If you’re seeing dry and slow, add a handful of greens plus a light sprinkle of water, then mix.
Mind map: symptom → likely imbalance → fix
One last detail: balance is about layers, not perfection
You don’t need to weigh everything. You need a pile that stays damp, aerated, and layered. If you add kitchen scraps, follow with a covering of dry carbon. If you add lots of dry leaves, add some greens and water during turning. Composting is basically repeated small adjustments—like tuning a bicycle chain, not building a rocket.
3.3 Moisture, aeration, and temperature targets you can observe without lab gear
Regenerative compost and soil-building systems run on biology, and biology runs on three basics: water, air, and temperature. You don’t need instruments to manage them—you need a few repeatable observations and a willingness to adjust.
Moisture targets: “damp sponge,” not “wet mud”
What you’re aiming for: materials should feel like a wrung-out sponge. They should be moist enough that microbes can work, but not so wet that air gets squeezed out.
How to check (no tools):
- Squeeze test (compost pile or bucket): Grab a handful of mixed material. Squeeze firmly.
- Right: a few drops may appear, but the material doesn’t drip.
- Too dry: it crumbles or no moisture transfers.
- Too wet: it drips or feels slick and heavy.
- Hand feel test (soil beds): Press a handful of soil into a ball.
- Right: it forms a ball briefly, then breaks apart when you poke it.
- Too dry: it won’t hold shape.
- Too wet: it stays a sticky lump and smears.
Easy fixes:
- Too dry: add water in small amounts while turning or mixing so moisture spreads. For compost, sprinkle and mix rather than dumping.
- Too wet: add dry carbon (shredded leaves, straw, cardboard), increase aeration by turning, and avoid compacting.
Concrete example (urban compost bin): If your countertop worm bin smells sour and the bedding feels like a wrung towel that still drips, you likely have excess moisture. Add dry shredded paper/cardboard and mix gently. Check again after a day; worms usually respond quickly.
Aeration targets: oxygen is the quiet limiter
Aeration controls whether you get a steady breakdown or a slow, smelly slog. In compost, oxygen availability is often the difference between “pleasant earthy” and “why does this smell like that?”
What you’re aiming for: enough air movement that the pile doesn’t become anaerobic. In soil, aeration means maintaining structure so pores stay open.
How to observe aeration without gadgets:
- Compost pile smell:
- Good sign: earthy, forest-floor smell.
- Bad sign: ammonia-like, rotten, or sewage-like odors.
- Compost texture after turning: If the pile stays clumpy and wet after mixing, air channels may be limited. If it breaks apart into crumbly chunks, aeration is improving.
- Soil structure check: After watering, does the surface crust harden quickly? Crusting can indicate compaction or too much bare soil exposure.
Easy fixes:
- Improve compost aeration: turn more frequently, or build the pile with more coarse bulking material (straw, shredded branches, dry leaves).
- Improve soil aeration: avoid working wet soil, keep roots and cover crops in place, and use mulch to protect structure.
Concrete example (raised bed after heavy rain): If water sits on the surface for a long time and the bed smells “off” when you dig, you may have compaction or poor drainage. The fix is not more digging. Add coarse organic matter on top (leaf mulch, compost mixed with bulky material), keep soil covered, and let roots and worms do the loosening over time.
Temperature targets: use it as a feedback signal
Temperature is a proxy for microbial activity and airflow. You can’t manage it precisely without a thermometer, but you can still use it effectively by observing heat, timing, and consistency.
What you’re aiming for:
- Compost: a warm-up phase followed by steady cooling as materials break down.
- Soil beds: not “hot,” but biologically active. You’re looking for stable, covered ground rather than exposed swings.
How to observe compost temperature without a thermometer:
- Back-of-hand test: Carefully touch the side of the pile (not the top crust).
- Cool: pile is near ambient.
- Warm: noticeably warmer than air.
- Hot: too hot to comfortably hold your hand for more than a moment.
- Timing pattern: Many compost systems warm within days if moisture and aeration are right. If it never warms, it’s often too dry, too wet, too small, or too carbon-heavy.
How to interpret temperature signals:
- Too cool + no breakdown: add moisture (if dry) and mix in more nitrogen-rich material (fresh green plant matter) or reduce overly woody fraction.
- Too hot + strong odors: likely too much nitrogen and/or insufficient aeration. Turn to add oxygen and balance with dry carbon.
- Steady warmth that gradually cools: generally means the process is progressing.
Concrete example (leaf-heavy compost): A pile made mostly of dry leaves often stays cool. Add a layer of fresh grass clippings or kitchen greens (in moderation) and mix. If it becomes wet and smells, add dry leaves and turn.
A simple “targets and actions” checklist
Use this as a quick loop whenever you check your compost or soil.
| Observation | Likely cause | What to do next |
|---|---|---|
| Squeeze test drips | Too wet, low oxygen | Add dry carbon + turn/mix |
| Squeeze test crumbles | Too dry | Sprinkle water + mix |
| Sour/rotten smell | Anaerobic pockets | Turn, add bulking material |
| Ammonia smell | Too much nitrogen, too wet | Add dry carbon, improve aeration |
| Compost never warms | Too dry, too carbon-heavy, too small | Moisten, add greens, build larger |
| Soil crusts after watering | Compaction/bare surface | Add mulch/cover crop, avoid working wet |
Mind map: Moisture, aeration, temperature in one system
Mind map: Moisture, aeration, temperature (no lab gear)
Putting it together: a practical routine you can repeat
For compost (weekly):
- Do the squeeze test.
- Smell it.
- Check warmth with the back-of-hand.
- If any two signals point the same direction (too wet + rotten smell, or too dry + no warmth), adjust immediately.
For soil beds (after watering or rain):
- Watch whether water soaks in or pools.
- Check surface crusting.
- Look for earthworm activity and visible crumb structure.
- If the surface stays bare and dry quickly, increase mulch and keep living roots in place.
The goal is not to chase perfect numbers. The goal is to keep the system in the workable zone where air can move, water is available, and microbial activity can proceed without turning your compost into a swamp or your soil into a dust bowl.
3.4 Screening, curing, and using compost at the right time and rate
Compost isn’t “done” the moment it stops steaming. Screening and curing are how you turn a pile of partly finished material into something you can spread without creating weed problems, nitrogen dips, or lumpy mulch that dries out too fast.
Screening: separate the usable compost from the leftovers
What screening does
- Removes sticks, stones, and chunks that haven’t broken down.
- Produces a more uniform texture for top-dressing and potting.
- Lets you return larger bits to the next batch so they finish properly.
When to screen
- Screen when the compost is cool, crumbly, and smells earthy rather than sour or ammonia-like.
- If it’s still warm, screening can spread unfinished material and slow the final breakdown.
How to screen (simple, practical methods)
- Hardware cloth sieve: Great for small batches. Push compost through with a gloved hand or shovel.
- Wheelbarrow + screen: Works well for larger volumes. Keep the screen at a comfortable height so you don’t compact the compost while pushing.
- Two-pass approach: First pass removes big bits; second pass refines texture for seed-starting mixes.
What to do with the screened-out material
- If it’s mostly woody or fibrous, add it back to your active pile with fresh “greens” and moisture.
- If it’s mostly intact but not foul-smelling, you can use it as mulch in pathways where fine texture isn’t required.
Quick texture checks
- Good: dark brown, granular, breaks apart easily.
- Not ready: recognizable food pieces, long fibers, or clumps that stay wet and sticky.
Curing: finishing the breakdown so compost behaves in the garden
What curing accomplishes
- Finishes decomposition so compost is less likely to rob nitrogen from plants.
- Reduces the chance of burning seedlings or causing uneven growth.
- Lets microbial activity settle into a stable, soil-friendly state.
How long to cure
- A common rule of thumb is 2–4 weeks after the compost is “ready to screen.”
- If your compost was made slowly, has lots of woody material, or smells strongly at first, give it more time.
Curing setup
- Pile compost in a low mound or keep it in a breathable container.
- Keep it slightly moist, not wet. If it dries out completely, curing slows; if it’s soggy, it can turn anaerobic.
- Turn once if it’s cooling unevenly or if you want a more consistent finish.
Curing smell and appearance
- Earthy, forest-floor smell is the goal.
- A strong sour smell suggests excess moisture or too much “green” material; fix by mixing in dry browns and improving airflow.
Using compost at the right time
Compost timing is mostly about plant stage and application method.
Best times to apply
- Before planting: Mix into beds to improve soil structure and nutrient availability.
- After planting: Use as a top-dressing or mulch layer to feed soil life without disturbing roots.
- For seedlings: Use screened, well-cured compost only, and keep it as a small portion of the growing mix.
Application method matters
- Incorporate when you’re preparing a bed and can mix compost into the top layer.
- Top-dress when plants are already established and you want minimal root disturbance.
- Mulch when you’re protecting soil and reducing evaporation.
Using compost at the right rate
Rates depend on whether you’re feeding soil, improving structure, or building a mulch layer.
1) Bed preparation (mix-in)
- Typical rate: about 1–2 inches (2.5–5 cm) of compost mixed into the top 6–8 inches (15–20 cm) of soil.
- If your soil is already rich and you’re just maintaining, use the lower end.
- If soil is compacted or mostly bare, use the higher end.
Easy example
- You have a 10 ft × 3 ft bed (30 sq ft). If you apply 1 inch of compost over it, you’re roughly applying about 1.9 cubic feet per 10 sq ft (rule-of-thumb). For a 30 sq ft bed, that’s about 5.7 cubic feet. Adjust up or down based on your target depth.
2) Top-dressing established beds
- Typical rate: 0.5–1 inch (1–2.5 cm) per application.
- Apply and leave it on the surface; earthworms and watering will move it down.
Easy example
- For leafy greens in mid-season, a thin top-dress (around 0.5 inch) helps without smothering stems.
3) Mulch layer on pathways and around perennials
- Typical rate: 1–2 inches (2.5–5 cm).
- Keep mulch off stems and crowns to reduce rot risk.
Easy example
- Around tomatoes, mulch is useful, but keep it a few inches away from the base so the stem stays dry.
4) Containers and raised beds with limited volume
- Typical rate: use compost as a component, not the whole mix.
- A practical approach is to blend compost with a structural base (like coir, leaf mold, or a soil/soilless mix) so it doesn’t compact.
Easy example
- For a potting mix, compost might be 20–30% of the total volume, with the rest providing drainage and structure.
How to avoid common “compost problems”
Problem: plants look nitrogen-starved (slow growth, pale leaves)
- Cause: compost not fully cured or too much applied at once.
- Fix: use more cured compost, reduce the rate, and top-dress rather than heavy mix-in.
Problem: seedlings damp off or burn at the edges
- Cause: compost too hot, too wet, or insufficiently screened.
- Fix: ensure compost is cool, screened, and cured; keep compost out of direct contact with seedling stems.
Problem: weeds show up
- Cause: compost made from weed seeds that survived heating or were added late.
- Fix: screen and remove obvious seeds; use compost as mulch only after it’s fully cured and your process consistently reaches high temperatures.
A quick decision checklist (screen → cure → apply)
- Cool? If not, wait.
- Crumbly and dark? If not, cure longer.
- Earthy smell? If sour/ammonia, adjust moisture and airflow.
- Screened texture matches use? Fine for seedlings, chunkier for pathways.
- Rate fits the job? Thin top-dress for established plants; mix-in depth for bed prep.
Mind map: screening, curing, and using compost
Mind Map: Compost Screening → Curing → Application
One integrated example: turning a batch into a usable product
You finish a compost batch and it’s cool, dark, and crumbly. You screen it through hardware cloth. The fine fraction goes into a curing pile for two weeks. The larger woody bits go back to your next batch.
When the curing period ends, you apply:
- 0.5 inch top-dress on established greens.
- 1 inch mix-in on a bed you’re preparing for the next planting.
- 1–2 inch mulch on a pathway, keeping it away from plant crowns.
The result is compost that behaves like soil improvement rather than an unpredictable experiment.
3.5 Compost tea and extracts: practical use cases and safe application practices
Compost tea and extracts are ways to move biology and soluble nutrients from compost into a liquid form. They can be useful, but they’re not a magic substitute for soil building. Think of them as a targeted “delivery method” for specific moments: transplant stress, early-season growth, or a quick nutrient nudge—while your compost, mulch, and cover crops keep doing the heavy lifting.
What you’re actually making (and why it matters)
Compost tea is compost mixed with water, sometimes aerated, then strained. The goal is to capture water-soluble compounds and some microbial activity.
Compost extract is similar, but typically involves a shorter contact time or different handling that emphasizes dissolved components rather than maintaining a large living population.
Key practical difference: aerated teas are more likely to keep microbes active during brewing, while extracts are often more about nutrients and soluble organics. In both cases, the liquid is temporary—once brewed, it should be used promptly.
Mind map: choosing the right liquid for the job
Practical use cases (with concrete examples)
1) Transplant support (soil drench, not leaf spray)
- When: 0–2 days after transplanting, especially in hot weather or when roots were disturbed.
- Why it helps: the liquid can provide readily available nutrients and a mild microbial boost at the root zone.
- Example: You transplant tomatoes into a bed mulched with straw. After planting, water normally to settle soil, then apply a diluted compost tea to the base of each plant. Keep the leaves dry.
2) Early-season “wake-up” for beds that are slow to start
- When: spring, when soil is warming and plants are just beginning active growth.
- Why it helps: compost tea can supply soluble nutrients while your mulch and compost continue building structure.
- Example: Your perennial bed looks pale in early spring. After the first weeding and a fresh top-dressing of compost, you apply a light soil drench around established plants. You don’t replace compost; you complement it.
3) Foliar application for specific situations (use cautiously)
- When: you want to support plant vigor and you can apply under good conditions.
- Why it’s tricky: leaves can be sensitive, and wet foliage increases disease risk if applied at the wrong time.
- Example: A patch of lettuce shows mild transplant shock. You apply a very dilute compost extract as a fine mist in the morning, with no runoff and no pooling. You stop if you see spotting or if the weather is humid and likely to stay wet.
4) Soil drench after disturbance
- When: after turning soil, removing cover crops, or dealing with compaction.
- Why it helps: a drench can help re-establish microbial activity in the disturbed zone.
- Example: You loosen a compacted path edge and plant herbs. After planting, you apply a diluted tea along the loosened strip, then mulch to prevent bare soil from drying out.
Safe application practices (the part that prevents problems)
1) Use clean equipment and clean water
- A bucket, stirring tool, and strainer should be washed before use.
- If your water is questionable, don’t use it for foliar sprays. For soil drench, it’s still better to use water you’d drink if you had to.
2) Strain thoroughly Unstrained tea can clog sprayers and leave residue on leaves and soil surfaces. Straining also reduces the chance of applying bits of compost that can smell, mat, or create uneven coverage.
3) Dilute and apply lightly Over-application is a common reason people think compost tea “burns” plants. Dilution reduces the risk of salt buildup and overly concentrated organics.
A simple starting point for many gardeners is:
- Soil drench: apply a diluted mix to the root zone.
- Foliar spray: use a much more dilute mix than you would for soil.
If you’re unsure, test on a small area first—one row, one plant, one afternoon.
4) Apply at the right time of day
- Foliar: morning is usually safer because leaves dry faster.
- Soil drench: any time works as long as you don’t create runoff.
5) Avoid spraying edible leaves close to harvest Even when compost is well-made, liquid applications on edible foliage create a food-safety concern. Use a conservative approach: keep foliar applications away from harvest windows and prefer soil drench for leafy crops.
6) Don’t use tea as a substitute for compost and mulch Compost tea is a short-term input. Compost and mulch are long-term infrastructure for soil structure, moisture stability, and ongoing nutrient cycling.
A practical method (simple, repeatable, and not fussy)
Basic workflow:
- Fill a clean container with water.
- Add finished compost (not raw, not manure-based unless you know exactly what you’re doing).
- Stir or aerate briefly depending on your method.
- Strain through a fine mesh.
- Dilute.
- Apply promptly.
Prompt use matters: once brewed, microbial activity changes over time. If you can’t apply soon, don’t brew a large batch.
Mind map: safe decision checklist before you apply
Example routines by garden type
Urban containers (balcony herbs, peppers, greens):
- Prefer soil drench because containers dry out quickly and foliar residue can be harder to manage.
- Apply after transplanting or after a heavy watering cycle that leaches nutrients.
- Keep the surface mulched (even a thin layer of compost or leaf mold) so the liquid doesn’t just run through.
In-ground beds (mixed vegetables and flowers):
- Use tea as a support tool: after transplanting, after cover crop termination, or during early growth.
- Pair it with a top-dressing of compost so you’re feeding both the short-term and long-term system.
Perennial gardens (shrubs, fruit trees, established flowers):
- Use light soil drench around the drip line rather than soaking the trunk area.
- Apply when plants are actively growing, not when they’re dormant.
Troubleshooting: what to change when it doesn’t work
- Leaves spot or look worse after foliar spray: stop foliar applications, switch to soil drench, and apply only in dry, fast-drying conditions.
- Plants look unchanged: you may be applying too rarely or too dilute to matter. Increase frequency slightly or focus on compost and mulch first.
- Bad smell or slimy residue: your compost may not be finished, or the mixture sat too long. Use finished compost, strain well, and apply promptly.
Compost tea and extracts can be practical tools when used with restraint: apply to the root zone when possible, dilute appropriately, and treat them as a short-term companion to compost, mulch, and cover crops.
4. Water Regeneration: Capture, Slow, Soak, and Reuse
4.1 Mapping your water flow: where runoff starts and where it should go
Regenerative water management starts with a simple question: when it rains, where does the water actually go? Not where you wish it went, not where a diagram says it should go—where it flows across your surface, how fast it moves, and what it hits first.
Step 1: Do a “walkthrough map” before you change anything
Grab a notepad, a phone camera, and a few colored markers (or just different pen colors). Walk the property at least twice: once during a dry day to note slopes and once during/after a rain to confirm the real paths.
As you walk, mark these locations:
- Runoff start points: bare soil patches, compacted paths, edges of beds, downspout discharge points, and any area where water visibly begins to move.
- Flow paths: the narrow lanes where water tracks across the ground.
- Collection points: low spots, puddles, clogged drains, and places where water disappears into cracks or sinks.
- Barriers and redirects: walls, curbs, raised planters, fences, and dense plantings that slow water.
A useful rule: if you can draw a line with a finger on the ground and it “feels” like water would follow it, you’re probably close. Rain confirms it.
Step 2: Observe runoff behavior, not just direction
Two gardens can have the same slope and still behave differently because of soil condition, surface texture, and vegetation.
Watch for these clues:
- Sheet flow: water spreads thinly across a surface. This is often easier to manage because you can slow it with mulch and cover.
- Rill flow: water forms small channels. This usually means the surface is too bare or too compacted.
- Concentrated flow: water moves in a defined stream (often from downspouts or hardscape edges). This needs immediate attention because it can erode soil quickly.
Also note timing:
- Does runoff start immediately after the first drops, or only after the soil is saturated?
- Does water soak in within minutes, or does it keep moving for a long time?
Step 3: Make a simple water-flow map (one page is enough)
You don’t need engineering drawings. You need a map you can act on.
Create a top-down sketch of your garden and label:
- Beds, lawn, paths, hard surfaces (driveway, patio), and any slopes.
- Downspouts, hose bibs, and irrigation lines.
- Low points and any existing drains.
- The observed runoff start points and flow paths.
Then add two categories of arrows:
- “Where it goes now” (solid arrows)
- “Where it should go” (dashed arrows)
In regenerative systems, “should go” usually means: into soil where plants can use it, spread out rather than concentrated, and slowed enough to infiltrate.
Step 4: Use a mind map to organize decisions
Below is a practical mind map you can copy into your notes. It keeps the mapping process from turning into a pile of observations.
Step 5: Translate the map into “target zones”
Once you know where runoff starts and where it flows, you can decide where to send it.
Create three target zones:
- Infiltration zones: areas with healthy soil and active roots (often under trees, in established beds, or in well-mulched zones).
- Treatment zones: areas that can handle water temporarily while it soaks in (cover-cropped sections, newly amended beds, or rain garden basins).
- Safe overflow routes: paths that can handle water without damage if the soil can’t absorb it (gravel paths designed for drainage, swale outlets, or stable ground cover).
A good mapping habit: every runoff path should end in one of these zones. If it ends in a place that erodes or stays muddy, your “where it should go” arrows need to change.
Step 6: Examples you can replicate
Example A: Downspout dumping onto a bed edge
What you see: Water exits the downspout and immediately runs along the bed edge, forming a narrow channel.
Map it like this:
- Solid arrow: downspout → bed edge → rill channel → low spot.
- Dashed arrow: downspout → infiltration zone inside the bed (spread out) → safe overflow to a stable path.
Why this works: The problem is concentration. Redirecting the water into a wider, vegetated area slows it and lets it soak.
Practical fix to match the map:
- Add a short splash pad or redirect the downspout outlet so it lands on a mulched, planted area rather than the bare edge.
- If the bed soil is compacted, loosen and top-dress with compost and mulch so infiltration improves where the water lands.
Example B: Bare path acting like a gutter
What you see: After rain, the path stays wet longer and channels water toward a corner.
Map it like this:
- Solid arrow: runoff from beds → path → corner puddle.
- Dashed arrow: runoff from beds → spread across adjacent soil/cover → infiltrate before reaching the corner.
Why this works: Paths often become the lowest-friction route for water. If you can’t eliminate the path, you can reduce its “gutter” behavior.
Practical fix to match the map:
- Increase mulch or add a groundcover strip beside the path so water doesn’t funnel onto the path surface.
- Improve soil structure in the path edges (not just the center) so water doesn’t keep moving along the boundary.
Example C: Lawn-to-garden sheet flow
What you see: Water spreads across the lawn and then suddenly concentrates at the first low point near the garden.
Map it like this:
- Solid arrow: lawn sheet flow → low point concentration.
- Dashed arrow: lawn sheet flow → treatment zone (slightly depressed, planted area) → infiltration.
Why this works: If you can intercept sheet flow early, you prevent it from becoming concentrated later.
Practical fix to match the map:
- Create a shallow, planted swale or rain garden edge at the point where water begins to gather, not at the point where it already eroded.
- Keep the swale planted and mulched so it handles water without turning into a bare channel.
Step 7: Quick checklist to confirm your map is usable
Before you start building anything, verify:
- You can point to at least one runoff start point on your map.
- Every flow path has an arrow that ends in a target zone.
- You’ve noted whether the flow is sheet, rill, or concentrated.
- You have identified at least one safe overflow route for excess water.
When your map answers those four items, it becomes a tool rather than a drawing. The next steps—mulch placement, soil structure work, and redirecting water—then have a clear “why” tied to what you observed.
4.2 Mulch and soil cover as the first water-saving infrastructure
If you want to save water, start by keeping it where you put it. Mulch and soil cover reduce evaporation, slow runoff, and protect soil structure so roots can access moisture longer. Think of it as “water management” that happens even when you’re not holding a hose.
Why mulch saves water (in practical terms)
- Less evaporation from the soil surface: Bare soil turns into a dry crust that lets water escape quickly. A mulch layer shades the surface and breaks the wind over the soil.
- More infiltration, less runoff: When rain hits bare ground, it can splash and compact the surface. Compaction makes water run off instead of soaking in. Cover helps rain enter and spread through the topsoil.
- Cooler soil for longer: Soil temperature affects how fast plants transpire. Cooler soil generally means plants use water more slowly.
- Stable soil structure: Regular cover supports soil organisms and helps maintain aggregates. Better structure means more pore space for holding water.
A simple way to notice the difference: after a watering or rain, check whether the surface stays damp longer under mulch. If it dries quickly, your cover is too thin, too patchy, or decomposing faster than you’re replenishing.
What to mulch with: choose by function
Different mulches do different jobs. You’re aiming for consistent cover, not a single “perfect” material.
- Leaf mulch (excellent for most gardens): Shredded leaves form a light, insulating layer. They also break down into organic matter. Use a thickness that won’t blow away.
- Wood chips or bark (best for paths and perennial areas): They last longer and suppress weeds well. Keep chips away from plant stems to prevent rot and to avoid creating a habitat for pests.
- Straw or hay (use carefully): It’s good for vegetable beds when weed-free, but it can contain seeds. If you use it, source from seed-free material and monitor for sprouting.
- Compost as a top-dressing (thin layer): Compost alone doesn’t always provide long-lasting cover, but a thin compost layer under a thicker mulch can improve soil while still protecting the surface.
- Living mulch (cover crops or low plants): Ground cover plants protect soil continuously. They require management so they don’t compete too strongly with your main crops.
A good rule: use the material you can apply consistently. Water savings come from coverage that stays in place.
How thick is thick enough?
Thickness depends on material and climate, but these starting points work well for most home gardens:
- Shredded leaves: about 2–4 inches (5–10 cm)
- Straw/hay: about 2–3 inches (5–8 cm)
- Wood chips/bark: about 2–4 inches (5–10 cm)
- Compost top-dressing: about 0.5–1 inch (1–2.5 cm), then cover with something longer-lasting if needed
If you see soil peeking through, the layer is too thin or too uneven. If you see slow plant emergence or stems staying too wet, the layer may be too thick or placed too close to crowns.
Where to mulch: beds, paths, and around plants
Mulch works best when it covers the soil you want to protect.
- Vegetable beds: Mulch after seedlings establish and after soil warms up. For transplants, leave a small gap around stems.
- Paths: Mulch paths aggressively. Paths are often where runoff starts and where weeds steal water.
- Perennial borders: Mulch early in the season to stabilize moisture and reduce bare-soil periods.
- Tree rings: Keep mulch in a ring, not piled against the trunk. A ring reduces evaporation and supports steady moisture for roots.
A practical check: walk your garden after a rain. If you can see channels where water runs off, those areas need more cover or better placement.
Timing: mulch when it helps, not when it hurts
- Early season: Apply cover once plants are established or once soil conditions support growth. Too much mulch too early can slow warming.
- Mid-season: Replenish as layers shrink. Decomposing mulch often settles, leaving gaps.
- Late season: Keep soil covered to prevent winter bare patches that lead to erosion and spring crusting.
If you’re unsure, start with paths and the areas that stay bare the longest. Then expand into beds as you learn how quickly your mulch breaks down.
Soil cover systems that work together
Mulch is strongest when paired with good soil structure and plant spacing.
- Mulch + compost: Add compost to feed soil, then cover it so nutrients don’t wash away.
- Mulch + drip irrigation: Place drip lines under mulch so water goes where roots are, not where evaporation happens.
- Mulch + continuous ground cover: Combine organic mulch with living cover to keep soil shaded even when mulch thins.
Mind map: mulch decisions at a glance
Mulch & Soil Cover (Water Saving) — Decision Mind Map
Examples you can copy
Example 1: A small vegetable bed with bare patches
- Problem: Soil dries fast between waterings; weeds appear in the gaps.
- Fix:
- Add shredded leaves 2–3 inches thick after transplants establish.
- Leave a 2–3 inch “breathing zone” around stems.
- Add a thin compost layer under the leaves if the bed is nutrient-poor.
- Result you should see: Slower drying and fewer weeds because the soil surface stays shaded and protected.
Example 2: Paths that shed water
- Problem: After rain, water runs along the path edge and carries soil away.
- Fix:
- Mulch paths with wood chips 2–4 inches thick.
- Keep chips slightly lower than bed edges so water doesn’t pool against plant crowns.
- If the path is compacted, loosen the top layer first so water can soak into the path material.
- Result you should see: Less runoff and less bare soil at the path margins.
Example 3: Container gardening that dries too quickly
- Problem: Pots need frequent watering.
- Fix:
- Top-dress with compost 0.5–1 inch.
- Add a thin layer of shredded leaves or fine bark on top (about 1–2 inches).
- Water thoroughly, then stop until the top layer dries slightly.
- Result you should see: Longer intervals between waterings because the pot surface isn’t exposed.
Troubleshooting: when mulch doesn’t save water
- Mulch is blowing away: Increase thickness slightly, use heavier materials, or anchor with a light layer of compost.
- Soil stays wet and plants look stressed: Pull mulch back from crowns and reduce thickness in that zone.
- Weeds still show up: Your mulch may be too thin or too patchy. Add more coverage and address the edges where light reaches soil.
- Water still runs off: The soil may be compacted. Mulch helps, but it can’t fully compensate for a hardpan. Improve soil structure where runoff starts.
A simple “mulch success” checklist
- Soil surface is mostly covered year-round.
- Mulch thickness is consistent across the bed.
- Stems/crowns have clearance.
- Paths are covered and not acting like runoff channels.
- After rain or watering, the soil stays damp longer than before.
Mulch and soil cover are the quiet workhorses of regenerative gardening: they reduce water loss, protect soil structure, and make every watering event more effective. Once you get coverage right, the rest of the system—plants, compost, and irrigation—has a better chance to perform.
4.3 Drip irrigation and soaker systems: sizing, placement, and maintenance basics
Drip and soaker irrigation work by delivering water slowly at the root zone, where plants can actually use it. The goal is simple: keep soil moisture steady enough for growth without leaving puddles or dry pockets. The details—sizing, layout, and upkeep—are what make the difference.
Sizing: match flow rate to your soil and layout
Start with three practical questions:
- How long can you run before the soil is wet where you need it?
- How much area does one line cover?
- How evenly does the system deliver water across that area?
Step 1: Estimate how deep you’re watering.
- Shallow-rooted greens often need moisture in the top 6–8 in (15–20 cm).
- Most vegetables and many perennials benefit from 8–12 in (20–30 cm).
Step 2: Use a simple “time-to-wet” test. Instead of guessing, run the system on a small section and check soil moisture.
- Place a screwdriver or soil probe at the target depth.
- Run for a short interval (for example, 15–20 minutes), then check.
- Repeat with 10–15 minute increments until the soil is consistently moist at the depth you want.
Step 3: Convert wetting time into a run schedule. Once you know the wetting time for your soil, you can adjust frequency.
- Sandy soils usually need more frequent watering.
- Clay soils often need less frequent watering but longer soak times.
Step 4: Choose emitters and spacing that fit your bed.
- Soaker hoses typically have distributed pores; they’re forgiving and good for irregular shapes.
- Drip tubing with emitters gives more control. Common emitter spacings are 6 in (15 cm) or 12 in (30 cm) depending on plant size.
A helpful rule of thumb for placement rather than math: if plants are spaced far apart, use fewer emitters per plant and rely on soil moisture spreading laterally. If plants are close, you can reduce emitter output and avoid overwatering.
Placement: water roots, not leaves (and not the path)
Good placement is mostly about geometry and avoiding wasted water.
1) Put water where roots will be.
- For row crops, run tubing along the row centerline.
- For beds, place tubing under mulch and near the plant base line.
- For transplants, position emitters so water reaches the root ball area without soaking the stem.
2) Keep emitters out of the “walkway zone.” If you irrigate paths, you’ll get weeds and muddy feet. Even if it feels convenient, it’s a maintenance tax.
- In raised beds, keep tubing inside the bed footprint.
- In-ground beds, keep tubing at least a few inches from the edge where runoff can escape.
3) Use multiple lines for long beds. Water spreads, but not infinitely. Long runs can cause uneven wetting.
- If one line leaves the far end dry, split the bed into two zones or add a second line.
- If the near end is always wet while the far end is dry, reduce run time and increase frequency, or add lines.
4) Account for slope. On a slope, pressure changes along the line can cause uneven flow.
- Place tubing so the lower end doesn’t become a constant drip puddle.
- Consider zoning by slope segments if the difference is noticeable.
5) Match system type to bed shape.
- Soaker hoses are great for beds with mixed plant spacing.
- Drip lines are great for consistent rows and trellised systems.
Maintenance basics: keep flow steady and prevent clogs
Most drip problems are boring: clogged emitters, leaks at fittings, or pressure issues. The fix is usually equally unglamorous.
1) Filter and flush.
- Install a filter if your water source isn’t clean.
- Flush lines periodically to clear sediment.
- If you see uneven watering, check for partial clogs before changing everything.
2) Inspect for leaks and kinks.
- Look for damp spots where you don’t expect them.
- Check tubing connections and end caps.
- Avoid burying tubing where you’ll later dig; a small puncture can waste water for weeks.
3) Manage pressure. Too much pressure can cause blowouts or emitter damage. Too little pressure can cause dry ends.
- If your system uses a regulator, keep it in place and functioning.
- If you’re using multiple zones, verify each zone has adequate pressure.
4) Protect from sun and physical damage. Tubing degrades over time, especially when exposed.
- Cover lines with mulch.
- Keep them away from foot traffic and sharp tools.
5) Seasonal routine.
- During the growing season: check emitters after the first few runs, then do quick spot checks weekly.
- At season end: drain lines if your climate freezes, and store components that can be damaged by cold.
Mind map: drip and soaker systems (sizing, placement, maintenance)
Examples you can copy
Example A: Raised bed with mixed vegetables (soaker hose)
- Bed: 4 ft wide, 8 ft long.
- Layout: Lay a soaker hose along the bed center, then add a second short run if the far end stays dry during the time-to-wet test.
- Placement: Keep the hose under 2–3 in (5–8 cm) of mulch.
- Watering schedule: Start with a run time that wets the top 8–10 in (20–25 cm), then adjust frequency based on soil feel (dry top layer, moist below).
Example B: Row planting (drip tubing with emitters)
- Plants: carrots or lettuce in rows.
- Layout: Place drip tubing under mulch along each row.
- Emitter spacing: Use closer spacing for small plants early in the season; you can switch to wider spacing later by using separate lines or adjusting emitter selection.
- Placement check: After a watering cycle, dig a small test hole at the far end of the row. If it’s dry at depth, the run is too short or the line needs zoning.
Example C: Sloped yard (zoned drip)
- Problem: lower end gets soggy; upper end dries out.
- Fix: Split the system into two zones by elevation.
- Placement: Keep tubing inside the bed and avoid directing water toward the downhill edge where runoff can escape.
- Maintenance: After changes, repeat the time-to-wet test for each zone because pressure differences can change wetting time.
Quick troubleshooting checklist
- Plants look thirsty but soil near the line is wet: emitters may be clogged or the line may be delivering unevenly; test the far end.
- Soil stays wet and weeds explode: run time is too long or tubing is watering paths; move tubing inward and shorten cycles.
- Only the near end waters well: pressure is too high/low or the run is too long for one zone; split the bed or adjust zoning.
- Random dry spots: check for kinks, punctures, or partial clogs.
Drip and soaker systems reward careful setup. Once you’ve matched emitter spacing to your plants, confirmed wetting depth with a time-to-wet test, and kept filters and lines clean, maintenance becomes a short routine instead of a recurring mystery.
4.4 Rain capture and storage for urban and small-scale growers
Rain capture is less about collecting “as much as possible” and more about collecting the right amount at the right time, then delivering it where plants can use it. In small spaces, the limiting factors are usually roof area, storage volume, and how quickly water can be moved from the collection point to beds or containers.
Start with a quick site reality check
Before buying anything, note three things:
- Catchment area: the roof (or awning) surface that drains to your downspout.
- Available storage: where a tank can sit safely (weight, access, and whether it can be covered).
- Delivery method: hose, gravity drip, or watering cans from a spigot.
A simple way to estimate how much water you might collect is to use a “rule of thumb” volume estimate: \[ \text{Liters collected} \approx \text{Rainfall (mm)} \times \text{Catchment area (m}^2\text{)} \times 0.8 \] The factor \(0.8\) accounts for losses from first-flush diversion, splash-out, and imperfect capture. If you prefer gallons, the same idea applies with consistent units.
Capture: from roof to clean tank
1) Use gutters and downspouts correctly
- Keep gutters sloped so water actually reaches the downspout.
- Add a leaf screen or gutter guard to reduce debris.
- Ensure the downspout outlet is connected to your diverter or first-flush system.
2) First-flush diversion (small but important) Rain often starts by washing dust, pollen, and roof grit into the system. A first-flush diverter sends the initial runoff away from the tank, then switches to capture cleaner water.
- For small systems, a diverter that discards the first few liters per event is usually enough to reduce sediment.
- If you don’t want a diverter, at least plan for tank filtration and expect occasional sediment cleanup.
3) Filtration where it matters You want filtration that matches your storage and delivery.
- Before the tank: a simple mesh screen reduces leaves and large debris.
- Before irrigation: a finer filter (like a mesh or cartridge filter) protects drip emitters.
If you’re watering containers with a hose, you can often use a basic filter at the tank outlet. If you’re running drip lines, protect the emitters more carefully.
Storage: choose volume and placement that fit your space
Storage is where most urban systems get stuck. A tank that’s too small becomes “rain collection theater,” and a tank that’s too large becomes a weight and access problem.
1) Tank types for small-scale growers
- Food-grade plastic tanks (common for rainwater): good for covered storage and easy plumbing.
- Barrels with lids: workable for small gardens; keep them covered to limit algae.
- Underground cisterns: useful when space is tight, but installation is more involved.
2) Covering matters Cover the tank to reduce:
- Algae growth (light exclusion)
- Mosquito breeding (physical barrier)
- Debris entry (leaves and dust)
A covered tank also keeps water cooler, which can reduce sediment settling issues.
3) Overflow and safety Plan an overflow path so the system doesn’t dump water where it causes problems.
- Direct overflow to a rain garden, infiltration bed, or a designated soak area.
- Keep overflow away from building foundations.
4) Sediment management Even with filtration, some sediment settles. Use one or more of these strategies:
- A bottom drain for periodic flushing.
- A sediment trap upstream of the tank.
- A tank outlet positioned so it draws from a higher point, leaving sludge behind.
Delivery: move water from tank to plants efficiently
The best storage system still fails if delivery is awkward. Choose delivery based on your layout.
Option A: Gravity-fed watering (simple and quiet) Gravity works when the tank is elevated above beds or when you can route lines downhill.
- Use a shutoff valve and a basic filter.
- Add a pressure regulator if needed.
Option B: Pump-assisted delivery (more control) A small pump can move water to containers or drip lines.
- Use a timer if you want consistent watering.
- Protect the pump with a pre-filter.
Option C: Manual watering from a spigot For balconies and tiny plots, a spigot plus watering cans can be the most practical.
- Keep a bucket or hose adapter ready.
- Use a watering can with a fine rose to avoid soil splash.
Urban-friendly examples that actually work
Example 1: Balcony grower with a small barrel
- Catchment: a balcony awning or window-side downspout extension.
- Storage: one covered 60–120 L barrel.
- Delivery: spigot to a watering can.
- Setup details: add a mesh screen at the inlet, and place the barrel where overflow can drain safely to a planter tray or designated soak area.
What this system is good at: topping up containers during dry spells without relying on municipal water every time.
Example 2: Rowhouse garden with gutter + two tanks
- Catchment: roof gutters feeding a diverter.
- Storage: two linked tanks totaling 300–600 L.
- Delivery: gravity to a drip line for raised beds.
- Setup details: include a first-flush diverter, a tank outlet filter, and a drain valve for seasonal sediment removal.
What this system is good at: reducing irrigation frequency and keeping drip lines running during short dry stretches.
Example 3: Community garden shed with a rainwater manifold
- Catchment: shed roof gutters.
- Storage: multiple barrels or a small tank bank.
- Delivery: a manifold with separate valves for different zones.
- Setup details: label valves, keep filters consistent, and route overflow to a nearby infiltration bed.
What this system is good at: distributing water to several plots without each plot needing its own storage.
Maintenance that keeps rainwater usable
Rainwater systems don’t need constant attention, but they do need a few routine checks.
- After storms: check that gutters and screens aren’t clogged.
- Monthly in the growing season: inspect the tank inlet screen and the filter before irrigation.
- Every few months: flush sediment from the tank bottom drain.
- Before winter: drain lines that could freeze and secure the tank so it can handle overflow.
A practical mindset: treat the system like a garden tool. If you keep it clean and functional, it will behave.
Mind map: rain capture and storage for small growers
Quick checklist for your next step
- Measure your catchment area (roof section draining to one downspout).
- Decide your delivery method (hose, gravity drip, or pump).
- Choose covered storage with a safe overflow route.
- Add first-flush diversion and at least one filtration stage.
- Plan a simple maintenance routine so sediment doesn’t quietly become a drip-line problem.
When these pieces fit together, rainwater becomes a dependable part of your irrigation system rather than a one-off project you only remember during storms.
4.5 Greywater and safe reuse considerations for garden irrigation
Greywater and safe reuse for garden irrigation is mostly about two things: keeping water clean enough for plants and soil, and preventing it from becoming a nuisance for people. If you treat greywater like “water with a job,” you can design that job to match your household sources, your garden layout, and your local rules.
What counts as greywater (and what doesn’t)
Greywater is typically wastewater from sinks, showers, and laundry (not toilet water). The safety difference comes from what’s mixed in.
- Usually acceptable for garden irrigation (with basic precautions): shower and bath water, hand-wash water, rinse water from clean dishes, and laundry water if you use low-residue detergents.
- Usually not suitable for reuse: water from toilets, kitchen grease and food waste, dishwasher discharge (often higher in fats and salts), and any water contaminated with chemicals you wouldn’t want on edible plants.
A practical rule: if the water smells strongly, leaves oily residue, or contains visible particles, it’s not “greywater for irrigation” in a home system.
The main risks: soil, plants, and people
Greywater safety isn’t just about bacteria; it’s also about salts, detergents, and how water moves through your soil.
-
Pathogens and hygiene
- Human contact is the big concern. Irrigation should avoid splashing and should keep water away from edible parts.
- Even when water is “clean enough” for plants, it may still carry microbes. Use methods that reduce contact and keep application controlled.
-
Detergents and surfactants
- Many soaps are designed for skin, not soil biology. Some can harm soil structure or reduce infiltration.
- Laundry detergents vary widely. The more residue and fragrance, the more likely you’ll see problems.
-
Salts and sodium
- Greywater can contain dissolved salts from soaps, detergents, and water hardness.
- Salts accumulate in soil over time, especially in containers or areas with limited leaching.
-
Clogging and distribution problems
- Hair, lint, and fine particles can clog hoses and emitters.
- Poor distribution can create wet spots that invite odors and pests.
Source-to-system matching: choose your inputs first
Before you build anything, list your greywater sources and decide which ones you’ll include.
- Shower/bath water: usually lower in detergents than laundry, but it can include hair and skin oils.
- Laundry water: often the most variable source. If you reuse it, choose detergents that are low in residue and avoid bleach and harsh additives.
- Hand-wash and rinse water: often the easiest to manage, but volumes may be small.
If you want a simple, safer setup, start with shower water and hand-wash water. Add laundry only after you’ve confirmed your detergent situation and your system can handle higher variability.
Treatment level: what “minimal” means in practice
Most home garden reuse systems rely on filtration and controlled application, not on full water treatment. “Minimal” doesn’t mean “no precautions.”
Filtration and settling
- Use a strainer to catch hair and larger debris.
- Add a settling step (even a simple tank with time to settle) to reduce fine solids.
- If you use drip irrigation, filtration becomes more important because emitters are small.
Storage and timing
- Greywater stored in a container can develop odors and microbial growth.
- Keep storage short, keep covers on, and avoid warm, stagnant conditions.
Detergent management
- Choose detergents that rinse cleanly and don’t leave residue.
- Avoid adding products that create strong chemical odors or visible residue.
Application methods that reduce risk
The safest garden reuse approaches apply greywater slowly, below the surface, and away from edible plant contact.
Best-fit irrigation methods
- Subsurface drip (preferred): reduces splashing and keeps water in the root zone.
- Soaker hoses with careful placement: works if you can prevent runoff and keep soil infiltration strong.
- Hand watering with a watering can: can be acceptable for small volumes, but it’s harder to keep consistent and it increases the chance of splashing.
Avoid
- Spray irrigation that creates mist or droplets.
- Overhead watering on leafy greens.
- Surface pooling that creates wet, smelly patches.
Layout rules: where greywater should go
A good layout prevents greywater from turning into a local swamp.
- Apply to established planting beds with healthy, active soil.
- Keep it away from foundations and areas where it can saturate walls.
- Avoid applying near tree trunks if your system can’t keep water evenly distributed.
- Use berms or swales to guide water into the intended zone and prevent runoff.
Distance and contact
Even without quoting specific legal distances (which vary), you can follow the logic:
- Keep greywater away from paths, patios, and places people walk barefoot.
- Keep it away from edible parts by using subsurface irrigation and planting choices.
Soil and plant choices: what tolerates greywater best
Greywater reuse works best when the garden can handle periodic salt and detergent exposure.
- Prefer deep-rooted, hardy plants for the first trials.
- Avoid using greywater on crops eaten raw until you’re confident in your system and your detergent choices.
- Use mulch to reduce evaporation and keep soil surface stable, but don’t bury emitters in a way that prevents inspection.
Containers and raised beds
Containers concentrate salts because there’s less soil volume to buffer and leach. If you reuse greywater in containers:
- Use larger containers when possible.
- Plan occasional thorough watering with clean water to flush salts, if your situation allows.
- Monitor plant stress closely.
Monitoring: simple checks that catch problems early
You don’t need lab tests to notice trouble. You do need a routine.
Smell and appearance
- Strong odor suggests stagnation, excessive solids, or too-warm storage.
- Surface crusting can indicate salt buildup.
- Slime or scum in tanks suggests poor filtration or long storage.
Plant response
- Leaf burn or browning at edges can be salt stress.
- Wilting despite moist soil can indicate infiltration problems or detergent effects.
- Stunted growth may point to nutrient imbalance or root stress.
Soil infiltration
- If water starts to sit on the surface, your soil may be losing infiltration due to residue or compaction.
- Fixing infiltration (aeration, improving soil structure, adjusting application rate) matters more than adding more greywater.
A practical example: shower-to-subdrip bed
Here’s a straightforward setup that many gardeners can adapt.
- Source: shower water from a bathroom used by one or two people.
- Collection: a small, covered tank near the garden.
- Pre-filtration: a hair strainer at the drain.
- Distribution: subsurface drip lines laid in the bed, with emitters placed under mulch.
- Controls: a simple timer or gravity flow schedule so application is slow and consistent.
- Planting: non-leafy crops and perennials in the first season.
Why it works: shower water is typically less detergent-heavy than laundry, subsurface drip reduces contact, and slow application prevents runoff.
A practical example: laundry greywater with stricter detergent rules
Laundry reuse is doable, but it’s the one that most often causes soil issues.
- Source: laundry rinse water only (if you can separate it).
- Detergent: use low-residue, fragrance-light detergents and avoid additives like bleach.
- Filtration: lint removal is essential.
- Application: subsurface drip or soaker hoses with careful scheduling.
- Soil management: keep beds mulched and monitor for crusting.
Why it works: you reduce chemical variability at the source and keep distribution controlled.
Troubleshooting guide (common problems and fixes)
- Bad smell from the system: shorten storage time, improve filtration, keep the tank covered, and reduce solids entering the tank.
- Clogged emitters: add finer filtration, increase settling time, and check for hair/lint bypass.
- Salt crust on soil surface: reduce greywater volume, increase clean-water flushing if available, and ensure the bed has enough infiltration.
- Plants look stressed but soil is wet: check for detergent residue effects, verify application rate (too fast can overwhelm infiltration), and confirm you’re not applying to the wrong zone.
Safety checklist before you start
- Confirm your greywater sources and exclude anything contaminated.
- Use filtration for solids and hair.
- Prefer subsurface or slow, non-splash application.
- Keep greywater away from paths and edible parts.
- Choose plants that can handle periodic salt exposure.
- Monitor odor, soil surface changes, and plant stress.
Greywater reuse is not complicated, but it is specific. When you match the water source to the right delivery method and keep an eye on soil behavior, you get the benefit—without turning your garden into a science experiment.
5. Designing Regenerative Beds and Planting Systems
5.1 Bed layout for resilience: access, drainage, and root zone planning
A resilient bed is one you can reach easily, keep from turning into a swamp, and manage so roots get consistent conditions. The layout choices you make at the start determine how much effort you spend later—on watering, weeding, and fixing problems you could have avoided.
Start with access: design for “no stepping on soil”
Rule of thumb: plan bed width so you can reach the center without leaning or stepping into the bed.
- Typical widths: 3 ft (0.9 m) for beds accessible from both sides; 2 ft (0.6 m) for beds accessible from one side.
- Path width: 12–18 in (30–45 cm) is usually workable for a wheelbarrow-free garden; wider paths help if you carry compost or use a kneeling pad.
- Edge height: keep bed edges sturdy and consistent. A 6–12 in (15–30 cm) raised bed edge helps contain mulch and makes it easier to maintain a clean planting surface.
Concrete example (backyard): If you have a 10 ft long bed along a fence and you can access it from the yard side only, make it 2 ft wide. Add a 15 in path between the bed and any obstacle (like a shed wall) so you can move a bucket without scraping plants.
Concrete example (urban balcony): With containers, “access” means you can reach the soil surface for transplanting and top-dressing. Arrange pots in a grid with a clear walkway, and keep the heaviest containers near the door for easier moving.
Plan drainage before you plant: water should move, not pool
Drainage is not just about whether water drains; it’s about where it drains and how quickly the root zone can recover after a heavy watering or rain.
Step 1: observe your site. After a rain, look for:
- Standing water that remains for more than a day.
- Soggy edges where runoff collects.
- Dry patches that stay pale and crusty.
Step 2: choose a bed type based on what you see.
- In-ground beds: best when the soil drains reasonably well and you can maintain a consistent surface cover.
- Raised beds: useful when native soil is compacted, slow-draining, or you want more control over root-zone depth.
- Mounded rows: helpful on slopes where you want to slow runoff and keep roots from sitting in moving water.
Step 3: build drainage into the layout.
- Slope the paths, not the bed. If you have a slight grade, keep the bed surface level and let water move through paths.
- Avoid “bathtub beds.” Don’t place beds in low spots where water naturally collects unless you’re prepared to raise the bed and manage runoff.
- Use a path that can handle wet feet. Gravel or permeable pavers reduce mud and keep you from compacting soil by walking through it.
Concrete example (slow-draining yard): If water pools in one corner, don’t just raise that one bed. Raise the bed and also redirect runoff by grading the path so it carries water away from the bed edge. Even a small change—like ensuring the path slopes 1–2% away from the bed—can prevent repeated saturation.
Root zone planning: depth, texture, and consistency
Resilience comes from giving roots a stable environment. That means planning the root zone depth and the soil texture roots will actually experience.
1) Choose target root depth by crop group
- Leafy greens and many herbs: often do well with 8–10 in (20–25 cm) of usable depth.
- Most vegetables (tomatoes, peppers, squash): aim for 12–18 in (30–45 cm).
- Perennials (berries, some herbs, long-lived flowers): plan deeper where possible, because roots persist.
2) Match bed depth to your soil reality
- If you’re using raised beds, you control depth more easily.
- If you’re planting in-ground, you may need to address compaction and improve structure before expecting deep rooting.
3) Keep the root zone consistent across the bed Inconsistent zones create weak spots: roots hit a hard layer, then stall. In raised beds, consistency is mostly about how you fill. In-ground, it’s about how you prepare the planting area.
Concrete example (raised bed fill): If you fill with a mix that’s too fine, it can compact and hold water longer than you want. A practical approach is to use a blend that includes enough coarse material for drainage while still holding moisture. The goal is a soil that crumbles when you squeeze it, then breaks apart rather than forming a sticky mass.
Layout details that prevent future headaches
Edge management:
- Keep bed edges straight and firm so mulch stays in place.
- Avoid gaps where weeds and grass can invade and where water can undercut the bed.
Spacing between beds:
- Leave enough room for you to work without stepping on soil.
- If beds are close, you’ll compact the edges every time you weed or harvest.
Orientation and sun:
- Place beds so tall plants don’t shade shorter ones for most of the day.
- On small sites, orient beds to maximize morning light and reduce afternoon shading where it matters.
Wind exposure:
- In exposed areas, consider windbreak placement so plants aren’t constantly stressed. Even a simple hedge line or fence can change how quickly soil dries.
A mind map for bed layout decisions
Quick planning checklist (use before you build)
- Can you reach the center of each bed without stepping into it?
- After a rain, do you see pooling or persistent sogginess?
- Are paths designed to carry water away from bed edges?
- Is your planned bed depth appropriate for the crops you actually grow?
- Will the soil in the root zone be consistent (no hard, compacted layers)?
- Are edges solid enough to keep mulch and soil where they belong?
Example layouts you can copy
Layout A: Two raised beds in a backyard (easy access, controlled drainage)
- Two beds, each 3 ft wide, accessible from both sides.
- 15 in paths between beds and around the perimeter.
- Beds placed on slightly higher ground or raised to avoid the lowest corner.
- Plant tall crops on the north or west side (depending on your hemisphere and sun pattern) so they don’t shade everything.
Layout B: One long in-ground bed along a fence (single-side access)
- Bed width 2 ft, length as needed.
- Path on the open side only, kept permeable to reduce mud.
- If drainage is slow, improve the planting area structure and keep mulch cover thick enough to prevent crusting.
Layout C: Balcony containers (root zone in pots, access as a walkway)
- Arrange containers in rows with a clear central walkway.
- Use consistent potting depth across containers so watering schedules don’t vary wildly.
- Group plants by water needs so you’re not constantly adjusting.
A good bed layout doesn’t just look tidy. It makes the garden easier to maintain, reduces stress on plants, and keeps the root zone working the way you want—so the rest of regenerative practices have a solid foundation to build on.
5.2 Companion planting that supports function: pollinators, pest confusion, and habitat
Companion planting works best when you treat it like a set of jobs, not a random mix of plants. Each companion should do something specific: feed pollinators, disrupt pest routines, or provide shelter for beneficial insects. When you plan by function, you can keep your vegetable beds productive while still building a small ecosystem.
The three functions to design for
1) Pollinators: food + landing + timing
Pollinators need more than flowers. They need nectar and pollen at the times your crops are flowering, plus easy access to blooms.
- Food: Choose plants with different bloom windows so something is flowering before and after your main crop.
- Landing: Use a mix of flower shapes. Flat-topped flowers (like yarrow) and small clustered blooms (like alyssum) give different insects different “landing pads.”
- Timing: If your crop flowers briefly, add companions that bloom slightly earlier and slightly later.
Easy example (urban bed):
- Plant alyssum along the front edge of lettuce and brassicas. It flowers quickly and stays low, so it doesn’t shade the crop.
- Add borage near the back or in a corner. It blooms later and attracts a wider range of pollinators.
2) Pest confusion: make it harder to find the target
Most pests don’t “choose” your plants out of preference. They follow cues like scent, color, and the overall pattern of a bed. Companions can interfere with those cues.
- Reduce the visual and scent contrast: Interplanting can break up the single-crop look that pests key into.
- Add non-host plants: A non-host doesn’t feed the pest, but it can still mask the host’s signals.
- Avoid creating a pest buffet: Some companion plants attract the same pests as your crop. If you notice repeated damage, remove or relocate that companion.
Easy example (brassica bed):
- Mix dill and caraway among cabbages or kale. They don’t replace the crop, but they change the bed’s scent profile and attract beneficial insects that prey on common brassica pests.
- Keep nasturtiums at the edge if you use them. They can attract aphids away from some vegetables, but they can also become aphid magnets if left unmanaged.
3) Habitat: shelter, water, and overwintering
Beneficial insects often need places to rest, hide, and reproduce. Habitat plants and structures help them stay in your garden instead of passing through.
- Shelter: Dense foliage, hollow stems, and layered plantings provide daytime cover.
- Overwintering: Perennial companions and undisturbed stems can host beneficial life stages.
- Water access: A shallow dish with pebbles can help small beneficial insects drink without drowning.
Easy example (small garden corner):
- Plant yarrow and echinacea in one corner as long-term habitat.
- Leave a few stems standing after harvest (especially from plants that naturally dry well) so beneficial insects have a place to overwinter.
- Add a shallow water source near the corner, refreshed every few days.
Mind map: companion planting by function
Companion Planting Mind Map (Function-Based)
Practical pairing ideas (with clear “why”)
Pollinator-forward companions for vegetable beds
- Alyssum (Lobularia): Low, quick bloom along the front edge. It’s useful when you want pollinator support without shading.
- Borage (Borago officinalis): Taller, strong nectar source. Place it where it won’t crowd plants that need airflow.
- Dill and fennel (when allowed to flower): Umbel flowers attract many beneficial insects. Let a few plants go to bloom rather than harvesting everything.
Pest confusion and beneficial-insect support
- Dill/caraway near brassicas: Umbel flowers attract predators and parasitoids that help with aphids and small caterpillars.
- Marigolds (use selectively): They can help with some pest issues in certain gardens, but results vary. If you see heavy pest pressure on marigolds themselves, treat them as a monitoring plant, not a guaranteed fix.
- Chives and onions near carrots or greens: Their scent can help mask host cues. Keep them from taking over by dividing clumps.
Habitat builders that don’t steal the show
- Yarrow: Long-lasting flowers and a tough structure that supports beneficial insects.
- Perennial herbs (like thyme or oregano): Provide ground cover and shelter when you keep them trimmed rather than letting them sprawl.
- Ground cover (like clover in appropriate areas): Reduces bare soil and supports beneficial insects that hunt at the soil surface.
Placement patterns that work in real beds
Pattern A: Edge bloom strip
Use a narrow strip along the bed edge for pollinators and beneficial insects.
- Put low bloomers (alyssum) near the front.
- Add taller bloomers (borage or yarrow) toward the back.
- Keep the strip close enough that insects can move into the crop area easily.
Pattern B: “Gaps become habitat”
Instead of leaving empty spaces, fill gaps with companions.
- When seedlings are small, plant companions in the gaps.
- As the crop grows, companions may need trimming so airflow stays good.
Pattern C: Corner habitat patch
Reserve one corner for perennials and longer bloom plants.
- This creates a stable base for beneficial insects.
- Rotate annual vegetables elsewhere so the habitat patch stays consistent.
A simple decision checklist (use before planting)
- What job does this companion do? Pollinator food, pest confusion, or habitat.
- Does it bloom when my crop needs help? Match bloom timing to crop flowering.
- Will it compete for light or water? If yes, move it to an edge or reduce the number.
- Does it attract the same pests as the crop? If it becomes a pest hotspot, adjust.
- Can I observe it easily? If you can’t see it, you can’t learn from it.
Quick examples you can copy
Example 1: Lettuce bed (urban-friendly)
- Lettuce as the main crop.
- Alyssum along the front edge.
- Chives in a couple of clumps between rows.
- Dill in one corner where it can flower.
What each plant is doing: alyssum provides continuous small blooms; chives add scent and structure; dill adds umbels for beneficial insects.
Example 2: Kale and cabbage (pest pressure season)
- Kale/cabbage in the center.
- Dill and caraway interplanted for umbels.
- Yarrow at the edge as a habitat anchor.
- Optional: a small number of nasturtiums at the far edge, monitored closely.
What to watch: if nasturtiums become covered in aphids, reduce them or relocate them so they don’t become the main food source.
How to know it’s working (without guesswork)
Give the system a short window to establish, then look for specific signs:
- More insects visiting flowers during crop flowering.
- Fewer pest outbreaks that start suddenly across the whole bed.
- Beneficial insects showing up repeatedly in the same area.
If you see the opposite—pests concentrating on a companion, or airflow problems from overcrowding—adjust placement or reduce that companion’s role. Companion planting is less about perfect combinations and more about building a garden that supports the right helpers while keeping your crops easy to manage.
5.3 Polyculture and succession planting for continuous ground cover
Continuous ground cover is the simplest way to keep soil covered, feed soil life, and reduce weed pressure. Polyculture and succession planting help you keep something growing in the same space without leaving bare patches between harvests.
Polyculture: multiple plants, one job
Polyculture means growing more than one crop in the same bed so they share space and time. The goal isn’t to cram everything together; it’s to combine plants with different growth habits so the soil stays covered.
A practical way to think about polyculture:
- Cover layer: low plants that shade soil (clover, creeping thyme, lettuce, or small herbs).
- Main crop layer: the crop you’re harvesting (tomatoes, peppers, beans, brassicas, carrots).
- Vertical layer (optional): trellised plants that capture light without occupying ground (peas, cucumbers, pole beans).
- Root layer (optional): plants with different rooting depth to use water and nutrients more evenly (carrots with shallow-rooted greens, for example).
Example polyculture: “greens + beans + flowers” bed
Use this pattern when you want frequent harvests and minimal bare soil.
- Greens (cover layer): fast greens like lettuce, arugula, or spinach.
- Beans (main crop + cover): bush beans for quick harvest, or pole beans if you have trellis space.
- Flowers (support layer): calendula or nasturtium to attract beneficial insects and add a dense edge.
How it stays covered: harvest greens by taking outer leaves first, so the plant canopy remains until the next sowing. Beans fill gaps with their foliage, and flowers keep the bed edges from thinning out.
Succession planting: stagger the calendar
Succession planting means sowing or transplanting in waves. Instead of planting everything at once, you schedule smaller batches so the bed is never empty.
A good succession plan answers two questions:
- How long does each crop occupy the space? (from sowing to harvest)
- How long does it take to establish the next crop? (seedling emergence and early growth)
If you plant the next crop too late, you’ll get a bare-soil gap. If you plant it too early, the new seedlings will struggle under full-size plants.
Example succession: “cut-and-come-again greens”
- Sow a small patch of greens every 10–14 days.
- Harvest by cutting outer leaves, leaving the center to regrow.
- When one wave slows down (heat or pest pressure), the next wave is already large enough to keep soil shaded.
This approach works especially well in urban gardens where you want steady harvests without reworking beds constantly.
Combine them: polyculture + succession = continuous cover
Polyculture handles the “same time” problem (keeping soil shaded while crops grow). Succession handles the “between harvests” problem (preventing bare gaps when one crop finishes).
A simple combined method:
- Choose one crop that finishes quickly (like radish, spinach, or bush greens).
- Pair it with one crop that lasts longer (like carrots, peas, or a trellised cucumber).
- Add a low cover plant or mulch-friendly ground cover that remains through the transition.
Example combined system: “radish → carrots, with clover cover”
- Radish (quick finish): sow in a grid.
- Carrots (longer finish): sow between radish rows.
- Clover (ground cover): establish lightly in the bed early, or use a cut-and-drop cover strategy.
What happens over time:
- Radishes mature first and are harvested, opening space.
- Carrots are still growing and will eventually fill the space with foliage.
- Clover (or cut-and-drop residue) keeps soil covered during the transition.
This is a good example of “continuous cover without forcing everything to mature at the same time.”
Spacing and timing rules that prevent bare soil
These rules keep succession realistic.
-
Stagger by establishment time, not by harvest time.
- If seedlings take 2 weeks to become canopy, schedule the next sowing so they reach canopy before the previous crop thins.
-
Use partial harvests to buy time.
- Cutting outer leaves or harvesting a portion of plants reduces the sudden canopy drop that creates bare patches.
-
Plan for edge coverage.
- Bed edges often go bare first. Add a low plant at the perimeter (or keep mulch slightly thicker at edges) so weeds don’t get a foothold.
-
Match plant density to canopy speed.
- If a crop grows slowly at first, pair it with a faster canopy plant so the soil doesn’t sit exposed.
Mind map: Polyculture + succession for ground cover
Mind map: Continuous ground cover
A ready-to-use bed template (with examples)
Pick one template and repeat it across your beds.
Template A: “greens waves under a longer crop”
- Longer crop: carrots or brassicas (slower canopy early).
- Greens: arugula/lettuce in waves.
- Ground cover: mulch plus a low plant at edges (or clover in the off-season).
Template B: “trellis top, leafy bottom”
- Vertical: peas or cucumbers on a trellis.
- Bottom: fast greens between trellis lines.
- Ground cover: low herbs or cut-and-drop residue.
Template C: “quick harvests with a slow backbone”
- Quick: radish or spinach.
- Backbone: beans, carrots, or a small patch of perennial herbs.
- Ground cover: clover or dense low plants.
Troubleshooting: when cover fails
- Bare gaps appear after harvest.
- Fix: harvest in portions and start the next wave earlier.
- Seedlings struggle under existing plants.
- Fix: reduce overlap duration; sow smaller batches more frequently.
- One crop dominates and crowds others.
- Fix: adjust density so the cover layer stays low and the main crop doesn’t shade it out.
- Weeds show up in the transition period.
- Fix: increase edge coverage and use a thin layer of mulch while seedlings establish.
Continuous ground cover isn’t about keeping every inch green at all times. It’s about designing overlapping growth so the soil is rarely exposed, and when it is, it’s for a short window you can control.
5.4 Integrating perennials, annuals, and shrubs for layered productivity
Layered planting is less about stacking plants like shelves and more about matching each plant group to a job: shrubs provide structure and long-term roots, perennials fill the middle with repeatable returns, and annuals handle quick coverage and seasonal gaps. When these layers work together, you get steadier yields, fewer bare patches, and a garden that looks intentional even when one group is between “peak moments.”
The roles (and what each layer is good at)
- Shrubs (the long game): They anchor the garden, stabilize soil with deeper roots, and create habitat. Choose shrubs that suit your maintenance tolerance; pruning needs are real.
- Perennials (the dependable middle): They return year after year, often with predictable flowering and foliage. Many also support beneficial insects.
- Annuals (the short game): They fill space fast, let you experiment with varieties, and can be swapped out when conditions change.
A practical rule: shrubs and perennials should be able to carry the bed even if annuals fail. Annuals are the garnish, not the foundation.
Mind map: Layered productivity system
Designing the layers so they don’t fight
1) Start with spacing that respects mature size
Many layered gardens fail because the initial spacing assumes plants will stay small. Instead, plan for mature dimensions:
- Place shrubs far enough that their mature canopy won’t shade the entire bed.
- Give perennials room to spread, especially clumping types.
- Use annuals in the “working gaps” between established plants.
Example: If a shrub will be 4 ft wide, don’t place perennials right up to it. Leave a ring of space for mulch and for the inevitable pruning or weeding access.
2) Match plant height to the light pattern
Layering works best when the tallest plants are where they receive the most light.
- In full sun beds, you can place shrubs at the back or edges and let perennials and annuals fill the foreground.
- In partial shade, keep shrubs and tall perennials from casting long shadows over the plants that need more light.
Example: In a north-facing bed, put shorter perennials and annuals on the side that gets the most direct sun, and keep the tallest shrubs where they won’t block the light for the whole season.
3) Plan for root zone overlap
Above-ground layering is only half the story. Roots compete for water and nutrients.
- Choose perennials that tolerate the same watering rhythm as your shrubs.
- In dry climates, avoid placing thirsty annuals right next to drought-tolerant shrubs unless you can water precisely.
Example: If your shrubs are drought-tolerant and you only water deeply once a week, don’t pair them with annuals that want daily moisture. Either adjust irrigation or choose annuals that handle less water.
A simple layout template (works in beds and large containers)
Use a repeating pattern so the bed stays productive even as plants mature.
- Back/edges: shrubs at intervals (not a continuous wall)
- Middle: perennials in drifts or clusters
- Front/voids: annuals for seasonal coverage
Example layout (one 4 ft wide bed):
- One shrub centered along the back edge.
- Three to five perennial clumps spaced so their foliage overlaps slightly but doesn’t merge.
- Annuals planted in the remaining gaps and along the front edge where you can harvest or cut back.
Mind map: Integration decisions checklist
Concrete pairing ideas (with “why it works”)
Shrub + perennial: structure plus repeat returns
- Shrub: a compact flowering shrub (or a berry shrub if that fits your goals)
- Perennials: long-blooming or foliage-forward plants that can handle the shrub’s shade pattern
Why it works: the shrub provides consistent height and root stability, while perennials fill the space that would otherwise go bare between shrub growth spurts.
Example: A compact shrub with perennials that bloom in mid-season. When the shrub is between flushes, the perennials keep the bed visually and ecologically active.
Perennial + annual: gap filling without permanent crowding
- Perennial: a clumping plant that stays put
- Annual: a fast grower that can be removed cleanly after its season
Why it works: annuals can occupy space temporarily, then be replaced without disturbing established roots.
Example: Plant annuals in the front edge where you can harvest or cut back. When the annuals finish, you can replant with a different annual set or let the perennials take over the visual space.
Shrub + annual: use annuals as “seasonal understory”
This is useful when shrubs are still small.
Why it works: annuals can cover soil while shrubs are young, reducing weeds and erosion.
Example: For the first 1–2 seasons around a newly planted shrub, use annuals in a ring pattern that keeps a clear mulch area near the shrub base for watering and future pruning access.
Succession timing that keeps the bed covered
Layering isn’t only about plant types; it’s also about timing.
- Perennials establish first. Plant them early enough to root before you rely on them for coverage.
- Annuals follow the calendar. Sow or transplant after frost dates and soil warming.
- Plan a second annual wave if your climate has a long growing season.
Example: If spring annuals finish by early summer, replace them with heat-tolerant annuals or late-season growers so the bed doesn’t go bare.
Maintenance that supports layered productivity
- Mulch consistently, but don’t bury crowns. A 2–3 inch layer helps suppress weeds and moderates moisture.
- Use cutback timing for perennials. Some perennials look better when cut back after flowering; others can be left for structure. Match the cutback to your bed’s needs.
- Deadhead strategically. If you deadhead annuals, they often keep producing. If you leave seed heads on perennials, you may trade some flowers for habitat and winter structure.
Example: In a mixed bed, deadhead annuals weekly during peak bloom, but leave perennial seed heads until late season so you don’t remove the parts that support insects and birds.
Common mistakes (and what to do instead)
- Planting too close “because it looks empty.” Empty space is temporary; crowded roots are permanent.
- Fix: Start with fewer plants and add annuals to fill gaps.
- Choosing shrubs that outgrow the site. A shrub that needs constant containment becomes a maintenance tax.
- Fix: Choose compact varieties or plan for a larger bed footprint.
- Using annuals that require different watering than the rest of the bed. The bed becomes a compromise.
- Fix: Group plants by watering needs or use irrigation zoning.
A quick example plan you can copy
Scenario: A sunny urban bed, 6 ft long, 4 ft wide.
- Shrubs: 2 compact shrubs spaced 3 ft apart along the back edge.
- Perennials: 6–8 plants in two drifts (3–4 per drift) in the middle, chosen for mid-season bloom and foliage.
- Annuals: 10–14 plants in the front edge and between drifts, replaced once mid-season if needed.
Result: shrubs and perennials keep the bed productive across years, while annuals provide fast coverage and seasonal variety without permanently crowding the established plants.
Layering works when each plant group has a clear job and enough room to do it. Once you design for mature size, light, and root competition, the rest is mostly timing and consistent soil cover.
5.5 Planting density and spacing rules that protect soil and reduce disease pressure
Planting density is where “regenerative” meets “practical.” Too sparse, you get bare soil and weeds. Too crowded, you get slow drying, more humidity around leaves, and disease that spreads like it has a calendar invite.
The spacing goal: protect soil first, then manage airflow
Regenerative beds aim for continuous ground cover, but that doesn’t mean every plant should be packed shoulder-to-shoulder. A good rule is to separate two jobs:
- Soil cover job: close the ground quickly using mulch, living cover, and appropriate row spacing.
- Airflow job: keep leaves from forming a wet blanket by giving each plant enough room to dry after rain or irrigation.
If you only think about plant spacing, you’ll miss the soil side. If you only think about soil cover, you’ll miss the leaf side. Both matter.
A simple density framework you can use today
Use this three-part check before planting (or after thinning):
- Can the soil stay covered? Aim for minimal bare ground between plants once they establish.
- Can leaves dry within a few hours? After watering, the canopy should not stay wet all day.
- Can you work the bed without stepping on it? Compaction and broken soil structure raise disease risk indirectly.
When these three are satisfied, you’re usually in the right density range.
Mind map: spacing decisions that reduce disease pressure
Concrete spacing rules by crop category
These are starting points. Your local conditions and your variety size matter, but the logic stays the same.
Leafy greens: close the ground, but don’t trap moisture
- Target: quick ground cover without forming a solid wall of leaves.
- Practical rule: sow a bit closer than final spacing, then thin early.
- Example (lettuce):
- Sow seeds in a band, then thin when seedlings have 2–3 true leaves.
- Final spacing often lands around 20–30 cm (8–12 in) between plants, depending on variety.
- If you skip thinning, you’ll get smaller heads and slower drying after watering.
Why thinning helps disease: crowded lettuce creates a humid pocket inside the canopy. Even if the bed looks lush, the leaves stay wet longer, which favors common foliar issues.
Fruiting crops: trellis to separate leaves, not just to look tidy
- Target: airflow through the canopy and light reaching lower leaves.
- Practical rule: trellis or stake so leaves are not all stacked at one height.
- Example (cucumber on a trellis):
- Plant fewer plants per row than you would for a sprawling bed.
- Train vines upward and keep the lower zone clearer.
- If you let cucumbers sprawl, leaves overlap horizontally and drying slows.
Why trellising reduces disease: it breaks up the “wet wall” effect. Water and humidity move through the canopy instead of pooling.
Tomatoes: spacing plus pruning is the combo
- Target: sunlight and airflow through the plant.
- Practical rule: give each plant room to breathe, then prune to prevent a dense interior.
- Example (tomatoes in a bed):
- If you’re using cages, you still need spacing between plants.
- A common approach is 45–60 cm (18–24 in) between plants in-row, with paths wide enough to avoid stepping.
- Remove lower leaves that touch soil and prune to keep the interior from becoming a thicket.
Why this matters: many tomato diseases spread when leaves remain damp and when airflow is blocked. Pruning doesn’t just “tidy”—it changes how quickly leaves dry.
Root crops: spacing supports uniform growth and easier thinning
- Target: even root development and minimal need for later disturbance.
- Practical rule: sow to the spacing you want, then thin once.
- Example (carrots):
- Sow lightly, then thin early to avoid later “replanting” that disturbs soil structure.
- If plants are too crowded, roots fork and plants become stressed, which can make them more vulnerable to pests and leaf issues.
Soil cover and spacing: the part people forget
You can reduce disease pressure without increasing plant spacing by improving ground conditions.
- Use mulch strategically: a mulch layer reduces splash and keeps soil moisture steadier.
- Avoid bare soil between rows: bare ground increases weed competition and forces you to cultivate more often, which disrupts soil structure.
- Match mulch to crop: lettuce likes cooler, moist soil; tomatoes like mulch too, but you still want to keep leaves off the soil.
Example (bed with mixed greens and herbs):
- Plant greens at a density that closes the ground quickly.
- Keep a mulch layer under the canopy.
- Add herbs at their normal spacing so they don’t create a dense, shaded wall.
A quick “spacing adjustment” checklist for real conditions
Use these when your garden doesn’t match the textbook.
- If your bed stays wet after watering: increase spacing next season or thin now.
- If you see mildew spots after humid mornings: reduce canopy density by thinning and pruning.
- If plants are leggy and pale: spacing may be too tight for light penetration; adjust and consider orientation.
- If you’re constantly stepping into beds: widen beds or adjust layout; compaction raises stress and slows recovery.
Thinning: treat it as a disease-management tool, not a chore
Thinning is often framed as “making room.” It’s also about creating a canopy that dries.
- Thin early: remove weaker seedlings when they’re small.
- Thin on a dry day: you’re less likely to spread disease via tools or wet leaf surfaces.
- Don’t leave thinned plants in the bed: especially if you suspect disease.
Example (greens bed):
- If you notice dense patches, thin in sections.
- Keep the bed evenly covered rather than leaving one area bare and another overcrowded.
Spacing math you can do in minutes
If you want a quick estimate for how many plants fit in a bed, use this approach:
- Measure usable planting length and width.
- Decide the final spacing (between plants) and whether you’re planting in rows or clusters.
- Count plants per row, then multiply by number of rows.
For example, if a bed has 1.2 m usable width and you plan 0.3 m between rows, you can fit 4 rows (with small adjustments for bed edges). Then if you space plants 0.25 m apart along the row, the number of plants depends on row length.
This isn’t about precision to the centimeter. It’s about avoiding the common mistake of planting “by feel” and ending up with a canopy that never dries.
Final rule of thumb
Aim for continuous soil cover with leaf spacing that allows drying. If you can’t get both, prioritize drying first for disease-prone crops, then compensate for soil cover with mulch and living ground cover.
When you get the balance right, the bed looks productive and stays workable—without turning every watering into a humidity experiment.
6. Cover Crops and Living Mulches for Year-Round Soil Protection
6.1 Selecting cover crops by goal: nitrogen, biomass, erosion control, and weed suppression
Cover crops are like multitools: the “right” one depends on what problem you’re trying to solve in the next few weeks or months. The trick is to match the crop’s growth habit and timing to your goal, then manage it so it doesn’t create new problems (like smothering seedlings or tying up nitrogen).
Quick mind map: choose by goal
Step 1: Decide the time window (because timing beats guesswork)
Before choosing species, write down two dates: when you’ll plant the cover crop and when you need the bed ready for the next crop. A cover crop that’s perfect for erosion control in fall might be too aggressive if you need to plant tomatoes in spring.
- Short window (4–8 weeks): choose quick-establishing options like buckwheat or oats.
- Medium window (2–4 months): choose rye or clover depending on whether you want biomass, nitrogen, or both.
- Long window (4–8+ months): you can use vetch/peas for nitrogen, rye/triticale for structure, or mixes for layered benefits.
Step 2: Match the goal to the cover crop type
A) Nitrogen goal: legumes that feed the soil food web
Legumes (like clover, vetch, and peas) host nitrogen-fixing bacteria in root nodules. They don’t “spray nitrogen” into the air; they build it into plant tissue, which becomes available after you terminate and incorporate or mulch it.
What to look for
- Growth stage at termination: terminate before flowering for faster breakdown.
- Residue management: if you leave a thick mat, it can slow planting; if you chop and lay it down, it usually works better.
Easy examples
- Spring bed rotation (short on time): sow crimson clover after early greens are harvested. Terminate when it’s leafy but not yet in full bloom, then plant directly into the residue.
- Fall transition to winter greens: sow hairy vetch where you want nitrogen plus winter cover. In spring, cut it and leave the mulch; the residue helps suppress weeds while the nitrogen becomes available.
Common pitfall (and the fix)
- Pitfall: terminating legumes too late can leave tough residue that breaks down slowly.
- Fix: mow/cut earlier, or choose a legume that matches your calendar.
B) Biomass goal: fast growth to protect and build organic matter
Biomass cover crops are chosen for how much plant material they produce and how quickly they cover the soil. More biomass usually means more mulch potential, which helps with moisture retention and temperature moderation.
What to look for
- Speed of establishment: oats and rye are reliable.
- Height and lodging risk: tall crops can flop if planted too late or cut too high.
Easy examples
- After summer harvest (need quick cover): plant oats. They grow fast, then you can mow them down before they set seed.
- Longer fall/winter cover: use cereal rye for heavy residue. It’s especially useful when you want a thick mulch layer for spring planting.
Common pitfall (and the fix)
- Pitfall: letting biomass crops go to seed creates volunteers.
- Fix: terminate before seed set, and keep mowing/cutting if regrowth happens.
C) Erosion control goal: dense cover and roots that hold soil
Erosion control is about keeping soil in place during rain and wind. You want quick ground cover and root systems that stabilize the top layer.
What to look for
- Rapid canopy formation: buckwheat is good when you need quick cover.
- Rooting depth and persistence: rye and triticale help hold soil through cooler months.
Easy examples
- Bare slope or exposed bed after harvest: sow rye or triticale promptly. The dense growth reduces splash erosion.
- Hot, dry window where you need quick cover: sow buckwheat. It establishes quickly and shades the soil.
Common pitfall (and the fix)
- Pitfall: planting too late means the crop doesn’t establish before heavy rain.
- Fix: prioritize establishment timing over “perfect” species choice.
D) Weed suppression goal: competition, shading, and smart termination
Weed suppression comes from two things: how well the cover crop competes and how you manage it when it’s time to plant. Some species also produce compounds that can inhibit certain weeds, but the most dependable method is simply keeping the soil covered and avoiding bare gaps.
What to look for
- Dense growth: rye can form a strong mulch layer.
- Continuous cover: mixes can keep living cover longer.
- Termination timing: killing the cover crop too early can reduce suppression; too late can create residue that’s hard to manage.
Easy examples
- Weed-prone beds between crops: use cereal rye for winter cover, then terminate in spring right before planting. The residue acts like a blanket.
- Short gaps between plantings: use buckwheat to cover quickly, then terminate before it sets seed.
Common pitfall (and the fix)
- Pitfall: leaving a thick, uncut mat can block water and slow seedling emergence.
- Fix: mow or chop and spread residue thinly where you’ll plant.
Mind map: common cover crops mapped to goals
Putting it together: practical selection scenarios
Scenario 1: After early lettuce, you want nitrogen and weed control
- Goal: add nitrogen, keep weeds down, and avoid bare soil.
- Choice: crimson clover (legume) or a clover + rye mix if you want extra biomass.
- Management: terminate before flowering; mow and lay residue down for direct planting.
Scenario 2: A bed is empty in fall and you’re worried about erosion
- Goal: protect soil through wet weather.
- Choice: cereal rye for persistent cover, or rye + vetch if you also want nitrogen.
- Management: sow promptly after harvest; in spring, cut and mulch rather than leaving a standing mat.
Scenario 3: You need a quick cover between two plantings in summer
- Goal: cover fast, suppress weeds, and avoid volunteers.
- Choice: buckwheat.
- Management: terminate before it sets seed; use the residue as mulch.
Scenario 4: You want maximum mulch for moisture retention
- Goal: biomass first, then soil improvement.
- Choice: oats (short term) or cereal rye (longer term).
- Management: mow at the right stage so residue is manageable and doesn’t smother seedlings.
A simple decision checklist
- What’s the calendar? Choose species that can establish and be terminated on time.
- What’s the main problem? Nitrogen, biomass, erosion, or weeds.
- How will you terminate? Plan mowing/cutting so residue becomes mulch, not a barrier.
- Will you plant into it soon? If yes, prioritize manageable residue and earlier termination.
Cover crops work best when you treat them as part of the crop rotation, not as a separate project. Pick the species that matches your goal and your timing, then manage it so the next crop gets a good start.
6.2 Timing and termination methods: mow, crimp, cut-and-drop, and incorporation
Cover crops do two jobs: they protect soil while they grow, and they feed the soil food web when you end them. Timing and termination method decide whether you get a quick mulch layer, a steady release of nutrients, or a messy tangle that competes with your vegetables.
Timing: end the cover at the right stage
A good rule is to terminate when the cover crop is actively growing but before it sets lots of seed. That keeps weeds from hitchhiking into your beds and prevents the residue from turning into tough, slow-to-break stems.
Common stage targets (adjust to your climate and species):
- Before flowering / early bloom: residue is usually easier to break down and less likely to be woody.
- After a biomass push but before seed: you get more leaf and root mass without creating a seed bank.
- Avoid late, fully mature stands: they can mat, shade seedlings, and take longer to decompose.
Vegetable timing example (spring transition):
- If you want to plant tomatoes in late spring, terminate a cereal/legume mix about 1–2 weeks before transplanting. This gives residue time to settle and reduces the chance that seedlings struggle through a thick, upright mat.
Fall transition example (winter cover into spring beds):
- Terminate in early spring when soil is workable. If you wait until the cover is tall and dry, you’ll spend more time clearing residue and you may end up with uneven soil contact.
Termination methods: what each one does best
Think of termination as controlling three things:
- Residue form (leafy mulch vs. upright stems)
- Soil contact (does residue lie flat and touch the ground?)
- Decomposition speed (how quickly microbes can start breaking it down?)
1) Mow
What it is: Cut the cover crop down to a low height.
Best for: Tall covers, quick biomass reduction, and situations where you want residue left on the surface.
How to do it well:
- Mow when plants are still green and not fully hardened.
- Leave residue in place rather than raking it off, unless you need a clear planting line.
- If regrowth is likely (especially with some legumes), mow again after a short interval or switch to a second method like crimping.
Example (urban bed with a rye cover):
- You have a narrow bed and want to plant greens. Mow the rye to a few inches, then plant through the flattened layer. If the rye keeps pushing back, mow again a week later and plant once the regrowth is weaker.
Watch-outs:
- Mowing alone can leave stems that spring back. If you see upright regrowth, crimping or cut-and-drop often works better.
2) Crimp
What it is: Mechanically bend and crush stems so they stop growing while leaving most residue on the surface.
Best for: Cereal rye and other covers with strong stems; systems aiming for a mulch layer that stays put.
How to do it well:
- Crimp at the stage where stems are pliable enough to bend but mature enough to hold the crushed shape.
- Use a consistent pass so you don’t miss patches that can regrow.
- Plant soon after crimping, typically within a few days to about 2 weeks, depending on residue thickness and your soil temperature.
Example (no-till style planting line):
- Crimp rye, then cut small planting holes through the mat. Add compost to the hole, plant, and water in. The residue acts like a blanket, reducing evaporation and suppressing some weeds.
Watch-outs:
- If you crimp too late and stems are woody, you may not get a clean kill. If you crimp too early, the cover may regrow.
3) Cut-and-drop
What it is: Cut the cover and lay the cut biomass onto the soil surface.
Best for: Mixed covers, smaller areas, and when you want to manage residue thickness by moving it where you need it.
How to do it well:
- Cut with a scythe, sickle, or sharp shears.
- Drop the biomass so it lies flat. If it stays upright, it can dry into a mat that blocks seedlings.
- For thick stands, consider cutting in sections so you can spread residue evenly.
Example (small garden bed with clover + grasses):
- Cut the clover-grass mix and drop it across the bed. The clover leaves tend to stay more decomposable, while the grass stems form a light mulch. Plant into the spaces you create, then top with a thin compost layer if needed.
Watch-outs:
- If you drop a very thick layer, it can slow soil warming in spring. In that case, thin the residue slightly or terminate earlier.
4) Incorporation (turning into the soil)
What it is: Mix cover crop biomass into the topsoil.
Best for: When you need a clean seedbed, when residue is too thick to manage on the surface, or when you’re working with short covers.
How to do it well:
- Incorporate when biomass is not overly woody.
- Avoid burying huge amounts of high-carbon material right before planting; it can temporarily tie up nitrogen as it breaks down.
- After incorporation, let the soil settle and consider waiting a short period before planting if the cover was heavy.
Example (incorporating a short legume cover before beans):
- If you used a legume cover that’s mostly leaves and stems, incorporation can speed decomposition and provide nutrients. Plant after the soil has settled and you’ve confirmed the bed isn’t clumpy or overly wet.
Watch-outs:
- Incorporation disturbs soil structure and can reduce surface habitat for beneficial organisms. If your goal is maximum soil protection, surface termination methods usually fit better.
Choosing a method: quick decision logic
Use this practical checklist:
- Do you want a mulch layer for weed suppression and moisture retention? Choose mow, crimp, or cut-and-drop.
- Is the cover thick and tangled? Cut-and-drop helps you manage thickness; incorporation can be a fallback.
- Is the cover mostly stiff stems (like rye)? Crimp often gives the most reliable kill.
- Do you need a very clean seedbed right now? Incorporation is the most direct.
Mind map: termination timing and method
Mind map: Timing + termination methods
Practical examples by scenario
Scenario A: Spring greens after a rye cover
- Timing: terminate when rye is heading but not fully seeded.
- Method: mow or crimp.
- Why it works: flattened residue reduces evaporation and helps suppress weeds while greens establish quickly.
Scenario B: Tomatoes after a mixed cover (legume + grass)
- Timing: terminate 1–2 weeks before transplanting.
- Method: cut-and-drop.
- Why it works: you can spread residue to avoid a thick mat near the planting holes, reducing transplant stress.
Scenario C: Bed needs a clean seedbed for direct sowing
- Timing: terminate earlier so decomposition starts before sowing.
- Method: incorporation (or partial incorporation).
- Why it works: direct seeding needs good seed-to-soil contact, and surface mats can interfere.
Scenario D: You want maximum soil cover and minimal disturbance
- Timing: terminate at early bloom.
- Method: crimp (or mow followed by a second pass).
- Why it works: residue stays on the surface, protecting soil and supporting beneficial life.
A simple “after you terminate” checklist
- Look for regrowth within a week. If you see upright stems, adjust timing next time or use a stronger termination pass.
- Check residue contact. If residue is floating or standing, seedlings will struggle. Spread or thin it.
- Confirm planting access. Create planting holes or lines before residue becomes too dry and hard to move.
- Water consistently at establishment. Termination methods affect how quickly the soil dries under mulch.
Good termination is less about one perfect tool and more about matching method to cover type, growth stage, and your planting schedule. When those line up, the cover crop becomes mulch and food instead of a chore.
6.3 Living mulches in vegetable systems: what works and how to manage competition
Living mulches are plants grown alongside your vegetables to keep the soil covered and protected. The trick is choosing a living mulch that helps without stealing the show. In a vegetable bed, “competition” isn’t automatically bad—it becomes a problem when the mulch outgrows your crop’s ability to capture light, water, and nutrients.
What living mulches should do (and what they shouldn’t)
A useful living mulch:
- Forms quick ground cover so soil stays shaded and less likely to crust.
- Improves soil structure over time by adding roots and organic matter.
- Helps moderate moisture by reducing evaporation.
- Supports beneficial insects by offering habitat.
A living mulch that’s misbehaving:
- Creates a thick mat that blocks vegetable seedlings from getting light.
- Dries the bed because it uses more water than your vegetables.
- Turns nutrient cycling into a tug-of-war, especially for nitrogen-hungry crops.
Mind map: choosing and managing living mulches
What works best: practical pairings
Living mulches work most reliably when you pair them by growth habit and timing.
1) Low-growing, slow, and easy to manage
- Creeping thyme or dwarf clovers in sunny perennial-ish beds can work, but in annual vegetable rows they’re often too slow to cover quickly.
- White clover is a common choice because it establishes well and stays relatively low, but it can become thirsty and nitrogen-fixing can shift nutrient balance.
2) Fast cover that you control
- Buckwheat is excellent for short-term cover, but it’s not a “set it and forget it” living mulch. It’s better treated as a temporary cover that you cut back once vegetables are established.
- Annual ryegrass can cover quickly, but it competes strongly and is usually a poor match for vegetables unless you’re using it as a short-term cover and terminating aggressively.
3) “Living mulch” that behaves like a mulch
- Cut-and-drop living mulch is often the most gardener-friendly approach: you grow a cover plant between rows, then regularly cut it so it stays low while still shading soil.
Timing: the most important lever
Most competition problems come from starting the living mulch too early.
A simple rule: let your vegetables get established first, then bring in the living mulch.
- For transplants (tomatoes, peppers, brassicas), sow or plant the living mulch after the crop has recovered from transplanting and has started steady leaf growth.
- For direct-seeded crops (carrots, lettuce), wait until seedlings are large enough to tolerate partial shading and have a decent root system.
If you want a concrete schedule, use this pattern:
- Plant vegetables.
- Keep the soil mostly bare or lightly mulched for the first few weeks.
- Introduce living mulch once the crop is clearly winning the light race.
- Cut back the living mulch before it overlaps the crop canopy.
Managing competition: how to keep the mulch helpful
1) Use row spacing and “crop access zones”
Instead of broadcasting living mulch everywhere, create zones.
- Keep a narrow strip around the vegetable row more open early on.
- Allow living mulch to occupy the inter-row space.
This reduces direct competition at the exact point where vegetables need resources most.
2) Control height with mowing or trimming
If the living mulch starts to shade the crop, it’s time to intervene.
- Trim to keep the mulch low.
- Leave the cut material on the soil surface as a temporary mulch layer.
This turns a competition problem into a soil-protection advantage.
3) Adjust irrigation and feeding
Living mulches can change water use.
- If your bed is drip-irrigated, ensure emitters reach the vegetable root zone even when mulch is present.
- If you notice vegetables lagging while the mulch looks lush, reduce mulch vigor by trimming and consider a modest increase in vegetable-side feeding.
Nutrient balance matters too. Clover can fix nitrogen, but vegetables still need a steady supply. Compost and well-timed side-dressing often work better than heavy reliance on the mulch alone.
4) Thin when the mulch gets too confident
A living mulch is not a permanent carpet. It’s a managed plant community.
- Thin or remove sections where vegetables struggle.
- Re-seed only where you want continuous cover.
Examples you can copy (with what to watch)
Example A: White clover between rows for leafy greens
Setup: Lettuce or spinach in rows, white clover in the inter-row space.
- Start with mostly bare soil until greens are established.
- Then allow clover to fill the gaps.
Management:
- Trim clover if it begins to shade the greens.
- Keep an eye on moisture: clover can dry the bed during warm spells.
What success looks like: Greens grow steadily, soil stays covered, and you’re not constantly weeding the inter-row space.
Example B: Cut-and-drop living mulch with a fast cover
Setup: Use a fast cover plant (like buckwheat) in the inter-row area during early growth.
- Let it establish quickly for soil cover.
- Cut it before it competes for light.
Management:
- Cut frequently enough that it stays low.
- Leave the clippings as a surface mulch.
What success looks like: You get soil protection without the cover plant taking over the vegetable canopy.
Example C: Clover or low cover in a long-season bed (tomatoes)
Setup: Tomatoes with living mulch between rows.
- Transplant tomatoes first.
- Introduce living mulch after the tomato canopy is established.
Management:
- Trim living mulch as tomatoes expand.
- Keep mulch away from the immediate base of stems to reduce humidity around foliage.
What success looks like: Fewer weeds, more stable soil moisture, and tomatoes that don’t look “starved” compared to a bare-soil control strip.
Quick troubleshooting guide
- Vegetables look leggy or pale: living mulch is shading too much. Trim sooner and consider more open crop access zones.
- Soil stays covered but vegetables stall: mulch may be using too much water or nutrients. Increase irrigation to vegetable emitters and trim the mulch height.
- Weeds still show up: living mulch isn’t covering fast enough. Either improve establishment timing or increase the density in inter-row spaces.
- Mulch becomes a mat: it’s too dense or too tall. Thin and cut-and-drop to reset.
A simple decision checklist
Before you commit to a living mulch, ask:
- Can my vegetables establish first?
- Will I be able to trim or thin the mulch without wrecking the crop?
- Does my irrigation reach the vegetable root zone reliably?
- Is the living mulch likely to stay low enough in my conditions?
If you can answer “yes” to these, living mulches become less of a gamble and more of a practical system: soil stays covered, weeds get less room, and your bed becomes easier to manage week after week.
6.4 Seed sourcing, establishment, and troubleshooting poor germination
Good cover crops start with two things: seed that can actually germinate, and an establishment routine that matches the seed’s needs. If either part is off, you’ll see the classic symptoms—patchy emergence, slow sprouting, or nothing at all—followed by the urge to blame the weather. Weather matters, but so do the basics.
Seed sourcing: what to look for (and what to ignore)
1) Choose seed suited to your goal and your conditions.
- If you want quick ground cover to suppress weeds, prioritize fast-germinating annuals.
- If you want nitrogen support, include legumes.
- If you need erosion control, select species that establish dense root systems quickly.
2) Check viability indicators.
- Look for a clear pack date or best-by date. Older seed can still work, but germination rates often drop.
- Prefer seed lots with consistent labeling and germination information when available.
3) Match seed size to your sowing method.
- Large seeds (like many legumes) tolerate deeper placement.
- Small seeds (many grasses and some clovers) need shallow coverage and good seed-to-soil contact.
4) Don’t mix “mystery” seed with careful planning. If you’re building a cover-crop system, keep mixes intentional. Mixing unknown seed sources makes troubleshooting harder because you can’t tell which species is failing.
Establishment: a repeatable routine
Think of establishment as three steps: prepare the surface, place the seed correctly, and manage moisture until emergence.
Step 1: Prepare the surface
- Remove or flatten heavy residue where you’ll sow. A thin mulch layer is fine; thick, uneven cover can block seed-to-soil contact.
- Rake or lightly cultivate to create a firm seedbed. You want soil that crumbles under a finger but doesn’t turn into dust.
Urban example: On a balcony container, use a top layer of fine, screened compost or potting mix for the top 1–2 inches. Seeds germinate in that layer, not in the coarse mix below.
Step 2: Place seed at the right depth
A simple rule: smaller seed goes shallower.
- Many small-seeded cover crops do best with light coverage (often around 0.25–0.5 inch).
- Larger seeds often tolerate 0.5–1 inch, depending on species.
If you don’t know the exact depth, start shallow and adjust next time. Too deep is a common reason for “nothing happened.”
Step 3: Ensure seed-to-soil contact
- After sowing, press seed lightly into the soil using the back of a rake, a roller, or even your feet (gently).
- This matters because seeds need moisture access and a stable environment to start germination.
Step 4: Manage moisture until emergence
- Keep the top layer consistently moist, not soaked.
- A practical approach is to water lightly once or twice daily during the germination window, then taper as seedlings establish.
Concrete example: If you sow in the morning and the top inch dries by evening, you’ll likely get uneven emergence. Add a second light watering or use a temporary cover (like a light row cover) to reduce surface drying.
Mind map: seed-to-soil success checklist
Mind map: Establishing cover-crop seed
Troubleshooting poor germination: diagnose before you re-sow
When germination disappoints, resist the urge to blame yourself immediately. Instead, treat it like a short investigation.
Symptom A: Patchy emergence (some seedlings, many bare spots)
Most common causes
- Uneven moisture (dry pockets)
- Inconsistent seed depth
- Seeds sitting on residue instead of soil
What to do
- Check moisture by digging a small test hole in a bare spot and a sprouted spot. Look for moisture differences at the seed depth.
- Rake lightly and re-press seed in areas that didn’t contact soil.
Example: In a raised bed with thick compost on top, seeds may germinate where the compost is thin and fail where it’s thick. A thin, firm top layer helps.
Symptom B: No emergence
Most common causes
- Seed placed too deep
- Seed-to-soil contact missing
- Seed is too old or not viable
- Soil conditions outside the seed’s comfort zone
What to do
- Dig up a few seeds from the sowing depth. If they’re intact and dry, moisture/contact were the issue. If they’re swollen but not sprouted, conditions may be too cold or too dry to continue.
- If seeds were covered heavily, re-sow shallower.
Example: If you broadcast clover into a thick mulch layer and didn’t rake it in, the seeds may have been insulated from moisture access. Light coverage plus pressing usually fixes this.
Symptom C: Slow emergence (seedlings appear, but later than expected)
Most common causes
- Cool soil slowing metabolism
- Moisture fluctuations (wet then dry)
- Dormancy traits in certain species
What to do
- Keep moisture steady until you see consistent sprouting.
- Compare emergence timing to the species’ typical window. If you’re outside the expected temperature range, slow emergence may be normal.
Example: Some legumes can take longer in cool conditions. If you re-sow immediately, you may end up with overcrowding once the first wave finally appears.
Symptom D: Moldy surface or crusting
Most common causes
- Overwatering or heavy rain followed by drying into a crust
- Poor aeration at the surface
What to do
- Water more lightly and more frequently rather than soaking.
- If crust forms, gently loosen the surface with a rake without disturbing deeper seeds.
A practical “seed establishment” decision tree
    flowchart TD
A[Seed sown] --> B{What do you see after the expected window?}
B -->|Patchy emergence| C[Check moisture and seed-to-soil contact]
C --> C1[Dig test holes in bare vs sprouted spots]
C1 --> C2[Adjust watering; re-press or lightly rake]
B -->|No emergence| D[Check depth, contact, and viability]
D --> D1[Dig up seeds at sowing depth]
D1 --> D2{Are seeds dry or intact?}
D2 -->|Dry| E[Improve moisture; re-sow shallower]
D2 -->|Swollen but not sprouted| F[Soil conditions too cold/unstable; wait]
D2 -->|No viable signs| G[Replace seed lot; verify freshness]
B -->|Slow emergence| H[Maintain steady moisture and wait]
H --> H1[Confirm temperature suitability for the species]
Examples you can copy
Example 1: Quick cover in a small urban bed
- Rake the surface to a firm, crumbly texture.
- Broadcast a small-seeded mix lightly, then rake just enough to cover.
- Press with the back of a rake.
- Water lightly twice daily for the first week, then reduce.
Example 2: Container cover crop without bare soil
- Use a top layer of fine mix for the seed zone.
- Sow shallow and press.
- Water in the morning so the surface doesn’t stay saturated overnight.
- If the surface dries fast, use a temporary light cover until seedlings emerge.
Example 3: Troubleshooting a failed patch
- Mark a 1-square-foot area.
- Dig at the sowing depth in three spots.
- If seeds are dry: water more consistently and re-sow shallower.
- If seeds are swollen but stalled: keep moisture steady and wait for conditions to improve.
Quick rules that prevent most germination problems
- Shallow for small seeds, deeper for large seeds.
- Press seed into soil so moisture can reach it.
- Keep the top layer consistently moist until you see emergence.
- Diagnose with test holes before re-sowing.
- Avoid thick residue over the seed line when sowing.
When you treat establishment like a controlled process—seed quality, correct placement, and moisture management—poor germination becomes less of a mystery and more of a solvable checklist.
6.5 Managing cover crop residue so it feeds soil instead of smothering plants
Cover crops are supposed to leave residue behind, but “left behind” can mean two very different things: a thin, decomposing blanket that feeds soil life, or a thick mat that blocks light, traps moisture, and slows planting. The goal is to manage residue so it breaks down fast enough to support the next crop.
Why residue sometimes smothers
Residue becomes a problem when several conditions line up:
- Too much thickness: A heavy layer shades seedlings and creates a barrier to emergence.
- Too much carbon at once: High-carbon material (like many grasses) can tie up nitrogen while microbes work on it.
- Too wet or too cold: Decomposition slows, so residue lingers longer than you need.
- Poor contact with soil: If residue stays dry on top, it decomposes slowly.
- Timing mismatch: If you terminate too early or too late, you get either tough stems or a mat that hasn’t broken down.
The fix is not “remove residue.” It’s control thickness, contact, and timing so decomposition happens in the window your crop needs.
Mind map: residue management decisions
Step 1: Choose a termination approach that matches your residue
Different termination methods produce different residue behavior.
- Roller-crimp (for no-till planting): Creates flattened stems that form a mat. Works best when the mat is not overly thick and when you plant into the flattened layer promptly.
- Cut-and-drop (for beds you can manage): You cut the cover crop and leave it on the surface. This is flexible, but you must prevent a thick “haystack” effect.
- Light incorporation (for small areas or raised beds): Mixing residue into the top layer increases soil contact and speeds breakdown. It can be useful when residue is bulky or you’re planting small-seeded crops.
Practical rule: If your next crop is sensitive at emergence, prioritize soil contact over leaving a thick surface mat.
Step 2: Control residue thickness with simple tactics
You don’t need fancy equipment. You need a consistent way to avoid piling.
Tactic A: Terminate earlier when you’re worried about thickness
- If your cover crop is already tall and fibrous, it will leave tougher residue.
- Terminating at a stage where stems are still manageable reduces the “stringy blanket” problem.
Tactic B: Chop before you drop
- In small beds, you can mow or use a trimmer to shorten stems.
- Shorter pieces pack less densely and decompose more evenly.
Tactic C: Thin the mat where seedlings will go
- For row crops, you can leave residue in the alleys and clear a narrow strip for planting.
- For transplants, you can create planting holes and keep residue around them rather than directly over them.
Example: If you’re planting lettuce into a rye cover crop, a thick rye mat can shade seedlings. Cutting and dropping, then clearing a planting band (or planting transplants into holes) helps the lettuce get light while the residue still feeds soil between rows.
Step 3: Improve soil contact so residue actually breaks down
Residue feeds soil when microbes can access it and when moisture can move through.
- Crimp or cut so stems lie flat: Flat residue increases contact with soil.
- Avoid leaving residue in long, dry bundles: Bundles dry out and persist.
- If residue is very dry, water lightly before planting: You’re not trying to soak the bed; you’re trying to kick-start decomposition.
Example: In a dry spell, a thick cover crop mat can sit like mulch that never quite “starts.” A light irrigation after termination (enough to moisten the top layer) often reduces the time residue stays intact.
Step 4: Match termination timing to the next crop’s germination window
Residue breakdown is not instant. Your planting schedule should respect the decomposition timeline.
A practical approach:
- Plant when residue is beginning to soften, not when it’s still fully intact.
- If you’re planting into cold conditions, expect slower breakdown and plan for a thinner mat or more soil contact.
Example: In early spring, cover crop residue may remain stiff longer. If you terminate and plant immediately into a thick mat, seedlings can struggle. Either reduce biomass at termination, chop residue, or use transplants instead of direct seeding for that crop.
Step 5: Manage nitrogen tie-up without guessing wildly
High-carbon residues can temporarily reduce available nitrogen while microbes break down the material. You’ll notice it as slow growth or pale leaves in the next crop.
How to respond:
- Use compost or a small, targeted nitrogen boost only if you see symptoms.
- Prefer residue that’s not excessively carbon-heavy for the crop you’re following.
- Keep residue thickness reasonable to reduce the amount of carbon microbes must process.
Example: If you follow a grass-heavy cover crop with a nitrogen-demanding crop like brassicas, and you see stunted growth after planting, a modest compost application around the plants can help. The key is to avoid blanket heavy feeding when the real issue is often “too much mat, too soon.”
Step 6: Use planting strategies that prevent smothering
Even with good residue management, planting method matters.
- For direct seeding: Ensure seeds are placed at the correct depth and that residue doesn’t cover the seed zone.
- For transplants: Create planting holes or pockets so the root ball and stem base are not buried under thick residue.
- For row crops: Keep residue between rows rather than directly over the seed line.
Example: When planting tomatoes into a cover crop, you can leave residue as a mulch layer around the base after transplanting, but you should avoid burying the stem or covering the planting hole so the plant can establish quickly.
Quick troubleshooting checklist
- Seedlings not emerging → residue too thick over the seed zone; clear a planting band or chop residue.
- Seedlings emerge but look pale and slow → possible nitrogen tie-up; reduce mat thickness next time and consider a small targeted compost boost.
- Residue still intact after a couple of weeks → cold/wet conditions or poor soil contact; moisten lightly and improve contact (crimp/shorten/chop).
- Bed stays too wet under the mat → residue may be trapping moisture; thin it and ensure drainage.
A simple “do this, then that” workflow
- Terminate the cover crop at a manageable stage.
- Chop or flatten so residue is not a thick, fibrous layer.
- Ensure soil contact by crimping flat or lightly disturbing where appropriate.
- Plant with a method that protects the seed/planting hole from being buried.
- Watch the first 2–3 weeks for emergence and early color; adjust next season by changing thickness and timing.
When residue is managed well, it stops being a barrier and becomes a slow, steady food source for soil organisms. The difference is usually not “regenerative vs not,” but whether the residue is given the right conditions to break down in the same time frame your next crop needs to get established.
7. Regenerative Pest and Disease Management Without Broad-Spectrum Harm
7.1 Building plant health through soil, water, and diversity before intervention
Before you reach for any control method, aim for the boring stuff that makes plants harder to mess with: soil that supports roots, water that matches plant needs, and plant communities that don’t all get hit by the same problem at the same time. When these three are working, “intervention” becomes less frequent and more targeted.
Soil: the root zone is the whole game
Healthy plants usually start with a root environment that can do three things reliably: hold enough oxygen, hold enough water, and supply nutrients in forms roots can access.
- Structure over amendments. If soil is compacted, nutrients and water can’t move well. A simple sign: water sits on the surface or runs off quickly, and roots look shallow or circling. Fixing structure with compost and surface cover helps biology do the heavy lifting.
- Biology over guesswork. Compost and mulch feed soil organisms, which in turn improve aggregation, nutrient cycling, and disease suppression. You don’t need to “sterilize” anything; you need to keep the soil food web busy.
- Avoid salt and shock. Over-fertilizing can burn roots and increase stress. If you’re adding compost or any fertilizer, do it gradually and observe. A plant that’s already stressed from salts or uneven nutrition is more likely to attract pests and show disease.
Easy example (raised bed): If your bed has been bare between seasons, add a thick mulch layer (leaf mulch or compost) and plant a cover crop. In spring, you’ll usually see better infiltration and fewer wilting episodes because the soil stays cooler and holds moisture longer.
Water: match timing and delivery to the root zone
Water problems often look like pest or disease problems because stress changes how plants defend themselves. The goal is consistent moisture where roots live, not constant wetness.
- Water deeply, then let the top layer breathe. Frequent light watering trains roots to stay near the surface, where heat and drought stress hit first. Deep watering encourages roots to explore.
- Use mulch as the water manager. Mulch reduces evaporation, buffers temperature swings, and slows runoff. That means fewer “dry then soaked” cycles that can trigger issues like blossom-end rot in tomatoes.
- Aim at the soil, not the leaves. Wet foliage can increase disease pressure. Drip lines or soaker hoses keep water where it belongs.
Easy example (container tomatoes): In a pot, water can swing fast. Add a 2–3 cm mulch layer on top of the soil and water until excess drains, then wait until the top few centimeters feel dry. If you water daily “just a little,” you’ll often see uneven growth and more trouble later.
Diversity: don’t give pests a single menu
Diversity reduces the chance that a single pest or pathogen finds everything it likes. It also supports beneficial insects and improves resilience when conditions shift.
- Mix plant families. Avoid planting the same crop repeatedly in the same spot. Rotating families interrupts pest life cycles and reduces pathogen buildup.
- Interplant with functional companions. Companions can provide habitat, confuse pests, or simply fill space so soil stays covered. The key is not forcing a complicated design—just avoid monoculture.
- Include flowers and perennials where possible. Even a few flowering plants near beds can support beneficial insects that help keep pest populations in check.
Easy example (urban bed with greens): Instead of one long row of lettuce, split it into sections and add herbs or flowering plants between. If slugs or aphids show up, they’re less likely to spread uniformly across the entire bed.
A practical mind map: soil + water + diversity
How to apply this before you “treat” anything
Use a simple routine that checks the three drivers first.
- Look at the root zone conditions. Is the soil compacted, bare, or crusted? If yes, address cover and structure before adding inputs.
- Check watering patterns. Are you watering on a schedule regardless of weather, or based on soil moisture? Adjust delivery and timing.
- Review plant mix and spacing. Are you growing one family in a block? Are plants too crowded? Adjust layout to reduce stress and improve airflow.
- Then monitor. After changes, observe for 1–3 weeks. Many “mystery” problems improve when stress drops.
Concrete example (powdery mildew on squash): Instead of immediately treating, check whether leaves stay wet from overhead watering, whether plants are crowded, and whether the soil has enough organic matter and consistent moisture. If you switch to soaker irrigation, add mulch, and thin for airflow, you often reduce disease pressure because the plants are less stressed and the canopy dries faster.
Quick diagnostic cues that point to soil, water, or diversity
- Soil likely: stunted growth with poor root development, hard crust, or water running off.
- Water likely: wilting during heat that improves after watering, or leaf issues that track watering days.
- Diversity likely: a pest outbreak that spreads rapidly across one crop type, or repeated problems in the same bed year after year.
The “before intervention” checklist (use it like a pre-flight)
- Soil is covered most of the year (no long bare stretches).
- Mulch is present and not piled against stems.
- Water is delivered to the soil (drip/soaker) and applied deeply.
- Plants are spaced to reduce constant leaf wetness and crowding.
- Crop families are mixed and rotated so the same pest doesn’t get a full repeat meal.
When these basics are in place, you’re not ignoring pests or diseases—you’re removing the conditions that make them win. That’s the most practical kind of prevention: it reduces the need for action, and it makes any action you do take more effective.
7.2 Monitoring and thresholds: scouting routines that prevent outbreaks
Monitoring and thresholds are how you catch problems early without turning your garden into a daily emergency room. The goal is simple: notice changes, compare them to a baseline, and act only when the situation crosses a practical line.
What “scouting” actually means
Scouting is a repeatable routine for checking plants in a consistent way. Consistency matters because pests and diseases don’t arrive on a schedule, but your attention can.
A good scouting routine has three parts:
- Where you look (the same zones each time)
- What you record (the same observations each time)
- When you decide (a threshold that triggers action)
The scouting zones
Use a simple map of your garden and split it into zones. For example:
- Zone A: front row / most sun
- Zone B: center beds / most shade
- Zone C: edges near fences or paths
- Zone D: containers and raised beds (often dry faster)
In each zone, pick a few sentinel plants—plants that are representative and easy to inspect. If you have 20 tomato plants, you don’t need to inspect all 20 every time. Inspect 3–5 consistently.
What to look for (and how to look)
Different issues show up differently. Your job is to separate “normal variation” from “patterned damage.”
Leaf-level checks
Spend 60–90 seconds per sentinel plant:
- Top surface: spots, stippling, discoloration
- Underside: eggs, small larvae, webbing
- Edges: chewing, curling, browning
- New growth: distorted tips often show up early
A quick rule: if you only look from above, you’ll miss many of the early signs.
Plant-level checks
After leaf checks, scan the whole plant:
- Growth rate: stunted or suddenly slowed growth
- Distribution: damage on one plant vs. spreading across the zone
- Plant vigor: wilting that doesn’t match soil moisture
Soil and microclimate checks
Some problems start below the surface or in the “in-between” places:
- Mulch depth and coverage: bare soil invites weeds and dries out the surface
- Air movement: crowded plants hold moisture longer
- Watering pattern: uneven wetting can create disease hotspots
Baselines: your garden’s “normal”
Thresholds work only if you know what “normal” looks like in your garden.
Start with a baseline week:
- Choose 2–4 sentinel plants per zone.
- Record what you see without acting.
- Note the usual level of minor chewing, a few leaf spots, or occasional aphids.
Write down what you consider “minor” versus “concerning.” Minor might mean a few aphids on one stem with no curling. Concerning might mean colonies forming on multiple stems.
Thresholds: practical lines you can use
A threshold is not a universal number. It’s a decision rule based on your goals, plant stage, and how fast the issue is spreading.
Use three types of thresholds:
1) Action threshold (when to intervene)
This is your “do something now” line.
Examples:
- Aphids on young growth: If you see colonies on new leaves and the leaves start curling, intervene.
- Powdery mildew on susceptible crops: If you find fresh mildew patches on multiple leaves and they’re expanding, intervene.
- Cabbage pests (caterpillars): If you find larvae or fresh feeding damage on more than one plant in a zone, intervene.
2) Tolerance threshold (how much damage you’ll accept)
This is your “not yet” line.
Examples:
- Leaf spots: If spots are limited to older leaves and plants are otherwise vigorous, you can tolerate it and monitor.
- Early chewing: If damage is minor and plants are still growing normally, you can wait for the next check.
3) Escalation threshold (when to change strategy)
This is your “the first fix didn’t work” line.
Examples:
- If you apply a targeted control and the pest count or damage increases by the next scouting round, switch tactics (timing, method, or plant placement).
A simple scoring system that doesn’t require a lab
You can turn scouting into numbers without making it complicated.
The 0–3 damage score
For each sentinel plant, score the most relevant symptom:
- 0: no visible issue
- 1: light damage on a few leaves/stems
- 2: moderate damage on several leaves/stems
- 3: heavy damage, clear decline, or rapid spread within the plant
Then add a spread note:
- S: localized to one plant
- M: several plants in the zone
- W: widespread across the zone
A decision rule example:
- If average damage score ≥ 2 and spread is M or W, intervene.
This keeps you from reacting to one unlucky leaf while still catching real problems.
Scouting frequency that matches plant risk
More frequent checks are useful when plants are vulnerable.
A practical schedule:
- Seedlings and transplants: 2–3 times per week
- Fast-growing fruiting crops (tomatoes, peppers, cucumbers): 1–2 times per week
- Established perennials and mature beds: weekly is usually enough
- After weather swings (heavy rain, heat spikes): add an extra check 24–48 hours later
Mind map: scouting routine and decision flow
Mind map: Scouting and thresholds
Examples you can copy into your own garden
Example 1: Aphids on kale (fast to notice, easy to overreact)
Baseline: You sometimes see a few aphids on the underside of older leaves.
Scouting day: On two sentinel plants in Zone B:
- Plant 1: damage score 1 (a few curled leaves)
- Plant 2: damage score 2 (colonies on new growth)
- Spread note: M (several plants show early signs)
Threshold decision: Action threshold crossed because damage is on new growth and spread is more than localized.
What you do next (targeted):
- Remove the most affected leaves.
- Blast remaining aphids off with a strong water stream.
- Re-check in 3–4 days.
Escalation: If colonies return and damage score rises to 3 by the next check, switch to a different targeted approach (timing, barriers, or a different control method).
Example 2: Powdery mildew on zucchini (often tolerable at first)
Baseline: A few older leaves show light spotting late in the season.
Scouting day: On one sentinel plant in Zone A:
- Damage score 1 (small patches on older leaves)
- Spread note: S (only that plant)
Threshold decision: Tolerance threshold applies. You monitor because the plant is still vigorous and the issue is localized.
Monitoring focus: Look for fresh mildew on new leaves and check whether spread increases within the zone.
Action when it changes: If you see damage score 2 on multiple plants or mildew appearing on new growth, intervene.
Example 3: Tomato hornworm (rare, but worth a clear rule)
Hornworms aren’t subtle when they’re present.
Scouting day: One sentinel tomato shows a damaged leaf and you find a larva.
- Damage score 2 (active feeding)
- Spread note: S (one plant)
Threshold decision: Even with localized spread, action is justified because the pest is large and can do major damage quickly.
What you do next: Hand-remove the larva and inspect nearby plants in the same zone.
Re-check rule: If you find another larva within 1 week, increase scouting frequency for that zone.
A scouting log template (minimal but useful)
Scouting log
Date: ____  Weather: ____
Zone: ____  Sentinel plants: ____

Plant 1: score 0–3 ____  Spread S/M/W ____  Notes: ____
Plant 2: score 0–3 ____  Spread S/M/W ____  Notes: ____
Plant 3: score 0–3 ____  Spread S/M/W ____  Notes: ____

Most likely issue: ____
Action taken (if any): ____
Next check date: ____
The key habits that prevent outbreaks
- Check undersides and new growth early, not after damage is obvious.
- Use zones and sentinel plants so you don’t miss patterns.
- Score and spread so you can decide consistently.
- Act based on thresholds, not feelings—your garden doesn’t care how busy your week is.
When scouting is routine, outbreaks become less about surprise and more about timing. You’ll still have pests and diseases, but you’ll meet them when they’re small enough to manage.
7.3 Mechanical and cultural controls: pruning, sanitation, spacing, and barriers
Mechanical and cultural controls are the “hands-on” side of pest and disease management. They work by changing the conditions pests and pathogens need: less shelter, fewer entry points, better airflow, and fewer chances to spread problems from plant to plant. You’re not trying to sterilize everything; you’re trying to reduce the odds.
The big idea (in one minute)
- Pruning reduces dense foliage where humidity lingers and pests hide.
- Sanitation removes infected material and prevents hitchhikers from moving around.
- Spacing improves airflow and light, which makes leaves less hospitable.
- Barriers block pests from reaching plants in the first place.
Mind map: mechanical + cultural controls
Mind map: Mechanical and cultural controls
Pruning: cut for airflow, not for aesthetics
What to prune
Prune to remove:
- Dead or dying tissue (it’s a dead-end for the plant and a welcome mat for problems).
- Leaves touching the soil (soil splash is a common disease messenger).
- Crossing branches that rub (wounds invite infection and create entry points).
- Overly dense interior growth that blocks airflow.
How to prune (simple rules)
- Make clean cuts. Ragged edges heal slower.
- Remove the problem part, not the whole plant unless the plant is clearly beyond saving.
- Thin gradually. If you remove too much at once, you stress the plant and reduce its ability to recover.
- Step back and check structure. You want light and air to reach the interior.
Timing examples
- Tomatoes and peppers: remove lower leaves that touch the soil and thin foliage when plants become crowded.
- Cucumbers and squash: manage vines so leaves don’t form a damp wall; focus on reducing leaf overlap.
- Fruit trees and shrubs: prune during appropriate dormant or active growth windows for your region; the key is to avoid leaving large wounds exposed for long periods.
Tool hygiene that actually matters
- Between plants: if you’re pruning anything that looks diseased, wipe or sanitize tools before moving to the next plant.
- Between varieties: if you’re working with multiple cultivars, treat each as its own “zone” to avoid accidental transfer.
A practical example: if you see powdery mildew on one plant, prune only the affected leaves, bag them for disposal, sanitize tools, then move on. You’re reducing the chance that spores hitch a ride on blades.
Sanitation: remove sources and stop hitchhikers
Sanitation is less about being squeaky clean and more about breaking the cycle.
What to remove
- Diseased leaves and stems as soon as you notice them.
- Spent plants at the end of the season.
- Weeds in and around beds, especially those that host the same pests.
- Fallen debris that stays wet and close to plant crowns.
Disposal choices (and why they differ)
- If you have hot compost that reaches high temperatures, many gardeners compost healthy plant material and some disease-free debris.
- If you don’t have reliable hot composting, bag and discard anything clearly diseased.
The reasoning is straightforward: some pathogens survive composting if the pile doesn’t get hot enough.
Hands and surfaces
- Wash hands or use gloves when moving from diseased plants to healthy ones.
- Clean stakes, trellises, and cages if they’re visibly contaminated.
A concrete scenario: you’re harvesting leafy greens. If you notice a patch of downy mildew, don’t keep brushing through the bed. Harvest from healthy sections first, then handle the affected area last, and clean tools afterward.
Spacing: give plants room to dry
Spacing is one of the most reliable controls because it reduces the time leaves stay wet and limits how easily pests move.
How to space correctly
- Use mature plant size, not the size at planting.
- Leave room for airflow paths: if you can’t see light through the canopy, airflow is probably limited.
- Avoid planting in tight clusters where leaves overlap constantly.
Layout examples
- Staggered rows: instead of straight lines that create a dense wall, stagger plants so air can move between them.
- Corner management: corners often trap humidity. If you have to plant near a fence or wall, choose varieties that tolerate airflow and prune to keep the interior open.
Mulch as a spacing partner
Mulch doesn’t replace spacing, but it helps by reducing soil splash. When rain or irrigation hits bare soil, it can fling spores onto lower leaves. A consistent mulch layer reduces that mess.
Barriers: block pests before they start the job
Barriers are most effective when installed early and maintained without gaps.
Types of barriers and what they’re good for
- Row covers (light fabric): help with flying pests like some moths and leaf-feeding insects.
- Netting: useful for larger pests such as birds and some fruit-eating insects.
- Collars: protect seedlings from soil-level pests.
- Physical exclusion around beds: can reduce access for crawling pests.
Installation details that make or break success
- Seal edges. If fabric touches soil loosely, pests can enter from the sides.
- Secure to the ground. Use clips, weights, or buried edges depending on your setup.
- Check regularly. Wind and plant growth create gaps.
Timing examples
- Seedlings: install collars or covers immediately after planting.
- Fruit crops: add netting before the first ripening stage when pests learn the route.
Tradeoffs to manage
- Pollination: if you use row covers on flowering crops, you may need to remove covers during bloom or use designs that allow pollinators access.
- Heat: covers can warm the microclimate. Ventilation and shade management matter on hot days.
Putting it together: a simple integrated routine
Here’s a practical workflow you can repeat without turning your garden into a full-time job:
- At planting: set spacing, install collars or early covers if needed.
- Weekly: scout the same areas (lower leaves, plant interiors, edges of beds).
- When you find issues: prune only the affected tissue, remove debris, and sanitize tools before moving on.
- After harvest: remove spent plants and fallen debris.
- Ongoing: keep weeds down so pests don’t get extra staging areas.
A quick example for gardeners growing tomatoes: you space plants for airflow, remove lower leaves that touch soil, prune interior growth once plants get bushy, sanitize pruners between plants if you see leaf disease, and use barriers early if you’re dealing with specific pests. Each step reduces a different pathway pests and pathogens use.
Quick reference: what to do when you see a problem
- Leaves look crowded or wet inside the canopy → thin and prune for airflow.
- You see diseased leaves → remove them promptly and sanitize tools.
- Plants are touching or overlapping constantly → adjust spacing next season and prune now to reduce contact.
- Pests appear to “arrive” from outside → add or improve barriers, especially at edges and entry points.
Mechanical and cultural controls work best when they’re consistent. One good pruning is helpful; repeated, targeted pruning plus sanitation and barriers is what keeps problems from becoming a habit.
7.4 Beneficial insects and habitat: practical ways to attract and retain them
Beneficial insects don’t “arrive” because you want them to; they stick around when the garden offers food, shelter, and the right microclimate. Your job is to make those three things easy to find and hard to leave.
What “beneficial” usually means in a garden
Most beneficial insects fall into one of three roles:
- Predators: eat pests (lady beetles, lacewings, hoverflies as adults; ground beetles as residents).
- Parasitoids: lay eggs in or on pest insects (tiny wasps that you rarely notice until you see fewer caterpillars).
- Pollinators and helpers: support flowering plants and overall ecosystem function (bees, some flies, butterflies).
You can’t manage all of them the same way. Predators often need prey nearby; parasitoids need host insects; pollinators need nectar and pollen.
Mind map: habitat components that keep beneficial insects around
Practical habitat moves that work in real gardens
1) Plant for nectar and pollen, not just for looks
Many beneficial insects feed on nectar as adults and need pollen to produce eggs. A common mistake is planting flowers only when you’re already harvesting vegetables. Instead, aim for a staggered set of blooms.
Easy examples:
- Early season: let a few plants flower before your main crop takes over. Even a small patch of flowering herbs can help.
- Mid season: choose flowers that keep producing as temperatures rise.
- Late season: keep something blooming after the first harvest wave.
If you’re growing mostly vegetables, you can still do this by adding a small “beneficial border” or a few flowering pockets inside beds.
2) Provide overwintering shelter without turning your garden into a landfill
Beneficial insects need places to survive cold months. You don’t need to leave everything messy; you need some protected habitat.
Easy examples:
- Leave leaf litter in a corner or under shrubs instead of raking it all away.
- Keep a few hollow stems standing through winter (then cut them back in spring).
- Maintain undisturbed soil edges where you don’t cultivate repeatedly.
A good rule: if you can still access your beds and paths, you can usually spare a small section for overwintering.
3) Add nesting and breeding options, especially for ground-dwellers
Some beneficial insects nest in the ground or in plant stems. Others use deadwood or crevices. You can encourage these behaviors with small, targeted changes.
Easy examples:
- Create a bare-soil patch (a few square feet) in a sunny, sheltered spot. Lightly rake it and avoid mulching over it.
- Leave dead stems standing for part of the year.
- Keep a small area of wood chips or coarse mulch where insects can move and hide.
If you use “insect hotels,” treat them as a bonus, not the foundation. The garden’s flowering and shelter matter more.
4) Make water accessible without creating mosquito breeding pools
Beneficial insects need water for drinking and humidity. A shallow setup works better than a deep dish.
Easy examples:
- Put a shallow tray with pebbles near a flowering area.
- Mist the soil surface lightly on hot days if your mulch is very dry.
Avoid leaving standing water that stays still for days.
5) Keep some prey nearby, but manage the balance
Predators and parasitoids often appear when pest pressure exists. That doesn’t mean you should ignore outbreaks; it means you should avoid wiping out every pest insect the moment you see one.
Easy examples:
- When you spot aphids, check whether lady beetles, lacewing larvae, or hoverfly larvae are already present.
- If you remove aphids, do it in a way that doesn’t eliminate all insects at once (for example, targeted removal from the most affected plants).
This approach supports beneficial populations while still protecting your crops.
How to attract specific groups (with simple cues)
- Hoverflies (adults): often show up around flowering herbs and small flowers. If you see them hovering near blooms, you’re already halfway there.
- Lady beetles: tend to appear when aphids are present. If aphids never show up, they may still visit flowers, but reproduction is less likely.
- Lacewings: adults like nectar; larvae hunt pests in sheltered areas. Leaf litter and mulch help larvae survive.
- Ground beetles: prefer cool, moist hiding places. Mulch and reduced tilling support them.
- Parasitic wasps: you usually won’t see them directly. You’ll notice their effect when caterpillars and aphids decline without obvious predator activity.
Use these cues to decide what to adjust. If you have flowers but no predators, you may need more shelter or a small amount of prey tolerance.
Retention: keep beneficial habitat stable through the season
Attraction is temporary; retention is about consistency.
Do:
- Keep flowering plants producing across the season.
- Maintain mulch cover so the soil stays moist and protected.
- Avoid mowing or clearing every patch at the same time.
Avoid:
- Broad-spectrum sprays that hit beneficial insects along with pests.
- Frequent deep cultivation that destroys overwintering sites.
A simple “beneficial habitat” checklist for your next bed
- At least one flowering pocket that blooms early, mid, and late.
- One small area left for leaf litter or stems to overwinter.
- Mulch kept consistent (no bare soil for long stretches).
- A shallow water source with pebbles.
- A plan for targeted pest response instead of whole-garden resets.
When these pieces are in place, beneficial insects don’t need to be “invited” repeatedly. They find the garden’s logic and stay for the same reason you do: it meets their basic needs.
7.5 Targeted organic controls and integrated approaches that minimize collateral damage
Regenerative gardening aims to keep the soil food web working while you handle pests. That means you treat “control” as a last step in a chain: prevent, monitor, intervene briefly and locally, then return to habitat-friendly conditions.
Start with a diagnosis, not a spray
Before choosing any organic control, confirm what you’re dealing with and where it’s happening.
- Match the symptom to the pest. Chewed leaves, stippling, webbing, sticky honeydew, and frass (droppings) point to different culprits.
- Check the plant’s “hot spots.” Look under leaves, along stems, and near new growth. Many outbreaks start small.
- Estimate severity. If damage is mostly cosmetic and predators are present, you may only need to adjust watering, spacing, or pruning.
A quick rule: if you can’t describe the pest in one sentence, you’re not ready to treat.
Use an integrated sequence: least disruptive first
Think of interventions as a ladder. Each step should be more targeted than the last.
- Cultural fixes (no sprays). Remove heavily infested leaves, adjust irrigation to reduce stress, and avoid excess nitrogen that encourages soft growth.
- Physical controls. Hand removal, pruning, barriers, and targeted spot treatments.
- Biological and habitat supports. Encourage beneficial insects and reduce conditions that favor the pest.
- Targeted organic products. Apply only to affected areas and only when monitoring shows they’re needed.
This sequence minimizes collateral damage because you’re not applying broad treatments “just in case.”
Mind map: decision flow for targeted organic control
Mind map: Pest → Control with minimal collateral damage
Targeted organic controls: what they do and what they risk
Organic doesn’t automatically mean harmless. Many “natural” products still affect non-target insects, especially when sprayed broadly.
1) Insecticidal soap (contact action)
- Best for: soft-bodied pests like aphids and some small insects when coverage is thorough.
- How to minimize collateral damage:
- Spray early morning or late afternoon to reduce exposure to active pollinators.
- Treat only infested leaves.
- Avoid spraying when beneficial insects are visibly active on the plant.
- Watch-outs: leaf burn can happen if plants are stressed or if temperatures are high.
Example: Aphids on a few kale plants. You rinse the worst clusters with a gentle stream, then spot-spray only the curled leaves with soap. Two days later, you scout again; if predators moved in, you stop.
2) Neem-based products (systemic-ish effects, but still targeted)
- Best for: pests where you need a longer window of action, often on chewing or sucking insects.
- How to minimize collateral damage:
- Use as a spot treatment, not a whole-bed routine.
- Apply when beneficial activity is lower.
- Don’t combine with other sprays unless the label allows it.
- Watch-outs: neem can affect some beneficial insects if applied directly.
Example: Whiteflies emerging on the underside of tomato leaves. You remove the most infested leaves, then apply neem to the underside of remaining affected leaves only. You avoid spraying flowers nearby.
3) Bt (Bacillus thuringiensis) for caterpillars
- Best for: specific caterpillars (not all “worms”). It works when pests ingest it.
- How to minimize collateral damage:
- Apply to plants where caterpillars are actively feeding.
- Use the correct Bt type for the target pest.
- Avoid spraying when caterpillars aren’t present; you’re wasting product and exposing non-targets.
- Watch-outs: it’s not a general cure for every leaf hole.
Example: Small holes on brassicas with visible young caterpillars. You check leaf undersides, then apply Bt to those plants. You recheck after a few days; if damage continues but caterpillars are gone, the pest ID was wrong.
4) Horticultural oils (smothering/contact)
- Best for: scale insects and some overwintering stages.
- How to minimize collateral damage:
- Apply when plants are not heat-stressed.
- Avoid spraying during peak beneficial insect activity.
- Target the infested stems and leaf surfaces.
- Watch-outs: oils can cause phytotoxicity if misapplied.
Example: Scale on a woody stem of a fruiting shrub in a container. You prune out the worst branch tips, then apply oil only to the affected stem sections.
Timing matters more than “strength”
Many collateral-damage problems come from spraying at the wrong time.
- Treat the pest’s vulnerable stage. Young aphids and early caterpillars respond differently than older, protected stages.
- Avoid peak pollinator hours. Even if you’re using an organic product, direct contact can still harm beneficial insects.
- Don’t spray on stressed plants. Heat, drought, and nutrient imbalance make leaf burn more likely.
Spot treatment and “leave the rest alone”
A regenerative garden is a living system. If you spray the entire bed, you remove predators and competitors across the whole area.
Use these tactics:
- Hotspot mapping: mark where pests cluster and treat only those zones.
- Selective pruning: remove a few heavily infested leaves instead of treating the whole plant.
- Staggered approach: treat one section, scout, then decide whether the next section needs intervention.
Example: Powdery mildew appears on a few cucumber leaves. You remove the affected leaves and improve airflow (trellis, spacing, watering at soil level). If needed, you use a targeted organic option only on the remaining affected leaves rather than coating the entire plant.
A simple scouting routine that supports targeted action
You don’t need lab work. You need consistent observation.
- Frequency: 2–3 times per week during active growth.
- Method: inspect the same plant types in the same order.
- Notes: pest presence, life stage (eggs/larvae/adults), and whether beneficial insects are present.
When you record what you see, you can stop repeating treatments that aren’t solving the actual problem.
What “success” looks like after treatment
After any targeted organic control, evaluate outcomes beyond “did the pest disappear.”
- Pest reduction: fewer individuals or less new damage.
- Beneficial survival: predators and parasitoids still show up on nearby leaves.
- Plant response: no widespread leaf burn, no new stress symptoms.
If pest numbers don’t drop, don’t automatically repeat. Re-check the pest identity and the coverage. Many failures are coverage or timing issues, not product choice.
Integrated example: aphids on an urban balcony
- Observe: aphids clustered on new growth of a few basil and pepper plants; ladybugs present on nearby leaves.
- Prevent: avoid over-fertilizing; water consistently.
- Physical: prune the most curled shoots.
- Targeted organic: spot-spray insecticidal soap only on infested shoots in the late afternoon.
- Scout: two days later, aphid numbers drop and ladybugs remain active.
- Stop: no further sprays because the system is regulating.
This approach keeps beneficial insects working and limits exposure of the rest of your garden to unnecessary inputs.
Quick checklist before you apply any organic control
- I can describe the pest and its location on the plant.
- I’ve checked for beneficial insects and I’m treating hotspots only.
- I’m applying at a time that reduces non-target exposure.
- I’m using the correct product for the pest’s life stage.
- I’ll scout again soon and adjust based on what I observe.
8. Nutrient Cycling and Feeding the Soil Food Web
8.1 Understanding nutrient availability: mineralization, immobilization, and timing
Regenerative gardening feeds the soil food web, but plants still need nutrients in forms they can actually take up. The tricky part is that nutrients move between “locked in organic matter,” “available in soil solution,” and “lost to the wrong place.” Two key processes—mineralization and immobilization—control that movement, and timing decides whether your plants benefit.
The basic nutrient journey (what plants can use)
Plants mainly absorb nutrients as ions in soil water (for example, nitrate \(\text{NO}_3^-\), ammonium \(\text{NH}_4^+\), phosphate \(\text{PO}_4^{3-}\), potassium \(\text{K}^+\), calcium \(\text{Ca}^{2+}\)). Many nutrients start out in organic forms (plant residues, manure, compost). Soil microbes break those organic compounds down, releasing mineral forms. That breakdown is mineralization.
At the same time, microbes can temporarily “grab” nutrients to build their own bodies. When microbes take up nutrients faster than plants can, nutrients become less available. That temporary holding pattern is immobilization.
Mind map: nutrient availability in one picture
Mineralization: turning organic nutrients into plant-usable forms
Mineralization is the microbial conversion of nutrients from organic matter into mineral forms.
- Nitrogen (N): Organic nitrogen in compost and residues is broken down into ammonium \(\text{NH}_4^+\). With oxygen present, some ammonium is further converted to nitrate \(\text{NO}_3^-\) by nitrifying bacteria.
- Phosphorus (P): Organic phosphorus is mineralized into phosphate, but phosphate availability also depends on soil chemistry (it can bind to minerals).
- Sulfur (S): Organic sulfur can become sulfate \(\text{SO}_4^{2-}\), which plants can use.
Mineralization doesn’t happen on a schedule you can set with a calendar. It responds to conditions:
- Moisture: microbes need water films around soil particles.
- Temperature: microbial activity rises with warmth (within a practical range).
- Oxygen: many steps work best in well-aerated soil.
Concrete example (mineralization in action): You top-dress a bed with finished compost in spring. Over the next couple of weeks, soil microbes start breaking down compost compounds. You often see steady growth without a sudden “hit,” because mineralization releases nutrients gradually as conditions stay favorable.
Immobilization: when nutrients get temporarily “borrowed”
Immobilization is not a failure; it’s a temporary trade. Microbes need nitrogen to decompose carbon-rich materials. If you add a lot of fresh, carbon-heavy material (think straw, wood chips, or high-carbon leaf litter) without enough nitrogen, microbes may pull available nitrogen from the soil solution to build their biomass.
The result is often:
- slower growth in plants that are nearby
- paler leaves (especially older leaves for nitrogen deficiency)
- a “why did my soil get worse after I added mulch?” moment
Concrete example (immobilization from fresh carbon): You lay down a thick layer of fresh wood chips around young seedlings. The chips start decomposing, and microbes ramp up. If the bed had limited nitrogen to begin with, seedlings may show nitrogen stress because microbes are using the available nitrogen first. The chips still help long-term soil structure, but the short-term nutrient balance can be off.
The carbon-to-nitrogen (C:N) idea—useful, not mystical
A common way to predict mineralization vs immobilization is the C:N ratio of the material you add.
- High C:N inputs (more carbon than nitrogen) tend to increase immobilization risk.
- Lower C:N inputs tend to support mineralization.
But C:N isn’t the only factor. Soil moisture, aeration, and how quickly material breaks down matter too. Still, it’s a practical tool for deciding how to apply amendments.
Rule of thumb for gardeners:
- For active crops (seedlings, fast-growing greens), prioritize materials that are already fairly decomposed (finished compost, well-aged manure, composted leaf mold).
- For paths and long-term mulch zones, carbon-rich materials are fine, because you’re not asking them to feed a hungry crop immediately.
Timing: matching nutrient release to plant demand
Even if mineralization is happening, plants only benefit when nutrients are released when they can be taken up.
1) Early season: avoid nitrogen lock-up
Early growth often needs nitrogen to build leaf area. If you add fresh carbon-rich mulch right next to seedlings, you can create a temporary nutrient shortage.
Practical approach:
- Start seedlings in a bed with compost already mixed or top-dressed.
- If you want wood chips, keep them on paths or use a thinner layer around plants, then let the system stabilize.
2) Mid-season: feed as roots expand and demand rises
As plants grow, their nutrient demand increases. Compost top-dressing and mulch management can support steady uptake.
Practical approach:
- Apply compost when plants are established enough to respond.
- Keep soil covered so mineralization doesn’t swing wildly between dry and wet.
3) Late season: slow down the “push”
Late in the season, many crops don’t need heavy nitrogen. Excess nitrogen can encourage lush growth that doesn’t match the crop’s finishing stage.
Practical approach:
- Use compost and mulch to maintain soil life, but avoid large nitrogen-heavy additions late when plants are trying to mature.
Mind map: timing decisions for common garden situations
How to tell which process is happening (without lab tests)
You can’t directly measure mineralization rate in a home garden, but you can observe patterns.
- Signs consistent with immobilization (often nitrogen-related): pale growth soon after adding fresh carbon; symptoms appear while plants are otherwise healthy.
- Signs consistent with mineralization lag: slow growth that improves after conditions stabilize (more consistent moisture, better soil contact, time).
- Signs consistent with nutrient loss or poor uptake: nutrient deficiency symptoms even though you added amendments; often tied to drainage issues, compaction, or dry spells.
Concrete example (distinguishing immobilization vs drought): You add straw mulch and seedlings pale. If the soil is also drying quickly and leaves are wilting, drought stress may be the main issue. If the soil stays evenly moist and only growth is pale, immobilization is more likely.
A simple “timing + input” checklist
Before you add compost, mulch, or amendments, ask:
- What stage is the crop in? (seedling vs established vs finishing)
- What is the input’s decomposition speed? (finished compost vs fresh chips)
- Is the bed staying evenly moist and aerated? (microbes need workable conditions)
- Where is the input placed? (near roots vs paths)
If you answer these, you’ll usually know whether your next input supports mineralization for the plants you’re growing—or whether it’s likely to cause a temporary immobilization detour.
Quick takeaway
- Mineralization makes nutrients available by converting organic forms into mineral ions.
- Immobilization temporarily reduces availability when microbes use nutrients to decompose carbon-rich material.
- Timing matters because plants only benefit when nutrient release lines up with their growth stage and your soil conditions.
8.2 Using compost and mulch as the primary nutrient source
If you want compost and mulch to do most of the feeding, the goal is simple: keep nutrients cycling through soil life while keeping roots in a stable, protected environment. Compost supplies nutrients and microbes; mulch slows losses and feeds the system over time. Together, they replace a lot of “fertilizer thinking” with “soil management thinking.”
What compost and mulch each do (so you don’t expect the wrong job)
- Compost = nutrient delivery + biology support. It adds partially decomposed organic matter, which releases nutrients gradually. It also brings microbes and improves soil structure, helping roots access water and minerals.
- Mulch = nutrient protection + gradual input. Mulch reduces evaporation, buffers temperature, and prevents erosion. As it breaks down, it contributes organic matter. It can also reduce weed pressure, which matters because weeds compete for nutrients.
A common mistake is treating mulch like instant fertilizer. Most mulches release nutrients slowly, so the “feeding” effect depends on breakdown and soil contact.
Mind map: how compost and mulch become a nutrient system
Mind map: Compost + mulch as the primary nutrient source
Step-by-step: build a compost-first feeding routine
1) Start with finished compost and use it where roots can reach it
Use finished compost (dark, crumbly, earthy smell) rather than half-decomposed material. Half-finished compost can tie up nitrogen while it continues breaking down.
Easy example (raised bed, spring):
- Before planting, spread 1–2 cm (about 0.5–1 inch) of compost over the top of the bed.
- Lightly mix it into the top 5–10 cm (2–4 inches) if you’re preparing new beds.
- Plant immediately so roots meet the compost-rich zone.
If you don’t want to mix, you can still top-dress, but expect slower results because nutrients must move downward through soil water.
2) Top-dress during the growing season
Top-dressing is how you keep nutrients coming without reworking the bed.
Easy example (tomatoes or peppers):
- Once plants are established (after early growth), apply compost as a thin layer around the plant.
- Keep compost a few centimeters away from stems to reduce the chance of rot and to avoid creating a soggy collar.
- Reapply every few weeks depending on growth and weather.
A practical rule: if plants look hungry (pale leaves, slow growth) and soil is dry, you’ll often get better results by watering first, then top-dressing lightly, rather than adding more compost on top of dry soil.
3) Use compost as a “cover crop for nutrients”
Compost works best when it stays in contact with soil moisture and soil organisms. That’s where mulch comes in.
Easy example (leafy greens):
- Apply compost before sowing.
- Add mulch after seedlings emerge and are established.
- The mulch reduces drying, so compost nutrients don’t get stranded in dry topsoil.
Mulch choices that support nutrient cycling
Mulch isn’t one product; it’s a strategy. Different mulches break down at different speeds.
- Leaves (leaf mold or shredded leaves): Break down relatively steadily and often integrate well with compost-based systems.
- Straw: Good for weed suppression and moisture retention; it decomposes slower than leaves.
- Wood chips / bark: Excellent for long-lasting cover, especially in paths and around perennials. They break down slowly, so they’re less reliable as the main nutrient source for heavy feeders.
- Grass clippings (used carefully): Can work well if applied thinly and allowed to dry slightly first; thick layers can mat and create anaerobic conditions.
Easy example (paths vs. crop beds):
- Use wood chips on paths to keep soil covered and reduce erosion.
- Use leaves or composted plant material on beds where you want faster nutrient cycling.
Thickness and placement: the “enough, not too much” approach
Mulch thickness affects both nutrient release and plant health.
- Too thin: soil dries quickly and weeds move in.
- Too thick: mulch can smother seedlings, slow warming in spring, or keep soil too wet.
Easy example (seedlings):
- Wait until seedlings are established before applying a full mulch layer.
- Start with a lighter layer, then increase once plants are sturdy.
Placement matters too. Keep mulch off the crown of plants and avoid piling it against stems. That simple habit prevents a lot of “why is this rotting?” problems.
Moisture: the hidden requirement for compost-and-mulch feeding
Compost and mulch don’t feed plants by magic; they feed soil life, and soil life needs moisture to do its work. In dry weather, nutrients can remain locked in organic matter.
Easy example (hot week during summer):
- If beds are mulched but growth stalls, check soil moisture under the mulch.
- Water deeply enough to wet the root zone, then let mulch do its job of slowing evaporation.
This is also why compost top-dressing works better when you’re not adding it onto bone-dry soil.
How to match compost-and-mulch feeding to plant needs
Not every plant has the same appetite.
- Heavy feeders (tomatoes, squash, corn): Usually need more compost input and more consistent moisture.
- Moderate feeders (most herbs, many leafy greens): Often do well with compost top-dressing plus a steady mulch layer.
- Light feeders (some legumes, many flowers): Can thrive with less compost, especially if you keep soil covered and avoid overfeeding.
Easy example (mixed bed):
- Put a slightly thicker compost layer in the zones for heavy feeders.
- Use a consistent mulch layer across the whole bed to maintain moisture and reduce weeds.
Troubleshooting: when compost-and-mulch isn’t doing enough
- Plants look pale and growth is slow: Often a moisture issue, insufficient compost rate, or compost that isn’t finished.
- Plants look lush but weak or prone to issues: You may be overdoing nitrogen-rich inputs or keeping soil too wet; adjust compost rate and watering.
- Weeds keep winning: Mulch may be too thin, applied too late, or placed where it doesn’t block light.
- Mulch seems to “sit there” without breaking down: Soil may be too dry, or the mulch type may be slow to decompose in your conditions.
A simple “do this” routine you can repeat
- Pre-plant: Add a thin layer of finished compost and mix lightly if preparing a new bed.
- Plant: Mulch after seedlings establish.
- Mid-season: Top-dress lightly with compost and keep mulch intact.
- Water: Water deeply enough to keep decomposition and root activity going.
- Adjust: If growth lags, correct moisture and compost rate before switching to more inputs.
When compost and mulch are managed as a system—nutrients in, losses reduced, soil life supported—you get steady feeding without constantly chasing symptoms. The garden still needs attention, but it becomes the kind of attention that improves the soil rather than just treating the next problem.
8.3 When and how to add supplemental inputs: manure, leaf mold, and mineral fertilizers
Regenerative gardening aims to feed the soil food web first, then let plants benefit from what’s already there. Supplemental inputs can help when the soil is temporarily short on nutrients, when you’re converting a neglected area, or when you need a fast correction. The key is to add the right material at the right time, in a way that supports biology instead of smothering it.
Mind map: choosing supplemental inputs
Manure: when it helps and how to apply it safely
Manure is nutrient-dense, but it’s also the most likely input to cause problems if used fresh. Fresh manure can burn roots, add weed seeds, and push nitrogen in forms that don’t match plant needs.
When to use manure
- Before planting or during bed establishment. A composted manure application gives time for nutrients to become available and for salts to mellow.
- When you’re building fertility in a new or depleted bed. If your soil is low in organic matter, manure compost can jump-start microbial activity.
- For heavy feeders, but not as a constant drip. Leafy greens and brassicas often benefit, yet repeated heavy applications can lead to lush growth with weaker structure.
What to use
- Use well-composted manure (often labeled composted or aged). It should look like dark, crumbly compost with minimal recognizable bedding.
How to apply
- Top-dress and mulch. Spread a thin layer on the soil surface and cover with mulch (straw, shredded leaves, or wood-chip-free options near stems).
- Avoid direct contact with seedlings. Keep manure compost a few inches away from young plant crowns.
- Incorporate lightly only if needed. For established beds, surface application is usually enough. Light mixing can help if the soil is very compacted, but deep tilling disrupts soil structure.
Example: spring bed reset (urban garden bed)
- You’re starting a 4x8 ft bed after winter weeds. You want tomatoes and basil.
- Apply 1/2 to 1 inch of well-composted manure across the bed surface, then cover with 2 inches of mulch.
- Wait about 1–2 weeks before transplanting, then plant. If you see vigorous leafy growth but few flowers later, you’ve likely overfed nitrogen—reduce future manure and rely more on compost and mulch.
Common mistakes to avoid
- Using fresh manure.
- Applying too close to seedlings.
- Treating manure as a substitute for mulch and cover crops.
Leaf mold: the slow worker that improves the whole system
Leaf mold is mostly carbon. It doesn’t behave like a quick fertilizer, but it improves soil structure, water retention, and microbial habitat. Think of it as a long-term “living bedding” for your soil.
When to use leaf mold
- Any time you need organic matter without pushing nutrients hard. It’s especially useful where you want steadier growth and fewer nutrient swings.
- For seedling and transplant support. Leaf mold can be mixed into potting blends or used as a gentle top layer.
- In beds where you want to reduce compaction and improve infiltration. It helps soil hold water and resist crusting.
How to apply
- Top-dress in thin layers. A light application works better than a thick blanket that stays wet and slow to integrate.
- Mix into planting holes for containers. For pots, blend leaf mold with your base mix rather than dumping it on top.
- Use as a mulch component. Shredded leaves and leaf mold can be layered under other mulches.
Example: container tomatoes without overfeeding
- Your container mix is decent but dries out fast.
- Mix 20–30% leaf mold into the potting base. Then top-dress with a 1/2 inch layer after transplanting.
- Use compost as the main nutrient source. If growth is pale, add a small supplemental mineral input (see below) rather than increasing manure.
Common mistakes to avoid
- Assuming leaf mold will fix nutrient deficiencies quickly.
- Applying thick layers that prevent oxygen from reaching the soil surface.
Mineral fertilizers: targeted corrections, not constant maintenance
Mineral fertilizers provide nutrients in concentrated forms. They’re useful when you need a specific nutrient at a specific time, but they can also bypass the soil biology you’re trying to support.
When to use mineral fertilizers
- After a soil test or clear, consistent deficiency pattern. Symptoms can be misleading, so look for patterns across multiple plants.
- Early in the crop cycle for establishment. Transplants often need a boost before roots fully explore the bed.
- When organic inputs are insufficient for the crop’s demand. For example, fruiting plants may require more potassium than compost alone provides.
How to apply mineral fertilizers
- Choose a targeted product. Look for formulations that match the nutrient you’re correcting (nitrogen-focused for leafy growth, phosphorus for early roots, potassium for flowering/fruiting).
- Use small doses and re-check. Start lower than the label rate, especially in rich compost beds.
- Apply where roots can access it. For in-ground beds, side-dress along the root zone and then water in. For containers, dissolve or mix according to label instructions and avoid dry, concentrated granules near stems.
- Pair with mulch and compost. Mineral inputs work better when the soil has organic matter to buffer moisture and support microbial processing.
Example: pale lettuce after transplanting
- You transplant lettuce into a bed that has compost and mulch, but leaves look washed out and growth is slow.
- Instead of adding more manure compost, apply a light nitrogen correction using a mineral fertilizer appropriate for edible greens.
- Water thoroughly after application.
- Reassess in 7–14 days. If color improves and growth resumes, stop there and let compost/mulch carry the next phase.
Example: fruiting plants and potassium timing
- Your tomatoes flower, but fruit set is weak and plants look stressed during hot spells.
- If your soil test indicates low potassium, apply a potassium-focused mineral fertilizer around the onset of flowering.
- Keep nitrogen moderate so plants don’t stay in “leaf mode.”
Mind map: timing and method
A practical decision checklist (use before you add anything)
- What problem are you trying to solve? Nutrient shortage, poor structure, or both.
- Is the soil already rich in compost? If yes, mineral inputs should be smaller and less frequent.
- What stage is the crop in? Establishment and flowering are different jobs.
- How will you apply it? Surface top-dressing supports biology; concentrated granules near stems can cause issues.
- How will you observe results? Pick one or two indicators (leaf color, growth rate, flowering/fruit set) and check after a reasonable interval.
Putting it together: a simple integrated approach
- Use leaf mold to improve structure and moisture stability.
- Use composted manure sparingly to add nutrients and organic matter during bed setup or when fertility is clearly low.
- Use mineral fertilizers only for targeted corrections, in small doses, timed to crop needs.
If you keep those roles distinct, your garden gets both the quick fixes it sometimes needs and the long-term soil improvement it’s built for.
8.4 Managing nitrogen and carbon balance to avoid stunting and excess growth
Plants need nitrogen (N) to build proteins and new tissue, and carbon (C) to build sugars, structure, and roots. In a regenerative system, those nutrients arrive mostly through compost, mulch, and cover crops. The trick is timing and balance: too much readily available nitrogen relative to carbon can push soft, fast growth that’s easier for pests to chew and harder for plants to support. Too little nitrogen (or too much carbon that ties up nitrogen) can stall growth and leave leaves pale.
The simple mental model: “food” vs “builders”
- Nitrogen = builders’ wages: without enough, plants can’t make proteins.
- Carbon = building material and energy: microbes use carbon to power decomposition.
- Microbes are the middle managers: when carbon-rich material is abundant, microbes multiply and may temporarily use available nitrogen to do the job.
That’s why the same compost or mulch can behave differently depending on how fresh it is, how thick you apply it, and what the weather is doing.
Mind map: nitrogen–carbon balance in practice
How to recognize the problem (without lab tests)
1) Excess nitrogen: fast leaves, weak structure
Common signs:
- Dark green leaves with thick, lush growth.
- Lots of vegetative growth but fewer flowers or fruit set.
- Plants that flop or stay tender.
- More chewing insects or sap-sucking pests showing up early.
Why it happens:
- Nitrogen is arriving faster than the plant can convert it into stable structure.
- Microbial activity may be high, but the plant’s growth pattern is skewed toward leaf production.
What to do:
- Pause nitrogen-heavy inputs for a few weeks.
- Increase carbon-rich cover moderately (not a blanket) to slow the nitrogen pulse.
- Prioritize potassium and phosphorus through compost rather than adding more N.
- Avoid deep, frequent tilling that re-releases nitrogen and disturbs soil structure.
Concrete example:
- Your tomato plants are producing huge leaves but no blossoms by mid-summer. You recently added a thick layer of fresh manure compost. Instead of adding more compost, top-dress with a thin layer of well-cured compost and add a light mulch (like chopped leaves) around the base, keeping mulch off the stem. Also stop any high-nitrogen feeding until flowering begins.
2) Nitrogen stalling: pale growth and slow expansion
Common signs:
- Older leaves yellowing first (often a nitrogen-related pattern).
- Stunted plants that don’t “take off” after transplanting.
- Slow leaf expansion even when watering is adequate.
Why it happens:
- Nitrogen is being tied up by carbon-rich materials that haven’t decomposed enough.
- The soil may be covered with a thick, fresh carbon source (wood chips, straw, or un-composted plant matter) without enough nitrogen to support microbial work.
What to do:
- Use compost that’s mature for the planting zone.
- Add a small nitrogen boost in a controlled way (for example, a thin compost top-dress) rather than dumping more carbon.
- Increase contact between soil and decomposing material (e.g., incorporate lightly in the top few centimeters where appropriate, or use “cut-and-drop” cover crops that break down faster).
Concrete example:
- You sheet-mulched a bed with thick straw and then planted greens. Two weeks later, growth is sluggish and leaves are pale. The straw is doing its job as a barrier, but it’s also asking microbes to work hard. Pull the straw back slightly around the seedlings, add a thin layer of cured compost directly on the soil surface, then reapply mulch more lightly. This keeps the weed suppression while reducing nitrogen immobilization.
Managing the balance with three levers
Lever A: Compost maturity and placement
- Fresh compost / manure compost: higher risk of nitrogen immobilization or uneven nutrient release.
- Cured compost: more stable, easier to use as a top-dress around active growth.
Practical rule:
- Planting and early growth: place compost closer to the root zone and keep it well-cured.
- Mulch layers: use carbon sources that are either chopped fine or already partially decomposed.
Lever B: Mulch type and thickness
Carbon-rich mulches are useful, but thickness matters.
- Too thick with fresh carbon can slow nitrogen availability.
- Moderate thickness with a compost “bridge” helps.
Practical rule:
- If you’re using a carbon-heavy mulch (straw, wood chips), keep it off the crown and consider a thin compost layer under it for the first growing cycle.
Concrete example:
- For carrots, you want consistent moisture and minimal disturbance. Instead of laying a deep wood-chip blanket, use a thinner layer of leaf mulch and keep the top layer light. Add compost in bands or a thin layer before planting so seedlings aren’t competing with microbes for nitrogen.
Lever C: Timing nitrogen to plant demand
Nitrogen demand rises as plants build leaves and roots.
- Feeding too early can lead to lush growth before the plant has the structure to support it.
- Feeding too late can leave plants stuck in slow growth.
Practical rule:
- Match nitrogen inputs to active growth phases: after transplant establishment, and again when plants are expanding canopy or forming stems.
A quick “balance check” routine for gardeners
Use this simple sequence every time you plan a feeding or mulch change:
- Look at growth stage: Are plants starting to expand leaves, or already producing flowers/fruit?
- Check leaf color pattern: Is yellowing happening on older leaves (possible nitrogen shortage) or are leaves very dark and lush (possible nitrogen excess)?
- Review recent inputs: Did you add fresh carbon (straw/wood) or nitrogen-heavy compost/manure recently?
- Adjust one lever at a time: change either the nitrogen input, the mulch thickness, or the compost maturity/placement—not all three at once.
Mini decision guide (what to change first)
| Situation | Likely imbalance | Change first | Why it works |
|---|---|---|---|
| Dark green, lots of leaves, few flowers | Nitrogen too high | Stop N-heavy inputs; thin mulch or add moderate carbon | Reduces nitrogen pulse and shifts energy toward reproduction |
| Pale leaves, slow growth after mulching | Carbon immobilizing N | Add thin cured compost near roots; lighten carbon layer | Supplies nitrogen where seedlings need it |
| Healthy growth but weeds explode | Not a nitrogen issue | Improve cover and mulch continuity | Weeds respond quickly to bare soil and light |
Example scenarios you can copy
Scenario 1: Leafy basil that won’t flower
- You used a nitrogen-rich compost and kept the bed bare between harvests.
- Fix: after harvesting, apply a thin top-dress of cured compost and keep mulch consistent. Avoid additional nitrogen until you see flowering begin.
Scenario 2: Broccoli seedlings under a thick wood-chip layer
- Growth is slow and leaves look washed out.
- Fix: pull mulch back around the seedlings, add a small band of cured compost, then reapply mulch at a lighter depth.
Scenario 3: Squash with vigorous vines and small fruit
- Leaves are huge; fruit set is inconsistent.
- Fix: reduce nitrogen inputs and focus on compost-based nutrients. Keep soil covered but avoid adding thick fresh carbon right at the base during fruiting.
Bottom line
Managing nitrogen and carbon balance is mostly about matching inputs to plant stage and controlling how fast microbes are asked to work. When growth is too lush, reduce nitrogen pressure. When growth stalls after carbon-heavy mulching, bridge the gap with mature compost near the roots. The garden will tell you which direction to adjust—your job is to change the smallest thing that makes the biggest difference.
8.5 Crop-specific feeding plans for heavy feeders, legumes, and fruiting plants
Regenerative feeding is mostly timing plus soil biology. The “plan” is how you match nutrient demand to what your compost and mulch can supply, without forcing plants into fast, fragile growth.
The baseline: what you’re feeding
- Heavy feeders (many leafy greens, brassicas, corn, squash) want steady nitrogen and potassium, plus enough calcium and magnesium to keep tissues sturdy.
- Legumes (beans, peas, clover) want phosphorus and potassium to support nodules and flowering, while nitrogen is mostly handled by the plant–microbe partnership.
- Fruiting plants (tomatoes, peppers, cucumbers, eggplant, melons) want a shift from vegetative growth to flowering and fruit set: nitrogen early, then more potassium and balanced calcium as fruits form.
A simple way to avoid mistakes: feed the soil cover first, then add small, targeted supplements only if growth or color shows you need it.
Mind map: feeding logic by crop type
Heavy feeders: a steady, soil-led plan
What to do before planting
- Lay down a compost layer: spread 1–2 cm (½–1 in) of finished compost over the bed and lightly mix into the top 5–10 cm (2–4 in) if you’re preparing new beds. If the bed is already well-covered, you can skip mixing and just mulch on top.
- Mulch immediately: cover with 5–8 cm (2–3 in) of straw, leaf mold, or shredded leaves. Keep mulch off direct contact with seedlings.
Why this works: compost supplies nitrogen slowly, while mulch stabilizes moisture so microbes can keep converting nutrients.
Side-dressing during growth
- For fast growers (lettuce, kale, chard, brassicas): side-dress once about 3–4 weeks after transplanting or when plants reach about half their mature size.
- Use ½–1 cm (¼–½ in) compost, or a thin band of compost along the row.
Easy examples
- Squash or corn in a small bed: compost at planting, then one side-dress when the canopy starts to knit together.
- Leafy greens in succession plantings: compost at each planting, then a light top-up after the first harvest cycle.
Signs you need to adjust
- Pale, slow growth: add a thin compost top-up. If you’re using compost sparingly, a small amount of well-finished compost tea can help, but the key is still soil moisture and mulch.
- Soft, floppy growth: you may be overdoing nitrogen. Reduce side-dress frequency and keep mulch consistent.
- Potassium deficiency (older leaves yellowing at edges, poor vigor): add compost plus a potassium-leaning amendment if you use one, but do it in small amounts and observe for a week.
Legumes: feed for nodules, not for leaf fireworks
Legumes are the one group where “more fertilizer” often means “fewer flowers.” If you give them lots of available nitrogen, they may reduce nodulation.
What to do at planting
- Use compost lightly: apply a thin layer (½–1 cm / ¼–½ in) and mulch.
- Prioritize phosphorus and potassium: if your soil is known to be low in these, incorporate a modest amount of mineral support at planting.
In-season feeding
- Avoid mid-season nitrogen boosts. If plants are growing but not flowering, check water consistency and sunlight before adding anything.
- If growth is weak and leaves are uniformly pale, a small compost top-up is safer than nitrogen-heavy inputs.
Easy examples
- Bush beans: compost at planting, mulch, then no further feeding unless plants look truly underpowered.
- Peas on a trellis: compost at planting plus a light top-up only if the first flush is delayed.
Signs you need to adjust
- Lots of leaves, few flowers/pods: likely too much available nitrogen. Stop feeding and keep watering even.
- Stunted growth with poor nodules: check soil conditions (compaction, waterlogging) and ensure phosphorus isn’t limiting.
- Yellowing that starts on older leaves: can be nutrient imbalance; compost top-up is usually a good first move.
Fruiting plants: shift from early nitrogen to later potassium and calcium
Fruiting plants are where timing matters most. The plant’s job changes: first it builds structure, then it invests in flowers and fruit.
Early stage (establishment to first flowers)
- Feed modestly: compost at planting plus mulch is usually enough.
- If you transplant, wait about 2–3 weeks before any extra feeding so roots can catch up.
Concrete example:
- Tomatoes: compost layer at planting, mulch, then a light side-dress only if leaves are pale or growth is clearly slow.
Mid stage (flowering to early fruit set)
- Increase potassium support: side-dress with compost once around the time you see the first clusters forming.
- Keep nitrogen steady but not high. Too much nitrogen here often means more leaves than fruit.
Late stage (fruit filling)
- Avoid late nitrogen: focus on consistent moisture and mulch. If you need a boost, use compost rather than nitrogen-heavy inputs.
Calcium and water: the practical combo
Blossom-end rot is often blamed on calcium, but the usual culprit is calcium transport failure caused by inconsistent watering.
- Keep soil moisture even.
- Maintain mulch thickness.
- Don’t let plants swing between dry and soaked.
Easy examples
- Peppers: compost at planting, then one compost side-dress at first flowering. After that, prioritize steady watering.
- Cucumbers: compost at planting, then a side-dress when vines start to set fruit. Mulch heavily because cucumbers hate drying out.
- Eggplant: compost at planting, then one mid-season top-up when buds appear.
A compact “when to feed” checklist
- Heavy feeders: compost at planting + one side-dress mid-season.
- Legumes: compost lightly at planting + no nitrogen mid-season.
- Fruiting plants: compost at planting + modest early feeding, then one potassium-leaning side-dress at flowering.
If you want one rule that prevents most problems: feed less often, but keep the soil covered and evenly moist. Plants respond better to stable conditions than to frequent “corrections.”
9. Regenerative Weed Control That Builds Soil Instead of Fighting It
9.1 Weed ecology basics: why weeds appear and what they indicate
Weeds aren’t random intruders; they’re plants that match the conditions you’ve accidentally provided. When you understand those conditions, you stop treating weeds like a personal failing and start treating them like a feedback system.
Why weeds show up in the first place
1) Weed seeds are already present. Many weed seeds wait in soil for years, then sprout when light, temperature, and moisture line up. If you disturb soil, you often bring buried seeds closer to the surface where they can germinate.
2) Bare soil is an invitation. Most weeds need access to light. When mulch is thin or gaps appear between plants, sunlight reaches the soil surface and triggers germination.
3) Disturbance creates “reset buttons.” Tilling, hoeing, and digging can break up soil crusts and expose fresh mineral soil. That combination is great for weed establishment because it’s also great for seed-to-soedling transition.
4) Water and nutrients can be uneven. Drip lines, compost placement, and foot traffic patterns create zones where moisture and fertility are higher. Weeds often cluster where conditions are easiest for them.
5) Plant competition is missing or weak. If your crop plants are small, spaced too far apart, or slow to cover the ground, weeds fill the gap. Fast ground cover and dense planting reduce the time weeds have to get established.
What weeds indicate about your garden
Think of weeds as “field notes” about soil cover, moisture, and disturbance. One weed species won’t diagnose everything, but patterns are useful.
- Weeds that thrive in disturbed soil (often annuals) usually indicate frequent soil disturbance or exposed ground.
- Weeds that tolerate dry conditions often point to inconsistent watering, poor mulch coverage, or compacted soil that sheds water.
- Weeds that prefer rich, moist soil suggest nutrient hotspots or areas where compost or irrigation concentrates.
- Perennial weeds often indicate established root systems that survive normal weeding. They usually require repeated, targeted management rather than one-time removal.
Mind map: Weed ecology in your garden
Weed ecology basics (mind map)
Concrete examples you can use immediately
Example A: The “hoe line” problem You notice weeds mainly along the row where you’ve been hoeing. That’s a clue: hoeing disturbs the top layer and exposes mineral soil. Even if you remove weeds today, you may be setting up tomorrow’s germination.
What to change: stop relying on repeated surface disturbance. Instead, mulch between plants and keep the crop canopy dense. If you must hoe, do it when weeds are tiny and before they set seed, then cover the soil afterward.
Example B: Weeds after compost spreading You spread compost, and within a couple of weeks weeds appear right where the compost went. Compost can contain viable seeds, and it also creates a moist, nutrient-rich surface that’s friendly to germination.
What to change: apply compost as a top-dress under existing plants, then cover with mulch to limit light. If you’re starting new beds, consider using compost in a way that supports cover crops or fast-growing plants so the soil surface isn’t exposed for long.
Example C: Dry patch weeds In a bed that dries out quickly, you see weeds that look tough and drought-tolerant. The pattern suggests that water isn’t reaching the soil evenly or mulch coverage is too thin.
What to change: increase mulch depth and check irrigation placement. If you use drip, ensure emitters are positioned to wet the root zone rather than only the surface edge.
Example D: Perennial regrowth after pulling You pull a weed, and it returns from the same spot with new shoots. That indicates a surviving root or rhizome system. Annual weeds usually disappear after their seeds are removed; perennials often require repeated weakening.
What to change: remove regrowth consistently and avoid letting it photosynthesize and store energy. Pair this with improved ground cover so the perennial has fewer opportunities to re-establish.
A simple way to “read” your weeds
Use a quick observation routine before you start removing anything.
- Map where weeds cluster. Note whether they’re in paths, near irrigation, around compost, or in bare corners.
- Note the growth type. Are they mostly small annuals, or do you see persistent regrowth from the same location?
- Check soil cover. Look for thin mulch, gaps between plants, or areas where you can see soil.
- Check disturbance history. If you recently tilled, dug, or heavily hoed, expect more germination.
If you do this for a week, you’ll usually see a pattern: weeds are concentrated where light and disturbance are highest, or where water and nutrients are uneven.
Mind map: “Weed clues” to management choices
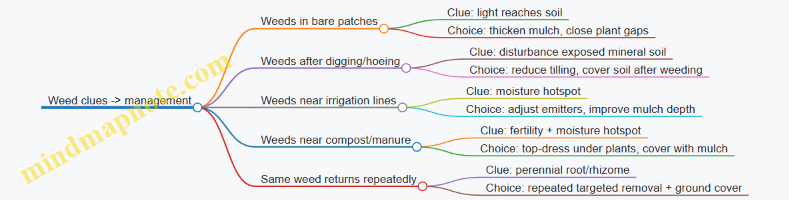
Weed ecology is less about memorizing species and more about noticing conditions. When you treat weeds as indicators of light, disturbance, moisture, and competition, your next action becomes clearer—and your weeding time usually gets shorter.
9.2 Prevention first: spacing, mulching, and continuous cover strategies
Prevention is the part of weed control you can plan once and benefit from all season. Instead of reacting to weeds after they’ve germinated, you reduce the chances they can get light, space, and stable soil conditions. Three tools do most of the work: spacing, mulching, and continuous cover.
Spacing: give crops the advantage before weeds show up
When plants are spaced so they close canopy quickly, weeds lose the light race. Spacing also affects airflow and soil moisture at the surface, which changes how easily weeds establish.
Practical spacing rules (use as starting points):
- Match spacing to mature size, not seed packet optimism. If a plant will spread, plan for it. Crowding later is harder than adjusting now.
- Prefer “slightly snug” over “generous.” For many vegetables, a modest reduction in spacing helps cover the soil sooner. If you see disease pressure, you can loosen next season.
- Group plants by canopy height. Put taller plants where they won’t shade everything, and use shorter plants to cover the ground.
Easy example: lettuce bed vs. bare soil
- Less effective: lettuce planted far apart, leaving visible soil between rows. Weeds germinate fast because light reaches the surface.
- More effective: lettuce planted closer within the row, with a thin layer of mulch between plants. The soil stays shaded longer, and fewer weed seedlings survive.
Urban and container note: In pots, spacing matters even more because the soil surface is small and weeds have fewer “escape routes.” If you leave gaps, weeds fill them quickly.
Mulching: block light, moderate moisture, and protect soil structure
Mulch is not just a blanket. It changes the surface environment where weed seeds try to sprout.
What mulch should do:
- Reduce light at the soil surface so seedlings can’t photosynthesize.
- Stabilize moisture so the top layer doesn’t repeatedly dry and re-wet, which can trigger more germination.
- Protect soil structure by preventing crusting and reducing erosion from watering.
Mulch types and when they fit:
- Organic mulch (straw, shredded leaves, wood chips): Great for paths and around established plants. It breaks down over time and feeds soil.
- Compost as mulch (thin layer): Works well for beds where you want nutrients and weed suppression together. Keep it thin enough that seedlings can emerge where you intend.
- Living mulch (cover crops): Useful when you want the “mulch” to be alive and actively protect soil.
How thick is thick enough?
- For straw or shredded leaves: aim for a layer that covers the soil so you can’t easily see it through the mulch.
- For wood chips: thicker layers suppress weeds well, but keep chips away from plant stems to avoid moisture trapping.
Easy example: tomato row with two mulching strategies
- Less effective: bare soil between tomato plants. Weeds establish early and become harder to remove once they’re rooted.
- More effective: mulch laid after transplanting and watered in. Weed seedlings that do appear are fewer and easier to pull because they’re not supported by a favorable surface.
Mulch placement tip: Leave a small gap around stems and crowns. This reduces the chance of rot and keeps the plant’s base from staying too wet.
Continuous cover: keep soil from ever becoming “open season”
Weeds are opportunists. They thrive when soil is exposed, disturbed, or left uncovered between plantings. Continuous cover means the soil is protected by living plants, mulch, or both.
Three ways to maintain continuous cover:
- Cover crops during off-seasons (or between crop cycles).
- Interplanting so ground cover is present while main crops grow.
- Succession planting so you don’t leave gaps after harvest.
Easy example: a bed that stays covered all year
- Spring: plant a fast ground-covering crop or use a living mulch approach.
- Summer: keep mulch on paths and between rows; use succession planting for quick re-occupancy.
- Fall: sow a cover crop immediately after harvest so soil isn’t bare.
Interplanting example (simple and practical):
- Plant a slower crop (like carrots) with a faster companion (like lettuce) that fills the space early. Harvest the fast crop before it competes too much, leaving the slower crop still supported by mulch and remaining cover.
A mind map of prevention-first weed control
Putting it together: a simple workflow for a new bed
Use this sequence so you don’t create the very conditions weeds love.
- Plan spacing before planting. Sketch rows or blocks and mark where plants will be at maturity.
- Prepare soil cover early. If you’re using mulch, plan where it will go so you can apply it right after planting or transplanting.
- Plant for quick ground coverage. Choose crop combinations that close the canopy sooner rather than later.
- Add continuous cover immediately after harvest. Don’t wait for “the next time you have time.” Bare soil is a weed invitation.
- Spot-check weekly. Prevention reduces weed numbers, not weed existence. Pull small seedlings while they’re easy.
Easy example: the “two-week gap” problem
- If you harvest a crop and leave soil bare for two weeks, you often get a flush of germination. Filling that gap with mulch or a quick cover crop prevents that flush.
Common mistakes that break prevention
- Mulching too late. If you wait until weeds are established, mulch becomes a cover for existing problems.
- Mulching too close to stems. Moisture trapped at crowns can cause rot and weak growth.
- Spacing for convenience, not canopy. If plants don’t close the soil surface, weeds will.
- Leaving bare soil between successions. Even short gaps matter.
Quick checklist for your next planting
- Are plants spaced for mature size and faster canopy closure?
- Will mulch cover the soil where you don’t want weeds?
- What covers the ground after harvest—cover crop, living mulch, or succession planting?
- Where will you pull seedlings if a few still appear?
When spacing, mulching, and continuous cover work together, weed control becomes less of a daily chore and more of a routine. The garden stays covered, the soil surface stays less hospitable, and the weeds you do get are usually small enough to handle without turning the bed into a wrestling match.
9.3 Mechanical methods that protect soil structure: hoeing depth, timing, and tools
Mechanical weed control works best when it treats soil like a living structure, not a blank canvas. The goal is simple: cut weeds early, disturb the soil as little as possible, and keep the surface covered so you don’t invite a fresh wave of germination.
The soil-structure rule of thumb
Soil structure depends on aggregates—small clumps held together by organic matter and biological activity. When you hoe too deep or too often, you break those clumps, which can lead to crusting, faster drying, and more weeds. A good mechanical routine aims for shallow, targeted cuts at the weed’s base, with minimal turning or pulverizing.
Hoeing depth: shallow cuts beat deep “cleaning”
A practical depth target is 0.5–1.5 cm (about 1/4–1/2 inch) for most hoeing in established beds. That’s enough to sever tiny seedlings and disturb only the top layer where weed germination happens.
- For newly emerged seedlings: stay near the surface. You’re aiming to slice stems, not work the soil.
- For slightly larger weeds: you may need a bit more depth, but avoid going deeper than necessary. If you can’t cut them at the surface, the weeds are already past the easy stage.
- Avoid “stirring” the bed: if you see soil crumbs and dust, you’ve gone too far. That’s a sign you’re breaking aggregates rather than just removing weeds.
Quick check: after hoeing, the surface should look like it was skimmed, not plowed. If you can rake it into a fine powder with one pass, you likely overdid the disturbance.
Timing: hoe when weeds are small and the soil is workable
Timing is where mechanical control becomes efficient instead of repetitive.
1) Hoe early, not often. The best time to hoe is when weeds are small enough to cut in one pass. If you wait until they’re established, you’ll need deeper cuts, more passes, and you’ll expose more soil.
2) Hoe when the soil surface is stable.
- Too wet: you’ll smear and compact, which harms structure.
- Too dry: you’ll create dust and break aggregates.
A workable compromise is when the top layer crumbles lightly rather than smearing. If you can press a small clump and it turns into a paste, wait. If it turns into dust, water lightly or wait for a better window.
3) Use weather timing to your advantage. After a light rain or irrigation, weed seedlings often emerge or become easier to cut. A short delay can help the surface firm up so your hoe skims rather than digs.
Tools: choose the one that matches the job and the bed
Different weeds and bed conditions call for different tools. The “best” tool is the one that lets you cut at shallow depth.
1) Stirrup hoe (slicing action):
- Best for: rows, narrow beds, and frequent light passes.
- Why it protects structure: the blade slices just under the surface rather than digging.
- Example: In a vegetable bed with 20–30 cm (8–12 inch) spacing, run the stirrup hoe between rows when seedlings are 1–3 cm tall. You’ll cut them without turning the soil.
2) Flat hoe (chopping action):
- Best for: thicker weed patches and slightly larger seedlings.
- Caution: it can dig if you angle it wrong or push too hard.
- Example: For a bed edge where weeds are a bit taller, use a shallow, quick swing. Keep the blade nearly parallel to the soil surface.
3) Scuffle hoe (wide, shallow cultivation):
- Best for: larger areas and paths where you want a consistent shallow skim.
- Example: For a 1 m (3 ft) wide bed, use the scuffle hoe to skim the top layer between plants after weeds appear, then follow with mulch to prevent regrowth.
4) Hand hoe or draw hoe (precision):
- Best for: around plant stems where you can’t risk cutting roots.
- Example: When weeds appear close to carrot tops or young lettuce, use a hand hoe with controlled depth rather than a long-handled tool.
5) Weed pullers and knives (targeted removal):
- Best for: a few stubborn weeds that are too large for shallow hoeing.
- Example: If a thistle or deep-rooted weed shows up, remove it fully by hand rather than repeatedly hoeing around it and disturbing the surrounding soil.
A simple mechanical routine that keeps soil intact
Use this pattern to avoid the “hoe, expose, reweed” cycle.
- Scout: walk the bed and identify weed size.
- Skim: hoe at 0.5–1.5 cm depth, aiming for one pass.
- Repeat only if needed: if you miss seedlings, do a second light pass within a few days.
- Cover immediately: after hoeing, apply mulch or ensure ground cover is present so the surface doesn’t become a seedbed.
If you hoe and leave bare soil, you’re basically giving weed seeds a head start.
Practical examples by garden situation
Example A: Vegetable bed with bare soil between rows
- Problem: weeds appear quickly after irrigation.
- Approach: use a stirrup hoe between rows at shallow depth when seedlings are tiny.
- Timing: hoe the day after a light watering when the surface is firm.
- Finish: add mulch between rows (or maintain a living mulch) so the surface stays shaded.
Example B: Newly planted bed with fragile seedlings
- Problem: hoeing too close damages crops.
- Approach: switch to hand tools for the crop zone and use a scuffle hoe only in the wider inter-row spaces.
- Timing: hoe before weeds reach crop height, not after.
- Finish: keep mulch thin but continuous to reduce new germination.
Example C: Pathways and high-traffic edges
- Problem: weeds establish in disturbed soil.
- Approach: use a scuffle hoe or flat hoe with shallow skimming.
- Timing: maintain a routine so weeds don’t get established.
- Finish: keep paths covered with appropriate material (mulch or ground cover) to reduce bare soil exposure.
Mind map: hoeing depth, timing, and tools
Common mistakes (and the fix)
- Mistake: hoeing after weeds are already tall. Fix: adjust your routine so you hoe at the seedling stage.
- Mistake: pushing the blade downward to “make sure.” Fix: practice a shallow skim and let the blade do the cutting.
- Mistake: hoeing and leaving soil bare. Fix: mulch or maintain ground cover right after mechanical control.
Mechanical control is at its best when it’s boring: shallow, timely, and followed by cover. That’s how you remove weeds without turning your soil structure into a fine, crust-prone surface.
9.4 Smothering and sheet mulching for beds and paths with practical steps
Bare soil invites weeds because it offers light, space, and a place for seeds to land. Smothering and sheet mulching work by removing that “invitation” while you build soil underneath. The key is coverage that blocks light, plus a top layer that stays put long enough for biology to do its job.
When to use smothering vs. sheet mulching
- Smothering (faster, temporary): Best for clearing a small patch of weeds before planting. You’re aiming for a short window of darkness, not a permanent landscape.
- Sheet mulching (slower, longer-lasting): Best for beds and paths where you want weed suppression plus soil improvement over time.
A practical rule: if you want to plant soon, smother. If you’re preparing a bed or path and can wait a bit, sheet mulch.
Mind map: Smothering & sheet mulching workflow
Materials that actually work
- Cardboard: Use plain brown cardboard or thick, uncoated boxes. Avoid glossy printing and tape when possible.
- Newspaper: Works if it’s plain and not heavily colored. Use multiple layers.
- Compost: Acts like a “bridge” between the weed-blocking layer and your plants.
- Mulch: Choose based on where you’re mulching.
- For beds: straw or chopped leaves are easy to manage.
- For paths: wood chips or coarse leaf mulch stay put and resist erosion.
If you’re using wood chips in a bed, keep them as a surface mulch and ensure there’s compost underneath so plants aren’t stuck in a nutrient-poor layer.
Step-by-step: Smothering a weedy patch (2–6 weeks)
- Mow or cut weeds low. You want the maximum surface contact with the cover.
- Water the area lightly. Moist soil helps the cover settle and encourages decomposition.
- Lay cardboard tightly. Overlap seams by at least 5–10 cm (2–4 in). Press it down so it touches soil.
- Weight the edges. Use rocks, soil, or landscape staples. Wind loves to lift corners.
- Top with a mulch layer. Add 5–8 cm (2–3 in) of straw or leaves. This prevents the cardboard from drying out and blowing away.
- Wait and check. Lift a corner after a couple weeks. If you see green growth, keep it covered longer.
- Plant into the cleared area. Cut holes through the cover and add a handful of compost into each planting spot.
Example: A 1 m² patch of dandelion and clover in a community garden.
- Cut weeds low, cover with two layers of cardboard, top with chopped leaves.
- After 4 weeks, plant lettuce and herbs by cutting holes and adding compost.
- Any weeds that pop up are usually from gaps; patch those immediately.
Step-by-step: Sheet mulching a bed (2–4+ months)
Sheet mulching is smothering with a longer timeline and a more soil-building payoff.
- Start with a clean, low surface. Cut weeds down. Don’t dig unless you must; digging can bring up new seeds.
- Add cardboard/newspaper in full coverage. Overlap edges and seams.
- Moisten the cardboard. A thorough watering helps it conform and speeds breakdown.
- Add compost as the planting layer. Spread 2–5 cm (1–2 in) of compost over the cardboard.
- Top with mulch.
- For beds: 5–8 cm (2–3 in) of leaves or straw.
- For paths: 7–12 cm (3–5 in) of wood chips or coarse leaf mulch.
- Leave it alone long enough. Don’t keep lifting it to “check.” Each lift invites light and breaks the system.
- Plant using cut-and-compost pockets.
- Cut a cross-shaped opening.
- Pull back mulch.
- Add compost directly to the planting hole.
- Plant and keep mulch a few centimeters away from stems.
Example: Converting a tired lawn edge into a perennial bed.
- Sheet mulch in early fall.
- By spring, the surface is calmer: fewer weeds, more earthworm activity, and easier planting.
- Plant perennials by cutting openings and adding compost pockets.
Step-by-step: Sheet mulching paths (for weed-free walking)
Paths are where you can be a bit more aggressive because you’re not trying to grow crops there.
- Define the path edges. A clear boundary prevents mulch creep.
- Remove vegetation at the surface. Mow low or scrape off the top growth.
- Lay cardboard across the whole path. Overlap seams.
- Top with coarse mulch. Use wood chips or thick leaf mulch.
- Maintain thickness. After heavy rain or wind, add more mulch where it thins.
Example: A narrow walkway between raised beds.
- Cardboard underlayer, then 10 cm (4 in) of wood chips.
- If weeds appear, it’s usually because the cardboard shifted or edges weren’t weighted.
How thick is thick enough?
- Cardboard layer: enough to block light completely. If you can see through it, it’s not doing its job.
- Mulch layer: thick enough to resist wind and rain.
If you’re dealing with persistent weeds, prioritize coverage quality (no gaps, good overlaps, weighted edges) over adding more layers of the same material.
Planting without undoing the system
- Cut openings, don’t peel back everything. Peel-back planting exposes soil to light and invites weeds.
- Keep mulch off stems. Direct contact can encourage rot in some plants.
- Add compost at the planting spot. Plants need a nutrient and moisture buffer; the cardboard layer is not that buffer.
Troubleshooting: what goes wrong and how to fix it
- Weeds appear quickly: You likely had gaps, lifted corners, or insufficient overlap.
- Fix: patch with additional cardboard and re-top with mulch.
- Mulch blows away: The top layer is too light or not anchored.
- Fix: increase mulch thickness and weight edges.
- Plants struggle after planting: You may have planted into a thin compost pocket.
- Fix: widen the cut opening and add more compost before planting.
Practical mind map: “Coverage checklist”
Coverage Checklist
- Light-blocking layer fully covers soil
- Seams overlap (no straight gaps)
- Edges are pinned/weighted
- Cardboard is in contact with soil
- Top mulch layer is thick enough to resist weather
- Planting uses cut holes + compost pockets
- Mulch is kept off plant stems
- Thin spots are re-covered after storms
Smothering and sheet mulching are simple in concept and picky in execution: the method works when the cover is continuous and the top layer stays put. Once you get the hang of overlaps, edges, and planting pockets, you’ll spend less time chasing weeds and more time building soil that behaves like it has a plan.
9.5 Handling persistent weeds safely with integrated, repeatable routines
Persistent weeds usually aren’t “bad luck.” They’re doing well because your system gives them what they need: light, bare soil, disturbed ground, and timing that favors their life cycle. The goal of a safe routine is simple: reduce weed opportunities without repeatedly harming soil structure or beneficial insects.
Start with a quick weed reality check
Before changing anything, spend 10 minutes observing. You’re looking for patterns you can act on.
- Where are they strongest? Along edges, in wheel tracks, under trellises, or in the center of beds?
- How do they spread? From seed (many small plants), from runners (creeping stems), or from underground storage (regrowth after pulling).
- When do they appear? Early spring flush, mid-summer, or after you disturb soil.
If you can’t identify the weed, treat it by behavior: seedling weeds respond well to prevention and shallow removal; creepers and rhizomes need repeated top removal plus smothering; taproot weeds need consistent cutting at the right depth.
The integrated routine: “prevent, interrupt, protect”
Use the same sequence every time you notice weeds. Consistency beats intensity.
-
Prevent light and bare soil
- Keep soil covered with mulch, living plants, or both.
- For vegetable beds, aim for continuous ground cover between crops.
- Example: If you harvest lettuce and leave bare soil for two weeks, you’ve basically scheduled a weed germination party. Add a quick cover crop or a thick mulch layer immediately.
-
Interrupt growth at the right moment
- Remove weeds when they’re small enough that you can pull or cut them without tearing soil.
- For persistent weeds, the key is repeated interruption. Every time you cut off the top growth, you force the plant to spend energy regrowing.
- Example: If you’re dealing with a creeping weed that re-sprouts after weeding, don’t “get it all once.” Plan to cut it back every 7–14 days during its active growth window.
-
Protect soil structure and biology
- Avoid deep hoeing and frequent tilling. Disturbance brings up new seeds and breaks soil aggregates.
- Use tools that match the job: a sharp hoe for seedlings, a narrow knife for spot removal, and a fork only when you truly need to lift roots.
- Example: In a bed with good structure, shallow surface work plus mulch beats digging out every last bit of root. You’re managing the system, not excavating a museum exhibit.
Mind map: persistent weed routine (repeatable)
Build a “weed calendar” that matches plant behavior
A routine works best when it aligns with the weed’s life cycle.
-
Seedling-heavy weeds (common in disturbed or uncovered soil):
- Check 2–3 times per week during germination periods.
- Remove small seedlings before they root deeply.
- Example: After rain, seedlings pop up overnight. A quick pass the next day prevents a week of weeding later.
-
Runner weeds (creeping stems):
- Focus on cutting the top growth and smothering the regrowth.
- Use a barrier layer in the worst patches (cardboard + mulch works well in many gardens).
- Example: If runners invade from a path edge, treat the edge as a separate zone: keep a thick mulch strip there and cut any runners that cross into beds.
-
Storage-root or rhizome weeds (regrow after pulling):
- Expect regrowth after removal.
- Plan repeated cutting at the same depth range so you remove the growing points.
- Example: If you pull and the weed returns, don’t assume you failed. You just collected a temporary victory. Keep cutting until the plant’s energy reserves run down.
Safe methods that scale from small to large patches
1) Spot removal with minimal soil disruption
- Use a narrow tool to cut weeds at the soil surface or slightly below.
- Only remove what’s in your way; don’t widen the disturbance.
- Example: In a crop bed, remove weeds in a 6–12 inch radius around each plant rather than clearing the whole bed bare.
2) Smothering for persistent patches
- Apply a thick mulch layer or layered cardboard where weeds are entrenched.
- Keep the cover in place long enough to prevent regrowth from reaching light.
- Example: For a patch of persistent weeds near a fence line, cover it and then plant into the cover using small openings. You’re turning a weed hotspot into a controlled zone.
3) Timing-based mowing/hand cutting
- If weeds are flowering or setting seed, cutting before seed formation prevents future germination.
- Example: If you can’t remove every weed in a large area, cut the area consistently before seed heads mature. You reduce the seed bank over time.
4) Mulch thickness that actually blocks light
- Thin mulch invites weeds. Thick mulch reduces the number of seedlings that can establish.
- Example: If you use a light layer of straw and weeds still appear quickly, add more material or combine mulch with living cover.
A repeatable weekly routine (simple and practical)
Week 1–2 (assessment + first interruption):
- Identify the top 1–2 weed trouble spots.
- Remove seedlings and cut back regrowth.
- Add mulch or plant cover where bare soil exists.
Week 3–6 (maintenance + smothering):
- Repeat the same check pattern: edges, then paths, then bed centers.
- Spot-treat regrowth immediately.
- Add barriers or thicker mulch only where needed.
After pressure drops (reduce effort without stopping):
- Keep soil covered.
- Do quick spot checks instead of full passes.
- Remove any new seedlings early.
Troubleshooting: when your routine isn’t working
- Weeds return quickly after removal: You likely removed tops but missed growing points, or the area is staying uncovered. Increase interruption frequency and improve cover.
- Weeds spread outward from a single edge: Treat the edge as a separate management zone with thicker mulch and consistent cutting.
- Weeds explode after you harvest: You’re leaving bare soil. Add a cover crop, living mulch, or immediate mulch.
- You’re digging more and weeds increase: Disturbance is bringing up more seeds. Switch to shallow cutting and coverage.
Quick examples you can copy
-
Example A: Persistent seedlings in a newly planted bed
- Mulch immediately after planting.
- Check twice weekly for 3–4 weeks.
- Remove seedlings when they’re small, using a hoe or hand tool without digging.
-
Example B: Creeping weed invading from a path
- Create a thick mulch strip along the path edge.
- Cut any runners that cross into the bed every 7–14 days.
- Smother the worst patch with cardboard + mulch if it keeps returning.
-
Example C: Storage-root weed that regrows after pulling
- Stop “one-and-done” pulling.
- Cut regrowth repeatedly at the same depth range.
- Keep the area covered so new shoots can’t photosynthesize.
A safe, integrated weed routine is less about heroic effort and more about timing, coverage, and repeatable interruption. When you manage the conditions weeds need—light, bare soil, and repeated disturbance—persistent weeds become manageable rather than mysterious.
10. Urban and Small-Space Regenerative Gardening Systems
10.1 Container soil design: structure, drainage, and moisture retention
Container gardening is soil engineering with plants attached. In-ground soil gets help from surrounding earth; containers don’t. So you design for three jobs: (1) structure so roots can grow and breathe, (2) drainage so water doesn’t turn into a stagnant puddle, and (3) moisture retention so you don’t irrigate every time you blink.
The container soil “jobs” (and what goes wrong)
- Structure (air + root space): If the mix compacts, roots struggle and oxygen drops. Plants may look “fine” for a while, then stall.
- Drainage (water out): If water can’t move through, you get chronic sogginess. Yellowing leaves and slow growth are common signs.
- Moisture retention (water in reserve): If the mix dries too fast, plants wilt even when you water “enough.”
A good mix balances these. Too much drainage material can dry out quickly; too much moisture-holding material can suffocate roots.
Start with the container: size and drainage hardware
Before soil, check the container.
- Drainage holes are non-negotiable. If you’re using a decorative pot, keep the plant in a nursery pot with holes, then set it inside the decorative one.
- Use a saucer carefully. Empty standing water after watering. Leaving it there invites root stress.
- Match pot size to plant behavior. Small pots dry fast and swing between wet and dry. Larger pots buffer moisture and reduce stress.
Quick rule of thumb
- Herbs and leafy greens: often do well in medium pots.
- Tomatoes, peppers, and fruiting plants: usually benefit from larger volumes to avoid constant watering.
Build the mix: a practical component approach
Think in layers of function rather than brands.
1) Base for structure
Use a quality potting mix as the foundation. It already has a texture designed for containers.
- Avoid “garden soil” in containers. It compacts and drains poorly.
2) Drainage and aeration
Add materials that create pore space.
- Perlite improves aeration and helps prevent compaction.
- Pumice or coarse sand can also help, but sand can be tricky in some mixes because it may pack depending on particle size.
A common target is enough aeration that the mix feels light and doesn’t slump into a dense mass when you squeeze it.
3) Moisture retention
Add water-holding components.
- Compost holds some moisture and adds biology.
- Coconut coir retains water and improves consistency.
- Worm castings add nutrients and help with texture.
If you’re growing in hot sun or very small pots, you may need more moisture retention than you think.
4) Optional: slow-release nutrition
Containers lose nutrients faster than beds because water drains through. You can add a small amount of well-finished compost and/or a controlled-release fertilizer if you prefer a steadier feeding schedule.
A few ready-to-use mix recipes (with reasoning)
These are starting points. Adjust based on your climate and pot size.
Recipe A: general-purpose container mix
- 2 parts potting mix
- 1 part compost
- 1 part aeration (perlite or pumice)
Why it works: compost improves moisture and fertility; aeration prevents compaction.
Recipe B: fast-drying balcony mix
- 2 parts potting mix
- 1 part coir (or compost)
- 1 part aeration
Why it works: coir increases water holding without making the mix heavy.
Recipe C: heavy feeders (tomatoes, peppers)
- 2 parts potting mix
- 1 part compost
- 1 part aeration
Then top-dress with compost during the season and feed as needed.
Why it works: these plants use water and nutrients quickly, so you want a mix that stays usable rather than turning into a dry, crusty brick.
Don’t do the “rocks in the bottom” myth
Putting gravel or rocks at the bottom of a pot can reduce the effective soil volume and doesn’t reliably improve drainage. Water still saturates the soil above, and roots still occupy that zone. If you need better drainage, focus on soil texture and drainage holes, not a rock layer.
How to test your mix in 60 seconds
Do a simple squeeze-and-drain test.
- Fill a container with your mix.
- Water thoroughly until it drains.
- Wait 10 minutes.
- Lift the container and feel the weight.
Then check the surface after a day.
- If it stays heavy for a long time: drainage is too slow or the mix is too dense.
- If it becomes very light quickly and the surface cracks: moisture retention is too low.
Adjust by adding more aeration (if too wet) or more compost/coir (if too dry).
Surface management: the part you can control daily
Even with a good mix, containers dry from the top.
- Mulch the surface with a thin layer of compost, shredded leaves, or fine bark (for non-edible ornamentals, bark is fine; for edible containers, keep it clean and not too thick).
- Avoid bare soil in full sun. Bare soil evaporates quickly.
A 1–2 cm mulch layer can reduce daily water demand without changing the root zone.
Watering behavior depends on mix design
A moisture-retentive mix doesn’t mean “water less forever.” It means the plant has a buffer.
- Water until you see drainage, then let the top portion dry slightly before watering again.
- For many containers, a practical check is: stick a finger 2–3 cm down. If it feels dry at that depth, it’s time.
Example setups (with what to watch)
Example 1: Basil in a 10–12 inch pot
- Use a general-purpose mix (Recipe A).
- Keep the surface lightly mulched.
- Basil is sensitive to drying; if leaves droop in the afternoon, increase moisture retention or pot size.
Watch for: yellowing from overwatering, or crispy edges from drying.
Example 2: Succulents in a shallow planter
- Use a potting mix with extra aeration.
- Keep compost minimal; focus on drainage and fast drying.
Watch for: soft, translucent leaves (too wet) versus shriveling (too dry).
Example 3: Tomatoes in a large container
- Use Recipe C.
- Don’t let the mix dry out repeatedly; it can lead to uneven growth and stress.
- Add compost top-dressing mid-season.
Watch for: slow growth and pale leaves (nutrient depletion) or persistent wilting (root stress from either dryness or soggy conditions).
Mind map: container soil design
Container Soil Design Mind Map
A simple checklist before you plant
- Pot has drainage holes.
- Mix includes aeration (not just compost).
- Mix includes moisture retention (not just airy materials).
- You can water thoroughly and the pot doesn’t stay heavy for hours.
- Surface is mulched to reduce evaporation.
When your container soil is designed this way, you stop fighting the environment and start managing it. The plants still do the growing, but you’ve given them a root zone that behaves like a real ecosystem instead of a waterlogged experiment.
10.2 Vermicomposting and bokashi for apartments and balconies
Apartment composting has two constraints that shape everything: space and odor control. The good news is that both vermicomposting and bokashi are designed for small volumes and indoor use. The better news is that you can choose based on how you want to handle food scraps—whether you prefer “slow and steady” (worms) or “ferment and seal” (bokashi).
Quick decision guide (practical, not theoretical)
- Choose vermicomposting if you want a continuous system that turns scraps into castings and you’re okay with managing bedding moisture and feeding schedules.
- Choose bokashi if you want a compact, low-odor workflow where scraps are fermented in a sealed container, then finished in soil or a larger compost system.
- Choose both if you have a balcony garden and want to ferment scraps indoors (bokashi) while using worms for a smaller, ongoing stream.
Vermicomposting in apartments: what you’re actually managing
A worm bin is a controlled habitat. You’re balancing four things:
- Bedding (carbon-rich material like shredded paper or coconut coir)
- Moisture (damp like a wrung-out sponge)
- Air (enough oxygen through ventilation holes and gentle fluffing)
- Food input (small, frequent amounts to avoid souring)
Setup essentials (small footprint)
- Bin type: A stackable worm bin with a drain spout for liquid collection is convenient.
- Location: A stable indoor spot away from direct sun and heat vents.
- Ventilation: Keep airflow paths clear; worms dislike stagnant, wet conditions.
- Drainage: Use a tray or catchment for any liquid so you don’t end up with a mystery smell.
Bedding and moisture: the “wrung sponge” rule
Start bedding slightly damp. If it drips when squeezed, it’s too wet. If it feels dry and crumbly, add water gradually. Bedding that stays consistently damp but not flooded helps worms move and reduces anaerobic pockets.
Feeding schedule: small amounts beat big dumps
Worms can process food, but they need time and a steady pace. A simple approach:
- Feed a small amount every few days.
- Bury scraps under fresh bedding so they’re not exposed to oxygen and fruit flies.
- If the bin smells strongly sour or like rotten food, reduce the next feeding and add dry bedding.
What to feed (and what to avoid)
Good candidates:
- Fruit and vegetable scraps (chopped)
- Coffee grounds and filters (paper filters are fine)
- Crushed eggshells (sparingly)
Use caution:
- Very watery scraps (like large amounts of melon) can overwhelm moisture balance.
- Oily foods can slow down processing and attract pests.
Avoid:
- Meat, dairy, and greasy leftovers. They tend to create odor and invite unwanted organisms.
Harvesting castings: keep it simple
Castings are the end product. In a small apartment bin, you can harvest by:
- Moving food to one side for a couple of weeks, then collecting castings from the other side.
- Screening if you want a finer texture for container plants.
Liquid from the drain is often called “worm tea.” If you collect it, treat it as concentrated. Use it diluted on soil, not as a direct leaf spray.
Balcony vermicomposting: managing temperature swings
Balconies can be cooler at night and hotter in sun. Worms prefer moderate temperatures. If your balcony gets strong sun, place the bin in shade and insulate the sides with a breathable wrap (not airtight plastic). In cold weather, keep the bin closer to the building wall where temperatures are steadier.
Mind map: vermicomposting for apartments
Bokashi on a balcony or indoors: the sealed fermentation workflow
Bokashi is a fermentation process using bran inoculated with beneficial microbes. Instead of relying on worms to break down food, you ferment scraps in a sealed container. The container design matters because the process is meant to be mostly sealed.
What you need
- A bokashi bucket with a tight lid and a spigot for liquid
- Bokashi bran (the inoculated material)
- A place to store the bucket (balcony corner or indoors)
How to use it (step-by-step)
- Add a thin layer of bran to the bottom.
- Add scraps in small batches, pressing them down.
- Cover scraps with bran until the surface is evenly coated.
- Drain liquid periodically using the spigot.
- Repeat until the bucket is full.
- Finish the contents in soil by mixing into garden beds or a larger compost system.
The key is the layer of bran. It reduces odor and keeps the fermentation controlled. If you skip the covering step, you’ll likely get smell and slower processing.
What to feed
Bokashi handles a wider range of scraps than worm bins, including:
- Cooked leftovers in small amounts
- Meat and dairy in limited quantities (still keep portions reasonable)
Even with bokashi, avoid dumping huge amounts at once. Small additions keep the fermentation consistent and reduce mess.
Liquid management
Bokashi liquid can be collected through the spigot. It’s typically acidic and concentrated, so it should be diluted before use on soil. If you’re using it on container plants, start with a conservative dilution and apply to soil, not leaves.
Mind map: bokashi for apartments and balconies
Concrete examples: two apartment routines
Example A: Worm bin for a weekly cooking pattern
- Monday: add a small handful of chopped vegetable scraps, bury under bedding.
- Thursday: add coffee grounds and a few fruit peels, cover with bedding.
- Saturday: check moisture. If bedding looks dry, mist lightly; if wet, add dry shredded paper.
- Sunday: harvest a small amount of castings from the side that’s finished.
This routine works because inputs are predictable and the bin never gets overwhelmed.
Example B: Bokashi for a small household with lots of mixed leftovers
- Each day: add scraps to the bucket, press down, and cover with bran.
- Every 2–3 days: drain liquid into a container.
- When the bucket is full: move the fermented contents to a balcony planter or a dedicated soil area and mix in.
This routine works because the sealed bucket handles mixed food without turning your living space into a compost experiment.
Troubleshooting that actually helps
- Worm bin smells bad: Usually too wet, too much food at once, or poor airflow. Reduce feeding, add dry bedding, and gently fluff to restore oxygen.
- Worm bin has fruit flies: Scraps aren’t buried deeply enough or the surface is exposed. Cover with bedding every time.
- Bokashi smells strongly unpleasant: The lid may not be sealed well, or scraps weren’t covered with bran. Check the seal and keep the bran layer consistent.
Choosing between them for your balcony garden
If you want the simplest indoor workflow with minimal fuss about moisture and airflow, bokashi is often easier to keep consistent. If you want a system that produces castings you can use directly for container soil, vermicomposting is a good fit—especially once you find the feeding rhythm that matches your household.
Either way, the goal is the same: turn scraps into something useful while keeping your living space clean, quiet, and odor-controlled.
10.3 Rooftop and balcony water management: wind, heat, and runoff control
Rooftops and balconies dry out fast, then dump water where you least want it. The goal is simple: keep water in the root zone longer, slow wind-driven evaporation, and prevent runoff from carrying soil and nutrients off the site.
Start with a quick site read (5 minutes)
Before changing anything, observe three things during a typical watering or rain event:
- Wind direction and speed: Watch which side dries first and where spray lands.
- Heat pockets: Note where surfaces radiate heat (often near walls, railings, and dark planters).
- Runoff path: After watering, check where water exits the container area or balcony surface.
A balcony that “looks level” can still shed water toward one corner. That corner becomes your design target.
Mind map: Rooftop/Balcony water management
Mind map: Rooftop and balcony water management
Wind: stop evaporation and stop spray
Wind is the fastest way to turn “enough water” into “water that never reached roots.”
1) Reduce exposed soil area
Bare soil is a drying machine. Use one or more of these:
- Living cover: Low groundcovers in large planters or between pots.
- Mulch layer: 1–2 cm of straw, shredded leaves, or coarse compost on top.
- Dense planting: In vegetable containers, avoid leaving long gaps between plants.
Example: On a balcony with herbs in individual pots, add a thin mulch layer and group pots closer together. The microclimate between pots stays cooler and less windy.
2) Choose irrigation that doesn’t fight the wind
- Prefer drip or soaker hoses over spray nozzles.
- If using a watering can, pour slowly at the soil surface, not from above.
- Avoid misting systems; they lose water to drift.
Example: A rooftop with strong afternoon gusts: switch from a handheld sprayer to a narrow-tip watering can. Watering time may increase slightly, but soil moisture lasts longer.
3) Add wind buffering without blocking light
Windbreaks work best when they reduce airflow near the plants, not when they create a dark wall.
- Temporary screens (shade cloth or lattice) placed on the windward side.
- Tall plants as buffers only if they don’t shade everything.
Example: Place a trellis with climbing beans on the windward edge of a planter row. The plants still get sun, but the soil surface sees less direct gusts.
Heat: keep containers from cooking the root zone
Heat affects both evaporation and water-holding capacity. Containers heat up faster than ground soil.
1) Use pot materials and colors strategically
- Light-colored containers reflect heat.
- Insulated sleeves (or wrapping with breathable insulation) reduce temperature swings.
- Avoid thin, dark plastic in full sun when possible.
Example: If you have two identical herb pots, swap the dark one for a light one. You’ll usually notice the dark pot needs water sooner even with the same mix.
2) Improve the mix for water retention—without turning it into mud
A good rooftop/balcony mix holds water but still drains. Aim for:
- Organic matter (compost) for water holding
- Mineral structure (perlite/pumice or similar) for drainage
- Avoid over-saturating with too much fine peat-like material
Example: If your containers dry out in a day, add compost and a water-holding amendment in small increments rather than replacing everything at once. Then observe for a week.
3) Mulch and surface shading
Mulch reduces evaporation and buffers temperature.
- Apply after the soil is evenly moist.
- Keep mulch away from plant stems to reduce rot risk.
Example: In summer, a 1–2 cm mulch layer under tomato cages can cut the frequency of watering compared with bare soil.
Runoff control: keep water and soil where they belong
Runoff is not just a mess; it can carry nutrients and fine soil off the balcony or rooftop.
1) Plan for drainage before you plan for plants
Many balconies have a drainage system. Containers should be managed so water exits predictably.
- Use drip trays or saucers where allowed.
- Ensure trays can be emptied safely.
- Avoid letting water pool against building surfaces.
Example: For a rooftop with limited drainage, use deep saucers under large pots and empty them after watering. This prevents constant saturation and reduces the chance of nutrient-rich water leaving the system.
2) Slow the water down at the soil surface
Fast pouring can cause channeling and runoff.
- Water in short cycles: apply, wait 5–10 minutes, then apply again.
- Keep the water stream gentle and close to the soil.
Example: Instead of filling a 20-liter container in one go, water in two rounds. You’ll see less runoff and more even moisture.
3) Use berms or edging to prevent soil washout
If you’re using raised planters or large tubs, add a simple barrier:
- Raised lip on planter edges
- Landscape fabric under mulch (only if it doesn’t block drainage)
- Coarse top layer (like bark chips) to reduce surface erosion
Example: On a windy rooftop, a coarse mulch layer on top of a compost-rich mix can prevent the “soil cap” from blowing or washing away.
4) Capture and reuse water carefully
If you can capture runoff from trays, reuse it for the same containers after it settles.
- Avoid reusing water that looks muddy or contains lots of soil.
- Don’t reuse water that may be contaminated.
Example: After watering, let tray water sit for 10 minutes. Pour off the clearer portion back into the container mix, leaving sediment behind.
Practical irrigation approach for small spaces
Drip setup that works
- Place emitters close to plant roots.
- Use a timer if you’re away, but test first.
- Check for clogged emitters and uneven flow.
Example: A balcony herb box: install 2–4 drip emitters along the length of the box rather than one emitter in the center. Plants near the edges often dry first.
Scheduling that matches plant needs
- Water earlier in the day to reduce evaporation.
- Use short, frequent watering during heat waves rather than one long soak.
Example: In midsummer, a container that normally needs water every two days may need a top-up every day. A quick morning cycle keeps roots stable.
Monitoring: simple checks that prevent guesswork
1) Finger test
Insert a finger 3–5 cm into the soil. If it feels dry at that depth, watering is needed.
2) Weight check (surprisingly effective)
Lift the container when fully watered, then again after a day. You’ll learn your container’s “dry weight.”
Example: If a pot feels noticeably lighter after 24 hours, you can adjust watering frequency without waiting for wilting.
3) Watch plant signals, but don’t wait for them
Leaf droop can mean heat stress, but it can also mean overwatering. Use soil checks first.
Quick checklist for a rooftop/balcony water plan
- Soil surface is covered (mulch or living cover)
- Irrigation is directed to soil (drip/soaker or gentle pour)
- Containers are protected from direct wind where possible
- Containers are insulated or light-colored in strong sun
- Runoff path is controlled (trays/saucers/planter edging)
- Watering is done in cycles to reduce runoff
- You can measure moisture with a finger test or weight
When wind, heat, and runoff are handled together, rooftop and balcony gardens become easier to manage. The plants still do the growing; you just stop the water from getting lost on the way.
10.4 Vertical growing and trellising to maximize cover and reduce bare soil
Bare soil is a magnet for weeds and a slow leak for water. Vertical growing helps you keep living cover on the ground by moving leaves upward, while trellising keeps plants upright so they can shade the soil instead of sprawling into it.
Why vertical growth reduces bare soil
When plants sprawl, they often leave gaps between stems and rows. With trellises, you can train vines and climbing plants into a predictable “leaf wall,” which:
- reduces open ground between plants,
- improves airflow around foliage (less time wet, fewer disease problems),
- makes harvesting easier, so you’re more likely to keep plants pruned and productive.
A simple rule: if you can’t reach the middle of the bed comfortably, you’ll skip harvests, and the plants will sprawl. Trellises fix that by bringing the work to you.
Choose a trellis style that matches your crop and space
Pick the trellis before you plant so you can place it where it won’t shade other plants too much.
Common options (and what they’re best at):
- A-frame (leaning “ladder”): Great for peas, beans, and cucumbers. Strong and easy to tie into.
- String trellis (posts + lines): Good for small spaces and for training multiple plants in a tight footprint.
- Trellis fence or wall panel: Works well for vining crops and for creating a living screen.
- Cage/hoop trellis: Useful for tomatoes (with cages) or for heavy-fruiting vines where you want support all around.
If you’re growing in containers, use a short, sturdy trellis rather than a tall one. Wind and tipping are real, and a stable structure keeps plants from breaking and leaving messy, bare patches.
Mind map: trellising decisions that prevent bare soil
Training basics: guide the plant early, then manage the mess
Most trellising failures come from waiting too long. Vines are flexible at first; later they become stubborn and break when you try to redirect them.
A practical training sequence (works for most climbers):
- Install trellis at planting time. Don’t plant first and “figure it out later.”
- Start with one main stem (or a few, depending on the crop). Tie it loosely so it can thicken.
- Guide tendrils or stems toward the trellis lines every few days.
- Prune to prevent crowding once the plant reaches the top. Crowding creates dense foliage that shades itself and leaves the ground less covered.
Tie material matters. Use soft ties (fabric strips or plant ties) and check them weekly. A tie that tightens as stems grow can cut through tissue and create a bare, damaged zone.
Spacing and layout: trellis plants should still “fill the bed”
Vertical growth doesn’t mean you can plant sparsely and call it done. You want enough plants to close the gaps.
Bed layout approach:
- Put trellised crops in a single row or two narrow rows facing the trellis.
- Keep mulch under and between them.
- Add low ground cover between trellis zones (more on this below).
Example: peas on an A-frame in a 4 ft (1.2 m) wide bed
- Plant peas in a single row centered on the trellis.
- Add a strip of mulch 12–18 in (30–45 cm) wide under the trellis.
- Between the pea row and the bed edges, plant a low cover crop or fast ground cover (like a short-lived leafy plant) to keep soil covered after pea harvest.
This setup keeps the soil covered during the pea season and prevents the “empty middle” problem after harvest.
Pair trellised crops with ground cover plants
Trellising moves leaves upward, but the ground still needs coverage. Use a two-layer strategy: mulch + living cover.
Good pairings (easy to manage):
- Trellised beans + quick leafy cover in the gaps.
- Cucumbers on strings + low herbs or lettuce along the edges.
- Peas on trellis + succession greens once peas are done.
Choose ground cover plants that won’t tangle with the trellis crop. If they sprawl into the trellis, you’ll spend your time untangling instead of harvesting.
Training patterns that maximize shading
You can train vines in different ways to control where leaves land.
1) Single-line training (tight and tidy):
- One stem per line.
- Best for string trellises and narrow beds.
- Leaves form a vertical sheet; ground stays mostly shaded by mulch and any companion cover.
2) Fan training (wider leaf spread):
- Several stems spread across a frame.
- Useful for cucumbers or climbing beans where you want more leaf area.
- Requires more pruning to avoid a knotty canopy.
3) Zig-zag training (for A-frames):
- Guide stems to alternate sides.
- Helps balance leaf load and reduces one-sided shading.
Example: cucumbers on an A-frame
- Tie the first stem to the center.
- As it grows, guide it to one side, then the other.
- Once it reaches the top, prune back so the plant doesn’t drop long, messy vines that leave the soil exposed.
Container and balcony trellising: keep it stable and covered
Vertical growing in containers is often limited by two things: root volume and wind.
Container tips that directly affect bare soil:
- Use bigger pots than you think you need. Small pots dry fast, and stressed plants drop leaves, which reduces ground shading.
- Add mulch on top of container soil (even a thin layer). It reduces evaporation and keeps the surface from turning into a weed seedbed.
- Anchor trellises firmly. A wobbling trellis causes broken stems and messy growth.
Example: balcony beans in a 5-gallon container
- Install a short trellis at planting.
- Train one main stem upward.
- Keep the soil surface covered with mulch and a small companion plant at the rim (or a dense top layer of living cover if your climate allows).
Mind map: training and pruning to prevent gaps
Troubleshooting: what to change when coverage drops
- Vines keep falling to the ground: You waited too long or the trellis is too far from the plant. Re-train early next time; for now, gently guide and prune to reduce weight.
- Leaves are dense but soil is still bare: The plant is shading itself. Prune to open the canopy and redirect growth upward.
- Plants look healthy but weeds appear: Your living cover isn’t closing gaps. Increase mulch thickness and add a low companion or succession planting.
Vertical growing works best when it’s treated as a system: structure, training, spacing, and ground cover all have to cooperate. When they do, your bed stays productive and the soil stays busy—without you spending your weekends wrestling vines.
10.5 Community and shared spaces: coordinating compost, water, and habitat
Shared gardens work best when the “shared” part is defined clearly. People don’t need the same tasks, but they do need the same rules: what goes where, who checks what, and how decisions get made when something breaks.
Start with three shared goals (and one shared map)
Pick goals that everyone can see in the real world:
- Compost goal: reliable processing of organics with predictable output.
- Water goal: less runoff and fewer dry spells through capture, storage, and efficient use.
- Habitat goal: more beneficial insects and more stable ground cover.
Then make one simple shared map of the site showing:
- compost area(s)
- water sources, hoses, and irrigation lines
- planting zones (including paths)
- “no-go” zones (where dumping or watering is not allowed)
A map prevents the most common coordination failure: people doing good work in the wrong place.
Mind map: roles and systems
Community Garden Coordination Mind Map
Coordinating compost: make the system hard to misuse
Compost coordination is mostly about reducing ambiguity.
1) Define “allowed” and “not allowed” in plain language. Example signage (posted at the collection point):
- Allowed: fruit/veg scraps, coffee grounds, dry leaves, shredded cardboard (if no glossy coating)
- Not allowed: meat, dairy, oily foods, pet waste, weeds with seeds, treated wood
2) Use a two-stream approach if the group is busy.
- Stream A (fast): kitchen scraps + browns collected daily.
- Stream B (slow): leaves and dry material collected weekly.
This keeps the pile from becoming a wet, smelly bucket when someone forgets to add browns.
3) Assign a “compost check” routine. A weekly 10-minute check is enough for most community setups:
- Is it too wet? Add dry leaves/cardboard.
- Is it too dry? Add water while turning.
- Does it smell sour? Increase browns and aerate.
- Is it heating? Turn if needed and note progress.
4) Decide how finished compost is distributed. Example rule: finished compost goes to “soil improvement zones” first (paths, heavy-feeding beds, new plantings). Individual plot owners can request compost, but the group keeps a log so the supply doesn’t disappear.
5) Keep tools and materials together. A shared compost station should include: pitchfork/shovel, a small bin for browns, a hose with a shutoff, and a thermometer if you want one. When tools are scattered, the system becomes optional.
Coordinating water: treat it like plumbing, not a vibe
Water coordination fails when people assume “someone will turn it on” or “the hose is for everyone.”
1) Divide the site into irrigation zones. Example zones:
- Zone 1: newly planted beds (more frequent watering)
- Zone 2: established beds (less frequent)
- Zone 3: paths and ground cover (usually minimal)
- Zone 4: compost area (only as needed)
Label hoses and valves with zone names, not just “left/right.”
2) Use a shared schedule tied to observation. Instead of fixed watering days, use a simple trigger:
- If the top 2–3 cm of soil is dry and plants show slight midday wilt, water Zone 1.
- If soil stays moist, skip.
This reduces overwatering and makes the system resilient to busy weeks.
3) Install a “capture-first” habit. Even small setups benefit from capturing water where it lands:
- direct downspouts into barrels
- use a simple diverter to send overflow to a mulch basin
- route overflow to a planted area rather than bare ground
4) Prevent hose chaos with a checkout rule. Example: hoses are stored in one cabinet; anyone using them signs a quick note (date, zone, start time). That note helps track leaks and clogged lines.
5) Maintenance is part of the plan. Assign one person per month to check:
- clogged emitters
- leaks at fittings
- mulch coverage around drip lines
If you don’t schedule maintenance, the system quietly degrades.
Coordinating habitat: design for function, not just flowers
Habitat coordination is easiest when it’s tied to specific functions.
1) Create habitat “anchors” that don’t require daily attention. Examples:
- a pollinator strip at the edge of the site
- a small patch of flowering herbs near the compost area
- a ground-cover zone along paths
These anchors reduce the need for constant replanting.
2) Manage habitat and pests together. Instead of treating pests as an emergency, treat them as a monitoring signal. Example approach:
- keep a weekly “plant health walk” across the same route
- note leaf damage, aphid clusters, and beneficial insect sightings
- respond with targeted actions (pruning, washing with water, removing heavily infested leaves) rather than broad spraying
3) Use ground cover as the habitat glue. Bare soil invites weeds and dries out quickly. A shared ground-cover plan can be as simple as:
- cover crops in off-season beds
- mulch in paths
- living mulches or dense plantings in active beds
4) Make habitat visible to newcomers. Add small signs like: “This strip supports pollinators and beneficial insects—please don’t mow it short.” People respect what they understand.
Mind map: the weekly operating rhythm
Weekly Operating Rhythm Mind Map
Concrete example: a 20-bed community plot
Imagine a shared garden with 20 beds, one compost area, and a rain barrel system.
Compost coordination setup
- Two labeled bins at the kitchen collection point: “scraps” and “browns.”
- A weekly browns restock from leaf piles.
- One compost check day each week.
- Finished compost used first on paths and new bed edges.
Water coordination setup
- Drip lines split into three zones.
- A shared logbook at the tool shed.
- Watering decisions based on soil moisture and plant condition.
Habitat coordination setup
- A 1-meter pollinator strip along the sunny edge.
- Ground cover on paths using mulch and low plants.
- A weekly plant health walk that focuses on the same route.
Within a month, the garden stops feeling like a collection of individual efforts and starts functioning like one system with multiple hands.
Quick checklist for coordination that doesn’t collapse
- One site map with compost, water, and habitat zones.
- Clear “allowed/not allowed” compost rules.
- Labeled water zones and a simple watering trigger.
- Habitat anchors that require minimal rework.
- A weekly check routine and a shared log.
When the rules are specific and the tasks are small, community gardens become easier to maintain—and easier to join.
11. Implementation Playbooks: Step-by-Step for Real Gardens
11.1 A 30-day regenerative reset plan for neglected beds
Neglected beds usually have one or more of these issues: bare soil, compacted ground, low organic matter, weeds that have gotten comfortable, and plants that are stressed before you even notice. This 30-day plan focuses on stabilizing the system first, then adding structure and fertility, and finally reintroducing crops with less drama and fewer failures.
Before you start (10 minutes)
- Walk the bed and note: bare patches, hard crust, standing water, dominant weeds, and where plants struggle.
- Choose a target: either “cover first” (if weeds and bare soil dominate) or “soil first” (if the bed is mostly bare but not weedy).
- Gather basics: compost (or finished compost), mulch (leaf mold, straw, shredded leaves, or wood chips for paths), a hand fork or broadfork (optional), and a watering can or hose with a gentle setting.
Mind map: the 30-day reset logic
30-Day Regenerative Reset Mind Map
Week 1 (Days 1–7): Stop the bleeding
Day 1: Clear only what blocks coverage
- Pull weeds that are already flowering or seeding. If you can’t identify the weed, treat it as “likely seeding” and remove it.
- Leave roots in place if they’re not actively spreading. The goal is to prevent seed rain, not to dig up the whole bed.
Day 2: Cover bare soil immediately
- If you have compostable material: spread 1–2 inches (2.5–5 cm) of compost on bare patches, then cover with mulch.
- If you don’t: use mulch first (shredded leaves or straw), then add compost later in the week.
- Example: In a 4 ft × 8 ft (1.2 m × 2.4 m) bed, aim for mulch that you can still see through in places where you’ll plant later. Thick, uniform coverage is great for weeds, but you still need a plan for crop placement.
Day 3: Light surface loosening for crusted beds
- If the soil forms a hard crust, use a hand fork to loosen the top 1–2 inches (2.5–5 cm). Don’t dig deeper; you’re improving infiltration and seedbed conditions, not flipping soil.
- Water lightly after loosening so the cover settles.
Day 4: Water to support cover, not to soak the world
- Water until the top layer is damp, then stop. Overwatering can create anaerobic pockets under thick mulch.
- Quick check: press a finger into the soil under the mulch edge. It should feel cool and moist, not muddy.
Day 5: Choose a strategy for weeds
- If weeds are mostly annuals: sheet mulch (cardboard + compost + mulch) over the worst areas.
- If weeds are mostly perennial: remove crowns where possible, then cover aggressively and plan for repeated shallow removal.
- Example: For a bed dominated by dandelion-like rosettes, cut the tops and cover the area; expect follow-up removal during the reset.
Day 6: Sheet mulch (if needed)
- Lay cardboard (no glossy coatings if you can avoid them), overlap seams by a few inches, then add 1 inch (2.5 cm) compost and 2–3 inches (5–7.5 cm) mulch.
- Punch planting holes later rather than removing the whole sheet.
Day 7: Bed “quiet time”
- Don’t add new inputs today. Let the cover settle and observe moisture and weed pressure.
Week 2 (Days 8–14): Build the base
Day 8: Add compost where you’ll grow
- Spread 1/2–1 inch (1.25–2.5 cm) compost over the planting zones.
- Keep compost off paths and walkways if you want to reduce mud.
Day 9: Mulch reinforcement
- Top up mulch to maintain coverage. If you can see bare soil, you’ll likely see weeds.
- Example: If you used straw, it may thin out. Add a second layer so it doesn’t blow away or dry out.
Day 10: Start cover crops or living mulch (optional but helpful)
- If you’re not planting crops yet, sow a simple cover crop mix suited to your climate.
- If you are planting soon, use a lighter cover (or rely on mulch) to avoid competition.
- Practical rule: cover crops are for soil protection and structure; they should not steal water from your main plants.
Day 11: Improve drainage only where necessary
- If you see standing water after watering or rain, loosen the soil surface around the wet spot and add compost to encourage infiltration.
- Avoid creating channels that send water elsewhere; aim for absorption in place.
Day 12: Set up a simple watering routine
- For newly covered beds, water less frequently but more deeply when the top layer dries.
- Example: In hot weather, check every 2–3 days. In mild weather, check every 4–5 days.
Day 13: Prepare planting holes
- If using sheet mulch, mark where crops will go and cut holes large enough for roots.
- Loosen the soil inside the hole so roots can expand.
Day 14: Final weed prevention pass
- Remove any weeds that have emerged through gaps. Pull them when small; it’s faster and gentler on soil.
Week 3 (Days 15–21): Reintroduce plants
Day 15: Plant hardy transplants or quick direct sow
- Choose plants that tolerate a reset: greens, peas, radishes, or herbs.
- Plant into compost-amended zones, not into bare mulch gaps.
- Example: For a neglected bed, sow radish and lettuce in rows or clusters. They establish quickly and give you something to manage while soil recovers.
Day 16: Water at planting time, then adjust
- Water thoroughly right after planting.
- After that, keep moisture consistent. Regenerative beds still need water during establishment; the difference is that mulch reduces waste.
Day 17: Add a thin top-dress (optional)
- If plants look pale or slow, add a thin compost top-dress around them (not against stems).
- Avoid heavy fertilizer dumps; the goal is steady growth, not a sudden flush.
Day 18: Mulch management around plants
- Keep mulch close enough to suppress weeds but leave a small breathing space around stems.
- Example: For tomatoes or peppers, keep mulch a few inches away from the main stem and focus coverage in the surrounding soil.
Day 19: Scout for pests and stress
- Look for leaf damage, wilting, or yellowing patterns.
- If you see wilting, check moisture first before assuming pests.
Day 20: Weed early and shallow
- Remove weeds when they’re small. A quick hoeing or hand pull prevents root establishment.
- Don’t dig deep; you’re protecting soil structure you just worked to rebuild.
Day 21: Add habitat details
- If you have space, add a small patch of flowering plants or let a few beneficial-friendly flowers establish at the bed edge.
- Keep it simple: one or two species is enough.
Week 4 (Days 22–30): Lock in results
Day 22: Adjust watering based on soil feel
- If soil stays damp under mulch, reduce watering.
- If it dries quickly, add a bit more mulch or water slightly deeper.
Day 23: Compost top-dress for active growth
- Add 1/4–1/2 inch (0.6–1.25 cm) compost around established plants.
- Example: For leafy greens, a light top-dress supports continuous harvest without pushing excessive soft growth.
Day 24: Finish weed control with targeted removal
- Focus on the weeds that are closest to seeding.
- If you used sheet mulch, check the edges where gaps form and patch them with mulch.
Day 25: Replant or fill gaps
- If some areas failed to establish, re-sow with fast crops rather than leaving bare soil.
- Bare soil is an invitation; fill it.
Day 26: Check soil structure by infiltration
- After watering, observe how quickly water soaks in. If it pools, loosen the surface lightly and add compost.
Day 27: Reduce disturbance
- Avoid unnecessary digging. Let roots and soil organisms do their job.
Day 28: Optional cover crop reinforcement
- If you didn’t plant cover earlier, you can still sow a short-term cover in unused spaces.
- Keep it away from main crops so it doesn’t compete.
Day 29: Final weed pass and tidy coverage
- Remove weeds, then ensure mulch coverage is continuous.
Day 30: Evaluate with simple scorecards
- Score each bed area 0–2:
- Coverage (bare soil present?)
- Weed pressure (few seedlings vs many?)
- Soil moisture retention (drying speed?)
- Plant steadiness (growth consistent?)
- Use the scores to decide what to repeat next month: more mulch, more compost, or more careful watering.
Concrete example: one neglected bed, three outcomes
- Before: bare patches, crusty surface, weeds seeding weekly.
- After Day 7: bare soil covered, weeds removed at flowering stage, surface loosened only where crust formed.
- After Day 21: greens and radishes established, mulch intact, fewer weeds emerging because gaps were patched.
- After Day 30: continuous cover, compost top-dressed, and a clear planting map for the next cycle.
Quick checklist (printable in your head)
- Cover bare soil within 48 hours.
- Remove weeds that are seeding.
- Add compost to planting zones, then mulch to hold it in place.
- Water to support establishment, not to flood.
- Weed early and shallow.
- Keep disturbance low after planting.
11.2 A 90-day plan for establishing cover crops and improving soil structure
This plan assumes you want cover crops to do two jobs at once: protect the soil surface and help build structure through roots and biology. The timeline below is written so you can start in spring or early fall. If you’re in a region with short seasons, use the same steps but shorten the “wait” periods.
Before you start (Day 0–3): pick goals, then pick crops
Cover crops are not one-size-fits-all. Choose based on what your soil needs most.
- If your soil is bare and crusty: prioritize quick ground cover and root growth (fast biomass).
- If your soil is compacted: prioritize deeper rooting and repeated cover cycles (structure over speed).
- If you want fewer weeds: prioritize dense cover and timely termination.
Simple crop pairing rule:
- Use one “cover” (fast, surface protection) plus one “structure” (roots that go deeper or add different residue).
Examples (easy combos):
- Lawn-to-garden transition bed: annual ryegrass (fast cover) + clover (nitrogen and residue diversity).
- Vegetable bed after harvest: oats (quick biomass) + vetch (rooting and nitrogen contribution).
- Heavier clay that stays wet: rye (tougher roots) + field peas (if you can manage moisture and termination timing).
Mind map: 90-day workflow
Week 1 (Days 4–10): prep and sow for good contact
Cover crops fail most often for boring reasons: seed didn’t reach soil contact, or moisture wasn’t consistent.
Bed prep (keep it simple):
- Remove weeds that are already established and seeding.
- Loosen the top layer only as needed to create a seedbed. You’re aiming for contact, not turning the whole bed.
- Rake to break up clumps.
Sowing steps (works for beds and many containers):
- Broadcast or drill at the label rate.
- Cover lightly (about the depth of the seed’s thickness). If you can’t cover it, press it in with the back of a rake.
- Water in thoroughly so the top few centimeters stay moist for germination.
Watering target: keep the top layer consistently damp for the first week. After germination, shift to deeper, less frequent watering if rainfall is light.
Example: If you sow oats after a harvest and the forecast is dry, water twice in the first week (morning and early evening) rather than daily shallow watering.
Week 2 (Days 11–17): confirm germination and prevent bare patches
At this stage, you’re checking whether the stand is even.
What to look for:
- Seedlings emerging within the expected window.
- No large bare zones.
If you see patchiness:
- Spot-sow with the same mix where gaps are obvious.
- Water those spots more carefully than the rest of the bed.
Weed check:
- If weeds are taller than the cover crop, mow or cut them down before they set seed. Don’t wait for the cover crop to “catch up.”
Week 3 (Days 18–24): let roots do their job
Now the goal is steady growth without overworking the bed.
Management:
- Avoid heavy foot traffic.
- Keep moisture steady enough that the cover crop doesn’t stall.
- If you’re in a very wet period, ensure drainage isn’t blocked by mulch or debris.
Example: In a raised bed that holds water, you may need to reduce watering frequency even if the soil surface looks dry. Check moisture 5–10 cm down.
Week 4 (Days 25–31): first structural cue—watch residue and root behavior
You can’t see roots easily, but you can infer progress.
Indicators:
- Soil surface stays covered.
- Plants form a continuous mat rather than scattered tufts.
- You can gently pull a seedling and see whether roots are forming.
If growth is slow:
- Don’t add fertilizer automatically. Slow growth can be low moisture, poor seedbed contact, or temperature mismatch.
- Correct the most likely limiting factor first (usually moisture).
Weeks 5–6 (Days 32–45): maintain cover density
This is the “don’t let it get thin” phase.
If the cover crop is dense:
- Leave it alone.
If it’s thinning:
- Water to support regrowth.
- If weeds are competing, cut weeds early rather than trying to pull them.
Example: If clover is slow but rye is strong, you can still benefit. Clover will often fill in later, and the rye’s residue can protect the soil while you wait.
Weeks 7–8 (Days 46–59): prepare for termination timing
Termination is where many gardeners accidentally sabotage the plan. The cover crop should be terminated at a stage that balances residue quality and ease of cutting.
General timing guidance (use plant stage, not the calendar alone):
- Terminate before the cover crop goes to seed.
- For legumes (like clover or vetch), terminate when they’re well-established but not fully mature.
Choose a termination method based on your setup:
- Cut-and-drop (best for beds where you can leave residue on top).
- Mow (useful for larger areas).
- Light incorporation (only if you have a reason; it can disturb soil structure).
Example: After 6 weeks of oats, cut-and-drop works well because the residue lays down and protects the surface while you plant.
Weeks 9–10 (Days 60–73): terminate and leave residue
Once you terminate, don’t rake it away. Residue is part of the soil-building system.
Termination day checklist:
- Cut the cover crop so it lies flat.
- Leave residue in place.
- If you’re planting into it, ensure you can access the planting holes.
If residue is too thick:
- Create planting channels (small clear strips) rather than removing everything.
Example: For a bed transitioning to tomatoes, cut the cover crop and leave a thick mulch layer between rows. Plant into small openings so the soil warms and dries slightly around the seedlings.
Weeks 11–12 (Days 74–90): plant through the mulch and stabilize
This final phase is about making the transition smooth.
Planting into residue:
- Open small holes or furrows.
- Plant your crop.
- Mulch around plants if needed, but avoid burying stems.
Watering after planting:
- Water seedlings directly at the base.
- Expect the mulch to reduce evaporation, so you may need less frequent watering than in bare soil.
Soil structure reinforcement:
- Keep disturbance minimal. No deep tilling.
- Use gentle weeding only where necessary.
Example: If you planted leafy greens after terminating a rye-oat mix, you can keep the residue as a weed barrier. Thin seedlings early so airflow improves and the bed doesn’t stay constantly wet.
Mind map: decision points during the 90 days
Quick “what good looks like” checklist
- By Day 10: seedlings are up and the bed isn’t patchy.
- By Day 31: the soil surface is mostly covered.
- By Day 59: plants are vigorous enough to produce residue.
- By Day 73: cover crop is terminated before seed set and residue is left in place.
- By Day 90: your new crop is established with minimal bare soil between plants.
Common mistakes (and what to do instead)
- Mistake: sowing but skipping light coverage or pressing. Fix: cover lightly and press seed into contact.
- Mistake: letting weeds go to seed while cover crops are still small. Fix: cut weeds early.
- Mistake: raking residue away after termination. Fix: leave residue to protect soil and feed the system.
- Mistake: terminating too late. Fix: terminate based on plant stage, not just days.
A concrete example timeline (one bed)
- Day 0–3: after harvesting lettuce, you choose oats + clover for fast cover plus residue diversity.
- Day 4–10: rake, sow, cover lightly, water in twice during the first week.
- Day 11–17: confirm even emergence; spot-sow gaps.
- Day 18–31: keep moisture steady; cut any weeds that get ahead.
- Day 32–59: let it grow; avoid disturbing the bed.
- Day 60–73: cut-and-drop when oats are tall but before seed heads form.
- Day 74–90: plant carrots or greens into holes; water at the base and let mulch handle the rest.
This 90-day sequence turns cover crops from a “nice idea” into a repeatable routine: establish a dense stand, terminate at the right stage, and plant into the residue so soil structure keeps improving instead of resetting.
11.3 A season-by-season planting schedule for continuous ground cover
Continuous ground cover means the soil is never left bare for long stretches. In practice, you’re aiming for overlapping “green time” from one planting to the next, plus a residue plan so mulch and cover crop remains keep doing work after the plants stop.
Mind map: the logic behind continuous cover
The baseline schedule (works for most temperate climates)
Use this as a template. Adjust dates by about 2–4 weeks based on your local spring and fall temperatures.
Spring (cover the soil while vegetables get established)
Goal: prevent bare soil during transplanting and early growth.
- Early spring (before main planting):
- If you have winter cover residue, leave it in place and plant through it.
- If the bed is bare, sow a quick cover like crimson clover or ryegrass (light seeding, keep evenly moist).
- When transplanting vegetables:
- Use a living mulch strip or inter-row cover rather than covering the plant crowns.
- Example: sow white clover between rows in a bed where you’ll grow tomatoes or peppers. Keep the clover low by mowing or trimming once the vegetables are established.
- Late spring (after harvest of early crops):
- Immediately sow a summer cover such as buckwheat (fast, good for quick cover) or cowpea (warm-season legume).
Concrete example:
- A 4x8 bed: grow lettuce in early spring. As soon as you clear it, sow buckwheat. When it flowers, cut it and leave the residue. Then transplant a second round of greens into the mulch.
Summer (keep living cover between heavy harvests)
Goal: reduce evaporation and keep weeds from getting a foothold.
- Warm-season cover options:
- Cowpea (good for heat; also adds nitrogen).
- Sunn hemp (if your season is long enough).
- Buckwheat for short windows.
- Management rule:
- Don’t let summer cover become a tangled mat that competes with your crop. Cut it when it reaches roughly knee height (or when it starts shading your crop rows).
- Mulch reinforcement:
- After cutting, add a thin layer of compost or leaf mulch if residue is too sparse.
Concrete example:
- In a zucchini bed, sow cowpea in the empty spaces after thinning. When zucchini canopy expands, trim cowpea back so it doesn’t steal light. The trimmed vines become mulch.
Fall (the main “insurance policy” for soil protection)
Goal: establish a cover that survives cool weather and feeds soil.
- After the last harvest:
- Sow a winter-hardy mix. A common approach is:
- Cereal rye (structure and biomass)
- Vetch or crimson clover (nitrogen)
- Optional: radish (helps break up compaction; terminate before it becomes woody)
- Sow a winter-hardy mix. A common approach is:
- If you’re short on time:
- Use crimson clover alone or ryegrass alone for quick establishment.
- Termination timing:
- Terminate in spring when the cover is still green and before it goes to seed.
- If you’re planting into it, cut and leave residue rather than digging.
Concrete example:
- A bed that ends with fall broccoli: right after pulling plants, sow rye + vetch. In spring, cut the cover and plant carrots into the residue. The residue acts like a moisture blanket and weed barrier.
Winter (keep soil covered, even if growth slows)
Goal: maintain cover and prevent erosion.
- If you have winter cover:
- Leave it alone. Growth slows, but the plant cover still protects soil.
- If you have bare soil due to timing:
- Use a “quick cover” strategy: sow ryegrass or another fast germinator as soon as conditions allow.
- Avoid:
- Heavy foot traffic on wet beds, which compacts soil and undermines infiltration.
Concrete example:
- On a small urban plot, you can’t always sow in time. If you miss the fall window, sow ryegrass in late fall. It won’t be lush, but it still reduces erosion and bare-soil exposure.
Mind map: choosing cover crops by bed goal
A practical “bed calendar” you can reuse
Assume you have two main vegetable cycles per year.
- Bed A (spring greens → summer crop):
- Spring: sow/maintain clover or ryegrass between rows.
- After spring harvest: sow buckwheat.
- Summer: cut buckwheat and keep a low cover between plants.
- Fall: sow rye + vetch.
- Bed B (summer crop → fall/winter cover):
- Spring: plant vegetables into existing winter residue.
- After summer harvest: sow cowpea or buckwheat depending on heat.
- Fall: switch to winter-hardy mix.
- Winter: leave residue.
Spacing and overlap rules (so “continuous” is actually continuous)
- Overlap window: aim to have the next cover established before the previous one is fully removed. For example, if you cut a cover in late June, sow the next cover the same day or within 3–5 days.
- Residue rule: when you terminate a cover, leave enough plant material to cover the soil surface. If you can see bare soil between stems, add a thin mulch layer.
- Competition rule: keep cover plants away from crop crowns. Inter-row cover is easier to manage than full-bed cover when crops are young.
Quick checklist for each season
- Spring: cover bare patches immediately; plant through residue when possible.
- Summer: cut warm-season cover before it competes; keep residue on the surface.
- Fall: sow winter-hardy cover right after harvest; plan termination timing.
- Winter: protect soil with existing cover; avoid compaction.
One integrated example: a 12-month loop on a single bed
- March: bed has winter rye residue. Transplant tomatoes into cut residue strips.
- May: between rows, establish white clover. Trim clover once it starts shading tomato lower leaves.
- July: after early greens are harvested from a side section, sow buckwheat in that section.
- August: cut buckwheat at flowering; leave residue as mulch.
- September: sow rye + vetch across the whole bed.
- November–February: leave cover in place; avoid walking on wet soil.
- Next March: cut and plant again.
This schedule works because each phase solves a specific problem: spring prevents bare soil during establishment, summer reduces evaporation and weeds, fall builds the winter “blanket,” and winter keeps the blanket from disappearing.
11.4 Building a simple integrated pest management routine from day one
Integrated Pest Management (IPM) is a routine, not a one-time fix. The goal is to prevent pest problems from getting big by combining good growing conditions, early detection, and targeted actions that don’t wipe out everything helpful.
The IPM loop (your daily/weekly rhythm)
- Prevent: set the garden up so pests struggle.
- Observe: check plants before damage is obvious.
- Identify: confirm what you’re dealing with.
- Decide: choose the least disruptive action that fits the situation.
- Act: apply the action correctly and promptly.
- Review: note what worked so you repeat it.
A simple schedule works best:
- Day 1 (setup): install monitoring tools and baseline your garden.
- Weekly (10–20 minutes): scout, record, and adjust.
- After any action: re-check in 2–7 days depending on the pest.
Mind map: your day-one IPM system
Step 1: Prevent problems before you need to fight them
Start with the “boring” basics that reduce pest pressure.
- Plant spacing and airflow: overcrowding creates humid microclimates that favor fungal issues and makes pests easier to spread. If you’re unsure, err on the wider side and use trellises to keep foliage off the ground.
- Soil and watering consistency: stressed plants attract pests and recover slowly. Water deeply, then let the top layer dry slightly before watering again. Mulch helps keep the soil moisture steady.
- Continuous ground cover: bare soil invites weeds, and weeds can host pests. Use mulch or cover crops between plantings.
- Diversity in plantings: a mixed bed is harder for pests to “find the whole buffet.” Even adding a few different flowering plants around vegetables can support beneficial insects.
Easy example: If you’re starting tomatoes in a raised bed, don’t plant them shoulder-to-shoulder. Add a trellis, mulch around the base, and include a small patch of flowering plants along the edge. You’re not just making it pretty—you’re reducing leaf wetness and improving beneficial presence.
Step 2: Set up monitoring that takes minutes, not hours
You’re looking for early signs, not waiting for full-on damage.
- Create a scouting route: walk the same path each week so you don’t miss areas. For beds, check the same 5–10 plants each time.
- Inspect the right places: many pests start on undersides of leaves, at growing tips, and where plants touch or overlap.
- Use a simple record: write down what you saw, where, and how many plants were affected.
A quick note format:
- Plant:
- Pest/damage:
- Location on plant:
- Count/estimate:
- Beneficials seen (yes/no):
- Action taken:
- Re-check date:
Easy example: On week one, you notice a few curled leaves on one pepper plant. You record “1 plant, leaf tips, slight curling, no insects seen.” Next week you check again. If it stays minor, you keep monitoring. If it spreads, you act.
Step 3: Identify accurately enough to choose the right response
Many “pest problems” are actually plant stress, nutrient issues, or mechanical damage. Identification doesn’t need to be perfect, but it should be specific.
Use these practical checks:
- Look for the pest: aphids, caterpillars, mites, and beetles leave different clues.
- Check the pattern: holes in leaves, stippling, webbing, or leaf mines point to different causes.
- Check the life stage: eggs, larvae, and adults respond differently to control methods.
Easy example:
- Aphids: clusters on new growth, sticky residue (honeydew), often accompanied by ants.
- Caterpillars: larger irregular holes, frass (droppings) near feeding sites.
- Mites: fine stippling and webbing, often worse in hot/dry conditions.
Step 4: Decide using a simple “severity + spread” rule
You don’t need a complicated threshold model. Use a consistent decision rule:
- Severity: How bad is the damage on the affected plants?
- Spread: Is it staying localized or moving to new plants?
- Plant priority: Is it a young transplant, a fruiting plant, or a hardy filler?
- Beneficial presence: Are predators/parasitoids present and actively reducing pests?
A practical approach:
- If damage is low and localized, monitor and improve conditions.
- If damage is increasing or spreading, take a targeted action.
- If damage is high and plants are failing, escalate to stronger controls.
Easy example: If you see a few aphids on one plant but ladybugs are present and the plant is otherwise healthy, you can often wait a week while you rinse aphids off and keep an eye on spread.
Step 5: Act with the least disruptive option that works
Choose actions in an order that matches the pest and your garden.
-
Physical removal
- Hand-pick caterpillars.
- Prune heavily infested leaves and dispose in sealed trash (not compost).
- Rinse aphids off with a steady spray.
-
Barriers
- Row covers for seedlings and vulnerable crops.
- Use them correctly: secure edges and remove when flowers need pollination.
-
Cultural fixes
- Adjust watering schedule if plants are consistently stressed.
- Improve spacing if humidity is high.
- Remove weeds that host pests.
-
Targeted treatments (only when needed)
- If you use any spray, apply it to the affected areas and timing matters. Many pests are easiest to hit at specific life stages.
- Avoid blanket spraying “just in case,” because it often harms beneficial insects too.
Easy example: Flea beetles chewing holes on young greens? A row cover can protect seedlings immediately. If you remove it for pollination, you can re-cover after flowering or use it during the highest activity window.
Step 6: Review after action so the routine improves
After you act, re-check in a set window:
- Fast pests (aphids, beetles): check in 2–3 days.
- Slower pests (some caterpillars, leaf miners): check in 5–7 days.
Record what happened:
- Did the pest count drop?
- Did damage stop progressing?
- Did beneficial insects increase or disappear?
Then decide:
- Repeat the same action if it worked.
- Adjust timing or method if it didn’t.
- If the problem persists, re-identify—sometimes the “pest” was misdiagnosed.
A ready-to-use weekly IPM checklist
- Walk the scouting route.
- Inspect undersides of leaves on 5–10 plants.
- Note any new damage patterns.
- Record pest presence and approximate counts.
- Look for beneficial insects (even a few counts).
- Decide: monitor, remove, barrier, or targeted action.
- Set a re-check date after any action.
Easy example: Week 3: you see early leaf stippling on cucumbers. You record it, check for mites/webbing, and confirm whether the pattern matches. If it’s mild and localized, you increase watering consistency and remove the worst leaves. If it spreads, you escalate to a more targeted approach.
A good IPM routine feels almost too simple: consistent scouting, honest notes, and actions that match what you actually see. That’s the point—your garden becomes a system you manage, not a mystery you guess at.
11.5 Troubleshooting guide: what to change when growth, soil, or pests stall
When a garden stalls, the fix is usually not a single product. It’s a change in one or two conditions that are limiting growth, then a follow-up adjustment after you observe the result. Use this guide like a checklist: identify the symptom, test the likely cause, change one thing, and wait long enough to see whether the plant responds.
Mind map: troubleshoot by symptom
Step 1: confirm the pattern (before you change anything)
- Which plants are affected? If only one variety is struggling, check variety-specific needs and root health. If everything is struggling, look at soil moisture, light, and temperature.
- Where is the problem showing up? Yellowing starting at older leaves often points to nitrogen issues. Yellowing starting at new growth can point to iron or root problems.
- How fast did it change? Sudden wilting after a heat wave suggests water stress. Gradual decline over weeks often points to soil structure, fertility timing, or persistent pest pressure.
Step 2: match symptoms to likely causes and what to change
A) Growth stalls: pale leaves, slow growth, weak stems
Symptom: leaves are pale green to yellow, starting on older leaves.
- Likely cause: nitrogen is limiting, or compost/mulch isn’t breaking down fast enough for the current growth stage.
- What to change (one at a time):
- Increase active mulch/compost contact: top-dress with a thin layer of finished compost (about 1 cm) and keep it covered with a light mulch so it stays moist.
- Check watering consistency: nitrogen uptake slows when soil dries out repeatedly.
- Example: A row of tomatoes in a mulched bed looks washed out and stops growing. You add a thin compost top-dress, then switch to deeper, less frequent watering so the root zone stays evenly moist.
Symptom: new growth is yellow while older leaves stay greener.
- Likely cause: iron availability issues, root stress, or overly wet soil.
- What to change:
- Improve drainage and oxygen: if the bed stays wet or smells sour, reduce watering frequency and add compost to improve structure rather than adding more fertilizer.
- Check soil pH indirectly: if you’ve been using lots of alkaline amendments or have very hard water, the plant may struggle to access iron.
- Example: Basil in a container turns yellow at the tips. The pot dries on top but stays soggy underneath. You repot into a better-draining mix and water until excess drains, then let the top layer dry slightly before watering again.
Symptom: plants are stunted and slow even though they look “fed.”
- Likely cause: cold soil, compaction, or roots not exploring.
- What to change:
- Warm the root zone: use mulch to reduce temperature swings and avoid working soil when it’s wet.
- Loosen without wrecking structure: if compaction is suspected, add compost and use surface aeration (forking lightly) only where needed.
- Example: Carrots in a compacted path-side bed are short and forked. You stop stepping there, add compost on top, and keep the surface covered so roots can grow into a healthier structure.
B) Wilting: plants look thirsty but the soil might not be
Symptom: wilting during the day, recovering at night.
- Likely cause: water stress from heat or wind.
- What to change:
- Mulch thicker and check irrigation timing: aim for consistent moisture rather than frequent shallow watering.
- Example: Lettuce wilts by afternoon in summer. You add a thicker straw mulch layer and switch to watering early morning with enough water to wet the root zone.
Symptom: wilting that doesn’t recover, stems feel soft, or soil smells off.
- Likely cause: root rot from overwatering or poor drainage.
- What to change:
- Reduce water and improve drainage: stop overhead watering, let the top layer dry, and add compost to build structure.
- Example: Seedlings collapse after watering. You pause watering, improve airflow, and water only at the base once the surface is dry.
C) Soil problems: water pooling, crusting, or no earthworms
Symptom: water pools or runs off quickly.
- Likely cause: compaction, low organic matter, or bare soil.
- What to change:
- Add organic matter and keep cover: top-dress compost and maintain mulch so water infiltrates instead of eroding.
- Avoid repeated tilling: it can break aggregates and worsen runoff.
- Example: A raised bed sheds water after rain. You stop disturbing the surface, add compost, and plant a quick cover crop between main crops.
Symptom: hard crust forms after watering or rain.
- Likely cause: low organic matter, fine particle dominance, or too much bare soil.
- What to change:
- Increase surface protection: mulch and compost top-dressing reduce crusting.
- Water gently: avoid blasting the surface.
- Example: Newly seeded greens germinate poorly because the surface crusts. You switch to a lighter watering approach and keep a thin mulch layer once seedlings emerge.
Symptom: earthworms are absent or rare.
- Likely cause: soil is too dry, too wet, or lacks stable organic matter.
- What to change:
- Stabilize moisture with mulch: aim for consistently covered soil.
- Feed slowly: use compost and cover crops rather than frequent high-dose amendments.
- Example: A bed that’s been bare and frequently weeded has no worms. You add compost, plant a cover crop, and keep mulch in place.
D) Pests and disease: choose the intervention that matches the pattern
Symptom: holes in leaves, missing leaf edges, or slime trails.
- Likely cause: caterpillars, beetles, or slugs.
- What to change:
- Time your checks: slugs are often most visible in the evening; caterpillars show up on specific host plants.
- Remove the problem early: hand-pick where feasible and adjust habitat (reduce hiding spots).
- Example: Host plant leaves have ragged holes at night. You inspect after dusk, remove slugs, and keep mulch slightly pulled back from the plant stems.
Symptom: sticky leaves, curled new growth, or ants farming insects.
- Likely cause: aphids or scale.
- What to change:
- Dislodge and reduce stress: a strong water spray can knock aphids off; improve watering consistency so plants aren’t weak.
- Support beneficial insects: avoid broad-spectrum sprays that also remove predators.
- Example: Peppers get sticky on new growth. You spray aphids off, then stop over-fertilizing with nitrogen so the plant doesn’t produce overly soft growth.
Symptom: powdery mildew or leaf spots, especially in humid weather.
- Likely cause: poor airflow, wet foliage, or excess nitrogen.
- What to change:
- Improve spacing and airflow: prune lightly where appropriate.
- Water at the base: reduce leaf wetness.
- Example: Zucchini leaves develop spots after overhead watering. You switch to drip/soaker irrigation and thin dense growth.
Symptom: sudden wilting with darkened stems at the soil line.
- Likely cause: crown rot or damping-off.
- What to change:
- Reduce moisture at the base: water less frequently and avoid splashing.
- Remove badly affected plants: prevent spread.
- Example: Seedlings in a crowded tray collapse. You thin them, improve airflow, and water only when the surface is dry.
Step 3: use a simple “change log” so you don’t chase your tail
Keep notes for each bed: date, symptom, what you changed, and what you observed 3–7 days later (for pests) or 2–3 weeks later (for soil and growth). This prevents repeating the same action that didn’t work.
| Bed/Plant | Symptom | Likely cause | Change made | Date | Result after 3-7 days |
|---|---|---|---|---|---|
| Tomatoes | Pale older leaves | Nitrogen limiting | Thin compost top-dress + steadier watering | 6/10 | New growth greener |
| Lettuce | Wilting afternoons | Water stress | Thicker mulch + early watering | 7/2 | Less afternoon droop |
| Basil (container) | Yellow tips | Root stress/poor drainage | Repot into draining mix | 7/8 | Leaves stabilize |
Quick decision rules (fast triage)
- If soil is wet and plants wilt: suspect roots, not thirst. Reduce water and improve drainage.
- If plants are pale and soil is dry: fix moisture and mulch first; then consider compost top-dressing.
- If pests appear suddenly: check the host plants and look for the pattern (time of day, leaf underside, stem base).
- If disease shows up after wet weather: reduce leaf wetness and improve airflow before adding anything else.
Mind map: what to change first
Use these steps as a loop: observe → choose the most likely limiter → change one condition → wait for the plant to show a response. Regenerative gardening rewards patience, but it also rewards precision—small adjustments, recorded, beat random interventions.
12. Measuring Progress and Maintaining Regenerative Practices
12.1 Tracking soil health with practical indicators: infiltration, earthworms, and structure
Soil health is easiest to track when you measure a few things that respond quickly and explain what’s happening underground. In this section, focus on three practical indicators: infiltration (how fast water moves in), earthworms (a living signal of habitat), and structure (how soil holds together). You don’t need lab tests to get useful feedback; you need consistent methods and a short list of observations.
1) Infiltration: how quickly water enters
Infiltration tells you whether water is soaking into the root zone or running off. When infiltration is slow, plants often look “fine” until a hot day or a heavy watering reveals the problem.
Simple infiltration test (the “cup test”)
- Choose a spot in a bed that represents the area you care about.
- Wet the soil surface lightly the day before if it’s bone-dry.
- On test day, pour a measured amount of water (for example, 1–2 cups) onto the soil surface.
- Start a timer when the water hits the ground.
- Record how long it takes for the water to disappear (soak in) and whether it pools.
What to record:
- Time to soak in (seconds or minutes)
- Pooling or runoff (yes/no)
- Any crusting or surface sealing (yes/no)
What the results usually mean
- Water disappears quickly: pores are open and the surface isn’t sealing.
- Water pools and then slowly sinks: compaction, low organic matter, or crusting may be limiting flow.
- Water runs off immediately: infiltration is very low; you’ll likely need more soil cover, less disturbance, and improved structure before expecting big changes.
Example: comparing two beds
If Bed A soaks in within 2 minutes and Bed B takes 15 minutes, Bed B is telling you it needs more than “more compost.” It may need reduced foot traffic, less tilling, thicker mulch, and time for roots and soil organisms to rebuild pores.
How often to test
Test the same spots every 2–4 weeks during the growing season, and again after a major mulch or compost change. Consistency matters more than frequency.
2) Earthworms: a living indicator of habitat
Earthworms don’t just mean “more worms.” They indicate that the soil has food, moisture stability, and structure that supports movement.
How to count without turning your garden into a science fair
Pick a small area (about a spade width) and gently loosen the top layer.
- Look for worms in the top 5–10 cm.
- Count visible worms and note their general location (surface litter, mixed compost layer, or deeper soil).
- Return the soil to its original position.
Do this at the same time of day and under similar moisture conditions. Worm activity changes with temperature and dryness.
What to record
- Worm count per spade area
- Depth where most worms are found
- Presence of castings (small worm piles)
- Soil moisture feel (crumbly, damp, dry, sticky)
Interpreting common patterns
- Many worms near the surface: often a sign of steady organic inputs and surface cover.
- Few worms but good infiltration: could mean the soil is improving but hasn’t built a stable worm population yet.
- Few worms and slow infiltration: usually points to poor habitat—often crusting, low organic matter, or repeated disturbance.
Example: mulch thickness and worm response
If you add a 5–8 cm mulch layer and stop disturbing the bed, you may see more worms in the top layer within a few weeks. If you keep weeding by frequent hoeing, worms may stay scarce even if plants look okay.
3) Structure: how soil behaves when you touch it
Structure is the “shape” of the soil—how particles clump, how pores connect, and how the soil resists compaction. You can assess it with simple, repeatable hand tests.
The squeeze-and-break test
Take a small handful of soil from the top 10 cm.
- Squeeze it: does it form a tight ball?
- Break it: does it crumble into smaller pieces or smear like paste?
- Feel: does it feel gritty (good mineral presence) or slick and sticky (often too much fine material or too much moisture)?
What to record:
- Crumbles easily vs forms a hard ball
- Smears vs breaks cleanly
- Grittiness vs slickness
The ribbon test (optional, for more detail)
If the soil is workable, try to roll a thin ribbon between your fingers.
- If it forms a ribbon easily, clay content or compaction may be high.
- If it won’t ribbon and stays crumbly, structure is likely more favorable.
What structure problems look like in the garden
- Crust after watering: indicates surface sealing and weak aggregates.
- Hardpan below mulch: water may soak at the top but struggle deeper.
- Soil that smears when wet: compaction risk is high; avoid working it when it’s sticky.
Example: diagnosing a “mystery” decline
If infiltration slows and soil smears when wet, but you’ve been adding compost, the issue may be timing and disturbance. Working the bed when soil is too wet can undo structure gains. In that case, the fix is to change when you work, not just what you add.
A simple tracking routine (use the same spots)
Choose 3–5 locations across your garden: one representative bed, one area with heavier traffic, and one area with different soil texture if you have it. Mark them with small flags.
What to do each check-in
- Run the cup test at each spot.
- Do a quick structure squeeze-and-break.
- If you can, count worms in one bed per month (not every time).
Record in a table
Use a consistent format so you can compare over time.
| Spot | Date | Infiltration time | Pooling/runoff | Structure (crumbles/smears) | Worm count (top 5–10 cm) |
|---|---|---|---|---|---|
| Bed 1 | |||||
| Bed 2 |
Mind map: soil health indicators and what they tell you
Putting the indicators together: quick decision logic
Use the three signals as a set, not separate trivia.
- Fast infiltration + crumbly structure + worms present: keep doing what you’re doing (usually consistent mulch and minimal disturbance).
- Slow infiltration + crumbly structure: surface cover may be fine, but deeper pores may be limited; check for compaction from traffic or equipment.
- Slow infiltration + smearing structure: reduce disturbance and avoid working when wet; focus on cover and root growth.
- Few worms + good infiltration: habitat may be improving but not yet stable; maintain steady organic inputs and avoid frequent soil disturbance.
Example: a practical “before and after” snapshot
Start with one bed that has bare soil between plants.
- Week 0: infiltration takes 12 minutes, soil smears when wet, worms are scarce.
- Week 2: you add thicker mulch and stop hoeing; infiltration drops to 6 minutes, soil breaks into smaller crumbs.
- Week 4: infiltration is 3–4 minutes, worms appear in the top layer, and you see small castings.
The point isn’t to chase a perfect number. It’s to see whether your actions change the soil’s behavior in the direction you want.
Track these indicators long enough to notice patterns, then adjust one variable at a time: mulch thickness, disturbance level, or watering method. Soil health improves through systems, not one-off fixes.
12.2 Monitoring biodiversity: pollinators, beneficial insects, and habitat signals
Biodiversity monitoring doesn’t require a lab or a spreadsheet the size of a phone book. You’re looking for patterns: which groups show up, whether they’re using your garden consistently, and whether your habitat choices are doing what you intended. Think of it as garden “accounting,” except the currency is insects and the receipts are your observations.
What to monitor (and why it’s enough)
Start with three categories that cover most of what matters in a regenerative garden:
- Pollinators (bees, hoverflies, butterflies, beetles) — they connect flowering plants to seed and fruit set.
- Beneficial insects (predators and parasitoids) — they help keep pest populations from getting out of hand.
- Habitat signals (soil cover, nesting sites, overwintering structure) — they explain why insects are present or absent.
You don’t need to identify every species. You need consistent categories and repeatable checks.
A simple monitoring rhythm
Use a routine you can keep:
- Weekly (10–15 minutes): quick walk-through and note what’s active.
- Twice per month (20–30 minutes): closer look at flowers and plant edges.
- Seasonal (once): check habitat features (mulch depth, dead stems, water sources, bare-soil patches).
If you only have time for one thing, do the weekly walk-through. It catches changes early, like a sudden drop in flower visitors or a new beneficial insect showing up after you adjust planting.
Mind map: what to look for
How to observe pollinators without getting stuck
Pollinators are easiest to monitor where flowers are concentrated. Pick one or two “flower stations” per garden zone and watch them for a short, timed window.
Example: one 10-minute station
- Choose a cluster of flowering herbs (like basil flowers, dill, or alyssum) near your main bed.
- Set a timer for 10 minutes.
- Record each visitor category: “bee,” “hoverfly,” “butterfly/moth,” “other.”
- Note behavior: “repeated landings,” “single visit,” “pollen collection,” “nectar only.”
You’re not trying to count perfectly. You’re checking whether the station is working as a resource.
What good looks like:
- Multiple visits by the same category across the window.
- Visitors showing up on different days, not just one lucky morning.
- Flowering plants that match the visitor’s timing (for instance, early bloomers for early-season bees).
What to change when it’s not:
- If visitors show up only when you water heavily, you may be creating a “wet but not food” situation. Adjust flower choices and keep soil cover consistent.
- If you see visitors but no seed/fruit set, the issue may be plant spacing, flower timing, or insufficient compatible flowering overlap.
Beneficial insects: look for patterns, not trophies
Beneficial insects are often present in ways that are easy to miss: larvae on the undersides of leaves, predators hiding under mulch edges, or parasitoids leaving indirect evidence.
A practical approach:
- Pick two plant types that are commonly attacked in your garden (for example, brassicas for caterpillars, or legumes for aphids).
- Inspect them once per week.
- Record:
- Pest presence (aphids, caterpillars, etc.) by rough severity: none / a few / noticeable.
- Beneficial presence: lady beetle adults, lacewing eggs/larvae, hoverfly larvae, mummified aphids, or “predators seen.”
Example observation log (simple categories):
- Week 1: aphids “a few,” no beneficials seen.
- Week 2: aphids “noticeable,” lady beetle adults “seen,” hoverfly adults “seen.”
- Week 3: aphids “a few,” mummified aphids “seen,” no new aphid growth.
Even without species-level ID, this tells you whether your system is responding with natural control.
Habitat signals you can verify in minutes
Insects don’t show up randomly. Your habitat choices create predictable conditions.
1) Flower continuity
A garden with only spring blooms can look “busy” for a month and then go quiet. Check whether you have:
- early-season nectar/pollen sources,
- mid-season flowering,
- late-season options.
Example: If your beds are bare after harvest, you’ll often see pollinators disappear even if the soil is healthy. Add a succession of flowering plants or keep a cover crop that flowers (where appropriate).
2) Nesting and overwintering
Beneficial insects and pollinators need places to reproduce and survive.
- Ground-nesting bees: look for small, undisturbed bare patches in sunny areas.
- Cavity-nesting bees: hollow stems and dead wood matter.
- Overwintering predators: leaf litter, mulch depth, and undisturbed corners provide shelter.
Example: If you tidy every stem to the ground in autumn, you remove overwintering habitat. Instead, leave some dead stems standing and keep a portion of the garden less “finished.”
3) Water access
Many insects need water for drinking and for building. You don’t need a pond.
Example: A shallow dish with pebbles can support beneficial insects on hot days. Alternatively, keep a damp edge in a mulched area rather than relying only on overhead watering.
Recording that stays useful
Use a consistent format so your notes can be compared week to week.
Minimum viable record:
- Date
- Location (bed/zone)
- Pollinator categories seen
- Beneficial categories seen
- Pest category severity
- One habitat note (flowering, mulch, water, nesting)
Example entry (short):
- “Zone A, 2026-05-14: bees + hoverflies on dill; lady beetles seen; aphids a few on beans; mulch intact; no bare soil patch disturbed.”
After a few weeks, you’ll notice which habitat changes correlate with insect changes.
Interpreting results without overreacting
A single week of low insect activity can happen for reasons unrelated to your garden (weather, timing, nearby flowering). Look for directional changes:
- Consistent absence across multiple weeks during peak bloom suggests a resource gap (flowers, nesting, water, or structure).
- Pest rises but beneficials also rise suggests your system is balancing itself; you may only need to reduce stressors.
- Pests rise and beneficials stay absent suggests habitat or pesticide exposure issues, or simply that your beneficial-friendly plants aren’t present.
Quick checklist for your next monitoring session
- Choose one flower station and watch for 10 minutes.
- Inspect two “pest-prone” plant types for beneficial signs.
- Note habitat: flower continuity, nesting/overwintering, and water access.
- Record categories, not species.
- Repeat the same route next week.
Monitoring biodiversity is less about collecting facts and more about building a reliable picture of how your garden functions. When you can connect insect presence to habitat conditions, you can make targeted changes that support both pollinators and the helpers that keep pests in check.
12.3 Water metrics you can measure: runoff reduction and irrigation frequency
Regenerative gardening treats water as a system, not a daily chore. If your soil can absorb and store water, you’ll need less irrigation and you’ll see less runoff. The trick is to measure a couple of things that are simple enough to repeat and clear enough to guide decisions.
What to measure (and why it matters)
You’ll focus on two practical metrics:
- Runoff reduction: how much rain or irrigation water leaves your garden instead of soaking in.
- Irrigation frequency: how often you apply water, and whether that schedule is drifting as the soil improves.
These metrics connect directly to soil cover, infiltration, and root growth. If you improve infiltration, runoff drops and irrigation intervals usually lengthen.
Runoff reduction: measure it without fancy gear
Metric A: Runoff occurrence (binary)
This is the simplest metric: did water run off the bed during a rain or irrigation event?
- Record: Yes/No for each event.
- Also record: approximate intensity (light/medium/heavy) and duration.
Why it’s useful: you’ll quickly learn whether your current soil cover and mulch depth are doing their job.
Example: After adding 3–5 cm of mulch and planting a cover crop between rows, you note that a medium rain no longer produces visible runoff from the bed edge. That’s a real change, even before you measure volume.
Metric B: Runoff volume proxy (catch-and-measure)
If you want more than a yes/no answer, use a simple catch method.
How
- Place a shallow collection tray or bucket under the lowest edge of a bed.
- Put a mark on the bucket so you can estimate volume.
- After the event, measure the collected water.
What to record
- Collected runoff volume (mL or liters)
- Bed area (m²)
- Event type (rain vs irrigation)
How to interpret
- Compare runoff volume between events of similar intensity.
- If you can’t match intensity, compare runoff to a consistent baseline event you repeat (for example, your usual irrigation cycle).
Example: In early spring, a 20-minute irrigation produces about 2 liters of runoff from a 2 m² bed. After adding compost and increasing cover, the same irrigation produces about 0.5 liters. That’s a 75% reduction in the runoff proxy for the same input.
Metric C: Infiltration time (how long until runoff starts)
Runoff often starts when the soil surface can’t absorb water fast enough.
How
- During irrigation, start a timer when water begins.
- Note the time until runoff appears at the bed edge.
Record
- Time to first runoff (minutes)
- Irrigation method (drip/soaker/sprinkler)
- Mulch condition (fresh, thinning, bare patches)
Example: Before improving cover, runoff starts at 6 minutes. After adding mulch and reducing bare soil, runoff starts at 14 minutes. Even if total runoff still exists, the delay is a sign that infiltration capacity improved.
Irrigation frequency: measure how often you water (and what triggers it)
Irrigation frequency is not just “how many times per week.” It’s about the interval between irrigations and the reason you irrigated.
Metric D: Irrigation interval (days between waterings)
Track the number of days between irrigation events.
Record
- Date/time of irrigation
- Total applied amount (if known) or irrigation duration
- Bed type (vegetables, perennials, containers)
- Soil cover status (mulch thickness or cover crop presence)
Example: In a vegetable bed, you irrigate every 3 days in July. After establishing a thicker mulch layer and improving soil structure, you irrigate every 5–6 days for the same crop stage.
Metric E: Irrigation trigger (what made you decide)
Use a consistent trigger so your data isn’t just “because it felt dry.” Choose one or two simple triggers:
- Soil moisture feel: check 5–10 cm down.
- Leaf behavior: wilting at midday that recovers by evening.
- Surface condition: crusting, bare patches, or mulch breakdown.
Record the trigger each time.
Example: If you irrigate because the surface looks dry but the soil is still cool and moist 8 cm down, you may be watering too early. After you start checking deeper, irrigation intervals often stabilize.
Metric F: Applied water per interval (duration or liters)
If you can’t measure liters, track duration consistently.
- Drip/soaker: record minutes per zone.
- Containers: record total volume per pot.
Example: Two weeks after compost and mulch improvements, you keep the same irrigation duration but need fewer events. That suggests the soil is holding more water between irrigations.
Mind maps (how the metrics connect)
Mind map: Runoff reduction
Mind map: Irrigation frequency

A simple recording setup that won’t annoy you
Use a small log sheet (paper or notes app). The goal is repeatability, not perfection.
Minimum fields per event
- Date
- Bed/zone
- Irrigation or rain
- Duration or amount
- Runoff occurrence (Yes/No)
- Time to first runoff (if applicable)
- Irrigation trigger
- Notes (mulch condition, cover crop present)
Example log entry (irrigation)
- Bed: tomato bed (2 m²)
- Irrigation: soaker hose, 25 minutes
- Trigger: soil felt dry at 8 cm
- Runoff: Yes
- Time to first runoff: 10 minutes
- Notes: mulch thinned near the edge
After a change (re-mulch and patch bare spots), you repeat the same irrigation duration and compare.
How to use the numbers to make decisions
Decision rule 1: If runoff occurs, fix infiltration before adding water
If you see runoff during a typical irrigation, increasing irrigation frequency usually makes the problem worse. Start with:
- thicker surface cover (mulch or living cover)
- checking for compaction or bare edge pooling
- adjusting irrigation to deliver water more gently
Example: Runoff starts at 6 minutes during a 20-minute irrigation. After adding mulch and improving cover, runoff starts at 14 minutes. You keep the same irrigation duration but reduce the number of events because soil stays moist longer.
Decision rule 2: If irrigation frequency drops while triggers stay consistent, you’re improving storage
When you can wait longer between irrigations using the same trigger method, that’s a sign your soil is holding water better.
Example: You use the same 8 cm soil feel check. Early season: irrigate every 3 days. Later: irrigate every 5 days, and the soil still feels moist at the trigger depth. That’s progress you can measure.
Quick calculation you can do (optional, but handy)
If you measure runoff volume with a catch method, you can compare runoff per area.
\[ \text{Runoff proxy} = \frac{V_{runoff}}{A_{bed}} \]
Where:
- \(V_{runoff}\) is collected runoff volume (liters)
- \(A_{bed}\) is bed area (m²)
Example: 0.5 liters collected from a 2 m² bed gives: \[ \frac{0.5}{2} = 0.25\text{ L/m}^2 \]
Compare that to an earlier event with a higher value.
Putting it together: a practical example scenario
A gardener manages two raised beds of similar size.
- Before changes: mulch is thin and some soil is bare between plants. During a standard 20-minute soaker irrigation, runoff occurs and appears at 6 minutes. Irrigation happens every 3 days.
- After changes: mulch is replenished and cover is continuous (including edges). During the same 20-minute irrigation, runoff appears at 14 minutes and the catch tray collects less water. Irrigation happens every 5–6 days using the same 8 cm soil feel trigger.
The metrics agree: runoff reduction and irrigation frequency both improve, which points to better infiltration and water storage.
Track runoff and irrigation frequency consistently for a few weeks, then compare like with like. When the soil is doing its job, you’ll see it in the log: fewer runoff events, longer intervals, and less guesswork.
12.4 Recording inputs and outcomes to refine your system each season
Seasonal refinement works best when you record inputs and outcomes in a way that lets you answer three questions: What did I change? What happened? What will I do next time? The trick is to keep the notes specific enough to be useful, but simple enough that you’ll actually write them.
What to record (inputs)
Inputs are anything you did that could influence results. Record them in plain language, with dates and amounts when you can.
1) Soil and fertility inputs
- Mulch type and thickness: e.g., “leaf mulch, 2–3 cm, applied May 6.”
- Compost additions: amount per bed (bucket count, wheelbarrow, or a rough layer depth).
- Cover crop actions: sowing date, termination method (cut-and-drop, mow, incorporation), and residue left on top.
- Any amendments: composted manure, leaf mold, mineral additions, biochar, etc. Include where they went.
Example entry:
- “Bed A: compost layer ~1 cm on Apr 10; cover crop rye terminated by mowing on May 18; left residue on surface.”
2) Water inputs
- Irrigation method: drip/soaker/sprinkler.
- Schedule: days per week and approximate run time.
- Rain events: “received ~12 mm on Jun 2” (or “heavy rain, no irrigation needed that week”).
- Mulch changes affecting water: e.g., “added straw mulch after transplanting.”
Example entry:
- “Week 3: drip ran 2x for ~30 min; no irrigation on Jun 2 due to rain.”
3) Planting and management inputs
- What you planted: variety, spacing, and whether it was direct-sown or transplanted.
- Row covers or netting: installed/removed dates.
- Pruning or training: when you removed leaves, thinned, or trellised.
- Weeding approach: “weeded shallowly every 7–10 days” or “sheet-mulched path.”
Example entry:
- “Tomatoes spaced 45 cm; trellised at 30 cm height; removed lower leaves starting Jul 5.”
4) Pest and disease interventions
- What you used: soap spray, neem (if used), hand removal, pruning, traps.
- When and where: affected bed/row, and the date.
- How much: “spot-sprayed 6 plants” beats “sprayed the bed.”
What to record (outcomes)
Outcomes are what you observed after the inputs. Record them as measurements when possible, and otherwise as consistent observations.
1) Soil outcomes
- Surface condition: bare soil vs covered, crusting, visible earthworm activity.
- Infiltration: “water soaked in within 10 minutes” vs “puddled.”
- Rooting depth clues: how plants respond after dry spells; whether roots are visible in loosened soil.
Example entry:
- “Bed A infiltration: puddled for ~5 minutes on May 28, then soaked in; improved after compost top-dress.”
2) Plant outcomes
- Growth rate: height/leaf count at set dates (e.g., every two weeks).
- Yield: harvest weight, number of fruits, or “first harvest date + total harvest.”
- Health notes: leaf color, spotting patterns, wilting timing, pest damage type.
Example entry:
- “Cukes: first harvest Jun 22; total 18 fruits by Aug 10; leaf spotting increased after Jul 18.”
3) Water outcomes
- Irrigation frequency needed: did you run more or less than planned?
- Drying pattern: “top 2 cm dried quickly but soil below stayed moist” is more useful than “it was dry.”
4) Weed and pest outcomes
- Weed pressure: count by category (grass vs broadleaf) or “low/medium/high” with a quick note.
- Pest presence: “aphids on new growth” or “cabbage moth eggs on underside” with dates.
- Beneficial activity: pollinators visiting, ladybugs present, or birds foraging.
A simple seasonal recording system
Use a consistent template so you can compare seasons without rereading your entire life story.
The “Input → Outcome → Next action” log
For each bed (or container group), keep a short list of events.
- Input: what you changed (date + description)
- Outcome: what you saw 1–3 weeks later (or at the next check)
- Next action: what you’ll do differently next time
Example log (Bed A):
- Input (Apr 10): compost top-dress ~1 cm.
- Outcome (May 28): infiltration improved; plants greener; fewer weeds in the first month.
- Next action: keep compost rate the same; add a thicker mulch layer earlier.
Checkpoints that match plant timelines
Record more often when plants are changing fast.
- After planting/transplanting: 3–7 day check for establishment.
- Mid-season: every 2 weeks for growth and pest notes.
- After major interventions: within 48 hours (for sprays/pruning) and again 1–2 weeks later.
- Harvest period: record yield and any quality issues.
Mind maps: turning notes into decisions
Use these mind maps as a worksheet. Write short phrases, not essays.
Mind map 1: Bed-level review
Bed Review Mind Map
Mind map 2: Cause-and-effect prompts
Examples of seasonal refinement (practical and specific)
Example 1: Compost rate vs weed pressure
- Observation: In Bed B, compost top-dress was applied, but weeds still surged in early summer.
- Likely link: Compost helps soil life, but it doesn’t automatically cover bare ground.
- Next action: Keep the compost rate, but add a thicker mulch layer immediately after planting and maintain cover during gaps between crops.
Example 2: Water schedule vs disease timing
- Observation: Powdery mildew appeared earlier in a bed that was watered more frequently with shorter cycles.
- Likely link: Frequent wetting can change leaf surface conditions and plant stress patterns.
- Next action: Switch to longer, less frequent irrigation runs, and adjust spacing or airflow practices at the same time so you’re not changing two variables at once.
Example 3: Cover crop termination method
- Observation: A bed where cover crop residue was left thick showed slower early growth but better moisture retention.
- Likely link: Residue can be beneficial, but timing and thickness matter.
- Next action: Terminate earlier or reduce residue thickness around transplants while keeping the soil covered.
How to refine without overcorrecting
Make one change at a time when you can. If you change everything, you’ll only learn that “something happened.” When you must change multiple things (weather, pest outbreaks, limited time), record them all and note which one you think is the primary lever.
A good end-of-season habit is to write three short statements:
- “This worked because…” (tie an input to an outcome)
- “This didn’t work because…” (identify the mismatch)
- “Next season I will test…” (a single, measurable adjustment)
When your notes follow that structure, you’ll stop relying on memory and start building a garden system that improves with each season—bed by bed, decision by decision.
12.5 Maintenance routines that keep soil covered and systems stable
Regenerative gardens don’t stay “regenerative” by accident. They stay that way because you maintain the boring basics: keep soil covered, keep roots growing, and keep the system from getting stuck in a bare-soil cycle. Below are maintenance routines you can repeat without turning your garden into a part-time job.
The three maintenance rules (simple, not simplistic)
- Cover stays on. If soil is bare for more than a short window, weeds and crusting move in.
- Roots stay active. Living roots feed soil life and help structure hold together.
- Disturbance stays intentional. You can loosen, amend, and weed—but you don’t need to do it everywhere, every time.
Weekly routine (15–30 minutes for most beds)
- Check cover coverage. Walk the beds and look for gaps: thin mulch spots, uncovered edges, or bare patches around transplants.
- Example: After a windy week, straw mulch can shift. Add a small handful back to the edges where it thinned.
- Top up mulch where it matters. Focus on the top 1–3 inches where light reaches soil.
- Example: For lettuce beds, keep a light mulch layer between plants. It reduces splash and keeps the soil from drying out.
- Weed only at the “seedling stage.” Pull or chop weeds when they’re small and before they set seed.
- Example: If you see a few dandelion seedlings, remove them early rather than waiting for a full patch.
- Observe moisture and drainage. If water sits or the soil dries fast, adjust irrigation timing and mulch thickness.
- Example: If a bed dries out in two days during heat, add mulch first before increasing watering volume.
Monthly routine (the “reset and repair” block)
- Rebalance cover types. Rotate or combine cover materials so you’re not relying on one thing.
- Example: Use compost as a thin top layer under straw, or add leaf mold under a more stable mulch.
- Prune and manage plant architecture. Remove dead leaves and excess growth that blocks airflow, but avoid stripping the bed bare.
- Example: If tomato lower leaves yellow, remove them and keep mulch intact so soil remains protected.
- Refresh compost top-dressing where plants are heavy feeders. Apply a shallow layer and re-mulch.
- Example: For fruiting crops, a thin compost layer around the base supports steady growth without leaving soil exposed.
- Inspect for compaction and crusting. Look for hard surfaces after watering or foot traffic.
- Example: If paths are muddy and beds are compacted, redirect traffic to paths and add mulch to paths.
Seasonal routine (cover strategy changes with the calendar)
- Spring: establish living cover quickly. As soon as you can work the soil, plant cover crops or use transplants that keep soil shaded.
- Example: If you’re transitioning from winter cover to summer vegetables, mow and leave residue in place, then plant through it.
- Summer: manage residue and heat. Keep mulch from blowing away and prevent it from becoming a dry crust.
- Example: If mulch gets thin, top up before it reaches bare soil. If it’s too thick and stays soggy, thin it slightly and improve drainage.
- Autumn: cover the gaps. After harvest, don’t leave beds empty.
- Example: Plant a quick cover crop right after removing spent plants, then plan termination for the next planting window.
- Winter: protect structure, not just soil. Use mulch and cover crops to reduce erosion and keep biological activity steady.
- Example: In windy areas, heavier mulch layers or dense cover crops reduce topsoil loss.
A practical “cover maintenance” checklist
Use this quick scan whenever you’re in the garden:
- Bare soil? If yes, add mulch or plant something that shades soil.
- Mulch depth below target? Top up to your usual thickness.
- Residue too thick against stems? Pull mulch back slightly from plant crowns to reduce rot risk.
- Weed seedlings present? Chop/pull now; don’t wait.
- Soil surface crusting? Increase cover and reduce aggressive watering that splashes.
Mind map: Maintenance routines that keep soil covered and systems stable
Maintenance routines mind map
Examples you can copy (with small adjustments)
-
Example 1: Mulch-first bed after harvest
- Remove spent plants.
- Add a 1–2 inch compost layer (optional if you already top-dress regularly).
- Cover with straw or leaf mulch to keep soil shaded.
- If you want living cover, sow a quick cover crop right after mulching.
-
Example 2: Container garden that doesn’t go bare
- Keep a mulch layer on top of potting mix (even 1 inch helps).
- Use a “living top” like low herbs or ornamental groundcovers in larger containers.
- When you harvest, immediately re-cover the exposed soil surface with mulch or a planted filler.
-
Example 3: Bed with persistent weeds
- Stop chasing weeds across the whole bed.
- Increase cover thickness in the problem zone.
- Weed only the seedlings you can reach quickly, then re-mulch.
- If weeds keep returning, reduce light to soil by adding a second mulch layer or denser ground cover.
Keeping systems stable: what to avoid
- Don’t remove all residue “for neatness.” Leaving chopped leaves and cover residue protects soil and reduces weed pressure.
- Don’t till to solve every problem. If you’re seeing weeds, start with cover and timing before you turn soil.
- Don’t let mulch become a blanket with no contact. Mulch that’s too thin or constantly displaced fails its job; adjust placement and thickness.
A stable regenerative garden is mostly routine: cover the soil, keep roots growing, and make small corrections before problems spread. If you do that consistently, the garden spends less time recovering and more time producing.