Veterinary Medicine and Animal Health Care Systems
1. Foundations of Veterinary Medicine and Clinical Reasoning
1.1 Scope of Veterinary Practice and Core Responsibilities
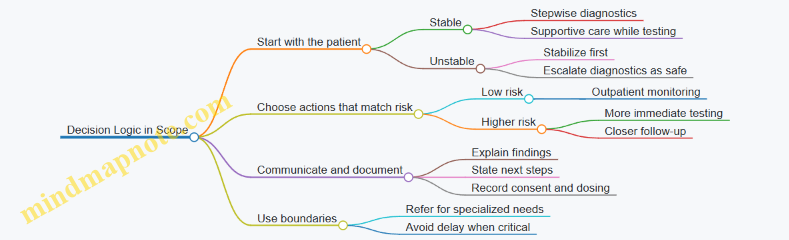
Veterinary medicine is clinical care plus professional responsibility. The scope starts with diagnosing and treating animals, but it also includes preventing disease, protecting public health, and communicating clearly with the people who make decisions for the patient. In practice, “scope” means you know what you can do safely, what you must refer, and what you must document.
Core Responsibilities in Daily Work
A veterinarian’s core responsibilities can be grouped into five practical lanes: patient assessment, diagnosis and treatment, prevention, client communication, and professional accountability.
Patient assessment begins with a history and a physical exam that match the complaint. For example, a dog presented for vomiting needs hydration status, abdominal pain evaluation, and a quick check for red flags like lethargy or pale gums. A rabbit presented for reduced appetite needs gut motility assessment and careful handling because stress can worsen the problem.
Diagnosis and treatment require choosing actions that are proportionate to the risk. If a cat is stable and has mild diarrhea, you might start with targeted diagnostics and supportive care. If a dog is weak with possible toxin exposure, stabilization and immediate decontamination steps come first, even before every test is completed.
Prevention is not a separate job; it is built into routine care. Vaccination schedules, parasite control, dental planning, and lifestyle counseling reduce the chance of future illness. A simple example: recommending a fecal test schedule for a multi-dog household helps catch internal parasites early instead of treating repeated flare-ups.
Client communication is a clinical tool. You explain what you found, what you think is most likely, what else could be going on, and what you will do next. If you recommend bloodwork, you also explain why it matters for that specific case, such as checking kidney values before starting certain medications.
Professional accountability includes informed consent, accurate records, medication safety, and infection control. A good record is not just a formality; it is how the next clinician understands what happened and why.
Boundaries and When to Refer
Scope also includes knowing limits. Referral is appropriate when the case needs specialized diagnostics, advanced procedures, or when the risk of delay is unacceptable. For instance, a routine skin case might be managed in-house, but a rapidly progressive neurologic presentation may warrant urgent imaging or specialist evaluation.
A useful rule of thumb is to match your plan to the patient’s stability. Unstable patients need immediate stabilization and then escalation. Stable patients can often follow a stepwise diagnostic plan, where each step reduces uncertainty.
Documentation That Supports Care
Documentation should answer three questions: What did you observe, what did you decide, and what did you do. A complete note typically includes:
- Signalment and presenting complaint
- History details relevant to the problem
- Physical exam findings with key measurements when available
- Differential diagnosis reasoning in plain language
- Diagnostics ordered and the rationale
- Treatment plan, dosing, and monitoring instructions
- Client communication and consent
Example: If you prescribe an antibiotic, record the suspected source of infection, the dosing schedule, and any monitoring plan for side effects. If you recommend home monitoring, specify what the owner should watch for, such as appetite, urination frequency, or breathing effort.
Mind Map: Scope and Responsibilities
Integrated Example: From Intake to Plan
A 6-year-old dog arrives for coughing and reduced activity. The intake starts with stability: breathing rate, effort, mucous membrane color, and temperature. The history focuses on onset, triggers, appetite, and any exposure to other animals. The physical exam checks for nasal discharge, lung sounds, heart murmur, and lymph node enlargement.
If the dog is stable, you might begin with chest radiographs and basic bloodwork to guide whether the cough is more likely infectious, inflammatory, or cardiac-related. If the dog is struggling to breathe, you prioritize oxygenation and stabilization first, then proceed with diagnostics that can be done safely.
Throughout, you communicate the plan in steps: what you need to know, what you expect to find, and what the next decision depends on. You document the reasoning and the consent, then provide home monitoring instructions that match the treatment, such as activity restriction and return precautions.
Mind Map: Decision Logic for Scope
Practical Takeaway
Scope is not a list of tasks; it is a system for safe, effective care. When assessment, diagnosis, treatment, prevention, communication, and documentation work together, the patient gets consistent decisions and the client gets clarity. That combination is the core responsibility, every time.
1.2 The Veterinary Patient Interview and History Taking
A good history is not a list of symptoms. It is a structured story that helps you decide what to check next, what to test, and what to treat right away. The goal is to connect the owner’s observations to clinical reasoning, while also protecting the patient from delays.
The Interview Starts with Safety and Urgency
Begin by sorting the visit into “needs help now” versus “we can work stepwise.” Ask about breathing difficulty, collapse, uncontrolled bleeding, seizures, severe weakness, and ingestion of toxins. If any red flags appear, stabilize first and keep the history short and targeted. For example, if a dog is breathing with effort, you can ask: “When did it start?” “Is the dog still eating or drinking?” and “Any known exposure to smoke, chemicals, or plants?” while preparing oxygen and monitoring.
The Core History Framework
Use a consistent order so you do not miss key facts. A practical flow is: chief complaint, signalment, history of present illness, medical history, medications, environment, and review of systems.
- Chief complaint: Ask the owner to describe what they noticed first and why they decided to come today.
- Signalment: Species, breed, sex, age, weight, reproductive status, and lifestyle. These shape risk and test choices.
- History of present illness: Onset, progression, severity, frequency, triggers, and response to anything already tried.
- Medical history: Prior diagnoses, surgeries, chronic conditions, and past hospitalizations.
- Medications and supplements: Include doses if possible; “human meds” matter even when owners think they are harmless.
- Environment and exposures: Household animals, outdoor access, travel, water sources, diet changes, hunting or scavenging, and pest control.
- Review of systems: Briefly confirm or rule out other organ systems involved.
A simple example: a cat with vomiting. The owner says it started yesterday, happens after meals, and the cat is still eating a little. You then ask about hairballs versus foreign objects, litter box changes, appetite changes, and whether any new food or treats were introduced.
Asking Questions That Produce Usable Answers
Owners often describe what they see, not what it means. Your job is to translate observations into clinical variables.
- Time anchors: “What were you doing when you first noticed it?” helps estimate onset.
- Frequency and pattern: “How many times in 24 hours?” is more actionable than “often.”
- Severity scales: “Is it mild, moderate, or severe?” can be quantified by function—eating, walking, resting, or breathing.
- Comparisons: “Same as usual or different?” reduces vague descriptions.
- Response to treatment: “Did it improve after the last dose?” guides whether to continue, stop, or change.
The Interview Technique That Prevents Missed Details
Use active listening and confirm key points. Repeat the most important facts in your own words before moving on. For instance: “So the cough started two weeks ago, is worse at night, and you’ve noticed reduced appetite. No fever that you’ve seen, and the dog is still playing a little.” This confirmation catches misunderstandings early.
Also watch for “hidden history.” Owners may mention it late: a new flea product, a yard chemical, a neighbor’s dog visiting, a sudden diet change, or a chew that went missing. When you hear a clue, ask a focused follow-up rather than restarting the whole interview.
Documentation That Supports Clinical Reasoning
Write notes that can be used by another clinician. Include the owner’s wording for the chief complaint, then add your structured interpretation.
A useful template:
- Chief complaint in owner’s words
- Onset and progression
- Pertinent negatives (what is not happening)
- Current status (eating, drinking, urination, defecation, activity, breathing)
- Home treatments tried
- Exposures and environment
- Risk factors (age, vaccination status, parasite prevention, travel)
Mind Map: History Taking Workflow
Example: Turning a Story into a Plan
A rabbit is presented for reduced appetite. The owner says it “just stopped eating,” but also mentions softer feces and less activity. You ask about water intake, hay availability, recent greens, and any tooth grinding or nasal discharge. You also confirm whether any new bedding or cleaning product was used. The history suggests gastrointestinal stasis risk and possible dental or respiratory contributors, so you prioritize exam findings and supportive care while arranging appropriate diagnostics.
Example: Pertinent Negatives That Matter
For a dog with diarrhea, owners may focus on stool appearance. You still ask about vomiting, blood, fever signs, recent antibiotic use, and household contact with similar symptoms. “No vomiting” and “no recent antibiotics” can steer you away from certain causes and toward others, saving time and unnecessary tests.
Mind Map: What to Ask for Common Presentations
A strong interview ends with a clear summary: what the owner observed, what you still need to confirm, and what you will do next. That last step keeps the visit from becoming a collection of facts and turns it into a clinical path.
1.3 Physical Examination Methods and Documentation Standards
A physical exam is not a checklist; it is a structured conversation with the patient. You start broad to avoid missing obvious problems, then narrow to confirm or refute your working differential. Documentation turns that conversation into a usable record for the next clinician, the next shift, and the next decision.
Core Principles of a Systematic Exam
Begin with preparation: confirm identity, review presenting complaint, and check whether the patient needs stabilization before handling. Then follow a consistent order so you do not “hunt” for abnormalities and forget the basics. A practical order is: general appearance, vital signs, head and neck, thorax, abdomen, musculoskeletal system, skin and coat, neurologic status, and finally a focused recheck of anything abnormal.
Use a “compare and confirm” mindset. When you find an abnormality, compare left vs right, cranial vs caudal, and superficial vs deeper structures. Confirm with a second method when possible, such as palpation plus auscultation, or observation plus range-of-motion testing.
Patient Handling and Safety
Good technique prevents both injury and missed findings. Approach calmly, support the patient appropriately, and use restraint only as needed to obtain the exam. If the patient is painful, start with the least painful steps first and reassess pain before moving to more provocative maneuvers.
For example, if a dog is limping, you can often evaluate posture and gait before attempting joint flexion. If a cat is tense, you can still assess body condition, mucous membranes, and respiration without forcing full positioning.
Vital Signs and Baseline Observations
Record vital signs with units and method when relevant. Include heart rate, respiratory rate, temperature, pulse quality, and mucous membrane color and capillary refill time. Baseline observations should also cover hydration status, body condition score, and mental status.
Example: “HR 168 bpm, regular; RR 36 rpm; T 39.6°C; MM pink, CRT <2 sec; alert but tense; BCS 4/9; mild dehydration suspected.” This reads like a map, not a mystery novel.
Regional Examination Techniques
Head and Neck: Assess eyes for symmetry and discharge, ears for odor and pain response, and palpate lymph nodes. In the mouth, note dental status and any halitosis, but avoid prolonged restraint.
Thorax: Auscultate systematically by moving through standard zones. Palpate for tracheal sensitivity and assess effort of breathing. If cough is present, note triggers and timing.
Abdomen: Use inspection first, then gentle palpation. Note abdominal symmetry, distension, and pain response. If you suspect organomegaly, describe location and whether it is focal or diffuse.
Musculoskeletal: Evaluate gait, stance, and range of motion. For lameness, document which limb, whether the issue is weight-bearing or swing-phase, and any swelling or heat.
Skin and Coat: Describe lesions by distribution, size, and type. Note pruritus level if observed, and whether lesions are alopecic, erythematous, crusted, or scaling.
Neurologic Status: Provide a brief, practical screen: mentation, posture, gait, cranial nerve observations when feasible, and spinal pain response.
Documentation Standards That Make Notes Useful
Write for clarity and continuity. Use consistent phrasing, avoid vague terms like “normal” without context, and record both findings and interpretation. When you document negatives, tie them to your exam focus.
A strong note includes:
- What you did: exam order or key maneuvers
- What you found: objective measurements and observable signs
- How the patient responded: pain, tolerance, behavior
- Why it matters: brief clinical interpretation
Example: “Abdomen soft, mild cranial abdominal discomfort on palpation; no guarding; no palpable mass. Findings support mild hepatobiliary or gastric irritation; no evidence of rigid abdomen.”
Mind Map: Exam Flow and Documentation
Case Example: From Findings to a Clean Record
A 5-year-old cat presents for reduced appetite and hiding. You note mental status as “withdrawn but responsive,” record vitals, then examine head and neck for lymph nodes and oral pain. Thoracic auscultation reveals quiet lung sounds without obvious wheeze. Abdominal palpation shows mild discomfort in the cranial abdomen without guarding. Skin and coat are unremarkable.
Your documentation might read: “Mental status withdrawn but responsive. HR 156 bpm regular; RR 28 rpm; T 38.9°C; MM slightly tacky, CRT <2 sec. Head/neck: no ocular discharge, lymph nodes not enlarged. Thorax: no increased effort, auscultation unremarkable. Abdomen: mild cranial discomfort, soft, no guarding, no palpable mass. Skin/coat: no focal lesions.”
That record supports targeted diagnostics because it narrows the problem to a region and a symptom pattern, without overclaiming.
1.4 Clinical Problem Representation and Differential Diagnosis Planning
Clinical problem representation (CPR) is the habit of turning messy observations into a structured story the team can act on. Differential diagnosis planning is the next step: generating a ranked list of plausible causes, then choosing tests that confirm or rule them out efficiently. The goal is not to guess perfectly; it is to reduce uncertainty in a controlled way.
Core Inputs and Problem Statement
Start with three buckets of information: signalment, history, and exam findings. Signalment includes species, breed, age, sex, weight, reproductive status, and environment. History includes onset time, progression, appetite, water intake, urination/defecation, vomiting, coughing, exposure risks, medications, and prior treatments. Exam findings include vital signs, hydration, pain level, body condition, and targeted abnormalities.
A useful CPR problem statement has four parts:
- Main complaint in plain language (for example, “vomiting and lethargy”).
- Time course (acute hours, subacute days, chronic weeks).
- Syndrome pattern (gastrointestinal, respiratory, neurologic, dermatologic, systemic).
- Severity and stability (stable enough for diagnostics now, or needs stabilization first).
Example: “A 6-year-old neutered male cat with 2 days of vomiting and reduced appetite, showing dehydration and mild abdominal discomfort, stable enough for diagnostic sampling.”
Syndrome Framing and Localization
Most differentials become easier when you localize the problem. Localization can be anatomic (where in the body), physiologic (what system is failing), or pathophysiologic (what mechanism is likely). For vomiting, localization might be esophagus, stomach, small intestine, pancreas, liver/biliary system, or systemic causes like toxins or metabolic disease.
A practical technique is to translate findings into “if this, then that” relationships. If the cat is dehydrated and has poor appetite, gastrointestinal loss and reduced intake are likely. If there is abdominal pain, obstruction or inflammatory disease rises on the list. If there are neurologic signs, consider central causes or toxin exposure.
Differential Diagnosis Construction
A differential list should be broad at first, then narrowed using pattern matching and test results. Use three tiers:
- Top tier: common and dangerous, or common and consistent with the pattern.
- Middle tier: plausible but less fitting or less common.
- Lower tier: unlikely but high-impact, included because missing it would be costly.
Ranking is not about confidence alone; it also considers test availability, safety, and how quickly the condition can worsen.
Mind Map: From Observations to Differentials
Test Planning That Matches the Differential
Tests should be chosen to answer specific questions. A good test plan states: what you expect to find if each top differential is true, and what result would make it less likely.
For the vomiting example, initial tests might include:
- CBC and chemistry to look for inflammation, anemia, electrolyte disturbances, kidney/liver involvement.
- Urinalysis to assess dehydration and renal status.
- Fecal testing if diarrhea or parasite risk is present.
- Abdominal ultrasound if pain, persistent vomiting, or concern for obstruction/pancreatitis.
If the chemistry shows marked azotemia and the cat is dehydrated, kidney disease becomes a stronger contender, and the plan shifts toward confirming renal involvement and managing dehydration while still considering obstruction if imaging suggests it.
Reassessment and Stopping Rules
CPR is not a one-time document. Reassessment happens after each major data point. Update the differential ranking, then decide whether to proceed, pause, or stop.
Stopping rules keep the process honest. For instance, if imaging shows a clear cause and cytology supports it, you can stop chasing unrelated differentials. If a test is negative but the condition is still likely due to timing or sampling limits, you document why you are not fully ruling it out.
Example: Building a Differential with Reasoned Tiers
Case: A 9-year-old dog with 3 days of coughing and reduced exercise tolerance.
- Problem statement: “Subacute cough with decreased activity; stable vitals; respiratory syndrome pattern.”
- Localization: likely lower airway or lung parenchyma, based on cough frequency and lack of nasal discharge.
- Top tier differentials: infectious bronchitis/pneumonia, aspiration, heart failure with pulmonary edema.
- Middle tier: bronchiectasis, pulmonary mass causing airway irritation.
- Lower tier: pulmonary thromboembolism or atypical infections, included because missing them can be costly.
Test plan: Start with thoracic imaging and basic labs to separate cardiac from pulmonary causes, then use targeted sampling if imaging suggests infection or mass. After imaging, the differential list is revised based on what the lungs and heart actually look like.
Documentation That Keeps the Team Aligned
Write the CPR so another clinician can pick up the case without rereading the entire history. Include the problem statement, the localization logic, the tiered differential list, and the specific questions each test is meant to answer. When the plan is clear, the team spends less time arguing about what to do next and more time doing it well.
1.5 Communication with Clients and Ethical Decision Making in Care
Good communication is clinical work. It reduces misunderstandings, improves adherence, and helps you make ethically sound choices when the medical facts and the household realities don’t line up neatly.
The Client Conversation as Part of Diagnosis
Start with the client’s observations, because they often contain the earliest pattern changes. Ask open questions first, then tighten with specifics: “What changed first?” “How long has it been going on?” “What makes it better or worse?” “Any new foods, medications, cleaners, or plants?” A practical example: a cat “not eating” may mean nausea, dental pain, stress, or a blocked urinary tract. The history you gather determines which exam findings and tests matter most.
Next, summarize what you heard in plain language. This is not a performance; it’s a check for accuracy. Example: “You’re seeing vomiting after meals, and the appetite drops the same day. No diarrhea. The vomiting started about a week ago.” If the client corrects you, you adjust the plan immediately.
Explaining Uncertainty Without Losing Direction
Ethical care includes being honest about what you know and what you don’t. Use structured uncertainty: what is likely, what is possible, and what you need to confirm. Example: “Based on the exam and history, pancreatitis is a strong possibility. We also need to rule out foreign body and intestinal inflammation. Bloodwork and ultrasound will help us sort this out.”
Avoid vague reassurances like “probably nothing.” Instead, tie uncertainty to action: “Because the risk of dehydration is real, we’ll start fluids today while we test.” This keeps the conversation grounded in patient safety.
Shared Decision Making with Clear Options
Offer options that differ in both intensity and tradeoffs. A useful structure is three tiers: immediate stabilization, diagnostic clarification, and longer-term management. Example for a dog with persistent coughing:
- Tier 1: “We’ll check oxygenation and start supportive care today.”
- Tier 2: “If it doesn’t improve, we’ll do chest imaging and consider bronchoscopy if indicated.”
- Tier 3: “If imaging suggests heart disease, we’ll discuss a medication plan and follow-up schedule.”
Clients decide best when you connect each tier to outcomes they can expect. “Most dogs with mild kennel cough improve within a few days with rest and supportive care” is more helpful than “it should get better.”
Informed Consent That Includes Practical Constraints
Informed consent is not a signature; it’s understanding. Confirm the client can repeat the plan in their own words: “Tell me what you’ll do at home tonight.” Then address barriers: cost, time, handling difficulty, and medication administration. Example: if a cat hates pills, discuss alternatives such as compounded formulations, liquid dosing, or appetite-friendly strategies—without pretending every option is equally feasible.
Document consent discussions in a way that reflects the decision logic: what was recommended, what alternatives were offered, and what the client chose.
Ethical Decision Making When Values Conflict with Medical Advice
Ethics often shows up as a mismatch between medical recommendations and household priorities. Common scenarios include:
- Refusal of a needed test: You can proceed with a safer minimum plan, explain risks of delayed diagnosis, and document the client’s choice.
- Limited budget: You can prioritize tests that change management most. Example: if imaging won’t alter the immediate stabilization steps, start stabilization and use targeted diagnostics first.
- Time and handling limits: If the client cannot safely restrain for a procedure, you may adjust the approach, choose sedation only when justified, or recommend a referral when the risk is unacceptable.
Ethical care also includes respecting the client’s autonomy while protecting the patient from avoidable harm. If a plan would likely cause significant suffering or missed emergencies, you must clearly state that concern and propose a safer alternative.
Mind Map: Client Communication and Ethics
Example: A Systematic Conversation in Practice
A rabbit presents with reduced appetite and droppings. You suspect gastrointestinal stasis but need to assess dehydration and pain. You say: “I’m concerned about gut slowdown. We can start supportive care now, and we’ll also check hydration and look for causes that change treatment.” You offer options: immediate fluids and pain control today, then targeted diagnostics based on response. You ask the client to repeat the home steps: feeding support, monitoring droppings, and when to return. If the client declines imaging, you explain what you can still do safely and what signs would require urgent escalation.
Example: Handling a Refusal Without Argument
If a client refuses a recommended test, respond with curiosity and clarity: “Help me understand what’s driving the decision.” Then restate the medical impact: “Without this, we may miss a cause that changes treatment. We can still start stabilization, but we’ll watch closely and adjust if you notice X or Y.” You document the refusal and the agreed plan, including the return criteria.
Closing the Loop with Follow-Up Instructions
End every visit with a concrete next step and a clear return trigger. Example: “If appetite doesn’t improve within 24 hours, or if you see no droppings for 12 hours, call us immediately.” This turns communication into action and reduces the chance that “we’ll see how it goes” becomes “we missed the window.”
2. Diagnostic Workflows for Animal Diseases
2.1 Triage Prioritization and Stabilization Before Diagnostics
Triage is the step where you decide what to fix first, not what to test first. In veterinary medicine, diagnostics are powerful, but they are not helpful if the patient is crashing while samples are being collected. A practical triage mindset is: stabilize life threats, then choose the smallest set of diagnostics that answers the next clinical question.
Foundational Priorities: ABCs and Threats to Life
Start with the basics in a repeatable order: airway, breathing, circulation, then neurologic status and temperature. If you only remember one rule, make it this: if oxygen delivery is failing, delay most nonessential tests.
Airway: Look for patency, effort, and ability to protect the airway. Examples include a choking dog with stridor, a cat with severe dyspnea and open-mouth breathing, or a patient with vomiting and reduced consciousness.
Breathing: Assess respiratory rate, effort, symmetry of chest movement, and mucous membrane color. A fast, labored pattern with cyanosis is a priority over bloodwork.
Circulation: Check pulse quality, capillary refill time, heart rate, and perfusion. Weak pulses, prolonged refill, and cold extremities suggest shock and require immediate support.
Neurologic status: Note mentation, seizures, and ability to swallow. A seizing patient needs safety and control before imaging.
Temperature: Hypothermia worsens coagulation and drug handling; hyperthermia can accompany heat stroke or severe infection. Measure early so you can correct it while you proceed.
Stepwise Triage Workflow
- Quick scan in under 30 seconds: Identify the dominant problem—respiratory distress, shock, bleeding, altered mentation, or severe pain.
- Immediate stabilization actions: Oxygen, positioning, suction if needed, IV access, fluids or blood products when indicated, warming or cooling, and pain control.
- Focused reassessment: After each intervention, re-check the same ABCs. If the patient improves, continue stabilization and then proceed to diagnostics.
- Diagnostics that match the next decision: Choose tests that change management. If you are treating shock, you still may need a quick PCV/TP, lactate, and blood glucose, but you do not need a full chemistry panel before starting perfusion.
- Document and communicate: Record what you did, what you observed, and the patient’s response. This prevents duplicated efforts and helps the next clinician continue logically.
Stabilization Before Diagnostics: Concrete Examples
Example 1: Dyspneic dog with suspected aspiration. Place in a comfortable position, provide oxygen, and consider suction if secretions are obstructing. Only after breathing improves do you decide whether radiographs are safe and whether you need sedation. If the dog cannot maintain oxygenation, diagnostics that require restraint are postponed.
Example 2: Cat with pale mucous membranes and weak pulse. Establish IV access, start fluids if perfusion is poor, and check a rapid PCV/TP. If PCV is low and there is no obvious dehydration, you prioritize bleeding evaluation and consider blood products. A full coagulation panel can wait until the patient is stable enough to tolerate it.
Example 3: Seizing patient. Control seizures first and protect the airway. After stabilization, you can proceed with glucose measurement and then decide on further diagnostics such as imaging or infectious testing based on the history and exam.
Mind Map: Triage Prioritization and Stabilization
Practical “Next Test” Logic
Once the patient is stable enough to tolerate handling, ask a single question: “What will this test change?” A blood glucose can explain weakness and seizures quickly. A PCV/TP can guide whether fluids are appropriate or whether blood loss is likely. Imaging can be delayed until oxygenation is adequate, because a poor-quality study wastes time and increases risk.
Triage is not a checklist for its own sake. It is a sequence of decisions that keeps the patient alive long enough for diagnostics to matter—and keeps your team from working hard on the wrong problem.
2.2 Diagnostic Testing Selection and Test Result Interpretation
Choosing the right diagnostic test is less about collecting data and more about answering a specific question. Start with the clinical problem, then pick tests that either confirm a likely cause, rule out dangerous mimics, or clarify uncertainty that changes treatment.
Step One: Translate Symptoms into Testable Questions
A useful question is specific enough to guide action. For example, “Is this dog’s vomiting caused by pancreatitis?” is actionable, while “What’s wrong?” is not. Convert the history and exam into a short list of hypotheses, then link each hypothesis to a test that can support or refute it.
Example: A cat with lethargy, poor appetite, and dehydration. The exam suggests possible kidney disease, but the severity matters for fluid planning. A basic chemistry panel and urinalysis answer different parts of the question: chemistry supports organ function status, while urinalysis helps interpret whether the kidneys can concentrate urine.
Step Two: Match Test Type to Clinical Need
Different tests answer different kinds of questions.
- Screening tests find common problems quickly. They are efficient when the pretest probability is moderate.
- Confirmatory tests verify a specific diagnosis when screening suggests it.
- Rule-out tests are chosen when missing a condition would be costly, even if the condition is less likely.
- Monitoring tests track response to treatment or disease progression.
Example: In a dog with fever and cough, a thoracic radiograph can quickly assess whether the problem is likely pulmonary versus cardiac or upper airway. If radiographs suggest pneumonia, a complete blood count and inflammatory markers can support infection, while culture and sensitivity become the confirmatory step when antibiotics fail or the case is severe.
Step Three: Consider Pretest Probability and Sampling Quality
A test result is only as meaningful as the context and the sample.
- Pretest probability: If a disease is unlikely, a positive result may be a false positive. If it is likely, a negative result may still require follow-up.
- Sampling quality: Poor collection is a common reason for confusing results.
Example: A fecal sample collected days after symptom onset can miss parasites that were present earlier. Similarly, a throat swab taken without adequate contact can underrepresent organisms.
Step Four: Interpret Results Using Test Performance Concepts
Use three practical ideas: sensitivity, specificity, and predictive value.
- Sensitivity answers: “If the disease is present, how often will the test be positive?” High sensitivity helps rule out disease when negative.
- Specificity answers: “If the disease is absent, how often will the test be negative?” High specificity helps confirm disease when positive.
- Predictive value depends on prevalence in the individual patient context, not just the lab’s numbers.
Example: A rapid antigen test for a pathogen with high specificity is useful when the patient’s signs fit the disease. If the clinical picture does not match, a positive result still needs confirmation or careful correlation.
Step Five: Use Reference Ranges Correctly
Reference ranges are population-based, not patient-based. Interpret them alongside age, species, hydration status, and concurrent disease.
- Mild abnormalities may reflect dehydration, stress, or sample handling.
- Marked abnormalities are more likely clinically meaningful.
- Trends often matter more than a single value.
Example: A mildly elevated alanine aminotransferase in a stressed dog may not indicate primary liver disease. If bilirubin and bile acids are normal and the dog improves, the enzyme elevation may be transient.
Step Six: Recognize Common Pitfalls
- Overreliance on a single test: Many diseases overlap in lab patterns.
- Ignoring timing: Some tests become positive only after a disease stage.
- Confusing colonization with infection: A culture may grow organisms that are not the cause.
- Not correlating with the exam: A lab abnormality without a matching clinical story may be incidental.
Example: A urinalysis may show bacteria, but if the sample is contaminated and the cat has no urinary signs, interpretation must consider collection method and sediment findings.
Mind Map: Test Selection and Interpretation Logic
Example: A Systematic Path from Question to Action
A young dog presents with vomiting and diarrhea. The exam shows mild dehydration and no abdominal guarding.
- Question: Is this acute gastroenteritis likely infectious, inflammatory, or toxin-related?
- First tests: A fecal exam and basic bloodwork to assess dehydration and rule out major systemic involvement.
- Interpretation: If fecal testing is negative but bloodwork shows no significant inflammatory pattern, treat supportively while monitoring response.
- Escalation: If vomiting persists or worsens, add additional diagnostics such as imaging or targeted tests based on evolving signs.
- Follow-up: Recheck hydration status and reassess the differential using new information.
The key is that each test should change the plan. If it does not, it is usually not the right test for that moment.
2.3 Imaging Selection and Practical Preparation for Radiography and Ultrasound
Choosing imaging is less about “more tests” and more about matching the question to the tool. Radiography is fast, widely available, and great for surveying bones, lungs, and many abdominal patterns. Ultrasound is excellent for soft-tissue detail, fluid, and organ structure, especially when you need to distinguish “solid vs fluid” or “one organ vs another.” A good workflow starts with stabilization, then selects the modality that answers the next most useful question.
Foundational Decision Rules
Start with the clinical problem representation: what body system is most likely involved, and what change would you expect to see. For example, a dog with coughing and fever often benefits from thoracic radiographs to assess lung pattern and pleural involvement. A cat with vomiting and suspected biliary disease may require ultrasound to evaluate gallbladder and bile ducts more directly than radiographs.
Next, consider urgency and patient tolerance. Radiography can be quicker for restless patients, while ultrasound may require more time for positioning and scanning. If the patient is unstable, prioritize stabilization first; imaging should not compete with airway, breathing, and perfusion.
Finally, think about what each modality can and cannot do. Radiographs show contrast mainly through density differences, so subtle soft-tissue changes can be missed. Ultrasound provides real-time structure and fluid characterization, but it depends on acoustic windows and operator technique.
Radiography Preparation That Prevents Repeats
Radiography preparation aims to reduce motion, improve positioning accuracy, and ensure image quality.
Patient handling and restraint. Use calm, consistent handling and plan restraint before you start. If sedation is needed, follow clinic protocols and reassess after positioning. Motion is the most common reason for repeat images, and repeats waste time when you’re trying to guide treatment.
Clipping and skin care. Clip only what you need for the projection and marker placement. Clean, dry skin improves contact and reduces artifacts from hair and debris.
Positioning and markers. Plan the view sequence before the patient is on the table. Use anatomical landmarks to align the body part and place markers to prevent later confusion. For thorax, ensure the spine is visible and the sternum is not overly rotated; for abdomen, center the region of interest and avoid excessive compression.
Exposure and technique awareness. Adjust technique based on body size and the region being imaged. Overexposure can hide subtle lesions; underexposure can obscure detail. If your clinic uses digital systems, still treat technique selection as a deliberate step, not a button press.
Quality check before leaving the room. Confirm that the anatomy is complete, rotation is acceptable, and the exposure is adequate. A quick check prevents “we’ll fix it later” moments.
Ultrasound Preparation That Improves Diagnostic Confidence
Ultrasound preparation focuses on acoustic access, patient comfort, and systematic scanning.
Fasting and timing. Fasting reduces gastric content and improves visualization. Use clinic guidance for duration based on species and patient condition. If the patient cannot fast, document what you could not optimize and interpret findings with that limitation in mind.
Clipping and coupling. Clip the scan area generously enough to avoid hair interference, then apply coupling gel to eliminate air gaps. Air is the enemy of ultrasound; it creates shadowing and false “nothing here” impressions.
Transducer selection and settings. Choose frequency based on depth and expected structure. Higher frequency improves superficial detail, while lower frequency helps reach deeper organs. Adjust depth and gain to keep the region of interest in view without washing out contrast.
Systematic scanning order. Scan in a repeatable pattern: start with the region of interest, then confirm adjacent structures. For abdomen, a common approach is to evaluate liver, gallbladder, bile ducts, pancreas region, kidneys, spleen, and then fluid spaces.
Image documentation. Save representative stills and short clips that show the key findings and measurements. Labeling should be consistent and tied to the clinical question.
Integrated Workflow for Choosing and Preparing
Use a single checklist mindset for both modalities: stabilize, confirm the question, choose the tool, prepare the patient, then verify image quality.
Example 1: Dog with acute cough. Start with stabilization and oxygenation assessment. Choose thoracic radiographs first to map lung pattern and check for pleural effusion. Prepare for minimal motion by planning restraint and selecting appropriate views. If radiographs suggest focal disease or pleural involvement, ultrasound can follow to evaluate pleural fluid and guide sampling.
Example 2: Cat with suspected urinary obstruction. Radiography can quickly assess bladder size and check for radiopaque calculi. Ultrasound is then used to evaluate bladder wall thickness, urethral region when feasible, and kidney changes. Prepare by clipping the ventral abdomen and using coupling gel thoroughly to avoid artifacts that mimic wall irregularity.
Mind Map: Imaging Selection and Preparation
Practical “Do This First” Checklist
- Confirm stabilization status and patient safety.
- Write the imaging goal in one sentence (what you’re trying to prove or rule out).
- Pick radiography or ultrasound based on the expected finding type.
- Prepare the patient for minimal motion and best acoustic access.
- Verify image quality immediately, then proceed to interpretation and next actions.
2.4 Laboratory Diagnostics for Hematology Biochemistry and Urinalysis
Laboratory diagnostics turn “something seems off” into measurable patterns. In practice, the lab results are only as useful as the sample quality, the reference range you’re using, and the clinical context you bring to the table. A good workflow starts with what you’re trying to answer, then chooses tests that can answer it with minimal waste.
Foundations of Sample Quality and Interpretation
Before running hematology, biochemistry, or urinalysis, confirm basic pre-analytical factors. Hemolysis in blood samples can falsely raise potassium and some enzymes, while delayed processing can shift glucose and cell morphology. For urine, contamination from the perineal area can mimic infection, and improper storage can change bacterial counts and pH.
Reference ranges matter because they vary by species, age, and sometimes by lab method. When a value is “near normal,” it may still be clinically meaningful if the trend is moving or if the patient’s symptoms point in that direction. A single number rarely tells the whole story; patterns across tests do.
Hematology for Oxygen Transport and Inflammation
Hematology typically includes packed cell volume/hematocrit, hemoglobin, red blood cell indices, white blood cell counts, and platelet estimates. The key is to interpret cell counts alongside morphology.
Red cell patterns help you sort anemia types. For example, a dog with low hematocrit and microcytosis may suggest iron deficiency or chronic blood loss, while anemia with normal or high reticulocyte response can indicate blood loss or hemolysis depending on smear findings. If you see spherocytes or schistocytes, you’re no longer just counting—you’re localizing the likely mechanism.
White cell patterns guide inflammation and infection assessment. Neutrophilia with a left shift can fit acute bacterial infection or severe inflammation, while lymphopenia may accompany stress responses. Eosinophilia often points toward parasites, allergic disease, or certain drug reactions, but it should be interpreted with skin findings and exposure history.
Platelets matter for bleeding risk and clotting disorders. If platelet numbers are low, confirm whether the sample might be clotted or platelet clumping is present; a smear can prevent an unnecessary panic.
Biochemistry for Organ Function and Metabolic Status
Biochemistry panels commonly include liver enzymes, bilirubin, kidney markers, electrolytes, glucose, proteins, and sometimes pancreatic markers. Think of them as organ “signal lights,” not direct diagnoses.
Kidney evaluation often uses creatinine and blood urea nitrogen. In a cat with dehydration, creatinine may rise due to reduced perfusion, so hydration status and urine specific gravity help interpret whether the change is functional or structural. Urinalysis becomes the partner test that tells you whether the kidneys are concentrating appropriately.
Liver evaluation uses enzymes and bilirubin, but enzyme elevations can reflect different processes. A dog with elevated ALT and mild bilirubin may have hepatocellular injury, while a different pattern with cholestasis markers suggests bile flow issues. Total protein and albumin help you assess chronicity and synthetic function.
Electrolytes and glucose are practical because they can be corrected quickly. A patient with low potassium can worsen weakness and complicate treatment plans, and a patient with hyperglycemia needs careful interpretation alongside stress, diabetes history, and ketone assessment when appropriate.
Urinalysis for Concentration, Infection, and Kidney Clues
Urinalysis is more than “is there infection.” It includes urine specific gravity, dipstick screening, sediment microscopy, and sometimes urine protein assessment.
Specific gravity helps you judge concentrating ability. For example, a dog with vomiting and diarrhea may have low specific gravity early from dehydration, but persistent inability to concentrate supports intrinsic renal dysfunction.
Dipstick results screen for blood, protein, glucose, ketones, and leukocyte esterase. A positive leukocyte esterase with bacteria on sediment supports infection, while leukocyte esterase without bacteria may suggest inflammation or sample contamination.
Sediment microscopy is where the story gets concrete. You can see red blood cells, white blood cells, casts, crystals, and bacteria. Crystals can be incidental or clinically relevant depending on type, urine pH, and whether there’s evidence of inflammation.
Integrated Example Workflow
A 6-year-old dog presents for lethargy and reduced appetite. The clinician suspects systemic illness and orders hematology, biochemistry, and urinalysis.
- Hematology shows mild anemia and a neutrophil-predominant leukogram.
- Biochemistry reveals elevated kidney markers and mildly increased liver enzymes.
- Urinalysis shows low specific gravity and sediment with few cells and no bacteria.
Together, these findings support a kidney-focused problem with systemic effects rather than a primary urinary infection. The next step is to refine the kidney assessment with urine culture if infection becomes more likely, and to correlate with hydration status, blood pressure, and imaging if indicated.
Mind Map: Laboratory Diagnostics Integration
Practical Checkpoints for Daily Use
When results don’t fit the story, suspect sample quality first. If hematology and biochemistry suggest kidney disease but urine specific gravity is unexpectedly high, revisit hydration, collection method, and timing. If urinalysis suggests infection but sediment is bland, confirm collection technique and consider whether the patient’s clinical signs truly match a urinary source.
2.5 Diagnostic Sampling Techniques for Cytology and Microbiology
Good sampling is half the diagnosis. The other half is choosing the right sample for the question you’re asking. Cytology answers “what cells are here right now,” while microbiology answers “which organisms are present and what they might do.” Both depend on collecting material that actually represents the lesion, not the surrounding debris.
Foundational Principles for Sample Quality
Start with lesion selection. If a wound has both wet and dry areas, sample the wet edge where active material is most likely. If a mass is ulcerated, swab the base rather than the crust. In respiratory cases, collect from the most dependent or most abnormal region you can access, because secretions pool where disease tends to concentrate.
Next is timing and handling. Many organisms are fragile, and many cells degrade quickly. Plan collection before you start anesthesia or sedation, label tubes immediately, and keep samples at the temperature and transport conditions your lab expects. If you can’t meet those conditions, prioritize cytology on-site when appropriate, because cells often remain interpretable longer than bacteria in poor transport.
Finally, avoid contamination. Use sterile equipment, change gloves between sites, and prevent contact between the sampling device and fur, bedding, or the outside of the container. A “clean” sample is not just hygienic; it prevents false positives that waste time and antibiotics.
Cytology Sampling Techniques
Cytology sampling aims to preserve cell morphology and minimize dilution.
For skin and ear lesions, use impression smears for exudative surfaces, tape preparations for superficial debris, and swabs only when the lab can process them reliably. When using a swab, rotate the tip firmly against the lesion and express it onto a slide or into the appropriate medium per your lab’s instructions.
For fine needle aspirates, use a small-gauge needle and apply gentle suction only if needed. Over-suction can pull blood and dilute cells, making interpretation harder. After aspiration, spread material thinly and quickly. Thick smears trap cells in a haze; thin smears let you see cell borders and inflammatory patterns.
For body fluids, collect with minimal trauma and avoid air bubbles. If the fluid is bloody, note it on the submission form and consider repeating if the clinical question depends on cell differential.
Microbiology Sampling Techniques
Microbiology sampling aims to collect viable organisms and enough quantity for culture or molecular testing.
For wound infections, swab technique matters. Swabbing superficial exudate often captures skin flora rather than the pathogen driving the lesion. If possible, aspirate deeper material or collect tissue. If you must swab, press firmly to the base of the lesion after removing surface debris, and submit promptly.
For urine, contamination is the main enemy. Use cystocentesis when feasible for culture, because it reduces urethral contamination. If the patient is difficult, document the collection method clearly so the lab can interpret results appropriately.
For respiratory sampling, choose the method that matches the patient’s stability and the suspected site. Tracheal wash or bronchoalveolar sampling can better represent lower airway disease than surface swabs. If the patient is coughing, collect during active production of secretions rather than waiting for a “perfect” moment.
For blood culture, collect before antibiotics when possible and follow aseptic technique. Mix and label correctly; mislabeled bottles are a common reason for unusable results.
Mind Map: Cytology and Microbiology Sampling
Integrated Examples
Example: Chronic Otitis With Thick Discharge Collect cytology from the ear canal surface to assess inflammatory cells and yeast presence. For microbiology, swab the base after gently removing excess debris, or aspirate deeper material if the canal allows. If the cytology shows heavy neutrophils with intracellular organisms, prioritize microbiology even when yeast is also seen, because mixed infections are common.
Example: Lameness With a Draining Tract For cytology, take a smear from material expressed at the tract opening to look for inflammatory cells and possible foreign material. For microbiology, avoid only swabbing the surface. If you can access deeper material, aspirate or collect tissue from the tract base. Label the sample as “tract base” so the lab interprets it as a deeper source.
Example: Suspected Urinary Tract Infection Use cystocentesis for culture to reduce contamination. Submit a separate sample for urinalysis and consider cytology if there is concern for neoplasia or marked inflammation. If the culture grows mixed flora, the collection method becomes part of the explanation rather than a mystery.
Practical Checklist for Submission
Collect the right sample from the right site, label immediately, and match handling to the test type. Cytology tolerates some delays better than microbiology, but neither benefits from sloppy technique. If you keep the goal in mind—cells for cytology, viable organisms for microbiology—you’ll make sampling decisions that hold up under scrutiny.
3. Diagnostic Imaging and Procedural Diagnostics
3.1 Radiography Positioning and Quality Control
Good radiographs start before the exposure button. Positioning is the art of placing anatomy so it is visible, interpretable, and not misleading. Quality control is the habit of checking the image for preventable problems while the patient is still in front of you.
Foundational Principles of Positioning
Begin with three questions: What anatomy must be seen? What must be excluded? How will you keep the patient still and aligned? For example, if you are evaluating pneumonia in a dog, you need lung fields on both sides with the heart and diaphragm visible enough to judge size and silhouette. If the patient is rotated, one lung may appear larger simply because it is closer to the detector.
Positioning also depends on patient size and cooperation. A small cat may tolerate gentle restraint with minimal sedation, while a large dog may require positioning aids such as sandbags or foam wedges. The goal is not “perfect stillness,” but consistent geometry across views.
Patient Preparation and Safety Checks
Before positioning, confirm the patient is stable and the area is safe for handling. Remove collars and tags that can create artifacts. Clip or part thick fur only when needed for marker placement or when hair density will obscure anatomy. Use lead shielding appropriately, but remember that shielding does not replace correct collimation.
A practical habit: place the marker first, then position. If you position first and then add a marker, you may discover the marker is now outside the field or overlaps the region you meant to evaluate.
Positioning Geometry and View Selection
Most positioning errors come from three sources: rotation, improper centering, and incorrect beam angle. Rotation is the most common. You can detect it by checking whether the spine is centered and whether both sides of the thorax appear symmetrical.
Centering matters because anatomy can be cut off. If you are taking a lateral thoracic view, center the beam over the heart region and ensure the diaphragm is included. For abdominal views, center over the area of concern and confirm that both kidneys and the urinary bladder region are within the field when that is clinically relevant.
Beam angle affects shape. If the beam is angled too much, structures can appear magnified or distorted. Keep the beam perpendicular to the detector for standard views unless a specific projection requires otherwise.
Collimation and Exposure Field Control
Collimation reduces scatter and improves contrast. It also prevents you from “accidentally” including irrelevant anatomy that can confuse interpretation. For instance, a thoracic radiograph that includes the entire abdomen may make it harder to judge diaphragm margins and can distract from the primary complaint.
A simple rule: collimate to the anatomy of interest, then verify that the entire target region is still fully covered after final adjustments.
Quality Control Checklist During the Session
Quality control is not a separate step; it is a quick loop after each view. Check image orientation, centering, rotation, and collimation before the patient leaves.
Mind Map: Radiography Quality Control Loop

Common Positioning Problems and Fixes
Rotation in Thoracic Views: If the patient is rotated, one lung may appear more opaque and the heart silhouette may look distorted. Fix by re-aligning the sternum and spine relative to the detector and re-checking symmetry.
Incorrect Centering: If the diaphragm is cut off, you lose the ability to assess pleural space and abdominal extension. Fix by moving the beam center and confirming inclusion of both hemidiaphragms.
Motion Blur: Motion can come from pain, breathing, or struggling. Fix by improving comfort, using appropriate restraint, and timing the exposure when motion is minimal.
Example Workflow for a Lateral Thoracic View
A dog presents for cough. You plan a lateral thoracic radiograph first.
- Remove collar and tags; place a side marker.
- Position the dog in lateral recumbency with the spine as straight as possible.
- Align the thorax so both scapulae are positioned to minimize overlap with lung fields.
- Center the beam over the heart region and include the diaphragm.
- Collimate to thorax only.
- After exposure, check for rotation, diaphragm inclusion, and motion blur.
If the diaphragm is partially missing, repeat immediately rather than trying to interpret an incomplete view.
Advanced Quality Control Details
For subtle disease, consistency across views matters. If you repeat a radiograph, try to match positioning as closely as possible so changes reflect anatomy, not technique. Also ensure that exposure settings produce diagnostic contrast; underexposure can hide small effusions, while overexposure can wash out lung detail.
Finally, document positioning limitations when they occur. For example, if a painful patient cannot fully extend, note that limitation so interpretation accounts for altered geometry. A radiograph is a measurement, not a guess, and good documentation keeps the measurement honest.
3.2 Ultrasound Principles and Common Clinical Applications
Ultrasound uses high-frequency sound waves to create real-time images of tissues. A probe sends pulses into the body and listens for echoes that return at different times and strengths. The machine converts those echoes into brightness on the screen, so the key physics goal is simple: measure how far sound traveled and how strongly it bounced back.
Core Principles That Drive Image Appearance
Frequency and resolution tradeoff. Higher frequency gives better detail but less depth. Lower frequency reaches deeper structures with less fine detail. In practice, clinicians choose a probe that matches the patient size and the target depth, such as using a higher-frequency probe for superficial lymph nodes and a lower-frequency probe for deep abdominal organs.
Echogenicity and sound behavior. Tissues differ in how they reflect sound. Fluid tends to appear dark (anechoic) because sound passes through it with few echoes. Dense tissues like bone reflect strongly and create bright surfaces with acoustic shadowing behind them. Fat often looks moderately bright, and muscle is usually intermediate.
Acoustic coupling and artifacts. Gel removes air between probe and skin, because air blocks sound. Without good coupling, images degrade and artifacts multiply. Common artifacts include:
- Acoustic shadowing behind mineralized structures.
- Reverberation from strong reflective interfaces.
- Enhancement through fluid-filled spaces, where areas behind fluid look brighter.
Doppler basics for blood flow. Color Doppler overlays moving blood signals on the grayscale image. Power Doppler is sensitive to flow and can help detect low-velocity flow, while spectral Doppler measures velocities over time. The clinical trick is to align the Doppler cursor with expected flow direction and to interpret results in context with the grayscale findings.
Systematic Scanning Workflow
A consistent workflow prevents missed findings and reduces “wandering probe syndrome.”
- Start with patient positioning and preparation. Clip hair only as needed, apply generous gel, and stabilize the probe to avoid motion artifacts.
- Use landmarks and sweep patterns. Begin with a known structure, then sweep systematically in multiple planes.
- Confirm anatomy before interpretation. Identify organ boundaries, then assess size, shape, and internal pattern.
- Document key measurements. Record organ dimensions, lesion location, and relevant Doppler parameters when used.
- Correlate with clinical signs. Ultrasound findings should explain the patient’s problem, not just look interesting.
Common Clinical Applications
Abdomen and Gastrointestinal Tract
Ultrasound is excellent for evaluating fluid, organ architecture, and many causes of vomiting or diarrhea. For example, a thickened intestinal wall with layered appearance changes can suggest inflammation, while a focal mass may appear as a discrete hypoechoic or mixed echogenic lesion. Free abdominal fluid appears dark and can be sampled if safe.
Practical example. A dog presents with intermittent vomiting. Ultrasound shows a focal, well-demarcated mass in the stomach wall with reduced layering. The clinician correlates with appetite history and plans targeted biopsy or surgical referral rather than treating blindly for nonspecific gastritis.
Urinary System
Bladder evaluation is straightforward: urine is typically anechoic, and stones often create bright foci with shadowing. Hydronephrosis appears as dilated renal pelvis structures, and ureteral dilation may support obstruction.
Practical example. A cat with dysuria has a thickened bladder wall and echogenic material consistent with sediment. The clinician uses ultrasound to guide whether medical management is appropriate and to monitor response after treatment.
Cardiology and Thorax
Cardiac ultrasound helps assess chamber size, wall motion, and pericardial effusion. In emergency settings, detecting pericardial fluid can change immediate management.
Practical example. A small dog with weakness and muffled heart sounds has an anechoic pericardial effusion on ultrasound. The clinician prioritizes stabilization and discusses next steps based on effusion severity.
Respiratory Tract and Pleural Space
Lung ultrasound can detect pleural fluid, consolidations, and patterns consistent with atelectasis. Pleural effusion appears as dark fluid separating lung from the chest wall.
Practical example. A dog with cough and fever shows pleural fluid on ultrasound. The clinician plans thoracocentesis and uses ultrasound guidance to improve safety.
Musculoskeletal and Soft Tissue
Ultrasound can guide needle placement for aspiration and evaluate tendon and ligament injuries. Tendons often show fibrillar structure; disruption or fluid around a tendon suggests injury or inflammation.
Practical example. A cat with a painful shoulder has a focal hypoechoic lesion near a tendon sheath. Ultrasound-guided aspiration helps determine whether the lesion is inflammatory, infectious, or neoplastic.
Mind Map: Ultrasound Principles and Applications
Quick Interpretation Checklist
When ultrasound results feel confusing, return to fundamentals: confirm the organ, check echogenicity and layering, look for fluid and shadowing, then decide whether Doppler adds information. If the findings do not match the clinical story, re-scan with a structured sweep before changing the plan.
3.3 Advanced Imaging Workflows for CT and MRI in Clinical Settings
CT and MRI are not “bigger X-rays.” They are different ways of measuring tissue, and the workflow should reflect that. A good advanced imaging plan starts with the clinical question, then matches the modality, protocol, and safety steps to the patient.
Foundational Workflow from Question to Scan
- Define the clinical question in one sentence. Example: “Is this dog’s neurologic deficit caused by a compressive lesion, and where is it located?” This prevents collecting images that do not answer the question.
- Choose modality based on tissue behavior and urgency. CT is fast and excellent for bone detail, many lung problems, and many acute trauma scenarios. MRI is better for soft tissue contrast, spinal cord, brain parenchyma, and many inflammatory or infiltrative processes.
- Confirm patient readiness before transport. Check fasting status, sedation plan, IV access, and whether the patient can safely maintain positioning. If the patient cannot hold still, the “best” scan becomes a blurry scan with expensive regrets.
- Plan contrast use early. Decide whether contrast is needed and what route fits the question. For CT, iodinated contrast is common; for MRI, gadolinium-based contrast may be used depending on the protocol and clinical goal.
CT Workflow Details That Prevent Common Failures
Positioning and immobilization. Use consistent landmarks and immobilize the region of interest. For head and neck, secure the head to reduce motion between slices. For abdomen, confirm that the patient is centered to avoid missing anatomy.
Protocol selection. Start with a scout view, then choose slice thickness and reconstruction strategy. Thinner slices improve small lesion detection but increase noise; reconstruction kernels and iterative reconstruction settings help balance detail and clarity.
Contrast timing. Timing matters because enhancement changes over minutes. A practical approach is to use a timing strategy tied to the organ of interest rather than a single fixed delay. Example: for suspected liver lesions, use a protocol that captures the phase where lesion-to-parenchyma contrast is most informative.
Radiation safety basics. Limit scan length to the question, avoid repeat scans when possible, and document dose-related parameters in the record.
MRI Workflow Details That Keep Images Usable
Sequence planning. MRI is a sequence collection, not one picture. Choose sequences that address the question: T1 for anatomy and post-contrast evaluation, T2 for fluid and edema patterns, and fat-suppressed sequences when lesion conspicuity matters.
Motion control. MRI is sensitive to motion. Sedation and careful monitoring are not optional when the patient cannot remain still. Even small motion can degrade fine neurologic or musculoskeletal detail.
Coils and field of view. Select the coil that matches the anatomy. A coil mismatch can reduce signal-to-noise and make small lesions harder to see.
Contrast considerations. Confirm renal status and follow facility policies for gadolinium use. Document the exact contrast agent and dose, and record whether post-contrast sequences were acquired.
Safety and Sedation Integration
Advanced imaging workflows treat sedation as part of the protocol, not a separate task. Ensure pre-sedation assessment, establish IV access when contrast is planned, and maintain airway readiness. Monitor oxygenation, ventilation, heart rate, and temperature. After the scan, document recovery status and any complications.
Mind Map: CT and MRI Workflow Integration
Example: Neurologic Localization with CT Then MRI
A 6-year-old dog presents with progressive hindlimb weakness. The clinician first performs a neurologic exam to localize the problem to the spinal cord region. Because the question is localization and soft tissue characterization, MRI is prioritized.
- Pre-scan: The team confirms sedation readiness, places IV access, and plans sequences for T2 and T1 with and without contrast.
- Acquisition: The MRI protocol includes sequences that highlight edema and compressive lesions, plus post-contrast imaging to assess lesion enhancement patterns.
- Quality check: If motion artifacts obscure the cord, the team repeats only the affected sequences rather than rescanning everything.
If MRI is delayed due to scheduling constraints, CT may be used first to assess bony canal changes and rule out obvious fractures, but the final tissue characterization still relies on MRI.
Example: Abdominal Lesion Workup with CT Phases
A cat with chronic vomiting has weight loss and intermittent abdominal pain. The clinician suspects a focal lesion and chooses CT with contrast.
- Pre-scan: Confirm fasting and establish IV access.
- Protocol: Use a multi-phase approach so that lesion enhancement relative to surrounding tissue is captured.
- Interpretation support: Document the phase timing so the radiologist can correlate enhancement patterns with the clinical question.
This workflow keeps the scan purposeful: each phase exists because it answers a specific diagnostic uncertainty, not because more images were taken.
3.4 Endoscopy and Bronchoscopy Preparation and Findings Documentation
Endoscopy and bronchoscopy are procedure-based diagnostics: you’re not just “looking,” you’re collecting evidence. Good preparation reduces risk, improves image quality, and makes findings easier to interpret later.
Foundational Concepts for Safe Diagnostic Endoscopy
Start with the goal. Is the purpose to identify a lesion, obtain samples, relieve obstruction, or stage disease? The goal determines scope choice, patient positioning, and what you plan to sample.
Next, match the patient to the procedure. Consider airway anatomy, aspiration risk, coagulation status, and whether the patient can tolerate sedation without compromising breathing. For bronchoscopy, airway stability matters more than for many upper-GI endoscopies because the procedure directly involves ventilation.
Finally, plan your documentation before you begin. If you can’t describe what you saw in a structured way, you can’t reliably compare it to future exams.
Pre-Procedure Preparation Workflow
Patient Assessment and Stabilization
Confirm fasting instructions appropriate to the species and procedure. Review current medications, especially anticoagulants and drugs that affect motility or respiration. Perform a focused exam and baseline vitals.
If the patient is unstable, stabilize first. For example, a dog with active vomiting and dehydration should receive fluid correction and antiemetics before upper-GI endoscopy, because poor perfusion and ongoing emesis increase complication risk and blur visualization.
Sedation and Monitoring Setup
Use a monitoring plan that covers oxygenation, ventilation, heart rate, blood pressure, and temperature. For bronchoscopy, ensure you can support ventilation and manage secretions. Have suction ready and test it before the scope enters the airway.
Equipment Readiness and Scope Handling
Verify scope function, light source, and image capture. Confirm that biopsy forceps, cytology brushes, and specimen containers are labeled and ready. Keep a clear “clean-to-dirty” flow so you don’t contaminate samples or mix containers.
Sample Planning and Labeling
Decide what you will collect: biopsies, cytology, bronchoalveolar lavage, or brushings. Label containers before sedation. A simple rule prevents mix-ups: one lesion site equals one labeled specimen set.
Example: If you see two gastric regions, label “Stomach region A” and “Stomach region B” separately, even if they look similar. Later interpretation depends on location.
Bronchoscopy Preparation Specifics
Bronchoscopy often requires careful airway management. Prepare for secretions by ensuring suction adequacy and having sterile saline available if lavage is planned.
If the patient has coughing or increased airway noise, consider whether topical anesthesia is appropriate and whether the patient can maintain oxygenation during scope passage. For small patients, plan for rapid access to emergency airway support.
Procedure Execution and Finding Documentation
Systematic Visual Survey
Use a consistent order. For upper-GI endoscopy, document esophagus, stomach (including cardia and pylorus), and duodenum. For bronchoscopy, document trachea, main bronchi, and lobar bronchi as visualized.
Describe what you see using objective terms: color, surface pattern, vascularity, presence of exudate, ulceration, mass effect, and distribution.
Lesion Description Framework
For each lesion, record:
- Location and side (if applicable)
- Size estimate (use a scale reference when possible)
- Shape (focal, multifocal, diffuse)
- Surface (ulcerated, nodular, granular, smooth)
- Exudate (none, mucus, pus, blood)
- Tissue response (friable, bleeding with touch)
Example: “Duodenal mucosa diffusely erythematous with multiple small nodular foci, 1–3 mm, mildly friable; no visible ulcer crater; mild yellow exudate.” This reads like evidence, not like guesswork.
Sampling Documentation
Record what was sampled and how. Note biopsy number and approximate depth if relevant. For lavage, document the volume used and the appearance of recovered fluid.
Example: “Bronchoalveolar lavage performed in right caudal lung lobe; recovered fluid cloudy with mild blood tinge; cytology submitted from recovered fraction; additional biopsies not obtained due to friability.”
Findings Reporting That Holds Up Later
Use a structured report format so clinicians can act on it without reinterpreting your memory.
Minimum Findings Checklist
Include:
- Procedure type and scope route
- Sedation approach summary and tolerance
- Areas examined and any segments not visualized
- Lesions described with the framework above
- Samples collected with container labels and intended tests
- Immediate complications or lack thereof
Example Findings Note
“Esophagus: mild diffuse erythema, no strictures. Stomach: focal raised nodular area at pyloric antrum, ~8 mm, granular surface, moderately friable; biopsies obtained (6 samples). Duodenum: normal mucosa. No active bleeding observed. Specimens submitted for histopathology; cytology not performed.”
Mind Map: Endoscopy and Bronchoscopy Preparation and Documentation
Quick Practical Example: Two Different Outcomes from Similar Visuals
A cat’s stomach may show mild erythema that looks “the same” across visits. If you document distribution and sampling location consistently, histopathology can be compared meaningfully. If you only write “stomach irritated,” the next clinician has to guess whether the biopsies targeted the same region.
A better approach is to record: “mild erythema limited to pyloric antrum” and “biopsies from antrum and cardia separately.” The difference is small during the procedure and huge when interpreting results later.
3.5 Biopsy and Tissue Sampling for Histopathology
Histopathology answers a simple question: what do the tissues look like under a microscope, and how does that appearance explain the clinical problem. The quality of the answer depends on the sample, the handling, and the way the tissue is fixed and labeled. A good biopsy is not just “getting tissue,” it is getting the right tissue in the right condition.
Core Principles of Tissue Sampling
Start by matching the biopsy type to the diagnostic goal. A small skin punch can confirm many dermatologic conditions, while a wedge biopsy may be needed to assess a mass’s architecture. If the lesion is heterogeneous, sampling only the most obvious area can miss the diagnosis; taking multiple targeted samples increases the chance of capturing representative tissue.
Next, plan for orientation and margins. For masses, note whether the sample includes the center, edge, or invasive front. For organs, identify the side that faces the suspected lesion. Orientation matters because histology can only interpret what the tissue orientation allows.
Finally, prevent artifacts. Crushing tissue during collection, excessive squeezing of biopsy forceps, and delays in fixation can create misleading changes. Think of the sample as a fragile message: you want it delivered quickly and intact.
Choosing the Right Biopsy Approach
Select the approach based on location, size, and safety.
- Fine needle aspiration vs biopsy: aspiration yields cells, while biopsy yields tissue architecture. Histopathology usually requires tissue architecture, so aspiration alone may be insufficient when tumor type or invasion pattern is important.
- Punch, shave, and excisional biopsies: skin lesions often allow punch or excisional sampling. A punch is efficient for focal lesions; excision is useful when margins or full lesion assessment are needed.
- Core needle and surgical biopsies: masses in deeper tissues may require image-guided core sampling or surgical access.
- Endoscopic biopsies: gastrointestinal and airway lesions can be sampled through endoscopy, but the forceps bite size and number of samples strongly affect diagnostic yield.
Tissue Handling and Fixation Workflow
Fixation preserves structure and prevents autolysis. Use an appropriate fixative volume and ensure the tissue is fully immersed.
A practical workflow:
- Label first: specimen container label should include patient ID, site, and laterality before collection.
- Collect gently: avoid squeezing; if using forceps, grasp the tissue edges.
- Control size: smaller tissue pieces fix faster and more evenly. Overly thick samples can fix poorly in the center.
- Fix promptly: place tissue into fixative immediately after collection.
- Document details: include the suspected diagnosis, lesion location, and whether the sample includes margins or invasive edge.
If you suspect a bleeding-prone lesion, coordinate with the lab on handling priorities so the sample is not compromised by excessive blood or clotting.
Mind Map: Biopsy Planning and Execution
Example: Skin Mass Biopsy with Clear Orientation
A dog presents with a firm, ulcerated skin mass on the forelimb. The clinician suspects a malignant process and wants architecture and margin information.
- Sampling plan: take a punch from the edge where invasion is most likely, plus a second punch from the center to check for heterogeneity.
- Orientation: mark the edge sample as “edge” and the center sample as “center” on the container label.
- Handling: place each punch into fixative immediately without compressing the tissue.
- Documentation: include laterality, exact location, and the clinical impression that invasion is suspected.
When the report returns, the pathologist can interpret whether the lesion shows invasive growth patterns and whether the sampled areas are representative.
Example: Endoscopic GI Biopsy Sampling Strategy
A cat has chronic vomiting and endoscopy shows mild, patchy gastric changes. Because lesions may be subtle, sampling only the most obvious spot can miss the diagnosis.
- Sampling plan: take multiple biopsies from the most abnormal areas and also from adjacent-appearing mucosa.
- Handling: keep bites small enough to fix evenly and avoid crushing the mucosa with excessive force.
- Documentation: note the stomach region sampled and whether changes were focal or diffuse.
This approach improves the odds that histology reflects the true distribution of disease.
Quality Checks Before You Send the Sample
Before transport, verify that labels match the clinical notes, the tissue is in fixative, and the sample size is appropriate for fixation. If any of these are uncertain, correct them immediately rather than hoping the lab can “work around it.” Histopathology is precise work, and it rewards careful preparation.
4. Infectious Disease Diagnosis and Treatment Protocols
4.1 Approach to Fever and Systemic Illness in Small Animals
Fever is a sign, not a diagnosis. In small animals, systemic illness often starts with subtle changes—reduced appetite, quieter behavior, or a slightly off gait—before owners notice dramatic symptoms. The goal of the first minutes is to decide whether the patient needs immediate stabilization, then to build a focused differential diagnosis using signalment, history, exam findings, and basic diagnostics.
Core Concepts for Interpreting Fever
A “fever” is an elevated body temperature, but temperature alone does not tell you the cause. Some serious infections present without high fever, especially early, in very young animals, or in patients with impaired immune responses. Conversely, stress, pain, heat exposure, and certain medications can raise temperature without infection. Treat the measurement as a data point that must be interpreted alongside perfusion, mentation, hydration, respiratory effort, and mucous membrane color.
Stepwise Triage and Stabilization
Start with ABCs before chasing causes.
- Airway and breathing: Check respiratory rate, effort, and oxygenation. If the patient is struggling to breathe, oxygen and stabilization come first.
- Circulation: Assess heart rate, pulse quality, capillary refill time, and mucous membrane color. If shock is suspected, begin fluid resuscitation and reassess frequently.
- Perfusion and mentation: A bright, responsive patient with mild fever is different from a dull, weak patient with the same temperature.
- Pain and temperature control: Provide analgesia when pain is likely. Use antipyretics selectively; in some infections, suppressing fever without addressing the cause can complicate interpretation.
Example: A 6-year-old dog arrives with a temperature of 40.1°C and mild lethargy. It is breathing comfortably and has normal mucous membranes. You can proceed to diagnostics promptly. A similar temperature in a dog with pale gums, weak pulses, and prolonged capillary refill triggers shock-focused care first.
Building the Differential Diagnosis
Use a structured approach that prevents “random testing.”
- Localizing clues: Skin lesions, cough, vomiting/diarrhea, urinary signs, lameness, or abdominal pain narrow the field.
- Pattern recognition: Acute onset over hours suggests toxins, severe infections, or immune reactions. Gradual onset over days suggests bacterial infections, inflammatory disease, or chronic processes.
- Signalment: Age, breed predispositions, reproductive status, vaccination history, travel, and exposure to vectors or other animals shape probabilities.
- Immune and inflammatory context: Lymphadenopathy, petechiae, joint swelling, or anemia can point toward specific categories.
Focused History That Actually Changes Decisions
Ask questions that connect to likely sources and risk.
- Exposure: Sick contacts, shelter or boarding history, hunting or outdoor exposure, and tick/flea exposure.
- Intake and output: Appetite, vomiting/diarrhea, urination frequency, and water intake.
- Medication and procedures: Recent antibiotics, steroids, vaccinations, dental work, or wound care.
- Timeline: When the first abnormal behavior appeared and whether it is worsening.
Example: A cat with fever and reduced appetite after a recent dental procedure raises suspicion for oral infection or bacteremia. Another cat with fever and vomiting after a new litter box raises suspicion for urinary or gastrointestinal sources.
Physical Examination Findings to Prioritize
Perform a full exam, but document findings that guide next steps.
- Mucous membranes and hydration: Helps distinguish dehydration from shock.
- Lymph nodes: Enlarged, painful, or fixed nodes can suggest infection or inflammation.
- Skin and coat: Look for wounds, abscesses, tick attachment, or generalized dermatitis.
- Abdomen: Pain, distension, or organomegaly can direct imaging and sampling.
- Joints and gait: Swollen joints and reluctance to move suggest septic arthritis or immune-mediated disease.
- Cardiopulmonary exam: Murmurs, crackles, or pleural sounds can indicate endocarditis, pneumonia, or effusion.
First-Line Diagnostics and How to Use Them
Start with tests that answer multiple questions quickly.
- CBC: Leukocytosis/leukopenia, left shift, anemia, and platelet changes help categorize inflammation and possible bone marrow involvement.
- Chemistry panel: Kidney and liver function guide medication choices and detect organ involvement.
- Urinalysis: Screens for urinary infection and renal concentrating ability.
- Fecal testing when GI signs exist: Helps identify parasites or inflammatory patterns.
- Thoracic imaging: If cough, tachypnea, or abnormal lung sounds are present, radiographs often clarify pneumonia or effusion.
Example: A dog with fever, vomiting, and abdominal discomfort has CBC showing anemia and mild leukocytosis, chemistry with elevated liver enzymes, and urinalysis without infection. This combination supports hepatobiliary or systemic inflammatory causes and guides imaging and targeted sampling rather than repeating broad GI tests.
When to Escalate Beyond Basic Testing
Escalate when the patient is unstable, diagnostics are unrevealing, or there are red flags.
- Blood cultures and targeted cultures when bacterial infection is suspected and before antibiotics if feasible.
- Ultrasound for abdominal pain, suspected abscess, biliary disease, or lymph node evaluation.
- Cytology of accessible lesions or effusions to confirm inflammatory and infectious patterns.
- Coagulation testing if petechiae, bleeding, or platelet abnormalities appear.
Mind Map: Fever and Systemic Illness Approach
Case Example: Putting It Together
A 9-year-old dog presents with fever, reduced appetite, and mild lethargy. Temperature is 40.0°C. It is breathing comfortably, has pink mucous membranes, and normal capillary refill. History reveals recent dental pain and a small draining lesion near a molar. Exam shows enlarged submandibular lymph nodes and mild oral inflammation. CBC shows neutrophilia with a left shift, chemistry shows mild elevation in liver enzymes, and urinalysis is unremarkable. Thoracic radiographs show no pneumonia. You prioritize oral source control and obtain appropriate sampling for culture when feasible, then choose antibiotics based on the most likely source and the patient’s organ function.
This approach keeps the work logical: stabilize if needed, localize using history and exam, use first-line tests to confirm organ involvement and inflammation patterns, then escalate to targeted sampling when the basics do not explain the whole picture.
4.2 Respiratory Infections Diagnostic Pathways and Sample Handling
Respiratory infections in animals are rarely “just one thing.” The diagnostic pathway starts with stabilizing the patient and ends with a specimen that is actually usable. If you skip either step, the rest of the work becomes expensive guesswork.
Step 1: Triage and Stabilization Before Sampling
Begin by deciding whether the patient needs immediate support. Measure temperature, respiratory rate, effort, mucous membrane color, and hydration. If oxygen saturation is available, record it. Stabilize first when there is severe dyspnea, cyanosis, or marked lethargy; sampling can wait a few minutes, not hours.
Example: A young dog with tachypnea and open-mouth breathing gets oxygen and a quick airway assessment. Only after breathing is more controlled do you proceed to collecting a sample for cytology and culture.
Step 2: Build a Focused Differential Diagnosis
Use signalment and history to narrow the likely causes. Consider species and age, vaccination status, exposure to shelters or boarding, season, travel, and whether the cough is acute or chronic. Ask about nasal discharge type, exercise intolerance, appetite changes, and any vomiting or diarrhea that might suggest systemic illness.
Key clinical branches:
- Upper airway signs dominate: nasal discharge, sneezing, stertor, cough triggered by excitement or eating.
- Lower airway signs dominate: persistent cough, wheeze, crackles, increased respiratory effort.
- Systemic signs dominate: fever, lethargy, poor appetite, weight loss.
Step 3: Choose the Right Diagnostic Tests
Start with tests that answer the biggest questions quickly.
-
Imaging as a map
Thoracic radiographs help distinguish bronchial pattern, interstitial pattern, alveolar consolidation, pleural involvement, and foreign material. Document whether the pattern is focal or diffuse. -
Cytology as a fast reality check
Cytology can show neutrophils, macrophages, bacteria, yeast, or inflammatory patterns. It also helps decide whether culture is likely to be informative. -
Microbiology when it changes treatment
Culture and sensitivity are most useful when disease is severe, recurrent, not responding to initial therapy, or when you can obtain a good-quality specimen. -
Additional tests when indicated
PCR panels may be appropriate when you suspect specific infectious agents and when sample quality is high. Bloodwork supports severity and helps interpret systemic effects.
Step 4: Sample Handling Principles That Prevent False Results
A good specimen is one that arrives at the lab in the right condition, from the right site, at the right time.
Collect from the most informative location. For lower airway disease, samples should come from the trachea or bronchi rather than only the nasal cavity.
Use the correct container and transport medium. Some specimens require sterile containers; others require specific transport media. Label clearly with site, time, and patient ID.
Minimize contamination. Swabs from the nose can pick up normal flora. If you must use a swab, interpret results cautiously and pair them with cytology.
Control timing. If delays are unavoidable, use appropriate transport conditions to preserve organism viability.
Handle for the intended test. Cytology needs immediate slide preparation or proper fixation. Culture needs sterile technique and careful transport.
Example: A cat with nasal discharge yields a swab that grows mixed organisms. Cytology shows few inflammatory cells, suggesting contamination or colonization rather than a primary bacterial infection. Treatment shifts toward the most likely cause based on the full picture.
Step 5: Respiratory Specimen Types and Practical Workflow
Tracheal wash or bronchoalveolar lavage
- Best for lower airway cytology and culture.
- Requires careful technique to avoid excessive dilution.
Endotracheal aspirate
- Useful when lavage is not feasible.
- Still requires sterile collection and prompt processing.
Nasal swabs
- More useful for screening and cytology than definitive culture interpretation.
Sputum or expectorate
- Works when the patient can produce it, but contamination risk is real.
Pleural fluid
- If present, it is often a high-yield specimen for cytology and culture.
Step 6: Interpret Results in Context
Do not treat a culture result without checking cytology and imaging. A heavy growth of bacteria with abundant neutrophils supports infection. Sparse inflammatory cells with mixed growth often points to contamination or colonization.
Example: A dog with focal alveolar consolidation has bronchoalveolar lavage cytology showing neutrophils and intracellular bacteria. Culture later confirms a susceptible organism, and the treatment plan is adjusted to match sensitivity results.
Mind Map: Respiratory Infection Diagnostics and Sample Handling
Case Study: From Triage to Usable Specimens
A medium-sized dog presents with acute cough and mild fever. Radiographs show a diffuse bronchial pattern. The dog is stable enough for sampling without delaying oxygen support. A tracheal aspirate is collected using sterile technique and submitted promptly for cytology and culture. Cytology shows neutrophils with intracellular bacteria, supporting bacterial lower airway infection rather than simple irritation. Culture later identifies a susceptible organism, and the clinician narrows therapy accordingly.
The diagnostic win here is not the final organism name. It is the chain: stable patient, correct sampling site, specimen handled for the intended tests, and interpretation tied to cytology and imaging.
4.3 Gastrointestinal Infections Diagnostic Pathways and Stool Testing
Gastrointestinal infections are diagnosed by combining pattern recognition with targeted testing. The goal is to answer two practical questions: what is causing the diarrhea or vomiting, and how urgently does the patient need stabilization before results arrive.
Foundational Triage and Case Framing
Start with stabilization and risk assessment. If the patient is dehydrated, hypotensive, or has persistent vomiting, begin fluids and antiemetics while collecting samples. Then frame the case using three anchors: signalment and exposure (age, vaccination status, household contacts, diet changes), clinical pattern (acute versus chronic, watery versus bloody, presence of fever), and severity (hydration, mentation, pain).
A useful rule of thumb: bloody diarrhea and systemic illness increase the likelihood of invasive bacterial disease or parasites that damage the gut lining, while purely watery diarrhea often points toward enterotoxigenic bacteria, viruses, or dietary causes. Still, overlap is common, so testing should match the pattern.
Diagnostic Pathway from Least to Most Specific
- Confirm it is infectious enough to test. If the history suggests toxins, sudden diet change, or medication effects, stool testing may be low yield.
- Choose the right sample type. Fresh stool is best for culture and antigen tests; rectal swabs can work when stool is unavailable.
- Select tests based on pattern.
- Watery diarrhea without blood: fecal PCR panel or antigen tests when available; consider Giardia testing in appropriate cases.
- Bloody diarrhea or tenesmus: fecal culture for enteric bacteria plus parasite evaluation; add cytology if available.
- Puppies and kittens, outbreaks, shelters: prioritize broad PCR panels and parasite screening.
- Interpret results with context. A positive test is evidence, not a verdict; a negative test does not always rule out infection, especially if sampling timing or handling was suboptimal.
Stool Testing Workflow That Actually Works
Stool testing succeeds when collection, storage, and labeling are consistent.
- Collection: Use a clean container; avoid litter or disinfectant contamination. Collect from multiple areas of stool when possible.
- Timing: Aim for same-day submission. If delay is unavoidable, follow lab instructions for refrigerated versus frozen handling.
- Volume and consistency: Many assays require a minimum amount; watery samples may dilute inhibitors, while very formed stool can reduce test sensitivity.
- Documentation: Record time of collection, clinical signs, and whether the patient received antibiotics or antiparasitics recently.
Mind Map: Stool Testing Decision Tree
Examples That Tie Testing to Reasoning
Example 1: Acute Watery Diarrhea in a Vaccinated Adult Dog A two-year-old dog develops watery diarrhea for 24 hours with normal appetite and no fever. The household has no sick contacts. Because the pattern is watery and mild, you can collect a fresh sample and run a fecal PCR panel if available, focusing on common enteric pathogens. If Giardia is a concern due to intermittent diarrhea or prior exposure, add Giardia testing. If the PCR panel is negative and the dog remains stable, supportive care may be sufficient while you monitor closely.
Example 2: Bloody Diarrhea in a Puppy From a Breeding Facility A six-week-old puppy has tenesmus and small-volume bloody stools. This pattern suggests invasive disease or parasites that damage the mucosa. Collect fresh stool promptly and submit for fecal culture and parasite evaluation. If the clinic has cytology capability, look for inflammatory cells that support an invasive process. Because puppies can deteriorate quickly, do not wait for results to start fluids and pain control.
Example 3: Chronic Diarrhea With Weight Loss in a Cat A cat has two months of loose stools and gradual weight loss. Even if the owner reports “normal appetite,” chronicity shifts the focus toward parasites and inflammatory causes. Stool testing should include microscopy for ova and cysts and Giardia testing when indicated. If initial results are negative but suspicion remains, repeat sampling can improve sensitivity because shedding can be intermittent.
Practical Interpretation and Next Steps
When results return, match them to the clinical pattern. A pathogen detected in a patient with compatible signs is more meaningful than the same result in a patient with resolved symptoms. If tests are negative but the case remains strongly suspicious, re-check sample quality, timing, and whether antibiotics or antiparasitics were given before collection. Then adjust the diagnostic plan to the most likely remaining causes based on the original pattern and severity.
4.4 Vector Borne Diseases Diagnostic Testing and Treatment Planning
Vector-borne diseases are a two-part puzzle: the patient’s immune and clinical response, and the vector exposure that likely triggered it. Good testing starts with a clear exposure story, then matches test choice to the disease stage and the patient’s risk level. Treatment planning follows the same logic: treat what is most likely and most dangerous first, while using test results to refine therapy and prevent unnecessary medication.
Foundational Exposure Assessment
Begin with a structured history that covers where the animal lives, where it goes, and what bites it might have encountered. Ask about recent travel, time outdoors at dusk and dawn, yard conditions (standing water, tall grass), and household vector control practices. For multi-pet homes, note whether other animals have compatible signs or known diagnoses.
A practical example: a 4-year-old dog with fever and lethargy after spending weekends near a pond. The clinician documents tick exposure, checks for tick attachment history, and records whether flea and tick preventives were used consistently. This history guides both test selection and whether to start treatment immediately.
Diagnostic Testing Strategy
Step 1: Decide Whether to Start Before Results
If the patient is unstable, has severe anemia, neurologic signs, respiratory compromise, or marked thrombocytopenia, treatment should not wait for confirmatory testing. In stable cases, testing can be prioritized to avoid overtreatment.
Example: a dog with pale gums, tachycardia, and low packed cell volume. Even if serology is pending, blood-based tests and immediate supportive care are prioritized, and empiric therapy is considered based on the most likely vector-borne causes.
Step 2: Match Test Type to Disease Stage
Vector-borne diseases often have a timing mismatch between exposure and detectable markers.
- Antigen tests can be useful when the pathogen burden is high.
- PCR detects pathogen genetic material and can be informative early, but sample handling matters.
- Serology detects antibodies, which may lag behind infection and can remain positive after recovery.
A systematic approach is to use a combination when the clinical picture is strong. For instance, in suspected tick-borne illness with compatible signs, pairing PCR with a targeted serology panel can reduce the chance of misinterpreting early or late disease.
Step 3: Choose Samples and Handle Them Correctly
Blood collection should be planned around test requirements. EDTA tubes are commonly used for PCR and some hematology workflows; serum is often used for serology. Label samples clearly with time of collection and site, and keep them at appropriate temperatures until processing.
Example: a clinician collects EDTA blood for PCR and serum for antibodies during the same visit, then documents the exact collection time. This prevents the common problem of “the right test, wrong tube,” which wastes both time and money.
Step 4: Interpret Results with Context
A positive test is not automatically a complete explanation, and a negative test does not always rule disease out.
- Positive serology may reflect past exposure, especially in animals with prior preventive use gaps.
- Negative serology early in infection can occur before antibodies develop.
- PCR positives suggest current infection, but contamination and low-level positives can complicate interpretation.
Use the patient’s clinical signs, CBC/chemistry patterns, and exposure history to decide whether to treat, retest, or broaden the differential.
Treatment Planning Framework
Step 1: Prioritize Safety and Severity
Start with supportive care tailored to the patient’s immediate needs: fluids for dehydration, oxygen for respiratory compromise, transfusion planning for severe anemia, and seizure control when neurologic signs appear. Antimicrobials or antiparasitics are chosen based on the most likely organism and the patient’s condition.
Example: a dog with vomiting, fever, and low platelets. Supportive care addresses dehydration and bleeding risk, while antimicrobial therapy targets the most likely tick-borne causes.
Step 2: Select Targeted Therapy
Treatment choice depends on the suspected pathogen group and local diagnostic confirmation patterns. When the clinical picture strongly suggests a specific vector-borne disease, therapy can begin while awaiting confirmatory results.
Example: if PCR is positive for a specific tick-borne organism and the patient’s clinical course matches, therapy is continued and adjusted for response rather than switching repeatedly based on partial improvement.
Step 3: Plan for Monitoring and Reassessment
Monitoring should be measurable and tied to the disease mechanism.
- Recheck CBC and key chemistry values to track anemia, platelet trends, and organ involvement.
- Reassess clinical parameters such as appetite, temperature, mentation, and hydration.
- Document response milestones so the team can decide whether to continue, modify, or investigate alternative diagnoses.
A simple internal checklist can prevent “we treated, but we didn’t measure.”
Mind Map: Vector Borne Testing and Treatment Logic
Case Study: Tick Exposure with Fever and Anemia
A 6-year-old mixed-breed dog presents with fever, pale gums, and weakness after months of inconsistent tick preventive use. The clinician records a history of yard tick exposure and checks for tick attachment sites. Physical exam confirms pale mucous membranes and mild lymphadenopathy.
Testing includes CBC, chemistry, EDTA blood for PCR, and serum for targeted serology. Because the dog is clinically stable but clearly ill, treatment begins promptly based on the most likely tick-borne causes while awaiting results. Supportive care includes fluids and monitoring for worsening anemia.
When PCR returns positive for a tick-borne organism and serology supports recent exposure, therapy is continued and the monitoring plan is tightened. The team rechecks CBC in a defined interval and tracks platelet and hematocrit trends alongside clinical improvement. If the dog’s temperature normalizes but anemia lags, the plan focuses on adherence, supportive care, and confirming that no secondary complication is driving the persistent lab abnormality.
Practical Example: Avoiding the “One Test, One Answer” Trap
A cat with mild lethargy and a low-grade fever has a positive antibody test but no clear clinical pattern for active disease. The clinician reviews exposure history and repeats targeted testing with a method that better matches current infection detection. Treatment is not started solely on the antibody result when the clinical picture is weak, and the plan emphasizes confirmation before committing to prolonged therapy.
Summary of Integrated Approach
Vector-borne diagnostics work best when exposure history, disease stage, and test type are aligned. Treatment planning then uses severity and likely pathogens to decide whether to start immediately, while monitoring provides the feedback loop that turns test results into clinical decisions.
4.5 Zoonotic Risk Management and Infection Control During Care
Zoonotic risk management starts with a simple idea: assume every patient could carry something transmissible, then reduce exposure with layered controls. In practice, that means you manage risk at three levels—people, procedures, and environment—so no single step carries the whole job.
Foundational Concepts and Risk Assessment
Begin with a quick risk assessment before the first physical contact. Use the presenting signs and setting: coughing, diarrhea, skin lesions, wounds, and unknown vaccination status all change what you do next. Also consider the patient’s behavior. A cat that hisses and bites is not just “difficult”; it is a higher-risk exposure scenario because it increases the chance of bites, scratches, and aerosolized saliva.
A practical workflow is to separate tasks into “clean first, dirty last.” For example, you can triage a stable patient, then handle a coughing patient, and only afterward clean and disinfect the room. This prevents you from dragging contamination across the clinic like a rolling suitcase.
Core Infection Control Principles
Use standard precautions for every case: hand hygiene, appropriate personal protective equipment, respiratory etiquette, safe sharps handling, and routine cleaning and disinfection. Hand hygiene is the anchor. Wash with soap and water when hands are visibly soiled or after contact with feces, vomit, or blood; otherwise use an alcohol-based rub.
PPE is not a fashion choice; it is a barrier with a job. Gloves reduce hand contamination during contact with body fluids. Eye protection matters when splashes are plausible, such as during wound cleaning or suctioning. A mask or respirator is chosen based on the procedure and the patient’s respiratory signs.
Sharps safety is a separate discipline. Use puncture-resistant disposal containers at point of use, never recap needles, and keep hands clear of the needle path during restraint and injections.
Procedure-Based Controls with Examples
Example: Handling a dog with diarrhea. Start by preparing supplies before contact: gloves, disposable pads, and a designated waste bag. Restrain calmly to avoid splashes. Collect fecal samples with tools that can be disinfected or discarded. Afterward, remove gloves without touching the outside surfaces, perform hand hygiene, and disinfect the exam surface with a product appropriate for organic material. If the patient vomited, treat the area as higher contamination and clean thoroughly before disinfection.
Example: Examining a cat with a draining skin lesion. Wear gloves and consider eye protection if exudate can splash. Use a clean-to-dirty approach: inspect and palpate surrounding tissue before touching the lesion. If you collect cytology, use a separate set of instruments or disinfect between sites. Document the lesion while wearing PPE, then remove PPE and sanitize hands before touching the chart or computer.
Example: Performing a dental procedure on a coughing patient. Aerosols are the concern. Use appropriate respiratory protection, eye protection, and gloves. Minimize unnecessary aerosol generation by using suction effectively and keeping the patient’s head positioned to reduce spread. After the procedure, follow room cleaning steps before allowing the next patient.
Environmental Cleaning and Waste Handling
Cleaning removes visible soil; disinfection kills remaining microbes. Do not skip cleaning when there is organic material. Use correct contact time for disinfectants, and ensure surfaces are not wiped dry before the required time has passed.
Manage laundry and waste as contaminated until proven otherwise. Bag waste at the point of generation, seal it properly, and store it away from clean supplies. Handle soiled linens carefully to avoid shaking them.
Staff Workflow and Communication
A good infection control system includes predictable roles. Assign who restrains, who collects samples, and who cleans between steps. When a zoonotic risk is suspected, communicate it early so PPE and room preparation happen before the patient is brought in.
Document what you did and why. If you used enhanced PPE due to respiratory signs or a draining lesion, record it. That documentation supports continuity of care and helps the next team member choose the right precautions.
Mind Map: Zoonotic Risk Management and Infection Control
Case Study: One Exam Room, Two Different Risks
A clinic sees two patients back-to-back: a stable dog for vaccines and a cat with a draining wound. For the dog, standard precautions are enough. For the cat, the team prepares PPE and supplies before entry, uses a clean-to-dirty approach during the exam, and disinfects the room after the wound assessment with attention to contact time. The key is that the second case does not “borrow” the cleanliness of the first; the room is treated as contaminated based on the actual patient contact.
When infection control is systematic, it feels less like a checklist and more like good housekeeping. The clinic stays functional, staff stay safer, and patients get care without unnecessary delays.
5. Parasitology and Vector Management in Animal Health
5.1 External Parasites Identification and Clinical Assessment
External parasites are usually easier to spot than internal ones—until you realize how many “itchy skin” causes can look similar. This section gives a systematic way to identify likely external parasites, confirm them when possible, and assess clinical impact so treatment matches the problem rather than the guess.
Foundational Concepts and What Counts as Evidence
Start by separating signs from evidence.
- Signs are what you see or the client reports: itching, hair loss, scabs, redness, ear shaking, visible mites, or “fleas running.”
- Evidence is what you can document: a parasite seen on the animal, a positive skin scraping/cytology, a flea comb finding, or characteristic eggs/larvae on the coat or bedding.
A practical rule: if you can’t collect evidence, you still treat the most likely cause, but you document why and what you will recheck.
Step One History That Narrows the Differential
Ask targeted questions that map to parasite behavior and life cycles.
- Itch pattern and onset: sudden onset after boarding or grooming suggests fleas; chronic itch with seasonal changes can fit mites or allergies (parasites can still be involved).
- Distribution: fleas often cause lumbosacral dermatitis; ear involvement points toward ear mites or secondary infection; generalized scaling and hair loss can fit mange.
- Household and contact animals: multiple pets itching at once supports contagious external parasites.
- Environment: outdoor access, yard exposure, and bedding changes help interpret flea pressure and reinfestation risk.
- Prior treatments: when and what was used matters because some products don’t cover every parasite stage.
Example: A dog with intense itching around the tail base and no other symptoms, plus a cat in the home with “mysterious dandruff,” makes fleas and flea allergy dermatitis high on the list.
Step Two Physical Exam with a Parasite-First Mindset
Perform a full exam, but use a parasite-focused sequence.
- Coat and skin inspection: look for papules, crusts, alopecia, scaling, and erythema. Flea allergy dermatitis often shows small papules and scabs over the rump and tail base.
- Flea combing: comb over a white towel or paper. Flea dirt looks like dark specks that smear reddish-brown when moistened.
- Lymph node and body condition: chronic ectoparasitism can contribute to poor body condition and secondary infections.
- Ear exam: check for head shaking, odor, debris, and erythema. Ear mites can cause dark, crumbly material; secondary otitis can complicate interpretation.
- Regional palpation: thickened skin, nodules, or painful areas can suggest secondary bacterial infection or less common infestations.
Step Three Identification by Pattern and Targeted Sampling
Use pattern recognition to choose the next test.
- Fleas: often evidence-based via combing; eggs are not usually seen on the animal in routine exams.
- Ear mites: debris and clinical signs guide cytology; confirm with microscopic identification when feasible.
- Mange mites: generalized scaling, thick crusts, and alopecia suggest sarcoptic or demodectic mange; sampling is needed because treatment differs.
Step Four Clinical Assessment of Severity and Complicating Factors
Identification is only half the job. Assess how much the parasite is affecting the patient.
- Dermatitis severity: note extent (localized vs generalized), lesion type (papules, crusts, pustules), and presence of alopecia.
- Secondary infection: look for pustules, honey-colored crusts, malodor, and increased pain. Parasites can trigger inflammation that invites bacteria.
- Comfort and function: quantify itch intensity by behavior (scratching frequency, sleep disruption) and check for ear pain or head tilt.
- Systemic impact: in heavy infestations, especially in young or debilitated animals, watch for anemia risk and lethargy.
- Reinfestation risk: fleas and some mites persist in the environment. If you treat only the animal without addressing exposure, the “mystery recurrence” is inevitable.
Example: A kitten with flea dirt on combing and crusting on the rump needs not only parasite control but also assessment for anemia risk and secondary skin infection.
Step Five Documentation That Makes Treatment Make Sense
Record:
- Lesion distribution and description (use consistent terms).
- Evidence obtained (flea comb results, cytology findings, scraping results).
- Severity notes and any secondary infection indicators.
- Client-reported timeline and prior product use.
This documentation supports rechecks and helps explain outcomes. If symptoms improve but evidence persists, you can adjust the plan based on what you actually found.
Quick Practical Example Workflow
A dog presents for itching.
- History: itching started after a recent visit to a boarding facility; two other dogs in the home are itchy.
- Exam: flea comb finds dark specks that smear reddish-brown; papules and scabs are concentrated over the tail base.
- Assessment: mild generalized scaling but no pustules; dog is bright and eating.
- Plan alignment: treat for fleas with attention to environmental reinfestation risk, and document the lesion distribution for follow-up.
When you follow this sequence, you’re not just “looking for bugs.” You’re building a defensible clinical picture that guides the right treatment and a sensible recheck.
5.2 Internal Parasites Diagnostic Methods and Fecal Testing Workflow
Internal parasites are diagnosed by combining three things: the patient’s story, what you see on exam, and what you find in feces. Fecal testing is powerful, but it’s not magic; parasites shed eggs or larvae unevenly, so your workflow has to reduce missed detections and produce results you can actually act on.
Foundations of Internal Parasite Diagnosis
Start with a focused history: age, diet, deworming schedule, housing type, hunting or scavenging behavior, travel, and exposure to other animals. Then connect symptoms to likely locations. For example, chronic weight loss and potbelly in young animals can fit roundworms, while intermittent diarrhea and mucus may fit whipworms or coccidia depending on age and environment.
On physical exam, look for clues that change urgency and test selection: dehydration, anemia, poor body condition, dull coat, and abdominal discomfort. If the patient is weak, vomiting repeatedly, or has severe diarrhea, stabilize first; fecal testing is still useful, but it should not delay basic supportive care.
Fecal Testing Goals and Test Selection
Your goal is to answer two questions: “Is there evidence of parasites right now?” and “Which type is most likely?” Different tests answer different parts.
- Direct smear helps you see motile organisms or fragile stages when present.
- Fecal flotation concentrates eggs or oocysts for easier detection.
- Sedimentation is useful for heavier eggs and some protozoa that don’t float well.
- Fecal PCR can identify specific parasite DNA, especially when microscopy is limited or when you need species-level clarity.
Choose based on patient age, symptom pattern, and what you expect to find. For instance, puppies with watery diarrhea may need flotation plus direct smear for coccidia, while older dogs with chronic intermittent GI signs often benefit from flotation and a careful interpretation of egg counts.
Step by Step Fecal Sample Workflow
A good sample beats a fancy test. Collect fresh feces when possible, ideally within a few hours. If storage is needed, follow your clinic’s handling rules so organisms don’t degrade.
- Label and document: patient ID, date collected, consistency of stool, and any recent deworming.
- Select the right amount: enough to mix thoroughly; avoid only the outer dry bits.
- Prepare for concentration: homogenize the sample so eggs and oocysts are evenly distributed.
- Run at least one concentration method: flotation or sedimentation depending on expected parasite types.
- Perform microscopy systematically: scan low power first, then confirm at higher magnification.
- Record findings clearly: organism type, approximate quantity, and whether the morphology matches.
- Plan follow up: if symptoms persist and the first test is negative, repeat testing rather than assuming “no parasites.”
A practical rule: if the clinical picture strongly suggests parasites but the first fecal test is negative, repeat with a new sample collected on a different day. Shedding patterns are the reason; you’re not being stubborn, you’re being accurate.
Mind Map: Internal Parasites and Fecal Testing Workflow
Interpreting Results Without Overpromising
A positive fecal test supports treatment, but interpretation still matters. “Few eggs” can mean low burden, early infection, or uneven shedding. “Many eggs” suggests a higher burden and often explains more severe clinical signs.
Also, not every organism found is the whole story. Mixed infections happen, and some GI signs can come from non-parasitic causes. If the fecal test shows parasites but the patient doesn’t improve after appropriate therapy, reassess the diagnosis and consider additional diagnostics.
Example: Puppy with Diarrhea and Weight Loss
A 10-week-old puppy presents with two weeks of diarrhea and poor weight gain. The owner reports one deworming at 6 weeks but no follow-up. Stool is watery with mild mucus.
Workflow:
- History and exam identify dehydration risk and poor condition.
- Fecal testing includes flotation and a direct smear.
- Microscopy shows oocysts consistent with coccidia.
- Treatment is selected to target coccidia, and supportive care addresses hydration and stool consistency.
- A follow-up fecal test is planned after therapy to confirm clearance, especially since coccidia can be persistent when hygiene is inconsistent.
Example: Adult Dog with Intermittent GI Signs
A 3-year-old dog has intermittent soft stools and occasional vomiting. Deworming history is uncertain. The dog lives indoors but has access to a yard.
Workflow:
- History focuses on exposure and prior treatments.
- Fecal flotation is performed, and sedimentation is considered if flotation is negative but suspicion remains.
- Microscopy identifies whipworm-type eggs.
- Treatment targets whipworms, and the owner is instructed on cleaning feces promptly to reduce reinfection.
- If symptoms continue after treatment, repeat fecal testing and broaden the diagnostic approach.
Example: Negative Fecal Test with Strong Suspicion
A young animal has chronic diarrhea, but the first fecal flotation is negative. The exam suggests mild dehydration and poor body condition.
Workflow:
- You don’t treat “the test result”; you treat the patient.
- Because shedding can be intermittent, you collect a new sample on a different day and repeat microscopy.
- If repeat testing remains negative, you consider other causes of diarrhea and adjust the diagnostic plan.
Documentation That Makes Treatment Easier
Record the sample quality, test type, organism identification, and your confidence level based on morphology. Note the date collected (for example, 2026-02-07) and whether the patient had any deworming recently. Clear documentation prevents confusion later and helps you decide whether a repeat test is needed or whether the diagnosis should shift.
5.3 Heartworm and Blood Borne Parasites Diagnostic Strategies
Heartworm and blood borne parasites share a practical diagnostic theme: you’re not just “testing,” you’re matching the test to the patient’s timeline, risk, and clinical picture. A good workflow starts with risk assessment, then chooses tests that answer specific questions—exposure, active infection, and disease severity—while avoiding results that are technically correct but clinically misleading.
Step One: Build the Clinical and Risk Picture
Begin with history that changes test selection. Ask about mosquito exposure, geographic history, prior prevention adherence, and whether the patient is on any current preventives. Then map symptoms to likely mechanisms. For example, a dog with chronic cough and exercise intolerance fits heartworm disease physiology, while a dog with fever, anemia, and lethargy suggests a blood borne process that may require urgent stabilization.
A useful mental model is “what would I expect to see if infection is present right now?” Heartworm antigen tests detect adult female antigens, so early infections may test negative. Blood smears detect parasites present in circulating blood, so low parasitemia can produce false negatives.
Step Two: Choose Tests That Match the Question
For heartworm, a typical strategy uses antigen testing plus a confirmatory or complementary method. Many clinics pair an antigen test with a microfilaria test (often a concentration method) to improve interpretation. If antigen is positive but microfilaria is negative, the patient may have adult worms without circulating microfilariae, or the microfilariae may be below detection limits.
For blood borne parasites, start with a blood smear and a complete blood count. Smears can show organisms directly, while CBC patterns help you interpret what you’re seeing. Anemia with regenerative changes can support hemolysis, and thrombocytopenia can align with certain infections. Still, a normal CBC does not rule out disease early in the course.
Step Three: Interpret Results Without Getting Tricked
Interpretation is where most diagnostic errors happen. A negative heartworm antigen does not guarantee absence if the patient recently acquired infection or has incomplete prevention history. A negative smear does not guarantee absence if parasitemia is low or if the smear quality is poor.
Use a structured interpretation approach:
- If clinical signs strongly fit heartworm and antigen is negative, consider repeating after an appropriate interval and reassessing prevention history.
- If smear shows organisms, confirm species when possible because treatment choices depend on the organism.
- If smear is negative but clinical suspicion remains high, repeat smear with careful technique and consider additional tests that detect parasite DNA or antigen, depending on clinic capabilities.
Step Four: Practical Sampling and Quality Control
Smear quality matters. Use a fresh sample, spread to a thin monolayer, and stain consistently. If you’re doing microfilaria concentration, follow the method exactly; small deviations can reduce sensitivity.
For heartworm antigen testing, ensure proper sample handling and avoid hemolysis or contamination that can interfere with assays. For both heartworm and blood borne testing, document the exact sample type and collection time so interpretation stays anchored to reality.
Step Five: Integrate Diagnostics into Treatment Readiness
Diagnostics should feed directly into treatment planning. Heartworm treatment requires baseline assessment of severity and organ involvement because therapy can stress the patient. Blood borne parasite treatment decisions depend on organism identification and the patient’s stability.
A concrete example: a dog with positive heartworm antigen but negative microfilariae still needs staging and careful monitoring. Another example: a cat with fever and anemia may have a negative smear early; you can’t treat “nothing,” so you stabilize, repeat testing with better sampling, and interpret CBC trends.
Mind Map: Heartworm and Blood Borne Parasite Diagnostics
Example: Interpreting Mixed Heartworm Results
A 4-year-old dog presents with intermittent cough. History suggests inconsistent prevention. Antigen is positive, microfilariae are negative. The most likely explanation is adult infection without detectable circulating microfilariae, or detection limits. The clinic proceeds with staging and baseline organ assessment rather than assuming “mild” disease.
Example: Negative Smear with High Suspicion
A dog arrives with fever, pale gums, and lethargy. CBC shows anemia and thrombocytopenia. The initial smear is negative. Instead of treating as “ruled out,” the clinic repeats the smear with careful technique and reviews sample quality. Meanwhile, supportive care addresses perfusion and oxygen delivery so the patient can tolerate definitive therapy once the organism is identified.
Case Study: Systematic Decision Path
A clinic receives a dog from a rural area with poor prevention history. The dog has exercise intolerance and a mild cough. The antigen test is positive. The microfilaria test is negative. The clinic documents the result pattern, performs baseline assessment for treatment readiness, and schedules follow-up testing only when it changes clinical decisions. The key is that the diagnostic plan is not a checklist; it’s a chain of decisions that keeps the patient safe while you narrow the diagnosis.
5.4 Mange and Dermatitis Associated Parasites Diagnostic Confirmation
Mange and parasite-associated dermatitis can look similar to allergies, bacterial overgrowth, or contact irritation. Diagnostic confirmation matters because the treatment differs, and the wrong choice can waste time while the skin barrier keeps getting punched.
Foundational Concepts for Confirmation
Start by confirming that the problem is truly parasite-associated. Parasites usually produce patterns that repeat across visits: intense pruritus, papules or crusts, and lesions that follow predictable distribution. Sarcoptic mange often causes generalized itch and can involve the ears, elbows, hocks, and ventral abdomen. Demodicosis often shows patchy alopecia and scaling, commonly around the face or limbs, and may be less itchy than sarcoptic mange.
Then confirm that the sample you collect can answer the question you’re asking. A skin scrape is not a “test for parasites” in the abstract; it’s a test for mites or mite stages in the specific area you sampled. If the skin is too intact, mites may not be accessible. If the sample is too superficial, you may get a negative result even when disease is present.
Stepwise Diagnostic Workflow
-
Reassess history and distribution Ask about onset, progression, itch intensity, household animals, and whether lesions started after a new environment or grooming routine. If multiple animals are itchy, suspect contagious mange or fleas. If only one young animal is affected, consider demodicosis and immune context.
-
Perform a targeted skin exam Clip or part hair only where needed. Look for crusts, papules, and areas where skin feels thickened. These often yield better diagnostic material than smooth, intact skin.
-
Choose the right sampling method
- Skin scraping for mites: best for sarcoptic mange and demodicosis when mites are accessible.
- Tape strip for superficial mites and eggs: useful when lesions are exudative or when you need a quick screen.
- Cytology for secondary changes: not a direct mite test, but it helps interpret the skin environment and rule in bacterial or yeast overgrowth.
-
Collect multiple samples from multiple sites One scrape from one spot is a gamble. Sample at least two or three lesions, plus one representative itchy or crusted area. For demodicosis, sample active borders of alopecia rather than only the most hairless center.
-
Prepare and evaluate samples correctly Use mineral oil or appropriate medium to improve slide quality and reduce desiccation. Examine promptly under the microscope. If you’re using a lab workflow, label samples with site and lesion type so results can be interpreted in context.
Mind Map: Diagnostic Confirmation Pathway
Example: Sarcoptic Mange Confirmation in a Multi-Pet Home
A dog presents with sudden, intense itch and crusts on the ears and elbows. Two other dogs in the home show mild scratching. You scrape the edge of crusted lesions on the ear pinna and elbow, plus a ventral abdominal papule. Microscopy shows mites and life stages consistent with sarcoptic mange. Because the household pattern supports contagious spread, you treat all at-risk animals according to the confirmed diagnosis and reinforce environmental cleaning practices that reduce reinfestation.
Example: Demodicosis Confirmation with Patchy Alopecia
A young dog has two round patches of hair loss on the face and a small area on a forelimb. Itches are mild. You scrape the active border where hair transitions from normal to alopecic, not only the center. Microscopy reveals demodex mites. You then assess for secondary infection using cytology, because demodicosis often comes with bacterial overgrowth that can worsen redness and odor.
Common Pitfalls and How to Avoid Them
- Sampling the wrong skin: intact, smooth skin often yields false negatives. Target crusts, papules, and thickened areas.
- Single-site sampling: mites can be patchy. Multiple sites reduce sampling error.
- Ignoring secondary disease: cytology helps explain why the skin looks inflamed even when mite numbers are low.
- Over-relying on a negative scrape: a negative result doesn’t automatically rule out mange. If clinical suspicion remains high, repeat sampling with better lesion targeting.
Practical Confirmation Checklist
- Distribution matches a mange pattern
- Itch and household history fit the suspected cause
- Samples collected from multiple representative lesions
- Slide preparation supports mite visualization
- Cytology interprets secondary infection and inflammation
- Negative results trigger re-sampling rather than premature dismissal
5.5 Practical Deworming and Treatment Scheduling for Mixed Households
Mixed households—multiple pets, different species, varying ages, and sometimes shared outdoor access—turn deworming into a scheduling puzzle. The goal is simple: treat the right parasites at the right time, while avoiding unnecessary medication and minimizing reinfection.
Core Principles for Scheduling
Start by separating “prevention” from “response.” Prevention targets common parasites based on risk, while response targets a specific diagnosis or strong clinical suspicion. In a mixed household, you also need a “who lives where” map: pets that share bedding, litter, runs, or yards share reinfection pathways.
Next, use a consistent timing anchor. Many clinics schedule deworming around a predictable interval (for example, every 2–4 weeks for young animals during early life, then less often as risk decreases). If you have a recent fecal test date, use it as your reference point; otherwise, base the plan on age, lifestyle, and prior treatment history.
Finally, treat the household as a system. Deworming without cleaning and feces management is like fixing a leak while leaving the bucket under the drip.
Stepwise Workflow for Mixed Households
- Inventory the household. List each animal, species, age, weight, pregnancy/lactation status, and whether they hunt, roam, or share litter/bedding.
- Assess exposure routes. Identify shared outdoor areas, rodent activity, communal water bowls, and whether any pet has diarrhea, vomiting, or weight loss.
- Choose the treatment scope. If you have no fecal results, start with a broad plan appropriate for the most likely parasites in your setting. If you do have fecal results, narrow treatment to the confirmed organisms.
- Set a timeline. Young animals often need repeated dosing to catch parasites as they mature. Adults may need fewer doses but still require household coordination.
- Plan for reinfection control. Schedule litter box cleaning, feces pickup, and bedding washing to occur on the same days as dosing.
- Document and follow up. Record product, dose, date, and any side effects. Recheck with fecal testing when indicated.
Mind Map: Household Deworming Logic
Practical Scheduling Example
Assume a household with two kittens (8 weeks old), one adult dog (3 years), and one indoor cat (2 years). The dog and kittens go into a shared yard; the cat stays indoors but shares a hallway litter area.
Week 1 (starting point):
- Dose the kittens and the dog on the same day.
- Dose the indoor cat as well if it shares litter space or if there is any chance of fecal contamination via paws or shared cleaning tools.
- Clean litter boxes thoroughly and remove yard feces the day of dosing.
- Wash bedding used by kittens and the dog.
Week 3:
- Repeat dosing for the kittens using the same product class and interval recommended for young animals.
- Reassess the dog and cat based on risk and any stool findings; if the dog has ongoing exposure, keep the plan aligned with the household schedule.
Week 5:
- Repeat dosing for kittens again.
- Consider fecal testing for the kittens if diarrhea, poor weight gain, or inconsistent stool quality appears.
If you need a concrete calendar anchor, you can start on two months ago, 2026-02-07, and then dose at 2-week intervals for the kittens while maintaining the same-day coordination across animals.
Advanced Details That Prevent Common Mistakes
1. Don’t mix products casually. Different dewormers target different parasites. If you change products mid-plan without a reason, you may miss the parasite lifecycle stage you were trying to cover.
2. Adjust for age and health status. Very young animals, pregnant/lactating pets, and animals with significant illness may require different dosing choices. Use the label guidance and veterinary direction for safety.
3. Treat all susceptible animals, not just the one with symptoms. In mixed households, “the one with diarrhea” may be the first to show signs, but others can carry parasites without obvious symptoms.
4. Clean the environment on dosing days. Feces removal and litter hygiene reduce the number of parasite eggs or larvae available to reinfect pets.
Case Study: Shared Yard Reinfection
A dog and two kittens share a yard. After the first dosing, the kittens develop loose stool again two weeks later. The dog’s stool looks normal.
The likely issue is reinfection from the yard rather than treatment failure. The fix is not “more frequent dosing immediately,” but better feces pickup and litter/foot-traffic control. After improving cleanup and repeating the kitten dosing on schedule, stool quality stabilizes.
Quick Scheduling Checklist
- List every animal and confirm who shares spaces.
- Pick broad vs targeted treatment based on fecal results.
- Dose young animals on a repeat interval; coordinate household dosing days.
- Clean litter and remove feces on dosing days.
- Record everything and follow up with fecal testing when indicated.
6. Dermatology and Allergic Disease Diagnosis and Treatment
6.1 Dermatologic History and Lesion Characterization
A good dermatology visit starts with two parallel tracks: a careful history that explains what changed and when, and a lesion description that explains what you see. The trick is to keep them connected. If the owner says “itch started after the new shampoo,” your lesion notes should help confirm whether the pattern fits contact irritation, allergy, or something else.
Core History Questions That Guide Lesion Interpretation
Begin with onset and tempo. Ask when the problem started, whether it was sudden or gradual, and if it is getting worse, better, or staying the same. Sudden onset with intense itch often points toward irritant or allergic triggers, while slow progression can fit chronic infections, endocrine issues, or long-standing allergies.
Next, ask about distribution. Request the first location the owner noticed and how it spread. Owners often remember “it started on the belly” or “around the ears,” which helps you decide whether you’re dealing with localized disease, generalized disease, or a pattern like face-and-paws involvement.
Then cover itch and comfort. Record severity (mild, moderate, severe), timing (worse at night, after exercise, after grooming), and whether scratching leads to hair loss, scabs, or skin thickening. Itch that flares after bathing can be a clue, but it can also reflect that the skin barrier is already compromised.
Ask about treatments already tried. Include shampoos, sprays, wipes, topical steroids, antibiotics, antifungals, flea products, and any “leftover” medications. Note the response: did itch improve within days, did lesions stop spreading, and did anything worsen? A partial response can be more informative than a complete lack of response.
Finally, gather exposure and host factors. Include diet changes, new pets, boarding or daycare, travel, yard access, grooming frequency, and flea/tick prevention adherence. For multi-pet households, ask whether other animals itch or have skin changes.
Lesion Characterization Framework
Lesion description should be systematic: morphology, distribution, severity, and secondary changes.
Morphology answers what the lesion looks like. Common categories include erythema (redness), papules (small raised bumps), pustules (pus-filled bumps), vesicles (fluid-filled), wheals (temporary raised swelling), crusts (dried exudate), scales (dry flakes), alopecia (hair loss), ulcers (loss of skin), and lichenification (thickened, rough skin from chronic rubbing).
Distribution answers where lesions are. Use consistent body maps in your notes: pinnae and ear margins, face, neck, axillae, elbows, ventral abdomen, perineum, tail base, inguinal area, paws, and inter-digital spaces. Symmetry matters. Symmetric patterns often suggest allergy or endocrine contributions, while asymmetric patterns can suggest localized infection, trauma, or foreign material.
Severity is about extent and impact. Record whether lesions are mild and focal, moderate and multifocal, or severe and generalized. Include whether there is pain, odor, weeping, or significant hair loss.
Secondary changes explain what the primary lesion has become. Scratching and licking create excoriations, crusting, and ulceration. Chronic itch can lead to thickened skin and pigment changes.
Integrated Example from History to Lesions
An owner reports that a dog started itching around the ears and feet two weeks ago. It is worse after walks and after bathing. They used a new shampoo last week and noticed increased redness within two days. On exam, you document erythema of the ear margins, papules on the ventral paws, and crusting from excoriations. There is also alopecia between toes.
This combination supports a barrier problem with secondary inflammation. The history points toward a trigger around bathing, but the distribution also fits common allergic patterns in dogs. Your next step is to confirm whether infection is present by checking for odor, discharge, and cytology rather than assuming the shampoo is the only cause.
Mind Map: Dermatologic History and Lesion Characterization
Practical Note-Taking Tips That Prevent Common Errors
Write lesion descriptions in the same order every time. If you always start with morphology, then distribution, then severity, you reduce the chance of missing a key detail. Also, avoid vague terms like “rash” without specifying what you actually see. “Erythema with papules and crusting on ventral paws” is far more actionable than “rash on feet.”
Finally, connect the dots explicitly in your assessment notes: “History suggests trigger around bathing; lesion distribution includes ear margins and inter-digital areas; secondary excoriations present.” That single sentence keeps the visit coherent and makes the next diagnostic decision easier.
6.2 Skin Scrapes Cytology and Fungal Testing Workflows
Skin disease diagnosis works best when you treat sampling like a mini investigation: you collect enough material from the right place, preserve it correctly, and interpret it with the rest of the exam in mind. Skin scrapes and fungal testing are the two tools that often answer the question “Is this parasite, fungus, or something else?” without jumping straight to broad treatment.
Foundational Principles for Sampling
Start with lesion selection. Choose areas that are active and representative: fresh papules, scaling edges, crusts, and sites of active itch or erythema. Avoid only picking the most dramatic scab if it’s likely dead keratin; instead, sample the border where living inflammation meets scale.
Next, match the method to the suspected target. Superficial scrapings are for surface organisms and mites that live near the stratum corneum. Deeper scrapings increase yield for mites that burrow deeper, but they also increase discomfort and bleeding risk, so you should stop when you’ve reached a reasonable depth and focus on technique.
Finally, document what you did. Record lesion location, depth estimate, number of slides, and whether you used mineral oil or tape. This matters because cytology without context is like a lab report without a patient name.
Skin Scrapes Workflow from Prep to Slide
-
Prepare the patient and area. Clip only if needed to see scale and crust boundaries; avoid shaving large areas unnecessarily. Clean gently with sterile saline or a minimal amount of appropriate cleanser, then dry.
-
Choose tools. Use a blunt scalpel blade or skin scraping tool. For each lesion, plan to collect multiple passes.
-
Collect superficial material first. Hold the blade at a shallow angle and scrape firmly enough to lift scale and superficial debris. Collect from the scale edge and any erythematous border.
-
If deeper disease is suspected, escalate carefully. Repeat with increased pressure and slightly deeper passes, but reassess patient comfort and bleeding.
-
Transfer to slides. Spread material thinly on labeled slides. For fungal testing, you may also collect separate material into a sterile container or onto appropriate media depending on your lab workflow.
-
Stain and interpret. Air-dry slides for cytology stains that require it, then stain per your clinic protocol. For fungal elements, fungal stains or direct microscopy may be used depending on the test.
Cytology Interpretation System
Cytology answers “what’s in the sample,” but you still need a structured interpretation.
- Look for mites and their life stages. Identify mite bodies, eggs, or characteristic debris patterns. If you see mites, you can often connect them to the clinical distribution.
- Assess inflammation and secondary infection. Neutrophils suggest active bacterial involvement; eosinophils can support allergic or parasitic processes.
- Evaluate yeast and bacteria. Yeast overgrowth can be a primary driver in some cases or a secondary amplifier in others. Bacteria presence helps you decide whether you need antimicrobial therapy alongside antifungal or antiparasitic treatment.
- Consider sample quality. If the slide is mostly thick crust with little scale edge material, you may miss organisms. In that case, repeat sampling from a better border.
Fungal Testing Workflow and Practical Choices
Fungal testing often includes direct microscopy and fungal culture, depending on what your clinic can run.
- Direct microscopy. This is fast and can show fungal elements when organism burden is high. Use it when you need an immediate clue, especially for ringworm-like lesions.
- Fungal culture. Culture is slower but more sensitive. It’s useful when direct microscopy is negative but suspicion remains based on lesion pattern and cytology.
Sampling for fungal testing should be separate from cytology slides to avoid contamination and to preserve material for the specific method. If you suspect dermatophytes, collect from the lesion edge and any broken hairs or scale that contains fungal spores.
Mind Map: Skin Scrapes Cytology and Fungal Testing
Example: Itch with Scale and Mixed Findings
A dog presents with generalized itch and patchy scaling on the ears and elbows. Skin scrapings from the ear edge show mites and eggs, while cytology also shows yeast and neutrophils. The reasoning is straightforward: the mites explain the itch and inflammation, and the yeast plus neutrophils suggest secondary overgrowth.
You would treat the mite cause first while also addressing yeast and bacterial involvement based on the cytology pattern. If fungal testing is negative on direct microscopy but the lesions include classic ring-like patches, you still collect for culture because a negative quick test can happen when organism load is low.
Example: Negative Scrapes with Persistent Suspicion
A cat has focal alopecia with scale on the face. Superficial and deeper scrapings are negative for mites, and cytology shows minimal inflammation with no yeast. Because the lesion pattern still fits a fungal process, you collect separate material for fungal testing. This avoids the common trap of declaring “not fungus” just because the scrape didn’t show it; dermatophytes can be missed if the sample is too crust-heavy or collected from the wrong border.
Quality Checks That Prevent Repeats
If you repeatedly get negative results, check technique before changing treatment. Confirm you sampled the lesion edge, used enough passes, labeled correctly, and preserved material appropriately for fungal testing. When slides look thick and opaque, the fix is often better sampling rather than more hope.
6.3 Allergic Dermatitis Diagnostic Approach and Rule Out Methods
Allergic dermatitis is a diagnosis you earn, not one you guess. The goal is to confirm an immune-mediated pattern and rule out look-alikes that demand different treatment. In practice, you’ll move from broad pattern recognition to targeted testing, while keeping the patient comfortable and the household informed.
Foundational Concepts That Guide Testing
Start by separating “itchy skin” into categories based on distribution, lesion type, and seasonality.
- Distribution clues: Flea allergy often favors the rump and tail base; contact reactions may match exposure sites like collar areas or bedding contact points.
- Lesion clues: Papules, erythema, excoriations, and self-trauma suggest itch-driven disease. Pustules or thick crusts push you to consider bacterial overgrowth or folliculitis.
- Seasonality and triggers: A pattern that worsens during certain months supports allergy, but it doesn’t exclude parasites or infections.
A useful mental model is: itch → inflammation → secondary changes. Secondary changes can mask the original driver, so early rule-outs matter.
Stepwise Diagnostic Approach
Step 1: Stabilize and Reduce Confounders
Before deep testing, reduce inflammation and secondary infection risk.
- If the animal is extremely itchy, short-term anti-itch therapy can improve exam quality and allow better sample collection.
- If there are signs of bacterial involvement (odor, pustules, oozing), treat or sample promptly rather than waiting for “perfect” test conditions.
Example: A dog with red, raw paws and ventral abdomen is miserable. After controlling itch enough to examine paws and ears thoroughly, you can collect cytology from both sites and avoid sampling only the most traumatized areas.
Step 2: Rule Out Fleas and Other External Parasites
Even when you suspect allergy, parasites remain the most common “why is this still itchy?” reason.
- Perform a flea history (household pets, outdoor access, recent prevention gaps).
- Do flea combing and look for flea dirt (dark specks that turn reddish-brown in water).
- Confirm with skin scrapings when mites are plausible (especially if lesions are generalized, crusted, or ear-involved).
Example: A cat with head and neck pruritus is treated for “environmental allergy,” but flea combing reveals flea dirt. After consistent flea control, the cat’s itch improves within days, and the allergy workup becomes unnecessary.
Step 3: Rule Out Food-Related Dermatitis
Food allergy can mimic environmental allergy closely, so it needs a structured approach.
- Use a strict elimination diet with a novel protein or hydrolyzed diet as appropriate.
- Ensure no treats, flavored medications, or chewable supplements slip in.
- Track response using a simple scoring sheet for itch and lesion severity.
Example: A dog receives “just a few” training treats during the first week of diet trial. The itch score doesn’t improve, and the owner concludes the diet failed. A better approach is to document all exposures and start the trial again with strict compliance.
Step 4: Screen for Infection and Malassezia
Allergic patients often develop secondary infections, and infections can also cause itch.
- Use skin cytology from multiple representative sites.
- Consider ear cytology when ears are involved.
- Interpret results in context: Malassezia overgrowth often accompanies moist, erythematous areas.
Example: Cytology shows cocci and inflammatory cells in a dog’s axillae. Treating the infection reduces itch, and subsequent allergy evaluation becomes clearer.
Step 5: Identify the Allergy Type Using Pattern and Response
Once parasites and infections are addressed, you can focus on allergy patterns.
- Atopic dermatitis often presents with recurrent pruritus, typical distributions, and seasonality.
- Contact dermatitis aligns with exposure sites and may improve when the suspected trigger is removed.
Rule-out logic: if lesions persist despite parasite control, diet trial, and infection management, allergy becomes more likely.
Mind Map: Allergic Dermatitis Rule-Out Path

Practical Examples of Rule-Out Reasoning
Example 1: Ear-First Itch A dog has recurrent ear inflammation and face rubbing. You do ear cytology first. If Malassezia and bacteria are present, treat them and reassess pruritus. If itch returns quickly after infection control, you proceed to parasite and diet rule-outs before labeling atopy.
Example 2: Localized Collar Lesions A cat develops erythema and pruritus where a collar contacts the neck. You remove the collar and switch to a different material. If improvement is clear and sustained, contact dermatitis rises in likelihood, while you still keep parasite rule-outs in the background.
Example 3: Generalized Crusting With Intense Itch A dog with crusts and generalized pruritus is tested with skin scrapings and cytology. If mites are found, you treat for mites and reassess. If cytology shows heavy bacterial involvement, infection treatment comes first to prevent ongoing itch amplification.
Documentation That Keeps the Work Logical
Record three things every visit: distribution, lesion type, and what you ruled out and when. Add a brief note on compliance factors like diet adherence and prevention coverage. This prevents the common trap of repeating tests without changing the underlying question.
By following the sequence—stabilize, rule out parasites, rule out food, rule out infection, then interpret allergy patterns—you reduce guesswork and make each next step earn its place.
6.4 Bacterial and Malassezia Overgrowth Diagnosis and Treatment Plans
Bacterial and Malassezia overgrowth often show up together because skin barrier damage and moisture create the perfect “two-for-one” environment. The goal is not just to stop the itch today, but to identify what is driving the overgrowth so you can choose the right test and the right treatment length.
Foundational Concepts for Overgrowth Recognition
Start with lesion pattern and distribution. Malassezia commonly favors warm, moist areas such as ear canals, axillae, groin, and interdigital spaces. Bacterial overgrowth more often accompanies crusting, pustules, erosions, and malodor, and it can worsen after scratching or licking.
Next, confirm that you are treating overgrowth rather than primary disease. Allergic dermatitis, endocrine disease, and ectoparasites can all set the stage. If you treat only the secondary infection without addressing the underlying trigger, the problem tends to return quickly.
Diagnostic Mindset and Stepwise Workup
A systematic approach prevents “test roulette.”
- Assess severity and comfort: If the animal is painful, very itchy, or has extensive lesions, start symptomatic control while diagnostics are underway.
- Collect samples before antibiotics when possible: Cytology is fast and can guide immediate therapy.
- Use targeted tests: Cytology for Malassezia and bacteria; culture and sensitivity when recurrent, severe, or unresponsive.
- Document baseline: Photograph lesions and record odor, pruritus score, and distribution to judge response.
Mind Map: Diagnostic and Treatment Logic
Cytology for Malassezia and Bacteria
Cytology is the workhorse because it answers two practical questions: “Is there overgrowth?” and “Which type is most prominent?”
For Malassezia, look for yeast forms and associated inflammation. For bacteria, identify cocci or rods and note whether they appear intracellular, which can suggest active infection rather than surface contamination.
Example: A dog with greasy ear discharge and mild crusting on the inner pinna has cytology showing abundant yeast and inflammatory cells. You start an antifungal ear plan and add a topical antifungal shampoo schedule for the body. You also recheck in about 10–14 days to confirm that cytology and odor are improving.
When to Use Culture and Sensitivity
Culture is not routine for every mild case, but it becomes essential when you see any of the following: repeated relapses, poor response after an appropriate course, deep or draining lesions, or a history of antibiotic exposure that may select resistant organisms.
Example: A cat with recurrent chin lesions has cytology showing bacteria, but after a standard topical regimen the lesions persist. Culture identifies a resistant organism, and sensitivity results guide a narrower systemic choice. The improvement is faster because the treatment matches the organism rather than guessing.
Treatment Plans That Match the Findings
Treatment should be layered: reduce overgrowth, control inflammation, and prevent recurrence.
Topical therapy
- Use antimicrobial or antifungal shampoos/rinses for body involvement.
- For ears, use an appropriate ear solution regimen based on cytology and the presence of yeast versus bacteria.
Systemic therapy
- Use systemic antibiotics when there is clear bacterial infection with significant inflammation, extensive lesions, or failure of topical-only management.
- Use systemic antifungals when Malassezia is extensive, recurrent, or not controlled with topical therapy.
Anti-itch and inflammation control Short-term symptom relief improves compliance and reduces self-trauma. It also helps you judge whether the overgrowth is truly improving rather than the animal just tolerating the itch.
Underlying trigger management Treat the driver. If allergies are suspected, implement an allergy-focused plan alongside overgrowth therapy. If parasites are possible, ensure effective control. If endocrine disease is present, correct it because it changes the skin environment.
Practical Example Plan with Clear Milestones
Example: A young adult dog with axillary and groin erythema, greasy scale, and musty odor has skin cytology showing yeast and mixed bacteria. You start a topical antifungal shampoo twice weekly for two weeks, add a targeted topical antimicrobial for bacterial lesions, and provide short-term itch control. You schedule a recheck in 10–14 days with photos and a repeat cytology from the same lesion type. If yeast counts drop but bacteria remain prominent, you adjust the topical antimicrobial emphasis. If both remain high, you consider culture and reassess for an untreated trigger.
Monitoring and Decision Points
Recheck timing should match severity, but the principle is consistent: reassess early enough to prevent prolonged ineffective therapy. Use response criteria that are measurable—odor reduction, lesion spread, pruritus score, and cytology trends—so decisions are based on evidence rather than hope.
Common Pitfalls to Avoid
- Treating only the body when the ears are the main reservoir.
- Using systemic antibiotics for mild, cytology-light cases where topical therapy would suffice.
- Skipping trigger management and then wondering why the overgrowth returns.
- Changing multiple variables at once, which makes it impossible to know what worked.
6.5 Itch Control Therapy Plans and Topical Treatment Protocols
Itch control is not a single medication choice; it’s a plan that reduces the itch drivers while protecting the skin barrier. In practice, you start by confirming the itch pattern and ruling out obvious triggers like fleas, then you choose topical therapy that matches the lesion type and the patient’s tolerance for handling.
Step One: Define the Itch Goal and Time Horizon
Set a measurable goal: for example, reduce scratching intensity within 3–5 days and improve lesion appearance within 2–3 weeks. This matters because topical therapy often works on a timeline—some effects are immediate (less inflammation), while others require consistent barrier repair (less dryness and scaling).
A useful framework is to treat itch as a symptom while simultaneously treating the cause. If the cause is unresolved, topical therapy becomes a short-term bandage.
Step Two: Match Topical Therapy to Lesion Type
Topical choices should align with what you see.
- Oily, crusted, malodorous areas: prioritize cleansing and antiseptic action.
- Dry, scaly, rough skin: prioritize moisturizers and barrier support.
- Exudative, weepy lesions: prioritize gentle drying and anti-inflammatory control.
- Localized thickened plaques: prioritize targeted anti-inflammatory therapy and careful recheck.
A practical example: a dog with greasy, yellowish ear discharge and mild body itch may need a more antiseptic approach on the body if there are similar skin changes, but you still treat the ear separately with an ear-specific plan.
Step Three: Build a Topical Routine That Patients Will Tolerate
Topical therapy fails most often because it’s too complicated. Choose a routine that fits the household.
A simple starting protocol for many itchy dogs and cats:
- Cleanse once daily or every other day for the first week, then taper.
- Apply anti-inflammatory topical once daily to affected areas.
- Moisturize after cleansing if the skin looks dry or tight.
- Recheck at 7–14 days to adjust frequency.
Example: a cat that tolerates wiping but not bathing may do better with gentle wipes and a leave-on moisturizer rather than frequent rinses.
Step Four: Use Correct Application Technique
Technique is part of the medication.
- Clip or gently trim heavy hair around lesions to improve contact.
- Apply to the lesion and a small surrounding margin to reduce “edge misses.”
- Avoid over-saturating so the patient doesn’t immediately lick it off.
- Use gloves or clean hands to prevent spreading yeast or bacteria to unaffected areas.
If the patient licks after application, consider an Elizabethan collar or a soft alternative long enough for the product to set.
Step Five: Combine Topicals with Itch-Reducing Support
Topicals can reduce itch, but many patients need a layered approach.
- Anti-inflammatory topical reduces local inflammation.
- Barrier support reduces dryness-driven itch.
- Antiseptic cleansing reduces microbial amplification.
- Systemic itch control may be added when itch remains disruptive despite correct topical use.
Example: a dog with seasonal flare-ups may respond well to a consistent cleansing schedule plus a topical anti-inflammatory, but if scratching causes skin breaks, you may need systemic itch control to prevent a cycle of worsening lesions.
Step Six: Monitor Response and Adjust Without Guessing
Recheck should focus on itch behavior and lesion evolution.
- If itch improves but lesions persist, you may need longer cleansing or a different topical target.
- If itch worsens after starting, reassess for contact irritation, incorrect lesion matching, or an untreated trigger like fleas.
- If there is no change by the expected timeline, revisit the diagnosis and sampling rather than simply increasing frequency.
Mind Map: Itch Control Plan Logic
Example: A Week-One Topical Protocol for a Mild-to-Moderate Flare
A common plan for a dog with generalized mild itch and erythema:
- Days 1–7: cleanse affected areas every other day, then apply a leave-on anti-inflammatory to red and itchy zones once daily.
- Between treatments: apply a moisturizer to dry areas after cleansing.
- Household steps: check for fleas and manage bedding washing to reduce re-exposure.
- Recheck: at day 7–10, assess itch score and lesion change; taper cleansing if itch is clearly improved.
Example: Localized Hot Spots with Rapid Itch Relief Needs
For a small, localized area that is intensely itchy and inflamed:
- Clip hair around the spot.
- Cleanse gently once daily.
- Apply a targeted anti-inflammatory topical to the lesion and surrounding margin.
- Use a collar until the patient stops licking.
- Recheck in 3–5 days to ensure the lesion is drying and itch is trending down.
Common Pitfalls to Avoid
- Treating itch without addressing fleas or microbial overgrowth when signs suggest them.
- Using overly frequent cleansing when the skin is already dry and tight.
- Applying products only to the center of lesions and missing the inflamed edge.
- Extending a failing plan without reassessment when the expected timeline passes.
A good itch plan is boring in the best way: consistent, matched to the skin you see, and adjusted based on response rather than hope.
7. Cardiovascular and Respiratory Disease Management
7.1 Heart Murmurs and Cardiac Auscultation Documentation
Heart murmurs are sounds, but good documentation turns those sounds into clinical decisions. The goal is to describe what you heard in a way that another clinician can reproduce and interpret.
Foundations of Heart Sound Interpretation
Start with the basics: normal heart sounds are S1 (mitral and tricuspid closure) and S2 (aortic and pulmonic closure). A murmur is an additional sound caused by turbulent blood flow. Turbulence can reflect normal flow under certain conditions, but in most cases it signals altered flow due to valve disease, shunts, or flow changes from anemia, fever, or exercise.
A practical first step is to confirm you are hearing a murmur and not an artifact. Check for consistent timing with the cardiac cycle, repeat auscultation after the patient settles, and compare left and right sides. If the murmur changes dramatically with positioning, note the position because it may reflect dynamic flow.
Auscultation Technique for Reliable Findings
Use a systematic approach: patient position, stethoscope placement, and timing. Place the diaphragm over standard cardiac landmarks and listen in a consistent order.
- Position: For small animals, listen with the patient calm and restrained safely. For dogs, lateral recumbency can help isolate sides; for cats, a quiet room and gentle handling matter.
- Placement: Listen at the left and right apex region, base, and along the thoracic midline as appropriate for the species.
- Timing: Determine whether the murmur is systolic, diastolic, or continuous.
- Intensity: Use a consistent scale (commonly 1–6). Record the number, not just “soft” or “loud.”
- Quality: Describe the sound character (e.g., blowing, harsh, musical). Quality helps differentiate patterns, even though it is partly subjective.
- Radiation: Note where it is loudest and whether it travels to the axilla, back, or neck.
- Associated Findings: Document heart rate, rhythm, pulse quality, and any gallop or extra sounds.
A simple example: a dog in left lateral recumbency has a grade 3/6 blowing systolic murmur loudest at the left apex with mild radiation toward the axilla, with normal heart rate and no extra sounds. That single sentence already contains timing, location, intensity, and context.
Documentation Elements That Make Notes Clinically Useful
Good notes separate observation from interpretation. Record observations first, then add your working impression.
Minimum documentation set
- Murmur timing: systolic/diastolic/continuous
- Intensity: grade 1–6
- Location: where it is loudest
- Radiation: where it is heard best beyond the primary site
- Quality: blowing/harsh/musical
- Associated sounds: S3/S4, clicks, gallops
- Rhythm and rate: regular/irregular, tachycardic/bradycardic
- Patient context: stress level, position, recent activity
Example documentation
- “Systolic murmur, grade 4/6, blowing quality, loudest at left base, radiates to right base; no diastolic component; S2 mildly obscured; heart rhythm regular; HR 140 bpm; patient calm in right lateral recumbency.”
Mind Map: Murmur Description Workflow
Common Patterns and How to Describe Them
You do not need to diagnose from auscultation alone, but patterns guide next steps.
- Systolic murmurs are often linked to valve regurgitation or outflow changes. Describe whether the murmur is loudest at the apex (often consistent with mitral regurgitation patterns) or at the base (often consistent with aortic or pulmonic outflow patterns).
- Diastolic murmurs are less common and should be documented carefully because timing matters. Record whether it is early or late diastole if you can distinguish it.
- Continuous murmurs should be recorded with attention to whether they are truly continuous or appear continuous due to rapid heart rate. Note the exact timing impression and intensity.
Example: “Diastolic murmur, grade 2/6, harsh quality, best heard at left base, late diastole predominance; regular rhythm; HR 120 bpm; no systolic component appreciated.”
Quality Control for Documentation
Before finalizing the note, perform a quick internal check: Did you record timing and grade? Did you specify where it is loudest? Did you mention radiation and any extra sounds? If any of these are missing, the murmur description becomes harder to compare across visits.
If you are unsure about timing, say so explicitly rather than guessing. For instance: “Timing uncertain between late systole and early diastole; grade 3/6; loudest at left apex.” That honesty prevents the note from becoming a confident error.
Finally, keep the note consistent across patients and clinicians. A murmur described the same way every time is like a map with the same legend—less mystery, more usefulness.
7.2 Diagnostic Use of ECG and Echocardiography
Why These Tests Fit Together
An ECG gives you a time-based snapshot of electrical activity, while echocardiography shows the anatomy and motion behind that activity. Used together, they help you answer two questions: “What is the heart doing electrically?” and “What is the heart doing mechanically?” In practice, this pairing reduces guesswork—especially when a murmur, cough, or weakness could come from several different cardiac problems.
Foundational Concepts for ECG Interpretation
Start with a disciplined ECG workflow. First, confirm the patient is stable enough to record a usable tracing, then verify calibration and lead placement. A clean baseline matters because small errors can masquerade as disease.
Next, interpret in a consistent order:
- Rate and rhythm: Is the rhythm regular? Are P waves present and consistent?
- Intervals and conduction: Measure PR, QRS duration, and QTc when appropriate.
- Axis and chamber enlargement clues: Look for patterns that suggest left or right-sided enlargement.
- ST-T changes and arrhythmia morphology: Identify ischemia-like patterns, inflammation-related changes, or ventricular ectopy.
A practical example: a dog with intermittent weakness and a history of “skipping beats” may show frequent premature ventricular complexes on ECG. If echocardiography later shows reduced systolic function, the electrical finding becomes more clinically urgent because it aligns with impaired pumping.
ECG Patterns That Commonly Change Management
ECG is not just about naming rhythms; it guides immediate decisions.
- Bradyarrhythmias: If the ECG shows slow rates with dropped beats or conduction blocks, you prioritize perfusion assessment and consider whether pacing-level urgency is present.
- Tachyarrhythmias: Sustained fast rhythms can worsen oxygen delivery quickly, so you correlate with pulse quality, mentation, and blood pressure.
- Atrial enlargement and atrial arrhythmias: In cats, atrial enlargement can accompany atrial fibrillation. Even when the patient looks “okay,” the rhythm can increase thromboembolic risk, so you treat promptly and monitor closely.
- Ventricular ectopy: Occasional ectopy may be incidental, but frequent runs, complex morphologies, or concurrent structural disease on echo raise concern.
Echocardiography Basics That Prevent Misreads
Echocardiography is operator-dependent, so your goal is repeatable technique. Begin with image quality checks: correct transducer position, stable patient positioning, and consistent views. Then interpret systematically.
A useful structure:
- Cardiac size: Compare chamber dimensions to species-appropriate expectations.
- Wall motion and systolic function: Assess how well the ventricles contract.
- Valves and regurgitation: Identify abnormal flow direction and severity.
- Diastolic function clues: Look for patterns that suggest impaired filling.
- Pericardial space: Check for effusion or constriction signs.
Concrete example: a cat with cough and a murmur may have a normal ECG or only mild changes. Echocardiography can still reveal hypertrophic cardiomyopathy with dynamic obstruction, which changes medication choices and how aggressively you manage outflow issues.
Integrating ECG and Echocardiography in Real Cases
Integration means you reconcile what you see electrically with what you see mechanically.
- Electrical problem with structural confirmation: Frequent ventricular ectopy plus reduced systolic function supports a higher-risk cardiac profile.
- Electrical problem without major structural disease: Some arrhythmias occur with minimal structural changes. You still treat symptoms and consider reversible contributors, but you avoid over-escalating based on ECG alone.
- Structural disease with subtle ECG findings: Early valve disease or mild cardiomyopathy may not produce dramatic ECG abnormalities. Echo can be the first clue.
A simple “two-column” reasoning habit helps: write down the ECG finding, then write down the echo finding that either supports it or challenges it. If they conflict, you re-check technique and measurement rather than forcing a single diagnosis.
Mind Map: ECG and Echocardiography Diagnostic Use
Example Workflow for a Busy Clinic Day
A dog presents for exercise intolerance and a new cough. You record an ECG first because it is fast and can reveal rhythm issues that affect immediate safety. The ECG shows irregular rhythm with absent consistent P waves, suggesting atrial fibrillation. You then perform echocardiography to determine chamber size and valve involvement. If echo shows left atrial enlargement and mitral regurgitation, you treat the rhythm and address the underlying structural driver, then schedule rechecks that track both rhythm control and mechanical function.
Common Pitfalls and How to Avoid Them
- Over-trusting a single tracing: Arrhythmias can be intermittent. If the ECG is normal but suspicion remains, repeat or correlate with symptoms.
- Ignoring clinical context: A rhythm abnormality in a stable patient may be less urgent than the same rhythm in someone with poor perfusion.
- Measuring without consistency: Echo measurements should be repeatable. If values vary widely between views, re-acquire images before concluding severity.
- Forgetting that technique is part of the diagnosis: Both ECG and echo depend on correct setup. When results don’t make sense, check the basics before changing the plan.
7.3 Congestive Heart Failure Stabilization and Medication Management
Congestive heart failure (CHF) is less a single diagnosis and more a clinical syndrome: the heart cannot move blood forward at the rate the body needs, so fluid and pressure back up. Stabilization aims to improve oxygenation and perfusion first, then reduce cardiac workload, and finally prevent recurrence with a medication plan that matches the underlying disease.
Step 1: Stabilize Oxygenation and Perfusion
Start with triage priorities: respiratory effort, mucous membrane color, mentation, heart rate, and pulse quality. If the patient is struggling to breathe, oxygen comes before paperwork. For example, a dog with tachypnea and increased respiratory effort benefits from oxygen supplementation and a calm environment while you confirm whether the distress is cardiogenic.
Fluid status matters. In CHF, you often avoid routine fluids because many patients are already congested. Instead, assess perfusion: weak pulses, cool extremities, and prolonged capillary refill suggest poor forward flow, where carefully chosen therapy may be needed. A practical approach is to treat shock-like signs with clinician judgment while continuing to manage pulmonary edema.
Step 2: Reduce Pulmonary Edema and Venous Congestion
Pulmonary edema is the common reason CHF patients look like they are “working hard to breathe.” Diuretics are the usual first-line tool to reduce fluid in the lungs and venous system. In practice, you monitor response by respiratory rate, effort, lung sounds, and comfort rather than by “dose math” alone.
Example: A 9-year-old cat presents with open-mouth breathing and crackles. After oxygen and diuretic therapy, you recheck within a short interval. If breathing eases and the patient becomes more comfortable, you continue the plan and document the response. If there is no improvement, you reassess the diagnosis, consider alternative causes of dyspnea, and verify that the medication was delivered and absorbed.
Step 3: Choose Medication Strategy by Heart Disease Pattern
Medication management depends on whether the problem is primarily left-sided failure, right-sided failure, or a mixed picture, and whether the underlying disease is more likely to be systolic or diastolic.
- Left-sided CHF often drives pulmonary edema and cough or tachypnea.
- Right-sided CHF often shows ascites, pleural effusion, jugular distention, or hepatomegaly.
- Diastolic dysfunction may respond differently than systolic dysfunction because the heart fills poorly rather than pumping weakly.
A useful mental model is to match each drug class to a physiologic goal: reduce preload, reduce afterload, improve contractility when appropriate, and control heart rate when filling is impaired.
Step 4: Core Medication Classes and Practical Use
Diuretics reduce congestion. Use the lowest effective dose that maintains comfort, and recheck frequently early on. Over-diuresis can worsen perfusion and kidney function, so you track hydration status and renal parameters.
Vasodilators can help when blood pressure and perfusion allow. They reduce afterload and venous return, which can improve breathing and reduce cardiac workload.
Positive inotropes are selected when indicated, typically when systolic function is poor and perfusion is inadequate. They are not a universal “add-on,” because they can increase oxygen demand and affect arrhythmia risk.
ACE inhibitors help reduce maladaptive remodeling and lower afterload. They are commonly introduced once the patient is stabilized and perfusion is acceptable.
Beta blockers are used selectively, often when heart rate control is needed and the patient is stable enough to tolerate them. In unstable patients, they can be counterproductive.
Antithrombotic considerations may apply when risk is high, especially in certain cardiomyopathies where thromboembolism is a concern. The decision should be grounded in the patient’s risk profile and current clinical status.
Step 5: Monitoring and Dose Adjustment
Monitoring is not optional; it is the medication plan in action. Recheck respiratory rate and effort, heart rate and rhythm, mucous membrane color, and appetite. For kidney function and electrolytes, you monitor labs when diuretics and ACE inhibitors are used, because changes can be subtle at first.
Example: A dog improves after diuretics but becomes less interested in food and has mild weakness at home. In the clinic, you reassess hydration, check renal values, and review dosing timing. You may adjust the diuretic dose downward or modify the schedule while keeping the patient comfortable.
Step 6: Client Instructions That Prevent Common Failures
Home management succeeds when instructions are specific. Tell owners what “better” looks like: easier breathing, normal resting behavior, and stable appetite. Also specify what “not okay” looks like: increased effort to breathe, persistent open-mouth breathing, collapse, or inability to keep medications down.
A simple rule helps: if breathing worsens, contact the clinic promptly rather than waiting for the next dose. Provide clear guidance on medication timing and what to do if a dose is missed.
Mind Map: Congestive Heart Failure Stabilization and Medication Management
Case Example: From Stabilization to Maintenance
A patient arrives tachypneic with crackles and mild weakness. Oxygen and diuretic therapy improve breathing within the observation window. After stabilization, the plan adds an ACE inhibitor and sets a maintenance diuretic dose based on comfort and lab trends. The owner receives clear home monitoring instructions and a schedule for rechecks so the medication plan stays aligned with the patient’s actual response.
7.4 Cough Dyspnea and Upper Airway Assessment Workflows
Cough and dyspnea often share the same first problem: airflow is limited, irritated, or both. The workflow below keeps you from jumping straight to guesses by starting with safety, then narrowing the location of the problem, then choosing tests that match what you found.
Foundational Triage and Stabilization
Begin with a quick risk check while you prepare equipment.
- Assess breathing effort: note respiratory rate, effort, and whether the patient can hold a normal posture.
- Check oxygenation: if you have pulse oximetry, record SpO2 and trend it after interventions.
- Look for immediate obstruction signs: open-mouth breathing, stridor, cyanosis, weak cough, or sudden collapse.
- Start supportive care early: keep the patient calm, reduce stress, and provide oxygen when indicated.
Example: A 6-year-old dog arrives with noisy breathing and mild cyanosis. You place oxygen, keep the dog in a quiet room, and document effort and SpO2 before any diagnostic steps.
History That Actually Narrows the Differential
Ask questions that separate upper airway from lower airway and infectious from noninfectious causes.
- Onset and pattern: sudden onset suggests foreign body or acute edema; gradual onset suggests mass, chronic inflammation, or collapse.
- Cough character: dry, honking, productive, or gagging.
- Trigger: exercise, excitement, eating, drinking, or collar pressure.
- Voice change and swallowing: hoarseness, regurgitation, or drooling can point toward laryngeal or pharyngeal involvement.
- Environmental exposure: smoke, dust, new bedding, or kennel exposure.
Example: A cat with intermittent coughing that worsens after eating and shows drooling is more suspicious for pharyngeal or laryngeal dysfunction than for primary bronchitis.
Physical Exam Localization
Use a structured exam to localize the noise and the likely site.
- Observe at rest: note whether noise is louder on inhalation (often upper airway) or exhalation (often lower airway).
- Palpate and inspect: check nasal discharge, oral lesions, and neck tenderness.
- Auscultation with technique: compare trachea, thoracic inlet, and lung fields; listen for wheeze, crackles, and airflow limitation.
- Assess airway reflexes: gag reflex, cough response, and ability to swallow.
Example: A dog with inspiratory stridor and reduced airflow sounds at the thoracic inlet likely has an upper airway component, even if the lungs are mostly quiet.
Upper Airway Red Flags and Immediate Actions
If you see signs of significant obstruction, prioritize stabilization and minimize stress.
- Severe inspiratory effort or stridor at rest
- Cyanosis or very low SpO2
- Inability to swallow or manage secretions
- Sudden onset after possible aspiration
Example: A small dog with acute stridor after chewing a toy needs airway planning before imaging. You document the findings, stabilize, and proceed with the safest next step.
Diagnostic Pathways That Match the Suspected Site
Choose tests based on localization, not on habit.
- Radiography: useful for tracheal narrowing, mass effect, foreign body suspicion, and aspiration patterns.
- Endoscopy: best for direct visualization of larynx, pharynx, and dynamic obstruction.
- Ultrasound: can help evaluate pleural space and some soft tissue structures when appropriate.
- Laboratory tests: support systemic infection, inflammation, or anemia; they do not replace airway localization.
Example: A dog with chronic honking cough and inspiratory noise that worsens with excitement may benefit from airway imaging and endoscopic evaluation to assess dynamic collapse.
Treatment Planning with Clear Targets
Upper airway treatment depends on the cause, but the targets are consistent: reduce obstruction, control inflammation, and prevent aspiration.
- If edema or inflammation is suspected: anti-inflammatory therapy may be appropriate, with careful monitoring of response.
- If bronchospasm is suspected: bronchodilators can be considered when lower airway signs dominate.
- If infection is suspected: select antibiotics based on clinical context and severity.
- If aspiration risk is present: adjust feeding strategy and consider antiemetic or supportive measures.
Example: A dog with coughing after drinking and wet-sounding breathing gets feeding adjustments and aspiration precautions while you investigate the airway.
Monitoring and Reassessment Loop
Recheck after each intervention. Improvement should be measurable.
- Reassess effort and noise: does stridor lessen or does cough become more effective?
- Trend SpO2: record before and after oxygen or medication.
- Document response time: note how quickly the patient changes.
Example: After oxygen and anti-inflammatory therapy, a patient’s inspiratory effort decreases within an hour, and SpO2 rises from 90% to 95%.
Mind Map of the Workflow
Integrated Example Walkthrough
A 9-year-old cat presents with inspiratory noise and intermittent coughing. You start oxygen because effort is moderate and SpO2 is reduced. History reveals worsening after eating and mild drooling. On exam, you hear noise louder during inhalation and the lungs are relatively quiet. You document swallowing difficulty and proceed with imaging to evaluate the upper airway contour, then plan endoscopic assessment to visualize laryngeal function. Treatment focuses on reducing airway inflammation and minimizing aspiration risk, and you reassess within an hour to confirm reduced effort and improved oxygenation.
7.5 Pneumonia and Pleural Effusion Diagnostic and Treatment Protocols
Pneumonia and pleural effusion often travel together like an uninvited pair: one problem worsens the other, and the patient’s breathing tells you which one is currently winning. The goal is to stabilize first, then identify the cause well enough to treat it correctly.
Foundational Triage and Stabilization
Start with breathing and perfusion. If the patient is hypoxemic, tachypneic, or tiring, begin oxygen support immediately while you gather history and plan diagnostics. For example, a 6-year-old dog with open-mouth breathing and pale gums should receive oxygen and careful handling before radiographs are attempted.
Use a quick stabilization checklist:
- Assess respiratory rate, effort, mucous membrane color, pulse quality, and mentation.
- Reduce stress and limit exertion.
- Establish IV access if fluids or medications are needed.
- Decide whether thoracocentesis is indicated based on effusion size, respiratory compromise, and imaging.
Diagnostic Approach from Signal to Cause
Step 1: Confirm the Problem on Imaging
Thoracic radiographs are the usual starting point. Pneumonia typically appears as alveolar patterns, bronchointerstitial patterns, or mixed changes. Pleural effusion shows as increased soft tissue opacity with loss of normal lung detail and possible mediastinal shift.
A practical example: a cat with dyspnea and muffled heart sounds may show pleural effusion on radiographs. If the lungs are compressed, you can see “atelectasis-like” changes that mimic pneumonia. That’s why you confirm the effusion and then interpret lung findings in context.
Step 2: Decide Whether to Tap the Chest
Pleural effusion is both a diagnostic sample and a therapeutic step. Indications for thoracocentesis include significant respiratory distress, large effusion, or radiographic evidence of fluid causing lung compression.
When you tap, record:
- Volume removed and patient response.
- Appearance of fluid (straw, serosanguinous, purulent, milky).
- Collection method for cytology, culture, and chemistry.
Step 3: Build a Differential Diagnosis Ladder
For pneumonia, consider aspiration, bacterial infection, viral or atypical causes, fungal disease, parasitic migration, and neoplasia with secondary infection. For pleural effusion, consider transudates (e.g., heart failure), exudates (infection, inflammation), chylothorax, hemothorax, and effusions related to malignancy.
A useful reasoning rule: if the patient improves quickly after thoracocentesis, the fluid is a major driver of respiratory signs. If it doesn’t, pneumonia or airway disease may be the dominant issue.
Mind Map: Pneumonia and Pleural Effusion Workflow
Treatment Protocols That Match the Evidence
Empiric Antibiotics with Clear Triggers
Empiric antibiotics are appropriate when pneumonia is likely and the patient is clinically ill, imaging supports infection, or pleural fluid suggests bacterial involvement. Choose based on local resistance patterns and patient factors such as age, comorbidities, and prior antibiotic exposure.
Example: a dog with fever, neutrophilia, alveolar infiltrates, and pleural fluid that is turbid with high neutrophils should start antibiotics promptly after samples are collected.
Targeted Therapy After Pleural Fluid Results
If culture identifies an organism, adjust antibiotics to the sensitivity profile. If cytology suggests malignancy, antibiotics may still be used if infection is present, but the plan must shift toward managing the underlying cause.
Pleural Effusion Management
- If effusion is infectious or exudative, treat the infection and consider repeat sampling if the patient worsens.
- If chylothorax is suspected (milky fluid, high triglycerides), manage with dietary fat restriction and supportive care; repeated taps may be needed for comfort.
- If transudative effusion is likely, focus on the primary driver such as cardiac disease and avoid unnecessary repeated procedures.
A practical example: a cat with heart failure signs and a transudative effusion should not be treated like a bacterial pneumonia case. The breathing improves when the cardiac issue is addressed, and repeated thoracocentesis without addressing the cause becomes a revolving door.
Monitoring and Reassessment
Recheck within a clinically appropriate window based on severity. Monitor respiratory rate, effort, oxygen requirement, appetite, and temperature. Repeat imaging is useful when the patient fails to improve or when effusion recurs quickly.
A simple success metric: the patient should show reduced work of breathing and improved activity within days of appropriate therapy. If not, revisit the differential, confirm sample adequacy, and consider additional diagnostics such as bronchoscopy or repeat thoracic imaging.
Common Pitfalls and How to Avoid Them
- Assuming all infiltrates are pneumonia: compressed lungs from effusion can look similar.
- Skipping fluid sampling: pleural fluid can clarify the cause and guide therapy.
- Treating without reassessment: if breathing doesn’t improve, the plan needs revision, not just longer medication lists.
Example: Integrated Case Walkthrough
A 9-year-old dog presents with cough, tachypnea, and reduced appetite. Radiographs show a moderate pleural effusion with patchy alveolar changes. Oxygen is provided, and thoracocentesis is performed. The fluid is exudative with many neutrophils; cytology shows inflammation without malignant cells. After sampling for culture, empiric antibiotics are started. Over the next 48–72 hours, breathing effort decreases and appetite returns. Culture later grows a susceptible bacterial isolate, and antibiotics are adjusted accordingly. A follow-up exam confirms stable respiratory status, and repeat imaging is deferred unless signs recur.
8. Gastrointestinal and Hepatic Disease Diagnosis and Treatment
8.1 Vomiting and Diarrhea Clinical Triage and Stabilization
Vomiting and diarrhea are symptoms, not diagnoses. Triage focuses on three questions: Is the patient stable? Is there a dangerous cause that needs immediate action? What information can we gather quickly without making the patient worse?
Foundational Triage Priorities
Start with the ABCs, then move to hydration and pain. A simple rule: if the patient is weak, cold, pale, or breathing hard, treat that first—diagnostics come next.
- Airway and breathing: Persistent retching with poor effort, aspiration risk, or severe respiratory distress changes the order of tasks.
- Circulation: Check mucous membrane color, capillary refill time, pulse quality, and temperature. Shock signs (tachycardia, weak pulses, prolonged refill) mean fluids and monitoring before extensive testing.
- Neurologic status: Depression, seizures, or disorientation can accompany electrolyte derangements, toxins, or severe systemic illness.
- Pain and comfort: Abdominal pain can worsen stress and vomiting. Provide analgesia when appropriate and safe.
Quick History That Actually Changes Decisions
Ask targeted questions that guide stabilization and testing:
- Onset and pattern: Sudden onset after a meal or exposure suggests ingestion or infection; repeated episodes over days suggests ongoing inflammation or obstruction risk.
- Vomiting details: Frequency, presence of blood, bile (yellow/green), and whether the patient can keep water down.
- Diarrhea details: Volume, frequency, blood or black tarry stool, mucus, and straining.
- Diet and treats: New foods, table scraps, garbage access, milk, bones, or rich treats.
- Medications and toxins: NSAIDs, antibiotics, human meds, plants, rodenticides, and cleaning products.
- Environment and contacts: Kennel exposure, daycare, other sick pets, and parasite control history.
- Urination and thirst: Low urine with ongoing vomiting/diarrhea supports dehydration and possible kidney involvement.
Physical Exam Findings with High Yield
Perform a focused abdominal and hydration exam:
- Hydration assessment: Skin tenting, tacky or dry gums, sunken eyes, and mentation. In small animals, dehydration can be significant even when skin tenting is subtle.
- Abdominal palpation: Localized pain, distension, guarding, or a firm mass. A tense, painful abdomen raises concern for obstruction or peritonitis.
- Rectal exam when indicated: Blood, melena, strictures, or pain that suggests colitis severity or obstruction.
- Temperature and perfusion: Fever supports infection/inflammation; hypothermia can accompany shock.
Stabilization Steps Before Deep Diagnostics
Stabilization is a sequence, not a checklist.
- Control vomiting to enable hydration: Antiemetics are often appropriate once aspiration risk is assessed.
- Correct dehydration and perfusion: Use IV fluids when the patient is unstable, cannot keep fluids down, or has significant electrolyte abnormalities.
- Address pain: Treat abdominal discomfort to reduce stress-related worsening.
- Prevent aspiration: If vomiting is ongoing, position carefully and consider airway risk during sedation or procedures.
Example: A 6-year-old dog arrives vomiting every 30–60 minutes, weak, with tacky gums and prolonged refill. The plan is IV fluids and antiemetic first, then bloodwork and imaging once perfusion improves.
Diagnostic Triage: Choose Tests by Risk
After stabilization, select diagnostics based on severity and red flags.
High-risk red flags include:
- Persistent vomiting with inability to drink
- Blood in vomit or stool, melena
- Severe abdominal pain or distension
- Collapse, marked lethargy, or abnormal mentation
- Suspected toxin exposure
- Young animals with rapid deterioration
Common initial tests:
- CBC and chemistry: Look for anemia, leukocytosis, electrolyte imbalances, kidney values, and liver involvement.
- Urinalysis: Supports dehydration assessment and helps identify concurrent urinary issues.
- Fecal testing: Parasites and infectious causes when diarrhea is prominent or exposure risk exists.
- Imaging: Abdominal radiographs or ultrasound when obstruction, foreign body, or severe abdominal pain is suspected.
Example: A cat with diarrhea and vomiting plus poor appetite for 48 hours is stable but dehydrated. Bloodwork and urinalysis come first; ultrasound is added if abdominal palpation suggests thickening or if labs show concerning patterns.
Mind Map: Vomiting and Diarrhea Triage and Stabilization
Reassessment: The Part That Prevents Mistakes
Triage isn’t finished after the first set of actions. Recheck vitals, hydration, and comfort after antiemetics and fluids. If vomiting continues despite appropriate control, reconsider aspiration risk, obstruction, toxin exposure, or severe systemic disease.
Example: A dog receives antiemetic and IV fluids. If it still vomits repeatedly and becomes more painful on palpation, imaging is prioritized rather than repeating the same medication plan.
Practical Stabilization Example with Reasoning
Scenario: A puppy has watery diarrhea and occasional vomiting for one day. It is bright but has mild dehydration.
- Triage: Stable circulation and mentation, so immediate IV fluids may not be necessary, but hydration support is.
- Stabilization: Offer small, frequent water or oral rehydration if vomiting is controlled; consider antiemetic if vomiting prevents intake.
- Diagnostics: Fecal testing is reasonable due to age and exposure risk; CBC/chemistry are added if dehydration worsens or appetite drops.
- Escalation trigger: If it becomes lethargic, stops drinking, or shows blood in stool, shift to IV fluids and broader diagnostics.
This approach keeps the patient safe while still moving toward answers in a structured way.
8.2 Abdominal Palpation and Pain Scoring Documentation
Abdominal palpation is both a diagnostic tool and a communication tool. The goal is not to “find the sore spot” by force; it is to map discomfort, identify likely pain sources, and document findings in a way that another clinician can interpret later.
Foundational Principles of Safe Palpation
Start with patient context. A vomiting dog that is bright between episodes may tolerate gentle palpation differently than a dehydrated cat that tenses at touch. Before touching the abdomen, assess demeanor, hydration cues, respiratory effort, and whether the patient is already receiving analgesia. If the patient is guarding, begin with observation and light contact rather than deep palpation.
Use a consistent hand approach. Place the patient in a stable position, warm your hands, and palpate in a predictable sequence: cranial to caudal, and superficial to deeper layers. Gentle pressure should be applied first to detect tone and superficial tenderness; deeper palpation is reserved for areas that remain concerning after initial contact.
Pain scoring should reflect what you see and feel, not what you hope is happening. If you cannot reliably score, document why (for example, patient is too tense, or the abdomen cannot be assessed due to positioning).
Pain Scoring That Can Be Reproduced
Choose a scoring method and stick to it. Many clinics use a simple 0–3 or 0–10 scale. The key is defining what each number means in plain terms.
A practical 0–3 example for abdominal palpation:
- 0: No discomfort; abdomen relaxed.
- 1: Mild discomfort; slight tensing or withdrawal without vocalization.
- 2: Moderate discomfort; clear guarding, vocalization, or marked withdrawal.
- 3: Severe discomfort; persistent guarding, strong withdrawal, or inability to continue palpation.
Document both the score and the behavior. A score without behavior is like a lab result without units.
Stepwise Palpation Sequence
- Observe and palpate superficial landmarks: abdominal wall tension, skin sensitivity, and any obvious masses.
- Assess cranial abdomen: gentle palpation near the stomach region and liver area; note discomfort location.
- Assess mid abdomen: evaluate for intestinal thickening, focal tenderness, or abnormal fluid sensation.
- Assess caudal abdomen: check for urinary bladder distension, uterine enlargement in intact females, and pelvic discomfort.
- Recheck the most painful area last: this reduces the chance that early pain sensitizes the patient.
If you suspect a specific organ system, keep your palpation language consistent. For example, “focal tenderness in right cranial abdomen” is more useful than “seems like liver.”
Documentation Elements That Matter
Record the following in a structured way:
- Patient position and restraint level: standing, sternal, lateral; minimal or moderate restraint.
- Analgesia status: none given yet, already on analgesics, or given prior to exam.
- Palpation quality: gentle only, moderate pressure, or limited due to guarding.
- Pain score: include the scale used and the score per region.
- Region mapping: cranial/mid/caudal and left/right.
- Associated findings: vomiting history, diarrhea, dehydration, abdominal distension, palpable masses.
A short example note:
“Lateral exam. Hands warmed. Abdomen palpated cranial to caudal with gentle pressure. Superficial tone increased in right cranial quadrant. Pain score 2/3 in right cranial abdomen with guarding and withdrawal; no vocalization. No palpable mass. Mid abdomen mildly tense, pain score 1/3. Caudal abdomen unremarkable; bladder not distended.”
Common Pitfalls and How to Avoid Them
Overreaching is the most common issue. If the patient scores 2/3 in one area, do not keep pressing to “see if it gets worse.” Instead, stop, reassess, and document the limitation.
Another pitfall is mixing palpation findings with diagnostic conclusions. You can write “focal tenderness” without claiming “pancreatitis” based on touch alone.
Finally, inconsistent scoring across clinicians creates confusion. If your clinic uses a 0–3 scale, ensure everyone uses the same definitions.
Mind Map: Abdominal Palpation and Pain Scoring Documentation
Example: Two Patients, Same Exam, Different Documentation
Example 1: Dog with vomiting
- Pain score 1/3 in mid abdomen with mild tensing.
- No guarding in cranial or caudal regions.
- Note that palpation was gentle and tolerated.
Example 2: Cat with suspected obstruction
- Pain score 2/3 in cranial abdomen with vocalization.
- Mid abdomen pain score 1/3 with withdrawal.
- Palpation limited after repeated guarding; document the limitation.
These notes help the next clinician decide whether to prioritize imaging, fluid therapy, or analgesia adjustments—without guessing what you meant.
8.3 Diagnostic Testing for Pancreatitis and Hepatobiliary Disease
Pancreatitis and hepatobiliary disease often share signs like vomiting, poor appetite, lethargy, and abdominal discomfort. Testing works best when you treat it like a decision tree: first confirm the patient is stable enough for diagnostics, then choose tests that answer specific questions—pancreas inflammation, bile flow obstruction, liver cell injury, or infection.
Core Concepts Before You Test
Start with three foundational ideas.
-
Clinical signs overlap. A dog with pancreatitis can also have secondary liver enzyme changes, and a dog with cholangitis can show abdominal pain that looks like pancreatitis.
-
No single test is perfect. Pancreatic lipase tests are helpful but not definitive; liver panels show patterns, not diagnoses.
-
Timing matters. Early disease can yield “normal-ish” results, while later disease may show clearer abnormalities.
Stepwise Testing Workflow
1) Stabilize and Baseline
Before bloodwork, ensure hydration and perfusion. If the patient is vomiting or dehydrated, correct enough to reduce risk during handling and sampling. Then collect baseline data: CBC, chemistry panel, and urinalysis. These establish whether there is systemic inflammation, anemia, electrolyte derangements, or concurrent kidney involvement.
Example: A 6-year-old dog with vomiting and mild abdominal pain has mild leukocytosis and elevated ALT. You still need pancreas and biliary evaluation because ALT elevation alone cannot tell you whether the liver is the primary problem.
2) Pancreas Testing
For suspected pancreatitis, use a pancreatic-specific assay when available (commonly canine pancreatic lipase immunoreactivity). Interpret it alongside clinical signs and imaging.
- Positive result: Supports pancreatitis, especially when paired with compatible history and abdominal tenderness.
- Negative result: Does not fully rule it out, particularly if signs started very recently or if the patient is atypical.
Example: A cat with anorexia and vomiting has a negative pancreatic lipase test. Ultrasound shows an enlarged, hypoechoic pancreas with peripancreatic fat changes, supporting pancreatitis despite the negative assay.
3) Hepatobiliary Testing
A hepatobiliary workup aims to separate hepatocellular injury from cholestasis and to detect biliary obstruction or infection.
Use a liver-focused panel and interpret patterns:
- Cholestatic pattern: Often higher ALP and GGT with bilirubin changes.
- Hepatocellular pattern: Often higher ALT with variable ALP.
Also consider bile acids testing when appropriate, since it can reflect functional impairment.
Example: A dog with vomiting and jaundice has markedly elevated ALP and GGT with mild ALT. That pattern pushes you toward cholestasis, prompting bile flow evaluation rather than treating it as “just pancreatitis.”
4) Imaging as the Tie-Breaker
Ultrasound is the main imaging tool for both pancreas and hepatobiliary disease.
For pancreas, look for pancreatic enlargement, altered echogenicity, and peripancreatic changes. For hepatobiliary disease, evaluate:
- gallbladder wall and bile appearance
- bile duct size and visibility
- liver echotexture
- presence of biliary sludge or obstruction
Example: A dog with elevated liver enzymes and abdominal pain has a pancreatic lipase test that is borderline. Ultrasound shows gallbladder sludge and bile duct changes, shifting the primary diagnosis toward hepatobiliary disease.
5) Sampling When Infection or Obstruction Is Likely
If cholangitis is suspected or if imaging suggests biliary obstruction, additional sampling may be warranted. Options can include bile sampling via appropriate procedures and cytology/culture when feasible. The goal is to identify infection and guide targeted treatment.
Example: A dog with fever, neutrophilia, and ultrasound evidence of gallbladder wall thickening undergoes bile sampling. Cytology supports bacterial inflammation, and culture helps refine antibiotic choice.
Mind Map: Pancreatitis and Hepatobiliary Testing
Practical Interpretation Rules
-
Treat enzyme patterns as clues, not verdicts. ALT, ALP, and GGT help you choose the next test, especially ultrasound focus.
-
Use ultrasound to decide what the bloodwork can’t. Blood tests suggest; imaging localizes.
-
Re-check the story when results disagree. If the pancreas test is negative but imaging shows biliary disease, the liver/bile story becomes primary.
Example: On 2026-02-05, a dog presents with vomiting and mild abdominal pain. Pancreatic lipase is negative, but ultrasound shows gallbladder sludge and bile duct changes. The diagnostic emphasis shifts to hepatobiliary disease, and treatment targets bile flow and inflammation rather than assuming pancreatitis alone.
8.4 Imaging and Endoscopy Use for GI Obstruction and Inflammation
GI obstruction and GI inflammation can look similar at first glance: vomiting, reduced appetite, abdominal discomfort, and sometimes diarrhea. Imaging and endoscopy help separate “something is blocking the path” from “the lining is irritated or inflamed,” and they also show where the problem is and how severe it is.
Foundations for Choosing Imaging and Endoscopy
Start with stabilization and a short problem list: signalment, duration of signs, vomiting pattern, stool or gas passage, hydration status, and pain level. Then decide what you need most right now.
- If the patient is unstable, prioritize stabilization first: fluids, antiemetics, pain control, and oxygen if needed. Imaging can wait until perfusion is adequate.
- If obstruction is suspected, you want fast localization and confirmation. Plain radiographs are often the first step, while ultrasound can quickly identify wall thickening, motility changes, and foreign material.
- If inflammation is suspected, you want to assess wall layers, lymph nodes, and the presence of focal lesions that might require sampling.
A practical rule: imaging answers “where and what pattern,” while endoscopy answers “what it looks like from inside” and enables biopsy.
Imaging Pathway for Suspected Obstruction
Radiography First When You Need Speed
Plain radiographs can show gas patterns and foreign material. Look for:
- Dilated loops of bowel with air-fluid levels, suggesting obstruction.
- Loss of normal gas distribution, especially when vomiting is persistent.
- Radiopaque foreign bodies when present.
Example: A dog with repeated vomiting and no stool for 24 hours has multiple dilated small-bowel loops on radiographs. The pattern supports obstruction, and ultrasound is used next to look for the transition point and to assess bowel wall integrity.
Ultrasound to Identify the Transition Point and Wall Integrity
Ultrasound is particularly useful because it evaluates motility, wall thickness, and layering. Key targets include:
- Bowel wall thickness and layering. Loss of normal layering can suggest inflammation or ischemia.
- Motility. Reduced or absent peristalsis supports clinically significant obstruction.
- Contents. Echogenic material or a focal mass can suggest foreign material or intussusception.
- Mesenteric changes. Enlarged lymph nodes or altered mesenteric vessels can support inflammation or compromised bowel.
Example: A cat with intermittent vomiting has ultrasound showing a segment of bowel with abnormal layering and reduced motility. The findings support a focal obstructive process, and endoscopy is planned to evaluate reachable segments and to guide whether surgery is necessary.
Imaging Pathway for Suspected Inflammation
Inflammation often presents as wall thickening, altered motility, and regional lymph node changes. Ultrasound helps by showing:
- Layered wall structure and whether thickening is focal or diffuse.
- Lymph node enlargement and changes in echogenicity.
- Evidence of concurrent complications such as strictures or focal masses.
Example: A dog with chronic vomiting and weight loss has ultrasound showing focal gastric wall thickening and mildly enlarged regional lymph nodes. Endoscopy is selected to visualize mucosal changes and obtain biopsy samples.
Endoscopy Use for Localization and Tissue Sampling
Endoscopy is most valuable when you need direct visualization and biopsy. It is not a substitute for surgery when the obstruction is complete or when the patient’s condition requires immediate intervention.
Pre-Procedure Planning
- Confirm what segment you can reach based on suspected location.
- Review imaging to avoid surprises. If radiographs suggest small-bowel obstruction, upper endoscopy may only partially address the problem.
- Plan biopsy strategy. Multiple samples from abnormal areas and representative normal-appearing areas improve diagnostic yield.
What You Look For
For obstruction-related cases, endoscopy may show:
- Mucosal irritation from retained contents.
- Ulceration or erosions near a lesion.
- Evidence of extrinsic compression or intraluminal abnormalities.
For inflammation-related cases, endoscopy may show:
- Erythema, erosions, ulceration, or thickened mucosa.
- Changes in fold pattern.
- Lesions that appear focal and therefore warrant targeted biopsy.
Example: A dog with vomiting and ultrasound-confirmed gastric wall thickening undergoes upper endoscopy. The mucosa shows patchy erosions. Biopsies from both the most abnormal and adjacent areas help distinguish inflammatory disease from focal neoplasia.
Mind Map: Imaging and Endoscopy for GI Obstruction and Inflammation
Integrated Example Workflow
A medium-sized dog presents with vomiting and reduced stooling for 18 hours. Radiographs show dilated small-bowel loops with altered gas distribution. Ultrasound identifies a focal segment with reduced motility and partial loss of wall layering. Upper endoscopy is performed to evaluate reachable stomach and proximal small bowel mucosa; it shows erosions consistent with irritation from upstream obstruction. Biopsies help rule out primary inflammatory mucosal disease, supporting a mechanical obstruction as the main driver. The treatment plan then focuses on definitive management of the obstructed segment rather than long-term anti-inflammatory therapy alone.
Practical Takeaways
Imaging and endoscopy work best as a sequence: radiographs and ultrasound map the problem, endoscopy adds mucosal detail and tissue confirmation. When you keep the goal clear—confirm, localize, assess integrity, and sample—you avoid the common trap of collecting information without changing the plan.
8.5 Dietary Therapy and Medication Plans for Chronic GI Conditions
Chronic gastrointestinal (GI) conditions are rarely fixed by a single pill or a single bag of food. The practical goal is to reduce intestinal irritation, support digestion, and keep clinical signs controlled long enough for the patient to maintain weight and energy. A good plan starts with what you already know from the workup: the likely category of disease (inflammatory, malabsorptive, motility-related, or dietary intolerance), the severity, and the patient’s baseline body condition.
Foundational Principles for Diet and Medication Pairing
Diet therapy works best when it matches the suspected mechanism. For example, if the problem is inflammatory, the diet should be easy to digest and consistent; if the problem is malabsorption, the diet should provide nutrients that can be absorbed with less strain. Medication then targets inflammation, motility, secretion, or specific triggers.
A useful rule of thumb is to change one major variable at a time. If you switch diet and start multiple new drugs on the same day, you cannot tell what helped, what caused side effects, or what to adjust next. When you must do both, document the rationale and set a short reassessment window.
Stepwise Dietary Therapy for Chronic GI Conditions
Step 1: Choose a diet strategy that fits the clinical pattern.
- Suspected food-responsive enteropathy or intolerance: select a diet with a single, novel protein and controlled carbohydrate profile.
- Suspected inflammatory bowel disease pattern: choose a highly digestible, balanced therapeutic diet designed to reduce antigen exposure and digestive workload.
- Suspected malabsorption: prioritize diets with high digestibility and appropriate fat and fiber levels for the patient.
Step 2: Implement a transition plan. Most patients tolerate a gradual switch over 5–7 days. If signs are severe, you may transition faster, but you still want to avoid abrupt changes that can worsen diarrhea.
Step 3: Set measurable targets. Targets should be concrete: stool firmness, frequency, appetite, vomiting episodes, body weight trend, and energy level. “Better” is not a metric; “no vomiting for 10 days and stool score improved” is.
Step 4: Reassess and adjust. If stool quality does not improve after an appropriate trial, consider whether the diet is wrong for the mechanism, the transition was too abrupt, adherence is inconsistent, or an additional medication is needed.
Medication Plans That Match the Diet Goal
Medication selection should align with the dominant problem.
- Inflammation control: anti-inflammatory therapy is typically the backbone for chronic inflammatory patterns. The diet reduces ongoing irritation while medication suppresses the inflammatory response.
- Motility and stool consistency: if diarrhea persists despite diet, motility modifiers or adsorbents may be used to stabilize stool while the diet takes effect.
- Gastric acid and nausea support: if vomiting or suspected gastritis is prominent, acid suppression can reduce irritation and improve tolerance of oral intake.
- Pancreatic support when indicated: if exocrine pancreatic insufficiency is part of the picture, enzyme replacement is essential; diet alone cannot compensate.
A practical integration approach is to start with the diet and one targeted medication, then add or adjust based on response and side effects. This keeps the plan readable for both the clinic and the client.
Mind Map: Integrated Diet and Medication Logic
Example: Chronic Diarrhea with Weight Loss
A 6-year-old dog presents with 6 weeks of intermittent diarrhea and mild weight loss. The workup suggests an inflammatory pattern without evidence of parasites. The plan begins with a highly digestible therapeutic diet and a gradual transition over 7 days. A single anti-inflammatory medication is started to reduce intestinal inflammation.
At day 14, the client reports improved appetite and fewer loose stools, but stool is still soft. The next step is not to add three new drugs. Instead, confirm adherence (no treats that undermine the diet), review stool frequency, and consider whether stool stabilization support is appropriate while the anti-inflammatory effect continues. By day 28, the goal is firmer stools and stable weight; if weight is not improving, the clinician revisits the diagnosis and the diet’s fit.
Example: Vomiting Predominant Signs
A cat has chronic intermittent vomiting and reduced appetite. The plan uses a highly digestible diet and includes acid suppression to reduce gastric irritation, because vomiting can worsen appetite and make clients less consistent with feeding. Enzyme therapy is added only if testing or clinical signs support malabsorption. Recheck focuses on vomiting frequency and appetite first; stool quality is tracked as a secondary outcome.
Practical Monitoring and Client Instructions
Ask clients to record daily stool score, vomiting episodes, appetite, and any missed doses. If a patient worsens, the first question is usually not “What new drug?” but “Did the diet change, were there treats, and were doses given correctly?” That simple checklist prevents unnecessary medication stacking and keeps the plan consistent.
A chronic GI plan is successful when diet and medication reinforce each other: the diet reduces ongoing irritation and digestive stress, and the medication addresses the specific physiologic problem driving the signs.
9. Endocrine and Metabolic Disorders in Clinical Practice
9.1 Diabetes Mellitus Diagnostic Criteria and Monitoring Plans
Diabetes mellitus in dogs and cats is diagnosed by combining clinical signs, blood glucose patterns, and evidence that the hyperglycemia is persistent and not caused by stress or a temporary surge. The goal is not just to label the condition, but to start treatment with enough confidence that you can monitor response and adjust safely.
Foundational Concepts for Diagnosis
Start with the patient story. Common signs include increased drinking and urination, increased appetite with weight loss, poor coat, lethargy, and recurrent infections. In cats, the presentation can be subtle, and some patients show weight loss without obvious polyuria.
Next, interpret glucose with context. A single elevated blood glucose can occur from stress, excitement, pain, or recent feeding. That’s why diagnostic criteria rely on persistence and on urine findings that reflect sustained glucose spilling into urine.
Diagnostic Criteria for Dogs and Cats
Use a structured approach:
-
Clinical signs consistent with diabetes
- Example: A 9-year-old dog drinks more water and has accidents indoors; appetite is high but weight is dropping.
-
Hyperglycemia on blood testing
- Example: A blood glucose of 320 mg/dL is found during a visit where the dog is calm and fasting.
-
Evidence that hyperglycemia is persistent
- Options include repeated blood glucose measurements and/or fructosamine.
-
Urinalysis evidence of diabetes
- Look for glucosuria and often ketones.
- Glucosuria supports that glucose has been elevated long enough to exceed the kidney’s reabsorption threshold.
-
Rule out common mimics
- Stress hyperglycemia, recent feeding effects, and concurrent endocrine disease can confuse the picture.
A practical way to apply this is to treat the diagnosis as a probability that becomes stronger as you add independent evidence. If you have signs plus hyperglycemia plus glucosuria, the diagnosis is usually strong. If you have only one abnormal value, you should confirm before committing to long-term insulin.
Monitoring Plans After Diagnosis
Monitoring has two jobs: confirm that insulin is working and keep the patient safe from hypoglycemia and ketosis. The monitoring plan should match the patient’s risk level and the owner’s ability to collect data.
Baseline Data to Collect
Collect before starting or at the time of starting insulin:
- Weight and body condition score
- Full urinalysis including ketones
- Blood glucose baseline and, when available, fructosamine
- CBC and chemistry to identify concurrent issues that affect control
- Blood pressure when indicated
Example: A cat with diabetes and mild kidney disease may have different hydration needs and may be more sensitive to dosing changes.
Early Rechecks and Dose Adjustment
In the first phase, recheck frequently because the patient’s response can vary. Typical targets include reducing clinical signs and achieving safe glucose ranges without repeated lows.
- At-home monitoring: Owners can track appetite, thirst, urination, and body weight. If they can safely measure blood glucose, they can also provide spot checks.
- In-clinic monitoring: A glucose curve may be used to map glucose across the dosing interval.
Example: If a dog’s thirst improves but glucose remains high at the expected nadir, the dose may need adjustment. If the dog becomes weak or shaky between doses, hypoglycemia becomes the priority concern.
Ketone Monitoring and Safety Triggers
Ketones matter because they can signal insulin deficiency and risk of diabetic ketoacidosis. Monitor ketones in urine (or blood when available) especially when:
- The patient is not eating
- Vomiting occurs
- Clinical signs worsen despite insulin
- There is a history of poor control
Example: A patient with new lethargy and ketones on urinalysis should be evaluated promptly rather than waiting for the next scheduled recheck.
Mind Map: Diabetes Diagnosis and Monitoring
Example Workflow for a Realistic Start
A common workflow looks like this:
- Step 1: Confirm clinical signs and collect a fasting or minimally stressed glucose sample.
- Step 2: Run urinalysis for glucosuria and ketones.
- Step 3: If results support diabetes, start insulin and provide a written dosing schedule.
- Step 4: Recheck within the early window using glucose data and clinical response.
- Step 5: Adjust dose based on the pattern, not just a single number.
Example: A dog improves thirst within days, but urinalysis still shows glucosuria. That suggests partial response and supports a dose adjustment rather than stopping insulin.
Practical Monitoring Targets and Documentation
Document at each check:
- Insulin dose, timing, and any missed doses
- Food intake and treats
- Water intake and urination frequency
- Weight change
- Urinalysis ketones and glucose when available
Good documentation prevents accidental “dose math” errors and makes it easier to interpret whether changes reflect insulin response or day-to-day variation.
9.2 Hypothyroidism and Hyperthyroidism Diagnostic Workflows
Core Concepts and Clinical Pattern Recognition
Hypothyroidism and hyperthyroidism are mirror-image problems in many ways: one slows the body down, the other speeds it up. The diagnostic workflow starts by sorting the patient into a likely direction using history, physical exam, and a few high-yield lab checks.
For hypothyroidism, common clues include lethargy, weight gain without overeating, cold intolerance, dry skin, recurrent skin infections, and bradycardia. For hyperthyroidism, especially in cats, clues include weight loss despite normal or increased appetite, polyphagia, hyperactivity, vomiting, diarrhea, and tachycardia.
A practical rule: if the story and exam don’t match the expected pattern, treat the case as “possible thyroid disease plus something else,” and broaden the differential rather than forcing a thyroid label.
Step 1: Stabilize the Case and Confirm the Signal
Before ordering thyroid tests, address two issues that can distort results: acute illness and medication effects.
- Acute systemic illness can change thyroid hormone levels even when the thyroid gland is not the primary problem. If the patient is unstable, focus on stabilization first.
- Medications can interfere. Ask about glucocorticoids, anticonvulsants, and non-thyroidal drugs that may alter thyroid assays.
Example: A dog with vomiting and fever is “cold and slow” on exam. Thyroid testing might be misleading if the patient is in the middle of an infection. Stabilize, then retest if initial results are equivocal.
Step 2: Baseline Screening Labs for Context
Baseline labs help interpret thyroid tests and identify mimics.
For both conditions, consider:
- CBC and chemistry panel to look for anemia, liver enzyme patterns, kidney changes, and inflammation.
- Urinalysis when dehydration or renal disease is possible.
- Blood pressure in cats with suspected hyperthyroidism, since hypertension can coexist.
Example: A cat with weight loss and tachycardia also has elevated creatinine. That doesn’t rule out hyperthyroidism, but it changes how you plan treatment and monitoring.
Step 3: Hypothyroidism Diagnostic Workflow
Hypothyroidism in dogs is commonly primary, but the workflow still checks for secondary causes and mimics.
- Start with thyroid screening using a test that reflects hormone availability.
- If results are low or borderline, confirm with a second approach that reduces false positives.
- If results remain unclear, interpret in the context of clinical signs and consider additional evaluation.
Common practical pattern:
- Low thyroid hormone with compatible clinical signs supports hypothyroidism.
- Borderline results require confirmation rather than immediate labeling.
Example: A 6-year-old dog has lethargy, weight gain, and a dull coat. Screening shows low total T4. Before concluding, confirm with a second test and review whether the dog has concurrent illness or medication exposure.
Step 4: Hyperthyroidism Diagnostic Workflow
In cats, hyperthyroidism is usually primary and often straightforward, but confirmation matters when results are borderline.
- Use a thyroid test appropriate for feline physiology.
- If the result is clearly positive, proceed with staging and baseline organ assessment.
- If the result is borderline or discordant with clinical signs, repeat testing under stable conditions or use a confirmatory method.
Staging after diagnosis is part of “diagnostic workflow,” because it prevents surprises later.
Example: A cat with polyphagia and tachycardia has a high thyroid hormone result. Baseline chemistry shows mild kidney impairment. You document both findings so treatment choices and follow-up targets are consistent.
Step 5: Interpreting Discordant Results
Discordance is common: clinical signs may suggest thyroid disease, but labs may not cooperate.
Use a structured approach:
- Re-check medication and illness timing.
- Confirm sample handling and whether the patient was fasting or stressed.
- Reassess the differential diagnosis using baseline labs.
Example: A dog with hair loss and lethargy has borderline thyroid values. CBC shows inflammation and chemistry suggests concurrent disease. You treat the primary issue and reassess thyroid status after recovery.
Step 6: Documentation That Makes Follow-Up Easier
Record the reasoning, not just the numbers.
- List the clinical signs that support thyroid disease.
- Note factors that can affect test interpretation.
- Document the test type, result category, and the plan for confirmation or repeat.
This prevents the classic “we retested but nobody remembers why” problem.
Mind Map: Hypothyroidism and Hyperthyroidism Diagnostic Workflow
Case Example: Integrated Decision Path
A 9-year-old cat is presented for weight loss and increased appetite. Exam shows tachycardia and mild restlessness. CBC and chemistry reveal mild kidney changes, and blood pressure is elevated.
Workflow application:
- The clinical pattern fits hyperthyroidism.
- Thyroid testing is performed and returns a clearly positive result.
- The baseline kidney findings and hypertension are documented to guide treatment monitoring.
The key diagnostic win here is not just “thyroid is high,” but “thyroid is high, and we already know what else needs attention.”
9.3 Hyperadrenocorticism Diagnostic Testing and Treatment Planning
Hyperadrenocorticism, or Cushing’s disease, is a diagnosis you earn step by step. The goal of testing is not just to label the condition, but to identify which form you’re dealing with and how aggressively to treat—because treatment choices depend on the source of excess cortisol.
Core Concepts That Guide Testing
Cortisol excess can be driven by either an adrenal tumor or by stimulation from the pituitary. In practice, you start by confirming that cortisol regulation is abnormal, then you classify the cause, and finally you plan treatment with monitoring built in.
A useful way to think about the process is: screening tests answer “Is this likely Cushing’s?” while confirmatory and classification tests answer “What kind is it, and how confident are we?”
Stepwise Diagnostic Workflow
Step 1: Confirm Clinical Suspicion with Baseline Data
Before specialized tests, document findings that commonly support the suspicion: pot-bellied appearance, thin skin, comedones, muscle wasting, recurrent skin infections, and increased thirst and urination. Baseline bloodwork and urinalysis help you rule out look-alikes and establish a starting point for later monitoring.
Example: A 9-year-old dog with hair loss and recurrent skin infections has elevated alkaline phosphatase and mild stress leukogram on CBC. Urinalysis shows dilute urine. These findings don’t prove Cushing’s, but they make the next steps reasonable.
Step 2: Choose a Screening Test
Screening tests look for cortisol that is inappropriately high or not suppressed when it should be. Two common approaches are:
- Low-dose dexamethasone suppression test: evaluates whether an administered steroid suppresses cortisol production.
- Urine cortisol-to-creatinine ratio: evaluates cortisol excretion over time, reducing the impact of single stressful moments.
Practical example: If the dog is very anxious at the clinic, a urine-based screening may be more reliable than a test that depends on a single blood draw.
Step 3: Interpret Results with a “Gray Zone” Mindset
No screening test is perfect. Some results land in a gray zone where repeat testing or a different test is more informative. Interpretation should also consider concurrent illness, recent steroid exposure, and sample handling.
Example: A dog that received a steroid injection for dermatitis two weeks ago may show abnormal suppression or cortisol patterns. The clinician should address steroid interference before concluding Cushing’s.
Step 4: Confirm and Classify
Once screening suggests Cushing’s, you confirm with additional testing and then classify the source.
Common confirmatory and classification tools include:
- ACTH stimulation test: assesses adrenal responsiveness by measuring cortisol before and after ACTH.
- High-dose dexamethasone suppression test: helps differentiate pituitary-driven disease from adrenal-driven disease based on the degree of suppression.
Example: A dog with abnormal screening and a strong cortisol rise on ACTH stimulation is consistent with hyperadrenocorticism. If high-dose dexamethasone suppresses cortisol substantially, pituitary origin becomes more likely.
Step 5: Consider Imaging When It Changes the Plan
Imaging is not the first step for every case, but it becomes important when it affects treatment decisions. Adrenal imaging can be useful when classification suggests adrenal disease or when there are signs of adrenal enlargement.
Example: A dog classified as likely adrenal-origin disease may benefit from abdominal imaging to support surgical planning or to guide expectations for medical management.
Treatment Planning That Matches the Diagnosis
Treatment planning is a balancing act between controlling cortisol effects, minimizing side effects, and keeping monitoring practical.
Pituitary-Driven Disease Planning
Medical management is commonly the first choice. The plan includes:
- selecting a cortisol-lowering medication
- setting an initial dosing strategy
- scheduling follow-up testing to confirm control and detect under- or over-treatment
Example: After starting therapy, recheck clinical signs and perform a monitoring test at the interval your protocol uses. If signs improve but monitoring shows excessive suppression, dose adjustment prevents iatrogenic adrenal insufficiency.
Adrenal-Driven Disease Planning
Options often include surgery when feasible, or medical management when surgery is not appropriate. The plan should address:
- feasibility and risks of adrenalectomy
- expected monitoring needs
- how to manage cortisol levels during and after intervention
Example: If imaging suggests a unilateral adrenal mass and the patient is a reasonable surgical candidate, surgical planning can be paired with perioperative cortisol management to avoid abrupt hormone shifts.
Monitoring and Safety Checks
Monitoring is not optional; it’s part of the treatment itself. Track:
- clinical improvement (skin, coat, thirst/urination, muscle mass)
- laboratory changes that reflect cortisol control
- medication side effects and signs of adrenal insufficiency
Example: A dog on therapy that becomes lethargic, refuses food, or develops vomiting may need prompt evaluation for excessive cortisol suppression.
Mind Map: Hyperadrenocorticism Testing and Treatment Planning
Integrated Example Case
A 7-year-old dog presents with progressive hair thinning, comedones, and increased drinking. Baseline urinalysis shows dilute urine, and chemistry supports a chronic steroid effect pattern. A low-dose dexamethasone suppression test is abnormal, so an ACTH stimulation test is performed and confirms adrenal responsiveness. High-dose dexamethasone suppression suggests pituitary-driven disease. Treatment begins with a cortisol-lowering medication, and follow-up testing is scheduled to confirm control. At recheck, the dog’s appetite and energy are improved, thirst is reduced, and monitoring results guide a dose adjustment to keep cortisol effects in the therapeutic range.
9.4 Electrolyte and Acid Base Disorders Assessment and Correction
Electrolyte And Acid Base Assessment And Correction
Electrolyte and acid base work is easiest when you treat it like a detective story with a checklist: first confirm the problem, then identify the pattern, then choose the correction that fixes the physiology rather than just the numbers.
Step 1: Confirm the Sample Is Telling the Truth
Start with the basics that prevent embarrassing misreads. Check whether the blood was handled promptly, whether the sample was hemolyzed, and whether the analyzer flags errors. Hemolysis can falsely raise potassium and distort some chemistry values. If the patient is unstable, prioritize immediate recheck after stabilization rather than trusting a single delayed sample.
Step 2: Build the Acid Base Picture from Two Anchors
Use a structured approach: (1) determine whether there is an acidemia or alkalemia, and (2) determine whether the primary problem is respiratory or metabolic.
- Primary direction: pH tells you the overall direction.
- Respiratory component: PaCO2 (or CO2 on the analyzer) moves pH by changing carbonic acid.
- Metabolic component: HCO3- (or total CO2) reflects bicarbonate status.
If pH is low and PaCO2 is high, that’s a respiratory acidosis pattern. If pH is low and HCO3- is low with PaCO2 not proportionally high, that’s metabolic acidosis.
Step 3: Identify Compensation Instead of Guessing
Compensation is the body’s attempt to correct pH without fixing the root cause. For example, in metabolic acidosis, ventilation often increases to lower PaCO2. If the PaCO2 is “too far” from what compensation would predict, think mixed disorders. This matters because treatment differs: you don’t want to chase bicarbonate if the main issue is respiratory failure.
Step 4: Use Anion Gap to Separate Metabolic Acidosis Causes
When metabolic acidosis is present, calculate an anion gap to sort causes into categories.
- High anion gap metabolic acidosis suggests accumulation of unmeasured acids.
- Normal anion gap metabolic acidosis suggests bicarbonate loss or impaired renal acid handling.
A practical example: a dog with vomiting and diarrhea may show a normal anion gap metabolic acidosis due to bicarbonate loss, while a patient with diabetic ketoacidosis or lactic acidosis often shows a high anion gap pattern.
Step 5: Electrolytes Are Not Just Potassium
Electrolytes interact with acid base and with each other.
- Potassium: acidosis tends to shift potassium out of cells, so serum K+ may be high even when total body potassium is low. Insulin and correction of acidosis can drive potassium back into cells, risking hypokalemia.
- Sodium and chloride: help interpret volume status and acid base patterns, especially when chloride is high in hyperchloremic acidosis.
- Calcium and magnesium: low ionized calcium can worsen neuromuscular signs; low magnesium can make potassium hard to correct.
Mind Map: Electrolyte and Acid Base Workflow
Step 6: Choose Correction That Matches the Pattern
Correction is a sequence, not a single intervention.
-
If respiratory acidosis is present, improve ventilation and oxygenation. Acid base values will not normalize reliably until gas exchange improves.
-
If metabolic acidosis is present, address the cause (for example, perfusion, ketosis, toxin exposure, or GI bicarbonate loss). Fluid choice matters: large volumes of chloride-rich fluids can contribute to hyperchloremic acidosis, especially in patients who already have metabolic acidosis.
-
If bicarbonate therapy is considered, it should be selective. It can raise bicarbonate but may worsen sodium load, increase CO2 generation, and shift potassium. Use it when clinically justified and monitor closely rather than treating the lab alone.
-
Potassium correction must be planned, not reactive. If potassium is low, replace while monitoring ECG and rechecking levels after insulin or bicarbonate changes. If potassium is high, avoid insulin-bicarbonate “fixes” unless you have a clear reason and a monitoring plan.
Example: Vomiting with Diarrhea in a Small Animal
A cat presents with repeated vomiting and watery diarrhea. Blood gas shows low pH and low HCO3- with PaCO2 not proportionally high, consistent with metabolic acidosis. Chloride is elevated and anion gap is normal, supporting bicarbonate loss. Treatment focuses on restoring perfusion with appropriate fluids, stopping the ongoing GI losses, and correcting potassium if needed. Potassium replacement is timed carefully because as dehydration improves and acidosis resolves, serum potassium can change quickly.
Example: Diabetic Ketoacidosis with High Anion Gap Acidosis
A dog with suspected diabetic ketoacidosis shows low pH, low HCO3-, and a high anion gap. The correction plan prioritizes insulin therapy and fluid resuscitation to improve perfusion and stop ketone production. Potassium is monitored closely because insulin drives potassium into cells; hypokalemia can appear after treatment starts even if initial potassium was normal or high.
Step 7: Recheck with Purpose
After major interventions—ventilation changes, fluid boluses, insulin initiation, or any bicarbonate plan—recheck acid base and electrolytes. Rechecking prevents “set-and-forget” errors and helps confirm that the physiology is moving in the intended direction.
Mind Map: Correction Priorities
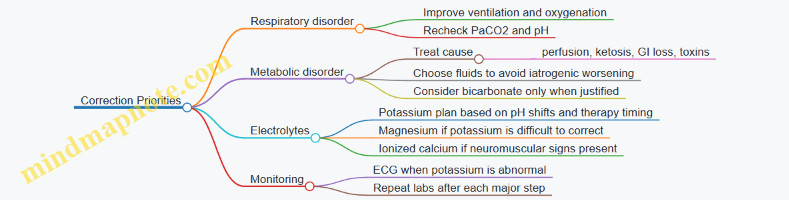
Electrolyte and acid base correction works best when you connect the pattern to the mechanism. Once you do, the numbers stop being mysterious and start behaving like useful clues.
9.5 Obesity and Weight Management Clinical Protocols
Obesity is not just extra body fat; it changes how organs work, how joints move, and how patients respond to illness. A clinic protocol should therefore start with measurement, move to cause assessment, then end with a plan that clients can actually follow.
Foundational Assessment and Baseline Measurements
Begin every case with a consistent baseline so progress is measurable.
- Confirm the problem: Use body condition score (BCS) on a 9-point scale (small animals) or a 5-point scale (some systems). Record weight and waist/abdominal girth when feasible.
- Check for confounders: Review diet history, treats, feeding frequency, activity level, spay/neuter status, and any recent changes.
- Rule out medical contributors: Screen for hypothyroidism, hyperadrenocorticism, diabetes, and medication effects (for example, steroids). If the history suggests it, run targeted labs rather than “everything.”
Example: A 7-year-old neutered cat is “always hungry.” BCS is 8/9, weight is stable, but the owner reports frequent treat dispensing. The protocol records BCS, weight, and treat schedule, then screens for endocrine disease before assuming behavior alone.
Clinical Reasoning for Cause and Risk
Weight gain usually comes from energy imbalance, but the “why” matters for treatment success.
- Dietary excess: Portion size, calorie density, treat frequency, and unmeasured additions (table scraps, “just a few” bites).
- Feeding pattern: Free-feeding, multiple bowls, or inconsistent household routines.
- Reduced activity: Pain, arthritis, low mobility, or environmental barriers.
- Medical and medication factors: Endocrine disease, insulin resistance, or drugs that increase appetite.
Example: A dog with BCS 7/9 and stiffness on stairs is fed the same amount as last year, but activity dropped after a knee injury. The protocol treats weight and pain together, because exercise without comfort is like asking a sore knee to do homework.
Treatment Goals and Success Metrics
Set goals that are specific and time-bound.
- Primary goal: Achieve a target BCS (often 4–5/9 for dogs/cats depending on system) rather than chasing a single number.
- Rate of loss: Aim for gradual loss (commonly about 1% of body weight per week for many patients; adjust for frailty or comorbidities).
- Monitoring schedule: Recheck weight and BCS every 2–4 weeks early on.
Example: A client wants “10 pounds off.” The protocol reframes the goal: “Reduce from BCS 8/9 to 5/9 over 3–4 months,” with monthly check-ins.
Nutrition Plan and Feeding Protocol
A weight plan should specify what, how much, and how often.
- Calculate calories: Use the patient’s ideal weight estimate and a veterinary-calculated calorie target.
- Choose an appropriate diet: Use a weight-management diet with controlled calories and adequate protein to preserve lean mass.
- Measure everything: Use a kitchen scale or a consistent measuring cup. Treats count.
- Set feeding structure: Divide daily calories into 2–3 meals to reduce hunger-driven begging.
Example: Instead of “one scoop,” the protocol uses grams: “Feed 85 g of weight diet at 7 a.m. and 85 g at 6 p.m., plus 10 g of approved treats per day.”
Behavior, Environment, and Hunger Management
Clients need practical strategies that reduce conflict and improve consistency.
- Treat replacement: Swap treats for measured portions of the diet, approved low-calorie chews, or puzzle feeding.
- Hunger scripts: Teach owners that hunger cues are expected early. The plan includes a short-term adjustment period.
- Household alignment: Assign one person to handle food portions. Prevent “side feeding” by guests.
- Enrichment with boundaries: Use play and sniffing, but avoid rewarding begging with extra food.
Example: A cat owner stops “midnight snacks” by placing a timed feeder for the diet portion and using a wand toy for 5 minutes before the scheduled meal.
Activity and Pain-Aware Exercise
Exercise should match mobility and comfort.
- Assess musculoskeletal limitations: Look for arthritis, spinal pain, or weakness.
- Start small and repeatable: Short leash walks, indoor ramps, or controlled treadmill sessions if available.
- Add comfort first: If pain is present, coordinate analgesia so movement is feasible.
Example: A dog with osteoarthritis begins with two 8-minute walks daily. After pain control is optimized, the owner increases to 12 minutes per walk.
Monitoring, Adjustments, and Safety Checks
A protocol needs decision points when progress stalls.
- If weight loss is on track: Maintain calorie target and continue monitoring.
- If no loss after 2–4 weeks: Recheck measurements, treat totals, and adherence. Consider hidden calories and diet changes.
- If loss is too fast or lean mass drops: Reduce the deficit and reassess protein adequacy and comorbidities.
- Reassess medical causes: If progress is absent despite accurate feeding, revisit endocrine screening or medication review.
Example: A dog loses 0.1 kg in a month despite “strict feeding.” The protocol discovers that family members add training treats without logging them. The fix is a single measured treat allowance and a log sheet.
Mind Map: Obesity and Weight Management Clinical Protocol
Case Example: Integrated Protocol in Action
A 9-year-old neutered dog presents with BCS 8/9 and mild lameness. The clinic records weight and BCS, reviews diet and treats, and screens for endocrine disease because the appetite is increased. The plan sets a calorie target based on ideal weight, switches to a weight-management diet, and replaces treats with measured diet portions. Exercise begins with short, comfortable leash walks after pain control is addressed. At the 3-week recheck, weight is down modestly and BCS is unchanged; the protocol confirms accurate measuring and reduces treat allowance slightly. By the next check, BCS improves, and the plan continues with the same structure and monitoring cadence.
10. Neurologic and Musculoskeletal Disease Diagnosis and Treatment
10.1 Neurologic Exam Structure and Localization
A neurologic exam is a structured way to answer two questions: where is the problem, and what is it likely to be? The “where” comes from localization, and the “what” comes from pattern recognition plus targeted testing.
Exam Setup and Safety
Start with a quick safety check. If the patient is seizuring, severely ataxic, or painful, stabilize first: control seizures, reduce fall risk, and manage pain so you can examine reliably. Then confirm basic vitals and mentation before you touch the nervous system. A dog that is hypoglycemic or in shock can look neurologic because the brain is not getting what it needs.
Step 1: Mentation and Behavior
Assess alertness, responsiveness, and behavior toward you and the environment. Note whether the patient is normal, depressed, obtunded, disoriented, or aggressive. Then check for normal interaction with handlers and familiar objects. A patient that is “quiet but not aware” often points toward diffuse brain dysfunction rather than a single focal lesion.
Step 2: Cranial Nerve Function
Cranial nerves help you localize to brainstem, midbrain, or specific peripheral nerves.
- Vision and menace: Compare sides; test in good lighting.
- Pupils: Look for size differences and light response.
- Facial sensation and symmetry: Check corneal reflex and facial movement.
- Gag and swallow: Evaluate brainstem and lower motor pathways.
- Hearing: Observe startle or response to sound.
Example: A cat with absent menace on one side but normal pupils suggests a lesion affecting the visual pathway rather than a generalized brain problem.
Step 3: Posture and Gait
Observe standing first, then walk. Record whether the gait is:
- Proprioceptive ataxia: “Knows where the feet are” poorly; often worse when eyes are closed.
- Motor weakness: Feet may drag with reduced strength.
- Vestibular signs: Head tilt, nystagmus, falling to one side.
Example: A dog that circles and falls to the left with head tilt and nystagmus localizes toward the vestibular system, often brainstem or inner ear depending on other findings.
Step 4: Spinal Reflexes and Pain
Reflexes and pain help separate upper motor neuron from lower motor neuron and identify spinal segments.
- Upper motor neuron pattern: increased tone, hyperreflexia, reduced voluntary movement.
- Lower motor neuron pattern: decreased tone, hyporeflexia, muscle atrophy.
- Pain: spinal pain can be dramatic even when weakness is mild.
Example: A dachshund with back pain, reluctance to move, and normal reflexes early may still have a spinal cord lesion; pain can be the first clue.
Step 5: Sensation and Spinal Segment Mapping
Test superficial and deep pain, then refine with segmental reflexes.
- Deep pain is critical for prognosis in severe spinal cord injury.
- Superficial pain helps localize more rostral or peripheral involvement.
Use a consistent order so you don’t miss asymmetry. If you find a deficit, map it to the most likely spinal cord segments and peripheral nerves.
Step 6: Localize Using Patterns
Localization is the art of combining findings into a coherent story.
Mind Map: Neurologic Exam to Localization
Practical Example: Putting It Together
A dog presents with head tilt and nystagmus, but also has normal menace and normal limb reflexes.
- Mentation is normal.
- Cranial nerves show vestibular-related signs.
- Gait shows falling to one side.
- Spinal reflexes are symmetric.
Localization: vestibular system rather than spinal cord. Next steps would focus on ear and brainstem-related causes, guided by the rest of the exam.
Common Exam Pitfalls
Avoid these classic traps:
- Skipping mentation: you may misclassify diffuse disease as focal.
- Testing reflexes too casually: compare sides and document tone.
- Confusing weakness with ataxia: watch the feet during weight-bearing.
- Forgetting pain: spinal pain can be the earliest sign of serious disease.
A good neurologic exam ends with a concise localization statement and a short list of differentials that match the pattern. That statement is what turns the exam from a checklist into a clinical tool.
10.2 Seizure Workups Diagnostic Testing and Safety Considerations
A seizure workup starts with two goals: confirm that the event is truly a seizure, and keep the patient safe while you gather evidence. If you skip either, you end up with a confident diagnosis and a patient who didn’t survive the appointment. The workup is usually systematic: stabilize first, then localize, then test to narrow the differential.
Foundational Safety During the Event and Immediately After
During active seizures, prioritize airway, breathing, and circulation. Move hazards away, dim harsh light, and avoid restraining limbs in a way that increases injury risk. Record the event timeline: onset time, duration, whether it clusters, and recovery quality. After the seizure stops, watch for ongoing disorientation, head pressing, or repeated twitching—these can indicate continued abnormal brain activity rather than a clean end.
If the patient is obtunded or has repeated seizures, establish IV access early and check glucose promptly. Low blood sugar can mimic neurologic disease and is treatable fast. Also check temperature; both fever and hypothermia can worsen outcomes and suggest systemic causes.
Confirming the Event Is a Seizure
Not every collapse is a seizure. Syncope, vestibular episodes, severe pain, and metabolic disturbances can look similar. A helpful approach is to compare the history to typical seizure patterns: stereotyped movements, loss of consciousness, rhythmic activity, post-event confusion, and recurrence. Ask about toxins, medication exposure, head trauma, and recent changes in diet or flea/tick products.
A quick neurologic exam after stabilization helps with localization. Look for deficits that persist between events, since persistent deficits push you toward structural or inflammatory brain disease rather than purely metabolic causes.
Diagnostic Testing Strategy from Broad to Specific
Start with tests that catch common, treatable, and non-neurologic causes.
- Baseline bloodwork: CBC and serum biochemistry to evaluate anemia, infection signals, liver and kidney function, and electrolyte abnormalities.
- Glucose: confirm normoglycemia after treatment, not just at the first check.
- Electrolytes: sodium, calcium, and magnesium abnormalities can contribute to abnormal firing.
- Urinalysis: supports systemic disease assessment and helps interpret kidney-related metabolic issues.
- Toxicology screening when indicated: history-driven rather than blanket testing.
If baseline tests do not explain the events, proceed to neurologic-focused testing. Cerebrospinal fluid (CSF) analysis is often the next major step when inflammation or infection is plausible and when imaging supports safe collection.
Imaging and CSF Timing with Safety in Mind
Brain imaging is chosen based on patient stability, exam findings, and whether you suspect mass effect. MRI is more sensitive for many intracranial conditions, while CT can still be useful for certain structural lesions. The key safety consideration is sedation planning: seizure patients can be sensitive to sedatives, and repeated seizures increase aspiration risk. Use the lowest effective sedation plan that allows safe imaging and minimizes physiologic stress.
CSF collection should be done when the patient can tolerate positioning and when coagulation status is acceptable. Review platelet count and coagulation history; if there’s concern, address it before sampling. During and after CSF collection, monitor for worsening neurologic signs, pain, and changes in consciousness.
Mind Map: Seizure Workup Logic and Safety Checks
Example: A Practical Stepwise Workup
A 4-year-old dog has two generalized seizures within 24 hours. Between events, it seems mildly disoriented and has a reduced menace response. The clinician stabilizes first, checks glucose and temperature, and starts IV access. CBC and biochemistry show mild liver enzyme elevation and normal electrolytes. Urinalysis is unremarkable.
Because persistent neurologic deficits are present and baseline bloodwork doesn’t provide a clear metabolic explanation, the workup moves to imaging. MRI is performed with a sedation plan tailored to seizure risk. Imaging suggests an inflammatory pattern rather than a mass. CSF is collected safely after reviewing coagulation parameters, and CSF analysis supports inflammatory disease. The treatment plan then targets the inflammatory process rather than treating blindly as if it were only metabolic.
Example: Safety-First When Seizures Cluster
A cat presents with repeated focal twitching that escalates over an hour. The clinician treats for ongoing seizure activity, rechecks glucose after initial stabilization, and monitors breathing closely because repeated seizures increase aspiration risk. CBC and biochemistry reveal significant hypocalcemia. The workup continues with confirmation and correction of the metabolic cause, and the neurologic exam is repeated after stabilization to ensure deficits resolve as expected.
Safety Considerations That Affect Testing Quality
Testing results are only useful if the patient is stable enough to obtain them correctly. Poor sample handling can distort electrolytes and glucose interpretation. Sedation that is too deep can mask neurologic deficits, while sedation that is too light can lead to motion artifacts on imaging. Consistent monitoring and clear documentation of what was done, when it was done, and how the patient responded make the next decision easier and safer.
10.3 Spinal Pain and Neuromuscular Disorders Diagnostic Pathways
Spinal pain and neuromuscular disorders share a common challenge: the problem can be local to the spine, originate in the spinal cord, or be “downstream” in peripheral nerves, muscles, or joints. A good diagnostic pathway keeps these possibilities organized while still moving efficiently from what you can observe to what you can test.
Foundational Triage and Localization
Start with stability and safety. If the patient is painful, weak, or at risk of collapse, use a low-stress handling plan and minimize repeated transfers. Then localize using three layers of information: posture and gait, neurologic deficits, and pain response.
A practical localization sequence:
- Observe gait and posture: knuckling, scuffing, wide base, ataxia, paresis.
- Assess spinal reflexes: withdrawal, patellar, withdrawal tone, and segmental reflex changes.
- Evaluate pain: spinal hyperesthesia, reluctance to move, and response to palpation.
- Check mentation and cranial nerves: helps separate spinal disease from more diffuse neurologic processes.
Easy example: A dog that is ataxic with increased tone and normal mentation suggests a spinal cord problem more than a muscle disorder. A cat that is weak with reduced reflexes and muscle wasting points toward peripheral nerve or neuromuscular disease.
Neurologic Exam Structure That Guides Testing
Use a consistent neurologic exam so your next step is never a guess. Document:
- Ambulatory status: ambulatory vs non-ambulatory.
- Postural reactions: hopping, wheelbarrow, proprioception.
- Spinal reflexes: normal, increased, decreased, or asymmetric.
- Pain localization: cervical, thoracic, lumbar, or generalized.
- Symmetry: unilateral vs bilateral.
This exam structure matters because it predicts which tests are most likely to change management. If localization suggests spinal cord compression, imaging becomes urgent. If localization suggests peripheral nerve or muscle, targeted sampling and electrophysiology or specialized labs may be more informative.
Mind Map: From Signs to Diagnostic Branches
Branch a Spinal Cord Disease Pathway
When the exam suggests an upper motor neuron pattern (increased tone, exaggerated reflexes, proprioceptive deficits), prioritize spinal cord localization. Pain can be a clue, but pain alone is not localization. Compression, inflammation, and vascular causes can look similar early.
Imaging choice: MRI is typically the most informative for spinal cord pathology. If MRI is not immediately available, plain radiographs can help identify vertebral alignment issues, fractures, or gross degenerative changes, but they do not reliably confirm spinal cord compression.
CSF considerations: cerebrospinal fluid analysis can support inflammatory causes when imaging and clinical context justify it. Sampling should be planned to avoid worsening neurologic status.
Easy example: A young dog with sudden neck pain and non-ambulatory status benefits from rapid spinal cord localization and imaging planning. Waiting for “trial meds” can delay definitive decisions.
Branch B Peripheral Nerve Disease Pathway
A lower motor neuron pattern (reduced reflexes, flaccid weakness, muscle atrophy) shifts attention to peripheral nerves. Asymmetry is common, and pain may be less prominent than in spinal cord disease.
Testing often includes:
- Electrophysiology when available to distinguish neuropathy types.
- CSF when inflammatory neuropathies are suspected.
- Targeted labs to evaluate systemic contributors.
Easy example: A cat with asymmetric weakness and reduced reflexes that worsens over days may warrant a peripheral nerve workup rather than immediate spinal imaging, unless pain or proprioceptive deficits suggest cord involvement.
Branch C Neuromuscular Junction and Muscle Pathway
Neuromuscular junction disorders and primary muscle disease can mimic spinal problems because weakness changes gait. The key is reflex pattern, muscle bulk, and fatigue-related history.
Common lab anchors:
- Creatine kinase for muscle injury or myopathy.
- Specific neuromuscular testing when clinical signs fit.
- Muscle biopsy when noninvasive tests are inconclusive and the result will change treatment.
Easy example: A dog with generalized weakness, reduced reflexes, and elevated CK supports a muscle-centered pathway. If reflexes are preserved and proprioception is impaired, the spine or cord remains more likely.
Branch D Non-Neurologic Pain That Pretends to Be Neurologic
Sometimes the neurologic exam is normal or nearly normal, and the “spinal pain” story is actually orthopedic. Joint disease, disc-like pain without neurologic deficits, or muscle strain can produce reluctance to move.
In this branch, repeat the neurologic exam after analgesia and gentle movement. If deficits remain absent and pain is localized, orthopedic-focused diagnostics become appropriate.
Integrated Example Workflow
A practical workflow for a dog with back pain:
- Localize: gait ataxia vs weakness, reflex changes, and pain distribution.
- Decide branch: spinal cord vs peripheral vs muscle vs orthopedic.
- Choose tests that change decisions: MRI for cord localization; CK and neuromuscular testing for muscle-centered patterns; orthopedic imaging when neuro findings are minimal.
- Document each step so the next clinician can follow the logic.
When you keep localization and branch selection explicit, the diagnostic pathway becomes less about “what else could it be” and more about “what will this test tell us that we can act on today.”
10.4 Lameness Evaluation Gait Analysis and Imaging Selection
Lameness evaluation starts with a simple goal: identify where the problem is and how severe it is, then choose imaging that answers the specific question. A good workflow prevents the classic clinic mistake of “x-ray first, think later,” which often produces images that are technically fine but clinically unhelpful.
Foundational Gait Assessment and Localization
Begin with observation in a quiet, consistent space. Walk the patient at a normal pace, then repeat at a slower pace and, if safe, at a trot. Note whether the gait abnormality is consistent or intermittent, and whether it changes with speed. Consistency matters because it often points to musculoskeletal pain rather than fatigue or neurologic weakness.
Next, localize by pattern. Forelimb lameness often shows shortened stance and reduced weight bearing on the affected limb. Hindlimb lameness may show a shortened stride and altered pelvic motion. If the patient “hops” or holds a limb up, treat it as severe pain until proven otherwise.
Palpation and range of motion refine localization. Compare left and right for temperature, swelling, pain response, and crepitus. Gentle joint flexion and extension can reveal whether the pain is joint-based or more diffuse in muscle and tendon.
A practical example: a dog with mild forelimb lameness that worsens when the elbow is flexed suggests elbow joint involvement more than shoulder muscle strain. That single observation can guide imaging toward the elbow rather than the entire limb.
Gait Analysis Details That Change Imaging Choices
Watch the stance phase and the swing phase separately. Pain during stance suggests weight-bearing pain; pain during swing suggests discomfort with limb advancement or joint motion. Also note head carriage and trunk motion. Head bobbing can accompany forelimb pain, while pelvic hitching can accompany hindlimb pain.
Consider compensations. A patient may shift weight to the “good” limb, creating secondary strain. If both limbs appear abnormal, imaging should prioritize the limb with the clearest pain on exam and the most consistent gait deficit.
Imaging Selection Principles
Imaging should answer a question. The question is usually one of these: Is there a fracture or joint incongruity? Is there osteoarthritis or enthesopathy? Is there a soft-tissue injury that needs a different modality? The modality follows the question.
Start with radiography when bone alignment, joint surfaces, and mineralized structures are likely involved. Radiographs are most useful when you have a suspected anatomic region from gait and palpation.
Choose views deliberately. For example, if the suspected problem is a stifle joint, include standard stifle projections rather than random limb angles. If the patient is too painful to position, prioritize views that still evaluate the suspected joint surfaces.
When radiographs are normal but clinical suspicion remains high, consider that the problem may be soft tissue, early bone injury, or an occult fracture. In those cases, advanced imaging or targeted ultrasound may be more informative than repeating the same radiographs.
A useful rule of thumb: if the exam localizes to a joint and radiographs show no explanation, the next step should be based on the specific structure suspected, not on “more x-rays.”
Stepwise Workflow for a Typical Case
- Observe gait at walk and trot, noting stance and swing abnormalities.
- Localize with palpation and range of motion, comparing sides.
- Form a short differential tied to anatomic regions.
- Select imaging that best tests the top differential.
- Reassess after imaging and update the differential based on findings.
Example: A cat presents with hindlimb lameness after jumping. Gait shows reduced weight bearing and reluctance to extend the hip. Palpation suggests pain near the hip. Radiographs focus on the hip joint. If radiographs show no fracture but pain persists, the next step should target occult injury or soft-tissue causes rather than expanding to unrelated joints.
Mind Map: Lameness Evaluation to Imaging Selection
Practical Imaging Selection Examples
Example 1: Suspected elbow pain in a young dog. Gait shows forelimb lameness that worsens with elbow flexion. Imaging focuses on elbow joint views that evaluate joint congruity and mineralized changes. If radiographs are unremarkable but pain is clear on exam, the next step should address causes not reliably visible on standard radiographs.
Example 2: Suspected stifle pain in a medium dog. The patient shows reduced stance and reluctance to extend the stifle. Radiographs target the stifle with appropriate projections. If the exam suggests meniscal or ligament involvement and radiographs do not explain the pain, imaging selection should shift toward modalities that better evaluate soft tissue.
Common Pitfalls to Avoid
Avoid imaging the entire limb “just in case.” That approach increases cost and still may miss the relevant structure. Also avoid repeating the same views without re-checking localization; if the exam points elsewhere, the imaging plan should follow.
A final reassessment closes the loop: if gait and palpation localize to a joint but imaging does not match, the next step is not more of the same—it is a targeted change based on the clinical question.
10.5 Fracture and Soft Tissue Injury Treatment Planning and Follow Up
Fracture and soft tissue injuries share a common first step: decide what must be stabilized now, what can wait, and what can be missed if you move too fast. A good plan starts with injury localization, pain control, and a clear understanding of whether the problem is primarily bone, joint, tendon/ligament, or muscle.
Foundational Assessment and Triage
Begin with a focused history and a physical exam that answers five questions: Is the patient stable enough for imaging or anesthesia? Where is the pain? Is there deformity, abnormal motion, or crepitus? Are there open wounds that change infection risk? Are neurologic or vascular signs present (for example, delayed capillary refill or loss of deep pain)?
A simple example: a dog with a non-weight-bearing forelimb after a fall. If the paw is cold and capillary refill is slow, you treat perfusion and pain first, then image. If the limb is warm and perfused, you can proceed to radiographs sooner.
Imaging Strategy and Injury Classification
Radiographs are the backbone of fracture planning. Use at least two views for the affected region, and include the joints above and below when possible. For soft tissue injuries, imaging may be indirect: joint effusion, avulsion fragments, or mineralized tendon changes can guide decisions.
Classify fractures by stability and pattern. Stable fractures may be managed with external support or splints; unstable fractures often need fixation. Open fractures require urgent wound management because bacteria do not care about your schedule.
Treatment Planning Framework
Treatment planning links three elements: mechanical stability, tissue biology, and patient comfort.
-
Mechanical stability: Choose the method that prevents harmful motion. Splints and casts provide external support; plates, screws, pins, and external fixators provide internal or hybrid stability.
-
Tissue biology: Respect soft tissue. Over-tight bandaging can compromise blood flow and delay healing. For open wounds, irrigation and appropriate closure strategy matter as much as the fixation choice.
-
Patient comfort: Pain control is not optional. Use multimodal analgesia when appropriate, and reassess after each intervention.
Example: a cat with a tibial fracture and a small skin wound. If the wound is contaminated, you prioritize wound care and analgesia, then decide whether fixation can be done immediately or staged. The goal is to avoid trapping infection under hardware.
Soft Tissue Injury Management
Soft tissue injuries include tendon, ligament, muscle, and joint capsule problems. Many are treated conservatively at first when stability is adequate.
- Tendon injuries: Immobilize long enough to protect the repair, but avoid prolonged immobilization that leads to stiffness.
- Ligament injuries: Stabilize the joint and manage pain; physical therapy and controlled activity often matter more than strict rest.
- Muscle injuries: Support and controlled use usually outperform aggressive early activity.
Example: a dog with a strained shoulder after slipping. If there is no instability and the exam suggests muscle strain, you can use controlled activity restriction plus analgesia, then reassess gait and range of motion.
Follow Up and Monitoring
Follow up is where plans succeed or fail. Schedule rechecks based on injury type and treatment method. Monitor pain, limb use, swelling, bandage integrity, and neurologic status.
For fractures, radiographs are typically repeated to confirm alignment and healing progression. For splints and casts, check bandage fit and skin condition early, because swelling changes quickly.
Example: after applying a splint, you recheck within a few days to ensure the splint is not too tight and the toes remain perfused. If toes become cool or swollen, you adjust immediately.
Complication Prevention and Response
Common complications include bandage-related pressure sores, delayed union, implant irritation, infection, and joint stiffness. Prevention is mostly boring and effective: correct bandage technique, appropriate immobilization duration, clean wound handling, and clear owner instructions.
If complications appear, respond systematically: reassess pain and perfusion, inspect the skin, review imaging, and adjust the plan rather than guessing.
Mind Map: Fracture and Soft Tissue Follow Up Workflow
Example: Integrated Case Plan for a Closed Tibial Fracture
A medium-sized dog presents after a slip with a closed tibial fracture and normal toe perfusion. You stabilize pain, obtain radiographs with views that include the stifle and hock, and classify the fracture as unstable. You choose fixation that restores alignment and minimizes harmful motion, then apply a protective bandage only as needed.
At the first follow-up, you inspect skin and toe perfusion, confirm that swelling has not compromised circulation, and reassess comfort. At subsequent rechecks, you evaluate limb use and repeat imaging to confirm healing progression. If the dog shows increasing pain or reduced limb use, you do not assume it is “just soreness”; you inspect the bandage, recheck the limb, and review imaging.
11. Emergency Care and Critical Patient Management
11.1 Emergency Triage Systems and Stabilization Priorities
Emergency triage is the art of deciding what to do first when everything feels urgent. The goal is not to diagnose everything immediately; it is to prevent death and deterioration while collecting just enough information to guide safe next steps.
Foundational Principles of Triage
Triage starts with a quick safety check: confirm the patient is stable enough to approach, identify hazards (aggressive animals, sharp objects, chemical exposure), and ensure you have basic equipment within reach. Then use a structured approach based on three questions: Is the airway open? Is breathing adequate? Is circulation sufficient? If any answer is “no,” stabilization comes before detailed history.
A practical mindset is “treat the life threats first, then the rest.” For example, a dog with pale gums, weak pulses, and cool extremities needs perfusion support before you spend time on a full abdominal workup.
Stabilization Priorities in Sequence
Stabilization follows a consistent sequence so the team does not improvise under stress.
- Airway and Breathing: Clear visible obstructions, position the airway, and provide oxygen. If the patient is not moving air effectively, escalate quickly to assisted ventilation. A cat with heavy salivation and noisy breathing may need suction and oxygen before you attempt imaging.
- Circulation: Assess perfusion using heart rate, pulse quality, mucous membrane color, capillary refill time, and temperature gradient. Establish vascular access when feasible. If shock is suspected, start fluid resuscitation while monitoring response.
- Disability: Check mentation and pupils. Seizures, head trauma, or severe hypoglycemia can change immediate priorities.
- Exposure and Environment: Remove wet or contaminated material, keep the patient warm, and look for injuries you might miss when the patient is covered by a blanket.
This sequence prevents the common trap of “fixing the obvious problem” while the patient quietly worsens elsewhere.
Triage Categories and What They Mean
Many clinics use color-coded or numeric systems. The exact labels vary, but the logic should be consistent: higher priority means immediate risk of death or loss of function.
- Immediate: Airway compromise, severe respiratory distress, active uncontrolled bleeding, profound shock, or seizures not responding to first measures.
- Delayed: Stable but serious conditions that can wait briefly for diagnostics after initial stabilization.
- Minor: Stable issues with low risk of rapid deterioration.
Example: A dog with a fractured limb and normal breathing and perfusion can often be stabilized with pain control and bandaging while you prioritize a cat with labored breathing.
Mind Map: Emergency Triage and Stabilization Flow
Concrete Examples That Tie It Together
Example 1: Respiratory Distress in a Dog A dog arrives with open-mouth breathing and cyanotic mucous membranes. Triage places it in Immediate. You provide oxygen, position the airway, and assess whether the patient can maintain ventilation. Only after breathing improves do you consider imaging or bronchodilator response documentation.
Example 2: Suspected Shock After Trauma A young cat is quiet, cold, and has weak pulses after being hit by a car. The triage focus is circulation and disability. You establish access, begin fluid resuscitation, and reassess perfusion frequently. If mentation worsens despite improved pulse quality, you escalate to additional supportive measures and targeted diagnostics.
Example 3: Seizure With Unknown Cause A dog has active seizures. The disability component becomes the priority. You protect the airway, control the seizure, and check glucose early. Once the patient is stable enough to breathe comfortably, you proceed with a focused history and minimal diagnostics that directly change treatment.
Reassessment and Documentation
Stabilization is not a one-time checklist. Reassess vitals and perfusion response at short intervals, and record what you did and what changed. If oxygen improves color but pulse quality remains poor, the next step targets circulation rather than repeating the same oxygen strategy.
A good triage system is only as strong as its communication. Assign roles so one person monitors breathing and perfusion while another prepares medications or samples. When the team can say, “Airway is stable, breathing is improving, perfusion is not,” decisions become straightforward instead of frantic.
11.2 Shock Fluid Therapy and Perfusion Monitoring
Shock is a mismatch between oxygen delivery and tissue demand. Fluid therapy helps when the problem is low circulating volume, but it can also worsen outcomes if the patient is already overloaded or if the shock is primarily distributive or cardiogenic. The goal is not “more fluids,” it is restoring perfusion while watching for the moment the patient stops benefiting.
Foundational Concepts for Perfusion
Perfusion is reflected by clinical signs and measurable endpoints. Start with the basics: mentation, pulse quality, capillary refill time, mucous membrane color, temperature gradient, heart rate, respiratory effort, and urine output. These are imperfect, but they are fast and they change when treatment works.
A practical rule: if the patient is cold, weak, and underfilled, perfusion is likely poor. If the patient is warm with bounding pulses and edema, perfusion may be impaired by mechanisms other than simple volume loss. Fluid responsiveness is the bridge between “likely hypovolemia” and “actually improving.”
Shock Classification and Why It Changes Fluid Plans
Different shock types respond differently.
- Hypovolemic shock: blood loss, dehydration, third-spacing. Fluids often improve pulse quality and perfusion.
- Cardiogenic shock: poor pump function. Fluids can increase pulmonary edema and worsen oxygenation.
- Distributive shock: sepsis, anaphylaxis. Fluids may help early, but perfusion often requires addressing the underlying cause and sometimes vasopressors.
- Obstructive shock: tamponade, severe pulmonary thromboembolism. Fluids alone won’t fix the obstruction.
This is why perfusion monitoring must run in parallel with therapy. You are testing the patient’s response, not following a single recipe.
Initial Stabilization Fluid Strategy
Begin with stabilization while you gather diagnostics. Use an IV catheter that can deliver the planned rate, and confirm access patency. If the patient is severely unstable, start fluids immediately and reassess frequently.
A common approach is a bolus of isotonic crystalloid, then reassessment. The reassessment should include pulse quality, mentation, mucous membrane color, capillary refill time, heart rate, and temperature gradient. If urine output is available, track it too, but don’t wait for it to decide the next step.
Example: A dog with vomiting and collapse has pale gums, delayed capillary refill, cool extremities, and tachycardia. After a measured crystalloid bolus, the pulse becomes stronger, gums look less pale, and the dog’s mentation improves. Continue with a slower rate and reassess again after the next interval.
If the same patient instead becomes more dyspneic, develops crackles, or shows worsening oxygenation, stop chasing volume and pivot to cardiogenic or distributive causes.
Perfusion Monitoring Endpoints
Use a small set of endpoints that you can repeat reliably.
- Capillary Refill Time and Mucous Membranes: track trends, not single readings.
- Heart Rate and Pulse Quality: weak pulses that strengthen after fluids suggest improved stroke volume.
- Temperature Gradient: cold extremities that warm can indicate improved peripheral perfusion.
- Blood Pressure and Perfusion Pressure: if you have a cuff or arterial line, monitor mean arterial pressure. If you don’t, clinical perfusion signs become even more important.
- Urine Output: aim for a practical minimum threshold, but interpret it with hydration status and renal perfusion.
- Lactate and Blood Gases: lactate can help when available, especially for distributive shock, but it should be interpreted alongside clinical status.
A useful workflow is to reassess every few minutes during bolus phases and every 15–30 minutes once stabilized, adjusting frequency to how unstable the patient is.
Avoiding the Common Fluid Pitfalls
- Over-resuscitation: edema and worsening lung sounds can appear quickly in cardiogenic or septic patients.
- Under-resuscitation: waiting too long to treat poor perfusion can worsen organ injury.
- Ignoring the cause: fluids can improve perfusion temporarily while the underlying problem continues.
- Poor documentation: without a clear timeline of bolus amounts and responses, it’s hard to learn from the case.
Example: A cat with sepsis receives repeated boluses because capillary refill improves briefly. Later, respiratory effort increases and lung sounds worsen. The perfusion signs were improving, but the patient was also accumulating fluid. The plan shifts to targeted diagnostics, antimicrobial therapy, and reassessment of perfusion endpoints rather than continuing boluses.
Mind Map: Shock Fluid Therapy and Perfusion Monitoring
Practical Integrated Example Workflow
A horse arrives with suspected colic-associated dehydration and weakness. You start isotonic crystalloid through a large-bore IV, monitor pulse quality, mucous membranes, temperature gradient, and mentation, and reassess after the bolus. If perfusion improves, you slow the rate and continue monitoring urine output and respiratory effort. If perfusion does not improve or respiratory signs worsen, you stop bolus escalation and broaden the differential while continuing supportive care. The patient’s response guides the next step, and perfusion endpoints keep the plan grounded in reality.
11.3 Toxicology Assessment and Decontamination Procedures
Toxicology in emergency medicine starts with one goal: figure out what the patient was exposed to, then stop the exposure from continuing. The assessment is systematic because many toxins share early signs, while the treatments differ in timing and method. A good workflow prevents both under-treatment and unnecessary decontamination.
Foundational Triage and Safety
Begin with scene and handler safety. If the source is unknown, treat it as potentially hazardous: gloves, eye protection, and ventilation when fumes are possible. Move the patient only if it reduces risk; otherwise, stabilize first.
Next, triage by ABCs. Respiratory compromise and shock come before toxin specifics. For example, a dog that collapsed after chewing a plant may need oxygen and fluids before you can safely collect samples.
Then gather exposure information fast. Ask about product names, approximate dose, time since exposure, route, and whether vomiting was attempted at home. Even vague details help: “rat bait” is more useful than “something for pests.” If multiple pets share the household, ask whether others show signs.
Toxicology Assessment Framework
Use a structured approach that links signs to likely mechanisms.
- Identify the syndrome: GI upset, neurologic signs, respiratory signs, cardiovascular changes, skin/eye irritation, or bleeding.
- Estimate severity: mild GI signs with stable mentation differ from seizures or arrhythmias.
- Prioritize tests: baseline bloodwork, glucose, electrolytes, and blood pressure often guide immediate therapy. Consider specific tests when they change decisions.
- Plan decontamination: only when it is likely to help and can be done safely.
A practical example: a cat with drooling and pawing at the mouth after eating a household plant may have caustic or irritant injury. If the patient is stable, oral decontamination and mouth rinsing can be appropriate, but aggressive interventions should wait until you confirm the route and stability.
Decontamination Principles
Decontamination aims to reduce toxin absorption. It is most effective early, but “early” is not the same for every route.
- Skin and coat: remove contaminated material and wash thoroughly.
- Eyes: irrigate promptly and continue until pH is normalized when caustic injury is suspected.
- Ingestion: consider whether removing material from the GI tract is beneficial versus harmful.
- Inhalation: focus on oxygenation, airway protection, and removing the patient from the source.
Avoid reflex vomiting. Inducing vomiting can worsen aspiration risk, especially with corrosives, hydrocarbons, or when the patient is drowsy or seizing.
Mind Map: Toxicology Assessment and Decontamination
Route-Specific Decontamination Procedures
Skin and Coat
Remove the patient from the contaminated area. Clip matted fur if needed to access the skin, then wash with copious lukewarm water and gentle cleansing. Continue until runoff is visibly cleaner. For example, if a dog is coated in a pesticide, washing reduces ongoing absorption while you simultaneously treat symptoms.
Avoid oils or “neutralizers” unless a specific protocol indicates them. Many substances react unpredictably, and extra chemicals can worsen irritation.
Eyes
Irrigate immediately with sterile saline or appropriate eyewash. Use a steady flow and ensure both eyes are treated if exposure is uncertain. If caustic injury is suspected, pH monitoring guides how long irrigation continues.
A common example is a cat exposed to a cleaning product. Even if the cat seems to blink normally at first, ongoing irritation can progress, so irrigation should not be delayed.
Ingestion
For ingestion, decontamination choices depend on the toxin and the patient’s condition.
- Activated charcoal may be considered when it is likely to bind the toxin and the patient can protect the airway.
- Gastric lavage is rarely used and typically reserved for specific high-risk situations under veterinary emergency protocols.
- Vomiting induction is generally avoided when aspiration risk is high or when corrosives/hydrocarbons are possible.
If the patient is vomiting or has altered mentation, airway protection becomes the first step. A dog that is alert and stable after eating a small amount of a toxin may be managed differently than one that is already lethargic and coughing.
Inhalation
Move the patient to fresh air and support breathing. If there is respiratory distress, oxygen and airway management take priority. Decontamination of the coat may still be needed if the toxin settled on fur.
Documentation and Reassessment
Document the exposure details, time course, what decontamination steps were performed, and the patient’s response. Reassess frequently because toxin effects can evolve after the initial presentation.
A useful habit is to record “last known normal” and “time since exposure” in the same place. When the timeline is clear, decisions about decontamination and monitoring become more consistent, and the whole team can act without guessing.
11.4 Acute Respiratory Failure Oxygenation and Ventilation Support
Acute respiratory failure means the patient cannot maintain adequate oxygenation, ventilation, or both. Your first goal is to stabilize while you gather enough information to choose the right support level. Think in two tracks: oxygen delivery to tissues and removal of carbon dioxide, then match the method to the cause.
Foundational Assessment and Immediate Actions
Start with a rapid check of airway patency, breathing effort, and circulation. Look for cyanosis, increased work of breathing, abnormal respiratory rate, and altered mentation. Measure oxygenation with pulse oximetry if available, but treat it as a trend tool rather than a perfect truth machine. If the patient is struggling to breathe, do not wait for imaging before providing support.
Example: A dog with severe tachypnea and pale gums arrives after aspiration. You place the patient in a comfortable position, suction the oropharynx if needed, and begin oxygen while you prepare for further diagnostics. The oxygen plan is not “extra”; it prevents hypoxic injury while you work.
Oxygenation Support Methods
Oxygenation support ranges from low-flow supplementation to advanced delivery. Choose based on how much the patient can tolerate and how severe the hypoxemia appears.
- Nasal oxygen or face mask: Useful when the patient is breathing adequately but oxygen saturation is low.
- Oxygen cage or hood: Helps when staff access is limited, but monitor closely because CO2 clearance and patient comfort can be variable.
- High-flow systems: Provide more reliable inspired oxygen and can improve oxygenation when low-flow methods fail.
- Noninvasive ventilation: Consider when the patient can protect the airway and tolerate the interface.
- Invasive ventilation: Required when the patient cannot maintain oxygenation or ventilation, cannot protect the airway, or is tiring.
Practical rule: If oxygenation does not improve after appropriate delivery and positioning, escalate rather than simply increasing oxygen indefinitely.
Ventilation Support and CO2 Management
Ventilation support targets carbon dioxide removal and adequate minute ventilation. CO2 retention often accompanies airway obstruction, hypoventilation, or severe lung disease. Monitor ventilation by observing respiratory effort, mentation, and when available, capnography or blood gas analysis.
Example: A cat with severe dyspnea from asthma-like bronchospasm may initially respond to bronchodilation and oxygen. If the cat becomes quiet, shallow-breathing, and CO2 rises, you escalate to ventilatory support rather than continuing only oxygen.
Choosing the Right Escalation Path
Escalation should be systematic: optimize basics, then increase support level. The basics include positioning, suctioning, bronchodilation when indicated, pain control, and treating the underlying cause as you stabilize.
A simple decision framework:
- Airway: Is it obstructed or at risk of collapse?
- Breathing effort: Is the patient tiring or failing to generate adequate ventilation?
- Oxygenation response: Does saturation improve with correct oxygen delivery?
- Ventilation status: Is CO2 rising or is the patient becoming less responsive?
If any of these points fail, move up the support ladder.
Mind Map: Oxygenation and Ventilation Support
Invasive Ventilation Essentials
When invasive ventilation is necessary, the priorities are airway control, appropriate ventilation settings, and continuous monitoring. Confirm tube placement, secure the airway, and use monitoring for oxygenation and ventilation. Adjust settings based on observed chest movement, oxygenation response, and CO2 trends.
Example: A dog with severe pneumonia becomes progressively obtunded and hypoxemic despite oxygen. After intubation and ventilation initiation, you reassess oxygenation and ventilation frequently, then coordinate diagnostics such as thoracic imaging and sampling to identify the cause.
Monitoring and Reassessment Loop
Support is not a one-time action. Reassess after each change in oxygen delivery or ventilatory strategy. Watch for improvement in respiratory effort, stabilization of oxygen saturation trends, and better mentation. If the patient worsens, review the basics first: tube position, oxygen delivery equipment, suctioning needs, and whether the underlying cause is being treated.
Integrated Example Workflow
A horse with sudden respiratory distress arrives with increased effort and low oxygen saturation. You position for comfort, clear visible obstruction if present, start oxygen, and assess whether ventilation is adequate. If the horse continues to tire and CO2 is suspected to rise, you escalate to ventilatory support while preparing diagnostics and treatment for the likely cause. Throughout, you keep reassessing response to each step rather than assuming the first intervention will carry the case.
11.5 Pain Management and Critical Care Documentation
Pain control is not just comfort; it’s part of stabilization. In emergency and critical care, pain affects breathing, heart rate, blood pressure, appetite, and the ability to cooperate with exams. Documentation, meanwhile, is what turns “we gave something” into a clear clinical record that supports safe dosing, reassessment, and continuity of care.
Foundational Principles for Pain Control
Start with a quick pain assessment that fits the situation. In a stable patient, use a validated scale when available. In a critical patient, use a practical approach: observe posture, facial expression, response to palpation, respiration pattern, and mentation. If the patient is too unstable to score, treat based on likely pain source and reassess immediately after analgesia.
Choose analgesia based on three things: pain mechanism (somatic, visceral, neuropathic), patient status (perfusion, ventilation, renal and hepatic function), and route feasibility. In emergencies, the goal is rapid onset with predictable effects. If you can’t give oral medication, plan for injectable options and consider local or regional techniques when appropriate.
Stepwise Analgesia in Critical Patients
- Stabilize first, then target pain: If shock or severe hypoxemia is present, address perfusion and oxygenation while initiating analgesia that won’t worsen hemodynamics.
- Use multimodal analgesia: Combine medications that work through different pathways to reduce the required dose of any single drug.
- Reassess on a schedule: Recheck pain after each intervention. A common workflow is reassessment within 15–30 minutes for acute severe pain, then at intervals based on drug duration and patient changes.
Practical Example
A dog arrives after a road traffic accident. It is tachycardic, panting, and reluctant to move. You suspect fractures and soft tissue injury. You stabilize breathing and perfusion, then start multimodal analgesia with an opioid plus an adjunct appropriate to renal and blood pressure status. You document baseline pain score or descriptive findings, administer the first dose, and reassess after 20 minutes. If pain remains high, you adjust the plan using the recorded response rather than repeating the same dose blindly.
Documentation That Actually Helps
Pain documentation should answer five questions every time: What was the pain like? What did you do? How much did you give? When did you reassess? What changed?
Minimum Record Elements
- Pain assessment method: scale name or descriptive criteria used
- Baseline findings: score and key observations (e.g., guarded abdomen, tense facial muscles, vocalization with handling)
- Drug and dose: exact medication name, concentration if relevant, route, and dose per kg
- Time stamps: administration time and reassessment time
- Response: pain score change and any adverse effects (sedation, vomiting, hypotension, respiratory depression)
- Plan update: next dose timing or escalation/de-escalation rationale
Common Pitfalls
- Recording only “pain meds given” without dose or time
- Reassessing too late to guide the next decision
- Documenting adverse effects without linking them to the timing of the dose
Mind Map: Pain Management and Documentation Workflow
Example Documentation Entry
Patient: Cat, suspected ureteral obstruction, anxious and tense abdomen.
Baseline pain: Descriptive score used due to stress; guarded posture, tense abdomen on palpation, vocalization with handling.
Intervention: Buprenorphine 0.02 mg/kg IM at 14:10.
Reassessment: At 14:35, patient calmer, less abdominal guarding; no vomiting; respiratory rate unchanged.
Plan update: Continue multimodal analgesia with an adjunct appropriate for renal status; next reassessment at 15:00.
This entry links the pain behavior to the medication timing and the observed response, so the next clinician can adjust safely.
Documentation for Ongoing Critical Care
As patients move from immediate stabilization to monitored care, pain management becomes a scheduled process. Document pain assessments alongside vital signs and perfusion status. If sedation is used to facilitate procedures or ventilation, record the sedation goal, the level achieved, and how it affects pain scoring. When pain is controlled, document that too—because “better” is clinically meaningful when it’s tied to a score or specific observations.
Finally, ensure handoff notes include the last analgesic dose, time of last reassessment, and the current pain trend. In critical care, the record is the patient’s memory, and it should be accurate enough to guide the next decision without guesswork.
12. Veterinary Clinic Management and Quality Care Systems
12.1 Clinic Workflow Design Appointment Scheduling and Patient Flow
A clinic’s appointment system is really a patient-flow system with calendars attached. When it works, clients get predictable time windows, staff know what to do next, and patients spend less time waiting in stress-prone areas.
Foundational Principles for Scheduling
Start with three constraints: (1) medical needs vary, (2) staff capacity varies by time of day, and (3) rooms and equipment are shared resources. A practical scheduling design uses a small set of appointment types, each mapped to an expected visit length and a likely exam room requirement.
Use a triage-first intake rule: every appointment request is categorized before it becomes a “slot.” For example, a “coughing dog” request is not automatically a 30-minute wellness visit; it may need a shorter wait and a room that can handle respiratory isolation if needed.
Appointment Types and Time Budgets
Create appointment categories that match how you actually work. A typical set:
- Wellness and Routine Follow-Up: predictable, low urgency.
- New Problem Visit: one primary complaint, moderate complexity.
- Recheck After Testing: depends on results availability.
- Injury or Acute Pain: often needs earlier placement.
- Procedure-Heavy Visits: require specific equipment or longer restraint time.
Then assign time budgets that include “buffer time” for real life. If a “new problem visit” is scheduled for 30 minutes but your average intake takes 10 minutes, you will consistently run late. A better approach is to schedule 40 minutes and treat the extra 10 as a buffer for history, vitals, and room setup.
Patient Flow from Arrival to Discharge
A clean flow reduces repeated questions and prevents patients from sitting in the wrong place.
- Arrival and Check-In: confirm identity, reason for visit, and any immediate red flags (e.g., severe breathing difficulty).
- Pre-Exam Intake: collect key history and update medications before the clinician enters.
- Rooming: match patient needs to room type. A dog with vomiting may need a different setup than a cat with a skin complaint.
- Exam and Treatment: perform the planned steps in a consistent order so documentation and discharge happen smoothly.
- Discharge and Next Steps: provide clear instructions, schedule the next appointment if needed, and confirm medication pickup or dispensing.
A small but important detail: discharge should not be a separate “end-of-day scramble.” Build it into the visit time budget.
Mind Map: Clinic Workflow and Scheduling Logic
Example: Scheduling a New Problem Visit Without Chaos
On 2026-02-07, a client calls about a 6-year-old cat with decreased appetite and hiding for two days. The intake script asks three fast questions: breathing effort, vomiting/diarrhea, and water intake. The answers suggest moderate urgency with no immediate breathing crisis.
Instead of booking a generic 30-minute slot, the scheduler selects “New Problem Visit” with a 40-minute budget and assigns a room that supports quiet handling. Pre-exam intake is completed before the clinician enters: current diet, last known normal, and medication list are confirmed. The clinician then focuses the exam on dehydration status, abdominal discomfort, and oral health, followed by a plan for diagnostics and a follow-up recheck.
The result is not just “fewer minutes waiting.” It’s fewer repeated questions, fewer room changes, and a discharge plan that can be completed before the next patient arrives.
Example: Handling Late Arrivals and Preventing a Domino Effect
If a client arrives 15 minutes late, the clinic should not automatically punish the next appointment. Use a simple rule: if the late arrival is a wellness visit, shorten the buffer for the next slot; if it is an acute pain case, keep the next slot intact and adjust only the wellness follow-up.
This works because the clinic has already categorized appointment types by urgency and complexity. Staff can make consistent decisions without improvising every time.
Practical Controls That Keep the System Honest
Track three metrics weekly: average check-in-to-room time, percentage of appointments that run late beyond a set threshold, and reasons for delays (room readiness, missing history, equipment not prepared). When you review the causes, you can fix the process rather than blaming people.
A good scheduling system feels boring in the best way: it runs on clear categories, predictable time budgets, and patient flow that matches the clinic’s actual capacity.
12.2 Medical Records Documentation Standards and Data Integrity
Medical records are the clinic’s shared memory. When they’re clear, complete, and consistent, they reduce mistakes, speed up decisions, and make follow-ups actually follow up. This section covers what to record, how to record it, and how to keep the data trustworthy from first visit to final billing.
Foundations of Clinical Documentation
Start with the patient’s identity and the visit context. Every record should include species, breed, sex, age or date of birth, weight, microchip or ID details, and the reason for the visit. If the patient is a repeat case, link the current visit to the most relevant prior problems rather than forcing readers to hunt through months of notes.
Next, document the clinical story in a way that supports reasoning. History should capture owner observations in plain language, including onset timing, progression, appetite, water intake, urination or defecation changes, medications given before arrival, and any home treatments. Physical exam findings should be organized by system, with abnormal findings clearly marked and normal findings included when they matter for localization.
A good record also captures the “why.” Record the clinical impression, the problem list, and the rationale for diagnostics or treatments. For example: “Vomiting and lethargy for 24 hours; mild dehydration; abdominal discomfort on palpation. Plan: CBC/chemistry to assess infection and electrolyte status; abdominal ultrasound if pain persists after initial stabilization.”
Core Data Elements and Consistency Rules
Use consistent units and formats. Weight should be recorded with units and the method if relevant (clinic scale vs. owner estimate). Vital signs should include time taken and reference ranges if your clinic uses them. Medication entries should include drug name, strength, dose, route, frequency, start time, and planned duration.
For diagnostics, record sample type, collection time, handling notes, and test results with reference ranges when available. If a test was not performed, document why. “Urinalysis deferred due to patient stress and priority stabilization” is more useful than leaving a blank.
Treatments should include both what was done and what the patient received. For instance, “Administered maropitant 1 mg/kg SC at 10:15; recheck vomiting at 2 hours; discharge with maropitant 1 mg/kg PO q24h for 5 days” is actionable.
Documentation Workflow from Visit to Follow Up
A systematic workflow prevents the classic problem of “the note exists, but it’s not usable.” Use a sequence:
- Immediate charting during the visit for vitals, exam findings, and key owner statements.
- Diagnostic and treatment entries as soon as results return or actions occur.
- Reassessment documentation after stabilization or after a treatment response window.
- Discharge instructions written in the same record, with clear monitoring points.
Example: A dog comes in for coughing. The record notes respiratory rate and effort, auscultation findings, and oxygen saturation. After nebulization, the clinician documents whether effort improved and whether cough frequency changed. Discharge instructions specify when to return: “If respiratory rate remains above X at rest after 2 hours, or if gums become pale/blue.”
Data Integrity Controls
Data integrity means the record is accurate, complete, and resistant to accidental corruption.
- Single source of truth: Avoid duplicating the same medication or diagnosis across multiple fields without a clear reason.
- Auditability: Edits should preserve the original entry and show who changed what and when.
- Controlled abbreviations: Use clinic-approved abbreviations only, and define them in your internal standards.
- Legibility and structure: If your system allows free text, still use consistent headings or templates so readers can scan quickly.
If your clinic uses electronic records, ensure that offline documentation is later reconciled. A handwritten note that never becomes an electronic entry is a record gap, not a “temporary detail.”
Mind Map: Documentation Standards and Integrity
Example: One Visit, Multiple Roles
Consider a cat with diarrhea and mild dehydration. The veterinarian documents the problem list and reasoning for fecal testing and bloodwork. The technician records hydration status, stool consistency, and sample collection time. The nurse logs medication administration and the time of reassessment. The discharge section includes diet instructions, medication schedule, and a clear return plan if vomiting begins or hydration worsens.
When these entries are consistent, the next clinician can read the record and understand the case without guessing. That’s the whole point: records that support decisions, not records that merely exist.
12.3 Treatment Planning Client Education and Consent Documentation
Treatment planning is where clinical reasoning meets real life. The goal is simple: explain what you found, what you recommend, why it makes sense, what it costs in time and risk, and what happens next. Consent is not a signature; it is a documented conversation.
Foundational Principles for Clear Education
Start with the patient’s problem list, not a list of drugs. A good plan begins with a short summary of the main issues, such as “vomiting and dehydration with suspected gastrointestinal inflammation.” Then connect each recommendation to that problem list.
Use a three-layer explanation:
- What we think is happening: one or two sentences using plain language.
- What we will do: the treatment steps in order.
- What to watch for: measurable outcomes and warning signs.
Example: For a dog with suspected urinary tract infection, you might explain that urine testing helps confirm infection and guide antibiotic choice. Then you outline hydration support, antibiotic timing, and recheck timing. Finally, you list signs that mean “call now,” like inability to urinate or worsening lethargy.
Building a Treatment Plan That Clients Can Follow
A practical plan includes timing, dosing responsibilities, and monitoring. Clients do better when the plan answers “when,” “how much,” and “what if it doesn’t work.”
A systematic approach:
- Stabilize first: if the patient is unstable, education focuses on immediate priorities (pain control, fluids, oxygen, seizure safety).
- Choose the minimum effective steps: start with interventions that address the highest-risk problems.
- Sequence diagnostics and treatments: explain whether treatment begins before results return and why.
- Define success: specify what improvement looks like, such as “vomiting stops within 48 hours” or “appetite returns and pain score decreases.”
Example: A cat with dental pain and poor appetite may need analgesia immediately. You explain that pain control improves eating and reduces stress, which also makes later dental evaluation safer.
Consent Documentation That Matches the Conversation
Consent documentation should reflect the discussion, not just the procedure. Include:
- Diagnosis or working diagnosis: what you are treating and why.
- Recommended treatment(s): medication names, routes, and duration.
- Expected benefits: what the treatment is meant to achieve.
- Material risks and common side effects: keep it relevant to the patient.
- Alternatives: even if you recommend one option, note what else was discussed.
- Financial and logistical constraints: document agreed limits, such as “owner declined CT; ultrasound and labs performed.”
- Monitoring and follow-up: recheck date, phone check-in plan, and emergency triggers.
If a client declines a component, document the reason when provided and the impact on the plan. Example: “Owner declined imaging; plan adjusted to rely on exam and response to analgesia, with recheck in 48 hours.”
Mind Map: Treatment Planning and Consent Flow
Example: Putting It Together in a Short Script
You can use a consistent structure during the conversation:
- Assessment: “Your dog is dehydrated and has signs consistent with a urinary infection. We need urine testing to confirm and choose the right antibiotic.”
- Plan: “We’ll start fluids today, collect a urine sample, and begin antibiotics once the sample is obtained. We’ll recheck in 7 days.”
- Monitoring: “If vomiting returns, if he can’t urinate, or if he becomes unusually weak, call immediately.”
- Risks and alternatives: “Antibiotics can cause mild stomach upset. If the test suggests a different cause, we may adjust treatment. You can choose supportive care only, but it may delay resolution.”
- Consent documentation: record the agreed steps, the client’s questions, and any declined components.
Documentation Details That Prevent Confusion
Write in a way that another clinician can act on it without guessing. Include:
- Dose and schedule clarity: “1 tablet by mouth every 12 hours” beats “antibiotic as directed.”
- Owner instructions: what to do if a dose is missed.
- Communication plan: who to call and when.
- Recheck criteria: what findings trigger earlier review.
Example: “If appetite does not improve by day 2, schedule a recheck sooner” is more useful than “monitor closely.”
Consent Is Ongoing, Not One-Time
Revisit consent when the plan changes due to new results, lack of response, or emerging risks. Document the update and the client’s agreement. This keeps the record accurate and reduces the chance that the client feels blindsided later—because the record will show the decision-making process was shared from the start.
12.4 Pharmacy Inventory Control and Medication Dispensing Practices
A clinic’s pharmacy is a small system with big consequences: the right drug, in the right dose, to the right patient, at the right time. Inventory control keeps shortages from interrupting care, while dispensing practices protect patient safety and reduce medication errors.
Core Inventory Concepts for Clinic Stability
Start with three foundational ideas: visibility, accountability, and traceability.
Visibility means you can answer, quickly, “What do we have, how much, and where is it?” Accountability means staff know who is responsible for what, including receiving, storage, and dispensing. Traceability means you can reconstruct what happened if something goes wrong.
A practical baseline is a simple “par level” system. Set a minimum quantity for each high-use medication based on typical weekly demand plus a buffer for ordering delays. For example, if you dispense about 20 amoxicillin-clavulanate tablets per week for dogs and your supplier lead time is usually 5 days, you might set a par level that covers roughly 3 weeks of use. That buffer prevents “we ran out mid-day” problems.
Receiving and Storage Controls That Prevent Errors
Receiving is where many inventory mistakes begin. When shipments arrive, verify the medication name, strength, dosage form, expiration date, and package integrity. Record lot numbers and expiration dates in your inventory log. If your clinic uses barcodes, scan at receiving; if not, use a consistent manual entry format.
Storage should match medication requirements. Keep temperature-sensitive items in controlled areas and separate them from general supplies. Store controlled substances with restricted access and maintain a log of who opened the storage area and when.
A useful habit is “first-expire, first-out.” Place new stock behind existing stock so older inventory is used first. For example, if two bottles of metronidazole are on the shelf, the one expiring sooner should be placed where it is easiest to pick first.
Inventory Counting and Reconciliation
Cycle counts reduce workload compared with counting everything at once. Choose a schedule: count fast movers weekly, medium movers monthly, and slow movers quarterly. Then reconcile discrepancies by checking receiving records, dispensing logs, and returns.
If your count is off by 30 tablets of a frequently used antibiotic, don’t guess. Trace the difference: review recent dispenses, check whether any doses were wasted and documented, and confirm whether any stock was moved to a different storage location.
For controlled substances, reconciliation should be more frequent and more strict. If the numbers don’t match, treat it as a process failure until proven otherwise.
Dispensing Workflow That Reduces Medication Mistakes
Dispensing should follow a consistent sequence: verify, prepare, label, and document.
Verification includes confirming the patient identity, the prescribed drug, the concentration, the route, and the dose calculation. For example, if a cat prescription is written as “0.5 mL” but the bottle concentration is different from what the staff expects, the error can happen even when the drug name is correct. Always verify concentration and units.
Preparation includes measuring the correct volume or number of tablets. If you compound or reconstitute, document the diluent, final concentration, and expiration time for the prepared dose.
Labeling must be clear and complete: patient name, drug name, strength, dosing instructions, route, and expiration if applicable. A label that says only “antibiotic” is not a label; it’s a guessing game.
Documentation ties the dispensing to the prescription and inventory movement. Record the lot number for traceability, especially for medications that are frequently substituted or have multiple lot batches.
Client-Facing Dispensing Practices
Client instructions are part of dispensing, not an afterthought. Provide dosing schedules in plain language and confirm understanding. For example: “Give 1 tablet twice daily at 7 AM and 7 PM” is easier to follow than “twice daily.”
Also document counseling topics: missed dose instructions, storage guidance, and what side effects should trigger a call. If a client is likely to forget, write a simple reminder on the label or in the discharge notes.
Mind Map for Pharmacy Control and Dispensing
Example: Antibiotic Dispense with Lot Traceability
A dog is prescribed amoxicillin-clavulanate 250 mg tablets, “1 tablet by mouth twice daily for 10 days.” The staff verifies the tablet strength on the bottle, prepares the quantity for 20 doses plus a small buffer if your clinic policy allows, and labels the bottle with the patient name, “250 mg,” twice-daily instructions, and the expiration date of the bottle. The inventory log records the lot number used. If the client calls on day 6 saying the tablets look different, the clinic can check whether the lot changed and whether the client received the correct batch.
Example: Handling a Stock Discrepancy
During a weekly cycle count, the clinic finds 12 fewer tablets than expected for a fast-moving medication. The team checks the last 10 dispenses for that drug, confirms the dose instructions matched the bottle strength, and reviews waste documentation. They discover two tablets were removed for a dose demonstration but were not recorded as waste. After correcting the log, they update the workflow so demonstrations require the same waste documentation as any other discarded dose.
12.5 Infection Prevention Sterilization And Facility Cleaning Protocols
Infection prevention in a veterinary clinic is a chain: clean the right things, disinfect the right surfaces, sterilize what must be sterilized, and verify that the chain is intact. If any link is weak, the patient pays the bill—usually in the form of a wound infection, a respiratory outbreak, or a stubborn case of “why did this happen again?”
Foundational Concepts That Drive the Protocol
Start with three practical ideas.
-
Clean first, disinfect second. Organic material blocks disinfectants. If you wipe blood or feces away poorly, the disinfectant is mostly just doing paperwork.
-
Match the method to the item. Heat-tolerant instruments generally go to sterilization; heat-sensitive items may require high-level disinfection; surfaces get cleaning plus appropriate disinfection.
-
Control contamination during handling. Clean and dirty workflows must be separated so “clean” doesn’t become a synonym for “recently touched.”
Cleaning Workflow for Rooms and Surfaces
A systematic workflow prevents missed spots.
- Prepare: Put on appropriate PPE, remove visible debris, and ensure adequate ventilation.
- Clean: Use detergent and friction. For example, scrub the exam table with detergent after a dog with diarrhea; rinsing alone won’t remove residue.
- Rinse when required: Some detergents leave films that interfere with disinfectants.
- Disinfect: Apply the correct disinfectant at the correct concentration and keep the surface wet for the required contact time.
- Final check: Look for streaks, pooled fluid, and missed corners around door handles and under equipment.
Example: After a parvovirus-suspected case, clean first to remove fecal material, then disinfect with an agent appropriate for non-enveloped viruses, ensuring the surface stays visibly wet for the full contact time.
Instrument Decontamination and Sterilization
Instruments follow a “dirty-to-clean” path.
- Point of use: Wipe gross soil promptly to prevent drying.
- Transport: Use closed, labeled containers so instruments don’t drip across the clinic.
- Decontamination: Clean in an enzymatic bath or with detergent and mechanical action as appropriate.
- Rinse and dry: Residual detergent can reduce sterilization effectiveness.
- Packaging: Wrap or containerize instruments to protect sterility after processing.
- Sterilization: Use validated cycles for steam sterilization when compatible.
- Storage: Store in a dry, clean area with protected packaging.
- Release criteria: Only release loads that meet monitoring results.
Example: A dental kit used on a cat with gingivitis should be cleaned immediately, dried thoroughly, packaged, and sterilized with the correct cycle. If the pack is wet or torn, it’s not “almost sterile”; it’s not sterile.
Disinfection for Heat-Sensitive Items
Not everything can go into a sterilizer. For heat-sensitive equipment, use high-level disinfection according to the manufacturer’s instructions and the clinic’s validated process.
- Ensure the item is fully immersed or evenly coated.
- Keep the item wet for the full contact time.
- Rinse if the disinfectant requires it, then dry with a clean method.
Example: A flexible endoscope requires careful cleaning before high-level disinfection; skipping the cleaning step is like trying to disinfect a dirty plate without washing it.
Verification and Monitoring That Prevents Silent Failures
Sterilization is not a vibe; it’s measurable.
- Mechanical monitoring: Time, temperature, and pressure logs.
- Chemical indicators: Confirm exposure in each pack.
- Biological indicators: Confirm the sterilizer’s ability to kill resistant organisms on a scheduled basis.
- Recordkeeping: Track loads, cycle parameters, and outcomes.
Example: If a chemical indicator shows incomplete exposure, the clinic treats the load as non-sterile, reprocesses the instruments, and checks why the cycle failed.
Facility Cleaning Schedule and Zoning
Use zoning to reduce cross-contamination.
- Clean zone: Storage, clean instrument handling, paperwork.
- Dirty zone: Decontamination and soiled item handling.
- Transition zone: Areas where items move between states.
Create a schedule that matches clinic traffic.
- Between patients: High-touch surfaces in exam rooms, restraint areas, and shared equipment.
- Daily: Floors, sinks, drains, and general surfaces.
- Weekly or as needed: Deep cleaning of vents, behind equipment, and storage areas.
Mind Map: Infection Prevention System
Practical Nonconformance Handling
When something goes wrong, the response should be consistent.
- Wet or damaged packs: Reprocess.
- Failed indicators: Quarantine the load, investigate the cycle, and reprocess.
- Missed cleaning step: Re-clean before disinfecting or sterilizing.
Example: If a staff member forgets to clean an instrument after a procedure, the clinic does not “just disinfect longer.” It redoes the cleaning step, then proceeds with the correct sterilization workflow.
Closing Integration for Clinic Consistency
A good protocol is one that staff can follow under real conditions: busy days, imperfect timing, and shared equipment. When cleaning, sterilization, and monitoring are connected—plus zoning and schedules that reflect how the clinic actually moves—the clinic reduces infections without relying on memory or luck.