Home Fat Loss Workout System
Chapter 1: Understanding Fat Loss and Muscle Building Fundamentals
1.1 The Science of Fat Loss: How Your Body Burns Calories
Fat loss boils down to one fundamental principle: your body must burn more calories than it consumes. But how exactly does your body burn calories? Let’s break it down.
Your body uses calories as fuel to perform all activities, from breathing and digesting food to running and lifting weights. The total calories you burn in a day is called your Total Daily Energy Expenditure (TDEE). TDEE consists of three main components:
Mind Map: Total Daily Energy Expenditure (TDEE)
Basal Metabolic Rate (BMR) is the number of calories your body needs to maintain basic functions like breathing, circulating blood, and cell production while at rest. It accounts for approximately 60-75% of your TDEE. For example, a person weighing 70 kg might have a BMR around 1600-1800 calories per day.
Thermic Effect of Food (TEF) refers to the calories your body uses to digest, absorb, and process nutrients. This usually accounts for about 10% of your daily calories. So if you eat 2000 calories, roughly 200 calories are spent just processing that food.
Physical Activity Level (PAL) includes all calories burned through movement, exercise, and daily activities. This is the most variable component and can range from 15% to over 30% of your TDEE depending on how active you are.
Mind Map: Components of Calorie Burn
How Fat Loss Happens
Fat loss occurs when your body taps into stored energy (fat) to make up for a calorie deficit. When you consume fewer calories than your TDEE, your body compensates by breaking down fat stores to meet its energy needs.
For example, if your TDEE is 2200 calories but you consume 1800 calories, your body needs to find an extra 400 calories from somewhere. It will pull from fat reserves, muscle glycogen, or other energy stores.
Energy from Fat vs. Carbohydrates vs. Protein
The body can use three main macronutrients for energy:
- Carbohydrates are the body’s preferred energy source, especially during high-intensity activities. They break down into glucose, which fuels muscles and the brain.
- Fat is a dense energy source, providing 9 calories per gram compared to 4 calories per gram for carbs and protein. Fat is the main fuel during rest and low-intensity activities.
- Protein is primarily used for repair and growth but can be converted to energy if necessary.
When in a calorie deficit, your body increases fat oxidation to supply energy. However, if the deficit is too large or protein intake is insufficient, muscle loss can occur.
Example: Calculating a Calorie Deficit for Fat Loss
Suppose Jane has a TDEE of 2000 calories. To lose fat, she decides to eat 500 calories less per day, consuming 1500 calories. This 500-calorie deficit means she should lose roughly 1 pound of fat per week (since 1 pound of fat equals about 3500 calories).
The Role of Exercise in Calorie Burn
Exercise increases your Physical Activity Level (PAL), raising your TDEE. For instance, a 30-minute moderate-intensity workout might burn an extra 250-400 calories depending on the activity and individual.
Exercise also helps preserve lean muscle mass during fat loss, which is important because muscle tissue burns more calories at rest than fat tissue.
Summary Mind Map
Mind Map: Fat Loss Process
Understanding these basics helps you design a workout and nutrition plan that creates a sustainable calorie deficit while maintaining muscle and overall health.
1.2 Muscle Building Basics: Why Lean Muscle Matters
Muscle building is often seen as the domain of bodybuilders or gym enthusiasts, but understanding why lean muscle matters is important for anyone focused on fat loss and overall health. Lean muscle refers to muscle tissue that is dense and free from excess fat. It plays several roles beyond just aesthetics.
Why Lean Muscle Matters
-
Increases Resting Metabolic Rate (RMR): Muscle tissue burns more calories at rest than fat tissue. This means the more lean muscle you have, the more calories your body uses even when you’re not exercising.
-
Improves Body Composition: Building muscle helps reduce fat percentage by increasing lean mass. This leads to a firmer, more toned appearance rather than just weight loss on the scale.
-
Supports Functional Strength: Lean muscle improves your ability to perform daily activities and exercise efficiently, reducing injury risk.
-
Enhances Insulin Sensitivity: More muscle mass helps regulate blood sugar better, which can aid fat loss and overall metabolic health.
-
Supports Bone Health: Muscle contractions stimulate bone growth and strength, which is crucial as we age.
Mind Map: Benefits of Lean Muscle
How Muscle Growth Happens
Muscle growth, or hypertrophy, occurs when muscle fibers sustain small amounts of damage through exercise, especially resistance training. The body repairs these fibers, making them thicker and stronger. This process requires:
- Progressive Overload: Gradually increasing the demand on muscles through heavier weights, more reps, or varied exercises.
- Adequate Nutrition: Sufficient protein intake supports repair and growth.
- Recovery: Muscles need rest to rebuild; overtraining can hinder progress.
Example: Progressive Overload in Practice
Imagine starting with 10 push-ups. After a week, you increase to 12, then 15 the next week. This gradual increase forces your muscles to adapt and grow stronger.
Muscle Types Relevant to Fat Loss
- Type I (Slow-Twitch): Endurance-oriented, these fibers burn fat efficiently during prolonged activity.
- Type II (Fast-Twitch): Power and strength fibers that respond well to high-intensity training and contribute to muscle size.
Both types are important. Combining endurance and strength training helps maximize fat loss and muscle growth.
Mind Map: Muscle Growth Essentials
Practical Example: Combining Fat Loss and Muscle Building
A workout routine that includes bodyweight squats, lunges, and planks can build muscle while burning calories. For instance, performing 3 sets of 15 squats challenges the leg muscles enough to stimulate growth without equipment. Adding lunges targets different muscles, and planks strengthen the core.
Summary
Lean muscle is more than just a look; it’s a metabolic engine and a functional asset. Building and maintaining it supports fat loss, improves health markers, and makes daily movement easier. Effective muscle building involves consistent, progressive exercise, proper nutrition, and rest. Understanding these basics helps create a balanced approach to fat loss and fitness.
1.3 Metabolism Explained: Boosting Your Body’s Calorie Burn
Metabolism is the collection of chemical processes your body uses to convert food into energy. This energy powers everything you do, from breathing to exercising. Understanding metabolism helps clarify why some people seem to burn calories faster than others and how you can influence your own calorie burn.
At its core, metabolism consists of three main components:
- Basal Metabolic Rate (BMR): The calories your body needs to maintain basic functions at rest, like keeping your heart beating and lungs working.
- Thermic Effect of Food (TEF): The energy used to digest, absorb, and process the nutrients in your meals.
- Physical Activity Energy Expenditure (PAEE): The calories burned during any movement, including exercise and daily activities.
Mind Map: Components of Metabolism
Basal Metabolic Rate (BMR)
BMR accounts for the largest portion of your daily calorie burn, typically 60-75%. It depends on factors like age, sex, weight, and muscle mass. Muscle tissue burns more calories at rest than fat tissue, so increasing lean muscle can raise your BMR.
Example: Two people of the same weight but different muscle mass will have different BMRs. The one with more muscle burns more calories even while sitting.
Thermic Effect of Food (TEF)
TEF usually accounts for about 10% of your daily calorie burn. Protein has a higher TEF compared to fats and carbohydrates, meaning your body uses more energy to process protein.
Example: Eating a meal rich in protein, like grilled chicken and vegetables, will require more energy to digest than a meal high in simple carbs, such as white bread.
Physical Activity Energy Expenditure (PAEE)
This is the most variable component. It includes planned exercise and spontaneous movements like walking or fidgeting. Increasing PAEE is the most direct way to boost daily calorie burn.
Example: A 30-minute brisk walk can burn approximately 150 calories, depending on your weight and pace.
Mind Map: Ways to Boost Metabolism
Strategies to Boost Your Metabolism
1. Build Lean Muscle: Muscle tissue requires more energy to maintain than fat. Incorporating strength training into your routine increases muscle mass, which raises your BMR.
Example: Performing push-ups and lunges at home three times a week can gradually increase muscle mass.
2. Increase Physical Activity: Adding more movement throughout the day increases PAEE. This includes structured workouts and simple habits like taking stairs or walking during breaks.
Example: Replacing TV time with a 20-minute HIIT session can significantly increase calorie burn.
3. Eat Protein-Rich Meals: Protein’s higher thermic effect means your body spends more energy digesting it. Including protein in every meal supports metabolism.
Example: Starting your day with eggs or Greek yogurt provides a protein boost.
4. Stay Hydrated: Water is necessary for metabolic processes. Drinking enough water can temporarily increase metabolism by supporting digestion and energy production.
Example: Drinking a glass of cold water can slightly increase calorie burn as your body warms it to body temperature.
5. Prioritize Sleep and Manage Stress: Poor sleep and high stress can disrupt hormones that regulate metabolism, leading to slower calorie burn.
Example: Establishing a regular sleep schedule and practicing relaxation techniques can help maintain metabolic health.
Mind Map: Metabolism Boosting Example Routine
Understanding metabolism is not about quick fixes but about consistent habits that support your body’s energy systems. Small changes in muscle mass, activity level, and nutrition add up to meaningful increases in calorie burn over time.
1.4 The Role of Nutrition in Fat Loss and Muscle Gain
Nutrition plays a central role in both fat loss and muscle gain. Without the right balance of nutrients, your workouts won’t deliver the results you want, no matter how consistent you are. Understanding how nutrition supports these goals helps you make smarter food choices that complement your exercise routine.
Calories: The Energy Equation
At the most basic level, fat loss requires a calorie deficit—burning more calories than you consume. Muscle gain, on the other hand, usually needs a calorie surplus or at least maintenance with sufficient protein to support muscle repair and growth.
- Calorie Deficit: To lose fat, consume fewer calories than your body uses. This forces your body to tap into fat stores for energy.
- Calorie Surplus: To build muscle, eat more calories than you burn, providing extra energy and nutrients for muscle repair.
Example: If your daily maintenance calories are 2,000, eating 1,700 calories creates a deficit for fat loss, while 2,200 calories supports muscle gain.
Macronutrients: Protein, Carbs, and Fats
Each macronutrient has a distinct role.
- Protein: Essential for muscle repair and growth. Aim for about 1.6 to 2.2 grams per kilogram of body weight daily when building muscle or losing fat to preserve lean mass.
- Carbohydrates: Your body’s preferred energy source, especially during workouts. They fuel performance and recovery.
- Fats: Important for hormone production and overall health. Typically, 20-30% of your total calories should come from fats.
Mind Map: Macronutrient Roles
Example: A 70 kg person aiming for fat loss might target 140 grams of protein (560 calories), 150 grams of carbs (600 calories), and 60 grams of fat (540 calories), totaling roughly 1,700 calories.
Meal Timing and Frequency
While total calories and macros matter most, meal timing can influence energy levels and recovery.
- Eating protein evenly throughout the day supports muscle protein synthesis.
- Consuming carbs before and after workouts helps fuel exercise and replenish glycogen.
Example: Having a balanced meal with protein and carbs about 1-2 hours before a workout can improve performance. Post-workout, a similar meal aids recovery.
Hydration
Water is often overlooked but vital. Dehydration can reduce workout intensity and recovery.
- Aim for at least 2-3 liters of water daily.
- Increase intake around workouts.
Practical Example: Daily Nutrition Plan for Fat Loss and Muscle Gain
Breakfast:
- Scrambled eggs (3 eggs)
- Whole grain toast (1 slice)
- Spinach and tomato

Snack:
- Greek yogurt (150g)
- Handful of almonds (15g)

Lunch:
- Grilled chicken breast (150g)
- Quinoa (100g cooked)
- Steamed broccoli

Pre-Workout Snack:
- Banana
- Small scoop of whey protein

Dinner:
- Baked salmon (150g)
- Sweet potato (150g)
- Mixed green salad with olive oil

Hydration:
- Water throughout the day
- Additional 500ml around workout
Mind Map: Nutrition Components for Fat Loss and Muscle Gain
Food Quality
Choosing whole, minimally processed foods provides better nutrient density and satiety. Processed foods often contain added sugars and unhealthy fats that can hinder fat loss and muscle gain.
Summary
Nutrition is the foundation that supports your workout efforts. Balancing calories, macronutrients, meal timing, and hydration creates an environment where fat loss and muscle gain can happen efficiently. Simple, consistent choices matter more than complicated diets or timing tricks.
1.5 Common Myths and Misconceptions About Fat Loss and Muscle Building
Understanding fat loss and muscle building is often clouded by myths that can mislead efforts and waste time. Clearing these up helps set realistic expectations and guides better decisions.
Myth 1: Spot Reduction Works
Many believe that targeting a specific body part with exercises will burn fat there. For example, doing hundreds of sit-ups will melt belly fat. In reality, fat loss happens systemically—your body decides where to burn fat based on genetics and overall calorie deficit, not the muscle you exercise.
Example: Doing leg lifts won’t specifically reduce thigh fat. Instead, a combination of overall fat loss through diet and full-body exercise will reduce fat in that area.
Mind Map: Spot Reduction Myth
Myth 2: More Sweat Means More Fat Burn
Sweating is your body’s way of cooling down, not a direct indicator of fat loss. You can sweat heavily in a sauna without burning calories, and conversely, burn fat during low-sweat activities.
Example: A slow walk in a cool environment may burn fat but produce little sweat, whereas a hot yoga session might cause heavy sweating but not necessarily greater fat loss.
Mind Map: Sweat and Fat Loss
Myth 3: Lifting Weights Makes You Bulky
This is a common concern, especially among women. Building significant muscle mass requires specific training, nutrition, and often genetics. Weight training helps build lean muscle, which improves metabolism and body composition without necessarily making you bulky.
Example: Incorporating resistance training in your routine can help you look toned and lean rather than bulky.
Mind Map: Weight Lifting and Bulk
Myth 4: You Must Exercise for Hours Every Day to Lose Fat
Long workouts are not always better. Fat loss depends on total calorie burn and consistency, not just workout length. Short, intense workouts can be as effective or more so than long, moderate sessions.
Example: A 20-minute high-intensity interval training (HIIT) session can burn as many calories as a 60-minute steady jog.
Mind Map: Workout Duration and Fat Loss
Myth 5: Carbs Are the Enemy
Carbohydrates are often blamed for fat gain, but they are a primary energy source. The key is the amount and quality of carbs consumed relative to your energy needs.
Example: Whole grains and vegetables provide sustained energy and fiber, while excessive refined sugars can contribute to fat gain.
Mind Map: Carbohydrates and Fat Loss
Myth 6: Muscle Weighs More Than Fat
Muscle is denser than fat, so a pound of muscle and a pound of fat weigh the same. The difference is volume—muscle takes up less space than fat.
Example: Someone may look leaner but weigh more due to increased muscle mass.
Mind Map: Muscle vs Fat Weight
Myth 7: You Can Out-Exercise a Bad Diet
Exercise supports fat loss but cannot fully compensate for poor nutrition. Consuming more calories than you burn will prevent fat loss regardless of exercise.
Example: Eating high-calorie junk food regularly will stall fat loss even with daily workouts.
Mind Map: Exercise vs Diet
Myth 8: Fat Loss Is Linear
Fat loss often happens in fits and starts, not a steady downward slope. Factors like water retention, hormonal fluctuations, and muscle gain can affect scale readings.
Example: You might see no change or even a slight increase on the scale one week despite fat loss due to water retention.
Mind Map: Fat Loss Progress
Summary
Understanding these myths helps avoid frustration and wasted effort. Fat loss and muscle building require a balanced approach involving consistent exercise, sensible nutrition, and patience. Recognizing how your body truly works can make your home fat loss workout system more effective and sustainable.
1.6 Setting Realistic Goals: Measuring Progress Effectively
Setting realistic goals is a crucial step in any fat loss and muscle-building journey. Without clear, measurable objectives, it’s easy to lose direction or become discouraged. This section explains how to set achievable goals and track your progress effectively.
Understanding Goal Types
Goals can be categorized into three main types:
- Outcome Goals: These focus on the end result, such as losing 10 pounds or fitting into a smaller clothing size.
- Performance Goals: These relate to measurable improvements in fitness, like doing 20 push-ups or increasing workout duration.
- Process Goals: These involve daily or weekly habits, such as exercising 4 times a week or drinking enough water.
Focusing solely on outcome goals can lead to frustration if progress stalls. Including performance and process goals keeps motivation steady by highlighting consistent effort and small wins.
SMART Goals Framework
A useful method to set goals is the SMART framework:
- Specific: Clearly define what you want to achieve.
- Measurable: Use quantifiable indicators.
- Achievable: Set goals that are realistic given your current situation.
- Relevant: Ensure the goal aligns with your overall objectives.
- Time-bound: Set a deadline to create urgency.
Example: Instead of “I want to lose weight,” say “I want to lose 5 pounds in 6 weeks by exercising 4 times a week and eating balanced meals.”
Measuring Progress Effectively
Tracking progress is about more than just the number on the scale. Here are several methods to consider:
- Body Measurements: Use a tape measure to track waist, hips, chest, arms, and thighs. Changes here can show fat loss or muscle gain even if weight stays steady.
- Progress Photos: Take photos from multiple angles weekly or biweekly under consistent lighting and clothing.
- Fitness Performance: Record reps, sets, weights, or workout duration to see strength and endurance improvements.
- Body Fat Percentage: If possible, use calipers or smart scales to estimate body fat, but don’t obsess over small fluctuations.
- How Clothes Fit: Pay attention to comfort and fit changes in your everyday clothing.
Mind Map: Goal Setting and Measurement
Example: Setting a Realistic Goal
Imagine you currently exercise twice a week and want to increase activity to lose fat and build muscle. A realistic goal might be:
- Goal: Exercise 4 times per week for 30 minutes each session.
- Measurement: Track workouts in a journal or app.
- Performance Goal: Increase push-ups from 10 to 20 in 6 weeks.
- Outcome Goal: Lose 4 pounds in 6 weeks.
This goal is specific, measurable, and time-bound. It also includes process and performance goals, which help maintain motivation.
Mind Map: Example Goal Breakdown
Avoiding Common Pitfalls
- Setting Unrealistic Goals: Losing 10 pounds in a week is neither safe nor sustainable.
- Ignoring Non-Scale Victories: Muscle gain can offset fat loss on the scale.
- Inconsistent Tracking: Sporadic measurements provide unreliable data.
- Neglecting Process Goals: Without daily habits, outcome goals are harder to reach.
Tips for Consistent Progress Measurement
- Choose 2-3 tracking methods to avoid overwhelm.
- Measure at the same time of day and under similar conditions.
- Use a notebook or digital tool to log data.
- Review progress weekly and adjust goals if necessary.
Summary
Setting realistic goals means balancing ambition with practicality. Use the SMART framework to define clear targets, and track progress through multiple methods beyond just weight. This approach keeps motivation steady and provides a fuller picture of your fat loss and muscle-building journey.
Chapter 2: Preparing Your Home Environment for Effective Workouts
2.1 Creating a Dedicated Workout Space: Maximizing Small Areas
Creating a dedicated workout space at home can feel like a challenge, especially when space is limited. However, even a small corner can become an effective exercise zone with some planning and organization. The key is to maximize the available area while keeping it functional and inviting enough to encourage regular use.
Mind Map: Key Elements of a Small Workout Space
Choosing the Location
Pick a spot that is quiet and free from heavy foot traffic. A corner in the living room, a section of the bedroom, or even a hallway nook can work. Natural light is a bonus because it helps keep energy levels up and makes the space more pleasant. Avoid areas near televisions or noisy appliances to reduce distractions.
Flooring Considerations
If you have hard floors, invest in a good-quality non-slip exercise mat. It cushions joints and prevents slipping during dynamic moves like jumping jacks or burpees. For carpeted areas, a thicker mat or interlocking foam tiles can provide extra support and protect the carpet from wear.
Equipment Selection and Storage
In small spaces, less is more. Choose equipment that serves multiple purposes, such as adjustable dumbbells or resistance bands. These take up minimal room but offer a wide range of exercises.
Storage solutions are crucial. Vertical racks or wall hooks keep items off the floor. For example, resistance bands can hang on hooks, while dumbbells can be stacked neatly on a small shelf. Using under-bed or under-sofa bins for less frequently used gear keeps clutter out of sight.
Atmosphere and Motivation
Good ventilation prevents stuffiness, especially in small spaces. If windows aren’t available, a small fan can help. Lighting should be bright enough to see clearly but not harsh—soft LED lights or daylight bulbs work well.
Adding personal touches like a small plant, a motivational poster, or a speaker for music can make the space feel inviting without crowding it.
Example Setup: 6x6 Foot Corner
- Location: Bedroom corner near window
- Flooring: Interlocking foam tiles covering 36 sq ft
- Equipment: Set of resistance bands, yoga mat, adjustable dumbbells
- Storage: Wall-mounted hooks for bands, small shelf for dumbbells
- Atmosphere: Small fan, LED strip lighting, potted plant
This setup allows for a variety of workouts including strength training, stretching, and cardio moves like jump squats.
Example Setup: Hallway Nook
- Location: Hallway section between two rooms
- Flooring: Thick exercise mat rolled out
- Equipment: Foldable bench, kettlebell, jump rope
- Storage: Foldable bench doubles as storage for jump rope and kettlebell
- Atmosphere: Overhead light with adjustable brightness
This arrangement maximizes a narrow space by using foldable and dual-purpose items.
Tips for Maximizing Small Spaces
- Keep the area tidy to avoid tripping hazards.
- Use mirrors to create a sense of openness and check form.
- Choose equipment that can be easily moved or stored after use.
- Consider multi-use furniture, like ottomans with storage.
By focusing on these practical elements, even the smallest space can become a dedicated workout zone that supports your fat loss and muscle building goals.
2.2 Essential Equipment for Home Fat Loss Workouts: Budget-Friendly Options
When setting up a home workout space for fat loss, the right equipment can make a big difference without breaking the bank. The goal is to have versatile, durable, and space-efficient tools that support a variety of exercises. Here’s a breakdown of essential, budget-friendly equipment options, along with examples and a mind map to organize the choices.
Essential Equipment Categories
- Bodyweight Tools
- Resistance Equipment
- Cardio Aids
- Support and Recovery Gear
Mind Map: Essential Home Workout Equipment
Bodyweight Tools
Pull-up Bar: A doorway pull-up bar is inexpensive and allows for upper body and core strengthening exercises. It can be used for pull-ups, chin-ups, and hanging leg raises. Example: A basic steel bar with adjustable width fits most door frames and costs around $20-$30.
Jump Rope: Jump ropes are excellent for cardio and coordination. They take up almost no space and cost under $10 for a decent quality rope. Example: A speed rope with adjustable length can be used for interval training.
Yoga Mat: A non-slip mat provides cushioning for floor exercises like planks, push-ups, and stretching. Mats are affordable, usually between $15-$30, and improve comfort and safety.
Resistance Equipment
Resistance Bands: These come in various tension levels and are highly versatile. They can replace weights for many exercises, such as squats, rows, and presses. Example: A set of loop bands and tube bands with handles costs around $15-$25.
Dumbbells: Adjustable dumbbells save space and money by combining multiple weights into one set. For fat loss, moderate weights (5-20 lbs) are sufficient for most routines. Example: A pair of fixed 10-pound dumbbells can be found for about $20-$30 each.
Kettlebells: Kettlebells add dynamic movement options like swings and goblet squats. A single 15-20 lb kettlebell is a good starting point, priced around $30-$40.
Cardio Aids
Jump Rope: Already mentioned under bodyweight tools, it doubles as a cardio aid.
Mini Stepper: Compact steppers simulate stair climbing and provide low-impact cardio. They usually cost between $40-$60 and fit easily in small spaces.
Support and Recovery Gear
Foam Roller: Foam rollers help with muscle recovery and flexibility. A basic roller costs about $20-$30 and can be used post-workout to reduce soreness.
Exercise Ball: Also known as a stability ball, it aids core workouts and stretching. A medium-sized ball costs around $20 and can double as a chair to improve posture.
Examples of Budget-Friendly Equipment Setups
Minimalist Setup:
- Yoga mat ($20)
- Jump rope ($10)
- Resistance bands set ($20)
Total: Approximately $50
This setup covers cardio, strength, and flexibility with minimal space and cost.
Expanded Setup:
- Yoga mat ($20)
- Adjustable dumbbells ($50)
- Pull-up bar ($25)
- Foam roller ($25)
Total: Approximately $120
This allows for more varied strength training and recovery options.
Final Thoughts
Choosing equipment depends on your space, budget, and workout preferences. Prioritize items that support multiple exercises and can grow with your fitness level. Starting simple and adding tools as needed is a practical approach. Remember, consistency and proper technique matter more than fancy gear when it comes to fat loss and building lean muscle.
2.3 Safety First: Injury Prevention Tips for Home Exercising
Exercising at home offers convenience but also requires a careful approach to avoid injuries. Without a trainer physically present, it’s important to build habits that protect your body while maximizing workout effectiveness. Here are practical tips to keep your workouts safe.
Understand Your Limits
Know your current fitness level and avoid jumping into advanced exercises too quickly. For example, if you’re new to push-ups, start with wall or knee push-ups before progressing to full ones. Pushing beyond your capacity increases injury risk.
Warm-Up Properly
A proper warm-up raises your heart rate and loosens muscles, reducing strain during exercise. Spend 5–10 minutes on dynamic movements like arm circles, leg swings, or light jogging in place. Avoid static stretching before workouts, as it can reduce muscle power.
Maintain Proper Form
Incorrect form is a common cause of injury. Use mirrors or record yourself to check posture. For instance, during squats, keep your knees aligned over your toes and avoid letting them cave inward. If unsure, start with simpler movements and build up.
Create a Safe Workout Space
Clear the area of obstacles and ensure the floor is non-slip. Avoid exercising on slippery surfaces or cluttered rooms. For example, move furniture or rugs that could cause tripping or slipping.
Use Equipment Correctly
If using resistance bands, dumbbells, or mats, inspect them regularly for wear and tear. A snapped band or torn mat can cause accidents. Follow manufacturer instructions for setup and use.
Progress Gradually
Increase intensity, duration, or resistance slowly. For example, add 5–10% more reps or weight each week rather than doubling effort suddenly. This approach allows your muscles and joints to adapt.
Listen to Your Body
Pain is a warning sign. Distinguish between muscle fatigue and sharp or persistent pain. If you feel discomfort beyond typical exertion, stop and assess. For example, joint pain during lunges may indicate improper form or overuse.
Stay Hydrated and Rested
Dehydration and fatigue impair coordination and focus, increasing injury risk. Drink water before, during, and after workouts. Ensure adequate sleep to support recovery.
Mind Map: Injury Prevention Basics
Example: Proper Squat Form Check
- Feet shoulder-width apart
- Toes slightly pointed out
- Chest up, back straight
- Knees track over toes, not inward
- Weight on heels
- Lower hips as if sitting on a chair
If your knees collapse inward or your heels lift, adjust stance or reduce depth.
Example: Safe Use of Resistance Bands
- Check for cracks or tears before use
- Anchor bands securely to avoid snapping back
- Control movements; avoid letting bands snap
- Start with lighter resistance and increase gradually
Mind Map: Home Workout Safety Checklist
Following these guidelines helps you exercise safely at home, reducing injury risk and making your fat loss journey more sustainable.
2.4 Organizing Your Workout Schedule: Consistency and Flexibility
Organizing your workout schedule at home is about striking a balance between consistency and flexibility. Consistency helps build habits and progress, while flexibility ensures you can adapt to life’s unpredictability without losing momentum.
Why Schedule Your Workouts?
A clear schedule reduces decision fatigue. When you know what, when, and how long you’ll exercise, it’s easier to follow through. It also helps prevent overtraining or neglecting certain muscle groups.
Key Principles for Scheduling
- Frequency: Aim for 3-5 sessions per week to allow recovery and progress.
- Duration: Sessions can range from 20 to 60 minutes depending on your goals and time.
- Variety: Mix cardio, strength, core, and flexibility workouts to cover all bases.
- Rest: Schedule rest or active recovery days to avoid burnout.
Mind Map: Basic Workout Schedule Structure
Building Flexibility into Your Schedule
Life happens. Meetings run late, kids need attention, or you just don’t feel up to a tough workout. Flexibility means having a plan B that keeps you moving without stress.
- Swap Days: If you miss Tuesday’s HIIT, do it on Wednesday and shift the rest day.
- Shorten Sessions: When pressed for time, do a 15-minute focused workout instead of skipping.
- Mix Intensity: Replace a high-intensity day with a mobility or stretching session if energy is low.
Mind Map: Flexibility Options
Example: Weekly Schedule with Built-in Flexibility
| Day | Planned Workout | Flexible Option |
|---|---|---|
| Monday | Full Body Strength | Shorten to Upper Body Focus (20 min) |
| Tuesday | HIIT Cardio | Swap with Wednesday or do Mobility |
| Wednesday | Rest or Mobility | Active Recovery Walk if Feeling Good |
| Thursday | Core and Stability | Replace with Stretching if Tired |
| Friday | Upper Body Strength | Combine with Core if Time Permits |
| Saturday | Low-Impact Cardio | Rest if Needed |
| Sunday | Rest | Light Stretching or Meditation |
Tips for Staying Consistent
- Set Specific Times: Treat workouts like appointments.
- Prepare Ahead: Lay out clothes and equipment the night before.
- Track Progress: Use a journal or app to note workouts and feelings.
- Be Kind to Yourself: Missing a day isn’t failure; adjust and move on.
Mind Map: Consistency Strategies
Organizing your workout schedule with these principles helps you maintain a steady routine without feeling boxed in. The goal is to create a system that fits your life, not the other way around.
2.5 Tracking Progress at Home: Using Journals and Apps
Tracking progress at home is a practical way to stay on course with your fat loss and muscle-building goals. It helps you see what’s working, what needs adjustment, and keeps motivation steady. Two common tools for this are journals and apps. Each has its strengths, and using them thoughtfully can make a real difference.
Why Track Progress?
Tracking isn’t just about numbers. It’s about understanding your body’s response to workouts and nutrition. When you record data consistently, you create a feedback loop that informs your decisions. It also highlights small wins that might otherwise go unnoticed.
Using Journals for Tracking
A physical or digital journal lets you customize what you track. You can jot down workout details, how you felt, nutrition notes, and measurements. The act of writing can reinforce commitment and make you more mindful.
What to track in a journal:
- Date and time of workout
- Type of workout and exercises performed
- Number of sets, reps, and weights (if any)
- Duration and intensity
- Energy levels and mood
- Body measurements (waist, hips, chest, arms, legs)
- Weight
- Notes on nutrition or sleep
Example journal entry:
Date: March 15
Workout: HIIT - 20 minutes
Exercises: 3 rounds of 30s burpees, 30s rest, 30s squats, 30s rest
Energy: Good, felt strong
Weight: 180 lbs
Waist: 34 inches
Notes: Ate balanced meals, slept 7 hours
Using Apps for Tracking
Apps can automate and simplify tracking. Many allow you to log workouts, track calories, and monitor progress visually with charts. Some apps send reminders and offer quick data entry options.
Advantages of apps:
- Easy data visualization (graphs, trends)
- Quick input, especially with presets
- Reminders to keep you consistent
- Integration with other health data (heart rate, steps)
Example app tracking features:
- Workout log with exercise database
- Calorie and macronutrient tracker
- Progress photos and measurement logs
- Goal setting and milestone alerts
Combining Journals and Apps
Using both can cover different needs. Journals are great for detailed notes and reflections, while apps handle numbers and trends efficiently. For example, you might log workouts and feelings in a journal and use an app to track calories and body measurements.
Mind Map: Tracking Progress at Home
Practical Tips for Effective Tracking
- Choose what matters most to you. Don’t overload your journal or app with unnecessary data.
- Track consistently but don’t obsess. Missing a day or two isn’t a setback.
- Use progress photos alongside numbers. Visual evidence can be very motivating.
- Review your data weekly to spot trends and make small tweaks.
- Note how you feel physically and mentally; progress isn’t just physical.
Example: Weekly Tracking Routine
- Monday: Log workout details and weight in journal.
- Wednesday: Take body measurements and enter in app.
- Friday: Reflect on energy and mood in journal.
- Sunday: Review app charts and journal notes to plan next week.
Tracking progress at home doesn’t have to be complicated. With a clear approach and simple tools, you can keep your fat loss and muscle-building journey on track and informed.
2.6 Motivational Techniques to Stay Committed
Staying committed to a home fat loss workout system can be challenging, especially without the structure of a gym or trainer. Motivation is not a constant state but a set of habits and strategies that help maintain focus over time. Here are practical motivational techniques, supported by mind maps and examples, to help you stay on track.
Set Clear, Achievable Goals
Start by defining specific, measurable, and realistic goals. Instead of vague aims like “lose weight,” try “complete 3 workouts per week for the next month.” Clear goals provide direction and a sense of accomplishment.
Mind Map: Goal Setting
Example: Sarah sets a goal to do 20 minutes of HIIT three times weekly. She tracks each session in a journal, which helps her see progress and stay motivated.
Build a Routine and Stick to It
Consistency is easier when workouts become part of your daily or weekly routine. Choose specific days and times and treat them like appointments.
Mind Map: Routine Building
Example: John decides to exercise every Monday, Wednesday, and Friday at 7 a.m. He places his workout clothes next to his bed to reduce friction in getting started.
Use Visual Reminders and Tracking
Visual cues reinforce commitment. Tracking progress visually can be motivating and provide feedback on effort.
Mind Map: Visual Motivation
Example: Maria uses a whiteboard in her workout space to mark each completed session. Seeing the growing number of checkmarks encourages her to keep going.
Focus on Enjoyable Activities
Motivation lasts longer when workouts are enjoyable. Incorporate exercises you like or vary routines to prevent boredom.
Mind Map: Enjoyment in Workouts
Example: David mixes jumping rope with bodyweight circuits and listens to his favorite podcast, making workouts something he looks forward to.
Manage Expectations and Celebrate Small Wins
Recognize that progress takes time and celebrate incremental achievements to maintain morale.
Mind Map: Managing Expectations
Example: Lisa notes that after two weeks, she feels more energetic even though the scale hasn’t changed. She acknowledges this as progress and stays motivated.
Create Accountability Systems
Accountability can come from external or internal sources. Sharing goals or tracking progress publicly can increase commitment.
Mind Map: Accountability
Example: Mark pairs up with a friend for virtual workouts. They text each other after completing sessions, which helps both stay consistent.
Prepare for Obstacles
Anticipate common barriers such as fatigue, time constraints, or low motivation, and plan strategies to overcome them.
Mind Map: Overcoming Obstacles
Example: Emma knows her evenings are often busy, so she prepares 15-minute morning workouts for those days. When she misses a session, she reminds herself that one missed workout doesn’t undo progress.
In summary, motivation for home fat loss workouts comes from clear goals, consistent routines, visual tracking, enjoyment, realistic expectations, accountability, and planning for challenges. Applying these techniques with concrete examples can help maintain commitment and make your workout system sustainable.
Chapter 3: Warm-Up and Mobility Routines to Enhance Performance
3.1 Importance of Warm-Ups: Preparing Your Body for Exercise
Warm-ups are an essential part of any workout routine, especially when the goal is fat loss and muscle building at home. They prepare your body for the physical demands ahead by gradually increasing your heart rate, loosening muscles, and improving joint mobility. Skipping warm-ups can lead to poor performance and a higher risk of injury.
Why Warm-Ups Matter
- Increase Blood Flow: Warm-ups raise your heart rate, which boosts circulation and delivers more oxygen and nutrients to your muscles.
- Enhance Muscle Elasticity: Gradual movement warms muscles, making them more flexible and less prone to strains.
- Improve Joint Mobility: Dynamic movements lubricate joints, allowing smoother and safer motion.
- Activate the Nervous System: Prepares your brain and muscles to work together efficiently.
- Mental Preparation: Helps you focus and get into the right mindset for exercise.
Mind Map: Benefits of Warm-Ups
Example: Simple Warm-Up Routine
- Marching in Place (2 minutes): Start by lifting your knees and swinging your arms to gradually raise your heart rate.
- Arm Circles (1 minute): Extend your arms and make small to medium circles forward and backward to loosen shoulder joints.
- Leg Swings (1 minute per leg): Hold onto a wall for balance and swing one leg forward and backward to mobilize the hip.
- Hip Circles (1 minute): Place hands on hips and rotate your hips in a circular motion to improve pelvic mobility.
Mind Map: Sample Warm-Up Components
How Warm-Ups Affect Performance
Warming up increases muscle temperature, which improves enzyme activity involved in energy production. This means your muscles can contract more efficiently. For example, a cold muscle contracts slower and with less force, which can reduce workout effectiveness. Additionally, warming up improves the elasticity of tendons and ligaments, reducing the chance of tears or strains during more intense movements like squats or lunges.
Practical Tip
If your workout includes jumping or sprinting, include dynamic movements that mimic those actions but at a lower intensity. For instance, before doing jump squats, perform bodyweight squats at a slower pace to prepare your muscles and joints.
Mind Map: Warm-Up Tailored to Workout Type
Common Misconceptions
- Warm-ups are only for athletes: Everyone benefits from warming up, regardless of fitness level.
- Static stretching is the best warm-up: Static stretches are better saved for after workouts; dynamic movements are more effective for warming up.
- Warm-ups need to be long: Even 5 minutes of targeted warm-up can be sufficient.
In summary, a proper warm-up prepares your body physically and mentally, reduces injury risk, and can improve workout quality. Including a short, focused warm-up before your fat loss and muscle-building routines at home is a simple step that pays off in performance and safety.
3.2 Simple Dynamic Stretching Routines for Fat Loss Workouts
Dynamic stretching involves controlled, active movements that prepare your muscles and joints for exercise by increasing blood flow and mobility. Unlike static stretching, where you hold a position, dynamic stretches mimic the motions you’ll perform during your workout, making them ideal for fat loss routines that often include cardio and strength elements.
Why Dynamic Stretching Matters for Fat Loss Workouts
Dynamic stretching warms up your body efficiently, reducing injury risk and improving performance. It activates the nervous system and primes muscles for the intensity ahead, helping you move better and burn calories more effectively.
Key Principles of Dynamic Stretching
- Movement over stillness: Keep your body moving through a full range of motion.
- Controlled speed: Perform movements smoothly to avoid strain.
- Specificity: Choose stretches that relate to your workout activities.
- Duration: Spend about 5-10 minutes on dynamic stretches before exercising.
Simple Dynamic Stretching Routines
Below are several routines that target major muscle groups and joints involved in fat loss workouts. Each routine includes examples with brief instructions.
Leg Swings
- Purpose: Loosens hips, hamstrings, and glutes.
- How to do it: Stand next to a wall or chair for balance. Swing one leg forward and backward in a controlled manner, keeping your torso upright. Perform 10-15 swings per leg.
Arm Circles
- Purpose: Warms up shoulders and upper back.
- How to do it: Extend arms out to the sides at shoulder height. Make small circles forward for 15 seconds, then reverse direction for another 15 seconds.
Walking Lunges with Twist
- Purpose: Activates legs, hips, and core.
- How to do it: Step forward into a lunge, keeping your knee over your ankle. While in the lunge, twist your torso toward the front leg. Return to standing and repeat on the other side. Perform 10 lunges per leg.
High Knees
- Purpose: Raises heart rate and warms up hip flexors and calves.
- How to do it: Jog in place, bringing knees up toward your chest as high as comfortable. Maintain a brisk pace for 30 seconds.
Torso Rotations
- Purpose: Mobilizes the spine and core.
- How to do it: Stand with feet shoulder-width apart, hands on hips or extended in front. Rotate your upper body left and right in a controlled manner. Perform 15 rotations each side.
Side Lunges
- Purpose: Opens hips and strengthens inner thighs.
- How to do it: Step out to the side with one leg, bending that knee while keeping the other leg straight. Push back to center and repeat on the other side. Perform 10 lunges per side.
Mind Map: Dynamic Stretching Routine Components
Example 5-Minute Dynamic Stretching Routine for Fat Loss Workouts
| Exercise | Duration/Reps | Notes |
|---|---|---|
| Leg Swings (each leg) | 15 swings | Use support for balance |
| Arm Circles | 15 seconds forward, 15 backward | Keep movements smooth |
| Walking Lunges with Twist | 10 per leg | Focus on controlled twists |
| High Knees | 30 seconds | Maintain steady pace |
| Torso Rotations | 15 per side | Keep feet planted |
| Side Lunges | 10 per side | Keep back straight |
Tips for Effective Dynamic Stretching
- Start slow and gradually increase range and speed.
- Focus on form to avoid injury.
- Breathe steadily throughout the movements.
- Tailor stretches to your workout; for example, add more leg-focused stretches before a lower-body session.
Dynamic stretching is a practical and efficient way to prepare your body for fat loss workouts at home. Incorporating these simple routines will help you move better, reduce injury risk, and get more from your exercise sessions.
3.3 Mobility Drills to Improve Joint Health and Range of Motion
Mobility drills are exercises designed to improve the range of motion and function of your joints. Unlike static stretching, which focuses on lengthening muscles, mobility drills emphasize controlled movement through full joint ranges. This helps maintain joint health, reduces injury risk, and supports better workout performance.
Why Mobility Matters
Joints are the hinges of your body. When they move freely and smoothly, your workouts become more effective and less painful. Stiff or restricted joints can lead to compensations, where other muscles or joints take on extra stress, increasing injury risk.
Key Principles of Mobility Drills
- Controlled Movement: Move deliberately, not forcefully.
- Full Range of Motion: Work through the entire joint movement without pain.
- Consistency: Regular practice yields better results.
- Breath Awareness: Coordinate breathing with movement to relax muscles.
Mind Map: Components of Mobility Drills
Examples of Mobility Drills
Shoulder Circles
- Stand or sit tall.
- Extend arms out to the sides.
- Slowly make large circles with your arms, forward for 10 reps, then backward for 10 reps.
- Keep movements smooth and controlled.
This drill lubricates the shoulder joints and warms up the muscles around the scapula.
Hip Pendulum Swings
- Stand next to a wall or chair for support.
- Swing one leg forward and backward like a pendulum, keeping the movement controlled.
- Perform 15 swings per leg.
- Then, swing the leg side to side across your body for 15 reps.
This helps improve hip joint mobility and prepares the hips for squats or lunges.
Ankle Circles
- Sit or stand with one foot off the ground.
- Rotate the ankle clockwise 10 times, then counterclockwise 10 times.
- Repeat with the other foot.
Ankle mobility is crucial for balance and proper foot placement during exercises.
Cat-Cow Spine Mobilization
- Start on hands and knees.
- Inhale, arch your back, lifting your chest and tailbone (Cow).
- Exhale, round your spine, tucking your chin and pelvis (Cat).
- Repeat 10 times slowly.
This drill increases spinal flexibility and warms up the back muscles.
Mind Map: Sample Mobility Routine
Tips for Effective Mobility Drills
- Perform drills before workouts to prepare joints.
- Avoid forcing movements beyond comfort.
- Use slow, deliberate motions to build control.
- Incorporate breathing to relax muscles.
- Consistency matters more than duration; 5-10 minutes daily can make a difference.
By integrating these mobility drills into your routine, you support joint health and improve your ability to perform fat loss workouts effectively. The goal is to move better, not just harder.
3.4 Sample 10-Minute Warm-Up Routine with Step-by-Step Instructions
A well-structured warm-up prepares your body for the workout ahead by increasing blood flow, raising muscle temperature, and improving joint mobility. This 10-minute routine combines dynamic stretching and light cardio movements to activate major muscle groups and enhance your range of motion.
Sample 10-Minute Warm-Up Routine with Step-by-Step Instructions
Minute 0-2: Light Cardio to Raise Heart Rate
- March in Place or Light Jogging: Lift your knees moderately and swing your arms to engage your whole body.
- Example: March with exaggerated arm swings for 1 minute, then transition to a light jog for 1 minute.
Minute 2-4: Dynamic Lower Body Movements
- Leg Swings: Hold onto a wall or chair for balance. Swing one leg forward and backward in a controlled manner for 10-15 swings per leg.
- Hip Circles: Stand with feet shoulder-width apart, place hands on hips, and rotate hips in a circular motion 10 times clockwise, then 10 times counterclockwise.
Minute 4-6: Dynamic Upper Body Movements
- Arm Circles: Extend arms to the sides and make small circles, gradually increasing size. Perform 15 circles forward and 15 backward.
- Torso Twists: Stand with feet hip-width apart, bend elbows at 90 degrees, and twist your torso side to side smoothly for 20 repetitions.
Minute 6-8: Combined Movements for Coordination and Mobility
- Walking Lunges with a Twist: Step forward into a lunge, then twist your torso toward the front leg. Alternate legs for 10 lunges per side.
- Inchworms: From standing, bend at the hips and walk your hands forward into a plank position, then walk feet toward hands and stand up. Repeat 5 times.
Minute 8-10: Activation and Preparation for Workout
- Bodyweight Squats: Feet shoulder-width apart, lower hips back and down, keeping chest up. Perform 15 slow, controlled squats.
- Jumping Jacks: Perform 30 seconds of jumping jacks to elevate heart rate and prepare for more intense activity.
Mind Map: 10-Minute Warm-Up Routine
Examples and Notes
- Leg Swings: Keep movements controlled to avoid straining the hip flexors. If balance is an issue, hold onto a stable surface.
- Arm Circles: Start small to avoid shoulder discomfort, gradually increasing the circle size.
- Walking Lunges with Twist: This movement warms up the legs and engages the core, preparing you for rotational movements during workouts.
- Inchworms: This exercise activates the shoulders, core, and hamstrings simultaneously.
- Jumping Jacks: If you have joint concerns, replace jumping jacks with step jacks (stepping side to side while raising arms).
This routine is designed to be adaptable. You can adjust the duration of each segment based on your fitness level or specific workout needs. The key is to move continuously and avoid static stretching during the warm-up phase, as dynamic movements better prepare muscles and joints for exercise.
By following this step-by-step warm-up, you reduce injury risk and improve workout performance, setting a solid foundation for your fat loss and muscle-building sessions.
3.5 Breathing Techniques to Optimize Workout Efficiency
Breathing is often overlooked in workouts, yet it plays a crucial role in how efficiently your body performs and recovers. Proper breathing techniques can help you maintain endurance, reduce fatigue, and even improve focus during exercise. This section covers practical breathing methods tailored for home fat loss workouts, with clear examples and mind maps to guide you.
Why Breathing Matters in Workouts
Breathing supplies oxygen to your muscles, which they need to generate energy. When you breathe inefficiently, your muscles get less oxygen, causing quicker fatigue and reduced performance. Additionally, controlled breathing helps regulate heart rate and maintain rhythm during repetitive movements.
Basic Breathing Principles for Exercise
- Inhale through the nose: Filters and warms the air.
- Exhale through the mouth: Allows faster release of carbon dioxide.
- Match breath to movement: Coordinate breathing with exercise phases.
Common Breathing Patterns
- Diaphragmatic (Belly) Breathing: Engages the diaphragm, allowing deeper breaths.
- Chest Breathing: Shallower, less efficient, often linked to tension.
- Pursed-Lip Breathing: Slows exhalation, useful for recovery.
Mind Map: Breathing Techniques Overview
Technique 1: Diaphragmatic Breathing (Belly Breathing)
This technique encourages full oxygen exchange by engaging the diaphragm rather than shallow chest breathing. It promotes relaxation and better oxygen flow.
How to practice:
- Sit or lie down comfortably.
- Place one hand on your chest and the other on your belly.
- Inhale slowly through your nose, feeling your belly rise.
- Exhale through your mouth, feeling your belly fall.
Example during workout:
While performing a plank, focus on belly breathing to maintain steady oxygen flow and reduce tension.
Technique 2: Rhythmic Breathing
Coordinating your breath with your movements helps maintain a steady pace and prevents breath-holding, which can spike blood pressure.
Example for bodyweight squats:
- Inhale as you lower down (eccentric phase).
- Exhale as you push up (concentric phase).
Mind Map: Rhythmic Breathing in Exercise
Technique 3: Pursed-Lip Breathing for Recovery
This method slows your exhalation, helping to control breathing rate and improve oxygen exchange during rest periods.
How to practice:
- Inhale slowly through your nose.
- Purse your lips as if about to whistle.
- Exhale slowly and steadily through pursed lips.
Example:
After a high-intensity interval, use pursed-lip breathing for 30 seconds to lower heart rate and prepare for the next set.
Practical Tips for Breathing During Workouts
- Avoid breath-holding during exertion; it can cause dizziness.
- Practice breathing techniques during warm-ups to build habit.
- Use a metronome or count to maintain rhythmic breathing.
- If you feel short of breath, slow down and focus on deep belly breaths.
Mind Map: Breathing Tips Summary
Summary Example: Applying Breathing Techniques in a Sample Routine
Routine: 10 bodyweight squats, 10 push-ups, 30-second plank
- Squats: Inhale through nose lowering down, exhale through mouth pushing up.
- Push-ups: Inhale lowering chest, exhale pushing up.
- Plank: Maintain steady diaphragmatic breathing.
Between rounds, use pursed-lip breathing to recover.
By integrating these breathing techniques into your home fat loss workouts, you can improve oxygen delivery, maintain stamina, and reduce unnecessary tension. Practicing them regularly will make your workouts feel smoother and more controlled.
Chapter 4: High-Intensity Interval Training (HIIT) for Maximum Fat Burn
4.1 What is HIIT and Why It’s Effective for Fat Loss
High-Intensity Interval Training (HIIT) is a workout style that alternates short bursts of intense exercise with periods of lower-intensity recovery or rest. The idea is to push your body close to its maximum effort during the high-intensity phases, then allow partial recovery before repeating the cycle. This pattern continues for a set duration, often between 10 to 30 minutes.
The effectiveness of HIIT for fat loss comes from several physiological responses it triggers. First, the intense effort increases your heart rate rapidly, which burns calories during the workout. More importantly, HIIT elevates your metabolic rate for hours after exercise, a phenomenon called excess post-exercise oxygen consumption (EPOC). This means your body continues to burn calories at a higher rate even after you finish exercising.
Here is a simple mind map to visualize the core components of HIIT and why it works for fat loss:
An example of a HIIT cycle might be 30 seconds of sprinting followed by 90 seconds of walking or slow jogging, repeated 8 times. This 20-minute session combines intense effort with recovery, maximizing calorie burn in a short time.
Another example using bodyweight exercises at home could be 40 seconds of jumping jacks followed by 20 seconds of rest, repeated 10 times. This keeps the heart rate elevated and engages multiple muscle groups.
The alternating intensity challenges both aerobic and anaerobic energy systems. During high-intensity intervals, your body relies on anaerobic pathways, which burn carbohydrates quickly and produce metabolic byproducts that contribute to fatigue. The recovery phases allow partial clearance of these byproducts, enabling you to sustain repeated efforts.
HIIT also helps preserve lean muscle mass better than long-duration steady-state cardio. Since the intense bursts recruit muscle fibers more effectively, the body maintains or even builds muscle while losing fat.
Here’s a mind map summarizing the energy systems involved:
In practice, HIIT workouts can be tailored to your fitness level and preferences. Beginners might start with shorter high-intensity intervals and longer recovery, such as 20 seconds work and 40 seconds rest. More advanced exercisers can increase work duration or reduce rest.
To sum up, HIIT is effective for fat loss because it combines intense effort with recovery, leading to a high calorie burn during and after exercise, supports muscle retention, and fits into a busy schedule due to its short duration. Its adaptability and minimal equipment needs make it a practical choice for home workouts focused on fat loss.
4.2 Structuring a HIIT Workout at Home: Time and Intensity Guidelines
Structuring a HIIT workout at home requires balancing exercise duration, intensity, and rest to maximize calorie burn without overtaxing your body. The core idea behind HIIT (High-Intensity Interval Training) is alternating short bursts of intense activity with recovery periods. This pattern pushes your cardiovascular and muscular systems, promoting fat loss and muscle endurance.
Key Components of a HIIT Workout
- Work Interval: The period of high-intensity exercise.
- Rest Interval: The recovery period following the work interval.
- Number of Rounds: How many cycles of work and rest you complete.
- Total Duration: Overall length of the workout session.
Time Guidelines
Typical HIIT sessions last between 10 and 30 minutes. For beginners, shorter total durations with longer rest intervals are advisable. More experienced individuals can increase work time, reduce rest, or add rounds.
| Level | Work Interval | Rest Interval | Rounds | Total Time |
|---|---|---|---|---|
| Beginner | 20 seconds | 40 seconds | 6 | ~6 minutes |
| Intermediate | 30 seconds | 30 seconds | 8 | ~8 minutes |
| Advanced | 40 seconds | 20 seconds | 10 | ~10 minutes |
Intensity Guidelines
Intensity should be high enough to raise your heart rate to 80-95% of your maximum during work intervals. This means pushing yourself but not to the point of complete exhaustion. During rest intervals, your heart rate should drop enough to prepare you for the next burst.
Sample Mind Map: Structuring a HIIT Workout
Example 1: Beginner HIIT Session (Total ~6 minutes)
- Work: Jumping jacks – 20 seconds
- Rest: March in place – 40 seconds
- Repeat 6 times
This setup allows you to build endurance and get used to the work-rest rhythm.
Example 2: Intermediate HIIT Session (Total ~8 minutes)
- Work: Bodyweight squats – 30 seconds
- Rest: Slow walking or standing rest – 30 seconds
- Repeat 8 times
This increases both work duration and rounds, challenging your stamina.
Example 3: Advanced HIIT Session (Total ~10 minutes)
- Work: Burpees – 40 seconds
- Rest: Light jogging in place – 20 seconds
- Repeat 10 times
This pushes your cardiovascular system and muscular endurance with minimal rest.
Tips for Structuring Your HIIT Workout
- Choose exercises that engage large muscle groups for maximum calorie burn.
- Use a timer or app to keep intervals precise.
- Warm up before starting to prepare your body and reduce injury risk.
- Cool down after to aid recovery.
- Adjust intervals based on how you feel; it’s okay to modify rest or work times.
Mind Map: Adjusting Intensity and Duration
Structuring your HIIT workout around these guidelines helps you tailor sessions to your fitness level and goals, making your home workouts both efficient and effective.
4.3 Bodyweight HIIT Exercises: Squats, Burpees, Jumping Jacks, and More
Bodyweight HIIT exercises are a practical and effective way to burn fat and build muscle without any equipment. They rely on your own body weight to create resistance and challenge your cardiovascular system. Below, we explore some foundational exercises—squats, burpees, jumping jacks, and others—explaining how to perform them correctly, their benefits, and how they fit into a HIIT routine.
Squats
Squats target the large muscles of your lower body, including the quadriceps, hamstrings, glutes, and calves. They also engage your core for stability.
- How to perform: Stand with feet shoulder-width apart. Lower your hips back and down as if sitting in a chair, keeping your chest up and knees tracking over your toes. Go as low as comfortable, ideally until your thighs are parallel to the floor. Push through your heels to return to standing.
- Benefits: Builds lower-body strength, improves mobility, and increases calorie burn due to large muscle involvement.
Burpees
Burpees are a full-body exercise combining a squat, plank, push-up, and jump. They elevate heart rate quickly, making them a HIIT staple.
- How to perform: From standing, drop into a squat and place hands on the floor. Kick your feet back into a plank position, perform a push-up (optional for beginners), jump feet back to hands, then explosively jump upward.
- Benefits: Combines strength and cardio, improves coordination, and burns a high number of calories in a short time.
Jumping Jacks
Jumping jacks are a classic cardio move that raises heart rate and warms up the body.
- How to perform: Stand with feet together and arms at your sides. Jump feet out wide while raising arms overhead. Jump back to start.
- Benefits: Simple, low-impact cardio that improves endurance and coordination.
Additional Bodyweight HIIT Exercises
- Mountain Climbers: From a plank position, alternate driving knees toward the chest rapidly. This works the core, shoulders, and legs while boosting heart rate.
- Lunges: Step forward with one foot and lower your hips until both knees are bent at about 90 degrees. Alternate legs. Lunges strengthen legs and glutes and improve balance.
- High Knees: Run in place, lifting knees as high as possible. This increases cardiovascular intensity and engages the core.
- Plank to Push-Up: Start in a forearm plank, then push up into a full push-up position one arm at a time, then return. This strengthens the upper body and core.
Mind Map: Bodyweight HIIT Exercises
Example HIIT Circuit Using These Exercises
- 40 seconds work, 20 seconds rest, repeat circuit 3-4 times:
- Squats
- Mountain Climbers
- Burpees
- Lunges (alternate legs)
- Jumping Jacks
- Plank to Push-Up
Tips for Execution
- Maintain proper form to avoid injury and maximize effectiveness.
- Adjust intensity by increasing speed or duration of work intervals.
- Beginners can modify burpees by skipping the push-up or jump.
- Use a timer or app to keep intervals consistent.
These exercises form a solid foundation for home HIIT workouts. They require no equipment, can be adapted to all fitness levels, and target multiple muscle groups while keeping your heart rate elevated for fat loss and muscle toning.
4.4 Sample Beginner, Intermediate, and Advanced HIIT Routines
High-Intensity Interval Training (HIIT) is a versatile method that can be adapted to different fitness levels by adjusting exercise complexity, interval length, and rest periods. Below are sample routines tailored for beginners, intermediates, and advanced exercisers. Each routine includes a mind map to visualize structure and examples to clarify execution.
Beginner HIIT Routine
This routine focuses on building basic endurance and familiarizing the body with interval training. Exercises are low-impact and use bodyweight only.
Structure:
- Work interval: 20 seconds
- Rest interval: 40 seconds
- Rounds: 6
Exercises:
- Marching in place
- Wall push-ups
- Bodyweight squats
- Standing knee lifts
Mind Map:
Example: Start with marching in place for 20 seconds, lifting knees to waist height at a steady pace. Rest for 40 seconds by standing still or walking slowly. Next, perform wall push-ups for 20 seconds, focusing on controlled movement. Continue alternating exercises with rest periods until all rounds are complete.
Intermediate HIIT Routine
This routine increases intensity and complexity, incorporating dynamic movements and shorter rest to challenge cardiovascular and muscular endurance.
Structure:
- Work interval: 30 seconds
- Rest interval: 30 seconds
- Rounds: 8
Exercises:
- Jumping jacks
- Push-ups (regular or knee-supported)
- Bodyweight lunges (alternating legs)
- Plank hold
Mind Map:
Example: Begin with jumping jacks for 30 seconds, maintaining a steady pace that elevates heart rate without causing early fatigue. Rest for 30 seconds. Move to push-ups, focusing on full range of motion. Continue through lunges and plank holds, ensuring proper form. Repeat the circuit 8 times.
Advanced HIIT Routine
Designed for those with a solid fitness base, this routine combines high-impact moves and minimal rest to maximize calorie burn and muscle engagement.
Structure:
- Work interval: 40 seconds
- Rest interval: 20 seconds
- Rounds: 10
Exercises:
- Burpees
- Plyometric jump squats
- Mountain climbers
- Push-up to shoulder tap
Mind Map:
Example: Start with burpees, performing each rep with controlled speed to maintain form. Rest for 20 seconds. Next, do jump squats, focusing on landing softly to protect joints. Follow with mountain climbers at a fast pace, then push-ups with alternating shoulder taps to engage core stability. Repeat the circuit 10 times.
Notes on Progression and Adaptation
- Beginners should prioritize form and controlled movement over speed.
- Intermediate exercisers can increase work intervals or reduce rest as fitness improves.
- Advanced routines require attention to recovery and injury prevention due to higher impact.
Each routine can be modified by adjusting interval lengths or substituting exercises to accommodate personal preferences or limitations. The key is maintaining the balance between effort and recovery to sustain intensity throughout the session.
4.5 Modifications and Progressions for Different Fitness Levels
Modifications and progressions are essential tools in tailoring HIIT workouts to fit different fitness levels. They allow you to start where you are and advance safely as your strength and endurance improve. Understanding how to adjust exercises ensures that workouts remain challenging without risking injury or discouragement.
Why Modify or Progress?
Modifications reduce intensity or complexity, making exercises accessible to beginners or those with limitations. Progressions increase difficulty, helping intermediate and advanced exercisers avoid plateaus and continue building fitness.
Common Principles for Modifications and Progressions
- Range of Motion: Reduce or increase the movement distance.
- Speed: Slow down for control or speed up for intensity.
- Repetitions and Sets: Lower reps or sets to ease in; increase them to push harder.
- Rest Intervals: Longer rests for beginners; shorter rests for advanced.
- Exercise Complexity: Simplify movements or add coordination challenges.
Mind Map: Modifications and Progressions Overview
Examples of Modifications and Progressions for Common HIIT Exercises
Squat Jumps
- Modification: Perform regular squats without the jump, focusing on controlled movement and proper form.
- Progression: Add a tuck jump, bringing knees higher to increase intensity.
Burpees
- Modification: Step back into plank instead of jumping, and omit the push-up.
- Progression: Add a push-up and a jump with a clap overhead.
Mountain Climbers
- Modification: Slow down the pace, focusing on bringing knees forward one at a time.
- Progression: Increase speed or add a twist bringing the knee toward the opposite elbow.
Mind Map: Squat Jump Modifications and Progressions
Structuring Your Workout Based on Fitness Level
| Fitness Level | Modifications | Progressions | Rest Intervals |
|---|---|---|---|
| Beginner | Low impact, slower pace, fewer reps | N/A | 45-60 seconds |
| Intermediate | Mix of low and moderate impact, moderate reps | Add jumps, increase speed | 30-45 seconds |
| Advanced | N/A | High impact, plyometrics, added resistance | 15-30 seconds |
Sample Exercise: Jumping Jacks
- Beginner: Step side to side instead of jumping.
- Intermediate: Regular jumping jacks at moderate speed.
- Advanced: Add a squat when landing or use light dumbbells.
Mind Map: Jumping Jack Variations
Tips for Applying Modifications and Progressions
- Start with modifications if unsure about your current fitness.
- Focus on form before increasing intensity.
- Gradually introduce progressions to avoid injury.
- Listen to your body; rest when needed.
- Use a workout journal to track changes and improvements.
By thoughtfully adjusting exercises, you can maintain a workout that fits your current ability and grows with you. This approach keeps your home fat loss workouts effective, safe, and engaging.
4.6 Incorporating Rest and Recovery Within HIIT Sessions
Incorporating rest and recovery within High-Intensity Interval Training (HIIT) sessions is essential to maximize effectiveness and reduce injury risk. Rest periods allow your body to partially recover, enabling you to maintain intensity during work intervals. Without adequate rest, performance drops, and fatigue accumulates, which can compromise form and increase injury chances.
Why Rest Matters in HIIT
- Energy replenishment: During intense exercise, your muscles rely heavily on anaerobic energy systems that deplete quickly. Rest intervals help restore energy stores, particularly adenosine triphosphate (ATP) and phosphocreatine.
- Heart rate regulation: Rest allows your heart rate to drop, preparing you for the next burst of effort.
- Mental reset: Brief pauses help maintain focus and motivation throughout the session.
Types of Rest in HIIT
- Passive rest: Complete stop or very low activity, such as standing or slow walking.
- Active rest: Low-intensity movement like gentle jogging or dynamic stretching.
The choice depends on your fitness level and workout goals.
Structuring Rest Periods
Rest duration is often expressed as a ratio relative to the work interval. Common ratios include:
- 1:1 ratio: Equal time for work and rest (e.g., 30 seconds work, 30 seconds rest). Suitable for beginners.
- 1:2 ratio: Twice as much rest as work (e.g., 20 seconds work, 40 seconds rest). Helps maintain higher intensity during work intervals.
- 2:1 ratio: More work than rest (e.g., 40 seconds work, 20 seconds rest). For advanced exercisers aiming to increase endurance.
Example: Beginner HIIT Session with Rest
| Interval | Activity | Duration |
|---|---|---|
| 1 | Jumping Jacks | 30 sec |
| 2 | Rest (passive) | 30 sec |
| 3 | Bodyweight Squats | 30 sec |
| 4 | Rest (active walk) | 30 sec |
| 5 | Modified Push-Ups | 30 sec |
| 6 | Rest (passive) | 30 sec |
Repeat 3 rounds.
Mind Map: Rest and Recovery Components in HIIT
Integrating Recovery Techniques During Rest
During rest intervals, you can incorporate light mobility exercises or breathing techniques to aid recovery without compromising rest quality. For example, slow arm circles or deep diaphragmatic breathing can help reduce muscle tension and improve oxygen delivery.
Example: Active Rest with Breathing
- Work interval: 30 seconds of burpees
- Rest interval: 30 seconds of walking in place while focusing on deep, slow breaths
This approach keeps blood flowing and helps clear metabolic byproducts.
Adjusting Rest Based on Feedback
Listen to your body. If you notice form breakdown, excessive breathlessness, or dizziness, increase rest time or switch to active rest. Conversely, if rest feels too long and you’re fully recovered quickly, shorten rest to maintain workout intensity.
Mind Map: Monitoring and Adjusting Rest
Summary
Rest and recovery within HIIT sessions are not optional pauses but integral parts of the workout design. Properly timed rest improves performance, reduces injury risk, and supports sustained effort. Balancing work and rest with attention to your body’s signals ensures you get the most from your HIIT workouts at home.
Chapter 5: Strength Training with Bodyweight and Minimal Equipment
5.1 Benefits of Strength Training for Fat Loss and Muscle Building
Strength training plays a key role in both fat loss and muscle building, making it an essential component of any effective home workout system. Unlike cardio, which primarily burns calories during the activity, strength training influences your body’s metabolism over a longer period. This happens because muscle tissue requires more energy to maintain than fat tissue, so increasing muscle mass raises your resting metabolic rate.
Here’s a mind map summarizing the main benefits:
Increased Resting Metabolic Rate (RMR): Muscle tissue is metabolically active, meaning it burns calories even when you’re not exercising. For example, adding 1 pound of muscle can increase your daily calorie burn by about 6 to 10 calories. While this might seem small, over time and combined with other benefits, it contributes significantly to fat loss.
Afterburn Effect (Excess Post-Exercise Oxygen Consumption - EPOC): Strength training creates micro-tears in muscle fibers, which your body repairs after the workout. This repair process requires energy, increasing calorie burn for hours or even up to 24-48 hours after exercise. For instance, a 30-minute intense strength session can elevate your metabolism well beyond the workout itself.
Improved Insulin Sensitivity: Regular strength training helps your muscles use glucose more efficiently, reducing blood sugar levels and lowering the risk of fat storage. This is particularly helpful for managing weight and preventing metabolic issues.
Muscle Hypertrophy: This is the process of muscle growth, where muscle fibers increase in size due to consistent resistance training. Larger muscles not only improve appearance but also enhance strength and endurance. For example, performing progressive push-ups or resistance band exercises over weeks leads to visible muscle tone and increased power.
Functional Benefits: Strength training improves posture by balancing muscle groups, reducing the risk of back pain. It also supports joint health by strengthening muscles around them, which lowers injury risk. Everyday activities like carrying groceries or climbing stairs become easier with stronger muscles.
Psychological Benefits: Beyond physical changes, strength training can boost self-confidence as you notice progress and improved abilities. It also helps reduce stress by releasing endorphins and providing a focused, goal-oriented activity.
Here’s a simple example to illustrate the fat loss benefit:
- Imagine two people of the same weight and height. One does only cardio, the other combines cardio with strength training.
- After several months, the person including strength training will likely have more muscle mass and less fat.
- This means their body burns more calories at rest, making it easier to maintain or continue losing fat.
In summary, strength training is not just about building muscle; it’s a strategic tool for improving metabolism, enhancing body composition, and supporting overall health. Incorporating it into your home workout routine ensures you’re working smarter, not just harder, toward fat loss and lean muscle development.
5.2 Key Bodyweight Exercises: Push-Ups, Lunges, Planks, and Variations
Bodyweight exercises are the backbone of any home workout system, especially when equipment is limited. They rely on your own body as resistance, making them accessible and effective for building strength and burning fat. Here, we focus on three foundational exercises—push-ups, lunges, and planks—along with their variations to keep your workouts fresh and challenging.
Push-Ups
Push-ups primarily target the chest, shoulders, and triceps, while also engaging the core and lower body for stability. They improve upper body strength and muscular endurance.
Basic Push-Up Technique:
- Start in a high plank position with hands shoulder-width apart.
- Keep your body in a straight line from head to heels.
- Lower your chest toward the floor by bending your elbows.
- Push back up to the starting position.
Common Mistakes:
- Letting hips sag or pike up.
- Flaring elbows too wide.
- Not going low enough.
Variations:
- Knee Push-Ups: Easier version, keep knees on the floor.
- Incline Push-Ups: Hands on a raised surface to reduce load.
- Decline Push-Ups: Feet elevated to increase difficulty.
- Diamond Push-Ups: Hands close together under chest to emphasize triceps.
Example Routine:
- 3 sets of 10 standard push-ups.
- If too difficult, start with knee push-ups and progress.
Lunges
Lunges work the quadriceps, hamstrings, glutes, and calves. They also improve balance and coordination.
Basic Forward Lunge Technique:
- Stand tall with feet hip-width apart.
- Step forward with one leg, lowering hips until both knees are bent at about 90 degrees.
- The back knee should hover just above the floor.
- Push through the front heel to return to standing.
Common Mistakes:
- Knee extending past toes.
- Leaning torso forward excessively.
- Losing balance.
Variations:
- Reverse Lunges: Step backward instead of forward.
- Walking Lunges: Perform lunges moving forward continuously.
- Side Lunges: Step out to the side to target inner and outer thighs.
- Jump Lunges: Add a plyometric jump for power and cardio.
Example Routine:
- 3 sets of 12 lunges per leg, alternating legs.
- Start with forward lunges and add variations as you gain confidence.
Planks
Planks are isometric exercises that strengthen the core, shoulders, and back. They improve posture and stability.
Basic Forearm Plank Technique:
- Position yourself face down, forearms on the floor, elbows under shoulders.
- Keep your body in a straight line from head to heels.
- Engage your core and hold the position.
Common Mistakes:
- Hips sagging or rising too high.
- Holding breath.
- Neck strain from looking forward.
Variations:
- High Plank: Hands directly under shoulders, arms extended.
- Side Plank: Support body on one forearm and the side of one foot.
- Plank with Shoulder Taps: From high plank, tap opposite shoulder with hand.
- Plank to Push-Up: Transition between forearm plank and high plank.
Example Routine:
- Hold a forearm plank for 30 seconds.
- Gradually increase hold time or add variations.
Mind Maps
Push-Ups Mind Map
Lunges Mind Map
Planks Mind Map
Integrating These Exercises
A simple circuit combining these exercises can be:
- 10 push-ups
- 12 lunges per leg
- 30-second plank hold
- Rest 60 seconds
- Repeat 3 times
This routine covers major muscle groups, builds strength, and supports fat loss by keeping your heart rate elevated. Adjust reps and hold times based on your fitness level. Variations can be swapped in to maintain progress and prevent boredom.
In summary, mastering push-ups, lunges, and planks with proper form and incorporating their variations provides a solid foundation for home strength training. They require no or minimal equipment, making them practical and effective for fat loss and lean muscle development.
5.3 Using Resistance Bands and Dumbbells for Added Challenge
Using resistance bands and dumbbells can add variety and intensity to your home workouts without requiring a lot of space or expensive equipment. Both tools help increase muscle engagement by providing external resistance, which challenges your muscles beyond bodyweight alone.
Resistance Bands
Resistance bands are elastic bands that come in various thicknesses and lengths, offering different resistance levels. They are versatile, portable, and can be used for strength training, mobility work, and rehabilitation.
Benefits of Resistance Bands
- Variable resistance: The tension increases as the band stretches.
- Joint-friendly: Bands provide smooth resistance, reducing joint stress.
- Versatility: Can target almost every muscle group.
Mind Map: Resistance Band Uses
Example Exercises
-
Banded Squats
- Place the band just above your knees.
- Stand with feet shoulder-width apart.
- Squat down while pushing knees outward against the band.
- This adds resistance to the glutes and outer thighs.
-
Bicep Curls with Bands
- Stand on the middle of the band.
- Hold handles or ends with palms facing forward.
- Curl hands toward shoulders, keeping elbows close.
-
Lateral Band Walks
- Place band around ankles or just above knees.
- Slightly squat and step side to side, maintaining tension.
- Targets hip abductors and glutes.
Dumbbells
Dumbbells are free weights that come in fixed or adjustable weights. They allow for controlled, progressive overload and can be used for compound and isolation exercises.
Benefits of Dumbbells
- Easy to adjust weight.
- Improve muscle balance by forcing each side to work independently.
- Enable a wide range of motion.
Mind Map: Dumbbell Exercise Categories
Example Exercises
-
Goblet Squat
- Hold a dumbbell vertically at chest level.
- Feet shoulder-width apart.
- Squat down keeping chest up and elbows inside knees.
- Great for quads, glutes, and core.
-
Dumbbell Rows
- Place one hand and knee on a bench or sturdy surface.
- Hold dumbbell in the other hand.
- Pull dumbbell toward your hip, squeezing shoulder blade.
- Works back muscles and biceps.
-
Dumbbell Shoulder Press
- Hold dumbbells at shoulder height.
- Press overhead until arms are fully extended.
- Targets shoulders and triceps.
Combining Bands and Dumbbells
Using both tools in a workout can increase complexity and muscle activation. For example, you can add a resistance band around your legs during dumbbell squats to engage the hips more, or perform dumbbell bicep curls while standing on a band for extra resistance.
Mind Map: Combined Use
Tips for Effective Use
- Start with lighter resistance and increase gradually.
- Focus on controlled movements to maximize muscle engagement.
- Maintain proper form to avoid injury.
- Use bands to add resistance in directions dumbbells can’t (e.g., lateral or rotational).
- Incorporate supersets alternating between dumbbell and band exercises for efficiency.
By integrating resistance bands and dumbbells into your home workouts, you can create more challenging and diverse routines that promote fat loss and lean muscle development without needing a gym.
5.4 Designing Full-Body Strength Circuits for Home
Designing full-body strength circuits for home workouts is about combining exercises that target multiple muscle groups efficiently, using minimal or no equipment. The goal is to create a balanced routine that challenges your muscles, boosts calorie burn, and fits your available space and time.
Key Principles for Full-Body Strength Circuits
- Exercise Selection: Choose movements that engage large muscle groups and involve multiple joints. Examples include squats, push-ups, lunges, and planks.
- Balance: Ensure the circuit works opposing muscle groups (e.g., push and pull) and covers legs, core, and upper body.
- Intensity and Volume: Adjust repetitions, sets, and rest periods based on your fitness level.
- Progression: Gradually increase difficulty by adding reps, sets, or resistance.
Mind Map: Designing a Full-Body Strength Circuit
Example Circuit 1: Bodyweight Only (No Equipment)
- Squats – 15 reps
- Push-Ups – 10-15 reps (modify on knees if needed)
- Walking Lunges – 12 reps per leg
- Plank – Hold for 30 seconds
- Glute Bridges – 15 reps
- Superman Hold – Hold for 30 seconds
Instructions: Perform each exercise back-to-back with minimal rest. After completing all six, rest for 45 seconds. Repeat the circuit 3 times.
Mind Map: Bodyweight Circuit Flow
Example Circuit 2: Using Resistance Bands
- Resistance Band Squat to Press – 12 reps
- Resistance Band Rows – 15 reps
- Resistance Band Deadlifts – 12 reps
- Resistance Band Chest Press – 12 reps
- Resistance Band Russian Twists – 20 reps (10 each side)
- Resistance Band Side Steps – 15 steps each side
Instructions: Complete each exercise in sequence with 30 seconds rest after the full circuit. Repeat 3-4 rounds.
Mind Map: Resistance Band Circuit Components
Structuring Your Circuit
- Warm-Up: Always start with 5-10 minutes of light cardio and dynamic stretching.
- Exercise Order: Alternate between upper and lower body to allow muscle groups to recover slightly.
- Reps and Sets: Beginners can start with 2 sets of 10 reps per exercise; more experienced individuals can increase to 4 sets or add reps.
- Rest Periods: Keep rest short (30-60 seconds) to maintain intensity and promote fat loss.
Tips for Success
- Focus on form over speed. Proper technique reduces injury risk and improves effectiveness.
- Use a timer or app to keep track of intervals and rest.
- Modify exercises to suit your fitness level (e.g., incline push-ups, assisted lunges).
- Incorporate variety by swapping exercises every few weeks.
Example Weekly Plan Incorporating Full-Body Circuits
| Day | Workout Type |
|---|---|
| Monday | Full-Body Strength Circuit |
| Tuesday | Low-Intensity Cardio/Rest |
| Wednesday | Full-Body Strength Circuit |
| Thursday | Mobility and Core Focus |
| Friday | Full-Body Strength Circuit |
| Saturday | Active Rest or Light Yoga |
| Sunday | Rest |
Designing full-body strength circuits at home is straightforward once you understand the balance of exercises and structure. Using bodyweight or simple equipment, you can build an effective routine that fits your schedule and space while promoting fat loss and muscle growth.
5.5 Proper Form and Technique: Illustrated Examples
Proper form and technique are the foundation of effective and safe workouts, especially when working out at home without direct supervision. Correct execution ensures you target the intended muscles, reduce injury risk, and get the most out of each movement. Below, we break down key bodyweight exercises with clear instructions and mind maps to visualize the main points.
Push-Ups
Key Points:
- Hands shoulder-width apart
- Elbows at about 45 degrees from the body
- Core engaged to keep a straight line from head to heels
- Lower chest nearly to the floor
- Avoid sagging hips or flaring elbows
Mind Map:
Example: Imagine lowering yourself as if sliding your chest down a smooth wall, keeping your body rigid like a plank. This prevents hips from dropping and ensures the chest gets close to the floor.
Squats
Key Points:
- Feet shoulder-width apart or slightly wider
- Toes slightly pointed out
- Chest up, back straight
- Knees track over toes, not caving inward
- Sit back as if onto a chair
- Weight on heels
Mind Map:
Example: Picture sitting back into an invisible chair behind you, keeping your chest proud and knees aligned with your feet. This helps avoid leaning forward or letting knees cave.
Planks
Key Points:
- Forearms or hands on the floor, elbows under shoulders
- Body in a straight line from head to heels
- Engage core and glutes
- Avoid letting hips sag or rise too high
- Neck neutral, gaze down
Mind Map:
Example: Imagine your body is a straight board balanced on your elbows and toes. Tighten your belly as if bracing for a light punch to the stomach.
Lunges
Key Points:
- Step forward with one foot
- Front knee aligned over ankle
- Back knee lowered toward floor but not touching
- Torso upright
- Weight evenly distributed
Mind Map:
Example: Think of taking a confident step forward, bending both knees to about 90 degrees, and keeping your chest lifted to avoid leaning forward.
Glute Bridges
Key Points:
- Lie on back, knees bent, feet flat hip-width apart
- Drive hips upward by squeezing glutes
- Keep core engaged to avoid arching lower back
- Hold at top with hips aligned with knees and shoulders
- Lower hips slowly
Mind Map:
Example: Imagine pushing the floor away with your heels to lift your hips, as if forming a straight bridge from shoulders to knees.
General Tips for Maintaining Proper Form
- Start slow: Focus on quality, not quantity.
- Use mirrors or record yourself: Visual feedback helps catch errors.
- Breathe consistently: Exhale during exertion, inhale during release.
- Engage the core: Almost every exercise benefits from a stable midsection.
- Listen to your body: Discomfort is normal, pain is not.
Proper form is a skill that improves with practice. Taking the time to master these basics will make your home fat loss workouts safer and more effective.
5.6 Progressive Overload: How to Continuously Build Strength at Home
Progressive overload is the principle of gradually increasing the demands on your muscles to stimulate growth and strength gains. At home, where equipment might be limited, understanding how to apply progressive overload creatively is key to continuous improvement.
What is Progressive Overload?
Progressive overload means challenging your muscles more than they are used to. This can be done by increasing weight, reps, sets, or reducing rest time. The goal is to push your muscles beyond their current capacity, prompting adaptation.
Mind Map: Progressive Overload Methods
Examples of Applying Progressive Overload at Home
Increasing Resistance
If you start with bodyweight squats, you can add resistance by holding a backpack filled with books. Over time, increase the weight by adding more books or switching to heavier objects. Resistance bands can also be looped around your legs or arms to add tension.
Increasing Volume
If you do 3 sets of 10 push-ups, try increasing to 12 reps per set or adding a fourth set. This adds more total work, encouraging strength gains.
Increasing Intensity
Shorten your rest periods from 60 seconds to 45 seconds between sets. This forces your muscles to work harder with less recovery.
Improving Technique
Focus on slow, controlled movements with full range of motion. For example, lower yourself slowly during a push-up (eccentric phase) to increase muscle tension without adding weight.
Changing Exercise Difficulty
Progress from knee push-ups to standard push-ups, then to decline push-ups (feet elevated). Each variation increases the challenge.
Mind Map: Progressive Overload Example – Push-Up Progression
Tracking Progress
Keep a simple workout log noting reps, sets, rest time, and any added resistance. This helps you see when to increase difficulty. For example:
| Date | Exercise | Sets | Reps | Resistance | Rest (sec) |
|---|---|---|---|---|---|
| Jan 1 | Push-Ups | 3 | 10 | Bodyweight | 60 |
| Jan 8 | Push-Ups | 3 | 12 | Bodyweight | 60 |
| Jan 15 | Push-Ups | 4 | 12 | Bodyweight | 45 |
| Jan 22 | Push-Ups | 3 | 10 | Backpack (5 lbs) | 60 |
Tips for Sustainable Progressive Overload at Home
- Small increments matter: Adding one or two reps or a few seconds less rest can make a difference.
- Listen to your body: Avoid increasing too fast; muscle soreness is normal but sharp pain is not.
- Mix overload methods: Combine increasing reps with harder variations or added resistance.
- Use tempo changes: Slowing down the eccentric (lowering) phase increases muscle tension without extra weight.
Mind Map: Tempo Variations for Overload
Example: Squat Tempo Overload
Start with 3 seconds lowering, 1 second pause at the bottom, then 1 second standing up. This increases time under tension and muscle fatigue without adding weight.
In summary, progressive overload at home is about creatively increasing challenge through resistance, volume, intensity, technique, and exercise difficulty. Tracking progress and making small, consistent adjustments will help you build strength steadily without needing a gym full of equipment.
Chapter 6: Core and Stability Workouts to Support Fat Loss
6.1 The Importance of Core Strength in Fat Loss and Overall Fitness
Core strength is often talked about in fitness circles, but its role in fat loss and overall fitness deserves a clear explanation. The core is not just your abs; it includes muscles around your trunk and pelvis, such as the transverse abdominis, obliques, erector spinae, and pelvic floor muscles. These muscles stabilize your spine and pelvis, support posture, and transfer force between your upper and lower body.
Why Core Strength Matters for Fat Loss
A strong core improves your ability to perform exercises efficiently. When your core is stable, your body moves more effectively, which means you can maintain proper form during workouts, reduce injury risk, and engage more muscle groups. This leads to higher calorie burn during exercise.
For example, during a squat or a jumping jack, a strong core helps maintain balance and alignment, allowing you to work harder and longer without fatigue or strain. This efficiency supports sustained fat-burning activity.
Core Strength and Overall Fitness
Core muscles are involved in nearly every movement you make. Whether you’re lifting groceries, playing with kids, or doing a home workout, your core stabilizes your body. Weak core muscles can lead to poor posture, lower back pain, and decreased functional fitness.
Improving core strength enhances balance and coordination, which lowers the risk of falls and injuries. It also supports better breathing mechanics, as some core muscles assist in respiration.
Mind Map: Core Strength Components and Benefits
Practical Example: Core Engagement in a Bodyweight Squat
When performing a bodyweight squat, engaging your core means tightening the muscles around your midsection as if preparing for a light punch. This engagement stabilizes your spine and pelvis, preventing your lower back from arching excessively or rounding. Without this, your form breaks down, reducing the effectiveness of the squat and increasing injury risk.
By maintaining core engagement, you can perform more repetitions with better form, increasing calorie burn and muscle activation.
Core Strength Beyond Exercise
Strong core muscles also improve everyday activities. For instance, carrying a heavy bag becomes easier and safer when your core supports your spine. Sitting for long periods is less likely to cause discomfort if your core helps maintain good posture.
Mind Map: Everyday Benefits of Core Strength
In summary, core strength is a foundation for effective fat loss workouts and overall fitness. It supports movement efficiency, injury prevention, and daily function. Focusing on core strength in your home workout routine will help you burn calories more effectively and build lean muscle with less risk of setbacks.
6.2 Effective Core Exercises: Crunches, Leg Raises, Russian Twists
Strengthening your core is essential not only for aesthetics but also for improving posture, balance, and overall functional fitness. This section covers three fundamental core exercises: crunches, leg raises, and Russian twists. Each targets different muscles within the core group, providing a balanced approach to core training.
Crunches
Crunches primarily engage the rectus abdominis, the muscle running vertically along the front of your abdomen. They help develop the “six-pack” muscles and improve spinal flexion control.
How to perform a basic crunch:
- Lie on your back with knees bent and feet flat on the floor, hip-width apart.
- Place your hands lightly behind your head or crossed over your chest.
- Engage your core and lift your shoulder blades off the floor, keeping your lower back pressed into the ground.
- Exhale as you lift, pause briefly at the top, then inhale as you lower back down with control.
Common mistakes:
- Pulling on the neck with your hands, which can strain the cervical spine.
- Using momentum instead of muscle engagement.
- Allowing the lower back to arch off the floor.
Example set: 3 sets of 15 repetitions, resting 30 seconds between sets.
Leg Raises
Leg raises target the lower portion of the rectus abdominis and the hip flexors. They are effective for building lower abdominal strength, often a challenging area to engage.
How to perform a lying leg raise:
- Lie flat on your back with legs extended and arms by your sides or under your glutes for support.
- Keep your legs straight and together.
- Engage your core and slowly lift your legs toward the ceiling until they form about a 90-degree angle with your torso.
- Lower your legs slowly without letting your lower back arch off the floor.
Modifications:
- Bend knees slightly if straight legs cause discomfort.
- Perform single-leg raises to reduce intensity.
Common mistakes:
- Letting the lower back lift off the floor.
- Using momentum to swing legs up and down.
Example set: 3 sets of 12 repetitions, resting 45 seconds between sets.
Russian Twists
Russian twists work the obliques, the muscles on the sides of your abdomen, which help with rotational movements and core stability.
How to perform Russian twists:
- Sit on the floor with knees bent and feet flat.
- Lean back slightly to create a V-shape between your torso and thighs.
- Clasp your hands together in front of your chest or hold a light weight.
- Twist your torso to the right, touching the floor beside your hip.
- Return to center and twist to the left.
- Keep your core engaged and movements controlled.
Modifications:
- Keep feet on the floor for more stability.
- Lift feet off the ground to increase difficulty.
Common mistakes:
- Moving arms instead of rotating the torso.
- Rounding the back excessively.
Example set: 3 sets of 20 twists (10 per side), resting 30 seconds between sets.
Mind Maps
Core Exercise Overview
Common Mistakes and Corrections
Sample Routine Structure
Summary
Crunches, leg raises, and Russian twists form a solid foundation for core training at home. Each exercise targets distinct muscles, contributing to a well-rounded core workout. Focus on controlled movements, proper form, and gradual progression to avoid injury and maximize benefits. Incorporate these exercises into your routine consistently, and you’ll build strength and stability that supports your fat loss and muscle-building goals.
6.3 Stability and Balance Drills Using Minimal Equipment
Stability and balance drills are essential components of a fat loss workout system because they engage smaller stabilizer muscles that support larger movements and improve overall coordination. These drills help prevent injuries, enhance posture, and make everyday activities easier. The good news is that you don’t need fancy equipment to work on stability and balance at home; minimal tools and your own bodyweight will do the trick.
Why Stability and Balance Matter
- Core engagement: Stability exercises activate deep core muscles, which support your spine and improve posture.
- Injury prevention: Better balance reduces the risk of falls and strains.
- Improved movement efficiency: Stability helps you perform other exercises more effectively.
Minimal Equipment Options
- Balance pad or folded towel: Provides an unstable surface to challenge your balance.
- Resistance bands: Can add slight instability or resistance.
- Chair or wall: Useful for support during beginner drills.
- Small weights or household items: For added challenge in some drills.
Mind Map: Stability and Balance Drills
Examples of Stability and Balance Drills
Single-Leg Stand
How to do it:
- Stand tall near a wall or chair for support if needed.
- Lift one foot off the ground, bending the knee slightly.
- Hold the position for 20-30 seconds.
- Switch legs.
Progression: Close your eyes or stand on a folded towel to increase difficulty.
Why it works: This simple drill activates ankle, knee, and hip stabilizers while challenging your balance.
Heel-to-Toe Walk
How to do it:
- Find a straight line on the floor or imagine one.
- Place the heel of one foot directly in front of the toes of the other foot.
- Walk forward slowly, maintaining balance.
- Take 10-15 steps.
Variation: Perform backward heel-to-toe walk for added challenge.
Why it works: This drill improves dynamic balance and coordination.
Bird Dog
How to do it:
- Start on hands and knees, with wrists under shoulders and knees under hips.
- Extend your right arm forward and left leg backward simultaneously.
- Hold for 3-5 seconds, keeping your core tight.
- Return to starting position and switch sides.
- Repeat 8-12 times per side.
Why it works: This exercise strengthens core muscles and improves spinal stability.
Squats on a Balance Pad
How to do it:
- Stand on a balance pad or folded towel with feet shoulder-width apart.
- Perform a squat by bending knees and hips, keeping chest up.
- Return to standing.
- Do 10-15 repetitions.
Why it works: The unstable surface forces your stabilizer muscles to engage more intensely.
Lateral Band Walks
How to do it:
- Place a resistance band around your legs just above the knees.
- Slightly bend your knees and hips into a half-squat position.
- Step sideways slowly, maintaining tension on the band.
- Take 10-15 steps in one direction, then back.
Why it works: This drill strengthens hip abductors and improves lateral stability.
Plank with Arm or Leg Lift
How to do it:
- Get into a forearm plank position, keeping your body in a straight line.
- Slowly lift one arm forward or one leg backward.
- Hold for 3-5 seconds, then switch sides.
- Repeat 8-10 times per side.
Why it works: This variation challenges core stability by reducing your base of support.
Tips for Effective Stability and Balance Training
- Start with support if needed and gradually reduce reliance on it.
- Focus on slow, controlled movements rather than speed.
- Engage your core throughout all drills.
- Incorporate balance drills into your warm-up or cool-down routines.
- Consistency is key: practicing balance 3-4 times a week yields noticeable improvements.
By integrating these drills into your home workout system, you’ll build a foundation that supports fat loss and muscle development while reducing injury risk. Stability and balance are often overlooked, but they play a quiet, steady role in your overall fitness progress.
6.4 Sample Core Workout Routines with Detailed Instructions
Core workouts strengthen the muscles around your trunk, improving posture, balance, and overall strength. Below are three sample core workout routines tailored for different fitness levels, each with clear instructions and tips for proper form.
Beginner Core Workout Routine
Goal: Build foundational core strength with simple, low-impact exercises.
-
Exercise 1: Basic Crunches
- Lie on your back with knees bent, feet flat on the floor.
- Place hands behind your head, elbows wide.
- Engage your core and lift your shoulders off the floor about 2-3 inches.
- Lower back down with control.
- Perform 3 sets of 12 reps.
-
Exercise 2: Dead Bug
- Lie on your back, arms extended toward the ceiling.
- Lift knees to 90 degrees (shins parallel to floor).
- Slowly lower right arm and left leg toward the floor without touching it.
- Return to start and repeat on opposite side.
- Perform 3 sets of 10 reps per side.
-
Exercise 3: Glute Bridge
- Lie on your back, knees bent, feet hip-width apart.
- Press through your heels to lift hips until your body forms a straight line from shoulders to knees.
- Hold for 2 seconds, then lower.
- Perform 3 sets of 15 reps.
Intermediate Core Workout Routine
Goal: Increase core endurance and stability with more dynamic moves.
-
Exercise 1: Plank (Forearm)
- Position forearms on the floor, elbows under shoulders.
- Extend legs behind you, balancing on toes.
- Keep your body in a straight line from head to heels.
- Engage your core and hold for 30-45 seconds.
- Repeat 3 times with 30 seconds rest.
-
Exercise 2: Russian Twists
- Sit on the floor with knees bent, feet slightly lifted.
- Lean back slightly, keeping your back straight.
- Clasp hands together and twist torso to the right, then left.
- Perform 3 sets of 20 twists (10 each side).
-
Exercise 3: Leg Raises
- Lie flat on your back, legs extended.
- Place hands under your glutes for support.
- Keeping legs straight, lift them toward the ceiling until perpendicular to the floor.
- Lower legs slowly without touching the floor.
- Perform 3 sets of 12 reps.
Advanced Core Workout Routine
Goal: Develop strength, control, and muscular endurance with challenging exercises.
-
Exercise 1: Side Plank with Hip Dips
- Lie on your side, forearm on the floor, elbow under shoulder.
- Stack feet and lift hips to form a straight line.
- Slowly lower hips toward the floor, then lift back up.
- Perform 3 sets of 15 dips per side.
-
Exercise 2: Hollow Body Hold
- Lie on your back, arms extended overhead.
- Lift shoulders and legs off the floor, keeping lower back pressed into the ground.
- Hold this position for 20-30 seconds.
- Repeat 3 times.
-
Exercise 3: Bicycle Crunches
- Lie on your back, hands behind your head.
- Bring right elbow toward left knee while extending right leg.
- Switch sides in a pedaling motion.
- Perform 3 sets of 20 reps (10 each side).
Mind Map: Core Workout Routine Structure
Tips for Success
- Form over speed: Focus on controlled movements rather than rushing through reps.
- Engage your core: Imagine pulling your belly button toward your spine during each exercise.
- Breathing: Exhale during exertion (e.g., lifting or twisting) and inhale during relaxation phases.
- Rest: Allow 30-60 seconds between sets to maintain quality.
- Progress gradually: Increase reps or hold times as your strength improves.
These routines provide a clear path to strengthening your core muscles at home. Adjust the number of sets or reps based on your comfort and fitness level, and remember that consistency is key to seeing results.
6.5 Integrating Core Work into Daily Fat Loss Programs
Integrating core work into daily fat loss programs is a practical approach that supports both calorie burning and muscle development. The core is more than just the abs; it includes muscles around your trunk, hips, and lower back. Strengthening these muscles improves posture, stability, and overall movement efficiency, which can enhance your fat loss workouts.
Why Include Core Work Daily?
Core exercises help maintain proper form during other workouts, reducing injury risk and allowing you to push harder. They also engage multiple muscle groups, increasing calorie burn. Incorporating short core sessions daily can complement your main workouts without causing excessive fatigue.
How to Integrate Core Work
Core training doesn’t need to be lengthy or complicated. You can add 5 to 10 minutes of focused core exercises at various points in your routine:
- Warm-up: Gentle activation exercises like pelvic tilts or bird dogs prepare the core.
- Between sets: Use core moves as active rest, such as planks or dead bugs.
- Post-workout: Finish with targeted core strengthening or stretching.
- Standalone sessions: On lighter days, a dedicated core circuit can maintain consistency.
Mind Map: Core Integration Points
Sample Daily Core Routine (7 Minutes)
- Dead Bug (1 min): Lie on your back, arms up, alternate lowering opposite arm and leg.
- Plank (1 min): Hold a forearm plank, keeping hips aligned.
- Russian Twists (1 min): Sit, lean back slightly, twist torso side to side.
- Bird Dog (1 min): On hands and knees, extend opposite arm and leg.
- Side Plank (30 sec each side): Support body on one forearm, hips lifted.
- Glute Bridge (1 min): Lie on back, lift hips to engage core and glutes.
Mind Map: Example Core Exercises
Example: Integrating Core into a Fat Loss Circuit
Suppose you have a fat loss circuit with jumping jacks, squats, and push-ups. Between these, insert 30 seconds of core work:
- Jumping Jacks (45 sec)
- Rest (15 sec)
- Plank (30 sec)
- Squats (45 sec)
- Rest (15 sec)
- Dead Bug (30 sec)
- Push-ups (45 sec)
- Rest (15 sec)
- Side Plank (30 sec each side)
This approach keeps the heart rate elevated while engaging the core consistently.
Tips for Consistency
- Keep core sessions short and varied to avoid boredom.
- Focus on quality over quantity; proper form matters more than reps.
- Use a timer or app to stay on track.
- Listen to your body; if core muscles feel overly fatigued, allow rest.
Integrating core work into your daily fat loss program adds functional strength and supports your overall goals. It’s a small time investment with benefits that ripple through your entire fitness routine.
6.6 Common Mistakes and How to Avoid Them
Common mistakes in core and stability workouts can slow progress or cause injury, but they are easy to fix once identified. Understanding these pitfalls helps maintain effectiveness and safety.
Mistake 1: Neglecting Proper Form
Many people rush through core exercises, sacrificing form for speed or reps. For example, during a plank, sagging hips or raised buttocks reduce core engagement and can strain the lower back.
How to avoid: Focus on maintaining a straight line from head to heels. Engage your abdominal muscles by pulling your belly button toward your spine. Use a mirror or record yourself to check alignment.
Mistake 2: Overusing the Neck or Back Muscles
In exercises like crunches or leg raises, some compensate by pulling on the neck or arching the back excessively. This shifts effort away from the core and risks discomfort.
How to avoid: Keep your chin slightly tucked and hands lightly supporting the head without pulling. Keep movements controlled and avoid jerking. For leg raises, keep the lower back pressed gently into the floor.
Mistake 3: Holding Your Breath
Holding breath during core exercises increases intra-abdominal pressure and can cause dizziness or fatigue.
How to avoid: Breathe steadily and rhythmically. Exhale during the exertion phase (e.g., lifting up in a crunch) and inhale during relaxation.
Mistake 4: Doing Too Much Too Soon
Jumping into advanced core exercises without building foundational strength can lead to poor form and injury.
How to avoid: Start with basic moves like planks and bird-dogs. Gradually increase difficulty by adding time, reps, or complexity. For example, progress from a forearm plank to a side plank.
Mistake 5: Ignoring Stability and Balance
Core training is not just about crunches; neglecting stability exercises limits functional strength. For instance, skipping balance drills like single-leg stands misses improving coordination.
How to avoid: Incorporate exercises that challenge balance, such as standing on one leg or using a stability ball. These improve muscle control and reduce injury risk.
Mistake 6: Skipping Warm-Up and Cool-Down
Jumping straight into core workouts without warming up can reduce performance and increase injury risk. Similarly, skipping cool-down stretches can cause stiffness.
How to avoid: Spend 5-10 minutes warming up with light cardio and dynamic stretches. End sessions with static stretches targeting the core and surrounding muscles.
Mistake 7: Overtraining the Core
The core muscles need recovery like any other muscle group. Training core every day without rest can lead to fatigue and reduced gains.
How to avoid: Allow at least 48 hours between intense core sessions. Use lighter or active recovery days with gentle movements.
Summary Example: Fixing a Common Plank Mistake
Problem: Hips sag during plank, causing lower back strain.
Fix: Engage abs by pulling belly button in, keep hips aligned with shoulders and heels, hold position for shorter time with proper form rather than longer with poor form.
This approach ensures the core works effectively without risking injury.
By paying attention to these common mistakes and applying simple corrections, core and stability workouts become safer and more productive. The key is mindful practice, gradual progression, and listening to your body.
Chapter 7: Flexibility and Cool-Down Practices for Recovery
7.1 Why Cooling Down is Crucial After Fat Loss Workouts
Cooling down after fat loss workouts is often overlooked, but it plays a key role in helping your body transition from exercise back to rest. When you finish a workout, your heart rate, breathing, and blood flow are elevated. A proper cool-down gradually lowers these levels, preventing sudden changes that can cause dizziness or discomfort.
One main reason cooling down matters is to help clear metabolic waste products like lactic acid from your muscles. During intense exercise, lactic acid builds up, contributing to muscle fatigue and soreness. Light activity during a cool-down encourages blood circulation, which helps flush out these byproducts more efficiently.
Cooling down also aids in muscle recovery. Stretching during this phase improves flexibility and reduces muscle tightness, which can decrease the risk of injury in future workouts. It also helps maintain or improve your range of motion, which is important for functional movement and overall fitness.
Another benefit is the regulation of your nervous system. Exercise stimulates the sympathetic nervous system (the “fight or flight” response), and a cool-down activates the parasympathetic system, promoting relaxation and recovery. This shift can improve your mood and reduce stress hormones.
Here’s a simple mind map to visualize why cooling down is crucial:
For example, after a high-intensity interval training (HIIT) session, instead of stopping abruptly, you might spend 5 to 10 minutes walking at a slow pace and performing gentle stretches. This allows your heart rate to come down steadily and your muscles to relax.
Consider a scenario where someone skips the cool-down and sits down immediately after intense exercise. The sudden drop in blood flow can cause blood to pool in the legs, leading to lightheadedness or fainting. A gradual cool-down helps avoid this by maintaining circulation.
In practical terms, a cool-down might include:
- 3 to 5 minutes of low-intensity cardio like walking or slow cycling
- Static stretches targeting major muscle groups used during the workout
- Deep breathing exercises to encourage relaxation
By integrating a cool-down into your routine, you support your body’s recovery processes, reduce soreness, and prepare yourself mentally for the next workout. It’s a small time investment that pays off in better performance and fewer setbacks.
7.2 Static Stretching Techniques for Major Muscle Groups
Static stretching involves holding a stretch position for a period, typically between 15 and 60 seconds, to lengthen muscles and improve flexibility. It is an essential part of the cool-down phase after workouts, helping reduce muscle tension and promote recovery. Below, we cover static stretching techniques for major muscle groups, with clear instructions and examples.
Static Stretching Techniques for Major Muscle Groups
Hamstrings
- Seated Forward Bend: Sit on the floor with legs extended straight. Keep your back straight and hinge at the hips to reach toward your toes. Hold the stretch where you feel tension in the back of your thighs without pain.
Quadriceps
- Standing Quad Stretch: Stand on one leg, bend the other knee, and bring your heel toward your buttocks. Hold your ankle with the corresponding hand and keep knees close together. Maintain balance by focusing on a fixed point.
Calves
- Wall Calf Stretch: Place your hands on a wall, step one foot back, keeping it flat on the floor and the knee straight. Lean forward slightly to feel a stretch in the calf muscle of the back leg.
Glutes
- Seated Figure-Four Stretch: Sit with one leg crossed over the other, ankle resting on the opposite knee. Gently press the raised knee downward while leaning slightly forward to stretch the glute.
Hip Flexors
- Kneeling Hip Flexor Stretch: Kneel on one knee with the other foot in front, forming a 90-degree angle. Push hips forward while keeping your torso upright until you feel a stretch in the front of the hip.
Lower Back
- Child’s Pose: Kneel on the floor, sit back on your heels, and stretch your arms forward on the floor. Relax your forehead to the ground and breathe deeply to release tension in the lower back.
Chest
- Doorway Stretch: Stand in a doorway with arms bent at 90 degrees, hands on the door frame. Step forward slowly to stretch the chest muscles.
Shoulders
- Cross-Body Shoulder Stretch: Bring one arm across your body at shoulder height. Use the opposite hand to gently pull the arm closer to your chest.
Triceps
- Overhead Triceps Stretch: Raise one arm overhead, bend the elbow to reach down your back. Use the opposite hand to gently push the elbow downward.
Mind Map: Static Stretching for Major Muscle Groups
Tips for Effective Static Stretching
- Hold Time: Aim for 20-30 seconds per stretch. Longer holds can be beneficial but avoid discomfort.
- Breathing: Breathe slowly and deeply to help muscles relax.
- Avoid Bouncing: Static stretches should be steady; bouncing can cause injury.
- Stretch Both Sides: Always perform stretches on both sides to maintain balance.
- Post-Workout Focus: Static stretching is best after exercise when muscles are warm.
Example Routine
- Seated Forward Bend – 30 seconds
- Standing Quad Stretch (each leg) – 30 seconds
- Wall Calf Stretch (each leg) – 30 seconds
- Seated Figure-Four Stretch (each side) – 30 seconds
- Kneeling Hip Flexor Stretch (each side) – 30 seconds
- Child’s Pose – 30 seconds
- Doorway Stretch – 30 seconds
- Cross-Body Shoulder Stretch (each arm) – 30 seconds
- Overhead Triceps Stretch (each arm) – 30 seconds
This routine covers all major muscle groups, promoting flexibility and aiding recovery after fat loss workouts.
7.3 Foam Rolling and Self-Myofascial Release at Home
Foam rolling and self-myofascial release (SMR) are techniques used to relieve muscle tightness, improve blood flow, and enhance recovery after workouts. They involve applying pressure to specific areas of the body to release tension in the fascia—the connective tissue surrounding muscles. Doing this at home is practical, requires minimal equipment, and can complement your fat loss and muscle-building workouts by helping you move better and reduce soreness.
What is Foam Rolling and SMR?
Foam rolling uses a cylindrical foam roller to apply pressure to muscles. SMR broadly refers to any self-applied technique to release muscle knots or trigger points, which can include tools like massage balls or even your hands.
Why Include Foam Rolling in Your Routine?
- Improves flexibility: Rolling helps lengthen tight muscles.
- Reduces muscle soreness: It can speed up recovery by increasing blood flow.
- Enhances movement quality: Looser muscles mean better form during workouts.
Basic Foam Rolling Mind Map
How to Foam Roll Effectively
- Choose the right tool: A medium-density foam roller is good for beginners. Softer rollers are gentler; firmer ones provide deeper pressure.
- Target major muscle groups: Focus on areas like calves, quads, hamstrings, glutes, upper back, and lats.
- Roll slowly: Move at about 1 inch per second.
- Pause on tender spots: When you find a tight or sore spot, hold pressure for 20-30 seconds to allow the muscle to release.
- Avoid rolling joints or bones: Stick to muscle tissue.
Example: Foam Rolling the Quadriceps
- Sit face down with the foam roller under your thighs.
- Use your arms to support your upper body.
- Slowly roll from just above the knees to the hip flexors.
- Pause on any tight spots for 20-30 seconds.
Self-Myofascial Release with Massage Balls
Massage balls can target smaller or harder-to-reach areas like the shoulders, feet, or glutes.
Example: Releasing the Piriformis Muscle
- Sit on the floor and place a massage ball under your glute on the side you want to release.
- Cross the opposite leg over the knee for support.
- Gently roll around the ball to find tight spots.
- Hold pressure on tender areas for 20-30 seconds.
SMR Mind Map for Common Muscle Groups
Tips for Safe and Effective SMR
- Start gently, especially if new to foam rolling.
- Avoid rolling directly on painful or injured areas.
- Breathe deeply to help muscles relax.
- Limit sessions to 10-15 minutes to avoid overstressing tissues.
Integrating Foam Rolling into Your Workout
- Use foam rolling as part of your warm-up to increase blood flow.
- Include it in your cool-down to aid recovery.
- On rest days, foam rolling can help maintain muscle suppleness.
Sample Foam Rolling Routine (10 Minutes)
- Calves: 1 minute each leg
- Hamstrings: 1 minute each leg
- Quadriceps: 1 minute each leg
- Glutes: 1 minute each side
- Upper back: 2 minutes
Foam rolling and self-myofascial release are simple, effective ways to support your home fat loss workouts. They help keep your muscles flexible and ready to perform, which can improve your results and reduce discomfort.
7.4 Guided Cool-Down Routine: Step-by-Step Example
A cool-down routine helps your body transition from exercise to rest, reducing muscle stiffness and aiding recovery. Here’s a clear, step-by-step cool-down example you can follow after your home fat loss workout. It combines gentle stretching, breathing, and relaxation techniques designed to target major muscle groups and promote circulation.
Step 1: Slow March or Walk in Place (2 minutes)
- Purpose: Gradually lower your heart rate and encourage blood flow.
- How: Walk in place or around your workout space at a slow, comfortable pace.
Step 2: Standing Quadriceps Stretch (30 seconds per leg)
- Purpose: Stretch the front thigh muscles, which often tighten during fat loss workouts.
- How: Stand on one leg, pull the other foot toward your buttocks, keeping knees close. Hold onto a wall or chair for balance if needed.
Step 3: Seated Hamstring Stretch (30 seconds per leg)
- Purpose: Lengthen the hamstrings, which can become tight from exercises like squats and lunges.
- How: Sit on the floor with one leg extended, the other bent. Reach toward your toes of the extended leg without bouncing.
Step 4: Chest Opener Stretch (30 seconds)
- Purpose: Counteract the forward rounding of shoulders from push-ups and other upper body moves.
- How: Clasp hands behind your back, straighten arms, and gently lift your chest while squeezing shoulder blades together.
Step 5: Cat-Cow Mobility Stretch (1 minute)
- Purpose: Mobilize the spine and relieve tension in the back.
- How: On hands and knees, alternate between arching your back upward (cat) and dipping it downward (cow), moving smoothly with your breath.
Step 6: Child’s Pose (1 minute)
- Purpose: Relax the lower back, hips, and shoulders.
- How: From hands and knees, sit back onto your heels, stretch your arms forward, and rest your forehead on the floor or a cushion.
Step 7: Deep Breathing and Relaxation (2 minutes)
- Purpose: Lower heart rate further and promote mental calm.
- How: Sit or lie down comfortably. Inhale slowly through the nose for 4 seconds, hold for 2 seconds, exhale through the mouth for 6 seconds. Repeat.
Summary Mind Map of the Cool-Down Routine
This routine takes about 8 minutes and covers major muscle groups involved in fat loss workouts. It helps reduce muscle tightness, improve flexibility, and calm your nervous system. Adjust timing or intensity to fit your needs, but keep the focus on gentle, controlled movements and mindful breathing.
7.5 Breathing and Relaxation Methods to Enhance Recovery
Breathing and relaxation techniques play a key role in recovery after workouts. They help lower heart rate, reduce muscle tension, and calm the nervous system, which supports repair and prepares you for your next session. Here, we explore practical methods with clear examples and mind maps to guide you.
Why Focus on Breathing and Relaxation?
After intense exercise, your body remains in a heightened state. Deep, controlled breathing signals your parasympathetic nervous system to shift from “fight or flight” to “rest and digest.” This transition aids in lowering cortisol levels, improving oxygen delivery, and reducing muscle soreness.
Basic Breathing Techniques
-
Diaphragmatic Breathing (Belly Breathing): Focus on expanding your belly as you inhale deeply through the nose, then slowly exhale through the mouth. This encourages full oxygen exchange and relaxes the diaphragm.
-
Box Breathing: Inhale for 4 seconds, hold for 4 seconds, exhale for 4 seconds, hold for 4 seconds, then repeat. This method stabilizes breathing rhythm and calms the mind.
-
4-7-8 Breathing: Inhale quietly through the nose for 4 seconds, hold the breath for 7 seconds, then exhale forcefully through the mouth for 8 seconds. This technique helps reduce anxiety and promotes relaxation.
Mind Map: Breathing Techniques Overview
Relaxation Methods
-
Progressive Muscle Relaxation (PMR): Tense a muscle group for 5 seconds, then release and notice the difference. Move systematically from feet to head or vice versa. This reduces muscle tightness and improves body awareness.
-
Guided Imagery: Close your eyes and picture a calm, peaceful place. Combine this with slow breathing to lower stress and promote mental rest.
-
Mindful Body Scan: Slowly bring attention to each part of your body, noticing sensations without judgment. This practice helps identify lingering tension and encourages relaxation.
Mind Map: Relaxation Methods
Example Routine to Enhance Recovery
-
Start with Diaphragmatic Breathing: Sit or lie down comfortably. Place one hand on your chest and one on your belly. Inhale deeply through your nose, feeling your belly rise. Exhale slowly through your mouth, feeling your belly fall. Repeat for 5 minutes.
-
Progressive Muscle Relaxation: Starting with your feet, tense the muscles tightly for 5 seconds, then release. Move up through calves, thighs, abdomen, chest, arms, neck, and face. Pay attention to the sensation of relaxation after each release.
-
Box Breathing: After PMR, practice box breathing for 3 minutes to steady your breath and mind.
-
Mindful Body Scan: Finish by mentally scanning your body from head to toe, noting any areas of tension or ease.
Tips for Effective Practice
- Perform breathing and relaxation exercises in a quiet, comfortable space.
- Use a timer to keep track without distraction.
- Combine these techniques with gentle stretching or foam rolling for enhanced recovery.
- Practice regularly, not just post-workout, to improve overall stress management.
Mind Map: Recovery Session Example
Incorporating these breathing and relaxation methods into your post-workout routine can accelerate recovery and improve your overall workout experience. They are simple to learn, require no equipment, and can be adapted to fit your schedule and preferences.
7.6 Scheduling Recovery Days to Prevent Burnout
Recovery days are an essential part of any workout plan, especially when your goal is fat loss and lean muscle building. They allow your muscles to repair, reduce the risk of injury, and help maintain motivation over the long term. Without planned recovery, you risk overtraining, which can stall progress and lead to burnout.
Why Schedule Recovery Days?
- Muscle Repair: Exercise causes microscopic muscle damage. Recovery days give your body time to rebuild stronger muscle fibers.
- Energy Restoration: Workouts deplete glycogen stores. Rest days help replenish these energy reserves.
- Mental Reset: Taking breaks prevents workout fatigue and keeps motivation fresh.
- Injury Prevention: Overuse injuries often come from insufficient rest.
How Often Should You Schedule Recovery Days?
This depends on workout intensity, fitness level, and personal response. A common approach is:
- Beginners: 2-3 recovery days per week
- Intermediate: 1-2 recovery days per week
- Advanced: 1 recovery day per week or active recovery
Types of Recovery Days
- Complete Rest: No structured exercise, just light daily activities.
- Active Recovery: Low-intensity activities like walking, gentle yoga, or stretching.
Sample Weekly Schedule
| Day | Activity |
|---|---|
| Monday | HIIT Workout |
| Tuesday | Strength Training |
| Wednesday | Active Recovery (Yoga) |
| Thursday | HIIT Workout |
| Friday | Strength Training |
| Saturday | Complete Rest |
| Sunday | Light Walk or Stretching |
Mind Map: Planning Recovery Days
Example: Adjusting Recovery Based on Feedback
If you notice persistent soreness, fatigue, or declining performance, it might be time to add an extra recovery day or switch a workout day to active recovery. For instance, if a Thursday HIIT session leaves you drained, replace Friday’s strength training with a light stretching session.
Mind Map: Signs You Need More Recovery
Practical Tips for Recovery Days
- Keep moving lightly to avoid stiffness.
- Hydrate well to aid muscle repair.
- Focus on nutrition that supports recovery, like protein and antioxidants.
- Use recovery tools such as foam rollers or gentle massage.
Example Recovery Day Routine
- Morning: 20-minute gentle yoga focusing on flexibility
- Afternoon: Light walk for 15-20 minutes
- Evening: Foam rolling major muscle groups
Scheduling recovery days is not about skipping workouts but about making your training sustainable and effective. Treat rest as an active part of your fat loss and muscle-building system, not an afterthought.
Chapter 8: Nutrition Strategies to Complement Your Home Workout System
8.1 Macronutrients and Their Role in Fat Loss and Muscle Building
Macronutrients are the main nutrients your body needs in large amounts to function properly and support your fitness goals, including fat loss and muscle building. They consist of carbohydrates, proteins, and fats. Understanding how each macronutrient works helps you tailor your diet to optimize energy use, recovery, and muscle growth.
Macronutrients Mind Map
Carbohydrates
Carbohydrates are your body’s preferred energy source, especially during high-intensity workouts. They break down into glucose, which fuels your muscles and brain. When you consume carbs, your body stores some as glycogen in muscles and the liver for quick energy.
Example: Eating a bowl of oatmeal before a workout provides slow-digesting carbs that sustain energy over time. On the other hand, a banana offers quick energy due to its simple sugars, useful if you need a fast boost.
For fat loss, managing carbohydrate intake is about timing and quality. Complex carbs like whole grains and vegetables digest slower, keeping you full longer and avoiding blood sugar spikes. Simple carbs, especially refined sugars, can lead to fat storage if consumed excessively.
Proteins
Protein is essential for repairing and building muscle tissue. When you exercise, especially strength training, tiny tears occur in muscle fibers. Protein provides amino acids that help rebuild these fibers stronger and bigger.
Example: After a home workout, a serving of Greek yogurt or a protein shake helps supply the necessary amino acids for recovery. Plant-based options like lentils or tofu also provide protein but may require combining sources to get all essential amino acids.
For fat loss, protein has a higher thermic effect than carbs or fats, meaning your body uses more energy to digest it. It also helps preserve lean muscle mass when you’re in a calorie deficit.
Fats
Dietary fats support hormone production, including hormones like testosterone and estrogen, which influence muscle growth and fat metabolism. Fats also provide long-lasting energy and help absorb fat-soluble vitamins (A, D, E, K).
Example: Adding a tablespoon of olive oil to your salad or snacking on a handful of almonds provides healthy unsaturated fats. Saturated fats, found in butter or fatty cuts of meat, should be consumed in moderation.
For fat loss, fats are calorie-dense (9 calories per gram), so portion control is important. However, cutting fats too low can impair hormone function and overall health.
Macronutrient Ratios for Fat Loss and Muscle Building
Finding the right balance depends on your goals, activity level, and personal preferences. A common starting point is:
- Protein: 25-35% of daily calories
- Carbohydrates: 40-50%
- Fats: 20-30%
Adjusting these ratios can help. For example, increasing protein and lowering carbs slightly may help preserve muscle during fat loss.
Macronutrient Mind Map with Roles and Examples
Practical Example: Daily Macronutrient Breakdown for a 2000-Calorie Diet
- Protein: 30% = 600 calories = 150 grams (since 1 gram protein = 4 calories)
- Carbohydrates: 45% = 900 calories = 225 grams (1 gram carb = 4 calories)
- Fats: 25% = 500 calories = 55 grams (1 gram fat = 9 calories)
This breakdown supports muscle maintenance and fat loss by providing ample protein, moderate carbs for energy, and enough fats for hormone balance.
Summary
Each macronutrient plays a distinct role in fat loss and muscle building. Carbs fuel your workouts, protein repairs and builds muscle, and fats support hormones and overall health. Balancing these nutrients according to your lifestyle and goals helps you burn calories efficiently and build lean muscle with simple, sustainable routines.
8.2 Meal Planning Basics: Simple and Balanced Home-Cooked Meals
Meal planning is a practical approach to eating that helps you maintain balance, control portions, and avoid last-minute decisions that often lead to less healthy choices. When your goal is fat loss and muscle building, the focus should be on meals that provide adequate protein, moderate healthy fats, and carbohydrates that fuel your workouts and recovery.
Key Principles of Meal Planning
- Balance: Each meal should ideally include a source of protein, carbohydrates, and fats. This combination supports muscle repair, energy levels, and satiety.
- Simplicity: Choose ingredients and recipes that are easy to prepare and repeat. This reduces decision fatigue and increases the chance you stick with the plan.
- Variety: Rotate different protein sources, vegetables, and grains to cover a broad spectrum of nutrients and keep meals interesting.
- Portion Control: Use portion sizes that align with your calorie goals. This helps ensure you’re in a calorie deficit for fat loss or at maintenance for muscle building.
Mind Map: Components of a Balanced Meal
Protein: The Building Block
Protein supports muscle repair and growth. Aim for a palm-sized portion per meal. Examples include grilled chicken breast, a couple of eggs, or a serving of lentils. For vegetarians, beans and tofu are excellent options.
Carbohydrates: Fuel and Fiber
Carbs provide energy for workouts and daily activities. Opt for complex carbs like brown rice or sweet potatoes, which digest slowly and keep you full longer. A fist-sized portion is a good starting point.
Fats: Essential and Satiating
Healthy fats support hormone production and nutrient absorption. Include a thumb-sized portion of fats such as olive oil drizzled on a salad or a small handful of nuts.
Vegetables: Nutrient Powerhouses
Vegetables add fiber, vitamins, and minerals with very few calories. Fill half your plate with a colorful mix of veggies like steamed broccoli, roasted bell peppers, or fresh spinach.
Example Meal Plan for a Day
- Breakfast: Scrambled eggs (2) with spinach and tomatoes, whole grain toast (1 slice), and a small avocado slice.
- Lunch: Grilled chicken breast (palm-sized), quinoa (fist-sized), steamed broccoli and carrots, drizzled with olive oil.
- Snack: Greek yogurt with a handful of mixed nuts.
- Dinner: Baked salmon (palm-sized), sweet potato (fist-sized), mixed green salad with olive oil and lemon dressing.
Mind Map: Sample Daily Meal Structure
Tips for Efficient Meal Planning
- Batch Cooking: Prepare proteins and grains in bulk to save time during the week.
- Simple Recipes: Use one-pan or sheet-pan meals to minimize cleanup.
- Flexible Ingredients: Swap out similar items based on availability or preference (e.g., chicken for turkey, quinoa for brown rice).
- Use Leftovers: Incorporate leftovers into salads, wraps, or scrambled eggs to reduce waste.
Example Simple Recipe: One-Pan Chicken and Veggies
- Ingredients: Chicken breast, bell peppers, zucchini, olive oil, garlic, salt, pepper.
- Method: Toss chopped veggies and chicken in olive oil and seasonings. Spread on a baking sheet and roast at 400°F (200°C) for 25 minutes.
- Serve with a side of cooked quinoa or brown rice.
This approach keeps meal prep straightforward and ensures balanced nutrition without complicated cooking.
By focusing on these basics, your meal planning becomes a tool that supports your fat loss and muscle-building goals without adding stress or complexity.
8.3 Hydration Tips to Support Workout Performance
Hydration plays a crucial role in supporting workout performance, especially in a home fat loss workout system where intensity and consistency matter. Water is the medium through which nutrients travel, waste is removed, and body temperature is regulated. Without proper hydration, your energy levels, muscle function, and recovery can suffer.
Why Hydration Matters During Workouts
- Maintains Blood Volume: Adequate hydration keeps your blood volume stable, ensuring oxygen and nutrients reach muscles efficiently.
- Regulates Body Temperature: Sweating cools the body, but this process requires fluid replacement to avoid overheating.
- Supports Joint Lubrication: Water helps keep joints flexible and reduces the risk of injury.
- Prevents Fatigue: Dehydration can cause early fatigue and reduce workout intensity.
How Much Water Do You Need?
Hydration needs vary depending on body size, workout intensity, and environment. A general guideline is to drink about 500 ml (17 oz) of water 2 hours before exercise and then sip 150-350 ml (5-12 oz) every 15-20 minutes during workouts.
Mind Map: Hydration Timing and Amount
Practical Hydration Tips
- Start Hydrated: Don’t wait until you’re thirsty. Thirst is a late signal of dehydration.
- Use a Water Bottle: Keep a bottle nearby during workouts to remind yourself to sip regularly.
- Monitor Urine Color: Pale yellow urine generally indicates good hydration; dark urine suggests you need more fluids.
- Adjust for Sweat Rate: If you sweat heavily, increase fluid intake accordingly.
- Include Electrolytes When Needed: For workouts longer than an hour or in hot conditions, consider drinks with sodium, potassium, and magnesium to replace lost electrolytes.
Mind Map: Hydration Factors
Examples
-
Example 1: Sarah plans a 30-minute HIIT session at home. She drinks 500 ml of water two hours before and sips about 200 ml during the workout. Since her session is under an hour and indoors, water alone suffices.
-
Example 2: Mike does a 90-minute strength and cardio circuit in a warm room. He drinks 500 ml two hours before, sips 300 ml every 15 minutes during the workout, and uses a homemade electrolyte drink (water, pinch of salt, and a splash of orange juice) to replenish minerals.
-
Example 3: Emma notices dark urine after her workouts. She increases her water intake throughout the day and keeps a water bottle at her desk. Her urine color lightens, and she feels less fatigued during workouts.
Signs of Dehydration to Watch For
- Dizziness or lightheadedness
- Dry mouth or sticky saliva
- Muscle cramps
- Headache
- Reduced urine output
Mind Map: Hydration Checklist
In summary, staying properly hydrated supports your energy, muscle function, and recovery during home fat loss workouts. Simple habits like drinking before you’re thirsty, sipping regularly, and adjusting fluids based on your workout and environment make a significant difference in performance and results.
8.4 Pre- and Post-Workout Nutrition: What to Eat and When
Pre- and post-workout nutrition plays a key role in supporting your fat loss and muscle-building efforts. What you eat before and after exercise affects your energy levels, workout performance, recovery speed, and muscle repair. Understanding the timing and composition of these meals can help you get the most out of your home workouts.
Pre-Workout Nutrition: What to Eat and When
The goal of pre-workout nutrition is to fuel your body with enough energy to perform well without causing discomfort. Ideally, you want to eat a balanced meal or snack that provides carbohydrates for quick energy, some protein to support muscle function, and a small amount of fat.
- Timing: Aim to eat a full meal 2 to 3 hours before your workout. If you can’t eat that early, a small snack 30 to 60 minutes before exercise is better than nothing.
- Carbohydrates: These are your primary energy source during workouts. Choose easily digestible carbs like fruit, oatmeal, or whole-grain bread.
- Protein: Moderate protein intake before exercise helps reduce muscle breakdown. Examples include yogurt, a boiled egg, or a small portion of lean meat.
- Fat: Keep fat low before workouts because it slows digestion and might cause discomfort.
Pre-Workout Mind Map
Examples of Pre-Workout Meals and Snacks
- 2-3 hours before: Grilled chicken breast, brown rice, and steamed vegetables
- 2-3 hours before: Whole-grain toast with peanut butter and sliced banana
- 30-60 minutes before: A small bowl of Greek yogurt with honey
- 30-60 minutes before: An apple with a handful of almonds
Post-Workout Nutrition: What to Eat and When
After your workout, your body needs nutrients to repair muscle tissue and replenish energy stores. The focus here is on protein to support muscle recovery and carbohydrates to restore glycogen.
- Timing: Try to eat within 30 to 60 minutes after exercising. This window helps optimize recovery.
- Protein: Aim for 15-25 grams of high-quality protein. This amount supports muscle protein synthesis.
- Carbohydrates: Include moderate to high glycemic carbs to quickly replenish glycogen.
- Fat: Including some fat is fine post-workout, but avoid excessive amounts that might slow digestion.
Post-Workout Mind Map
Examples of Post-Workout Meals and Snacks
- Grilled salmon with quinoa and roasted vegetables
- Protein smoothie with whey protein, banana, and almond milk
- Cottage cheese with pineapple chunks
- Turkey sandwich on whole-grain bread with lettuce and tomato
Hydration Around Workouts
Water is often overlooked but essential. Drink water before, during (if needed), and after your workout to maintain hydration. Dehydration can reduce performance and slow recovery.
Summary Table of Pre- and Post-Workout Nutrition
| Aspect | Pre-Workout | Post-Workout |
|---|---|---|
| Timing | 2-3 hours (meal) or 30-60 minutes (snack) before workout | Within 30-60 minutes after workout |
| Main Focus | Fuel energy, moderate protein, low fat | Muscle repair, glycogen replenishment, moderate fat |
| Carbohydrates | Easily digestible carbs (fruit, oats) | Moderate to high glycemic carbs (rice, potatoes) |
| Protein | Moderate (yogurt, egg) | Higher (whey, lean meat) |
| Fat | Minimal | Moderate, avoid heavy fats |
| Hydration | Drink water | Rehydrate with water or electrolytes |
By planning your meals and snacks around your workouts, you can improve energy levels, workout quality, and recovery. Adjust portions and timing based on your personal preferences and how your body responds.
8.5 Sample Meal Plans with Easy Recipes
Creating meal plans that support fat loss and muscle building doesn’t have to be complicated. The key is balancing macronutrients—protein, carbohydrates, and fats—in a way that fuels your workouts and recovery without excess calories. Below are sample meal plans for different calorie ranges, each including simple recipes you can prepare at home. These examples emphasize whole foods, straightforward preparation, and variety.
Mind Map: Components of a Balanced Meal Plan
Sample Meal Plan: 1500 Calories (Weight Loss Focus)
Breakfast:
- Greek yogurt (150g) with 1 tbsp chia seeds and 1/2 cup mixed berries
- 1 slice whole-grain toast with 1 tsp natural peanut butter
Lunch:
- Grilled chicken salad: 120g chicken breast, mixed greens, cherry tomatoes, cucumber, 1 tbsp olive oil, lemon juice dressing
- 1 small apple
Snack:
- 1 boiled egg
- 10 almonds
Dinner:
- Baked salmon (120g) with steamed broccoli and 1/2 cup quinoa
Recipe Example: Grilled Chicken Salad
- Season chicken breast with salt, pepper, and garlic powder.
- Grill for 5-7 minutes each side until cooked through.
- Toss mixed greens, cherry tomatoes, and cucumber with olive oil and lemon juice.
- Slice chicken and place on top.
Sample Meal Plan: 2000 Calories (Muscle Building Focus)
Breakfast:
- Oatmeal (1/2 cup dry oats) cooked with water or milk
- Stir in 1 scoop protein powder or 2 boiled eggs
- Add 1 tbsp flaxseed and a small banana
Lunch:
- Turkey and avocado wrap: whole-grain tortilla, 150g sliced turkey breast, 1/4 avocado, lettuce, tomato
- Side of carrot sticks
Snack:
- Cottage cheese (150g) with pineapple chunks
Dinner:
- Stir-fried tofu (150g) with mixed vegetables (bell peppers, snap peas, carrots) in 1 tbsp sesame oil
- 3/4 cup cooked brown rice
Recipe Example: Stir-Fried Tofu and Vegetables
- Press tofu to remove excess water, then cube.
- Heat sesame oil in a pan over medium heat.
- Add tofu cubes and cook until golden on all sides.
- Add chopped vegetables and stir-fry for 5-7 minutes.
- Season with low-sodium soy sauce or tamari.
Sample Meal Plan: 1800 Calories (Balanced Fat Loss and Muscle Maintenance)
Breakfast:
- Smoothie: 1 cup spinach, 1/2 cup frozen berries, 1 scoop protein powder, 1 tbsp almond butter, 1 cup unsweetened almond milk
Lunch:
- Lentil soup (1.5 cups) with mixed vegetables
- Side salad with olive oil and vinegar dressing
Snack:
- Rice cakes (2) topped with 2 tbsp hummus
Dinner:
- Grilled lean beef (120g) with roasted sweet potatoes (1 medium) and steamed green beans
Recipe Example: Lentil Soup
- Sauté diced onions, carrots, and celery in 1 tbsp olive oil until soft.
- Add 1 cup rinsed lentils and 4 cups vegetable broth.
- Simmer for 25-30 minutes until lentils are tender.
- Season with salt, pepper, and herbs like thyme or bay leaf.
Tips for Meal Preparation and Variation
- Cook proteins in batches (grill chicken, bake tofu) to save time.
- Use frozen vegetables to reduce prep time and waste.
- Swap fruits and vegetables based on season and preference.
- Adjust portion sizes to meet your specific calorie needs.
Mind Map: Easy Recipe Ingredients to Keep on Hand
These sample meal plans and recipes provide a practical framework. They focus on nutrient-dense foods that support your workout goals without requiring complicated cooking or exotic ingredients. Adjust as needed for taste, dietary restrictions, and energy demands.
8.6 Tracking Calories and Nutrient Intake Without Stress
Tracking calories and nutrient intake doesn’t have to be a chore or a source of stress. The goal is to gain awareness of what you eat so you can make informed choices that support fat loss and muscle building. Here’s a straightforward approach to tracking without overcomplicating things.
Why Track Calories and Nutrients?
Understanding your intake helps ensure you’re eating enough to fuel workouts and recovery, but not so much that fat loss stalls. It also highlights nutrient balance—protein, carbs, and fats—that supports muscle growth and overall health.
Simple Methods to Track Intake
- Food Journal: Write down what you eat each day. Include portion sizes and ingredients. This can be done in a notebook or on your phone.
- Photo Log: Snap pictures of your meals. Later, estimate portions and ingredients.
- Basic Calorie Counting: Use a calorie estimate for common foods to get a rough total.
Mind Map: Basic Tracking Approach
Estimating Portions Without a Scale
You don’t need a food scale to get reasonable estimates. Use everyday objects:
- Palm of your hand = approx. 3-4 oz protein (chicken, fish, beef)
- Fist = about 1 cup of vegetables or carbs (rice, pasta, beans)
- Thumb = roughly 1 tablespoon of fats (olive oil, peanut butter)
Mind Map: Portion Estimation
Tracking Macronutrients
Focus on the three main macronutrients:
- Protein: Supports muscle repair and growth.
- Carbohydrates: Provide energy for workouts.
- Fats: Essential for hormone function and satiety.
Example: If you eat a chicken breast (palm-sized), a cup of steamed broccoli (fist-sized), and a tablespoon of olive oil (thumb-sized), you can estimate:
- Protein: ~30g (chicken breast)
- Carbs: ~6g (broccoli)
- Fat: ~14g (olive oil)
Mind Map: Macronutrient Focus
Example Day of Tracking
| Meal | Food Items | Estimated Calories | Protein (g) | Carbs (g) | Fat (g) |
|---|---|---|---|---|---|
| Breakfast | 2 eggs (large), 1 slice toast | 250 | 14 | 15 | 14 |
| Snack | Greek yogurt (1 cup), berries | 150 | 12 | 20 | 0 |
| Lunch | Grilled chicken (palm), quinoa (fist), olive oil (thumb) | 450 | 35 | 40 | 15 |
| Dinner | Salmon (palm), steamed veggies (fist), avocado (thumb) | 500 | 40 | 10 | 25 |
| Total | 1350 | 101 | 85 | 54 |
Tips to Keep Tracking Stress-Free
- Be consistent, not perfect: Aim to track most meals, but don’t stress over occasional slips.
- Use averages: If you eat similar meals regularly, estimate once and reuse those numbers.
- Focus on trends: Look at weekly patterns rather than daily fluctuations.
- Keep it simple: Track calories and protein first, then add carbs and fats if you want more detail.
Mind Map: Stress-Free Tracking Tips
By integrating these straightforward methods, you can track your intake effectively without feeling overwhelmed. This awareness supports your fat loss and muscle-building goals while keeping the process manageable and sustainable.
Chapter 9: Designing Personalized Workout Plans for Sustainable Results
9.1 Assessing Your Fitness Level and Setting Benchmarks
Assessing your fitness level is the first step in creating a workout plan that fits your current abilities and goals. Without a clear understanding of where you stand, it’s easy to set unrealistic targets or follow routines that don’t challenge you enough. Setting benchmarks helps you track progress objectively and adjust your workouts as needed.
Why Assess Fitness Level?
- Establishes a baseline to measure improvement.
- Identifies strengths and weaknesses.
- Helps prevent injury by avoiding exercises that are too advanced.
- Provides motivation through measurable progress.
Key Components to Assess
Fitness is multi-dimensional. For fat loss and lean muscle building, focus on these areas:
- Cardiovascular Endurance: How well your heart and lungs support sustained activity.
- Muscular Strength: The maximum force your muscles can exert.
- Muscular Endurance: The ability of muscles to perform repeated contractions.
- Flexibility: Range of motion in your joints.
- Body Composition: Ratio of fat to lean mass.
Simple Fitness Tests You Can Do at Home
Cardiovascular Endurance
- 3-Minute Step Test: Step up and down a 12-inch platform at a steady pace for 3 minutes. Measure your heart rate immediately after. Lower heart rate indicates better endurance.
Muscular Strength
- Push-Up Test: Count how many push-ups you can do in one set with good form.
Muscular Endurance
- Wall Sit: Time how long you can hold a seated position against a wall.
Flexibility
- Sit and Reach Test: Sit on the floor with legs straight and reach forward as far as possible.
Body Composition
- Use a tape measure to record waist, hips, chest, arms, and thighs. Track changes over time.
Example Mind Map: Fitness Assessment Components
Setting Benchmarks
Once you complete these tests, record your results. These numbers become your starting benchmarks. For example:
- Push-ups: 12 reps
- Wall sit: 45 seconds
- Sit and reach: 10 inches
- Resting heart rate post step test: 110 bpm
Benchmarks should be realistic and personalized. Comparing yourself to others is less useful than tracking your own progress.
Using Benchmarks to Guide Your Workouts
- If your push-up count is low, include more upper-body strength exercises.
- Short wall sit times suggest focusing on lower-body endurance.
- Limited flexibility means adding mobility work.
- High post-exercise heart rate indicates a need to build cardiovascular fitness gradually.
Example Mind Map: Using Benchmarks to Plan Workouts
Tracking Progress
Repeat these tests every 4-6 weeks. Improvements confirm your plan is working. If results stall, adjust intensity, volume, or exercise selection.
Summary
Assessing your fitness level and setting benchmarks is a straightforward process that provides a clear picture of your starting point. It informs your workout design and helps you stay on track. Using simple tests and measurements at home, you can create a personalized, effective fat loss and muscle-building program.
9.2 Combining Cardio, Strength, and Core Workouts Effectively
Combining cardio, strength, and core workouts effectively means balancing these components to maximize fat loss and muscle building without overtraining or neglecting any area. Each type of workout targets different physiological systems and muscle groups, so integrating them thoughtfully helps create a well-rounded routine.
Understanding the Roles
- Cardio primarily improves cardiovascular health and burns calories quickly.
- Strength training builds muscle, which increases resting metabolic rate.
- Core workouts stabilize your body, improve posture, and support all movements.
Mind Map: Components of an Effective Workout
How to Combine Them
-
Sequence Matters:
- Start with a warm-up.
- Do strength training first when muscles are fresh.
- Follow with cardio to maximize fat burn.
- Finish with core exercises to avoid fatigue compromising form.
-
Frequency and Duration:
- Aim for 3-4 strength sessions weekly.
- Include cardio 3-5 times per week, mixing HIIT and steady-state.
- Core work can be done 3-5 times weekly, often integrated into other workouts.
-
Intensity Balance:
- Avoid doing high-intensity cardio and heavy strength training on the same day unless you are experienced.
- Use lighter cardio or active recovery on strength days if needed.
Mind Map: Weekly Workout Layout Example
Example Routine Combining All Three
-
Warm-up (5-10 minutes): Jumping jacks, arm circles, leg swings.
-
Strength Circuit (20 minutes):
- Push-ups (12 reps)
- Squats (15 reps)
- Dumbbell Rows (12 reps each arm)
- Lunges (10 reps each leg)
- Repeat circuit 3 times with 1-minute rest between rounds.
-
Cardio Burst (10 minutes HIIT):
- 30 seconds burpees
- 30 seconds rest
- 30 seconds high knees
- 30 seconds rest
- Repeat 5 rounds.
-
Core Finisher (10 minutes):
- Plank (hold 45 seconds)
- Russian Twists (20 reps)
- Leg Raises (15 reps)
- Side Plank (30 seconds each side)
- Repeat twice.
Tips for Integration
- Modify exercises to match your fitness level.
- Use compound movements during strength training to engage core muscles naturally.
- If short on time, combine cardio and strength in circuits.
- Listen to your body; rest if you feel excessive fatigue.
Mind Map: Combining Workouts in a Single Session
Combining cardio, strength, and core workouts is about creating synergy between these elements. When planned carefully, this approach helps burn calories efficiently, build lean muscle, and improve overall fitness without overwhelming the body.
9.3 Weekly and Monthly Workout Scheduling Examples
Creating a workout schedule that fits your lifestyle and goals is key to making steady progress in fat loss and muscle building. The goal is to balance intensity, recovery, and variety without overwhelming yourself. Here, we’ll explore practical weekly and monthly scheduling examples, supported by mind maps to visualize how different workout components fit together.
Weekly Workout Scheduling
A typical week should include a mix of cardio, strength training, core work, and rest or active recovery days. The exact distribution depends on your fitness level and availability.
Example 1: Balanced Beginner Week
- Monday: Full-body strength training (bodyweight focus)
- Tuesday: HIIT cardio session (20 minutes)
- Wednesday: Core and mobility work
- Thursday: Rest or light activity (walking, stretching)
- Friday: Strength training with resistance bands
- Saturday: Moderate-intensity steady-state cardio (30 minutes)
- Sunday: Rest
This schedule balances effort and recovery, introducing strength and cardio without overloading any single day.
Example 2: Intermediate Focus on Fat Loss
- Monday: HIIT session (25 minutes)
- Tuesday: Strength training (upper body focus)
- Wednesday: Core and flexibility
- Thursday: HIIT session (20 minutes)
- Friday: Strength training (lower body focus)
- Saturday: Active recovery (yoga, walking)
- Sunday: Rest
This plan increases HIIT frequency and splits strength training by muscle groups to allow focused effort and recovery.
Monthly Workout Scheduling
Over a month, you can cycle intensity and volume to avoid plateaus and burnout. A common approach is to use three weeks of increasing intensity followed by a lighter recovery week.
Example: Four-Week Cycle
- Week 1: Moderate intensity, focus on learning form and consistency
- Week 2: Increased intensity and volume, adding more reps or sets
- Week 3: Peak intensity week, pushing close to your limits safely
- Week 4: Deload week with reduced volume and intensity, focusing on mobility and recovery
This cycle helps your body adapt progressively while preventing overtraining.
Combining Weekly and Monthly Planning
You can layer the weekly schedules within the monthly cycle by adjusting the intensity each week. For example, in Week 1, perform the beginner weekly plan with moderate effort. By Week 3, increase the number of HIIT intervals or add resistance to strength exercises. Week 4 would then scale back to lighter sessions and more rest.
Sample Weekly Schedule with Intensity Notes
| Day | Workout Type | Intensity Level | Notes |
|---|---|---|---|
| Monday | Full-body Strength | Moderate | Focus on form and control |
| Tuesday | HIIT | Moderate | 20-25 minutes, 30s work/30s rest |
| Wednesday | Core & Mobility | Low | Stretching and stability drills |
| Thursday | Rest or Light Activity | Low | Walking or gentle yoga |
| Friday | Strength (Bands) | Moderate-High | Add resistance, increase sets |
| Saturday | Steady-State Cardio | Moderate | 30-40 minutes at steady pace |
| Sunday | Rest | Low | Full rest or light stretching |
Tips for Scheduling
- Consistency beats intensity: Regular moderate workouts are better than sporadic intense sessions.
- Listen to your body: Adjust rest days if you feel overly fatigued.
- Mix it up: Vary exercises weekly to keep workouts engaging and target muscles differently.
- Plan for flexibility: Life happens; have backup shorter sessions ready.
By structuring your workouts with clear weekly and monthly plans, you create a sustainable path to fat loss and muscle gain that fits your home environment and lifestyle.
9.4 Adjusting Workouts Based on Progress and Plateaus
Adjusting workouts based on progress and plateaus is a practical skill that keeps your fat loss and muscle-building journey moving forward. When you start a new routine, improvements often come quickly. Over time, however, your body adapts, and progress can slow or stall. Recognizing this and making thoughtful changes is key.
Understanding Plateaus
A plateau happens when your performance, strength, or fat loss stops improving despite consistent effort. This is a natural part of training and signals that your body needs a new stimulus.
Signs You May Need to Adjust Your Workouts
- No increase in reps, sets, or weights over several sessions
- Fat loss has stalled for 2-4 weeks
- Workouts feel easier but results don’t match
- Persistent fatigue or lack of motivation
Mind Map: Reasons for Plateaus and Adjustment Strategies
How to Adjust Your Workouts
-
Increase Intensity: Add more resistance, speed, or complexity. For example, if you’ve been doing standard push-ups, try decline push-ups or add a weighted vest.
-
Increase Volume: Add more sets or reps. If you’re doing 3 sets of 10 squats, try 4 sets or increase reps to 12.
-
Change Exercise Selection: Swap exercises targeting the same muscle groups but with different movement patterns. Replace bodyweight lunges with Bulgarian split squats.
-
Adjust Rest Periods: Shorten rest to increase cardiovascular demand or lengthen rest to lift heavier weights.
-
Incorporate Different Training Modalities: If you’ve focused on HIIT, add strength circuits or mobility work.
-
Prioritize Recovery: Sometimes a plateau signals overtraining. Adding rest days or active recovery like yoga can help.
Example: Adjusting a Workout Plan
Initial Plan:
- 3 rounds of 10 push-ups, 15 bodyweight squats, 20 jumping jacks
- Rest 60 seconds between rounds
After 4 weeks, plateau noticed:
- Increase to 4 rounds
- Change push-ups to diamond push-ups for more triceps focus
- Reduce rest to 45 seconds
This small adjustment increases intensity and volume, challenging muscles differently and improving cardiovascular demand.
Mind Map: Step-by-Step Adjustment Process
Practical Tips
- Avoid making multiple big changes at once; small, incremental tweaks are easier to track.
- Keep a workout log to see trends and identify when progress slows.
- Listen to your body; fatigue and soreness are normal, but persistent pain or exhaustion may mean you need more rest.
- Remember that plateaus are not failures but signals to adapt your approach.
By regularly evaluating your workouts and making informed adjustments, you maintain steady progress toward fat loss and lean muscle goals without unnecessary frustration or injury risk.
9.5 Incorporating Active Rest and Cross-Training
Incorporating active rest and cross-training into your home fat loss workout system can improve recovery, prevent boredom, and reduce the risk of injury. Active rest means engaging in low-intensity activities on your rest days instead of complete inactivity. Cross-training involves mixing different types of exercises to work various muscle groups and energy systems.
Why Active Rest Matters
Active rest helps maintain blood flow, which aids muscle recovery by delivering nutrients and removing waste products. It also keeps you moving without stressing your body, making it easier to stick with your routine.
Examples of Active Rest Activities
- Walking: A 20-30 minute brisk walk can loosen tight muscles and improve circulation.
- Gentle Yoga or Stretching: Focus on mobility and flexibility without pushing to fatigue.
- Light Cycling: Pedaling at an easy pace for 15-20 minutes keeps the legs active without strain.
- Swimming or Water Aerobics: Low-impact options that engage muscles gently.
Cross-Training Benefits
Cross-training balances your workout by targeting muscles and movements not emphasized in your primary routine. It can enhance overall fitness, reduce overuse injuries, and keep motivation high by adding variety.
Cross-Training Modalities for Home Workouts
- Bodyweight Strength Training: If your main routine is cardio-heavy, add strength circuits using push-ups, lunges, and planks.
- HIIT Sessions: If you usually do steady-state cardio, try short bursts of high-intensity intervals.
- Pilates or Core-Focused Workouts: These improve stability and posture, supporting other exercises.
- Dance or Aerobic Classes: Fun ways to boost cardiovascular fitness and coordination.
Mind Map: Active Rest and Cross-Training Components
Integrating Active Rest and Cross-Training
A typical week might look like this:
- Monday: HIIT workout
- Tuesday: Active rest (walking or yoga)
- Wednesday: Strength training
- Thursday: Cross-training (dance or Pilates)
- Friday: HIIT or cardio
- Saturday: Active rest (light cycling or swimming)
- Sunday: Rest or gentle stretching
Example: Cross-Training Circuit for a Cardio-Focused Week
- 10 push-ups
- 15 bodyweight squats
- 30-second plank
- 12 lunges (each leg)
- 20 jumping jacks
Repeat 3 times with 1-minute rest between rounds. This adds strength elements to your cardio routine.
Tips for Success
- Listen to your body: If active rest feels like too much, scale back.
- Keep active rest low intensity; the goal is movement, not fatigue.
- Choose cross-training activities you enjoy to maintain consistency.
- Use cross-training days to work on weaknesses or imbalances.
In summary, active rest and cross-training are practical tools to enhance your home fat loss workout system. They help you recover better, stay engaged, and develop a well-rounded fitness base without needing extra equipment or complicated schedules.
9.6 Sample 4-Week Home Fat Loss Workout Program
This 4-week program balances cardio, strength, and core work, designed to fit into a home setting with minimal equipment. Each week progresses in intensity or volume to encourage steady improvement without overwhelming your schedule.
Weekly Structure Overview
Week 1: Foundation
Goal: Establish a routine, focus on form and consistency.
-
Day 1: Full-Body Strength Circuit (3 rounds)
- 10 Bodyweight Squats
- 8 Knee Push-Ups
- 15-Second Plank
- 10 Glute Bridges
- 20 Jumping Jacks
-
Day 2: Active Rest
- 20-minute brisk walk or light stretching
-
Day 3: HIIT Intro (20 minutes)
- 30 seconds work, 30 seconds rest, repeat each exercise twice
- Exercises: High Knees, Modified Burpees, Mountain Climbers, Bodyweight Lunges
-
Day 4: Core and Mobility
- 3 rounds:
- 15 Crunches
- 10 Leg Raises
- 20-Second Side Plank (each side)
- 5 minutes dynamic stretching
- 3 rounds:
-
Days 5-7: Rest or light activity
Week 2: Build Endurance
Goal: Increase workout frequency and add volume.
-
Day 1: Strength Circuit (4 rounds)
- 15 Bodyweight Squats
- 10 Standard Push-Ups
- 30-Second Plank
- 15 Glute Bridges
- 25 Jumping Jacks
-
Day 2: HIIT (25 minutes)
- 40 seconds work, 20 seconds rest
- Exercises: Jump Squats, Burpees, Mountain Climbers, Reverse Lunges
-
Day 3: Core Focus
- 4 rounds:
- 20 Russian Twists
- 15 Leg Raises
- 30-Second Side Plank (each side)
- 10 Superman Holds
- 4 rounds:
-
Day 4: Active Rest
- 30 minutes light cycling or walking
-
Day 5: Full-Body Strength + Cardio
- Circuit (3 rounds):
- 12 Push-Ups
- 20 Bodyweight Squats
- 15 Dumbbell Rows (if available) or Resistance Band Rows
- 30 seconds Jump Rope or simulated jump rope
- Circuit (3 rounds):
-
Days 6-7: Rest or gentle stretching
Week 3: Increase Intensity
Goal: Push intensity with shorter rests and more challenging variations.
-
Day 1: Advanced Strength Circuit (4 rounds)
- 20 Jump Squats
- 15 Standard Push-Ups
- 45-Second Plank
- 20 Glute Bridges with March
- 30 Jumping Jacks
-
Day 2: HIIT (30 minutes)
- 45 seconds work, 15 seconds rest
- Exercises: Burpees, Mountain Climbers, Jump Lunges, High Knees
-
Day 3: Core and Stability
- 4 rounds:
- 25 Russian Twists
- 20 Leg Raises
- 45-Second Side Plank (each side)
- 15 Superman Holds
- 4 rounds:
-
Day 4: Active Rest
- 30 minutes yoga or mobility work
-
Day 5: Full-Body Strength + Cardio Circuit (5 rounds)
- 15 Push-Ups
- 25 Bodyweight Squats
- 20 Dumbbell or Resistance Band Rows
- 45 seconds Jump Rope or simulated jump rope
-
Days 6-7: Rest or light activity
Week 4: Peak and Recover
Goal: Maximize effort early in the week, then taper to recover.
-
Day 1: Full-Body Strength Challenge (5 rounds)
- 25 Jump Squats
- 20 Push-Ups
- 60-Second Plank
- 25 Glute Bridges with March
- 40 Jumping Jacks
-
Day 2: HIIT Peak (30 minutes)
- 50 seconds work, 10 seconds rest
- Exercises: Burpees, Mountain Climbers, Jump Lunges, High Knees
-
Day 3: Core and Mobility
- 4 rounds:
- 30 Russian Twists
- 25 Leg Raises
- 60-Second Side Plank (each side)
- 20 Superman Holds
- 10 minutes full-body stretching
- 4 rounds:
-
Days 4-7: Recovery
- Light walking, stretching, or yoga
Example: Day 1 Week 1 Strength Circuit Explained
- Bodyweight Squats: Stand feet shoulder-width apart, lower hips back and down, keep chest up. Example: “Imagine sitting back into a chair, then stand tall.”
- Knee Push-Ups: From a plank position on knees, lower chest to floor, elbows at 45 degrees. Example: “Keep your core tight and lower slowly.”
- Plank: Forearms on floor, body in a straight line, hold steady. Example: “Pretend you’re a sturdy plank of wood.”
- Glute Bridges: Lie on back, knees bent, lift hips to form a straight line from knees to shoulders. Example: “Squeeze your glutes at the top like you’re trying to hold a pencil between them.”
- Jumping Jacks: Classic cardio move, arms and legs moving in and out. Example: “Land softly to protect your joints.”
This program is designed to be flexible. If a day feels too hard, reduce rounds or rest longer. If it feels easy, add reps or rounds. The key is steady progress and consistency, not perfection.
Chapter 10: Overcoming Common Challenges and Staying Motivated
10.1 Identifying and Managing Workout Plateaus
A workout plateau happens when your progress stalls despite consistent effort. You might notice your weight loss slows, your strength gains halt, or your endurance stops improving. Plateaus are common and not a sign of failure—they simply indicate your body has adapted to your current routine.
How to Identify a Plateau
- No change in performance: You perform the same exercises with the same weights or reps but don’t improve.
- Stalled weight loss: The scale doesn’t budge for several weeks despite sticking to your workout and diet.
- Lack of motivation or increased fatigue: You feel tired or bored during workouts, which can signal your body needs a change.
Mind Map: Signs of a Workout Plateau
Common Causes of Plateaus
- Routine Adaptation: Your body becomes efficient at your current exercises.
- Insufficient Recovery: Overtraining can stall progress.
- Nutritional Imbalance: Calories or macronutrients may not support continued fat loss or muscle growth.
- Lack of Progression: Not increasing intensity, volume, or complexity.
Mind Map: Causes of Plateaus
Managing and Breaking Through Plateaus
1. Change Your Workout Variables
- Increase intensity by adding reps, sets, or resistance.
- Alter exercise selection to challenge muscles differently.
- Modify rest periods to increase workout density.
Example: If you’ve been doing 3 sets of 10 push-ups, try 4 sets or switch to decline push-ups for added difficulty.
2. Incorporate Periodization
- Plan cycles of varying intensity and volume.
- Alternate between heavier strength days and lighter recovery or endurance days.
Example: Week 1: heavier weights, fewer reps; Week 2: lighter weights, more reps.
3. Prioritize Recovery
- Ensure adequate sleep and rest days.
- Use active recovery like stretching or light cardio.
Example: If you feel unusually tired, schedule a rest day or a gentle yoga session instead of a high-intensity workout.
4. Review Nutrition
- Adjust calorie intake to reflect current goals and activity.
- Balance macronutrients to support energy and muscle repair.
Example: If fat loss has stalled, slightly reduce calorie intake or increase protein to preserve muscle.
5. Track and Reflect
- Keep a workout log to spot patterns.
- Note how you feel physically and mentally.
Example: Record reps, sets, weights, and energy levels to identify when progress stalls.
Mind Map: Strategies to Overcome Plateaus
Example Scenario
Case: Sarah has been doing the same home workout for 8 weeks. Her weight has stayed the same, and she feels less motivated.
Approach:
- She increases her squat reps from 12 to 15 and adds resistance bands.
- She schedules one extra rest day per week.
- She adjusts her protein intake to support muscle recovery.
- She starts logging workouts to monitor progress.
After two weeks, Sarah notices improved strength and renewed motivation.
Plateaus are a natural part of fitness. Recognizing them early and applying thoughtful adjustments helps maintain steady progress without frustration.
10.2 Strategies for Staying Consistent with Home Workouts
Consistency in home workouts is often the biggest challenge. Without a gym environment or scheduled classes, motivation can waver. However, there are practical strategies to build and maintain a steady routine.
Establish a Fixed Schedule
Treat your workout like an appointment. Choose specific days and times that fit your lifestyle and stick to them. For example, Monday, Wednesday, and Friday at 7 a.m. or Tuesday and Thursday at 6 p.m. This reduces decision fatigue and builds habit.
Create a Dedicated Workout Space
Having a specific area for exercise helps cue your brain into workout mode. It doesn’t need to be large or fancy—a corner with a mat and some equipment works. Keeping this space tidy and ready lowers barriers to starting.
Use Reminders and Triggers
Set alarms or calendar alerts to prompt workout time. Pair workouts with existing habits, like exercising right after brushing your teeth or before dinner. These triggers make workouts part of your routine rather than an optional task.
Track Your Progress
Logging workouts, even briefly, builds a sense of accomplishment. Use a notebook, app, or simple checklist. Seeing consistent entries encourages continuation and highlights improvements.
Find Accountability
Tell a friend or family member about your goals. Sharing progress or plans creates external motivation. If possible, schedule virtual or in-person workout sessions with a partner.
Vary Your Workouts
Repetition can lead to boredom. Rotate exercises, try different formats like HIIT or strength circuits, and adjust intensity. Variety keeps workouts interesting and challenges your body in new ways.
Set Small, Achievable Goals
Break your larger goal into weekly or daily targets. For example, completing three workouts a week or increasing reps gradually. Meeting these smaller goals builds confidence and momentum.
Incorporate Rewards
Reward yourself for sticking to your plan. It can be as simple as a favorite healthy snack, a relaxing bath, or watching an episode of a show after completing a workout. Rewards reinforce positive behavior.
Manage Expectations
Some days will be harder than others. Accept that missing a session occasionally is normal. The key is to return to the routine without guilt or overcompensation.
Example: Weekly Routine with Built-in Consistency Strategies
- Monday 7 a.m.: HIIT session in dedicated workout corner; calendar alarm set; post-workout journal entry.
- Wednesday 7 a.m.: Strength training with resistance bands; workout buddy video call; small reward of smoothie.
- Friday 7 a.m.: Core and flexibility exercises; progress photos taken; reminder to schedule next week’s workouts.
By combining these strategies, you create a system that supports regular exercise at home without relying solely on motivation. Consistency grows from structure, environment, and manageable goals.
10.3 Dealing with Time Constraints and Busy Schedules
Dealing with time constraints and busy schedules is one of the most common obstacles to maintaining a consistent workout routine at home. The key is to adapt your approach so that fitness fits into your life, not the other way around. Here are practical strategies and examples to help you make the most of limited time.
Prioritize Short, Effective Workouts
When time is tight, longer sessions aren’t always necessary. High-intensity interval training (HIIT) or circuit workouts can deliver solid fat-burning and muscle-building benefits in 15 to 30 minutes.
Example:
- 20-minute HIIT session: 40 seconds work, 20 seconds rest, cycling through 5 exercises (jump squats, push-ups, mountain climbers, lunges, planks) repeated 3 times.
This approach maximizes calorie burn and muscle engagement without requiring a large time commitment.
Schedule Workouts Like Appointments
Treat your workout as a non-negotiable appointment. Block out specific times in your calendar and stick to them. This reduces the chance of skipping due to last-minute distractions.
Example:
- Set a recurring 6:30 a.m. workout slot before the day’s demands begin.
- Alternatively, use a lunch break for a quick 15-minute routine.
Break Workouts into Smaller Segments
If a continuous workout isn’t feasible, split it into shorter sessions spread throughout the day. Three 10-minute sessions can be as effective as one 30-minute session.
Example:
- Morning: 10 minutes of bodyweight squats and lunges.
- Afternoon: 10 minutes of push-ups and planks.
- Evening: 10 minutes of stretching and core work.
Use Efficient Exercise Selection
Choose compound movements that work multiple muscle groups simultaneously. This saves time and increases workout efficiency.
Example:
- Squat to press (if you have dumbbells or resistance bands).
- Burpees, which combine cardio and strength.
- Push-ups that engage chest, shoulders, triceps, and core.
Incorporate Movement into Daily Tasks
You don’t always need a formal workout. Adding physical activity to daily routines helps increase overall calorie burn.
Example:
- Do calf raises while brushing your teeth.
- Take stairs instead of elevators.
- Perform wall sits during TV commercials.
Mind Map: Managing Time for Workouts
Plan Ahead to Avoid Decision Fatigue
Deciding what workout to do can waste time or cause procrastination. Prepare your workout plan in advance.
Example:
- Sunday evening: write down three workout options for the week.
- Keep workout clothes and equipment ready to reduce setup time.
Use Technology Wisely
Timers, workout apps, or simple alarms can keep you on track and remind you to move.
Example:
- Set a timer for 20 minutes to keep workouts focused.
- Use interval timers for HIIT sessions.
Mind Map: Strategies for Busy Schedules
Realistic Expectations and Flexibility
Busy days happen. If you miss a workout, don’t let it derail your progress. Adjust your schedule or shorten the next session to stay consistent.
Example:
- Missed morning workout? Do a 10-minute evening routine.
- If energy is low, focus on stretching or mobility instead of intense exercise.
Summary
Managing time constraints requires planning, prioritizing, and flexibility. Short, focused workouts, scheduling, breaking sessions into chunks, and integrating movement into daily life all help maintain consistency. Preparing in advance and using efficient exercises reduce wasted time. Finally, being realistic and adaptable keeps you on track without added stress.
10.4 Mental Techniques to Boost Motivation and Focus
Maintaining motivation and focus during a home fat loss workout system can be challenging. Mental techniques help keep your mind engaged and your efforts consistent. Here are practical strategies with examples and mind maps to clarify how they work.
Setting Clear, Achievable Goals
Goals give direction and a sense of purpose. Break larger goals into smaller, manageable steps to avoid feeling overwhelmed.
Example: Instead of “Lose 20 pounds,” try “Complete 3 workouts per week for the next month.”
Mind Map:
Using Visualization Techniques
Visualizing success can reinforce commitment. Imagine completing a workout or fitting into a favorite outfit.
Example: Before starting a session, spend 1-2 minutes picturing yourself finishing strong and feeling energized.
Mind Map:
Creating a Routine and Habit Loop
Consistency builds momentum. Establish a fixed time and place for workouts to form a habit.
Example: Schedule workouts every Monday, Wednesday, and Friday at 7 AM in your living room.
Mind Map:
Using Self-Talk and Affirmations
What you say to yourself influences motivation. Replace negative thoughts with constructive ones.
Example: Change “I’m too tired” to “A quick workout will boost my energy.”
Mind Map:
Breaking Workouts into Manageable Segments
Large tasks can feel daunting. Divide workouts into smaller chunks to maintain focus.
Example: Instead of a 30-minute session, do three 10-minute blocks with short breaks.
Mind Map:
Tracking Progress Visually
Seeing progress reinforces motivation. Use charts, journals, or apps to record workouts and results.
Example: Mark workout days on a calendar and note improvements in reps or duration.
Mind Map:
Focusing on Process Over Outcome
Concentrate on daily actions rather than distant results to maintain steady motivation.
Example: Celebrate completing today’s workout instead of fixating on total weight loss.
Mind Map:
Using Environmental Cues
Arrange your space to encourage workouts. Visible equipment or workout clothes can serve as reminders.
Example: Keep your yoga mat rolled out or dumbbells in sight.
Mind Map:
Practicing Mindfulness During Workouts
Stay present to improve focus and enjoyment. Notice your breathing, muscle engagement, and movement.
Example: During a plank, focus on core tension and steady breathing rather than distractions.
Mind Map:
Rewarding Yourself Appropriately
Rewards reinforce behavior but should support your goals.
Example: After a week of consistent workouts, treat yourself to a relaxing bath or a favorite healthy snack.
Mind Map:
These mental techniques are tools you can combine and adjust to fit your preferences and lifestyle. Their effectiveness grows with practice and consistency. Using mind maps can help visualize and organize your approach, making motivation and focus easier to maintain.
10.5 Building a Support System: Family, Friends, and Online Communities
Building a support system can make a significant difference in maintaining motivation and consistency in your home fat loss workout journey. Support comes in many forms—family, friends, and online communities each offer unique benefits and challenges. Understanding how to engage with these groups effectively can help you stay on track without feeling isolated or overwhelmed.
Family Support
Family members often have the most direct impact on your daily routine. Their involvement can range from encouragement to active participation.
- Encouragement and Accountability: Sharing your goals with family members can create a sense of accountability. For example, telling your partner or children about your workout schedule may encourage you to stick to it because you know they’re aware.
- Shared Activities: Inviting family members to join you in simple workouts or walks can build camaraderie and make exercise a social event rather than a chore.
- Respecting Boundaries: It’s important to communicate your needs clearly. If you need uninterrupted workout time, explaining this to family members helps prevent conflicts.
Example: Sarah schedules her workouts early in the morning before her family wakes up. She shares her progress with her spouse weekly, who cheers her on and sometimes joins weekend hikes.
Friends as Workout Allies
Friends can be powerful motivators, especially when they share similar fitness interests.
- Workout Buddies: Exercising with a friend, even virtually, can increase commitment. For instance, setting a weekly video call workout session helps both parties stay accountable.
- Friendly Competition: Light competition, like tracking who completes more reps or minutes, can add fun and push you to improve.
- Sharing Tips and Experiences: Friends can exchange advice on routines, nutrition, or overcoming plateaus, providing practical insights.
Example: Mark and his friend use a shared app to log their workouts and cheer each other on with messages and emojis, turning their fat loss journey into a friendly challenge.
Online Communities
Online groups offer access to a broad network of people with similar goals, often providing diverse perspectives and resources.
- Anonymity and Flexibility: You can participate as much or as little as you want, which is helpful if you prefer privacy or have a busy schedule.
- Diverse Support: Members often share personal stories, advice, and encouragement, which can normalize struggles and celebrate successes.
- Resource Sharing: Many communities provide workout plans, nutrition tips, and motivational posts.
Example: Lisa joined an online forum where members post daily workout check-ins. She finds motivation in reading others’ progress and shares her own milestones.
Mind Map: Building a Support System
Mind Map: Engaging Family Effectively
Mind Map: Leveraging Friends for Motivation
Mind Map: Using Online Communities
Practical Tips
- Be clear about what kind of support you want. Sometimes people want advice, other times just encouragement.
- Balance giving and receiving support to maintain healthy relationships.
- Use technology to bridge gaps—video calls, messaging apps, and shared calendars can keep everyone connected.
- Remember that support systems are dynamic; they may change as your needs evolve.
In sum, building a support system is about creating a network that fits your lifestyle and personality. Whether it’s a family member cheering you on, a friend sharing a workout challenge, or an online group offering advice, these connections can help you stay consistent and enjoy the process of burning calories and building lean muscle at home.
10.6 Celebrating Milestones and Rewarding Progress
Celebrating milestones and rewarding progress is a practical way to maintain motivation and recognize the effort invested in your fat loss and muscle building journey. It helps create positive reinforcement loops that encourage consistency without relying solely on external validation.
Why Celebrate Milestones?
Recognizing achievements, no matter how small, signals to your brain that your hard work is paying off. This acknowledgment can improve adherence to your workout system and nutrition plan. It also helps break down long-term goals into manageable steps, reducing overwhelm.
Types of Milestones to Celebrate
- Performance Milestones: Completing a set number of workouts, increasing reps or weights, or improving workout intensity.
- Physical Milestones: Losing a certain amount of body fat, gaining muscle definition, or fitting into a desired clothing size.
- Consistency Milestones: Sticking to your workout schedule for a week, month, or longer.
- Behavioral Milestones: Successfully preparing meals at home, improving sleep habits, or increasing daily activity.
Rewarding Progress: Practical Examples
Rewards should be meaningful but not counterproductive. For example, celebrating fat loss with a high-calorie treat might undermine your progress. Instead, consider rewards that support your goals or enhance your lifestyle.
| Milestone Type | Example Milestone | Appropriate Reward Example |
|---|---|---|
| Performance | Adding 5 more push-ups | New workout gear or a massage |
| Physical | Losing 5 pounds of fat | A relaxing bath with new bath products |
| Consistency | Completing 4 weeks of workouts | A movie night or a new book |
| Behavioral | Cooking all meals at home for a week | A kitchen gadget or cooking class |
Mind Map: Celebrating Milestones and Rewarding Progress
Practical Tips for Celebrating and Rewarding Progress
- Set Clear, Measurable Milestones: Define what success looks like in concrete terms. Instead of “lose weight,” aim for “lose 2 pounds in 2 weeks.”
- Choose Non-Food Rewards: Food rewards can sometimes conflict with fat loss goals. Opt for experiences, items, or activities that enhance well-being.
- Share Achievements: Telling a friend or family member about your progress can increase accountability and provide social support.
- Reflect Regularly: Take time to review your progress and how your rewards make you feel. Adjust milestones and rewards to keep them motivating.
Example Scenario
Imagine you set a milestone to complete 12 workouts in a month. Upon reaching it, you reward yourself with a new pair of workout shoes. This reward not only celebrates your consistency but also supports your future workouts by improving comfort and performance. Sharing this achievement with a workout buddy adds a social layer that reinforces your commitment.
Summary
Celebrating milestones and rewarding progress is a straightforward strategy to maintain motivation and acknowledge effort. By choosing meaningful, goal-supportive rewards and setting clear milestones, you create a positive cycle that encourages ongoing commitment to your home fat loss workout system.
Chapter 11: Tracking Progress and Making Data-Driven Adjustments
11.1 Methods for Measuring Fat Loss and Muscle Gain at Home
Measuring fat loss and muscle gain at home can be straightforward if you use the right methods and stay consistent. The goal is to track changes in your body composition over time, not just your weight on the scale. Here are several practical methods you can use, each with examples and a mind map to help visualize the process.
Body Weight Tracking
This is the simplest method: step on a scale regularly, ideally at the same time of day and under similar conditions (e.g., after waking up and using the bathroom). While body weight alone doesn’t distinguish between fat and muscle, it offers a baseline to monitor overall changes.
Example: Weigh yourself every Monday morning before breakfast. If your weight decreases over weeks, you’re likely losing fat, but if it stays the same while your clothes fit better, you might be gaining muscle.
Tape Measurements
Using a flexible measuring tape, measure key body parts: waist, hips, chest, arms, and thighs. Fat loss usually shows as a reduction in circumference, while muscle gain can increase measurements in areas like arms and legs.
Example: Measure your waist at the narrowest point and your hips at the widest. Record these numbers weekly. A shrinking waist with stable or growing arm measurements suggests fat loss combined with muscle gain.
Skinfold Calipers
Calipers measure the thickness of skinfolds at specific body sites to estimate body fat percentage. While accuracy depends on technique, it’s a useful tool if you learn the proper method.
Example: Pinch the skin at the triceps, abdomen, and thigh, then use calipers to measure the fold thickness. Compare readings every few weeks to see fat loss progress.
Progress Photos
Taking photos from multiple angles (front, side, back) under consistent lighting and posture helps visually track changes that scales and measurements might miss.
Example: Take photos every two weeks wearing the same outfit and standing in the same spot. Over time, you can see muscle definition improve or fat areas reduce.
Clothing Fit
Notice how your clothes fit. Looser waistbands or tighter sleeves can indicate fat loss or muscle gain respectively. This method is subjective but practical.
Example: If your jeans feel looser around the waist but your shirt sleeves feel snugger, you’re likely losing fat and gaining muscle.
Strength and Performance Tracking
While not a direct measurement of body composition, improvements in strength and endurance often correlate with muscle gain and fat loss.
Example: If you can do more push-ups or hold a plank longer than a month ago, your muscle endurance and strength have improved.
Mind Map Summary
Putting It All Together
Use a combination of these methods rather than relying on one alone. For example, track your weight and tape measurements weekly, take progress photos monthly, and note how your clothes fit and your strength improves. This multi-angle approach gives a clearer picture of your fat loss and muscle gain journey.
Consistency in measurement timing and technique is key. Avoid obsessing over daily fluctuations; instead, look for trends over weeks and months. This approach helps you stay grounded and motivated by real progress rather than short-term noise.
11.2 Using Photos, Measurements, and Fitness Tests
Tracking your progress during a fat loss and muscle building journey is essential for staying informed and motivated. Three practical methods to measure progress at home are photos, body measurements, and fitness tests. Each offers unique insights and, when combined, provide a comprehensive picture of your improvements.
Using Photos
Photos are a visual record of your body’s changes over time. They capture details that scales and numbers might miss, such as muscle definition, posture, and overall shape.
Best Practices for Progress Photos:
- Take photos in consistent lighting and location.
- Wear similar clothing or minimal attire to reveal body contours.
- Use the same camera or device for consistency.
- Capture multiple angles: front, side, and back.
- Take photos at regular intervals, such as every two weeks.
Example: Imagine you start your program and take photos on Day 1. Two weeks later, you take another set under the same conditions. Comparing these side-by-side can reveal subtle changes like reduced waist circumference or improved muscle tone, even if the scale hasn’t moved much.
Body Measurements
Measuring specific body parts with a tape measure provides quantitative data on fat loss and muscle gain. It’s more informative than weight alone because muscle is denser than fat.
Key Measurement Sites:
- Waist (at the narrowest point or just above the navel)
- Hips (at the widest part)
- Chest (around the fullest part)
- Thighs (midway between hip and knee)
- Arms (mid-bicep)
How to Measure:
- Use a flexible, non-stretch tape measure.
- Measure the same spot each time.
- Keep the tape snug but not tight.
- Record measurements in a notebook or app.
Example: If your waist measurement decreases by 2 inches over a month while your arm measurement increases by 1 inch, it suggests fat loss around the midsection and muscle growth in the arms.
Fitness Tests
Fitness tests assess your strength, endurance, and cardiovascular improvements. They provide functional evidence of progress beyond appearance.
Common Home Fitness Tests:
- Push-Up Test: Count how many push-ups you can do with good form.
- Plank Hold: Time how long you can hold a plank position.
- Squat Test: Perform as many bodyweight squats as possible in one minute.
- Step Test: Step up and down on a sturdy platform for three minutes, then measure recovery heart rate.
How to Use Fitness Tests:
- Perform tests at the start of your program.
- Repeat tests every 4-6 weeks.
- Track improvements in reps, time, or recovery.
Example: If you start by holding a plank for 30 seconds and after six weeks can hold it for 60 seconds, that’s a clear sign your core strength has improved.
Combining Methods
Using photos, measurements, and fitness tests together gives a fuller picture. Photos show visual changes, measurements quantify size shifts, and fitness tests reveal functional gains.
Example of Combined Tracking:
- Week 1: Take baseline photos, measure waist and arms, perform fitness tests.
- Week 4: Repeat all three.
- Compare photos for visible changes.
- Note measurement differences to confirm fat loss or muscle gain.
- Observe fitness test improvements to understand strength and endurance gains.
This multi-angle approach helps avoid frustration when the scale doesn’t reflect your hard work. It also highlights areas needing adjustment in your workout or nutrition plan.
In summary, regularly using photos, measurements, and fitness tests provides clear, objective feedback on your home fat loss workout system progress. Each method complements the others, making your tracking more accurate and motivating.
11.3 Interpreting Workout Logs and Nutrition Journals
Interpreting workout logs and nutrition journals is a practical skill that helps you understand how your efforts translate into progress. These records are more than just data; they are tools to identify patterns, spot areas for improvement, and keep your goals on track.
Understanding Workout Logs
A workout log typically includes details like exercise type, sets, reps, weight used, duration, intensity, and how you felt during the session. The key is to look beyond the numbers and focus on trends.
Mind Map: Workout Log Components
Example: If you notice that your reps for push-ups increased steadily over two weeks but then plateaued, it might be time to add a variation or increase intensity. Similarly, if your perceived effort is high but progress stalls, it could indicate overtraining or insufficient recovery.
Interpreting Nutrition Journals
Nutrition journals record what you eat, portion sizes, meal timing, and sometimes how you feel after eating. The goal is to identify eating habits that support or hinder fat loss and muscle building.
Mind Map: Nutrition Journal Components
Example: If your journal shows frequent late-night snacking on high-calorie foods, this might be a target for adjustment. Or, if you feel sluggish after certain meals, you can experiment with different food combinations to find what fuels you best.
Combining Insights from Both Logs
When you compare workout and nutrition logs, you get a fuller picture. For instance, a day with poor workout performance might coincide with low carbohydrate intake or inadequate hydration.
Mind Map: Integrated Log Interpretation
Example: Suppose your logs show that on days you consume fewer carbs, your HIIT sessions feel tougher and your reps drop. This suggests adjusting your carb intake around workouts could improve performance.
Practical Tips for Interpretation
- Look for Patterns, Not Single Data Points: One off-day doesn’t indicate failure. Trends over weeks matter.
- Context Matters: Notes about sleep, stress, or illness can explain anomalies.
- Be Honest and Consistent: Accurate logging leads to meaningful insights.
- Use Logs to Test Hypotheses: If you suspect a certain food or workout timing affects performance, track it deliberately.
Example Scenario
Jane tracks her workouts and notices her squat reps stagnate at 12 for three sessions. Her nutrition journal shows she’s been skipping breakfast and feeling low energy. After adding a balanced breakfast with protein and carbs, her squat reps increase to 15 in the next session. This simple change, identified through her logs, helps her break the plateau.
In summary, interpreting workout logs and nutrition journals is about connecting the dots between what you do, what you eat, and how your body responds. This ongoing feedback loop guides smarter decisions and steady progress.
11.4 Adjusting Workout Intensity and Volume Based on Data
Adjusting workout intensity and volume based on data is a practical way to ensure your fat loss and muscle-building efforts stay on track. Intensity refers to how hard you work during exercise—think weight lifted, speed, or effort level—while volume is the total amount of work done, usually measured by sets, reps, or total time. Both need to be balanced to avoid plateaus or injury.
Understanding Your Data
Before making adjustments, gather clear data from your workouts. This can include:
- Number of reps and sets completed
- Weight or resistance used
- Duration of cardio or HIIT sessions
- Perceived exertion (how hard the workout felt on a scale of 1 to 10)
- Recovery indicators like soreness or fatigue
When to Adjust Intensity
If your data shows consistent ease in completing workouts, it’s time to increase intensity. For example, if you’re doing 3 sets of 12 push-ups and they feel easy, try adding more reps, slowing down the movement, or adding a weighted vest.
Conversely, if your perceived exertion is very high and recovery is poor, reduce intensity to avoid overtraining.
When to Adjust Volume
Volume adjustments depend on your goals and recovery. If fat loss stalls, increasing volume by adding an extra set or extending cardio duration can help burn more calories. If muscle gain is the goal, gradually increasing volume by adding sets or exercises can stimulate growth.
If you notice excessive fatigue or soreness, cutting back on volume allows your body to recover.
Mind Map: Adjusting Workout Intensity and Volume
Example 1: Increasing Intensity
You’ve been doing bodyweight squats: 3 sets of 15 reps. Your workout log shows you complete all reps easily, and your perceived exertion is around 4/10. To increase intensity:
- Add a pause at the bottom of each squat for 2 seconds
- Increase reps to 20 per set
- Hold dumbbells or kettlebells if available
Example 2: Adjusting Volume
Your HIIT sessions are 15 minutes long, 3 times a week, but your weight loss has plateaued. Your recovery is good, and you feel ready for more. Options to increase volume:
- Add a 4th session per week
- Extend each session to 20 minutes
- Add an extra round of intervals within each session
Example 3: Decreasing Intensity or Volume
After a particularly busy week, your workout data shows high fatigue and soreness, and your perceived exertion is 9/10. To avoid burnout:
- Reduce weights or resistance by 10-20%
- Cut sets from 4 to 2
- Replace HIIT with low-impact cardio or active recovery
Mind Map: Signs to Adjust Intensity and Volume

Practical Tips
- Make changes gradually: small increments prevent injury and burnout.
- Track changes and outcomes: note how adjustments affect performance and recovery.
- Balance intensity and volume: increasing one often means adjusting the other.
- Listen to your body: data is important, but subjective feelings matter too.
Adjusting your workout intensity and volume based on data is a continuous process. It keeps your training effective, safe, and aligned with your goals.
11.5 Recognizing Signs of Overtraining and When to Rest
Recognizing signs of overtraining is crucial for maintaining progress and avoiding injury. Overtraining happens when your workout intensity, volume, or frequency exceeds your body’s ability to recover. Rest is not a sign of weakness; it’s part of the process. Knowing when to pause can save weeks of progress and keep you motivated.
Physical Signs of Overtraining
- Persistent muscle soreness lasting more than 72 hours
- Increased resting heart rate compared to your normal baseline
- Frequent injuries or nagging joint pain
- Unusual fatigue during workouts or daily activities
- Decreased performance despite consistent effort
Mental and Emotional Signs
- Lack of motivation or enthusiasm for workouts
- Irritability or mood swings
- Difficulty concentrating or feeling mentally foggy
- Trouble sleeping or restless nights
Mind Map: Signs of Overtraining
When to Rest
If you notice multiple signs from the list above, it’s time to consider rest. Rest doesn’t always mean complete inactivity. Active recovery like light walking, stretching, or yoga can help blood flow and muscle repair without adding stress.
Examples
-
Example 1: Jane noticed her usual 30-minute HIIT sessions felt exhausting, and her legs ached for days after. She also found herself dreading workouts. She took three days off, replaced her workouts with gentle stretching, and returned feeling refreshed.
-
Example 2: Mark’s resting heart rate jumped from 60 to 75 beats per minute over a week, and his performance in push-ups dropped. He scaled back intensity and added an extra rest day, which helped his energy levels bounce back.
Mind Map: Rest Strategies
Practical Tips
- Track your resting heart rate each morning to spot unusual increases.
- Keep a workout journal noting energy levels and mood.
- Schedule regular rest days and listen to your body’s signals.
- Prioritize sleep and balanced nutrition to support recovery.
Recognizing overtraining early and responding with appropriate rest keeps your fat loss and muscle-building journey sustainable and injury-free.
11.6 Tools and Apps to Simplify Progress Tracking
Tracking your progress during a fat loss and muscle-building journey is crucial. It helps you understand what works, what doesn’t, and when to adjust your plan. Fortunately, several tools and apps can simplify this process, making it easier to stay organized and motivated. Below, we explore some common categories of tools, how they function, and examples of their use, accompanied by mind maps to clarify their features and benefits.
Fitness Tracking Apps
Fitness apps typically allow you to log workouts, track calories burned, and monitor your exercise routines over time. They often include timers, exercise libraries, and progress charts.

Example: Using an app to log your HIIT sessions lets you see improvements in duration or intensity week by week. If you notice your workout times plateau, you can tweak your routine accordingly.
Nutrition Tracking Apps
These apps focus on recording your food intake, calculating calories, and tracking macronutrients like protein, carbs, and fats. They often include barcode scanners and meal suggestions.
Example: Logging your meals helps ensure you meet your protein targets to support muscle growth while maintaining a calorie deficit for fat loss.
Body Measurement and Progress Photo Apps
These tools help you record body measurements (waist, hips, arms, etc.) and store progress photos to visually track changes over time.
Example: Taking weekly photos and measurements can reveal subtle changes that the scale might miss, such as muscle definition or fat loss in specific areas.
Workout Planning and Scheduling Apps
These apps help you organize your workouts, set reminders, and plan rest days. They may also include templates or allow custom workout creation.
Example: Scheduling your workouts in advance with reminders reduces the chance of skipping sessions and helps maintain consistency.
All-in-One Fitness Platforms
Some apps combine workout logging, nutrition tracking, progress photos, and planning into one platform, providing a comprehensive overview.
Example: Using an all-in-one app can reduce the hassle of juggling multiple tools, allowing you to see how your nutrition and workouts interact.
Practical Tips for Using Tools and Apps
- Consistency is key: Regularly logging your data provides the clearest picture of progress.
- Keep it simple: Choose tools that fit your lifestyle and don’t overwhelm you with features you won’t use.
- Review data periodically: Look at trends weekly or monthly rather than obsessing over daily fluctuations.
- Use reminders: Set notifications to log meals, workouts, or measurements so you don’t forget.
- Backup your data: Some apps allow exporting your data; this can be useful for long-term tracking or sharing with a coach.
By integrating these tools into your home fat loss workout system, you can make tracking less of a chore and more of a helpful habit. The clearer your data, the better you can tailor your routines and nutrition to meet your goals.
Chapter 12: Sample Workouts and Routines for Different Goals
12.1 Fat Loss Focused Workouts: High-Calorie Burn Sessions
Fat loss workouts prioritize maximizing calorie expenditure while maintaining muscle mass. These sessions typically combine cardiovascular intensity with strength elements to elevate heart rate and stimulate metabolism. The goal is to create a workout that is efficient, effective, and adaptable to home settings.
Key Components of High-Calorie Burn Sessions
- Intensity: Workouts should push your heart rate into a moderate-to-high zone, typically 70-85% of your maximum heart rate.
- Compound Movements: Exercises that engage multiple muscle groups burn more calories.
- Interval Structure: Alternating periods of work and rest optimize fat burning.
- Progressive Challenge: Gradually increasing difficulty prevents plateaus.
Mind Map: Structure of a Fat Loss Focused Workout
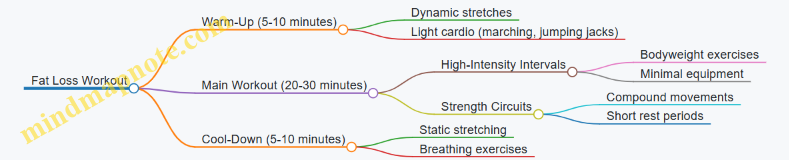
Example Workout: 25-Minute Fat Loss Circuit
Warm-Up (5 minutes):
- Marching in place – 1 minute
- Arm circles – 30 seconds each direction
- Bodyweight squats – 1 minute
- Hip openers – 1 minute
- Light jumping jacks – 1 minute
Main Workout (3 rounds): Perform each exercise for 40 seconds, rest 20 seconds before moving to the next.
- Jump Squats – Explosive movement to engage legs and raise heart rate.
- Push-Ups – Upper body strength and core engagement.
- Mountain Climbers – Cardio and core activation.
- Reverse Lunges – Balance and leg strength.
- Plank to Shoulder Tap – Core stability and upper body endurance.
Rest 1 minute between rounds.
Cool-Down (5 minutes):
- Standing hamstring stretch – 30 seconds each leg
- Chest opener stretch – 30 seconds
- Cat-Cow stretch – 1 minute
- Deep diaphragmatic breathing – 2 minutes
Mind Map: Exercise Selection for Fat Loss
Tips for Maximizing Calorie Burn
- Maintain Proper Form: Efficient movement reduces injury risk and ensures muscle engagement.
- Keep Rest Periods Short: 15-30 seconds rest keeps heart rate elevated.
- Use Full Range of Motion: Increases muscle activation and calorie expenditure.
- Incorporate Explosive Movements: Jump squats or burpees increase intensity.
- Modify as Needed: Adjust intensity or duration based on fitness level.
Example Modifications
- Low Impact: Replace jump squats with regular squats; mountain climbers with slow knee drives.
- Beginner: Reduce work intervals to 20 seconds, increase rest to 40 seconds.
- Advanced: Add resistance bands or light dumbbells to exercises.
Sample Weekly Fat Loss Session Plan
- Monday: 25-minute HIIT circuit (as above)
- Wednesday: Strength-focused fat loss session (bodyweight circuits)
- Friday: Cardio and core combination workout
Each session includes warm-up and cool-down phases.
High-calorie burn workouts at home do not require fancy equipment or long hours. Consistency, proper technique, and gradual progression are the pillars of effective fat loss. The examples and structures here provide a clear framework to build from, ensuring workouts remain engaging and productive.
12.2 Lean Muscle Building Routines with Minimal Equipment
Building lean muscle at home without a full gym setup is entirely possible with minimal equipment and a well-structured routine. The key is to focus on compound movements, progressive overload, and consistent form. This section outlines practical routines and examples using common tools like resistance bands, dumbbells, and bodyweight exercises.
Understanding Lean Muscle Building with Minimal Equipment
Lean muscle growth requires stimulating muscle fibers through resistance and allowing recovery. Minimal equipment routines rely on manipulating variables such as repetitions, sets, tempo, and rest periods to increase intensity.
Equipment Overview
- Resistance Bands: Versatile, portable, and adjustable tension.
- Dumbbells: Adjustable or fixed weights for added resistance.
- Bodyweight: Effective for many exercises, especially when combined with tempo control.
Mind Map: Components of Lean Muscle Building Routines
Exercise Categories and Examples
Push Movements
- Push-Ups: Variations include standard, incline, decline, and band-resisted push-ups.
- Resistance Band Chest Press: Anchor band behind and press forward.
- Dumbbell Shoulder Press: Seated or standing.
Pull Movements
- Resistance Band Rows: Anchor band at door or sturdy object.
- Dumbbell Bent-Over Rows: Focus on scapular retraction.
- Bodyweight Inverted Rows: Use a sturdy table or low bar.
Lower Body
- Bodyweight Squats: Add tempo or jump squats for intensity.
- Resistance Band Deadlifts: Bands simulate deadlift movement.
- Dumbbell Lunges: Forward, reverse, or walking lunges.
Core
- Planks: Front and side variations.
- Russian Twists: With or without weight.
- Leg Raises: Lying or hanging if possible.
Mind Map: Sample Full-Body Routine Structure
Sample Routine: Beginner Full-Body Circuit
| Exercise | Equipment | Sets | Reps | Rest Between Sets |
|---|---|---|---|---|
| Push-Ups (incline) | Bodyweight | 3 | 10-12 | 60 seconds |
| Resistance Band Rows | Resistance Band | 3 | 12-15 | 60 seconds |
| Dumbbell Goblet Squats | Dumbbell | 3 | 12-15 | 60 seconds |
| Plank | Bodyweight | 3 | 30 seconds | 60 seconds |
Progressive Overload Strategies
- Increase reps or sets gradually.
- Slow down the eccentric (lowering) phase to increase time under tension.
- Add resistance by using heavier bands or dumbbells.
- Reduce rest periods to increase workout density.
Mind Map: Progressive Overload Techniques
Example: Tempo Modification for Push-Ups
- Lower down in 3 seconds
- Pause for 1 second at the bottom
- Push up explosively
- Rest 60 seconds
This approach increases muscle tension without adding external weight.
Upper/Lower Split Example
Day 1: Upper Body
- Dumbbell Shoulder Press: 4 sets of 10 reps
- Resistance Band Rows: 4 sets of 12 reps
- Push-Ups: 3 sets of 15 reps
- Plank: 3 sets of 45 seconds
Day 2: Lower Body
- Dumbbell Lunges: 4 sets of 12 reps per leg
- Resistance Band Deadlifts: 4 sets of 12 reps
- Bodyweight Squats (slow tempo): 3 sets of 20 reps
- Side Planks: 3 sets of 30 seconds per side
Tips for Success
- Focus on controlled movements and proper form.
- Warm up before and stretch after workouts.
- Track your progress to adjust resistance and volume.
- Rest at least 48 hours between sessions targeting the same muscle groups.
By combining these elements, you can create effective lean muscle building routines at home that require little equipment but deliver consistent results.
12.3 Combined Fat Loss and Muscle Toning Circuits
Combined fat loss and muscle toning circuits are designed to maximize calorie burn while simultaneously building and defining muscle. The key is to blend cardiovascular moves with strength exercises in a sequence that keeps your heart rate elevated and muscles engaged. This approach helps you burn fat efficiently and shape lean muscle without needing separate sessions for cardio and strength.
What is a Combined Circuit?
A circuit is a series of exercises performed one after another with minimal rest. In a combined fat loss and muscle toning circuit, each exercise targets different muscle groups or energy systems to maintain intensity and avoid early fatigue.
Why Combine Fat Loss and Muscle Toning?
- Efficiency: You get both cardio and strength benefits in one session.
- Metabolic Boost: Muscle toning increases resting metabolism, aiding fat loss.
- Variety: Keeps workouts interesting and reduces boredom.
Structure of a Typical Circuit
- 6 to 8 exercises
- 30 to 45 seconds work per exercise
- 15 to 30 seconds rest between exercises
- 2 to 4 rounds depending on fitness level
Mind Map: Components of a Combined Circuit
Example Circuit 1: Beginner Level
- Jumping Jacks (30 sec)
- Bodyweight Squats (30 sec)
- Incline Push-Ups (hands on a sturdy surface, 30 sec)
- Mountain Climbers (30 sec)
- Glute Bridges (30 sec)
- Plank Hold (20 sec)
Rest: 20 seconds between exercises Rounds: 2
Explanation: This circuit alternates cardio moves (jumping jacks, mountain climbers) with strength exercises (squats, push-ups, glute bridges) and core work (plank). The short rest keeps heart rate elevated.
Example Circuit 2: Intermediate Level
- High Knees (40 sec)
- Bulgarian Split Squats (20 sec each leg)
- Standard Push-Ups (40 sec)
- Jump Squats (40 sec)
- Russian Twists (40 sec)
- Plank to Push-Up (40 sec)
Rest: 15 seconds between exercises Rounds: 3
Explanation: This circuit increases intensity by adding unilateral leg work and plyometrics. Core exercises like Russian twists and plank to push-up engage multiple muscle groups.
Mind Map: Exercise Selection Criteria

Tips for Effective Circuits
- Maintain good form to prevent injury.
- Adjust work and rest times based on your fitness level.
- Use a timer or app to keep track of intervals.
- Warm up before and cool down after circuits.
Example Circuit 3: Advanced Level
- Burpees (45 sec)
- Pistol Squats to a Chair (20 sec each leg)
- Diamond Push-Ups (45 sec)
- Jump Lunges (45 sec)
- V-Ups (45 sec)
- Side Plank with Hip Dips (30 sec each side)
Rest: 15 seconds between exercises Rounds: 4
Explanation: This circuit challenges strength, balance, and cardiovascular endurance. Exercises like pistol squats and diamond push-ups increase muscle toning demands.
Mind Map: Progression Strategies
Sample Weekly Schedule Incorporating Combined Circuits
- Monday: Circuit 1 (Beginner)
- Wednesday: Circuit 2 (Intermediate)
- Friday: Circuit 3 (Advanced)
This schedule allows recovery days between sessions and gradual intensity increase.
Final Notes
Combined fat loss and muscle toning circuits are adaptable. You can swap exercises based on your equipment, preferences, or physical limitations. The goal is to keep moving, challenge your muscles, and maintain an elevated heart rate for effective fat loss and muscle definition.
12.4 Low-Impact Options for Beginners or Injury Recovery
Low-impact workouts are an excellent choice for beginners or those recovering from injury because they reduce stress on joints while still promoting fat loss and muscle maintenance. These exercises focus on controlled movements, stability, and gradual strength building, making them accessible and safe without sacrificing effectiveness.
Understanding Low-Impact Workouts
Low-impact means at least one foot remains in contact with the ground or a stable surface at all times. This reduces the shock transmitted through joints compared to high-impact activities like running or jumping. The goal is to maintain an elevated heart rate and engage muscles without abrupt or jarring motions.
Benefits for Beginners and Injury Recovery
- Joint Protection: Minimizes risk of aggravating existing injuries.
- Improved Mobility: Encourages gentle range of motion and flexibility.
- Muscle Activation: Builds strength progressively without overloading.
- Cardiovascular Health: Supports calorie burning with manageable intensity.
Mind Map: Low-Impact Workout Components
Sample Low-Impact Exercises with Examples
Marching in Place
Stand tall and lift knees alternately to hip height, swinging arms naturally. This raises heart rate gently and warms muscles.
- Example: March for 1 minute, rest 30 seconds, repeat 3 times.
Wall Push-Ups
Face a wall, place hands shoulder-width apart, and lean in by bending elbows. Push back to start. This strengthens chest and arms with minimal strain.
- Example: 3 sets of 10 reps with 30 seconds rest between sets.
Glute Bridges
Lie on your back with knees bent and feet flat. Lift hips toward the ceiling, squeezing glutes at the top, then lower slowly.
- Example: 3 sets of 12 reps, focusing on controlled movement.
Seated Leg Lifts
Sit on a sturdy chair, straighten one leg and hold for a few seconds, then lower. Repeat with the other leg. Builds quadriceps strength.
- Example: 2 sets of 15 reps per leg.
Low-Impact Side Steps
Step side to side with controlled movements, keeping knees soft and core engaged. This improves coordination and burns calories.
- Example: 2 minutes continuous stepping, rest 1 minute, repeat twice.
Standing on One Foot
Hold onto a chair for balance if needed. Lift one foot and maintain balance for 20 seconds, then switch. Enhances stability.
- Example: 3 rounds per leg.
Mind Map: Weekly Low-Impact Workout Plan
Tips for Success
- Focus on Form: Proper technique reduces injury risk and maximizes benefits.
- Progress Gradually: Increase repetitions or duration slowly as strength and endurance improve.
- Listen to Your Body: Discomfort is normal, pain is not. Adjust exercises accordingly.
- Use Support When Needed: Chairs, walls, or rails can provide stability.
Example Routine: Beginner Low-Impact Circuit
- Marching in Place – 60 seconds
- Wall Push-Ups – 10 reps
- Glute Bridges – 12 reps
- Seated Leg Lifts – 15 reps per leg
- Low-Impact Side Steps – 60 seconds
Repeat the circuit 2-3 times with 1-2 minutes rest between rounds.
This routine balances cardiovascular work, strength, and mobility without stressing joints. It can be done in under 20 minutes and adjusted in intensity by changing pace or repetitions.
Low-impact workouts provide a practical, effective way to start or maintain a fat loss program at home, especially when high-impact exercises are not an option. They build a solid foundation for fitness while respecting the body’s limits.
12.5 Quick 15-20 Minute Workouts for Busy Days
When time is tight, a short workout can still deliver meaningful results. The key is to focus on exercises that engage multiple muscle groups and keep your heart rate elevated. This section offers practical routines designed to fit into a busy schedule without sacrificing effectiveness.
Why Short Workouts Work
Short workouts rely on intensity and efficiency. By combining strength and cardio moves, you stimulate fat burning and muscle engagement simultaneously. These sessions are especially useful on days when longer workouts aren’t feasible but consistency matters.
Mind Map: Components of a Quick Workout
Sample Quick Workout #1: Full-Body Circuit (No Equipment)
Warm-Up (3 minutes):
- 30 seconds jumping jacks
- 30 seconds arm circles
- 30 seconds high knees
- 30 seconds hip circles
- 30 seconds bodyweight squats
- 30 seconds lunges in place
Main Circuit (Repeat 3 times, 12 minutes total):
- 40 seconds push-ups
- 20 seconds rest
- 40 seconds bodyweight squats
- 20 seconds rest
- 40 seconds plank hold
- 20 seconds rest
- 40 seconds alternating reverse lunges
- 20 seconds rest
Cool-Down (3 minutes):
- Standing hamstring stretch (30 seconds each leg)
- Chest opener stretch (30 seconds)
- Deep breathing and shoulder rolls (1 minute)
Mind Map: Exercise Flow in Sample Workout #1
Sample Quick Workout #2: HIIT Style with Resistance Bands
Warm-Up (4 minutes):
- Marching in place with arm swings (1 minute)
- Side lunges (1 minute)
- Shoulder rolls and neck stretches (1 minute)
- Light band pull-aparts (1 minute)
Main Circuit (4 rounds, 12 minutes):
- 30 seconds band-resisted squats
- 15 seconds rest
- 30 seconds band rows
- 15 seconds rest
- 30 seconds band chest press
- 15 seconds rest
- 30 seconds mountain climbers
- 15 seconds rest
Cool-Down (3 minutes):
- Seated forward fold (1 minute)
- Band-assisted shoulder stretch (1 minute)
- Controlled deep breathing (1 minute)
Mind Map: Key Elements of Sample Workout #2
Sample Quick Workout #3: Core and Cardio Combo
Warm-Up (3 minutes):
- Torso twists (30 seconds)
- Knee hugs (30 seconds)
- Side bends (30 seconds)
- Light jogging in place (1.5 minutes)
Main Circuit (3 rounds, 12 minutes):
- 30 seconds bicycle crunches
- 20 seconds rest
- 30 seconds jumping jacks
- 20 seconds rest
- 30 seconds leg raises
- 20 seconds rest
- 30 seconds squat jumps
- 20 seconds rest
Cool-Down (3 minutes):
- Cat-cow stretches (1 minute)
- Child’s pose (1 minute)
- Slow deep breaths lying down (1 minute)
Mind Map: Core and Cardio Workout Structure
Tips for Maximizing Short Workouts
- Keep transitions quick: Minimize rest between exercises to maintain heart rate.
- Focus on form: Even in short sessions, proper technique prevents injury and improves results.
- Adjust intensity: Modify exercises to match your fitness level (e.g., knee push-ups instead of full push-ups).
- Use a timer: Set intervals to stay on track and avoid guessing.
- Stay consistent: Short workouts add up over time; aim for daily or near-daily sessions.
These quick routines show that even 15-20 minutes can be productive. The combination of warm-up, focused circuits, and cool-down ensures safety and effectiveness without demanding a large time commitment.
12.6 Weekend Challenge Workouts to Boost Results
Weekend workouts offer a chance to push a bit harder or try something different from your weekday routine. These sessions are designed to maximize calorie burn, engage multiple muscle groups, and keep your motivation fresh. The key is balancing intensity and variety without requiring complex equipment or excessive time.
Structure of a Weekend Challenge Workout
A typical weekend challenge workout includes three parts:
- Warm-up (5–10 minutes): Prepares your body and reduces injury risk.
- Main workout (20–30 minutes): High-intensity, full-body exercises.
- Cool-down (5–10 minutes): Stretching and breathing exercises to aid recovery.
Mind Map: Weekend Challenge Workout Components
Example 1: Full-Body HIIT Challenge
Warm-up (7 minutes):
- 1 minute jumping jacks
- 1 minute arm circles
- 1 minute high knees
- 1 minute leg swings
- 1 minute hip circles
- 2 minutes brisk walking or marching in place
Main Workout (25 minutes): Perform each exercise for 40 seconds, rest 20 seconds, repeat the circuit 3 times.
- Squat jumps
- Push-ups (modify on knees if needed)
- Mountain climbers
- Reverse lunges (alternate legs)
- Plank with shoulder taps
- Burpees
Cool-down (8 minutes):
- Standing hamstring stretch (30 seconds each leg)
- Chest opener stretch (30 seconds)
- Cat-cow stretches (1 minute)
- Seated spinal twist (30 seconds each side)
- Deep diaphragmatic breathing (2 minutes)
Mind Map: Full-Body HIIT Challenge
Example 2: Strength and Core Weekend Blast
Warm-up (6 minutes):
- Marching in place (2 minutes)
- Arm swings (1 minute)
- Hip openers (1 minute)
- Ankle circles (1 minute)
- Wrist stretches (1 minute)
Main Workout (30 minutes): Complete 3 rounds of the following, resting 1 minute between rounds.
- Push-ups – 12 reps
- Glute bridges – 15 reps
- Plank hold – 45 seconds
- Bodyweight squats – 20 reps
- Bicycle crunches – 20 reps (10 each side)
- Superman holds – 30 seconds
Cool-down (7 minutes):
- Child’s pose (1 minute)
- Standing quad stretch (30 seconds each leg)
- Side bends (30 seconds each side)
- Neck stretches (1 minute total)
- Slow deep breathing (2 minutes)
Mind Map: Strength and Core Weekend Blast
Tips for Success with Weekend Challenges
- Adjust intensity: If any exercise feels too hard, reduce the time or reps. If too easy, increase them.
- Focus on form: Quality beats quantity. Proper technique prevents injury and improves results.
- Hydrate: Drink water before, during, and after your workout.
- Listen to your body: Weekend challenges are meant to push limits but not cause pain.
- Mix it up: Rotate different weekend challenges to keep your body adapting.
Weekend challenge workouts are a practical way to break the routine and give your metabolism a boost. They fit well into home settings and require minimal equipment, making them accessible and effective. The examples above provide clear, actionable routines that combine fat loss and muscle building in a balanced way.