Intelligent Laser Sensing Systems
1. Fundamentals of Laser Sensing Technologies
1.1 Principles of Laser Operation and Photonics
Laser stands for Light Amplification by Stimulated Emission of Radiation. At its core, a laser produces a beam of light that is coherent, monochromatic, and highly directional. These properties distinguish laser light from ordinary light sources like bulbs or LEDs.
Basic Laser Operation
A laser consists of three main components:
- Gain Medium: The material where light amplification occurs.
- Energy Source (Pump): Provides energy to excite atoms or molecules in the gain medium.
- Optical Resonator: Usually two mirrors that reflect light back and forth, amplifying it.
When the gain medium is energized, atoms move to an excited state. As they return to a lower energy state, they emit photons. Stimulated emission occurs when an incoming photon causes an excited atom to emit a photon of identical phase, frequency, and direction, reinforcing the light beam.
The optical resonator ensures photons bounce between mirrors, passing repeatedly through the gain medium, increasing intensity. One mirror is partially transparent to allow some light to exit as the laser beam.
Key Characteristics of Laser Light
- Coherence: The emitted photons maintain a fixed phase relationship, enabling interference and precise focusing.
- Monochromaticity: Laser light has a very narrow wavelength range, often a single color.
- Directionality: The beam spreads very little over distance, allowing precise targeting.
Mind Map: Laser Operation Components
Photonics Overview
Photonics is the science of generating, controlling, and detecting photons, especially in the visible and near-infrared spectrum. It covers devices and systems that use light for sensing, communication, and processing.
In laser sensing systems, photonics involves the manipulation of laser light to interact with materials or environments, then collecting and interpreting the resulting signals.
Light-Matter Interaction
When laser light hits a material, several interactions can occur:
- Reflection: Light bounces off the surface.
- Refraction: Light changes direction passing through a medium.
- Absorption: Material takes in light energy, possibly changing temperature or state.
- Scattering: Light is redirected in many directions.
- Fluorescence/Phosphorescence: Material emits light after absorption.
Understanding these interactions is essential for designing sensors that measure distance, composition, or movement.
Mind Map: Photonics in Laser Sensing
Example: Simple Laser Distance Measurement
A laser distance sensor emits a laser pulse toward a target. The light reflects off the target and returns to a photodetector. By measuring the time it takes for the pulse to return (time-of-flight), the sensor calculates distance.
This relies on the laser’s directionality and coherence to ensure the beam reaches the target and the reflected signal is detectable. The photonics components include the laser diode, lenses to focus the beam, and photodiodes to detect the return signal.
Best Practice: Choosing a Gain Medium
When selecting a gain medium, consider:
- Wavelength needed for the application (e.g., eye-safe wavelengths for human environments).
- Power requirements.
- Size and cost constraints.
For example, semiconductor lasers are compact and efficient for short-range sensing, while solid-state lasers may be preferred for high-power industrial applications.
Summary
Understanding laser operation and photonics fundamentals is crucial for building effective laser sensing systems. The interplay between the gain medium, pumping method, and resonator defines the laser’s output characteristics. Photonics principles guide how this light is manipulated and detected to extract meaningful information from the environment.
1.2 Types of Laser Sensors and Their Characteristics
Laser sensors come in various forms, each tailored to specific measurement needs. Understanding their types and characteristics helps in choosing the right sensor for an application.
Categories of Laser Sensors
- Laser Distance Sensors: Measure distance by timing the travel of a laser pulse or by phase shift.
- Laser Displacement Sensors: Detect small changes in position or surface profile.
- Laser Doppler Sensors: Measure velocity or vibration using the Doppler effect.
- Laser Spectroscopic Sensors: Analyze material composition through laser-induced spectroscopy.
- Laser Imaging Sensors: Capture spatial information for mapping or object recognition.
Below is a mind map summarizing these types:
Laser Distance Sensors
Time-of-Flight (ToF) sensors emit a short laser pulse and measure the time it takes to reflect back. The distance is calculated using the speed of light. ToF sensors are straightforward and effective for longer ranges (meters to kilometers).
Example: A warehouse robot uses a ToF laser sensor to detect obstacles up to 20 meters away, enabling safe navigation.
Phase-Shift sensors compare the phase of a modulated laser beam sent and received. They offer higher accuracy than ToF but typically over shorter distances.
Example: In manufacturing, phase-shift sensors measure the thickness of thin materials with sub-millimeter precision.
Laser Displacement Sensors
Triangulation sensors project a laser spot onto a target and detect the reflected spot position with a camera or photodiode array. The angle shift translates into displacement.
Example: A production line uses triangulation sensors to check the flatness of metal sheets.
Confocal sensors focus a laser beam on the target surface and detect the reflected light intensity as the focus moves. The peak intensity corresponds to the surface position.
Example: Confocal sensors measure the height profile of microelectronic components.
Laser Doppler Sensors
These sensors exploit the Doppler effect, where the frequency of reflected laser light shifts proportionally to the velocity of the moving surface.
Laser Doppler Vibrometers measure vibration velocity without contact.
Example: Monitoring the vibration of a turbine blade to detect early signs of fatigue.
Laser Doppler Velocimeters measure flow velocity in fluids or gases.
Example: Measuring airflow speed in wind tunnel experiments.
Laser Spectroscopic Sensors
They analyze the interaction between laser light and matter to identify chemical composition or concentration.
Raman Spectroscopy detects molecular vibrations.
Example: Identifying contaminants in pharmaceuticals.
Absorption Spectroscopy measures light absorption at specific wavelengths.
Example: Monitoring gas emissions in industrial exhaust.
Laser Imaging Sensors
LIDAR (Light Detection and Ranging) uses laser pulses to create detailed 3D maps by measuring distances to many points.
Example: Autonomous vehicles use LIDAR to detect surrounding objects and terrain.
3D Laser Scanners capture surface geometry for reverse engineering or quality control.
Example: Scanning a mechanical part to verify dimensions against CAD models.
Mind Map: Characteristics of Laser Sensors
Example: Choosing a Sensor for Surface Profiling
Suppose you need to measure the surface roughness of a metal part with micron-level accuracy. A triangulation laser displacement sensor fits well because it offers high resolution over short distances. If the surface is shiny and reflective, confocal sensors might provide better signal stability.
Example: Velocity Measurement in Fluid Flow
For measuring air velocity in a duct, a laser Doppler velocimeter is suitable because it can measure flow speed without inserting probes that disturb the flow.
Summary
Each laser sensor type has strengths and limitations. Distance sensors excel at range measurement, displacement sensors at fine position changes, Doppler sensors at velocity, spectroscopic sensors at composition, and imaging sensors at spatial mapping. Matching sensor characteristics to application requirements ensures effective and reliable measurements.
1.3 Laser Beam Propagation and Interaction with Materials
Laser beam propagation describes how a laser beam travels through space and interacts with various materials it encounters. Understanding this behavior is essential for designing laser sensing systems that rely on precise control and interpretation of light.
Laser Beam Propagation Basics
A laser beam is typically characterized by its wavelength, beam diameter, divergence, and intensity profile. The most common beam profile is Gaussian, where intensity peaks at the center and decreases smoothly toward the edges.
Key concepts include:
- Beam Divergence: The gradual spreading of the beam as it moves away from the source.
- Rayleigh Range: The distance over which the beam remains relatively focused.
- Beam Waist: The location along the beam where the diameter is smallest.
These factors influence how the beam interacts with materials and how much energy is delivered to a target.
Interaction Mechanisms with Materials
When a laser beam encounters a material, several interactions can occur, depending on the material’s properties and the laser’s parameters:
- Reflection: The beam bounces off the surface. The amount depends on the surface’s reflectivity and angle of incidence.
- Refraction: The beam changes direction when passing through transparent materials due to a change in refractive index.
- Absorption: The material converts laser energy into heat or other forms, which can cause changes like heating or ablation.
- Scattering: The beam is deflected in many directions, often due to surface roughness or particles.
Mind Map: Laser Beam Propagation
Mind Map: Interaction with Materials
Examples
Example 1: Laser Distance Measurement Using Reflection
A laser distance sensor emits a beam toward a wall. The beam reflects off the wall and returns to a photodetector. The time-of-flight measurement depends on the reflection efficiency. A smooth, painted wall reflects light specularly, providing a strong return signal. A rough or matte surface scatters light, reducing signal strength and increasing measurement noise.
Example 2: Laser Cutting and Absorption
In laser cutting, a high-power laser beam is absorbed by metal, converting light into heat. The absorbed energy melts or vaporizes the material. The absorption depends on the metal’s surface finish and wavelength. For instance, polished aluminum reflects much of the beam, requiring higher power or different wavelengths for effective cutting.
Example 3: Refraction in Optical Components
A laser beam passes through a glass lens. The beam bends according to Snell’s Law, focusing to a point. Understanding refraction allows precise control of beam shape and focus, critical for sensing applications requiring tight beam spots.
Practical Considerations
- Beam Alignment: Small misalignments can cause significant changes in propagation and interaction.
- Material Properties: Knowing refractive index, absorption coefficient, and surface roughness helps predict beam behavior.
- Environmental Factors: Dust, humidity, and temperature can affect beam propagation and scattering.
By combining knowledge of propagation and material interaction, laser sensing systems can be optimized for accuracy, sensitivity, and robustness.
1.4 Key Parameters in Laser Sensing: Wavelength, Power, and Coherence
Laser sensing relies heavily on three fundamental parameters: wavelength, power, and coherence. Each affects how the laser interacts with the environment and how the sensor interprets the returned signal. Understanding these parameters helps in designing systems that are accurate, reliable, and suited to their specific applications.
Wavelength
Wavelength is the distance between successive peaks of the electromagnetic wave emitted by the laser. It determines the color of the laser light and influences how the light interacts with materials.
- Material Interaction: Different materials absorb, reflect, or transmit light differently depending on the wavelength. For example, infrared lasers penetrate fog better than visible lasers, making them suitable for automotive LIDAR.
- Resolution: Shorter wavelengths generally allow for higher spatial resolution because the diffraction limit is smaller.
- Eye Safety: Longer wavelengths (e.g., near-infrared) can be less damaging to the human eye under certain conditions, influencing safety classifications.
Example: A laser sensor designed for detecting surface roughness on metals might use a green laser (~532 nm) because metals reflect green light well, providing a strong return signal. Conversely, a sensor for atmospheric gas detection might use mid-infrared wavelengths where specific gases absorb light.
Mind Map: Wavelength Considerations
Power
Laser power is the amount of energy emitted per unit time, typically measured in milliwatts (mW) or watts (W). It affects the strength of the signal received back by the sensor and the system’s overall sensitivity.
- Signal Strength: Higher power increases the likelihood of detecting weak reflections from distant or low-reflectivity targets.
- Thermal Effects: Excessive power can heat the target or sensor components, potentially causing damage or measurement errors.
- Safety Limits: Power must be controlled to comply with safety standards to prevent harm to humans or animals.
Example: In a laser rangefinder used outdoors, increasing power helps maintain signal quality over long distances. However, in a medical laser sensor measuring tissue properties, power must remain low to avoid tissue damage.
Mind Map: Power Considerations
Coherence
Coherence describes the correlation between the phases of the laser light waves over time and space. It has two aspects: temporal coherence (related to the laser’s spectral linewidth) and spatial coherence (related to beam quality).
- Temporal Coherence: Determines the ability to produce interference patterns. High temporal coherence (narrow linewidth) is essential for interferometric sensing and precise distance measurements.
- Spatial Coherence: Affects beam focus and propagation. High spatial coherence means the beam can be tightly focused and maintain shape over distance.
Example: A laser Doppler vibrometer requires high temporal coherence to detect minute vibrations via interference. On the other hand, a simple proximity sensor might not need high coherence but benefits from a well-collimated beam.
Mind Map: Coherence Considerations
Integrated Example: Designing a Laser Sensor for Industrial Thickness Measurement
- Wavelength: Choose a wavelength that reflects well off the material surface, such as red (~650 nm) for plastics.
- Power: Moderate power to ensure a strong return without heating the sample.
- Coherence: High temporal coherence to enable interferometric measurements for sub-micron thickness resolution.
This combination ensures accurate, non-destructive thickness measurements with minimal risk to the material or operator.
Understanding wavelength, power, and coherence is essential to tailor laser sensing systems to their intended tasks. Each parameter influences the sensor’s effectiveness and safety, and balancing them is a key part of system design.
1.5 Best Practices: Selecting Appropriate Laser Sources with Practical Examples
Choosing the right laser source is a foundational step in designing an effective laser sensing system. The laser’s characteristics directly influence system accuracy, reliability, and suitability for the intended application. This section breaks down key considerations and offers practical examples to clarify the selection process.
Key Factors in Laser Source Selection
- Wavelength: Determines interaction with the target material and atmospheric conditions.
- Output Power: Affects range, signal-to-noise ratio, and safety.
- Beam Quality: Influences focusability and measurement precision.
- Modulation Capability: Important for time-of-flight and frequency-modulated continuous wave (FMCW) sensing.
- Size and Cost: Practical constraints depending on application and deployment.
- Coherence Length: Relevant for interferometric measurements.
Mind Map: Laser Source Selection Criteria
Wavelength Considerations
Wavelength affects how the laser light interacts with the environment and target. For example, near-infrared lasers (around 800–900 nm) are common for rangefinding because silicon photodetectors are sensitive here. Mid-infrared lasers (3–5 µm) are better for gas sensing due to molecular absorption lines.
Example: In a system designed to detect water vapor concentration, a laser operating at 2.7 µm (where water vapor absorbs strongly) is more effective than a 1.5 µm laser.
Output Power and Safety
Higher output power extends sensing range but increases safety risks. Eye safety standards (like IEC 60825) limit permissible exposure. Balancing power and safety is critical.
Example: For a handheld laser distance sensor used indoors, a low-power laser (<5 mW) ensures safety without sacrificing accuracy at short distances.
Beam Quality and Coherence
Beam quality, often quantified by the M² factor, affects how tightly the beam can be focused. Lower M² means better focusability and higher spatial resolution.
Coherence length is crucial in interferometry. A longer coherence length allows for more precise phase measurements.
Example: A laser with high coherence length (e.g., a single-frequency distributed feedback laser) is chosen for a fiber-optic interferometric sensor measuring strain.
Modulation and Pulse Characteristics
Pulsed lasers provide precise time-of-flight measurements but require fast detectors and electronics. Continuous wave lasers modulated in frequency or amplitude are used in FMCW systems.
Example: A pulsed Nd:YAG laser emitting nanosecond pulses is selected for a long-range LIDAR system to measure distances up to several kilometers.
Practical Example: Selecting a Laser for a Compact LIDAR
- Requirement: Measure distances up to 100 meters with centimeter accuracy.
- Wavelength: 905 nm (silicon photodiode sensitivity and eye safety balance).
- Output Power: Moderate (~10 mW) to maintain eye safety and sufficient range.
- Pulse Width: Short pulses (~10 ns) for good range resolution.
- Beam Quality: M² close to 1 for tight beam and minimal divergence.
This combination ensures a compact, safe, and accurate sensor suitable for automotive or robotics applications.
Mind Map: Example Laser Selection for Compact LIDAR
Practical Example: Gas Sensing Laser Selection
- Requirement: Detect methane concentration in air.
- Wavelength: Around 1650 nm, where methane has absorption lines.
- Output Power: Low to moderate to avoid saturation and heating effects.
- Modulation: Wavelength modulation spectroscopy (WMS) requires tunable diode lasers.
This choice enables sensitive detection with minimal interference from other gases.
Summary of Best Practices
- Match wavelength to target material and environment.
- Balance output power with safety and range requirements.
- Choose beam quality based on spatial resolution needs.
- Select modulation type aligned with sensing technique.
- Consider system size, cost, and integration complexity.
Each laser source choice should be justified by the application’s physical and operational constraints, not by convenience or availability alone. Testing prototypes with candidate lasers often reveals practical trade-offs not obvious on paper.
1.6 Case Study: Implementing a Basic Laser Distance Sensor
A laser distance sensor measures the distance between the sensor and a target object by timing the travel of a laser pulse or analyzing the phase shift of a continuous laser beam. This case study walks through the design and implementation of a simple time-of-flight (ToF) laser distance sensor, focusing on core concepts, practical steps, and example calculations.
Overview of the System
The basic components of a laser distance sensor include:
- Laser emitter: Produces a short pulse or continuous wave of light.
- Photodetector: Captures reflected light from the target.
- Timing circuitry or phase measurement: Measures the time delay or phase difference between emitted and received signals.
- Signal processing unit: Converts raw data into distance measurements.
Mind Map: Core Components and Workflow
Step 1: Selecting the Laser Source
For a basic ToF sensor, a pulsed laser diode emitting in the near-infrared range (e.g., 905 nm) is common. The pulse width affects resolution; shorter pulses allow finer distance resolution but require faster electronics.
Example: A 10 ns pulse corresponds roughly to a spatial resolution of about 1.5 meters (since light travels approximately 0.3 m/ns). To improve resolution, pulses in the order of a few nanoseconds or less are preferred.
Step 2: Photodetector Choice
A photodiode with fast response time is necessary to detect the reflected pulse accurately. Avalanche photodiodes (APDs) offer high sensitivity and gain but add complexity. For simplicity, a PIN photodiode can suffice.
Example: A PIN photodiode with a rise time of 1 ns can detect pulses with a similar duration, enabling sub-meter resolution.
Step 3: Timing Measurement
The core measurement is the time interval between emission and detection. This can be done using:
- Time-to-Digital Converters (TDCs): Specialized ICs that measure time intervals with picosecond resolution.
- High-speed counters: Using microcontrollers with timers.
Example: If the measured time delay is 20 ns, the distance is calculated as:
\[ \text{Distance} = \frac{c \times t}{2} = \frac{3 \times 10^8 , m/s \times 20 \times 10^{-9} , s}{2} = 3 \text{ meters} \]
The division by 2 accounts for the round-trip travel of the laser pulse.
Step 4: Signal Conditioning and Filtering
The received signal is often noisy and weak. Amplification and filtering improve signal quality before timing measurement.
- Use a transimpedance amplifier to convert photodiode current to voltage.
- Apply a bandpass filter centered on the expected pulse frequency.
Example: A simple RC low-pass filter can reduce high-frequency noise but must preserve pulse shape to maintain timing accuracy.
Step 5: Signal Processing and Distance Calculation
Once the timing data is acquired, the processing unit calculates distance and applies corrections.
- Compensate for temperature effects on laser speed and electronics.
- Average multiple measurements to reduce noise.
Example: Taking 10 measurements and averaging can reduce random timing jitter.
Mind Map: Signal Flow and Processing
Practical Example: Measuring Distance to a Wall
- Emit a 5 ns laser pulse.
- Detect the reflected pulse after 30 ns.
- Calculate distance:
\[ \frac{3 \times 10^8 \times 30 \times 10^{-9}}{2} = 4.5 \text{ meters} \]
- Repeat measurement 10 times:
Measurements (ns): 29.8, 30.1, 30.0, 30.2, 29.9, 30.0, 30.1, 30.0, 29.9, 30.1
Average time = 30.01 ns
Distance = 4.5015 meters
This averaging reduces random noise and stabilizes the reading.
Best Practices Highlighted
- Pulse Width vs. Resolution: Shorter pulses improve resolution but require faster electronics.
- Detector Choice: Balance sensitivity and speed based on application needs.
- Noise Management: Use proper amplification and filtering to maintain signal integrity.
- Timing Accuracy: Use precise timing hardware and average multiple readings.
- Environmental Compensation: Account for temperature and atmospheric conditions if precision is critical.
This case study outlines the essential steps and considerations for building a basic laser distance sensor. The examples demonstrate how component choices and signal processing directly impact measurement accuracy and reliability.
2. Photonic Components and System Design
2.1 Optical Components: Lenses, Mirrors, and Beam Splitters
Laser sensing systems rely heavily on precise manipulation of light. Three fundamental optical components—lenses, mirrors, and beam splitters—play key roles in shaping, directing, and dividing laser beams. Understanding their properties and practical use is essential for designing effective laser sensing setups.
Lenses
Lenses focus or diverge light by refraction, bending rays as they pass through materials with different refractive indices. The two main types are convex (converging) and concave (diverging) lenses.
- Convex lenses bring parallel rays to a focal point. They are used to focus laser beams onto sensors or targets.
- Concave lenses spread out rays, useful for beam expansion or collimation adjustments.
Key parameters:
- Focal length (f): Distance from lens center to focal point. Shorter focal lengths mean stronger focusing.
- Diameter: Determines the aperture and affects beam clipping.
- Material: Glass or plastic, chosen for transmission at laser wavelength.
Example: In a laser rangefinder, a convex lens focuses the outgoing beam to a narrow spot on the target and collects reflected light back onto a photodetector.
Mirrors
Mirrors reflect light, changing its direction without altering wavelength or intensity significantly (assuming high-quality coatings).
Types:
- Flat mirrors: Redirect beams without focusing.
- Curved mirrors: Can focus or diverge beams, similar to lenses but by reflection.
Coatings matter:
- Dielectric coatings: High reflectivity, low loss, wavelength-specific.
- Metallic coatings: Broader wavelength range but higher absorption.
Example: A scanning laser system uses a flat mirror mounted on a galvanometer to steer the beam across a surface.
Beam Splitters
Beam splitters divide a beam into two or more parts, either by reflection and transmission or by polarization.
Types:
- Plate beam splitters: Thin glass plates with partial reflective coatings.
- Cube beam splitters: Two right-angle prisms cemented together.
- Polarizing beam splitters: Separate beams based on polarization states.
Key considerations:
- Splitting ratio: Percentage of light reflected vs transmitted.
- Wavelength dependence: Coatings optimized for specific wavelengths.
Example: In a laser interferometer, a beam splitter sends half the laser light toward the reference arm and half toward the measurement arm.
Mind Maps
Optical Components Overview
Lens Application Example: Laser Rangefinder
Mirror Application Example: Beam Steering
Beam Splitter Application Example: Interferometer
Practical Tips and Examples
- When selecting lenses, check the laser wavelength compatibility. For example, a lens designed for visible light may absorb or scatter infrared laser beams.
- Align mirrors carefully; even a slight tilt can misdirect the beam by millimeters over short distances.
- Use beam splitters with coatings optimized for your laser wavelength to avoid excessive losses.
- In a lab setup, mounting optical components on adjustable stages helps fine-tune alignment.
Example: To build a simple laser displacement sensor, use a convex lens to focus the laser on a target surface. Place a photodiode behind the lens to collect reflected light. Adjust the lens position to maximize signal strength. Use a flat mirror to redirect the beam path if space is constrained.
Understanding these components and their interplay forms the foundation of any laser sensing system. Their correct choice and alignment ensure signal quality and system reliability.
2.2 Photodetectors and Their Performance Metrics
Photodetectors are the eyes of laser sensing systems. They convert incoming photons into electrical signals, making it possible to analyze the laser light after it interacts with the target. Choosing the right photodetector and understanding its performance metrics is crucial for system accuracy and reliability.
Types of Photodetectors
- Photodiodes: The most common type, photodiodes generate a current proportional to the incident light intensity. They are fast, compact, and have good sensitivity.
- Avalanche Photodiodes (APDs): These operate with internal gain through avalanche multiplication, increasing sensitivity but adding noise and requiring higher bias voltages.
- Phototransistors: Similar to photodiodes but with internal amplification, they offer higher gain but slower response times.
- Photomultiplier Tubes (PMTs): Extremely sensitive detectors that amplify the signal through electron multiplication, typically used in low-light applications.
- Charge-Coupled Devices (CCDs) and CMOS Sensors: Used for imaging, these convert light into charge and then into digital signals.
Key Performance Metrics
Understanding these metrics helps in selecting and optimizing photodetectors:
-
Responsivity (A/W): The ratio of output current to incident optical power. Higher responsivity means more electrical signal per unit of light.
-
Quantum Efficiency (QE): The percentage of photons converted into electrons. It depends on wavelength and detector material.
-
Noise Equivalent Power (NEP): The minimum optical power needed to produce a signal equal to the noise level, indicating sensitivity.
-
Dark Current: The current flowing through the detector in the absence of light, contributing to noise.
-
Bandwidth / Response Time: How fast the detector can respond to changes in light intensity, affecting temporal resolution.
-
Linearity: The range over which the output signal is proportional to input light intensity.
-
Dynamic Range: The ratio between the largest and smallest detectable signals.
-
Spectral Range: The range of wavelengths the detector can effectively sense.
Mind Map: Photodetector Types and Characteristics
Mind Map: Performance Metrics Explained
Example 1: Choosing a Photodetector for a Laser Distance Sensor
Suppose you are designing a laser distance sensor operating at 905 nm wavelength. You need a detector with fast response to measure time-of-flight accurately. A silicon photodiode is a good candidate because it has high responsivity around 900 nm and nanosecond-scale response times. However, if the signal is weak, an APD might be better due to its internal gain, despite the added noise and complexity.
Example 2: Evaluating Noise Impact in a Laser Vibrometer
A laser Doppler vibrometer measures vibrations by detecting frequency shifts in reflected laser light. The photodetector must have low dark current and low NEP to resolve small vibration amplitudes. A PIN photodiode with low dark current and high bandwidth is often chosen. If the signal is extremely weak, a PMT might be used, but at the cost of size and power.
Example 3: Balancing Dynamic Range and Linearity in Industrial Inspection
In an industrial setting, a laser sensor inspects surfaces with varying reflectivity. The photodetector must handle bright reflections without saturating and still detect faint signals. A photodiode with a wide dynamic range and good linearity is preferred. Sometimes, automatic gain control circuits accompany the detector to maintain signal integrity.
Summary
Photodetectors translate photons into measurable electrical signals, but their effectiveness depends on matching the device’s characteristics to the application’s needs. Responsivity, noise, speed, and spectral sensitivity are key factors. Understanding these metrics and how they interact helps in designing laser sensing systems that perform reliably and accurately.
2.3 Integration of Photonic Circuits in Laser Sensing
Photonic circuits are the optical equivalent of electronic circuits. They manipulate light signals on a chip-scale platform, enabling compact, efficient, and often faster laser sensing systems. Integrating photonic circuits into laser sensing setups reduces size and power consumption while improving robustness and scalability.
What Are Photonic Circuits?
Photonic circuits consist of components like waveguides, splitters, modulators, detectors, and resonators fabricated on substrates such as silicon or indium phosphide. These components guide and control light similarly to how wires and transistors manage electrical signals.
Why Integrate Photonic Circuits in Laser Sensing?
- Miniaturization: Traditional bulk optics are bulky and alignment-sensitive. Photonic circuits shrink the optical path onto a chip.
- Stability: On-chip components are less prone to misalignment caused by vibration or temperature changes.
- Mass Production: Photonic integrated circuits (PICs) can be fabricated using semiconductor processes, allowing reproducibility and cost reduction.
- Complex Functionality: Multiple functions—splitting, modulation, detection—can be combined on one chip.
Key Components in Photonic Circuits for Laser Sensing
- Waveguides: Channels that confine and direct light.
- Couplers and Splitters: Devices that split or combine light beams.
- Modulators: Components that alter light properties such as phase or intensity.
- Photodetectors: Convert optical signals into electrical signals.
- Resonators: Enhance sensitivity by trapping light at specific wavelengths.
Integration Challenges
- Coupling Efficiency: Efficiently coupling light from free space or fiber into waveguides is critical.
- Loss Management: Optical losses reduce signal strength and sensing accuracy.
- Thermal Effects: Temperature changes can shift optical properties, affecting performance.
- Fabrication Tolerances: Small deviations during manufacturing impact circuit behavior.
Mind Map: Photonic Circuit Integration in Laser Sensing
Example 1: On-Chip Interferometric Distance Sensor
An interferometric laser distance sensor uses a photonic circuit to split a laser beam into reference and measurement arms. The waveguides guide these beams, and after reflection from the target, they recombine on-chip. The resulting interference pattern is detected by integrated photodetectors. This setup eliminates bulky free-space optics and improves mechanical stability.
Best Practice: Ensure waveguide lengths are matched with sub-micron precision to maintain coherence. Use thermo-optic phase shifters on-chip to fine-tune the optical path difference.
Example 2: Integrated Spectrometer for Gas Sensing
A photonic circuit can implement an arrayed waveguide grating (AWG) to disperse incoming laser light into its spectral components. The dispersed light is directed to an array of photodetectors, enabling real-time spectral analysis on a chip. This compact spectrometer can be integrated with laser sources and AI algorithms for gas composition analysis.
Best Practice: Design waveguide bends with low loss and optimize AWG channel spacing to balance resolution and footprint.
Mind Map: Example Use Cases
Practical Tips for Integration
- Coupling: Use grating couplers or edge coupling to connect fibers or free-space beams to waveguides. Grating couplers allow vertical coupling but may have higher insertion loss.
- Thermal Control: Incorporate heaters or temperature sensors on-chip to compensate for thermal drift.
- Packaging: Protect the photonic chip with hermetic sealing and consider fiber pigtailing for robust connections.
- Testing: Use optical time-domain reflectometry (OTDR) and near-field scanning to verify waveguide integrity.
Summary
Integrating photonic circuits into laser sensing systems offers a path to compact, stable, and scalable sensors. Understanding the components, managing challenges like coupling and losses, and applying best practices in design and packaging are essential. Real-world examples such as on-chip interferometers and spectrometers illustrate how photonic integration can enhance laser sensing capabilities.
2.4 System Design Considerations for Stability and Sensitivity
Designing a laser sensing system requires balancing two often competing goals: stability and sensitivity. Stability ensures the system produces consistent, reliable measurements over time and varying conditions. Sensitivity determines the smallest change or signal the system can detect. Both are crucial, but improving one can sometimes degrade the other. Understanding the factors that influence each helps in making informed design choices.
Key Factors Affecting Stability and Sensitivity
Optical Setup
Optical alignment is the backbone of stability. Even minor misalignments can cause signal fluctuations or loss. Using kinematic mounts and precision stages helps maintain alignment. Mechanical rigidity reduces drift caused by vibrations or thermal expansion.
Thermal management is often overlooked. Temperature changes affect refractive indices, component dimensions, and laser wavelength. Incorporating materials with low thermal expansion coefficients or active temperature control stabilizes the optical path.
Example: In a laser displacement sensor, a loosely mounted mirror can shift with temperature changes, causing measurement drift. Replacing it with a fixed mount and adding a heat sink reduced drift by 60%.
Laser Source
The laser’s wavelength and power stability directly impact sensitivity and repeatability. Wavelength shifts can alter interference patterns or absorption characteristics, while power fluctuations affect signal amplitude.
Single longitudinal mode lasers typically offer better wavelength stability. Power stabilization circuits or feedback loops can maintain output power within tight tolerances.
Example: A gas laser used in a spectroscopic sensor showed power fluctuations of ±5%. Adding a photodiode feedback loop reduced fluctuations to ±0.5%, improving detection limits.
Detection System
Photodetector noise sets a fundamental limit on sensitivity. Choosing detectors with low dark current and noise-equivalent power is essential. Cooling photodiodes or using avalanche photodiodes can improve signal-to-noise ratio but adds complexity.
Bandwidth must match the signal characteristics. Too narrow a bandwidth filters out useful information; too wide allows noise.
Example: Switching from a standard photodiode to a cooled avalanche photodiode in a laser Doppler velocimeter improved velocity resolution by a factor of three.
Signal Processing
Filtering and calibration are critical for extracting meaningful data. Digital filters can suppress noise but introduce latency. Real-time systems must balance filtering complexity with processing speed.
Regular calibration against known standards compensates for drift and nonlinearity.
Example: Implementing a Kalman filter in a laser rangefinder reduced measurement noise without sacrificing update rate.
Environmental Influences
Temperature, vibrations, and ambient light can degrade both stability and sensitivity. Enclosures that isolate the system, vibration damping mounts, and optical filters help mitigate these effects.
Example: A laser sensor in a factory environment used a vibration-isolated platform and narrowband optical filters to maintain performance despite heavy machinery nearby.
Mind Map: Stability vs. Sensitivity Trade-offs
Practical Example: Designing for a Laser Vibrometer
A laser vibrometer must detect tiny vibrations (high sensitivity) while providing consistent readings over hours (high stability). The design included:
- A single-frequency laser with active wavelength locking to maintain spectral purity.
- An optical bench made from Invar to minimize thermal expansion.
- Photodetectors cooled to reduce noise.
- Digital signal processing with adaptive filters to track vibration frequencies while suppressing noise.
- Enclosure with vibration damping and temperature control.
This combination allowed detection of sub-nanometer vibrations with less than 1% drift over an 8-hour period.
Summary
Designing for stability and sensitivity involves careful choices across optical, electronic, and environmental domains. Understanding how each element influences the system helps avoid common pitfalls. Balancing these factors through informed trade-offs leads to laser sensing systems that are both precise and reliable.
2.5 Best Practices: Aligning Optical Components with Step-by-Step Examples
Aligning optical components is a fundamental step in building reliable laser sensing systems. Proper alignment ensures maximum signal strength, minimal losses, and accurate measurements. This section covers best practices for alignment with clear, step-by-step examples and mind maps to organize the process.
Understanding the Alignment Process
Before starting, it helps to break down the alignment task into manageable parts. The main goals are to ensure the laser beam travels along the intended path, hits the target components correctly, and that detectors receive the maximum possible signal.
Optical Component Alignment Mind Map
Step 1: Preparation
Start by cleaning all optical surfaces with appropriate solvents and lint-free wipes. Dust or smudges can cause scattering and reduce signal quality. Ensure all mounts and stages are firmly fixed to avoid drift during alignment. Confirm laser safety protocols are in place, including protective eyewear and beam stops.
Step 2: Initial Setup
Place the laser source and optical components approximately in their intended positions. Use mechanical mounts with coarse adjustment capabilities. At this stage, the goal is to get the beam roughly aligned along the optical axis.
Example: If aligning a lens to collimate a laser beam, position the lens at the approximate focal length distance from the laser output.
Step 3: Fine Alignment
This step involves precise adjustments to maximize beam quality and signal strength.
-
Beam Centering: Use irises or apertures placed along the beam path. Adjust mirrors or mounts so the beam passes centrally through all apertures.
-
Focus Adjustment: Move lenses or focusing elements along the beam path to achieve the desired beam waist or spot size at the detector.
-
Angular Tuning: Adjust mirror angles to ensure the beam direction matches the optical axis and hits the detector surface perpendicularly.
Example: When aligning a photodetector, adjust its position and angle while monitoring the output signal to find the peak response.
Step 4: Verification
Measure the signal strength or power at the detector. Record the values and repeat the alignment to check for consistency. Small changes in component positions should not cause large fluctuations in signal if alignment is stable.
Example: Use a power meter or photodiode output to verify that the signal is maximized and stable over time.
Step 5: Troubleshooting
If the signal is weak or unstable, check for:
- Loose mounts or vibrations
- Dirty optical surfaces
- Incorrect component distances
- Misaligned beam path
Adjust components incrementally and monitor the effect on signal strength.
Example: Aligning a Laser Distance Sensor
- Mount the laser diode and photodiode on adjustable stages.
- Turn on the laser at low power.
- Place an iris 10 cm from the laser output; adjust the laser position so the beam passes through the iris center.
- Position a collimating lens at its focal length from the laser; adjust lens position to minimize beam divergence.
- Place the photodiode at the expected focal point; adjust its position and angle while monitoring output voltage.
- Fine-tune mirror angles if present to maximize detected signal.
- Record the output and verify repeatability by slightly moving and returning components.
Mind Map for Step-by-Step Alignment
Step-by-Step Alignment Mind Map
Following these steps systematically reduces trial-and-error and leads to efficient, reliable alignment. Remember, patience and incremental adjustments are key. Small movements often have significant effects, so proceed carefully and document your settings for future reference.
2.6 Example: Building a Compact Laser Sensing Module
In this section, we’ll walk through the process of designing and assembling a compact laser sensing module. The goal is to create a functional unit that can measure distance using a laser, with considerations for size, power, and signal quality. This example integrates photonic components, signal conditioning, and basic processing.
Step 1: Define the Requirements
Before starting, clarify what the module needs to achieve. For this example:
- Measure distance up to 2 meters with millimeter accuracy.
- Compact form factor (approximately 5cm x 5cm x 3cm).
- Low power consumption suitable for battery operation.
- Output a digital signal compatible with microcontrollers.
Step 2: Select Key Components
| Component Type | Selected Item | Reasoning |
|---|---|---|
| Laser Source | 650 nm, 5 mW diode laser | Visible red laser, eye-safe at low power. |
| Photodetector | PIN photodiode | Fast response and good sensitivity. |
| Optics | Collimating lens, beam splitter | To focus and direct laser beam effectively. |
| Signal Conditioning | Transimpedance amplifier (TIA) | Converts photodiode current to voltage. |
| Microcontroller | ARM Cortex-M0 | Low power, sufficient processing capability. |
| Power Supply | 3.7V Li-ion battery | Compact and rechargeable. |
Step 3: Optical Layout Mind Map
This layout ensures the emitted beam is focused and the reflected signal is efficiently collected.
Step 4: Electrical Signal Chain Mind Map
This chain is essential for turning optical signals into usable digital information.
Step 5: Assembly and Integration
- Mount the laser diode on a small PCB with the collimating lens fixed in front.
- Position the beam splitter at a 45-degree angle to direct part of the beam to the photodiode for reference signal monitoring.
- Place the receiving lens and photodiode opposite the laser to collect reflected light.
- Connect the photodiode output to the transimpedance amplifier circuit.
- Route the amplified signal to the microcontroller’s ADC input.
- Integrate power management circuitry to regulate battery voltage.
Step 6: Signal Processing Example
The microcontroller samples the ADC at 10 kHz. The raw voltage corresponds to reflected light intensity, which varies with distance. To extract distance:
- Implement a threshold detection to identify the reflected pulse.
- Measure the time delay between emitted pulse and received reflection (time-of-flight).
- Calculate distance using the speed of light.
Example pseudocode snippet:
start_laser_pulse();
start_timer();
while(!reflection_detected()) {
  if(timer > max_time) break; // timeout
}
stop_timer();
distance = (timer * speed_of_light) / 2;
Step 7: Best Practices Highlighted
- Component Matching: Use a photodiode with spectral sensitivity matching the laser wavelength.
- Noise Reduction: Shield the photodiode and amplifier from ambient light and electromagnetic interference.
- Thermal Management: Ensure laser diode and photodiode operate within recommended temperature ranges.
- Mechanical Stability: Fix optical components rigidly to prevent misalignment.
- Power Efficiency: Use low-dropout regulators and sleep modes in the microcontroller.
Step 8: Troubleshooting Tips
- If no reflection is detected, check alignment of laser and photodiode.
- Monitor the reference beam via the beam splitter to verify laser output.
- Use an oscilloscope to inspect the amplifier output for expected signal shape.
- Confirm ADC readings are within expected voltage range.
Summary Mind Map
This example demonstrates the integration of photonics, electronics, and basic signal processing to build a compact laser sensing module. Each step involves decisions that affect performance and reliability, emphasizing the importance of a holistic approach.
3. Signal Acquisition and Conditioning in Laser Sensing
3.1 Analog Signal Acquisition Techniques
Analog signal acquisition is the first step in converting the physical phenomena detected by laser sensors into usable electrical signals. This process involves capturing the analog output from photodetectors or other transducers and preparing it for further processing. Understanding the methods and challenges in analog acquisition is essential for building reliable laser sensing systems.
Key Components of Analog Signal Acquisition
- Photodetector Output: The initial signal, often a current or voltage proportional to the light intensity.
- Transimpedance Amplifier (TIA): Converts photodiode current to voltage, providing gain and impedance matching.
- Filtering: Removes unwanted frequency components and noise.
- Signal Conditioning: Includes amplification, offset adjustment, and impedance matching.
Mind Map: Analog Signal Acquisition Overview
Photodetector Output Types
Laser sensors commonly use photodiodes that generate a current proportional to incident light. The raw current is usually very small (nanoamps to microamps), requiring sensitive amplification. Avalanche photodiodes (APDs) provide internal gain but introduce additional noise and require higher bias voltages.
Transimpedance Amplifier (TIA)
TIAs are the standard choice for converting photodiode current to voltage. The basic TIA consists of an operational amplifier with a feedback resistor. The output voltage ( V_{out} ) is given by:
\[ V_{out} = -I_{pd} \times R_f \]
where ( I_{pd} ) is the photodiode current and \( R_f \) is the feedback resistor. The choice of \( R_f \) balances gain and bandwidth: higher resistance increases gain but reduces bandwidth.
Example:
A photodiode produces 1 µA under a certain laser intensity. Using a 100 kΩ feedback resistor, the output voltage is:
\[ V_{out} = -1 \times 10^{-6} A \times 100 \times 10^{3} \Omega = -0.1 V \]
This voltage is easier to measure and process.
Filtering Techniques
Filtering removes noise and unwanted signals outside the frequency band of interest. Common filters include:
- Low-Pass Filters: Remove high-frequency noise.
- Band-Pass Filters: Isolate a specific frequency range.
- Notch Filters: Remove narrowband interference (e.g., 50/60 Hz power line noise).
Filters can be implemented using passive components (resistors, capacitors, inductors) or active circuits with operational amplifiers.
Mind Map: Filtering in Analog Acquisition
Signal Conditioning
After initial amplification and filtering, signals often require further conditioning:
- Offset Adjustment: Corrects DC bias to center the signal within the input range of ADCs.
- Impedance Matching: Ensures maximum power transfer and minimizes reflections.
- Additional Gain Stages: May be necessary if the signal is still weak.
Noise Considerations
Noise limits the sensitivity and accuracy of laser sensing. Common noise sources include:
- Thermal Noise: Generated by resistors and semiconductors, proportional to temperature.
- Shot Noise: Due to discrete charge carriers in photodiodes, proportional to the square root of the photocurrent.
- Flicker Noise: Low-frequency noise affecting stability.
Minimizing noise involves careful component selection, shielding, and layout.
Example: Analog Acquisition for a Laser Vibrometer
A laser Doppler vibrometer measures vibration velocity by detecting frequency shifts in reflected laser light. The photodetector outputs a small AC current at the Doppler frequency (kHz to MHz range). The acquisition chain includes:
- TIA with a 50 kΩ feedback resistor to convert current to voltage.
- Band-pass filter centered around the expected Doppler frequency to reject noise.
- Additional amplification to match ADC input range.
This setup ensures the signal is clean and strong enough for real-time processing.
Summary
Analog signal acquisition in laser sensing systems involves converting weak photodetector currents into usable voltages, filtering out noise, and conditioning signals for digitization. Each step requires balancing gain, bandwidth, and noise performance. Practical examples, like the vibrometer, show how these principles come together in real applications.
3.2 Noise Sources and Mitigation Strategies
Noise in laser sensing systems refers to any unwanted signal or disturbance that obscures or distorts the true measurement. Understanding noise sources and how to reduce their impact is essential for reliable sensing.
Common Noise Sources in Laser Sensing
-
Shot Noise: Originates from the discrete nature of photons and electrons. It is inherent in photodetection and follows a Poisson distribution, increasing with signal intensity but never disappearing.
-
Thermal Noise (Johnson-Nyquist Noise): Caused by the random motion of electrons in resistive components. It is present even without light input and depends on temperature and resistance.
-
Relative Intensity Noise (RIN): Fluctuations in the laser’s output power over time. It can be caused by power supply instability or intrinsic laser dynamics.
-
Ambient Light Noise: External light sources, such as sunlight or room lighting, can add unwanted signals to the detector.
-
Electronic Noise: Includes flicker noise, amplifier noise, and quantization noise from analog-to-digital converters.
-
Mechanical Vibrations and Acoustic Noise: Physical disturbances can cause misalignment or modulate the optical path, introducing noise.
-
Speckle Noise: Coherent laser light scattered from rough surfaces creates granular interference patterns, which appear as noise in the detected signal.
Mind Map: Noise Sources in Laser Sensing
Mitigation Strategies
-
Shot Noise: Since it is fundamental, the best approach is to increase the signal level where possible, improving the signal-to-noise ratio (SNR). For example, using a higher laser power or more sensitive photodetectors helps.
-
Thermal Noise: Lowering the temperature of electronic components reduces thermal noise. Using low-noise resistors and careful circuit design also helps.
-
Relative Intensity Noise (RIN): Stabilizing the laser power supply and using lasers with inherently low RIN characteristics are effective. Additionally, differential detection schemes can cancel common-mode intensity fluctuations.
-
Ambient Light Noise: Employ optical filters tuned to the laser wavelength to block unwanted light. Also, modulating the laser source and using synchronous detection can separate the laser signal from ambient light.
-
Electronic Noise: Use low-noise amplifiers and proper shielding to reduce interference. Selecting ADCs with appropriate resolution and sampling rates minimizes quantization noise.
-
Mechanical Vibrations and Acoustic Noise: Mount optical components on vibration-isolated platforms. Enclose the system to reduce acoustic coupling.
-
Speckle Noise: Techniques such as spatial averaging, polarization diversity, or wavelength tuning can reduce speckle effects.
Mind Map: Noise Mitigation Techniques
Examples
Example 1: Reducing Ambient Light Noise in a Laser Distance Sensor A laser distance sensor operating outdoors suffers from sunlight interference. By adding a narrowband optical filter centered on the laser wavelength and modulating the laser beam at 10 kHz, the system uses a lock-in amplifier to extract only the modulated signal. This approach significantly improves measurement accuracy by rejecting ambient light.
Example 2: Minimizing Electronic Noise in a Laser Doppler Vibrometer In a vibrometer, low-level Doppler signals are amplified. Using a low-noise transimpedance amplifier with carefully selected feedback resistors and shielding the circuit from electromagnetic interference reduces electronic noise. Additionally, cooling the amplifier reduces thermal noise, improving the detection of small vibrations.
Example 3: Speckle Noise Mitigation in Surface Profiling A laser profilometer experiences speckle noise when scanning rough surfaces. Implementing spatial averaging by scanning the laser spot over multiple adjacent points and averaging the results reduces speckle variance. Polarization diversity is also used by combining signals from two orthogonal polarizations, further smoothing the output.
Summary
Noise is an unavoidable part of laser sensing but understanding its sources allows targeted reduction. Combining optical, electronic, mechanical, and signal processing techniques leads to cleaner signals and more reliable measurements. Practical examples demonstrate how these strategies come together in real systems.
3.3 Signal Amplification and Filtering Methods
In laser sensing systems, the raw signals captured by photodetectors are often weak and noisy. Amplification and filtering are essential steps to make these signals usable for further processing. This section covers the fundamental methods for amplifying and filtering laser sensor signals, illustrated with practical examples and mind maps to clarify the concepts.
Signal Amplification
Amplification increases the amplitude of the sensor output to a level suitable for analog-to-digital conversion or further processing. The key is to boost the signal without introducing excessive noise or distortion.
Types of Amplifiers:
- Transimpedance Amplifier (TIA): Converts photodiode current to voltage. Common in laser sensing due to photodiodes producing current signals.
- Voltage Amplifier: Amplifies voltage signals, often used after TIA or in systems with voltage-output sensors.
- Programmable Gain Amplifier (PGA): Allows adjustable gain to handle varying signal strengths.
Key Considerations:
- Noise Performance: Amplifiers add noise; low-noise designs preserve signal integrity.
- Bandwidth: Must accommodate the signal frequency range without attenuation.
- Linearity: Ensures output is a faithful scaled version of input.
Example: A laser Doppler vibrometer uses a photodiode to detect interference fringes. The photodiode current is typically in the nanoampere range. A TIA with a gain of 1 MΩ converts this current into a voltage signal around 1 V peak-to-peak, suitable for digitization.
Filtering Methods
Filtering removes unwanted frequency components, such as noise or interference, from the amplified signal. Filters can be analog or digital, depending on the system design.
Common Filter Types:
- Low-Pass Filters (LPF): Pass signals below a cutoff frequency, removing high-frequency noise.
- High-Pass Filters (HPF): Remove low-frequency drift or baseline wander.
- Band-Pass Filters (BPF): Allow a specific frequency band, useful when the signal occupies a known frequency range.
- Notch Filters: Suppress narrowband interference like power line hum (50/60 Hz).
Filter Implementations:
- Passive Filters: Built with resistors, capacitors, and inductors; simple but limited in gain and flexibility.
- Active Filters: Use operational amplifiers to provide gain and sharper cutoff characteristics.
- Digital Filters: Applied after analog-to-digital conversion; offer precise control and adaptability.
Example: In a laser rangefinder, the signal modulated at 10 kHz may be corrupted by 60 Hz power line noise. A notch filter centered at 60 Hz removes this interference, while a low-pass filter with a cutoff at 15 kHz preserves the signal.
Mind Map: Signal Amplification
Mind Map: Filtering Methods
Practical Example: Designing an Amplification and Filtering Chain for a Laser Vibrometer
- Signal Source: Photodiode output current in nanoampere range.
- Amplification: Use a TIA with a feedback resistor of 1 MΩ to convert current to voltage.
- Filtering: Apply an active low-pass filter with a cutoff frequency slightly above the signal frequency (e.g., 20 kHz) to reduce high-frequency noise.
- Additional Filtering: Include a notch filter at 60 Hz to suppress power line interference.
- Output: Clean voltage signal ready for ADC input.
This chain ensures the weak photodiode signal is amplified without excessive noise and filtered to remove unwanted components, improving measurement accuracy.
Amplification and filtering are intertwined steps that prepare laser sensor signals for reliable interpretation. Choosing the right amplifier and filter types, considering noise and frequency characteristics, and tailoring the design to the specific application are crucial. The examples and mind maps here provide a foundation for practical implementation.
3.4 Analog-to-Digital Conversion for Laser Signals
Analog-to-Digital Conversion (ADC) is a critical step in laser sensing systems. It transforms the continuous analog signals produced by photodetectors into discrete digital data that can be processed by computers or embedded systems. This conversion must be precise and efficient to preserve the integrity of the laser signal and enable accurate analysis.
Why ADC Matters in Laser Sensing
Laser sensors often generate signals with subtle variations in amplitude and frequency. These signals carry information about distance, velocity, surface characteristics, or other physical parameters. If the ADC stage introduces noise, distortion, or insufficient resolution, the downstream processing—whether filtering, feature extraction, or AI interpretation—will suffer.
Key Parameters in ADC for Laser Signals
- Sampling Rate: Determines how often the analog signal is measured per second. According to the Nyquist theorem, the sampling rate must be at least twice the highest frequency component of the signal to avoid aliasing.
- Resolution (Bit Depth): Defines how finely the analog voltage range is quantized into digital values. Higher resolution reduces quantization error.
- Input Range: The voltage range the ADC can accept. Matching this to the photodetector output maximizes dynamic range.
- Signal-to-Noise Ratio (SNR): Indicates the quality of the conversion; higher SNR means less noise.
Mind Map: ADC Parameters and Their Impact
ADC for Laser Signals
├── Sampling Rate
│   ├── Must exceed 2x max signal frequency
│   ├── Affects temporal resolution
│   └── Trade-off: higher rate increases data volume
├── Resolution
│   ├── Number of bits (e.g., 12-bit, 16-bit)
│   ├── Determines quantization error
│   └── Higher bits = finer signal detail
├── Input Range
│   ├── Matches sensor output voltage
│   ├── Prevents clipping
│   └── Maximizes dynamic range
└── SNR
    ├── Influenced by ADC design
    ├── Affects signal fidelity
    └── Important for weak signals
Types of ADCs Commonly Used
- Successive Approximation Register (SAR): Balances speed and accuracy, suitable for many laser sensing applications.
- Sigma-Delta (ΣΔ): High resolution, good for low-frequency signals but slower.
- Flash ADC: Very fast but low resolution and power-hungry, rarely used in laser sensing.
Example: Choosing an ADC for a Laser Distance Sensor
Suppose a laser distance sensor outputs a signal with frequency components up to 100 kHz. To avoid aliasing, the sampling rate should be at least 200 kHz. A 16-bit SAR ADC with a 0–3.3 V input range matches the sensor output voltage and provides sufficient resolution to detect small distance changes.
Mind Map: ADC Selection Workflow
Select ADC for Laser Sensor
├── Identify Signal Bandwidth
│   └── Determine max frequency component
├── Determine Required Sampling Rate
│   └── ≥ 2x max frequency
├── Define Resolution Needs
│   └── Based on smallest measurable change
├── Match Input Voltage Range
│   └── To sensor output
├── Consider Power and Size Constraints
└── Choose ADC Type
    ├── SAR
    ├── Sigma-Delta
    └── Flash
Quantization and Its Effects
Quantization converts continuous voltage levels into discrete digital steps. This process introduces quantization noise, which can be modeled as an additive error. The quantization step size (LSB) is:
\[ LSB = \frac{V_{FSR}}{2^N} \]
where \(V_{FSR}\) is the full-scale voltage range and \(N\) is the number of bits.
Smaller LSB means finer resolution but requires more bits, increasing data size and processing demands.
Example: Quantization in Practice
If a 12-bit ADC with a 5 V range is used, the LSB is approximately 1.22 mV. Signals smaller than this step may be lost or rounded, affecting measurement accuracy.
Anti-Aliasing Filters
Before ADC, an analog low-pass filter removes frequency components above half the sampling rate. This prevents aliasing, where high-frequency signals fold back into lower frequencies, corrupting the data.
Example: Implementing an Anti-Aliasing Filter
For a 200 kHz sampling rate, the filter cutoff might be set near 90 kHz with a steep roll-off to attenuate frequencies above 100 kHz.
Practical Considerations
- Clock Jitter: Variations in ADC sampling clock can introduce errors, especially at high frequencies.
- Input Impedance: Must be compatible with sensor output to avoid signal distortion.
- Temperature Stability: ADC performance can drift with temperature; calibration may be necessary.
Example: ADC in a Laser Doppler Vibrometer
A laser Doppler vibrometer measures vibration velocity by detecting frequency shifts. The analog photodetector output contains high-frequency components up to 500 kHz. Using a 1 MHz sampling rate SAR ADC with 14-bit resolution ensures accurate capture of vibration signals.
Summary
Analog-to-Digital Conversion is a cornerstone of laser sensing systems. Selecting the right ADC involves balancing sampling rate, resolution, input range, and noise characteristics. Proper filtering and understanding quantization effects ensure the digital representation faithfully reflects the analog laser signal. Careful design at this stage sets the foundation for effective signal processing and AI analysis downstream.
3.5 Best Practices: Designing Low-Noise Signal Chains with Practical Examples
Designing low-noise signal chains is a critical step in laser sensing systems. Noise can obscure the signal of interest, reducing measurement accuracy and system reliability. This section covers practical approaches to minimize noise, illustrated with examples and mind maps to clarify key concepts.
Understanding Noise Sources
Noise in laser sensing signal chains comes from multiple origins:
- Thermal noise: Generated by resistors and electronic components due to temperature.
- Shot noise: Arises from the discrete nature of charge carriers in photodetectors.
- Flicker noise (1/f noise): Dominant at low frequencies, caused by imperfections in components.
- Environmental noise: Electromagnetic interference (EMI) from nearby equipment.
- Quantization noise: Introduced during analog-to-digital conversion.
Mind Map: Noise Sources in Signal Chains
Key Design Strategies
-
Component Selection
- Use low-noise amplifiers (LNAs) designed for your frequency range.
- Choose precision resistors with low temperature coefficients.
- Select photodetectors with low dark current to reduce shot noise.
-
Circuit Topology
- Employ differential signaling to reject common-mode noise.
- Use shielding and proper grounding to minimize EMI.
- Implement proper filtering (low-pass, band-pass) to remove out-of-band noise.
-
Signal Conditioning
- Amplify signals close to the sensor to improve signal-to-noise ratio (SNR).
- Use impedance matching to reduce reflections and noise coupling.
- Apply careful layout techniques to minimize parasitic capacitances and inductances.
-
Power Supply Management
- Use low-noise voltage regulators.
- Decouple power lines with capacitors near sensitive components.
-
Analog-to-Digital Conversion
- Choose ADCs with sufficient resolution and sampling rate.
- Use oversampling and averaging to reduce quantization noise.
Mind Map: Low-Noise Signal Chain Design
Practical Example 1: Designing a Low-Noise Photodiode Amplifier
Scenario: You need to amplify a weak photocurrent from a silicon photodiode for a laser distance sensor.
Approach:
- Use a transimpedance amplifier (TIA) configuration to convert current to voltage.
- Select an operational amplifier with low input current noise and low voltage noise.
- Choose a feedback resistor balancing gain and noise (higher resistance increases gain but also thermal noise).
- Add a feedback capacitor to stabilize the amplifier and reduce high-frequency noise.
- Place the amplifier as close as possible to the photodiode to reduce parasitic capacitance.
Example values:
- Feedback resistor: 100 kΩ
- Feedback capacitor: 1 pF
- Op-amp: Low-noise JFET input type
Outcome: This setup reduces noise floor, allowing detection of small signals without saturation.
Practical Example 2: Mitigating EMI in a Laser Doppler Vibrometer Signal Chain
Scenario: The sensor is installed near motors generating strong electromagnetic interference.
Approach:
- Use twisted pair cables for signal lines to reduce EMI pickup.
- Implement differential inputs on the amplifier stage.
- Add ferrite beads and EMI filters on power and signal lines.
- Ground the sensor housing and shield cables with conductive material.
- Design PCB with separate analog and digital ground planes connected at a single point.
Outcome: These measures reduce noise spikes and baseline drift, improving measurement stability.
Practical Example 3: Improving ADC Performance with Oversampling
Scenario: The ADC resolution limits the smallest detectable signal changes.
Approach:
- Sample the signal at a rate much higher than the Nyquist frequency.
- Average multiple samples to reduce random noise.
- Use digital filtering to smooth the signal.
Example: Sampling at 1 MHz for a 10 kHz signal, averaging 100 samples reduces noise by roughly a factor of 10.
Outcome: Enhanced effective resolution without changing hardware.
Summary
Designing low-noise signal chains requires attention to component choice, circuit design, and environmental factors. Combining these with practical techniques like shielding, filtering, and oversampling leads to clearer signals and more reliable laser sensing. The examples above show how to apply these principles in real-world scenarios.
3.6 Example: Signal Conditioning for a Laser Doppler Vibrometer
A Laser Doppler Vibrometer (LDV) measures the velocity or displacement of a vibrating surface by detecting the Doppler shift of reflected laser light. The raw signal from an LDV is typically a low-level analog voltage that carries the vibration information but is often contaminated with noise and interference. Proper signal conditioning is essential to extract meaningful data.
Key Steps in Signal Conditioning for LDV
- Amplification: Boost the weak photodetector output to a usable level.
- Filtering: Remove unwanted frequency components such as DC offsets, low-frequency drift, and high-frequency noise.
- Demodulation: Convert the frequency-shifted signal into a voltage proportional to velocity or displacement.
- Analog-to-Digital Conversion (ADC): Prepare the signal for digital processing.
Mind Map: Signal Conditioning Workflow for LDV
Amplification
The photodetector output is often in the microvolt to millivolt range. Using a low-noise preamplifier with selectable gain ensures the signal is strong enough for further processing without saturating the system. For example, a transimpedance amplifier converts the photodiode current to voltage, with gain adjusted based on expected signal strength.
Example: If the photodiode produces 10 µA at peak vibration, and the transimpedance amplifier has a gain of 100 kΩ, the output voltage will be 1 V peak, which is suitable for the next stage.
Filtering
Noise sources include ambient light fluctuations, electronic interference, and mechanical vibrations unrelated to the target signal. Filters help isolate the frequency band of interest.
- High-pass filter: Removes slow drifts and DC offsets. For vibration measurements, a cutoff around 1 Hz is typical.
- Low-pass filter: Limits bandwidth to avoid aliasing and reduce high-frequency noise. The cutoff depends on the maximum vibration frequency, e.g., 20 kHz.
- Notch filter: Targets specific interference like 50/60 Hz power line noise.
Example: A 2nd-order Butterworth high-pass filter at 1 Hz combined with a 4th-order low-pass filter at 20 kHz can clean the signal effectively.
Demodulation
The LDV signal is frequency modulated by the Doppler effect. To retrieve velocity, the signal must be demodulated.
- Frequency mixing: The signal is mixed with a reference frequency to produce a baseband signal proportional to velocity.
- Phase-locked loop (PLL): Tracks the frequency changes and outputs a voltage proportional to velocity.
Example: Using a PLL with a loop bandwidth of 10 kHz can track rapid velocity changes without losing lock.
Analog-to-Digital Conversion (ADC)
After conditioning, the analog signal is digitized for further processing or storage.
- Sampling rate: Should be at least twice the highest frequency component (Nyquist criterion). For a 20 kHz bandwidth, use at least 50 kHz sampling.
- Resolution: Higher bit depth improves dynamic range; 16-bit ADCs are common.
Example: Sampling at 100 kHz with 16-bit resolution captures detailed vibration data with minimal quantization noise.
Mind Map: Practical Example Parameters
Summary
Signal conditioning for an LDV involves carefully balancing amplification, filtering, demodulation, and digitization to preserve the vibration signal’s integrity. Each step requires parameter choices tailored to the specific application and expected signal characteristics. The examples provided illustrate typical values and configurations that yield clean, usable data for further analysis.
4. Real-Time Signal Processing Techniques
4.1 Fundamentals of Real-Time Processing Architectures
Real-time processing architectures form the backbone of intelligent laser sensing systems. These architectures ensure that data from laser sensors is processed quickly enough to meet the timing requirements of the application. The key challenge is balancing speed, accuracy, and resource constraints.
What is Real-Time Processing?
Real-time processing means that the system processes input data and produces output within a guaranteed time frame. This is crucial in laser sensing where delays can lead to inaccurate measurements or missed events.
There are two main types of real-time systems:
- Hard real-time: Missing a deadline results in system failure.
- Soft real-time: Deadlines are important but occasional misses are tolerable.
Laser sensing applications often require hard real-time processing, especially in safety-critical environments.
Core Components of Real-Time Architectures
- Sensors: Capture laser signals.
- Signal Conditioning: Amplify and filter signals.
- Data Acquisition: Convert analog signals to digital.
- Processing Unit: Executes algorithms to interpret data.
- Output Interface: Delivers processed results.
Each component must be optimized to maintain timing constraints.
Processing Architectures Overview
-
Single Processor Systems
- One CPU handles all tasks sequentially.
- Simple but limited in handling complex or high-speed data.
-
Multi-Processor Systems
- Multiple CPUs or cores share workload.
- Enables parallel processing, reducing latency.
-
Digital Signal Processors (DSPs)
- Specialized for fast numerical operations.
- Efficient for filtering and Fourier transforms.
-
Field Programmable Gate Arrays (FPGAs)
- Hardware configurable for parallel processing.
- Low latency and high throughput.
-
Hybrid Architectures
- Combine CPUs, DSPs, and FPGAs.
- Balance flexibility and performance.
Mind Map: Real-Time Processing Architectures
Timing and Scheduling
Real-time systems rely on scheduling to ensure tasks complete on time. Common scheduling methods include:
- Rate Monotonic Scheduling (RMS): Prioritizes tasks with shorter periods.
- Earliest Deadline First (EDF): Prioritizes tasks closest to their deadlines.
Example: In a laser scanning system, signal acquisition might run every 1 ms, while data fusion runs every 10 ms. RMS would assign higher priority to signal acquisition.
Example: Simple Real-Time Processing Pipeline
Consider a laser distance measurement system:
- Signal Acquisition: Photodetector output sampled every 500 µs.
- Filtering: Apply a digital low-pass filter to reduce noise.
- Feature Extraction: Detect peak corresponding to reflected pulse.
- Distance Calculation: Convert time delay to distance.
- Output: Send distance to display or control system.
Each step must complete before the next sample arrives to maintain real-time operation.
Mind Map: Timing and Scheduling
Practical Considerations
- Latency: Time between input and output; must be minimized.
- Jitter: Variation in latency; can cause instability.
- Throughput: Amount of data processed per unit time.
- Resource Constraints: CPU speed, memory, power consumption.
Example: FPGA vs DSP for Real-Time Processing
- DSP: Easier to program, good for algorithms with sequential steps.
- FPGA: Better for parallel tasks like simultaneous filtering of multiple channels.
A laser vibrometer measuring vibrations at multiple points might use FPGA to process all channels in parallel, while a single-channel system might rely on a DSP.
Summary
Real-time processing architectures in laser sensing systems must be carefully chosen to meet application-specific timing and performance needs. Understanding the trade-offs between different architectures and scheduling methods helps design systems that are both reliable and efficient.
4.2 Digital Filtering and Signal Enhancement
Digital filtering is a cornerstone of processing signals from laser sensing systems. It involves manipulating the digital representation of signals to reduce noise, extract relevant features, or improve signal quality. Signal enhancement refers to techniques that improve the interpretability or usability of the signal, often by emphasizing useful components and suppressing unwanted ones.
Why Digital Filtering Matters in Laser Sensing
Laser sensors often operate in environments with various noise sources: electronic noise, ambient light interference, mechanical vibrations, or atmospheric disturbances. Digital filters help isolate the true signal from these disturbances, enabling accurate measurement and analysis.
Mind Map: Core Concepts of Digital Filtering
Types of Digital Filters
-
Low-Pass Filters (LPF): Allow frequencies below a cutoff to pass, attenuating higher frequencies. Useful to smooth signals and remove high-frequency noise.
-
High-Pass Filters (HPF): Pass frequencies above a cutoff, removing slow-varying trends or baseline drift.
-
Band-Pass Filters (BPF): Pass a specific frequency band, blocking frequencies outside this range.
-
Band-Stop Filters (Notch Filters): Remove a narrow frequency band, often used to eliminate specific interference like 50/60 Hz power line noise.
Filter Design Approaches
-
FIR Filters: Have a finite duration impulse response, inherently stable, and can be designed with linear phase response. They require more computation for sharp cutoffs but are simpler to implement.
-
IIR Filters: Use feedback, can achieve sharp cutoffs with fewer coefficients, but may have nonlinear phase and potential stability issues.
Example: Removing High-Frequency Noise from a Laser Distance Signal
Imagine a laser distance sensor output contaminated with high-frequency electronic noise. Applying a low-pass FIR filter with a cutoff frequency just above the maximum expected signal frequency smooths the signal without distorting the measurement.
Step-by-step:
- Sample the signal at 1 kHz.
- Determine maximum signal frequency of interest: 50 Hz.
- Design a low-pass FIR filter with cutoff at 60 Hz.
- Apply the filter to the digitized signal.
This reduces noise spikes while preserving the true distance variations.
Mind Map: Signal Enhancement Techniques
Additional Signal Enhancement Techniques
-
Adaptive Filtering: Filters that adjust parameters in real time based on signal characteristics. Useful when noise properties change over time.
-
Signal Averaging: Repeated measurements are averaged to reduce random noise, improving signal-to-noise ratio.
-
Wavelet Denoising: Uses wavelet transforms to separate noise from signal components at multiple scales.
-
Baseline Correction: Removes slow-varying offsets or drifts in the signal, often with high-pass filtering or polynomial fitting.
-
Dynamic Range Adjustment: Scaling or compressing signal amplitude to optimize for downstream processing or visualization.
Example: Enhancing a Laser Doppler Vibrometer Signal
A laser Doppler vibrometer measures vibration velocity but often suffers from baseline drift and sporadic noise spikes.
Enhancement steps:
- Apply a high-pass filter to remove baseline drift below 1 Hz.
- Use a median filter to suppress isolated noise spikes.
- Perform signal averaging over multiple cycles to improve signal clarity.
This combination results in a cleaner velocity signal, easier to analyze for vibration characteristics.
Practical Tips and Best Practices
-
Always analyze the frequency content of your raw signal before choosing filter parameters.
-
Beware of phase distortion in IIR filters; if phase linearity matters, prefer FIR filters.
-
When using adaptive filters, ensure the adaptation rate balances responsiveness and stability.
-
Combine filtering with other enhancement methods like averaging or wavelet denoising for best results.
-
Validate filtering effects by comparing before-and-after signals and checking for signal distortion.
Digital filtering and signal enhancement are essential tools that, when applied thoughtfully, turn raw laser sensor data into reliable, actionable information.
4.3 Feature Extraction from Laser Sensor Data
Feature extraction is the process of transforming raw laser sensor data into a set of meaningful attributes that can be used for further analysis, classification, or decision-making. Laser sensors often produce complex signals influenced by environmental factors, target properties, and system noise. Extracting relevant features helps reduce data dimensionality and highlights the essential characteristics of the measured phenomena.
Why Feature Extraction Matters
Raw laser data can be noisy and voluminous. Directly feeding this data into algorithms without preprocessing can lead to poor performance and increased computational load. Feature extraction condenses the data into informative summaries, making it easier for AI algorithms or signal processors to interpret.
Common Types of Features in Laser Sensor Data
- Time-Domain Features: Derived directly from the signal waveform.
- Frequency-Domain Features: Obtained by transforming the signal into the frequency spectrum.
- Statistical Features: Summaries like mean, variance, skewness.
- Shape and Morphological Features: Characteristics of the waveform shape or spatial patterns.
Mind Map: Feature Extraction Categories
Time-Domain Feature Examples
- Peak Amplitude: The highest value in the laser return signal, often related to reflectivity or distance.
- Rise Time: Time taken for the signal to go from a low threshold to its peak, useful in distinguishing material types.
Example: In a laser rangefinder, measuring the rise time can help differentiate between a smooth metal surface and a rough wooden surface, as the latter tends to scatter the laser pulse, elongating the rise time.
Frequency-Domain Feature Examples
Applying a Fourier Transform to the laser signal reveals frequency components that may correspond to vibration, motion, or surface texture.
- Spectral Centroid: The “center of mass” of the spectrum, indicating where most energy is concentrated.
- Dominant Frequencies: Peaks in the spectrum that may correspond to periodic phenomena.
Example: A laser Doppler vibrometer measuring vibrations on a machine part can extract dominant frequencies to identify mechanical faults.
Statistical Feature Examples
Statistical moments summarize the distribution of signal values.
- Mean: Average signal level.
- Variance: Signal variability.
- Skewness: Asymmetry of the signal distribution.
Example: In laser-based surface inspection, skewness may indicate the presence of defects causing asymmetric reflections.
Shape and Morphological Features
Laser pulses often have characteristic shapes. Extracting features like pulse width or envelope shape can provide insights.
- Pulse Width: Duration of the pulse above a threshold.
- Envelope Characteristics: Shape of the signal envelope, such as smoothness or presence of multiple peaks.
Example: Differentiating between single-layer and multi-layer materials by analyzing pulse width and envelope complexity.
Mind Map: Step-by-Step Feature Extraction Workflow
Practical Example: Feature Extraction from a Laser Distance Sensor Signal
- Raw Signal: The sensor outputs a voltage signal corresponding to reflected laser pulses.
- Preprocessing: Apply a low-pass filter to remove high-frequency noise.
- Segmentation: Detect pulse start and end points using thresholding.
- Time-Domain Features: Measure peak amplitude and pulse width.
- Frequency-Domain Features: Compute Fourier transform of the pulse segment to find dominant frequencies.
- Statistical Features: Calculate mean and variance of the pulse segment.
- Result: A feature vector containing these values is passed to a classifier to determine surface type.
Tips for Effective Feature Extraction
- Always preprocess signals to reduce noise before feature computation.
- Choose features relevant to the physical phenomena you want to detect.
- Use visualization tools to understand feature distributions.
- Combine multiple feature types for richer representation.
- Validate features by testing their impact on downstream tasks.
Feature extraction is a bridge between raw laser sensor data and intelligent interpretation. By carefully selecting and computing features, systems can better understand their environment and make informed decisions.
4.4 Time-Frequency Analysis Methods
Time-frequency analysis is essential in laser sensing systems because laser signals often contain information that varies both in time and frequency. Unlike purely time-domain or frequency-domain analysis, time-frequency methods provide a way to observe how spectral content evolves over time, which is crucial for interpreting dynamic phenomena such as vibrations, Doppler shifts, or transient events.
Why Time-Frequency Analysis?
Laser sensing signals can be non-stationary, meaning their frequency content changes over time. For example, a laser Doppler vibrometer measuring a vibrating surface will produce signals whose frequency components shift as the vibration changes. Traditional Fourier analysis assumes stationarity and averages frequency content over the entire signal duration, losing temporal details.
Common Time-Frequency Analysis Techniques
-
Short-Time Fourier Transform (STFT)
- Divides the signal into short overlapping segments (windows).
- Applies Fourier transform to each segment.
- Produces a spectrogram showing frequency vs. time.
- Trade-off between time and frequency resolution depends on window size.
-
Wavelet Transform
- Uses wavelets (small waves) as basis functions.
- Provides multi-resolution analysis: good time resolution at high frequencies, good frequency resolution at low frequencies.
- Suitable for signals with transient features.
-
Wigner-Ville Distribution (WVD)
- A quadratic time-frequency distribution.
- Offers high resolution but can produce cross-term artifacts.
- Useful when high precision is needed and artifacts can be managed.
-
Hilbert-Huang Transform (HHT)
- Empirical mode decomposition followed by Hilbert spectral analysis.
- Adapted for nonlinear and non-stationary signals.
- More complex but can reveal intrinsic modes.
Mind Map: Time-Frequency Analysis Methods
Practical Example: Using STFT in Laser Vibrometry
Suppose you have a laser vibrometer signal measuring a surface that suddenly changes vibration frequency. Applying STFT with a Hamming window of 256 samples and 50% overlap, you generate a spectrogram. The spectrogram clearly shows the frequency shift over time, allowing you to pinpoint when the change occurred.
Best Practice: Choose the window size based on the expected signal dynamics. Smaller windows improve time resolution but reduce frequency resolution, and vice versa.
Practical Example: Wavelet Transform for Defect Detection
In laser sensing for material inspection, defects often cause transient reflections. Applying a wavelet transform with a Morlet wavelet can highlight these short-lived events in the time-frequency plane. This helps distinguish defects from background noise.
Mind Map: Applying Time-Frequency Analysis in Laser Sensing
Tips for Implementation
- Always preprocess signals to reduce noise before time-frequency analysis.
- Visualize results with spectrograms or scalograms to interpret data intuitively.
- Combine methods if needed; for instance, use STFT for general overview and wavelets for detailed transient analysis.
Time-frequency analysis methods form a toolbox that lets you extract meaningful information from complex laser sensing signals. Choosing the right method depends on the signal characteristics and the analysis goals.
4.5 Best Practices: Implementing Efficient Real-Time Algorithms with Code Examples
Real-time signal processing in laser sensing demands algorithms that are both fast and reliable. Efficiency here means minimizing latency without sacrificing accuracy. This section breaks down practical strategies and illustrates them with clear examples.
Key Considerations for Real-Time Algorithms
- Deterministic Execution: Algorithms should have predictable runtimes to meet strict timing requirements.
- Low Computational Complexity: Choose or design algorithms that avoid unnecessary operations.
- Memory Efficiency: Use data structures and buffers that fit within hardware constraints.
- Incremental Processing: Process data in small chunks or streams rather than large batches.
- Robustness to Noise: Implement filtering and smoothing techniques that do not add significant delay.
Mind Map: Core Elements of Efficient Real-Time Processing
Example 1: Moving Average Filter for Noise Reduction
A moving average filter smooths noisy laser sensor data by averaging a fixed number of recent samples. It’s simple, fast, and effective for many real-time applications.
class MovingAverageFilter:
    def __init__(self, window_size):
        self.window_size = window_size
        self.buffer = [0] * window_size
        self.index = 0
        self.sum = 0
        self.count = 0

    def process(self, new_sample):
        # Subtract the oldest sample
        self.sum -= self.buffer[self.index]
        # Add the new sample
        self.buffer[self.index] = new_sample
        self.sum += new_sample
        # Move index
        self.index = (self.index + 1) % self.window_size
        # Track number of samples processed
        if self.count < self.window_size:
            self.count += 1
        # Return average
        return self.sum / self.count

# Usage example
filter = MovingAverageFilter(window_size=5)
samples = [10, 12, 11, 13, 12, 14, 13]
filtered = [filter.process(s) for s in samples]
print(filtered)  # Output: smoothed values
Why this works: The algorithm uses a fixed-size buffer and updates the sum incrementally, avoiding recomputing the sum from scratch each time. This keeps processing time constant per sample.
Mind Map: Moving Average Filter Implementation
Example 2: Peak Detection Using Thresholding
Detecting peaks in laser sensor data is common for identifying events like reflections or obstacles. A simple threshold-based peak detector can run in real time with minimal overhead.
class PeakDetector:
    def __init__(self, threshold):
        self.threshold = threshold
        self.previous = None

    def process(self, sample):
        peak_detected = False
        if self.previous is not None:
            # Detect rising edge crossing threshold
            if self.previous < self.threshold <= sample:
                peak_detected = True
        self.previous = sample
        return peak_detected

# Usage example
detector = PeakDetector(threshold=15)
samples = [10, 12, 14, 16, 13, 17, 14]
peaks = [detector.process(s) for s in samples]
print(peaks)  # True where peaks cross threshold
Why this works: The detector only compares the current and previous samples against a fixed threshold, requiring minimal computation and memory.
Mind Map: Peak Detection Algorithm
Example 3: Real-Time Fast Fourier Transform (FFT) Using Overlapping Windows
Frequency analysis is often needed to extract vibration or Doppler information from laser signals. Implementing FFT in real time requires careful windowing and buffer management.
import numpy as np

class RealTimeFFT:
    def __init__(self, window_size, overlap):
        self.window_size = window_size
        self.overlap = overlap
        self.step = window_size - overlap
        self.buffer = np.zeros(window_size)
        self.index = 0

    def process(self, new_samples):
        # Shift buffer to make room for new samples
        self.buffer[:-len(new_samples)] = self.buffer[len(new_samples):]
        self.buffer[-len(new_samples):] = new_samples
        # Compute FFT
        fft_result = np.fft.fft(self.buffer)
        return fft_result

# Usage example
fft_processor = RealTimeFFT(window_size=1024, overlap=512)
# Simulate streaming data in chunks
chunks = [np.random.randn(512) for _ in range(10)]
for chunk in chunks:
    spectrum = fft_processor.process(chunk)
    # Process spectrum (e.g., find dominant frequency)
Why this works: Overlapping windows ensure continuity between FFT frames, while shifting the buffer avoids reallocations. Processing fixed-size chunks keeps timing predictable.
Mind Map: Real-Time FFT Processing
General Tips for Writing Real-Time Algorithms
- Avoid Dynamic Memory Allocation: Allocate buffers once during initialization.
- Use Fixed-Point Arithmetic When Possible: Floating point can be slower on some embedded platforms.
- Profile Your Code: Identify bottlenecks and optimize critical sections.
- Minimize Branching: Branch prediction failures can cause delays.
- Use Lookup Tables: For functions like sine/cosine in FFTs, precompute values.
- Test with Real Data: Simulated inputs may not reveal timing issues.
By combining these practices and examples, you can build real-time laser sensing algorithms that meet performance needs without unnecessary complexity.
4.6 Example: Real-Time Processing for Laser-Based Velocity Measurement
Laser-based velocity measurement often relies on the Doppler effect, where a laser beam reflects off a moving surface, causing a frequency shift proportional to the velocity of that surface. Processing this signal in real time requires a combination of signal acquisition, filtering, feature extraction, and velocity calculation.
Step 1: Signal Acquisition
A photodetector captures the reflected laser light, converting optical signals into electrical signals. The output is typically a modulated waveform whose frequency shift encodes velocity information.
Step 2: Preprocessing and Noise Reduction
Raw signals contain noise from ambient light, electronic components, and surface irregularities. Applying a bandpass filter centered around the expected Doppler frequency helps isolate the signal of interest.
Step 3: Frequency Estimation
Estimating the frequency shift accurately is crucial. Common methods include:
- Zero Crossing Detection: Counting times the signal crosses zero voltage.
- Fast Fourier Transform (FFT): Transforming the time-domain signal into frequency domain.
- Autocorrelation: Measuring signal similarity over time lags.
Each method balances complexity, accuracy, and latency.
Step 4: Velocity Calculation
The Doppler frequency shift ( f_d ) relates to velocity ( v ) by:
\[ v = \frac{\lambda f_d}{2} \]
where \( \lambda \) is the laser wavelength. Real-time processing converts the estimated frequency shift into velocity using this formula.
Step 5: Output and Feedback
Processed velocity data can be displayed, logged, or fed into control systems.
Mind Map: Real-Time Laser Velocity Measurement Processing
Practical Example: Implementing Real-Time FFT-Based Velocity Measurement
Setup:
- Laser wavelength \( \lambda = 650 \) nm (red laser)
- Sampling frequency \( f_s = 10 \) kHz
- Expected velocity range: 0 to 5 m/s
Process:
- Acquire signal from photodetector at 10 kHz.
- Apply a digital bandpass filter from 100 Hz to 2 kHz to isolate Doppler frequencies.
- Segment the signal into windows of 1024 samples.
- Perform FFT on each window to find the dominant frequency peak.
- Calculate velocity using the Doppler formula.
- Update output every 100 ms.
Code snippet (pseudo-code):
import numpy as np
from scipy.signal import butter, lfilter

def bandpass_filter(data, lowcut, highcut, fs, order=4):
    nyq = 0.5 * fs
    low = lowcut / nyq
    high = highcut / nyq
    b, a = butter(order, [low, high], btype='band')
    return lfilter(b, a, data)

# Constants
lambda_laser = 650e-9  # meters
fs = 10000  # Hz
window_size = 1024

# Acquire raw_data from photodetector
# raw_data = acquire_data()

# Filter signal
filtered_data = bandpass_filter(raw_data, 100, 2000, fs)

# Process in windows
for i in range(0, len(filtered_data) - window_size, window_size):
    window = filtered_data[i:i+window_size]
    fft_result = np.fft.fft(window)
    freqs = np.fft.fftfreq(window_size, 1/fs)
    positive_freqs = freqs[:window_size//2]
    magnitudes = np.abs(fft_result[:window_size//2])
    peak_index = np.argmax(magnitudes)
    doppler_freq = positive_freqs[peak_index]
    velocity = (lambda_laser * doppler_freq) / 2
    print(f"Velocity: {velocity:.3f} m/s")
Mind Map: FFT-Based Velocity Measurement Workflow
Additional Notes
- Window size affects frequency resolution and latency. Larger windows improve frequency resolution but increase delay.
- Overlapping windows can smooth velocity estimates.
- Zero crossing methods are simpler but less robust in noisy environments.
- Autocorrelation can improve frequency estimation for low SNR signals but requires more computation.
This example demonstrates how real-time signal processing turns raw photodetector data into meaningful velocity measurements using laser Doppler principles. The approach balances computational efficiency and accuracy, suitable for embedded or desktop systems.
5. Artificial Intelligence Algorithms for Laser Sensing
5.1 Overview of AI Techniques Relevant to Laser Sensing
Artificial intelligence (AI) techniques have become integral to interpreting and enhancing laser sensing data. This section provides a clear overview of the AI methods most relevant to laser sensing systems, focusing on their roles, strengths, and practical examples.
Categories of AI Techniques in Laser Sensing
AI methods applied to laser sensing broadly fall into three categories:
- Supervised Learning: Algorithms trained on labeled data to predict or classify new inputs.
- Unsupervised Learning: Methods that find patterns or structures in unlabeled data.
- Reinforcement Learning: Techniques where an agent learns optimal actions through feedback from the environment.
Below is a mind map summarizing these categories and their typical applications:
Supervised Learning
Supervised learning is the most common AI approach in laser sensing. It requires a dataset where inputs (laser sensor signals) are paired with correct outputs (labels or values). Common tasks include:
- Classification: For example, identifying surface defects from laser reflectance data. The algorithm learns to assign categories based on training examples.
- Regression: Estimating continuous parameters such as distance or velocity from laser signal features.
Example: A laser sensor captures reflected intensity patterns from different materials. A supervised classifier like a support vector machine (SVM) can be trained to distinguish between metal, plastic, and wood surfaces based on these patterns.
Unsupervised Learning
Unsupervised methods analyze laser data without explicit labels. They help uncover hidden structures or reduce data complexity.
- Clustering groups similar signal patterns, useful for anomaly detection or segmenting sensor data.
- Dimensionality Reduction techniques like Principal Component Analysis (PCA) simplify high-dimensional laser data to highlight key features.
Example: In a laser scanning system monitoring a manufacturing line, clustering algorithms can separate normal operation signals from unusual patterns indicating equipment wear.
Reinforcement Learning
Though less common in direct laser signal interpretation, reinforcement learning (RL) can optimize system parameters or control laser scanning paths.
- RL agents learn by trial and error, receiving rewards for desirable outcomes.
Example: An RL algorithm adjusts laser power and scanning speed in real time to maximize signal quality while minimizing energy consumption.
AI Techniques and Their Typical Algorithms
Practical Considerations
- Data Quality: AI performance depends heavily on the quality and representativeness of laser sensor data.
- Feature Engineering: Extracting meaningful features from raw laser signals improves AI model accuracy. Examples include time-domain statistics, frequency components, or wavelet coefficients.
- Model Complexity: Simple models like decision trees may suffice for straightforward classification, while complex neural networks handle nuanced patterns but require more data and computation.
Example: Using Supervised Learning for Laser-Based Surface Classification
- Data Collection: Gather laser reflectance signals from various known surface types.
- Feature Extraction: Compute intensity histograms and texture measures from the signals.
- Model Training: Train a random forest classifier on the labeled dataset.
- Evaluation: Test the model on new data to assess accuracy.
- Deployment: Integrate the model into the laser sensing system for real-time surface identification.
This example illustrates how AI can automate interpretation of complex laser data, reducing manual inspection effort.
Summary Mind Map
This overview sets the stage for deeper exploration of AI applications in laser sensing, emphasizing clear understanding and practical use.
5.2 Machine Learning Models for Pattern Recognition
Machine learning models are essential tools for recognizing patterns in laser sensing data. These models analyze input signals to identify meaningful features, classify objects, or detect anomalies. The choice of model depends on the problem complexity, data characteristics, and computational constraints.
Overview of Common Machine Learning Models
- Linear Models: Simple and interpretable, including Logistic Regression and Linear Discriminant Analysis (LDA). Useful when the relationship between features and classes is approximately linear.
- Support Vector Machines (SVMs): Effective for classification with clear margins between classes. Can handle nonlinear boundaries using kernel functions.
- Decision Trees and Random Forests: Tree-based models that split data based on feature thresholds. Random Forests combine multiple trees to improve robustness.
- k-Nearest Neighbors (k-NN): A non-parametric method that classifies based on the closest training examples in feature space.
- Neural Networks: Flexible models capable of capturing complex patterns, from simple multilayer perceptrons to deeper architectures.
Mind Map: Machine Learning Models for Pattern Recognition
Feature Representation in Laser Sensing
Before applying any model, raw laser data must be transformed into features. Common features include:
- Intensity values
- Time-of-flight measurements
- Frequency components (via Fourier or wavelet transforms)
- Statistical descriptors (mean, variance, skewness)
For example, a laser vibrometer signal might be converted into frequency-domain features to identify vibration patterns.
Example 1: Using SVM for Surface Defect Classification
Suppose we want to classify surface defects detected by a laser scanning system. The steps could be:
- Collect laser intensity profiles over different surface areas.
- Extract features such as peak intensities, width of peaks, and texture descriptors.
- Train an SVM with a radial basis function kernel on labeled data (defect types).
- Evaluate the model on new scans to classify defects.
This approach works well when defect patterns create distinct clusters in feature space.
Example 2: Random Forest for Material Identification
A laser sensor measures reflectance spectra from various materials. To identify the material:
- Extract spectral features at key wavelengths.
- Train a Random Forest classifier to learn decision boundaries.
- Use feature importance scores from the model to understand which wavelengths contribute most.
Random Forests handle noisy data and provide interpretability, which is useful in industrial settings.
Mind Map: Workflow for Applying Machine Learning in Laser Sensing
Considerations for Model Selection
- Data Size: Simpler models like logistic regression or SVMs require less data than deep neural networks.
- Feature Complexity: If features are well-engineered and separable, linear models may suffice.
- Computational Resources: Real-time systems may favor faster models.
- Interpretability: Tree-based models offer insight into decision logic.
Example 3: k-NN for Anomaly Detection in Laser Signals
In a quality control scenario, normal laser signal patterns are known. To detect anomalies:
- Store a database of normal feature vectors.
- For each new measurement, compute distance to nearest neighbors.
- Flag samples with distances exceeding a threshold as anomalies.
This method is straightforward and adapts well to changing conditions.
Summary
Machine learning models for pattern recognition in laser sensing range from simple linear classifiers to complex neural networks. The key is matching the model to the data and application. Feature extraction plays a critical role in enabling effective classification. Examples using SVMs, Random Forests, and k-NN illustrate practical approaches. Mind maps help visualize model categories and workflows, aiding understanding and implementation.
5.3 Deep Learning Architectures for Signal Interpretation
Deep learning has become a powerful tool for interpreting complex signals from laser sensing systems. Unlike traditional methods that rely on handcrafted features, deep learning models can automatically learn relevant features from raw or preprocessed data. This section focuses on common architectures suited for laser signal interpretation, practical considerations, and examples to clarify their application.
Key Deep Learning Architectures
-
Convolutional Neural Networks (CNNs)
CNNs are well-suited for spatially or temporally structured data. In laser sensing, signals often come as time series or spectrograms, which CNNs can process effectively by capturing local patterns.
- Example: Using CNNs to classify laser-induced vibration patterns for material defect detection.
-
Recurrent Neural Networks (RNNs) and Variants (LSTM, GRU)
RNNs handle sequential data by maintaining a memory of previous inputs. Long Short-Term Memory (LSTM) and Gated Recurrent Units (GRU) address the vanishing gradient problem, making them better for longer sequences.
- Example: Applying LSTM networks to analyze time-series laser Doppler vibrometer data for velocity estimation.
-
Autoencoders
Autoencoders learn compressed representations of input data, useful for noise reduction or anomaly detection in laser signals.
- Example: Using autoencoders to denoise laser backscatter signals before further processing.
-
Transformer Models
Transformers rely on attention mechanisms to weigh the importance of different parts of the input sequence, enabling parallel processing and improved long-range dependency capture.
- Example: Employing transformers to interpret complex laser spectral data for chemical sensing.
Mind Map: Deep Learning Architectures for Laser Signal Interpretation
Practical Example: CNN for Laser Signal Classification
Suppose you have laser vibrometer data represented as time-frequency spectrograms. A CNN can be designed with the following layers:
- Input layer: 2D spectrogram images
- Convolutional layers: Extract local features such as frequency patterns
- Pooling layers: Reduce dimensionality while preserving important features
- Fully connected layers: Combine features for classification
- Output layer: Softmax for defect categories
Training this network requires labeled data with known defect types. The CNN learns filters that highlight characteristic vibration signatures. After training, the model can classify new spectrograms with reasonable accuracy.
Practical Example: LSTM for Time-Series Laser Data
Laser Doppler vibrometer outputs velocity as a time series. An LSTM network can process this data to predict velocity trends or detect anomalies.
- Input: Sequences of velocity measurements
- LSTM layers: Capture temporal dependencies and trends
- Dense layers: Map LSTM outputs to predictions
- Output: Velocity estimate or anomaly score
This approach is useful when velocity changes over time contain subtle patterns that static models might miss.
Best Practices
-
Data Representation: Choose input formats that highlight relevant features. For example, convert raw signals to spectrograms for CNNs or keep raw sequences for LSTMs.
-
Model Complexity: Match model size to data volume to avoid overfitting. Small datasets benefit from simpler architectures or transfer learning.
-
Regularization: Use dropout or early stopping to prevent overfitting.
-
Evaluation: Use cross-validation and confusion matrices to assess classification performance.
-
Interpretability: Visualize learned filters or attention weights to understand model focus areas.
Mind Map: Practical Considerations
This section provides a foundation for selecting and implementing deep learning architectures tailored to laser sensing signals. The examples illustrate how different models fit different data types and tasks, while the mind maps summarize key points for quick reference.
5.4 Training and Validation with Laser Sensor Data
Training and validation are essential steps when applying AI algorithms to laser sensor data. The goal is to build models that can interpret sensor signals accurately and generalize well to new data. This section breaks down the process into manageable parts, illustrated with mind maps and practical examples.
Understanding the Data
Laser sensor data often come as time series, images, or point clouds, depending on the sensing modality. Before training, it’s important to understand the data structure, noise characteristics, and labeling quality.
Mind Map: Understanding Laser Sensor Data
Example: A laser vibrometer produces time-series vibration data. The data must be segmented into windows representing individual events before labeling.
Data Preparation
Data preparation includes cleaning, normalization, and splitting into training, validation, and test sets. Proper splitting avoids data leakage and ensures unbiased evaluation.
Mind Map: Data Preparation Steps
Example: For a laser rangefinder dataset, outliers caused by reflective surfaces are removed. The remaining data is normalized to zero mean and unit variance before splitting 70% training, 15% validation, and 15% test.
Model Training
Training involves feeding the prepared data into an AI model and adjusting parameters to minimize error. Key considerations include choosing the right loss function, batch size, and learning rate.
Mind Map: Model Training Essentials
Example: Training a convolutional neural network (CNN) on laser-scanned surface images uses cross-entropy loss for defect classification. Batch size is set to 32, and learning rate starts at 0.001.
Validation Techniques
Validation checks how well the model performs on unseen data. Common methods include hold-out validation, k-fold cross-validation, and leave-one-out.
Mind Map: Validation Methods
Example: Using 5-fold cross-validation on laser Doppler vibrometer data helps assess model stability across different vibration patterns.
Avoiding Overfitting and Underfitting
Overfitting happens when the model memorizes training data but fails on new inputs. Underfitting means the model is too simple to capture patterns.
Mind Map: Overfitting vs Underfitting
Example: Adding dropout layers in a neural network trained on laser sensor data reduces overfitting, improving validation accuracy.
Performance Metrics
Choosing the right metric depends on the task. Regression tasks use mean squared error; classification tasks use accuracy, precision, recall, and F1 score.
Mind Map: Performance Metrics
Example: For a laser-based defect detection system, precision and recall are critical because false negatives (missed defects) have serious consequences.
Example Workflow: Training a Laser Surface Defect Classifier
- Data Collection: Gather laser-scanned images of surfaces with and without defects.
- Data Cleaning: Remove corrupted scans and normalize pixel intensities.
- Labeling: Annotate images as “defect” or “no defect.”
- Splitting: Use 70% data for training, 15% for validation, 15% for testing.
- Model Selection: Choose a CNN architecture.
- Training: Use cross-entropy loss, batch size 32, learning rate 0.001.
- Validation: Perform 5-fold cross-validation.
- Evaluation: Calculate precision, recall, and F1 score.
- Adjustment: Apply dropout to reduce overfitting.
This workflow ensures the model learns meaningful patterns and generalizes well.
Training and validation with laser sensor data require careful attention to data characteristics and model behavior. The process is iterative and benefits from clear metrics and systematic evaluation. The mind maps above summarize key points and help keep the workflow organized.
5.5 Best Practices: Preparing Datasets and Avoiding Overfitting with Examples
Preparing datasets and avoiding overfitting are crucial steps when applying AI algorithms to laser sensing data. Overfitting happens when a model learns not only the underlying patterns but also the noise or peculiarities of the training data, resulting in poor generalization to new data. This section covers best practices to prepare datasets effectively and strategies to prevent overfitting, illustrated with concrete examples.
Dataset Preparation
A well-prepared dataset is the foundation for reliable AI models. Here are key steps:
-
Data Collection: Gather diverse laser sensing data covering all expected operating conditions. For example, if the system measures surface defects, collect data from different materials, lighting conditions, and sensor angles.
-
Data Labeling: Ensure accurate and consistent labeling. For instance, label defect types clearly and avoid ambiguous categories.
-
Data Cleaning: Remove corrupted or irrelevant data points. In laser sensing, this might mean discarding signals with excessive noise or sensor errors.
-
Data Augmentation: Increase dataset size and variability by applying transformations. For laser data, this could include adding synthetic noise, shifting signal timing, or simulating different environmental conditions.
-
Data Splitting: Divide data into training, validation, and test sets. A common split is 70% training, 15% validation, and 15% test. Ensure splits are representative and avoid leakage (e.g., same object appearing in both training and test).
Mind Map: Dataset Preparation
Avoiding Overfitting
Overfitting reduces model usefulness. Here are practical ways to avoid it:
-
Simplify the Model: Use the simplest model that performs adequately. For example, start with a shallow neural network before moving to deeper architectures.
-
Regularization: Techniques like L1/L2 regularization penalize overly complex models. In laser sensing, this helps prevent the model from fitting noise in signal features.
-
Early Stopping: Monitor validation loss during training and stop when it stops improving. This prevents the model from learning noise in later epochs.
-
Cross-Validation: Use k-fold cross-validation to assess model stability across different data subsets.
-
Dropout: Randomly drop neurons during training to reduce reliance on specific features.
-
Data Augmentation: As noted above, it also helps reduce overfitting by exposing the model to varied data.
-
Feature Selection: Use domain knowledge to select relevant features, reducing dimensionality and noise.
Mind Map: Avoiding Overfitting
Example 1: Surface Defect Classification
A laser sensor collects reflectance profiles from metal surfaces to detect defects. The initial dataset contains 500 samples labeled as “defect” or “no defect.” The model is a convolutional neural network (CNN).
-
Problem: The model achieves 98% accuracy on training data but only 75% on validation.
-
Diagnosis: Overfitting due to small dataset and complex model.
-
Actions Taken:
- Augmented data by adding Gaussian noise and slight shifts in signal timing.
- Reduced CNN depth from 5 layers to 3.
- Applied L2 regularization with a small coefficient.
- Implemented early stopping based on validation loss.
-
Result: Validation accuracy improved to 90%, and test accuracy was consistent.
Example 2: Laser Doppler Velocity Measurement
A system measures velocity using laser Doppler signals. The dataset includes signals from various speeds and environmental conditions.
-
Challenge: Model overfits to specific environmental noise patterns.
-
Solution:
- Collected additional data under different noise conditions.
- Used cross-validation to verify model robustness.
- Selected features based on physical understanding of Doppler shifts.
- Employed dropout layers during training.
-
Outcome: Model generalizes better across conditions, with reduced error variance.
Summary
Preparing datasets thoughtfully and applying overfitting prevention techniques are essential for building reliable AI models in laser sensing. Combining domain knowledge with standard machine learning practices leads to better performance and robustness.
This structured approach ensures that models learn meaningful patterns rather than quirks of the training data.
5.6 Example: Classifying Surface Defects Using AI on Laser Sensor Data
Surface defect detection is a common industrial challenge, especially in manufacturing processes where quality control is critical. Laser sensors provide precise surface profiles by measuring reflected light intensity or time-of-flight data. Using AI to classify defects from this data can automate inspection and improve consistency.
Step 1: Understanding the Data
Laser sensors scan the surface and generate signals that represent surface texture variations. These signals might be intensity profiles, distance measurements, or phase shifts. Defects such as scratches, pits, or bumps alter these signals in characteristic ways.
Mind map of data characteristics:
Step 2: Data Preprocessing
Raw laser data often contains noise and irrelevant variations. Preprocessing steps include:
- Filtering to remove high-frequency noise (e.g., using a low-pass filter).
- Normalization to standardize signal amplitude.
- Segmentation to isolate regions of interest.
Example: Applying a moving average filter smooths the intensity profile, making defect-induced dips or peaks more visible.
Step 3: Feature Extraction
AI models perform better with meaningful features rather than raw data. Common features include:
- Statistical descriptors: mean, variance, skewness of signal segments.
- Shape descriptors: peak height, width, and location.
- Frequency domain features: obtained via Fourier Transform.
Mind map for feature extraction:
Example: Calculating the variance of signal intensity in a segment can highlight irregularities caused by defects.
Step 4: Model Selection and Training
For classification, common AI models include Support Vector Machines (SVM), Random Forests, and Neural Networks. The choice depends on dataset size and complexity.
Example workflow:
- Split data into training and test sets.
- Train an SVM on extracted features.
- Validate model accuracy on test data.
Step 5: Evaluation Metrics
Accuracy alone can be misleading if defect classes are imbalanced. Use metrics such as:
- Precision and Recall
- F1 Score
- Confusion Matrix
Example: A model with 95% accuracy but low recall on scratches misses many defects, which is unacceptable.
Step 6: Deployment Considerations
Real-time classification requires efficient feature extraction and model inference. Techniques include:
- Reducing feature dimensionality (e.g., Principal Component Analysis).
- Using lightweight models.
Mind map summarizing the process:
Concrete Example
Suppose a laser sensor scans a metal sheet, producing intensity profiles. The goal is to classify segments as “scratch,” “pit,” or “no defect.”
- Preprocessing: Apply a moving average filter with a window size of 5 samples.
- Feature Extraction: For each segment, compute mean intensity, variance, and peak height.
- Model: Train a Random Forest classifier with 100 trees.
- Evaluation: Achieve 92% accuracy, with an F1 score of 0.89 for scratches.
This example shows how combining laser sensing with AI algorithms and signal processing steps leads to effective defect classification. Each step is essential: raw data alone is insufficient, and thoughtful feature design and model evaluation ensure reliable results.
6. Data Fusion Strategies in Intelligent Laser Systems
6.1 Principles of Data Fusion and Sensor Integration
Data fusion in laser sensing systems refers to the process of combining data from multiple sensors or sources to produce more consistent, accurate, and useful information than that provided by any individual sensor alone. Sensor integration is the practical aspect of bringing these sensors together into a cohesive system. Both are essential when working with intelligent laser sensing systems that rely on photonics, AI algorithms, and real-time signal processing.
Why Fuse Data?
Individual laser sensors have limitations such as noise, range constraints, or sensitivity to environmental conditions. By integrating multiple sensors and fusing their data, the system can compensate for these weaknesses, reduce uncertainty, and improve reliability.
Levels of Data Fusion
Data fusion can occur at different levels, each with distinct characteristics:
- Low-Level (Data-Level) Fusion: Raw data from sensors are combined directly. This requires synchronization and often involves filtering or averaging.
- Feature-Level Fusion: Features extracted from sensor data (e.g., peaks, frequency components) are combined. This reduces data volume and focuses on relevant information.
- Decision-Level Fusion: Independent decisions or classifications from each sensor are combined to reach a final conclusion.
Each level has trade-offs in complexity, latency, and robustness.
Mind Map: Levels of Data Fusion
Sensor Integration Challenges
Integrating multiple laser sensors involves addressing:
- Temporal Alignment: Ensuring data from different sensors correspond to the same time frame.
- Spatial Alignment: Calibrating sensor positions and orientations to a common reference.
- Data Format Compatibility: Converting data into compatible formats for fusion.
- Noise and Error Handling: Managing different noise profiles and error characteristics.
Example: Combining LIDAR and Laser Doppler Vibrometer Data
Imagine a system monitoring a manufacturing line where a LIDAR sensor measures object positions and a laser Doppler vibrometer measures vibrations. The LIDAR provides spatial coordinates, while the vibrometer provides frequency-domain vibration data.
- At the feature level, vibration frequencies and object positions can be combined to detect if an object is vibrating abnormally at a specific location.
- Decision-level fusion could involve separate anomaly detectors for position and vibration, whose outputs are combined to trigger alerts only when both indicate issues.
Mind Map: Sensor Integration Challenges
Fusion Techniques
Several common techniques are used for data fusion:
- Weighted Averaging: Assigns weights to sensor outputs based on confidence or accuracy.
- Kalman Filtering: A recursive algorithm that estimates system states by combining noisy sensor measurements over time.
- Bayesian Inference: Uses probability to update beliefs about system states based on sensor data.
- Neural Networks: Can learn complex fusion rules from training data.
Each technique suits different scenarios depending on sensor characteristics and computational resources.
Example: Kalman Filter for Laser Range Sensors
Two laser range sensors measure the distance to a target. Each measurement has noise. A Kalman filter can fuse these readings over time, producing a smoothed and more accurate estimate of the target distance. The filter accounts for measurement noise and system dynamics.
Mind Map: Fusion Techniques
Best Practices for Data Fusion and Sensor Integration
- Understand Sensor Characteristics: Know the noise, range, and error profiles of each sensor.
- Synchronize Data Streams: Use timestamps or hardware triggers to align data temporally.
- Calibrate Spatially: Perform geometric calibration to relate sensor coordinates.
- Choose Fusion Level Wisely: Balance between data volume, latency, and accuracy.
- Validate Fusion Results: Use ground truth or controlled tests to verify fused outputs.
Example: Practical Fusion Workflow
- Collect raw data from two laser sensors with synchronized timestamps.
- Convert data into a common coordinate system.
- Extract relevant features (e.g., distance, intensity).
- Apply a Kalman filter to combine measurements.
- Use the fused output for downstream AI algorithms.
This workflow ensures that the system benefits from multiple sensors while managing complexity.
In summary, data fusion and sensor integration form the backbone of intelligent laser sensing systems. They enable combining complementary information, reducing uncertainty, and improving system performance. Understanding the principles and practical considerations helps in designing robust and effective sensing solutions.
6.2 Fusion of Multiple Photonic Sensor Modalities
Combining data from different photonic sensor types can improve the accuracy, reliability, and scope of laser sensing systems. Each sensor modality captures unique aspects of the environment or target, and fusing their outputs helps to create a more comprehensive picture. This section explores how to integrate multiple photonic sensors effectively, with practical examples and mind maps to clarify the concepts.
Understanding Photonic Sensor Modalities
Photonic sensors vary by the physical principle they use and the information they provide. Common modalities include:
- Time-of-Flight (ToF) Sensors: Measure distance by timing the return of a laser pulse.
- Interferometric Sensors: Detect phase changes to measure displacement or vibration with high precision.
- Spectroscopic Sensors: Analyze wavelength-dependent absorption or reflection to identify material properties.
- Polarimetric Sensors: Use polarization changes to infer surface texture or stress.
- LIDAR: Combines ToF with scanning to create 3D maps.
Each modality has strengths and weaknesses. For example, ToF sensors provide direct distance but can struggle with reflective surfaces, while spectroscopic sensors offer chemical composition but not spatial data.
Why Fuse Multiple Modalities?
- Complementary Data: Different sensors fill gaps left by others.
- Error Reduction: Cross-validation between modalities reduces false readings.
- Robustness: If one sensor fails or is affected by environmental conditions, others can compensate.
- Enhanced Feature Extraction: Combining spatial, spectral, and polarization data enables richer analysis.
Basic Fusion Approaches
Fusion can happen at different levels:
- Data Level: Raw data from sensors combined before processing.
- Feature Level: Extracted features from each sensor merged.
- Decision Level: Independent sensor outputs combined to make a final decision.
The choice depends on system constraints like processing power, latency, and sensor compatibility.
Mind Map: Photonic Sensor Fusion Overview
Practical Example 1: Combining ToF and Spectroscopic Sensors for Material Identification and Distance
Imagine a system designed to inspect manufactured parts on a conveyor belt. A ToF sensor measures the distance to the part, ensuring correct positioning. Simultaneously, a spectroscopic sensor analyzes surface composition to detect contamination or coating defects.
- Data Level Fusion: Raw ToF distance data and spectral intensity values are combined into a single dataset.
- Feature Extraction: Distance and spectral peaks are extracted.
- Decision Level: A classifier uses both features to decide if the part passes quality control.
This fusion reduces false positives that might occur if only spectral data were used, for example, mistaking dirt for a coating defect.
Mind Map: ToF + Spectroscopic Fusion
Practical Example 2: Integrating Interferometric and Polarimetric Sensors for Structural Health Monitoring
In structural health monitoring, detecting tiny vibrations and stress changes is critical. An interferometric sensor can detect nanometer-scale displacements, while a polarimetric sensor measures changes in polarization caused by stress-induced birefringence.
- Feature Level Fusion: Displacement amplitude and polarization angle shifts are extracted.
- Correlation Analysis: Combined features reveal stress patterns and potential faults.
This fusion allows early detection of structural issues that might be missed by either sensor alone.
Mind Map: Interferometric + Polarimetric Fusion
Key Considerations When Fusing Photonic Modalities
- Synchronization: Sensors must be time-aligned to ensure data corresponds to the same event.
- Calibration: Each sensor’s output should be calibrated to a common reference to avoid bias.
- Data Alignment: Spatial alignment is necessary when sensors have different fields of view or resolutions.
- Computational Load: Fusion algorithms can be resource-intensive; balancing complexity and real-time requirements is essential.
Best Practices
- Start with simple fusion strategies (e.g., decision-level) before moving to more complex data-level fusion.
- Use calibration targets visible to all sensors to aid alignment.
- Implement modular software architectures to allow easy addition or removal of sensor modalities.
- Test fusion algorithms with controlled datasets before deploying in the field.
By combining multiple photonic sensor modalities thoughtfully, laser sensing systems gain depth and resilience. The examples and mind maps here provide a foundation for designing fusion strategies that match specific application needs.
6.3 Combining AI Outputs with Real-Time Signal Data
In intelligent laser sensing systems, combining AI outputs with real-time signal data is essential for creating responsive, accurate, and adaptable sensing solutions. This integration allows the system to leverage the strengths of both AI—such as pattern recognition and decision-making—and real-time signal processing, which ensures timely and precise handling of raw sensor data.
Why Combine AI Outputs with Real-Time Signal Data?
- Complementary Strengths: Real-time signal processing excels at filtering noise, extracting features, and maintaining temporal accuracy. AI algorithms interpret complex patterns and make predictions or classifications based on these features.
- Improved Accuracy: AI can correct or refine signal-based measurements by learning from historical data, while real-time data ensures the system remains responsive to immediate changes.
- Adaptive Systems: Combining both allows systems to adjust processing parameters dynamically based on AI feedback.
Key Approaches to Integration
- Sequential Processing: Real-time signal processing extracts features which are then fed into AI models for classification or regression.
- Parallel Processing: AI models run concurrently with signal processing, and their outputs are fused to improve decision confidence.
- Feedback Loops: AI outputs influence signal processing parameters in real time, creating adaptive filtering or thresholding.
Mind Map: Integration Workflow
Practical Example 1: Surface Defect Detection in Manufacturing
Scenario: A laser sensor scans a metal surface to detect defects. The raw signal contains noise and subtle variations.
- Step 1: Real-time signal processing filters noise and extracts features like peak amplitude and frequency components.
- Step 2: An AI classifier, trained on labeled defect and non-defect data, analyzes these features.
- Step 3: The AI output (defect probability) is combined with signal confidence metrics (signal-to-noise ratio) using weighted averaging.
- Step 4: If the combined score exceeds a threshold, an alert is triggered.
This approach improves detection accuracy by ensuring the AI decision is not solely based on raw features but also accounts for signal quality.
Mind Map: Surface Defect Detection Fusion
Practical Example 2: Laser Doppler Vibrometry for Vibration Analysis
Scenario: A laser Doppler vibrometer measures vibrations on a structure. Real-time signal processing extracts velocity and displacement signals.
- Step 1: Signal processing performs filtering and calculates instantaneous velocity.
- Step 2: An AI regression model predicts structural health indicators from velocity patterns.
- Step 3: The AI output is combined with real-time velocity magnitude to adjust alert thresholds dynamically.
This feedback loop allows the system to be sensitive to subtle changes while avoiding false alarms caused by transient noise.
Mind Map: Vibrometry Fusion with AI Feedback
Best Practices for Combining AI and Real-Time Signal Data
- Synchronize Data Streams: Ensure AI inputs and signal data are time-aligned to avoid lag-induced errors.
- Normalize Inputs: Scale features and AI outputs to compatible ranges before fusion.
- Choose Fusion Level Wisely: Decide whether to fuse raw data, features, or decisions based on system requirements.
- Implement Confidence Measures: Use signal quality metrics and AI confidence scores to weight fusion.
- Test with Realistic Data: Validate fusion strategies on datasets reflecting operational conditions.
Combining AI outputs with real-time signal data is a balancing act. It requires careful design to maintain responsiveness while leveraging AI’s interpretive power. The examples above illustrate how practical fusion strategies can enhance system performance in laser sensing applications.
6.4 Handling Uncertainty and Sensor Errors in Fusion
When combining data from multiple laser sensors or integrating laser sensing with other modalities, uncertainty and sensor errors are inevitable. Ignoring these factors can lead to misleading results or system failures. This section covers practical approaches to identify, quantify, and manage uncertainties and errors in sensor fusion.
Understanding Sources of Uncertainty and Errors
Sensor errors can be broadly categorized into systematic errors, random errors, and environmental influences. Systematic errors are consistent biases, such as calibration offsets or misalignment. Random errors arise from noise and fluctuations in measurements. Environmental factors include temperature changes, vibrations, or dust, which affect sensor performance.
Mind Map: Sources of Uncertainty and Errors
Quantifying Uncertainty
Quantification starts with characterizing each sensor’s error profile. Common methods include:
- Statistical Analysis: Calculate mean, variance, and standard deviation from repeated measurements.
- Error Models: Define mathematical models representing sensor behavior, e.g., Gaussian noise models.
- Confidence Intervals: Express measurement uncertainty as a range with a probability level.
Example: A laser rangefinder repeatedly measures a fixed distance. The readings have a mean of 1000 mm and a standard deviation of 2 mm. The uncertainty can be expressed as 1000 mm ± 2 mm (1σ confidence).
Incorporating Uncertainty in Fusion Algorithms
Fusion algorithms must account for uncertainties to weigh sensor inputs appropriately. Common approaches include:
- Kalman Filters: Use sensor noise covariance matrices to optimally combine measurements over time.
- Bayesian Methods: Treat sensor outputs as probability distributions and update beliefs based on new data.
- Weighted Averaging: Assign weights inversely proportional to sensor variance.
Example: When fusing distance measurements from two laser sensors, one with higher noise variance should contribute less to the final estimate.
Mind Map: Approaches to Handle Uncertainty in Fusion
Detecting and Managing Sensor Faults
Not all errors are random or small. Sensors can fail or produce outliers. Techniques to handle this include:
- Outlier Detection: Use statistical tests (e.g., Z-score) or robust estimators to identify abnormal readings.
- Redundancy: Use multiple sensors measuring the same quantity to cross-check data.
- Fault-Tolerant Fusion: Design fusion algorithms that can exclude or down-weight faulty sensors dynamically.
Example: If one laser sensor suddenly reports a distance far outside the expected range, the fusion system flags it as an outlier and reduces its influence.
Mind Map: Fault Management in Sensor Fusion
Practical Example: Fusion of Laser Distance and Velocity Sensors
Consider a system combining a laser rangefinder and a laser Doppler velocimeter to monitor a moving object. The rangefinder has a known bias due to temperature drift, and the velocimeter suffers from random noise.
- Characterize Errors: Measure bias in the rangefinder and noise variance in both sensors.
- Model Uncertainty: Represent rangefinder bias as a systematic offset and velocimeter noise as Gaussian noise.
- Apply Kalman Filter: Use the filter to estimate position and velocity, incorporating the bias as a state variable.
- Outlier Handling: Monitor residuals; if velocimeter readings deviate significantly, reduce their weight temporarily.
This approach improves accuracy and robustness compared to using either sensor alone.
Summary
Handling uncertainty and sensor errors is essential for reliable laser sensor fusion. Start by understanding error sources, quantify uncertainties, and incorporate them into fusion algorithms. Detect faults early and design systems that adapt to sensor performance changes. These steps ensure the fusion output remains trustworthy and useful in real-world conditions.
6.5 Best Practices: Designing Robust Fusion Pipelines with Illustrative Examples
Designing robust fusion pipelines in intelligent laser sensing systems involves carefully combining data from multiple sensors and processing layers to improve accuracy, reliability, and context-awareness. This section outlines practical steps and considerations, supported by illustrative examples and mind maps to clarify the process.
Key Principles in Fusion Pipeline Design
- Data Quality Assessment: Evaluate the reliability, noise levels, and latency of each sensor input before fusion.
- Temporal Alignment: Synchronize data streams to ensure meaningful correlation.
- Feature-Level vs. Decision-Level Fusion: Decide whether to combine raw/processed features or final decisions from individual sensors.
- Uncertainty Management: Quantify and propagate uncertainties through the fusion process.
- Modularity: Design pipeline components to be replaceable and scalable.
- Computational Efficiency: Balance fusion complexity with real-time constraints.
Mind Map: Fusion Pipeline Components
Step 1: Assess and Prepare Sensor Data
Before fusion, each sensor’s data should be cleaned and calibrated. For example, a laser rangefinder might produce noisy distance readings under certain lighting conditions. Applying a median filter can reduce outliers. Synchronizing timestamps across sensors ensures data corresponds to the same time frame.
Example: In an autonomous navigation system, laser rangefinder data is timestamped and filtered, while camera frames are corrected for lens distortion and aligned temporally using interpolation.
Step 2: Choose Fusion Level
- Feature-Level Fusion: Combine extracted features such as distance, intensity, or velocity vectors. This allows richer information but requires compatible feature spaces.
- Decision-Level Fusion: Combine outputs like detected object classes or presence/absence flags from separate classifiers. This is simpler but may lose detail.
Example: A system detecting obstacles might fuse laser intensity and camera color histograms at the feature level to improve material classification. Alternatively, it might fuse separate obstacle detection decisions from laser and camera at the decision level.
Step 3: Manage Uncertainty
Each sensor has inherent uncertainty. Representing these uncertainties explicitly helps the fusion algorithm weigh inputs appropriately.
Example: Using a Kalman filter, the system models sensor noise covariance matrices. If the laser sensor’s noise increases due to fog, its covariance grows, reducing its influence in the fused estimate.
Step 4: Implement Fusion Algorithm
Common fusion algorithms include:
- Kalman Filters: For linear, Gaussian systems with temporal data.
- Particle Filters: For nonlinear or non-Gaussian cases.
- Bayesian Networks: To model probabilistic dependencies.
- Neural Networks: For learned fusion strategies.
Example: A robot uses an Extended Kalman Filter to fuse laser range data and inertial measurements, producing a smooth position estimate.
Step 5: Validate and Iterate
Test the fusion pipeline with real-world data. Analyze failure cases and adjust preprocessing, fusion weights, or uncertainty models.
Example: After initial deployment, the system misclassifies glass surfaces. Adding reflectivity features from the laser sensor into the fusion improves performance.
Mind Map: Practical Fusion Workflow
Illustrative Example: Multi-Sensor Fusion for Obstacle Detection
Scenario: Combine data from a laser rangefinder and a camera to detect obstacles in an indoor environment.
- Preprocessing: Laser data is filtered with a moving average filter; camera images are undistorted and converted to grayscale.
- Feature Extraction: From laser, extract distance points; from camera, extract edges using Canny detector.
- Fusion Strategy: Feature-level fusion by projecting laser points onto the camera image plane to associate distance with edges.
- Uncertainty Handling: Assign confidence scores based on sensor noise and lighting conditions.
- Fusion Algorithm: Use a weighted average of distance estimates where laser and camera features overlap.
- Output: Generate a 2D obstacle map with confidence levels.
This approach improves obstacle detection accuracy compared to using either sensor alone.
Summary
Robust fusion pipelines require systematic preparation of sensor data, careful choice of fusion level, explicit handling of uncertainty, and iterative validation. Visualizing the pipeline components and workflow helps maintain clarity. Practical examples reinforce how these principles apply in real systems.
6.6 Example: Multi-Sensor Fusion for Autonomous Navigation
Autonomous navigation relies on accurate perception of the environment. Laser sensors, such as LiDAR, provide detailed spatial information, but they have limitations like sensitivity to weather or surface reflectivity. Combining data from multiple sensors can improve reliability and accuracy. This example illustrates how laser sensing data can be fused with other sensor inputs to support autonomous navigation.
Overview of Sensors Involved
- LiDAR (Light Detection and Ranging): Provides 3D point clouds representing the surroundings.
- Camera: Offers color and texture information, useful for object classification.
- Inertial Measurement Unit (IMU): Measures acceleration and angular velocity, aiding in motion estimation.
- GPS: Provides global position data, though with limited precision in urban canyons.
Fusion Objectives
- Improve obstacle detection and classification.
- Enhance localization accuracy.
- Provide robust navigation under varying environmental conditions.
Step 1: Data Acquisition and Preprocessing
Each sensor outputs data at different rates and formats. Synchronization is essential.
- LiDAR produces point clouds at 10-20 Hz.
- Cameras typically capture images at 30 Hz.
- IMU streams data at 100-200 Hz.
- GPS updates at 1-10 Hz.
Preprocessing includes noise filtering, timestamp alignment, and coordinate transformation to a common reference frame.
Step 2: Feature Extraction
- From LiDAR: Extract geometric features such as edges, planes, and clusters representing obstacles.
- From Camera: Detect objects using bounding boxes and semantic labels.
- From IMU: Calculate velocity and orientation changes.
Step 3: Data Fusion Techniques
Fusion can occur at different levels:
- Low-level (raw data fusion): Combining raw sensor data, e.g., projecting camera pixels onto LiDAR points.
- Feature-level fusion: Merging extracted features, such as associating LiDAR clusters with camera-detected objects.
- Decision-level fusion: Combining outputs from separate sensor-specific classifiers.
In this example, feature-level fusion is applied for balance between complexity and performance.
Mind Map: Multi-Sensor Fusion Workflow
Step 4: Sensor Confidence and Weighting
Each sensor has strengths and weaknesses. For example, LiDAR is precise in distance but struggles with transparent surfaces; cameras provide rich context but depend on lighting.
Assigning weights based on sensor reliability in current conditions improves fusion results. For instance, in fog, reduce camera weight and increase LiDAR weight.
Step 5: Integration and Decision Making
The fused data feeds into the navigation system. Obstacle maps are updated in real time, and localization is refined by combining GPS and IMU with LiDAR-based mapping.
This integration supports path planning algorithms that avoid obstacles and maintain accurate positioning.
Practical Example: Detecting a Pedestrian
- LiDAR detects a cluster of points at a certain distance.
- Camera identifies a human-shaped object in the same region.
- IMU confirms vehicle stability, reducing false positives from motion.
- Fusion associates the LiDAR cluster with the camera detection, increasing confidence.
- The system flags the object as a pedestrian and adjusts the vehicle’s path accordingly.
Mind Map: Pedestrian Detection Fusion
Summary
This example shows how multi-sensor fusion combines complementary data to improve autonomous navigation. The process involves careful synchronization, feature extraction, weighting sensor inputs, and integrating the results into actionable outputs. By fusing laser sensing with other modalities, systems gain robustness and precision that single sensors alone cannot provide.
7. Calibration and Validation of Laser Sensing Systems
7.1 Calibration Techniques for Photonic Sensors
Calibration is the process of adjusting and verifying a photonic sensor’s output to ensure its measurements are accurate and consistent with known standards. Photonic sensors, which rely on light interactions, can be sensitive to environmental factors, component aging, and alignment issues. Proper calibration is essential to maintain system reliability.
Why Calibrate Photonic Sensors?
- Correct systematic measurement errors.
- Compensate for drift over time.
- Ensure traceability to standards.
- Improve repeatability and reproducibility.
Types of Calibration
- Absolute Calibration: Establishes the sensor’s output against a known physical quantity.
- Relative Calibration: Adjusts sensor output relative to a reference sensor or baseline.
Common Calibration Techniques
- Wavelength Calibration: Aligning the sensor’s spectral response to known wavelength standards.
- Power Calibration: Adjusting output based on known optical power levels.
- Spatial Calibration: Correcting for beam alignment and positioning errors.
Mind Map: Calibration Techniques Overview
Step-by-Step Example: Power Calibration of a Photodiode Sensor
- Setup: Connect the photodiode sensor to the measurement system.
- Reference Source: Use a calibrated laser source with a known output power.
- Measurement: Record the sensor’s output voltage or current at the known power.
- Adjustment: Calculate the sensor’s responsivity (output per unit power).
- Correction: Apply a calibration factor to future measurements to convert raw output to power units.
This process ensures that the sensor’s electrical output corresponds accurately to the optical power it detects.
Mind Map: Power Calibration Process
Example: Wavelength Calibration Using Gas Absorption Lines
Certain gases absorb light at very specific wavelengths. By passing the laser light through a gas cell (e.g., iodine or methane), you can observe absorption dips at known wavelengths.
- Measure the sensor’s spectral response.
- Identify absorption features.
- Align the sensor’s wavelength scale to match the known absorption lines.
This method provides a precise wavelength reference without requiring expensive equipment.
Mind Map: Wavelength Calibration
Practical Tips for Calibration
- Environmental Control: Perform calibration in stable temperature and humidity conditions to reduce variability.
- Repeatability: Take multiple measurements to average out random noise.
- Documentation: Record calibration parameters and conditions for traceability.
- Regular Schedule: Calibrate periodically based on sensor usage and environmental exposure.
Example: Spatial Calibration for a Laser Displacement Sensor
A laser displacement sensor measures distance by detecting reflected light. Misalignment can cause errors.
- Use precision translation stages to move a target known distances.
- Record sensor output at each position.
- Plot sensor reading vs. actual displacement.
- Adjust sensor alignment or apply correction factors to linearize the response.
Mind Map: Spatial Calibration
Calibration is not a one-time task but an ongoing process to ensure photonic sensors deliver reliable data. Each technique suits different sensor types and measurement goals. Combining multiple calibration methods often yields the best results.
7.2 Reference Standards and Traceability
Reference standards and traceability form the backbone of reliable calibration in laser sensing systems. Without them, measurements lose meaning and comparisons become guesswork. This section explains what these terms mean, why they matter, and how they apply to laser sensing.
What Are Reference Standards?
Reference standards are physical artifacts or defined quantities used as benchmarks for measurement. They provide a known, stable value against which instruments can be calibrated. In laser sensing, common reference standards include:
- Wavelength Standards: Lasers or optical filters with precisely known emission wavelengths.
- Distance Standards: Gauge blocks or interferometric setups with certified lengths.
- Power Standards: Calibrated photodiodes or power meters with traceable responsivity.
These standards are maintained and certified by national metrology institutes to ensure consistency.
Understanding Traceability
Traceability is the documented, unbroken chain of calibrations linking a measurement to an accepted reference standard, usually tied to the International System of Units (SI). It guarantees that a measurement result can be related back to fundamental units through a series of comparisons, each with stated uncertainties.
Without traceability, a laser sensor’s output is just a number; with it, that number has meaning and can be trusted across time and location.
Mind Map: Reference Standards and Traceability in Laser Sensing
Applying Reference Standards in Laser Sensing Calibration
Consider a laser distance sensor used in manufacturing. To calibrate it:
- Use gauge blocks with certified lengths as physical distance standards.
- Measure the blocks with the sensor and record readings.
- Compare sensor readings to the known lengths.
- Adjust sensor output or apply correction factors.
- Document the calibration with certificates showing traceability to national standards.
This process ensures that when the sensor measures a part, the result is accurate and comparable to other measurements worldwide.
Example: Calibrating a Laser Power Meter
A laser power meter needs calibration to ensure its readings reflect true optical power. The steps might be:
- Use a calibrated thermal power sensor as a reference standard.
- Illuminate both the power meter and the reference sensor with the same laser source.
- Record readings from both devices.
- Calculate correction factors for the power meter.
- Maintain traceability by documenting the reference sensor’s calibration history.
This ensures the power meter’s readings are trustworthy for applications like laser safety or process control.
Mind Map: Traceability Chain Example
Why Traceability Matters in Practice
- Consistency Across Devices: Two laser sensors calibrated with traceable standards will produce comparable results.
- Regulatory Compliance: Many industries require traceable calibrations for quality and safety.
- Error Quantification: Traceability includes uncertainty budgets, helping users understand measurement limits.
Summary
Reference standards provide the yardstick; traceability ensures the yardstick is linked back to the original ruler. Together, they make laser sensing measurements reliable and meaningful. Calibration without these concepts is calibration in name only.
7.3 Validation Protocols for AI and Signal Processing Modules
Validation is a crucial step to ensure that AI models and signal processing algorithms perform as intended within intelligent laser sensing systems. Without proper validation, outputs may be unreliable or misleading, which can compromise the entire sensing application.
Key Objectives of Validation
- Confirm algorithm accuracy and robustness
- Detect biases or systematic errors
- Verify real-time performance constraints
- Ensure consistency across different operating conditions
Mind Map: Validation Protocol Components
Data Validation
The foundation of any validation process is the data. For AI modules, this means ensuring that the datasets used for training and testing are representative of real-world conditions. Signal processing modules require input signals that cover the expected range of variations.
Example: Suppose you have a laser sensor system designed to detect surface defects. The training data should include laser signals from various materials, defect types, and environmental conditions. Splitting data into training, validation, and testing sets helps prevent overfitting and assesses generalization.
Cross-validation, such as k-fold, can be used to maximize data utilization while providing reliable performance estimates.
Performance Metrics
Choosing the right metrics depends on the task. For classification tasks in AI, accuracy alone can be misleading if classes are imbalanced. Precision and recall provide insight into false positives and false negatives, respectively.
For signal processing algorithms, metrics might include signal-to-noise ratio improvement or error rates in feature extraction.
Example: In a laser Doppler vibrometer system, validating the signal processing pipeline might involve comparing extracted vibration frequencies against known reference signals and calculating mean squared error.
Robustness Testing
Real-world laser sensing systems encounter noise, temperature changes, and other environmental factors. Validation must include tests that simulate these conditions to evaluate algorithm resilience.
Example: Add controlled noise to input signals and observe AI model classification stability. If performance drops significantly, consider retraining with augmented data or refining preprocessing steps.
Real-Time Constraints
Validation should confirm that algorithms meet timing requirements. This involves measuring latency (time from input to output) and throughput (number of processed samples per second).
Example: For a laser-based velocity measurement system, the signal processing and AI inference must complete within milliseconds to provide timely feedback. Profiling tools can measure execution times and identify bottlenecks.
Reproducibility
Documenting code versions, parameter settings, and dataset versions ensures that validation results can be reproduced. This is essential for debugging and future improvements.
Example: Use version control systems and configuration files to track changes. When validating an AI model, log hyperparameters and training epochs.
Mind Map: Example Validation Workflow for AI Module
Concrete Example: Validating a Surface Defect Classifier
-
Data Preparation: Collect laser sensor readings from metal surfaces with and without defects. Split into 70% training, 15% validation, 15% testing.
-
Training: Use a convolutional neural network to classify defect types.
-
Evaluation: Calculate precision, recall, and F1 score on the validation set. Suppose precision is 0.85 and recall is 0.80.
-
Robustness: Add Gaussian noise to test data at varying levels. Observe that F1 score drops below 0.70 at high noise, indicating sensitivity.
-
Real-Time Check: Measure inference time on target hardware; it is 10 ms per sample, within the 20 ms requirement.
-
Documentation: Save model weights, training logs, and environment details for reproducibility.
Validation is not a one-time step but an ongoing process. Regular checks help maintain system reliability as data or operating conditions evolve.
7.4 Error Analysis and Performance Metrics
Error analysis and performance metrics are essential to understand how well a laser sensing system performs and where improvements are needed. In intelligent laser sensing, errors arise from multiple sources—photonics, signal processing, and AI algorithms. Quantifying these errors helps ensure the system meets its intended accuracy and reliability.
Types of Errors in Laser Sensing Systems
Errors can be broadly categorized as follows:
- Systematic Errors: Consistent, repeatable errors caused by calibration issues, component imperfections, or environmental factors.
- Random Errors: Unpredictable fluctuations due to noise, interference, or inherent sensor limitations.
- Model Errors: Inaccuracies introduced by AI algorithms or signal processing models that misinterpret data.
Understanding the nature of these errors guides the choice of metrics and analysis methods.
Mind Map: Sources of Error in Laser Sensing
Common Performance Metrics
-
Accuracy: The closeness of a measurement to the true value. For example, a laser rangefinder measuring a 10 m target with ±2 cm accuracy.
-
Precision: The repeatability or consistency of measurements under unchanged conditions.
-
Resolution: The smallest detectable change in the measured quantity.
-
Sensitivity: The system’s ability to detect small changes in input.
-
Signal-to-Noise Ratio (SNR): Ratio of the desired signal power to the noise power.
-
Root Mean Square Error (RMSE): A statistical measure of the magnitude of error.
-
Confusion Matrix Metrics (for AI classification tasks): Includes precision, recall, F1 score.
Mind Map: Performance Metrics Overview
Example 1: Error Analysis in a Laser Distance Sensor
Suppose a laser distance sensor is tested by measuring a fixed target at 5 m repeatedly. The results show a mean measured distance of 5.02 m with a standard deviation of 0.01 m.
- Accuracy: The mean error is +2 cm, indicating a systematic offset.
- Precision: The standard deviation of 1 cm shows good repeatability.
- Resolution: If the sensor reports measurements in 1 mm increments, the resolution is 1 mm.
By plotting the measurements over time, one might observe drift caused by temperature changes, suggesting the need for temperature compensation.
Example 2: Performance Metrics for AI Classification in Laser Sensing
Consider an AI model classifying surface defects from laser sensor data. After testing on 100 samples:
- True Positives (TP): 45
- True Negatives (TN): 40
- False Positives (FP): 5
- False Negatives (FN): 10
Calculate:
- Precision = TP / (TP + FP) = 45 / (45 + 5) = 0.9
- Recall = TP / (TP + FN) = 45 / (45 + 10) = 0.82
- F1 Score = 2 * (Precision * Recall) / (Precision + Recall) ≈ 0.86
These metrics reveal the model is good at identifying defects but misses some (false negatives), which could be critical depending on the application.
Error Propagation and Combined Metrics
In intelligent laser sensing, errors from photonics, signal processing, and AI combine. Understanding how these propagate is vital.
For example, if the photonic sensor has an error of ±1 cm and the signal processing adds ±0.5 cm, the combined error is not simply additive but follows a root-sum-square:
\[ \text{Total Error} = \sqrt{(1)^2 + (0.5)^2} = 1.12 \text{ cm} \]
This approach helps in setting realistic performance expectations.
Mind Map: Error Propagation
Practical Tips for Error Analysis
- Always separate systematic and random errors; systematic errors can often be corrected.
- Use repeated measurements to estimate precision.
- When evaluating AI models, consider both false positives and false negatives in context.
- Visualize errors with plots—histograms, scatter plots, or time series—to detect patterns.
- Document error sources clearly to guide future improvements.
In summary, error analysis and performance metrics provide a structured way to assess intelligent laser sensing systems. They help identify weaknesses, quantify reliability, and support informed decisions during system design and deployment.
7.5 Best Practices: Step-by-Step Calibration Procedures with Real-World Examples
Calibration is the backbone of reliable laser sensing systems. It ensures that measurements reflect true physical quantities rather than artifacts of the device or environment. The process involves comparing the sensor output against known standards and adjusting system parameters accordingly. Below is a structured approach to calibration, accompanied by mind maps and practical examples.
Step 1: Define Calibration Objectives and Metrics
Before starting, clarify what you need to calibrate and why. Are you calibrating distance measurements, intensity readings, or angular positions? Identify the key performance indicators (KPIs) such as accuracy, repeatability, and linearity.
Example: For a laser rangefinder used in industrial automation, the objective might be to ensure distance measurements are accurate within ±1 mm over a 10 m range.
Step 2: Select Appropriate Reference Standards
Choose calibration standards traceable to national or international benchmarks. These could be gauge blocks for distance, calibrated reflectance targets for intensity, or precision rotary stages for angular calibration.
Example: Using a set of gauge blocks with certified lengths to calibrate a laser displacement sensor ensures traceability and confidence in measurements.
Step 3: Prepare the Calibration Setup
Arrange the sensor and reference standards in a controlled environment. Minimize external influences such as vibrations, temperature fluctuations, and ambient light.
Example: Mount the laser sensor on a vibration-isolated optical table and use an adjustable mount to align it precisely with the gauge blocks.
Step 4: Perform Initial Measurements and Record Data
Take multiple readings at each calibration point to assess repeatability. Record raw sensor outputs along with environmental conditions.
Example: Measure the distance to each gauge block position five times, noting temperature and humidity during each measurement.
Step 5: Analyze Data and Identify Systematic Errors
Calculate deviations between sensor readings and reference values. Look for patterns indicating bias, non-linearity, or drift.
Example: Plot measured distances against gauge block lengths and fit a line. Deviations from this line reveal systematic errors.
Step 6: Apply Calibration Corrections
Adjust sensor parameters or apply correction algorithms to compensate for identified errors. This could involve offset correction, gain adjustment, or non-linear compensation.
Example: If the sensor consistently reads 0.5 mm too high, subtract this offset from all future measurements.
Step 7: Validate Calibration
Repeat measurements after applying corrections to verify improvements. Confirm that performance meets the defined objectives.
Example: After correction, the laser rangefinder measurements fall within ±0.8 mm of the gauge block lengths, satisfying the ±1 mm target.
Step 8: Document Calibration Results and Procedures
Keep detailed records of calibration steps, data, corrections applied, and environmental conditions. This documentation supports traceability and future recalibrations.
Example: Generate a calibration certificate including measurement data plots, correction formulas, and operator signatures.
Real-World Example: Calibrating a Laser Displacement Sensor
Scenario: A laser displacement sensor measures the thickness of metal sheets in a manufacturing line. The goal is to ensure thickness readings are accurate within ±0.02 mm.
- Objective: Calibrate thickness measurement accuracy.
- Reference: Use certified gauge blocks with thicknesses ranging from 0.5 mm to 5 mm.
- Setup: Sensor mounted on a stable frame, gauge blocks placed on a flat surface beneath.
- Measurement: Take 10 readings per gauge block, record ambient temperature.
- Analysis: Calculate mean error and observe a linear bias increasing with thickness.
- Correction: Apply a linear gain correction derived from regression analysis.
- Validation: Post-correction errors fall within ±0.015 mm.
- Documentation: Create a report with all data and correction details.
Mind Map Summary of Calibration Procedure
This structured approach helps maintain consistency and reliability in laser sensing systems. Calibration is not a one-time task but a routine that ensures your measurements remain trustworthy over time.
7.6 Example: Calibrating a Laser Rangefinder for Industrial Use
Calibration is essential to ensure that a laser rangefinder provides accurate and reliable distance measurements. In industrial settings, even small errors can lead to costly mistakes or safety issues. This example walks through a practical calibration process, highlighting key steps, considerations, and common pitfalls.
Step 1: Understand the Device and Its Specifications
Before starting calibration, gather the device’s technical specifications:
- Measurement range
- Accuracy and resolution
- Environmental operating conditions
- Output format (analog, digital, serial data)
Knowing these helps set realistic calibration goals and choose appropriate reference standards.
Step 2: Prepare the Calibration Environment
Create a stable, controlled environment to minimize external influences:
- Use a flat, stable surface for mounting the rangefinder.
- Ensure consistent lighting to avoid interference.
- Control temperature and humidity if possible, as these affect laser propagation.
Step 3: Select Reference Targets and Distances
Choose targets with known, precise distances. Common choices include:
- Gauge blocks or calibrated metal plates
- Optical flats with certified thickness
- Fixed markers at measured intervals
Set up targets at multiple distances covering the device’s operational range.
Step 4: Collect Raw Measurement Data
For each reference distance:
- Take multiple measurements (e.g., 10-20) to account for noise and variability.
- Record raw output values.
- Note environmental conditions.
Example:
| Reference Distance (m) | Measurement 1 (m) | Measurement 2 (m) | … | Measurement N (m) |
|---|---|---|---|---|
| 1.0 | 1.002 | 1.001 | … | 1.003 |
| 5.0 | 5.005 | 5.007 | … | 5.004 |
Step 5: Analyze Measurement Errors
Calculate the error for each measurement:
\[ \text{Error} = \text{Measured Distance} - \text{Reference Distance} \]
Then compute:
- Mean error (bias)
- Standard deviation (precision)
Plotting errors against reference distances can reveal systematic trends.
Step 6: Develop Calibration Correction Model
If errors show a linear trend, a simple linear correction may suffice:
\[ D_{corrected} = a \times D_{measured} + b \]
Where:
- \(a\) is a scale factor
- \(b\) is an offset
Use least squares regression on the error data to find \(a\) and \(b\).
If errors are more complex, consider polynomial or piecewise corrections.
Step 7: Implement and Validate Calibration
Apply the correction model to the raw measurements and test against the reference distances:
- Check if mean error approaches zero.
- Confirm that precision remains acceptable.
Repeat measurements to verify consistency.
Step 8: Document Calibration and Set Maintenance Schedule
Record:
- Calibration date
- Environmental conditions
- Correction parameters
- Measurement uncertainty
Plan periodic recalibration based on device usage and environmental factors.
Mind Map: Laser Rangefinder Calibration Process
Example Calculation
Suppose the following raw measurements were taken at a reference distance of 3.0 meters:
| Measurement # | Raw Distance (m) |
|---|---|
| 1 | 3.012 |
| 2 | 3.010 |
| 3 | 3.013 |
| 4 | 3.011 |
| 5 | 3.014 |
Mean measured distance = (3.012 + 3.010 + 3.013 + 3.011 + 3.014) / 5 = 3.012 m
Error = 3.012 - 3.000 = +0.012 m (12 mm bias)
If similar positive bias is observed across other distances, a correction offset \(b = -0.012\) m can be applied to reduce systematic error.
Common Pitfalls
- Using unstable or imprecise reference targets.
- Ignoring environmental factors that influence laser behavior.
- Collecting too few measurements, leading to unreliable statistics.
- Overfitting correction models to limited data.
Calibration is not a one-time task but an ongoing process to maintain measurement integrity. Following these steps ensures your laser rangefinder performs reliably in demanding industrial environments.
8. Embedded Systems and Hardware Implementation
8.1 Hardware Platforms for Real-Time Laser Sensing
Real-time laser sensing demands hardware platforms that can handle high-speed data acquisition, rapid signal processing, and often integration with AI algorithms. Choosing the right platform depends on the application’s requirements for latency, throughput, power consumption, and physical size.
Key Hardware Platform Categories
- Microcontrollers (MCUs): Suitable for low-speed, low-complexity laser sensing tasks. They offer simplicity and low power but limited processing power.
- Digital Signal Processors (DSPs): Designed for efficient numerical computation, DSPs excel at real-time signal filtering and transformation.
- Field Programmable Gate Arrays (FPGAs): Provide parallel processing capabilities and customizable hardware pipelines, ideal for high-throughput, low-latency tasks.
- System on Chips (SoCs): Combine CPUs, GPUs, DSPs, and sometimes FPGAs on a single chip, balancing flexibility and performance.
Considerations When Selecting Hardware
- Processing Speed: Laser sensing often involves high-frequency signals; hardware must process data without bottlenecks.
- Latency: Real-time systems require minimal delay between sensing and output.
- Power Consumption: Especially important for portable or battery-powered devices.
- I/O Interfaces: Compatibility with photonic sensors and data converters.
- Development Complexity: Trade-offs between ease of programming and performance.
Mind Map: Hardware Platform Selection Criteria
Microcontrollers (MCUs)
MCUs are often the first choice for simple laser sensing applications such as basic distance measurement or presence detection. They integrate ADCs, timers, and communication peripherals, making them compact and cost-effective.
Example: Using an ARM Cortex-M4 MCU to read photodiode output from a laser rangefinder. The MCU handles ADC sampling, basic filtering, and sends processed data over UART to a host system.
Best Practice: Optimize ADC sampling rate to balance resolution and power consumption. Use DMA (Direct Memory Access) to offload CPU during data acquisition.
Digital Signal Processors (DSPs)
DSPs specialize in fast arithmetic operations and are well-suited for filtering, FFTs, and other signal processing tasks common in laser sensing.
Example: Implementing a laser Doppler vibrometer signal processing chain on a Texas Instruments C6000 DSP. The DSP performs real-time FFTs to extract vibration frequencies.
Best Practice: Utilize fixed-point arithmetic where possible to improve speed and reduce power. Employ hardware accelerators integrated in DSPs for common operations.
Field Programmable Gate Arrays (FPGAs)
FPGAs offer hardware-level parallelism, enabling simultaneous processing of multiple data streams. This is advantageous for complex laser sensing systems requiring low latency.
Example: An FPGA-based LIDAR system processing raw photonic signals in parallel pipelines to generate 3D point clouds in real time.
Best Practice: Partition processing tasks into parallel blocks to maximize throughput. Use hardware description languages (HDLs) to implement custom filters and AI inference engines.
System on Chips (SoCs)
SoCs integrate multiple processing units, combining the flexibility of CPUs with the speed of DSPs or FPGAs. They are suitable for systems requiring both complex AI algorithms and real-time signal processing.
Example: A SoC with ARM cores and an embedded FPGA processes laser sensor data, runs AI models for classification, and communicates results over Ethernet.
Best Practice: Assign time-critical signal processing to FPGA fabric, while running AI inference and system management on CPU cores. Optimize data transfer between components to minimize latency.
Mind Map: Example Hardware Platform Use Cases
Summary
Selecting a hardware platform for real-time laser sensing involves balancing processing needs, latency, power, and development complexity. MCUs fit simple tasks, DSPs handle intensive signal processing, FPGAs excel at parallelism, and SoCs offer integrated solutions combining these strengths. Understanding the application’s demands guides the choice, ensuring the hardware supports both the photonic sensor and the required real-time processing.
8.2 FPGA and DSP Architectures for Signal Processing
In intelligent laser sensing systems, processing signals efficiently and in real time is crucial. Two common hardware platforms for this task are Field Programmable Gate Arrays (FPGAs) and Digital Signal Processors (DSPs). Each has strengths and trade-offs that influence system design.
FPGA Architectures
FPGAs are integrated circuits that can be configured by the user after manufacturing. They consist of an array of programmable logic blocks and interconnects, enabling custom hardware implementations.
- Parallelism: FPGAs excel at parallel processing. Multiple signal processing tasks can run simultaneously, which is beneficial for high-throughput laser data.
- Deterministic Timing: Because the hardware is fixed-function once programmed, timing is predictable, aiding real-time constraints.
- Customizability: You can tailor the architecture to specific algorithms, optimizing resource usage and latency.
Mind Map: FPGA Architecture Components
Example: Implementing a FIR Filter on FPGA
A finite impulse response (FIR) filter is common in laser signal conditioning. On an FPGA, each multiply-accumulate operation can be mapped to DSP slices, allowing multiple taps to be computed in parallel. This reduces latency compared to sequential processing on a general-purpose CPU.
DSP Architectures
DSPs are specialized microprocessors optimized for numerical operations common in signal processing. They typically feature:
- Single Instruction Multiple Data (SIMD): Allows simultaneous operations on multiple data points.
- Hardware Multiply-Accumulate (MAC) Units: Speed up common filtering and transform operations.
- Specialized Memory Architectures: Fast access to data and instructions.
Mind Map: DSP Architecture Features
Example: Using DSP for FFT Computation
Laser sensing often involves frequency domain analysis. DSPs can efficiently compute Fast Fourier Transforms (FFT) using built-in instructions and optimized libraries. While DSPs process data sequentially, pipelining and SIMD instructions improve throughput.
Comparing FPGA and DSP for Laser Signal Processing
| Feature | FPGA | DSP |
|---|---|---|
| Parallelism | High (custom parallel pipelines) | Moderate (SIMD, pipelining) |
| Flexibility | High (hardware reconfigurable) | Moderate (software programmable) |
| Development Time | Longer (hardware design required) | Shorter (software development) |
| Power Efficiency | Potentially better for parallel tasks | Efficient for sequential algorithms |
| Real-Time Predictability | Very high (deterministic hardware) | High (depends on software and OS) |
Hybrid Approaches
Some systems combine FPGAs and DSPs to leverage both strengths. For example, an FPGA can handle front-end filtering and data formatting, while a DSP performs higher-level algorithmic processing.
Mind Map: Hybrid FPGA-DSP Signal Processing Flow
Example: Laser Doppler Vibrometer Signal Chain
In a laser Doppler vibrometer, raw photodetector signals first pass through FPGA-based filters and decimators to reduce data rate and noise. The DSP then calculates velocity and displacement using processed data, applying algorithms that require floating-point operations.
Best Practices
- Match Architecture to Algorithm: Use FPGA for highly parallel, fixed-function tasks; DSP for flexible, complex computations.
- Optimize Data Movement: Minimize data transfer between FPGA and DSP to reduce latency.
- Use Hardware Resources Wisely: On FPGA, leverage DSP slices and block RAM efficiently.
- Consider Development Tools: FPGA design requires hardware description languages (HDLs) like VHDL or Verilog; DSP programming often uses C/C++ with specialized libraries.
Summary
FPGA and DSP architectures offer complementary capabilities for real-time laser signal processing. Understanding their internal structures and how they map to signal processing tasks helps in designing effective intelligent laser sensing systems.
8.3 Integration of AI Accelerators in Embedded Systems
Embedded systems for intelligent laser sensing often require real-time processing of complex data. AI accelerators—specialized hardware designed to speed up machine learning tasks—can significantly improve performance and energy efficiency. This section explains how to integrate these accelerators into embedded platforms, focusing on practical steps, challenges, and examples.
Understanding AI Accelerators
AI accelerators come in various forms: GPUs, TPUs, FPGAs, and dedicated ASICs. Each has strengths and trade-offs:
- GPUs: Good for parallel processing, widely supported, but can consume more power.
- TPUs: Optimized for tensor operations, efficient for deep learning but less flexible.
- FPGAs: Highly customizable, can be tailored for specific algorithms, but require more development effort.
- ASICs: Custom chips designed for specific AI tasks, very efficient but costly and inflexible.
Choosing the right accelerator depends on system constraints like power, latency, and development resources.
Integration Workflow
-
Model Selection and Optimization: Start with an AI model suited for the laser sensing task (e.g., classification, regression). Optimize it for the target accelerator by quantizing weights, pruning, or converting to compatible formats.
-
Hardware Interface Setup: Connect the AI accelerator to the embedded system’s main processor. This could be via PCIe, USB, or dedicated buses. Ensure drivers and firmware support communication.
-
Software Stack Configuration: Use SDKs or APIs provided by the accelerator vendor to deploy the AI model. This includes runtime environments and libraries for inference.
-
Data Pipeline Integration: Feed preprocessed laser sensor data into the AI accelerator. Manage data transfer efficiently to avoid bottlenecks.
-
Performance Tuning: Profile latency, throughput, and power consumption. Adjust batch sizes, precision, or parallelism to meet system requirements.
-
Validation and Testing: Verify that the integrated system produces correct outputs under real operating conditions.
Mind Map: AI Accelerator Integration Steps
Example: Integrating an FPGA AI Accelerator for Laser Signal Classification
Consider an embedded laser sensing system designed to classify surface textures based on reflected laser signals. The AI model is a convolutional neural network (CNN) trained on preprocessed signal features.
-
Model Optimization: The CNN is quantized from 32-bit floating point to 8-bit fixed point to reduce resource usage on the FPGA.
-
Hardware Setup: The FPGA board connects to the embedded processor via PCIe. Custom drivers are installed to enable data exchange.
-
Software Configuration: The FPGA vendor’s SDK is used to compile the quantized model into a hardware description that runs on the FPGA fabric.
-
Data Pipeline: The embedded processor preprocesses raw laser signals (filtering, normalization) and streams feature vectors to the FPGA.
-
Performance Tuning: Batch size is set to 1 to meet real-time constraints. Latency is measured and optimized by adjusting clock speeds and pipeline depth.
-
Validation: The system is tested with known surface samples to confirm classification accuracy matches expectations.
Mind Map: FPGA Integration Example
Challenges and Solutions
-
Data Transfer Bottlenecks: Moving data between CPU and accelerator can slow down processing. Use DMA (Direct Memory Access) to minimize CPU overhead.
-
Model Compatibility: Not all AI models run natively on every accelerator. Use model converters or retrain with compatible architectures.
-
Power Constraints: Embedded systems often have limited power budgets. Choose accelerators with low power modes and optimize model size.
-
Development Complexity: FPGA and ASIC integration require hardware design skills. Use high-level synthesis tools or prebuilt IP cores to reduce effort.
Best Practices
- Profile early and often to identify bottlenecks.
- Start with a simple model and gradually increase complexity.
- Use hardware simulation tools before deploying on physical devices.
- Document interfaces and data formats clearly to avoid integration errors.
Integrating AI accelerators into embedded laser sensing systems can greatly improve processing speed and efficiency. The key is careful planning, model optimization, and thorough testing to ensure the system meets real-time and accuracy requirements.
8.4 Power Management and Thermal Considerations
Power management and thermal control are essential in embedded laser sensing systems. These systems often operate continuously or in demanding environments, making efficient power use and heat dissipation critical to reliability and performance.
Power Management
Power management involves controlling and optimizing the energy consumption of all system components, including lasers, photodetectors, signal processors, and AI accelerators.
-
Power Budgeting: Start by estimating the power requirements of each component. For example, a laser diode may consume tens to hundreds of milliwatts, while an FPGA or DSP might draw several watts. Adding these gives the total system power budget.
-
Dynamic Power Scaling: Adjust power usage based on workload. For instance, reduce laser output power or processor clock speeds when sensing demands are low. This saves energy and reduces heat.
-
Sleep and Wake Modes: Implement low-power modes during idle periods. A laser sensor might shut down its laser or reduce sampling rate when no target is detected.
-
Voltage Regulation: Use efficient DC-DC converters to supply stable voltages with minimal loss. Linear regulators waste power as heat, so switching regulators are preferred for higher efficiency.
-
Power Sequencing: Ensure components power up and down in the correct order to avoid damage or data loss. For example, power the photodetector bias after the laser stabilizes.
Thermal Considerations
Heat generated by lasers, processors, and power electronics can degrade performance or cause failure. Managing this heat is vital.
-
Heat Sources: Identify major heat contributors. A high-power laser diode and an FPGA running complex AI algorithms are typical hot spots.
-
Thermal Pathways: Design clear paths for heat to flow away from components. This includes heat sinks, thermal interface materials, and chassis design.
-
Temperature Sensors: Integrate sensors near critical components to monitor temperature in real time. This data can trigger power adjustments or system shutdowns.
-
Active Cooling: Use fans or thermoelectric coolers if passive cooling is insufficient. For compact embedded systems, fans must be quiet and reliable.
-
Thermal Simulation: Model heat distribution during design to identify hotspots and optimize layout.
-
Material Selection: Use materials with good thermal conductivity for PCBs and enclosures.
Mind Map: Power Management in Laser Sensing Systems
Mind Map: Thermal Considerations
Examples
Example 1: Power Management in a Laser Distance Sensor
A laser distance sensor uses a 100 mW laser diode and a microcontroller. The system implements dynamic power scaling by reducing laser power to 30 mW when the target is beyond 10 meters, saving energy and reducing heat. The microcontroller enters a low-power mode between measurements, cutting its consumption by 50%. Voltage regulation uses a switching regulator with 85% efficiency.
Example 2: Thermal Control in an FPGA-Based Laser Vibrometer
An FPGA processes high-speed laser vibrometer data, generating significant heat. Designers attach a heat sink with thermal paste and place a temperature sensor near the FPGA. If temperature exceeds 70°C, the system reduces FPGA clock speed to lower heat output. The enclosure includes vents to promote airflow, and a small fan activates when temperature crosses 60°C.
Example 3: Power Sequencing in a Multi-Component Laser Sensing Module
A sensing module includes a laser diode, photodetector, and AI accelerator. The power controller ensures the laser diode powers on first and stabilizes for 100 ms before enabling the photodetector bias voltage. The AI accelerator powers up last to avoid processing unstable signals. On shutdown, the sequence reverses to prevent damage.
In summary, managing power and heat in intelligent laser sensing systems requires careful planning and implementation. Balancing energy efficiency with performance and reliability ensures the system operates smoothly in real-world conditions.
8.5 Best Practices: Designing Embedded Systems with Practical Implementation Examples
Designing embedded systems for intelligent laser sensing requires a careful balance of hardware capabilities, software efficiency, and real-world constraints. This section outlines best practices to guide you through the process, supported by practical examples and mind maps to clarify complex relationships.
Key Considerations in Embedded System Design
- Resource Constraints: Embedded platforms often have limited CPU power, memory, and energy. Prioritize efficient algorithms and hardware acceleration where possible.
- Real-Time Requirements: Laser sensing systems frequently demand low-latency processing to respond to dynamic environments.
- Integration: Seamless interaction between photonic sensors, signal conditioning circuits, and AI modules is essential.
- Scalability and Maintainability: Design modular software and hardware to simplify updates and troubleshooting.
Mind Map: Embedded System Design Components
Best Practices with Examples
Choose the Right Hardware Platform
Start by matching your system requirements with hardware capabilities. For example, if your laser sensing application requires high-speed signal processing, consider an FPGA or DSP alongside a microcontroller.
Example: A laser Doppler vibrometer needs to process high-frequency vibration signals in real time. Using an FPGA to implement digital filters offloads the CPU and meets timing constraints.
Modularize Software Components
Separate signal acquisition, processing, AI inference, and communication into distinct modules. This approach simplifies debugging and allows independent updates.
Example: In a laser rangefinder, the signal acquisition module handles ADC data, the processing module filters and extracts distance information, and the AI module classifies surface types. Each runs as a separate task under a real-time OS.
Optimize Signal Processing for Embedded Constraints
Use fixed-point arithmetic where possible to reduce computational load. Implement efficient filtering algorithms like FIR filters with symmetric coefficients to minimize multiplications.
Example: Replacing floating-point FFT with a fixed-point variant on a DSP reduces processing time and power consumption in a laser vibrometer.
Integrate AI Inference Efficiently
Deploy lightweight AI models tailored for embedded platforms. Quantize models to reduce memory footprint and inference time.
Example: A convolutional neural network for surface defect detection is pruned and quantized to run on a microcontroller with limited RAM.
Manage Power Consumption
Implement sleep modes and dynamic frequency scaling. Turn off unused peripherals during idle periods.
Example: In a battery-powered laser sensing node, the system enters low-power mode between measurements, waking only to acquire and process data.
Implement Robust Communication Protocols
Use error-checking and retransmission strategies to ensure data integrity, especially in noisy industrial environments.
Example: A laser sensor network uses CRC checks and acknowledgment packets over SPI to guarantee reliable data transfer.
Test and Calibrate Thoroughly
Automate calibration routines and include self-test features to detect sensor drift or hardware faults.
Example: The embedded system runs a calibration sequence on startup, adjusting gain settings based on reference measurements.
Mind Map: Software Module Breakdown
Practical Implementation Example: Laser Vibrometer Embedded System
Scenario: Design an embedded system to process laser vibrometer signals, classify vibration patterns, and communicate results.
- Hardware: ARM Cortex-M7 microcontroller with integrated DSP instructions, external ADC for high-resolution sampling.
- Software:
- Signal acquisition via DMA to minimize CPU load.
- FIR filtering implemented in fixed-point.
- Feature extraction (e.g., RMS, peak frequency) computed in real time.
- A small neural network classifies vibration types, quantized to 8-bit weights.
- Results sent over UART with CRC error checking.
- Power: MCU enters low-power mode between measurements.
This design balances processing speed, power use, and accuracy by leveraging hardware features and efficient software design.
By following these practices, you can build embedded systems that handle the demands of intelligent laser sensing without overloading resources or sacrificing reliability.
8.6 Example: Deploying an AI-Enabled Laser Sensor on an FPGA
Deploying an AI-enabled laser sensor on an FPGA involves combining photonic sensing hardware, real-time signal processing, and AI inference within a compact, efficient embedded platform. This example walks through the key steps, design considerations, and practical implementation details.
Step 1: Define System Requirements
- Laser sensor type: Time-of-flight (ToF) distance measurement
- AI task: Object classification based on reflected laser signal patterns
- Real-time constraint: Processing latency under 10 ms
- FPGA target: Mid-range FPGA with DSP slices and embedded RAM
Step 2: Signal Acquisition and Preprocessing
The laser sensor outputs analog signals representing reflected light intensity over time. These signals require digitization and conditioning before AI processing.
- Analog front-end: Amplification and filtering to reduce noise
- ADC: 12-bit resolution at 1 MSPS (mega samples per second)
- Preprocessing: Normalization and windowing of signal segments
Step 3: AI Model Selection and Optimization
The AI model must be lightweight enough to run on FPGA resources yet accurate for classification.
- Model type: Small convolutional neural network (CNN) with 3 convolutional layers and 2 fully connected layers
- Input: Preprocessed laser signal segments reshaped as 1D arrays
- Optimization: Quantization to 8-bit fixed point to reduce resource usage
Step 4: FPGA Implementation Architecture
The FPGA design integrates signal acquisition, preprocessing, AI inference, and output communication.
Step 5: Signal Acquisition Module
- Implement an SPI or parallel interface to receive ADC data
- Use FIFO buffers to handle data bursts
- Apply digital filters (e.g., moving average) in hardware for noise reduction
Example Verilog snippet for FIFO buffer:
module fifo_buffer #(parameter WIDTH=12, DEPTH=64) (
  input clk,
  input rst,
  input wr_en,
  input [WIDTH-1:0] data_in,
  output reg [WIDTH-1:0] data_out,
  input rd_en,
  output reg empty,
  output reg full
);
  // FIFO implementation details here
endmodule
Step 6: Preprocessing Module
- Normalize input data to a fixed range (e.g., 0 to 1) using fixed-point math
- Segment data into windows matching CNN input size
- Store windows in on-chip RAM for AI engine access
Example normalization formula:
normalized_value = (raw_value - min_value) / (max_value - min_value)
Implemented in fixed-point arithmetic with scaling factors.
Step 7: AI Inference Engine
- Map CNN layers to FPGA resources:
- Convolution layers use DSP slices for multiply-accumulate operations
- Activation functions approximated with lookup tables or piecewise linear functions
- Fully connected layers implemented as matrix-vector multiplications
- Use pipeline and parallelism to meet latency requirements
Example: Fixed-point multiply-accumulate operation in Verilog:
wire signed [15:0] mult_out;
assign mult_out = input_data * weight;
reg signed [31:0] acc;
always @(posedge clk) begin
  if (reset) acc <= 0;
  else acc <= acc + mult_out;
end
Step 8: Output and Communication
- After inference, classification results sent via UART or SPI to a host system
- Status LEDs indicate system health and processing status
Example UART transmission pseudocode:
if (classification_ready) {
  uart_send(classification_result);
}
Step 9: Testing and Validation
- Simulate each module independently and as a system
- Use test vectors from recorded laser sensor data
- Verify AI accuracy matches software baseline
- Measure latency and resource utilization
Summary Mind Map
This example demonstrates how to integrate laser sensing, real-time signal processing, and AI inference on an FPGA platform. The key is balancing resource constraints with performance needs, optimizing each stage from signal acquisition to AI computation. Using fixed-point arithmetic and hardware-friendly AI models ensures the system runs efficiently with predictable latency. Practical Verilog modules and mind maps help clarify the design and implementation process.
9. Software Frameworks and Development Tools
9.1 Software Architectures for Intelligent Laser Systems
Software architectures for intelligent laser systems form the backbone that connects photonic hardware, real-time signal processing, and AI algorithms into a cohesive unit. These architectures must balance responsiveness, reliability, and modularity to handle the continuous streams of data laser sensors produce while enabling complex computations without bottlenecks.
Core Architectural Layers
At a high level, software for intelligent laser sensing can be divided into several layers:
- Hardware Abstraction Layer (HAL): Interfaces directly with photonic sensors and acquisition hardware, managing device drivers and low-level communication.
- Signal Processing Layer: Implements filtering, noise reduction, feature extraction, and prepares data for AI modules.
- AI and Decision Layer: Runs machine learning models or rule-based algorithms to interpret processed signals.
- Application Layer: Handles user interaction, system configuration, data logging, and visualization.
Each layer should be designed to minimize dependencies, allowing updates or replacements without cascading changes.
Mind Map: Software Architecture Layers
Real-Time Considerations
Laser sensing systems often require real-time or near-real-time processing. This means the architecture must support predictable timing and low latency. Common approaches include:
- Multi-threading or multi-processing: Separate threads handle data acquisition, processing, and AI inference to prevent blocking.
- Buffering and Queues: Circular buffers or message queues smooth out data flow between asynchronous components.
- Prioritization: Critical tasks like sensor data capture get higher priority.
Mind Map: Real-Time Processing Structure
Modularity and Extensibility
A modular design allows swapping or upgrading components without rewriting the entire system. For example, you might want to replace a filtering algorithm or update the AI model independently.
Using interfaces or abstract classes to define component behavior helps. For instance, a signal processor interface could define methods like process(rawData) and configure(params). Concrete implementations then provide specific algorithms.
Example: Modular Signal Processing Pipeline
Each module can be enabled, disabled, or replaced without affecting others.
Data Flow and Communication Patterns
Data flow between components can follow different patterns:
- Pipeline: Data moves sequentially through processing stages.
- Publish-Subscribe: Components publish data to topics; subscribers consume relevant data asynchronously.
- Client-Server: Request-response model, useful for configuration or control commands.
Choosing the right pattern depends on system complexity and performance needs.
Example: Publish-Subscribe in Laser Sensing
Imagine a system where the data acquisition module publishes raw data to a “raw_data” topic. Signal processing modules subscribe to this topic, process data, and publish results to a “processed_data” topic. The AI module subscribes to “processed_data” and publishes decisions or alerts to an “alerts” topic.
Mind Map: Communication Patterns
Example: Simple Software Architecture for a Laser Distance Sensor
- HAL: Reads distance measurements from the laser sensor via USB.
- Signal Processing: Applies smoothing filter to raw distance values.
- AI Layer: Detects anomalies in distance patterns using a simple threshold-based classifier.
- Application: Displays distance and alerts on a dashboard.
This setup uses a pipeline architecture with a single processing thread and a basic UI. The modularity allows upgrading the AI layer to a machine learning model without changing other parts.
Summary
Designing software architecture for intelligent laser sensing systems requires clear separation of concerns, real-time data handling, and modularity. Mindful layering and communication patterns ensure the system remains maintainable and scalable. Concrete examples, like modular pipelines and publish-subscribe messaging, help ground these concepts in practical terms.
9.2 Real-Time Operating Systems and Middleware
Real-time operating systems (RTOS) and middleware form the backbone of intelligent laser sensing systems, especially when precise timing and predictable behavior are non-negotiable. Unlike general-purpose operating systems, RTOS prioritize deterministic task scheduling, ensuring that sensor data is processed within strict timing constraints. Middleware, on the other hand, acts as a bridge between hardware and application layers, simplifying communication and resource management.
Understanding RTOS in Laser Sensing
An RTOS manages hardware resources, runs applications, and processes data with guaranteed timing. This is crucial for laser sensing systems where delays or jitter can lead to inaccurate measurements or missed events.
Key features of RTOS include:
- Deterministic Scheduling: Tasks run within defined time windows.
- Interrupt Handling: Quick response to sensor events.
- Multitasking: Concurrent execution of signal acquisition, processing, and AI inference.
- Resource Management: Efficient use of CPU, memory, and peripherals.
Mind Map: RTOS Core Concepts
Middleware Role and Types
Middleware simplifies the complexity of hardware-software interaction. It provides standardized interfaces, communication protocols, and data handling mechanisms.
Common middleware components in laser sensing systems include:
- Message Queues: For inter-task communication.
- Data Serialization: To format sensor data for transmission or storage.
- Device Drivers: Abstract hardware specifics.
- Communication Protocols: Support for protocols like CAN, SPI, or Ethernet.
Mind Map: Middleware Components
Example: Implementing an RTOS for a Laser Doppler Vibrometer
Consider a laser Doppler vibrometer that measures vibration velocity in real time. The system must acquire laser sensor data, process signals, and run AI algorithms concurrently.
- Task 1: Sensor Data Acquisition (High priority)
- Task 2: Signal Filtering and Feature Extraction (Medium priority)
- Task 3: AI Inference for Anomaly Detection (Lower priority)
Using an RTOS, Task 1 preempts others to ensure no data is lost. Middleware message queues pass processed data from Task 2 to Task 3 asynchronously, maintaining system responsiveness.
Example: Middleware for Multi-Sensor Fusion
In a system combining laser rangefinders and photodetectors, middleware manages data streams from different sensors. It serializes data into a common format and synchronizes timestamps to fuse inputs accurately. This reduces complexity in application code and improves maintainability.
Best Practices
- Prioritize Tasks by Criticality: Assign higher priorities to time-sensitive sensor acquisition.
- Use Lightweight Middleware: Avoid bloated middleware that can introduce latency.
- Design for Modularity: Middleware should allow easy swapping or upgrading of components.
- Test Timing Constraints: Verify that RTOS scheduling meets the system’s real-time requirements.
Summary
RTOS and middleware are essential for managing the complexity and timing demands of intelligent laser sensing systems. RTOS ensures tasks execute predictably, while middleware streamlines communication and hardware abstraction. Together, they enable reliable, maintainable, and scalable system designs.
9.3 AI Frameworks Compatible with Laser Sensing Applications
Laser sensing systems generate complex data streams that often require tailored AI frameworks to extract meaningful information efficiently. Choosing the right AI framework depends on the nature of the laser data, computational constraints, and the specific task at hand, such as classification, regression, or anomaly detection.
Key Considerations for Framework Selection
- Data Type and Format: Laser sensing data can be time-series signals, images (e.g., from LIDAR point clouds), or spectral data. Frameworks that support flexible input types simplify preprocessing.
- Real-Time Processing Needs: Some applications require low-latency inference, influencing framework choice toward lightweight or hardware-accelerated options.
- Hardware Compatibility: Embedded systems may favor frameworks optimized for edge devices or FPGA integration.
- Model Complexity: Frameworks differ in ease of developing simple models versus complex deep learning architectures.
Popular AI Frameworks and Their Fit for Laser Sensing
| Framework | Strengths | Typical Use Cases in Laser Sensing |
|---|---|---|
| TensorFlow | Extensive ecosystem, hardware acceleration | Deep learning for point cloud classification, spectral analysis |
| PyTorch | Dynamic computation graph, ease of experimentation | Rapid prototyping of custom models, anomaly detection |
| ONNX Runtime | Model interoperability, optimized inference | Deploying trained models on embedded systems |
| scikit-learn | Simplicity, classical ML algorithms | Feature extraction, regression, clustering |
| TensorRT | High-performance inference on NVIDIA GPUs | Real-time processing in autonomous navigation |
Mind Map: AI Framework Selection for Laser Sensing
Example 1: Using TensorFlow for LIDAR Point Cloud Classification
A LIDAR sensor produces 3D point clouds representing the environment. TensorFlow’s support for convolutional neural networks (CNNs) can be leveraged to classify objects within the point cloud. The process involves:
- Preprocessing point cloud data into voxel grids or projected images.
- Designing a CNN architecture suitable for spatial data.
- Training the model on labeled datasets.
- Deploying the model with TensorFlow Lite for edge inference.
This approach benefits from TensorFlow’s scalability and hardware acceleration.
Example 2: Anomaly Detection in Laser Spectral Data with scikit-learn
Laser sensors often monitor spectral signatures to detect material properties. Using scikit-learn, one can apply classical algorithms like Isolation Forest or One-Class SVM to identify unusual spectral patterns indicating defects or contamination. The workflow includes:
- Extracting relevant features from raw spectral data.
- Training an anomaly detection model on normal spectra.
- Running inference to flag deviations.
This method is computationally light and interpretable.
Mind Map: AI Tasks and Suitable Frameworks
Example 3: Deploying a PyTorch Model on an Embedded System via ONNX
A PyTorch model trained for vibration pattern recognition from laser Doppler vibrometer data can be exported to ONNX format. This enables:
- Conversion to a format compatible with various runtimes.
- Deployment on embedded devices with limited resources.
- Integration with real-time signal processing pipelines.
This workflow separates model development from deployment constraints.
Summary
Selecting an AI framework for laser sensing involves balancing model complexity, data type, and deployment environment. TensorFlow and PyTorch cover a broad range of deep learning needs, while scikit-learn offers simplicity for classical methods. ONNX Runtime and TensorRT facilitate efficient deployment, especially for real-time applications. Understanding these options helps build intelligent laser sensing systems that are both effective and practical.
9.4 Debugging and Profiling Techniques
Debugging and profiling are essential steps in developing reliable and efficient software for intelligent laser sensing systems. These processes help identify errors, bottlenecks, and unexpected behaviors in code, especially when dealing with real-time signal processing and AI algorithms. This section covers practical approaches and tools to make debugging and profiling more manageable.
Debugging Techniques
Debugging is the process of finding and fixing bugs or logical errors in your code. In laser sensing systems, bugs can arise from incorrect signal handling, timing issues, or AI model misbehavior.
Common Debugging Methods:
- Print Statements: Simple but effective. Insert logs to track variable values and program flow.
- Interactive Debuggers: Step through code line-by-line, inspect variables, and evaluate expressions.
- Assertions: Embed sanity checks that halt execution if conditions fail.
- Unit Testing: Test small code units independently to isolate faults.
- Hardware-in-the-Loop Debugging: Test software with actual hardware components to catch integration issues.
Example:
Suppose a laser Doppler velocimeter’s velocity readings are erratic. Adding print statements to log raw signal values before filtering can reveal if noise spikes cause the problem or if the filter implementation is faulty.
Profiling Techniques
Profiling measures where your program spends time or uses resources, helping optimize performance.
Key Profiling Aspects:
- CPU Usage: Identify functions consuming excessive processing time.
- Memory Usage: Detect leaks or excessive allocations.
- I/O Wait Times: Check delays in data acquisition or communication.
- Latency: Measure delays between input and output, critical for real-time systems.
Example:
In a real-time laser signal processing pipeline, profiling might show that a Fourier transform step takes 70% of CPU time. This insight guides optimization efforts, such as using faster libraries or hardware acceleration.
Mind Map: Debugging Workflow
Mind Map: Profiling Focus Areas
Practical Debugging Example: Signal Dropout in Laser Sensor
Scenario: The laser sensor intermittently stops reporting data.
Steps:
- Reproduce: Confirm the dropout occurs under specific conditions.
- Log Data: Add timestamps and status logs around data acquisition calls.
- Check Hardware: Verify sensor connections and power supply.
- Use Debugger: Step through the data acquisition code to see if it blocks or skips.
- Analyze Logs: Identify if the dropout correlates with buffer overflows or communication timeouts.
- Fix: Adjust buffer sizes or add retry logic.
- Test: Run extended tests to confirm stability.
Practical Profiling Example: AI Inference Latency
Scenario: AI model inference on laser data causes delays.
Steps:
- Profile CPU Usage: Use a profiler to measure time spent in AI inference functions.
- Identify Hotspots: Find layers or operations with highest compute cost.
- Optimize: Replace slow operations with optimized versions or quantize the model.
- Measure Latency: Confirm inference time meets real-time requirements.
- Iterate: Repeat profiling after each change.
Tips for Effective Debugging and Profiling
- Keep logs concise but informative; too much data can obscure issues.
- Use automated tests to catch regressions early.
- Profile in environments close to deployment to get realistic measurements.
- Combine multiple tools for a comprehensive view.
- Document findings to build a knowledge base for future issues.
By integrating these debugging and profiling techniques into your development process, you can improve the reliability and performance of intelligent laser sensing systems without guesswork or trial-and-error. Clear diagnostics save time and help maintain system integrity.
9.5 Best Practices: Developing Modular and Maintainable Code with Examples
Developing modular and maintainable code is essential for intelligent laser sensing systems, where complexity arises from integrating photonics, AI algorithms, and real-time signal processing. Modularity breaks down the system into manageable parts, and maintainability ensures the code remains understandable and adaptable over time.
Principles of Modular Code
- Single Responsibility: Each module should have one clear purpose.
- Loose Coupling: Modules interact through well-defined interfaces, minimizing dependencies.
- High Cohesion: Related functions and data are grouped within the same module.
- Encapsulation: Internal details are hidden; only necessary parts are exposed.
Mind Map: Modular Code Design
Best Practices
-
Define Clear Interfaces
- Use function signatures or class methods that clearly state inputs and outputs.
- Example: A laser sensor data acquisition module exposes a
read_data()method returning raw samples without revealing hardware specifics.
-
Separate Concerns
- Divide code into layers: hardware interface, signal processing, AI inference, and application logic.
- Example: Signal filtering functions should not handle hardware communication.
-
Use Consistent Naming Conventions
- Names should reflect purpose and scope.
- Example: Prefix hardware interface functions with
hw_, e.g.,hw_initialize_laser().
-
Write Small, Focused Functions
- Functions should do one thing and do it well.
- Example: A function
calculate_fft()only computes the FFT without plotting or logging.
-
Document Interfaces and Modules
- Brief comments explaining module roles and method contracts.
- Example: Document expected data formats and units.
-
Implement Unit Tests for Modules
- Test modules independently to catch errors early.
- Example: Test AI model input preprocessing separately from model inference.
-
Use Version Control and Code Reviews
- Track changes and get feedback to maintain code quality.
Mind Map: Maintainable Code Practices
Example: Modular Laser Signal Processing Pipeline
# Module: hw_interface.py
class LaserHardwareInterface:
    def __init__(self, port):
        self.port = port
        self.connected = False

    def connect(self):
        # Connect to hardware
        self.connected = True

    def read_data(self):
        if not self.connected:
            raise RuntimeError("Not connected to hardware")
        # Return raw laser signal data as list
        return [0.1, 0.2, 0.15, 0.3]

# Module: signal_processing.py
import numpy as np

def apply_lowpass_filter(data, cutoff_freq, sample_rate):
    # Simple low-pass filter implementation
    # For example purposes, just return data unchanged
    return data

def calculate_fft(data):
    return np.fft.fft(data)

# Module: ai_inference.py
class LaserSignalClassifier:
    def __init__(self, model_path):
        self.model_path = model_path
        # Load model (mock)

    def preprocess(self, data):
        # Normalize or reshape data
        return data

    def predict(self, processed_data):
        # Return mock prediction
        return "normal"

# Application Layer
from hw_interface import LaserHardwareInterface
from signal_processing import apply_lowpass_filter, calculate_fft
from ai_inference import LaserSignalClassifier

# Instantiate modules
hw = LaserHardwareInterface(port="COM3")
hw.connect()
raw_data = hw.read_data()

filtered_data = apply_lowpass_filter(raw_data, cutoff_freq=50, sample_rate=1000)
fft_result = calculate_fft(filtered_data)

classifier = LaserSignalClassifier(model_path="model.pth")
processed_data = classifier.preprocess(fft_result)
prediction = classifier.predict(processed_data)

print(f"Classification result: {prediction}")
This example shows clear separation: hardware interaction is isolated, signal processing functions are independent, and AI inference is encapsulated in a class. Each module can be tested and updated without affecting others.
Mind Map: Example Pipeline Structure
Additional Tips
- Avoid Global State: Pass data explicitly to functions to reduce hidden dependencies.
- Use Configuration Files: Store parameters outside code for easier tuning.
- Refactor Regularly: Clean up code as features evolve.
- Log Meaningfully: Include context but avoid clutter.
By following these practices, your codebase will be easier to understand, test, and extend, which is crucial for complex laser sensing systems that combine hardware, signal processing, and AI.
9.6 Example: Building a Real-Time Laser Signal Processing Application
This example walks through the creation of a real-time signal processing application for a laser Doppler vibrometer (LDV). The goal is to capture vibration signals, filter noise, extract key features, and display results with minimal latency.
Step 1: Define System Requirements
- Input: Analog signal from photodetector representing Doppler-shifted laser light.
- Sampling Rate: 100 kHz to capture vibration frequencies up to 50 kHz.
- Processing: Noise filtering, envelope detection, and frequency analysis.
- Output: Real-time display of vibration amplitude and frequency.
Step 2: Signal Acquisition Setup
- Use a high-speed ADC with 16-bit resolution.
- Implement anti-aliasing analog low-pass filter with cutoff at 50 kHz.
Step 3: Real-Time Processing Pipeline
The pipeline includes:
- Noise Filtering: Apply a digital bandpass filter to isolate vibration frequencies.
- Envelope Detection: Use Hilbert transform or rectification followed by low-pass filtering.
- Frequency Analysis: Compute short-time Fourier transform (STFT) or use Goertzel algorithm for specific frequencies.
Step 4: Implementation Details
- Platform: Embedded ARM processor with DSP extensions.
- Programming language: C for performance-critical parts; Python for prototyping.
Mind Map: Real-Time Processing Pipeline
Step 5: Example Code Snippet for Bandpass Filter Design (Python)
from scipy.signal import butter, lfilter

# Design bandpass Butterworth filter
fs = 100000  # Sampling frequency
lowcut = 100  # Low cutoff frequency
highcut = 50000  # High cutoff frequency

b, a = butter(N=4, Wn=[lowcut/(fs/2), highcut/(fs/2)], btype='band')

def bandpass_filter(data):
    return lfilter(b, a, data)
Step 6: Envelope Detection Example (Rectification + Low-Pass)
import numpy as np
from scipy.signal import butter, filtfilt

# Low-pass filter design
cutoff = 500  # Cutoff frequency for envelope smoothing
b_lp, a_lp = butter(2, cutoff/(fs/2), btype='low')

def envelope_detection(signal):
    rectified = np.abs(signal)
    envelope = filtfilt(b_lp, a_lp, rectified)
    return envelope
Step 7: Frequency Analysis Using Goertzel Algorithm
import numpy as np

def goertzel(samples, sample_rate, target_freq):
    k = int(0.5 + ((len(samples) * target_freq) / sample_rate))
    omega = (2.0 * np.pi * k) / len(samples)
    coeff = 2.0 * np.cos(omega)
    s_prev = 0.0
    s_prev2 = 0.0
    for sample in samples:
        s = sample + coeff * s_prev - s_prev2
        s_prev2 = s_prev
        s_prev = s
    power = s_prev2**2 + s_prev**2 - coeff * s_prev * s_prev2
    return power
Step 8: Real-Time Loop Structure (Pseudocode)
while True:
    raw_data = acquire_samples(buffer_size)
    filtered_data = bandpass_filter(raw_data)
    envelope = envelope_detection(filtered_data)
    freq_power = goertzel(filtered_data, fs, target_freq)
    display_results(envelope, freq_power)
Step 9: Best Practices Highlighted
- Buffering: Use double buffering to avoid data loss during processing.
- Latency: Keep processing steps optimized to meet real-time constraints.
- Filter Design: Choose filter orders balancing sharpness and computational load.
- Testing: Validate each processing block independently with synthetic signals.
Step 10: Visualization
- Plot raw vs filtered signals to verify noise reduction.
- Display envelope to observe vibration amplitude changes.
- Show frequency power over time to detect dominant vibration frequencies.
Mind Map: System Overview
This example demonstrates a straightforward approach to processing laser sensor signals in real time. Each step is modular, allowing easy testing and tuning. The code snippets provide concrete starting points, and the mind maps help visualize the workflow and system components.
10. Application Case Studies and Best Practice Integration
10.1 Industrial Automation and Quality Control
Industrial automation relies heavily on precise, reliable sensing to maintain efficiency and product quality. Laser sensing systems fit well here due to their accuracy, speed, and non-contact nature. They measure dimensions, detect defects, and monitor processes without interrupting production lines.
Role of Laser Sensing in Automation
Laser sensors provide real-time data on product geometry, surface conditions, and positioning. This data feeds into control systems that adjust machinery or flag anomalies. For example, a laser triangulation sensor can measure the thickness of a metal sheet as it moves along a conveyor, ensuring it meets specifications.
Quality Control Applications
In quality control, laser sensing detects defects such as scratches, dents, or misalignments. It can also verify assembly completeness by scanning parts and comparing them to digital models.
Mind Map: Laser Sensing in Industrial Automation
Example 1: Dimension Measurement on a Production Line
A factory producing plastic bottles uses a laser displacement sensor to measure bottle height and diameter. The sensor emits a laser beam that reflects off the bottle surface. The reflected signal is captured by a photodetector, and the system calculates dimensions in real time. If measurements fall outside tolerance, the system triggers a reject mechanism.
Best practice here involves calibrating the sensor regularly against known standards and ensuring the laser spot size matches the feature size for accurate readings.
Mind Map: Quality Control Workflow with Laser Sensing
Example 2: Surface Defect Detection Using AI
In a metal stamping plant, laser line scanners capture surface profiles of stamped parts. The raw data includes height variations and texture information. After signal conditioning, an AI model trained on labeled defect data classifies areas as normal or defective.
The integration of AI allows the system to detect subtle defects that traditional thresholding might miss. A best practice is to maintain a diverse dataset representing different defect types and normal variations to reduce false positives.
Example 3: Real-Time Process Monitoring
A semiconductor manufacturing line uses laser sensors to monitor wafer alignment during robotic handling. The laser sensors provide positional data with micron-level precision. This data feeds into a real-time control system that adjusts robot arm movements to prevent misalignment.
Here, the best practice includes minimizing latency in signal processing and ensuring robust sensor mounting to avoid vibration-induced errors.
Summary
Laser sensing systems in industrial automation and quality control provide precise, fast, and non-contact measurements essential for maintaining product standards and process efficiency. Combining photonics with AI and real-time signal processing enhances defect detection and process control capabilities. Regular calibration, appropriate sensor selection, and well-designed data processing pipelines are key to reliable operation.
10.2 Environmental Monitoring and Remote Sensing
Environmental monitoring and remote sensing using intelligent laser sensing systems combine precise photonic measurements with AI-driven analysis and real-time signal processing to gather and interpret data about natural and built environments. These systems provide valuable insights into atmospheric conditions, vegetation health, water quality, and pollution levels, among other parameters.
Key Areas of Application
- Atmospheric sensing: measuring gases, aerosols, and pollutants
- Vegetation analysis: assessing plant health and biomass
- Water monitoring: detecting contaminants and turbidity
- Terrain mapping: creating detailed topographic models
Mind Map: Components of Environmental Laser Sensing Systems
Atmospheric Sensing Example
Consider a system designed to monitor air quality by measuring concentrations of nitrogen dioxide (NO2) and ozone (O3). A tunable laser source emits light at specific absorption wavelengths for these gases. The backscattered signal is collected by photodetectors, and real-time signal processing extracts absorption features.
AI models trained on labeled spectral data classify pollutant levels and detect anomalies. Best practice here includes calibrating the laser wavelength precisely and using adaptive filtering to reduce atmospheric noise.
Vegetation Health Monitoring
Laser sensing systems can assess vegetation by analyzing reflectance and fluorescence signals. For instance, a LIDAR system mounted on a drone scans a forest canopy to measure leaf area index and canopy height.
Signal processing algorithms correct for motion artifacts and extract structural features. AI algorithms then classify tree species and detect stress indicators. An example best practice is synchronizing GPS data with laser measurements to improve spatial accuracy.
Mind Map: Signal Processing and AI in Environmental Monitoring
Water Quality Assessment
Laser-induced fluorescence can detect organic compounds in water. A system emits UV laser pulses into a water sample and measures fluorescence spectra. Real-time processing isolates characteristic peaks associated with contaminants.
AI regression models estimate pollutant concentrations. A practical example involves using a portable sensor for on-site river monitoring, with best practices including frequent calibration against standard samples and compensating for temperature variations.
Terrain Mapping and Remote Sensing
LIDAR systems map terrain by measuring the time delay of reflected laser pulses. Real-time processing generates point clouds representing surface features.
AI algorithms classify land cover types and detect changes over time. An example is using airborne LIDAR to monitor erosion. Best practices include optimizing pulse repetition rates for resolution and employing outlier removal algorithms to clean data.
Mind Map: Deployment Platforms
Integration Example: Multi-Modal Environmental Monitoring
A comprehensive system might combine LIDAR for terrain, spectroscopic laser sensing for atmospheric gases, and fluorescence for water quality. Data fusion algorithms integrate these streams, improving overall environmental assessment.
Best practices include time-synchronizing data streams and applying uncertainty quantification to each sensor input.
In summary, environmental monitoring and remote sensing with intelligent laser systems rely on careful selection of photonic components, robust real-time signal processing, and AI algorithms tailored to specific sensing tasks. Practical examples highlight the importance of calibration, data fusion, and deployment considerations to achieve reliable and actionable environmental data.
10.3 Medical Diagnostics and Biophotonics
Medical diagnostics increasingly rely on laser sensing systems to provide precise, non-invasive measurements. Biophotonics—the study of light interactions with biological materials—forms the foundation for many of these applications. Laser sensing enables detailed imaging, tissue characterization, and functional monitoring, often in real time.
Key Areas in Medical Laser Sensing
- Optical Coherence Tomography (OCT): Uses low-coherence interferometry to generate cross-sectional images of tissue, commonly applied in ophthalmology.
- Laser Doppler Flowmetry (LDF): Measures blood flow by detecting Doppler shifts in laser light scattered by moving red blood cells.
- Raman Spectroscopy: Identifies molecular composition by analyzing inelastically scattered light.
- Fluorescence Lifetime Imaging (FLIM): Captures the decay rate of fluorescence to assess biochemical environments.
Mind Map: Medical Laser Sensing Modalities
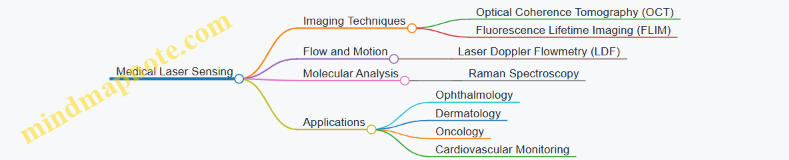
Optical Coherence Tomography (OCT)
OCT creates detailed images by measuring the echo time delay and intensity of backscattered light. It operates similarly to ultrasound but uses light instead of sound. This allows imaging at micrometer resolution.
Best Practice: When designing an OCT system, ensure the light source has a broad bandwidth to improve axial resolution. For example, a superluminescent diode centered at 1300 nm is often chosen for deeper tissue penetration.
Example: A retinal OCT system uses a scanning mirror to direct the beam across the eye. The reflected light interferes with a reference beam, producing an interference pattern that is processed in real time to build a 3D image of retinal layers.
Laser Doppler Flowmetry (LDF)
LDF measures blood flow by detecting frequency shifts caused by moving red blood cells. The system emits a laser beam into tissue; scattered light undergoes Doppler shifts proportional to velocity.
Best Practice: Use a photodetector with high sensitivity and low noise to capture weak Doppler-shifted signals. Implement adaptive filtering to separate flow signals from motion artifacts.
Example: In skin perfusion monitoring, an LDF probe is placed on the surface. The real-time signal processing extracts flow indices, which can indicate vascular health or wound healing progress.
Raman Spectroscopy
Raman spectroscopy identifies chemical fingerprints by measuring inelastically scattered photons. It helps detect biochemical changes in tissues, useful for cancer diagnostics.
Best Practice: Employ notch or edge filters to suppress the intense Rayleigh scattered light and isolate the weaker Raman signals. Use AI algorithms to classify spectral patterns.
Example: A handheld Raman probe scans suspicious skin lesions. The system collects spectra, which an AI model compares against known cancerous and benign profiles, assisting dermatologists in diagnosis.
Fluorescence Lifetime Imaging (FLIM)
FLIM measures the decay time of fluorescence from molecules after excitation by a laser pulse. It provides contrast based on molecular environment rather than intensity alone.
Best Practice: Synchronize laser pulses with time-correlated single-photon counting detectors for accurate lifetime measurements. Apply real-time signal processing to generate lifetime maps.
Example: In cancer surgery, FLIM guides surgeons by highlighting tumor margins through differences in fluorescence lifetime between healthy and malignant tissues.
Mind Map: Signal Processing and AI in Medical Laser Sensing
Integration of AI and Signal Processing
AI algorithms enhance medical laser sensing by interpreting complex data patterns. For instance, convolutional neural networks (CNNs) analyze OCT images to detect retinal diseases automatically.
Best Practice: Train AI models on diverse, well-annotated datasets to improve generalization. Use cross-validation and monitor for overfitting.
Example: A system combines OCT imaging with AI to classify diabetic retinopathy stages. Real-time feedback helps clinicians make faster decisions.
Summary
Medical diagnostics and biophotonics benefit from laser sensing systems that combine precise photonics, real-time signal processing, and AI. Each modality requires tailored hardware and software approaches. Practical examples demonstrate how best practices in system design and data analysis lead to reliable, clinically useful outcomes.
10.4 Autonomous Vehicles and Robotics
Laser sensing systems play a critical role in autonomous vehicles and robotics by providing precise spatial awareness and environmental mapping. These systems often rely on LiDAR (Light Detection and Ranging) technology, which uses laser pulses to measure distances to objects and surfaces. The data collected enables navigation, obstacle avoidance, and decision-making.
Key Functions of Laser Sensing in Autonomous Systems
- Environment Mapping: Creating detailed 3D maps of surroundings.
- Obstacle Detection: Identifying objects in the vehicle or robot’s path.
- Localization: Determining the system’s position relative to its environment.
- Motion Tracking: Monitoring moving objects and predicting trajectories.
Mind Map: Laser Sensing Roles in Autonomous Vehicles and Robotics

Integration of AI and Real-Time Signal Processing
Laser sensors generate large volumes of data that require real-time processing. AI algorithms, particularly machine learning models, help interpret this data by classifying objects, filtering noise, and predicting movements. Signal processing techniques enhance data quality before AI analysis, ensuring reliable input.
Mind Map: Data Flow in Intelligent Laser Sensing for Autonomous Systems

Example 1: Obstacle Detection and Avoidance
A robotic vehicle uses a LiDAR sensor to scan its surroundings. The raw data contains points representing nearby objects and surfaces. Signal processing filters out reflections from rain or dust, reducing false positives. A machine learning model classifies points as pedestrians, vehicles, or static obstacles. The system then calculates safe paths around detected objects, adjusting speed and direction in real time.
Example 2: Localization Using Laser Sensing and SLAM
A mobile robot navigates indoors where GPS signals are weak. It employs a laser scanner to generate 2D scans of walls and furniture. These scans feed into a SLAM algorithm that builds a map while simultaneously tracking the robot’s position within it. Real-time signal processing ensures scan data is clean and consistent, improving localization accuracy.
Best Practices for Implementation
- Sensor Placement: Position laser sensors to maximize field of view and minimize blind spots.
- Data Synchronization: Align laser data with other sensors (cameras, IMUs) for comprehensive situational awareness.
- Noise Management: Apply adaptive filtering to handle environmental conditions like rain, fog, or dust.
- Model Training: Use diverse datasets reflecting real-world scenarios to improve AI robustness.
- Computational Efficiency: Optimize algorithms for embedded platforms to meet real-time constraints.
Mind Map: Best Practices Summary
Laser sensing systems in autonomous vehicles and robotics require careful integration of photonics hardware, signal processing, and AI algorithms. Each component contributes to reliable perception and control, enabling systems to operate safely and effectively in complex environments.
10.5 Best Practices: Integrating Photonics, AI, and Signal Processing in Real Projects
Integrating photonics, AI, and real-time signal processing in laser sensing projects requires a balanced approach that respects the strengths and limitations of each domain. This section outlines practical best practices, supported by mind maps and examples, to help you build cohesive systems that perform reliably in real environments.
Start with Clear System Objectives
Before combining technologies, define what the system must achieve. Are you measuring distance, detecting defects, or classifying materials? Clear goals guide component selection and algorithm design.
Mind Map: Integration Workflow
- Define Objectives
  - Measurement Type
  - Accuracy Requirements
  - Environmental Constraints
- Photonics Setup
  - Laser Source Selection
  - Optical Components
  - Detector Choice
- Signal Processing
  - Noise Reduction
  - Feature Extraction
  - Real-Time Constraints
- AI Algorithms
  - Model Selection
  - Training Data
  - Validation
- System Integration
  - Hardware Synchronization
  - Software Architecture
  - Calibration
- Testing & Deployment
  - Performance Evaluation
  - Maintenance Plan
Photonics: Choose Components with Signal Processing in Mind
Select laser sources and detectors that provide signals compatible with your processing pipeline. For example, if your signal processor handles frequencies up to 1 MHz, avoid photodetectors with slower response times.
Example: In a laser Doppler vibrometer project, using a single-mode laser with a narrow linewidth reduces phase noise, simplifying downstream filtering and improving AI model accuracy.
Signal Processing: Keep It Real-Time and Robust
Design filters and feature extraction algorithms that run within your system’s latency budget. Use adaptive filtering when environmental noise varies.
Example: Implement a Kalman filter to smooth distance measurements from a laser rangefinder operating in a factory with fluctuating vibrations.
AI: Train on Representative Data and Validate Thoroughly
Gather data that reflects real operating conditions, including noise and signal distortions. Use cross-validation to avoid overfitting.
Example: For surface defect classification, include samples from different materials and lighting conditions. Augment data with synthetic noise to improve model resilience.
Mind Map: AI Integration Steps
- Data Collection
  - Diverse Conditions
  - Label Accuracy
- Preprocessing
  - Signal Normalization
  - Noise Reduction
- Model Training
  - Algorithm Choice
  - Hyperparameter Tuning
- Validation
  - Cross-Validation
  - Confusion Matrix Analysis
- Deployment
  - Real-Time Inference
  - Model Updates
Synchronize Hardware and Software
Ensure timing alignment between photonic components and processing units. Use hardware triggers or timestamps to correlate signals with AI outputs.
Example: In an autonomous navigation system using laser sensors, synchronize LiDAR pulses with AI decision modules to maintain accurate obstacle detection.
Calibration Is Not Optional
Regularly calibrate both photonic elements and AI models. Calibration corrects drift in laser power, detector sensitivity, and model biases.
Example: Use a known reference target to recalibrate distance measurements weekly, and retrain AI models quarterly with updated datasets.
Testing Under Real Conditions
Test the integrated system in the environment where it will operate. Simulated lab conditions rarely capture all variables.
Example: Deploy a laser sensing system for environmental monitoring outdoors to verify performance under varying weather and lighting.
Mind Map: Testing and Validation
- Laboratory Testing
  - Controlled Environment
  - Baseline Performance
- Field Testing
  - Environmental Variability
  - Long-Term Stability
- Performance Metrics
  - Accuracy
  - Latency
  - Reliability
- Feedback Loop
  - Issue Identification
  - Iterative Improvement
Maintain Clear Documentation
Document component specifications, signal processing algorithms, AI model versions, and calibration procedures. This practice aids troubleshooting and future upgrades.
Final Example: Integrated Laser Sensing System for Quality Control
- Objective: Detect surface defects on metal sheets.
- Photonics: Use a pulsed laser diode and photodiode array for reflectance measurement.
- Signal Processing: Apply bandpass filtering and peak detection to isolate defect signatures.
- AI: Train a convolutional neural network on labeled reflectance patterns.
- Integration: Synchronize laser pulses with data acquisition; deploy AI inference on an embedded processor.
- Calibration: Use defect-free reference sheets to adjust sensor gains.
- Testing: Validate on production line samples, iterating on AI model with new defect types.
By following these best practices, you create laser sensing systems where photonics, signal processing, and AI complement each other rather than compete, leading to more reliable and maintainable solutions.
10.6 Comprehensive Example: Designing an Intelligent Laser Sensing System from Concept to Deployment
Designing an intelligent laser sensing system from concept to deployment involves a sequence of well-defined steps, each building on the previous one. This example walks through the process of creating a laser-based surface inspection system for industrial quality control. The goal is to detect surface defects on metal sheets in real time, combining photonics, AI algorithms, and signal processing.
Step 1: Define System Requirements
The first step is to clarify what the system must achieve. Here, the system should:
- Detect scratches and dents as small as 0.1 mm on metal sheets
- Operate at a conveyor belt speed of 1 m/s
- Provide real-time alerts for defective products
- Integrate with existing factory control systems
Mind map for requirements:
Step 2: Select Photonic Components
Choosing the laser source and detectors depends on resolution, speed, and environment. For surface inspection:
- A visible wavelength laser (e.g., 650 nm) offers good surface contrast
- A line-scan camera or photodiode array captures reflected light
- Optical lenses focus and shape the beam
Best practice: Use a laser with stable power and narrow linewidth to reduce noise.
Example: A 5 mW diode laser combined with a CMOS line-scan sensor operating at 10 kHz line rate.
Mind map:
Step 3: Signal Acquisition and Conditioning
The reflected laser light is converted into electrical signals by the detector. These signals require conditioning:
- Amplification to boost weak signals
- Filtering to remove ambient light and electrical noise
- Analog-to-digital conversion for digital processing
Best practice: Use bandpass filters matched to the laser wavelength to reduce background interference.
Example: A transimpedance amplifier with a gain of 10^6 V/A and a 10 kHz low-pass filter.
Mind map:
Step 4: Real-Time Signal Processing
Processing the digitized signals involves:
- Noise reduction via digital filters
- Feature extraction such as edge detection or intensity variation
- Thresholding to identify defects
Best practice: Implement a moving average filter to smooth data without significant delay.
Example: A 5-point moving average filter followed by a Sobel edge detector.
Mind map:
Step 5: AI Algorithm Integration
To improve detection accuracy and reduce false positives, AI algorithms analyze processed data:
- Train a supervised classifier (e.g., SVM or lightweight CNN) on labeled defect and non-defect samples
- Use extracted features as input
- Validate model performance with cross-validation
Best practice: Balance model complexity with real-time constraints.
Example: Train an SVM with radial basis function kernel using intensity profiles.
Mind map:
Step 6: Data Fusion and Decision Making
Combine outputs from multiple sensors or processing channels to improve reliability:
- Fuse data from multiple laser lines scanning different sheet areas
- Use voting or weighted averaging for final defect decision
Best practice: Implement confidence scoring to handle uncertain detections.
Example: Three laser lines scanning in parallel; defects confirmed if detected by at least two lines.
Mind map:
Step 7: Calibration and Validation
Calibrate the system to ensure measurement accuracy:
- Use reference samples with known defect sizes
- Adjust laser power and detector gain
- Validate AI model on unseen samples
Best practice: Perform periodic recalibration to maintain performance.
Example: Calibrate using metal sheets with laser-etched defects of 0.1 mm, 0.2 mm, and 0.5 mm.
Mind map:
Step 8: Embedded System Implementation
Deploy the system on hardware capable of real-time operation:
- Use FPGA or DSP for signal processing
- Integrate AI inference engine optimized for embedded platforms
- Ensure communication with factory control via standard protocols
Best practice: Optimize code for latency and power consumption.
Example: FPGA implementing filters and feature extraction; AI inference on embedded ARM processor.
Mind map:
Step 9: System Testing and Deployment
Test the complete system under operational conditions:
- Run on live conveyor belt
- Monitor detection rates and false alarms
- Adjust thresholds and retrain AI if needed
Best practice: Collect operational data for continuous improvement.
Example: Deploy system in a pilot line, detect 95% of defects with less than 2% false alarms.
Mind map:
This example demonstrates how to integrate photonics, signal processing, and AI in a structured way. Each step includes clear decisions and best practices, supported by concrete examples and mind maps to visualize the workflow. The process emphasizes practical considerations such as calibration, embedded implementation, and real-time constraints, ensuring the system is both effective and deployable.
11. Troubleshooting and Maintenance of Intelligent Laser Systems
11.1 Common Issues in Photonic Components and Their Remedies
Photonic components form the backbone of laser sensing systems. Despite their precision, they are prone to a range of issues that can degrade system performance. Understanding these problems and their fixes is essential for maintaining reliable operation.
Common Issues Mind Map
Optical Alignment Problems
Misalignment is a frequent cause of reduced signal strength or distorted beam profiles. Even small shifts in lenses or mirrors can cause the laser beam to miss the photodetector or scatter.
Example: In a laser distance sensor, a slight tilt in the focusing lens caused the reflected beam to fall outside the photodiode active area, reducing the return signal by 40%. Realigning the lens restored full signal strength.
Remedies:
- Use precision mounts with fine adjustment screws.
- Employ alignment lasers or beam profilers during setup.
- Regularly check alignment after mechanical shocks or transport.
Contamination
Dust, fingerprints, and moisture on optical surfaces scatter or absorb the laser light, reducing efficiency and increasing noise.
Example: A laser vibrometer showed erratic readings due to dust accumulation on the input window. Cleaning with isopropyl alcohol and lint-free wipes stabilized the output.
Remedies:
- Handle optics with gloves.
- Store components in dust-free environments.
- Use protective windows or sealed enclosures.
- Clean surfaces gently with appropriate solvents and materials.
Component Degradation
Laser diodes and photodetectors degrade over time, losing output power or sensitivity. Optical coatings can also wear, increasing reflection losses.
Example: A laser diode in a sensing module showed a gradual power drop over 2000 hours, leading to reduced detection range. Replacing the diode restored performance.
Remedies:
- Monitor output power and responsivity periodically.
- Replace components before critical thresholds are crossed.
- Use components rated for the intended operating conditions.
Thermal Effects
Temperature changes cause expansion or contraction of optical mounts and components, shifting alignment or changing laser wavelength.
Example: In outdoor LIDAR units, daytime heating caused beam drift, affecting measurement accuracy.
Remedies:
- Use thermally stable materials for mounts.
- Incorporate active temperature control or compensation algorithms.
- Design for thermal isolation where possible.
Electrical Failures
Corroded connectors or broken wires can interrupt laser diode drive currents or photodetector signals.
Example: Intermittent signal loss traced to a corroded SMA connector on the photodetector output.
Remedies:
- Use corrosion-resistant connectors.
- Inspect and clean connectors regularly.
- Secure wiring to prevent strain.
Mechanical Damage
Scratches or chips on optical surfaces scatter light and reduce transmission.
Example: A scratched lens in a laser sensor caused increased noise and reduced signal-to-noise ratio.
Remedies:
- Handle optics carefully.
- Use protective covers.
- Replace damaged optics promptly.
Summary Mind Map of Remedies
Maintaining photonic components requires attention to detail and routine care. Small issues like a speck of dust or a loose screw can cascade into significant performance losses. Regular inspection, preventive maintenance, and prompt correction keep laser sensing systems running smoothly.
11.2 Diagnosing Signal Processing Errors
Signal processing errors in laser sensing systems can arise from a variety of sources, ranging from hardware faults to algorithmic missteps. Identifying and correcting these errors is essential to maintain system accuracy and reliability. This section breaks down common error types, diagnostic approaches, and practical examples to guide troubleshooting.
Common Types of Signal Processing Errors
- Noise and Interference: Unwanted signals that obscure or distort the laser sensor output.
- Signal Distortion: Alterations in the signal shape due to filtering or hardware limitations.
- Sampling Errors: Issues like aliasing or quantization noise introduced during digitization.
- Algorithmic Errors: Mistakes in signal processing code or model misconfigurations.
- Timing and Synchronization Errors: Misalignment between sensor data acquisition and processing.
Diagnostic Mind Map
Step-by-Step Diagnostic Approach
-
Visual Inspection of Raw Signals: Start by examining the raw sensor output on an oscilloscope or data viewer. Look for unexpected spikes, dropouts, or irregular patterns.
-
Frequency Analysis: Use Fourier Transform tools to identify noise frequencies or interference patterns. For example, a 50/60 Hz hum often indicates power line interference.
-
Check Hardware Connections: Loose cables, poor grounding, or damaged components can introduce noise or distortion. Confirm all connections are secure.
-
Validate Sampling Parameters: Ensure the analog-to-digital converter (ADC) is set to an appropriate sampling rate and resolution. Sampling below the Nyquist rate causes aliasing.
-
Review Signal Conditioning: Confirm that filters and amplifiers are configured correctly. Overly aggressive filtering can distort signals, while insufficient filtering leaves noise.
-
Test Processing Algorithms: Run algorithms with synthetic or known input signals to verify correctness. Compare outputs to expected results.
-
Check Timing and Synchronization: Verify that data acquisition and processing are properly synchronized. Timing mismatches can cause data misalignment.
Example 1: Identifying Power Line Interference
A laser vibrometer system shows periodic noise spikes in the velocity signal. The frequency analysis reveals a strong 60 Hz component.
- Diagnosis: Power line interference coupling into the sensor or signal chain.
- Action: Improve shielding and grounding; add notch filters centered at 60 Hz.
- Result: Noise spikes reduce significantly, restoring signal clarity.
Example 2: Sampling Rate Too Low Causes Aliasing
A laser distance sensor outputs a signal with unexpected low-frequency oscillations.
- Diagnosis: Sampling frequency set below twice the highest signal frequency.
- Action: Increase ADC sampling rate to exceed Nyquist frequency.
- Result: Aliasing artifacts disappear, and the true distance signal is recovered.
Example 3: Algorithmic Error in Filtering
An edge detection algorithm applied to laser scan data produces inconsistent results.
- Diagnosis: Incorrect filter coefficients causing phase distortion.
- Action: Review and correct filter design; test with step input signals.
- Result: Edge detection stabilizes and matches expected output.
Diagnostic Mind Map for Algorithmic Errors

Summary
Diagnosing signal processing errors requires a systematic approach: start with raw data inspection, proceed through hardware and parameter checks, and finally validate algorithms. Using frequency analysis and controlled test inputs helps isolate issues. Documenting findings and changes ensures repeatability and aids future troubleshooting.
11.3 AI Model Performance Monitoring and Updating
Monitoring and updating AI models embedded in intelligent laser sensing systems is essential to maintain accuracy and reliability. Models can degrade over time due to changes in the environment, sensor drift, or shifts in the data distribution. This section covers practical methods to track model performance and strategies to update models effectively.
Why Monitor AI Models?
AI models are not static. Even a well-trained model can lose effectiveness if the input data changes. For example, a laser sensor used in a factory might encounter new materials or lighting conditions that were not part of the original training data. Without monitoring, the system might produce inaccurate results, leading to poor decisions or system failures.
Key Metrics for Monitoring
- Accuracy: Percentage of correct predictions. Useful for classification tasks.
- Precision and Recall: Important when false positives or false negatives carry different weights.
- Mean Squared Error (MSE): Common for regression tasks, measuring average squared difference between predicted and actual values.
- Confusion Matrix: Breaks down true positives, false positives, true negatives, and false negatives.
- Latency: Time taken for the model to produce output, critical in real-time systems.
Monitoring Workflow Mind Map
Example: Monitoring a Surface Defect Classifier
Imagine a laser sensing system classifying surface defects on manufactured parts. The model outputs defect types based on laser reflection patterns.
- Collect predictions and compare with manual inspections (ground truth).
- Calculate precision and recall weekly.
- If precision drops below 85%, trigger an alert.
- Log inputs and outputs for further analysis.
This approach helps catch model drift early, allowing timely intervention.
Updating AI Models
Updating models involves retraining or fine-tuning to adapt to new data or conditions. There are several approaches:
- Periodic Retraining: Collect new labeled data over time and retrain the model at regular intervals.
- Incremental Learning: Update the model continuously with new data without full retraining.
- Transfer Learning: Use a pre-trained model and fine-tune it on new data.
Updating Workflow Mind Map
Example: Incremental Learning for Environmental Changes
A laser sensor monitoring air quality may experience seasonal changes affecting measurements. Instead of retraining from scratch, the system collects new labeled data monthly and incrementally updates the model. This keeps the model current without extensive downtime.
Practical Tips
- Maintain a Validation Dataset: Always keep a separate dataset to evaluate model updates objectively.
- Automate Monitoring: Use scripts or software to calculate metrics and send alerts automatically.
- Version Control Models: Track different model versions to compare performance and rollback if needed.
- Balance Update Frequency: Too frequent updates can cause instability; too infrequent can cause degradation.
- Document Changes: Keep records of data used, training parameters, and performance outcomes.
Example: Latency Monitoring in Real-Time Systems
In a laser Doppler velocimeter, model latency affects measurement timeliness. Monitoring average processing time per sample ensures the model meets real-time constraints. If latency increases beyond a threshold, it may indicate inefficiencies or hardware issues requiring investigation.
Summary
Consistent monitoring and timely updating of AI models ensure intelligent laser sensing systems remain accurate and reliable. Combining quantitative metrics with practical workflows helps maintain system performance in changing environments.
11.4 Maintenance Protocols for Long-Term Reliability
Maintaining intelligent laser sensing systems over the long term requires a structured approach that addresses both hardware and software components. Reliability hinges on regular upkeep, early detection of wear or drift, and systematic updates to AI models and signal processing algorithms. This section outlines key protocols and practical examples to keep your system running smoothly.
Key Areas of Maintenance
- Optical Components Care: Dust, misalignment, and surface degradation can degrade laser performance. Regular cleaning with appropriate solvents and alignment checks are essential.
- Electronic Hardware Checks: Inspect connectors, cables, and circuit boards for corrosion, loose contacts, or thermal damage.
- Signal Integrity Monitoring: Track noise levels and signal amplitude trends to spot degradation early.
- AI Model Validation and Updating: Periodically assess AI model accuracy against new data and retrain if necessary.
- Software and Firmware Updates: Apply patches and updates to fix bugs and improve performance.
Maintenance Mind Map
Practical Examples
Example 1: Cleaning and Aligning Optical Components
A laser sensor used in a dusty factory environment showed a gradual drop in signal strength. Upon inspection, dust accumulation on the lens was found. The maintenance team used a lint-free cloth with isopropyl alcohol to clean the lens carefully. They then used an alignment laser tool to verify the beam path, adjusting mirrors slightly to restore optimal alignment. Signal strength returned to expected levels, demonstrating the impact of simple cleaning and alignment.
Example 2: Monitoring Signal Integrity Over Time
In a laser Doppler vibrometer system, baseline noise was logged daily using a spectrum analyzer. Over a month, a slow increase in noise floor was detected. Investigation revealed a loose connector causing intermittent interference. Tightening the connector resolved the issue, preventing potential data corruption.
Example 3: AI Model Validation and Retraining
An AI model classifying surface defects was initially trained on a dataset from one production line. When deployed on a new line with slightly different lighting and material properties, accuracy dropped. Maintenance included collecting new labeled data, retraining the model, and validating it with confusion matrices to ensure balanced performance across defect classes. This process restored reliable classification.
Example 4: Firmware Update and Backup
A firmware update added improved noise filtering algorithms. Before applying the update, the team backed up existing configurations and tested the update on a test unit. After confirming stability, the update was rolled out to all units. This minimized downtime and prevented data loss.
Summary
Long-term reliability depends on routine, methodical maintenance that covers optics, electronics, signal quality, AI models, and software. Tracking trends and acting on small changes early prevents larger failures. Clear documentation of maintenance activities also supports consistent performance and easier troubleshooting.
11.5 Best Practices: Systematic Troubleshooting with Case Examples
Systematic troubleshooting in intelligent laser sensing systems requires a structured approach to isolate and resolve issues efficiently. This section outlines best practices supported by clear examples and mind maps to guide the process.
Step 1: Define the Problem Clearly
Start by describing the issue in precise terms. Is the sensor output noisy, delayed, or missing? Does the AI model misclassify data? Clear problem definition narrows down potential causes.
Step 2: Gather Relevant Data
Collect logs, sensor readings, and system states during the fault. Compare current data with baseline or expected values to identify anomalies.
Step 3: Break Down the System into Subsystems
Divide the laser sensing system into photonic hardware, signal acquisition, real-time processing, AI algorithms, and communication interfaces. This modular view helps isolate faults.
Step 4: Use a Mind Map to Visualize Possible Causes
A mind map organizes potential fault sources and guides investigation.
Troubleshooting Mind Map for Laser Sensing System
Step 5: Test and Isolate
Systematically test each subsystem starting from the most probable cause. Use known inputs and measure outputs to verify functionality.
Step 6: Apply Corrective Actions
Once the faulty component or process is identified, apply fixes such as recalibration, component replacement, or software patching.
Step 7: Verify and Document
After correction, verify system performance against specifications. Document the issue, diagnosis, and resolution for future reference.
Example 1: Noisy Signal in Laser Distance Sensor
Problem: The sensor output shows excessive noise, making distance readings unstable.
Approach:
- Check photonic hardware: Laser power was stable; optics were clean and aligned.
- Inspect signal acquisition: Found that the amplifier gain was set too high, causing saturation.
- Adjusted amplifier gain to recommended levels.
- Verified filtering parameters; implemented a low-pass filter to reduce high-frequency noise.
Result: Noise reduced to acceptable levels, stable distance readings restored.
Example 2: AI Model Misclassifies Surface Defects
Problem: The AI algorithm incorrectly labels smooth surfaces as defective.
Approach:
- Reviewed data preprocessing: Found inconsistent normalization causing input scale mismatch.
- Checked training data: Discovered imbalance with too few smooth surface samples.
- Retrained model with balanced dataset and consistent preprocessing.
Result: Classification accuracy improved significantly; false positives reduced.
Example 3: Delayed Real-Time Processing Output
Problem: The system’s real-time output lags behind sensor input, affecting control feedback.
Approach:
- Profiled processing pipeline: Identified bottleneck in digital filtering stage.
- Optimized filter implementation by switching to a more efficient algorithm.
- Verified timing synchronization between sensor sampling and processing.
Result: Latency reduced to within acceptable limits, restoring real-time performance.
Troubleshooting Mind Map: General Workflow
By following these steps and using structured tools like mind maps, troubleshooting becomes a manageable, logical process. Each example shows how focusing on specific subsystems and data leads to effective problem resolution.
11.6 Example: Resolving Signal Degradation in a Laser Sensing Network
Signal degradation in a laser sensing network can manifest as reduced signal-to-noise ratio (SNR), intermittent data loss, or inaccurate readings. This example walks through a systematic approach to identify and resolve such issues.
Step 1: Define the Problem
The network consists of multiple laser sensors deployed across an industrial facility for distance and vibration measurements. Operators report that some sensors show inconsistent readings and occasional signal dropouts.
Step 2: Initial Assessment
Start by gathering baseline data: signal strength, noise levels, and error rates from the affected sensors. Compare these with sensors functioning normally.
Step 3: Mind Map of Potential Causes
Signal Degradation Causes Mind Map
Step 4: Environmental Inspection
Physically inspect the sensor locations for dust, dirt, or physical obstructions. Use a clean cloth and appropriate solvents to clean optical surfaces. Check for temperature sensors nearby and confirm if temperature is within operational limits.
Step 5: Hardware Diagnostics
Measure laser output power with a power meter. If power is below specifications, consider replacing the laser diode. Inspect photodetector response using a calibrated light source. Tighten or realign optical mounts if misalignment is suspected.
Step 6: Signal Chain Analysis
Use an oscilloscope to observe raw analog signals from the photodetector. Look for increased noise or distortion. Check amplifier gain settings and filter responses. Verify ADC input range and resolution.
Step 7: Network and Data Integrity Check
Monitor data packets for loss or corruption. Use diagnostic tools to check communication latency and synchronization. Confirm that timestamps are consistent across sensors.
Step 8: Software and AI Validation
Review calibration parameters and update if necessary. Retrain AI models with recent data if performance has degraded. Check for firmware updates or patches addressing known bugs.
Step 9: Implement Fixes and Monitor
Apply identified fixes one at a time to isolate their effects. For example, after cleaning optics, monitor signal quality for improvement. After hardware replacement, verify restored signal strength.
Step 10: Document and Standardize
Record all findings, actions taken, and results. Develop maintenance checklists to prevent future degradation.
Mind Map: Troubleshooting Workflow
Concrete Example: Signal Conditioning Adjustment
During signal chain analysis, an engineer notices that the amplifier gain is set too high, causing saturation and distortion. Reducing the gain restores linearity and improves SNR. This simple adjustment reduces false alarms in vibration detection.
Concrete Example: AI Model Retraining
The AI model classifying surface defects begins to misclassify due to changes in sensor noise characteristics. Retraining the model with recent data that includes the new noise profile improves classification accuracy by 15%.
Summary
Resolving signal degradation requires a structured approach addressing environmental, hardware, signal processing, network, and software factors. Using mind maps helps organize potential causes and streamline troubleshooting. Incremental fixes combined with careful monitoring ensure effective restoration of system performance.