Amazon Rainforest Medicinal Plants
1. Foundations of Jungle Medicine and Plant Knowledge
1.1 Understanding Medicinal Plant Use in Amazonian Communities
Medicinal plant use in Amazonian communities is not a random collection of “herbs.” It is a practical system for noticing patterns in the body, matching those patterns to specific plants, and preparing remedies in ways that fit both the plant material and the person. The system also includes social rules: who is allowed to prepare, how knowledge is shared, and what counts as a safe outcome.
Core Idea: Plant Use Is Pattern Matching
A community’s medicinal practice starts with observation. People notice changes in digestion, skin, breathing, sleep, pain, and energy. They also notice context: whether symptoms appeared after food changes, exposure to insects, cold nights, physical strain, or emotional stress. Plant selection follows these observations rather than a one-plant-fits-all approach.
For example, a bitter bark preparation may be used when the stomach feels “stuck” or heavy, while a leaf infusion might be chosen when there is a mild fever with thirst. The difference is not just the plant; it is the symptom pattern and the expected direction of improvement.
Roles in the Community: Knowledge with Boundaries
In many settings, medicinal knowledge is distributed across roles. Some people focus on plant identification and preparation. Others focus on diagnosis through conversation, observation, and ritual elements. Even when a person can gather plants, preparation may still follow specific rules.
A practical best practice is to treat “permission” as part of safety. If a remedy is traditionally prepared by a specific caregiver, copying the method without understanding the role can lead to incorrect dosing, wrong plant parts, or missed contraindications.
What “Correct Use” Means: Preparation, Part, and Strength
Plant remedies depend on three details that are easy to overlook:
- Plant part: leaves, bark, roots, seeds, and resins can behave very differently.
- Preparation method: infusion, decoction, maceration, or topical use changes what compounds are extracted.
- Strength and duration: the same plant can be prepared weaker for children or stronger for short-term support.
A concrete example: a decoction made by simmering bark extracts more than a quick infusion of leaves. If someone uses the “leaf method” on bark, the remedy may be too weak or too harsh depending on the plant.
How Safety Is Built In: Trial, Monitoring, and Stop Rules
Safety is not only about avoiding obviously toxic plants. It also includes how remedies are tested and monitored.
A common approach is to start with a modest amount, watch for expected effects, and stop if the body reacts in an unexpected way. “Unexpected” can mean rash, persistent vomiting, dizziness, unusual sleepiness, or worsening pain. Monitoring is often paired with simple documentation: what was used, how it was prepared, and what changed after the remedy.
Mind Map: Medicinal Plant Use System
Example: A Simple Decision Path
Imagine someone has stomach discomfort after a heavy meal. The caregiver first checks whether there is nausea, cramping, or bloating. If the main issue is heaviness and slow digestion, a bitter preparation may be selected. If the main issue is loose stools, the focus shifts to soothing and rebalancing rather than “clearing.”
Then comes preparation strength. A weaker infusion might be used initially, with a clear plan for what improvement should look like over the next day. If symptoms worsen or new signs appear, the remedy is stopped and the selection is reconsidered.
Integrated Best Practice: Learn the System, Not Just the Plant
When studying medicinal plants, it helps to practice the logic chain:
- Identify the symptom pattern.
- Choose the correct plant part.
- Choose the correct preparation method.
- Use an appropriate strength for the person.
- Monitor and apply stop rules.
This approach keeps the focus on reliable outcomes. It also prevents a common mistake: treating “plant names” as if they automatically determine effect, when preparation and context do most of the work.
Case Snapshot: Recording Without Overcomplication
A useful record can be short and still effective. For instance, write the plant name as given locally, the plant part, the method (infusion or decoction), the amount used, and what changed after the first dose. If the remedy is repeated, note the second outcome too. This is enough to spot patterns and avoid repeating ineffective or problematic preparations.
A good rule of thumb is simple: if you cannot explain how the remedy was chosen and prepared, you probably cannot explain why it should work.
1.2 Core Principles of Shamanic Healing Practices and Plant Selection
Shamanic plant work starts with a simple question: what is the body asking for, and what does the plant reliably do? The “reliably” part matters, because plants are not interchangeable. A plant chosen for skin irritation is not automatically appropriate for stomach upset, even if both are uncomfortable.
The Healing Loop
A practical shamanic workflow can be treated like a loop you can repeat without losing your place.
- Observe the person: note symptoms, timing, triggers, and what makes things better or worse.
- Clarify the pattern: decide whether the issue looks more like heat, cold, blockage, weakness, or irritation. You do not need perfect labels; you need consistent reasoning.
- Match the plant role: choose plants that traditionally align with the pattern and that you can identify confidently.
- Select the preparation: infusion, decoction, poultice, or resin paste changes what compounds you extract and where they act.
- Test gently and track: start with a small, sensible amount and record response, side effects, and changes over time.
This loop keeps the practice grounded. If you skip observation or tracking, you end up guessing with authority, which is the fastest route to ineffective or unsafe use.
Plant Selection Principles
1. Identify first, then decide. If identification is uncertain, selection is automatically uncertain. A good rule is to only use plants you can describe by multiple features and confirm by habitat and plant part.
2. Choose by plant part and preparation. Leaves, bark, roots, and resins often behave differently. For example, a bark decoction may be used when you want a stronger, more “grounding” extraction, while a leaf infusion may be used for gentler, quicker comfort. The preparation is part of the selection.
3. Respect the “role” of the plant. In shamanic practice, plants are treated as having functional roles, not just chemical effects. A plant used traditionally for cleansing is not the same category as one used for soothing. You can still use modern reasoning, but you keep the role consistent.
4. Match strength to need. Strong preparations are not always better. If the person is sensitive, start with a weaker preparation or smaller dose. If symptoms are mild, avoid escalating strength just because you can.
5. Consider the whole person. Hunger, fatigue, dehydration, and stress can change how a remedy lands. A plant that helps when someone is well-rested may feel harsh when they are already depleted.
Mind Map: Healing Loop and Plant Matching
Example: Choosing a Plant for Digestive Discomfort
Suppose a person reports cramping after meals and a feeling of heaviness. You observe that symptoms worsen with fatty foods and improve with warm drinks. You clarify the pattern as likely “stagnation with irritation,” not just simple hunger.
- Plant role choice: select a plant traditionally used for digestive clearing and easing crampy discomfort.
- Plant part and preparation: choose a leaf or bark infusion depending on what you can identify confidently and what the tradition uses for similar symptoms.
- Dose and test: start with a small cup amount and wait long enough to notice change, rather than repeating immediately.
- Tracking: record whether cramps soften, whether nausea increases, and whether stool changes in a helpful direction.
If cramps worsen or new symptoms appear, you stop and reassess. That is not failure; it is correct use of information.
Example: Choosing a Plant for Skin Irritation
If the issue is itchy, localized, and appears after contact with plants or insects, you treat it as irritation rather than an internal problem.
- Plant role choice: pick plants traditionally used for soothing and protective skin comfort.
- Preparation choice: use a leaf poultice or resin diluted paste so the action is local.
- Safety check: avoid applying unknown plants to broken skin, and test a small area first.
- Tracking: note whether redness decreases and itching eases within a reasonable window.
Advanced Detail Without Guesswork
As you gain experience, you refine two things: consistency and specificity. Consistency means you keep the same loop and documentation style every time. Specificity means you match the plant part and preparation to the action site you want—stomach, throat, skin, or muscle—rather than hoping one remedy covers everything.
A shamanic approach works best when it behaves like careful craft: observe, match, prepare, test, and record. The plants are the teachers, but your method is the safety rail.
1.3 Botanical Literacy for Field Identification and Safe Handling
Botanical literacy is the skill of turning a living plant into a reliable, usable description—then handling it in a way that keeps you and others safe. In the field, your goal is not to “name everything perfectly.” Your goal is to identify well enough to prepare safely, document clearly, and stop when uncertainty is high.
Core Identification Workflow
Start with a quick triage: habitat, plant form, and the part you plan to use. Habitat clues include soil type, light level, and whether the plant grows near water or on drier ridges. Plant form includes whether it’s a tree, vine, shrub, or herb, plus growth habit like climbing or spreading. Then decide which part you’ll collect—leaf, bark, root, or resin—because each part can look different and can carry different risks.
Next, observe in layers. First, look at the whole plant: overall silhouette, branching pattern, and how the plant holds leaves. Second, focus on the target organs: leaf arrangement, leaf margin, stem texture, and any visible latex or resin. Third, check for reproductive traits when available: flowers, fruits, or seed pods. Reproductive traits often reduce confusion between look-alike species.
Finally, confirm with a “stop rule.” If you cannot describe at least three distinguishing features for the plant you intend to use, you pause collection and re-check. This is not a mood thing; it’s a safety thing.
Safe Handling Basics That Prevent Common Mistakes
Safe handling begins before contact. Wear gloves when handling unknown plants, especially if you plan to crush or scrape bark. Avoid touching your face, and wash hands after any plant contact, even if you think it’s harmless. Keep collected materials separate by label and by plant, because mixed piles are how misidentification becomes a real-world problem.
Use clean tools and a simple workflow: one plant, one tool set, one container. If you must switch plants, clean the tools and change gloves. This prevents cross-contamination, which can matter when you later prepare extracts.
Field Notes That Make Identification Usable
Good field notes are structured enough that someone else could follow them. Record local name, location description, habitat, plant form, and the exact part collected. Add a short list of distinguishing features you observed, written in plain language.
Example: “Vine on riverbank, opposite leaves, smooth stem, milky latex when broken, leaf margin entire, small white flowers seen.” That beats “leafy vine” every time.
Also record preparation intent. If you plan to use bark, note bark color and texture from the same individual plant. If you plan to use leaves, note leaf thickness and underside color. Intent helps you notice the right details.
Mind Map: Field Identification and Safe Handling
Practical Examples of “Good Enough” Identification
Example: Leaf-based remedy candidate You find a shrub with opposite leaves and a faint citrus smell when you gently rub a leaf between gloved fingers. You note leaf margin type, leaf underside color, and whether the stem is hairy or smooth. You also check for flowers or fruits. If you can describe three features—opposite leaves, smooth stem, and a consistent leaf underside color—you proceed with leaf collection only, using gloves and a labeled container.
Example: Bark-based remedy candidate You see a tree with peeling bark in patches. Before collecting, you confirm the tree’s overall form and leaf arrangement from the same individual. You record bark color on the inside and outside, plus whether there is any visible latex when the bark is lightly scraped with a clean tool. If you cannot match the bark to the same tree you observed above, you do not collect.
Handling Uncertainty Without Guessing
Sometimes you’ll have partial information: you recognize the habitat and plant form, but the leaf margin is unclear or the plant lacks flowers. In that case, treat the plant as “not ready.” You can still document it for later comparison, but you avoid collecting the part intended for preparation. This keeps your practice consistent: observation first, action second.
Quick Field Checklist
- Can you state habitat, plant form, and target part?
- Can you list three distinguishing features you observed?
- Are tools clean and containers labeled?
- Are you wearing gloves and avoiding face contact?
- Is the collected material from one plant only?
If you answer “yes” to these, you’re doing botanical literacy the way it should work: methodical, repeatable, and safe.
1.4 Preparing to Work with Plant Materials Using Clean Tools and Documentation
Clean tools and clear documentation are the boring parts that keep the useful parts from turning into guesswork. In jungle medicine, “clean” means more than hygiene: it means consistent preparation, traceable materials, and fewer surprises when a remedy doesn’t behave as expected.
Clean Tool Setup for Reliable Preparation
Start with a dedicated work area, even if it’s just a tarp on the ground. Keep plant materials, water, and tools separated until you’re ready to combine them. This reduces accidental cross-contamination—like using the same knife for a bitter bark and then slicing fruit for a snack.
Use a simple tool kit and keep it stable across sessions:
- Cutting tools: one knife or blade for plant material only.
- Containers: small, labeled jars or cups for each ingredient.
- Measuring aids: a spoon set or marked cup for consistent amounts.
- Filtration: clean cloth for straining infusions.
- Drying surfaces: clean trays or cloth for air-drying.
Before starting, rinse tools with clean water, then wipe with a clean cloth. If you have access to boiling water, briefly heat metal tools and let them cool covered. The goal is to reduce residue and microbes without leaving strong chemical smells or tastes.
Documentation That Makes Remedies Repeatable
Documentation is not paperwork for its own sake. It’s how you remember what you did when the next batch is similar but not identical.
Create a one-page remedy log for each preparation. Include:
- Plant identity: local name, physical description, and where it was collected.
- Plant part: leaf, bark, root, resin, or seed.
- Preparation method: infusion, decoction, maceration, poultice, or paste.
- Amount and ratio: for example, “1 handful per 250 ml water.”
- Time and temperature cues: “simmered gently for 20 minutes” or “steeped 15 minutes.”
- Straining and storage: cloth type, container, and whether it was used the same day.
- Intended use and outcome notes: what symptom it targeted and what changed.
Use a consistent date format. If you need one, write it as 2026-02-15 for the first entry in a training log.
Mind Map: Clean Tools and Documentation Workflow
Step-by-Step Example Infusion with Clean Handling
Example: Preparing a leaf infusion for mild stomach discomfort.
- Set up: Place a clean cloth on the work surface. Put a labeled cup for the infusion beside a separate container for leftover leaves.
- Tool separation: Use the plant-only knife to cut leaves. Do not touch food with the same blade.
- Measure: Use a marked cup or spoon. Example ratio: 1 heaped spoon of chopped leaves per 250 ml water.
- Water cleanliness: Pour water from a covered container. Avoid dipping the measuring cup into the main water source.
- Steep time: Steep for 15 minutes covered. Keep the container away from dust.
- Strain: Strain through clean cloth into the labeled cup.
- Log immediately: Record plant name, leaf part, ratio, steep time, and whether the infusion was cloudy or clear.
- Storage: If not used right away, cover and store in a cool shaded place. Note the time you prepared it.
Documentation Example Template for Field Use
Quality Checks Before You Call It Done
Do a quick check before serving or storing:
- Visual: Is the color and texture what you expect for that method?
- Smell: Off-odors can signal contamination or wrong plant part.
- Process match: Confirm you used the correct plant part and method. A decoction used as an infusion can change strength and taste.
If identification is uncertain or you see mold, stop and discard the batch. Cleaning and documentation are meant to prevent “maybe it’s fine” decisions.
Common Mistakes and How Clean Systems Prevent Them
- Mixing tools: If the same knife touches multiple plants, label and clean between plants.
- Vague timing: “A while” becomes “15 minutes” in the log.
- Unlabeled containers: If you can’t identify what’s in a jar without opening it, you’re already losing control.
Clean tools and documentation turn plant work into a repeatable craft. Once the process is stable, the plant’s effects can be evaluated with less confusion and more confidence.
1.5 Building a Plant Use Record with Dosage Notes and Preparation Methods
A plant use record is your practical memory. It turns “I think this helped” into “this preparation, at this strength, for this symptom, with this outcome.” The goal is not perfection; it’s repeatability with safety.
What to Record Every Time
Start with a consistent template so your notes stay searchable. Record the following in plain language:
- Plant identity: local name, part used (leaf/bark/root/resin), and how you identified it (field traits, habitat, and any distinguishing features).
- Source and handling: where it was gathered, date harvested, and how it was cleaned or processed before preparation.
- Preparation method: infusion, decoction, maceration, poultice, or paste. Include time, temperature (if relevant), and whether the material was fresh or dried.
- Dosage and schedule: amount per dose, frequency, and duration. If you use traditional measures, convert them into a simple household equivalent (for example, “one thumb-length strip” becomes “about 3 cm”).
- Intended use and target symptoms: what you were trying to change, and what you expected to happen first.
- Context: age range, general health notes, pregnancy status if relevant, and whether other remedies were used the same day.
- Outcome and observations: what improved, what stayed the same, and any side effects. Note timing, such as “within 30–60 minutes” or “next day.”
- Stop conditions: what would make you stop or switch (for example, worsening pain, rash, vomiting, dizziness).
A Simple Template You Can Copy
Use one page per remedy session. Keep it short enough that you’ll actually fill it out.
| Field | Example Entry |
|---|---|
| Plant | “Bark tea from local name: x” |
| Part Used | Bark, dried |
| Method | Decoction, simmer 15 min |
| Strength | 1 small bark piece per 250 ml water |
| Dose | 100 ml per dose |
| Schedule | 2 doses/day for 2 days |
| Symptom Target | Stomach cramps after heavy meal |
| Notes | Mild relief after first dose |
| Side Effects | None |
| Stop Condition | Stop if vomiting or rash |
Mind Map: Plant Use Record Workflow
Dosage Notes That Don’t Get Lost
Dosage is where records either help or fail. Write dosage in a way that survives memory gaps.
- Define your unit: If you measure by volume, use a consistent cup or spoon size. If you measure by plant size, describe it in repeatable terms (length, thickness, or weight if you have a scale).
- State strength: “One bark piece in water” is incomplete unless you also note water volume and whether the piece is dried or fresh.
- Separate dose from preparation: The preparation strength can be constant while the dose changes. For example, you can make a 250 ml decoction but take 100 ml per dose.
- Track timing: Many remedies show effects quickly (like soothing a throat) while others work over days (like digestive regularity). Timing helps you judge whether the remedy matched the symptom pattern.
Preparation Methods with Built-In Clarity
Use method-specific details so someone else could reproduce your process.
- Infusion: note steep time and whether the container was covered.
- Decoction: note simmer time and whether the plant was chopped or whole.
- Maceration: note soak duration and carrier (water, alcohol, oil) if used.
- Poultice and wraps: note thickness, how long it stayed on skin, and whether the skin was intact or already irritated.
Example: One Completed Record Entry
Date harvested: 2026-02-15
- Plant identity: local name “x”; bark; identified by rough outer texture and inner fibrous layer; gathered near a shaded stream edge.
- Preparation: decoction using dried bark. Simmer 15 minutes in 250 ml water. Strain while warm.
- Dosage: 100 ml per dose.
- Schedule: twice daily for 2 days.
- Target symptom: stomach cramps after a heavy meal.
- Context: adult, no known allergies; no other new remedies that day.
- Outcome: cramps reduced after first dose; no recurrence by evening.
- Side effects: none observed.
- Stop condition: stop if nausea, rash, or worsening pain.
- Adjustment note: if relief is partial, next time reduce dose frequency to once daily and extend to 3 days rather than increasing strength.
Advanced Detail Without Overcomplication
When you repeat a remedy, add a “change log” line:
- What you kept the same (plant part, method, strength).
- What you changed (dose, frequency, duration).
- Why you changed it (based on outcome timing or side effects).
This turns your record into a controlled learning tool. It also prevents the common trap of changing everything at once, which makes outcomes impossible to interpret.
Quick Checklist Before You Close the Page
- Plant identity and part used are clear.
- Method includes time and carrier amount.
- Dose includes amount per dose and schedule.
- Outcome includes timing and side effects.
- Stop conditions are written in plain language.
A good record reads like a recipe plus a short report. If you can hand it to a careful person and they can repeat it safely, you’ve done the hard part.
2. Safety, Ethics, and Responsible Stewardship
2.1 Risk Awareness for Toxicity, Allergies, and Misidentification
Medicinal plants in the Amazon can be helpful, but risk management is part of the practice, not an afterthought. Three hazards dominate: toxicity (the plant contains harmful compounds), allergies (the body reacts to a harmless substance), and misidentification (the wrong species gets used). If you treat these as separate problems, you’ll miss how they overlap—especially when a plant is prepared differently than expected.
Start with the Three Failure Points
Toxicity often comes from using the wrong plant part, using too strong a preparation, or using a plant known to be risky in certain contexts. A simple example: a bark tea may be tolerated in small amounts for one person, but the same strength from a different plant part can cause vomiting in another.
Allergies show up as skin reactions, itching, swelling, or breathing discomfort. Even “natural” remedies can trigger reactions, particularly when the remedy is applied to skin or used repeatedly.
Misidentification is the most preventable hazard. It happens when two species look similar, when local names are shared across plants, or when a plant changes appearance across seasons.
Mind Map: Risk Pathways
Verify Identity Before You Worry About Strength
A remedy is only as safe as its identification. Use a layered approach: confirm the plant’s habitat and growth form, check diagnostic features (leaf arrangement, bark texture, flower or fruit traits when available), and record the local name exactly as given. If you can, collect a voucher specimen or at least take clear photos of multiple angles and the plant part used.
Easy example: If a plant is described as “leaf for stomach comfort,” but the leaves you collected are opposite instead of alternate, pause. Don’t “fix” the problem by using the leaves anyway. Misidentification can turn a mild remedy into a toxic one.
Control Toxicity with Preparation Discipline
Toxicity risk drops when you standardize preparation steps. Track three variables every time: plant part, processing, and concentration.
- Plant part: Leaves, bark, roots, and resins can differ dramatically in potency.
- Processing: Drying, heating, soaking, or fermenting can change chemical availability.
- Concentration: “A handful in a pot” is not a concentration plan.
Easy example: For a decoction, measure the plant material and water ratio. If you normally use 1 tablespoon of dried bark per cup of water, don’t switch to “more bark because it seems weak” without recalculating.
Manage Allergies with Exposure Logic
Allergic reactions often follow exposure patterns. Skin contact tends to reveal sensitivity faster than ingestion. If you’re trying a new plant, use the least reactive route first when appropriate.
Easy example: If you plan to use a leaf poultice, test a small area of skin with a diluted preparation and wait for a clear reaction window. If itching, hives, or swelling appears, stop immediately and do not escalate.
Also consider personal context. People with known sensitivities to plant resins, latex-like sap, or frequent eczema flares may react more easily.
Use Stop Rules That Are Clear Enough to Follow
Stop rules prevent “toughing it out.” Define them before you start.
- Stop if there is wheezing, trouble breathing, facial swelling, or widespread hives.
- Stop if there is repeated vomiting, severe dizziness, or worsening pain after dosing.
- Stop if there is progressive rash beyond mild, transient irritation.
Then document what happened: plant name, plant part, preparation method, amount, time to onset, and symptoms. This turns a confusing event into usable information.
Mind Map: Practical Controls
Integrated Example: From Field to First Dose
You identify a plant described for “stomach comfort.” You confirm leaf traits and habitat, record the local name, and prepare a measured infusion using the specified plant part. Before giving it to someone who has never used it, you start with a small dose and observe for stomach upset beyond mild changes. If the person develops a rash or itching, you stop and record the preparation details. If symptoms are severe or breathing is affected, you treat it as an urgent safety event and do not repeat the remedy.
Risk awareness isn’t about fear; it’s about reducing avoidable variables. When identity, preparation strength, and exposure behavior are controlled, the remaining uncertainty becomes manageable.
2.2 Ethical Guidelines for Learning, Consent, and Knowledge Sharing
Ethics in jungle medicine starts with a simple idea: knowledge is not just information, it is a relationship. In practice, that means you treat every plant name, preparation method, and healing story as something held by people, not something you can “collect” like specimens.
Foundational Respect and Clear Intent
Begin by stating your purpose in plain language before asking questions. A good opening is: “I want to learn how you decide which plants to use and how you keep people safe.” This frames learning as care, not extraction.
Next, separate observation from participation. You can watch how a remedy is prepared without assuming you may reproduce it. If you later want to make it yourself, ask what level of involvement is appropriate.
Consent That Matches the Type of Knowledge
Consent is not one checkbox; it changes depending on what you want to learn.
- Names and uses: Often shared more readily, but still require permission.
- Preparation steps: May be restricted because small changes can affect safety.
- Personal or family practices: Usually require stronger permission and sometimes are not shareable at all.
- Healing outcomes and case stories: Should be treated as private unless explicitly cleared.
A practical rule: if the knowledge could reasonably affect someone’s health, you need explicit consent for how it will be used and by whom.
Asking Questions Without Taking
Ask questions that invite explanation rather than demand disclosure. Instead of “What plant is it?” try “How do you decide it is the right plant for this problem?” This encourages teaching the decision process, not just handing over a shortcut.
When someone declines to share, accept it without bargaining. You can still learn by focusing on safety practices, general identification habits, and how to recognize when a remedy is not appropriate.
Knowledge Sharing with Boundaries
When you share what you learned, keep the same boundaries you were given.
- Share the method at the allowed level. If you were taught a general approach, don’t publish exact measurements or step-by-step instructions if that was not granted.
- Avoid publishing sensitive details. If a preparation is tied to a specific family or community role, do not present it as universally available.
- Credit the source appropriately. Use the names and terms the knowledge holders prefer, and record who taught you.
A helpful habit is to maintain a “permission map” in your notes: for each remedy, write what you may do, what you may say, and what you must keep private.
Systematic Documentation That Protects People
Documentation is ethical when it reduces harm and respects limits.
Use structured notes that focus on safety and context:
- plant name as given locally
- part used and preparation type
- observed contraindications or caution notes
- who approved the information for learning and sharing
Avoid recording private case details unless consent explicitly covers documentation and future use.
Mind Map: Ethical Learning and Sharing
Example: Permission-First Learning Workflow
You meet a healer who agrees to teach you about remedies for stomach discomfort. You start with consent for general principles: how they distinguish “cramps from irritation” and how they decide when a person should seek clinical care.
Later, you ask whether you may write down the exact preparation steps. The healer says yes for your personal use but not for public sharing. You record the steps in your private notes, label them “personal use only,” and when you later explain the approach to others, you describe the decision process without the exact recipe.
This keeps learning practical while honoring the boundary that the healer set.
Case Study: When Consent Changes the Outcome
A student wants to document a bark remedy used during a family ceremony. The healer agrees to explain the safety considerations and the general preparation category, but not the ceremonial context or the precise timing.
The student follows the consent boundary: they record the safety notes and the general method, and they do not publish the ceremonial timing. As a result, the student can teach safe handling and caution signs without turning a private practice into a public instruction manual.
Ethical learning is not slower; it is clearer. It prevents misunderstandings, reduces the chance of unsafe misuse, and keeps the relationship intact.
2.3 Sustainable Harvesting Practices for Leaves Bark Roots and Resins
Sustainable harvesting starts with a simple question: what can the plant replace faster than you take it? In practice, that means matching the harvest method to the plant part, the growth rate, and the local ecology. A good rule of thumb is to harvest in ways that keep the plant functional—so it can keep photosynthesizing, regrowing tissue, and producing seeds.
Core Principles for Sustainable Harvesting
First, harvest only what you can identify confidently. Misidentification is not just a safety issue; it also causes unnecessary damage when the wrong plant is removed. Second, avoid harvesting during periods when the plant is least able to recover, such as when it is actively flowering and setting seed or when water stress is high. Third, use a “leave enough” mindset: take a portion, not the whole plant, and rotate collection sites so the same individuals are not repeatedly pressured.
A practical best practice is to create a small harvest plan before you step into the area. Write down the target plant, the part you will take, the approximate amount needed, and the recovery window you will allow. If you cannot estimate recovery, reduce the amount and increase the number of plants you sample.
Leaves Harvesting That Preserves Regrowth
Leaves are usually the easiest part to harvest without killing the plant, but they can still be overused. Choose mature leaves rather than the newest growth, and avoid stripping all leaves from a single branch. A common approach is to take leaves from multiple branches on the same plant, leaving the central growing tips intact.
Example: If you need leaves for a daily infusion, harvest from several plants rather than taking a heavy handful from one. Take about one-third of the leaves from each selected branch, then stop. If the plant looks thin or the remaining leaves are stressed, you have already taken too much.
Bark Harvesting with Recovery in Mind
Bark is slower to replace than leaves, so sustainability depends on minimizing ring damage. Avoid harvesting bark in a complete circle around the stem. Instead, take small sections from different sides, and leave a healthy strip of bark intact so the plant’s transport tissues remain functional.
Best practice: Harvest bark only from plants that are large enough to tolerate partial removal. If the plant is young or thin, choose a different specimen or switch to leaves or resin where appropriate.
Example: For a remedy that traditionally uses bark, collect small patches from multiple mature individuals. Keep the patches separated so the plant can compartmentalize damage and continue moving water and nutrients.
Roots Harvesting with Strict Limits
Roots are the hardest part to harvest sustainably because they anchor the plant and store energy. Sustainable root harvesting usually means taking small amounts from established plants and avoiding the removal of the main taproot.
Best practice: Prefer harvesting roots only when the plant’s above-ground portion can be maintained and when you can limit the excavation depth. If you must dig, take lateral roots rather than the central root system.
Example: If you need a small quantity of root material, dig a narrow trench on one side of the plant, collect a small section of lateral roots, and refill the soil firmly. Mark the plant so you do not return to it for a long recovery period.
Resins Harvesting That Avoids Long-Term Injury
Resins often require wounding the plant, so sustainability is about controlling the wound size and allowing time for sealing. Make shallow, targeted cuts rather than deep incisions, and avoid repeated tapping on the same exact spot.
Best practice: Use a consistent tapping pattern that distributes wounds across the plant. Stop once resin flow slows, because continued tapping increases damage without adding useful material.
Example: If resin is collected by making small slits, create a few short slits on one side, collect the resin, then leave the plant alone. On a later visit, choose a different section of the stem rather than reusing the same slits.
Mind Map: Sustainable Harvest Workflow
Mind Map: Decision Rules for When to Stop
Integrated Example: One Day, Four Plant Parts
A sustainable approach for a single work session could look like this: you collect leaves from several mature individuals, take small bark patches from only the largest stems, take a limited lateral root sample from one plant with careful refilling, and collect resin from shallow slits on different sections of another plant. You then record what you took and how each plant looked afterward. That last step matters because it turns “good intentions” into measurable practice—so your next harvest can be adjusted based on observed recovery rather than guesswork.
2.4 Storage, Labeling, and Shelf Life for Dried and Fresh Materials
Good storage is part of safety. It prevents accidental mix-ups, slows spoilage, and keeps plant material consistent from one preparation to the next. In jungle medicine, the “same plant” can behave differently if it’s stored poorly, so your goal is simple: stable identity, stable quality, and traceable preparation.
Foundational Concepts for Storage
Start by separating materials into two categories: fresh and dried. Fresh plant parts contain more water, so they are prone to microbial growth and enzyme changes. Dried materials have less water, so they last longer but can still degrade if exposed to heat, light, or moisture.
A practical rule: store for the weakest link. If the label is unclear, you can’t verify identity. If the container leaks moisture, drying doesn’t matter. If the storage area is hot, oils and resins can change even when sealed.
Labeling That Prevents Mistakes
Labeling should answer five questions at a glance: plant name (local and/or common), plant part, preparation state (fresh or dried), date of processing, and intended use or remedy type.
Use a label format that stays readable when wet or dusty. Write on waterproof tape or use a label that tolerates humidity. For example, a label might read: “Guayusa leaf, dried, infusion tea, 2026-02-10, for morning digestion.” Keep the date tied to processing, not when you first found the plant.
If you work with multiple batches, add a batch code. Batch codes are especially helpful for resins and bark powders, where strength can vary. A batch code also makes it easier to stop using a batch if you notice a problem.
Storage Conditions for Dried Materials
Dried materials should be kept dry, cool, and protected from light. Use airtight containers such as glass jars with tight lids or food-grade plastic containers with secure seals. Add a moisture barrier: keep containers in a dry cabinet rather than on a kitchen counter where humidity swings.
For powders, consider double containment: place powder in a small sealed bag or jar, then put that inside a larger airtight container. This reduces exposure if the inner seal fails.
Avoid storing dried plants near strong-smelling items. Many plant powders absorb odors, which can confuse identification and make remedies taste or smell different.
Storage Conditions for Fresh Materials
Fresh plant parts require faster use. If you can’t prepare immediately, store them in a way that slows spoilage without causing them to turn into a mushy science experiment.
For leafy materials, wrap lightly to reduce direct contact with condensation, then store in a breathable bag or container in a cool place. For thicker parts like bark strips, keep them dry on the outside and protected from direct airflow that dries them too quickly. If you must refrigerate, keep containers sealed enough to prevent cross-contamination of odors.
Fresh materials should be used in a short window. If you see discoloration, unusual odor, or sliminess, discard rather than “salvage.” In plant medicine, salvage is how you end up with a remedy that no longer matches your notes.
Shelf Life Expectations and Quality Checks
Shelf life depends on how well you dried and sealed the material. Use a simple quality-check routine.
- Dried leaves and flowers: typically remain usable for months when sealed and dry; check monthly for odor changes or clumping.
- Dried bark and roots: often last longer than leaves if fully dried; check for mold spots and brittle texture.
- Powders: degrade faster than whole dried pieces because more surface area is exposed; check for off smells and loss of color.
- Resins and gums: can harden or darken; check for tackiness changes and separation.
Quality checks should be documented. If a batch smells “off” or looks different, note it and stop using that batch. Your label becomes a safety tool, not just a memory aid.
Mind Map: Storage, Labeling, and Shelf Life
Example: Labeling and Container Setup for a Dried Batch
You dry a batch of leaves for infusion. After drying, cool them completely before sealing, because hot plant material traps moisture inside the container.
- Place dried leaves in a small jar.
- Add a label: “Leaf, dried, infusion, 2026-02-10, batch A3.”
- Put the jar inside a larger airtight container.
- Store in a cabinet away from sunlight.
After one month, open briefly and check: the leaves should smell like the original plant, not musty. If they clump heavily or smell sour, discard the batch and record the issue.
Example: Fresh Leaf Storage with Clear Use Windows
You harvest fresh leaves for a poultice. You plan to use them the same day and the next morning.
- Rinse gently if needed, then pat dry.
- Wrap in a clean cloth or paper that won’t shed fibers.
- Store in a cool place in a sealed container.
- Label: “Fresh leaf poultice, processed 2026-02-10, use by 2026-02-11.”
If the leaves turn slimy or develop a sour odor before the use-by time, discard. Your notes should match reality, not hope.
2.5 When to Seek Medical Care and How to Document Adverse Reactions
Medicinal plants can help, but they can also harm when the wrong plant is used, the preparation is too strong, or a person has an allergy or medical condition that changes how they respond. The goal of this section is simple: know the warning signs that require professional care, and record what happened in a way that helps clinicians make faster, safer decisions.
Foundational Decision Rules for Getting Help
Start with a practical rule: if symptoms are severe, rapidly worsening, or involve breathing, consciousness, or major bleeding, seek medical care immediately. If symptoms are mild but persistent, contact a clinician the same day or within 24 hours, especially when the remedy involved bark, roots, or concentrated extracts.
Use a second rule for uncertainty: if you cannot confidently identify the plant or you do not know the preparation strength, treat the situation as higher risk. In that case, document everything and seek advice sooner rather than later.
Warning Signs That Require Immediate Care
Seek emergency care when any of the following occur after using a jungle remedy:
- Trouble breathing, wheezing, swelling of lips or face, or widespread hives.
- Fainting, confusion, severe drowsiness, or seizures.
- Persistent vomiting, vomiting blood, or black tarry stools.
- Severe abdominal pain that does not ease, or a rigid belly.
- High fever with stiff neck, severe headache, or new rash.
- Signs of severe dehydration such as very little urination, dry mouth with dizziness, or inability to keep fluids down.
- Large burns, blistering, or rapidly spreading redness after topical use.
A slightly playful but useful reminder: if you are thinking, “This is not the usual pattern,” that thought counts as data.
When to Seek Same-Day or Within 24 Hours
Contact medical care promptly when symptoms are:
- New and unexplained, even if not dramatic.
- Lasting longer than expected for the condition being treated.
- Involving the heart or circulation, such as chest pain, fast irregular heartbeat, or severe dizziness.
- Suggestive of liver or kidney stress, such as yellow eyes, dark urine, or marked reduction in urination.
- Occurring after repeated dosing, where the pattern suggests dose-related harm.
How to Document Adverse Reactions Systematically
Documentation should be fast, factual, and complete enough to answer four questions: what was taken or applied, how it was prepared, when it was used, and what changed in the body.
Use this structure:
- Identification: local name, any written label, and how you identified the plant.
- Preparation: infusion, decoction, paste, poultice, or resin; plant part used; approximate strength (for example, “one handful simmered in one liter for 20 minutes”).
- Dose and timing: amount, frequency, and the exact time you started and stopped.
- Symptoms: list symptoms in order of appearance, with severity (mild/moderate/severe) and whether they improved or worsened.
- Context: other foods, alcohol, medications, pregnancy status, and any known allergies.
- Outcome: what you did next, including whether you stopped the remedy and whether symptoms changed.
If possible, record a photo of the plant preparation and any visible skin changes. Keep it simple: one clear photo is better than five blurry ones.
Mind Map: Medical Care Triggers and Documentation Steps
Example: Digestive Symptoms After a Bitter Bark Tea
A person drinks a bitter bark infusion for stomach discomfort. Two hours later they develop repeated vomiting and worsening cramps. They cannot keep water down.
- Action: seek same-day medical care or emergency care if vomiting is severe or dehydration signs appear.
- Documentation: record the bark local name, that it was a decoction simmered for 15 minutes, the approximate volume consumed, and the exact times of the first sip and first vomiting. Note whether there was diarrhea, blood in vomit, or black stools. List any regular medications and known allergies.
Example: Skin Reaction After a Leaf Poultice
After applying a leaf poultice for an insect bite, the area becomes intensely itchy, then develops blistering and spreads beyond the original spot within a few hours.
- Action: seek urgent medical care, especially with blistering or rapid spread.
- Documentation: note the leaf local name, how the leaves were crushed and how long the poultice stayed on, and the timeline from first contact to blistering. Photograph the rash if possible and record any other products used on the skin.
Practical Stop Conditions for the Remedy
Stop using the remedy and seek advice when symptoms clearly worsen after dosing, when new severe symptoms appear, or when you suspect misidentification. Continuing to “wait it out” is only reasonable when symptoms are mild, stable, and clearly improving.
A Simple Adverse Reaction Log Template
Date used: 2026-02-15
Plant name and part:
Preparation method and strength:
Dose amount and frequency:
Start time and stop time:
Symptoms in order with severity:
Other meds/foods/allergies:
What was done next:
Outcome after stopping:
This approach keeps the focus on what clinicians need: a clear timeline, accurate preparation details, and symptom progression. It also protects the person using the remedy, because good documentation turns confusion into actionable information.
3. Field Methods for Identifying Medicinal Plants
3.1 Using Habitat Clues and Growth Forms for Initial Sorting
Before you touch a plant for identification, you can often narrow the possibilities using where it grows and how it grows. Habitat clues tell you what the plant is likely adapted to, while growth forms tell you what structural “job” it performs in the forest. Together, they reduce guesswork and help you avoid mixing look-alikes.
Habitat Clues That Narrow the Search
Start with three observations: light, water, and ground type.
- Light: In the understory, many medicinal plants are shade-tolerant and grow as low shrubs or thin-stemmed herbs. In canopy gaps, you’ll see faster-growing vines and sun-loving shrubs. A practical example: if you find a plant only along a trail edge where sunlight hits for most of the day, treat it as a likely “gap specialist” rather than an understory herb.
- Water: Wet areas favor plants with thicker leaves, buttressed roots, or flexible stems that tolerate standing water. Drier ridges often host plants with smaller leaves, tougher bark, or growth that hugs the ground. Example: if the soil stays dark and cool after rain, prioritize species known to handle saturated conditions and be extra cautious with plants that look “fresh” but are growing in waterlogged microhabitats.
- Ground Type: Riverbanks, clay slopes, sandy patches, and leaf-litter mounds each select for different root and stem strategies. Example: a plant with a strong taproot is more plausible on firmer, well-drained soils than on soft, constantly shifting sand.
Record these observations in simple notes: Light (shade/gap/sun), Water (dry/moist/wet), Ground (clay/sand/leaf litter/rocky). This turns “I think it likes this place” into usable information.
Growth Forms That Signal Botanical Identity
Growth form is the plant’s visible architecture. Use it as a first filter before you focus on leaves and flowers.
- Herbs: Often have soft stems and clear leaf arrangement. They’re common in disturbed ground, forest edges, and shaded clearings.
- Shrubs: Woody stems with multiple branches. They frequently appear in mid-understory zones where light is intermittent.
- Trees: Distinct trunk structure and bark texture. Many medicinal uses in practice involve bark or leaves, so you should note whether you can access the relevant plant parts safely.
- Vines and Lianas: Twining or climbing stems. They often show up along tree trunks or canopy openings. Example: if you see a rope-like stem wrapping another plant, treat it as a vine category and avoid assuming it’s the same as a nearby shrub with similar leaf shape.
- Epiphytes: Plants growing on other plants without rooting in the ground. If you find a plant on a branch or trunk, your habitat notes must include host tree location and height.
A useful habit: assign each candidate a primary growth form and a secondary clue. For instance, “vine + riverbank” or “shrub + leaf-litter mound.” This combination is more informative than either alone.
A Systematic Sorting Workflow
- Scan the microhabitat: Identify light, water, and ground type.
- Classify growth form: Herb, shrub, tree, vine, or epiphyte.
- Check for structural consistency: Does the plant’s stem type and branching match the growth form category you chose?
- Group by likelihood: Create a small set of candidates that fit both habitat and growth form.
- Only then observe finer traits: Leaf arrangement, margin, smell, latex, and any visible flowers or fruits.
If a plant’s habitat and growth form disagree with your initial assumptions, pause. That mismatch is often the sign you’re looking at a different species than you first thought.
Mind Map: Habitat and Growth Form Sorting
Example: Sorting Two Similar-Looking Plants
You notice two plants with broadly similar leaf shapes near the same trail.
- Plant A: Leaves on a low woody shrub, growing where the ground is leaf-litter thick and the area stays moist after rain. Growth form points to shrub, habitat points to moist understory.
- Plant B: Leaves on a climbing vine wrapping a nearby tree trunk, found in a brighter gap where sunlight reaches the canopy edge. Growth form points to vine, habitat points to gap conditions.
Even before leaf details, you can treat these as different categories. Later, when you compare leaf arrangement and stem texture, you’ll likely confirm the separation rather than forcing a single identification.
Best Practice: Keep Categories Small
Aim for a short candidate list. If you end up with many “maybe” plants, your habitat notes are probably too vague or your growth form assignment is too broad. Tight categories make the next step—leaf and flower observation—faster, safer, and more accurate.
3.2 Leaf, Stem, Bark, and Flower Traits for Practical Identification
Practical identification starts with a simple rule: don’t try to name a plant from one feature. Use a small set of traits that stay consistent across seasons, then confirm with the next trait set. Leaves, stems, bark, and flowers each “answer” a different question—leaf traits help you sort quickly, stem traits help you verify structure, bark helps you confirm age and growth form, and flowers help you lock in identity.
Leaf Traits That Hold Up in the Field
Begin with leaf arrangement and shape, because these are usually visible even when the plant is not flowering.
- Arrangement: Look for opposite leaves, alternate leaves, or whorls. A quick example: if two leaves consistently appear at the same height on opposite sides of the stem, you’re likely seeing an opposite arrangement.
- Leaf margin: Note whether edges are smooth, toothed, lobed, or spiny. Example: a plant with consistently serrated edges can be separated from a close look-alike with smooth margins.
- Leaf surface: Check for hairiness, waxiness, or a rough texture. Rub a leaf between fingers only if it’s safe and non-irritating; note whether it feels velvety, slick, or gritty.
- Venation pattern: Many jungle leaves show strong midribs and clear side veins. Example: a prominent ladder-like side-vein pattern can narrow options when you compare two similar shrubs.
Best practice: take two leaf samples from different positions on the plant. Young leaves can look different from mature ones, and that difference is useful information, not a problem.
Stem Traits That Confirm Growth Form
Stems tell you how the plant builds itself. This matters because two species can share leaf shape but differ in stem structure.
- Stem cross-section: Some stems are round, others angular. A simple check is to look at the stem from above or along the edge of a broken twig.
- Surface features: Note whether the stem is smooth, ridged, lenticellate (tiny pores), or covered in hairs.
- Growth habit: Decide whether it’s a tree, shrub, vine, or herb. Example: vines often have twining stems and may show tendril-like structures, while shrubs usually branch from lower points.
- Sap behavior: If you can safely observe it, note whether sap is clear, milky, colored, or sticky. Example: milky sap is a strong clue for some families, but you still confirm with leaf and bark traits.
Best practice: don’t rely on sap color alone. Sap can change with injury and age, so treat it as a supporting trait.
Bark Traits That Help You Identify Older Plants
Bark is often the most reliable trait for trees and woody shrubs because it reflects long-term growth.
- Texture: Smooth, peeling, flaky, corky, or deeply furrowed. Example: peeling bark that comes off in thin sheets is easier to spot than subtle furrows.
- Color and pattern: Note the outer bark color and whether it reveals a different inner color when scratched.
- Thickness and scaling: Some barks feel papery; others are thick and rough.
- Exudates: Some barks release resins or latex when cut. If you observe this, record it carefully.
Safety note: avoid deep cutting. A shallow scrape can be enough to observe texture and color without turning the plant into a science project.
Flower Traits That Provide Final Confirmation
Flowers are the “signature” trait, but they may be absent. When present, use them to confirm what leaf and stem traits suggest.
- Flower position: Along the stem, at branch tips, or in clusters.
- Flower structure: Note whether petals are distinct or fused, and whether the flower is tubular or flat.
- Color and scent: Record color as accurately as possible and note whether there is a noticeable scent when you’re close.
- Fruit association: If flowers are gone, look for developing fruits or seed pods nearby. Example: a plant with distinctive seed pods can still be identified even when flowers are not visible.
Best practice: photograph flowers and leaves together in the same frame. That single habit prevents many “same species, wrong plant” mistakes.
Mind Map: Trait Workflow for Identification
Example: Systematic Comparison of Two Similar Shrubs
Imagine two shrubs with broadly similar leaf shapes.
- Leaf arrangement: Plant A has opposite leaves; Plant B has alternate leaves. That alone is a major split.
- Leaf margin: Plant A has smooth edges; Plant B has fine serrations. Now the difference is consistent.
- Stem surface: Plant A stems are smooth; Plant B stems are slightly hairy.
- Bark texture: Plant A shows thin peeling bark; Plant B shows rough, non-peeling bark.
- Flower confirmation: When flowering occurs, Plant A’s flowers appear in tight clusters, while Plant B’s flowers appear singly at branch tips.
By the time you reach flowers, you’re not guessing—you’re verifying a pattern you already built from earlier traits.
Practical Recording That Prevents Confusion
When you record traits, use short, consistent phrases: “opposite leaves,” “serrated margin,” “hairy stem,” “peeling bark,” “clustered flowers.” Add one observation that explains your confidence, such as “seen on three branches” or “same trait on young and mature leaves.” This turns identification into a repeatable process rather than a one-time impression.
3.3 Collecting Voucher Specimens and Recording Local Names
Voucher specimens are physical proof that a plant was identified correctly at the time it was collected. Local names are the cultural map that tells you how the community understands the plant’s role, preparation, and boundaries. Together, they reduce confusion later—especially when leaves change with age, bark looks different across seasons, or multiple species share a similar common name.
Foundational Goal and Scope
Start by deciding what your voucher is meant to accomplish. A voucher should support identification, not replace careful observation. For medicinal plants, aim to capture the traits that make the species recognizable: leaf arrangement, stem texture, bark or latex features, flower or fruit when available, and habitat context. If the plant is collected for a specific remedy, record which part was used and how it was prepared, so the specimen and the practice stay connected.
Step by Step Collection Workflow
- Confirm the plant in place before cutting. Note the exact location, light conditions, and nearby plants. A quick sketch of the whole plant helps later when leaves are missing from the final specimen.
- Photograph before and after sampling. Take one photo of the whole plant, then close-ups of leaves, stems, and any visible latex, resin, or odor. If flowers or fruits are present, photograph them from multiple angles.
- Collect representative material. For herbarium-style vouchers, collect leaves and small stem portions that show the diagnostic features. If the plant is a tree, include a small bark sample and a leaf sample from the same individual when possible.
- Label immediately. Use a waterproof label and write the collection number on it before the plant material is placed in a bag. If you wait, you will eventually lose the thread.
- Preserve with the right method. Press leaves promptly between absorbent sheets. For fleshy parts that do not press well, use separate preservation notes and store them in a way that keeps them from contaminating other samples.
- Record the local name while the conversation is fresh. Ask how the name is used in daily life, not only in medicine. Then ask what part of the plant is involved and what the name implies about preparation.
Recording Local Names Systematically
Local names can be descriptive, honorific, or functional. To keep them useful, record them as a set of fields rather than a single word.
- Local Name Spelling and Pronunciation: Write the name as heard, then add a phonetic guide if your transcription system differs from the speaker’s. Keep the original spelling from the speaker if they provide it.
- Meaning in Context: Ask what the name suggests about the plant’s behavior or use. Example: a name might indicate “bitter leaf” or “heals skin,” which helps you interpret why the plant is chosen.
- Part Specificity: Record whether the name refers to the leaf, bark, root, or resin. Many communities use the same name for the plant but treat different parts as different remedies.
- Preparation Association: Note the typical preparation style linked to the name. Example: if the name is commonly used for a decoction, record that association.
- Who Uses It and When: Record the speaker’s role, such as healer, family elder, or general caregiver, and whether the name is used for routine care or special situations.
Example: A Clean Voucher and Name Record
Imagine you collect a leafy shrub used for stomach comfort. You assign collection number AR-17.
- Voucher notes: “Leaves opposite, thick midrib, milky latex when broken, collected near a stream edge.”
- Photos: whole plant, leaf close-up, latex close-up.
- Local name record: Local name “Xanari” (phonetic: zan-AH-ree). Meaning in context: “bitter leaf.” Part specificity: leaf. Preparation association: short simmer into a tea.
- Remedy link: The community uses the leaf infusion for cramps after meals.
This structure lets you later compare your specimen traits with the community’s functional description, even if the plant’s appearance shifts across growth stages.
Mind Map: Voucher Specimens and Local Names
Common Mistakes and How to Avoid Them
The most frequent problem is mismatched records: a specimen bag labeled with one number while the notes describe another plant. Prevent this by labeling first, then sampling, then writing. Another common issue is treating local names as universal labels. A name may point to a plant, a part, or a preparation method; recording the fields keeps the meaning from slipping.
Practical Checklist for Field Consistency
Before you leave the site, confirm that each collection number has: (1) photos, (2) preserved material, (3) trait notes, and (4) local name fields for part and preparation. If any element is missing, fix it immediately while the plant is still in front of you—because memory is not a reliable storage medium.
3.4 Distinguishing Look Alike Species with Key Diagnostic Features
When two plants share a similar leaf shape or growth habit, “looks right” is not enough. In jungle work, misidentification can turn a helpful remedy into an avoidable problem, so this section focuses on repeatable diagnostic features you can check in a consistent order. The goal is not to memorize names; it’s to build a small set of observations that reliably separates look-alikes.
Start with a Safe Sorting Routine
Begin with a quick triage that reduces confusion before you examine details. First, confirm the plant part you intend to use is actually present and accessible: leaves, bark, root, or latex. Next, note habitat context—river edge, terra firme forest, disturbed ground, or canopy shade—because many look-alikes prefer different microhabitats. Then record the plant’s growth form: vine, shrub, tree, or herb. This step prevents a common mistake: comparing a vine to a tree because both have “similar leaves.”
Use a Feature Ladder from Easy to Specific
Work from features that are easiest to see to those that require closer inspection. If you can’t confirm a specific feature, stop and treat the plant as “not yet identified,” rather than forcing a match.
- Leaf arrangement and attachment: Are leaves opposite or alternate? Are they attached by a petiole, or do they appear directly attached to the stem? Look for consistent patterns across multiple nodes.
- Leaf margin and surface: Check for smooth, serrated, lobed, or entire edges. Then examine the underside for hairiness, color differences, or visible veins.
- Venation pattern: Many look-alikes share overall leaf shape but differ in how veins branch. A simple check is to trace the main veins from the midrib toward the edges.
- Stem and bark texture: Bark can be misleading when wet or freshly cut, so compare dry texture and note lenticels, peeling behavior, or sap presence.
- Flowers and fruits when available: Even small differences matter. Fruit shape, seed arrangement, and flower symmetry often separate species that otherwise look similar.
- Latex or resin behavior: If the plant exudes sap when cut, observe color changes over a minute or two and whether the sap is watery, milky, sticky, or dries to a film.
Mind Map: Diagnostic Feature Workflow
Practical Examples of “Key Feature” Separation
Example 1: Two shrubs with similar leaf shape You find two shrubs with broadly oval leaves. Both have smooth edges, so you might be tempted to treat them as the same plant. The ladder prevents that. One shrub has opposite leaf arrangement and a pale underside with fine hairs; the other has alternate leaves and a glossier underside with prominent veinlets. Even before you look for flowers, these two independent leaf traits usually separate the plants.
Example 2: A vine that resembles a different vine Two vines climb near each other. Both have lobed leaves, but one vine’s stems show a distinct milky latex when scraped, while the other produces clear sap that dries without stickiness. Latex behavior is a strong diagnostic feature because it often reflects internal chemistry and structure, not just leaf shape.
Example 3: Bark look-alikes for the same remedy category Two trees are both “bark used for stomach comfort” in local practice. The bark color is similar, but one peels in thin strips and shows many small lenticels; the other flakes in thicker patches and has smoother patches with fewer pores. If you only check color, you can mix them up. If you check peeling pattern and lenticels, you reduce the risk.
Decision Rules That Keep You Honest
A reliable identification is usually supported by multiple features that agree. If you find one feature that matches but another that conflicts, treat it as a mismatch until you can verify the conflicting trait. Also, compare more than one specimen: a single unusual leaf can happen due to damage, shade, or age.
Documentation That Supports Later Verification
Write down what you checked, not just what you concluded. For each specimen, record leaf arrangement, margin type, underside texture, and any sap behavior. If flowers or fruits are absent, say so explicitly. This makes your notes usable even when you revisit the plant later and need to confirm whether “look-alike” was resolved or merely assumed.
3.5 Creating a Simple Field Key for Common Jungle Medicinals
A field key is a short set of choices that leads you to the most likely plant—fast enough to use while you’re still in the habitat. The goal is not perfect certainty; it’s consistent narrowing. Start with features you can see without special tools, then move to features that require closer inspection.
Step 1: Decide Your Key Scope
Pick a small set of “common” medicinals you can reliably encounter in your area. If you try to key 60 plants at once, the key becomes a guessing machine. A practical target is 8–15 plants per key.
Example scope rule: include only plants you can usually find in the same season and habitat type, and that have stable, recognizable traits.
Step 2: Choose Traits That Work in the Field
Use traits that are:
- Visible quickly (leaf arrangement, bark texture, flower presence)
- Less affected by age or damage (leaf shape pattern, growth form)
- Not easily confused with unrelated plants (distinctive latex color, strong scent, thorn pattern)
Avoid traits that change constantly (exact height, leaf size after heavy rain, color that fades when dried).
Step 3: Write the Key as “Either/Or” Choices
A simple key uses paired statements. Each choice should send you to the next step number.
Best practice: keep each step to one decision. If a step asks you to judge three traits at once, people will disagree.
Example key logic for a small set:
- Step 1: separates by growth form: tree vs vine vs shrub vs herb
- Step 2: separates by leaf arrangement: opposite vs alternate
- Step 3: separates by a standout feature: milky latex vs none, thorns vs none
Step 4: Add a Confidence Check
After the key lands on a plant, require a final “sanity check” trait that confirms you didn’t land on a look-alike.
Example confidence check: “If the plant has milky latex, confirm latex color and whether it appears when a leaf is gently torn.” This is a controlled observation, not a harvesting step.
Step 5: Record Local Names and Preparation Notes
A field key should connect identification to safe handling. Add a small note area for:
- Local name(s)
- Plant part used traditionally
- Preparation form you plan to use later
- Any known “do not confuse with” warning from local knowledge
This keeps the key from becoming a purely botanical exercise.
Mind Map: Field Key Design
Example: Mini Field Key for Common Medicinals
Use this as a template. Replace plant names with the ones you actually include in your local scope.
Step 1: Growth Form 1.1 Tree or large shrub with woody stem → go to Step 2 1.2 Vine climbing or trailing → go to Step 4 1.3 Herb or low ground plant → go to Step 6
Step 2: Leaf Arrangement on Woody Stem 2.1 Leaves opposite on the stem → go to Step 3 2.2 Leaves alternate on the stem → go to Step 3
Step 3: Standout Feature 3.1 Milky latex when a leaf is gently torn; latex color is pale/white → Plant A 3.2 No milky latex; bark has strong fibrous texture when scraped lightly → Plant B
Step 4: Vine Leaf and Latex Check 4.1 Latex present when a leaf is gently torn → Plant C 4.2 Latex absent; vine has visible milky sap only after cutting → Plant D
Step 6: Leaf Shape Pattern 6.1 Leaves broad and rounded with a clear midrib prominence → Plant E 6.2 Leaves narrow or segmented; strong scent when rubbed → Plant F
Confidence Check for Any Result
- Confirm the standout feature used in the final step.
- Compare leaf arrangement and growth form again before committing.
Example: Confidence Check in Practice
If the key points to Plant A (milky latex), you confirm by gently tearing a leaf and observing:
- Does latex appear immediately?
- Is it milky white, clear, or colored?
- Does the latex persist on the torn edge for a few seconds?
If the latex behavior doesn’t match, return to the last decision step and choose the alternative.
Mind Map: Trait-to-Step Mapping
A good field key feels boring: it’s short, repeatable, and grounded in traits you can observe without guesswork. When you build it this way, identification becomes a process you can teach, practice, and improve—without turning every walk into a debate.
4. Preparation Methods for Plant Remedies
4.1 Infusions, Decoctions, and Tisanes With Step By Step Examples
Medicinal plant preparations differ mainly by how heat, time, and plant part work together. A good rule of thumb: infusions use hot water with shorter steeping for delicate tissues; decoctions simmer tougher parts like bark and roots; tisanes are the broader category for herbal drinks, which can be made as infusions or decoctions. The best practice is to match the method to the plant part, then keep the process consistent so your results are easier to interpret.
Core Concepts That Decide the Method
Plant Part Determines Heat Exposure
- Leaves and flowers: usually respond well to infusion because they contain many water-soluble compounds that don’t need long boiling.
- Bark and roots: often require decoction because tougher plant fibers release constituents more slowly.
- Resins and gums: typically need different handling than water-only drinks, so avoid forcing them into infusion or decoction.
Time Controls Extraction
Longer time can increase extraction, but it can also increase bitterness and pull unwanted material. Consistency matters: if you change time and temperature every time, you can’t tell what caused a change in effect.
Temperature Affects What You Extract
- Infusions rely on hot water to extract without prolonged boiling.
- Decoctions use simmering to break down tougher tissues.
Step by Step Infusion Example
Goal: A gentle leaf tea for mild digestive comfort.
Infusion Steps
- Measure: Use 1 teaspoon dried leaf (or 1 tablespoon fresh leaf) per 1 cup (250 ml) water.
- Heat water: Bring water to a boil, then let it sit 1 minute.
- Steep: Pour over plant material and cover.
- Time: Steep 10 minutes.
- Strain: Use a fine strainer.
- Cool and assess: Let it cool to warm, then taste for bitterness level. If it’s extremely bitter, shorten steeping next time.
Practical Best Practice
Keep a small note: plant part, amount, steep time, and how it tasted. Taste isn’t a diagnosis, but it helps you standardize future batches.
Step by Step Decoction Example
Goal: A bark drink for stronger, more “structural” plant parts.
Decoction Steps
- Measure: Use 1 tablespoon dried bark per 1 cup (250 ml) water.
- Start cold: Place bark in a pot and add water before heating.
- Simmer: Bring to a gentle simmer, then reduce to low.
- Time: Simmer 20 minutes with the lid slightly ajar.
- Reduce and strain: Strain while warm. If volume drops a lot, top up with boiled water to return to 250 ml.
- Cool and assess: Check color and bitterness. If it’s too harsh, reduce simmer time by 5 minutes next batch.
Practical Best Practice
Stir once or twice during simmering so the plant material doesn’t settle and scorch.
Tisane Planning for Consistent Results
A tisane is a drink preparation, not a single technique. You can choose infusion or decoction based on plant part, then keep the same “recipe logic” each time.
Simple Tisane Workflow
- Choose plant part → choose method → choose time → choose dose amount.
- If you combine plants, keep similar extraction needs together. For example, don’t mix delicate leaves with bark in the same pot unless you’re intentionally making a stronger decoction.
Mind Map: Infusions, Decoctions, and Tisanes
Example: Choosing the Right Method Quickly
If you have dried leaf, start with an infusion: hot water, 10 minutes, then strain. If you have dried bark, start with a decoction: simmer 20 minutes, strain, and adjust volume. If you’re unsure, begin with the gentler option (infusion) for leaves and the stronger option (decoction) for bark, then refine time based on bitterness and strength.
Example: A Two-Plant Combination Without Chaos
Scenario: You want a drink using one leaf and one bark.
- Make two separate preparations: leaf as infusion, bark as decoction.
- Combine only after straining and cooling slightly.
- This avoids overcooking the leaf while still extracting from the bark.
Quick Reference Ratios and Times
- Infusion: 1 tsp dried leaf per 1 cup; steep 10 minutes.
- Decoction: 1 tbsp dried bark per 1 cup; simmer 20 minutes.
These starting points are intentionally simple. Once you record what you made and how it turned out, you can adjust one variable at a time—time first, then amount—so your changes stay understandable.
4.2 Poultices Salves and Leaf Wraps for Skin and Musculoskeletal Use
Poultices, salves, and leaf wraps are “contact remedies”: they work where the plant material meets the body. That means the basics matter more than usual—clean handling, correct plant part, and a preparation that matches the problem.
Foundational Concepts for Contact Remedies
What You Are Trying to Do
A poultice or wrap typically aims for one or more of these outcomes:
- Protect and cushion irritated skin.
- Draw out heat or soreness by creating steady, gentle contact.
- Reduce itch by calming surface irritation.
- Support movement by warming or cooling a specific area.
A salve aims for lasting contact: it stays on the skin longer than a wet poultice, which is useful for dry irritation and minor abrasions.
Matching Preparation to Tissue
- Broken skin: prioritize gentle cleaning and protective dressing; avoid strong, gritty, or strongly astringent preparations.
- Closed bruises and muscle soreness: poultices and compress-style wraps are often practical.
- Dry, flaky, or mildly inflamed skin: salves and thin leaf-based wraps can be more comfortable.
Clean Handling Best Practices
Before any contact remedy:
- Wash hands and clear the work surface.
- Use clean cloths and a dedicated container for plant material.
- Keep a simple “stop rule” ready: if burning, spreading redness, or swelling increases, remove the remedy and rinse with clean water.
Poultices for Skin and Musculoskeletal Comfort
A poultice is plant material softened into a paste or mash and applied directly to the area.
Step by Step Example for a Leaf and Plant Paste
Use this approach when the goal is cushioning and localized comfort.
- Choose the plant part: tender leaves for surface comfort; thicker parts for longer contact.
- Soften: bruise leaves gently, then mash with a clean stone or bowl until it forms a spreadable layer.
- Control moisture: if it’s dripping, add a bit more leaf pulp; if it’s too dry, add a small amount of clean water.
- Apply: spread a layer about the thickness of a coin.
- Cover: place a clean cloth over the poultice to keep it in place.
- Time: start with 10–20 minutes for the first use, then adjust based on comfort.
- Remove and rinse: rinse with clean water, pat dry, and observe the skin for the next hour.
Common Mistakes to Avoid
- Too hot: heat can worsen inflammation. Warm is fine; hot is not.
- Too long: extended contact increases irritation risk.
- Too abrasive: gritty plant fibers can scratch and prolong redness.
Salves for Longer Contact and Skin Protection
A salve is a plant-infused fat or oil thickened enough to stay put.
Step by Step Example for a Simple Infused Salve
This example focuses on comfort and barrier support.
- Infuse: gently warm a carrier oil (or rendered fat) with cleaned, chopped plant material using low heat.
- Strain: strain while warm to remove solids.
- Thicken: cool slightly, then adjust thickness by adding a small amount of wax or by letting it set naturally.
- Test: apply a thin layer to a small skin area first.
- Apply: use a light coating, then cover if friction is likely.
Best Use Cases
- Dry irritation and minor chafing.
- Post-wash skin comfort where you want a protective layer.
- Areas that need contact for hours rather than minutes.
When Salves Are Not Ideal
- Actively weeping wounds.
- Deep cuts or suspected infection.
- Areas with rapidly spreading redness.
Leaf Wraps for Muscles and Localized Support
Leaf wraps are a practical middle ground: they provide contact without the mess of a thick paste.
Step by Step Example for a Wrap on a Sore Shoulder
- Select leaves: choose flexible leaves that can conform without tearing.
- Prepare the surface: bruise the leaf lightly so it releases plant juices.
- Add a thin layer: if using a plant paste, keep it thin to avoid uneven pressure.
- Wrap snugly: secure with cloth strips, not tight enough to tingle or numb.
- Check circulation: if fingers or skin feel cold or numb, loosen immediately.
- Duration: start with 30–60 minutes and reassess.
- Remove and cool down: rinse if needed and let the skin rest.
Wrap Timing Logic
Shorter sessions reduce irritation risk and help you learn what your skin tolerates. Longer contact is only for areas that consistently respond well.
Mind Map: Contact Remedy Workflow
Example: Choosing the Right Contact Remedy
- Itchy, mildly irritated skin patch → start with a leaf wrap or a thin salve; avoid gritty poultices.
- Sore muscle after a day of carrying → use a leaf wrap or short poultice session; keep it warm, not hot.
- Small superficial scrape → prioritize cleaning and protective dressing; if using plant contact, keep it gentle and brief.
Case Study: A Practical Decision in the Field
A person reports a tender forearm after repetitive lifting. The skin is intact, with no spreading redness.
- First choice: leaf wrap for 45 minutes to support comfort without heavy paste.
- If tenderness remains after one session: repeat with a short poultice (10–20 minutes) to increase contact.
- If burning or worsening redness appears: remove, rinse, and switch to protective rest rather than repeating the same preparation.
Advanced Details That Improve Results
Texture and Spread Matter
Even coverage prevents “hot spots” where plant juices concentrate. For poultices, aim for an even, coin-thickness layer.
Pressure Should Be Comfortable
Contact remedies should feel supportive, not constricting. Snug is fine; numbness is a warning.
Skin Observation Is Part of the Treatment
After removal, watch for delayed irritation. If the skin improves during the first hour, you can gradually extend timing next time.
4.3 Powders, Pastes, and Resins with Grinding and Mixing Techniques
Powders, pastes, and resins are the “concentrated forms” of jungle remedies. They can be convenient, stable, and precise—if you treat them like small chemistry projects rather than kitchen shortcuts. The goal is consistent particle size, controlled moisture, and clean mixing so the remedy behaves the same way each time.
Foundational Concepts for Consistent Strength
Start with three variables: plant part, dryness level, and particle size.
- Plant part matters because bark, root, and resin behave differently. Bark often grinds into fibrous powder; resins smear and need special handling.
- Dryness level determines whether grinding produces a fine powder or a sticky paste. If material is too wet, it clumps and traps water-soluble compounds unevenly.
- Particle size affects how quickly a remedy releases into the body. Finer powder generally mixes more evenly, but it can also irritate if used on sensitive skin.
A practical best practice is to standardize your workflow: dry first, grind second, then mix with a measured carrier.
Grinding Techniques for Powders
Powders work best when you can control texture. Use a clean, dry grinding surface and avoid cross-contamination between plants.
Step-by-step example: leaf or bark powder for a topical dusting paste
- Drying: Air-dry until brittle. If it bends, it’s not ready.
- Pre-break: Cut or snap into small pieces so grinding is faster and more uniform.
- Grinding: Use a stone or mortar. Grind in short bursts, then scrape down the sides.
- Sieving: If you have a simple mesh, sift to separate coarse fibers.
- Storage: Keep powder in a labeled container away from humidity.
If you notice a powder turning into a damp clump, stop and dry longer. Moisture is the silent saboteur.
Making Pastes with Controlled Moisture
Pastes are powders mixed with a carrier to create a spreadable consistency. The carrier can be water, plant oil, or a traditional binding liquid, depending on the intended use.
Core rule: add carrier gradually. Pastes fail when they become runny or grainy.
Step-by-step example: bark paste for localized soreness
- Grind bark into a fine powder.
- Place powder in a clean bowl.
- Add carrier a few drops at a time, mixing until it forms a smooth paste.
- Let it rest for a few minutes, then remix. Resting helps the powder hydrate evenly.
- Apply promptly, then clean tools.
For skin use, aim for a paste that spreads without dripping. For internal use, pastes should be prepared with extra care for cleanliness and dosage clarity.
Handling Resins with Heat and Patience
Resins are sticky, aromatic, and stubborn. They often require softening so they can be measured and mixed.
Step-by-step example: resin mixed into an oil base for a protective salve
- Soften: Warm the resin gently until it becomes pliable, not liquid.
- Measure: Use small portions so you can track strength.
- Combine: Mix resin into a carrier oil slowly, stirring until uniform.
- Strain if needed: If you see grit, strain through a fine cloth.
- Cool and label: Resins can separate if stored warm.
Avoid overheating. Too much heat can thin the mixture and make it harder to control consistency.
Mixing Techniques That Prevent Separation
Mixing is where “good ingredients” become “reliable remedy.” Use a consistent order and check texture.
- Powder into carrier: Add powder to liquid, not the other way around, to reduce lumps.
- Resin into oil: Break resin into small pieces before mixing.
- Scrape and remix: After mixing, scrape container sides and remix once more.
A simple quality check is the spread test: apply a small amount to a clean surface. If it runs, it’s too wet; if it won’t spread, it’s too dry or too coarse.
Mind Map: Powders Pastes and Resins Workflow
Example: A Complete Small-Batch Plan
Goal: a paste for a small area of skin irritation.
- Dry the chosen plant part until brittle.
- Grind to a fine powder and sieve if fibers remain.
- Add a small measured amount of carrier dropwise.
- Mix until smooth, rest briefly, then remix.
- Apply a thin layer, then clean tools and label the batch.
This approach keeps the remedy consistent even when you’re working in humid conditions, where “good intentions” can otherwise turn into unpredictable texture.
4.4 Fermentation and Maceration Methods for Extracting Plant Constituents
Fermentation and maceration are two ways to coax plant material into releasing useful compounds. Fermentation uses microbes to do part of the work for you, while maceration relies on time plus a solvent (water, alcohol, oil, or a mix). Both methods can be gentle, but they demand basic control: clean materials, clear ratios, and consistent timing.
Core Concepts and Why They Matter
Fermentation changes chemistry. Microbes convert sugars into acids and other small molecules, which can improve extraction of certain compounds and make a remedy less harsh on the stomach. Maceration changes extraction efficiency. Soaking breaks down plant structure and allows solvents to pull out compounds that match their polarity.
A practical rule: if the plant is rich in sugars or soft tissues, fermentation can be useful; if the plant is woody, resinous, or strongly aromatic, maceration often performs better. Either way, you should treat the process like cooking with a lab notebook: repeatable steps beat “eyeballing it.”
Mind Map: Fermentation and Maceration Workflow
Fermentation Method Foundations
Step 1: Pick the Right Plant Part
Fermentation works best when the plant part can stay in contact with the liquid without turning into a floating mess. Leaves and tender stems are easier to manage than thick bark. If you ferment bark, you usually need smaller pieces and a longer time.
Step 2: Choose a Medium and Control Salt or Sugar
A simple water-based fermentation uses salt to discourage unwanted microbes. Use a modest salt level and keep the plant submerged. If you use sugar, the microbes will have more fuel, but you must watch the process more closely because sweetness can mask sourness.
Step 3: Keep Conditions Consistent
Temperature affects speed. Warmer conditions ferment faster, cooler conditions slow things down. Oxygen exposure matters too: too much oxygen can encourage surface growth that you do not want. A practical approach is to use a weight or barrier to keep plant pieces under the liquid.
Step 4: Monitor Without Guessing
You are looking for signs of a stable fermentation: a pleasant sour smell, steady bubbling, and a gradual shift from “planty” to “tangy.” If you see fuzzy growth, strong rotten odors, or persistent cloudiness that worsens quickly, stop and discard.
Step 5: Finish, Strain, and Store
When the fermentation reaches the sourness you expect, strain promptly. Store in clean containers and keep it cool. Label the batch with plant part, medium, salt or sugar level, and the start and finish dates.
Maceration Method Foundations
Step 1: Prepare the Plant for Extraction
Maceration is about surface area and solvent contact. Chop leaves, bruise stems, and grind dried material. Woody parts benefit from smaller cuts and longer soaking.
Step 2: Select the Solvent by Target Compounds
Water tends to extract more polar compounds. Alcohol extracts a broader range, including many aromatic constituents. Oil extracts lipophilic compounds and is useful for topical preparations.
Step 3: Use a Clear Ratio
A consistent ratio prevents “mystery strength.” For example, if you use 1 part dried plant to 5 parts solvent by weight, keep that ratio across batches.
Step 4: Time and Agitation
Agitate early to wet the plant thoroughly, then let it rest. Stirging once or twice per day for the first few days helps extraction start strong. After that, you can reduce agitation if the plant is already fully soaked.
Step 5: Strain and Clarify
Strain through cloth, then let the liquid settle and decant if you need clarity. Avoid squeezing aggressively if the plant is bitter or irritating; you can always do a second, weaker soak later.
Example: Leaf Ferment for a Sour Extract
Use tender leaves chopped into small pieces. Pack them loosely into a clean jar, add water with a modest salt level, and keep the leaves submerged with a weight. Ferment until the smell turns pleasantly sour and bubbling slows. Strain, then store chilled. For use, dilute the extract in water before applying it to the intended remedy category.
Example: Bark Maceration in Alcohol
Cut dried bark into thin slices. Combine with alcohol at a fixed ratio (for instance, 1:5 by weight). Stir once daily for three days, then let it sit undisturbed. After the set time, strain through cloth and decant. Label the batch with plant part and ratio so you can reproduce the strength next time.
Example: Oil Maceration for Topical Use
Bruise dried leaves or flowers and soak in warm oil at a controlled low temperature for a short period, then let it cool and continue soaking at room temperature. Strain and store in a dark container. If the oil smells strongly of the plant but feels too harsh, reduce plant quantity and repeat with a weaker ratio.
Practical Control Checklist
- Clean tools and containers before starting
- Submerge plant material for fermentation
- Use consistent ratios for maceration
- Monitor smell and appearance during fermentation
- Label every batch with plant part, solvent or medium, ratio, and dates
- Stop if you see signs of spoilage
4.5 Dosing Practices Using Traditional Measures and Clear Conversion Notes
Traditional dosing is less about chasing a “perfect” number and more about staying consistent: same plant part, same preparation method, same strength, and the same way of measuring. In jungle settings, people often rely on familiar measures—spoonfuls, handfuls, cups, and time—because they are repeatable without lab equipment. The best practice is to treat these measures like a recipe: record them, standardize them, and adjust only one variable at a time.
Core Measurement Concepts
Start with four anchors. First, measure the plant material by weight when possible, because it reduces confusion when leaves are thick or roots are fibrous. If you cannot weigh, use volume measures for chopped material, but note that “packed” volume changes strength. Second, measure the extraction liquid by volume so your infusion or decoction has a consistent ratio. Third, measure time: steeping 10 minutes and simmering 30 minutes can produce very different extracts. Fourth, measure the final dose by volume, not by “how it feels,” because taste and strength do not reliably match potency.
A simple rule helps: if you change the plant amount, change the dose. If you change the extraction time, change the dose. If you change the container size, change the dose. If you keep all four anchors the same, you can compare outcomes.
Traditional Measures That Translate Well
Use measures that can be standardized in your household. A “teaspoon” and “tablespoon” are consistent enough for most practical work, but jungle kitchens may use different spoon sizes. So pick one set of utensils and label them.
Common traditional measures and how to make them clearer:
- Handfuls: define whether it means a loose handful or a packed handful.
- Pinches: define whether it is a pinch of powder or a pinch of chopped bark.
- Cups: define the cup size in milliliters.
- Sips: avoid for dosing unless you also record the approximate milliliter amount.
Conversion Notes That Prevent Mistakes
Write conversions directly on your remedy card. Keep them short and visible. Use the same unit system each time to avoid mental math errors.
Practical conversion table
| Measure | Metric | Notes |
|---|---|---|
| 1 teaspoon | 5 mL | Use the same spoon each time |
| 1 tablespoon | 15 mL | Often the easiest repeatable dose |
| 1 cup | 240 mL | Use a fixed cup size |
| 1 ounce (fluid) | 30 mL | Only if you must use imperial |
When converting from traditional “parts” like bark lengths or leaf counts, convert to weight or volume the first time you can. For example, if a remedy card says “one thumb-length of bark,” weigh that piece once, then replace future instructions with grams.
Systematic Dosing Workflow
Use this order every time.
- Define the preparation strength: infusion, decoction, maceration, or paste. Record plant part and ratio.
- Choose a starting dose: use the smallest traditional dose used by the community for that preparation type.
- Set a dosing interval: record how often it is taken, based on tradition and the preparation’s expected duration.
- Track response and tolerance: note digestion, sleepiness, stomach comfort, and any skin reactions.
- Adjust carefully: change either dose size or interval, not both at once.
A helpful example: if a bitter tonic is taken every 8 hours, and it causes nausea, reduce the dose by half but keep the interval the same for the next day. If it still causes nausea, stop and reassess the plant identity and preparation method.
Mind Map: Dosing with Traditional Measures
Example: Turning a Traditional Instruction into a Repeatable Dose
Suppose a remedy card says: “Simmer bark until strong, then take one tablespoon after meals.” To make it consistent, add three notes.
- Preparation note: “Use 20 g bark in 500 mL water; simmer 20 minutes; strain; cool.”
- Dose note: “Dose is 15 mL (1 tablespoon).”
- Interval note: “Take 1 tablespoon after breakfast and after dinner for up to two days, then reassess.”
If you later change the bark amount to 30 g but keep the same 15 mL dose, the strength increases. Your conversion notes should force you to adjust: either reduce the dose or return to the original ratio.
Example: Converting a “Handful” Instruction
A traditional instruction might read: “Steep one handful of leaves in a cup of water.” First time you do it, measure the handful. If it weighs 12 g when loosely packed, write: “1 handful = 12 g (loose).” If it weighs 18 g when packed, write that too. Future dosing becomes clearer because the extraction ratio is stable.
Clear Documentation Template
Keep a short dosing record for each remedy.
- Plant and part
- Preparation type and ratio
- Time and temperature method
- Final volume after straining
- Dose in mL and traditional measure
- Interval and duration
- Response notes and any side effects
This approach keeps traditional practice grounded in repeatable steps. It also makes it easier to notice when a change in plant material, preparation, or measurement is the real cause of a different outcome.
5. Plant Remedies for Digestive Health and Intestinal Comfort
5.1 Plants Used for Stomach Cramps and Indigestion
Stomach cramps and indigestion often share a pattern: the gut is irritated, moving too fast or too slowly, and producing discomfort that feels “tight,” “burny,” or “grippy.” In Amazonian plant practice, remedies are chosen by what the stomach is doing, not just by where it hurts. A good starting rule is to match the plant preparation to the symptom behavior: cramping and spasm call for calming and warming; indigestion with heaviness calls for stimulating digestion; burning or sourness calls for soothing and balancing.
Core Concepts for Choosing a Remedy
- Identify the dominant sensation: cramp-like tightening, bloating heaviness, burning/sourness, or nausea.
- Choose the preparation style: teas for gentle internal calming, decoctions for stronger “stomach settling,” and small doses for testing tolerance.
- Use a simple decision ladder: start mild, observe response, and stop if symptoms worsen or new red flags appear.
A practical example: if someone reports cramping after a heavy meal, you begin with a warm infusion prepared to be easy on the stomach. If the cramps ease but bloating remains, you adjust with a slightly more digestive-leaning preparation rather than repeating the same dose indefinitely.
Mind Map: Symptom to Plant Preparation Logic
Common Plant Roles in Stomach Comfort
Because many jungle plants have overlapping uses, it helps to think in roles rather than chasing one “magic” ingredient. The roles below are how practitioners often organize plant selection.
Calming and Antispasmodic Roles
Plants used for cramp-like tightening typically aim to reduce spasm and relax the gut. A warming infusion is usually the first choice because heat supports comfort and makes the remedy easier to take.
Example practice: After a meal, prepare a warm infusion from the selected stomach-calming plant material. Offer a small cup, then wait 20–30 minutes. If cramps soften, continue with one additional small dose the same day. If cramps intensify, stop and reassess.
Digestive Support Roles
Indigestion that feels heavy or sluggish often responds to bitter or aromatic preparations that encourage digestive flow. These are commonly taken as teas after meals, with modest dosing to avoid over-irritation.
Example practice: For heaviness after a rich meal, take a warm bitter tea in small sips. If the stomach feels calmer within an hour, you can use a second dose later that day. If there is burning, switch to a gentler preparation style rather than increasing strength.
Balancing and Soothing Roles
When indigestion includes burning or sourness, the goal is to soothe irritation and avoid making the stomach more reactive. Preparations are often mild and carefully portioned.
Example practice: If sourness appears after spicy or acidic foods, use a mild tea preparation and keep the dose small. Pair it with simple hydration and bland food for the next meal. If symptoms persist or worsen, stop plant dosing and focus on medical evaluation.
Preparation and Dosing Practices That Reduce Mistakes
- Start low, go slow: begin with a smaller cup or fewer sips than you think you need.
- Use consistent timing: take the remedy, then observe for a set interval before repeating.
- Record what happened: note symptom type, preparation method, dose size, and time to improvement.
Example symptom log:
- Time: 10:00
- Symptom: cramping after meal
- Remedy: warm infusion, small cup
- Response: cramps reduced by 30 minutes
- Action: one more small dose at 16:00
Case Study: Matching Remedy to Symptom Behavior
A person reports “tight waves” of stomach cramps and bloating after eating too quickly. The first choice is a calming warm infusion to address spasm. After 25 minutes, the tightness decreases, but bloating remains. Instead of repeating the same infusion at full strength, the next dose is adjusted toward digestive support with a gentler preparation style. The person avoids additional strong bitter dosing that day because burning begins to appear. By evening, cramps are gone and bloating is reduced.
Safety Boundaries for Stomach Remedies
Stop plant dosing and seek urgent care if there is severe or worsening pain, vomiting blood, black or bloody stool, signs of severe dehydration, or persistent symptoms that do not improve after careful, modest dosing. Also avoid using any plant remedy when identification is uncertain—stomach discomfort is common, but misidentification is not a small problem.
In practice, the best results come from disciplined matching: symptom behavior guides preparation style, preparation style guides dose size, and dose size guides whether you continue, adjust, or stop.
5.2 Botanicals for Diarrhea Support and Gentle Rehydration Practices
Diarrhea is often less about “cleansing” and more about the body losing water and salts faster than it can replace them. The practical goal is twofold: support the gut so it settles, and replace fluids in a way that the intestines can actually absorb. In jungle medicine, this usually means pairing a gentle rehydration approach with botanicals chosen for their soothing, astringent, or mild antimicrobial roles.
Foundational Concepts for Safe Support
Start with a quick triage mindset. If there is blood in stool, severe weakness, persistent high fever, or signs of dehydration like very dry mouth and minimal urination, botanical care should not be the only step. For milder, short-lasting diarrhea, you can focus on hydration first, then add plant support.
Rehydration works best when fluids include both water and salts. A simple home approach is to use oral rehydration solution principles: clean water plus measured salt and sugar. If you are preparing a plant-based drink, keep it gentle and avoid strong bitterness that can worsen nausea.
Gentle Rehydration Practices with Clear Steps
Use small, frequent sips rather than large amounts. A useful rhythm is a few mouthfuls every few minutes, increasing if the person tolerates it.
Example: Simple rehydration routine
- Prepare clean water and a measured salt-sugar mix.
- Offer 100–200 mL every 15–20 minutes for the first hour.
- After improvement, continue smaller sips until stools normalize.
If vomiting is present, pause for 10 minutes, then restart with smaller sips. This reduces the “spillover” effect where fluid exits before absorption.
Botanicals That Support Settling and Absorption
In practice, diarrhea support botanicals are chosen for one of three jobs:
- Astringent support to help reduce excess fluid in the stool.
- Soothing support to calm irritated gut lining.
- Support for microbial balance when diarrhea seems infectious.
A key best practice is to avoid mixing too many strong plants at once. Choose one main botanical for the first 24 hours, then adjust based on stool frequency and comfort.
Astringent Support with Leaf or Bark Preparations
Astringent plants are often used as light infusions or decoctions, then taken in modest amounts. The goal is not to “stop everything instantly,” but to help the gut regain normal water handling.
Example: Light astringent infusion plan
- Use a small measured amount of dried leaf or bark.
- Simmer gently or steep until the color is mild.
- Take small doses alongside rehydration sips.
If the drink causes nausea or cramps, reduce strength or switch to a more soothing preparation.
Soothing Support with Mild Tisanes and Leaf Wrap Logic
Soothing botanicals are typically prepared as gentle teas rather than concentrated extracts. Think “comfort,” not “concentration.”
Example: Soothing tea routine
- Steep a mild plant preparation for a shorter time.
- Offer it warm, not hot.
- Use it between rehydration sips to avoid overwhelming the stomach.
Support for Microbial Balance with Careful Strength Control
When diarrhea is likely infectious, some botanicals may help reduce microbial load. The best practice is to keep doses conservative and watch for side effects like increased burning sensations or worsening cramps.
Example: Conservative antimicrobial-leaning use
- Start with a weaker preparation than you think you need.
- Use once, then reassess stool frequency after several hours.
- Stop if symptoms worsen or if there is significant stomach irritation.
Mind Map: Diarrhea Support and Rehydration
Systematic Monitoring and Adjustment
Track three simple markers: stool frequency, ability to keep fluids down, and urination. If stool frequency drops and comfort improves, continue rehydration and taper botanical use. If stools remain frequent after a day, reassess strength, preparation method, and whether symptoms suggest a need for clinical evaluation.
Case-style example: adjusting after the first day
- Day start: rehydration + one mild astringent tea.
- After 6–12 hours: fewer stools, less urgency.
- Adjustment: keep rehydration steady, reduce tea strength or frequency.
- Stop botanical support when stools normalize and appetite returns.
This approach keeps the gut from being “over-managed” while still giving it practical help. The best outcomes usually come from consistent hydration and careful, modest botanical choices rather than aggressive combinations.
5.3 Remedies for Gas, Bloating, and Appetite Regulation
Gas and bloating usually come from two practical problems: too much fermentation in the gut, or slowed movement that lets gas linger. Appetite regulation is related, because hunger signals often shift when digestion is uncomfortable. In jungle medicine, remedies are chosen by the body’s pattern—whether the main issue is “stuck and heavy,” “spasmy and crampy,” or “too much fermentation.”
Foundational Concepts for Choosing a Remedy
Start with a quick pattern check.
- Stuck and heavy: belly feels full, movement feels slow, burping is difficult.
- Spasmy and crampy: pain comes in waves, gas feels trapped, relief follows warmth.
- Fermentation and sourness: lots of gas after certain foods, sometimes with loose stool or a sour taste.
- Appetite suppression: nausea, heaviness, or a “no interest in food” feeling.
Best practice is to match the remedy’s role to the pattern: carminative (helps gas pass), digestive stimulant (supports breakdown), antispasmodic (calms cramping), or mild astringent (helps when loose stool accompanies gas). If you’re unsure, begin with the gentlest option and reassess after the first dose.
Mind Map: Gas, Bloating, and Appetite Regulation
Preparation Methods That Fit the Pattern
Infusion for gentle support: Use when symptoms are mild or you want a steady digestive nudge. Example approach: steep a small amount of aromatic leaf in hot water, then sip slowly.
Decoction for stubborn heaviness: Use when the belly feels blocked and gas won’t move. Example approach: simmer briefly, then strain and drink warm.
Tonic bitter for appetite regulation: Use when appetite is low due to heaviness or mild nausea. The goal is not to force eating; it’s to make food feel tolerable.
Easy-to-Understand Remedy Examples
Example: Warm Carminative Tea for Trapped Gas
If the main feeling is “full but not moving,” choose a warming aromatic infusion.
- How to use: Drink a warm infusion in small sips.
- Best practice: Pair with slow walking for 5–10 minutes after drinking; movement helps gas travel.
- What to expect: Less pressure and easier burping within a few hours.
Example: Antispasmodic Comfort for Crampy Waves
For cramping that comes and goes, prioritize a calming preparation and warmth.
- How to use: Take a warm decoction or infusion, then rest with a warm wrap on the abdomen.
- Best practice: Avoid large meals; try a small, bland portion once discomfort eases.
- What to expect: Cramp intensity reduces, and gas passes more easily.
Example: Bitter Digestive Tonic for Appetite That Won’t Start
When appetite is suppressed by heaviness, a bitter tonic can restore readiness to eat.
- How to use: Take a small measured dose before a meal.
- Best practice: Keep the first meal light; the tonic works best when digestion has a chance to “catch up.”
- What to expect: Interest in food returns, and the next meal feels less heavy.
Example: Mild Astringent Support When Gas Comes with Loose Stool
If gas is paired with loose stool, choose a preparation that supports the gut lining without being harsh.
- How to use: Use a carefully prepared decoction in smaller doses.
- Best practice: Increase hydration and avoid very fatty foods until stool normalizes.
- What to expect: Less urgency and fewer gas episodes as stool steadies.
Dosing Logic and Safety Boundaries
Use a “start low, reassess” approach. If symptoms improve, continue for a short course rather than escalating. Stop and seek medical help if there is severe or worsening abdominal pain, persistent vomiting, blood in stool, fever, or signs of dehydration.
Integrated Daily Routine for Better Outcomes
A remedy works best when paired with digestion-friendly habits.
- Warmth: keep the abdomen warm during the first day.
- Slow eating: reduce swallowed air by eating at a slower pace.
- Food trigger awareness: note which foods reliably worsen gas and reduce them temporarily.
- Hydration: sip water regularly, especially when stool is loose.
When you match the remedy role to the pattern—carminative for trapped gas, antispasmodic for cramping, bitter tonic for appetite suppression, and mild astringent support when loose stool joins the party—you get a systematic approach that feels practical, not mysterious.
5.4 Bitter Tonics and Astringent Preparations with Practical Use Notes
Bitter tonics and astringents are two different “jobs” for plant remedies. Bitters tend to support digestion by encouraging saliva and digestive secretions, while astringents help tighten and reduce excess fluid in tissues. In practice, many jungle plants can do more than one thing, so the best approach is to match the preparation style to the intended effect and to keep notes on what you observe.
Foundational Concepts for Choosing the Right Preparation
Start with two questions: What symptom are you addressing, and what plant part is most likely to deliver the desired action?
- Bitter tonics often come from bark, root, or leaf preparations that are extracted with water (infusion or decoction) and used in small, consistent amounts.
- Astringents are often tannic in character, commonly found in bark, unripe fruit, or leaves, and are prepared as strong infusions or decoctions.
A practical rule: if the remedy is meant to be taken by mouth, keep the preparation clear, strained, and measured. If it is meant for skin or mouth tissues, you can be more flexible with strength, but still avoid gritty particles.
Bitter Tonics in Systematic Use
Bitter tonics are typically used before meals to support appetite and digestive flow. A simple example is a bitter bark infusion.
Example: Bitter Bark Infusion for Post-Meal Heaviness
- Use a small measured amount of dried bark.
- Simmer gently or steep in hot water depending on how tough the bark is.
- Strain well.
- Take a small dose 15 to 30 minutes before a meal.
Practical use notes
- Begin with a lower dose for the first day to check tolerance.
- If you notice stomach irritation or nausea, reduce strength or stop.
- Keep the same preparation for several days so your notes are meaningful.
Astringent Preparations in Systematic Use
Astringents are used when tissues seem “too wet,” such as mild diarrhea patterns, mouth irritation, or superficial skin weeping. The goal is to reduce excess fluid and calm irritation.
Example: Astringent Leaf Infusion for Mouth Rinse
- Prepare a stronger infusion than you would for a gentle tea.
- Strain thoroughly.
- Use as a rinse, not a swallow, especially if the taste is strongly drying.
- Repeat as needed, watching for dryness that becomes uncomfortable.
Practical use notes
- For mouth rinses, keep the liquid cool or lukewarm.
- If you get a burning sensation, stop and dilute next time.
- For any oral use, avoid preparations that are gritty or poorly strained.
Mind Map: How Bitters and Astringents Fit Together
Practical Measurement and Documentation
To keep your notes useful, record three things each time: dose, preparation strength, and timing.
Example: Simple Tracking for a Bitter Tonic
- Day 1: lower dose, before lunch
- Day 2: same dose, before lunch
- Day 3: increase only if Day 1 was well tolerated
If you are using an astringent for mouth irritation, note whether dryness helps or becomes uncomfortable. For skin use, note whether the area dries too much or stays calm.
Advanced Details Without Guesswork
- Strength control: If a tonic tastes extremely harsh, it may be too strong for daily use. Reduce plant quantity or shorten extraction time.
- Part selection: Tough bark often needs decoction; tender leaves often work better as an infusion.
- Straining: Bitter and astringent preparations can feel “rough” if not strained. Fine particles increase irritation.
- Consistency: Use the same preparation method for several days before changing anything.
Safety Boundaries That Keep the System Honest
Bitter tonics and astringents are not automatically gentle because they are “plant-based.” Stop use if you see persistent nausea, worsening stomach pain, mouth sores, or allergic-type reactions. If symptoms are severe or rapidly worsening, prioritize medical care rather than adjusting strength.
Example: When to Stop a Bitter Tonic
- You take it before meals and develop burning or sharp discomfort.
- The discomfort continues into the next meal despite reducing dose.
In that case, the correct action is to stop and reassess the plant choice, preparation strength, and timing.
5.5 Case Study Documentation for Digestive Preparations and Outcomes
A good case study is not a story; it’s a record that helps you repeat what worked and avoid what didn’t. For digestive preparations, documentation should cover four layers: the person’s baseline, the remedy plan, the preparation details, and the observed outcomes. The goal is clarity, not perfection—think “audit trail,” not “mystery novel.”
Case Study Framework
1) Baseline and context
- Age range and general health notes that matter for digestion (for example, known reflux, IBS-like patterns, recent antibiotics).
- Symptom description in plain terms: cramps, bloating, loose stools, constipation, nausea.
- Timing: when symptoms started and whether they follow meals.
- Triggers you can actually name: spicy food, travel water, stress, missed meals.
2) Remedy plan
- Plant(s) used and the role each plant plays (for example, “bitter for appetite and tone,” “astringent for loose stools,” “soothing leaf for cramps”).
- Preparation type: infusion, decoction, poultice (usually not for digestion), or paste.
- Dose and schedule: how much, how often, and for how many days.
- Stop conditions: what would make you stop or switch (worsening pain, persistent vomiting, blood in stool, rash, or dizziness).
3) Preparation details
- Plant part (leaf, bark, root, seed), and whether it was fresh or dried.
- Water amount and steeping or simmer time.
- Straining method and whether it was taken warm or cooled.
- Any additives used for practical reasons (for example, honey for palatability) and how much.
4) Outcomes and observations
- Symptom tracking at consistent intervals (for example, morning, afternoon, evening).
- Stool description using a simple scale you can repeat (loose, normal, firm; frequency).
- Side effects: headache, heartburn, dryness, nausea, or new cramps.
- Adherence: did the person take the remedy as scheduled?
Mind Map: Documentation Flow
Digestive Case Study Mind Map
Example Case Study 1 Loose Stools and Cramps
Baseline: A person in their 30s reports 2 days of loose stools (3–5 times/day) with cramping after meals. No fever. They note they ate street food the day symptoms began.
Plan: Use one plant primarily for calming cramps and another for tightening loose stools. Example roles: a soothing leaf infusion for gut comfort, plus an astringent bark decoction taken separately.
Preparation details:
- Leaf infusion: 1 teaspoon dried leaf in 250 ml hot water, steep 10 minutes, strain, take warm.
- Bark decoction: 1/2 teaspoon dried bark simmered gently in 250 ml water for 15 minutes, strain, cool to warm.
- Schedule: infusion after meals; decoction between meals.
- Stop conditions: stop if blood appears, if vomiting starts, or if cramps intensify.
Outcomes:
- Day 1 evening: cramping decreases from “sharp” to “mild,” stool frequency drops to 2–3 times.
- Day 2 morning: stool becomes more formed; appetite returns.
- Day 2 evening: no new side effects; remedy is stopped after 48 hours because symptoms resolved.
Review: The record suggests the combined roles matched the pattern: soothing for cramps and astringent support for stool form. The next time, start with the same schedule but shorten the decoction duration by a day if improvement begins early.
Example Case Study 2 Bloating and Slow Digestion
Baseline: A person in their 40s reports 1 week of bloating and heaviness after dinner. Stool is normal but less frequent than usual. They also mention irregular meal timing.
Plan: Choose a bitter tonic infusion to support digestive “tone” and a gentle warming preparation to reduce post-meal discomfort.
Preparation details:
- Bitter tonic infusion: 1 teaspoon dried bitter leaf in 300 ml hot water, steep 12 minutes, strain.
- Warming preparation: a mild seed or bark decoction, 1/2 teaspoon in 300 ml water, simmer 10 minutes.
- Schedule: tonic 20 minutes before dinner; warming preparation after dinner.
- Stop conditions: stop if heartburn worsens or if nausea increases.
Outcomes:
- Day 2: bloating after dinner reduces from “tight” to “noticeable but tolerable.”
- Day 4: bowel movements return to prior frequency; heaviness decreases.
- Side effects: none, but the person notes they felt better when meals were consistent.
Review: The documentation links symptom change to both remedy timing and meal regularity. For future use, keep the same plant roles but emphasize meal timing in the plan, since the record shows it mattered.
Mind Map: Review and Adjustment
Review and Adjustment Mind Map
Documentation Checklist for Digestive Outcomes
Before you close the case, confirm you recorded: baseline symptom pattern, exact plant parts and preparation method, dose and schedule, interval-based outcomes, side effects, adherence, and the reason you stopped. This makes the next attempt less guesswork and more informed practice—like having a map, not a vibe.
6. Plant Remedies for Respiratory Support and Throat Care
6.1 Steam Inhalations and Syrup Like Preparations for Congestion
Congestion usually means swollen, irritated tissue plus thick mucus. Steam helps by warming and moistening the airways, which can loosen mucus and make coughing more productive. Syrup like preparations add a second layer: they coat the throat and can soothe irritation while you keep fluids up. Used together, they form a practical two-step routine—comfort first, then clearance.
Foundational Concepts for Congestion Support
Start by distinguishing the “feel” of congestion:
- Dry, scratchy throat often improves with gentle steam and a soothing syrup.
- Thick mucus with a wet cough often improves with steam plus a syrup that supports expectoration.
- Nasal congestion responds well to steam inhalation, especially when you can breathe through your nose for short periods.
Best practice: treat congestion as a symptom, not a diagnosis. If breathing is difficult, wheezing is present, fever is high or persistent, or symptoms worsen after a short improvement, stop home care and seek medical evaluation.
Steam Inhalations for Warm Moist Airway Support
What You Need
- A bowl of hot water (not boiling)
- A towel
- Optional: a small amount of a safe, aromatic plant infusion (only if you already know it is appropriate for inhalation)
- A timer
Step by Step Example
- Set up: Sit upright. Place the bowl on a stable surface. Keep children and pets away.
- Heat control: Let water cool slightly after boiling. You want steam, not scalding heat.
- Inhale gently: Drape the towel over your head and lean just enough to feel warm moisture. Inhale through the nose if possible, then exhale slowly.
- Time: Start with 5 minutes, then reassess. Most people do well with 5–10 minutes.
- Repeat schedule: Use 1–3 times daily during the worst congestion days.
- Aftercare: Sip warm water afterward. Avoid cold air immediately after.
Safety note that matters: if you get dizziness, burning eyes, or throat irritation, reduce time or stop. Steam should feel helpful, not harsh.
Syrup Like Preparations for Throat Coating and Mucus Comfort
A “syrup like” remedy is typically a sweetened or glycerin based preparation that is easy to swallow and coats irritated tissue. The goal is not to “cure” congestion, but to reduce discomfort and support normal mucus movement.
Core Method Example
Use this as a template for a soothing syrup:
- Choose the plant role: pick one plant for soothing throat irritation and one for mucus support if you already know both are appropriate.
- Prepare an infusion: steep the plant material in warm water (or a suitable base) until the liquid is visibly colored and aromatic.
- Strain thoroughly: remove all solids.
- Thicken gently: add honey or another safe sweetener to create a syrup consistency. Stir until uniform.
- Bottle and label: include plant name, date prepared, and dosage.
Practical Dosing Example
- Adults: 1–2 teaspoons, 2–4 times daily.
- Children: use only if age appropriate and safe for the specific base; when unsure, choose steam and fluids instead.
If you notice stomach upset, reduce frequency first. If you notice allergy symptoms, stop.
Integrated Routine for Congestion Days
A simple, systematic plan:
- Morning: Steam inhalation, then syrup dose.
- Midday: Steam if nasal congestion is prominent; otherwise syrup dose and fluids.
- Evening: Steam to loosen mucus, then syrup before bed to reduce throat irritation.
Keep a short log: time, what you used, and whether mucus became easier to clear. This prevents “random remedy roulette.”
Mind Map: Steam and Syrup Workflow
Mind Map: Choosing the Right Approach
Example: A One-Day Congestion Plan
Morning: Steam for 6 minutes, then take 1 teaspoon of syrup.
Midday: Drink warm water; take another teaspoon if throat feels scratchy.
Evening: Steam for 8 minutes, then take 1–2 teaspoons before bed.
If you feel noticeably better after one day, continue the same routine for another day or two, then taper. If you feel worse or develop new symptoms, stop and get appropriate care.
6.2 Gargles and Mouth Rinses for Sore Throats
A sore throat often comes from irritation, dryness, or an infection that inflames the tissues at the back of the mouth. Gargles and mouth rinses help by (1) bringing the liquid into direct contact with the irritated area, (2) loosening mucus, and (3) reducing the time irritants linger. Think of them as targeted “contact time” tools rather than full-body treatments.
Foundational Concepts for Safe Contact
Start with two practical rules. First, use only remedies you can identify confidently and prepare consistently. Second, treat gargling as a technique: the goal is to bathe the throat, not to swallow the mixture.
What You Need
- Clean container for mixing
- Clean measuring spoon or cup
- A way to strain if using plant pieces
- Fresh water for rinsing afterward
When to Use Gargles
Gargles are most useful for throat discomfort, scratchiness, and post-nasal drip. Mouth rinses are better for mouth sores, gum irritation, and lingering bad taste that seems to originate in the mouth rather than the throat.
When Not to Use Them
Avoid gargles if you cannot reliably spit out the liquid, if you have severe swallowing difficulty, or if you have a known allergy to any ingredient. If symptoms include trouble breathing, drooling, or rapidly worsening pain, prioritize urgent medical care.
Plant Preparation Logic for Gargles and Rinses
Most throat rinses work best when prepared as a gentle infusion or decoction, then strained. The guiding idea is to extract water-soluble compounds without turning the liquid into a harsh, overly concentrated brew.
Step-by-Step Example Infusion
- Measure 1 teaspoon of dried bark or leaf (or 2 teaspoons fresh).
- Add to 1 cup (about 240 ml) of hot water.
- Cover and steep 15–20 minutes.
- Strain into a clean cup.
- Cool until warm, not hot.
Step-by-Step Example Decoction
- Measure 1 teaspoon dried bark or root (or 2 teaspoons fresh).
- Simmer gently in 1 cup water for 10 minutes.
- Turn off heat, cover, and rest 10 minutes.
- Strain and cool to warm.
Best Practice for Concentration
If you’re unsure, start weaker. A mild rinse used more consistently usually beats a strong rinse used once.
Technique for Gargling Without Chaos
Gargle Method
- Take a mouthful (about 1–2 tablespoons).
- Tilt your head slightly back.
- Breathe through your nose.
- Gargle for 20–30 seconds.
- Spit out fully.
Repeat 3–5 times per session. Use 2–4 sessions per day for short-term relief.
Mouth Rinse Method
Swish gently for 20–30 seconds, then spit. Rinse with plain water afterward if the taste is strong or if you notice dryness.
Mind Map: Sore Throat Gargle Planning
Integrated Examples You Can Use
Example 1: Warm Leaf Infusion Gargle for Scratchiness
- Prepare an infusion as described above.
- Cool to comfortably warm.
- Gargle 20–30 seconds, spit.
- Do 3 sessions per day.
Why it works: warm liquid increases comfort and helps mucus move, while a leaf-based infusion tends to be less harsh than bark-heavy preparations.
Example 2: Bark Decoction Gargle for Thick Mucus Feel
- Use the decoction method.
- Strain well to avoid grit.
- Gargle 20–30 seconds, spit.
- Do 2 sessions per day for the first day, then reassess.
Why it works: bark preparations are often more astringent, which can help reduce the “coated” sensation when mucus is sticky.
Example 3: Mouth Rinse for Gum Irritation
- Use the same infusion method but focus on swishing rather than gargling.
- Swish 20–30 seconds, spit.
- Rinse with plain water afterward.
Why it works: mouth rinses target local irritation without the deeper throat contact that gargling requires.
Advanced Details for Better Results
Consistency over Intensity
If you need stronger relief, adjust frequency first. For example, move from 2 to 3 sessions per day before increasing plant strength.
Texture and Straining
Plant particles can scratch tissue and make symptoms worse. Strain thoroughly, especially for decoctions.
Cooling and Comfort
Warm is the sweet spot. Too hot can irritate inflamed tissue; too cool may reduce comfort and willingness to use the remedy.
Simple Tracking
On a note card, record: preparation type, strength (mild/standard), number of sessions, and symptom change after 24 hours. This keeps adjustments grounded in what you actually observe.
Quick Stop Conditions
Stop the remedy if you notice burning that persists after rinsing with plain water, swelling of the mouth or throat, or a rash. If symptoms last beyond a few days without improvement, switch to medical evaluation rather than escalating concentration.
6.3 Plants Used for Cough Support and Mucus Management
Cough is your body’s way of clearing irritants, but mucus can make the process slow and uncomfortable. In Amazonian botanical practice, cough support usually aims for three practical outcomes: reduce throat irritation, help loosen or move mucus, and support breathing comfort. The best choice depends on whether the cough is dry and scratchy or wet and productive.
Foundational Concepts for Choosing the Right Plant
Start by sorting the cough type. A dry, tickly cough often responds better to soothing preparations that coat the throat. A wet cough often needs expectorant-style preparations that help mucus move out. If mucus is thick and sticky, the preparation should emphasize warming and gentle thinning rather than heavy, drying effects.
A simple field rule: match the plant’s role to the symptom.
- Soothing role: reduce irritation and coughing triggers.
- Loosening role: make mucus less sticky.
- Clearing role: support expulsion without forcing.
Mind Map: Cough Support Decision Path
Preparation Basics That Make Remedies Work Better
For cough and mucus, temperature and consistency matter. Warm preparations encourage circulation in the throat and can reduce the “stuck” feeling that makes cough linger. If you’re using a tea, aim for a comfortable warmth rather than boiling-hot. For thicker mucus, combine a warming drink with steam inhalation from the same plant or a complementary one.
Use consistent strength. A common mistake is making the tea too weak and then adding more plant repeatedly, which can lead to unpredictable dosing. Instead, choose one preparation method and one strength, then reassess after a short interval.
Plants Used for Cough Support and Mucus Management
Soothing Leaf and Bark Preparations
Soothing plants are often used when the throat feels raw or the cough is triggered by dryness. A practical example is a warm leaf infusion: steep the cleaned leaves in hot water, cover, and let it sit long enough to extract without overcooking. Sip slowly. If the cough worsens after drinking, switch to a gentler strength or stop.
Easy example routine
- Make a warm infusion.
- Sip in small amounts every 20–30 minutes while symptoms are active.
- Use for one day, then reassess.
Loosening Aromatic Leaves and Warming Decoctions
When mucus is present, aromatic plants are often used to help loosen it. A warming decoction—simmering the plant part briefly—can extract compounds that feel more “active” than a simple infusion. Keep the simmer short and controlled so the taste and strength stay consistent.
Easy example routine
- Simmer the plant part briefly.
- Strain and drink warm.
- Pair with warm fluids throughout the day.
Steam Inhalation for Mucus Movement
Steam is not a cure by itself, but it can support the same goal as the tea: moving mucus and reducing throat irritation. Use caution to avoid burns. A practical approach is to inhale steam gently for a few minutes, then rest and drink something warm.
Easy example routine
- Prepare a warm steam session.
- Inhale gently for a short period.
- Follow with sips of warm tea.
Integrated Best Practices for Using Multiple Plants
Sometimes two plants are used together with clear roles. For example, one plant may soothe the throat while another helps loosen mucus. Keep the roles distinct so you can tell what’s helping.
A simple combination structure:
- Base soothing tea for throat comfort.
- One loosening plant used in a separate preparation or at a different time.
- Hydration support throughout the day.
Avoid stacking many different plants at once. If you use more than two, you lose the ability to notice which preparation is effective or irritating.
Monitoring and Stop Conditions
Track two things: cough frequency and mucus character. If mucus becomes harder to clear, breathing feels tighter, or a rash appears, stop the plant preparation and switch to basic supportive care.
Also watch for stomach upset. Some cough plants are bitter or warming, and if they cause nausea, reduce strength or switch to a soothing-only approach.
Case Example: Matching Remedy to Symptom
A person has a wet cough with thick mucus and a scratchy throat. They start with a soothing warm infusion to reduce irritation, then use a warming decoction later to help loosen mucus. They add brief steam inhalation after the decoction and drink warm fluids between doses. After one day, the mucus becomes easier to clear and the cough becomes less forceful. They continue only the soothing preparation the next day and stop the loosening plant once mucus is moving more easily.
Mind Map: Preparation and Reassessment Loop
6.4 Anti Inflammatory Leaf and Bark Preparations for Airways
Airway inflammation shows up as swelling, mucus thickening, and irritation that makes breathing feel “tight” or noisy. Leaf and bark preparations are often used to calm these processes by combining soothing plant fibers with compounds that may reduce inflammatory signaling and support easier mucus movement. Because the airway is sensitive, the best practice is to keep preparations gentle, consistent, and easy to stop.
Foundational Concepts for Leaf and Bark Airway Use
Start with three practical ideas: (1) choose the correct plant part, (2) match preparation strength to the symptom, and (3) use a short, observable trial. Leaves are commonly used for lighter, more flexible preparations because they tend to extract readily in warm water. Barks are often used when a stronger, more structured extract is desired, but they require careful dosing because they can be more astringent.
A simple rule of thumb: if the goal is comfort with irritation and mucus, begin with a leaf-based infusion or steam. If the goal is dryness or persistent throat tightness, consider a bark-based decoction, but start weaker than you think you need.
Preparation Pathways for Airways
Leaf Infusion for Irritation and Mucus Support
Use a leaf infusion when the main issue is scratchiness, mild congestion, or throat irritation. Example approach: steep a small measured amount of dried leaf in hot (not boiling) water for 10–15 minutes, then strain. Keep the liquid warm when taken so it feels less harsh.
Best practice example: make a “single-batch trial” for one day. Label it with plant part, preparation time, and dose. If it helps without causing stomach upset or increased coughing, continue for the next day.
Bark Decoction for Astringent Comfort
Use a bark decoction when the airway feels dry, inflamed, or stubbornly irritated. Bark needs longer heat to extract. Example approach: simmer gently for 15–25 minutes, then strain and cool slightly before use.
Best practice example: start with a weaker decoction by reducing bark quantity by about one-third compared to your usual strength. This lowers the chance of over-astringency, which can make some people feel more dry or uncomfortable.
Steam Inhalation for Direct Airway Soothing
Steam is not a “stronger medicine,” it’s a delivery method. Use it when symptoms are localized to the nose, throat, or upper chest. Example approach: prepare a leaf infusion or a mild decoction, pour into a bowl, and inhale steam carefully for a short session. Keep the face at a safe distance to avoid burns.
Best practice example: limit sessions to a few minutes and stop if it increases coughing or causes dizziness. The goal is comfort, not endurance.
Systematic Dosing and Trial Design
Airway preparations work best when you can observe effects. Use a structured trial:
- Choose one plant part first (leaf or bark).
- Pick one preparation method (infusion, decoction, or steam).
- Use a consistent dose schedule for 24 hours.
- Track three markers: throat comfort, mucus looseness, and breathing ease.
Example trial plan: take a warm leaf infusion twice daily for one day, then reassess. If mucus becomes easier to clear and throat irritation decreases, continue. If symptoms worsen or you feel more dryness, switch to a milder leaf-only approach or reduce strength.
Safety and Stop Conditions
Airway inflammation can overlap with infections, asthma, or allergic reactions. If there is wheezing, severe shortness of breath, bluish lips, or high fever, treat it as urgent and do not rely on home preparations. Also stop the plant preparation if you notice rash, swelling, persistent vomiting, or a clear pattern of symptom worsening after dosing.
A practical “stop condition” for airway remedies: if coughing becomes more frequent immediately after taking the remedy, reduce dose or discontinue. The airway is reactive, and irritation is a signal, not a mystery.
Mind Map: Anti Inflammatory Leaf and Bark Preparations for Airways
Example: One Day Airway Comfort Plan
Morning: prepare a leaf infusion and drink it warm. Note throat comfort and whether mucus feels easier to move.
Midday: if the upper airway feels irritated, use a short steam session from the same infusion. Stop early if coughing increases.
Evening: reassess. If the throat feels dry or tight rather than wet and congested, consider a mild bark decoction for the next day only, using a weaker strength than you would normally use.
This approach keeps the process systematic: gentle first, clear observation, and a controlled escalation only when it matches the symptom pattern.
6.5 Practical Example Plans for Symptom Based Preparation Selection
This section turns symptom descriptions into a repeatable selection process. The goal is not to “guess a plant,” but to narrow options using clear criteria, then choose a preparation method that matches the body’s need and the plant part’s behavior.
Step by Step Selection Logic
- Confirm the symptom pattern. Note onset (sudden or gradual), severity, and whether it is localized (throat only) or systemic (whole body feverish).
- Check for red flags. If breathing is difficult, there is severe dehydration, uncontrolled bleeding, or altered consciousness, stop self-preparation and seek urgent care.
- Match symptom to a functional target. Examples: “soothe and coat,” “reduce spasm,” “support hydration,” “cool inflammation,” or “support wound cleaning.”
- Choose the plant part by practical chemistry. Leaves often suit quick infusions; bark and roots are commonly used for stronger, slower extractions; resins may be used sparingly for targeted topical work.
- Pick a preparation method that fits the target. Infusions for gentle extraction, decoctions for tougher plant material, poultices for local skin or muscle needs, and macerations for certain resins or fibrous parts.
- Set a dose window and stop rules. Use a small test dose first when appropriate, then reassess. Stop if symptoms worsen, new rash appears, or digestion becomes more upset.
Mind Map: Symptom to Preparation
Example Plan 1 Throat Discomfort with Dryness
Symptom notes: scratchy throat, mild cough, no high fever, worse after talking or dry air.
Selection logic: The functional target is soothing and coating, with gentle extraction. Leaves are often a practical starting point because they steep well and are easier to dose.
Preparation plan:
- Method: leaf infusion.
- How: steep a measured amount of dried or freshly chopped leaves in hot water, then strain.
- Use: sip slowly or use as a warm gargle.
- Best practice: warm, not scalding; repeated small doses work better than one large serving.
Stop rules: if throat swelling increases, breathing becomes noisy, or fever develops, stop and seek care.
Example Plan 2 Diarrhea with Mild Cramps
Symptom notes: frequent loose stools, cramps, thirst, no blood in stool.
Selection logic: The functional target is hydration support plus spasm comfort. Astringent preparations are typically chosen carefully, because too-strong extraction can worsen irritation.
Preparation plan:
- Method: gentle infusion or decoction depending on plant part.
- How: start with a weaker first dose to test tolerance.
- Use: small, frequent sips or oral doses alongside rehydration practices.
- Best practice: keep a simple record of stool frequency and how cramps change after each dose.
Stop rules: blood in stool, persistent high fever, severe weakness, or signs of dehydration require urgent care.
Example Plan 3 Localized Skin Itch After Insect Bites
Symptom notes: itchy raised bumps, localized redness, no spreading rash.
Selection logic: The functional target is cooling and irritation reduction, with topical control. Poultices and leaf-based topical preparations are practical because they act where the problem is.
Preparation plan:
- Method: crushed leaf poultice or a simple paste.
- How: clean the area, apply a thin layer, and cover with a breathable cloth.
- Timing: short intervals with reassessment.
- Best practice: avoid leaving sticky, occlusive layers on for long periods; rinse if irritation increases.
Stop rules: if redness spreads rapidly, pus forms, or fever appears, stop topical self-treatment and seek care.
Example Plan 4 Muscle Ache After Overuse
Symptom notes: sore joints or muscles after carrying loads, stiffness that improves with warmth.
Selection logic: The functional target is local inflammation comfort and muscle support. Topical applications often match the need better than oral dosing.
Preparation plan:
- Method: warm compress using an infusion, or a topical salve/paste.
- How: prepare a warm extract, soak cloth, apply briefly, then reassess.
- Best practice: use warmth first; if swelling is prominent and hot, reduce heat and reassess.
Stop rules: numbness, severe swelling, or worsening pain despite rest needs evaluation.
Documentation Template for Better Choices
Use this quick log each time you prepare a remedy:
- Symptom: what it is, where it is, severity
- Plant: local name, plant part, and identification confidence
- Preparation: infusion, decoction, poultice, or maceration
- Amount and timing: how much, how often
- Response: what improved, what stayed the same, what worsened
- Safety notes: any rash, nausea, or unusual reactions
A good plan is one you can repeat and refine. If the response is unclear, adjust one variable at a time: preparation strength, plant part, or dosing interval.
7. Plant Remedies for Skin Wounds and Infections
7.1 Cleaning And Dressing Wounds With Plant Based Materials
Plant-based wound care works best when you treat it like a process, not a single ingredient. The goal is simple: remove debris, reduce microbial load, protect tissue, and monitor changes. In shamanic practice, intention and attention matter, but the practical steps still need to be consistent—your hands, tools, and timing do most of the heavy lifting.
Foundational Concepts for Safe Cleaning
Start by sorting the wound type. A cut with clean edges behaves differently from a scraped area full of dirt. If you can, identify whether the wound is superficial (skin only) or deeper (gaping, fat visible, or numbness). If any of these are present—heavy bleeding that won’t slow, deep puncture, bite wounds, or signs of spreading infection—plant materials should not replace urgent medical care.
Next, prepare a “clean workflow.” Wash hands, clear a workspace, and use clean water. If you have gloves, use them. If you don’t, wash hands thoroughly and avoid touching the wound surface after cleaning begins. This is the unglamorous part that prevents most problems.
Plant Based Cleaning Materials and How to Use Them
Choose plant materials that are traditionally used for cleansing or soothing, then prepare them in a way that supports gentle application.
Infused water for rinsing: Make a mild infusion (not a strong decoction) so it doesn’t irritate tissue. Example: steep crushed leaves in clean water for 10–15 minutes, then strain through a clean cloth.
Resin or latex caution: Sticky substances can be useful, but they can also trap debris if applied directly to a dirty wound. Use resins only after the wound is cleaned, and apply a thin layer to the dressing side rather than packing it into the wound.
Leaf wraps for short contact: Some leaves are used as a temporary cover because they are soft and easy to replace. Use them as a protective layer, not as a substitute for cleaning.
Step by Step Cleaning and Dressing Workflow
- Stop bleeding if needed. Apply gentle pressure with a clean cloth. If bleeding soaks through quickly, increase pressure and seek urgent care.
- Rinse to remove debris. Use the strained plant infusion as a rinse. Pour slowly so it carries out grit rather than pushing it deeper.
- Remove visible dirt carefully. Use clean tweezers if you have them. If debris is embedded and won’t come out easily, don’t keep digging.
- Pat dry around the wound. Avoid rubbing the wound surface.
- Apply a protective dressing. Place a plant-prepared layer (such as a leaf wrap or a thin dressing infused on the outside) over the wound.
- Secure without strangling. Tie or tape so circulation remains comfortable. If fingers or toes tingle or turn pale, loosen.
- Set a change schedule. Replace the dressing when it becomes wet, dirty, or after a set interval you can maintain.
A practical example: a small jungle scrape. Rinse with mild leaf infusion, pat around it dry, then cover with a clean leaf wrap that you replace daily. If the scrape stays clean and pain decreases, you’re on the right track.
Mind Map: Cleaning and Dressing
Advanced Details That Prevent Common Failures
Strength control: Strong preparations can irritate tissue and slow healing. If you’re unsure, start mild and increase only if the wound tolerates it.
Contact time: For cleansing, use short contact during rinsing. For coverage, use a dressing that you can replace. Long, unattended contact with plant material can turn into a wet environment.
Layering logic: Clean first, then treat. If you apply a sticky or thick plant layer before rinsing, you may trap debris under the dressing.
Monitoring triggers: If redness expands beyond the wound edges, pain increases after initial improvement, or drainage becomes cloudy or foul, stop relying on plant-only care and seek help.
Example: Dressing a Small Cut on the Forearm
Clean hands, rinse the cut with a strained mild leaf infusion, and pat around it dry. Apply a thin protective layer on the dressing side, then cover with a leaf wrap or clean cloth. Secure loosely and change once daily. If the cut stays dry, edges come together, and tenderness gradually decreases, continue the same schedule.
Example: Handling a Dirty Scrape with Embedded Grit
Rinse repeatedly with mild infusion until the water runs clearer. Remove only what comes out easily with clean tweezers. Cover with a replaceable leaf wrap and secure gently. If embedded grit persists or the area becomes increasingly swollen, treat it as a medical issue rather than trying to “force” cleaning.
7.2 Poultices for Cuts Bruises and Insect Bites
Poultices are plant-based, moisture-bearing coverings placed on the skin to support healing, reduce discomfort, and protect the area from further irritation. In jungle medicine, the “best” poultice is the one that matches the problem: cuts need gentle cleaning and barrier support, bruises benefit from cooling and circulation-friendly handling, and insect bites require itch control and careful timing.
Core Idea and Safety Boundaries
Start with two non-negotiables: (1) never apply a poultice to deep puncture wounds or rapidly spreading infection, and (2) avoid using unknown plants on broken skin. A practical rule is to test any new plant preparation on intact skin first—small amount, short contact—before using it on an open area.
If you see heavy bleeding, worsening redness, pus, fever, numbness, or red streaks moving away from the wound, stop poulticing and switch to clinical care. Also avoid poultices on eyes, inside the mouth, or large burns.
Mind Map: Poultice Workflow
Foundational Steps That Make Poultices Work
-
Clean and assess first. Rinse the area with clean water. For cuts, remove visible dirt carefully; for bruises, keep the skin intact and dry enough to prevent slipping.
-
Choose the right plant part. Leaves are often used for quick, gentle compresses. Bark and resins are more concentrated and should be handled cautiously, especially on open cuts.
-
Prepare with the right texture. A poultice should be spreadable, not dripping. If it’s too wet, it can macerate skin and slow recovery.
-
Match temperature to the problem. For fresh bruising or hot, itchy bites, use a cooler preparation. For stiff, sore muscles (not open wounds), a mildly warm poultice can feel more comfortable.
Cuts: Gentle Cleaning and Barrier Support
For a superficial cut, the goal is to support cleaning, reduce irritation, and keep the wound protected.
Example: Leaf poultice for a small scrape
- Crush a clean leaf until it forms a moist paste.
- Spread a thin layer on a clean cloth or directly on gauze.
- Place it over the cut, then cover lightly so it stays in contact without sealing the skin too tightly.
- Leave for 10–20 minutes, then remove and rinse gently with clean water.
- Repeat 1–2 times daily while the wound is still open.
Best practice: If the cut is actively bleeding, apply pressure first with clean cloth. Poultices come after bleeding slows.
Stop condition: If redness expands beyond the immediate area, pain increases, or discharge appears, stop and seek care.
Bruises: Cooling Comfort and Controlled Contact
Bruises are closed injuries. The poultice should reduce discomfort and help manage swelling.
Example: Cooling compress for a fresh bruise
- Crush a leaf to release moisture.
- Wrap the paste in cloth so it doesn’t stick directly to skin.
- Apply for 15 minutes, then remove.
- Wait at least 30 minutes before repeating.
Best practice: Don’t keep a bruise covered for hours. Long contact can trap heat and worsen swelling.
Advanced detail: If the bruise feels “hot,” prioritize cooler preparations and shorter sessions. If it feels “stiff” after a day or two, you can shift to a slightly warmer compress for comfort, still using brief intervals.
Insect Bites: Itch Control Without Skin Damage
Insect bites often itch because of local irritation. The poultice should calm the skin and reduce scratching.
Example: Itch-soothing leaf wrap
- Crush a leaf to make a smooth, moist layer.
- Apply with a light dressing so the paste stays in place.
- Leave for 10 minutes, then remove.
- Repeat up to 2–3 times in the first day if itching persists.
Best practice: If the bite is already scratched raw, use a gentler approach: thinner paste, shorter contact, and careful rinsing afterward.
Stop condition: Seek care if swelling spreads quickly, breathing becomes difficult, or hives appear away from the bite.
Advanced Details That Prevent Common Mistakes
- Avoid “strong” preparations on open skin. Resins and highly concentrated extracts can irritate. If you must use them, keep contact short and use a barrier layer.
- Control thickness. Thick paste dries unevenly and can pull on healing tissue when removed.
- Keep it breathable. Over-sealing traps moisture and can encourage irritation.
- Document what you used. Note plant part, preparation method, contact time, and skin response. This turns trial-and-error into a clear record.
Practical Mini-Protocol Summary
- Cuts: Clean → thin leaf paste → 10–20 minutes → rinse → repeat 1–2 times daily.
- Bruises: Cool leaf paste in cloth → 15 minutes → remove → repeat after 30 minutes.
- Bites: Moist leaf paste → 10 minutes → remove → repeat 2–3 times the first day.
A poultice is not a mystery ingredient; it’s a controlled, short-contact method that respects skin integrity. When you match preparation strength, temperature, and contact time to the injury type, the results are usually straightforward—and your skin tends to agree.
7.3 Leaf and Resin Preparations for Itch and Irritation
Itch and irritation are usually local problems: skin barrier disruption, mild inflammation, insect irritation, or contact reactions. Leaf and resin preparations work best when you treat them like “skin tools,” not like mystery potions. Your job is to (1) calm the skin, (2) reduce the itch signal, and (3) protect the area while you watch for worsening.
Foundational Concepts for Leaf and Resin Use
Start with a simple decision rule: if the skin is open, we focus on gentle cleaning and dressing; if the skin is intact but itchy, we focus on cooling, soothing, and mild astringency. Leaves tend to be your first choice for cooling and short-term relief because they’re easy to process and usually less concentrated than resins. Resins are sticky, concentrated plant secretions; they’re useful when you need a film-forming layer that can reduce moisture loss and friction.
A practical best practice: prepare small batches. Skin reactions can be fast, and you want the option to stop without wasting materials.
Leaf Preparations for Itch and Irritation
Leaf preparations come in two common styles: crushed leaf juice and leaf wraps. Both rely on mechanical release of plant compounds and on keeping the skin contact controlled.
Leaf Juice Example
- Choose a fresh leaf that looks healthy and is not heavily damaged.
- Rinse with clean water, then pat dry.
- Crush gently between clean hands or a smooth stone until you see a thin, moist paste.
- Apply a thin layer to the itchy area.
- Leave for 10–15 minutes, then rinse with clean water.
- Repeat up to 2 times in a day if the skin stays calm.
Why the short timing matters: many irritants are dose-sensitive. If the skin stings more after 5 minutes, you stop and rinse.
Leaf Wrap Example
- Crush leaves into a spreadable paste.
- Place it on a clean cloth or leaf-safe barrier so it doesn’t directly rub.
- Cover the area and secure lightly.
- Keep contact for 20–30 minutes.
- Remove, rinse, and dry gently.
Wraps are especially helpful for insect bites because they reduce scratching and keep the area from drying out.
Resin Preparations for Itch and Irritation
Resins are sticky and can be potent. Use them like a controlled coating, not a thick glob. The safest approach is to dilute or blend resin with a carrier that reduces direct concentration.
Resin Film Example
- Collect a small amount of resin and keep it clean.
- Warm it slightly until it softens, then mix with a small amount of leaf oil or a neutral plant fat to make a thin paste.
- Apply a very thin layer to intact, itchy skin.
- Leave for 2–4 hours, then remove with gentle rinsing.
- Use once daily for 1–2 days, then reassess.
If you don’t have a carrier, avoid direct resin application on sensitive areas. Resins can trap heat and worsen irritation if used too concentrated.
Resin and Leaf Blend Example
- Make a leaf paste as described above.
- Mix in a small amount of softened resin until the paste becomes slightly tacky.
- Apply as a thin layer for 15–20 minutes.
- Rinse and stop if redness spreads.
This blend often works well when itch is accompanied by mild swelling, because the leaf paste provides immediate contact relief while the resin adds a protective film.
Safety Checks and Stop Conditions
Before applying anything, do a small patch test on a less sensitive area of skin. Watch for increasing redness, burning, blistering, or swelling beyond the original spot. If symptoms worsen quickly, rinse thoroughly and discontinue.
Avoid leaf or resin preparations on deep wounds, weeping sores, or areas with signs of infection such as spreading warmth, pus, or fever. For those situations, the priority is cleaning and appropriate dressing, not concentrated plant contact.
Mind Map: Leaf and Resin Itch Preparations
Integrated Example Workflow for a Typical Itchy Bite
- Clean the area with water and pat dry.
- Apply crushed leaf juice for 10 minutes.
- If itch reduces and redness stays limited, switch to a leaf wrap for 20–30 minutes.
- If the skin remains intact but keeps itching after the wrap, use a very thin resin film once the next day.
- Stop after 1–2 days of resin use if the skin is improving.
This workflow keeps concentration controlled, uses the gentler option first, and reserves resin for when you truly need a longer-lasting protective layer.
7.4 Antimicrobial Use Patterns With Clear Preparation Instructions
Antimicrobial use in jungle medicine follows a practical logic: first reduce contamination risk, then match the plant preparation to the problem site, then use a predictable schedule while watching for improvement. The “antimicrobial” label covers more than killing germs; many remedies also reduce moisture, loosen debris, and calm inflamed tissue so the body can finish the job.
Core Preparation Patterns
Pattern 1: Clean first, then treat. Before any antimicrobial plant preparation, rinse with clean water and remove visible dirt. A common field example is a leaf-wrapped wash: use a clean leaf as a barrier to pour water gently over the wound, then pat dry with a clean cloth. This prevents the remedy from being diluted by mud and keeps the treatment focused.
Pattern 2: Use the right extraction for the job. Water-based preparations tend to be better for surface use and quick rinses. Alcohol-based tinctures extract more plant resins and bitter compounds, but they require careful dilution and are not ideal for deep open wounds. Oil-based salves are useful when you need a protective layer and slow release.
Pattern 3: Apply with contact time. Many plant preparations work best when they stay in place long enough to interact with the tissue. For example, a poultice should be kept warm and moist for a set interval rather than wiped on and immediately removed.
Mind Map: Antimicrobial Workflow
Clear Preparation Instructions with Examples
Example: Leaf Compress for Surface Irritation
When to use: mild skin irritation, early signs of localized infection, or after cleaning a small wound.
How to prepare:
- Select fresh leaves known locally for cleansing or “cooling” use.
- Rinse leaves in clean water, then crush gently.
- Add a small amount of clean water and squeeze to make a thin mash.
- Soak a clean cloth in the liquid and apply to the area.
How to use: keep the cloth in place for 10–15 minutes, then re-wet as needed. Repeat 2–3 times daily. If the area becomes more painful or more red, stop and reassess.
Example: Decoction Rinse for Wound Cleaning
When to use: wounds with visible residue, or when you need a rinse that reaches creases and edges.
How to prepare:
- Use bark or leaf material in small pieces.
- Simmer gently in clean water for 10–20 minutes.
- Cool to comfortably warm, then strain through a clean cloth.
How to use: rinse the wound with the decoction once, then pat dry. Use once daily at first. If discharge decreases over 48 hours, continue for up to 3 days; if not, change the approach rather than repeating indefinitely.
Example: Poultice for Bites and Small Cuts
When to use: insect bites, minor cuts, or areas where debris needs loosening.
How to prepare:
- Crush leaves into a paste.
- If the paste is too dry, add a few drops of clean water.
- Spread the paste on a clean leaf or cloth to prevent direct plant contact with the deepest tissue.
How to use: apply for 20 minutes, then remove and rinse with clean water. Repeat twice daily. A helpful rule: if odor and swelling improve, keep the same schedule; if they worsen, stop.
Example: Oil-Based Salve for Protective Coverage
When to use: dry, healing wounds or irritated skin where you want a barrier and gentle antimicrobial support.
How to prepare:
- Warm a small amount of clean oil.
- Add finely chopped plant material and heat gently for a short period.
- Strain and cool.
How to use: apply a thin layer once or twice daily. Avoid heavy coating on actively draining wounds; too much oil can trap moisture.
Advanced Details That Prevent Common Mistakes
- Don’t treat a whole body with a wound remedy. Antimicrobial preparations are often site-specific; using them broadly can irritate skin and complicate observation.
- Avoid “stacking” multiple antimicrobial plants at once. If you combine remedies, you lose the ability to tell what helped and what caused irritation.
- Track three signals. Each day, note redness spread, pain level, and discharge/odor. Improvement in at least two signals is a good sign; worsening in any one is a reason to stop.
- Use dilution discipline. Strong preparations can be effective but also burn tissue. When in doubt, start weaker and increase only if the tissue tolerates it.
Mind Map: Monitoring and Stop Conditions

Practical Summary
Use a clean start, choose the preparation type that matches the site, apply with enough contact time, and monitor three clear signals. When the tissue responds, keep the schedule steady; when it doesn’t, change the plan rather than repeating the same step until something breaks.
7.5 Monitoring Healing and Documenting Changes Over Time
Healing documentation is not paperwork for its own sake. It helps you notice patterns, avoid repeating ineffective preparations, and spot when a remedy should be stopped and medical help sought. In jungle contexts, where conditions change quickly, good notes are the closest thing to a reliable “memory” you can trust.
Core Goal and What to Track
Track three layers: what you prepared, what you observed, and what changed over time.
- Remedy details: plant name (local name plus field ID notes), plant part, preparation method, amount used, and how it was administered.
- Baseline symptoms: severity, location, and triggers. Example: “stomach cramps, lower abdomen, 7/10, worse after eating.”
- Response timeline: when you gave the remedy, when symptoms changed, and whether the change was better, worse, or mixed.
A simple rule keeps notes useful: write down the smallest set of facts that would let someone else understand what happened.
A Practical Monitoring Schedule
Use a schedule that matches the expected onset of the preparation.
- First check: 30–60 minutes after topical or oral use for immediate effects like warmth, reduced itch, or nausea.
- Main check: 2–4 hours for many digestive and skin responses.
- Next check: the following day for sustained changes.
- Stop check: at the point you planned to stop or reduce the dose.
Example: If a leaf poultice is applied for insect bites, you might check redness and itch after 1 hour, then again after 6–12 hours, and finally the next morning.
What Counts as Improvement
Improvement is not only “gone.” It can be partial and still meaningful.
- Intensity: pain, cramps, itch, or cough frequency decreases.
- Function: easier swallowing, less abdominal tension, improved urination comfort.
- Pattern: symptoms become less tied to meals, movement, or night time.
- Side effects: fewer adverse reactions, not just fewer symptoms.
If symptoms improve but side effects appear, treat that as a real outcome. Notes should record both.
How to Record Without Overcomplicating
Use consistent wording and units. If you cannot measure precisely, use repeatable descriptors.
- Severity scale: 0–10 for pain/itch/cramps.
- Frequency: “times per day” or “episodes per hour.”
- Appearance: color, size, and texture changes for skin issues.
- Hydration cues: urine color and general thirst level.
Example entry (digestive):
- Date: 2026-02-15
- Remedy: bitter bark infusion, 1 cup, taken after meals
- Baseline: cramps 7/10, bloating after eating
- 2 hours: cramps 5/10, bloating reduced
- 6 hours: cramps 3/10, no nausea
- Next day: normal appetite, no recurrence
Decision Rules for Continuing or Stopping
Documentation should lead to action. Use clear stop conditions.
- Stop or reduce if symptoms worsen after the first main check, or if new concerning signs appear.
- Pause and reassess if there is no meaningful change after the planned number of doses.
- Escalate to clinical care if severe symptoms, dehydration signs, breathing difficulty, or uncontrolled bleeding occur.
Keep the rules written in plain language so they are easy to follow when you are tired.
Mind Map: Monitoring Workflow
Example: Skin Wound Dressing Follow-Up
A practical way to document skin healing is to track the wound’s “story” over time.
- Baseline: wound size (coin-sized), redness around edges, warmth level, and any discharge.
- After first dressing: note whether warmth decreases and whether discharge increases or becomes thicker.
- After 24 hours: check for reduced redness, clearer edges, and less tenderness when touched.
- After 48–72 hours: look for granulation and shrinking wound area.
If redness spreads beyond the original border or discharge becomes foul-smelling, stop the current approach and seek appropriate medical evaluation.
Common Mistakes and How to Avoid Them
- Changing multiple variables at once: if you switch plants and preparation method in the same day, you lose the ability to learn.
- Writing only outcomes: “better” is not enough; record what improved and when.
- Skipping baseline: without starting severity, you cannot tell whether change is real.
Closing Practice: The One-Page Remedy Log
Keep a single page per remedy episode. Include baseline, remedy details, and three check times. When you finish, summarize in one sentence: what changed, how fast, and whether you would repeat the same preparation.
That final sentence is the difference between notes that sit in a pocket and notes that actually help the next decision.
8. Plant Remedies for Pain, Inflammation, and Muscle Support
8.1 Bark and Root Preparations for Headaches and Body Aches
Purpose and Safety First
Bark and roots are often stronger than leaves because they concentrate protective compounds in tougher tissues. That strength is useful for headaches and body aches, but it also means you should treat every preparation as a “measured medicine,” not a casual tea.
Before you start, do three quick checks: (1) confirm the plant is correctly identified by a trusted local method, (2) avoid mixing unknown plants into the same batch, and (3) note any allergies, pregnancy status, liver or kidney issues, and regular medications. If you have severe headache with fever, stiff neck, confusion, weakness, or sudden “worst ever” pain, skip home preparations and seek medical care.
Foundational Concepts for Effective Preparations
Bark and roots typically yield their useful compounds through heat (decoction) or through time in water or alcohol (maceration). For pain-related use, the goal is consistent extraction and consistent dosing.
Use this logic:
- Bark tends to release compounds with gentle, longer simmering.
- Roots often need more time and smaller pieces to extract evenly.
- Fresh vs. dried changes strength; dried material is usually more concentrated, so you reduce the amount.
Mind Map: Preparation Logic
Step-by-Step Decoction Method
A decoction is the most common approach for bark and roots because it extracts compounds reliably.
- Prepare the material: cut bark into thin strips and chop roots into small pieces. Aim for similar sizes so extraction is even.
- Choose the ratio: start with a conservative ratio for safety.
- Dried bark or root: 1–2 teaspoons per 250 ml water.
- Fresh bark or root: 1–2 tablespoons per 250 ml water.
- Simmer gently: bring to a low simmer and keep it there.
- Bark: simmer 20–30 minutes.
- Root: simmer 30–45 minutes.
- Strain while warm: strain through clean cloth or a fine strainer.
- Cool and label: cool to room temperature, then label with plant name, date prepared, and strength.
Example 1: Bark for a Tension-Like Headache
- Use dried bark at 1 teaspoon per 250 ml.
- Simmer 20 minutes.
- Take 60–90 ml after the first meal, then reassess after 1–2 hours.
Example 2: Root for Generalized Body Aches
- Use dried root at 2 teaspoons per 250 ml.
- Simmer 40 minutes.
- Take 60 ml, then reassess after 2 hours. If improvement is clear and no side effects occur, you may take another 60 ml the same day.
Maceration When Heat Is Not Ideal
Maceration uses time instead of heat. It can be gentler, but it may extract more slowly.
Simple water maceration
- Combine chopped root or bark with cool clean water.
- Soak 6–12 hours, then strain.
- Use the same conservative dosing as decoction to avoid accidental overstrength.
Example 3: Root Maceration for Sensitive Stomachs
- Soak dried root at 1 teaspoon per 250 ml overnight.
- Strain in the morning.
- Take 60 ml with food, then reassess after 2 hours.
Dosing That Respects Real Life
Because headache triggers vary, dosing should be symptom-guided rather than “finish the whole batch.” Start with the smallest effective amount.
A practical rule:
- First dose: smaller than you think you need.
- Reassessment window: 1–2 hours for headache, 2 hours for body aches.
- Stop condition: nausea, dizziness, rash, unusual sleepiness, or worsening pain.
If you prepare for a group, dose individually. “Same plant, same amount” is not the same as “same person, same response.”
Supportive Use with Compresses and Hydration
A bark or root decoction works best when paired with basic comfort measures. Drink water, eat something light, and rest in a dim room if possible.
Example 4: Compress Plus Decoction
- Make a decoction as above.
- Soak a cloth in warm (not hot) strained liquid.
- Apply to the forehead or neck for 10 minutes, then remove and reassess.
Quality Control and Storage
Strain thoroughly to avoid gritty particles. Store in a clean covered container.
- Refrigerate and use within 24–48 hours for best consistency.
- Discard if it smells sour or changes color noticeably.
Mind Map: Quick Decision Path

Example Day Plan for Headache and Aches
- Morning: light breakfast, then 60–90 ml bark decoction.
- Midday: hydrate and rest; if aches persist, take 60 ml root decoction after food.
- Evening: avoid stacking multiple new preparations; use only compress or rest unless the first plan clearly helped.
Prepared on April 15.
8.2 Topical Applications for Sprains and Joint Discomfort
Sprains and joint discomfort usually involve irritated tissue, swelling, and limited movement. Topical plant applications aim to (1) reduce surface inflammation, (2) support circulation to the area, and (3) protect the skin barrier so the remedy can stay in contact long enough to help. A practical approach is to match the preparation to the stage: first calm the area, then restore comfortable mobility.
Foundational Concepts for Topical Use
Start with a quick triage. If there is an open wound, spreading redness, numbness, or severe pain that prevents any weight-bearing, treat it as a medical priority rather than a home remedy. For closed injuries, check the skin for rashes or known allergies before applying anything new.
Next, choose the topical form based on contact time and heat level:
- Compresses and wraps keep a remedy in place and allow gradual warming or cooling.
- Poultices deliver more plant material directly to the skin, which can be helpful for localized soreness.
- Salves and oils are best for longer contact and gentle massage, especially after the initial swelling settles.
Finally, keep the “skin-first” rule. If the skin stings, burns, or becomes increasingly red, stop and rinse with clean water.
Mind Map: Topical Strategy for Sprains
Acute Stage: Cooling Compresses That Don’t Overdo It
In the first day or two, the goal is to reduce surface heat and swelling. Use a cool compress rather than an icy one. Icy temperatures can irritate tissue and make the area more reactive.
Example: Leaf infusion compress
- Make a simple infusion: steep clean, crushed leaves in cool-to-warm water, then strain.
- Let the liquid cool to comfortably cool.
- Soak a clean cloth, wring it lightly, and place it over the joint.
- Keep contact for 10–15 minutes, then remove and rest the skin for at least 10 minutes.
- Repeat 2–3 cycles in a day.
A good sign is reduced tenderness and less “tight” swelling. If pain increases after each cycle, switch to shorter contact or stop.
Subacute Stage: Warm Compresses and Gentle Massage
After swelling begins to settle, warmth can improve comfort and help the joint move more freely. The key is warm, not hot. Think “comfortably warm tea,” not “hot bath.”
Example: Warm decoction wrap
- Prepare a decoction from tougher plant parts such as bark or stems, simmered briefly and strained.
- Warm the liquid to a comfortable temperature.
- Wrap the cloth around the joint and cover loosely with a dry layer to slow cooling.
- Use 15–20 minutes, then remove and let the skin return to normal.
- Pair with gentle range-of-motion movements that do not trigger sharp pain.
Poultices: Direct Plant Contact with a Skin Barrier
Poultices can be effective for localized soreness, but they require careful skin protection. Plant material can be irritating if it contacts skin directly for too long.
Example: Crushed-leaf poultice with barrier
- Crush clean leaves into a moist paste.
- Spread the paste on a thin cloth or gauze layer.
- Place the barrier between paste and skin.
- Apply for 10–15 minutes, then remove.
- Rinse gently with clean water and pat dry.
If you notice a rash, reduce contact time next time or switch to a compress instead.
Salves and Oils: Longer Contact for Comfort and Mobility
Salves and infused oils are useful when the skin is intact and you want steady contact plus massage. Massage should be gentle and slow, focusing on surrounding tissue rather than pressing directly into the most painful point.
Example: Infused oil massage routine
- Apply a thin layer to clean skin.
- Massage 3–5 minutes using light pressure.
- Cover with a breathable cloth if needed.
- Repeat once or twice daily for a few days.
A practical best practice is to avoid applying right before sleep if you tend to overheat or sweat, since that can increase skin irritation.
Integrated Safety and Best Practices
Keep a simple log: date, plant preparation type, contact time, and what changed in pain or swelling. This prevents the common “everything helped” problem where no one knows what actually did the work.
Also, don’t mix multiple strong preparations on the same spot at the same time. If you want to combine, do it sequentially across sessions—cool first when acute, then warm later when subacute.
Case Example: Ankle Sprain Plan
For a mild ankle sprain with intact skin: use cool compress cycles for the first 24–48 hours, then switch to warm wraps and a light salve massage once swelling eases. Stop if redness spreads, numbness appears, or pain escalates after applications.
8.3 Warm Infusions and Compresses for Inflammation Comfort
Inflammation often comes with heat, swelling, and tightness. Warm infusions and compresses aim to support comfort by improving local circulation, easing muscle guarding, and helping plant compounds distribute where they’re needed. The key is to match the method to the body part and to keep the temperature in the “comfortable warm” range—warm, not scalding.
Foundational Concepts for Warm Use
Start with a simple rule: warm methods are for stiffness and aching where the skin is intact and there’s no obvious spreading infection. If you see rapidly worsening redness, pus, severe tenderness, or fever, stop and seek medical care. For everyday inflammation comfort—like sprains, sore joints, or tight muscles—warm compresses are a practical first step.
A warm infusion is a plant preparation steeped in hot water, then used as a liquid base for compresses. The infusion should be strong enough to carry plant scent and color, but not so concentrated that it irritates skin. Think of it as “tea for the cloth,” not “plant extract for direct skin contact.”
Mind Map: Warm Infusion and Compress Workflow
Choosing Plants and Matching Them to the Body Part
For warm compresses, prioritize plants known in traditional practice for soothing inflammation and muscle discomfort, and keep the preparation mild. Use leaves, bark, or roots that are familiar to you and properly identified. If you’re unsure about a plant’s identity, don’t use it on skin.
Practical matching:
- Joints and sprains: Use a warm infusion from a soothing bark or leaf preparation tradition.
- Muscle tightness: Use a warm infusion from a leaf or root that’s commonly used for aches.
- Skin sensitivity: If you have sensitive skin, start with a weaker infusion and shorter contact time.
Step-by-Step Warm Infusion Method
- Measure plant material. Use a modest amount to start, such as 1–2 teaspoons dried plant per cup of water (or 1–2 tablespoons fresh per cup). If you’re using bark or tougher roots, you may need longer steeping rather than more plant.
- Heat water to steaming, not boiling. Boiling can degrade some delicate plant constituents and increases the chance of overly harsh infusion.
- Steep with a lid. Steep 10–20 minutes for leaves and 20–30 minutes for bark or roots.
- Strain thoroughly. Remove solids so they don’t scratch skin or cause irritation.
- Cool to “comfortable warm.” Test on the inside of your wrist. You should feel warmth without a burn.
Compress Assembly and Application
Use clean cloth. A simple setup works well:
- Fold cloth into a pad large enough to cover the inflamed area.
- Soak it in the warm infusion.
- Wring gently so it’s damp, not dripping.
- Apply with gentle pressure.
Timing: Start with 10 minutes. If the skin stays comfortable, you can extend to 15 minutes. Rewarm the cloth by soaking it again in the infusion.
Frequency: Use 1–2 times per day for the first 1–3 days, then reassess based on comfort and swelling.
Advanced Details That Improve Results
Temperature control: If the infusion cools quickly, keep a small container of warm infusion nearby and refresh the cloth. Consistent warmth matters more than repeated “hot” bursts.
Layering for comfort: If the area is bony or you’re prone to skin irritation, place a thin dry cloth between the skin and the damp pad. This reduces direct contact while still delivering warmth.
Observation as a safety tool: Check the skin at the halfway point. Mild pinkness can be normal; stinging, hives, or increasing redness means stop.
Example: Warm Compress for a Sprained Ankle
- Plant choice: A mild soothing bark or leaf infusion tradition you already trust and can identify.
- Infusion: 1.5 teaspoons dried plant per cup of steaming water, steep 20 minutes, strain.
- Temperature: Cool to wrist-comfort warm.
- Compress: Soaked folded cloth, gentle pressure over the sore area, 12 minutes.
- Aftercare: Rest the ankle, avoid aggressive stretching immediately, and note whether swelling feels less tight after the session.
Example: Warm Compress for Upper Back Muscle Tightness
- Plant choice: A leaf-based infusion tradition for aches.
- Infusion: 1 tablespoon fresh or 2 teaspoons dried per cup, steep 15 minutes, strain.
- Compress: Apply to the tight band of muscle, 10 minutes, then refresh once if needed.
- Aftercare: Follow with slow, comfortable range-of-motion movements—no forcing.
When to Stop and Seek Care
Stop warm compress use if pain spikes sharply, redness spreads, skin blisters, or you develop fever or chills. Warmth can feel good, but it shouldn’t mask warning signs.
Mind Map: Quick Decision Guide

8.4 Managing Dosage Frequency and Duration for Symptom Relief
Dosage frequency and duration are where good intentions meet real-world constraints: plant strength varies, symptoms change, and the body has its own schedule. The goal is not to “take more until it works,” but to use a clear time window, observe response, and stop or adjust when the pattern says so.
Foundational Timing Rules
Start with three basics: (1) choose one symptom target, (2) pick one preparation method, and (3) set a trial window. A trial window is the planned period you will use the remedy before reassessing. For many common jungle-preparation styles, a practical window is 24–72 hours for acute discomfort and up to 7 days for stable, non-emergency issues.
Frequency should match how the preparation behaves. Infusions and decoctions are usually used more frequently than slow-drying resins because water-based preparations tend to be consumed and metabolized faster. Topical leaf wraps are often applied in shorter cycles with skin checks, rather than left on continuously.
Duration is limited by two signals: symptom trend and tolerability. If symptoms improve steadily, you shorten the duration by stopping early. If symptoms stall, you stop the trial and reassess the plant choice, preparation strength, or whether the symptom needs medical evaluation.
A Simple Decision Flow
Use a “start low, observe, adjust” approach. Start with the smallest traditional serving size you can justify from the preparation method, then increase only if the first trial shows no effect and no adverse reaction.
Stop conditions should be written down before you begin. Examples include worsening pain, rash or swelling, persistent vomiting, severe dizziness, trouble breathing, or diarrhea that becomes watery and frequent. If any stop condition appears, discontinue the remedy and seek appropriate medical care.
Mind Map: Dosage Frequency and Duration
Practical Examples with Time Windows
Example: Digestive cramping with an infusion
- Preparation: a mild leaf infusion (not heavily concentrated).
- Frequency: 3 small servings across the day.
- Duration: 48 hours as a trial window.
- Best-practice observation: if cramps ease within the first day and stool pattern normalizes, stop after the second day rather than continuing “just in case.”
- Adjustment: if there is no change by the end of 48 hours, do not extend the same trial; reassess the plant choice or preparation strength.
Example: Skin irritation with a leaf wrap
- Preparation: fresh leaf wrap, cleaned and applied to intact skin.
- Frequency: replace the wrap every 4–6 hours.
- Duration: 2–3 days, reassessing after each cycle.
- Best-practice observation: if redness spreads, blistering appears, or itching intensifies, stop immediately. Skin reactions often show up quickly, so the “trial window” for topicals is shorter than for oral remedies.
Example: Pain support with a decoction
- Preparation: a decoction made to a moderate strength.
- Frequency: 2 servings per day.
- Duration: 3 days for a first trial.
- Best-practice observation: if pain decreases but stiffness remains, you can stop the decoction and switch to supportive topical measures or rest, rather than continuing oral dosing.
Advanced Details That Prevent Common Mistakes
-
Don’t stack multiple symptom-target remedies at once. If you use two oral plants for the same symptom, you lose the ability to tell which one helped or caused side effects. If you must combine, assign roles: one for symptom relief and one for supportive hydration or digestion, and keep frequency consistent.
-
Match dose timing to meal patterns. For digestive symptoms, dosing often works better when taken between meals rather than immediately after heavy food. For nausea-prone people, smaller, more spaced servings reduce the chance of triggering discomfort.
-
Use a response log with one metric. Choose one simple measure: pain score (0–10), number of bowel movements, or ease of breathing. Record it at the same time each day. This turns “it feels better” into something you can actually act on.
-
Respect concentration differences. A resin paste is not the same dosing logic as a leaf infusion. If you switch preparation methods, treat it as a new remedy strength and restart with a conservative trial window.
A Ready-to-Use Template
Write this before starting:
- Symptom target:
- Preparation type and strength:
- Start dose size:
- Frequency:
- Trial window end time:
- Stop conditions:
- One response metric:
Then follow the rule: if the response metric improves during the window, stop early; if it doesn’t, stop at the end of the window and reassess. Your body is the data source, and your schedule is the experiment design—no mysticism required, just careful timing.
8.5 Example Protocols for Safe Use and Stop Conditions
Safe use is less about finding the “right” plant and more about running a tight process: confirm identity, choose an appropriate preparation, start low, and stop when the body asks for it. Below are practical example protocols you can adapt to common jungle-medicine scenarios.
Core Safety Workflow Before Any Remedy
- Confirm identity and plant part: Use local names plus field traits (leaf arrangement, bark texture, habitat). If you cannot confidently match both, do not proceed.
- Choose the preparation type: Infusions for gentle extraction, decoctions for tougher plant parts, topical preparations for skin-only targets.
- Start with a small dose: A “test dose” helps you learn how the person reacts before scaling.
- Track baseline and changes: Note the symptom, timing, and any relevant conditions (pregnancy, chronic illness, known allergies).
- Use a clear stop rule: Decide in advance what counts as “stop now,” not after symptoms escalate.
Mind Map: Safe Use and Stop Conditions
Example Protocol 1: Digestive Discomfort with a Bitter Tea
Goal: Support mild indigestion or stomach heaviness.
Preparation example: A small infusion from a bitter leaf or bark piece, strained well.
Step-by-step:
- Day 1: Use a low dose (for example, a small cup) after a light meal.
- Wait 30–60 minutes and observe: nausea, burning sensation, or increased cramping.
- If tolerated, repeat once later the same day.
Stop conditions:
- Stop immediately if there is persistent vomiting, wheezing, or a rapid rash.
- Stop and reassess if cramping intensifies or if diarrhea becomes frequent and watery.
Why this works: Bitter preparations can stimulate digestion, but too strong a dose can irritate the stomach lining. Starting low prevents “learning through suffering.”
Example Protocol 2: Topical Leaf Poultice for Insect Bites
Goal: Reduce itch and local inflammation.
Preparation example: Crush a clean leaf to a paste, wrap in a thin cloth, and apply to intact skin only.
Step-by-step:
- Patch test: Apply a small amount to a less sensitive area first.
- Apply to the bite for 10–15 minutes, then remove and rinse with clean water.
- Repeat only if skin stays calm after the first session.
Stop conditions:
- Stop immediately for blistering, spreading redness, or swelling of face or eyelids.
- Stop and seek care if there is fever, pus, or rapidly worsening pain.
Why this works: Skin reactions can be allergic or irritant. Short contact time turns the first application into a safety check.
Example Protocol 3: Decoction for Fever Support
Goal: Provide comfort while monitoring for escalation.
Preparation example: A decoction from a bark or root portion, simmered and strained.
Step-by-step:
- Start with a small measured serving.
- Observe for 2–4 hours: sweating, energy level, and hydration tolerance.
- If symptoms improve, continue at a conservative frequency for a limited period.
Stop conditions:
- Stop and seek urgent care if fever is accompanied by stiff neck, confusion, shortness of breath, or severe headache.
- Stop and reassess if fever does not improve within the expected observation window or if the person becomes dehydrated.
Why this works: Fever can signal infections that need medical evaluation. Plant remedies can help comfort, but they should not replace monitoring.
Example Protocol 4: Urinary Discomfort with Gentle Support
Goal: Ease mild burning or frequent urination while watching for red flags.
Preparation example: A mild infusion from a leaf used traditionally for urinary comfort.
Step-by-step:
- Use a low dose and ensure adequate water intake.
- Track: frequency, burning intensity, and any flank pain.
Stop conditions:
- Stop and seek care urgently for back/flank pain, blood in urine, chills with fever, or inability to urinate.
- Stop and reassess if symptoms worsen after the first day.
Why this works: Urinary symptoms can range from irritation to infection. Stop rules protect against missing more serious causes.
Documentation Template for Any Protocol
Record these items every time:
- Plant name and plant part
- Preparation method (infusion, decoction, topical)
- Dose amount and time
- Symptom baseline and changes
- Any adverse effects and what you did next
A good protocol is repeatable. A good stop rule is specific. When you combine both, you get safety without guesswork.
9. Plant Remedies for Fever, Malaria Like Illness, and General Weakness
9.1 Recognizing Fever Patterns and Preparing Supportive Remedies
Fever is your body’s temperature set-point rising, usually in response to infection or inflammation. The goal of supportive remedies is not to “chase the number,” but to help the body stay hydrated, comfortable, and functional while you monitor for danger signs.
Core Fever Pattern Recognition
Start with three observations: temperature trend, symptom cluster, and timing.
- Trend: Is it rising, steady, or falling? A single reading is less useful than how it changes over hours.
- Symptom cluster: Fever with cough and sore throat suggests one pathway; fever with diarrhea suggests another.
- Timing: Sudden onset can feel different from a slow build. Recurrent fever cycles matter.
Use a simple home log. Write down time, temperature, and what changed since the last entry. A log turns “I think it’s worse” into usable information.
Danger Signs That Override Home Remedies
Supportive care is appropriate when the person is alert enough to drink and breathe comfortably. Seek urgent medical care if any of these appear:
- Trouble breathing, bluish lips, or severe chest pain
- Confusion, fainting, stiff neck, or new seizures
- Persistent vomiting or inability to keep fluids down
- Severe dehydration signs such as very dry mouth, no urination for many hours, or extreme lethargy
- Fever in an infant, or fever that is very high or worsening despite supportive measures
If you’re using plant remedies, treat these signs as a “stop and escalate” trigger, not a “continue and hope” situation.
Pattern Mind Map
Mind Map: Fever Recognition and Supportive Response
Foundational Supportive Remedies
Supportive remedies should be gentle, measurable, and easy to stop.
-
Hydration first: Offer small, frequent sips of clean water. If diarrhea or sweating is heavy, use an oral rehydration approach (water plus electrolytes if available). A practical example: 100–200 mL every 15–30 minutes, adjusting to tolerance.
-
Comfort cooling: Use light clothing and a cool, not icy, environment. If the person is uncomfortable, a lukewarm damp cloth on the forehead and neck can help. Avoid alcohol rubs; they can irritate skin and complicate monitoring.
-
Rest and light nourishment: If appetite is low, focus on easily digested foods such as broth, rice porridge, or mashed fruit. The point is not to “feed through fever,” but to prevent dehydration and maintain basic energy.
Plant-Based Supportive Preparation Examples
Plant remedies can be used as supportive measures when you can identify materials reliably and you know the person has no contraindications.
Example A: Cooling tea for comfort
- Choose a cooling-leaning leaf or bark preparation from your trusted, locally known plants.
- Preparation: Simmer a small measured amount in clean water for a short time, then strain.
- Use: Offer warm or room-temperature sips. Start with a small dose and observe for tolerance.
- Best practice: Pair with hydration and comfort measures, not as a replacement.
Example B: Bitter infusion for appetite and digestion support
- When fever comes with nausea or “heavy stomach” feelings, a mild bitter infusion can support digestion.
- Preparation: Use a light infusion rather than a strong decoction to reduce stomach irritation.
- Use: Offer after the person can drink water comfortably.
- Stop condition: If nausea worsens or vomiting starts, discontinue.
Example C: Steam inhalation for upper respiratory comfort
- For fever with congestion, steam inhalation can ease throat and nasal discomfort.
- Preparation: Use hot water in a safe container; keep the person at a comfortable distance.
- Use: Short sessions with supervision.
- Safety note: Prevent burns by keeping the container stable and out of reach.
Advanced Monitoring and Pattern-Based Adjustment
Once supportive care begins, reassess every few hours.
- If temperature is trending down and the person is drinking, continue the same plan.
- If temperature is rising or symptoms are shifting—new rash, worsening cough, increasing abdominal pain—update the log and escalate if danger signs appear.
- If plant remedies are used, change only one variable at a time. For instance, don’t switch both the tea and the dosing schedule in the same reassessment window.
Case Snapshot for Practical Reasoning
A person develops fever after several days of mild cough. Temperature rises over the first evening, then steadies. They can drink broth and urinate normally. Supportive care focuses on hydration, light clothing, and a gentle warming-bitter infusion after fluids are tolerated. The next morning, the log shows stable temperature and improved throat comfort. The plan continues with hydration and rest, while monitoring for any breathing difficulty or confusion.
Documentation Checklist
Record:
- Time and temperature trend
- Drinking amount and urine output
- Symptom changes after each remedy
- Any adverse reactions such as rash, worsening nausea, or unusual sleepiness
This approach keeps fever care grounded: supportive remedies help comfort and hydration, while pattern recognition guides when to continue at home and when to escalate.
9.2 Bitter Bark and Leaf Preparations Used for Fever Support
Foundational Concepts for Bitter Preparations
Bitter bark and leaves are used in many Amazonian traditions because bitterness often pairs with “cooling” sensations in the mouth and throat, and with a practical goal: support comfort while the body handles the underlying cause of fever. In shamanic practice, the plant is treated as a living partner, so preparation begins with attention and cleanliness, not just ingredients. In botanical terms, “bitter” is a sensory clue that the plant contains strongly flavored compounds; that clue helps you choose a preparation style and dosing rhythm.
A fever response has two jobs: reduce discomfort and support hydration and rest. Bitter preparations are typically used for the first job, while hydration and monitoring handle the second. If someone is very dehydrated, confused, or has trouble breathing, bitter tea is not the main intervention.
Mind Map: Bitter Bark and Leaf Fever Support
Stepwise Preparation Logic
Start with the plant part. Bark generally needs more time to release compounds, so it is usually decocted. Leaves often release more quickly, so they are infused or added later. This staged timing is a best practice because it reduces the chance of over-extracting harsh constituents.
Example: Staged Brew for Fever Comfort
- Bark decoction: Simmer bark pieces gently in clean water for about 15–25 minutes.
- Leaf infusion: Add crushed leaves for the final 5–10 minutes, then turn off heat.
- Strain and cool: Strain while warm, then cool to drinkable temperature.
- Taste check: It should be clearly bitter, not burnt or bitter-astringent to the point of nausea.
If the person cannot tolerate bitterness, use smaller sips rather than adding large amounts of sweetener. Sweetening can mask warning signs like nausea or stomach upset.
Practical Dosing and Observation
For fever support, the goal is steady comfort, not a single “strong dose.” A common approach is small, frequent sips.
Example: Sip Schedule
- Offer 2–4 small sips every 10–15 minutes for the first hour.
- Reassess alertness, stomach comfort, and any rash or dizziness.
- If tolerated, continue with a few sips every 1–2 hours while fever persists.
Stop the preparation if vomiting starts, if there is a new rash, or if the person becomes unusually sleepy or confused. Those signs suggest the body is reacting, and the fever plan needs to shift.
Advanced Details for Consistency
1) Strength control. Bitter bark varies by thickness and age. Keep the ratio consistent across batches. If you cannot measure precisely, use a repeatable method: same container size, same handful size, and same simmer time.
2) Extraction temperature. Gentle heat is usually enough for bark. Rapid boiling can increase harshness. A steady simmer is the “boring but effective” choice.
3) Timing with meals. If the stomach is unsettled, take the bitter preparation between small meals rather than on a fully empty stomach. If appetite is present, a light meal can improve tolerance.
4) Hydration pairing. Bitter tea works best when paired with water or a light rehydration routine. Fever increases fluid loss, and bitterness can sometimes reduce appetite, so hydration reminders matter.
Case Study: One Day of Fever Support
A caregiver prepares a staged brew using bark decoction plus a short leaf infusion. The person drinks small sips over the first hour and reports less throat dryness and mild stomach comfort. Temperature is monitored over the day, and hydration is encouraged with water in between sips. By late afternoon, the person is more alert and urinates normally. The caregiver stops the bitter preparation once comfort improves and continues only hydration and rest.
Safety Boundaries That Keep the Plan Real
Correct identification is non-negotiable. Bitter taste is not a guarantee of safety, and “bitter” plants can still be harmful if misidentified or over-extracted. Avoid combining multiple unknown bitter plants in the same session; if you need to adjust, change one variable at a time so you can tell what helped or harmed.
Finally, fever support is not a substitute for urgent care when there are red flags such as severe breathing trouble, persistent confusion, stiff neck, uncontrolled vomiting, or signs of dehydration that worsen despite fluids.
9.3 Hydration, Rest, and Symptom Tracking with Plant Use Notes
When feverish illness or “malaria-like” weakness shows up, hydration and rest are not side quests; they are the main stage. Plant remedies can support comfort, but they work best when the body has enough fluid to move heat out, enough rest to conserve energy, and enough observation to avoid repeating what isn’t helping.
Foundational Rhythm for Support
Start with a simple rhythm you can repeat for 24 hours. First, assess baseline comfort: energy level, thirst, urination frequency, and whether chills or sweating dominate. Second, choose one plant preparation role for the day—such as a bitter support infusion or a soothing throat-and-stomach tea—rather than stacking multiple strong preparations at once. Third, pair the plant with hydration and rest targets.
Hydration target: aim for small, frequent sips. A practical example is 100–200 mL every 30–60 minutes while awake, adjusted for nausea. If vomiting occurs, switch to smaller sips and pause the plant dose until the stomach settles.
Rest target: plan quiet time after each dose. If you dose at morning and afternoon, schedule a low-activity window for the next 1–2 hours. Rest reduces the “chase symptoms” effect where you keep changing remedies because you’re tired and noticing everything.
Symptom Tracking That Actually Helps
Tracking should answer three questions: Is the pattern changing? Is hydration improving? Are there warning signs?
Use a short log with consistent time points. For example, record at waking, midday, late afternoon, and bedtime. Each entry should include:
- Temperature or heat sensation (if you have a thermometer, note the number; otherwise note “cool, warm, hot”).
- Chills vs sweating (which one is more prominent right now).
- Thirst and mouth dryness (none, mild, moderate, severe).
- Urination (normal, reduced, none for many hours).
- Stomach tolerance (no nausea, mild nausea, vomiting).
- Plant dose details (plant name, plant part, preparation type, amount, and time).
- Outcome note (what improved or worsened within 1–3 hours).
A key best practice: write the plant dose immediately after giving it. If you wait, you’ll forget whether the timing was 45 minutes or 2 hours, and that difference matters when you’re trying to see cause-and-effect.
Plant Use Notes That Prevent Confusion
Plant use notes are not a diary for its own sake; they are a safety tool. Include:
- Preparation strength: “light” (short steep), “standard” (typical steep), or “strong” (long steep or concentrated decoction).
- How it was taken: with food, on an empty stomach, or after sips of water.
- Any mixing: whether it was combined with honey, salt water, or another remedy.
- Stop conditions: for example, “stop if vomiting occurs twice” or “stop if rash appears.”
Easy example plan:
- Morning: bitter support infusion, standard strength, taken after a few sips of water.
- Midday: hydration focus with oral sips; if nausea is present, delay the next plant dose.
- Late afternoon: soothing tea for stomach comfort only if the log shows improved tolerance.
This keeps the plant role aligned with what the body is currently able to handle.
Mind Map: What to Track and Why
Advanced Details Without the Guesswork
Timing logic: If chills dominate, hydration still matters, but you may need smaller sips because the stomach often feels sensitive. If sweating dominates, you may tolerate slightly larger sips, but keep them frequent to avoid nausea.
Dose adjustment rule: Change only one variable at a time. If you increase strength, keep timing and frequency the same for the next observation window. Otherwise you won’t know whether improvement came from the plant, the hydration, or the rest.
Example log entry:
- 2026-02-15 (use your own date format)
- Waking: warm heat sensation, mild chills, severe thirst, reduced urination.
- 09:00: bitter support infusion, standard strength, taken after 150 mL water.
- 10:30: chills reduced, thirst moderate, urination improved.
- 12:00: no nausea; continue hydration sips; delay next plant dose until late afternoon.
This kind of entry turns “I think it helped” into “it helped after this dose, with this tolerance, and hydration improved.”
When to Stop and Escalate
If you see repeated vomiting, inability to keep fluids down, confusion, severe weakness, or signs of dehydration that are worsening despite sips, stop plant dosing and seek urgent medical help. Plant remedies can be supportive, but they should not delay care when the body is clearly struggling to maintain basic hydration.
9.4 When to Use Traditional Remedies Alongside Clinical Care
Traditional remedies can fit into clinical care when they are used as supportive measures, not as replacements for diagnosis or urgent treatment. The key is to decide what role the plant remedy plays: symptom comfort, preparation for a clinic visit, or a short-term bridge while you arrange medical evaluation. If you keep that role clear, you avoid the common failure mode of mixing approaches without tracking what changed.
Foundational Rule: Match the Remedy to the Clinical Goal
Start by writing one sentence that links the remedy to a clinical goal. Examples:
- “Use a bitter tea to reduce nausea while I monitor hydration and arrange evaluation if vomiting continues.”
- “Use a warm compress and gentle infusion for body aches while I watch for fever escalation.”
This goal-first habit prevents accidental “treating the whole illness” with one plant. It also makes it easier to explain your plan to a clinician.
Safety Gate: Decide Whether Clinical Care Must Lead
Before using any traditional remedy, run a quick safety gate. If any of the following are present, clinical care should lead immediately:
- Severe dehydration signs (very dry mouth, dizziness, minimal urination)
- Confusion, fainting, trouble breathing, chest pain
- Uncontrolled bleeding, black or bloody stools
- High fever with stiff neck, severe headache, or rapidly worsening symptoms
- Pregnancy, infants, or known chronic conditions where medication interactions are a concern
If none of these apply, traditional remedies may be used as supportive care while you still monitor closely.
Practical Integration: How to Combine Without Confusing the Picture
Integration works best when you keep the “signal” clean. Use one traditional remedy at a time when possible, and keep the preparation method consistent. For example, if you’re using a leaf infusion for fever comfort, don’t switch between decoction and infusion mid-course unless you record the change.
A simple best-practice routine:
- Choose one remedy for one symptom.
- Set a time window for reassessment, such as 6–12 hours for mild fever comfort.
- Record the preparation details and the symptom response.
- Stop the remedy if symptoms worsen or new side effects appear.
Documentation That Clinicians Actually Use
Clinical teams benefit from concrete details. Record:
- Plant name as used locally plus your best identification notes
- Plant part (leaf, bark, root) and preparation method (infusion, decoction, poultice)
- Amount and frequency in plain terms (for example, “one cup, twice daily”)
- Start time and stop time
- Symptom changes and any side effects (rash, stomach upset, dizziness)
If you need a date for your log, use a date like 2026-02-15. Consistency matters more than the exact day.
Mind Map: Roles, Boundaries, and Monitoring
Example: Fever Support Without Losing the Clinical Thread
A person has a fever for one day, feels achy, and can drink fluids. They choose a traditional bitter bark infusion for comfort while they arrange a clinic visit.
- Goal: reduce discomfort and support hydration, not “cure the cause.”
- Plan: one infusion preparation method, twice daily.
- Monitoring: temperature trend, ability to drink, urine output.
- Stop rule: if fever rises quickly, confusion appears, or they cannot keep fluids down, they seek care immediately and stop the remedy.
When they reach the clinic, they share the plant part, preparation method, and timing. This helps clinicians interpret symptoms without guessing what was taken.
Example: Digestive Support with Clear Escalation
Someone has mild diarrhea and stomach cramps. They use a gentle astringent leaf preparation for short-term comfort.
- Goal: reduce cramping and support comfort while preventing dehydration.
- Best practice: prioritize oral rehydration and track urine output.
- Escalation: if diarrhea becomes bloody, fever appears, or dehydration signs develop, clinical care leads and the plant remedy is discontinued.
Advanced Detail: Interaction Awareness Without Guesswork
Even without knowing specific chemical interactions, you can reduce risk by:
- Avoiding multiple new remedies at once
- Keeping doses modest and time-limited
- Not combining strong sedating or purgative preparations with prescribed medicines unless a clinician agrees
- Watching for side effects that could mimic disease progression, such as dizziness or rash
The goal is not to “win” against uncertainty; it’s to keep the clinical picture understandable.
Quick Checklist for the Moment You Decide
- What symptom am I targeting?
- What is the reassessment window?
- Are there any safety gate triggers?
- Can I document plant part, method, and timing?
- What will make me stop and seek clinical care?
When these answers are clear, traditional remedies can be a practical support inside clinical care rather than a confusing detour.
9.5 Case Study Documentation for Fever Support Preparations
A good case study does two things at once: it records what was done in a way another careful person could repeat, and it shows how you decided what to do next. The goal is not to prove a cure; it’s to document symptom changes, preparation details, and safety checks so the record stays useful.
Case Study Overview
Date of first entry: 2026-02-15
Person: Adult, community member, no known pregnancy, history of stomach sensitivity.
Presenting signs: Chills, headache, body aches, warm skin, reduced appetite. No rash reported. Breathing normal at rest.
Immediate safety checks:
- Confirmed no severe breathing difficulty, confusion, stiff neck, or uncontrolled vomiting.
- Noted that fever support is supportive, not a substitute for urgent care when red flags appear.
- Recorded baseline: temperature reading if available, pulse feel, hydration status, and urine frequency.
Mind Map: Documentation Flow
Fever Support Case Study Mind Map
Plant Selection Logic
The fever pattern suggested a supportive approach focused on comfort and hydration rather than aggressive dosing. The selection followed three rules:
- Match the symptom role. Choose plants traditionally used for fever comfort, headache, and body aches.
- Respect the stomach. Because the person had stomach sensitivity, the preparation favored a gentler infusion over a strong decoction.
- Keep the plan simple. Use one main preparation first, then add a secondary supportive item only if needed.
Main preparation role: fever comfort and body-ache relief. Secondary supportive role: hydration and mild digestive support.
Preparation Record with Easy Examples
Record enough detail that the preparation can be repeated without guesswork.
Example 1: Gentle infusion for fever comfort
- Plant part: dried leaf or bark, finely chopped
- Amount: 1 tablespoon per 250 mL water
- Method: pour hot water, cover, steep 15 minutes
- Straining: fine cloth or clean mesh
- Administration: 100 mL warm, every 6 hours
- Stop conditions: worsening headache, new rash, persistent vomiting, or no improvement after a defined monitoring window
Example 2: Hydration support infusion
- Plant part: leaf or seed used traditionally for gentle thirst support
- Amount: 1 teaspoon per 250 mL water
- Method: steep 10 minutes
- Administration: small sips throughout the day, especially after sweating
Administration Plan and Timing
A practical schedule prevents accidental overuse.
- First dose: after baseline notes and hydration check.
- Second dose: 6 hours later if symptoms remain uncomfortable.
- Monitoring window: reassess at 6 and 12 hours.
Dose discipline example: If the person vomits after the first dose, do not repeat immediately. Wait 30–60 minutes, offer small sips of water, and document the reaction.
Monitoring and Symptom Scoring
Use consistent language so changes are measurable.
Example symptom scale for documentation
- Fever comfort: 0 none, 1 mild, 2 moderate, 3 severe
- Headache: 0 none, 1 mild, 2 moderate, 3 severe
- Body aches: 0 none, 1 mild, 2 moderate, 3 severe
- Hydration: 0 normal, 1 slightly dry, 2 dry, 3 very dry
Entry at 6 hours:
- Fever comfort: 2 → 1
- Headache: 2 → 1
- Body aches: 2 → 1
- Hydration: 1 → 1
- Side effects: none reported; appetite still low
Entry at 12 hours:
- Fever comfort: 1 → 0–1
- Headache: 1 → 0
- Body aches: 1 → 0–1
- Hydration: 1 → 0
- Side effects: none; sleep improved
Mind Map: Decision Points
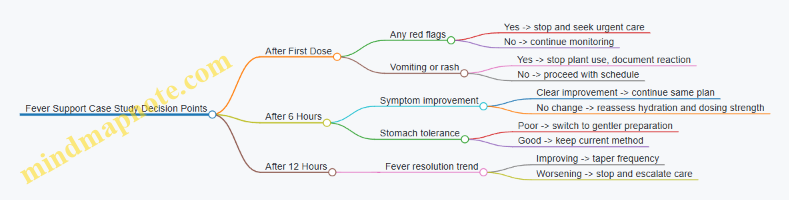
Outcome Summary and What to Adjust Next Time
What worked: The gentler infusion matched stomach tolerance and coincided with reduced headache and body aches within 6–12 hours.
What was avoided: Stronger decoction strength and frequent dosing that could irritate the stomach.
What to adjust next time: If symptoms are more intense, consider starting with the same infusion but reducing dose volume and increasing sip frequency, rather than increasing strength.
A final note should be plain and specific: “Prepared as recorded, administered on schedule, monitored at set intervals, and stopped when tolerance and symptom trend supported it.” That sentence alone keeps the record honest and usable.
10. Plant Remedies for Urinary, Kidney, and Metabolic Comfort
10.1 Botanicals Used for Urinary Discomfort and Cleansing Support
Urinary discomfort often shows up as burning, frequent urges, lower belly pressure, or cloudy urine. In the jungle context, “cleansing support” usually means helping the body move fluids, soothe irritated tissues, and support normal elimination—without assuming every symptom is the same cause. A practical approach starts with observation, then chooses a botanical preparation that matches the symptom pattern.
Foundational Concepts for Choosing Botanicals
Start by separating irritation from obstruction. Irritation tends to feel like burning or stinging, and may come with urgency. Obstruction tends to involve weak stream, difficulty starting, or pain that feels deeper and more mechanical. If there is fever, back pain, blood in urine, or inability to urinate, botanical care is not the main plan; urgent clinical evaluation matters.
Next, match the botanical role to the symptom:
- Soothing demulcents coat irritated lining and reduce the “raw” feeling.
- Gentle diuretics encourage steady urine flow without forcing harsh purging.
- Astringents help when there is mild leakage or frequent small voids.
- Antimicrobial-leaning botanicals are used cautiously and typically alongside hydration and monitoring.
A simple best-practice rule: choose one primary role for the first attempt, then adjust based on response within a day or two.
Mind Map: Symptom to Preparation Path
Common Botanical Preparation Patterns
Because exact species vary by region, the key is the preparation pattern and the botanical properties you’re aiming for. In Amazonian practice, urinary support often uses leaf or bark infusions for gentle internal action, and seed or mucilage-like materials for soothing.
Demulcent Soothing Example
If the main symptom is burning with urgency, a demulcent-style infusion is a good first try. Use a warm infusion made from a mucilage-leaning plant part (often seeds, inner bark, or other materials that thicken slightly when steeped). Strain carefully. Example workflow:
- Steep a measured amount in hot water for 10–15 minutes.
- Strain through a fine cloth.
- Sip warm in small portions across the day.
Best practice: keep the first attempt modest. If symptoms ease without new issues, continue for a short window rather than indefinitely.
Gentle Diuretic Example
When discomfort comes with a sense of “stagnation” or low urine output, choose a light leaf infusion rather than a strong decoction. Strong boiling can extract harsher compounds. Example workflow:
- Use a smaller amount of dried material than you would for a bitter tonic.
- Steep or simmer briefly, then strain.
- Encourage hydration alongside the tea.
A practical cue: aim for steady urine flow and reduced pressure, not intense flushing.
Astringent Support Example
If the pattern is frequent small voids with mild leakage, an astringent-leaning preparation may help. Use short dosing and stop if urine becomes too scant or discomfort increases. Example workflow:
- Prepare a tea with controlled strength.
- Take it at set intervals for one day.
- Reassess the next morning.
This is where documentation helps: note whether urgency decreases or whether symptoms shift.
Advanced Details Without Guesswork
Strength Control
Urinary support preparations should be consistent. Use the same measurement method each time (for example, “one tablespoon per cup” for dried material, or a fixed gram amount). If you don’t have scales, keep the plant amount and water volume constant.
Temperature and Timing
Warm liquids often reduce spasm-like discomfort and make drinking easier. Many people do better with even spacing rather than one large dose.
Monitoring and Stop Conditions
Stop and seek medical care if any of these appear:
- Fever or chills
- Back or side pain
- Blood in urine
- Severe worsening after initial improvement
- Rash, swelling, or breathing difficulty
Even in traditional settings, the “stop rule” is part of good care.
Case Study: A One-Day Response Plan
A person reports burning and urgency for the last 12 hours, with no fever and no back pain. They start a warm demulcent-style infusion in small sips across the day. They record: time started, number of voids, and whether burning decreases after each void. By evening, burning is reduced and urgency is less frequent. They continue the same preparation for the next morning only, then stop and reassess. If symptoms persist beyond a short window or worsen, the plan shifts to clinical evaluation rather than repeating the same preparation indefinitely.
Mind Map: Documentation Checklist
Using botanicals for urinary discomfort works best when you treat it like a small, controlled experiment: choose a role, prepare it consistently, watch the response, and stop when the body signals that it needs more than home care.
10.2 Plants for Swelling Support and Fluid Balance Comfort
Swelling often shows up when fluid collects in tissues, when inflammation increases local leakage, or when the body’s normal fluid handling is temporarily off. In jungle medicine, “fluid balance comfort” is usually approached as a two-part job: reduce the local drivers (heat, irritation, stagnation) and support gentle elimination or circulation. The goal is not to force sudden changes, but to help the body settle.
Foundational Concepts for Safe Use
Start with a quick sorting step. If swelling is paired with severe pain, redness spreading quickly, fever, shortness of breath, chest pain, or one-sided weakness, treat it as a medical priority rather than a plant project. For milder, localized swelling—like after minor injury, insect bites, or temporary water retention—plant preparations can be considered with careful dosing and clear stop rules.
Next, match the plant role to the likely pattern:
- Local calming: for hot, tender, or itchy swelling.
- Gentle circulation support: for sluggish, puffy areas without major redness.
- Support for elimination: for mild fluid retention, especially when urination is not painful.
Finally, keep a “measure and notice” habit. Use a consistent check: compare the swollen area to the same spot on the other side, and note changes in tightness, skin color, and comfort over 6–12 hours.
Mind Map: Swelling Support and Fluid Balance Comfort
Plant Preparation Pathways
1) Topical calming for localized swelling A simple compress can reduce discomfort without pushing whole-body changes. Use a clean cloth and a mild plant infusion. Example: steep a small amount of a soothing leaf preparation in warm water, cool it to comfortably warm, then apply for 10–15 minutes. Repeat up to two times in a day if skin stays comfortable.
2) Oral support for mild fluid retention For fluid balance comfort, jungle traditions often favor gentle preparations rather than strong, fast-acting ones. A common best practice is to start with a smaller dose than you would use for a stronger digestive bitter, then reassess after several hours. Pair oral support with steady drinking of water or light broth so the body isn’t forced to “choose” between elimination and dehydration.
3) Decoction strength for tougher plant parts Bark and roots typically require longer extraction. Use a short, controlled simmer and avoid making it overly concentrated. If you’re using bark-based preparations, treat them as “stronger by nature,” and reduce the amount rather than extending time indefinitely.
Example: A Systematic Home Protocol for Mild Swelling
Step 1: Identify the pattern If swelling is localized and tender after minor trauma or an insect bite, prioritize topical calming first.
Step 2: Choose the role
- Topical compress for local heat or itch.
- Oral gentle support only if swelling feels puffy and generalized.
Step 3: Prepare with restraint
- Compress: infusion, comfortably warm, 10–15 minutes.
- Oral: start with a small measured dose of a gentle infusion or decoction.
Step 4: Monitor Check comfort and skin tightness after 6–12 hours. If swelling increases, skin becomes more painful, or urination becomes painful or significantly reduced, stop the plant preparation.
Practical Best Practices That Prevent Common Mistakes
- One plant at a time: if you combine multiple remedies, you won’t know what helped or what irritated.
- Avoid “double diureting”: don’t stack strong elimination-style plants with heavy salt restriction or aggressive dehydration.
- Respect skin sensitivity: topical preparations should be tested on a small area first, especially if the plant is resinous or strongly astringent.
- Keep notes: write down plant part used, preparation method, dose size, and timing. It makes later adjustments rational instead of guessy.
Case Study: Localized Swelling After Insect Bite
A person notices a raised, itchy patch on the ankle after an insect bite. The area is warm but not spreading rapidly, and there’s no fever.
They apply a cool-to-comfortable compress made from a mild leaf infusion for 12 minutes, twice that day. The next morning, the itch is reduced and the swelling is smaller by a visible margin. Because the improvement is clear and the skin remains comfortable, they continue only the topical approach and skip oral preparations. By the second day, the swelling is mostly gone, and the skin feels less tight.
This pattern—topical first, oral only if needed—keeps the intervention proportional to the problem. It also reduces the chance of overcorrecting fluid handling when the main issue is local irritation.
10.3 Leaf and Seed Preparations for Metabolic Regulation Support
Metabolic regulation is a practical phrase for everyday goals: steadier energy, calmer appetite, and smoother digestion. Leaf and seed preparations are often used because they can be made in consistent strengths and adjusted by changing the plant part, the cut size, and the steep time. The key is to treat “metabolic support” as a set of measurable habits—then use botanical preparations as one tool in that system.
Foundational Concepts for Leaf and Seed Use
Start with the plant part. Leaves are typically used for gentle, water-based extraction because many common leaf compounds dissolve well in hot water. Seeds are often used for more concentrated effects because seeds may contain oils, starches, or more stable compounds that extract differently. In practice, you’ll see two broad preparation families:
- Leaf infusions for daily comfort and digestion support.
- Seed decoctions or simmered preparations for stronger regulation support, especially when the goal is to slow rapid digestion or support steady release of energy.
Next, define the target. “Metabolic regulation” usually means one or more of these: appetite steadiness, post-meal comfort, and bowel regularity. Choose one target for the first week so you can notice what changes.
Finally, use a consistent method. If you change plant part, water amount, heat level, and steep time all at once, you won’t know what caused the effect. Keep the method stable, then adjust one variable at a time.
Preparation Methods with Clear Examples
Leaf infusion example for after-meal comfort
Use when the main issue is heaviness after eating.
- Measure 1 teaspoon dried leaf (or 1 tablespoon fresh leaf) into a cup.
- Add 250–300 ml hot water.
- Cover and steep 10–15 minutes.
- Strain and drink warm.
Best practice: take it after a meal, not on an empty stomach, and keep the same timing for several days.
Seed simmer example for steadier appetite
Use when the main issue is hunger spikes or fast re-fueling.
- Measure 1/2 teaspoon to 1 teaspoon crushed seed.
- Add 300–400 ml water.
- Simmer gently 10–20 minutes.
- Strain; if the liquid thickens, stir before drinking.
Best practice: start with the lower seed amount. Seeds can be more filling, and you want to find the smallest effective dose.
Strength Control and Adjustment Logic
Metabolic support often depends on dose and consistency more than on “stronger is better.” Use a simple adjustment rule:
- If digestion feels fine but appetite is unchanged, increase seed amount slightly next time.
- If digestion feels sluggish, shorten simmer time or reduce seed amount.
- If the preparation feels too drying or causes discomfort, switch to a leaf infusion for a few days and reassess.
Keep a short log with three fields: preparation type, amount, and the one symptom you’re tracking (for example, “after-meal heaviness” or “hunger timing”). This prevents random changes from turning into confusion.
Safety and Practical Boundaries
Seed preparations can be more potent and sometimes more irritating if over-concentrated. Avoid using seeds that are unfamiliar or that have been stored improperly. If you notice stomach pain, persistent nausea, rash, or unusual weakness, stop and treat it as an adverse reaction.
Also consider interactions. If someone is pregnant, nursing, has diabetes medications, or has a history of kidney or liver issues, metabolic preparations should be approached cautiously and with clear medical guidance.
Mind Map: Leaf and Seed Preparations for Metabolic Regulation Support
Case Example: Building a Two-Week Routine
Week 1 focuses on one symptom. Choose either an after-meal leaf infusion or a seed simmer taken before the next meal. Keep the timing consistent.
Week 2 adjusts only one variable. If the leaf infusion helped heaviness but appetite still spikes, add a small seed simmer on the day you notice the spike, using the lower seed amount. If the seed simmer makes digestion feel heavy, return to leaf infusion only and reduce seed use.
This approach keeps the preparation systematic: you’re not guessing wildly, and you’re not changing everything at once. The jungle is generous, but your method should be disciplined.
10.4 Preparation Strength Control With Clear Measurement Guidance
Strength control means you can repeat a remedy without guessing. In jungle medicine, the same plant can vary by season, part used, and how finely it’s cut. Your job is to standardize what you can: measurements, preparation steps, and labeling. Then you can adjust strength responsibly rather than accidentally.
Foundational Concepts for Measuring Strength
Start by separating three ideas: plant amount, extraction method, and final volume. Plant amount is how much raw material you start with. Extraction method is how you pull constituents out, such as hot water for infusions or simmering for decoctions. Final volume is what you end up with in the cup or bottle.
A practical way to control strength is to use a “ratio target.” For example, decide that your base tea uses 1 gram of dried bark per 100 milliliters of water. If you later change the volume, you scale the plant amount proportionally. This keeps strength consistent even when the batch size changes.
Measurement Tools and Simple Conversions
Use tools that match your environment. A small kitchen scale is ideal for dried materials. For fresh leaves, volume measures can work, but they’re less consistent because leaves vary in density. If you must use volume, pack the plant material the same way every time.
Keep conversions straightforward:
- 1 teaspoon is about 5 milliliters.
- 1 tablespoon is about 15 milliliters.
- 100 milliliters is about 3.4 fluid ounces.
When using teaspoons or tablespoons, treat them as “measuring cups,” not as estimates. Level the spoon, don’t heap it.
Strength Targets by Preparation Type
Different preparations concentrate differently. Decoctions often extract more than infusions because of longer heat exposure. Powders can be stronger by mass because you’re not relying on extraction alone.
Use a baseline plan:
- Infusion baseline: shorter steep, lower heat.
- Decoction baseline: longer simmer, higher extraction.
- Powder baseline: small measured mass in water or honey.
Then adjust using one lever at a time. If the remedy is too strong, reduce plant mass first. If it’s too weak, increase extraction time next, but only within reasonable limits.
Mind Map: Strength Control Workflow
Step-by-Step Example for a Controlled Decoction
Example: You want a consistent bark decoction for urinary discomfort support. Choose a ratio target: 2 grams dried bark per 200 milliliters water.
- Measure 2 grams dried bark using a scale.
- Add to a pot with 200 milliliters water.
- Bring to a gentle simmer and simmer for 15 minutes.
- Strain through a clean cloth.
- If the final volume drops below 200 milliliters, top up with boiled water to restore the target volume. This keeps strength aligned to your ratio.
- Label the bottle with plant name, plant part, dried mass, water volume, simmer time, and date.
If you later decide it’s too strong, reduce the bark mass to 1.5 grams while keeping the simmer time and final volume the same. If it’s too weak, increase simmer time to 20 minutes while keeping bark mass and final volume unchanged.
Example: Controlled Powder Strength in Small Doses
Example: A powdered leaf or bark preparation is often used in tiny amounts. Choose a baseline mass per dose, such as 0.25 grams per dose.
- Weigh 0.25 grams powder.
- Mix into 30 milliliters warm water until evenly suspended.
- Note whether the powder settles quickly; if it does, stir immediately before drinking.
- Keep the dose consistent for several uses before adjusting.
If you need to adjust, change only one variable: go to 0.20 grams for a gentler dose or 0.30 grams for a stronger one. Avoid changing both mass and mixing volume at the same time.
Advanced Details That Prevent “Hidden Strength” Changes
Hidden strength changes come from evaporation, inconsistent cutting, and variable straining. Covered simmering reduces evaporation. Cutting bark into smaller pieces increases extraction, so cut size should be consistent across batches.
Straining matters too. If you squeeze the cloth hard, you may extract more. Decide on a straining method—gentle press or no press—and repeat it.
Finally, document your batch output. If you always restore final volume to the target, you can compare batches directly. If you don’t, you’ll end up comparing different strengths without realizing it.
Case-Style Example for Adjustment Discipline
Suppose Batch A feels too strong. You check your notes and find you simmered 15 minutes, but you also used smaller bark pieces than usual. For Batch B, keep the same bark mass and restore the same cut size, then keep simmer time at 15 minutes. If Batch B is still too strong, reduce bark mass. This disciplined approach prevents “mystery variables” from steering your remedy.
Mind Map: One-Lever Adjustment Rule
Practical Labeling for Measurement Clarity
Write labels like a recipe, not like a poem. Include plant part, fresh or dried, measured plant mass or packed volume, water volume, extraction method, time, and final volume. Add a short note about dose size and frequency. This is how you turn jungle knowledge into repeatable care—without losing the practical wisdom that comes from careful observation.
10.5 Safety Notes for People with Existing Kidney Conditions
People with kidney conditions need a different kind of caution: not “don’t use plants,” but “use plants with a tighter safety net.” Kidneys handle waste removal and help balance fluids, salts, and acids. Many herbal preparations can affect those systems indirectly—through diuretic effects, changes in blood pressure, or compounds that the body processes through the kidneys.
Start with a simple rule: if you already have reduced kidney function, treat every new remedy as a potential variable in your lab results. That means you begin with the smallest practical amount, use one change at a time, and stop if symptoms or measurements shift.
Foundational Safety Checks Before Any Remedy
- Know your baseline. If you have recent lab values (like creatinine/eGFR and potassium), keep them handy. If you don’t, get them before starting anything new.
- Confirm your diagnosis and current restrictions. Some people are advised to limit potassium, sodium, or fluids. A plant remedy that seems “natural” can still push those limits.
- Review your medications. Kidney patients often take drugs that interact with blood pressure, fluid balance, or bleeding risk. Even if a plant is traditionally used, the interaction risk is real.
- Avoid high-risk preparation types. Concentrated extracts, strong decoctions, and repeated dosing can raise exposure. For safety, prefer gentler preparations and shorter use windows.
Mind Map: Kidney Condition Safety Workflow
Practical Examples That Reduce Risk
Example: A mild digestive tea trial. If you want stomach comfort and you have mild chronic kidney disease, choose a single plant used as a tea rather than a concentrated decoction. Use a small amount once daily for a short period, and track stool changes and energy. If you notice reduced appetite plus dizziness, stop and reassess—those can be dehydration or medication overlap signals.
Example: Avoiding “extra water” remedies. Some jungle botanicals are used traditionally to “increase flow.” If your clinician has restricted fluids or you have swelling, avoid diuretic-style preparations. Instead, focus on non-diuretic support like gentle soothing infusions, and keep your fluid intake aligned with your plan.
Example: Potassium caution with leaf-based preparations. Leaf and seed preparations can sometimes be potassium-rich depending on the plant. If you have been told to limit potassium, treat leafy remedies as higher risk. Use only if you can confirm potassium content is unlikely to be high for that specific plant and preparation, and monitor as advised.
Advanced Details: How to Think About Kidney Load
Kidney safety isn’t only about “toxicity.” It’s also about processing burden. When a remedy contains multiple compounds, the body may need to metabolize and excrete them. In reduced kidney function, that clearance can be slower, increasing the chance of side effects even when the plant is not inherently dangerous.
Also watch for indirect effects:
- Blood pressure shifts can change kidney perfusion.
- Dehydration from diarrhea or excessive sweating can worsen kidney function.
- Electrolyte changes can be subtle at first, then show up as weakness, cramps, or palpitations.
Monitoring and Stop Conditions
Use a short monitoring window. For most cautious trials, check in daily for symptoms and stop at the first sign of trouble.
Stop conditions include:
- decreased urination or dark urine with thirst
- new swelling in face/ankles
- persistent nausea, confusion, or unusual sleepiness
- dizziness when standing
- any clinician-directed lab warning signs
If you need to stop, don’t “try again later” with a stronger dose. The goal is to learn what your body tolerates, not to win a contest against your own kidneys.
Communication Practices That Make Care Safer
When you talk to a clinician, include three details: plant name (local and common if possible), preparation method (tea, decoction, paste, etc.), and dosing schedule. If you can, also share the start date and whether you used any other remedies at the same time. That helps them interpret symptoms and labs without guessing.
Mind Map: What to Track During a Trial
Example: A Simple One-Change Rule
If you’re using a plant for digestive comfort, don’t start a second remedy the same day. Keep the change isolated so you can tell whether the improvement (or problem) is connected. If you later want to add another plant, do it after the first trial ends and you’ve returned to baseline.
Bottom Line Safety Summary
For kidney conditions, safety comes from controlled exposure, careful preparation choice, and tight monitoring. Treat traditional use as a starting point for discussion, not as a guarantee. Your kidneys already do a lot of work—your job is to avoid adding unnecessary uncertainty.
11. Plant Remedies for Women and Family Health
11.1 Postpartum and Recovery Support Preparations With Traditional Context
Postpartum recovery is a practical season: the body is healing, fluid balance is shifting, and sleep is fragmented. Traditional Amazonian plant knowledge often treats this period as a sequence of needs—cleaning, warmth, circulation, and gentle rebuilding—rather than a single “one remedy fixes everything” approach. The best practices below follow that logic, with clear preparation examples and safety boundaries.
Foundational Concepts for Postpartum Plant Use
Start with three grounding ideas.
First, preparation strength matters. A remedy that is too concentrated can irritate sensitive tissues, especially when the body is already inflamed. Use measured portions and consistent times.
Second, timing matters. Early postpartum care focuses on comfort and gentle support; later care can shift toward rebuilding. If a remedy causes burning, worsening bleeding, dizziness, or rash, stop and switch to a gentler option.
Third, context matters. Traditional use often includes a “why this plant now” explanation tied to symptoms and the person’s condition. You can keep the same structure even if you’re using modern documentation: note symptoms, preparation method, and response.
Mind Map: Postpartum Recovery Support
Traditional Context and Practical Symptom Pathways
Many postpartum preparations are chosen by symptom pattern rather than by “postpartum” alone.
Comfort and Warmth for Afterpains
Afterpains often feel like uterine cramping and muscle tightness. A warming infusion is commonly used to support comfort.
Example infusion plan
- Use a small measured portion of dried bark or leaf (start with a light dose).
- Simmer gently if using bark; steep if using leaf.
- Strain and take warm, not hot.
- Observe for 1–2 hours: comfort should improve without causing nausea or dizziness.
Gentle Cleaning and Hygiene Support
Some traditional practices include sitz-bath style preparations to support cleanliness and comfort. The goal is soothing, not aggressive cleansing.
Example sitz bath plan
- Prepare a mild decoction or infusion, then cool to comfortably warm.
- Use a clean basin and keep the water level low enough to avoid soaking beyond comfort.
- Limit time to a short session, then dry gently.
- If there is increased burning or bleeding, stop.
Circulation Support for Swelling and Heaviness
Mild swelling and a “heavy” feeling can occur as circulation and fluid balance shift. Traditional approaches often favor gentle tonics rather than strong diuretics.
Example tonic plan
- Choose a preparation that is not harsh on the stomach.
- Take in small, consistent amounts.
- Pair with hydration and rest; plants are support, not a substitute for basic care.
Tissue Rebuilding and Skin Comfort
Skin dryness, tenderness, and friction discomfort are common when mobility is limited. Leaf wraps or topical preparations are often used for localized comfort.
Example leaf wrap plan
- Use clean, properly identified leaves.
- Lightly soften leaves (for example, by gentle warming) and apply as a short wrap.
- Remove if irritation appears.
Best Practices That Keep Preparations Consistent
Use a simple workflow.
- Identify and confirm the plant with a reliable method; postpartum is not the time for guesswork.
- Clean tools and containers to reduce contamination risk.
- Label each batch with plant name, part used, preparation method, and a date. If you need a date in your notes, use something like March 2026-02-15.
- Start low and observe. If the first dose is well tolerated, you can follow the traditional frequency for that preparation.
- Document response using three fields: symptom change, side effects, and overall comfort.
Safety Boundaries for Postpartum Use
Avoid preparations that are known to be strongly irritating or that you cannot confidently identify. Do not replace urgent medical care for heavy bleeding, fever, severe pain, fainting, or signs of infection. If breastfeeding is involved, be extra cautious: choose gentle preparations and stop immediately if the person experiences adverse effects.
Case Study: A Simple Recovery Week Plan
Day 1–2: Warm infusion for afterpains, small measured doses, warm not hot.
Day 2–3: Mild sitz bath for hygiene comfort, short sessions, stop if burning increases.
Day 3–5: Gentle tonic for heaviness and mild swelling, paired with hydration and rest.
Day 4–7: Leaf wrap for localized skin tenderness, brief applications, remove at the first sign of irritation.
This structure keeps each remedy tied to a specific need, uses consistent preparation methods, and makes it easy to notice what helps without guessing.
11.2 Botanicals Used for Menstrual Comfort and Cramp Support
Menstrual discomfort is not one single problem. Cramps often involve uterine muscle contractions, while some people also experience bloating, nausea, or headaches. In Amazonian botanical practice, remedies are chosen by symptom pattern and by how the plant is prepared, not by a one-size-fits-all rule. The goal is practical comfort with careful attention to safety.
Foundational Concepts for Choosing Remedies
Start with three observations: (1) timing, (2) sensation, and (3) triggers. If cramps begin before bleeding and feel crampy or pulling, many traditions favor warming preparations. If discomfort is accompanied by diarrhea or a “hot” feeling, gentler cooling or astringent approaches may be preferred. If bloating is prominent, remedies that support digestion are often used alongside cramp-focused botanicals.
A best practice is to match the preparation method to the body’s need. Infusions and decoctions are commonly used for internal comfort because they extract water-soluble compounds. Poultices and leaf wraps can be used for localized lower-abdomen tension, especially when heat feels soothing.
Safety and Boundaries
Menstrual remedies still require the basics: correct plant identification, clean preparation, and conservative dosing. Avoid using unknown plants internally. If you have a history of heavy bleeding, anemia, pregnancy, or bleeding disorders, treat menstrual remedies as “support only” and prioritize medical guidance. If a remedy causes rash, vomiting, dizziness, or worsening pain, stop and reassess.
Symptom Map to Botanical Roles
Many plants are used for multiple roles, but each remedy should have a clear job. Think in terms of “what problem it targets” and “how it’s prepared.”
Mind Map: Menstrual Comfort Decision Path
Common Botanical Roles and Practical Examples
Example: Warming Cramp Relief Infusion
When cramps feel cold, tight, or begin before bleeding, a warming infusion is often used. A practical approach is to prepare a tea from a known, locally used leaf or bark material, steeped long enough to extract flavor and aroma. Use a small test dose first, then take the full dose only if no adverse reaction occurs.
How to use it:
- Prepare an infusion with clean water and the correct plant part.
- Sip slowly rather than chugging.
- Repeat based on symptom response, not on habit.
Example: Astringent Support for Heavy Flow Feelings
If bleeding feels heavy or prolonged, some traditions use astringent botanicals to support tissue tone. The key is restraint: astringent preparations should not be used to “push through” severe symptoms. If soaking through pads quickly, dizziness occurs, or clots are large, seek medical care.
How to use it:
- Choose a plant known for astringent action in your community.
- Use a measured internal dose.
- Track changes in flow and comfort over the next cycle.
Example: Digestive Support for Bloating and Gas
Bloating can amplify cramp sensations by increasing abdominal pressure. Digestive-support botanicals are prepared as gentle teas or lightly decocted preparations, aiming for comfort rather than strong purging.
How to use it:
- Start with a smaller dose when bloating appears.
- Combine with simple food choices like warm liquids and bland meals.
- If diarrhea develops, stop and reassess the plant choice.
Example: Local Heat with Leaf Wraps
For lower-abdomen tension, leaf wraps can provide steady warmth and a sense of containment. This is not a substitute for internal remedies when cramps are strong, but it can reduce the need for repeated internal dosing.
How to use it:
- Warm the leaf gently using steam or warm water.
- Place it over the lower abdomen with a breathable layer.
- Remove if skin becomes irritated.
Building a Simple Cycle Plan
A systematic plan reduces guesswork. For one cycle, record three things: start day, pain score, and which preparation you used. If a warming infusion helps, keep the same preparation method next cycle but adjust timing. If it doesn’t, change the preparation role—switch from warming to digestive support, or add a local wrap.
Case Study: One Cycle, Three Adjustments
A person experiences cramps starting one day before bleeding, plus bloating on day one. They use a warming infusion on the first pre-bleeding day, then add a digestive-support tea on day one. On day two, they switch from increasing internal dosing to using a leaf wrap for localized comfort. By day three, pain decreases without needing stronger preparations.
Advanced Details Without the Guesswork
- Match plant part to extraction: leaves and soft parts often suit infusions; tougher materials may require decoction.
- Use symptom-first dosing: take the dose when symptoms begin, not at fixed clock times.
- Keep a stop rule: if pain worsens after two doses, or if new symptoms appear, stop and reassess.
- Avoid mixing unknowns: combine only when you know each plant’s role and preparation.
Menstrual comfort is a coordination problem between body signals and preparation choices. When you treat each remedy as a specific tool—warming, astringent support, digestive comfort, or localized heat—you get clearer results and fewer surprises.
11.3 Breast Care and Skin Comfort Preparations with Hygiene Practices
Breast care in traditional contexts often blends practical hygiene with plant-based comfort. The goal is simple: keep skin clean, reduce friction and irritation, and support comfort during common issues like dryness, chafing, mild inflammation, or minor surface wounds. This section focuses on safe, non-invasive preparations and clear hygiene routines.
Foundational Hygiene Rules for Plant-Based Care
Start with a “clean hands, clean surface” workflow. Wash hands thoroughly, then prepare a clean cloth, a small bowl, and a label for each preparation. If you’re using fresh plant material, rinse gently with clean water and pat dry with a dedicated cloth. Avoid soaking tools in shared water that could contaminate the next batch.
For any application to breast skin, use a small test area first. Apply a thin layer to a less sensitive spot for 10–15 minutes, then rinse if irritation appears. This is not overcautious; plant extracts can be irritating even when they’re traditionally used.
Skin Comfort Targets and How Preparations Match Them
Skin comfort usually falls into three practical targets:
- Dryness and roughness: prioritize gentle oils or balms that reduce water loss.
- Chafing and friction: prioritize protective layers that stay put and don’t feel sticky.
- Mild surface irritation: prioritize soothing, anti-itch comfort with careful, limited contact.
A good preparation matches the target. If the skin is dry, astringent-heavy preparations can worsen tightness. If the skin is actively broken, heavy oils can trap moisture and slow cleaning.
Preparation Types and Stepwise Examples
Cleansing Rinse for Mild Irritation
Use a warm, weak infusion as a rinse rather than a soak. Example routine: steep a small amount of a mild leaf infusion in clean warm water for 10 minutes, strain, cool to comfortably warm, then gently pour over the area. Pat dry with a clean cloth. This reduces residue and helps the skin return to baseline.
Protective Ointment for Chafing
A protective ointment should be thin enough to spread, but thick enough to form a barrier. Example: warm a carrier oil with a small amount of soothing plant material, strain, then mix with a small amount of beeswax or plant wax to improve staying power. Apply a pea-sized amount to the friction zone only, not deep into folds.
Soothing Compress for Itch and Redness
A compress is useful when the skin feels hot or itchy. Example: soak a clean cloth in a cooled, weak infusion, wring lightly, and place on the skin for 5–10 minutes. Stop if stinging increases. Afterward, pat dry and apply only a light protective layer.
Hygiene Practices During Application
Use a fresh cloth or clean fingertips each time. If you’re applying with a cloth, discard it after use rather than reusing it for the next session. Keep containers covered. If a preparation smells sharply “off” or changes color quickly, discard it.
Avoid applying to open, actively draining wounds. For any wound, focus on gentle cleansing and dry dressing. If redness spreads, warmth increases, or pain escalates, treat it as a medical issue rather than a “wait and see” situation.
Mind Map: Breast Care Workflow and Preparation Choices
Mind Map: Choosing the Right Preparation
Case Example: A Practical Day Routine
Morning: wash hands, cleanse with a warm weak rinse, pat dry, then apply a thin protective layer to the friction-prone area.
After activity: if sweat causes rubbing, rinse with clean warm water, pat dry, then reapply only a small amount of protective ointment.
Evening: if skin feels dry, use a light compress for 5–10 minutes, pat dry, and apply a minimal layer. If irritation increases at any step, switch to cleansing only for the next session and reassess.
Advanced Detail: Managing Sensitivity and Contact Limits
Some people react to plant oils or aromatic components. If sensitivity appears, reduce contact time first: apply for 2–3 minutes, rinse, and observe. If symptoms persist, stop the plant preparation and use only gentle cleansing and a plain barrier like a simple, skin-safe emollient.
When using any balm, remember that “more” is not better. Thick layers can trap heat and moisture, especially in skin folds. A thin, deliberate layer keeps the skin comfortable without turning the surface into a sealed container.
Safety Boundaries for Comfort Care
Plant-based breast skin care is for surface comfort and hygiene support. It is not a substitute for evaluation of persistent lumps, fever, significant swelling, or discharge. If symptoms are severe or worsening, prioritize clinical assessment and keep the skin clean and dry while waiting.
11.4 Family Planning Knowledge Boundaries and Safe Use Documentation
Family planning knowledge in the Amazon is often shared with clear boundaries: what is appropriate for general wellness, what is reserved for trained practitioners, and what must never be attempted without proper guidance. This section focuses on safe documentation practices and decision rules you can apply even when you are not practicing shamanic work yourself. The goal is simple: reduce harm, respect local protocols, and keep records that make sense later.
Foundational Boundaries for Responsible Use
Start by separating three categories of plant knowledge.
-
Everyday support: remedies for mild digestive upset, skin irritation, or general comfort. These are commonly used with relatively low risk when prepared carefully.
-
Condition-specific care: remedies tied to pregnancy, postpartum recovery, menstrual pain, or fertility-related concerns. These often require timing, correct identification, and practitioner oversight.
-
Restricted knowledge: preparations that affect bleeding, uterine activity, or hormonal balance. These should be treated as “do not self-administer” unless you have explicit permission and training.
A practical rule: if a plant use is described in terms of “stopping,” “cleansing,” “bringing down,” or “controlling” reproductive processes, treat it as restricted and document it without attempting personal use.
Safe Use Documentation That Actually Helps
Good documentation is not just a diary; it is a safety tool. Record information in a consistent order so you can compare outcomes and spot patterns.
Minimum record fields
- Plant identity: local name, physical description, plant part used, and where it was collected.
- Preparation method: infusion, decoction, paste, poultice, or resin handling.
- Dose and timing: amount used, frequency, and start/stop times.
- Context: reason for use, concurrent foods or other remedies, and whether the person is pregnant, postpartum, or menstruating.
- Observed effects: what changed, how quickly, and any side effects.
- Outcome: resolved, improved, unchanged, or worsened.
Example A caregiver records a leaf infusion used for menstrual cramp comfort. They note the plant part (leaf), preparation (steeped in warm water for 20 minutes), dose (one small cup), and timing (evening only). They also record that the person was not pregnant and had no history of heavy bleeding. If cramps improve without unusual bleeding, the record supports future safe use within the same boundary.
Decision Rules for Reproductive Contexts
When reproductive health is involved, documentation should include decision checkpoints.
-
Confirm reproductive status before any remedy If pregnancy is possible, assume uncertainty and avoid restricted preparations. Document the uncertainty clearly.
-
Avoid combining unknown reproductive effects If multiple plants are used, record each one separately and note the order. If side effects occur, you need to know which preparation likely contributed.
-
Stop conditions Define what counts as “stop and seek help” before starting. Examples include severe abdominal pain, persistent vomiting, fainting, uncontrolled bleeding, or signs of allergic reaction.
-
Consent and role clarity Record who gave the guidance and what role they played. If a practitioner directed the remedy, note that. If you acted independently, record that too.
Mind Map: Knowledge Boundaries and Documentation
Example: Logging Restricted Knowledge Without Self-Use
Suppose you learn of a bark preparation described as affecting uterine activity. You do not administer it. Instead, you document it as restricted knowledge.
Example record
- Plant identity: local name, bark description, habitat notes.
- Preparation: described method only, no personal preparation.
- Intended use: “reproductive control” as stated by the source.
- Boundary: “restricted; no self-administration.”
- Source role: practitioner who provided the information.
- Safety note: “avoid use without training and explicit permission.”
This approach keeps the knowledge organized while preventing accidental misuse.
Example: Clear Stop Conditions in a Family Record
A family caregiver documents a non-restricted remedy for mild cramp comfort. They also write a short stop rule: “If bleeding becomes heavier than usual, or if pain becomes sharp and persistent, stop and seek medical assessment.” The record then includes whether the stop rule was triggered. This turns documentation into a practical safety net rather than a collection of facts.
Integrated Summary for Safe Practice
Family planning boundaries work best when they are written down and followed consistently. Use category labels to decide what you can safely document versus what you must treat as restricted. Then record preparation details, reproductive context, and stop conditions in a predictable format. With that system in place, your notes become a tool for safety, not just memory.
11.5 Child Safe Preparation Principles and Age Appropriate Handling
Children can be involved in plant learning without being treated like small adults. The safest approach is to separate “education with plants” from “medicine with plants,” then use age-appropriate handling rules that reduce risk from misidentification, wrong strength, and accidental ingestion.
Foundational Safety Rules for Children
Start with a simple boundary: children do not prepare internal remedies. They may help with non-medicinal tasks like rinsing leaves, sorting by size, or labeling containers under direct supervision. If a remedy is for a child, the adult prepares it, measures it, and documents it.
Use a three-check system before any child-facing preparation:
- Identity check: the plant must match the same local name and the same physical traits used in prior confirmed identifications.
- Part check: confirm the correct plant part is used (leaf vs bark vs root), since potency often changes by part.
- Method check: confirm the preparation method matches the intended use (for example, a decoction is not the same as a cold infusion).
Age Bands and Handling Expectations
Create age bands so instructions stay consistent. A practical model is:
- Under 6: no internal remedies; only externally applied, mild preparations with adult-made dilution.
- 6 to 12: internal remedies only when a qualified caregiver or clinician approves; otherwise stick to external comfort uses.
- 13 to 17: internal remedies may be considered case-by-case, but dosage must still be adult-measured and documented.
A good rule of thumb: if you cannot explain the remedy’s purpose and stop conditions in plain language to the supervising adult, it is not ready for a child.
Preparation Strength Control
Children’s bodies are smaller, but the bigger issue is that plant extracts can be unpredictable. Strength control means you avoid “eyeballing.” Use measured amounts and consistent times.
For external preparations, dilute more than you would for adults. For example, if an adult compress uses one handful of crushed leaves in a measured cup of water, a child compress uses a smaller amount of plant material and a longer strain time to keep the mixture gentle.
For internal preparations, only use methods that you can repeat reliably. If you cannot reproduce the same taste, color, and aroma from one batch to the next, do not use it for children.
Mind Map: Child Safe Preparation Workflow
Example: External Leaf Compress for Itch
A caregiver prepares a diluted leaf compress for a child’s mild skin irritation. The adult selects a plant with confirmed identity, uses only the specified leaf part, and prepares a strained infusion that is cooled before application. The child helps by placing a clean cloth over the affected area while the adult checks the skin for redness before and after.
Stop conditions are simple: if the skin becomes more inflamed, the child scratches aggressively, or there is swelling around the eyes or lips, the compress is removed immediately and the remedy is not repeated.
Example: Internal Remedy Decision for Ages 6 to 12
A child has stomach discomfort. The adult first checks whether the symptoms require clinical care rather than home treatment. If home care is appropriate, the adult uses a previously documented preparation method and measures a child-appropriate dose. The adult records the plant name, part, method, batch characteristics, and the exact dose.
If vomiting occurs, the child becomes unusually sleepy, or symptoms worsen after the first dose, the remedy stops and the caregiver seeks medical guidance.
Monitoring and Documentation That Actually Helps
Documentation should be short and specific. Record what was used, how it was prepared, the child’s age, the dose, and the response within a few hours. This prevents the common mistake of repeating a remedy because it “seemed to help,” even when the improvement was unrelated.
Practical Handling Rules for the Learning Moment
When children are present during gathering or preparation, keep plant materials physically separated from food and drinking water. Use dedicated containers for plant work, and store them out of reach. Teach a clear phrase: “Plants are for adults to measure.” It sounds strict, but it prevents the most common accidents—confusing a labeled remedy with a snack, or treating a strong batch as if it were the same as the last one.
Mind Map: What to Do When Something Goes Wrong
Closing Principle
Child-safe preparation is less about finding the “right” plant and more about controlling identity, method, strength, and monitoring. When those four pieces are consistent, the learning stays safe and the medicine stays accountable.
12. Integrating Shamanic Practice with Botanical Wisdom in Daily Use
12.1 Ritual Preparation, Intention, and Practical Remedy Readiness
Ritual preparation is not about mystique; it’s about reducing mistakes. When you slow down before working with plants, you create a mental checklist that helps you choose the right material, prepare it the same way each time, and stop when something feels off. Intention is the decision to follow a process, not a wish for an outcome.
Start with a readiness check that takes five minutes. Clear your workspace, wash hands, and set out only the tools you’ll use. If you’re working with fresh plant parts, plan for shade drying or immediate processing so you don’t leave materials sitting in heat. If you’re working with dried material, check that labels match the plant name and the part used. A simple rule prevents many errors: if you can’t explain what you’re holding and why, you’re not ready to prepare.
Next, define the purpose of the remedy in plain language. Instead of “for healing,” write a short function statement such as “to soothe stomach cramps” or “to support wound cleaning.” This statement guides your preparation method and strength. For example, a soothing stomach preparation usually favors gentle extraction like an infusion, while a cleaning wash may require a different concentration and a clean handling routine.
Then choose your preparation target: mild, moderate, or strong. Traditional practice often varies by person and context, so you’ll benefit from a consistent internal scale. Mild means shorter steeping or less plant material per water volume; moderate means the standard ratio you’ve used before; strong means longer extraction or higher plant-to-water ratio, with extra attention to taste, smell, and any signs of irritation. Keep a small note of the target on your label so you can repeat what worked.
Finally, set your stop conditions. These are practical boundaries that protect both you and the person receiving the remedy. Examples include “stop if the person develops rash or swelling,” “stop if the remedy causes burning beyond mild warmth,” or “stop if you cannot confirm plant identity.” Stop conditions are part of intention, because they turn caution into action.
Mind Map: Ritual Preparation Workflow
Example: Infusion with Clear Intent and Repeatable Strength
You want a mild infusion for “stomach cramps.” Write: purpose = soothe cramps; target = mild. Measure dried leaf at your usual mild ratio (for instance, one teaspoon per cup of water), then steep for a shorter time than your moderate version. Taste is not a diagnosis, but it can confirm you’re in the expected range: a mild infusion should be noticeably herbal, not harshly bitter or burning. Label the cup with purpose, plant part, target strength, and date prepared.
Before serving, do a quick review: plant identity confirmed, part used matches label, extraction time matches your target, and the container is clean. If any step doesn’t match, don’t “fix it later” by guessing. Re-start with the correct materials or adjust only one variable at a time.
Example: Leaf Poultice with Stop Conditions
Your purpose statement is “reduce itch from minor skin irritation.” Choose a preparation that supports direct skin contact, such as a leaf paste or wrap. Your stop conditions might include “stop if burning becomes intense,” “stop if rash spreads,” or “stop if there’s swelling around the application area.” Apply briefly at first, then reassess. If the skin responds well, you can extend the duration next time using the same timing plan.
Example: Documentation That Makes Intention Useful
After preparation, record three items: what you used, how you prepared it, and what you observed. Keep it simple: “Plant part, extraction method, target strength, and outcome notes.” This turns intention into a usable record. Over time, you’ll notice patterns, like which preparation target tends to be comfortable for a particular person.
Practical readiness is the bridge between ritual and remedy. When you treat intention as a checklist—purpose, target strength, identity, timing, and stop conditions—you reduce guesswork and make your work more consistent. That consistency is often the difference between “it helped” and “it helped in a way I can repeat safely.”
12.2 Combining Multiple Plants With Clear Roles and Preparation Steps
Combining plants works best when each plant has a job. Think of a remedy as a small team: one plant provides the main effect, one supports comfort, and one helps the preparation behave well (for example, by improving extraction or reducing harshness). The goal is not to add more ingredients; it is to add clarity.
Step 1: Assign Roles Before You Gather
Start by writing a one-line purpose for the blend, such as “calm stomach cramps and reduce nausea.” Then assign roles:
- Primary plant: the main target (cramps, cough, itch, swelling).
- Support plant: eases side effects (gas, dryness, irritation).
- Preparation helper: improves extraction or texture (bitter bark for astringency, aromatic leaf for smoother taste).
- Boundary plant: used sparingly to avoid overdoing strength (often a mild leaf or a small amount of resin).
Easy example: for a “gentle digestive tea,” choose a primary bitter leaf for cramps, add a support leaf known locally for nausea comfort, and keep the helper minimal so the tea stays drinkable.
Step 2: Choose Compatible Preparation Methods
Plants do not all extract the same way. Match the method to the plant part and the role.
- Infusion suits leaves and softer parts when you want a lighter extraction.
- Decoction suits bark, roots, and tougher materials when you need stronger extraction.
- Maceration suits resins or materials that release slowly.
- Topical blending suits leaves and resins when the goal is local action.
Best practice: if you have both bark and leaves, prepare them separately, then combine. This prevents overcooking leaves while still extracting bark.
Step 3: Use a Simple Ratio System
Traditional knowledge often uses “handfuls” or “pinches,” but you still need consistency. Use a ratio you can repeat:
- Start with 1 part primary
- Add 0.5 part support
- Add 0.25 part helper
- Keep boundary plant at 0.1–0.2 part (small changes matter)
Example: for a 30 g dried blend total, use 15 g primary, 7.5 g support, 3.75 g helper, and 3–6 g boundary depending on strength.
Step 4: Combine with Clear Timing
Timing prevents one plant from dominating the extraction.
- If using infusion + decoction: decoct bark first for the required time, then add leaves for a short infusion.
- If using resin: macerate resin separately in a suitable base until it softens, then add at the end.
- If using astringent bark: add it earlier for extraction, but reduce the amount if the goal is comfort rather than tightening.
Easy example: “stomach comfort tea.” Decoct bark for extraction, then add the leaf support for the final infusion window.
Step 5: Build a Preparation Sequence You Can Repeat
Use a checklist so the blend stays consistent.
- Label each plant with its role.
- Prepare bark/root separately from leaves.
- Combine only after each component reaches its intended extraction stage.
- Strain thoroughly.
- Taste-test only for strength and harshness, not for “proof.”
- Record the batch: weights, method, time, and outcome.
Mind Map: Roles and Steps for Multi-Plant Remedies
Example: Two-Stage Digestive Blend
Goal: reduce cramps and nausea without making the tea too bitter.
- Primary: bitter leaf for cramps (1 part)
- Support: nausea-comfort leaf (0.5 part)
- Helper: small amount of aromatic leaf to smooth taste (0.25 part)
Preparation steps:
- Decoction: if any bark is included, decoct it first.
- Infusion: add the primary and support leaves for a shorter infusion.
- Add helper last, then strain.
Best practice: if the tea feels harsh, reduce the helper or shorten the infusion next time rather than removing the primary.
Example: Topical Blend with Local Roles
Goal: soothe itch and support wound comfort.
- Primary: leaf known for calming irritation (1 part)
- Support: resin or leaf for protective action (0.5 part)
- Boundary: mild leaf to prevent over-drying (0.1–0.2 part)
Preparation steps:
- Crush or grind the primary leaf to release juice.
- Warm gently to loosen resin if used, then mix in small amounts.
- Add boundary leaf last to soften texture.
- Apply in a thin layer and monitor skin response.
Step 6: Stop Conditions and Adjustment Rules
After the first use, adjust based on what you observe:
- If the remedy is too strong, reduce primary first.
- If it is uncomfortable to take, reduce helper or shorten infusion.
- If it does not help, increase support slightly before increasing primary.
A good blend is not the one with the most plants. It is the one where each plant’s role is obvious, the method matches the plant part, and the timing keeps the strongest component from taking over.
12.3 Building a Personal Remedy Library with Labels and Instructions
A personal remedy library is not a cabinet of secrets. It is a working system that lets you repeat a preparation the same way each time, track what happened, and spot when something is off. The goal is consistency: same plant, same part, same method, same approximate strength, and the same decision rules for when to use or stop.
Core Library Components
Start with four folders of information, even if you keep them on paper.
-
Plant identity: local name, common name, and a field description you can verify later (leaf shape, bark texture, habitat notes). If you have a voucher specimen number or photo ID, include it.
-
Preparation record: plant part used (leaf, bark, root, resin), drying state (fresh or dried), cut size, extraction method (infusion, decoction, maceration), and approximate concentration (for example, “1 tablespoon dried bark per 1 cup water”).
-
Labeling standard: what the label must always show so you can act quickly.
-
Use and outcome notes: symptoms targeted, who used it, timing, and what changed.
A good library reduces guesswork. When you can’t remember how you made something, you can’t evaluate whether it worked.
Labeling That Prevents Mix-Ups
Use a consistent label template for every jar, bottle, or packet.
Label fields
- Remedy name and plant identity code
- Plant part and preparation method
- Strength estimate (your chosen ratio)
- Date prepared (use a fixed format like YYYY-MM-DD)
- Batch number (so you can connect label to record)
- Storage notes (cool, dark, refrigerated, dry)
- Stop rules (for example, “discontinue if rash, worsening pain, or no improvement after X hours”)
If you prepare on 2026-02-15, write it exactly like that. Consistency beats precision.
Instruction Cards That Make Repetition Easy
Each remedy gets an instruction card. Keep it short enough to follow in the moment.
Instruction card fields
- Purpose: what symptom pattern it targets
- Ingredients: plant identity code, part, and amount
- Method: step-by-step actions in order
- Safety checks: allergies, contraindications you already know, and “do not use” conditions
- Dosing guidance: your chosen measure and timing window
- Storage and shelf life: what you observe and how you decide it’s no longer usable
- Outcome logging: what to record after use
Example: A Simple Infusion Card
Remedy: Plant code ARA-01, leaf infusion
Purpose: mild digestive discomfort
Ingredients: 1 teaspoon dried leaves per 1 cup water
Method
- Heat water until steaming, not boiling hard.
- Add leaves, cover, and steep 10 minutes.
- Strain into a labeled cup or bottle.
Safety checks: do not use if you have known allergy to the plant; stop if nausea worsens.
Dosing guidance: 1/4 cup, up to 3 times in a day, with at least 4 hours between doses.
Storage: refrigerate and use within 24 hours.
Outcome logging: record stool frequency, cramping level, and any side effects.
This card is useful because it tells you what to do, not just what the remedy is.
Mind Map: Library Workflow
Batch Records and Review Rules
Treat each preparation as a batch. Even if you use the same ratio, the plant material can vary. Your batch record should include what you changed, even if the change is small.
A practical review rule: after three uses of a remedy for the same symptom pattern, write a short “what I learned” line. If outcomes are inconsistent, adjust only one variable at a time—usually the plant part amount or steeping time—then test again.
Example: Label and Batch Link
Label: “ARA-01 Leaf Infusion | 1 tsp/1 cup | 2026-02-15 | Batch B3 | Refrigerate | Stop if rash or worsening cramps.”
Record entry: “Batch B3 made with dried leaves, steeped 10 minutes, strained through cloth, stored refrigerated. Used for mild cramping at 6 hours after meal. Outcome: reduced cramping within 2 hours, no side effects.”
When label and record match, you can trust your own history.
Practical Organization
Arrange your library by symptom category first, then by plant identity code. A simple index page can list remedies under headings like “Digestive,” “Skin,” and “Respiratory,” with each entry pointing to the plant code and instruction card.
This structure keeps you from hunting through pages when you need a decision quickly. It also makes it easier to compare outcomes across remedies without mixing up preparation details.
12.4 Quality Control Checks for Fresh, Dried, and Stored Materials
Quality control is the boring part that keeps remedies boringly effective. In jungle medicine, “quality” means the plant you think you have, prepared the way you planned, and kept in a condition that doesn’t quietly change the remedy.
Core Quality Questions
Start every batch with five checks you can do without lab equipment: identity, plant part, preparation state, contamination risk, and storage conditions. If any answer is uncertain, treat the batch as “needs review,” not “probably fine.”
Fresh Material Checks
Fresh leaves, bark, roots, and resins should show the expected texture and color for the species and plant part. Smell is useful but not definitive: a clean, plant-like scent is a good sign; a sour, fermented, or moldy odor is a stop sign.
Inspect for insect damage, rot, and slime. If you see softening, dark streaks, or a wet sheen that wasn’t there earlier, discard that portion. For field handling, keep materials off bare ground and out of standing water. A simple best practice is to separate “collected” from “cleaned” in different containers so you don’t reintroduce dirt.
Drying Quality Checks
Drying is where many batches drift. The goal is dryness without scorching. Leaves should become crisp rather than brittle; bark should feel firm and not rubbery; roots should snap or break cleanly.
If drying is too slow, mold can start before the outside looks dry. If drying is too hot, color and aroma can fade and some compounds may degrade. A practical method is to dry in thin layers, turn or rearrange daily, and avoid direct sun for sensitive leaves. Record the drying start date as a batch note; for example, “dried on 2026-02-15” helps you track whether the material is still within your acceptable window.
Storage Quality Checks
Storage should prevent moisture, pests, and mix-ups. Use labeled containers that block humidity. For dried plant material, glass jars with tight lids work well; for resins, use containers that don’t trap sticky residue on the lid.
Before sealing, confirm the material is fully dry. A quick test is to weigh a small sample before and after an additional 24 hours of drying; if it still drops noticeably, it isn’t ready. Keep jars away from heat sources and direct light.
Contamination and Cross-Contact Checks
Cross-contact happens when tools, hands, or surfaces move between plants. Clean tools between species and between plant parts. If you grind multiple materials, wipe the grinder thoroughly and run a small “discard grind” of the next plant to clear residue.
Watch for “container memory.” If a jar once held a strongly scented bark, it can transfer odor to a mild leaf. Use separate containers for strongly aromatic resins and store them farther from delicate materials.
Batch Labeling and Traceability
Every batch needs a label that answers: what plant, which part, which preparation state, who prepared it, and when it was processed. Add a short note on any deviations, like “dried longer due to rain” or “collected after midday heat.” This is not bureaucracy; it’s how you explain outcomes later.
Mind Map: Quality Control Workflow
Example: Leaf Batch from Field to Jar
Collect leaves into a “dirty” container, then move them to a “cleaning” container after rinsing and sorting. Dry in thin layers, turning daily. When leaves are crisp, weigh a small sample and confirm no further weight loss after 24 hours. Label the jar with plant name, leaf-only, dried date, and your preparation method plan. Store in a sealed container away from heat.
Example: Resin Batch with Moisture Risk
Resins often trap moisture if stored too soon. After collection, allow resin to settle and cool before sealing. Use a container that can be cleaned easily, and label it with the resin source and date. Before using, check for clumping that suggests moisture uptake; if clumps are damp or smell sour, discard the affected portion.
Stop Conditions That Save Time Later
Stop and review when you find mold, persistent dampness, uncertain identity, or signs of cross-contact. If the batch fails one core quality question, don’t “fix it” by guessing. Re-sort, re-dry, or re-prepare with a clear reason recorded in the batch notes.
12.5 Complete Example Remedy Plans for Common Household Needs
These example plans show how to combine shamanic intention with practical preparation steps. Each plan uses a “role” for the plant (cleaning, warming, soothing, binding) so you can keep decisions consistent even when symptoms vary.
Mind Map: Household Needs to Remedy Roles
Foundational Setup for Every Plan
- Confirm identity and preparation method: Use the same plant name you recorded in your field notes, and match the part used (leaf, bark, root, resin). If you’re unsure, skip the remedy.
- Choose a single primary plant: Start with one plant that matches the main role. Add a second plant only if it clearly supports the first role.
- Use a consistent strength: For teas, keep the same ratio each time (for example, a small handful of chopped plant per cup). Consistency matters more than “stronger is better.”
- Track response: Note time, dose, and what changed. If symptoms worsen or new red flags appear, stop and seek medical care.
Example: Digestive Comfort for Cramps and Loose Stools
Primary role: Bitter + Astringent to calm spasms and reduce excess fluid.
- Preparation: Make a decoction from a bitter bark or root (chopped, simmered briefly, then strained). Use a smaller amount than you think you need; adjust after you see the first response.
- How to take: Sip warm. If cramps ease but stools remain loose, continue at the same dose for one more cycle rather than increasing strength.
- Best practice: Pair with oral rehydration (water with salts) and light foods. A plant remedy is not a substitute for fluid balance.
- Simple example plan: Daytime use only at first. If there’s no improvement after a short window, stop and reassess rather than stacking more plants.
Example: Skin Care for Minor Cuts and Itch
Primary role: Cleansing + Cooling to reduce contamination and irritation.
- Preparation: Rinse the area with clean water. Then use a leaf wash (steeped leaves strained) to gently cleanse.
- Topical step: Apply a leaf wrap over the cleaned area. Keep it clean and change it if it dries out or gets dirty.
- Best practice: Avoid using resin or strong extracts on broken skin unless you already know the plant’s behavior on skin. Start mild.
- Simple example plan: Clean, wash, wrap once, then reassess after a few hours. If redness spreads, stop and seek care.
Example: Respiratory Support for Congestion and Sore Throat
Primary role: Steam + Mucus management.
- Preparation: Prepare a steam inhalation using hot water and a small amount of aromatic leaves. Keep your face at a safe distance and limit time.
- Throat comfort: Use a gargle made from a light infusion. Warm, not hot.
- Best practice: Don’t combine multiple strong plants in the first attempt. Congestion often improves with consistent steam and hydration.
- Simple example plan: Steam once in the morning and once in the evening. Gargle after steam so the throat gets direct contact.
Example: Pain and Inflammation for Soreness After Work
Primary role: Warming + Compress.
- Preparation: Make a warm infusion from a bark or leaf used traditionally for soreness. Strain and cool slightly so it’s comfortable on skin.
- Topical step: Soak a cloth, wring it out, and apply as a compress. Rewarm as needed.
- Best practice: If skin stings or reddens quickly, stop. Topical reactions are your fastest feedback.
- Simple example plan: Use for a short session, then rest the area. If pain worsens, switch to medical evaluation.
Example: Fever Like Weakness with Hydration Support
Primary role: Hydration support + gentle bitter.
- Preparation: Offer a light tea rather than a concentrated decoction. The goal is comfort and monitoring, not “forcing” a cure.
- Care routine: Keep fluids going, encourage rest, and track temperature and symptoms.
- Best practice: Use one plant plan only. If fever persists or symptoms escalate, stop home treatment and seek medical care.
- Simple example plan: Small sips at intervals. Reassess after a set time window; do not keep increasing dose.
Mind Map: Decision Flow for Choosing a Plan
Integrated Best Practice: Shamanic Intention with Practical Controls
Before preparation, set a clear intention for the specific role—calming, cleansing, warming, or supporting hydration. Then follow the practical controls: correct plant part, consistent strength, clean handling, and careful observation. This combination keeps the remedy grounded in both meaning and method, so you can repeat what works and stop what doesn’t.