No-Code Startup: Build a Business Without Writing a Line
1. Introduction to No-Code Entrepreneurship
1.1 What is No-Code? Understanding the Basics
No-Code is a revolutionary approach to software development that allows individuals and businesses to build applications, websites, and automated workflows without writing traditional code. Instead of programming languages, no-code platforms use visual interfaces, drag-and-drop components, and pre-built templates to create functional digital products.
Why No-Code Matters
- Accessibility: Enables non-technical entrepreneurs, product managers, and side business founders to bring ideas to life.
- Speed: Accelerates development cycles from months to days or even hours.
- Cost-Effective: Reduces the need for expensive developer resources.
- Flexibility: Allows rapid iteration and easy updates.
Mind Map: Core Concepts of No-Code
How No-Code Differs from Low-Code
| Aspect | No-Code | Low-Code |
|---|---|---|
| Target Users | Non-technical users | Developers & technical users |
| Coding Required | None | Minimal coding |
| Flexibility | Limited to platform capabilities | More customizable |
| Speed | Very fast prototyping | Fast but requires some coding |
Example 1: Building a Website with No-Code
Imagine Sarah, a side business founder who wants to launch an online portfolio. Instead of hiring a developer or learning HTML/CSS, she uses Wix — a no-code website builder with drag-and-drop functionality. Within a few hours, Sarah creates a professional-looking website complete with contact forms and galleries.
Example 2: Automating Workflow Without Code
John, a product manager, wants to automate his team’s task notifications. Using Zapier, a no-code automation tool, he connects their project management app (Trello) to Slack. Now, whenever a task is updated, the team receives instant notifications — all set up through a simple visual interface.
Mind Map: Popular No-Code Platforms and Their Strengths
Summary
No-Code empowers entrepreneurs and product managers to build and launch digital products quickly and affordably without needing programming skills. By leveraging visual tools and pre-built components, no-code platforms democratize software creation, opening the door for innovation and experimentation.
This foundational understanding sets the stage for exploring how you can ideate, design, build, and scale your no-code startup effectively.
1.2 Why No-Code is a Game-Changer for Entrepreneurs
No-code platforms have revolutionized the way entrepreneurs build and launch businesses by removing traditional barriers associated with software development. Here’s why no-code is a true game-changer:
Speed to Market
No-code tools enable entrepreneurs to rapidly prototype, build, and launch products without waiting months for development cycles.
- Example: Sarah, a side business founder, used Bubble to create an MVP marketplace in just 3 weeks, compared to the typical 3-6 months with traditional coding.
Lower Costs
Hiring developers or agencies can be expensive. No-code platforms drastically reduce upfront costs by allowing founders to build themselves.
- Example: A solo entrepreneur saved over $20,000 by building an e-commerce store on Shopify with no-code plugins instead of hiring a developer.
Empowerment and Control
Entrepreneurs maintain full control over their product, making changes instantly without relying on technical teams.
- Example: Mike, a product manager, iterated his SaaS onboarding flow daily using Webflow and Zapier, improving user retention by 15% in a month.
Accessibility for Non-Technical Founders
No-code democratizes entrepreneurship by enabling people without programming skills to bring their ideas to life.
- Example: A marketing consultant launched a lead generation tool using Airtable and Softr without writing a single line of code.
Flexibility and Integration
Modern no-code platforms offer robust integrations and automation capabilities, allowing complex workflows without custom code.
- Example: An online course creator automated student onboarding, payment processing, and email sequences using Zapier, Memberstack, and Mailchimp.
Rapid Experimentation and Validation
No-code allows entrepreneurs to test ideas quickly, gather feedback, and pivot without sunk costs.
- Example: Using Typeform and Carrd, a founder validated demand for a niche service in under a week before investing further.
Mind Map: Why No-Code is a Game-Changer for Entrepreneurs
Mind Map: Real-World Examples of No-Code Impact
Summary
No-code platforms empower entrepreneurs by accelerating product development, lowering costs, and enabling non-technical founders to build scalable businesses. This paradigm shift is democratizing innovation and reshaping the startup landscape.
1.3 Common Misconceptions About No-Code Tools
No-code tools have revolutionized how entrepreneurs, product managers, and side business founders build digital products. However, despite their growing popularity, several misconceptions persist that can prevent people from fully embracing their potential. In this section, we will debunk these myths with clear explanations, mind maps, and practical examples.
Misconception 1: No-Code Means No Technical Skills Needed
Many believe that no-code tools require zero technical understanding. While no-code platforms drastically reduce the need for traditional programming, understanding logic, workflows, and data structures is still essential.
Mind Map:
Example: Sarah, a side business founder, used Bubble to build her marketplace app. She didn’t write code but spent time learning how to structure database relationships and workflows to ensure smooth user interactions.
Misconception 2: No-Code Tools Are Only for Simple Projects
Some think no-code platforms are limited to small or basic applications. In reality, many complex startups and SaaS products have been built entirely with no-code or low-code tools.
Mind Map:
Example: Comet, a freelance talent marketplace, started with no-code tools to validate their idea and build an MVP before scaling with developers.
Misconception 3: No-Code Products Lack Customization and Flexibility
It’s often assumed that no-code tools are rigid and don’t allow for tailored solutions. While there are limits compared to full custom code, many no-code platforms offer extensive customization options.
Mind Map:
Example: John used Webflow combined with Zapier to create a highly customized e-commerce site with unique user flows and automated inventory management.
Misconception 4: No-Code Is Just a Temporary Solution Before Hiring Developers
Many entrepreneurs think no-code is only for prototyping and that they must eventually rewrite their product with code. While some scale beyond no-code, many businesses run fully on no-code tools long-term.
Mind Map:
Example: Sophie runs a subscription-based coaching platform built entirely on Memberstack and Webflow, managing thousands of users without a single line of code.
Misconception 5: No-Code Tools Are Expensive and Not Cost-Effective
Some believe that no-code platforms are costly compared to traditional development. However, no-code tools often reduce upfront costs, speed up time-to-market, and lower maintenance expenses.
Mind Map:
Example: Alex saved over $20,000 in initial development costs by using Glide to build his mobile app prototype instead of hiring developers.
Summary
Understanding these misconceptions helps entrepreneurs and product managers make informed decisions about leveraging no-code tools effectively. No-code is not a magic bullet but a powerful enabler that combines ease of use with surprising depth and flexibility.
Pro Tip: Before dismissing no-code for your startup, try building a small prototype or MVP. This hands-on experience often reveals the true potential and limitations firsthand.
1.4 Overview of Popular No-Code Platforms and Their Use Cases
No-code platforms have revolutionized how entrepreneurs, product managers, and side business founders build and launch products without writing a single line of code. Each platform offers unique strengths tailored to different business needs—from web apps and e-commerce stores to automation and databases. Below is a detailed overview of some of the most popular no-code platforms, their core use cases, and practical examples.
Mind Map: Popular No-Code Platforms and Their Use Cases
Web & Mobile App Builders
Bubble
- Use Case: Building complex web applications with custom workflows, user authentication, and database management.
- Example: An entrepreneur builds a marketplace connecting freelance designers with clients, complete with payment processing and review systems.
Adalo
- Use Case: Creating native mobile apps for iOS and Android with drag-and-drop components.
- Example: A side business founder launches a fitness tracking app that syncs user progress and sends notifications.
Glide
- Use Case: Turning Google Sheets into mobile apps quickly.
- Example: A product manager creates an internal inventory app for their team using Glide connected to a shared Google Sheet.
Website & Landing Page Builders
Webflow
- Use Case: Designing and launching visually stunning, responsive websites with CMS capabilities.
- Example: A startup founder creates a marketing site with blog integration and SEO optimization without coding.
Carrd
- Use Case: Building simple, one-page landing pages for MVPs, portfolios, or event signups.
- Example: A freelancer launches a landing page to validate a new consulting service idea and collect emails.
Wix
- Use Case: Drag-and-drop website builder with e-commerce and blogging features.
- Example: A small business owner builds an online presence with integrated booking and payment options.
E-commerce Platforms
Shopify
- Use Case: Creating online stores with inventory management, payment gateways, and marketing tools.
- Example: A side business founder launches a print-on-demand store selling custom merchandise.
BigCommerce
- Use Case: Scalable e-commerce platform for growing businesses with advanced features.
- Example: An entrepreneur expands their product line and integrates multi-channel selling.
Automation & Integration
Zapier
- Use Case: Connecting apps and automating repetitive workflows without code.
- Example: Automatically adding new form submissions from Typeform to a Mailchimp email list.
Integromat (Make)
- Use Case: Advanced automation with multi-step scenarios and conditional logic.
- Example: Syncing customer orders from Shopify to Airtable and sending Slack notifications.
Databases & Backend
Airtable
- Use Case: Flexible spreadsheet-database hybrid for managing data, project tracking, and powering apps.
- Example: A product manager organizes feature requests and bug reports in Airtable, linked to a Bubble app.
Google Sheets
- Use Case: Simple data storage and lightweight backend for apps.
- Example: Using Google Sheets as a backend for a Glide app tracking event RSVPs.
Email Marketing & CRM
Mailchimp
- Use Case: Email marketing automation, audience segmentation, and campaign analytics.
- Example: A startup founder creates drip campaigns to onboard new users and nurture leads.
HubSpot
- Use Case: CRM platform with marketing, sales, and customer service tools.
- Example: Managing customer pipelines and automating follow-ups without coding.
Membership & Subscription Platforms
Memberstack
- Use Case: Adding user authentication, gated content, and subscription billing to websites.
- Example: A content creator builds a paid membership site with exclusive articles and videos.
Outseta
- Use Case: All-in-one platform combining CRM, billing, and customer support for SaaS startups.
- Example: A SaaS founder manages subscriptions, onboarding, and support in one no-code tool.
Summary
No-code platforms empower entrepreneurs and product managers to rapidly build, test, and scale their ideas without technical barriers. Selecting the right tool depends on your business model, product complexity, and growth plans. By combining these platforms, you can create robust, scalable startups entirely without writing code.
Quick Example: Combining Platforms for a No-Code Startup
- Use Carrd to create a landing page validating your idea.
- Collect emails via Typeform integrated with Zapier.
- Manage leads and customer data in Airtable.
- Build a web app MVP in Bubble connected to Airtable.
- Automate email sequences with Mailchimp.
This integrated approach lets you launch a full startup workflow without coding, saving time and resources.
1.5 Case Study: How a Side Business Founder Launched a Product in 30 Days Without Coding
Launching a product as a side business founder can seem daunting, especially without a technical background. However, with no-code tools, it’s entirely possible to go from idea to launch in just 30 days. This case study explores how Sarah, a marketing consultant, built and launched her online course platform without writing a single line of code.
Background:
- Founder: Sarah, marketing consultant with no coding skills
- Goal: Create an online course platform to teach digital marketing basics
- Timeframe: 30 days
- Constraints: Limited budget, part-time availability
Step 1: Ideation & Validation (Days 1-5)
Sarah started by validating her idea using no-code research and survey tools.
- Created a simple landing page using Carrd to describe her course concept.
- Embedded a Typeform survey to collect feedback and gauge interest.
- Shared the landing page on social media and relevant forums.
Mind Map: Ideation & Validation
Example: Sarah’s landing page received 150 visits and 40 survey responses in 3 days, with 70% expressing strong interest.
Step 2: Designing the Product (Days 6-10)
Using no-code design tools, Sarah created wireframes and a prototype.
- Used Figma to design the course platform interface.
- Focused on user-friendly navigation and clear call-to-actions.
- Shared the prototype with a small group for feedback.
Mind Map: Designing the Product
Example: Feedback led Sarah to simplify the course enrollment process, improving clarity.
Step 3: Building the Platform (Days 11-20)
Sarah chose Podia, a no-code platform tailored for online courses.
- Uploaded course videos and materials.
- Set up payment processing with Stripe integration.
- Customized the site branding and layout.
Mind Map: Building the Platform
Example: Podia’s drag-and-drop interface allowed Sarah to launch a fully functional course site without technical help.
Step 4: Marketing & Launch (Days 21-30)
Sarah automated marketing and customer engagement using no-code tools.
- Created an email drip campaign with Mailchimp.
- Used Zapier to connect Podia signups to her email list.
- Ran targeted Facebook ads with a small budget.
Mind Map: Marketing & Launch
Example: Within the first week of launch, Sarah enrolled 25 paying students and gathered testimonials.
Key Takeaways & Best Practices
- Validate early: Use simple landing pages and surveys to test ideas before building.
- Leverage specialized no-code platforms: Choose tools that fit your product type (e.g., Podia for courses).
- Iterate based on feedback: Share prototypes and improve before launch.
- Automate workflows: Connect tools with Zapier or Integromat to save time.
- Start small and scale: Launch with a minimal viable product and grow based on demand.
This case study illustrates that with the right no-code tools and a structured approach, side business founders can successfully launch products quickly and efficiently without coding knowledge.
2. Ideation and Validation Without Code
2.1 Identifying Market Needs Using No-Code Research Tools
Understanding market needs is the foundation of any successful startup. For no-code entrepreneurs, leveraging no-code research tools can streamline this process, enabling rapid insights without requiring technical expertise. This section explores how to identify market needs effectively using no-code tools, supported by mind maps and practical examples.
Why Identifying Market Needs Matters
Before building a product, it’s crucial to understand the problems your target audience faces. This ensures your solution is relevant and has demand, reducing the risk of failure.
No-Code Tools for Market Research
- Survey Tools: Typeform, Google Forms, SurveyMonkey
- Social Listening Tools: Brand24, Mention
- Keyword Research: Ubersuggest, AnswerThePublic
- Competitor Analysis: SimilarWeb, BuiltWith
- Idea Validation Platforms: Product Hunt, Indie Hackers
Step 1: Define Your Target Audience
Start by clearly defining who your potential customers are. Use no-code tools like Airtable or Notion to create audience personas.
Mind Map: Defining Target Audience
Step 2: Conduct Surveys to Gather Direct Feedback
Use Typeform or Google Forms to create engaging surveys that ask potential users about their challenges and preferences.
Best Practice:
- Keep surveys short (5-10 questions).
- Use multiple-choice and open-ended questions.
- Incentivize participation with discounts or giveaways.
Example:
A side business founder wants to build a productivity app. They create a Typeform survey asking:
- “What is your biggest productivity challenge?”
- “Which tools do you currently use?”
- “What features would you like to see?”
Step 3: Analyze Social Media and Forums
Use social listening tools like Brand24 or free methods such as Reddit and Twitter searches to identify trending problems and discussions.
Mind Map: Social Listening Focus Areas
Example:
A product manager monitors Twitter hashtags related to “remote work” and finds many users complaining about poor team communication tools, highlighting a market need.
Step 4: Keyword Research to Understand Demand
Use tools like Ubersuggest or AnswerThePublic to find what questions and keywords people search for related to your idea.
Mind Map: Keyword Research Workflow
Example:
An entrepreneur interested in launching an online cooking class searches “how to cook healthy meals” and discovers high search volume and many unanswered questions, indicating demand.
Step 5: Competitor and Market Analysis
Use SimilarWeb or BuiltWith to analyze competitors’ traffic sources, technologies, and market positioning.
Best Practice:
- Identify competitors’ strengths and weaknesses.
- Look for underserved niches.
Example:
A product manager uses SimilarWeb to find that a competitor’s website gets most traffic from organic search but lacks a mobile app, revealing an opportunity.
Step 6: Validate Ideas on Community Platforms
Share your idea on Product Hunt or Indie Hackers to get feedback and gauge interest.
Example:
A side business founder posts a no-code marketplace idea on Indie Hackers and receives valuable feedback, helping refine the concept.
Summary Mind Map: Identifying Market Needs Using No-Code Tools
Final Tips
- Combine multiple tools for richer insights.
- Continuously update your research as market trends evolve.
- Use no-code automation (e.g., Zapier) to aggregate data from different sources.
By following these steps and leveraging no-code research tools, entrepreneurs, product managers, and side business founders can confidently identify real market needs and build products that truly resonate with their audience.
2.2 Rapid Prototyping with No-Code MVP Builders
Rapid prototyping is a crucial step in the entrepreneurial journey, especially when building a Minimum Viable Product (MVP). It allows you to quickly bring your idea to life, test assumptions, and gather feedback without investing significant time or resources into coding. No-code MVP builders empower entrepreneurs, product managers, and side business founders to create functional prototypes swiftly and efficiently.
What is Rapid Prototyping in No-Code?
Rapid prototyping involves creating a working model of your product that demonstrates core features and user experience. Unlike traditional development, no-code MVP builders use visual interfaces, drag-and-drop components, and pre-built integrations to accelerate this process.
Benefits of Using No-Code MVP Builders
- Speed: Build and iterate your product in days or weeks instead of months.
- Cost-Effective: Avoid hiring developers or learning to code.
- Flexibility: Easily modify features based on user feedback.
- Validation: Test market demand and usability before full-scale development.
Popular No-Code MVP Builders
- Bubble: Powerful visual programming platform for web apps.
- Adalo: Focused on mobile app prototyping.
- Carrd: Simple landing page and single-page app builder.
- Glide: Turns spreadsheets into mobile apps.
- Thunkable: Drag-and-drop mobile app builder.
Mind Map: Steps for Rapid Prototyping with No-Code MVP Builders
Example 1: Building a Task Management Web App with Bubble
Step 1: Define Core Features
- Task creation and editing
- Due dates and reminders
- User registration and login
Step 2: Design Wireframe
- Use Bubble’s visual editor to create pages: Dashboard, Task List, Profile
Step 3: Build Workflows
- Set up database for tasks
- Create workflows for adding, updating, and deleting tasks
- Implement user authentication
Step 4: Test and Iterate
- Share prototype with a small group
- Gather feedback on usability
- Adjust UI and workflows accordingly
Outcome: Within a week, a functional MVP was ready to validate demand.
Example 2: Creating a Mobile Event RSVP App with Adalo
Step 1: Identify MVP Scope
- Event listing
- RSVP functionality
- Push notifications
Step 2: Design UI
- Use Adalo’s pre-built templates for event apps
Step 3: Build and Integrate
- Connect app screens
- Set up RSVP database
- Configure push notifications
Step 4: User Testing
- Invite friends to test RSVP flow
- Collect feedback on notification timing
Outcome: MVP launched in under two weeks, enabling early user engagement.
Best Practices for Rapid Prototyping with No-Code MVP Builders
- Focus on Core Value: Avoid feature bloat; build only what solves the main problem.
- Leverage Templates: Use pre-built templates to speed up design and development.
- Test Early and Often: Share prototypes with real users to gather actionable feedback.
- Document Workflows: Keep track of your app’s logic for easier iteration.
- Plan for Scalability: Choose tools that can grow with your product.
Mind Map: Best Practices
Additional Tips
- Combine no-code MVP builders with automation tools like Zapier to add functionality without code.
- Use Airtable or Google Sheets as backend databases for easy data management.
- Consider embedding surveys or feedback forms directly into your prototype for continuous insights.
By embracing rapid prototyping with no-code MVP builders, entrepreneurs can dramatically reduce time-to-market, minimize upfront costs, and validate ideas effectively. This approach democratizes product creation, making it accessible to anyone with a vision and drive to build a business without writing a single line of code.
2.3 Validating Your Idea Through Landing Pages and Surveys
Validating your startup idea early is crucial to avoid building a product that no one wants. No-code tools empower entrepreneurs, product managers, and side business founders to quickly test their concepts with real users without writing a single line of code. Two of the most effective validation methods are creating landing pages and conducting surveys.
Why Validate with Landing Pages and Surveys?
- Landing Pages: Serve as a simple, focused webpage to present your value proposition, gauge interest, and collect leads.
- Surveys: Help you gather qualitative and quantitative feedback from your target audience to understand their needs, preferences, and pain points.
Step 1: Building a Landing Page for Validation
Best Practices:
- Keep it simple and focused on one core idea.
- Use clear headlines and compelling calls-to-action (CTAs).
- Include social proof or testimonials if available.
- Add an email capture form to collect interested users.
No-Code Tools to Use:
- Carrd: Ultra-simple landing page builder.
- Webflow: More design flexibility with no code.
- Unbounce: Built for conversion optimization.
Example: Imagine you want to validate a new productivity app. You create a landing page with a headline: “Boost Your Productivity by 50% with Our App”. You add a short description, a few bullet points of features, and a signup form for early access.
Step 2: Designing Effective Surveys
Best Practices:
- Keep surveys short (5-10 questions).
- Use a mix of multiple-choice and open-ended questions.
- Ask about pain points, willingness to pay, and feature preferences.
- Avoid leading or biased questions.
No-Code Tools to Use:
- Typeform: Interactive and user-friendly surveys.
- Google Forms: Simple and free.
- SurveyMonkey: Advanced analytics and templates.
Example: Send a survey to your landing page signups asking:
- “What is your biggest productivity challenge?”
- “How much would you pay monthly for a solution?”
- “Which feature would you find most valuable?”
Mind Map: Validating Your Idea with Landing Pages and Surveys
Integrated Example: Validating a SaaS Idea Using Typeform and Carrd
- Create a Carrd landing page titled “Simplify Your Team’s Workflow” with a clear CTA: “Get Early Access”.
- Embed a Typeform survey on the landing page or send it via email to collected leads.
- Survey questions include:
- “What tools do you currently use for team collaboration?”
- “What frustrates you most about your current workflow?”
- “Would you be interested in a tool that automates task assignments?”
- “What is your budget for such a tool?”
- Analyze results: High signup and positive survey responses indicate strong market interest.
Tips for Success
- Use A/B testing on landing pages to optimize headlines and CTAs.
- Incentivize survey completion with discounts or early access.
- Follow up with respondents for deeper interviews.
- Iterate your landing page and survey based on feedback.
By leveraging no-code landing pages and surveys, you can quickly validate your startup idea, reduce risk, and build a product that truly resonates with your target audience—all without writing a single line of code.
2.4 Best Practices for Customer Feedback Loops Using No-Code Forms
Gathering customer feedback is essential for refining your product and ensuring it meets user needs. No-code forms provide an accessible, fast, and flexible way to collect this feedback without writing a single line of code. In this section, we’ll explore best practices for creating effective customer feedback loops using no-code form tools like Typeform, Google Forms, JotForm, and others.
Why Customer Feedback Loops Matter
- Continuous Improvement: Feedback helps identify pain points and areas for enhancement.
- Customer Engagement: Shows users their opinions matter, building loyalty.
- Data-Driven Decisions: Reduces guesswork by relying on real user input.
Best Practices for Customer Feedback Loops Using No-Code Forms
Define Clear Objectives
- Know what you want to learn: product usability, feature requests, satisfaction levels, etc.
- Example: A SaaS startup wants to understand which features users find most valuable.
Keep Forms Short and Focused
- Limit questions to 5-7 to avoid survey fatigue.
- Use multiple-choice or rating scales for quick responses.
Use Conditional Logic
- Show or hide questions based on previous answers to keep forms relevant.
- Example: If a user rates a feature poorly, show a follow-up question asking why.
Offer Incentives
- Encourage participation with discounts, freebies, or early access.
Embed Forms Seamlessly
- Integrate forms into your website, app, or email campaigns for higher response rates.
Automate Feedback Collection and Analysis
- Use tools like Zapier or Integromat to send responses to spreadsheets, CRMs, or notification channels.
Close the Loop
- Share insights or updates with customers to show their feedback led to changes.
Mind Map: Customer Feedback Loop Using No-Code Forms
Example 1: Validating Feature Satisfaction with Typeform
Scenario: A product manager wants to understand how satisfied users are with a newly launched feature.
Implementation:
- Create a Typeform survey with a 5-star rating question “How satisfied are you with Feature X?”
- Use conditional logic: if rating ≤ 3 stars, show an open-ended question “What can we improve?”
- Embed the form in the app’s dashboard.
- Automate responses to be sent to Airtable for tracking.
- Send a thank-you email with a discount code via Mailchimp.
Outcome:
- Collected actionable feedback highlighting specific pain points.
- Increased user engagement by showing responsiveness.
Example 2: Collecting Post-Purchase Feedback Using Google Forms
Scenario: An e-commerce side business founder wants to gather feedback after purchase.
Implementation:
- Create a Google Form with questions on delivery experience, product quality, and likelihood to recommend.
- Keep it under 5 questions with mostly multiple-choice and one open comment box.
- Include a link to the form in the order confirmation email.
- Use Google Sheets to analyze responses and identify trends.
Outcome:
- Identified common delivery delays and quality issues.
- Prioritized improvements in logistics and product packaging.
Tips for Maximizing Feedback Quality
- Ask One Thing at a Time: Avoid compound questions.
- Use Neutral Language: Prevent biasing answers.
- Test Your Form: Pilot with a small group before wide release.
- Respect Privacy: Be transparent about data use and comply with regulations.
Summary
Using no-code forms to create customer feedback loops enables entrepreneurs and product managers to quickly gather, analyze, and act on user insights. By following these best practices and leveraging automation, you can build a responsive, customer-centric startup without writing code.
2.5 Example: Validating a SaaS Idea Using Typeform and Carrd
Validating your SaaS idea before investing significant time and resources is crucial. Using no-code tools like Typeform and Carrd, you can quickly create interactive surveys and landing pages to test demand and gather feedback.
Step 1: Define Your SaaS Idea and Hypotheses
Before building anything, clearly outline your idea and what assumptions you want to validate. For example:
- Idea: A project management tool tailored for remote creative teams.
- Hypotheses:
- Remote creative teams struggle with existing generic project management tools.
- They would pay for a tool that integrates creative workflows.
Step 2: Create a Landing Page with Carrd
Carrd is a simple, intuitive platform to build one-page websites quickly.
Best Practices:
- Use a clear headline that communicates your value proposition.
- Include a brief description of your SaaS idea.
- Add a call-to-action (CTA) button that leads to your survey.
- Use social proof or testimonials if available.
Example:
Mind Map: Carrd Landing Page Structure
Step 3: Build a Survey with Typeform
Typeform allows you to create engaging, conversational surveys.
Best Practices:
- Keep it short (5-7 questions).
- Use multiple choice and rating scales for easy analysis.
- Include open-ended questions for qualitative insights.
- Ask about pain points, willingness to pay, and feature preferences.
Example Survey Outline:
Mind Map: Typeform Survey Flow
Step 4: Integrate Typeform with Carrd
Link the CTA button on your Carrd landing page directly to your Typeform survey. This creates a seamless experience for visitors.
Pro Tip: Use UTM parameters to track traffic sources and analyze which channels bring the most engaged users.
Step 5: Drive Traffic and Collect Data
Promote your landing page through relevant communities, social media, newsletters, or paid ads.
Example Channels:
- Facebook groups for remote workers
- LinkedIn posts targeting creative professionals
- Twitter hashtags like #remotework #creativeteams
Step 6: Analyze Results and Decide Next Steps
Look for patterns in responses:
- Are pain points consistent?
- Is there genuine interest and willingness to pay?
- Which features are most requested?
Use this data to refine your product concept or pivot if necessary.
Summary Mind Map: SaaS Idea Validation Workflow
By following this no-code validation approach, entrepreneurs and side business founders can minimize risk and make data-driven decisions before building their SaaS product. This method saves time, reduces costs, and ensures product-market fit early in the startup journey.
3. Designing Your Product Visually
3.1 Principles of User-Centered Design for No-Code Products
User-Centered Design (UCD) is a design philosophy and process that focuses on the needs, behaviors, and limitations of the end users at every stage of product development. For no-code entrepreneurs and product managers, applying UCD principles ensures that your no-code product is intuitive, useful, and delightful — even without deep technical expertise.
Why User-Centered Design Matters in No-Code
- No-code tools empower creators to build quickly, but without UCD, products risk being feature-rich yet user-unfriendly.
- Prioritizing users helps reduce costly redesigns and improves adoption.
- UCD aligns your product with real user problems, increasing chances of success.
Core Principles of User-Centered Design
Principle 1: Understanding Users
- Empathy: Put yourself in the user’s shoes. What problems do they face? What motivates them?
- User Research: Conduct interviews, surveys, or observe behavior using no-code tools like Typeform or Google Forms.
- Personas: Create user personas to represent your target audience segments.
Example: A side business founder building a fitness app uses Typeform to survey potential users about workout preferences and pain points, then creates personas like “Busy Professional” and “Home Workout Enthusiast” to guide design decisions.
Principle 2: Iterative Design
- Prototyping: Use no-code platforms like Figma or Adalo to create wireframes and clickable prototypes.
- Testing: Share prototypes with real users for feedback.
- Feedback Loops: Incorporate feedback quickly and repeat the cycle.
Example: A product manager creates a prototype of a booking app in Bubble, shares it with a small group, collects feedback via Google Forms, and iterates the design before launch.
Principle 3: Usability
- Simplicity: Avoid clutter; focus on core features.
- Accessibility: Ensure your product is usable by people with disabilities (e.g., color contrast, keyboard navigation).
- Consistency: Use consistent UI elements and language.
Example: An entrepreneur building an e-commerce site with Webflow uses preset style guides and accessibility checkers to maintain consistency and inclusivity.
Principle 4: Context of Use
- Environment: Consider where users will interact with your product (office, outdoors, mobile).
- Devices: Design responsively for desktop, tablet, and mobile.
- User Goals: Align features with what users want to accomplish quickly and efficiently.
Example: A side business founder creates a mobile-first event registration app using Glide, optimizing for users who register on the go.
Summary Mind Map
Final Tips for Applying UCD in No-Code Projects
- Start with user research before building.
- Use no-code prototyping tools to visualize ideas early.
- Test often with real users, even if it’s just friends or colleagues.
- Keep interfaces clean and focused.
- Always consider how and where your users will interact with your product.
By embedding these principles into your no-code startup journey, you create products that resonate with users and stand out in the market — all without writing a single line of code.
3.2 Using No-Code Design Tools to Create Wireframes and Mockups
Creating wireframes and mockups is a critical step in the product design process. It helps entrepreneurs and product managers visualize the user interface and user experience before investing time and resources into development. No-code design tools empower non-technical founders to craft professional, interactive designs quickly and efficiently.
Why Wireframes and Mockups Matter
- Wireframes are low-fidelity, simplified blueprints of your product’s layout and structure.
- Mockups are higher-fidelity, detailed visual representations that include colors, typography, and images.
Both help in:
- Communicating ideas clearly with stakeholders.
- Testing usability and flow early.
- Reducing costly changes during development.
Popular No-Code Design Tools
| Tool | Description | Best For |
|---|---|---|
| Figma | Collaborative, browser-based UI design | Wireframes & High-fidelity mockups |
| Adobe XD | Powerful prototyping and design tool | Interactive prototypes |
| Sketch | Mac-only vector design tool | UI/UX design |
| Balsamiq | Focused on low-fidelity wireframing | Quick wireframes |
| Canva | Easy drag-and-drop design tool | Simple mockups & marketing materials |
Step-by-Step Guide to Creating Wireframes and Mockups with Figma
- Set up your project: Create a new file and define frames for device screens (desktop, tablet, mobile).
- Create wireframes: Use basic shapes (rectangles, lines) to represent UI elements like buttons, menus, and images.
- Add annotations: Label components to clarify functionality.
- Build mockups: Apply colors, typography, and images to wireframes.
- Prototype interactions: Link frames to simulate navigation flows.
- Collaborate and gather feedback: Share the design link with your team or users.
Mind Map: Wireframing and Mockup Process
Best Practices for No-Code Design Tools
- Start simple: Begin with low-fidelity wireframes to focus on structure.
- Use components and styles: Reuse elements to maintain consistency and speed up design.
- Leverage templates: Many tools offer pre-built UI kits and templates.
- Collaborate in real-time: Use tools like Figma to get instant feedback.
- Test early and often: Share prototypes with users to validate design decisions.
Example: Designing a Mobile App Interface with Figma
Imagine you’re a side business founder building a fitness tracking app:
- Wireframe: Lay out screens such as Home, Activity Log, and Settings using simple boxes and placeholders.
- Mockup: Add brand colors, icons, and typography to make the app visually appealing.
- Prototype: Link the Home screen to Activity Log to simulate navigation.
- Feedback: Share with potential users and iterate based on their input.
This process helps you visualize your product without writing any code and ensures alignment with user expectations.
Additional Mind Map: No-Code Design Tool Features
By mastering no-code design tools for wireframing and mockups, entrepreneurs and product managers can significantly reduce time to market, improve communication, and create user-centric products without needing to write a single line of code.
3.3 Integrating Design with No-Code Development Platforms
Integrating your design seamlessly with no-code development platforms is a critical step in turning your visual concepts into fully functional products. This integration ensures that the user experience (UX) and user interface (UI) you meticulously crafted are faithfully translated into the final product, maintaining consistency and usability.
Why Integration Matters
- Consistency: Ensures the look and feel of your product matches the design mockups.
- Efficiency: Speeds up development by reducing back-and-forth between designers and builders.
- User Experience: Preserves usability principles embedded in the design.
Key Strategies for Integration
- Design Handoff Tools: Use platforms like Figma, Adobe XD, or Sketch that support developer handoff with specs, assets, and CSS code snippets.
- Direct Import: Some no-code platforms allow direct import of design files or components.
- Component Libraries: Build reusable design components that can be replicated within no-code builders.
- Style Guides: Create and maintain a style guide or design system to ensure uniformity.
Mind Map: Integrating Design with No-Code Platforms
Example 1: Using Figma and Webflow
- Step 1: Design your UI in Figma, creating frames for each screen.
- Step 2: Organize your layers and name elements clearly.
- Step 3: Export assets (images, SVGs) directly from Figma.
- Step 4: Use Webflow’s Designer to recreate layouts using the exported assets and CSS styles.
- Step 5: Use Webflow’s style panel to match typography, colors, and spacing exactly as in Figma.
Best Practice: Use Figma plugins like “Figma to Webflow” to export CSS code snippets and speed up the build process.
Example 2: Adobe XD to Bubble
- Step 1: Create your app screens in Adobe XD with interactive prototypes.
- Step 2: Export assets and gather style information (fonts, colors).
- Step 3: In Bubble, build pages using the visual editor, importing assets.
- Step 4: Apply styles manually or use Bubble’s style editor to create reusable styles matching your design.
Best Practice: Maintain a style guide in Bubble to ensure consistent UI elements across pages.
Example 3: Sketch to Glide
- Step 1: Design mobile app screens in Sketch.
- Step 2: Export icons and images optimized for mobile.
- Step 3: Use Glide’s interface to upload assets and configure layouts.
- Step 4: Use Glide’s style settings to apply colors and fonts consistent with your Sketch design.
Best Practice: Keep your Sketch file organized with symbols and shared styles to simplify asset export.
Tips for Smooth Integration
- Use Design Systems: Adopt or create a design system that can be mirrored in your no-code platform.
- Plan Responsiveness Early: Design with breakpoints in mind and test layouts on multiple devices.
- Leverage Plugins and Extensions: Many no-code platforms have plugins to import or sync designs.
- Collaborate Closely: Maintain communication between designers and builders to resolve discrepancies quickly.
By following these strategies and examples, entrepreneurs and product managers can effectively bridge the gap between design and development, ensuring their no-code startup delivers a polished, user-friendly product without writing a single line of code.
3.4 Best Practices for Responsive and Accessible Design
Creating a no-code product that is both responsive and accessible is crucial for reaching a wider audience and providing an excellent user experience. Responsive design ensures your product looks and works well on any device, while accessibility guarantees that users with disabilities can navigate and interact with your product effectively.
Key Principles of Responsive Design
- Fluid Grids: Use percentage-based widths so elements resize relative to the screen size.
- Flexible Images and Media: Images and videos should scale within their containers without breaking layouts.
- Media Queries: Apply CSS rules conditionally based on device characteristics like width, resolution, or orientation.
- Mobile-First Approach: Design for smaller screens first, then progressively enhance for larger devices.
Key Principles of Accessible Design
- Semantic HTML: Use proper HTML tags (e.g.,
<button>,<nav>,<header>) to convey meaning. - Keyboard Navigation: Ensure all interactive elements can be accessed and operated via keyboard.
- Color Contrast: Maintain sufficient contrast between text and background for readability.
- Alt Text for Images: Provide descriptive alternative text for images.
- ARIA Roles and Labels: Use ARIA attributes to improve screen reader compatibility.
Mind Map: Responsive Design Essentials
Mind Map: Accessibility Fundamentals
Practical Examples in No-Code Tools
Example 1: Responsive Design in Webflow
- Fluid Grids: Use Webflow’s built-in grid and flexbox layouts with percentage widths.
- Media Queries: Webflow automatically creates breakpoints for desktop, tablet, and mobile views.
- Mobile-First: Start designing in the mobile view and scale up.
Best Practice: Preview your site on multiple devices using Webflow’s preview modes and adjust styles accordingly.
Example 2: Accessibility in Bubble
- Semantic Elements: Bubble allows adding ARIA labels and roles to elements.
- Keyboard Navigation: Ensure all buttons and inputs are reachable via tab key.
- Alt Text: Add descriptive alt text to images in Bubble’s image element settings.
Best Practice: Use the WAVE accessibility extension to audit your Bubble app and fix issues.
Example 3: Accessible Forms with Typeform
- Typeform automatically provides keyboard navigation and screen reader compatibility.
- Use clear labels and instructions to improve form accessibility.
Best Practice: Test your forms with screen readers like NVDA or VoiceOver.
Additional Tips
- Test Early and Often: Use browser developer tools to simulate different screen sizes.
- Use Accessibility Checkers: Tools like Axe, Lighthouse, or WAVE help identify issues.
- Avoid Fixed Widths: Fixed pixel widths can break layouts on small screens.
- Provide Focus States: Customize focus outlines to help keyboard users see where they are.
- Use Readable Fonts: Choose legible font sizes and line heights.
Summary
Incorporating responsive and accessible design practices in your no-code startup ensures your product is usable and enjoyable for everyone, regardless of device or ability. Leveraging no-code platforms’ built-in features alongside manual best practices will help you build inclusive, scalable products.
3.5 Example: Designing a Mobile App Interface with Figma and Adalo
Designing a mobile app interface without writing code is entirely possible using powerful no-code tools like Figma for design and Adalo for app building. This example will guide you through the process of creating a clean, user-friendly mobile app interface and then bringing it to life using Adalo.
Step 1: Planning Your Mobile App Interface
Before jumping into design, it’s important to map out the app’s structure and user flow. This helps to visualize the screens and interactions.
Mind Map: Mobile App Planning
This simple mind map helps you organize the key screens and features your app will have.
Step 2: Designing the Interface in Figma
Figma is a collaborative design tool that allows you to create wireframes, mockups, and prototypes.
Best Practices:
- Use consistent spacing and typography.
- Design with mobile screen sizes in mind (e.g., 375x812 for iPhone X).
- Create reusable components like buttons and input fields.
Example:
- Create a new frame sized for a mobile screen.
- Design a login screen with input fields for email and password, and a login button.
- Use Figma’s Components feature to create a button component that can be reused.
Mind Map: Login Screen Components
You can also prototype interactions in Figma, such as linking the login button to the home screen frame.
Step 3: Exporting Design Assets
Once your design is ready, export necessary assets such as icons or images in PNG or SVG format. Figma allows you to export components or frames easily.
Step 4: Building the App in Adalo
Adalo is a no-code platform that lets you build native mobile apps visually.
Process:
- Create a new app project in Adalo.
- Use the drag-and-drop interface to add screens matching your Figma design.
- Add components like text inputs, buttons, images, and lists.
- Customize styles to match your Figma design (colors, fonts, spacing).
Example:
- Recreate the login screen by adding input fields for email and password.
- Add a login button and set up actions (e.g., user authentication).
- Use Adalo’s built-in user database to manage user accounts.
Mind Map: Adalo Screen Setup
Step 5: Testing and Iterating
Use Adalo’s preview feature to test your app on a mobile device or emulator. Gather feedback and iterate on your design and functionality.
Summary
| Step | Tool | Key Action | Example Outcome |
|---|---|---|---|
| Planning | N/A | Create mind map of app screens | Clear app structure |
| Designing Interface | Figma | Design screens and components | Login screen mockup |
| Exporting Assets | Figma | Export icons and images | SVG icons for buttons |
| Building App | Adalo | Drag-and-drop screen creation | Functional login screen |
| Testing and Iterating | Adalo | Preview and refine app | Improved UX based on feedback |
By combining Figma and Adalo, entrepreneurs and product managers can efficiently design and build mobile apps without writing a single line of code, enabling faster time-to-market and iterative development.
4. Building Your No-Code Product
4.1 Choosing the Right No-Code Platform Based on Your Product Type
Selecting the appropriate no-code platform is a crucial step in building your startup efficiently and effectively. Different platforms excel at different product types, and understanding these nuances will save you time, reduce frustration, and help you deliver a better product.
Key Considerations When Choosing a No-Code Platform
- Product Type: Web app, mobile app, e-commerce store, internal tool, automation, etc.
- Complexity: Simple landing page vs. multi-user platform with complex workflows.
- Scalability: Will your product need to handle thousands of users?
- Integrations: Need to connect with external services or APIs?
- Design Flexibility: How much control do you want over UI/UX?
- Budget: Some platforms have free tiers, others require subscriptions.
Mind Map: No-Code Platform Selection Based on Product Type
Web Applications
Best Platforms: Bubble, Adalo, Glide
- Bubble: Highly flexible and powerful for building complex web apps with user accounts, databases, and workflows. Great for SaaS products, marketplaces, and dashboards.
- Adalo: Focuses on mobile-first apps but also supports web apps. Easier learning curve than Bubble but less flexible.
- Glide: Turns Google Sheets into simple apps quickly. Ideal for MVPs or data-driven apps.
Example: A product manager wants to build a SaaS tool for team task management. Bubble is ideal because it supports user authentication, complex workflows, and custom database structures without coding.
Mobile Applications
Best Platforms: Adalo, Thunkable, Bravo Studio
- Adalo: Drag-and-drop mobile app builder with native app publishing.
- Thunkable: Allows building native apps for iOS and Android with drag-and-drop components.
- Bravo Studio: Converts Figma designs into native mobile apps, great for designers.
Example: A side business founder wants to create a fitness tracking app with GPS and social sharing. Thunkable offers native device features and cross-platform support.
E-commerce Stores
Best Platforms: Shopify, Gumroad, BigCommerce
- Shopify: The leading e-commerce platform with extensive app ecosystem and payment integrations.
- Gumroad: Simple platform for selling digital products and subscriptions.
- BigCommerce: Enterprise-grade e-commerce with scalability.
Example: An entrepreneur launching a handmade jewelry store can use Shopify to quickly set up a professional storefront with payment processing and inventory management.
Automation and Workflow
Best Platforms: Zapier, Make (formerly Integromat), Automate.io
- Zapier: Connects thousands of apps to automate repetitive tasks.
- Make: Visual automation builder with advanced logic and data manipulation.
- Automate.io: Similar to Zapier but with different pricing and app support.
Example: A product manager wants to automate lead capture from a Typeform survey into Airtable and send a Slack notification. Zapier can create this workflow without any code.
Internal Tools and Dashboards
Best Platforms: Airtable, Retool, Softr
- Airtable: Spreadsheet-database hybrid, great for organizing data and simple apps.
- Retool: Powerful internal tool builder that connects to databases and APIs.
- Softr: Turns Airtable data into customer-facing websites and portals.
Example: A startup founder needs a customer support dashboard that pulls data from multiple sources. Retool allows building this dashboard with drag-and-drop components connected to APIs.
Landing Pages and Marketing Sites
Best Platforms: Carrd, Webflow, Wix
- Carrd: Ultra-simple, affordable landing page builder.
- Webflow: Visual web design tool with CMS and advanced animations.
- Wix: User-friendly website builder with templates and app marketplace.
Example: A side business founder wants to create a compelling landing page to validate an idea. Carrd enables quick, beautiful pages with minimal effort.
Summary Table
| Product Type | Recommended Platforms | Strengths | Example Use Case |
|---|---|---|---|
| Web Apps | Bubble, Adalo, Glide | Complex workflows, user auth | SaaS task management tool |
| Mobile Apps | Adalo, Thunkable, Bravo Studio | Native features, cross-platform | Fitness tracking app |
| E-commerce | Shopify, Gumroad, BigCommerce | Payment, inventory, scalability | Handmade jewelry store |
| Automation | Zapier, Make, Automate.io | Workflow automation | Lead capture and notification workflow |
| Internal Tools | Airtable, Retool, Softr | Data management, dashboards | Customer support dashboard |
| Landing Pages | Carrd, Webflow, Wix | Design flexibility, ease of use | Idea validation landing page |
Best Practices for Selecting Your Platform
- Start with your MVP needs: Don’t overcomplicate. Choose a platform that fits your immediate product requirements.
- Test multiple platforms: Many offer free tiers or trials—experiment before committing.
- Consider future growth: Pick a platform that can scale or integrate with others as your startup grows.
- Leverage community and support: Platforms with active communities and good documentation reduce learning curves.
Final Example: Choosing a Platform for a Marketplace MVP
Imagine you want to build a marketplace connecting freelance designers with clients.
- You need user accounts, profiles, messaging, and payment handling.
- Bubble is a strong candidate due to its flexibility and built-in database.
- You could prototype quickly and iterate without writing code.
- Once validated, you can integrate payment gateways and scale with Bubble’s infrastructure.
This example shows how understanding your product type and requirements guides you to the right no-code platform, enabling you to build confidently and efficiently.
4.2 Step-by-Step Guide to Building a Web App with Bubble
Building a web app with Bubble is an empowering experience for entrepreneurs and product managers who want to launch quickly without writing code. Bubble offers a visual interface to design, develop, and deploy fully functional web applications.
Why Choose Bubble?
- No-code platform with drag-and-drop UI builder
- Powerful workflow engine for app logic
- Built-in database and API integrations
- Responsive design capabilities
- Scalable hosting and deployment
Step 1: Define Your App Idea and Core Features
Before diving into Bubble, clarify what your app will do and the key features it needs. For example, if you want to build a marketplace app, your core features might include user registration, product listings, search, and messaging.
Example: A freelance job board app where clients post jobs and freelancers apply.
Step 2: Set Up Your Bubble Account and New Project
- Go to bubble.io and sign up for a free account.
- Click “New App” and give your project a name.
- Choose a blank template or a starter template relevant to your idea.
Step 3: Design Your User Interface (UI)
Use Bubble’s drag-and-drop editor to create pages and place UI elements like buttons, inputs, repeating groups, and images.
Mind Map: UI Design Elements
Example: Create a homepage with a search bar, a list of recent job postings (using a repeating group), and a signup button.
Step 4: Define Your Data Structure
Bubble uses a built-in database where you define “Data Types” and their fields.
Mind Map: Data Structure for Freelance Job Board
Example: Create the “Job” data type with fields for title, description, budget, and a reference to the client who posted it.
Step 5: Build Workflows to Add Functionality
Workflows define the logic behind user actions, such as signing up, posting jobs, or sending messages.
Mind Map: Common Workflows
Example: Workflow for “Post a Job” button:
- When clicked, check if user is logged in and is a client.
- Create a new “Job” entry in the database with form inputs.
- Show confirmation message.
Step 6: Set Up User Authentication
Bubble provides built-in user authentication.
- Add signup and login forms.
- Use workflows to sign users up and log them in.
- Manage user sessions to control access to pages.
Example: Restrict the “Post a Job” page to logged-in clients only.
Step 7: Make Your App Responsive
Use Bubble’s responsive editor to ensure your app looks good on desktop and mobile devices.
Best Practices:
- Use groups to organize elements.
- Set minimum and maximum widths.
- Test on different screen sizes.
Step 8: Test Your App Thoroughly
- Use Bubble’s preview mode to test all workflows.
- Check for bugs or unexpected behavior.
- Get feedback from potential users.
Step 9: Deploy Your App
- When ready, deploy your app to live from Bubble’s dashboard.
- Connect a custom domain if desired.
Real-World Example: Building a Simple To-Do List App
- Create a “Task” data type with fields: title (text), completed (yes/no).
- Design a page with an input field and “Add Task” button.
- Workflow: When “Add Task” clicked, create a new Task with title from input.
- Display tasks in a repeating group with checkboxes to mark completed.
- Use workflows to update the “completed” field when checkbox toggled.
Summary Mind Map: Bubble Web App Development Process
By following these steps, entrepreneurs and product managers can quickly build and launch web apps without writing a single line of code, leveraging Bubble’s powerful no-code platform.
4.3 Creating E-commerce Stores Using Shopify and No-Code Plugins
Building an e-commerce store has never been easier thanks to Shopify and a rich ecosystem of no-code plugins. Entrepreneurs, product managers, and side business founders can launch fully functional online stores without writing a single line of code. This section will guide you through the best practices, tools, and examples to create your e-commerce store efficiently.
Why Shopify?
- User-friendly: Intuitive drag-and-drop interface.
- Scalable: From small shops to large enterprises.
- Extensive app ecosystem: Thousands of no-code plugins to extend functionality.
- Secure & reliable: Handles payments, hosting, and security.
Step-by-Step Guide to Creating Your Store
- Sign Up and Choose a Plan
- Start with Shopify’s free trial to explore features.
- Select a Theme
- Use free or paid themes from Shopify’s Theme Store.
- Customize colors, fonts, and layout visually.
- Add Products
- Upload product images, descriptions, pricing, and variants.
- Set Up Payment Gateways
- Use Shopify Payments or integrate PayPal, Stripe, etc.
- Configure Shipping & Taxes
- Define shipping zones and rates.
- Install No-Code Plugins to Enhance Your Store
- Examples include:
- Oberlo: For dropshipping automation.
- Yotpo: Customer reviews and ratings.
- Klaviyo: Email marketing automation.
- ReConvert: Post-purchase upsell funnels.
- Examples include:
- Launch and Promote Your Store
- Connect your domain.
- Use built-in SEO tools.
Mind Map: Creating an E-commerce Store with Shopify and No-Code Plugins
Best Practices for Using No-Code Plugins
- Start Simple: Begin with essential plugins to avoid overwhelming your store.
- Check Compatibility: Ensure plugins work well together and with your theme.
- Monitor Performance: Some plugins can slow down your site; test loading speeds.
- Leverage Automation: Use plugins like Klaviyo to automate email campaigns based on customer behavior.
- Use Reviews to Build Trust: Yotpo or Judge.me can help collect and display customer feedback.
Example 1: Launching a Dropshipping Store
- Scenario: A side business founder wants to sell fitness accessories without holding inventory.
- Tools: Shopify + Oberlo + Klaviyo + Yotpo
Process:
- Use Oberlo to import products from suppliers.
- Customize product pages with Shopify’s theme editor.
- Automate welcome and cart abandonment emails with Klaviyo.
- Collect and showcase reviews with Yotpo.
Outcome:
- Store launched in under 2 weeks.
- Automated workflows reduce manual tasks.
- Customer trust built through authentic reviews.
Example 2: Building a Branded Boutique Store
- Scenario: An entrepreneur wants to sell handmade candles with a strong brand presence.
- Tools: Shopify + ReConvert + Google Analytics + Social Media Plugins
Process:
- Choose a premium theme that reflects the brand’s aesthetic.
- Use ReConvert to create personalized post-purchase upsell offers.
- Integrate Google Analytics for tracking user behavior.
- Add social sharing buttons to product pages.
Outcome:
- Enhanced customer experience with upsells.
- Data-driven marketing decisions.
- Increased social engagement and referrals.
Mind Map: Example Dropshipping Store Workflow
Tips for Entrepreneurs and Product Managers
- Test Before Launch: Use Shopify’s preview mode and test orders.
- Focus on UX: Simplify navigation and checkout process.
- Leverage Analytics: Use plugin insights to optimize sales funnels.
- Iterate Quickly: No-code plugins allow fast changes without developer dependency.
By combining Shopify’s powerful e-commerce platform with no-code plugins, you can build a professional, scalable online store quickly and efficiently. Whether you’re launching a side hustle or managing a product line, these tools empower you to focus on growth and customer experience without worrying about code.
4.4 Automating Workflows with Zapier and Integromat
Automation is a cornerstone of scaling any startup, especially when building with no-code tools. Zapier and Integromat (now Make) are two of the most powerful no-code automation platforms that allow entrepreneurs and product managers to connect apps, automate repetitive tasks, and streamline workflows without writing a single line of code.
What is Workflow Automation?
Workflow automation means connecting different apps and services so that when an event happens in one app, it triggers actions in other apps automatically. This saves time, reduces errors, and lets you focus on growing your business.
Why Use Zapier and Integromat?
- Zapier: User-friendly, supports thousands of apps, ideal for straightforward automations.
- Integromat (Make): More visual and flexible, supports complex multi-step workflows and data transformations.
Mind Map: Key Concepts of Workflow Automation
Step-by-Step Example: Automate Lead Capture to CRM
Scenario: When someone fills out a Typeform survey, automatically add their info to Airtable and notify your Slack channel.
Zapier Workflow:
- Trigger: New Typeform response
- Action 1: Create a new record in Airtable base
- Action 2: Send a message to Slack channel
Integromat Workflow:
- Watch Typeform responses
- Add record to Airtable
- Post message to Slack
Mind Map: Lead Capture Automation
Best Practices for Automating Workflows
- Start Small: Begin with simple automations to understand triggers and actions.
- Test Thoroughly: Always test your workflows to avoid errors.
- Use Filters and Conditions: Avoid unnecessary actions by filtering data.
- Document Your Automations: Keep a record of workflows for troubleshooting and scaling.
- Monitor Usage: Keep an eye on task limits and optimize workflows.
Advanced Example: E-commerce Order Processing
Scenario: Automate order processing from Shopify to accounting and customer communication.
Workflow:
- Trigger: New order in Shopify
- Action 1: Add order details to Google Sheets for bookkeeping
- Action 2: Create invoice in QuickBooks
- Action 3: Send order confirmation email via Gmail
- Action 4: Notify fulfillment team on Slack
Mind Map: E-commerce Order Automation
Tips for Choosing Between Zapier and Integromat
| Feature | Zapier | Integromat (Make) |
|---|---|---|
| Ease of Use | Beginner-friendly | Visual, more technical |
| Complexity | Simple to moderate workflows | Complex multi-step workflows |
| Pricing | Free tier with limited tasks | Free tier with more operations |
| Data Manipulation | Basic | Advanced (functions, iterators) |
| App Integrations | 3000+ apps | 1000+ apps |
Final Thought
Automating workflows with Zapier and Integromat empowers no-code entrepreneurs to save time, reduce errors, and focus on strategic growth. By integrating best practices and starting with clear examples, you can build powerful automations that scale your no-code startup efficiently.
4.5 Example: Building a Marketplace MVP Without Code
Building a marketplace MVP (Minimum Viable Product) without writing code is entirely achievable using modern no-code platforms. In this section, we’ll walk through a detailed example of creating a simple marketplace MVP that connects buyers and sellers, using Bubble as the core platform, complemented by Airtable for data management and Zapier for automation.
Step 1: Define Your Marketplace MVP Scope
Before building, clarify the core features your MVP needs. For a basic marketplace, consider:
- User registration and profiles (buyers and sellers)
- Product listings by sellers
- Browsing and searching products by buyers
- Messaging or inquiry system
- Simple checkout or contact process
Step 2: Mind Map of Marketplace MVP Components
Marketplace MVP Mind Map
Step 3: Building the Marketplace Using Bubble
Why Bubble? Bubble is a powerful no-code platform that allows you to build fully functional web apps with a visual editor, database, workflows, and user authentication.
Example Workflow:
-
Set up User Roles:
- Use Bubble’s built-in user system.
- Add a field
role(buyer or seller) to the User data type.
-
Create Product Data Type:
- Fields: Title, Description, Price, Image, Seller (User), Category.
-
Design Pages:
- Signup/Login Page with role selection.
- Seller Dashboard to create and manage listings.
- Marketplace Page to browse and search products.
- Product Detail Page.
-
Workflows:
- When a seller submits a new listing, save it to the database.
- Buyers can search/filter listings.
- Buyers can send inquiries via a form that triggers an email to the seller.
-
Notifications:
- Use Bubble’s email action to notify sellers of new inquiries.
Step 4: Using Airtable as Backend (Optional Hybrid Approach)
If you prefer a spreadsheet-style backend or want to manage listings externally:
- Create an Airtable base with tables for Users and Listings.
- Use Bubble’s Airtable plugin to sync data.
- Sellers add listings via Bubble forms that update Airtable.
- Buyers browse listings pulled from Airtable.
Step 5: Automate with Zapier
To enhance your MVP without coding:
- Trigger email notifications when a new listing is created.
- Send Slack messages to your team for new inquiries.
- Add new buyer inquiries to a Google Sheet for tracking.
Step 6: Example Marketplace MVP Walkthrough
Imagine building “ArtisanHub,” a marketplace connecting local artisans with customers.
- User Sign Up: Sellers sign up and select “Seller” role.
- Create Listing: Sellers upload photos, add descriptions, set prices.
- Browse Products: Buyers filter by category “Pottery,” “Jewelry,” or “Textiles.”
- Inquiry: Buyer sends a message through a contact form.
- Notification: Seller receives an email alert about the inquiry.
This MVP requires no coding but delivers core marketplace functionality.
Additional Mind Map: Workflow Automation
Marketplace Automation Mind Map
Best Practices for Marketplace MVPs Without Code
- Start Small: Focus on core features that validate your idea.
- Leverage Templates: Bubble and other platforms offer marketplace templates to speed up development.
- Iterate Based on Feedback: Use no-code tools to quickly update your MVP.
- Keep User Experience Simple: Avoid overcomplicating navigation or forms.
- Plan for Scale: Choose platforms that allow you to upgrade as your marketplace grows.
By following this example, entrepreneurs and side business founders can confidently launch a marketplace MVP without writing a single line of code, saving time and resources while validating their business idea effectively.
5. Integrating Data and Backend Services
5.1 Understanding No-Code Databases and Data Management
No-code databases are the backbone of many no-code applications, enabling entrepreneurs and product managers to store, organize, and manipulate data without writing any code. Understanding how these databases work and how to manage data effectively is crucial for building scalable and efficient no-code startups.
What is a No-Code Database?
A no-code database is a visual, user-friendly platform that allows you to create, manage, and interact with data tables, records, and relationships without programming. Unlike traditional databases requiring SQL or backend coding, no-code databases provide intuitive interfaces such as spreadsheets or forms.
Key Features of No-Code Databases
- Visual Data Modeling: Create tables and define relationships visually.
- Easy Data Entry: Use forms or spreadsheets to add and update data.
- Automation Support: Integrate with automation tools for workflows.
- Collaboration: Multiple users can access and modify data simultaneously.
- API Access: Many offer API endpoints to connect with other apps.
Popular No-Code Databases
| Platform | Description | Use Case Example |
|---|---|---|
| Airtable | Spreadsheet-database hybrid with powerful views | Managing customer data for a marketing campaign |
| Google Sheets | Cloud-based spreadsheet with add-ons and scripts | Tracking sales leads and automating follow-ups |
| Notion | All-in-one workspace with database capabilities | Content calendar and project management |
| Coda | Document and database combined with automation | Product roadmap and feature tracking |
Mind Map: No-Code Database Components
Best Practices for Data Management in No-Code Databases
-
Design Your Data Structure Thoughtfully:
- Plan tables and relationships before building.
- Avoid redundant data to maintain integrity.
-
Use Consistent Naming Conventions:
- Clear and descriptive field names.
- Standardize formats for dates, currencies, etc.
-
Leverage Views to Organize Data:
- Create filtered views for different user roles.
- Use Kanban or calendar views to visualize workflows.
-
Automate Repetitive Tasks:
- Set up triggers for notifications or data updates.
- Integrate with tools like Zapier for cross-platform automation.
-
Ensure Data Security and Access Control:
- Assign proper permissions.
- Regularly back up data.
Example 1: Using Airtable to Manage Customer Data
Imagine you are a product manager launching a new SaaS product. You want to track customer signups, feedback, and support tickets without coding.
- Step 1: Create tables for Customers, Feedback, and Support Tickets.
- Step 2: Link Feedback and Support Tickets to Customers using linked record fields.
- Step 3: Use views to filter open tickets and recent feedback.
- Step 4: Automate email notifications to the support team when a new ticket is created.
This setup requires no code but offers a powerful CRM-like system.
Mind Map: Example Airtable Setup for Customer Management
Example 2: Google Sheets as a Lightweight No-Code Database
For side business founders, Google Sheets can be a simple no-code database:
- Track inventory with columns for Item Name, Quantity, Price, and Supplier.
- Use data validation to ensure quantity is a number.
- Employ Google Sheets scripts or add-ons to send reorder alerts when stock is low.
This approach is easy to set up and integrates well with other Google Workspace tools.
Summary
Understanding no-code databases and data management empowers entrepreneurs and product managers to build robust, scalable applications without writing code. By thoughtfully designing data structures, leveraging views, and automating workflows, you can create efficient business processes that grow with your startup.
Next Up: 5.2 Using Airtable as a Backend for Your No-Code App
5.2 Using Airtable as a Backend for Your No-Code App
Airtable is a powerful, flexible, and user-friendly no-code database platform that combines the simplicity of a spreadsheet with the power of a database. It’s an excellent choice for entrepreneurs and product managers looking to build and manage the backend of their no-code applications without writing any code.
Why Use Airtable as a Backend?
- Visual and Intuitive Interface: Easy to create, modify, and understand data structures.
- Relational Database Capabilities: Link tables to create relationships, just like traditional databases.
- API Access: Airtable provides a robust API that can be connected to no-code platforms like Bubble, Softr, or Glide.
- Automation and Integration: Connect with Zapier, Integromat, or native Airtable Automations to automate workflows.
- Collaboration: Real-time collaboration with team members.
Mind Map: Airtable as Backend Overview
Setting Up Airtable for Your No-Code App
-
Create a Base: Start by creating a new base (database) in Airtable. You can start from scratch or use one of the many templates.
-
Define Tables: Each table represents a data entity, such as Users, Products, Orders, or Tasks.
-
Add Fields: Customize fields with different data types — single line text, attachments, checkboxes, dropdowns, dates, etc.
-
Link Tables: Use linked record fields to create relationships between tables, enabling relational data structures.
-
Populate Data: Add sample data or import existing data via CSV or copy-paste.
Mind Map: Setting Up Airtable Base
Example: Building a Simple CRM Backend
Imagine you want to build a CRM app without code. Here’s how you can structure your Airtable base:
| Table Name | Purpose |
|---|---|
| Contacts | Store client information (name, email, phone) |
| Companies | Store company details linked to contacts |
| Deals | Track sales opportunities linked to contacts and companies |
Fields Example:
- Contacts: Name (Text), Email (Email), Phone (Phone), Company (Linked Record to Companies)
- Companies: Name (Text), Industry (Single Select), Website (URL)
- Deals: Deal Name (Text), Amount (Currency), Status (Single Select), Contact (Linked Record), Company (Linked Record)
This relational setup allows your no-code app to query and display data dynamically.
Connecting Airtable to Your No-Code App
Most no-code platforms support Airtable integration either natively or through tools like Zapier or Integromat.
Example: Connecting Airtable to Bubble
- Use Bubble’s API Connector plugin.
- Set up API calls to Airtable endpoints (GET, POST, PATCH) using your Airtable API key.
- Fetch and display data from Airtable tables.
- Send user input back to Airtable to create or update records.
Example: Using Softr
- Softr has native Airtable integration.
- Connect your Airtable base directly.
- Use Airtable tables as data sources for lists, forms, and user profiles.
Mind Map: Integration Workflow
Best Practices When Using Airtable as Backend
- Design for Scale: Keep tables normalized; avoid duplicating data.
- Use Views: Create filtered views in Airtable to control what data your app accesses.
- Secure Your API Key: Never expose your Airtable API key publicly.
- Limit Data Load: Use pagination or filtered API calls to improve performance.
- Automate Repetitive Tasks: Use Airtable Automations or Zapier to reduce manual work.
Real-World Example: Event Management App
An entrepreneur builds an event management app with Airtable as backend:
- Tables: Events, Attendees, Venues
- Relationships: Attendees linked to Events, Events linked to Venues
- Use Airtable forms to collect attendee registrations.
- Use Zapier to send confirmation emails automatically.
- Integrate with Glide to build a mobile app showing event details and attendee lists.
This example highlights how Airtable can power complex workflows without code.
Summary
Using Airtable as a backend for your no-code app empowers you to create relational databases with ease, integrate seamlessly with popular no-code platforms, and automate workflows efficiently. By following best practices and leveraging Airtable’s rich features, you can build scalable, maintainable, and collaborative no-code applications that meet your business needs.
5.3 Connecting APIs Without Coding: Tools and Techniques
Connecting APIs (Application Programming Interfaces) is a powerful way to extend the functionality of your no-code startup by allowing different software systems to communicate seamlessly. Traditionally, API integration required programming skills, but with the rise of no-code tools, entrepreneurs, product managers, and side business founders can now connect APIs without writing a single line of code.
What is an API?
An API is a set of rules that allows different software applications to talk to each other. For example, when you use a payment gateway like Stripe or a CRM like HubSpot, APIs enable your app to send and receive data from those platforms.
Why Connect APIs Without Coding?
- Speed: Quickly integrate multiple services without waiting for developers.
- Flexibility: Easily swap or add new services as your business evolves.
- Cost-effective: Avoid expensive developer hours for simple integrations.
Mind Map: Overview of No-Code API Integration
Popular No-Code Tools for API Integration
Zapier
Zapier is one of the most popular no-code automation tools that connects over 5,000 apps. It uses a trigger-action model where an event in one app triggers an action in another.
Example: Automatically add new Typeform responses to a Google Sheets spreadsheet.
Integromat (Make)
Integromat offers advanced workflows with visual mapping and supports complex logic, routers, and iterators.
Example: When a new order is placed on Shopify, send a personalized email via Gmail and update Airtable inventory.
Pipedream
Pipedream is a developer-friendly no-code platform that allows custom API requests and event-driven workflows.
Example: Listen for Stripe payment events and post a notification to Slack.
Parabola
Parabola is focused on data workflows, allowing you to pull data from APIs, transform it, and push it elsewhere.
Example: Aggregate sales data from multiple platforms and generate weekly reports.
Automate.io
Automate.io supports multi-app workflows with conditional logic.
Example: Sync new leads from Facebook Lead Ads to HubSpot CRM and send a welcome email.
Techniques for Connecting APIs Without Coding
Pre-built Connectors
Most no-code platforms come with pre-built connectors for popular apps (e.g., Gmail, Slack, Airtable). These connectors abstract away the API complexities.
Example: Using Zapier’s Gmail connector to send emails when a new form submission occurs.
Webhooks
Webhooks are user-defined HTTP callbacks that notify your app when an event happens in another app.
Example: Receiving real-time notifications in Discord when a new Stripe payment is processed.
Custom API Calls
When pre-built connectors are not available, many no-code tools allow you to make custom API requests by specifying endpoints, headers, and parameters.
Example: Using Integromat’s HTTP module to fetch data from a niche API and push it into Airtable.
Mind Map: Steps to Connect APIs Using No-Code Tools
Detailed Example: Connecting Airtable and Slack Using Zapier
Goal: Send a Slack message every time a new record is added to an Airtable base.
- Choose Trigger: Airtable – New Record in View
- Authenticate Airtable: Connect your Airtable account and select the base and table.
- Choose Action: Slack – Send Channel Message
- Authenticate Slack: Connect your Slack workspace.
- Configure Message: Customize the message with Airtable record fields.
- Test: Run a test to ensure the message posts correctly.
- Activate: Turn on the Zap to automate the process.
This example requires zero coding but leverages powerful API connections behind the scenes.
Mind Map: Example Workflow - Automate Order Fulfillment
Best Practices for No-Code API Integration
- Start Small: Begin with simple workflows and gradually add complexity.
- Use Clear Naming: Label your triggers and actions descriptively.
- Test Thoroughly: Always test workflows before going live.
- Monitor Usage: Keep an eye on API rate limits and quotas.
- Secure Credentials: Use environment variables or built-in vaults to store API keys securely.
Summary
Connecting APIs without coding empowers entrepreneurs and product managers to build powerful, integrated no-code startups efficiently. By leveraging tools like Zapier, Integromat, and Pipedream, you can automate workflows, synchronize data, and enhance your product’s capabilities without writing a single line of code.
5.4 Best Practices for Data Security and Privacy in No-Code Apps
Ensuring data security and privacy is critical when building no-code applications, especially as these apps often handle sensitive user information. While no-code platforms simplify development, entrepreneurs and product managers must proactively implement best practices to protect data and maintain user trust.
Key Principles of Data Security and Privacy
- Confidentiality: Ensure data is accessible only to authorized users.
- Integrity: Protect data from unauthorized modification.
- Availability: Ensure data and services are available when needed.
- Compliance: Adhere to relevant regulations like GDPR, CCPA, HIPAA.
Mind Map: Core Areas of Data Security in No-Code Apps
Secure Data Storage
- Use no-code platforms that offer encrypted databases or integrate with secure data storage solutions like Airtable with encryption enabled.
- Limit data access by configuring permissions carefully; for example, in Airtable, restrict who can view or edit sensitive tables.
Example: A founder building a customer management app with Softr integrates Airtable as backend. They set Airtable views with read-only access for public users and admin-only edit permissions to protect customer data.
Encrypt Data in Transit
- Always use HTTPS to encrypt data between users and your app.
- When connecting APIs or third-party services, ensure they support secure protocols (SSL/TLS).
Example: A side business founder uses Zapier to automate data flow between a Webflow website and Mailchimp. They verify that both platforms use HTTPS for all data exchanges, ensuring customer emails are transmitted securely.
Implement Strong Authentication and Authorization
- Use platforms that support multi-factor authentication (MFA) for admin access.
- Apply role-based access control (RBAC) to limit user permissions based on roles.
Example: A product manager building an internal tool with Bubble enables MFA for all team members and configures user roles so that only managers can access financial data.
Comply with Data Privacy Regulations
- Understand which laws apply to your users (e.g., GDPR for EU citizens, CCPA for California residents).
- Use no-code tools that provide built-in compliance features such as cookie consent banners and data export options.
Example: An entrepreneur launching a SaaS product uses Cookiebot integrated with their Webflow site to manage GDPR cookie consent and includes a privacy policy generated with iubenda.
Monitor and Audit Activity
- Enable activity logs where available to track changes and access.
- Regularly review logs for suspicious activity.
Example: A side business founder uses Airtable’s revision history feature to audit changes made to customer data and sets up email alerts for unusual modifications.
Backup and Disaster Recovery
- Schedule regular backups of your data.
- Use no-code platforms that offer export options or integrate with backup services.
Example: A product manager exports Airtable data weekly and stores backups in Google Drive to ensure data can be restored if needed.
Mind Map: Practical Steps to Secure Your No-Code App
Summary
Building a no-code app does not mean compromising on security and privacy. By understanding core principles, choosing secure platforms, configuring access properly, and complying with regulations, entrepreneurs and product managers can protect their users and build trust. Regular monitoring, backups, and team education further strengthen your app’s security posture.
Additional Resources
- OWASP Top 10 Security Risks
- GDPR Compliance Guide for Startups
- No-Code Security Checklist by Makerpad
Final Example: Secure No-Code CRM Setup
A side business founder creates a CRM using Airtable and Softr:
- Airtable stores customer data with encrypted fields.
- Softr frontend uses role-based login to restrict access.
- HTTPS is enforced on the Softr app.
- Multi-factor authentication is enabled for all team members.
- Regular backups of Airtable data are scheduled.
- Privacy policy and cookie consent are displayed on the app.
This setup ensures the CRM is both functional and secure without writing any code.
5.5 Example: Creating a CRM System Using Airtable and Softr
Building a CRM (Customer Relationship Management) system is a common need for startups and small businesses. With no-code tools like Airtable and Softr, you can create a fully functional CRM without writing any code. This example will guide you through the process, illustrating best practices and providing mind maps to visualize the workflow.
Step 1: Designing Your CRM Data Structure in Airtable
Airtable acts as the backend database where you store and manage your CRM data. The first step is to plan your tables and fields.
Mind Map: Airtable CRM Data Structure
Best Practice:
- Use linked records to connect related data (e.g., Contacts linked to Companies).
- Use single select fields for statuses and stages to maintain consistency.
- Add formula fields for calculated data like deal age or total deal value.
Step 2: Populating Your Airtable Base
Start by entering sample data or importing existing customer data into your Airtable base. This helps you visualize how your CRM will function.
Example:
| Name | Phone | Company | Status | Notes | |
|---|---|---|---|---|---|
| Jane Doe | [email protected] | 123-456-7890 | Acme Corp | Lead | Interested in demo |
| John Smith | [email protected] | 987-654-3210 | Beta LLC | Customer | Contract signed |
Step 3: Building the Frontend with Softr
Softr allows you to create a web app interface that connects directly to your Airtable base.
Mind Map: Softr CRM Frontend Components
Best Practice:
- Use Softr’s list blocks to display contacts, companies, and deals.
- Implement filters and search bars for easy data access.
- Use detail pages to show linked records and related information.
- Leverage Softr’s user authentication to restrict access if needed.
Step 4: Automating Workflows
You can automate notifications and data updates using Airtable Automations or integrate Zapier/Integromat.
Example Automation:
- When a deal stage changes to ‘Closed Won’, send a congratulatory email to the sales team.
- When a new contact is added, automatically create a welcome task.
Step 5: Testing and Iteration
Test your CRM system with real users or team members. Collect feedback and iterate on the design and data structure.
Summary Mind Map: No-Code CRM System Workflow
Final Thoughts
Using Airtable and Softr together provides a powerful yet simple way to build a CRM system tailored to your startup’s needs. This no-code approach saves time, reduces costs, and allows you to focus on growing your business rather than managing complex software development.
Start small, keep your data organized, and leverage the flexibility of no-code tools to scale your CRM as your business grows.
6. Marketing Your No-Code Startup
6.1 Building a Marketing Funnel Using No-Code Tools
Building an effective marketing funnel is crucial for converting prospects into loyal customers. With no-code tools, entrepreneurs, product managers, and side business founders can design, automate, and optimize their marketing funnels without writing a single line of code. This section will guide you through the process of building a marketing funnel using no-code tools, complete with practical examples and mind maps to visualize each stage.
What is a Marketing Funnel?
A marketing funnel is a step-by-step process that guides potential customers from awareness of your product or service to making a purchase and beyond. The typical stages include:
- Awareness
- Interest
- Consideration
- Conversion
- Retention
Why Use No-Code Tools for Marketing Funnels?
- Speed: Quickly build and iterate funnels.
- Cost-Effective: Avoid hiring developers.
- Automation: Seamlessly connect different tools.
- Flexibility: Easily customize based on customer behavior.
Mind Map: Marketing Funnel Stages and No-Code Tools
Step-by-Step Guide to Building Your Marketing Funnel
Step 1: Create Awareness
- Use Canva to design eye-catching social media graphics.
- Schedule posts with Buffer to maintain a consistent presence.
- Run targeted ads via Facebook Ads Manager to reach your ideal audience.
Example: A side business founder creates a series of Instagram posts promoting a free eBook using Canva and schedules them with Buffer. They run Facebook ads targeting entrepreneurs interested in productivity tools.
Step 2: Capture Interest
- Build a simple, high-converting landing page with Carrd.
- Embed a lead magnet signup form using Typeform.
Example: The founder creates a Carrd landing page offering the free eBook in exchange for an email address collected through a Typeform survey.
Step 3: Nurture Leads
- Set up an email sequence in Mailchimp to educate and build trust.
- Automate sending follow-up emails based on user engagement.
Example: After signup, the founder sends a 5-day email course on productivity hacks using Mailchimp’s automation workflows.
Step 4: Convert Leads into Customers
- Create a sales page with Shopify or Gumroad.
- Integrate payment processing with Stripe.
- Use Zapier to connect form submissions to your CRM and email marketing tools.
Example: The founder sells an advanced productivity planner on Gumroad, with Stripe handling payments. Zapier automatically adds buyers to a VIP email list.
Step 5: Retain Customers
- Implement customer support chatbots with Tidio.
- Collect feedback using SurveyMonkey.
- Launch a loyalty program with Smile.io.
Example: Customers receive personalized support via Tidio chatbot, and after purchase, they are invited to join a loyalty program rewarding repeat purchases.
Mind Map: Example Funnel for a No-Code Productivity Tool Startup
Best Practices
- Keep it simple: Start with a minimal funnel and iterate.
- Test and optimize: Use A/B testing on landing pages and emails.
- Personalize communication: Segment your audience for targeted messaging.
- Automate repetitive tasks: Use Zapier or Integromat to connect tools.
- Monitor analytics: Track funnel metrics to identify drop-off points.
Final Thoughts
No-code tools empower you to build comprehensive marketing funnels that are scalable and adaptable. By combining visual builders, automation platforms, and communication tools, you can create a seamless customer journey that drives growth without technical barriers.
Start small, experiment often, and leverage the power of no-code to turn prospects into lifelong customers.
6.2 Creating Content and Social Media Campaigns Without Coding
Creating engaging content and running effective social media campaigns are essential for growing your no-code startup’s audience and driving conversions. The good news is that you don’t need to write a single line of code to do this. There are numerous no-code tools and best practices that empower entrepreneurs, product managers, and side business founders to build compelling campaigns quickly and efficiently.
Why No-Code Content & Social Media Campaigns?
- Speed: Launch campaigns faster without waiting on developers.
- Flexibility: Easily tweak and optimize content based on real-time feedback.
- Cost-Effective: Reduce expenses by using affordable or free no-code tools.
Key Components of a No-Code Social Media Campaign
Step 1: Content Creation Without Code
Tools & Examples
- Canva: Drag-and-drop graphic design tool for creating social media images, infographics, and presentations.
- Example: Create branded Instagram posts using Canva templates.
- Lumen5: Turn blog posts into engaging videos automatically.
- Example: Convert a product tutorial blog into a short video for LinkedIn.
- Anchor: No-code podcast creation platform.
- Example: Launch a weekly podcast discussing industry trends.
Best Practices
- Use consistent branding (colors, fonts, logos).
- Repurpose content across formats (e.g., blog post → infographic → video).
- Keep posts concise and visually appealing.
Step 2: Scheduling & Publishing
Tools & Examples
- Buffer: Schedule posts across multiple platforms (Twitter, Facebook, LinkedIn, Instagram).
- Example: Schedule a week’s worth of posts in one sitting.
- Later: Visual content calendar especially good for Instagram.
- Example: Plan and preview Instagram feed layout.
Best Practices
- Post at times when your audience is most active.
- Maintain a consistent posting frequency.
- Use scheduling tools’ analytics to refine timing.
Step 3: Engagement & Community Building
Tools & Examples
- Typeform: Create interactive polls or surveys embedded in social posts.
- Example: Run a poll asking followers which feature they want next.
- Gleam: Run contests and giveaways to boost engagement.
- Example: Giveaway entry by sharing a post or tagging friends.
Best Practices
- Respond promptly to comments and messages.
- Encourage user-generated content.
- Use interactive content to increase participation.
Step 4: Analytics & Optimization
Tools & Examples
- Google Analytics: Track traffic from social campaigns to your website.
- Native Social Media Insights: Use Facebook Insights, Twitter Analytics, Instagram Insights.
- A/B Testing Tools: Use tools like Optimizely or Google Optimize (no-code setup) to test headlines or images.
Best Practices
- Monitor key metrics: engagement rate, click-through rate, conversions.
- Adjust content strategy based on data.
- Experiment with different content types and posting times.
Mind Map: End-to-End No-Code Social Media Campaign Workflow
Real-World Example: Launching a Product Awareness Campaign
Scenario: A side business founder launching a new productivity app wants to create buzz on social media.
- Content Creation: Uses Canva to design branded Instagram posts and Lumen5 to create a short demo video.
- Scheduling: Plans posts for the next two weeks using Buffer, targeting peak engagement times.
- Engagement: Runs a Typeform poll asking followers which feature excites them most, shared via Twitter and LinkedIn.
- Analytics: Monitors engagement and traffic via Instagram Insights and Google Analytics.
- Optimization: Notices higher engagement on video posts, increases video content frequency.
Summary
Creating content and social media campaigns without coding is entirely achievable with the right no-code tools and strategies. By following a structured workflow—from ideation to optimization—you can build meaningful connections with your audience, promote your startup effectively, and grow your business without technical barriers.
6.3 Email Marketing Automation with Mailchimp and No-Code Integrations
Email marketing remains one of the most effective channels for startups to engage with their audience, nurture leads, and drive conversions. For no-code entrepreneurs, leveraging tools like Mailchimp combined with no-code integrations can automate and scale these efforts without writing a single line of code.
Why Email Marketing Automation?
- Saves time by automating repetitive tasks
- Personalizes communication based on user behavior
- Improves engagement and conversion rates
- Enables targeted campaigns for different audience segments
Getting Started with Mailchimp
Mailchimp is a popular no-code email marketing platform that allows you to create, send, and analyze email campaigns with ease.
Key Features:
- Drag-and-drop email builder
- Audience segmentation
- Pre-built automation workflows
- Analytics and reporting
Setting Up Your First Automation Workflow
- Create an Audience: Import your contacts or collect emails via forms.
- Segment Your Audience: Group contacts based on behavior, demographics, or engagement.
- Design Your Email: Use Mailchimp’s drag-and-drop editor to create visually appealing emails.
- Choose an Automation Trigger: Examples include welcome emails, abandoned cart reminders, or birthday wishes.
- Set Up Follow-Up Emails: Create sequences to nurture leads over time.
Mind Map: Email Marketing Automation Workflow
No-Code Integrations to Supercharge Mailchimp
No-code automation platforms like Zapier, Integromat (Make), and Pabbly Connect allow you to connect Mailchimp with hundreds of other apps, automating workflows without coding.
Common Integrations:
- Form Builders: Automatically add new leads from Typeform, Google Forms, or Jotform to your Mailchimp audience.
- E-commerce: Sync Shopify or WooCommerce purchase data to trigger personalized emails.
- CRM: Connect HubSpot or Airtable to keep contact data updated.
- Social Media: Add new followers or webinar registrants to email lists.
Example 1: Automating Lead Capture from a Typeform Survey
Goal: When a user submits a Typeform survey, their email and responses are automatically added to a Mailchimp audience and tagged for segmentation.
Steps:
- Create a Typeform with relevant questions.
- Use Zapier to create a Zap:
- Trigger: New Typeform Entry
- Action: Add/Update Subscriber in Mailchimp
- Map survey answers to Mailchimp tags or merge fields
Outcome: New leads are segmented automatically for targeted campaigns.
Example 2: Sending Abandoned Cart Emails via Shopify and Mailchimp
Goal: Automatically send an email reminder to customers who added items to their cart but didn’t complete the purchase.
Steps:
- Connect Shopify to Mailchimp using a no-code integration tool.
- Set up an automation in Mailchimp triggered by “Abandoned Cart” events.
- Customize the email with product details and a call-to-action.
Outcome: Recover lost sales through timely, personalized emails.
Mind Map: No-Code Email Automation Integrations
Best Practices for Email Marketing Automation
- Segment Your Audience: Tailor messages based on interests and behaviors.
- Personalize Content: Use merge tags to include names, preferences, or past purchases.
- Test Your Emails: A/B test subject lines, content, and send times.
- Monitor Analytics: Track open rates, click-throughs, and conversions to optimize.
- Respect Privacy: Ensure compliance with GDPR and CAN-SPAM by including unsubscribe options.
Final Tip: Combining No-Code Tools for Maximum Impact
For example, you can use:
- Carrd to build a landing page capturing emails,
- Zapier to automate adding those emails to Mailchimp,
- Mailchimp to send automated welcome sequences,
- Airtable to manage and segment your contacts,
- Integromat to sync data across platforms.
This ecosystem of no-code tools empowers entrepreneurs to build sophisticated email marketing funnels without writing code.
By mastering email marketing automation with Mailchimp and no-code integrations, entrepreneurs and product managers can nurture leads efficiently, increase customer engagement, and grow their startups sustainably.
6.4 Tracking and Analytics Setup for No-Code Startups
Tracking and analytics are essential for understanding your users, optimizing your marketing efforts, and making data-driven decisions. For no-code startups, setting up effective tracking doesn’t require coding skills but does require a strategic approach and the right tools.
Why Tracking and Analytics Matter
- Measure user engagement and behavior
- Identify bottlenecks and drop-off points
- Optimize conversion funnels
- Track marketing campaign performance
- Inform product development and feature prioritization
Key Metrics to Track
- Traffic Sources: Where are your visitors coming from?
- User Behavior: Pages visited, session duration, bounce rate
- Conversion Rates: Sign-ups, purchases, form submissions
- Retention: Returning users, churn rate
- Revenue Metrics: Average order value, lifetime value
Mind Map: Core Components of Tracking Setup
Step-by-Step Guide to Setting Up Tracking
Choose Your Analytics Platform
- Google Analytics: Most popular, free, powerful for website tracking.
- Plausible Analytics: Privacy-focused, simple interface.
- Mixpanel / Amplitude: Advanced event-based analytics, great for apps.
Install Tracking Code
- For websites built with no-code tools like Webflow or Carrd, you can usually add tracking scripts in the settings.
- Example: In Webflow, go to Project Settings > Custom Code > Head Code and paste your Google Analytics script.
Define and Track Key Events
- Identify important user actions (e.g., sign-up button clicks, checkout completions).
- Use built-in event tracking or tools like Google Tag Manager (GTM) for more control.
Use UTM Parameters for Campaign Tracking
- Append UTM tags to your marketing URLs to track source, medium, and campaign.
- Example:
https://yourstartup.com?utm_source=facebook&utm_medium=cpc&utm_campaign=launch
Set Up Dashboards and Reports
- Use Google Data Studio or built-in dashboards in Mixpanel to visualize data.
- Automate reports to receive weekly or monthly summaries.
Mind Map: Example Workflow for Tracking Setup Using Google Analytics & Zapier
Practical Example: Tracking Sign-Ups on a No-Code Landing Page
Scenario: You built a landing page on Carrd to validate a SaaS idea. You want to track how many visitors sign up for your waitlist.
Steps:
- Add Google Analytics to Carrd:
- Paste GA tracking code in Carrd’s site settings.
- Create a ‘Thank You’ page:
- After form submission, redirect users to a thank you page.
- Set up a Goal in Google Analytics:
- Define a destination goal for the thank you page URL.
- Use UTM parameters in your marketing links:
- Track which campaigns drive sign-ups.
- Analyze data:
- Check conversion rate from visitors to sign-ups.
Best Practices
- Start simple: Focus on a few key metrics first.
- Test your tracking: Use tools like Google Tag Assistant to verify setup.
- Respect privacy: Comply with GDPR and CCPA; use cookie consent banners.
- Regularly review data: Schedule weekly check-ins to analyze trends.
- Combine qualitative data: Use surveys or feedback alongside analytics.
Additional Tools for No-Code Analytics
- Hotjar / Crazy Egg: Heatmaps and session recordings to understand user behavior visually.
- Segment: Centralizes data collection and routes it to multiple analytics tools.
- Heap Analytics: Automatically captures all user interactions without manual event setup.
Summary
Setting up tracking and analytics for your no-code startup empowers you to make informed decisions, optimize user experience, and grow efficiently. By leveraging no-code friendly tools and following best practices, you can build a robust data infrastructure without writing a single line of code.
6.5 Example: Launching a Product Campaign Using Webflow and Zapier
Launching a product campaign effectively is crucial for gaining traction and converting visitors into customers. Using no-code tools like Webflow and Zapier, entrepreneurs can build, automate, and optimize their marketing campaigns without writing a single line of code. This section walks you through a detailed example of launching a product campaign using these tools, complete with mind maps and practical examples.
Step 1: Build a High-Converting Landing Page in Webflow
Best Practice: Focus on clarity, strong calls-to-action (CTAs), and mobile responsiveness.
- Use Webflow’s visual designer to create a landing page that highlights your product’s value proposition.
- Include sections such as:
- Hero with headline and CTA button
- Features and benefits
- Social proof (testimonials, reviews)
- Email capture form
Example: A SaaS startup launches a landing page showcasing their new project management tool.
Step 2: Connect Webflow Form to Zapier for Automation
Best Practice: Automate lead capture and follow-up to save time and ensure no leads slip through.
- Use Webflow’s form element to collect visitor emails.
- In Zapier, create a Zap that triggers when a new Webflow form submission occurs.
- Actions in Zap:
- Add the lead to an email marketing platform (e.g., Mailchimp, ConvertKit).
- Send a personalized welcome email.
- Add the lead to a CRM or Google Sheets for tracking.
Example: When a visitor submits their email, Zapier adds them to Mailchimp and sends a welcome email with a product demo video link.
Step 3: Set Up Email Marketing Campaign
Best Practice: Use segmented and personalized emails to nurture leads.
- Design an email sequence in your email marketing tool.
- Include:
- Introduction to the product
- Benefits and use cases
- Customer testimonials
- Limited-time offers or discounts
Example: A 5-email drip campaign sent over two weeks to onboard and convert leads.
Step 4: Track Campaign Performance
Best Practice: Use analytics to monitor form submissions, email open rates, and conversions.
- Integrate Google Analytics with Webflow to track page visits and goal completions.
- Use Zapier to send conversion data to Google Sheets or a dashboard tool.
Example: Tracking the number of signups from the landing page and email click-through rates.
Step 5: Iterate and Optimize
Best Practice: Use A/B testing on Webflow landing pages and email subject lines.
- Create multiple versions of the landing page with different headlines or CTAs.
- Test email subject lines and content for better engagement.
- Use Zapier to segment leads based on behavior and send targeted follow-ups.
Example: Testing two different CTAs “Get Started Free” vs. “Watch Demo” to see which converts better.
Summary
By combining Webflow’s powerful visual website builder with Zapier’s automation capabilities, entrepreneurs can launch sophisticated product campaigns without coding. This approach saves time, reduces errors, and allows for rapid iteration based on real user data.
Key Takeaways:
- Build visually appealing, responsive landing pages with Webflow.
- Automate lead capture and follow-up with Zapier.
- Nurture leads through personalized email campaigns.
- Track and analyze campaign performance continuously.
- Use A/B testing and segmentation to optimize conversions.
This no-code workflow empowers entrepreneurs and product managers to focus on strategy and creativity while leveraging automation to handle repetitive tasks.
7. Managing Operations and Customer Support
7.1 Streamlining Customer Support with No-Code Chatbots
Customer support is a critical aspect of any startup, but it can quickly become overwhelming as your user base grows. No-code chatbots offer an efficient, scalable, and cost-effective way to handle common customer inquiries, provide instant responses, and free up your team to focus on more complex issues.
Why Use No-Code Chatbots for Customer Support?
- 24/7 Availability: Chatbots can respond to customers anytime, improving satisfaction.
- Instant Responses: Reduce wait times and improve user experience.
- Cost Efficiency: Automate repetitive tasks without hiring a large support team.
- Scalability: Easily handle increasing volumes of requests.
- Data Collection: Gather insights on customer needs and pain points.
Mind Map: Benefits of No-Code Chatbots
How to Build a No-Code Chatbot for Customer Support
-
Choose a No-Code Chatbot Platform:
- Examples: Chatfuel, ManyChat, Tars, Landbot, MobileMonkey
- Consider platform integrations (e.g., Facebook Messenger, website embedding, WhatsApp).
-
Define Common Customer Queries:
- FAQs
- Order status
- Product information
- Troubleshooting
-
Design Conversation Flows:
- Use drag-and-drop builders to create decision trees.
- Include quick replies, buttons, and fallback options.
-
Integrate with Backend Systems:
- Connect to CRM (e.g., Airtable, HubSpot) or order management systems.
- Use Zapier or Integromat to automate data sync.
-
Test and Deploy:
- Test chatbot responses thoroughly.
- Embed on website or social channels.
-
Monitor and Optimize:
- Analyze chatbot conversations.
- Update flows based on user feedback.
Mind Map: Building a No-Code Chatbot
Best Practices for No-Code Chatbots in Customer Support
- Keep Conversations Simple and Clear: Avoid jargon and keep responses concise.
- Provide Easy Escalation: Allow users to connect with a human agent if needed.
- Personalize Interactions: Use customer data to tailor responses.
- Use Visual Elements: Buttons, images, and quick replies improve engagement.
- Regularly Update Content: Reflect new FAQs, policies, or product changes.
Example 1: Using Landbot to Support an E-commerce Store
- Scenario: An online clothing store wants to reduce support tickets about order tracking and return policies.
- Implementation:
- Built a chatbot with Landbot embedded on the website.
- Created flows for order status by asking for order number and checking status via Airtable integration.
- Added return policy FAQs with quick reply buttons.
- Included a fallback option to chat with a human agent during business hours.
- Result: Reduced support tickets by 40%, improved customer satisfaction scores.
Example 2: Chatfuel for SaaS Customer Onboarding
- Scenario: A SaaS startup needs to onboard new users and answer common setup questions.
- Implementation:
- Used Chatfuel to build a Facebook Messenger chatbot.
- Created step-by-step onboarding guides triggered by user questions.
- Integrated with Google Sheets to track user progress.
- Set up automated reminders for incomplete onboarding steps.
- Result: Increased onboarding completion rate by 30%, reduced manual support workload.
Mind Map: Example Use Cases
Tools to Explore
| Tool | Key Features | Best For |
|---|---|---|
| Landbot | Visual flow builder, web embedding | Website chatbots, lead gen |
| Chatfuel | Facebook Messenger integration | Social media support |
| ManyChat | Multi-channel, marketing automation | Marketing + support combo |
| Tars | Conversational landing pages | Lead qualification |
| MobileMonkey | Omnichannel chatbot platform | Multi-platform engagement |
Final Tips
- Start small: automate the most frequent questions first.
- Continuously gather user feedback to improve chatbot flows.
- Combine chatbots with human support for best results.
- Leverage analytics to identify new automation opportunities.
By integrating no-code chatbots into your customer support strategy, you can provide faster, more consistent service while scaling your startup efficiently without writing a single line of code.
7.2 Managing Projects and Teams Using No-Code Tools like Notion and Trello
Effective project and team management is crucial for any startup, and no-code tools like Notion and Trello empower entrepreneurs, product managers, and side business founders to organize, collaborate, and track progress without writing a single line of code. This section explores best practices and practical examples to help you harness these tools for your no-code startup.
Why Use No-Code Project Management Tools?
- Accessibility: No technical expertise required.
- Flexibility: Adaptable to various workflows and team sizes.
- Collaboration: Real-time updates and communication.
- Integration: Connect with other no-code tools to automate workflows.
Overview of Notion and Trello
| Feature | Notion | Trello |
|---|---|---|
| Interface | All-in-one workspace with pages, databases, docs | Kanban-style boards with cards and lists |
| Use Cases | Documentation, project tracking, knowledge base | Task management, sprint planning, workflows |
| Collaboration | Comments, mentions, shared pages | Comments, attachments, integrations |
| Automation | Limited native, enhanced with Zapier/Integromat | Butler automation for repetitive tasks |
Best Practices for Managing Projects and Teams
Define Clear Project Goals and Milestones
- Use Notion databases or Trello boards to outline objectives.
- Break down goals into actionable tasks.
Create Transparent Task Assignments
- Assign tasks to team members with due dates.
- Use labels or tags to indicate priority and status.
Establish Consistent Communication Channels
- Use comments and mentions to keep conversations contextual.
- Integrate Slack or email notifications for updates.
Track Progress Visually
- Use Kanban boards in Trello or Notion to visualize workflows.
- Employ progress bars or status properties in Notion databases.
Automate Repetitive Tasks
- In Trello, use Butler to automate card movements.
- In Notion, connect with Zapier to sync tasks with calendars or messaging apps.
Mind Map: Project Management Workflow Using Notion
Mind Map: Team Collaboration with Trello
Example 1: Using Notion to Manage a Product Launch
Scenario: A side business founder is launching a new digital product and wants to keep track of all tasks, deadlines, and team responsibilities.
Implementation:
- Create a Notion page titled “Product Launch 2024.”
- Add a database table with columns: Task, Owner, Status (To Do, In Progress, Done), Priority, Due Date.
- Use the Kanban view to visualize tasks by status.
- Assign tasks to team members by tagging their Notion accounts.
- Use comments on tasks for updates and clarifications.
- Integrate with Google Calendar via Zapier to sync deadlines.
Outcome: The team has a centralized, transparent system to monitor progress and communicate effectively without juggling multiple apps.
Example 2: Organizing a Marketing Campaign with Trello
Scenario: An entrepreneur managing a small marketing team wants to organize content creation and campaign rollout.
Implementation:
- Set up a Trello board named “Q3 Marketing Campaign.”
- Create lists: Ideas, To Do, In Progress, Review, Published.
- Add cards for each content piece or campaign task.
- Assign team members and set due dates.
- Use Butler automation to move cards to “Review” when checklists are completed.
- Attach relevant files and add comments for feedback.
Outcome: The marketing team enjoys a clear visual workflow and automated task transitions, reducing manual updates and improving delivery speed.
Tips for Maximizing Efficiency
- Templates: Use or create templates in Notion and Trello for recurring projects.
- Integrations: Connect with Slack, Google Drive, or email to centralize communication.
- Mobile Access: Both tools have mobile apps to manage projects on the go.
- Regular Reviews: Schedule weekly check-ins using these tools to update statuses and reprioritize.
Summary
Managing projects and teams with no-code tools like Notion and Trello enables startups to stay organized, foster collaboration, and maintain agility. By leveraging visual task tracking, clear assignments, and automation, entrepreneurs can focus more on building their business and less on managing complexity.
7.3 Automating Billing and Subscription Management
Managing billing and subscriptions manually can be time-consuming and error-prone, especially as your no-code startup grows. Automating these processes not only saves time but also reduces mistakes, improves customer experience, and ensures timely payments. In this section, we’ll explore best practices, tools, and examples to help you automate billing and subscription management effectively.
Why Automate Billing and Subscription Management?
- Accuracy: Reduce human errors in invoicing and payments.
- Efficiency: Save time on repetitive tasks.
- Scalability: Handle growing customer base without extra manual work.
- Customer Satisfaction: Provide seamless payment experiences.
- Cash Flow: Ensure timely payments and reduce churn.
Key Components to Automate
Popular No-Code Tools for Billing Automation
| Tool | Use Case | Key Features |
|---|---|---|
| Stripe | Payment processing & subscriptions | Flexible billing, webhooks, invoicing |
| Memberstack | Membership & subscription management | Easy integration with no-code sites, gated content |
| Payhere | Simple payment & subscription management | Recurring payments, embeddable forms |
| Zapier | Workflow automation | Connects billing tools to CRMs, emails, etc. |
| Integromat | Advanced automation | Complex workflows, multi-step automations |
Best Practices for Automating Billing & Subscription Management
- Choose the Right Payment Processor: Pick one that supports your business model (e.g., subscription, one-time payments).
- Set Up Clear Subscription Plans: Define tiers, trial periods, and cancellation policies.
- Automate Invoice Generation and Delivery: Use tools that send invoices automatically after payment or subscription activation.
- Implement Payment Reminders and Dunning: Automatically notify customers of failed payments and retry.
- Integrate with Accounting and CRM: Sync payment data for bookkeeping and customer management.
- Test Your Workflow Thoroughly: Simulate payments, cancellations, and renewals to ensure smooth operation.
Example 1: Automating Subscription Billing Using Stripe & Zapier
Scenario: A SaaS startup wants to automate subscription billing, send welcome emails, and update CRM records.
Workflow:
How to implement:
- Use Stripe’s subscription API to manage plans.
- Connect Stripe to Zapier to trigger workflows on subscription events.
- Use Zapier to send emails and update CRM automatically.
Example 2: Managing Membership Subscriptions with Memberstack & Webflow
Scenario: A content creator wants to offer tiered memberships on their Webflow site with automated billing and content access.
Workflow:
How to implement:
- Design membership tiers in Memberstack.
- Embed Memberstack signup forms on Webflow.
- Configure gated content in Webflow tied to Memberstack memberships.
- Memberstack handles billing and notifications.
Example 3: Automating Billing for a Subscription Box Service Using Payhere & Airtable
Scenario: A subscription box business wants to automate monthly billing and track customer subscriptions in Airtable.
Workflow:
How to implement:
- Use Payhere to set up recurring payments.
- Connect Payhere to Airtable via Zapier or Integromat for real-time data sync.
- Use Airtable to manage customer info and subscription status.
Tips for Smooth Automation
- Start Small: Automate core billing functions first, then add complexity.
- Monitor Regularly: Check logs and reports to catch issues early.
- Communicate Clearly: Keep customers informed about billing cycles and changes.
- Backup Data: Regularly export billing data for security and compliance.
Automating billing and subscription management is a critical step for any no-code startup aiming to scale efficiently. Leveraging the right tools and workflows ensures your business runs smoothly, freeing you to focus on growth and customer satisfaction.
7.4 Best Practices for Customer Relationship Management Without Code
Customer Relationship Management (CRM) is essential for startups to build lasting relationships, improve customer satisfaction, and drive growth. No-code tools make CRM accessible without technical expertise, enabling entrepreneurs, product managers, and side business founders to manage their customer interactions efficiently.
Key Best Practices for No-Code CRM
Centralize Customer Data
- Use no-code databases like Airtable or Notion to consolidate customer information.
- Keep contact details, interaction history, and preferences in one place.
Automate Routine Tasks
- Automate follow-ups, reminders, and data entry using tools like Zapier or Integromat.
- Set triggers for onboarding emails or feedback requests.
Segment Your Customers
- Categorize customers based on behavior, purchase history, or demographics.
- Use segmentation to personalize communication and offers.
Track Customer Interactions
- Log calls, emails, and meetings to maintain context.
- Use no-code tools like HubSpot CRM (free tier) or Streak (Gmail integration).
Use Visual Pipelines
- Visualize sales or support pipelines with tools like Trello or Pipefy.
- Track progress and identify bottlenecks easily.
Integrate Communication Channels
- Connect email, chat, and social media platforms for unified messaging.
- Use tools like ManyChat for chatbots or Mailchimp for email campaigns.
Analyze and Improve
- Use dashboards in Airtable or Google Data Studio to monitor KPIs.
- Continuously refine your CRM processes based on data insights.
Mind Map: No-Code CRM Best Practices
Example 1: Using Airtable + Zapier for CRM Automation
Scenario: A side business founder wants to manage customer inquiries and automate follow-ups without coding.
Setup:
- Airtable base to store customer info and inquiry status.
- Web form (Typeform) integrated with Airtable.
- Zapier automation to send a personalized thank-you email after form submission.
Outcome:
- Customer data is centralized.
- Follow-up emails are sent automatically.
- The founder can track inquiry status visually in Airtable.
Example 2: Visual Sales Pipeline with Trello
Scenario: An entrepreneur managing a small sales team wants to track leads and deals.
Setup:
- Trello board with lists: New Leads, Contacted, Proposal Sent, Negotiation, Closed Won/Lost.
- Cards represent individual leads with customer info and notes.
- Integrate Trello with Gmail using Butler automation to log email interactions.
Outcome:
- Sales process is transparent and easy to manage.
- Team collaboration improves.
- No coding required to maintain pipeline.
Example 3: Integrating Customer Support Chatbot with ManyChat
Scenario: A product manager wants to provide instant support on Facebook Messenger.
Setup:
- ManyChat chatbot configured to answer FAQs and collect customer info.
- Data synced to Airtable for follow-up.
- Zapier triggers email alerts for complex queries.
Outcome:
- Customers receive immediate responses.
- Support team focuses on high-priority issues.
- Customer data is captured seamlessly.
Summary
No-code CRM empowers startups to manage customer relationships effectively without writing code. By centralizing data, automating tasks, segmenting customers, tracking interactions, visualizing pipelines, integrating communication, and analyzing results, entrepreneurs can build stronger customer connections and scale their businesses efficiently.
Embrace no-code CRM tools and best practices to transform your customer management strategy today!
7.5 Example: Running a Subscription Service Using Stripe and Memberstack
Running a subscription-based business without writing code is entirely feasible using powerful no-code tools like Stripe for payment processing and Memberstack for user authentication and membership management. This section will walk you through how to set up a subscription service, best practices, and provide illustrative mind maps to visualize the workflow.
Overview
- Stripe: Handles payment processing, subscription billing, invoicing, and financial reporting.
- Memberstack: Manages user sign-ups, login, gated content, and integrates seamlessly with Stripe for subscription management.
Step 1: Define Your Subscription Model
Before building, clarify your subscription tiers, pricing, and user benefits.
Example:
| Tier | Price (Monthly) | Features |
|---|---|---|
| Basic | $10 | Access to standard content |
| Premium | $25 | Access to premium content + community |
| Enterprise | $50 | All features + 1-on-1 coaching |
Step 2: Set Up Stripe
- Create a Stripe account.
- Define your products and pricing plans matching your subscription tiers.
- Enable webhooks to notify Memberstack about payment events.
Best Practice: Use Stripe’s test mode extensively before going live.
Step 3: Configure Memberstack
- Create a Memberstack account and connect it to your website builder (e.g., Webflow).
- Set up membership plans corresponding to your Stripe products.
- Link Memberstack membership plans to Stripe pricing plans for automatic billing.
- Configure gated content or features based on membership levels.
Step 4: Integrate Stripe and Memberstack
Memberstack handles the authentication and subscription logic, while Stripe manages payments. The integration ensures:
- Users can sign up and subscribe without leaving your site.
- Memberstack updates user access based on payment status.
- Automatic handling of subscription renewals, cancellations, and upgrades.
Mind Map: Subscription Service Workflow
Step 5: Build Your Website with Gated Content
- Use a no-code website builder like Webflow, Wix, or Squarespace.
- Design pages for each subscription tier.
- Use Memberstack to restrict access to premium content.
Example:
- Public homepage with subscription info.
- Login/signup page powered by Memberstack.
- Members-only dashboard with exclusive resources.
Step 6: Automate Customer Communication
- Use Memberstack’s integrations or tools like Zapier to automate welcome emails, payment reminders, and subscription updates.
Example Automation:
- New user signs up → Zapier triggers a welcome email.
- Payment fails → Zapier sends a retry notification.
Real-World Example: Yoga Online Subscription
Scenario: An entrepreneur launches an online yoga class subscription.
- Tiers: Basic (video library), Premium (live classes), VIP (personal coaching).
- Tools: Webflow for site, Memberstack for membership, Stripe for payments.
Process:
- Define tiers and pricing.
- Set up Stripe products.
- Configure Memberstack with gated video pages.
- Integrate Stripe for billing.
- Automate email reminders for class schedules.
This setup allows the entrepreneur to focus on content creation while the platform handles payments and user management seamlessly.
Additional Mind Map: Customer Journey
Best Practices
- Clear Pricing: Make subscription tiers and benefits transparent.
- Seamless UX: Minimize friction during signup and payment.
- Test Thoroughly: Use Stripe test mode and Memberstack preview.
- Automate Communication: Keep users informed about billing and content updates.
- Monitor Analytics: Track subscription growth and churn.
Summary
Using Stripe and Memberstack together empowers entrepreneurs and side business founders to launch and manage subscription services without writing code. This combination handles complex payment workflows and membership gating, allowing you to focus on delivering value to your customers.
For more detailed tutorials, check out the official documentation of Stripe and Memberstack.
8. Scaling Your No-Code Startup
8.1 Identifying When to Scale Your No-Code Product
Scaling a no-code product is a critical milestone in your startup journey. Knowing when and how to scale can make the difference between sustainable growth and overwhelming challenges. This section will guide you through key indicators, best practices, and examples to help you identify the right time to scale your no-code business.
Key Indicators That Signal It’s Time to Scale
- Consistent User Growth: A steady increase in active users or customers over several weeks or months.
- Validated Product-Market Fit: Positive feedback, low churn rates, and repeat usage indicate your product solves real problems.
- Revenue Growth and Stability: Increasing revenue streams that cover operational costs and show profit potential.
- Operational Bottlenecks: Manual processes or customer support demands that slow down your ability to serve users.
- Market Demand Outpaces Capacity: Requests for new features, integrations, or geographic expansion.
Mind Map: Signs It’s Time to Scale Your No-Code Product
Best Practices for Assessing Scale Readiness
-
Analyze Your Data: Use no-code analytics tools like Google Analytics, Mixpanel, or Amplitude integrated via platforms like Zapier to track user behavior and growth trends.
-
Gather Customer Feedback: Regularly collect feedback through Typeform surveys or Intercom chats to understand user satisfaction and feature requests.
-
Evaluate Operational Capacity: Identify repetitive manual tasks that could be automated with tools like Integromat or Zapier to prepare for increased demand.
-
Financial Forecasting: Use Airtable or Coda to build simple financial models that project revenue, costs, and cash flow under scaling scenarios.
-
Test Infrastructure Limits: Monitor your no-code platform’s performance and understand its limitations to avoid downtime during scale.
Example: Scaling a No-Code Marketplace MVP
Background: Sarah launched a no-code marketplace using Bubble to connect freelance designers with clients. After 6 months, her user base grew from 100 to 2,000 active users monthly.
Indicators to Scale:
- User requests for mobile app access increased.
- Customer support inquiries doubled, causing delays.
- Revenue from commissions covered platform costs and generated profit.
Actions Taken:
- Automated customer onboarding and support FAQs using Landbot chatbot.
- Integrated payment processing with Stripe to handle higher transaction volumes.
- Started building a hybrid mobile app using Adalo for better mobile experience.
Mind Map: Steps to Prepare for Scaling
Summary
Identifying when to scale your no-code product involves a combination of quantitative data and qualitative insights. By monitoring user growth, financial health, operational capacity, and market demand, you can make informed decisions to expand your startup sustainably. Leveraging no-code tools for automation, analytics, and customer engagement will ease the scaling process and prepare your business for the next phase of growth.
8.2 Optimizing Performance and User Experience at Scale
As your no-code startup grows, optimizing performance and user experience (UX) becomes critical to retain users and ensure smooth operation. Scaling a no-code product involves addressing speed, reliability, and usability challenges that arise with increased traffic and data.
Key Areas to Focus on When Scaling
Performance Optimization
Load Times & Server Response
- Use CDN (Content Delivery Networks) to serve static assets faster.
- Optimize images and media files for web delivery.
- Minimize the use of heavy plugins or unnecessary third-party scripts.
Example: A marketplace built on Bubble noticed slow load times during peak hours. By integrating Cloudflare CDN and compressing images using TinyPNG, they reduced page load times from 8 seconds to under 3 seconds.
Caching
- Implement caching strategies to reduce server load.
- Use no-code tools that support caching or integrate with caching services.
Example: A SaaS dashboard created with Softr integrated with Airtable used caching plugins to store frequently requested data, reducing API calls and improving responsiveness.
Database Optimization
- Structure your Airtable or other no-code databases efficiently.
- Archive or paginate large datasets instead of loading everything at once.
Example: An event management app using Airtable switched from loading all attendees at once to paginated views, improving load times and reducing crashes.
Enhancing User Experience (UX)
Responsive Design
- Ensure your product works seamlessly across devices.
- Use no-code platforms with built-in responsive design capabilities.
Example: A fitness coaching app built on Adalo leveraged its responsive design features to provide a consistent experience on both mobile and desktop.
Accessibility
- Follow accessibility best practices (e.g., color contrast, keyboard navigation).
- Use tools like Webflow’s accessibility checker.
Example: A content platform built with Webflow improved user retention by redesigning their site to meet WCAG standards, making it accessible to users with disabilities.
Intuitive Navigation
- Simplify menus and reduce clicks to key features.
- Use user feedback to iterate navigation flows.
Example: A no-code CRM built on Glide simplified its sidebar navigation after user surveys, resulting in a 20% increase in feature adoption.
Personalization
- Use user data to tailor content or features.
- Integrate no-code automation tools to customize experiences.
Example: An e-commerce store on Shopify used Klaviyo and Zapier to send personalized product recommendations based on browsing behavior.
Monitoring & Analytics
- Use tools like Google Analytics, Hotjar, or Mixpanel to track user behavior.
- Set up performance monitoring with tools like Pingdom or UptimeRobot.
- Implement error reporting and automated alerts to catch issues early.
Example: A no-code SaaS used Mixpanel to identify drop-off points in their onboarding funnel and improved user retention by redesigning those steps.
Automation for Scalability
- Automate repetitive tasks and workflows using Zapier, Integromat (Make), or n8n.
- Use auto-scaling features if your no-code platform supports it.
- Set up notifications for critical events (e.g., payment failures, support tickets).
Example: A subscription box startup automated order processing and customer notifications using Zapier, reducing manual work by 70% as their customer base grew.
Summary Checklist for Optimizing Performance & UX at Scale
- Implement CDN and optimize media assets
- Use caching and paginate large datasets
- Ensure responsive and accessible design
- Simplify navigation and personalize user experience
- Monitor user behavior and performance metrics
- Automate workflows and set up alerts
By focusing on these areas and leveraging no-code tools effectively, entrepreneurs and product managers can ensure their startups not only scale smoothly but also deliver exceptional user experiences without writing a single line of code.
8.3 Integrating Advanced Automation and AI Tools
As your no-code startup grows, leveraging advanced automation and AI tools can significantly enhance efficiency, user experience, and scalability. This section explores how to integrate these technologies seamlessly into your no-code workflows, with practical examples and mind maps to guide you.
Why Integrate Advanced Automation and AI?
- Boost Productivity: Automate repetitive tasks to free up time.
- Enhance User Experience: Use AI-driven personalization and chatbots.
- Improve Decision Making: Leverage AI analytics and insights.
- Scale Efficiently: Manage increased demand without proportional resource growth.
Key Areas to Automate and Enhance with AI
Practical Examples
Example 1: Automating Customer Support with AI Chatbots
- Tools: Landbot + ChatGPT API + Zapier
- Workflow:
- Landbot captures customer queries on your website.
- Queries are sent to ChatGPT API for natural language understanding and response generation.
- Zapier routes complex queries to human agents via Slack or email.
- Customer data is logged in Airtable for follow-up.
Benefits: 24/7 support, instant responses, reduced human workload.
Example 2: AI-Driven Marketing Personalization
- Tools: Segment + Recombee + Mailchimp
- Workflow:
- Segment collects user behavior data across your app and website.
- Recombee analyzes preferences and generates personalized product recommendations.
- Mailchimp sends tailored email campaigns based on AI insights.
Benefits: Higher engagement, improved conversion rates, better customer retention.
Example 3: Automating Data Insights and Reporting
- Tools: Airtable + Google Analytics + Tableau + AI Plugins
- Workflow:
- Google Analytics collects website/app usage data.
- Data is imported into Airtable for easy management.
- Tableau visualizes data with AI-powered trend detection.
- Automated reports are generated and emailed weekly via Zapier.
Benefits: Data-driven decisions, timely insights without manual effort.
Best Practices for Integration
- Start Small: Begin with automating one workflow to test effectiveness.
- Ensure Data Privacy: Use tools compliant with GDPR and other regulations.
- Monitor and Iterate: Regularly review automation performance and AI accuracy.
- Combine Human and AI: Use AI to augment, not fully replace, human input.
- Document Workflows: Keep clear documentation for troubleshooting and scaling.
Mind Map: Steps to Integrate AI & Automation in Your No-Code Startup
By thoughtfully integrating advanced automation and AI tools into your no-code startup, you can unlock new levels of efficiency and innovation without writing a single line of code. These integrations empower entrepreneurs and product managers to focus on strategic growth while technology handles the heavy lifting.
8.4 Hiring and Collaborating with Developers When Needed
While no-code tools empower entrepreneurs to build and scale products independently, there are moments when collaborating with professional developers can unlock new possibilities, tackle complex challenges, or accelerate growth. This section explores best practices for hiring and working effectively with developers when your no-code startup requires custom code or advanced technical expertise.
When to Consider Hiring Developers
- Complex Features Beyond No-Code Limits: When your product demands functionalities that no-code platforms cannot support, such as custom algorithms, integrations, or performance optimizations.
- Scalability and Performance: If your user base grows significantly and you need to optimize backend performance or migrate to more robust infrastructure.
- Custom Integrations: For connecting your product with legacy systems or APIs that require coding expertise.
- Security and Compliance: When handling sensitive data that requires advanced security measures beyond no-code capabilities.
Mind Map: Deciding to Hire Developers
Hiring Options and Best Practices
| Option | Description | Best Use Case | Example Platforms/Resources |
|---|---|---|---|
| Freelancers | Independent developers hired per project | Short-term or specialized tasks | Upwork, Toptal, Fiverr |
| Agencies | Teams providing end-to-end development services | Larger projects or ongoing support | Local agencies, Clutch.co listings |
| Full-time Hires | Developers employed as part of your startup | Long-term product development | LinkedIn, AngelList, Stack Overflow Jobs |
Best Practices:
- Write clear, concise job descriptions focusing on the skills needed to complement your no-code stack.
- Use technical assessments or small paid test projects to evaluate skills.
- Check references and portfolios.
Collaboration Strategies for No-Code Founders
-
Define Clear Objectives and Scope: Before engaging developers, document the exact features or problems to solve. Use visual aids like flowcharts or wireframes created with no-code design tools.
-
Maintain Open Communication: Use project management tools (e.g., Trello, Notion, Jira) to track progress and share updates.
-
Leverage Agile Methodologies: Break down work into sprints or milestones to get incremental deliverables and feedback.
-
Integrate Developer Work with No-Code Tools: Ensure developers understand your no-code stack to create compatible solutions.
-
Documentation: Keep thorough documentation of custom code and integrations for future maintenance.
Mind Map: Effective Collaboration Workflow
Example: Integrating Custom API with a Bubble App
Scenario: A product manager built a marketplace MVP using Bubble but needs a custom recommendation engine that Bubble cannot natively support.
Steps Taken:
- Hired a freelance developer from Upwork with API and Python experience.
- Defined the scope: build a recommendation API that accepts user data and returns personalized product suggestions.
- Created a detailed flowchart using Miro to visualize data flow between Bubble and the API.
- Used Trello to track development milestones.
- Developer built and deployed the API on AWS Lambda.
- Integrated the API with Bubble via Bubble’s API connector plugin.
- Tested the integration thoroughly with real user data.
Outcome: The startup enhanced user experience with personalized recommendations, leading to increased engagement and sales without rebuilding the entire product.
Example: Collaborating with a Developer to Build a Custom Payment Gateway
Scenario: A side business founder uses Shopify but wants to add a local payment gateway unsupported by Shopify apps.
Approach:
- Engaged a local development agency specializing in e-commerce integrations.
- Provided detailed requirements and compliance needs.
- Agency developed a custom app that connects Shopify checkout to the local payment gateway API.
- Founder used Notion to maintain project documentation and communicate feedback.
- The custom app was deployed and approved by Shopify.
Result: The business expanded into new markets with seamless payment options, driving revenue growth.
Summary
Hiring and collaborating with developers can be a strategic move to complement your no-code startup when technical challenges exceed no-code capabilities. By clearly defining needs, choosing the right hiring model, and fostering transparent communication, entrepreneurs and product managers can successfully integrate custom code to enhance their products while preserving the agility and speed of no-code development.
8.5 Example: Transitioning from No-Code MVP to Hybrid Development
Transitioning from a no-code MVP (Minimum Viable Product) to a hybrid development approach is a strategic step many startups take when their product gains traction and requires more customization, scalability, or performance enhancements. This section explores how entrepreneurs can smoothly evolve their no-code solutions by integrating custom code components while retaining the speed and flexibility of no-code tools.
Why Transition to Hybrid Development?
- Scalability Needs: No-code platforms may face limitations handling large user bases or complex logic.
- Customization: Unique features or integrations that no-code tools don’t support.
- Performance: Optimizing load times, database queries, or backend processes.
- Ownership & Control: Greater control over data, security, and infrastructure.
Step-by-Step Transition Process
-
Assess Your MVP’s Strengths and Limitations
- Identify which features are working well in no-code.
- Pinpoint bottlenecks or missing capabilities.
-
Define Hybrid Architecture
- Decide which parts remain no-code and which require custom code.
- Common pattern: Frontend/UI on no-code, backend/custom APIs coded.
-
Choose Technology Stack for Custom Code
- Backend frameworks (Node.js, Django, Ruby on Rails).
- Databases (PostgreSQL, MongoDB).
- Hosting (AWS, Heroku, Vercel).
-
Integrate No-Code with Custom Code
- Use APIs and webhooks to connect no-code frontends with custom backends.
- Example: Bubble app calling a custom REST API.
-
Migrate Data if Needed
- Export data from no-code databases (e.g., Airtable) to custom databases.
- Ensure data consistency and security.
-
Test and Iterate
- Run user acceptance tests.
- Monitor performance and fix integration issues.
-
Plan for Future Scaling
- Modularize code for easier updates.
- Keep some workflows no-code for rapid iteration.
Mind Map: Transitioning from No-Code MVP to Hybrid Development
Practical Example: From Bubble MVP to Hybrid App
Scenario: A founder built a marketplace MVP on Bubble but needs advanced search, faster response times, and custom payment flows.
-
Current Setup:
- Frontend and backend logic entirely on Bubble.
- Data stored in Bubble’s internal database.
-
Hybrid Transition Plan:
- Build a custom Node.js backend to handle complex search queries and payment processing.
- Expose RESTful APIs for Bubble frontend to consume.
- Migrate critical data from Bubble to a PostgreSQL database hosted on Heroku.
- Use Bubble’s API Connector to integrate with the new backend.
- Maintain UI and simpler workflows on Bubble for rapid updates.
-
Benefits:
- Improved performance on search and payments.
- Flexibility to add features not supported by Bubble.
- Retain speed of no-code for UI changes.
Additional Tips
- Document Integration Points: Keep clear API documentation for your no-code and custom code interfaces.
- Monitor Costs: Hybrid setups may increase hosting and maintenance costs.
- Keep User Experience Consistent: Ensure seamless interaction between no-code and coded components.
- Leverage No-Code for Admin Tools: Use no-code platforms to build internal dashboards or admin panels.
By thoughtfully combining no-code tools with custom development, entrepreneurs can enjoy the best of both worlds: rapid iteration and powerful, scalable products.
9. Legal and Financial Considerations for No-Code Startups
9.1 Understanding Legal Requirements and Compliance
Starting a no-code startup is exciting, but navigating the legal landscape is crucial to avoid pitfalls that could jeopardize your business. This section breaks down the essential legal requirements and compliance considerations for no-code entrepreneurs, with practical examples and mind maps to clarify complex topics.
Why Legal Compliance Matters for No-Code Startups
- Protects your business from lawsuits and fines
- Builds trust with customers and partners
- Ensures smooth operations and scalability
Key Legal Areas for No-Code Startups
Legal Requirements and Compliance Mind Map
Business Formation
Choosing the right legal structure affects your taxes, liability, and funding options.
Example:
- A side business founder uses an LLC to protect personal assets while keeping setup simple.
- A product manager launching a SaaS opts for a C-Corp to attract investors.
Best Practice: Consult with a legal advisor or use online services like LegalZoom or Stripe Atlas to register your business.
Intellectual Property (IP)
Protect your brand and product ideas to prevent unauthorized use.
Examples:
- Trademark your startup name and logo via the USPTO to secure brand identity.
- Use copyright to protect original content like blog posts or app designs.
Mind Map:
Contracts and Agreements
Clear contracts reduce misunderstandings and legal risks.
Examples:
- Terms of Service and Privacy Policy are mandatory for most web apps; tools like Termly or iubenda help generate them.
- NDAs protect sensitive information when collaborating with freelancers or partners.
Best Practice: Always customize templates to fit your business and consult a lawyer if possible.
Data Protection and Privacy
Handling user data responsibly is not only ethical but legally required in many jurisdictions.
Examples:
- Comply with GDPR if you have users in the EU by implementing cookie consent banners and data access rights.
- Follow CCPA regulations for California residents by allowing users to opt-out of data selling.
Mind Map:
Best Practice: Use no-code tools with built-in compliance features (e.g., Webflow, Bubble) and integrate with privacy management platforms.
Taxation
Understand your tax obligations to avoid penalties.
Examples:
- Collecting and remitting sales tax for digital products depending on state laws.
- Reporting income accurately, including revenue from subscriptions or one-time sales.
Best Practice: Use accounting software like QuickBooks or Xero integrated with your no-code platform.
Industry-Specific Regulations
Certain sectors have additional rules.
Examples:
- A no-code health app must comply with HIPAA to protect patient data.
- Financial startups need to follow SEC regulations when handling investments.
Summary Checklist for Legal Compliance
- Choose and register the right business entity
- Protect your IP (trademarks, copyrights)
- Draft clear contracts and policies
- Ensure data privacy compliance (GDPR, CCPA)
- Understand and fulfill tax obligations
- Identify and comply with industry-specific laws
Real-World Example: Launching a No-Code SaaS with Legal Compliance
Jane, a product manager, built a no-code SaaS platform using Bubble. Before launch, she:
- Registered her LLC through an online service
- Trademarked her brand name
- Used Termly to generate Terms of Service and Privacy Policy
- Implemented GDPR cookie consent via a plugin
- Integrated Stripe for payments and sales tax collection
- Consulted a lawyer to review contracts
This proactive approach helped Jane avoid legal issues and build customer trust from day one.
By understanding and addressing these legal requirements early, no-code entrepreneurs can focus on growth with confidence and peace of mind.
9.2 Protecting Intellectual Property Without a Technical Background
Protecting your intellectual property (IP) is crucial for any startup, including no-code businesses. Even if you don’t have a technical background, understanding the basics of IP protection can safeguard your ideas, brand, and products from unauthorized use or copying. This section will guide you through the essential concepts, practical steps, and examples tailored for no-code entrepreneurs.
What is Intellectual Property?
Intellectual Property refers to creations of the mind, such as inventions, designs, brand names, and original works. For no-code startups, IP can include:
- Brand names and logos
- Unique workflows or processes
- Original content (text, images, videos)
- Software interfaces and user experience designs
- Proprietary data structures or databases
Types of Intellectual Property Relevant to No-Code Startups
Step 1: Protect Your Brand with Trademarks
What is a Trademark? A trademark protects your brand identity — your business name, logo, and slogans.
How to Protect Your Brand:
- Conduct a trademark search using free tools like the USPTO Trademark Electronic Search System (TESS).
- Register your trademark to gain exclusive rights.
- Use ™ for unregistered marks and ® for registered trademarks.
Example: Sarah, a no-code entrepreneur, created a unique name “QuickForms” for her form-building app. She searched the USPTO database to ensure the name was free, then filed for trademark registration to protect her brand.
Step 2: Secure Copyrights for Your Content
What is Copyright? Copyright protects original works of authorship, including written content, images, videos, and software interfaces.
How to Protect Your Content:
- Automatically protected upon creation, but registration provides legal advantages.
- Use copyright notices on your website and marketing materials.
- Keep records of creation dates and versions.
Example: John designed a unique onboarding flow for his no-code app using Bubble. He documented the design process and added copyright notices on his website to assert ownership.
Step 3: Consider Patents for Innovative Features
What is a Patent? Patents protect inventions or processes that are new, useful, and non-obvious.
How to Protect Your Innovation:
- Determine if your no-code product has a patentable feature.
- Consult with a patent attorney for filing.
- Understand that patents can be costly and time-consuming.
Example: A no-code founder developed a novel algorithm for automated workflow optimization. After consulting a patent attorney, she filed a provisional patent to protect her invention.
Step 4: Protect Trade Secrets
What are Trade Secrets? Trade secrets include confidential business information that provides a competitive edge.
How to Protect Trade Secrets:
- Use Non-Disclosure Agreements (NDAs) with collaborators.
- Limit access to sensitive information.
- Maintain clear documentation of confidentiality policies.
Example: Mike runs a no-code consultancy and keeps his client list and pricing strategy confidential by having all employees sign NDAs.
Mind Map: Intellectual Property Protection Workflow
Practical Tips for No-Code Entrepreneurs
- Document Everything: Keep detailed records of your creations, dates, and collaborators.
- Use Clear Contracts: When working with freelancers or partners, use agreements that assign IP rights to your startup.
- Leverage Online Tools: Platforms like LegalZoom or Rocket Lawyer offer affordable IP registration assistance.
- Educate Yourself: Many IP offices provide free guides and webinars tailored for startups.
Example Scenario: Protecting a No-Code SaaS Startup
Emma built a SaaS product using no-code tools that automates social media posting. To protect her IP:
- She trademarked her brand name “PostMaster”.
- Added copyright notices on her website and marketing materials.
- Documented her unique automation workflows as trade secrets.
- Used NDAs when sharing her product roadmap with contractors.
This multi-layered approach helped Emma safeguard her business without needing to write a single line of code.
Summary
Protecting your intellectual property as a no-code entrepreneur doesn’t require technical expertise. By understanding the types of IP, taking practical steps like trademark registration, copyright notices, and using legal agreements, you can secure your startup’s assets and build a strong foundation for growth.
Additional Resources
- USPTO Trademark Search
- Copyright Basics - U.S. Copyright Office
- Intro to Patents - WIPO
- Nolo’s Guide to Trade Secrets
- LegalZoom IP Services
9.3 Managing Finances and Accounting Using No-Code Tools
Managing finances and accounting is a critical aspect of running a successful startup, and no-code tools have made it easier than ever for entrepreneurs without a technical or accounting background to keep their books in order. In this section, we’ll explore best practices, practical mind maps, and real-world examples to help you efficiently manage your startup’s finances using no-code solutions.
Why Use No-Code Tools for Finance & Accounting?
- Accessibility: No need for deep accounting knowledge or coding skills.
- Automation: Reduce manual data entry and human errors.
- Integration: Connect with other business tools for seamless workflows.
- Cost-Effective: Avoid expensive accounting software or hiring full-time accountants early on.
Key Financial Management Areas to Cover
Best Practices for Managing Finances Using No-Code Tools
- Centralize Your Financial Data: Use tools that consolidate income, expenses, invoices, and payments in one place.
- Automate Recurring Tasks: Set up automatic invoicing, payment reminders, and bank reconciliations.
- Use Visual Dashboards: Track KPIs like cash flow, burn rate, and runway with easy-to-understand charts.
- Ensure Data Security: Choose platforms with strong encryption and backup capabilities.
- Regularly Reconcile Accounts: Schedule weekly or monthly reviews to catch discrepancies early.
Popular No-Code Tools for Finance & Accounting
| Tool | Purpose | Key Features | Example Use Case |
|---|---|---|---|
| QuickBooks | Accounting & Bookkeeping | Automated invoicing, bank reconciliation, reports | Small business bookkeeping and tax preparation |
| Airtable | Custom Financial Databases | Custom tables, formulas, integrations | Expense tracking and budget management |
| Zapier | Workflow Automation | Connects apps, automates data sync | Auto-creating invoices from form submissions |
| Stripe | Payment Processing | Online payments, subscriptions | Managing customer payments and subscriptions |
| Notion | Financial Documentation & Planning | Templates, databases, collaboration | Budget planning and financial goal tracking |
Example 1: Automating Expense Tracking with Airtable and Zapier
Scenario: A side business founder wants to track expenses automatically from email receipts.
Workflow:
- Use Zapier to monitor incoming emails for receipts.
- Extract key data (amount, vendor, date) using Zapier’s parsing tools.
- Automatically add a new record to an Airtable base configured for expense tracking.
Benefits:
- Eliminates manual entry.
- Real-time expense visibility.
- Easy categorization and filtering within Airtable.
Example 2: Creating and Sending Invoices with QuickBooks and Memberstack
Scenario: A product manager running a subscription-based service needs to automate invoicing and payment collection.
Workflow:
- Use Memberstack to manage user subscriptions and access.
- Integrate Memberstack with QuickBooks via Zapier.
- Automatically generate and send invoices when a subscription is created or renewed.
- Track payments and send reminders through QuickBooks.
Benefits:
- Streamlined billing process.
- Reduced late payments.
- Clear financial records for accounting and tax purposes.
Example 3: Visualizing Financial Health with Notion Dashboards
Scenario: An entrepreneur wants a simple, customizable dashboard to monitor monthly revenue, expenses, and profit.
Workflow:
- Use Notion databases to input revenue and expense data.
- Create linked views and formulas to calculate profit and other KPIs.
- Embed charts and progress bars for visual insights.
- Share dashboard with co-founders or advisors.
Benefits:
- No coding required to build a tailored financial overview.
- Collaborative and easily updated.
- Helps in making informed business decisions.

Final Tips
- Start simple: Use one or two tools and expand as your business grows.
- Backup your data regularly.
- Consult with an accountant periodically to ensure compliance.
- Leverage community templates and tutorials to speed up setup.
By leveraging no-code tools effectively, entrepreneurs and product managers can maintain tight control over their startup finances without the steep learning curve traditionally associated with accounting software or coding custom solutions.
9.4 Best Practices for Contracts and Agreements in No-Code Businesses
When building a no-code startup, contracts and agreements are essential to protect your business, clarify expectations, and ensure smooth collaborations. Even without a technical background, entrepreneurs can effectively manage legal documents by following best practices tailored for no-code businesses.
Why Contracts Matter in No-Code Startups
- Define roles and responsibilities
- Protect intellectual property (IP)
- Set payment terms and deliverables
- Manage confidentiality and data privacy
- Mitigate risks and disputes
Key Types of Contracts for No-Code Businesses
- Service Agreements: For freelancers, consultants, or agencies helping with no-code development
- Partnership Agreements: When co-founding or collaborating with others
- Non-Disclosure Agreements (NDAs): To protect sensitive ideas or data
- Terms of Service & Privacy Policies: For your product or platform users
Best Practices Mind Map
Using No-Code Tools to Manage Contracts
Example 1: Automating Contract Signing with HelloSign and Zapier
- Create contract templates in HelloSign
- Use Zapier to trigger contract sending when a new client signs up via Typeform
- Automatically store signed contracts in Google Drive
Example 2: Managing Agreements with Notion and PandaDoc
- Track contract statuses in a Notion database
- Generate contracts via PandaDoc templates
- Link contract documents directly in Notion for easy access
Sample Contract Clause Explained
Intellectual Property Rights Clause Example:
“All intellectual property created during the course of this agreement shall be the sole property of [Your Company]. The contractor agrees to assign any rights, titles, or interests in the deliverables to [Your Company].”
Why it matters: This ensures that any no-code apps, workflows, or designs created by collaborators belong to your startup.
Example Scenario: Drafting a Service Agreement for a No-Code Developer
- Scope: Build a Bubble app MVP with specified features
- Deliverables: Fully functional app, documentation, and training session
- Payment: 50% upfront, 50% upon delivery
- Timeline: 6 weeks from contract signing
- Confidentiality: Developer agrees not to share proprietary business info
- Termination: Either party can terminate with 14 days’ notice
Tips for Entrepreneurs and Product Managers
- Always customize templates to fit your specific project
- Keep communication transparent and document all changes
- Use e-signature tools to speed up agreement finalization
- Store contracts securely and back them up regularly
- When in doubt, consult a legal professional specializing in startups
Summary
Contracts and agreements are foundational for no-code startups to operate professionally and protect their interests. By leveraging no-code legal tools, using clear language, and including essential clauses, entrepreneurs can confidently manage legal documents without needing to write code or hire expensive lawyers upfront.
9.5 Example: Using QuickBooks and HelloSign to Manage Startup Finances and Contracts
Managing finances and contracts efficiently is critical for any startup, especially for no-code entrepreneurs who may not have a technical or legal background. Leveraging tools like QuickBooks for accounting and HelloSign for digital signatures can streamline these processes, reduce errors, and save valuable time.
Why Use QuickBooks and HelloSign?
- QuickBooks: A powerful accounting software that simplifies bookkeeping, invoicing, expense tracking, and financial reporting.
- HelloSign: A user-friendly e-signature platform that helps you send, sign, and manage contracts digitally, ensuring legal compliance without printing or scanning.
Step-by-Step Workflow Example
-
Invoice Creation & Tracking with QuickBooks
- Create professional invoices quickly using customizable templates.
- Automate payment reminders to clients.
- Track income and expenses in real-time.
-
Contract Preparation & Signing with HelloSign
- Upload contract templates (e.g., NDAs, service agreements).
- Customize fields for signatures, dates, and initials.
- Send contracts directly to clients or partners for e-signature.
- Receive signed documents instantly and store them securely.
-
Integration & Automation
- Use Zapier or Integromat to connect QuickBooks and HelloSign.
- Automatically generate an invoice in QuickBooks once a contract is signed in HelloSign.
- Notify your team or update CRM when contracts are completed.
Mind Map: Managing Finances and Contracts with QuickBooks & HelloSign
Practical Example: Freelance Web Designer Startup
Scenario: Jane, a freelance web designer, uses no-code tools to run her business. She needs to manage client contracts and invoices efficiently.
- Jane creates a service agreement template in HelloSign with signature and date fields.
- When a new client agrees to work, she sends the contract via HelloSign.
- Upon contract completion, a Zapier automation triggers QuickBooks to generate an invoice based on the agreed price.
- QuickBooks sends the invoice to the client and tracks payment status.
- Jane receives notifications when payments are made and can generate monthly financial reports easily.
This workflow saves Jane hours of manual paperwork and reduces errors.
Tips for Maximizing Efficiency
- Template Standardization: Create reusable templates for contracts and invoices to speed up processes.
- Automation: Connect your tools with automation platforms to eliminate manual data entry.
- Security: Use strong passwords and two-factor authentication for both QuickBooks and HelloSign accounts.
- Regular Review: Schedule monthly reviews of your finances and contracts to stay compliant and informed.
By integrating QuickBooks and HelloSign into your no-code startup operations, you can confidently manage your finances and contracts without needing a dedicated accountant or legal team, freeing you to focus on growing your business.
10. Future Trends and Opportunities in No-Code Entrepreneurship
10.1 Emerging No-Code Technologies and Platforms
The no-code ecosystem is evolving rapidly, introducing innovative technologies and platforms that empower entrepreneurs, product managers, and side business founders to build sophisticated applications without writing a single line of code. In this section, we’ll explore some of the most exciting emerging no-code technologies and platforms, supported by mind maps and real-world examples to help you understand their applications and benefits.
Key Emerging No-Code Technologies
Emerging No-Code Technologies Mind Map
Visual Development Platforms
Visual development platforms allow users to design, build, and launch web and mobile applications through drag-and-drop interfaces and pre-built components.
Example:
- Bubble: Enables building complex web apps with database and workflow logic.
- Adalo: Focuses on mobile app creation with native app publishing.
- Webflow: Combines visual design with CMS and hosting for responsive websites.
Use Case: A side business founder can create a marketplace app on Bubble without coding, integrating payment gateways and user authentication.
Automation & Workflow Tools
Automation tools connect different apps and services, automating repetitive tasks and workflows.
Example:
- Zapier: Connects over 3,000 apps to automate workflows.
- Make (Integromat): Offers advanced visual automation with complex logic.
- n8n: Open-source workflow automation tool.
Use Case: An entrepreneur automates lead capture from a Typeform survey into Airtable and triggers a personalized email via Mailchimp.
AI-Powered No-Code Tools
AI integration is becoming more accessible with no-code platforms embedding machine learning and natural language processing.
Example:
- GPT-3 Integrations: Tools like OpenAI’s GPT-3 can be integrated via no-code platforms to generate content or automate customer support.
- Voiceflow: Build conversational voice and chatbots without code.
- Peltarion: AI platform for building and deploying models visually.
Use Case: A product manager creates a chatbot using Voiceflow that answers FAQs on their website, improving customer engagement.
Backend as a Service (BaaS)
BaaS platforms provide ready-to-use backend infrastructure including databases, authentication, and hosting.
Example:
- Firebase: Real-time database and authentication services.
- Supabase: Open-source Firebase alternative with SQL database.
- Backendless: Visual app backend with APIs and user management.
Use Case: A startup founder uses Supabase to handle user authentication and data storage for their no-code app built on Adalo.
Database & Data Management
No-code databases enable easy data organization, collaboration, and integration.
Example:
- Airtable: Spreadsheet-database hybrid with powerful views and automation.
- Coda: Combines documents and spreadsheets with automation.
- Ninox: Custom database builder with scripting capabilities.
Use Case: A product manager organizes project tasks and customer data in Airtable, syncing with their app via Zapier.
API Integration & Connectors
These tools simplify connecting multiple services and APIs without coding.
Example:
- Parabola: Drag-and-drop data flows for API integrations.
- Tray.io: Enterprise-grade automation and integration platform.
- Postman: No-code API testing and monitoring.
Use Case: An entrepreneur uses Parabola to pull data from Stripe and send customized reports to clients automatically.
E-commerce & Membership Platforms
No-code platforms focused on monetization through online stores and membership sites.
Example:
- Shopify: Build and manage online stores with no-code plugins.
- Memberstack: Add membership and subscription functionality to websites.
- Gumroad: Sell digital products easily without coding.
Use Case: A side business founder launches a digital product store on Shopify and uses Memberstack to create exclusive content for subscribers.
Mind Map: How These Technologies Work Together
No-Code Startup Ecosystem Mind Map
Real-World Example: Launching a No-Code AI-Powered Customer Support Chatbot
Scenario: A product manager wants to add a smart chatbot to their website to reduce support tickets.
Steps:
- Design chatbot flow using Voiceflow’s visual interface.
- Integrate GPT-3 via Voiceflow to enable natural language understanding.
- Embed the chatbot widget on a Webflow-built website.
- Automate ticket creation in Airtable using Zapier when the chatbot cannot resolve queries.
This approach requires zero coding but leverages cutting-edge AI and no-code platforms to improve customer experience.
Best Practices for Leveraging Emerging No-Code Technologies
- Start Small: Use no-code tools to build MVPs quickly before scaling.
- Combine Platforms: Integrate multiple no-code tools to cover design, backend, automation, and marketing.
- Stay Updated: No-code platforms evolve fast; regularly explore new features and tools.
- Focus on User Experience: Use visual design and AI tools to create intuitive, engaging products.
- Validate Continuously: Use no-code survey and analytics tools to gather feedback and iterate.
By embracing these emerging no-code technologies and platforms, entrepreneurs and product managers can accelerate their startup journey, reduce costs, and focus on delivering value without the traditional barriers of software development.
10.2 The Role of AI and Machine Learning in No-Code Development
Artificial Intelligence (AI) and Machine Learning (ML) are rapidly transforming the no-code landscape by enabling entrepreneurs and product managers to build smarter, more adaptive applications without writing any code. By integrating AI/ML capabilities into no-code platforms, users can automate complex tasks, gain insights from data, and create personalized experiences with ease.
Why AI and ML Matter in No-Code Development
- Automation of Complex Tasks: AI can handle tasks like natural language processing, image recognition, and predictive analytics, which traditionally required specialized coding skills.
- Enhanced User Experience: ML models can personalize content, recommend products, or optimize workflows based on user behavior.
- Data-Driven Decision Making: AI-powered analytics help startups make informed decisions quickly.
- Accessibility: No-code users can leverage powerful AI tools without needing data science expertise.
Mind Map: AI and ML Applications in No-Code Development
Examples of AI/ML in No-Code Platforms
Building an AI-Powered Chatbot with Landbot and OpenAI
- Use Case: Customer support automation for a side business.
- How it Works: Landbot allows drag-and-drop chatbot creation. By integrating OpenAI’s GPT-4 API via no-code connectors like Zapier or Integromat, the chatbot can understand and respond to complex customer queries conversationally.
- Best Practice: Start with a simple script and gradually train the AI with customer interactions to improve responses.
Predictive Analytics Dashboard with Airtable and Parabola
- Use Case: A product manager wants to forecast sales trends without coding.
- How it Works: Data is collected in Airtable, then Parabola is used to automate data transformation and connect to AI services like Google AutoML for forecasting.
- Best Practice: Regularly update datasets and validate model predictions with actual outcomes to refine accuracy.
Personalized Content Recommendations Using Bubble and Recombee
- Use Case: An entrepreneur building an e-commerce site wants to offer personalized product suggestions.
- How it Works: Bubble app integrates with Recombee’s recommendation engine via API connectors. User behavior data is sent to Recombee, which returns tailored product suggestions.
- Best Practice: Use clear user segmentation and test recommendation algorithms to optimize engagement.
Mind Map: Steps to Integrate AI in No-Code Projects
Best Practices for Leveraging AI/ML in No-Code
- Start Small: Begin with a simple AI feature and expand as you learn.
- Understand Limitations: AI models can make mistakes; always include fallback options.
- Data Privacy: Ensure compliance with data protection laws when handling user data.
- Continuous Learning: Use user feedback to retrain and improve AI models.
- Combine Human and AI: Use AI to augment human tasks, not fully replace them.
Final Thoughts
AI and ML are no longer exclusive to developers with advanced coding skills. No-code platforms are democratizing access to these powerful technologies, enabling entrepreneurs, product managers, and side business founders to build intelligent applications faster and more cost-effectively. By understanding how to integrate AI/ML thoughtfully, you can create innovative solutions that stand out in competitive markets.
10.3 Opportunities for Niche Markets and Vertical SaaS with No-Code
No-code platforms have unlocked unprecedented opportunities for entrepreneurs to build specialized solutions tailored to niche markets and vertical SaaS (Software as a Service) products without the need for traditional coding. By focusing on specific industries or customer segments, startups can deliver highly customized, efficient, and scalable solutions that address unique pain points.
Understanding Niche Markets and Vertical SaaS
- Niche Markets: Smaller, focused segments of a larger market with distinct needs.
- Vertical SaaS: Software solutions built specifically for a particular industry or vertical, such as healthcare, real estate, or education.
Why No-Code is Ideal for Niche and Vertical SaaS
- Speed to Market: Quickly prototype and launch specialized solutions.
- Cost Efficiency: Avoid expensive development cycles.
- Customization: Easily tailor workflows and features to industry-specific requirements.
- Iterative Improvement: Rapidly adapt based on user feedback.
Mind Map: Exploring Niche Markets for No-Code Startups
Mind Map: Vertical SaaS Features Enabled by No-Code
Examples of No-Code Vertical SaaS and Niche Market Solutions
Healthcare Appointment System
- Problem: Small clinics struggle with managing patient appointments and reminders.
- Solution: Using Airtable as a backend database, combined with Softr to build a patient portal where patients can book appointments, receive automated SMS reminders via Zapier integration.
- Best Practice: Start with a simple MVP focusing on booking and reminders, then iterate by adding telemedicine video integration using no-code tools like Jitsi embedded in the app.
Real Estate Tenant Management Platform
- Problem: Landlords need an easy way to track rent payments, maintenance requests, and tenant communication.
- Solution: Build a portal using Bubble that integrates with Stripe for payments, Airtable for data storage, and Twilio for SMS alerts.
- Best Practice: Use role-based access so tenants and landlords see relevant information only, improving security and user experience.
Online Course Platform for Fitness Coaches
- Problem: Fitness coaches want to offer personalized training programs and track client progress without complex software.
- Solution: Use Glide Apps to create a mobile app where coaches upload workout plans, clients log workouts, and progress is visualized.
- Best Practice: Automate weekly progress summary emails using Integromat to keep clients engaged.
Legal Document Automation Tool
- Problem: Small law firms need to automate contract generation and client intake.
- Solution: Combine Typeform for intake forms, Airtable for data management, and WebMerge (or Documate) for document generation.
- Best Practice: Provide templates that clients can customize, reducing lawyer workload and speeding up case onboarding.
How to Identify Your Niche for No-Code Vertical SaaS
- Leverage Personal Experience: Solve problems you or your network face.
- Research Industry Pain Points: Use forums, LinkedIn groups, and surveys.
- Validate with MVPs: Build quick prototypes using no-code tools.
- Engage Early Adopters: Gather feedback and iterate.
Final Thoughts
No-code empowers entrepreneurs to create highly specialized vertical SaaS products and niche market solutions efficiently and affordably. By combining industry knowledge with no-code tools, you can build tailored software that meets unique customer needs and scales with your business.
Start small, validate often, and leverage integrations to enhance your product’s capabilities without writing a single line of code.
10.4 Building a Community and Ecosystem Around Your No-Code Startup
Building a thriving community and ecosystem around your no-code startup is essential for sustained growth, user engagement, and creating advocates who can help amplify your product’s reach. This section explores strategies, best practices, and examples to help you cultivate a loyal community and a supportive ecosystem.
Why Build a Community?
- User Feedback & Product Improvement: Communities provide direct access to your users’ thoughts, pain points, and feature requests.
- Brand Advocacy: Engaged users become ambassadors who promote your product organically.
- Support Network: A community can help answer questions and reduce your support workload.
- Collaborative Growth: Ecosystems enable partnerships, integrations, and shared resources.
Mind Map: Core Elements of Building a Community
Best Practices for Building Your No-Code Startup Community
-
Choose the Right Platforms:
- Slack or Discord for real-time interaction.
- Facebook or LinkedIn groups for broader social engagement.
- Reddit or specialized forums for niche discussions.
-
Create Valuable Content:
- Share tutorials on how to use your no-code product effectively.
- Highlight user success stories to inspire others.
- Host webinars featuring product demos and Q&A sessions.
-
Encourage User Participation:
- Prompt users to share their projects built with your tool.
- Run challenges or contests that incentivize creativity.
- Recognize active members with badges or shout-outs.
-
Facilitate Collaboration:
- Build partnerships with other no-code tools to offer integrations.
- Encourage community members to collaborate on projects.
- Provide APIs or plugins to extend your product’s functionality.
-
Provide Support and Resources:
- Maintain an up-to-date knowledge base.
- Offer peer-to-peer support channels.
- Respond promptly to questions and feedback.
Example 1: Glide Apps Community
Glide, a no-code app builder, has cultivated a vibrant community on Slack where users share app ideas, ask for help, and showcase their projects. They regularly host webinars and challenges, rewarding top contributors with swag and early access to features.
- Key Takeaway: Regular engagement and recognition foster loyalty.
Example 2: Bubble Ecosystem
Bubble supports an ecosystem of agencies, freelancers, and plugin developers who extend the platform’s capabilities. Their forum is a hub for collaboration, troubleshooting, and sharing resources.
- Key Takeaway: Enabling third-party contributions expands your product’s reach and utility.
Mind Map: Steps to Launch a Community
Tools to Help Build and Manage Your Community
- Discourse: Open-source forum software for structured discussions.
- Circle: Community platform integrating with your product.
- Mighty Networks: Combines social networking and course hosting.
- Zapier/Integromat: Automate onboarding and engagement workflows.
Final Tips
- Start small but be consistent.
- Listen actively and adapt based on community feedback.
- Empower members to take ownership.
- Celebrate milestones and successes together.
By intentionally building a community and ecosystem around your no-code startup, you create a powerful engine for growth, innovation, and long-term success.
10.5 Example: Leveraging AI-Powered No-Code Tools to Innovate
Artificial Intelligence (AI) is revolutionizing the no-code landscape, enabling entrepreneurs and product managers to build smarter, more efficient, and innovative products without writing a single line of code. In this section, we’ll explore how AI-powered no-code tools can be harnessed to innovate your startup, complete with practical examples and mind maps to visualize the possibilities.
Understanding AI-Powered No-Code Tools
AI-powered no-code tools combine the ease of no-code platforms with the intelligence of AI technologies such as natural language processing (NLP), computer vision, machine learning, and automation. These tools allow you to build applications that can understand, predict, and automate complex tasks.
Mind Map: AI-Powered No-Code Tools Overview
Practical Examples of Leveraging AI-Powered No-Code Tools
Automating Customer Support with AI Chatbots
Tool Example: Landbot
- Build conversational chatbots that understand customer queries using NLP.
- Automate FAQs, booking, and lead qualification without coding.
Use Case: A side business founder launches an online coaching platform and integrates a Landbot chatbot on the website to handle common questions, freeing up time and improving user engagement.
Generating Marketing Content Instantly
Tool Example: Jasper (formerly Jarvis)
- Generate blog posts, social media captions, email copy, and ad content.
- Customize tone and style to match your brand.
Use Case: An entrepreneur uses Jasper to create weekly newsletters and social media posts, accelerating content production and maintaining consistent communication with customers.
Creating AI-Powered Data Insights Dashboards
Tool Example: Obviously AI
- Upload datasets and get instant predictive analytics without coding.
- Use AI to forecast sales, churn, or customer behavior.
Use Case: A product manager uploads user engagement data to Obviously AI to predict which features drive retention, helping prioritize product roadmap decisions.
Enhancing Visual Content Creation
Tool Example: RunwayML
- Use AI models to generate or edit images and videos.
- Create marketing visuals or product demos quickly.
Use Case: A startup founder creates eye-catching promotional videos for social media campaigns using RunwayML’s AI-powered video editing tools.
Mind Map: AI Use Cases in No-Code Startups
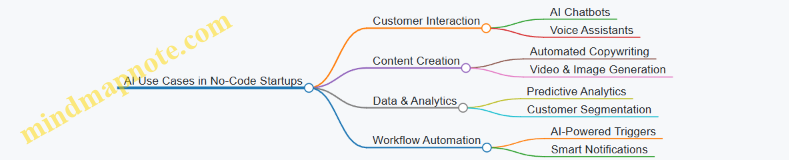
Best Practices for Integrating AI-Powered No-Code Tools
- Start Small: Begin with automating one process (e.g., customer support or content creation) to test AI effectiveness.
- Combine Tools: Use AI tools alongside traditional no-code platforms (e.g., integrate Jasper-generated content into Webflow sites).
- Maintain Human Oversight: Always review AI outputs to ensure quality and brand consistency.
- Leverage APIs: Many AI no-code tools offer API integrations to connect with your existing workflows.
- Stay Updated: AI tools evolve rapidly; keep learning and experimenting to stay ahead.
Final Thought
By leveraging AI-powered no-code tools, entrepreneurs and product managers can unlock new levels of innovation, efficiency, and scalability without needing technical expertise. Whether it’s automating customer interactions, generating compelling content, or gaining actionable insights from data, AI combined with no-code platforms is a powerful catalyst for building the next generation of startups.
Additional Resources
- Landbot AI Chatbot Builder
- Jasper AI Content Generator
- Obviously AI Predictive Analytics
- RunwayML Creative AI Tools
- Zapier AI Integrations
11. Resources and Next Steps
11.1 Curated List of No-Code Learning Resources and Communities
Embarking on your no-code startup journey can be both exciting and overwhelming. To help you navigate this space effectively, we’ve curated a comprehensive list of learning resources and communities that cater to entrepreneurs, product managers, and side business founders. These resources include tutorials, courses, blogs, forums, and active communities where you can ask questions, share insights, and find inspiration.
Mind Map: No-Code Learning Resources Overview
Tutorials and Documentation
-
Bubble Tutorials: Bubble offers an extensive library of tutorials ranging from beginner to advanced levels. For example, their “Build a Marketplace” tutorial walks you through creating a fully functional app without code.
- Bubble Tutorials
-
Adalo Learn: Adalo’s learning center provides step-by-step guides on building mobile apps with drag-and-drop components.
- Adalo Learn
-
Webflow University: Webflow’s free video tutorials cover everything from basic web design to CMS and e-commerce.
- Webflow University
-
Airtable Guides: Airtable’s official guides help you master database creation and automation.
- Airtable Guides
-
Zapier Learning Center: Learn how to automate workflows by connecting apps without code.
- Zapier Learning Center
Online Courses
-
Makerpad: One of the most popular no-code education platforms offering project-based courses and community support.
- Example Course: “Build a SaaS with Bubble and Stripe”
- Makerpad
-
Zeroqode Lab: Offers specialized courses focused on Bubble and other no-code tools.
- Example Course: “No-Code MVP with Bubble”
- Zeroqode Lab
-
Coursera No-Code Courses: Various universities and instructors offer no-code and low-code development courses.
- Example: “Introduction to No-Code Development”
- Coursera
Blogs and Knowledge Hubs
-
NoCode.Tech: A comprehensive directory of no-code tools, tutorials, and case studies.
- NoCode.Tech
-
Indie Hackers: A community-driven blog featuring interviews, startup stories, and no-code project showcases.
- Indie Hackers
-
Makerpad Blog: Shares tutorials, tool reviews, and success stories from no-code entrepreneurs.
- Makerpad Blog
Communities and Forums
-
NoCode Founders (Slack & Discord): A vibrant community of no-code makers sharing projects, tips, and collaboration opportunities.
- NoCode Founders
-
Indie Hackers Forum: Active discussions on no-code tools, growth strategies, and startup challenges.
- Indie Hackers Forum
-
Makerpad Slack: Access to experts and peers for real-time help and networking.
- Makerpad Slack
-
Product Hunt No-Code Tag: Discover and share new no-code products and tools.
- Product Hunt No-Code
Example: Using These Resources to Learn Bubble
- Start with Bubble Tutorials to understand the platform basics.
- Join Makerpad for a structured course on building a SaaS app.
- Engage with the NoCode Founders Slack community to ask questions and get feedback.
- Follow the Makerpad Blog for advanced tips and case studies.
- Use Bubble’s official documentation to troubleshoot and explore APIs.
Summary
By leveraging these curated resources and communities, you can accelerate your no-code learning curve, avoid common pitfalls, and build your startup efficiently. Remember, active participation in communities often leads to faster problem-solving and valuable networking opportunities.
Ready to dive deeper? Explore the next section on templates and starter kits to kickstart your no-code projects!
11.2 Templates and Starter Kits for Common No-Code Projects
When starting a no-code project, leveraging pre-built templates and starter kits can dramatically accelerate your development process. These resources provide a solid foundation, allowing you to customize and scale your product without starting from scratch. Below, we explore popular no-code project types, recommended templates, and starter kits, accompanied by mind maps to help you visualize their structure.
SaaS MVP Templates
Description: SaaS (Software as a Service) MVP templates help you quickly build a minimum viable product with core features such as user authentication, dashboards, and subscription management.
Popular Platforms: Bubble, Adalo, Glide
Example Templates:
- Bubble SaaS Starter Kit (includes user sign-up, payment integration, dashboard)
- Adalo SaaS Template (mobile-first app with subscription features)
Mind Map: SaaS MVP Template Structure
E-commerce Store Starter Kits
Description: Ready-made e-commerce templates help you launch online stores with product catalogs, shopping carts, and payment processing.
Popular Platforms: Shopify, Webflow, Squarespace
Example Templates:
- Shopify Minimal Theme (clean design with product filtering)
- Webflow E-commerce Starter Kit (responsive store with checkout flow)
Mind Map: E-commerce Store Components
Marketplace Starter Kits
Description: Marketplaces connect buyers and sellers. Starter kits typically include multi-vendor support, listings, and messaging.
Popular Platforms: Sharetribe, Bubble, Softr
Example Templates:
- Sharetribe Go (multi-vendor marketplace with booking and payments)
- Bubble Marketplace Template (customizable listings and user profiles)
Mind Map: Marketplace Starter Kit
CRM (Customer Relationship Management) Templates
Description: CRM templates help manage customer data, track interactions, and automate workflows.
Popular Platforms: Airtable, Notion, Softr
Example Templates:
- Airtable CRM Template (contact management with pipeline tracking)
- Notion CRM Dashboard (integrated notes and task management)
Mind Map: CRM Template Overview

Content Management System (CMS) Templates
Description: CMS templates enable you to create blogs, portfolios, or news sites without coding.
Popular Platforms: Webflow, WordPress (no-code builders), Ghost
Example Templates:
- Webflow Blog Template (dynamic content with categories and tags)
- Ghost Starter Theme (simple, SEO-friendly blog design)
Mind Map: CMS Template Structure
Booking & Appointment Scheduling Kits
Description: These templates allow users to book services, schedule appointments, and receive confirmations.
Popular Platforms: Calendly (integrations), Bubble, Softr
Example Templates:
- Bubble Appointment Scheduler Template
- Softr Booking System with Airtable Backend
Mind Map: Booking System Components

Tips for Using Templates and Starter Kits Effectively
- Customize to Your Brand: Change colors, fonts, and content to reflect your unique identity.
- Understand the Structure: Use mind maps to visualize how components interact before customizing.
- Test Thoroughly: Run through all user flows to ensure everything works as expected.
- Iterate Based on Feedback: Use early user feedback to refine and improve your template.
Summary
Templates and starter kits are invaluable for entrepreneurs, product managers, and side business founders venturing into no-code startups. They reduce time-to-market, provide tested structures, and help you focus on your unique value proposition rather than reinventing the wheel.
By combining these starter kits with the best practices covered throughout this blog, you can confidently build and launch your no-code business faster and smarter.
11.3 Tips for Continuous Learning and Staying Updated
In the fast-evolving world of no-code entrepreneurship, continuous learning is essential to keep up with new tools, techniques, and best practices. Here are actionable tips and strategies to help you stay updated and sharpen your skills over time.
Subscribe to No-Code Newsletters and Blogs
- Why: Curated content delivers the latest trends, tool updates, and success stories directly to your inbox.
- Examples:
- NoCode.tech Newsletter – Weekly updates on no-code tools and tutorials.
- Makerpad – Offers tutorials, interviews, and community insights.
- Indie Hackers – Stories and advice from bootstrapped founders.
Join No-Code Communities and Forums
- Why: Engaging with peers accelerates learning through shared experiences and problem-solving.
- Examples:
- NoCode Founders Slack – A vibrant community for networking and support.
- Reddit r/nocode – Discussions, tool recommendations, and project showcases.
- Makerpad Community – Access to workshops and collaboration opportunities.
Follow Influencers and Thought Leaders on Social Media
- Why: Real-time insights and tips from experts help you spot emerging trends early.
- Examples:
- Ben Tossell (Founder of Makerpad) on Twitter.
- Seth Kramer (No-Code Evangelist) on LinkedIn.
- Lacey Kesler (No-Code Creator) on YouTube.
Take Online Courses and Attend Webinars
- Why: Structured learning deepens your understanding and introduces you to advanced concepts.
- Examples:
- Zeroqode Lab – Specialized no-code app development courses.
- Udemy No-Code Courses – Various topics from beginner to advanced.
- Webflow University – Free tutorials on web design and development.
Experiment Regularly with New Tools and Features
- Why: Hands-on practice cements knowledge and uncovers creative use cases.
- Example: Set a monthly challenge to build a mini-project using a new no-code platform or feature.
Attend Virtual and In-Person No-Code Events
- Why: Networking and live demos provide inspiration and direct access to experts.
- Examples:
- No-Code Conf – Annual conference with workshops and talks.
- Local meetups – Search Meetup.com for no-code groups in your area.
Mind Maps
Mind Map 1: Continuous Learning Strategies
Mind Map 2: Benefits of Staying Updated
Practical Example: How Sarah, a Side Business Founder, Stays Updated
Sarah dedicates 30 minutes daily to her no-code learning routine:
- Reads the NoCode.tech newsletter every morning.
- Participates in weekly discussions on the NoCode Founders Slack.
- Watches one tutorial from Webflow University or Zeroqode Lab each week.
- Builds a small prototype monthly using a new tool or feature.
- Attends quarterly virtual no-code conferences.
This consistent approach helped Sarah launch and scale her no-code SaaS product efficiently.
By integrating these tips and strategies into your routine, you’ll ensure that your no-code startup stays innovative and competitive in the rapidly changing landscape.
11.4 How to Network and Find Mentors in the No-Code Space
Networking and mentorship are crucial for accelerating your growth as a no-code entrepreneur. Building relationships with experienced individuals can provide guidance, open doors to opportunities, and help you avoid common pitfalls. This section will cover practical strategies, mind maps to visualize approaches, and real-world examples to help you effectively network and find mentors in the no-code ecosystem.
Why Network and Find Mentors?
- Gain insights from experienced no-code founders and product managers.
- Receive feedback on your ideas and products.
- Access resources, tools, and potential partnerships.
- Stay updated with industry trends and best practices.
Mind Map: Approaches to Networking in the No-Code Space
Engage in Online Communities
No-code communities are vibrant hubs where beginners and experts share knowledge.
- Examples:
- Makerpad – Offers tutorials and a community forum.
- NoCodeDevs Slack – Active Slack workspace for no-code builders.
- Indie Hackers – Discussions on startups, many no-code focused.
Best Practices:
- Participate actively by asking questions and sharing your progress.
- Offer help where you can; mentorship is often reciprocal.
- Attend community calls or virtual meetups to meet people live.
Mind Map: Finding Mentors Through Online Communities
Attend Events and Workshops
Events are excellent for face-to-face (or virtual face-to-face) networking.
- Examples:
- No-Code Conf – Annual conference dedicated to no-code tools.
- Local or virtual hackathons focused on no-code projects.
- Workshops hosted by platforms like Bubble or Webflow.
Best Practices:
- Prepare a concise elevator pitch about your startup.
- Approach speakers and attendees with thoughtful questions.
- Follow up after events with personalized messages.
Create Content to Attract Mentors
Publishing content positions you as a serious builder and attracts mentors organically.
- Blog about your no-code journey and lessons learned.
- Host webinars or live demos of your product.
- Share case studies or tutorials.
Example:
- A product manager blogging about building a SaaS with Bubble attracted mentorship offers from experienced no-code developers.
Direct Outreach
Sometimes the best way is to reach out directly.
- Use LinkedIn or Twitter to connect with no-code experts.
- Personalize your message; mention why you admire their work.
- Be clear about what you seek (e.g., 15-minute advice call).
Example Message:
Hi [Name], I’m building a no-code marketplace using Bubble and really admire your work on [Project]. Would you be open to a 15-minute chat? I’d love to learn how you approached scaling your product.
Mind Map: Steps for Effective Direct Outreach
Real-World Example: How Sarah Found Her No-Code Mentor
Sarah, a side business founder, joined the NoCodeDevs Slack and regularly contributed to discussions. She noticed a seasoned Bubble developer answering questions she had. After engaging with his posts and sharing her MVP progress, she sent a polite direct message asking for mentorship. They scheduled a bi-weekly call, during which Sarah received valuable advice that helped her avoid costly mistakes.
Summary Checklist for Networking and Finding Mentors
- Join at least 3 no-code communities and participate weekly.
- Attend 1-2 no-code events or workshops per quarter.
- Create and share content regularly to showcase your journey.
- Identify 3 potential mentors and send personalized outreach messages.
- Follow up and nurture relationships consistently.
By integrating these strategies and leveraging the mind maps, entrepreneurs and product managers can build a strong network and find mentors who will support their no-code startup journey.
11.5 Final Checklist: Launching Your No-Code Startup Successfully
Launching a no-code startup can be an exciting yet complex journey. To ensure you cover all critical aspects and set yourself up for success, here is a comprehensive final checklist. This checklist integrates best practices, actionable steps, and examples to guide you through the launch phase.
🚀 Final Launch Checklist Mind Map
Detailed Checklist with Examples and Best Practices
Idea Validation
- Market Research: Use tools like Google Trends and AnswerThePublic to confirm demand.
- Customer Feedback: Create surveys with Typeform to gather early opinions.
- MVP Testing: Build a simple prototype on Bubble or Adalo and share with a test group.
Example: A side business founder validated a niche fitness app idea by sharing a Carrd landing page with a signup form, collecting 200+ interested users before building the product.
Product Readiness
- UI/UX Design Finalized: Use Figma to create and iterate your design.
- Functionality Tested: Perform user testing sessions with tools like Maze.
- Responsive Design Checked: Preview your app on multiple devices using Webflow’s built-in tools.
Best Practice: Always test your product on mobile and desktop to ensure seamless user experience.
Technical Setup
- No-Code Platform Selected: Choose based on your product type (e.g., Shopify for e-commerce, Bubble for web apps).
- Backend & Database Connected: Use Airtable or Firebase as your backend.
- Automation & Integrations Configured: Set up workflows with Zapier or Make (formerly Integromat).
Example: An entrepreneur automated order notifications and inventory updates by connecting Shopify with Slack and Airtable via Zapier.
Marketing & Sales
- Landing Page Live: Build with Carrd or Webflow.
- Email Campaigns Scheduled: Use Mailchimp or ConvertKit for drip campaigns.
- Social Media Profiles Set Up: Create consistent branding across platforms.
Best Practice: Use UTM parameters to track marketing campaign effectiveness.
Operations & Support
- Customer Support System Ready: Implement chatbots with Landbot or Crisp.
- Payment & Billing Set Up: Integrate Stripe or PayPal.
- Legal & Compliance Checked: Use tools like TermsFeed to generate privacy policies.
Example: A subscription box startup used Memberstack for membership management and Stripe for payments, streamlining operations without code.
Analytics & Optimization
- Tracking Tools Installed: Google Analytics, Hotjar for heatmaps.
- KPIs Defined: User acquisition, activation, retention, revenue.
- Feedback Loop Established: Regular surveys and in-app feedback forms.
Best Practice: Schedule weekly reviews of analytics to identify improvement areas.
Team & Collaboration
- Roles Assigned: Define responsibilities clearly.
- Communication Channels Open: Use Slack or Microsoft Teams.
- Documentation Prepared: Maintain a Notion workspace for all processes.
Example: A remote no-code startup used Notion for project management and documentation, enabling smooth collaboration.
Launch Day
- Soft Launch Conducted: Release to a limited audience to catch issues.
- Monitor Performance: Use real-time dashboards.
- Collect User Feedback: Encourage early users to report bugs and suggestions.
Best Practice: Have a contingency plan for unexpected issues.
Post-Launch
- Iterate Based on Feedback: Prioritize feature requests.
- Scale Marketing Efforts: Increase ad spend and partnerships.
- Plan Next Features: Roadmap based on validated user needs.
Example: After launch, a no-code SaaS founder used Airtable to track feature requests and customer feedback, iterating rapidly.
Summary
Launching a no-code startup successfully requires a holistic approach that balances product development, marketing, operations, and continuous improvement. By following this checklist and leveraging no-code tools effectively, entrepreneurs, product managers, and side business founders can reduce risk, save time, and accelerate their path to market.
Remember, the no-code ecosystem is vast and evolving—stay curious, experiment often, and build with your users at the center.
Happy launching! 🚀