Scalable RPC Systems with Tonic gRPC Tokio Runtime and Tower Middleware
1. Foundations of gRPC and Rust Service Communication
1.1 Core gRPC Concepts for Service Interfaces and Contracts
gRPC is a contract-first way to define how services talk. The contract is written in Protocol Buffers (protobuf), and the runtime uses that contract to generate strongly typed client and server code. The result is fewer “stringly typed” surprises and more compile-time guidance—your future self will appreciate it.
Service Interfaces as Contracts
A gRPC service definition lists RPC methods and their request and response message types. Each method has a clear shape:
- Unary: one request, one response.
- Server streaming: one request, many responses.
- Client streaming: many requests, one response.
- Bidirectional streaming: many requests and many responses.
In Rust with Tonic, those method shapes map directly to handler function signatures. That mapping matters because it determines how you structure control flow, error handling, and backpressure.
Example: Unary Method Contract
Suppose you want a simple “GetUser” call. Your protobuf contract might define a request containing an ID and a response containing user data. The generated Rust types ensure you can’t accidentally return the wrong payload type.
service UserDirectory {
  rpc GetUser(GetUserRequest) returns (GetUserResponse);
}

message GetUserRequest { string id = 1; }
message GetUserResponse { string id = 1; string name = 2; }
On the server side, the handler receives a typed GetUserRequest and returns a typed GetUserResponse (or a gRPC status error). On the client side, the same types are used when calling the method.
Message Design That Doesn’t Fight You
Protobuf messages are structured records. Each field has a numeric tag, and those tags are part of the long-term contract. Changing tags breaks compatibility; changing field names usually doesn’t.
Practical rules that keep contracts stable:
- Use stable field numbers. Never reuse numbers for deleted fields.
- Prefer explicit optionality. If a field may be absent, model it explicitly rather than relying on default values.
- Keep messages cohesive. A request message should describe the input needed for that method, not a grab bag of unrelated data.
- Choose types intentionally. For example, use
int64for IDs that may exceed 32-bit ranges.
Example: Modeling Optional Fields
If you want an optional filter in a request, represent it as an optional field rather than overloading “empty string means unset.”
message ListUsersRequest {
  string tenant_id = 1;
  optional string name_prefix = 2;
}
This makes middleware logic and handler logic clearer, because “unset” and “set to empty” are distinct.
RPC Semantics and Error Boundaries
gRPC defines how errors are represented: handlers return either a successful response or a status with a code and message. The key idea is that errors are part of the contract, not an afterthought.
- Unary calls fail once: request in, response out.
- Streaming calls can fail mid-stream: you must decide what “partial progress” means.
A good contract makes it obvious which failures are expected (like “not found”) versus exceptional (like “internal error”). That clarity reduces guesswork in clients.
Example: Status Mapping in Handlers
In Tonic, you typically return a Result<Response<_>, Status>. The Status carries the gRPC code.
use tonic::{Request, Response, Status};

async fn get_user(
  req: Request<GetUserRequest>
) -> Result<Response<GetUserResponse>, Status> {
  let id = req.into_inner().id;
  if id.is_empty() {
    return Err(Status::invalid_argument("id must not be empty"));
  }
  // fetch user...
  Ok(Response::new(GetUserResponse { id, name: "Ada".into() }))
}
Mind Map: Contract Building Blocks
Putting It Together: A Contract-First Workflow
Start by defining the service and message shapes. Then decide the RPC type based on how data flows: if the client asks for a single result, use unary; if the server produces a sequence, use server streaming. Finally, define how errors should look by choosing which invalid inputs map to invalid_argument, which missing resources map to not_found, and which unexpected issues map to internal.
That workflow keeps the contract readable and keeps the generated Rust code aligned with the actual behavior you intend to implement.
1.2 Protobuf Message Design for Efficient Wire Formats
Efficient gRPC starts with message design, because protobuf encoding cost shows up twice: once when serializing on the sender, and again when parsing on the receiver. The goal is not to “make it smaller” in the abstract, but to make encoding predictable, minimize unnecessary fields, and keep hot paths simple.
Core Principles for Wire Efficiency
Use Stable Field Numbers
Field numbers are part of the wire format. Pick them carefully and never reuse numbers for different meanings. When you add fields, choose new numbers and keep old ones reserved if you remove them. This prevents accidental decoding mismatches and avoids forcing clients to carry compatibility logic.
Prefer Explicit Types over Overloaded Semantics
A message field should represent one concept. If you try to pack multiple meanings into a single string or integer, you’ll end up with validation branches and parsing work on every call. Separate fields for separate semantics, even if it costs a few bytes, because it reduces CPU and error handling.
Choose the Right Scalar Representation
Protobuf scalars have different encoding sizes. For example, int32 uses varint encoding that can be compact for small positive values, while fixed32 and fixed64 use constant-size encodings. Use fixed* when values are naturally fixed-width (like hashes) and you want predictable size and faster encoding/decoding.
Keep Messages Flat Where It Matters
Nested messages add structure, but they also add parsing steps. For frequently accessed fields, a flatter message can reduce overhead. You can still use nested messages for logical grouping, but avoid deep nesting in request/response types that run on every call.
Avoid Repeated Fields Without Bounds
Repeated fields are encoded with multiple entries. If the list can grow unbounded, you risk large payloads and long parsing times. Use bounded sizes at the application level, and consider whether the design should be paginated or streamed.
Mind Map: Message Layout Decisions
Practical Example: Designing a Request Message
Suppose you’re building an RPC that fetches user activity. A naive design might store everything as strings and pack multiple meanings into one field. A more efficient design uses typed fields and keeps the request small.
Example: A More Efficient Protobuf Message
message GetActivityRequest {
  uint64 user_id = 1;
  uint32 page_size = 2;
  uint32 page_token = 3;
  enum ActivityType {
    ACTIVITY_TYPE_UNSPECIFIED = 0;
    LOGIN = 1;
    PURCHASE = 2;
  }
  ActivityType type = 4;
}
Reasoning: user_id as uint64 avoids negative-value ambiguity. page_size and page_token are numeric so they encode compactly for typical small values. The enum keeps the wire representation small and makes validation cheaper than parsing strings.
Advanced Details That Actually Matter
Understand Varint and Sign Handling
Varint encoding is efficient for small magnitudes. For signed integers, the encoding behavior depends on the chosen type. If you expect negative values rarely, choose a type that matches your value domain. If negatives are common, consider whether you want zigzag encoding semantics or fixed-width encodings.
Plan for Optionality Without Guesswork
In proto3, “unset” scalars don’t preserve presence by default. If you need to distinguish “not provided” from “provided with default value,” use presence-aware types (like wrapper types) or explicit oneof fields. Presence checks add branching, so only use them when the distinction changes behavior.
Keep Oneof Usage Focused
oneof is useful for mutually exclusive variants, but it introduces a tag plus one active field. It’s efficient when it prevents multiple fields from being carried simultaneously. If you have many independent optional fields, oneof can be counterproductive.
Example: Evolving a Message Safely
If you originally shipped:
message GetActivityRequest {
  uint64 user_id = 1;
  uint32 page_size = 2;
}
Later you add:
message GetActivityRequest {
  uint64 user_id = 1;
  uint32 page_size = 2;
  uint32 page_token = 3;
}
Reasoning: adding a new field is safe because older clients ignore unknown fields, and newer clients can default missing fields. The stable field numbers ensure that decoding remains consistent across versions.
Checklist for Efficient Message Design
- Field numbers are stable and never reused.
- Scalars match the value domain and encoding behavior.
- Requests and responses are kept flat for hot-path fields.
- Repeated fields have practical bounds.
- Presence is used only when behavior depends on it.
- Evolution is additive and semantics don’t get reassigned.
1.3 Unary Streaming and Bidirectional Streaming Call Patterns
gRPC in Tonic gives you three practical shapes for service communication: unary calls, server streaming, and bidirectional streaming. Unary is the simplest request-response handshake. Streaming patterns add a second dimension: time. Instead of “one request yields one response,” you decide how many messages can flow and who controls the pace.
Mind Map: Call Patterns and Control Points
Unary Calls as the Baseline
A unary RPC is a single request message that produces a single response message. In practice, unary calls are ideal when you can compute the result immediately or when you want a clean boundary for validation and error mapping.
A typical Tonic handler receives a request, reads fields, and returns a response. The key operational detail is that unary errors are returned once, so you can map domain failures to a single Status without worrying about partial progress.
Server Streaming as “One Request, Many Results”
Server streaming keeps the request side simple while allowing the server to emit multiple responses over time. The client starts the call once, then reads a stream of messages.
Use server streaming when:
- The client needs incremental results, such as paginated computation or progress updates.
- The response size is large enough that chunking is preferable to one huge message.
- You want cancellation to stop generation early.
In Tonic, the handler returns a Response<impl Stream<Item = Result<Msg, Status>>>. Each item is either a message or an error. If an error occurs mid-stream, the stream ends with that error, and the client observes the failure at the point it tries to read.
use tonic::{Request, Response, Status};
use tokio_stream::{self as stream, Stream};

async fn list_events(_req: Request<ListReq>)
  -> Result<Response<impl Stream<Item = Result<Event, Status>>>, Status>
{
  let events = vec![Event{ id: 1 }, Event{ id: 2 }];
  let out = stream::iter(events.into_iter().map(Ok));
  Ok(Response::new(out))
}
This example is intentionally small, but the pattern matters: the stream is produced lazily, and the client’s read loop effectively controls how quickly items are pulled.
Bidirectional Streaming as “Two Lifecycles, One Channel”
Bidirectional streaming allows both sides to send multiple messages. The important mental model is that you have one long-lived call with two independent flows: inbound messages from the client and outbound messages from the server.
Use bidirectional streaming when:
- The server must react to client input continuously.
- You need interactive protocols, such as command streams or session-based updates.
- You want to keep connection setup overhead low compared to repeated unary calls.
In Tonic, the handler typically takes a Request<Streaming<InMsg>> and returns a stream of OutMsg. Inside, you read from the inbound stream and produce outbound messages. The simplest approach is to process each incoming message sequentially and emit a response for each.
use tonic::{Request, Response, Status};
use tokio_stream::StreamExt;

async fn chat(req: Request<tonic::Streaming<ChatIn>>)
  -> Result<Response<impl tokio_stream::Stream<Item = Result<ChatOut, Status>>>, Status>
{
  let mut inbound = req.into_inner();
  let mut outputs = Vec::new();

  while let Some(msg) = inbound.next().await {
    let m = msg?;
    outputs.push(Ok(ChatOut { text: format!("echo: {}", m.text) }));
  }

  Ok(Response::new(tokio_stream::iter(outputs)))
}
This version buffers outputs, which is fine for illustrating control flow. In real services, you usually produce outputs incrementally rather than collecting everything first, so memory usage stays proportional to in-flight work.
Cancellation, Timeouts, and Error Semantics
Cancellation matters more in streaming than unary because work may span multiple messages. When the client drops the stream or the call is canceled, your handler should stop reading and stop producing.
Timeouts also behave differently: a unary timeout bounds the whole operation, while streaming timeouts bound the call duration and can interrupt long-running sessions. Plan your protocol so that each message exchange is meaningful even if the call ends early.
Error semantics are consistent but not identical across patterns:
- Unary: one error terminates the call.
- Server streaming: an error terminates the stream at the next read boundary.
- Bidirectional streaming: an error can occur while reading inbound, while producing outbound, or both; the call ends once the error is surfaced.
Practical Protocol Shape for Throughput
To keep streaming efficient, design message sizes and processing steps so that each inbound message can be handled quickly. If processing is slow, you should avoid blocking the inbound read loop; otherwise, the client’s send side may stall because the server is not consuming.
A clean approach is to treat each inbound message as a unit of work and respond in order when ordering matters, or respond as completed when ordering does not. Either way, the call pattern you choose should match the lifecycle you want: single-shot results for unary, incremental server output for server streaming, and interactive session behavior for bidirectional streaming.
1.4 Mapping gRPC Semantics to Rust Types and Error Models
gRPC has a few semantic rules that don’t map 1:1 to Rust’s type system. The goal is to make those rules explicit in your Rust signatures and error types, so handlers stay readable and callers get consistent behavior.
Unary Calls and Result Shapes
A unary RPC is conceptually “one request, one response, or an error.” In Rust, that usually becomes:
- Handler returns
Result<Response<T>, Status>. - Success path contains the response message.
- Failure path contains a
Statuswith a code and message.
A practical pattern is to keep your domain handler returning a domain error, then convert it at the boundary.
use tonic::{Request, Response, Status};

#[derive(Debug)]
struct DomainError { kind: &'static str }

impl From<DomainError> for Status {
    fn from(e: DomainError) -> Self {
        Status::failed_precondition(format!("{}", e.kind))
    }
}

async fn unary_handler(req: Request<MyReq>) -> Result<Response<MyResp>, Status> {
    let _ = req.into_inner();
    // domain logic...
    Err(DomainError { kind: "missing field" }.into())
}
This keeps your domain logic free of gRPC concerns while still producing correct gRPC semantics at the edge.
Streaming Calls and Backpressure Semantics
For server streaming, the handler returns a stream of items. The semantic rule is “items may be produced over time; the call ends either normally or with an error.” In Rust, that means your stream must be able to yield Result<Item, Status>.
For client streaming, the handler consumes a stream and returns a single response or error. For bidirectional streaming, both sides can fail independently, but the gRPC call still has a single terminal status.
A common mistake is to treat stream errors like regular items. Instead, model them as terminal failures by using Result inside the stream item type.
Mapping gRPC Status Codes to Rust Error Categories
Rust errors are usually structured as enums. gRPC errors are structured as Status codes. You want a deterministic mapping so the same domain failure always becomes the same gRPC code.
A systematic approach:
- Define a domain error enum with variants that reflect failure categories.
- Implement a conversion to
tonic::Status. - Ensure the conversion is total and explicit.
#[derive(Debug)]
enum DomainError {
    NotFound,
    InvalidInput,
    Conflict,
    RateLimited,
    Internal,
}

impl From<DomainError> for tonic::Status {
    fn from(e: DomainError) -> tonic::Status {
        use DomainError::*;
        match e {
            NotFound => tonic::Status::not_found("resource not found"),
            InvalidInput => tonic::Status::invalid_argument("invalid request"),
            Conflict => tonic::Status::already_exists("conflict"),
            RateLimited => tonic::Status::resource_exhausted("rate limited"),
            Internal => tonic::Status::internal("internal error"),
        }
    }
}
The mapping above is intentionally boring: stable codes beat cleverness.
Error Details and Messages Without Leaking Secrets
Status carries a human-readable message. In Rust, it’s tempting to include raw internal error strings. A safer approach is:
- Use concise messages for clients.
- Keep detailed diagnostics in logs.
- If you need structured details, attach them as metadata-like fields using
Statusdetails mechanisms, but keep the client-facing message short.
This separation prevents accidental exposure of internal state while still giving clients enough context to react.
Mind Map: Semantics to Types and Errors
Example: Consistent Mapping Across Unary and Streaming
If you reuse the same domain error enum and conversion, unary and streaming handlers stay consistent. The only difference is where the Result lives: returned value for unary, item type for streaming.
use tonic::Status;

#[derive(Debug)]
enum DomainError { NotFound, InvalidInput }
impl From<DomainError> for Status {
    fn from(e: DomainError) -> Status {
        match e {
            DomainError::NotFound => Status::not_found("resource not found"),
            DomainError::InvalidInput => Status::invalid_argument("invalid request"),
        }
    }
}

fn stream_item(domain: Result<MyItem, DomainError>) -> Result<MyItem, Status> {
    domain.map_err(Into::into)
}
This keeps your semantics aligned: the same failure category becomes the same gRPC status regardless of call pattern.
1.5 Practical Project Layout for a Tonic Based Service
A good Tonic project layout makes it easy to find the RPC definitions, the generated code, the server implementation, and the cross-cutting concerns like middleware and configuration. The goal is simple: when something breaks, you should know where to look without guessing.
Repository Shape That Scales Past “Hello World”
Start with a workspace-friendly structure even if you only have one service today. Keep generated code isolated so it doesn’t get mixed with hand-written logic.
A practical layout:
proto/holds.protofiles.build.rsandtonic_buildgenerate Rust code intosrc/generated/.src/contains server, client helpers, middleware, and shared types.tests/contains integration tests that run the server.
Mind Map: Practical Tonic Project Layout
Cargo and Module Boundaries
Use src/bin/ for the service entrypoint so the library code stays testable. Keep the server logic in src/server/ and expose only what the binary needs.
Example module skeleton:
// src/lib.rs
pub mod common;
pub mod middleware;
pub mod server;
pub mod client;

pub mod generated {
    include!(concat!(env!("OUT_DIR"), "/generated.rs"));
}
This keeps generated code separate while still letting your server reference the generated types.
Protobuf Placement and Build Output
Place .proto files under proto/ and generate into OUT_DIR to avoid committing generated artifacts. In build.rs, configure tonic_build and prost to compile your protos.
Example build.rs:
fn main() -> Result<(), Box<dyn std::error::Error>> {
    tonic_build::configure()
        .build_server(true)
        .build_client(true)
        .compile(&["proto/greeter.proto"], &["proto"])?;

    Ok(())
}
Keep proto include paths explicit so the build stays deterministic.
Server Implementation Organization
Inside src/server/, split the service trait implementation from business logic. The service trait methods should be thin: validate inputs, call a handler, map errors to gRPC status.
A clean pattern:
src/server/service.rsimplements the generated Tonic trait.src/server/handlers.rscontains domain logic.src/common/errors.rsdefines a unified error type.
Example service method shape:
// src/server/service.rs
use tonic::{Request, Response, Status};
use crate::generated::greeter_server::Greeter;

pub struct GreeterService;

#[tonic::async_trait]
impl Greeter for GreeterService {
    async fn say_hello(
        &self,
        req: Request<crate::generated::HelloRequest>,
    ) -> Result<Response<crate::generated::HelloReply>, Status> {
        let name = req.into_inner().name;
        let reply = crate::server::handlers::hello(name)
            .map_err(|e| Status::invalid_argument(e.to_string()))?;
        Ok(Response::new(reply))
    }
}
This keeps error mapping consistent and makes handlers::hello easy to unit test.
Middleware Placement and Composition
Put middleware in src/middleware/ and compose it in the binary entrypoint. Middleware should not depend on the binary; it should depend on shared types from src/common/.
Mind Map: Middleware Placement
Configuration and Environment Handling
Keep configuration in src/common/config.rs. The binary reads environment variables, builds a config struct, then passes it into the service and middleware constructors.
Example config struct:
// src/common/config.rs
#[derive(Clone)]
pub struct Config {
    pub bind_addr: String,
    pub max_concurrency: usize,
}
This avoids scattering std::env::var calls across the codebase.
Integration Tests That Match Real Usage
Use tests/ for integration tests that start the server on an ephemeral port, then call it with a real Tonic client. For streaming RPCs, assert both the message sequence and the termination behavior.
A simple test flow:
- Start server in the background.
- Create a client channel to the bound address.
- Call RPC and assert response.
- Shut down server cleanly.
A Concrete “Where Does This Go” Checklist
- Protobuf messages and services:
proto/ - Generated Rust types:
OUT_DIRviabuild.rs - gRPC trait implementation:
src/server/ - Domain logic:
src/server/handlers.rs - Shared error and mapping:
src/common/ - Middleware layers:
src/middleware/ - Server startup and layer composition:
src/bin/ - End-to-end behavior tests:
tests/
If you follow this, the project stays navigable even as you add more RPCs, more middleware, and more streaming paths.
2. Tonic gRPC Server Architecture and Tokio Runtime Integration
2.1 Building a Tonic Server with Service Traits and Handlers
A Tonic gRPC server is built around two ideas: a service trait that defines the RPC surface, and handlers that implement the behavior. The trait gives the compiler a contract; the handlers give the runtime something to do when a request arrives.
Service Traits as the Contract
In generated code, each gRPC service becomes a Rust trait with methods matching your RPC definitions. For unary RPCs, the method takes a request type and returns a response type wrapped in a Result. For streaming RPCs, the method returns a stream or accepts a stream, depending on the RPC kind.
A practical way to think about the trait is: “This is the shape of my API, plus the error channel.” That error channel matters because gRPC expects a status code, not just a log line.
Handlers as the Execution Unit
Handlers are where you translate request data into domain actions. They should be small enough to test, but they also need access to shared state like database pools, caches, or configuration.
In Tonic, shared state is typically stored in a struct that implements the generated service trait. That struct can hold an Arc to shared resources so cloning the service is cheap and thread-safe.
Minimal Unary Example
Below is a compact unary setup. It shows the core wiring: a service struct, an implementation of the trait, and server startup.
use tonic::{transport::Server, Request, Response, Status};
use std::sync::Arc;

pub mod greeter { tonic::include_proto!("greeter"); }
use greeter::greeter_server::{Greeter, GreeterServer};

#[derive(Clone)]
struct MyGreeter { state: Arc<String> }

#[tonic::async_trait]
impl Greeter for MyGreeter {
  async fn say_hello(
    &self,
    req: Request<greeter::HelloRequest>,
  ) -> Result<Response<greeter::HelloReply>, Status> {
    let name = req.into_inner().name;
    if name.trim().is_empty() {
      return Err(Status::invalid_argument("name must not be empty"));
    }
    let msg = format!("{} {}", self.state.as_str(), name);
    Ok(Response::new(greeter::HelloReply { message: msg }))
  }
}

#[tokio::main]
async fn main() -> Result<(), Box<dyn std::error::Error>> {
  let addr = "127.0.0.1:50051".parse()?;
  let svc = MyGreeter { state: Arc::new("Hello".to_string()) };
  Server::builder().add_service(GreeterServer::new(svc)).serve(addr).await?;
  Ok(())
}
Two details are worth noticing. First, Status::invalid_argument is how you communicate validation failures to clients. Second, the handler reads request fields via into_inner(), which makes ownership explicit and keeps the code predictable.
Mind Map: Server Structure
Systematic Request Lifecycle
A robust handler follows a consistent sequence:
- Extract and validate inputs: reject missing or malformed fields early using
Statusconstructors. - Call domain logic: keep business rules out of the gRPC layer when possible.
- Map errors to gRPC status: for example, treat “not found” as
Status::not_found, and permission issues asStatus::permission_denied. - Build the response: return a
Response<T>with the correct message type.
This structure prevents the common failure mode where handlers become a pile of ad-hoc checks and inconsistent error messages.
Practical Handler Design Tips
- Keep the service struct cloneable: Tonic may clone the service; deriving
ClonewithArcfields makes that painless. - Avoid blocking inside handlers: handlers are async; if you must do blocking work, isolate it so it doesn’t stall the runtime.
- Make validation explicit: trimming strings and checking required fields is cheap and saves clients from confusing downstream errors.
Where Streaming Fits
Streaming RPCs use the same trait-and-handler pattern, but the handler returns a stream or consumes one. The key difference is that you must handle backpressure and cancellation correctly, which usually means using bounded channels or streaming iterators rather than buffering everything in memory.
A Quick Mental Model
If the service trait is the “menu,” then the handler is the “kitchen.” The compiler ensures the menu items exist and have the right signatures; your code ensures each order is validated, processed, and returned with the right status when something goes wrong.
2.2 Configuring Tokio Runtime for Concurrency and I/O Throughput
A Tonic server runs on Tokio, so runtime configuration is where “how many requests can we handle” becomes “how many tasks can we actually schedule without tripping over ourselves.” The goal is simple: keep CPU busy, keep sockets flowing, and avoid letting slow I/O or heavy work block the async reactor.
Core Runtime Choices
Tokio offers two main runtime styles. The multi threaded runtime runs tasks across a worker thread pool, which is usually the right default for gRPC servers. The current thread runtime is more constrained and is best when you know you have a single-threaded workload.
For throughput, multi threaded plus a sensible worker count matters. A practical starting point is using the number of logical CPU cores, then validating with load tests. If you set too few workers, tasks queue up; too many can increase scheduling overhead.
Worker Threads and Task Scheduling
Tokio’s worker threads execute async tasks. Each incoming gRPC call becomes work that may include:
- decoding protobuf messages
- running your handler logic
- writing responses and streaming frames
- executing middleware layers
If your handler does CPU heavy work (compression, encryption, large transformations), it should not run on the async worker threads. Use spawn_blocking for blocking CPU work, or move CPU heavy logic into a dedicated thread pool you control. Otherwise, the runtime can’t schedule I/O efficiently.
A small but important detail: async tasks should yield frequently. If you write a loop that does not .await or otherwise yield, you can starve other tasks. For streaming handlers, yielding happens naturally when you await on stream items, but custom loops should still be structured to avoid long uninterrupted runs.
I/O Driver and Backpressure
Tokio’s I/O driver handles network readiness. gRPC over HTTP/2 involves many concurrent reads and writes, so you want to avoid unbounded buffering. Backpressure is your friend: when the client can’t keep up, your server should slow down rather than accumulate memory.
In practice, this means:
- prefer bounded channels when you fan out work
- stream responses instead of buffering entire payloads
- avoid collecting large request bodies into memory unless necessary
Timeouts and Cancellation Semantics
Concurrency without timeouts is how you end up with tasks that never finish. Tokio timers and cancellation are how you keep the system tidy.
Common patterns:
- apply per-request deadlines so slow clients don’t hold resources forever
- cancel downstream work when the client disconnects
- ensure streaming tasks stop when the stream is dropped
Tokio cancellation is cooperative: dropping a future or using a cancellation token stops work only at await points or when your code checks the token.
Example Runtime Configuration
Below is a minimal server runtime setup using multi threaded workers. The key knobs are worker count and enabling time and I/O drivers (Tokio does this automatically in most builds).
use tokio::runtime::Builder;

fn build_runtime() -> tokio::runtime::Runtime {
    let workers = std::cmp::max(2, num_cpus::get());
    Builder::new_multi_thread()
        .worker_threads(workers)
        .enable_all()
        .build()
        .expect("runtime build failed")
}
Use the runtime to run your Tonic server. Keep the runtime alive for the server lifetime so tasks aren’t abruptly dropped.
Practical Concurrency Limits
Tokio schedules tasks, but it doesn’t automatically protect you from too much concurrency. Add explicit limits where it matters:
- limit concurrent expensive handler operations
- limit concurrent streaming sessions per connection or per service
- limit concurrent outbound calls from your client
A simple approach is a semaphore. It’s easy to reason about and integrates cleanly with async code.
use tokio::sync::Semaphore;
use std::sync::Arc;

async fn handle_request(sem: Arc<Semaphore>) {
    let _permit = sem.acquire().await.expect("semaphore closed");
    // handler work that should be concurrency-limited
}
Mind Map: Tokio Runtime Configuration for gRPC
Putting It Together in a Server Mental Model
Think of the runtime as three cooperating systems: worker threads for executing async tasks, the I/O driver for network readiness, and timers for deadlines. Your job is to keep CPU-bound work from blocking worker threads, keep memory bounded when clients are slow, and keep tasks from living forever. When those pieces align, Tonic can sustain high throughput without turning your server into a pile of queued futures.
2.3 Managing Connection Lifecycle and Request Dispatch
A scalable gRPC server is mostly about what happens between “a TCP connection exists” and “a handler returns a response.” In Tonic, that middle stretch is where connection lifecycle, request dispatch, and backpressure meet. The goal is simple: keep connections healthy, route requests deterministically, and avoid letting slow clients stall the whole service.
Connection Lifecycle: From Accept to Graceful Shutdown
Tokio accepts connections and hands them to Tonic’s HTTP/2 stack. HTTP/2 multiplexes many RPC streams over one connection, so lifecycle management is less about “one connection per request” and more about “one connection carrying many concurrent streams.”
Key lifecycle states to design for:
- Healthy running: accept new streams, dispatch requests, and keep resource usage bounded.
- Graceful shutdown: stop accepting new connections, let in-flight RPCs finish, and cancel what cannot finish safely.
- Failure paths: handle abrupt disconnects, protocol errors, and timeouts without leaking tasks.
A practical pattern is to wire shutdown into the server future and ensure it stops cleanly. In Rust, you typically combine a shutdown signal with the server task.
use tokio::sync::oneshot;
use tonic::transport::Server;

let (tx, rx) = oneshot::channel::<()>();

let server = Server::builder()
    .add_service(my_service)
    .serve_with_shutdown(addr, async move {
        let _ = rx.await;
    });

// later: tx.send(()).ok();
server.await?;
This keeps shutdown behavior explicit: the server future ends when the signal arrives, while existing RPCs are allowed to complete according to Tonic and HTTP/2 semantics.
Request Dispatch: How RPCs Reach Handlers
Once a stream is established, each RPC maps to a handler call. Dispatch is driven by the generated service implementation and Tonic’s internal routing. Your job is to ensure handlers are fast to start, predictable in resource usage, and consistent in error mapping.
A handler should:
- Validate early: reject malformed requests before doing expensive work.
- Avoid blocking: use async I/O or spawn blocking work onto a dedicated blocking pool.
- Respect cancellation: if the client cancels, stop work promptly.
For example, a unary handler that checks metadata and then performs async work might look like this:
use tonic::{Request, Response, Status};

async fn get_user(
    &self,
    req: Request<GetUserRequest>,
) -> Result<Response<GetUserResponse>, Status> {
    let user_id = req.get_ref().user_id;
    if user_id == 0 {
        return Err(Status::invalid_argument("user_id must be nonzero"));
    }

    let user = self.repo.fetch_user(user_id).await
        .map_err(|_| Status::internal("repository error"))?;

    Ok(Response::new(GetUserResponse { user: Some(user) }))
}
Notice the structure: validation first, then a single async call, then a clean Status mapping. That predictability helps dispatch remain stable under load.
Backpressure and Concurrency Boundaries
HTTP/2 multiplexing means many streams can be active simultaneously. Without limits, a slow handler can still consume memory and CPU indirectly through queued work.
Use explicit boundaries:
- Per-request limits: cap message sizes and enforce timeouts at the handler boundary.
- Global concurrency limits: restrict how many requests can run handler logic concurrently.
- Streaming discipline: for server streaming, yield items only as the client consumes them.
A common approach is to wrap handler execution with a semaphore. This prevents “too many concurrent requests” from turning into “too many tasks.”
use tokio::sync::Semaphore;
use std::sync::Arc;

let sem = Arc::new(Semaphore::new(200));

async fn handle_with_limit(
    sem: Arc<Semaphore>,
    req: Request<GetUserRequest>,
) -> Result<Response<GetUserResponse>, Status> {
    let permit = sem.acquire().await.map_err(|_| Status::unavailable("shutdown"))?;
    let _permit = permit;

    // handler logic here
    Ok(Response::new(GetUserResponse { user: None }))
}
The permit is held for the duration of the handler, which keeps concurrency bounded and makes load behavior easier to reason about.
Mind Map: Connection Lifecycle and Dispatch
Putting It Together: A Cohesive Dispatch Strategy
A good dispatch strategy treats lifecycle and concurrency as one system. Shutdown stops new work, handlers validate and map errors consistently, and concurrency limits prevent multiplexed streams from overwhelming the runtime. When these pieces align, the server behaves predictably even when clients are slow, networks are flaky, or request volume spikes.
2.4 Implementing Streaming Responses With Backpressure Awareness
Streaming in gRPC is not just “send many messages.” It is a contract between producer speed and consumer capacity. In Tonic on Tokio, backpressure shows up as slower polling, bounded buffers, and cancellation signals. If you treat streaming as a firehose, memory grows; if you treat it as a conversation, throughput stays stable.
Streaming Response Foundations
A server streaming handler returns a Response<impl Stream<Item = Result<T, Status>>>. The stream is polled by the runtime; when the client can’t keep up, the poll cadence slows. Your job is to ensure each poll does bounded work and does not accumulate unbounded intermediate state.
Backpressure awareness starts with two rules:
- Do not pre-build the entire response. Produce items incrementally.
- Do not block inside the stream poll path. Use async primitives that yield.
Mind Map: Backpressure Aware Streaming
A Systematic Implementation Pattern
1) Generate Items Incrementally
If you have a database cursor or an internal iterator, wrap it so each poll_next fetches the next chunk. Keep each chunk small enough that one poll does not do heavy CPU work.
2) Use Bounded Channels When You Need Decoupling
Sometimes you must decouple production from consumption, for example when reading from an upstream source while formatting messages. In that case, use a bounded mpsc channel. When the channel fills, the producer awaits capacity, naturally slowing down.
3) Respect Cancellation
When the client cancels, the stream is dropped. Any background task you spawned must stop when the receiver is dropped. The simplest approach is to avoid spawning at all; when you do spawn, watch for send failures.
Example: Server Streaming with Bounded Buffer
use tokio::sync::mpsc;
use tokio_stream::wrappers::ReceiverStream;
use tonic::{Response, Status};

async fn stream_numbers() -> Result<Response<ReceiverStream<Result<i32, Status>>>, Status> {
    let (tx, rx) = mpsc::channel::<Result<i32, Status>>(16);

    tokio::spawn(async move {
        for i in 0..1_000_000i32 {
            if tx.send(Ok(i)).await.is_err() {
                break; // receiver dropped, client canceled
            }
        }
    });

    Ok(Response::new(ReceiverStream::new(rx)))
}
The channel capacity of 16 is the key backpressure lever. If the client slows, send().await waits, and the producer stops outrunning the consumer.
Example: Mapping Domain Errors Without Leaking State
use tonic::Status;

fn map_error(e: anyhow::Error) -> Status {
    // Keep details safe and consistent.
    // Example: translate known categories to gRPC codes.
    if e.to_string().contains("not found") {
        Status::not_found("resource missing")
    } else {
        Status::internal("stream failed")
    }
}
In a streaming context, once you yield an error item, decide whether to end the stream or keep going. For most RPCs, ending is simpler and safer because the client already has a terminal outcome.
Advanced Details That Prevent Subtle Bugs
Avoid Unbounded Work per Poll
If you compute the next message by scanning a large collection, do it in small steps. A common mistake is to do a long loop inside the stream poll method without awaiting; that blocks other tasks and makes backpressure feel “ignored.”
Keep per Request State Bounded
Any per-request cache, queue, or accumulator must have a size limit. If you need to buffer, buffer with a bounded structure like mpsc or a bounded ring buffer.
Ensure Background Tasks Do Not Outlive the Request
If you spawn a task, tie its lifetime to the stream receiver. In the bounded channel example, send().await.is_err() is the cancellation signal. That prevents orphan tasks from continuing work after the client disconnects.
Practical Checklist
- Stream items are produced incrementally.
- Any decoupling uses bounded buffers.
- The producer yields via
awaitrather than busy loops. - Cancellation stops background work.
- Errors are mapped consistently and terminate the stream when appropriate.
With these pieces in place, backpressure becomes a natural property of the system rather than a special case you hope to remember at the end.
2.5 Observability Hooks for Tracing and Metrics in the Server
Observability in a Tonic gRPC server is mostly about two things: seeing what happened and understanding why it happened. Tracing gives you a timeline across async boundaries, while metrics give you counts, rates, and distributions you can compare over time. The trick is to instrument at the right points without turning every request into a logging festival.
Tracing Foundations for Async gRPC
A gRPC request enters your server handler, then flows through middleware, decoding, business logic, and response encoding. In Rust async code, the call stack doesn’t stay put, so you need spans that follow the work.
Use tracing spans around the handler entry and around key internal steps. Keep span fields stable and low-cardinality: request method, service name, and a correlation id from metadata. Avoid putting raw user ids or full payloads into span fields.
Mind Map: Tracing and Span Placement
Metrics Foundations for Throughput and Latency
Metrics should answer questions like: “How many requests succeeded?” and “Where is latency coming from?” For gRPC, you typically track:
- Request count by method and status code
- Latency histogram for end-to-end handler time
- Streaming-specific metrics like message counts and stream duration
Keep metric labels limited. If you label by tenant id, you may create a metric cardinality problem that looks like a memory leak but isn’t.
Mind Map: Metrics and What to Measure
Integrated Instrumentation Flow
A practical pattern is: create a root span when the RPC starts, record timing and status when it ends, and emit metrics in the same lifecycle. That way, tracing and metrics agree on the request identity.
Example: Handler Instrumentation with Tracing and Metrics
use std::time::Instant;
use tonic::{Request, Response, Status};
use tracing::{info_span, Instrument};

async fn handle(req: Request<MyReq>) -> Result<Response<MyResp>, Status> {
    let method = "MyService/DoWork";
    let start = Instant::now();

    let corr_id = req
        .metadata()
        .get("x-correlation-id")
        .and_then(|v| v.to_str().ok())
        .unwrap_or("unknown");

    let span = info_span!("grpc_request", method, corr_id);
    let result = async {
        // Decode and validate
        // Auth checks
        // Business logic
        Ok(Response::new(MyResp { ok: true }))
    }
    .instrument(span)
    .await;

    let elapsed_ms = start.elapsed().as_millis() as u64;
    match &result {
        Ok(_) => {
            // metrics: grpc_requests_total{method, status="ok"} += 1
            // metrics: grpc_latency_ms_histogram{method} observe elapsed_ms
        }
        Err(status) => {
            // metrics: grpc_requests_total{method, status=status.code()} += 1
            // metrics: grpc_latency_ms_histogram{method} observe elapsed_ms
            // tracing: record status code
        }
    }

    result
}
This example keeps span fields simple and records latency once per request. For streaming, you’d measure from stream start until the stream completes, and increment message counters inside the loop.
Capturing Errors Without Losing Signal
When a handler returns Status, record the status code and a short error category. If you also log the error message, keep it structured and avoid duplicating the same string in multiple places. For tracing, use span fields like grpc_status and error_kind so you can filter quickly.
A common mistake is to log the full request on error. Instead, log validation failures as structured fields and keep payload logging out of the hot path.
Middleware Hooks for Consistent Observability
Middleware is where you can standardize instrumentation. Put the root span and request-level metrics in a middleware layer so every method gets the same treatment. Then let handlers add child spans for business steps.
Example: Middleware Root Span and Timing
use std::time::Instant;
use tonic::{Request, Response, Status};
use tower::{Service, ServiceBuilder};
use tracing::{info_span, Instrument};

fn with_observability<S>(inner: S) -> impl Service<Request<()>, Response=Response<()>, Error=Status>
where
    S: Service<Request<()>, Response=Response<()>, Error=Status> + Clone,
{
    ServiceBuilder::new()
        .service_fn(move |req| {
            let start = Instant::now();
            let span = info_span!("grpc_request", method = "unknown");
            let fut = inner.clone().call(req);
            async move {
                let res = fut.instrument(span).await;
                let _elapsed = start.elapsed();
                // metrics update based on res
                res
            }
        })
}
This sketch shows the lifecycle placement. In real code, extract method name from request extensions or metadata and update metrics with consistent labels.
Practical Mindful Defaults
- Create one root span per RPC and a small number of child spans for expensive steps.
- Record latency once per lifecycle, not at every internal function.
- Use metrics for aggregation and tracing for investigation; don’t force one to do the other’s job.
- Keep labels low-cardinality and fields stable.
With these defaults, your server becomes measurable without becoming noisy, and debugging stops being a scavenger hunt through logs.
3. Tonic gRPC Client Architecture and Call Management
3.1 Creating a Tonic Client with Channel Configuration
A Tonic client talks to a gRPC server through a Channel. Think of the channel as the transport and connection manager, while each RPC call is a request that rides on top of it. Good channel configuration matters because it controls timeouts, concurrency behavior, and how the client reacts to slow or broken networks.
Channel Configuration Basics
Start by creating a Endpoint, then turn it into a Channel. The endpoint holds configuration knobs; the channel is what your client uses.
Key ideas:
- Destination: host and port (or a URI-like endpoint).
- Transport security: plaintext vs TLS.
- Timeouts: connect timeout and per-request timeout.
- Concurrency: how many in-flight requests the channel can handle.
Here is a minimal unary client setup with a connect timeout and a per-request deadline.
use tonic::transport::{Channel, Endpoint};
use std::time::Duration;

async fn make_channel() -> Result<Channel, tonic::transport::Error> {
    let endpoint = Endpoint::from_static("http://127.0.0.1:50051")
        .connect_timeout(Duration::from_secs(2));

    endpoint.connect().await
}
Building the Client Stub
Tonic generates a client type from your .proto service. Once you have a Channel, you construct the client with it.
use tonic::transport::Channel;

// Generated by tonic from your proto
// use crate::greeter_client::GreeterClient;

async fn make_client(channel: Channel) {
    // let mut client = GreeterClient::new(channel);
    // let request = tonic::Request::new(...);
    // let response = client.some_rpc(request).await;
}
Even if you only show the stub creation, the important part is that the client owns the channel handle. Cloning the client typically clones the underlying channel reference, not a new TCP connection.
Timeouts That Actually Mean Something
There are two common timeout layers:
- Connect timeout: how long to wait for the TCP/TLS handshake.
- Request deadline: how long to wait for the RPC to finish.
A connect timeout that’s too short causes frequent failures during transient network hiccups. A request deadline that’s too long can tie up resources when the server is overloaded. Use both, and keep them aligned with your service’s expected latency.
Example pattern for a per-request deadline:
use tonic::Request;
use std::time::Duration;

async fn call_with_deadline(mut client: impl Send, req: Request<()>) {
    // let mut req = req;
    // req.set_timeout(Duration::from_secs(3));
    // let _ = client.some_rpc(req).await;
}
Concurrency and Backpressure at the Call Site
The channel can accept multiple in-flight RPCs. Your application decides how many calls to issue concurrently. If you fire too many requests at once, you’ll see increased latency and more timeouts, even when the server is healthy.
A practical approach is to cap concurrency in the caller using a semaphore. This keeps the client from overwhelming the server and makes performance behavior easier to reason about.
use tokio::sync::Semaphore;
use std::sync::Arc;

async fn bounded_calls<F, Fut>(sem: Arc<Semaphore>, f: F)
where
    F: FnOnce() -> Fut + Send + 'static,
    Fut: std::future::Future<Output = ()> + Send,
{
    let _permit = sem.acquire().await.unwrap();
    f().await;
}
TLS Versus Plaintext
If you use TLS, configure it on the endpoint before connecting. Plaintext is fine for local development, but production systems usually need TLS to protect metadata and payloads.
Mind the difference between:
- Transport security: encryption and authentication at the connection layer.
- Application authentication: identity checks done by middleware or interceptors.
Mind Map: Channel Configuration
Common Configuration Pitfalls
- Only setting connect timeout: you’ll still hang on slow RPCs because the request has no deadline.
- Only setting request timeout: you may waste time trying to connect to a dead endpoint.
- Unbounded concurrency: you can create self-inflicted overload where timeouts rise even though the server can handle a smaller load.
- Mixing security expectations: using plaintext endpoint settings against a TLS server fails during handshake.
Example: A Complete Client Setup Flow
Put it together: create the endpoint, connect to get a channel, build the client, then apply per-request deadlines and concurrency limits.
use tonic::transport::{Channel, Endpoint};
use std::time::Duration;

async fn build_client() -> Result<Channel, tonic::transport::Error> {
    let endpoint = Endpoint::from_static("http://127.0.0.1:50051")
        .connect_timeout(Duration::from_secs(2));
    endpoint.connect().await
}
Once this is in place, every RPC call becomes a predictable unit: it has a deadline, it runs under a concurrency cap, and it uses the same channel configuration for consistent behavior.
3.2 Handling Timeouts Retries and Idempotency at the Call Site
Timeouts, retries, and idempotency are easiest to get right when you treat them as one policy: “How long do I wait, what do I do when I don’t get an answer, and how do I avoid duplicating side effects?” In Rust with a Tonic client, you typically implement this at the call site by pairing per-request deadlines with retry rules and by choosing request identifiers that make repeated attempts safe.
Timeouts as Deadlines Not Suggestions
A timeout should represent a deadline for the entire RPC attempt, including network time, server processing, and response transfer. In practice, you set a deadline per attempt and keep it short enough to fail fast under load, but long enough to cover normal tail latency.
A good baseline is to start with a small timeout for unary calls and a larger one for streaming setup, then adjust based on observed latency distributions. The key is consistency: if you retry, each attempt should have its own timeout, not a single timeout shared across attempts.
use std::time::Duration;
use tonic::transport::Channel;

async fn unary_with_timeout(
    mut client: MyServiceClient<Channel>,
    req: MyRequest,
) -> Result<MyResponse, tonic::Status> {
    let timeout = Duration::from_millis(500);
    let resp = client
        .my_unary(req)
        .timeout(timeout)
        .await?;
    Ok(resp)
}
Retry Rules That Match Failure Modes
Retries should not be “retry everything.” Instead, classify failures into: (1) no response received (transport errors, deadline exceeded), (2) response received with an error status, and (3) partial progress for streaming calls.
For unary RPCs, retry on transport errors and on status codes that are typically transient, such as Unavailable and DeadlineExceeded. Avoid retrying on InvalidArgument, PermissionDenied, and other client-side errors; repeating them just burns time and bandwidth.
Also decide whether retries are bounded by attempt count, total time, or both. A simple approach is attempt count plus per-attempt timeout. If you need a total budget, compute it explicitly and stop when the budget is exhausted.
Idempotency Keys for Safe Replays
Idempotency matters when a retry might cause the server to perform the same side effect twice. The standard fix is an idempotency key: a unique identifier included in the request so the server can detect duplicates and return the same result.
For unary calls that create resources or trigger actions, include a key like request_id or idempotency_token. The server stores the mapping from key to outcome for a retention window. If the same key arrives again, the server returns the previously computed response.
On the client side, generate the key per logical operation, not per attempt. That way, retries reuse the same key.
use uuid::Uuid;

fn build_request_with_idempotency(base: MyBaseInput) -> MyRequest {
    let idempotency_token = Uuid::new_v4().to_string();
    MyRequest {
        input: Some(base),
        idempotency_token,
    }
}
A Systematic Call Site Policy
A practical call site policy for unary RPCs looks like this:
- Create a single idempotency token for the logical operation.
- For each attempt, apply a per-attempt timeout.
- Retry only on failures that are likely transient.
- Stop after a maximum number of attempts.
- If you get an error status that is not retryable, return immediately.
The following example shows the structure without pretending every project needs the same constants.
use std::time::Duration;

async fn unary_with_retries(
    mut client: MyServiceClient<Channel>,
    req: MyRequest,
) -> Result<MyResponse, tonic::Status> {
    let per_attempt = Duration::from_millis(500);
    let max_attempts = 3;

    for attempt in 1..=max_attempts {
        let result = client
            .my_unary(req.clone())
            .timeout(per_attempt)
            .await;

        match result {
            Ok(resp) => return Ok(resp),
            Err(status) => {
                let retryable = matches!(
                    status.code(),
                    tonic::Code::Unavailable | tonic::Code::DeadlineExceeded
                );
                if !retryable || attempt == max_attempts {
                    return Err(status);
                }
            }
        }
    }
    unreachable!()
}
Mind Map: Timeout, Retry, Idempotency Interlock
Streaming Calls: The “Don’t Guess” Rule
For streaming RPCs, retries are trickier because you may have already sent part of the stream or the server may have produced partial output. At the call site, prefer designing the protocol so the client can resume safely: include a session identifier and sequence numbers, and make the server treat replays as duplicates for the same sequence range.
Practical Example: Create Action Without Duplicates
Suppose CreateOrder triggers a side effect. The client generates one idempotency token for the order creation request, applies a per-attempt timeout, retries only on transient failures, and reuses the same token across attempts. The server stores the outcome keyed by the token and returns the same order id if the request repeats.
This combination prevents duplicate orders, keeps latency bounded, and ensures retries are a controlled tool rather than a random walk.
3.3 Managing Connection Pooling and Reuse with Channels
In Tonic, a “channel” is the client-side transport handle that manages HTTP/2 connections under the hood. Reusing a channel matters because creating one per request wastes work and can increase tail latency. The goal is simple: create a small number of channels, reuse them across calls, and let the runtime handle multiplexing.
Core Idea: Reuse Channels, Not Clients per Request
A typical pattern is to build a Channel once at startup, then clone it into request handlers. Cloning is cheap because the underlying connection state is shared. You can also build multiple channels when you need isolation (for example, different target endpoints or different TLS configurations).
Example: One Channel Shared Across Handlers
use tonic::transport::Channel;
use std::sync::Arc;

#[derive(Clone)]
struct AppClient {
    channel: Channel,
}

impl AppClient {
    async fn new(dst: String) -> anyhow::Result<Self> {
        let channel = Channel::from_shared(dst)?.connect().await?;
        Ok(Self { channel })
    }
}

// In your request handler, clone the channel and create the gRPC stub.
// The stub is lightweight; the channel is the expensive part.
When You Need Multiple Channels
You usually don’t want a “pool” in the traditional database sense. HTTP/2 already multiplexes many in-flight RPCs over one connection. Still, multiple channels can be useful:
- Different destinations: one channel per upstream address.
- Different security settings: separate channels for different TLS identities.
- Different traffic classes: if you need strict separation for limits or routing.
A practical rule: start with one channel per destination, then add more only when you have a concrete constraint.
Connection Lifecycle and Backpressure
A channel manages connection establishment and then keeps the connection alive. If the connection drops, calls will fail until reconnection succeeds. Your application should treat this as normal and rely on call-level timeouts and retry policies rather than trying to “pre-warm” connections.
Backpressure shows up as slower responses and increased time spent waiting for capacity. Because HTTP/2 multiplexing shares a connection, a single overloaded stream pattern can affect others. That’s why you should pair channel reuse with sensible concurrency limits in middleware.
Practical Channel Configuration
Tonic lets you configure the channel with options such as timeouts and HTTP settings. The key is to align these with your call semantics:
- Connect timeout: how long you’re willing to wait for the initial connection.
- Request timeout: enforced per RPC, usually via
tonic::Requesttimeout or client-side call options. - Keepalive: helps detect dead peers and maintain liveness.
Avoid setting very long timeouts “just in case.” Long timeouts hide problems and make failure recovery slower.
Mind Map: Channel Reuse and Pooling
Example: Sharing a Channel with an Arc Wrapper
If your app state is stored in an Arc, wrap the channel so handlers can access it without rebuilding.
use std::sync::Arc;
use tonic::transport::Channel;

#[derive(Clone)]
struct State {
    channel: Channel,
}

async fn build_state(dst: String) -> anyhow::Result<Arc<State>> {
    let channel = Channel::from_shared(dst)?.connect().await?;
    Ok(Arc::new(State { channel }))
}
Example: Pairing Channel Reuse with Per-Call Timeouts
Channel reuse doesn’t replace per-call timeouts. Timeouts bound resource usage when upstream is slow.
use tonic::Request;
use std::time::Duration;

async fn call_with_timeout<S>(mut stub: S) -> Result<(), tonic::Status>
where
    S: Clone,
{
    let req = Request::new(/* your message */);
    let resp = stub
        .some_rpc(req)
        .timeout(Duration::from_secs(2))
        .await?;
    Ok(())
}
Operational Checks That Prevent Surprises
- Count channels: log the number of distinct channels created; it should be small.
- Measure connection errors: treat them as signals that your retry/timeout strategy is doing its job.
- Watch concurrency: if latency rises while CPU is stable, you likely need tighter concurrency limits.
Channel reuse is the foundation; the rest is disciplined control of timeouts and concurrency so multiplexing stays healthy instead of turning into a traffic jam.
3.4 Streaming Client Implementations With Flow Control
Streaming calls are where “it works” meets “it survives.” On the client side, flow control is mostly about deciding how fast you read, how you buffer, and how you stop cleanly when the server or your own logic says “enough.” In Rust with Tonic and Tokio, you typically combine three tools: bounded buffering, explicit cancellation, and careful mapping of backpressure signals into your application logic.
Core Flow Control Concepts
Start with the direction of pressure. If your client reads slowly, the server may accumulate work or block on sending. If your client reads fast but your application processes slowly, your client will accumulate buffered items and memory usage grows. The goal is to make the slowest stage explicit and bounded.
A practical mental model is a pipeline:
- Network receive produces stream items.
- Your client buffers items until the application is ready.
- Your application processes items and may produce side effects.
- Cancellation stops the pipeline when either side is done.
In gRPC streaming, you can’t directly “set TCP window sizes” from application code, but you can control how much you pull from the stream and how much you queue internally.
Bounded Buffering with Backpressure
If you simply iterate a stream and process each item sequentially, you get natural backpressure: you only request the next item after finishing the current one. That’s the simplest safe approach.
When you want concurrency, you must introduce a bounded queue. The queue becomes your flow-control boundary: once full, you stop pulling from the gRPC stream until capacity returns.
Mind Map: Streaming Client Flow Control
Sequential Pull with Natural Backpressure
For many services, sequential processing is enough. It keeps buffering minimal and makes cancellation straightforward.
use tonic::Status;

async fn consume_sequential<S>(mut stream: S) -> Result<(), Status>
where
    S: futures_core::Stream,
    S::Item: std::fmt::Debug,
{
    while let Some(item) = stream.next().await {
        let item = item?; // if Item is Result<T, Status>
        // Process item synchronously in the loop
        // e.g., update state, write to DB, etc.
    }
    Ok(())
}
This pattern ensures you never read more than you can process, but it limits throughput when per-item processing is slow.
Concurrent Processing with Bounded Queue
To increase throughput, decouple receiving from processing using a bounded channel. The receiving task pulls from the gRPC stream and sends into the channel. If the channel is full, the receiver awaits capacity, which automatically slows down pulling from the server.
use tokio::sync::mpsc;
use futures::StreamExt;
use tonic::Status;

async fn consume_bounded<S>(mut stream: S) -> Result<(), Status>
where
    S: futures_core::Stream,
    S::Item: std::convert::TryInto<Result<i32, Status>>,
{
    let (tx, mut rx) = mpsc::channel::<i32>(128);

    let recv = tokio::spawn(async move {
        while let Some(msg) = stream.next().await {
            let v: Result<i32, Status> = msg.try_into().unwrap();
            let v = v?;
            tx.send(v).await.map_err(|_| Status::cancelled("receiver dropped"))?;
        }
        Ok::<_, Status>(())
    });

    while let Some(v) = rx.recv().await {
        // Process v
    }

    recv.await??;
    Ok(())
}
The queue size (128 here) is your explicit memory budget. If processing slows, the receiver blocks on send, which throttles the stream consumption.
Explicit Cancellation and Clean Shutdown
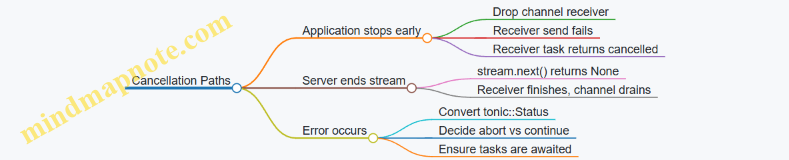
Cancellation should be deterministic. If your processing decides to stop early (for example, you reached a target count), you should drop the receiver side and abort the receiving task or trigger cancellation.
A clean approach is to use a cancellation token or to rely on task dropping plus channel closure. Dropping the processing consumer causes the channel receiver to stop, which makes send fail and lets the receiver exit.
Mind Map: Cancellation Paths
Error Handling Without Breaking Flow
In streaming, errors can arrive mid-stream. Decide whether an error should abort the whole call or skip a bad item. A common rule is: if the error is a transport or protocol issue, abort; if it’s an application-level item error, you may skip.
When you abort, stop pulling from the stream by ending the receiver loop, then ensure the processing side stops by closing the channel or awaiting tasks.
Practical Example: Rate-Limited Consumption
Suppose you need to cap how many items you process per second while still keeping memory bounded. You can combine a bounded channel with a simple pacing mechanism in the processing loop.
use tokio::time::{self, Duration};

async fn paced_process(mut rx: tokio::sync::mpsc::Receiver<i32>) {
    let mut tick = time::interval(Duration::from_millis(10));
    while let Some(v) = rx.recv().await {
        tick.tick().await;
        // Process v
    }
}
Pacing slows processing, which fills the bounded queue, which then slows receiving, which ultimately throttles the server-side send rate. That chain is the point: one bounded boundary, multiple stages aligned.
Summary Checklist
- Prefer sequential consumption when possible for minimal buffering.
- If you add concurrency, use a bounded channel to cap memory.
- Treat channel capacity as your flow-control contract.
- Make cancellation deterministic by stopping the receiver and closing the pipeline.
- Abort on transport/protocol errors; consider skipping only item-level failures.
3.5 Error Conversion Strategies for Consistent Client Behavior
Consistent client behavior starts with consistent error shapes. In Rust gRPC services, you typically have three layers of meaning: domain failure (what went wrong), transport failure (what the call experienced), and protocol status (what the client sees). Your job is to map between them without losing the parts the client needs to decide what to do next.
Foundational Model for Error Meaning
Begin by separating error categories in your service code:
- Domain errors: invalid input, missing entity, business rule violations.
- Infrastructure errors: database timeouts, cache failures, upstream RPC failures.
- Protocol errors: malformed requests, authentication failures, deadline exceeded.
A practical approach is to define a small domain error enum and convert it once at the boundary. That keeps middleware and handlers from inventing ad hoc mappings.
A Unified Error Type at the Boundary
Create a service error type that can carry:
- a gRPC status code (or enough info to choose one)
- a human-readable message
- optional details for debugging (without leaking secrets)
Then implement a single conversion path from your internal error to tonic::Status. This ensures every handler produces the same status structure.
use tonic::Status;

#[derive(Debug)]
enum DomainError {
    NotFound,
    InvalidArgument(String),
    Conflict(String),
    UpstreamUnavailable,
}

fn to_status(err: DomainError) -> Status {
    match err {
        DomainError::NotFound => Status::not_found("resource not found"),
        DomainError::InvalidArgument(msg) => Status::invalid_argument(msg),
        DomainError::Conflict(msg) => Status::already_exists(msg),
        DomainError::UpstreamUnavailable => {
            Status::unavailable("upstream unavailable")
        }
    }
}
Notice the messages: they are stable enough for client logic and safe enough for logs. If you need richer context, attach it as structured details rather than stuffing it into the message.
Mapping Rules That Clients Can Rely On
Clients usually implement behavior based on status codes. Make those codes predictable:
- Invalid input →
InvalidArgument. - Missing resource →
NotFound. - Business conflict (e.g., version mismatch) →
AlreadyExistsorFailedPreconditiondepending on semantics. - Capacity or dependency issues →
Unavailable. - Authentication/authorization →
Unauthenticated/PermissionDenied. - Deadlines →
DeadlineExceeded.
For infrastructure errors, decide whether they are transient. If a database connection pool is exhausted, map to Unavailable. If the request is fundamentally wrong, map to InvalidArgument. This distinction is what prevents clients from retrying when they should not.
Preserving Debug Context Without Breaking Client Logic
A common mistake is to include unique identifiers in the message and then have clients parse it. Instead:
- Keep the message stable and generic.
- Put request-specific context into details or server logs.
- Ensure the status code remains the primary signal.
If you use details, treat them as optional. Clients should not fail if details are missing.
Handling Nested Errors and Upstream Calls
When your handler calls another service, you’ll receive a tonic::Status from upstream. Don’t blindly forward it; translate it into your service’s meaning.
A good rule: forward only when the upstream status directly matches your domain. Otherwise, map it to your own category. For example, an upstream NotFound might mean your resource is missing too, but an upstream Unavailable might mean your dependency is down, which you should still present as Unavailable.
fn map_upstream(status: Status) -> Status {
    match status.code() {
        tonic::Code::NotFound => Status::not_found("resource not found"),
        tonic::Code::Unavailable => Status::unavailable("upstream unavailable"),
        other => Status::internal(format!("upstream error: {other:?}")),
    }
}
This keeps the client’s decision tree consistent even when dependencies change.
Mind Map: Error Conversion Pipeline
Example: Consistent Behavior for Retry Decisions
Suppose a client retries on Unavailable and never retries on InvalidArgument. Your service must enforce that contract.
- If the request is missing a required field, return
InvalidArgumenteven if the database would also fail. - If the database times out, return
Unavailable. - If the caller’s deadline is exceeded, return
DeadlineExceeded.
This is less about being “correct” in theory and more about preventing retry storms caused by mismatched mappings.
Practical Checklist for Consistency
- Convert to
tonic::Statusin one place per handler boundary. - Use stable status codes for client decision logic.
- Keep messages generic; put sensitive or variable data in logs or details.
- Translate upstream statuses into your domain meaning.
- Ensure streaming handlers also map errors consistently at the point where the stream fails.
When these rules are followed, clients can treat errors as a reliable contract rather than a guessing game. The server still gets to be precise internally; the client gets predictable outcomes.
4. Tower Middleware Design for Cross Cutting Concerns
4.1 Tower Service Trait Fundamentals for Composable Layers
Tower’s core idea is simple: treat request handling like a function you can wrap. In Rust, that “function” is the Service trait, and each middleware is a Layer that produces a new Service around an existing one. Once you internalize that, the rest of Tower feels less like magic and more like plumbing.
The Service Trait as a Contract
A Service is something that can receive a request and eventually produce a response. It is generic over request and response types, and it is asynchronous. The trait also models readiness, which matters because real systems can’t always accept unlimited work.
Key pieces you’ll see in practice:
poll_ready: tells you whether the service can accept a new request right now.call: starts handling a request and returns a future.ResponseandError: define what comes back and what failures look like.
This separation is important. Middleware often needs to enforce limits before calling the inner service, and limits require a readiness signal.
Readiness and Backpressure in Plain Terms
Imagine a service with a fixed-size worker pool. If all workers are busy, poll_ready returns “not ready,” and the caller should wait. That waiting is not busy-spinning; it’s cooperative with the async runtime.
In middleware, you typically:
- Check readiness for the inner service.
- Apply your own constraints (like concurrency limits).
- Only then accept the request and call the inner service.
This is how Tower avoids turning “too much traffic” into “unbounded memory growth.”
Layers as Service Transformers
A Layer takes an existing service and returns a new service. Think of it as a factory for wrappers.
- Layer: “Given
S, produceS'.” - Service: “
S'can be polled for readiness and can handle requests.”
This design keeps middleware composable. You can stack layers in a predictable order, and each layer only needs to understand how to wrap the service it receives.
A Minimal Mental Model for Composition
When you build a stack, you’re effectively creating a pipeline:
- Outer layer runs first on the request.
- Inner layers run next.
- The response unwinds back outward.
That means ordering affects semantics. For example, if you put authentication after rate limiting, you might waste rate-limit budget on unauthenticated traffic. If you put tracing outside everything, you’ll capture the full duration including middleware overhead.
Mind Map: Tower Concepts
Example: A Tiny Wrapper Service
Below is a conceptual wrapper that logs when it is called. It doesn’t implement a full middleware, but it shows the shape of the Service contract.
use std::task::{Context, Poll};
use tower::Service;

struct LoggingService<S> { inner: S }

impl<S, Req> Service<Req> for LoggingService<S>
where
    S: Service<Req>,
{
    type Response = S::Response;
    type Error = S::Error;
    type Future = S::Future;

    fn poll_ready(&mut self, cx: &mut Context<'_>) -> Poll<Result<(), Self::Error>> {
        self.inner.poll_ready(cx)
    }

    fn call(&mut self, req: Req) -> Self::Future {
        // log here
        self.inner.call(req)
    }
}
Notice how the wrapper forwards poll_ready to the inner service. Real middleware often adds logic before forwarding, but the forwarding pattern is the baseline.
Example: Readiness Gate for Concurrency
A concurrency-limiting middleware typically refuses readiness when permits are exhausted. That refusal is expressed through poll_ready, not through rejecting requests in call. This keeps the control flow consistent with Tower’s model.
A common pattern is:
- Acquire a permit only when the service is ready.
- If no permit is available, return “not ready.”
- Release the permit when the future completes.
This approach makes overload behavior predictable and avoids “accept then fail” churn.
How This Connects to gRPC and Tonic
In a Tonic setup, your RPC handler is effectively a service that receives requests and produces responses. Tower layers then become the place where you enforce cross-cutting behavior: timeouts, authentication checks, metrics, and error mapping.
The most important takeaway is that Tower’s Service trait gives you two levers—readiness and request handling—that middleware can use to manage load safely. Once you design with those levers in mind, the rest of the middleware stack becomes straightforward composition rather than guesswork.
4.2 Designing Middleware Interfaces for Request and Response Types
Middleware in Tower is easiest to reason about when you treat it as a pure transformation pipeline: it observes an incoming request, optionally changes it, calls the next service, then observes or transforms the response. The key design choice is what types your middleware accepts and returns, because those types determine what information is available at each step and how much work you can safely do.
The Service Boundary and Type Contracts
A Tower middleware is typically a Layer that produces a Service. The Service has a request type Req and a response type Res. Your middleware interface should make these types explicit and consistent across the stack.
For gRPC with Tonic, the “request” is usually a tonic::Request<T> where T is your protobuf message. The “response” is tonic::Response<U>. Middleware often needs access to metadata (headers) and extensions (per-request state), so the interface should preserve the tonic::Request wrapper rather than stripping it early.
A practical rule: if your middleware needs to read or write metadata, it should accept tonic::Request<ReqMsg> and return tonic::Response<ResMsg> without changing the inner message types. If you must change the inner message, do it in a way that keeps the rest of the stack type-compatible.
Choosing What Middleware Should Change
There are three common categories of middleware behavior.
- Observation only: record metrics, tracing spans, or log fields. These middleware should not change
ReqorRestypes. - Metadata and extensions: add authentication context, request IDs, or correlation data. These middleware should preserve the inner message types and only mutate the
tonic::Requestextensions or metadata. - Request/response transformation: normalize fields, redact sensitive data, or wrap responses. These middleware may change the inner message types, but then every downstream layer must agree on the new types.
When you keep transformations minimal, you avoid type “domino effects” where one layer forces a rewrite of the entire stack.
Interface Shape for Request and Response Types
Design your middleware so that the type parameters reflect the gRPC message types, not the transport details.
- Request type:
tonic::Request<ReqMsg> - Response type:
tonic::Response<ResMsg> - Error type: usually
tonic::Statusor a type convertible to it
If you need to store per-request state, prefer request.extensions_mut() over global state. That keeps concurrency safe and makes the middleware behavior local.
Example: Metadata Enrichment Middleware
This middleware reads a header, stores it in request extensions, and leaves the request and response message types unchanged.
use tonic::{Request, Response, Status};
use tower::{Service, ServiceExt};
use std::task::{Context, Poll};
use std::future::Future;

#[derive(Clone)]
pub struct CorrelationLayer;

pub struct CorrelationService<S> { inner: S }

impl<S, ReqMsg, ResMsg> Service<Request<ReqMsg>> for CorrelationService<S>
where
  S: Service<Request<ReqMsg>, Response = Response<ResMsg>, Error = Status> + Clone,
  S::Future: Send + 'static,
  ReqMsg: Send + 'static,
  ResMsg: Send + 'static,
{
  type Response = Response<ResMsg>;
  type Error = Status;
  type Future = S::Future;

  fn poll_ready(&mut self, cx: &mut Context<'_>) -> Poll<Result<(), Self::Error>> {
    self.inner.poll_ready(cx)
  }

  fn call(&mut self, mut req: Request<ReqMsg>) -> Self::Future {
    let corr = req.metadata().get("x-correlation-id").and_then(|v| v.to_str().ok());
    if let Some(c) = corr { req.extensions_mut().insert(c.to_string()); }
    self.inner.call(req)
  }
}
The important part is the signature: it accepts Request<ReqMsg> and returns Response<ResMsg>. That means downstream middleware can still rely on the same protobuf message types.
Example: Response Redaction Middleware
If you need to modify the response payload, you must decide whether to change the inner message type or keep it the same.
- If you can redact in place, keep the response type
ResMsg. - If redaction changes structure, you’ll need a new response type and the stack must be updated accordingly.
A safe default for gRPC is in-place redaction when possible, because it preserves the response type contract.
Mind Map: Middleware Type Design
Advanced Details Without Type Confusion
When you stack multiple middleware layers, type compatibility is the real “runtime” of your design. If one layer changes ReqMsg or ResMsg, every later layer must compile against the new types. That’s why metadata/extension middleware is so common: it adds information without changing the payload types.
Also watch for where you do work. If you only need metadata, do it before calling the inner service so you can fail early with a tonic::Status when required fields are missing. If you need to inspect the response, do it after the inner call, and keep the response type stable unless you have a deliberate reason to transform it.
Finally, keep your middleware interface narrow: accept exactly the request wrapper you need, return exactly the response wrapper you promise, and let the inner message types flow through unchanged unless you intentionally redesign the pipeline.
4.3 Implementing Authentication and Authorization Layers
Authentication answers “who is calling,” while authorization answers “what are they allowed to do.” In a Tonic + Tower setup, you typically implement both as Tower middleware so the decision happens before your handler runs and so the result is consistent across unary and streaming calls.
Authentication Foundations
Start by choosing a credential source. Common options are:
- Metadata header such as
authorization: Bearer <token> - mTLS identity where the transport layer already validated the peer
- Session cookies (less common for gRPC, but possible)
For gRPC, metadata is the practical default. Your middleware should:
- Extract the header from the incoming
Requestmetadata. - Validate it (signature check, expiry check, and issuer/audience checks).
- Convert the validated identity into a small internal struct, e.g.
AuthContext { subject, roles, scopes }. - Attach that context to the request for downstream layers.
In Tower, “attach to request” usually means storing it in request extensions. Tonic’s Request supports extensions, and middleware can read what earlier middleware wrote.
Authorization Foundations
Authorization should be explicit and local to the middleware. A clean approach is to define a policy function that takes AuthContext plus the RPC method and request fields, then returns allow/deny.
Keep authorization rules separate from token parsing. That separation makes it easier to test: you can unit test policy logic with synthetic AuthContext values without re-validating tokens.
A practical policy shape:
- Role-based checks for coarse access (e.g.,
admincan manage resources) - Scope-based checks for fine-grained permissions (e.g.,
resource:read) - Field-based checks for ownership (e.g., subject must match
resource.owner_id)
Mind Map: Authentication and Authorization Flow
Example: Tower Middleware Skeleton
Below is a minimal pattern showing how authentication and authorization can be split into two layers. The exact token verification is intentionally stubbed.
use tonic::{Request, Status};
use tower::{Layer, Service};

#[derive(Clone, Debug)]
struct AuthContext { subject: String, roles: Vec<String> }

fn unauthenticated(msg: &str) -> Status {
    Status::unauthenticated(msg)
}
fn forbidden(msg: &str) -> Status {
    Status::permission_denied(msg)
}
#[derive(Clone)]
struct AuthLayer;

impl<S> Layer<S> for AuthLayer {
    type Service = AuthService<S>;
    fn layer(&self, inner: S) -> Self::Service { AuthService { inner } }
}

#[derive(Clone)]
struct AuthService<S> { inner: S }

impl<S> Service<Request<()>> for AuthService<S>
where S: Service<Request<()>, Response=(), Error=Status> + Clone {
    type Response = S::Response;
    type Error = Status;
    type Future = S::Future;

    fn poll_ready(&mut self, cx: &mut std::task::Context<'_>) -> std::task::Poll<Result<(), Self::Error>> {
        self.inner.poll_ready(cx)
    }

    fn call(&mut self, mut req: Request<()>) -> Self::Future {
        // 1) extract metadata
        // 2) verify token
        // 3) insert AuthContext into extensions
        // req.extensions_mut().insert(auth_ctx);
        self.inner.call(req)
    }
}
This skeleton omits the request type parameters for brevity, but the key idea is stable: authentication middleware populates extensions, and authorization middleware reads them.
Example: Authorization Policy with Ownership Check
Authorization middleware can read AuthContext from extensions, then apply a policy. For ownership checks, use request fields.
fn authorize_read(auth: &AuthContext, owner_id: &str) -> Result<(), Status> {
    if auth.subject == owner_id { return Ok(()); }
    if auth.roles.iter().any(|r| r == "admin") { return Ok(()); }
    Err(forbidden("not allowed to read this resource"))
}
In the middleware, you’d call authorize_read using the request’s owner_id field. If it returns an error, stop the pipeline and return the status immediately.
Middleware Ordering and Streaming Nuance
Order matters. Authentication should run before authorization, and both should run before any middleware that logs “who did what” based on AuthContext. For streaming RPCs, ensure the middleware runs once per call and that the extracted identity is available for the entire stream lifetime. If you need per-message authorization, implement it inside the handler or a specialized stream middleware that checks each item.
Error Semantics That Stay Consistent
Use UNAUTHENTICATED when credentials are missing or invalid, and PERMISSION_DENIED when credentials are valid but not allowed. Consistent status codes make client behavior predictable and keep debugging sane when multiple layers are involved.
Practical Testing Strategy
Test three cases for each middleware:
- Missing credentials returns
UNAUTHENTICATED. - Invalid token returns
UNAUTHENTICATED. - Valid token but wrong permissions returns
PERMISSION_DENIED.
Then add one case for each policy rule, such as ownership mismatch and admin override. This gives you confidence that the layers enforce the same rules your handlers assume.
4.4 Implementing Rate Limiting and Concurrency Limits with Tower
Rate limiting and concurrency limiting solve different problems. Rate limiting controls how often requests arrive; concurrency limiting controls how many are in flight. In Tower, you can compose both as middleware layers so the policy is enforced consistently for every RPC method.
Foundations: What to Limit and Why
Start by listing the resource you’re protecting: CPU time, database connections, upstream calls, or memory used by request processing. Then decide the unit:
- Rate: requests per time window (e.g., 200 requests per second per client).
- Concurrency: simultaneous in-flight requests (e.g., at most 50 active handlers per client).
A good default is to apply concurrency limits first because they prevent runaway resource usage even when traffic spikes. Rate limiting then smooths bursts and reduces queueing.
Mind Map: Limit Types and Tower Placement
Choosing Keys: Per Client, per Method, per Tenant
If you limit globally, one noisy client can throttle everyone. If you limit per method, you can protect expensive endpoints without penalizing cheap ones. A practical compromise is per client per method.
In gRPC, you often have a client identifier in metadata (for example, x-client-id) or from authentication middleware. Your limiter should accept a function like key_from_request(&Request) -> String.
Concurrency Limiting with a Semaphore
Concurrency limiting is easiest to reason about: each request must acquire a permit before running the handler. If no permits are available, you reject immediately.
Here’s a minimal Tower-style pattern using a semaphore. The key idea is that permit acquisition happens before calling the inner service.
use std::sync::Arc;
use tokio::sync::Semaphore;
use tower::{Service, ServiceExt};

#[derive(Clone)]
struct ConcurrencyLimit<S> {
    inner: S,
    sem: Arc<Semaphore>,
}

// In your Service::call implementation:
// 1) acquire_owned permit
// 2) if unavailable, return ResourceExhausted
// 3) call inner service
// 4) permit drops after response future completes
To make it per key, you store a semaphore per client key in a concurrent map. Keep the map from growing forever by removing semaphores for keys that haven’t been used recently.
Rate Limiting with a Token Bucket
Token bucket fits well with bursty traffic. Tokens refill at a steady rate, and requests consume one token. If there’s no token, reject.
The key detail is that the refill logic must be consistent under concurrency. That means the bucket state is updated atomically per key.
use std::time::{Duration, Instant};

struct Bucket {
    tokens: f64,
    last: Instant,
}

impl Bucket {
    fn refill(&mut self, now: Instant, rate: f64) {
        let elapsed = now.duration_since(self.last).as_secs_f64();
        self.tokens = (self.tokens + elapsed * rate).min(1.0);
        self.last = now;
    }
}
In practice, you’ll store Bucket behind a lock per key (or use a concurrent structure that updates per key). The limiter middleware then:
- Computes the key.
- Refills the bucket based on
Instant::now(). - Checks whether
tokens >= 1.0. - Rejects with a gRPC status if not.
Middleware Order That Prevents Waste
Tower processes layers in order. Put concurrency limiting closest to the handler so you avoid doing expensive work when the system is already saturated. Put rate limiting before concurrency if you want to reduce the number of rejected requests that still contend for permits.
A common order is:
- Extract key from metadata.
- Rate limit check.
- Concurrency permit acquisition.
- Call the inner service.
This order ensures that requests failing rate checks don’t even try to grab permits.
Mapping Rejections to gRPC Status
When limits trigger, return a status that clients can interpret consistently. For rate limiting and concurrency exhaustion, ResourceExhausted is usually appropriate. If you also implement queueing (often you shouldn’t for RPC handlers), you can use Unavailable for overload.
Also consider adding a Retry-After style hint in metadata when you know the next token time. Even without it, clients can still back off based on the status.
Practical Example: Layer Stack for per Client Limits
Assume you have client_id from metadata. You build two middlewares: one rate limiter and one concurrency limiter, both keyed by client_id and optionally method name.
- Rate: 100 requests per second per client.
- Concurrency: 20 in-flight requests per client.
When a request arrives:
- If the token bucket is empty, reject with
ResourceExhausted. - Otherwise, try to acquire a semaphore permit.
- If permits are exhausted, reject with
ResourceExhausted. - If both checks pass, run the handler normally.
This combination keeps latency stable under load: rate limiting reduces burst pressure, and concurrency limiting prevents the service from doing too much work at once.
4.5 Building Reusable Middleware Crates and Layer Stacks
Reusable middleware in Tower works best when you treat it like a small library with a clear contract: what it expects, what it changes, and what it guarantees. The goal is not to hide complexity, but to make the complexity predictable.
Foundations for Reusable Middleware Crates
A middleware crate should expose a single entry point that is easy to compose. In practice, that means:
- A
Layertype that can be stacked. - A
Servicetype that performs the work. - Configuration that is explicit and cloneable when needed.
Start by deciding what the middleware touches. For example, an auth layer might read metadata and attach an identity to request extensions. A rate limit layer might read a key and enforce a budget. If your middleware both reads and writes, document the exact fields it uses so other layers can cooperate.
Mind Map: Middleware Crate Responsibilities
Designing Layer Stacks That Stay Correct
Tower stacks are order-sensitive. If one layer depends on data produced by another, you must enforce ordering by construction, not by hope.
A practical pattern is to build a “stack builder” function that returns a fully composed service. That function becomes the single place where ordering is defined.
Example: Layer Stack Builder for gRPC
use tower::{ServiceBuilder, Service};

pub fn build_rpc_stack<S>(svc: S) -> impl Service<_, Response = _, Error = _>
where
    S: Service<_, Response = _, Error = _> + Clone + Send + 'static,
{
    ServiceBuilder::new()
        .layer(AuthLayer::new())
        .layer(RateLimitLayer::new(100))
        .layer(ObservabilityLayer::default())
        .service(svc)
}
This keeps the “what runs first” decision in one place. It also makes it easier to test the stack as a unit.
Making Middleware Interoperate Without Tight Coupling
Interoperability usually comes down to a shared convention. For gRPC, the request carries metadata, and the service can store per-request data in extensions. A reusable middleware crate should:
- Use stable keys for extensions.
- Avoid overwriting fields unless it owns them.
- Fail early with a clear error when required data is missing.
Example: Extension Key Convention
use std::any::TypeId;

#[derive(Clone, Debug)]
pub struct Identity {
    pub subject: String,
}

pub fn identity_key() -> TypeId {
    TypeId::of::<Identity>()
}
Even if you don’t use TypeId directly, the idea is the same: choose one canonical type for the stored value so other layers can retrieve it without guessing.
Error Handling and Readiness Semantics
Reusable middleware must behave well under load. Two common pitfalls are:
- Ignoring readiness, which can cause backpressure to break.
- Mapping errors inconsistently, which makes debugging painful.
Your middleware should forward readiness checks to the inner service and only block when it must. For rate limiting, that means waiting until a permit is available or returning a deterministic error when the policy says “no.” For auth, it should return an error immediately when credentials are missing or invalid.
Mind Map: Correctness Rules for Middleware
Packaging Middleware Crates for Reuse
A middleware crate should be small enough to understand in one sitting, but complete enough to drop into a service without surgery.
- Keep configuration in a dedicated struct with defaults.
- Make the layer constructor accept only what it truly needs.
- Keep policy logic separate from request plumbing so it can be unit tested without async setup.
Example: Configurable Rate Limit Layer
#[derive(Clone, Debug)]
pub struct RateLimitConfig {
    pub max_requests: u32,
}

impl Default for RateLimitConfig {
    fn default() -> Self {
        Self { max_requests: 100 }
    }
}

pub struct RateLimitLayer {
    cfg: RateLimitConfig,
}

impl RateLimitLayer {
    pub fn new(max_requests: u32) -> Self {
        Self { cfg: RateLimitConfig { max_requests } }
    }
}
This makes the crate predictable: callers know exactly what can be configured and what cannot.
Testing Reusable Middleware in Isolation
Test the middleware at two levels.
- Policy tests: given inputs, does it decide correctly? For auth, does it accept valid credentials and reject invalid ones? For rate limiting, does it compute the right key and enforce the right threshold?
- Service tests: does it integrate correctly with Tower semantics? You want to verify that it forwards readiness, preserves extensions, and returns the expected error type.
A good test suite also checks ordering indirectly by composing the stack and asserting that dependent layers see the data they require.
Putting It All Together
A reusable middleware crate is a disciplined unit: it exposes a Layer, uses explicit configuration, follows Tower readiness rules, and communicates via stable request conventions like metadata parsing and extensions. A reusable layer stack is a composition recipe: it defines ordering once, so every service that uses it gets consistent behavior without re-deriving the rules.
5. End-to-End Request Flow with Tonic and Tower
5.1 Understanding How Requests Traverse Tower Layers
When a Tonic request hits your service, it doesn’t jump straight into your handler. Instead, it flows through a Tower stack where each layer can inspect, transform, or short-circuit the request. Understanding that path helps you place middleware in the right order and avoid surprises like “why didn’t my auth run?”
The Tower Service Model in One Pass
Tower’s core abstraction is Service<Request> -> Response, with an async call method. A layer wraps an inner service and returns a new service with different behavior. In practice, your gRPC method handler is the “inner service,” and your middleware layers are wrappers around it.
A useful mental model is: each layer gets a chance to run code before the inner service is called, and then it can also react to the result after the inner service returns.
Where Tonic Fits into the Stack
Tonic builds gRPC method dispatch on top of Tower. For each incoming RPC, Tonic constructs a request type (including metadata) and routes it to the generated service implementation. That generated implementation then calls into your business logic, but only after the Tower stack has been applied.
So the traversal order is:
- Tonic receives the RPC and parses the gRPC frame into a request.
- The request enters the outermost Tower layer.
- Each layer runs its “before call” logic.
- The innermost service executes the actual RPC handler.
- Layers run “after call” logic in reverse order as the response bubbles back.
A Concrete Example with Two Layers
Imagine you have:
AuthLayer: checks metadata for a token.MetricsLayer: records latency and status.
If you build the stack as MetricsLayer outer, AuthLayer inner, the order looks like this:
- Metrics before: start timer
- Auth before: validate token
- Handler: run business logic
- Auth after: nothing (or enrich context)
- Metrics after: stop timer, record outcome
If you swap them, you’ll measure different things. For example, if auth rejects early, you might want metrics to include that rejection time. That’s why order matters.
Mind Map: Request Traversal and Layer Responsibilities
What “Before” and “After” Really Mean
In Tower middleware, “before” is code executed before inner.call(request).await. “After” is code executed after that future resolves. This distinction matters for:
- Short-circuiting: auth can return an error without calling the inner service.
- Request mutation: a layer can modify the request before passing it onward.
- Response observation: metrics can record the final status, including errors.
A common pitfall is assuming a layer can observe something it never lets happen. If a layer rejects early, downstream layers won’t run their “before” logic.
How Errors Travel Up the Stack
When the handler returns an error, it becomes the result of the innermost service future. Each layer can then:
- pass the error through unchanged,
- map it to a different error type,
- or convert it into a successful response (rare, but possible).
In gRPC terms, the final error mapping determines the status code and message. That’s why an error-mapping layer should usually be near the boundary where you want consistent behavior for all methods.
Example: Layer Order with Early Rejection
Suppose AuthLayer rejects when metadata is missing. If AuthLayer is outer to MetricsLayer, then metrics might never see the rejection unless the metrics layer wraps the auth layer. The fix is to place metrics outside the auth layer so it can time and record both accepted and rejected calls.
Here’s the traversal logic in a compact form:
Outer: Metrics
Inner: Auth
Innermost: Handler

Request enters
- Metrics before
- Auth before
  - if missing token -> return error
- Handler not called
- Auth after not relevant
- Metrics after records error
Practical Takeaway for Middleware Placement
Treat your Tower stack like a pipeline with two directions: request going inward, response going outward. Put layers that must run for every call (like logging or metrics) on the outside. Put layers that should guard expensive work (like auth or basic validation) closer to the inside. Then ensure your error mapping layer is positioned so it can consistently translate failures into the gRPC status your clients expect.
5.2 Propagating Metadata and Headers Through Middleware
Metadata in gRPC is the small set of key-value pairs that rides along with each call. In Tonic, you typically see it as Request::metadata() on the server side and as metadata attached to a client request. Middleware becomes the place where you consistently read, validate, transform, and forward that metadata—without forcing every handler to repeat the same plumbing.
What Metadata Means in a Middleware Pipeline
Think of metadata as two parallel streams: the request payload and the call context. Middleware should treat metadata as context, not business data. That leads to three practical rules:
- Read early, validate once. If you need an auth token, parse it in middleware and store the result in request extensions.
- Write deterministically. If you add headers like
x-request-id, do it in one place so downstream layers don’t disagree. - Preserve what you don’t understand. Forward unknown metadata keys so other layers can use them.
Server Side: Reading and Validating Metadata
On the server, you start with a tonic::Request<T>. Middleware receives a Request and can inspect metadata before the handler runs.
use tonic::{Request, metadata::MetadataMap};

fn get_header(md: &MetadataMap, key: &str) -> Option<String> {
    md.get(key).and_then(|v| v.to_str().ok()).map(|s| s.to_owned())
}

fn ensure_request_id(mut req: Request<()>) -> Request<()> {
    let md = req.metadata();
    let rid = get_header(md, "x-request-id");
    if rid.is_none() {
        // In real code, generate a request id and insert it.
    }
    req
}
A key detail: metadata keys are lowercase in practice. If you standardize on lowercase names, you avoid subtle mismatches between clients and middleware.
Storing Derived Context in Request Extensions
Once you validate metadata, don’t keep re-parsing it. Put derived values into request extensions so handlers and later middleware can access them cheaply.
use tonic::Request;
use std::any::Any;

#[derive(Clone, Debug)]
struct AuthContext { subject: String }

fn attach_auth(mut req: Request<()>, subject: String) -> Request<()> {
    req.extensions_mut().insert(AuthContext { subject });
    req
}

fn read_auth(req: &Request<()>) -> Option<AuthContext> {
    req.extensions().get::<AuthContext>().cloned()
}
This pattern keeps metadata handling separate from business logic. Handlers can focus on domain types, while middleware owns the translation from headers to internal context.
Forwarding Metadata to Downstream Calls
When your server middleware calls another service, you must forward relevant metadata. The safest approach is selective forwarding: forward what downstream needs, not everything.
A common set includes:
x-request-idfor correlationauthorizationor a derived identity claim- trace context fields if you use them
Selective forwarding also prevents accidental leakage of internal-only keys.
Client Side: Attaching Metadata to Requests
On the client, you attach metadata before sending. In Tonic, you typically build a request and insert metadata into it.
use tonic::Request;
use tonic::metadata::MetadataValue;

fn with_request_id<T>(mut req: Request<T>, rid: &str) -> Request<T> {
    let v = MetadataValue::try_from(rid).expect("valid header value");
    req.metadata_mut().insert("x-request-id", v);
    req
}
The value must be valid for header usage. If you generate IDs, keep them ASCII and avoid whitespace.
Mind Map: Metadata Flow Through Middleware
Example: Correlation and Identity in One Pass
Suppose you want every handler to log with a request id and every downstream call to carry the same id.
- Middleware reads
x-request-idfrom incoming metadata. - If missing, it generates one and inserts it into the request metadata.
- Middleware parses
authorizationinto anAuthContextand stores it in extensions. - When the handler calls a downstream client, it copies the request id from the incoming request metadata into the outgoing request.
The result is consistent correlation without forcing each handler to know header names or parsing rules.
Common Pitfalls and How Middleware Avoids Them
- Parsing in every handler. Middleware centralizes parsing and reduces drift.
- Inconsistent header casing. Normalize keys to lowercase at the boundary.
- Forwarding everything. Selective forwarding reduces accidental exposure.
- Not handling invalid values. Treat malformed metadata as an error at the middleware boundary, so handlers never see broken context.
5.3 Implementing Consistent Context Handling Across Boundaries
In a layered gRPC service, “context” shows up in multiple places: request metadata, per-call deadlines, authentication identity, correlation IDs, and any state your middleware or handlers need. Consistency means every layer agrees on what the context contains, how it is named, how it is validated, and how it is propagated—without accidentally duplicating or losing fields.
What Context Means in a Tonic Plus Tower Pipeline
Start with a simple rule: treat context as data that must survive three boundaries—client to server transport, server middleware chain, and handler execution. In practice, you’ll carry:
- Correlation ID: used for logs and metrics joins.
- Identity: derived from authentication metadata.
- Deadline and cancellation: enforced by the runtime and surfaced to handlers.
- Request-scoped state: like tenant ID or feature flags computed once.
A useful mental model is “metadata in, context out.” Metadata arrives as gRPC headers; your middleware converts it into a typed request context; the handler consumes that typed context.
Mind Map: Context Data Flow and Ownership
A Practical Strategy: Typed Request Context via Extensions
Tower middleware typically sees a request type and can attach data to it. In Tonic, the handler receives a Request<T>, which includes metadata and extensions. The consistent approach is:
- Normalize metadata early: parse correlation ID, identity, and tenant once.
- Store typed values in request extensions.
- Read typed values in later middleware and handlers.
- Forward metadata to downstream clients using the same keys.
This avoids the “stringly-typed” trap where every layer re-parses headers and risks mismatched formats.
Example: Correlation ID Middleware and Handler Usage
use tonic::{Request, Status};
use tower::Service;

#[derive(Clone, Debug)]
struct CorrelationId(String);

fn get_or_create_correlation_id(req: &mut Request<()>) -> Result<(), Status> {
    // Pseudocode: read header from req.metadata()
    // If missing, generate a new one.
    let id = "abc-123".to_string();
    req.extensions_mut().insert(CorrelationId(id));
    Ok(())
}

async fn handler(req: Request<()>) -> Result<(), Status> {
    let cid = req
        .extensions()
        .get::<CorrelationId>()
        .ok_or_else(|| Status::internal("missing correlation id"))?;
    // Use cid.0 in logs and metrics.
    Ok(())
}
The key detail is the contract: if the correlation middleware runs, the handler can rely on the extension being present. If it doesn’t, failing fast with a clear status is better than silently logging without an ID.
Deadline and Cancellation: Don’t Treat Them as Optional
Deadlines and cancellation are part of the call context, not just runtime behavior. Your handler should pass the call’s cancellation signal into any long-running async work. The consistency rule is:
- Every awaited operation should be cancellation-aware.
- Middleware should not swallow cancellation errors and continue work.
In practice, this means structuring handlers so that work is performed in bounded steps and each step checks for cancellation through the runtime’s normal mechanisms.
Mind Map: Boundary Rules for Propagation
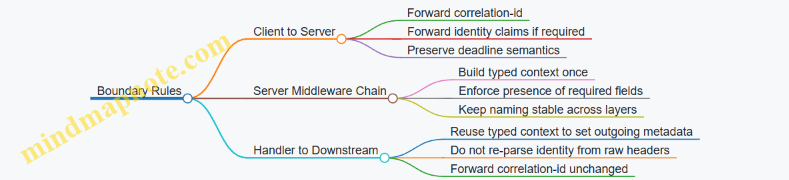
Example: Forwarding Context to a Downstream Call
When your handler calls another service, build outgoing metadata from the typed context rather than re-reading raw headers. That keeps the “source of truth” in one place.
use tonic::metadata::MetadataMap;

fn build_outgoing_metadata(cid: &CorrelationId) -> MetadataMap {
    let mut md = MetadataMap::new();
    // Pseudocode: md.insert("correlation-id", cid.0.clone())
    md
}

async fn downstream_call(cid: CorrelationId) {
    let md = build_outgoing_metadata(&cid);
    // client.request_with_metadata(md).await
}
Common Failure Modes and How to Avoid Them
- Missing extension: happens when middleware order changes. Fix by making middleware ordering explicit and failing fast when required context is absent.
- Conflicting keys: correlation ID stored under one header name but forwarded under another. Fix by defining a single set of constants for metadata keys.
- Re-parsing identity: each layer extracts identity differently. Fix by converting metadata to typed context once.
- Logging without context: logs emitted before correlation ID is attached. Fix by ensuring correlation middleware runs at the start of the chain.
Consistent context handling is mostly boring engineering: define a contract, attach typed data early, enforce presence, and forward it deterministically. When you do that, debugging becomes a lot less like detective work and a lot more like reading a well-labeled receipt.
5.4 Coordinating Middleware Order for Correct Semantics
Middleware order is not cosmetic. In Tower, each layer wraps the next one, so the outer layer sees the request first and the response last. That means ordering determines what data is available, what errors look like, and which side effects happen even when calls fail.
Why Order Changes Meaning
Think of a request as a packet that travels inward through layers, then travels back outward through the same layers in reverse. If you place authentication outside rate limiting, you may rate-limit unauthenticated traffic differently than you intend. If you place timeout outside retry, the timeout may include retry time, changing the effective deadline. If you place error mapping outside logging, you may log the mapped status instead of the original domain error.
A useful mental model is to classify middleware by when it should observe and when it should transform:
- Observation layers: logging, tracing, metrics. They should usually wrap broadly so they can see both success and failure.
- Policy layers: auth, authorization, rate limiting, concurrency limits. They should run early to avoid wasting work.
- Control layers: timeouts, retries, circuit breaking. They should be placed so their scope matches the semantics you want.
- Transformation layers: request/response mapping, error conversion. They should run close to the boundary where types change.
A Practical Ordering Checklist
- Decide the earliest point where you can reject. Auth and basic request validation should typically be outer to avoid expensive downstream work.
- Decide the scope of time. If you want a single end-to-end deadline, put timeout outside retry. If you want each attempt to have its own budget, put timeout inside retry.
- Decide the scope of side effects. If a middleware triggers side effects (like auditing), place it after the policy layers that determine whether the call is allowed.
- Decide what errors should look like to observers. If you want logs to include domain error details, log before error mapping. If you want logs to reflect gRPC status codes, log after mapping.
- Keep type transformations near the boundary. Metadata extraction, header normalization, and error mapping should be close to where those types are created or consumed.
Mind Map: Layer Responsibilities and Placement
Example: Two Different Timeout Scopes
Assume you have RetryLayer and TimeoutLayer, plus AuthLayer.
Goal A: One end-to-end deadline. If the client sets a deadline, you want retries to fit inside it.
- Order:
Auth -> Timeout -> Retry -> Handler - Effect: the timeout covers all attempts. If the deadline is tight, you stop retrying early.
Goal B: Per-attempt timeout. If you want each attempt to have its own budget, independent of how many retries you try.
- Order:
Auth -> Retry -> Timeout -> Handler - Effect: each attempt can time out, and retry continues until attempts are exhausted.
In both cases, the handler sees different failure timing, and the logs will show different durations unless your observation layer captures the right timestamps.
Example: Error Mapping and Logging Placement
Suppose your handler returns a domain error like UserNotAllowed. You map it to gRPC status PermissionDenied.
- If you place
ErrorMappingLayerinsideLoggingLayer, logs can include the original domain error before it becomes a status code. - If you place
ErrorMappingLayeroutsideLoggingLayer, logs will record the mapped status, which is often easier to correlate with client behavior.
Neither is universally correct. The choice should match what you need to debug: domain logic or wire-level outcomes.
Example: Rate Limiting vs Authentication
If you put RateLimitLayer outside AuthLayer, unauthenticated requests consume rate-limit budget. That can be desirable when you want to protect the system from raw traffic. If you put AuthLayer outside RateLimitLayer, you can rate-limit per authenticated identity, but you may do more work on invalid credentials.
A common compromise is to split policy: do cheap checks early (like required metadata presence), then apply identity-based limits after authentication succeeds.
A Concrete Recommended Ordering Pattern
For many services, a stable baseline is:
- Outer: observation (logging/tracing/metrics)
- Then: policy (authn/authz, request validation)
- Then: control (timeout, retry)
- Then: transformation (metadata normalization, error mapping)
- Inner: handler
The key is that each layer’s position answers a specific question: who should be rejected first, what time budget applies, and what representation of errors should be observed.
5.5 Practical Example: Building a Layered Request Pipeline
This example builds a small unary gRPC service and routes every request through a Tower middleware stack. The goal is to make request handling predictable: validate inputs, attach context, enforce limits, and record metrics—without scattering logic across handlers.
Mind Map: Layered Request Pipeline
Step 1: Define a Minimal Service Contract
Assume a protobuf service with a unary RPC like Compute(Request) returns (Response). In Rust, the handler receives a typed request and returns a typed response or a Status error.
A practical pattern is to keep the handler focused on domain logic. Everything cross-cutting goes into middleware.
Step 2: Create Middleware Responsibilities
We’ll implement four responsibilities:
- Identity extraction: read a user id from request metadata and store it in request extensions.
- Validation: reject missing fields early with a clear
Status. - Limits: cap concurrent requests with a semaphore and cap request rate with a token bucket.
- Metrics: record latency and outcome for every request.
The order matters. Identity extraction must run before validation if validation depends on identity. Limits should run before expensive work in the handler.
Step 3: Build a Tower Service Stack
Tower middleware wraps a Service that takes a request and returns a response. In Tonic, you typically implement a custom service or use a wrapper that adapts Tonic requests into Tower requests.
Below is a compact example using a Tower Service-like approach. It focuses on the middleware logic and shows how to keep the handler clean.
use std::sync::Arc;
use tokio::sync::Semaphore;
use tonic::{Request, Response, Status};
use tower::Service;

#[derive(Clone)]
struct Limits { sem: Arc<Semaphore> }

async fn validate(req: &Request<ComputeRequest>) -> Result<(), Status> {
    if req.get_ref().input.is_empty() {
        return Err(Status::invalid_argument("input must not be empty"));
    }
    Ok(())
}
Now the layered pipeline. Each middleware either enriches the request or rejects it. The handler only computes.
async fn handle(req: Request<ComputeRequest>) -> Result<Response<ComputeResponse>, Status> {
    let _guard = req.extensions().get::<tokio::sync::OwnedSemaphorePermit>().cloned();
    let user_id = req.extensions().get::<String>().cloned().unwrap_or("anonymous".into());
    let input = req.get_ref().input.clone();
    let out = format!("{}:{}", user_id, input.len());
    Ok(Response::new(ComputeResponse { output: out }))
}

async fn pipeline(req: Request<ComputeRequest>, limits: Limits) -> Result<Response<ComputeResponse>, Status> {
    // Identity extraction
    let user_id = req.metadata().get("x-user-id")
        .and_then(|v| v.to_str().ok())
        .map(|s| s.to_string())
        .unwrap_or_else(|| "anonymous".to_string());
    req.extensions_mut().insert(user_id);

    // Validation
    validate(&req).await?;

    // Concurrency limit
    let permit = limits.sem.clone().acquire_owned().await
        .map_err(|_| Status::resource_exhausted("server overloaded"))?;
    req.extensions_mut().insert(permit);

    // Metrics would observe start/end around handle
    handle(req).await
}
Step 4: Wire It into the Tonic Handler
In the actual Tonic service implementation, call pipeline from the RPC method. This keeps the handler method short and makes the middleware stack explicit.
A clean structure is:
impl MyService for MyGrpcServiceasync fn compute(&self, req: Request<ComputeRequest>) -> Result<Response<ComputeResponse>, Status>pipeline(req, self.limits.clone()).await
Step 5: Verify Behavior with a Concrete Example
Test these scenarios:
- Missing input: request has empty
input. Validation rejects withinvalid_argumentbefore acquiring permits. - Missing metadata: no
x-user-id. Identity extraction defaults toanonymous, and the handler still computes. - Overload: semaphore permits exhausted. The pipeline returns
resource_exhaustedwithout running the handler.
A useful mental model is that middleware forms a gate chain: each gate either enriches the request or stops it. When you keep the handler pure, you can reason about failures by reading the pipeline top to bottom.
6. High Throughput Performance Engineering in Rust RPC Services
6.1 Reducing Allocation Hotspots in Serialization and Handling
High throughput RPC services often spend time not on the network, but on “stuffing and unstuffing” data: allocating buffers, copying bytes, and building temporary objects while converting between protobuf messages and your domain types. The goal in this section is to reduce allocations and copies without changing semantics.
Start with What Allocates
Begin by separating allocations into three buckets:
- Serialization allocations: protobuf encoding creates intermediate buffers and temporary structures.
- Handling allocations: request handlers create new domain objects, maps, vectors, and strings.
- Middleware allocations: layers attach metadata, clone request parts, or build error wrappers.
A simple way to find the biggest offenders is to measure allocations per request and per message size. If you can’t measure yet, use a rule of thumb: if the same request path allocates more than once per call, you likely have avoidable temporaries.
Mind Map: Allocation Sources and Fixes
Reduce Serialization Allocations
In tonic, protobuf encoding happens when the request is turned into bytes for transport. You can’t rewrite protobuf internals, but you can reduce the amount of work you force it to do.
Practice 1: Avoid unnecessary message rebuilding. If your handler receives a protobuf request and then immediately constructs another protobuf message, consider mapping directly to the domain type and only constructing the response once. Every extra message build is extra allocations.
Practice 2: Keep strings and bytes owned only once. If your protobuf schema uses string fields, converting them into String clones can be expensive. Prefer passing &str references into domain logic when possible, and only allocate when you truly need ownership.
Practice 3: Reuse buffers in streaming paths. Streaming handlers often encode many messages. If you build a new Vec<u8> per item, you’ll see allocation spikes. Instead, reuse a buffer per stream task and write into it repeatedly.
Reduce Handling Allocations
Most allocation waste in handlers comes from collection growth and intermediate objects.
Practice 4: Preallocate vectors and maps. If you know the expected number of elements, call with_capacity. For example, when converting a list of protobuf items into a domain Vec, preallocate using the input length.
Practice 5: Convert in one pass. A common anti-pattern is: protobuf request → intermediate domain struct → final domain struct. If the intermediate struct exists only to transform fields, remove it and populate the final struct directly.
Practice 6: Avoid eager error string formatting. If you create errors with formatted strings on every failure, you allocate even when the error is rare but still measurable. Build errors using static messages or lightweight fields, and format only when you must.
Middleware Allocation Control
Tower middleware can accidentally multiply allocations by cloning request parts or metadata.
Practice 7: Parse metadata once. If multiple layers need the same header, parse it in the earliest layer and store the parsed value in request extensions. Later layers should read it without re-parsing.
Practice 8: Store lightweight context. Instead of storing large strings or full objects in per-request context, store IDs or small structs. If you need shared state, keep it outside the request path and reference it.
Example: Preallocating and One-Pass Conversion
fn to_domain_items(req_items: &[ProtoItem]) -> Vec<DomainItem> {
    let mut out = Vec::with_capacity(req_items.len());
    for p in req_items {
        out.push(DomainItem {
            id: p.id,
            // Borrow when possible; allocate only if domain requires ownership.
            name: p.name.clone(),
        });
    }
    out
}
If DomainItem.name can be Cow<'a, str> or &'a str, you can remove the clone. The key is to align ownership with the lifetime you actually have.
Example: Reusing a Buffer in a Stream
async fn encode_stream(mut rx: Receiver<ProtoChunk>) {
    let mut buf = Vec::with_capacity(16 * 1024);
    while let Some(chunk) = rx.recv().await {
        buf.clear();
        // encode chunk into buf
        // send buf as bytes
    }
}
This pattern keeps the allocation count stable across many streamed messages. The buffer grows only if a message exceeds the initial capacity.
Verify with Allocation and Latency Metrics
After each change, confirm improvements with two measurements:
- Allocation count and allocated bytes per request: ensures you actually reduced heap churn.
- Tail latency under load: allocation reductions often help the 95th and 99th percentiles because fewer GC-like pauses exist in Rust’s allocator behavior.
A good stopping point is when the allocation profile shows fewer distinct allocation sites on the hot path, not just a lower average.
Practical Checklist
- Avoid building extra protobuf messages.
- Preallocate collections based on known sizes.
- Convert in one pass and remove intermediate structs.
- Reuse buffers in streaming loops.
- Parse metadata once and store parsed values.
- Keep error formatting lazy.
If you apply these in order—serialization, then handler, then middleware—you’ll usually find the biggest wins quickly, and the remaining work becomes targeted instead of guessy.
6.2 Efficient Buffering Strategies for Streaming and Large Messages
Efficient buffering is about controlling how much data you hold, where you hold it, and how quickly you move it through the system. In streaming RPCs, buffering mistakes show up as rising memory, uneven latency, and backpressure that arrives too late. In large unary or streaming messages, the same mistakes show up as allocation spikes and long GC-like pauses (Rust won’t GC, but allocators still get grumpy).
Mind Map: Buffering Strategy for Streaming and Large Messages
Foundational Concepts for Buffering
A streaming handler typically has three stages: reading incoming items, transforming or validating them, and writing outgoing items. Each stage can buffer. If you let any stage buffer without a bound, the system will eventually buffer “everything,” which is just a fancy way of saying “memory pressure.”
Backpressure is the mechanism that prevents the slow consumer from forcing the fast producer to accumulate unlimited work. In async Rust, backpressure usually means your send operation awaits when the downstream is full, or your stream yields only when there is demand.
Bounded Queues Instead of Unbounded Work Accumulation
A common pattern is to decouple reading from processing using a channel. Use a bounded channel so the reader cannot outrun the processor.
use tokio::sync::mpsc;

let (tx, mut rx) = mpsc::channel::<Bytes>(64);

// Reader task
let reader = async move {
    while let Some(item) = inbound.next().await {
        let bytes = item?;
        tx.send(bytes).await?; // awaits when full
    }
    Ok::<_, tonic::Status>(())
};

// Processor task
let processor = async move {
    while let Some(bytes) = rx.recv().await {
        let out = transform(bytes);
        outbound.send(out).await?;
    }
    Ok::<_, tonic::Status>(())
};
This keeps memory bounded by the channel capacity times the average item size. The “64” is not magic; it is a starting point you validate with measurements.
Chunking Large Messages into Predictable Units
Large messages stress buffering because they encourage “read everything, then process.” For streaming, prefer chunking into smaller pieces that match your processing granularity. Chunking also makes backpressure more effective: the writer can stop after a few chunks instead of after a huge message.
A practical rule is to choose chunk sizes that are small enough to fit comfortably in memory while large enough to avoid overhead from per-chunk framing and per-chunk allocations. If your transformation is CPU-heavy, chunk sizes should also align with how long one chunk takes to process so you don’t create long stalls.
Reusing Buffers to Reduce Allocation Chains
Even when you bound queues, you can still waste time and memory by copying data repeatedly. For byte-heavy pipelines, reuse buffers where possible.
One approach is to keep a small pool of reusable BytesMut buffers and convert to Bytes when sending. Another approach is to avoid intermediate Vec<u8> conversions by using bytes::Bytes end-to-end.
use bytes::{Bytes, BytesMut};

fn to_bytes(mut buf: BytesMut) -> Bytes {
    // Freeze without extra copies
    buf.split().freeze()
}

// Example: build a chunk in a reusable BytesMut
let mut tmp = BytesMut::with_capacity(64 * 1024);
// fill tmp from source...
let chunk: Bytes = to_bytes(tmp);
If you see repeated allocations in profiles, look for conversions like Bytes -> Vec -> Bytes and remove them.
Coordinating Cancellation with Buffer Limits
Cancellation should stop producers quickly. If a writer is slow and the client cancels, you want the reader to stop reading rather than filling the bounded queue until it blocks. In practice, that means wiring cancellation through your tasks and ensuring that when the outbound stream ends, the inbound loop exits.
A simple technique is to select on a cancellation signal while reading, and to drop the sender so the processor task terminates.
Tuning Message Sizes and Limits
Buffering efficiency depends on message size. If messages are consistently near the maximum, you’ll see large transient buffers and longer processing times per item. If messages are tiny, you’ll see overhead from per-message framing and scheduling.
Set explicit limits in your service configuration and enforce them early in the handler. For example, reject or split payloads that exceed your chosen chunking strategy so the rest of the pipeline can assume bounded sizes.
Practical Example: A Bounded Streaming Pipeline
Imagine a service that receives a stream of file chunks, validates each chunk, and emits transformed chunks. Use a bounded channel between the inbound reader and the transformer, chunk sizes that match your validation cost, and avoid copying by keeping data as Bytes.
The key is that each stage has a bound: the channel capacity bounds in-flight chunks, chunk size bounds per-item memory, and outbound backpressure bounds how quickly the pipeline can drain. When all three are bounded, memory stays predictable and latency becomes easier to reason about.
6.3 Controlling Concurrency With Backpressure and Limits
When a Rust gRPC service gets busy, concurrency is the lever that decides whether you stay responsive or start queueing requests until memory and latency both complain. The goal is simple: accept work only as fast as you can process it, and make overload behavior predictable.
Core Idea: Concurrency Is a Budget
Concurrency limits cap the number of in-flight requests or stream items. Backpressure is what happens when producers try to send more work than consumers can handle. In async Rust, “backpressure” usually means you stop reading from an input stream or you await capacity before accepting more work.
A useful mental model is a bounded queue between the network and your handler logic. If the queue is full, you either block (for streams) or reject quickly (for unary calls). Either choice is better than letting the system grow unbounded.
Mind Map: Concurrency and Backpressure
Concurrency and Backpressure Mind Map
Unary Calls: Limit In-Flight and Reject Predictably
For unary RPCs, you typically want a hard cap on in-flight requests. A tokio::sync::Semaphore is a clean fit: acquiring a permit is your admission control, and releasing happens when the request finishes.
use tokio::sync::Semaphore;
use tonic::{Request, Response, Status};

async fn handle(req: Request<()>, sem: &Semaphore) -> Result<Response<()>, Status> {
    let permit = sem
        .try_acquire()
        .map_err(|_| Status::resource_exhausted("server overloaded"))?;

    // Do the work while holding the permit.
    let _ = req;
    // ... handler logic ...

    drop(permit);
    Ok(Response::new(()))
}
try_acquire makes overload behavior immediate. If you prefer waiting, use acquire().await, but then you’re turning overload into latency spikes. For most high-throughput services, fast rejection is the more stable choice.
Streaming Calls: Backpressure Must Be Real
Streaming is trickier because the client can keep sending items. If your handler reads the entire stream into memory, you’ve defeated backpressure. Instead, process items as they arrive, and only pull more when you have capacity.
A common pattern is a bounded channel plus a worker pool. The stream-reading task pushes items into the channel; if the channel is full, send().await naturally pauses reading.
use tokio::sync::mpsc;

async fn process_stream(mut inbound: impl futures::Stream<Item = i32>) {
    let (tx, mut rx) = mpsc::channel::<i32>(64);

    let producer = async move {
        while let Some(item) = inbound.next().await {
            if tx.send(item).await.is_err() { break; }
        }
    };

    let consumer = async move {
        while let Some(item) = rx.recv().await {
            // ... handle item ...
            let _ = item;
        }
    };

    tokio::join!(producer, consumer);
}
The channel capacity is your backpressure knob. When it fills, the producer awaits, which slows down reads from the network.
Choosing Limits: Separate Global and Per-Client
Global limits prevent the whole service from collapsing. Per-client limits prevent one noisy neighbor from consuming the entire budget. In Tower middleware, you can implement per-client admission using a map from client identity to a semaphore, with eviction to avoid unbounded growth.
Even without per-client logic, you should still decide what “concurrency” means for your workload. If each request triggers a database call, concurrency is often IO-bound and can be higher. If each request performs heavy CPU work, concurrency should be closer to the number of cores or the size of your CPU worker pool.
Cancellation and Shutdown: Don’t Leak Work
When a client cancels, your handler should stop promptly. For unary calls, dropping the future releases permits. For streams, ensure that when the receiver side is dropped, the producer stops sending and exits. This keeps backpressure effective and prevents “zombie” tasks that keep consuming CPU.
Observability: Measure the Limit, Not Just the Latency
To tune limits, track at least three signals: current in-flight count, queue depth (for bounded queues), and rejection rate. If you only watch latency, you’ll miss the moment the system starts refusing work and you’ll tune blindly.
A practical rule: if queue depth stays near the maximum, your limit is too high for the work you’re doing, or your handler is slower than expected. If rejection rate is high but latency stays stable, your limit is doing its job—now you tune capacity or optimize the handler.
Integrated Example: Tower Middleware Admission Control
Use middleware to apply the same admission policy across methods. The middleware acquires a permit before calling the inner service and releases automatically when the response future completes. For unary methods, you can return resource_exhausted immediately when no permit is available, while stream methods rely on bounded internal queues to apply backpressure naturally.
6.4 Minimizing Lock Contention in Shared State Middleware
High throughput RPC services often spend time waiting, not computing. In middleware, the usual culprit is shared mutable state protected by a lock: every request tries to acquire it, even when it only needs to read. The goal is to reduce both the frequency of lock acquisitions and the time each acquisition holds.
Start with a Contention Map
Before changing code, identify where locks are used and why. In practice, you want to answer three questions per lock: (1) Is the operation read-heavy or write-heavy? (2) How long does the critical section run? (3) Does the lock guard multiple unrelated concerns?
A quick mental model: if every request performs a “small read” but still takes a mutex, you’re paying a toll at every intersection.
Prefer Read Sharing over Write Sharing
If the state is mostly read, use a read-write lock so multiple readers can proceed concurrently. In Rust, RwLock allows concurrent reads, while writes are exclusive.
Example: caching configuration used by authentication middleware.
use std::sync::Arc;
use tokio::sync::RwLock;

#[derive(Clone)]
struct Config { issuer: String }

struct AuthState { config: RwLock<Config> }

async fn check_token(state: Arc<AuthState>) -> bool {
    let cfg = state.config.read().await;
    // Fast read-only check
    cfg.issuer.len() > 0
}
This helps when reads dominate. It does not help when writes are frequent, because writers block readers.
Shrink the Critical Section
Even with the right lock type, contention grows if you hold the lock while doing slow work. The fix is to copy what you need, then release the lock before expensive operations.
Example: extracting a rate limit bucket pointer or a small snapshot.
use std::sync::Arc;
use tokio::sync::Mutex;

struct Shared { counter: u64 }

async fn handle(shared: Arc<Mutex<Shared>>) {
    let snapshot = {
        let mut guard = shared.lock().await;
        guard.counter += 1;
        guard.counter
    }; // lock released here

    // Slow work without holding the lock
    let _ = snapshot * 2;
}
The pattern is simple: lock, update or read minimal data, unlock, then continue.
Split Locks by Concern
A single mutex guarding unrelated state forces every request to serialize. Split by concern so requests only contend on what they truly share.
Example: separate locks for authentication context and metrics counters.
AuthStateguarded byRwLockfor config and a small map for token metadata.Metricsguarded by atomic counters or a separate lock.
This reduces the “blast radius” of a write.
Use Atomics for Simple Counters
If the shared state is just increments, use atomics instead of locks. Atomics avoid waiting entirely.
Example: tracking request counts.
use std::sync::atomic::{AtomicU64, Ordering};

struct Metrics { total: AtomicU64 }

fn on_request(m: &Metrics) {
    m.total.fetch_add(1, Ordering::Relaxed);
}
Relaxed is appropriate for pure counting where ordering relative to other memory operations is unnecessary.
Reduce Lock Frequency with Sharded State
When you need a map that is updated per key (like per-user rate limiting), a single lock around the whole map becomes a bottleneck. Shard the map into multiple buckets, each with its own lock, chosen by hashing the key.
Mind Map: lock minimization strategy
Sharded Rate Limiter Example
Below is a compact sharding approach using a vector of mutex-protected buckets.
use std::sync::Arc;
use tokio::sync::Mutex;
use std::collections::HashMap;

struct Sharded<K, V> { buckets: Vec<Mutex<HashMap<K, V>>> }

fn shard_index<K: std::hash::Hash>(k: &K, n: usize) -> usize {
    use std::hash::{Hash, Hasher};
    let mut h = std::collections::hash_map::DefaultHasher::new();
    k.hash(&mut h);
    (h.finish() as usize) % n
}

async fn get_bucket<K: std::hash::Hash + Eq + Clone, V>(s: &Sharded<K, V>, k: &K)
-> &Mutex<HashMap<K, V>> {
    let idx = shard_index(k, s.buckets.len());
    &s.buckets[idx]
}
In middleware, you lock only the bucket for the specific key. Requests for different keys proceed in parallel, which is exactly what you want when traffic fans out.
Measure Contention in Middleware
Lock contention is visible in two ways: increased request latency and reduced CPU utilization due to waiting. Instrument middleware to record time spent inside lock acquisition paths (not just total request time). If you can’t measure lock wait directly, measure end-to-end latency while varying load and lock scope.
A practical checklist:
- If latency spikes correlate with traffic bursts, suspect a hot lock.
- If critical sections include serialization, network calls, or formatting, move them outside the lock.
- If writes are frequent,
RwLockmay not help; sharding or atomics may.
Common Pitfalls
- Holding a lock across
.awaitpoints. This can deadlock or stall unrelated requests. - Guarding large structures when only small fields are needed. Copy small fields out.
- Using a single global mutex for everything. Split or shard.
The net effect of these changes is straightforward: fewer requests wait on the same lock, and the ones that do wait spend less time holding it.
6.5 Practical Benchmarking Methodology for RPC Throughput
Benchmarking RPC throughput is mostly about controlling variables. If you measure “everything,” you usually measure nothing useful. The goal here is to produce repeatable numbers for a specific call pattern, payload profile, and concurrency level—then explain why those numbers move.
Define the Measurement Target
Start by writing down what “throughput” means for your service.
- Metric choice: Prefer requests per second (RPS) for unary calls and messages per second for streaming, plus p50/p95 latency so you can tell when throughput is bought with pain.
- Call shape: Unary, client streaming, server streaming, and bidi streaming behave differently under backpressure.
- Payload profile: Fix request size, response size, and serialization complexity. A benchmark that changes message size is not a benchmark; it’s a different workload.
A simple baseline definition for unary calls:
- 1 request per call
- fixed protobuf message size (e.g., 1 KiB request, 2 KiB response)
- concurrency level N
- target duration long enough to reach steady state (often 10–30 seconds per run)
Build a Controlled Harness
Your harness should minimize “benchmarking overhead” and keep the system in a known state.
- Separate client and server processes so CPU contention is explicit.
- Pin resources conceptually: run on a quiet machine, disable unrelated background load, and keep the same CPU governor.
- Warm up: run a short warm-up phase before recording metrics so caches and connection setup settle.
- Reuse channels: create the client channel once per benchmark case, not per request.
Example harness structure for unary throughput:
- Start server
- Create client channel
- Warm-up: 2–3 seconds
- Measure: 15 seconds
- Stop and record
Choose Concurrency and Load Model
Throughput depends on how you generate load.
- Closed-loop load: keep N in-flight requests; this models a system with bounded concurrency.
- Open-loop load: send at a fixed rate; this models an external producer.
For Tower and async runtimes, closed-loop is often easier to interpret because it directly tests how well the server and middleware handle saturation.
A practical sweep:
- N = 1, 2, 4, 8, 16, 32, 64
- For each N, record RPS and p95 latency
- Stop increasing N when latency grows sharply or error rate rises
Instrument What Matters
You need enough visibility to explain changes, not just detect them.
Track these categories:
- Transport: connection reuse, TLS on/off, keep-alive behavior
- Serialization: protobuf encode/decode time
- Middleware: per-layer timing and error counts
- Runtime: queueing delays and task scheduling pressure
A lightweight approach is to add timing spans around handler execution and around each middleware layer, then correlate those with latency percentiles.
Use Mind Maps to Keep Variables Straight
Mind maps help you avoid the classic mistake: changing three things at once.
Mind Map: Benchmark Variables and Observables
Run Experiments Systematically
Treat each benchmark case like a small experiment.
- Baseline case: minimal middleware stack, fixed payloads, fixed concurrency sweep.
- Single change case: add one middleware (e.g., auth check) while keeping everything else identical.
- Repeatability: run each case multiple times and compare distributions, not single runs.
- Regression guard: keep a “known good” baseline and fail the benchmark if it drifts beyond a threshold.
Example: comparing middleware overhead
- Case A: tracing only
- Case B: tracing + rate limiting
- Case C: tracing + rate limiting + auth validation
If RPS drops sharply from A to B, the rate limiter likely adds contention or extra async work. If latency increases but RPS stays stable, you may be queueing rather than failing.
Interpret Results Without Guessing
Use a simple decision framework.
- RPS increases with N, then plateaus: you hit a capacity limit (CPU, locks, or network).
- RPS increases but p95 latency spikes: you’re queueing; middleware or handler is slower under load.
- Error rate rises: timeouts, resource exhaustion, or backpressure misconfiguration.
- Throughput changes when payload size changes: serialization or memory allocation is a likely bottleneck.
Mind Map: Interpreting Throughput Shapes
Example Benchmark Case Matrix
A compact matrix keeps cases comparable.
| Case | Call Type | Payload | Middleware Stack | Load Model |
|---|---|---|---|---|
| A | Unary | 1 KiB req / 2 KiB resp | tracing only | closed-loop N sweep |
| B | Unary | same | tracing + auth | closed-loop N sweep |
| C | Unary | same | tracing + auth + rate limit | closed-loop N sweep |
| D | Unary | 4 KiB req / 8 KiB resp | tracing + auth + rate limit | closed-loop N sweep |
Run A–C first to isolate middleware cost, then D to test whether serialization dominates.
Record Results in a Way You Can Compare Later
For each case, store:
- configuration (call type, payload sizes, middleware list)
- concurrency sweep table (N, RPS, p50, p95, errors)
- notes on harness settings (warm-up, duration, channel reuse)
A good benchmark log reads like a recipe. If someone else can’t reproduce it, the numbers are just decoration.
7. Robust Error Handling and Status Mapping for gRPC
7.1 Designing a Unified Error Type for Service Boundaries
A unified error type is the glue between your domain logic and gRPC’s wire-level status model. The goal is simple: every failure that crosses the service boundary becomes a single, predictable shape that can be logged, mapped to a tonic::Status, and optionally carry structured details.
Foundational Principles for Boundary Errors
Start by separating three concerns:
- What failed: a stable error category you can match on.
- Why it failed: human-readable context suitable for logs and debugging.
- How it should appear to the client: the gRPC status code plus optional details.
In Rust, this typically means one public error enum for boundary errors, plus conversions from internal errors. Keep the boundary error free of transport-specific types so it can be reused by both server handlers and client call wrappers.
Error Categories and Stable Mapping
Define categories that reflect service semantics rather than implementation details. For example, “validation” is more useful than “serde failed” because the client can respond to the category.
A practical set for many services:
InvalidArgumentNotFoundPermissionDeniedUnavailableConflictInternal
Each category maps to a gRPC Code. Your mapping should be centralized so you don’t end up with five slightly different “internal error” behaviors.
Unified Error Shape
A good boundary error type usually includes:
kind: the stable categorymessage: short context for logsdetails: optional structured fields (strings are fine to start)source: optional underlying error for debugging
Below is a compact example of a boundary error enum with a conversion to tonic::Status.
use tonic::Code;

#[derive(Debug)]
pub enum BoundaryErrorKind {
    InvalidArgument,
    NotFound,
    PermissionDenied,
    Unavailable,
    Conflict,
    Internal,
}

#[derive(Debug)]
pub struct BoundaryError {
    pub kind: BoundaryErrorKind,
    pub message: String,
    pub details: Vec<(String, String)>,
}

impl BoundaryError {
    pub fn to_status(&self) -> tonic::Status {
        let code = match self.kind {
            BoundaryErrorKind::InvalidArgument => Code::InvalidArgument,
            BoundaryErrorKind::NotFound => Code::NotFound,
            BoundaryErrorKind::PermissionDenied => Code::PermissionDenied,
            BoundaryErrorKind::Unavailable => Code::Unavailable,
            BoundaryErrorKind::Conflict => Code::AlreadyExists,
            BoundaryErrorKind::Internal => Code::Internal,
        };
        tonic::Status::new(code, self.message.clone())
    }
}
This example keeps details separate from the message. You can later decide how to serialize details into gRPC metadata or status details without changing your domain code.
Conversions from Domain Errors
Your domain layer should return its own error types. Then you implement From<DomainError> for BoundaryError (or TryFrom when needed). This keeps the boundary error as the single outward-facing contract.
A common pattern is:
- Domain error carries rich context.
- Conversion chooses a
kindand formats a safe message. - Sensitive fields are omitted or replaced.
For instance, if a database constraint fails, you might map it to Conflict and include a field name, but not raw SQL.
Mind Map: Boundary Error Design
Example: Mapping Validation Failures
Suppose you validate a request and find missing fields. Your handler should return Result<T, BoundaryError> internally, then convert to tonic::Status at the boundary.
A validation error might look like:
kind:InvalidArgumentmessage: “request is missing required fielduser_id”details:[ ("field", "user_id") ]
Even if you don’t yet serialize details into the status, keeping them in the error type makes it easy to add later without rewriting your handlers.
Example: Handling Not Found Without Leaking Storage
When a lookup fails, resist the temptation to mention the storage mechanism. Instead:
kind:NotFoundmessage: “user does not exist”details:[ ("resource", "user") ]
This keeps the client contract stable and prevents accidental disclosure of internal identifiers or query structure.
Advanced Details That Prevent Pain Later
- Keep the boundary error message short so logs stay readable and status messages don’t become a dumping ground.
- Use
kindfor matching in middleware and tests; don’t match on message strings. - Centralize the
kind -> Codemapping so changes happen in one place. - Decide on a details strategy early: either embed details into the status message format or attach them as structured fields later. The key is consistency.
With these pieces in place, your service boundary becomes predictable: domain errors convert into one unified shape, and that shape converts into gRPC status in a controlled, testable way.
7.2 Mapping Domain Errors to gRPC Status Codes Correctly
Mapping domain errors to gRPC status codes is where “correctness” becomes visible to clients. The goal is simple: every failure should carry (1) a stable gRPC status code, (2) a clear human-readable message, and (3) optional structured details—without leaking internal implementation details.
Start with a domain error taxonomy. In practice, you want a small set of domain error categories that correspond to client actions or client expectations. For example, “user not found” and “invalid input” are different categories even if both are “not found” in some database sense. Then decide which categories map to which gRPC codes.
Foundational Mapping Rules
Use these rules as a baseline, then refine with service-specific semantics.
- Invalid input maps to InvalidArgument. If the request violates the contract (missing required fields, wrong ranges, malformed IDs), the client should fix the request.
- Authentication failures map to Unauthenticated when credentials are missing or invalid, and to PermissionDenied when credentials are present but not allowed.
- Authorization failures map to PermissionDenied. This is distinct from authentication: the client is known, but the action is not permitted.
- Missing resources map to NotFound when the resource does not exist or is not visible.
- Conflicts map to AlreadyExists or Aborted depending on whether the client can retry with different data. “Already exists” is a stable condition; “aborted” often indicates a concurrent modification.
- Rate limiting maps to ResourceExhausted. Keep messages specific enough to guide behavior without revealing internal limits.
- Temporary downstream failures map to Unavailable. Use this when the service cannot reach a dependency or the dependency is overloaded.
- Unexpected internal failures map to Internal. This is the default for bugs, invariant violations, and unclassified errors.
A useful mental model: gRPC codes should reflect what the client can do next, not what went wrong inside the server.
Systematic Error Classification Flow
- Validate request shape before calling domain logic. If validation fails, return InvalidArgument immediately.
- Run domain operation and capture domain errors as a typed value.
- Classify domain error category into one of your mapping buckets.
- Choose the gRPC code using the rules above.
- Craft the message: short, actionable, and consistent. Avoid dumping SQL errors or stack traces.
- Attach details only when they help clients make decisions (for example, which field failed validation).
- Log the full internal error server-side with correlation context.
Mind Map: Error Mapping Responsibilities
Example: Mapping a Typed Domain Error
Imagine a domain operation create_order that can fail with typed errors: InvalidCustomerId, OrderAlreadyExists, InventoryUnavailable, and Unexpected. Map them to gRPC codes consistently.
use tonic::{Request, Status};

#[derive(Debug)]
enum DomainError {
    InvalidCustomerId,
    OrderAlreadyExists,
    InventoryUnavailable,
    Unexpected,
}

fn to_status(err: DomainError) -> Status {
    match err {
        DomainError::InvalidCustomerId => Status::invalid_argument("customer_id is invalid"),
        DomainError::OrderAlreadyExists => Status::already_exists("order already exists"),
        DomainError::InventoryUnavailable => Status::unavailable("inventory service unavailable"),
        DomainError::Unexpected => Status::internal("internal error"),
    }
}

async fn handler(req: Request<()>) -> Result<(), Status> {
    let domain_err = DomainError::Unexpected;
    Err(to_status(domain_err))
}
Notice what’s missing: no database error strings, no “panic” wording, and no ambiguity about the client-facing category.
Example: Field-Level Validation Details
When the client needs to correct specific fields, keep the gRPC code as InvalidArgument but add details that point to the exact problem. A common pattern is to include a list of invalid fields in the message or in structured details.
- Code: InvalidArgument
- Message: “request validation failed”
- Details:
{ field: "quantity", reason: "must be > 0" }
This prevents clients from guessing which part of the request is wrong.
Common Pitfalls and How to Avoid Them
- Overusing Internal: if you can classify the error category, don’t hide it behind Internal.
- Mixing authentication and authorization: missing/invalid credentials is Unauthenticated; lack of permission is PermissionDenied.
- Using NotFound for everything: “not found” should mean the resource doesn’t exist or isn’t visible, not that a dependency failed.
- Changing messages unpredictably: clients should rely on code and details, not on fragile message text.
Practical Checklist for Correctness
- Every domain error category maps to exactly one gRPC code.
- Validation errors return InvalidArgument before domain execution.
- Downstream outages return Unavailable rather than Internal.
- Authorization uses PermissionDenied.
- Unexpected errors return Internal with a generic message.
- Full error context is logged server-side; clients get stable, actionable output.
With this structure, mapping becomes a disciplined translation layer rather than a pile of ad-hoc matches. Clients get consistent semantics, and your server stays honest about what it knows and what it doesn’t.
7.3 Preserving Error Details and Debug Context Safely
When a gRPC call fails, you want two things at once: a stable, client-safe error surface and enough server-side context to diagnose the real cause. The trick is to treat “details” as a controlled channel, not a dumping ground for internal state.
What “Details” Means in Practice
In gRPC, the client typically sees a status code, a short message, and optional structured metadata. In Tonic, that usually maps to tonic::Status plus optional payloads carried via status details or trailing metadata. Your goal is to ensure:
- The client message is consistent and non-sensitive.
- The server retains rich context in logs or tracing spans.
- Any extra data sent to the client is intentionally curated and bounded.
A common mistake is to put raw error strings from deep layers into the status message. Those strings often include SQL fragments, internal identifiers, or stack-like noise that makes debugging harder for humans and riskier for security.
A Safe Error Contract
Define a small set of client-facing messages per domain failure category. Then map internal errors into those categories at the boundary layer (where your service handler returns a Result). For example:
InvalidArgumentfor malformed inputs.NotFoundwhen a referenced entity doesn’t exist.Unavailablefor transient dependency issues.Internalfor everything else.
Keep the client message short, but make it actionable. “invalid request” is less useful than “missing required field: user_id”. Still, avoid echoing secrets or full payloads.
Capturing Debug Context Without Leaking It
Debug context belongs in server observability, not in the client-facing status. Use tracing spans to attach structured fields such as:
- request id or correlation id
- method name
- tenant or shard id (only if non-sensitive)
- dependency name and operation
- timing and retry count
Then, when you create a tonic::Status, include only a sanitized message. The server logs can keep the original error chain.
Here’s a compact pattern for mapping internal errors to safe statuses while preserving the original error for logs/tracing:
use tonic::{Status, Code};
use tracing::{error, Span};

fn map_error<E: std::fmt::Display>(err: E, code: Code, msg: &'static str) -> Status {
    error!(error = %err, "rpc failed");
    Status::new(code, msg)
}
This keeps the client message stable and pushes the detailed error into structured logs.
Using Status Details Carefully
If you need structured data for the client (for example, a validation error list), send only what the client can safely use. Prefer small, bounded structures and avoid including raw internal identifiers that can be used for enumeration.
A practical approach is to create a dedicated “public error details” type and convert internal validation errors into it. Keep it limited in size and shape.
Mind Map: Error Details and Debug Context
Example: Validation Errors with Safe Details
Suppose a request includes a list of items, and some items fail validation. You can return InvalidArgument and include a list of field-level issues that the client can correct. Keep each issue small: field name and a short reason.
On the server, log the full validation error with the original context, but only return the curated list to the client. That way, the client can fix inputs without learning anything about your internal model or database schema.
Example: Dependency Failures with Correlation Id
When a downstream call fails, return Unavailable or Internal with a generic message like “dependency temporarily unavailable”. In the server span, attach:
- dependency operation
- upstream status code
- elapsed time
- correlation id
If the client needs to report the failure, include the correlation id only if it’s safe and useful. Otherwise, rely on logs and tracing for diagnosis.
Checklist for Safe Preservation
- Do you map internal errors to a small set of client-facing categories?
- Is the client message sanitized and stable?
- Are rich error chains recorded in logs or tracing fields?
- Are any status details bounded in size and free of secrets?
- Is there a correlation id that ties client reports to server diagnostics?
Done well, clients get predictable failures they can react to, while engineers get enough context to fix the real issue without rummaging through sensitive data.
7.4 Handling Partial Failures in Streaming Calls
Streaming calls fail in more interesting ways than unary calls. In a unary RPC, you either get a response or you don’t. In a streaming RPC, you may have already delivered some messages, then hit an error mid-flight. The key is to decide what “failure” means for the already-sent portion, and to make that decision consistent across server, client, and middleware.
Foundational Model of Partial Failure
A streaming RPC has three observable phases: request consumption, response emission, and termination. Partial failure typically occurs during response emission or while the server is still consuming the request stream. In gRPC, the stream ends with a final status. That status applies to the whole RPC, even if earlier messages were valid.
To handle this systematically, treat the stream as a sequence of events with an explicit end marker. Your application logic should not assume that “some messages arrived” implies “the RPC succeeded.” Instead, it should treat the final status as the authoritative completion signal.
Server Side: Decide Completion Semantics
On the server, choose one of these completion semantics:
- All-or-nothing delivery: If an error occurs, you avoid sending any application-level results that would be interpreted as complete. You may still send progress messages, but they must be clearly marked as non-final.
- Best-effort with explicit finality: You allow partial results, but each result must carry enough context for the client to know whether it is final or provisional.
- Fail fast with bounded work: You stop processing immediately on fatal errors and terminate the stream with an appropriate status.
A practical approach is to send provisional messages with a done flag or a sequence number, and only treat messages as final when the stream ends successfully.
Client Side: Separate Data from Completion
On the client, implement two layers of logic:
- Data handling: process each received message immediately, but store it in a structure that can be reconciled later.
- Completion handling: when the stream terminates, check the final status. If it’s non-success, mark the whole operation as failed and decide how to reconcile stored messages.
This prevents the common mistake of updating downstream state based solely on received messages. If you must update state incrementally, do it in a way that can be rolled back or compensated.
Error Classification for Streaming
Not all errors are equal. Classify them into:
- Transient: network hiccups, temporary resource exhaustion.
- Permanent: invalid arguments, authentication failures, schema mismatches.
- Local processing: business rule violations, downstream dependency errors.
Then map them to gRPC status codes consistently. For example, invalid input should become InvalidArgument, while a downstream timeout might become Unavailable or DeadlineExceeded depending on where the timeout occurred.
Example: Provisional Results with Reconciliation
Consider a server that streams computed items from an input stream. If it fails after sending some items, the client should not treat them as complete.
// Client-side sketch: collect provisional items, reconcile on end.
struct Item { seq: u64, value: String }

let mut items: Vec<Item> = Vec::new();
let mut stream = client.compute(request_stream).await?;

while let Some(msg) = stream.message().await? {
    items.push(Item { seq: msg.seq, value: msg.value });
}

// After the loop, check final status via the stream result.
// If it is an error, mark items as partial and reconcile.
In practice, you’ll use the exact Tonic streaming APIs you have, but the logic stays the same: messages are processed, then completion status decides whether the batch is valid.
Mind Map: Partial Failure Handling
Middleware Interaction: Don’t Hide the Ending
Tower middleware often wraps requests and responses. For streaming, ensure middleware does not swallow the terminal status or convert it into a “successful” response. If you add logging, record both the number of messages processed and the final status. If you add metrics, track partial vs complete outcomes as separate counters.
A simple rule: middleware may observe messages, but only the stream termination determines completion.
Practical Checklist
- Include a way to distinguish provisional from final results.
- Treat final status as the completion authority.
- Reconcile client-side state when the stream ends with an error.
- Map error classes to consistent gRPC status codes.
- Ensure middleware preserves terminal status and records message counts.
When you follow these rules, partial failures stop being surprises and start being predictable behavior with clear boundaries.
7.5 Implementing Error Middleware for Consistent Responses
Consistent error responses matter because clients need predictable shapes: a stable gRPC status code, a clear message, and optional structured details. In a Tonic + Tower setup, error middleware is the place where you standardize those outputs without scattering mapping logic across every handler.
Core Idea
Your handlers should return domain errors (or a small set of service errors). Middleware then converts those errors into tonic::Status in one place. This keeps business logic focused on correctness and keeps transport semantics consistent.
Step 1: Define a Small Error Vocabulary
Start with an error type that captures what went wrong at the service boundary. Keep it coarse enough to map cleanly to gRPC statuses.
use thiserror::Error;

#[derive(Debug, Error)]
pub enum ServiceError {
    #[error("invalid argument: {0}")]
    InvalidArgument(String),
    #[error("unauthenticated")]
    Unauthenticated,
    #[error("forbidden")]
    Forbidden,
    #[error("Resource Not Found")]
    NotFound,
    #[error("conflict")]
    Conflict,
    #[error("Internal Error")]
    Internal,
}
Step 2: Map Domain Errors to GRPC Status
Create a single conversion function. Use stable messages for client readability, and keep detailed context in logs rather than in the status string.
use tonic::Status;
use tonic::Code;

impl ServiceError {
    pub fn to_status(&self) -> Status {
        match self {
            ServiceError::InvalidArgument(_) => Status::new(Code::InvalidArgument, "invalid argument"),
            ServiceError::Unauthenticated => Status::new(Code::Unauthenticated, "unauthenticated"),
            ServiceError::Forbidden => Status::new(Code::PermissionDenied, "forbidden"),
            ServiceError::NotFound => Status::new(Code::NotFound, "not found"),
            ServiceError::Conflict => Status::new(Code::AlreadyExists, "conflict"),
            ServiceError::Internal => Status::new(Code::Internal, "internal error"),
        }
    }
}
Step 3: Implement Tower Middleware That Intercepts Errors
Tower middleware wraps a Service and can transform the Result. In practice, you’ll likely have handlers return Result<Response<_>, ServiceError> and then convert to tonic::Status at the boundary.
A common pattern is: handlers return Result<_, ServiceError>, and middleware turns ServiceError into tonic::Status.
use std::task::{Context, Poll};
use tower::{Layer, Service};
use http::Request;
use tonic::Status;

pub struct ErrorLayer;
impl<S> Layer<S> for ErrorLayer {
    type Service = ErrorMiddleware<S>;
    fn layer(&self, inner: S) -> Self::Service { ErrorMiddleware { inner } }
}

pub struct ErrorMiddleware<S> { inner: S }

impl<S, ReqBody> Service<Request<ReqBody>> for ErrorMiddleware<S>
where
    S: Service<Request<ReqBody>, Response = http::Response<bytes::Bytes>, Error = ServiceError>,
{
    type Response = http::Response<bytes::Bytes>;
    type Error = Status;
    type Future = S::Future;

    fn poll_ready(&mut self, cx: &mut Context<'_>) -> Poll<Result<(), Self::Error>> {
        self.inner.poll_ready(cx).map_err(|e| e.to_status())
    }

    fn call(&mut self, req: Request<ReqBody>) -> Self::Future {
        self.inner.call(req)
    }
}
The exact trait bounds vary depending on how you structure your service stack, but the principle stays: convert ServiceError to tonic::Status at the edges.
Step 4: Ensure Metadata and Details Stay Consistent
If you use Status::with_details, keep the schema stable. For example, attach a small error code string and a correlation id. Middleware should add these uniformly so clients can parse them without guessing.
Mind Map: Error Middleware Responsibilities
Step 5: Middleware Order and Interaction with Other Layers
Place error middleware so it wraps the layers that might produce ServiceError. If you put it too early, later layers may return raw errors that bypass your mapping. If you put it too late, you may lose the chance to normalize details before the response is built.
A practical rule: error middleware should be the outermost layer that still has access to the domain error type.
Example: Consistent Mapping Across Unary and Streaming
Unary calls fail once, so mapping is straightforward. Streaming calls can fail mid-stream; the middleware should still ensure that when an error is surfaced, it becomes a tonic::Status with the same code/message rules.
In handlers, return ServiceError whenever you detect a failure condition. In the stream, convert errors into the same ServiceError type rather than mixing tonic::Status directly. That way, the middleware remains the single source of truth.
Step 6: Test the Mapping Behavior
Write tests that assert:
InvalidArgumentalways becomesCode::InvalidArgument.UnauthenticatedbecomesCode::Unauthenticated.ForbiddenbecomesCode::PermissionDenied.NotFoundbecomesCode::NotFound.InternalbecomesCode::Internalwith the stable message.
Also test that the status string does not leak internal formatting from domain errors. The message should be predictable; the logs can carry the messy truth.
8. Observability with Tracing Metrics and Structured Logging
8.1 Instrumenting Tonic Services with Tracing Spans
Tracing spans give you a structured timeline of what happened inside a request: where it started, which internal steps ran, and where time was spent. In a Tonic service, you typically want spans at three levels: the incoming RPC boundary, the handler’s logical work units, and any outgoing calls you make.
Span Foundations for gRPC Boundaries
Start by treating each RPC as a root span. That root span should include stable identifiers you can filter on later, such as the RPC method name and the peer address. Then, inside the handler, create child spans for distinct operations like validation, database access, and response building.
A good rule: if a step can fail independently or has measurable latency, it deserves its own span. If it’s just a few lines of glue code, keep it inside the parent span.
Mind Map: Span Placement Strategy
Creating Spans in a Tonic Handler
Tonic handlers are async functions, so spans should be entered in the async context where the work happens. The tracing crate provides #[instrument] for quick instrumentation, and Span::current() plus in_scope for manual control.
Below is a practical pattern for a unary RPC. It creates a span for the handler, adds useful attributes, and records errors without dumping request payloads.
use tonic::{Request, Response, Status};
use tracing::{instrument, info};

pub struct MySvc;

#[tonic::async_trait]
impl my_proto::my_service_server::MyService for MySvc {
    #[instrument(skip(self, req), fields(rpc.method = "UnaryExample"))]
    async fn unary_example(
        &self,
        req: Request<my_proto::Req>,
    ) -> Result<Response<my_proto::Resp>, Status> {
        let peer = req
            .remote_addr()
            .map(|a| a.to_string())
            .unwrap_or_else(|| "unknown".into());

        tracing::Span::current().record("net.peer", &peer);
        info!("handler started");

        // Validation span is implicit via the handler span.
        // Add explicit spans for heavier steps.
        let out = my_logic(req.into_inner()).await?;
        Ok(Response::new(out))
    }
}
Adding Child Spans for Logical Work Units
When a handler does multiple expensive operations, use explicit child spans. This keeps the root span readable and makes it easy to see which part dominates latency.
use tracing::instrument;

#[instrument(skip(input))]
async fn my_logic(input: my_proto::Req) -> Result<my_proto::Resp, Status> {
    let validated = validate(input).await?;
    let row = fetch_from_store(validated).await?;
    Ok(build_response(row))
}
Here, each helper function gets its own span automatically. The skip prevents large inputs from being formatted into logs.
Recording Errors and Mapping Them to Span Status
A span should reflect failures in a consistent way. When you return a Status, record the error on the current span and include a short, non-sensitive message. Avoid attaching raw payloads; attach identifiers like user IDs or request IDs if you already have them.
A simple pattern is to record before returning:
- set an attribute like
error.kind - record a message like
error.message - keep it short enough to be searchable
Propagating Trace Context Through Metadata
For outgoing calls, you want the client span to be a child of the current server span. In practice, that means injecting the current trace context into gRPC metadata so the downstream service can create a matching root span.
The key idea: treat metadata as the carrier, not as a place to store business data. If you already have a request ID, you can include it as an attribute on spans, while trace context handles correlation.
Mind Map: What to Put in Span Fields
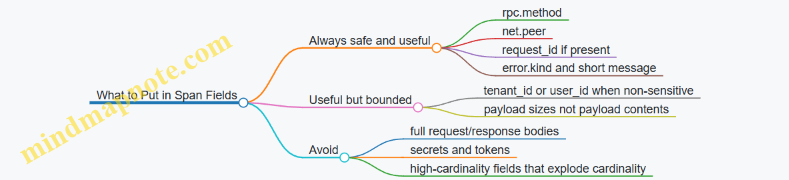
Practical Checklist for Span Hygiene
- Use a root span per RPC and end it when the response is produced.
- Add child spans for operations that take noticeable time or fail independently.
- Record errors on the span that actually observed them.
- Skip large inputs in
#[instrument]to prevent noisy logs. - Propagate trace context for outgoing calls so correlation works end-to-end.
With these rules, your traces become a map of execution rather than a pile of timestamps, and you can answer the basic questions quickly: what ran, how long it took, and where it went wrong.
8.2 Propagating Trace Context Through gRPC Metadata
Trace context propagation is the part where “a request” stops being a story told by one service and becomes a single thread you can follow across services. In gRPC, the thread is carried in metadata headers, and in Rust you typically use tracing spans plus a propagator that knows how to read and write those headers.
Foundational Model of Trace Context
A trace context usually includes a trace identifier, a span identifier, and flags that control sampling. When a client calls a server, the client creates a new span as a child of the current span, then serializes the context into gRPC metadata. The server reads the metadata, creates a span with the same trace identifier, and links it to the parent span from the incoming headers.
The practical implication: if you forget to propagate, you still get spans, but they won’t stitch into a single trace. If you propagate incorrectly, you may create traces that look connected while actually mixing unrelated requests.
Metadata Keys and Encoding Rules
gRPC metadata keys are lowercase ASCII strings. Values are typically ASCII, and some implementations require that values be valid header-safe strings. Your propagator should handle encoding details, but you still need to ensure you’re using the correct metadata container and key names.
In Tonic, you work with tonic::metadata::MetadataMap. You can attach metadata to outgoing requests and read it from incoming requests. The propagator bridges between tracing context and metadata.
Client Side Propagation in Tonic
On the client, you start with the current tracing span context, inject it into metadata, and attach that metadata to the Request. A common pattern is to use an interceptor-like function or a helper that wraps request creation.
Example:
use tonic::Request;
use tonic::metadata::{MetadataMap, MetadataValue};

fn add_trace_headers(mut md: MetadataMap, traceparent: &str) -> MetadataMap {
    md.insert("traceparent", MetadataValue::from_str(traceparent).unwrap());
    md
}

fn build_request<T>(msg: T, traceparent: &str) -> Request<T> {
    let md = MetadataMap::new();
    let md = add_trace_headers(md, traceparent);
    let mut req = Request::new(msg);
    *req.metadata_mut() = md;
    req
}
In real code, traceparent is produced by your propagator from the current span context, not manually. The important part is the flow: inject into metadata, attach to the request.
Server Side Extraction and Span Creation
On the server, you read metadata from the incoming Request. Then you extract the parent context and create a new span for the handler. If you’re using tracing, the span should be entered so that logs and child spans inherit the correct trace context.
A minimal mental model: incoming metadata → extract context → start span → run handler inside span.
Mind Map: Propagation Responsibilities
Handling Sampling and Flags Correctly
Sampling decisions affect whether spans are recorded. If the client includes sampling flags in the metadata, the server should respect them when deciding whether to record. If you ignore sampling flags, you can end up with partial traces that are hard to reason about.
A practical check: ensure your propagator injects and extracts the same set of fields. If your tracing setup uses a specific format (for example, a traceparent-style header), keep it consistent across all services.
Practical Example with a Handler Flow
Consider a unary RPC handler. The server receives a request, extracts trace context from metadata, creates a span named after the RPC method, and then calls the business logic. Inside business logic, any additional spans automatically become children of the handler span.
Example:
use tonic::{Request, Response, Status};
use tracing::{info, Span};

fn handle(mut req: Request<()>) -> Result<Response<()>, Status> {
    // 1) Extract parent context from req.metadata()
    // 2) Create a span using extracted context
    let span = Span::current();

    // 3) Enter span so logs and child spans inherit it
    let _enter = span.enter();

    info!("handling rpc with trace context");
    Ok(Response::new(()))
}
The snippet omits the actual extraction/injection calls, but the structure is the point: extraction happens before span creation, and span entry happens before any logging.
Verification Checklist That Doesn’t Lie
- Confirm the same trace identifier appears in both client and server spans.
- Confirm the server handler span is a child of the client span (or correctly linked).
- Confirm logs emitted inside the handler include the trace context.
- Confirm behavior when metadata is missing: you should start a new trace rather than crash.
When these checks pass, metadata propagation is doing its job: it turns separate RPC calls into one coherent execution narrative.
8.3 Capturing Latency Throughput and Error Rate Metrics
Capturing metrics for a Tonic gRPC service is mostly about choosing the right measurement points and making sure every request gets counted exactly once. The goal is simple: when latency rises, you should be able to say whether it’s caused by queueing, handler time, downstream calls, or retries. When throughput drops, you should know whether it’s due to backpressure, connection issues, or timeouts. When errors rise, you should see which status codes dominate and whether they correlate with specific methods or middleware layers.
What to Measure First
Start with three families of metrics.
- Latency: measure end-to-end request time and, if possible, break it down into phases like queueing and handler execution.
- Throughput: count completed requests per method and per status class.
- Error Rate: compute error counts and ratios by status code and method.
A practical rule: record latency for every completed request, and record status for every completed request. If you only measure errors, you’ll miss slow failures that still return success.
Where to Capture Metrics in Tonic and Tower
In Tower, middleware wraps a Service, so it sees the request before it enters the inner service and it sees the response or error after the inner service finishes. That makes it ideal for consistent measurement.
In Tonic, the handler is where business logic runs, but middleware is where you can standardize measurement across unary and streaming. For streaming, “request completion” is ambiguous because the call can last a long time. For that reason, capture:
- Unary: measure from call start to response ready.
- Streaming: measure from call start to stream end, and also track early termination as an error or cancellation depending on the outcome.
Metric Definitions That Don’t Lie
Use clear definitions so dashboards don’t become interpretive art.
- Latency histogram: observe duration in milliseconds for each completed call.
- Throughput counter: increment once per completed call.
- Error counter: increment when the call ends with a non-success gRPC status.
- Error rate: derive as
error_count / total_countover a time window.
For gRPC, “success” is typically status code OK. Everything else counts as error even if the transport succeeded.
Example: A Tower Layer for Latency and Status
Below is a minimal pattern using tracing plus a metrics recorder interface. The recorder is abstract so you can plug in your preferred metrics backend.
use std::time::Instant;
use tonic::Status;
use tower::{Layer, Service};

pub struct MetricsLayer<R> { recorder: R }

impl<R> MetricsLayer<R> {
    pub fn new(recorder: R) -> Self { Self { recorder } }
}

impl<S, R> Layer<S> for MetricsLayer<R>
where
    S: Service<tonic::Request<()>> + Clone,
{
    type Service = MetricsService<S, R>;
    fn layer(&self, inner: S) -> Self::Service {
        MetricsService { inner, recorder: self.recorder.clone() }
    }
}

pub struct MetricsService<S, R> { inner: S, recorder: R }

impl<S, R> Service<tonic::Request<()>> for MetricsService<S, R>
where
    S: Service<tonic::Request<()>, Response = tonic::Response<()>>,
    R: Clone,
{
    type Response = S::Response;
    type Error = S::Error;
    type Future = S::Future;

    fn poll_ready(
        &mut self,
        cx: &mut std::task::Context<'_>,
    ) -> std::task::Poll<Result<(), Self::Error>> {
        self.inner.poll_ready(cx)
    }

    fn call(&mut self, req: tonic::Request<()>) -> Self::Future {
        let start = Instant::now();
        let method = req.metadata().get("grpc-method").cloned();
        let recorder = self.recorder.clone();
        let fut = self.inner.call(req);
        async move {
            let res = fut.await;
            let dur_ms = start.elapsed().as_millis() as u64;
            match &res {
                Ok(_) => recorder.observe_ok(method, dur_ms),
                Err(e) => {
                    let status = e
                        .into()
                        .map(|s: Status| s.code().as_str().to_string())
                        .unwrap_or_else(|_| "unknown".to_string());
                    recorder.observe_err(method, status, dur_ms);
                }
            }
            res
        }
    }
}
This sketch shows the core idea: capture Instant before calling the inner service, then observe duration and status after completion. In a real implementation, you’ll extract the method name from request extensions or metadata in a way that matches your setup.
Mind Map: Latency, Throughput, and Error Rate
Advanced Details Without the Headaches
Label cardinality matters. If you label by user ID, you’ll create a metric explosion and slow everything down. Prefer stable labels like method name, status code, and direction (unary vs streaming). If you need more detail, log it at debug level and keep metrics aggregated.
Retries and timeouts can distort latency. If you retry inside a client, measure both per-attempt latency and overall call latency. On the server side, you’ll only see the final attempt unless you propagate attempt metadata.
Streaming cancellation should be classified consistently. If the client cancels, treat it as a specific status or cancellation category so it doesn’t look like a server bug.
A Simple Validation Checklist
Before trusting dashboards, verify these invariants:
- Every completed call increments throughput exactly once.
- Every completed call observes one latency value.
- Error counters increase only when status is non-OK.
- Histograms show sensible shapes under normal load (no sudden spikes at 0ms).
With these rules in place, latency, throughput, and error rate become a coherent story rather than three unrelated charts.
8.4 Logging Request Context Without Leaking Sensitive Data
Logging request context is useful because it helps you connect symptoms to a specific call path. It becomes harmful when logs accidentally include secrets, personal data, or credentials. The goal is simple: log enough to debug and measure, but never log what you would not want to appear in a ticket, a dashboard, or a shared terminal.
What to Log and What to Avoid
Start by classifying fields into three buckets.
- Safe identifiers: request IDs, trace IDs, method names, service names, and coarse-grained tenant or region labels.
- Sensitive identifiers: user emails, phone numbers, account numbers, session tokens, API keys, and any value that can be used to authenticate or impersonate.
- Sensitive payload fragments: message bodies, headers like
authorization, cookies, and any “debug” fields that were never meant for logs.
A practical rule: if a value can be used to access something, treat it as sensitive unless you have an explicit allowlist.
Mind Map: Logging Context Boundaries
Building a Safe Logging Pipeline with Tower Middleware
In a Tower stack, the cleanest place to log context is at the boundary where you have both the request metadata and the eventual outcome. For gRPC, that typically means logging in middleware around the service call.
Use an allowlist approach: construct a log context object from known-safe fields only. Then add a redaction step for any header values you must inspect.
Here’s a compact example of a redaction helper and a context builder. It avoids logging raw authorization headers and hashes user identifiers so you can correlate without exposing the original.
use std::collections::HashMap;

fn redact_header(name: &str, value: &str) -> Option<String> {
    let lower = name.to_ascii_lowercase();
    if lower == "authorization" || lower == "cookie" {
        return Some("[REDACTED]".to_string());
    }
    Some(value.to_string())
}

fn stable_fingerprint(input: &str) -> String {
    use std::hash::{Hash, Hasher};
    let mut h = std::collections::hash_map::DefaultHasher::new();
    input.hash(&mut h);
    format!("{:x}", h.finish())
}

fn build_log_context(safe: &[(&str, &str)]) -> HashMap<String, String> {
    let mut m = HashMap::new();
    for (k, v) in safe {
        m.insert((*k).to_string(), (*v).to_string());
    }
    m
}
A key nuance: hashing is not encryption. It’s for correlation, not secrecy. If the identifier space is small, a hash can still be guessed. That’s why you should prefer opaque IDs generated by your system (like internal request IDs) over user-provided values.
Handling gRPC Metadata and Headers
gRPC metadata often carries both useful and sensitive information. Treat metadata as untrusted input.
- Do not log full headers. Log only specific keys you have allowlisted.
- Normalize header names before comparisons.
- Redact known secret headers even if you think they are “internal.”
- Truncate long values to keep logs readable and avoid accidental dumping of large payloads.
If you need to debug why authentication failed, log the result category (for example, “missing token” vs “invalid token”) rather than the token itself.
Logging on Success and on Failure
To avoid missing context, log in two places: after the call returns successfully and when it returns an error. Both logs should share the same safe context fields.
A subtle but important detail: error messages can contain user-controlled content. If you include error.to_string() directly, you may end up logging sensitive payload fragments. Prefer structured fields like gRPC status code and a short, sanitized error category.
Streaming Calls Without Leaking Payloads
Streaming complicates logging because you may be tempted to log each message. Resist that. Instead:
- Log stream-level metadata once: method name, request ID, and stream outcome.
- If you must log per-message progress, log only counters (e.g., number of messages, bytes processed) and timing.
- For backpressure or cancellation events, log the event type and counts, not message contents.
Verification Checklist
Before shipping, verify the behavior with tests and review.
- Unit tests: feed middleware with headers containing
authorization, cookies, and sample PII; assert logs contain[REDACTED]or fingerprints, never raw values. - Integration tests: run a real gRPC call through the stack and confirm that both success and error paths produce consistent safe context.
- Log review: search for common secret patterns like
Bearer,AKIA, or long base64-like strings; ensure none appear.
A good logging system makes the safe path easy and the unsafe path hard. Your future self will thank you, and your security team will not have to play detective.
8.5 Practical Example: Building an Observability Layer Stack
You want observability that is consistent across unary and streaming calls, cheap enough to keep enabled, and structured enough to answer real questions like “where did latency go?” and “which requests failed and why?”. The cleanest way is to build a small Tower layer stack and reuse it on both server and client sides.
Mind Map: Observability Layer Stack
Step 1: Define What You Measure
Start with a minimal metric set:
rpc_request_duration_secondshistogram byservice,method, andoutcome.rpc_in_flightgauge to see concurrency pressure.rpc_request_errors_totalcounter byservice,method, andgrpc_status.
Outcome should be one of ok, cancelled, deadline_exceeded, unknown. Keep labels stable; avoid labeling by user id, tenant id, or raw message fields.
Step 2: Create a Span per Call
For unary calls, a single span is enough. For streaming calls, you still create one span per RPC, then add events for meaningful milestones (first message received, stream closed, cancellation observed). This keeps the trace readable without drowning it in per-message spans.
A practical naming scheme is rpc {service}.{method}. Use the gRPC method name from the request URI or service trait metadata.
Step 3: Implement a Tower Layer for Server Calls
Below is a compact example of a Tower layer that wraps a service, extracts trace context from metadata, creates a span, and records metrics. It uses tracing for spans and a placeholder metrics API.
use std::task::{Context, Poll};
use tower::{Layer, Service};
use tracing::{Span, Instrument};

pub struct ObsLayer;

impl<S> Layer<S> for ObsLayer {
    type Service = ObsService<S>;
    fn layer(&self, inner: S) -> Self::Service { ObsService { inner } }
}

pub struct ObsService<S> { inner: S }

impl<S, Req> Service<Req> for ObsService<S>
where
    S: Service<Req> + Send,
    S::Future: Send,
{
    type Response = S::Response;
    type Error = S::Error;
    type Future = S::Future;

    fn poll_ready(&mut self, cx: &mut Context<'_>) -> Poll<Result<(), Self::Error>> {
        self.inner.poll_ready(cx)
    }

    fn call(&mut self, req: Req) -> Self::Future {
        let span = Span::current();
        // In real code: extract metadata, build a new span, attach trace ids.
        self.inner.call(req).instrument(span)
    }
}
This skeleton shows the mechanics. In your real implementation, you’ll create a new span inside call, then record duration when the future completes.
Step 4: Record Duration and Outcome
To record outcome reliably, you need to observe the result of the future. A common pattern is to wrap the future and map Ok vs Err into stable tags.
use std::time::Instant;
use futures::FutureExt;

pub fn instrument_future<F, T, E>(fut: F, start: Instant) -> impl std::future::Future<Output = Result<T, E>>
where
    F: std::future::Future<Output = Result<T, E>>,
{
    fut.map(move |res| {
        let elapsed = start.elapsed();
        // metrics::histogram!("rpc_request_duration_seconds", elapsed, labels...);
        // metrics::counter!("rpc_request_errors_total", 1, labels...);
        res
    })
}
For gRPC, map tonic::Status into your outcome categories. Cancellation and deadline are common; treat them explicitly so dashboards don’t lump them into unknown.
Step 5: Handle Streaming Without Per-Message Noise
For streaming handlers, add events at boundaries:
- On stream start: record
in_flightincrement and create the span. - On first item: add an event
first_message. - On termination: record
closedwith the final status.
Avoid recording every message size as a metric label. If you need sizes, record a histogram without per-message labels.
Step 6: Compose the Stack Order
Order matters. Context extraction must happen before span creation, and metrics should observe the final outcome.
Stack Order
1. Metadata Extraction Layer
2. Span Creation Layer
3. Metrics Duration Layer
4. Error Tagging Layer
5. Logging Correlation Layer
Mind Map: What Goes Where
Step 7: Verify with One Unary and One Streaming Call
Run a unary call and confirm:
- One span is created.
- Duration is recorded once.
- Outcome matches the gRPC status.
Then run a streaming call that ends normally and one that is cancelled. Confirm:
- The span remains the same for the whole RPC.
- Cancellation produces
cancelledordeadline_exceededconsistently. - No per-message metrics explode cardinality.
That’s the whole point of the stack: each layer has one job, and together they produce observability you can trust when the system is under load.
9. Security and Transport Configuration for Production RPC Systems
9.1 TLS Configuration for gRPC Transport Security
Transport security starts with one goal: ensure that bytes sent over the network are confidential and tamper-evident, and that the client is talking to the intended server. In gRPC with Rust, Tonic rides on top of HTTP/2, so TLS is configured at the transport layer while your service logic stays unchanged.
Core Concepts That Matter in Practice
TLS has three moving parts that show up in configuration:
- Server identity: the server presents a certificate chain proving its name.
- Trust anchors: the client decides which certificate authorities it trusts.
- Session keys: derived during the handshake so later traffic is encrypted.
In Rust gRPC, you typically provide:
- On the server: a certificate chain and a private key.
- On the client: a root CA bundle (or a custom trust store) and optionally a server name for verification.
Server TLS Configuration with Tonic
A practical server setup loads PEM files, builds a TLS identity, and attaches it to the gRPC server. The identity must match the certificate’s private key, and the certificate chain should include intermediates when needed.
Example: server TLS with PEM files
use tonic::transport::{Server, ServerTlsConfig};

async fn serve() -> Result<(), Box<dyn std::error::Error>> {
    let cert = std::fs::read("certs/server.pem")?;
    let key = std::fs::read("certs/server.key")?;

    let tls = ServerTlsConfig::new()
        .identity(tonic::transport::Identity::from_pem(cert, key));

    Server::builder()
        .tls_config(tls)?
        .add_service(my_service::MyServer::new(my_service_impl))
        .serve("0.0.0.0:50051".parse()?)
        .await?;

    Ok(())
}
If you see handshake failures, the usual culprits are mismatched key material, missing intermediate certificates, or clients validating against the wrong server name.
Client TLS Configuration and Server Name Verification
On the client side, you supply a CA bundle so the client can verify the server certificate chain. You also need to ensure the server name used for verification matches the certificate’s Subject Alternative Names.
Example: client TLS with a custom CA
use tonic::transport::{Channel, ClientTlsConfig};

async fn make_channel() -> Result<Channel, Box<dyn std::error::Error>> {
    let ca = std::fs::read("certs/ca.pem")?;

    let tls = ClientTlsConfig::new()
        .ca_certificate(tonic::transport::Certificate::from_pem(ca));

    let channel = Channel::from_static("https://my-grpc.example:50051")
        .tls_config(tls)?
        .connect()
        .await?;

    Ok(channel)
}
If the certificate is issued for my-grpc.example, the client must connect using that hostname (or configure the server name accordingly). Using an IP address often breaks verification unless the certificate includes that IP in SAN.
Certificate Chain Hygiene and File Formats
TLS configuration is unforgiving about PEM content:
- Certificates should be PEM encoded and include the full chain when required.
- Private keys should be PEM encoded and correspond to the certificate.
- CA bundles should contain only trust anchors you intend to trust.
A common debugging move is to inspect the certificate’s SAN entries and confirm they cover the hostname you use in the client URL.
Mind Map: TLS Configuration Flow
Practical Checklist for a Clean Handshake
- Confirm the server certificate is valid for the hostname the client uses.
- Ensure the server key matches the certificate.
- Provide the client with the CA that issued the server certificate.
- Include intermediate certificates in the server chain when your CA requires it.
- Keep PEM files unencrypted for server startup unless you have a secure unlock mechanism.
Example: Minimal Mutual TLS Shape
Mutual TLS adds client authentication by requiring the server to validate client certificates. The configuration pattern is the same idea—server loads a CA bundle for client cert verification, and the client presents its certificate and key.
use tonic::transport::{Server, ServerTlsConfig, ClientTlsConfig};

// Server: require and verify client certs
fn server_tls_with_client_auth() -> ServerTlsConfig {
    let server_cert = std::fs::read("certs/server.pem").unwrap();
    let server_key = std::fs::read("certs/server.key").unwrap();
    let client_ca = std::fs::read("certs/client-ca.pem").unwrap();

    ServerTlsConfig::new()
        .identity(tonic::transport::Identity::from_pem(server_cert, server_key))
        .client_ca_root(tonic::transport::Certificate::from_pem(client_ca))
}

// Client: present certificate to server
fn client_tls_with_identity() -> ClientTlsConfig {
    let ca = std::fs::read("certs/ca.pem").unwrap();
    let cert = std::fs::read("certs/client.pem").unwrap();
    let key = std::fs::read("certs/client.key").unwrap();

    ClientTlsConfig::new()
        .ca_certificate(tonic::transport::Certificate::from_pem(ca))
        .identity(tonic::transport::Identity::from_pem(cert, key))
}
Mutual TLS is more configuration, but it pays off when you need strong identity at both ends without relying on application-layer tokens.
9.2 Certificate Validation and Client Authentication Setup
A secure gRPC setup starts with two decisions: what the client must prove, and what the server must verify. In practice, that means configuring TLS on both sides and then tightening certificate validation so you don’t accidentally accept the wrong peer. The goal is simple: only the intended client can connect, and only when the presented certificate chain is valid for the expected identity.
Foundations of TLS Identity and Trust
TLS uses certificates to bind a public key to an identity. For client authentication, the server requests a client certificate and validates it against a trust store. For server authentication, the client validates the server certificate against its own trust store.
Key concepts you’ll configure:
- Trust store: the set of CA certificates you trust.
- Verification mode: whether to require a certificate and whether to verify the chain.
- Identity checks: matching the certificate’s subject or SAN fields to the expected identity.
- Revocation: whether to check CRLs or OCSP (often optional in internal deployments, but still worth understanding).
Server Side Client Authentication Setup
On the server, you typically enable mutual TLS by requiring client certificates. The server then validates the presented chain and extracts identity information for authorization decisions.
A practical approach:
- Load server certificate and private key.
- Load CA certificates that issued client certificates.
- Configure the server to require client certificates.
- Enforce chain validation.
- Optionally map certificate identity to an application principal.
Example configuration sketch (Rust with tonic and rustls style APIs):
use tonic::transport::{Server, ServerTlsConfig};
use rustls::{Certificate, PrivateKey};

fn server_tls_config() -> ServerTlsConfig {
    // Load PEM files into rustls types (omitted for brevity)
    let server_cert: Vec<Certificate> = vec![];
    let server_key: PrivateKey = PrivateKey(vec![]);
    let client_ca: Vec<Certificate> = vec![];

    let tls = ServerTlsConfig::new()
        .identity(rustls::ServerConfig::builder()
            .with_single_cert(server_cert, server_key)
            .unwrap())
        .client_ca_root(client_ca);

    tls
}

// Server::builder().tls_config(server_tls_config()).unwrap()
The important part is not the exact builder calls, but the intent: the server must be configured with a CA root for client cert validation and must require client certificates.
Client Side Certificate Validation and Server Identity
On the client, you validate the server certificate chain and ensure it matches the expected identity. If you skip identity checks, a valid certificate from the wrong host can still pass chain validation.
Concrete checklist:
- Provide the CA bundle that issued the server certificate.
- Set the expected server name for verification.
- Reject connections when verification fails.
In many setups, the expected identity is the DNS name in the server certificate’s SAN. If your certificates use IP addresses, ensure the SAN includes the IP and that your client verification mode supports it.
Identity Mapping for Authorization
Certificate validation answers “is this peer trusted?” Authorization answers “is this peer allowed to do this?”. A common pattern is:
- Validate the client certificate chain.
- Extract a stable identifier from the certificate, such as:
- SAN DNS name or URI
- Subject common name (less preferred than SAN)
- A custom extension used for service accounts
- Use that identifier in middleware to enforce permissions.
This keeps TLS concerns separate from business logic. Middleware can read the extracted identity and attach it to request context.
Mind Map: Certificate Validation and Client Authentication
Example: Enforcing Fail Closed Behavior
When certificate validation fails, the safest behavior is to reject the connection immediately. That means you should not “log and continue,” and you should not fall back to plaintext. In middleware, also avoid treating missing identity as an anonymous user with broad access; treat it as unauthenticated.
A simple rule of thumb: if the TLS layer cannot prove identity, the application layer should not guess.
Example: Using Certificate Identity in Middleware
A typical flow is:
- TLS handshake completes.
- The server extracts client identity from the validated certificate.
- Middleware checks whether that identity is allowed to call the target RPC.
- The handler runs only after authorization passes.
This keeps your RPC handlers focused on domain logic while still making certificate-based authentication enforceable and testable.
9.3 Implementing Application Level Authentication Middleware
Application level authentication answers a simple question: “Who is calling, according to the application?” Transport security (like TLS) protects the channel, but middleware decides whether the request is allowed to act.
Mind Map: Authentication Middleware Responsibilities
Authentication Data Flow in Tower
A Tower middleware typically receives a Request, inspects it, and either forwards it to the next service or returns an error response. For gRPC, the “headers” live in gRPC metadata, which Tonic exposes through request extensions and metadata accessors.
A practical rule: keep authentication middleware focused on identity establishment, not permission checks. Authorization middleware can later enforce roles, scopes, or resource ownership.
Token Formats and Claim Extraction
Start by choosing a token format and a validation strategy. Common options include:
- Bearer tokens in an
authorizationmetadata header. - API keys in a dedicated header like
x-api-key.
For bearer tokens, parse the header value, extract the token, verify it, and then read claims such as sub (subject), aud (audience), and exp (expiration). For API keys, validate the key against a store and map it to a principal.
A small but important detail: normalize identity early. If your claims use user_id but your code expects sub, convert once and store a consistent Principal structure.
Attaching Identity to the Request
Tower middleware should attach the authenticated identity to the request so downstream handlers can use it without re-parsing tokens. In Rust, the usual mechanism is request.extensions_mut().insert(...).
Downstream code then reads the identity from extensions. This keeps handler logic clean and makes it easy to test authentication separately.
Example: Middleware Skeleton with Identity Attachment
use tonic::{Request, Status};
use tower::{Layer, Service};
use std::task::{Context, Poll};

#[derive(Clone)]
pub struct AuthLayer;

pub struct AuthService<S> { inner: S }

impl<S> Layer<S> for AuthLayer {
  type Service = AuthService<S>;
  fn layer(&self, inner: S) -> Self::Service { AuthService { inner } }
}

impl<S> Service<Request<()>> for AuthService<S>
where S: Service<Request<()>, Response = (), Error = Status> + Clone {
  type Response = (); type Error = Status; type Future = S::Future;
  fn poll_ready(&mut self, cx: &mut Context<'_>) -> Poll<Result<(), Self::Error>> {
    self.inner.poll_ready(cx)
  }
  fn call(&mut self, mut req: Request<()>) -> Self::Future {
    // 1) extract metadata
    // 2) validate token
    // 3) insert Principal into extensions
    // 4) forward to inner
    self.inner.call(req)
  }
}
The skeleton above omits token parsing and validation details, but it shows the middleware boundary and where identity insertion belongs.
Example: Validating a Bearer Token and Returning gRPC Status
fn authenticate_bearer(auth_header: &str) -> Result<Principal, Status> {
  let token = auth_header.strip_prefix("Bearer ")
    .ok_or_else(|| Status::unauthenticated("Missing Bearer token"))?;

  // Verify signature and claims (implementation-specific)
  // - signature validity
  // - exp not in the past
  // - aud matches expected service

  let claims = verify_token(token)
    .map_err(|_| Status::unauthenticated("Invalid credentials"))?;

  Ok(Principal {
    sub: claims.sub,
    tenant: claims.tenant,
  })
}
Use generic error messages like “Invalid credentials” to avoid leaking whether a token is malformed, expired, or signed with the wrong key.
Security Details That Matter in Practice
- Constant time comparisons: if you compare secrets (like API keys), use constant time equality to reduce timing leakage.
- Audience and expiration checks: validating only the signature is not enough; claims must match the service and time constraints.
- Header presence and format: treat missing or incorrectly formatted headers as unauthenticated, not internal errors.
- Do not trust identity from the client: the middleware should derive identity only from validated credentials.
Testing the Middleware Behavior
Write tests that exercise the middleware decision points:
- Request without credentials returns
Status::unauthenticated. - Request with invalid credentials returns
Status::unauthenticated. - Request with valid credentials inserts
Principalinto extensions. - Downstream handler can read the inserted identity and produce correct responses.
A good test asserts both the status and the side effect (identity insertion). That way you catch cases where authentication “succeeds” but identity is missing, which is the kind of bug that wastes hours.
Mind Map: Common Failure Modes and Fixes
Application level authentication middleware becomes reliable when it has a clear contract: validate credentials, attach a normalized principal, and return consistent gRPC statuses. Once that contract is stable, authorization and business logic can stay simple and predictable.
9.4 Authorization Checks With Role Based and Claim Based Models
Authorization answers one question: “May this caller perform this action on this resource?” In a gRPC service, the caller identity arrives via metadata (for example, an Authorization header mapped into request metadata). The authorization layer should then translate that identity into permissions and enforce them consistently across unary and streaming calls.
Foundations of Role Based Authorization
Role based authorization (RBAC) groups permissions into roles like admin, support, or billing_viewer. A user gets one or more roles, and the service checks whether any role grants the required permission.
A practical RBAC rule set usually looks like:
- Roles map to permissions:
role -> {permission} - Requests map to required permissions:
action -> permission - Resources may add constraints:
permission + resource scope
Example: a DeleteAccount action might require account:delete and only be allowed when the resource belongs to the caller’s tenant.
Foundations of Claim Based Authorization
Claim based authorization (often called ABAC) evaluates policies using claims carried by the identity. Claims can include tenant_id, department, plan, or user_id. Instead of “role grants permission,” the policy says “if these claims match, allow.”
A claim based policy for GetInvoice might be:
- Allow if
claims.tenant_id == resource.tenant_id - Allow if
claims.planis notfree
The key difference: RBAC is about membership in roles; claim based is about properties of the caller and the resource.
Mind Map: Authorization Model Components
Designing a Unified Authorization Decision
Whether you choose RBAC, claim based, or both, keep the decision interface uniform. A good pattern is:
- Build an
AuthContextfrom validated identity - Compute
Decision { allowed: bool, reason: ... } - Convert
Decisionintotonic::Statusonce
This avoids “authorization logic scattered across handlers,” which is where bugs breed.
Example: RBAC Checks with Tenant Scope
Assume the middleware has already validated the token and produced:
roles: Vec<String>tenant_id: String
RBAC policy:
supportrole grantsaccount:readadminrole grantsaccount:delete
Enforcement rule:
- For
account:delete, requireadminandresource.tenant_id == caller.tenant_id
fn authorize_rbac(
    roles: &[String],
    required_permission: &str,
    caller_tenant: &str,
    resource_tenant: &str,
) -> bool {
    if caller_tenant != resource_tenant {
        return false;
    }
    let role_perms = [
        ("support", vec!["account:read"]),
        ("admin", vec!["account:delete"]),
    ];
    roles.iter().any(|r| {
        role_perms
            .iter()
            .find(|(role, _)| role == r)
            .map(|(_, perms)| perms.iter().any(|p| p == &required_permission))
            .unwrap_or(false)
    })
}
Example: Claim Based Checks with Predicate Rules
For claim based authorization, you typically evaluate predicates against claims and resource fields. A simple rule engine can be explicit Rust logic first, then evolve later.
Policy for GetInvoice:
claims.tenant_id == resource.tenant_idclaims.plan != "free"
fn authorize_claims(
    claims_tenant: &str,
    claims_plan: &str,
    resource_tenant: &str,
) -> bool {
    claims_tenant == resource_tenant && claims_plan != "free"
}
Combining RBAC and Claim Based Without Confusion
Many systems use both: RBAC for coarse permission gates, claims for fine-grained scope. A clean approach is:
- RBAC gate: does the caller have the required permission?
- Claim gate: does the caller satisfy resource constraints?
- Allow only if both pass.
This ordering matters because it keeps error reasons consistent and avoids leaking which claim failed when the permission was missing.
Enforcement Details That Matter in gRPC
When authorization fails, return a gRPC status that matches the situation:
- Missing or invalid identity:
Unauthenticated - Identity present but not allowed:
PermissionDenied
For streaming calls, enforce authorization before producing any response frames. If you authorize per message, you must also handle cancellation and avoid partial output.
Mind Map: Middleware Placement and Data Flow
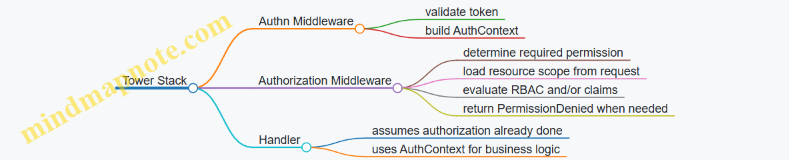
Practical Example: Authorization Middleware Decision Flow
A typical request flow is:
- Extract identity claims from metadata
- Normalize into
AuthContext { roles, claims, subject } - Determine required permission from the RPC method and action
- Extract resource tenant or owner from the request
- Evaluate RBAC gate, then claim gate
- If denied, return
tonic::Status::permission_denied("..." )
The result is predictable behavior: handlers stay focused on business logic, while authorization remains consistent, testable, and easy to reason about.
9.5 Secure Handling of Metadata and Secrets in Middleware
In gRPC, metadata is the control plane: it carries identity, routing hints, correlation IDs, and sometimes tokens. Middleware is where that metadata gets inspected, transformed, logged, and forwarded. The security goal is simple: only the minimum required data should be visible to each layer, and secrets should never be accidentally copied into logs, errors, or client-visible responses.
Threat Model for Metadata in Middleware
Start with a concrete list of what can go wrong:
- Accidental disclosure: logging full headers or returning them in error details.
- Over-broad propagation: forwarding internal headers to downstream services that do not need them.
- Confused deputy: middleware trusts metadata that was never authenticated.
- Inconsistent parsing: different layers interpret the same header differently, leading to bypasses.
A practical rule: treat metadata as untrusted input until an authentication step marks it as trusted.
Metadata Classification and Ownership
Classify metadata keys by purpose and sensitivity:
- Public context: request IDs, trace IDs, tenant IDs. These can be forwarded and logged with care.
- Security context: user ID, roles, session identifiers. These should be forwarded only to services that enforce authorization.
- Secrets: bearer tokens, API keys, HMAC signatures. These should be consumed and then removed or replaced with non-sensitive claims.
In middleware, enforce ownership: the layer that authenticates owns the security context; other layers should read it but not re-interpret raw tokens.
Safe Parsing and Validation
Metadata parsing should be strict and deterministic:
- Validate presence and format before use.
- Reject unexpected encodings and multiple values.
- Normalize casing and whitespace consistently.
A small but important detail: if a header is missing, decide whether the request is unauthenticated or malformed. Mixing those cases can create confusing audit trails and inconsistent access control.
Secret Handling Patterns
Use one of these patterns depending on what the metadata represents.
Pattern A: Consume and Replace
- Read the token from metadata.
- Verify it.
- Replace it with a derived, non-secret claim set (for example,
user_idandscopes). - Remove the original token from further processing.
Pattern B: Token Pass-through With Redaction
- Only if downstream services must verify the same token.
- Ensure logs never include the raw token.
- Ensure error messages never include the raw token.
Pattern C: Signature Verification
- For request signing headers, verify the signature early.
- After verification, do not forward the signature header unless required.
Logging Without Leaking Secrets
Logging should be structured and selective:
- Log IDs and outcomes (authenticated, denied, reason code).
- Avoid logging raw token values, signatures, or full authorization headers.
- If you must log something for debugging, log a stable fingerprint (like a hash) rather than the secret itself.
A good middleware habit is to build a “log-safe view” of metadata: a map containing only approved keys.
Error Handling and Status Details
gRPC status details can become a disclosure channel. Keep error messages generic:
- Use status codes to communicate the category.
- Put only non-sensitive context in the message.
- Avoid echoing request metadata in error strings.
Mind Map: Secure Metadata Flow
Example: Redacting Authorization Metadata in Middleware
use tonic::{Request, metadata::MetadataMap};

fn log_safe_metadata(meta: &MetadataMap) -> Vec<(String, String)> {
    let mut out = Vec::new();
    for (k, v) in meta.iter() {
        let key = k.as_str().to_ascii_lowercase();
        if key == "authorization" || key.ends_with("signature") {
            out.push((key, "[redacted]".to_string()));
        } else {
            out.push((key, v.to_str().unwrap_or("[invalid]").to_string()));
        }
    }
    out
}

fn strip_secrets(meta: &mut MetadataMap) {
    meta.remove("authorization");
    meta.remove("x-request-signature");
}

fn middleware(req: Request<()>) -> Request<()> {
    let mut meta = req.metadata().clone();
    let _safe = log_safe_metadata(&meta);
    strip_secrets(&mut meta);
    req
}
This example shows two core behaviors: redaction for logging and stripping for propagation. In real middleware, you would also validate and authenticate before trusting any derived claims.
Example: Consume and Replace with Derived Claims
use tonic::Request;

struct Claims { user_id: String, scopes: Vec<String> }

fn authenticate_and_replace(req: &mut Request<()>) -> Result<Claims, tonic::Status> {
    let token = req.metadata().get("authorization")
        .ok_or_else(|| tonic::Status::unauthenticated("missing token"))?
        .to_str().map_err(|_| tonic::Status::unauthenticated("bad token"))?;

    // Verify token and derive claims
    let claims = Claims { user_id: "u123".to_string(), scopes: vec!["read".to_string()] };

    // Replace: remove raw token and attach derived claims to request extensions
    // (Extensions are internal to the process, not forwarded as metadata.)
    req.extensions_mut().insert(claims);
    Ok(req.extensions().get::<Claims>().unwrap().clone())
}
This approach prevents downstream layers from ever seeing the raw secret. It also makes authorization checks depend on verified claims rather than on metadata strings.
Practical Checklist for Middleware Authors
- Parse metadata strictly and consistently.
- Authenticate before trusting security context.
- Strip secrets before propagation.
- Log only log-safe keys and outcomes.
- Keep error messages generic and metadata-free.
- Use derived claims stored in request-local extensions for authorization decisions.
10. Resource Management and Backpressure in Streaming Workloads
10.1 Backpressure Fundamentals for Async Streams in Rust
Backpressure is what keeps a fast producer from overwhelming a slow consumer. In async Rust, it usually shows up when you connect streams, channels, and tasks: without a deliberate strategy, buffers grow, latency spikes, and memory usage becomes the “surprise feature.” The goal is simple: make the system slow down in the right place, at the right time.
What Backpressure Means in Practice
Consider a streaming RPC handler that reads incoming items and forwards them to downstream processing. If downstream processing takes 50 ms per item and the producer can emit 1,000 items per second, the system must either buffer, drop, or apply flow control. Backpressure is the mechanism that chooses buffering limits or forces the producer to wait.
In Rust terms, you’ll see backpressure expressed as:
- Awaiting readiness: the producer awaits when the consumer can’t keep up.
- Bounded buffers: the system caps in-flight items so memory can’t grow without bound.
- Cancellation propagation: when the consumer stops, upstream stops too.
Mind Map: Backpressure Components
Backpressure Fundamentals Mind Map
The Core Pattern: Bounded Channel with Await
A common approach is to insert a bounded channel between stages. The producer sends into the channel; the send operation becomes an implicit backpressure point once the buffer is full.
use tokio::sync::mpsc;

async fn forward_items(mut input: impl futures::Stream<Item = i32>,
                        mut tx: mpsc::Sender<i32>) {
    while let Some(item) = input.next().await {
        // Backpressure point: waits when buffer is full.
        if tx.send(item).await.is_err() {
            break; // Receiver dropped, stop producing.
        }
    }
}

async fn consume_items(mut rx: mpsc::Receiver<i32>) {
    while let Some(item) = rx.recv().await {
        // Simulate slow work.
        tokio::time::sleep(std::time::Duration::from_millis(50)).await;
        let _ = item;
    }
}
The key detail is the .send(item).await: it turns “fast loop” into “loop that respects capacity.” If the receiver is gone, send returns an error and the producer exits cleanly.
Stream Polling and Where Backpressure Can Disappear
Backpressure only works if you keep the pipeline honest. Two pitfalls are common:
- Detached tasks that buffer internally: if you spawn a task per item and don’t limit concurrency, you’ve moved the queue somewhere else.
- Eager collection: calling
collect()on a stream before processing removes the opportunity to slow the producer.
Instead, prefer a forwarding loop that awaits each stage’s capacity or readiness. When you must parallelize, use a bounded concurrency mechanism so the number of in-flight items stays capped.
Cancellation Propagation in Streaming Pipelines
In streaming RPC, the client may cancel mid-flight. Backpressure helps, but cancellation is the other half of the story. If the consumer stops, upstream should stop too.
A practical rule: whenever you forward items, treat “receiver dropped” or “send failed” as a cancellation signal. Also ensure your loops check for termination conditions rather than continuing to read from the source.
Choosing a Strategy: Wait, Drop, or Coalesce
When buffers fill, you have options. Waiting preserves all items but increases latency. Dropping reduces latency but loses data. Coalescing keeps only the latest state, which is useful for “status” streams.
A simple decision guide:
- Lossless streams: wait on bounded capacity.
- Telemetry where occasional loss is acceptable: drop when full.
- State updates: coalesce to the latest value.
Measuring Backpressure Effectiveness
Backpressure isn’t just a concept; it’s observable. Track:
- In-flight count: how many items are currently queued or being processed.
- Queue length: channel capacity usage over time.
- End-to-end latency: time from receipt to completion.
If queue length grows steadily, your consumer is slower than your producer for sustained periods, and waiting will eventually dominate latency. If queue length stays bounded, backpressure is doing its job.
Putting It Together for RPC Streaming
In a streaming handler, structure your code so that:
- reading from the RPC stream happens in a loop that can pause,
- forwarding into downstream processing uses bounded capacity,
- cancellation stops upstream work promptly,
- and concurrency is limited so you don’t create hidden queues.
Backpressure is the difference between “it works in tests” and “it stays stable under load.” The good news is that in Rust, you can make that stability a property of your control flow, not a hope and a prayer.
10.2 Designing Streaming Handlers with Bounded Buffers
Streaming handlers are where throughput and safety meet. A bounded buffer turns “keep reading until memory runs out” into “keep reading until the system can’t accept more, then slow down.” In Rust async code, that usually means you control the pace of producing items and you cap the amount of in-flight work.
Mind Map: Streaming Handler Bounded Buffers
Foundational Model: Producer, Buffer, Consumer
Think of a streaming handler as three stages. First, a producer reads or receives items (from the request stream, a database cursor, or an internal event source). Second, a bounded buffer stores items temporarily. Third, a consumer processes items and yields results to the response stream.
If the producer is faster than the consumer, the buffer fills. Once full, the producer must wait or stop. Waiting is usually better than dropping for correctness, but sometimes you choose dropping for best-effort telemetry. The key is that the behavior is explicit and bounded.
Choosing the Right Buffer Type
For many streaming RPCs, a bounded channel is the simplest tool. It provides a capacity limit and naturally blocks the producer when the consumer can’t keep up.
A common pattern is:
- Spawn a task that reads from the inbound stream and sends items into a bounded channel.
- In the handler’s main task, receive from the channel, process, and yield to the outbound stream.
This structure keeps the handler responsive to cancellation because the receiver loop can stop promptly when the client disconnects.
Example: Bounded Inbound to Outbound Pipeline
Below is a compact unary-to-stream style pipeline using a bounded channel. The same idea applies to request-stream to response-stream handlers.
use tokio::sync::mpsc;
use tokio_stream::wrappers::ReceiverStream;

async fn handle_stream(mut inbound: impl futures::Stream<Item = i32>) -> impl futures::Stream<Item = i32> {
    let (tx, rx) = mpsc::channel::<i32>(128);

    tokio::spawn(async move {
        while let Some(item) = inbound.next().await {
            if tx.send(item).await.is_err() {
                break; // receiver dropped
            }
        }
    });

    let out = ReceiverStream::new(rx).map(|x| x * 2);
    out
}
The capacity 128 is the bound. When the consumer slows down, send().await waits, which is backpressure. When the client disconnects, the receiver drops, send returns an error, and the producer task exits.
Capacity Strategy That Doesn’t Guess Randomly
Pick a capacity based on what you want to trade:
- If you care about low latency, keep the buffer small so items don’t sit around waiting.
- If you expect short bursts, allow a modest buffer so the consumer can catch up without stalling the producer immediately.
A practical approach is to start with a conservative value, measure queue depth and send wait time, then adjust. Queue depth tells you whether the buffer is mostly empty or constantly full.
Handling Buffer Full Behavior Explicitly
With mpsc::channel, the default is “wait until there is space.” That’s usually correct for ordered processing. If you need a different policy, you can use non-blocking sends and decide what to do when full.
if tx.try_send(item).is_err() {
    // Choose one: drop, coalesce, or return an error
    // For ordered correctness, returning an error is often safest.
}
When you return an error, map it to a gRPC status that matches the semantics of your service. For example, if the server can’t accept more work, treat it as resource exhaustion rather than a generic internal failure.
Coordinating Concurrency with Semaphores
Sometimes the bottleneck isn’t the channel; it’s the processing step. If processing spawns expensive tasks, cap in-flight work with a semaphore so the buffer doesn’t just move the problem downstream.
A good rule: bound both the queue and the work. Queue bounds memory; semaphore bounds CPU and external calls.
Cancellation and Shutdown Without Leaks
Bounded buffers help, but cancellation still matters. Ensure that:
- Producer tasks stop when the receiver drops.
- Long-running processing checks cancellation points naturally via
.await. - You don’t keep tasks alive after the client is gone.
The send().await.is_err() pattern in the example is a simple, reliable cancellation signal.
Observability for Queue Health
Track at least two numbers per connection or per handler instance:
- Current queue depth (or an approximation).
- Time spent waiting to send.
Queue depth answers “are we behind?” Waiting time answers “how bad is it?” Together, they tell you whether you need a larger buffer, a faster consumer, or fewer concurrent operations.
Summary: Bounded Buffers as a Contract
A bounded streaming handler is a contract between producer and consumer. The buffer capacity defines the maximum in-flight memory footprint. Backpressure defines how the system behaves under load. Cancellation defines how quickly it stops when the client leaves. When these are explicit, your streaming RPC stays predictable even when traffic gets messy.
10.3 Preventing Memory Growth with Controlled Flow Control
Memory growth in streaming RPCs usually comes from one place: producers can generate data faster than consumers can process it. In Rust async systems, that mismatch often turns into buffered items piling up in queues, channels, or internal stream buffers. The fix is not “use less memory,” but “make backpressure real,” so the system slows down at the right boundary.
Foundational Model of Where Memory Accumulates
Think in three buffers: (1) the network receive buffer, (2) the application-level queue between tasks, and (3) the serialization or aggregation buffer. If any stage can accept unlimited work, the upstream stage will keep feeding it. Controlled flow control means every stage has a bounded capacity and a clear policy for what happens when capacity is full.
A practical mental checklist:
- Is there any unbounded channel or queue in the path?
- Does the consumer await work, or does it spawn tasks that keep running?
- Are you buffering entire streams in memory before sending downstream?
- Do you ignore cancellation signals and keep producing?
Backpressure Boundaries That Actually Work
Backpressure is most effective when it is applied at the boundary where work is produced. In gRPC streaming handlers, that boundary is typically the loop that reads incoming items or generates outgoing items.
For server-side streaming, the handler should not precompute a large response. Instead, it should produce the next chunk only after the previous chunk has been accepted by the transport. In practice, that means awaiting the send operation in each iteration rather than collecting results first.
For client-side streaming, the client should not read the entire response stream into a vector. It should process each message as it arrives, and if processing is slower, the read loop should naturally slow down because it awaits processing completion.
Bounded Queues and Concurrency Caps
When you need parallelism, use bounded queues to connect stages. A common pattern is a producer task that reads or generates items and pushes them into a bounded channel, while one or more consumer tasks pull from it.
Key rule: choose a queue size that reflects acceptable buffering, not “whatever fits.” If you set the buffer to 1–32 items, you force the system to slow down quickly and keep memory stable.
Example: Bounded Channel Between Producer and Consumer
use tokio::sync::mpsc;

async fn run_pipeline() {
    let (tx, mut rx) = mpsc::channel::<Vec<u8>>(32);

    let producer = tokio::spawn(async move {
        for i in 0..10_000u32 {
            let chunk = vec![i as u8; 1024];
            if tx.send(chunk).await.is_err() {
                break;
            }
        }
    });

    while let Some(chunk) = rx.recv().await {
        // Process chunk; if this is slow, producer awaits send.
        let _ = chunk.len();
    }

    let _ = producer.await;
}
This stays memory-stable because send().await blocks when the channel is full. If the consumer slows down, the producer can’t keep allocating new chunks.
Controlled Flow Control for Streaming RPC Handlers
In a streaming handler, avoid patterns that detach work from the request lifecycle. If you spawn a task per incoming message without bounds, you can create a backlog of tasks that each holds data. Prefer a single task that processes sequentially, or a small fixed worker pool fed by a bounded queue.
Also, treat cancellation as a first-class signal. When the client disconnects, the handler should stop producing immediately. In Rust, that usually means the send/receive operations return early or the stream ends, and your loops should exit without continuing to generate more data.
Mind Map: Preventing Memory Growth with Controlled Flow Control
Example: Server Streaming with Bounded Work
use tokio::time::{sleep, Duration};

async fn server_stream_simulation(mut out: impl FnMut(Vec<u8>) -> bool) {
    for n in 0..10_000u32 {
        // Simulate expensive generation.
        let chunk = vec![n as u8; 1024];

        // If the transport or downstream is not ready, stop producing.
        if !out(chunk) {
            break;
        }

        // Simulate consumer slowness.
        sleep(Duration::from_millis(1)).await;
    }
}
In a real gRPC handler, the “out” step corresponds to awaiting the send of each message. The important part is that production is paced by successful delivery, so you don’t build a backlog in memory.
Practical Verification Checklist
To ensure memory growth is actually prevented, test with a deliberately slow consumer and confirm that:
- queue depth stays near the configured bound,
- in-flight items do not grow without limit,
- the handler stops producing promptly when the stream ends.
Controlled flow control is successful when the system’s throughput naturally matches the slowest stage, and memory usage becomes boringly flat.
10.4 Coordinating Cancellation and Shutdown Behavior
Cancellation and shutdown are where “it works on my machine” turns into “why did it hang in production.” In Rust async services, you need a plan for three moments: when a request is cancelled, when the server begins shutdown, and when in-flight work finally stops.
Foundational Model of Cancellation
Start by separating two signals:
- Request cancellation: the client stops waiting, or a deadline expires.
- Server shutdown: the process is stopping, so you should stop accepting new work and wind down existing work.
In Tokio, the practical tools are:
CancellationTokento broadcast intent to stop.select!to race ongoing work against cancellation.JoinHandleto await task completion during shutdown.
A useful rule: every long-running async loop should have a cancellation path that breaks the loop quickly and deterministically.
Mind Map: Cancellation and Shutdown Flow
Coordinating Unary Calls
Unary handlers are simpler because they usually do one unit of work and return. Still, you must handle cancellation while waiting on I/O.
Example: a handler that queries a database and maps results. The key is to race the query against cancellation.
use tokio::select;
use tokio_util::sync::CancellationToken;

async fn handle_unary(cancel: CancellationToken) -> Result<String, tonic::Status> {
    let query = async {
        // pretend I/O
        tokio::time::sleep(std::time::Duration::from_millis(200)).await;
        Ok::<_, tonic::Status>("ok".to_string())
    };

    select! {
        res = query => res,
        _ = cancel.cancelled() => Err(tonic::Status::cancelled("request cancelled")),
    }
}
This pattern prevents “zombie work” that continues after the client has stopped waiting.
Coordinating Streaming Calls
Streaming is where cancellation needs extra care because you may be producing items over time. Your handler should:
- Stop producing new items immediately when cancelled.
- Avoid unbounded buffering between producer and network writer.
- Ensure the stream ends cleanly so the client sees termination rather than a broken connection.
A common approach is to use a bounded channel for internal buffering and to select on cancellation while sending.
use tokio::sync::mpsc;
use tokio::select;
use tokio_util::sync::CancellationToken;

async fn stream_loop(cancel: CancellationToken) -> mpsc::Receiver<i32> {
    let (tx, rx) = mpsc::channel(8);
    tokio::spawn(async move {
        let mut n = 0;
        loop {
            if tx.is_closed() { break; }
            select! {
                _ = cancel.cancelled() => break,
                _ = async {
                    tokio::time::sleep(std::time::Duration::from_millis(50)).await;
                    n += 1;
                    let _ = tx.send(n).await;
                } => {}
            }
        }
    });
    rx
}
The bounded channel size forces backpressure: if the client is slow, the producer pauses instead of accumulating memory.
Server Shutdown Coordination
Server shutdown should be coordinated at the top level so every handler can observe it. The typical sequence is:
- Create a global shutdown token.
- When shutdown begins, trigger the token.
- Stop accepting new requests.
- Await in-flight tasks, optionally with a timeout.
In practice, you often track spawned tasks in a Vec<JoinHandle<_>>. For streaming, you may not spawn a separate task if the handler itself is the stream; in that case, the handler’s internal select! against the shutdown token is enough.
A simple shutdown sketch:
use tokio::task::JoinHandle;
use tokio_util::sync::CancellationToken;

async fn shutdown_wait(handles: Vec<JoinHandle<()>>, token: CancellationToken) {
    token.cancel();
    for h in handles {
        let _ = h.await;
    }
}
If you need a timeout, wrap the await in tokio::time::timeout and log or convert the outcome into a clean exit path.
Middleware and Context Propagation
Cancellation tokens should be available where they matter. If you use Tower middleware, inject the relevant token into request extensions or handler parameters so each layer can make consistent decisions.
For request cancellation, the token should be derived from the call context. For server shutdown, it should come from the global token. When both exist, the handler should treat either one as a stop condition.
Practical Checklist for Correct Behavior
- Every loop that waits or produces must include a
select!branch for cancellation. - Streaming send operations must be bounded or backpressured.
- Shutdown must stop accepting new work and signal in-flight work.
- Handlers should return a cancellation status when cancelled, not a generic internal error.
- Resource cleanup should happen on cancellation paths, not only on success.
When these pieces line up, cancellation becomes predictable: requests stop promptly, streams terminate cleanly, and shutdown completes without leaving background work running longer than necessary.
10.5 Practical Example: Implementing a Bounded Streaming Pipeline
This example builds a bounded streaming pipeline for a gRPC server method. The goal is simple: accept an incoming stream, process items concurrently, and emit results without letting memory grow unbounded when downstream slows down.
Core Idea
We’ll use three stages:
- Ingest: read requests from the client stream.
- Process: transform each request into a result using async work.
- Egress: send results back as a response stream.
Boundedness comes from two places:
- A bounded channel between ingest and process.
- A bounded concurrency limit in the processing stage.
When the channel fills, ingest naturally pauses, which prevents runaway buffering.
Mind Map: Bounded Streaming Pipeline
Example Setup
Assume a protobuf service like:
- Client sends
RequestItemstream. - Server returns
ResponseItemstream.
In Rust, the handler returns a Response<impl Stream<Item = Result<ResponseItem, Status>>>.
Minimal Pipeline Implementation
Below is a compact pattern using tokio::sync::mpsc for bounded buffering and tokio::sync::Semaphore for concurrency control.
use tokio::sync::{mpsc, Semaphore};
use tokio_stream::wrappers::ReceiverStream;
use tonic::{Request, Response, Status};

pub async fn stream_process(
    &self,
    req: Request<tonic::Streaming<RequestItem>>,
) -> Result<Response<ReceiverStream<Result<ResponseItem, Status>>>, Status> {
    let mut inbound = req.into_inner();

    let (tx, rx) = mpsc::channel::<Result<ResponseItem, Status>>(32);
    let sem = Semaphore::new(16);

    let mut handles = Vec::new();

    while let Some(item) = inbound.message().await.map_err(|e| Status::internal(e.to_string()))? {
        let permit = sem.clone().acquire_owned().await.map_err(|_| Status::cancelled("shutdown".into()))?;
        let tx = tx.clone();

        handles.push(tokio::spawn(async move {
            let _permit = permit;
            let res = process_one(item).await;
            let _ = tx.send(res).await;
        }));
    }

    drop(tx);

    for h in handles { let _ = h.await; }

    Ok(Response::new(ReceiverStream::new(rx)))
}
This code is intentionally direct. The bounded channel capacity is 32, and the concurrency limit is 16. If the client sends faster than processing, the channel fills and the send calls await, which slows processing tasks; once processing slows, ingest naturally waits for message() to yield and for permits to become available.
Processing Function with Clear Error Mapping
The processing stage should convert domain failures into Status values. Keep it deterministic: the same input should produce the same status.
async fn process_one(item: RequestItem) -> Result<ResponseItem, Status> {
    if item.id == 0 {
        return Err(Status::invalid_argument("id must be nonzero"));
    }

    let computed = do_work(item).await.map_err(|e| {
        Status::internal(format!("processing failed: {e}"))
    })?;

    Ok(ResponseItem { id: item.id, value: computed })
}
Ordering and Semantics
The pipeline above does not guarantee output ordering because tasks complete at different times. If ordering matters, you can attach a sequence number and reorder in the egress stage using a small buffer, but that adds complexity and memory usage. For many streaming workloads, “as completed” is acceptable as long as the contract states it.
Cancellation and Shutdown Behavior
When the client cancels, inbound.message().await returns an error and the handler exits. Dropping tx closes the channel, and the receiver stream ends. The semaphore permits are owned by tasks, so they stop naturally when the handler scope ends.
Practical Tuning Checklist
- Start with a small channel capacity (like 16–64) and adjust based on observed memory.
- Set concurrency to match the work type: CPU-heavy work often benefits from fewer tasks than I/O-heavy work.
- Ensure
process_onedoes not allocate large temporary buffers per item. - Keep error mapping consistent so clients can handle failures predictably.
This pattern gives you bounded memory, controlled parallelism, and a streaming response that behaves well when either side slows down.
11. Testing Strategies for Scalable RPC Layers and Middleware
11.1 Unit Testing Middleware With Mock Services and Requests
Unit tests for middleware should answer one question: “Given an input request, what exact output or side effect does the middleware produce?” The fastest way to get there is to test the middleware as a pure-ish transformer around a mocked inner service.
Mind Map: Unit Testing Middleware with Mock Services and Requests
Foundational Setup with a Mock Inner Service
In Tower, middleware typically wraps an inner Service<Request> -> Response. For unit tests, implement a tiny mock service that captures the request it receives and returns a fixed result.
A practical pattern is:
- Store the last request in an
Arc<Mutex<Option<RequestType>>>. - Store a call counter.
- Return either
Ok(response)orErr(status)based on the test case.
Here is a minimal mock for unary-style calls using Tonic request/response types.
use std::sync::{Arc, Mutex};
use tonic::{Request, Response, Status};
use tower::Service;

#[derive(Clone)]
struct MockSvc {
  seen: Arc<Mutex<Option<Request<MyReq>>>>,
  calls: Arc<Mutex<u32>>,
  result: Result<Response<MyResp>, Status>,
}

impl Service<Request<MyReq>> for MockSvc {
  type Response = Response<MyResp>;
  type Error = Status;
  type Future = std::future::Ready<Result<Self::Response, Self::Error>>;

  fn poll_ready(
    &mut self,
    _cx: &mut std::task::Context<'_>,
  ) -> std::task::Poll<Result<(), Self::Error>> {
    std::task::Poll::Ready(Ok(()))
  }

  fn call(&mut self, req: Request<MyReq>) -> Self::Future {
    *self.calls.lock().unwrap() += 1;
    *self.seen.lock().unwrap() = Some(req);
    std::future::ready(self.result.clone())
  }
}
This mock is intentionally boring. Boring mocks make it easier to see whether the middleware is doing the real work.
Example: Testing Header Injection Middleware
Suppose your middleware adds a header like x-request-id when it is missing. The unit test should verify two things: the inner service is called once, and the request reaching the inner service contains the injected metadata.
use tonic::metadata::MetadataValue;
use tower::ServiceExt;

#[tokio::test]
async fn injects_request_id_when_missing() {
  let seen = Arc::new(Mutex::new(None));
  let calls = Arc::new(Mutex::new(0));

  let mock = MockSvc {
    seen: seen.clone(),
    calls: calls.clone(),
    result: Ok(Response::new(MyResp { ok: true })),
  };

  let mw = RequestIdMiddleware::new("fixed-id");
  let mut svc = mw.layer(mock);

  let req = Request::new(MyReq { payload: "hi".into() });
  let _ = svc.ready().await.unwrap().call(req).await.unwrap();

  assert_eq!(*calls.lock().unwrap(), 1);
  let inner_req = seen.lock().unwrap().take().unwrap();
  let id = inner_req.metadata().get("x-request-id").unwrap();
  assert_eq!(id, &MetadataValue::from_str("fixed-id").unwrap());
}
Key nuance: the test checks the request as the inner service sees it, not the request you originally constructed.
Example: Testing Rejection Without Calling Inner
For authorization middleware, a common bug is accidentally calling the inner service even after rejecting. Test that the inner service is not called.
- Configure the mock to return
Okif called. - Provide a request missing required credentials.
- Assert the middleware returns
Err(Status::permission_denied(_)). - Assert call count remains zero.
Example: Testing Error Mapping from Inner Service
If the middleware maps inner errors into a consistent status, unit tests should cover at least:
- Inner returns
Status::invalid_argument, middleware preserves it. - Inner returns
Status::internal, middleware rewrites it tounavailablewith a stable message.
The assertion should check both the status code and the message content, because message drift is a real source of flaky client behavior.
Mind Map: What to Assert in Each Test
Practical Coverage Checklist
Write tests for the middleware’s decision points, not just the happy path. For unary middleware, that usually means success, early rejection, and inner error mapping. If your middleware also touches streaming requests, add at least one test that ensures the middleware applies the same metadata rules to the initial request before any stream items are processed.
11.2 Integration Testing Tonic Services with In Process Servers
Integration tests answer a practical question: “Do the pieces work together when the network stack and async runtime are actually involved?” For Tonic, the most reliable approach is an in-process server that runs inside the test process. That keeps tests fast, deterministic, and still exercises real request routing, serialization, streaming behavior, and middleware.
Core Idea: Real gRPC, Real Async, Minimal Friction
An in-process server typically uses a bound local address and a real Tonic transport. Your test then creates a client channel pointed at that address, calls the service, and asserts on both responses and side effects (like recorded calls or emitted metrics).
Key benefits:
- You test the generated gRPC stubs and the service trait implementation together.
- You test middleware order and error mapping through the full stack.
- You can still control dependencies by injecting state into the service implementation.
Test Setup Flow
- Define a service implementation that holds test-controlled state.
- Spawn a Tonic server on a local socket.
- Create a client channel to the server.
- Execute unary and streaming calls.
- Assert on responses and on captured state.
- Shut down the server cleanly to avoid hanging tasks.
Mind Map: Integration Test Layers
Example: Unary Integration Test with Captured State
Below is a compact pattern. The service stores received requests in a thread-safe container so the test can assert on side effects.
use std::sync::{Arc, Mutex};
use tonic::{transport::Server, Request, Response};

#[derive(Clone)]
struct TestState { seen: Arc<Mutex<Vec<String>>> }

#[derive(Default)]
struct MySvc { state: TestState }

#[tonic::async_trait]
impl my_proto::my_service_server::MyService for MySvc {
  async fn ping(&self, req: Request<my_proto::PingRequest>)
    -> Result<Response<my_proto::PingResponse>, tonic::Status> {
    self.state.seen.lock().unwrap().push(req.into_inner().msg);
    Ok(Response::new(my_proto::PingResponse { ok: true }))
  }
}
Now the in-process server and client wiring. Use an ephemeral port to avoid collisions.
use tokio::net::TcpListener;
use my_proto::my_service_client::MyServiceClient;

#[tokio::test]
async fn unary_ping_in_process() {
  let state = TestState { seen: Arc::new(Mutex::new(vec![])) };
  let svc = MySvc { state: state.clone() };

  let listener = TcpListener::bind("127.0.0.1:0").await.unwrap();
  let addr = listener.local_addr().unwrap();

  let server_task = tokio::spawn(async move {
    Server::builder()
      .add_service(my_proto::my_service_server::MyServiceServer::new(svc))
      .serve_with_incoming_shutdown(tokio_stream::wrappers::TcpListenerStream::new(listener), async {
        tokio::time::sleep(std::time::Duration::from_millis(50)).await;
      })
      .await
      .unwrap();
  });

  let mut client = MyServiceClient::connect(format!("http://{}", addr)).await.unwrap();
  let resp = client.ping(my_proto::PingRequest { msg: "hi".into() }).await.unwrap();
  assert!(resp.into_inner().ok);
  assert_eq!(state.seen.lock().unwrap().as_slice(), ["hi"]);

  server_task.abort();
}
The shutdown mechanism above is intentionally simple: it prevents the server from running forever. In real tests, prefer a deterministic shutdown signal (like a oneshot) so the server stops immediately after assertions.
Example: Streaming Integration Test with Deterministic Sequences
Streaming tests should verify three things: the server emits the expected sequence, the client consumes it correctly, and cancellation behaves predictably.
A practical approach is to have the server stream from a fixed in-memory list. The test then collects items into a vector and asserts equality.
#[tokio::test]
async fn server_stream_in_process_collects_all() {
  let state = TestState { seen: Arc::new(Mutex::new(vec![])) };
  let svc = MySvc { state };

  let listener = TcpListener::bind("127.0.0.1:0").await.unwrap();
  let addr = listener.local_addr().unwrap();

  let server_task = tokio::spawn(async move {
    Server::builder()
      .add_service(my_proto::my_service_server::MyServiceServer::new(svc))
      .serve_with_incoming_shutdown(tokio_stream::wrappers::TcpListenerStream::new(listener), async {
        tokio::time::sleep(std::time::Duration::from_millis(50)).await;
      })
      .await
      .unwrap();
  });

  let mut client = MyServiceClient::connect(format!("http://{}", addr)).await.unwrap();
  let mut stream = client.server_stream(my_proto::StreamRequest { n: 3 }).await.unwrap().into_inner();

  let mut out = vec![];
  while let Some(item) = stream.message().await.unwrap() {
    out.push(item.value);
  }

  assert_eq!(out, vec![1, 2, 3]);
  server_task.abort();
}
Assertions That Actually Catch Bugs
- Assert on gRPC status codes for error paths, not just “it failed.”
- Assert on middleware side effects by recording counters in shared state.
- For streaming, assert on item order and termination behavior.
- Keep timeouts short and explicit so failures are quick and readable.
Mind Map: What to Assert
Integration tests are easiest to maintain when each test case is small and the service state is explicit. When you do that, failures point to the exact layer that misbehaved, instead of leaving you to guess whether serialization, routing, or middleware ordering was the culprit.
11.3 Testing Streaming Semantics and Backpressure Behavior
Streaming tests fail in predictable ways: you either assert the wrong thing (order, count, or timing), or you never actually apply pressure (so backpressure bugs stay hidden). This section gives you a systematic approach that starts with semantics and ends with stress-style tests that still run quickly.
What “Streaming Semantics” Means in Practice
Streaming semantics cover three axes:
- Message ordering: the server sends items in a specific sequence, and the client observes the same sequence.
- Termination behavior: the stream ends with a normal completion, a cancellation, or an error status.
- Flow control behavior: the system slows down when the consumer can’t keep up, rather than buffering forever.
A good test names which axis it is validating. If you test ordering and termination together, a failure report becomes harder to interpret.
Mind Map: Streaming Test Checklist
Building Deterministic Streaming Tests
Async streaming tests are easiest when you control the producer and consumer speeds.
Pattern: use a bounded queue between the producer and the stream response, then make the client consume slowly.
- The server handler produces messages into a bounded buffer.
- When the buffer fills, the handler should await capacity, demonstrating backpressure.
- The client delays reads, forcing the buffer to fill.
This avoids “sleep and hope” tests. You still use timeouts, but only as safety rails.
Example: Slow Consumer with Bounded Buffer
use tokio::sync::mpsc;
use tokio::time::{timeout, Duration};

#[tokio::test]
async fn backpressure_blocks_producer() {
    let (tx, mut rx) = mpsc::channel::<u32>(2);

    let producer = tokio::spawn(async move {
        for i in 0..5u32 {
            tx.send(i).await.unwrap();
        }
    });

    // Client reads slowly so the buffer fills quickly.
    let first = rx.recv().await.unwrap();
    assert_eq!(first, 0);

    // Producer should not finish while buffer is full.
    let finished = timeout(Duration::from_millis(50), producer).await;
    assert!(finished.is_err(), "producer finished unexpectedly");

    // Drain remaining messages.
    while let Some(_v) = rx.recv().await {}
}
This example tests the core mechanism: a bounded channel forces the producer to await capacity. In a gRPC test, the same idea applies, but the “buffer” is your stream source and the “consumer” is the client reading from the stream.
Example: Asserting Termination Type
Termination type matters because gRPC surfaces different reasons through different error paths.
- Normal completion: the client stream ends without an error.
- Server error mid-stream: the client receives an error status when attempting the next read.
- Client cancellation: the server observes cancellation and stops producing.
A practical test structure:
- Collect messages until the first failure or completion.
- Assert the exact number of messages received.
- Assert the termination reason by matching the error status category (or by observing a cancellation flag on the server).
Integration Testing Strategy Without Flakiness
For integration tests, prefer an in-process server and a real client stream. Then:
- Use a bounded internal queue in the handler.
- Use a client read loop that intentionally waits between reads.
- Add instrumentation: counters for produced and consumed items, plus a server-side “cancelled” boolean set when the stream is dropped.
When you assert backpressure, don’t just assert “it was slow.” Assert a concrete property: the producer cannot complete or cannot advance past a known message index while the client is paused.
Negative Tests That Catch Real Bugs
Include at least three negative tests:
- Client cancels early: client stops reading after N messages; server should stop producing and not leak tasks.
- Server errors mid-stream: client should receive exactly the messages sent before the error, then fail on the next read.
- Slow consumer with bounded buffering: producer should block once the buffer is full; consumed count should match what the client actually read.
These tests cover the most common failure modes: incorrect ordering, incorrect termination, and unbounded buffering.
What to Assert, Not Just What to Observe
A streaming test should end with assertions that are specific and checkable:
- Exact message sequence for ordering.
- Exact termination reason for completion vs error vs cancellation.
- Evidence of backpressure via producer blocking or bounded buffer invariants.
- No unexpected extra messages after termination.
If your test only prints logs, it’s not a test yet. Logs are useful, but assertions are what keep the behavior from drifting.
11.4 Property Based Testing for Serialization and Error Mapping
Property based testing checks general rules across many generated inputs, instead of hand-picking a few examples. For RPC layers, two rules matter most: (1) serialization must be stable and reversible where expected, and (2) domain and transport errors must map to gRPC statuses consistently.
Core Properties for Serialization
Start with properties that are easy to state and hard to accidentally break.
Round Trip Invariants
For messages where the wire format should preserve meaning, the property is: decode(encode(x)) == x.
A practical approach is to test at the boundary you control. If you serialize protobuf messages, generate valid Rust values, convert them to protobuf messages, encode to bytes, decode back, and compare.
Canonicalization and Determinism
Even when round trip holds, determinism prevents flaky tests. A useful property is: encode(x) produces identical bytes for the same logical value. This catches hidden sources of nondeterminism like unordered maps that were not normalized.
Size and Resource Safety
Serialization should not explode memory for reasonable inputs. A property can assert that encoded size stays under a threshold for bounded generators, and that decoding succeeds without panicking.
Error Mapping Properties
Error mapping is where correctness often degrades quietly. You want properties that enforce both classification and detail.
Status Code Consistency
Define a mapping function from your domain error type to gRPC status codes. The property is: for any domain error variant, the mapped status code matches the expected one.
Detail Preservation Rules
If you attach structured details or error messages, test that they survive the mapping. A property can assert that the status message contains a stable identifier (like an error code string) rather than a full debug dump.
No Information Leaks
If you redact sensitive fields, test that the mapped status does not include raw secrets. This is easiest when your generator can produce both safe and unsafe inputs and your mapping function is deterministic.
Mind Map: Test Design
Example: Round Trip and Determinism
The following sketch shows the structure of a property test. The exact generator and message types depend on your protobuf schema.
use proptest::prelude::*;

proptest! {
  #[test]
  fn round_trip_is_lossless(input in any_valid_request()) {
    let pb = input.to_protobuf();
    let bytes1 = pb.encode_to_vec();
    let pb2 = decode_request(&bytes1).unwrap();
    prop_assert_eq!(pb2, pb);

    let bytes2 = pb.encode_to_vec();
    prop_assert_eq!(bytes2, bytes1);
  }
}
To keep tests meaningful, any_valid_request() should generate values that respect protobuf constraints you rely on, like bounded string lengths and valid enum ranges.
Example: Error Mapping as a Property
Assume you have a domain error enum and a function map_error_to_status.
use proptest::prelude::*;
use tonic::Code;

proptest! {
  #[test]
  fn maps_domain_errors_to_expected_codes(err in any_domain_error()) {
    let status = map_error_to_status(&err);
    let expected = expected_code_for(&err);
    prop_assert_eq!(status.code(), expected);
  }
}
Then add a second property for detail rules.
proptest! {
  #[test]
  fn status_details_are_stable_and_safe(err in any_domain_error()) {
    let status = map_error_to_status(&err);
    prop_assert!(status.message().contains(err.stable_id()));
    prop_assert!(!status.message().contains("RAW_SECRET"));
  }
}
Practical Notes That Prevent False Confidence
- Use bounded generators. Unbounded strings can make tests slow and produce meaningless failures.
- Compare logical equality, not debug strings. For protobuf messages, structural equality is usually the right oracle.
- Test mapping at the function boundary. If you test through the full RPC stack, you’ll mix serialization bugs with transport behavior.
- Let shrinking do its job. When a property fails, the minimal counterexample should point directly to the violated rule, not to incidental formatting.
Systematic Coverage Plan
A good coverage sequence is: first round trip for each message type, then determinism for messages with collections, then size bounds for the largest expected payloads, and finally error mapping properties for each domain error variant. This order keeps failures localized: serialization issues show up before status mapping issues, and status mapping issues show up before any integration-level confusion.
11.5 Practical Example: Building a Comprehensive Test Suite
A good test suite for a Tonic service plus Tower middleware checks behavior, not just compilation. Start with small, deterministic units, then add integration tests that exercise the full request path, and finish with streaming and concurrency tests that catch the bugs you only see under load.
Test Scope and What to Verify
For each RPC method, decide what “correct” means:
- Contract correctness: request fields map to domain inputs, and responses match the protobuf schema.
- Middleware correctness: headers and metadata are read and written as expected, and errors are transformed consistently.
- Failure correctness: timeouts, cancellations, and invalid inputs produce stable gRPC status codes.
- Streaming correctness: backpressure is respected, and cancellation stops work promptly.
A practical rule: every middleware layer gets at least one unit test, and every RPC method gets at least one integration test that includes the full layer stack.
Mind Map of the Test Suite
Mind Map: Comprehensive Test Suite
Unit Tests for Middleware Layers
Unit tests should avoid networking. Build the middleware as a tower::Service around a tiny inner service that returns known results.
Example: test that an auth middleware rejects missing credentials.
use tonic::{Request, Status};
use tower::{Service, ServiceExt};

#[tokio::test]
async fn auth_rejects_missing_token() {
    let inner = tower::service_fn(|_req: Request<()>| async move {
        Ok::<_, Status>(tonic::Response::new(()))
    });

    let svc = auth_middleware(inner); // your layer returns a Service

    let req = Request::new(());
    let err = svc.oneshot(req).await.unwrap_err();

    assert_eq!(err.code(), tonic::Code::Unauthenticated);
}
Keep these tests focused: one assertion about status code, plus one assertion about whether the inner service was called (use an atomic counter).
Integration Tests for the Full Request Path
Integration tests spin up a real in-process server and call it through a client channel. This catches mismatches between metadata keys, error mapping, and middleware ordering.
Use a fixed date for deterministic logs or headers when needed, such as 2026-03-25.
use tonic::transport::Server;
use tokio::net::TcpListener;

#[tokio::test]
async fn unary_rpc_uses_full_middleware_stack() {
    let listener = TcpListener::bind("127.0.0.1:0").await.unwrap();
    let addr = listener.local_addr().unwrap();

    let svc = build_service_with_layers();

    tokio::spawn(async move {
        Server::builder()
            .add_service(svc)
            .serve_with_incoming(tokio_stream::wrappers::TcpListenerStream::new(listener))
            .await
            .unwrap();
    });

    let mut client = build_client(addr); // tonic client

    let resp = client.my_unary(Request::new(make_valid_request())).await.unwrap();
    assert_eq!(resp.into_inner().field, "expected");
}
Also add one integration test that proves ordering: for example, auth should run before rate limiting so unauthenticated requests don’t consume quota.
Streaming Tests That Catch Backpressure Bugs
For streaming, verify two things: the server stops when the client cancels, and the server doesn’t buffer unboundedly.
A simple pattern:
- Use a client stream that yields N items.
- Cancel after M items.
- Assert the server-side handler observes cancellation and stops producing.
To make this deterministic, use a bounded channel inside the handler and record how many items were processed before cancellation.
Assertions That Stay Stable
Avoid brittle string matching on error messages. Prefer:
status.code()for the category.status.message()only when you control the exact text.status.details()when you attach structured details.
For middleware, assert both the final outcome and the side effects: counters, recorded metadata, and whether the inner handler ran.
A Minimal Test Matrix
- Unary method: 1 happy path integration test, 1 validation failure integration test, 1 middleware ordering test.
- Each middleware: 1 unit test for the rejection path and 1 unit test for the pass path.
- Streaming method: 1 cancellation test and 1 bounded processing test.
This matrix keeps coverage meaningful without turning the suite into a full-time job.
12. Case Study Building a Layered High Throughput RPC Service in Rust
12.1 Defining Protobuf Contracts for a Realistic Service Domain
A good protobuf contract makes the rest of the system simpler: handlers become straightforward translations between wire types and domain types, middleware can reason about stable fields, and clients can rely on consistent error semantics. The goal is not to mirror your internal structs; it’s to define a stable, language-neutral interface that stays usable as the service evolves.
Start with Domain Boundaries and Call Shapes
Pick a realistic domain that forces you to model both identity and behavior. For example, an “Order Fulfillment” service needs:
- A way to identify customers and orders.
- Commands that change state (place order, cancel order).
- Queries that read state (get order status).
- Events that stream updates (order status changes).
Then decide call shapes:
- Unary calls for request-response operations.
- Server streaming for “here are updates as they happen.”
- Client streaming only when the client naturally sends a sequence (e.g., batch cancellations).
A practical rule: if the client can compute the full request before sending, unary is usually the cleanest. If the server produces a sequence over time, streaming is the natural fit.
Choose Stable Identifiers and Field Types
Use explicit identifier fields rather than embedding complex objects. For example, prefer order_id as a string or bytes, and keep customer identity separate. When you need structured identifiers, model them as messages with clear semantics.
For field types:
- Use
stringfor human-readable IDs only when you truly need them. - Use
int64for numeric IDs that may exceed 32-bit. - Use
google.protobuf.Timestampfor times. - Use
bytesfor opaque tokens.
Avoid “convenience” fields that duplicate data across messages. Duplication is sometimes necessary, but it should be intentional and documented by naming.
Design Messages for Compatibility
Protobuf compatibility is mostly about how you add and change fields:
- Add new optional fields rather than reusing old ones.
- Never change field numbers.
- Avoid changing meaning while keeping the same name.
A message that will likely grow should be structured with room for extension. For example, an Order message can include a status and a repeated list of LineItem entries, while leaving room for future metadata.
Model Errors as Data, Not Just Text
Instead of relying on free-form strings, define a structured error payload that middleware and clients can interpret. Even if you map it to gRPC Status later, the contract should carry stable fields like error_code and reason.
Example Protobuf Contract Skeleton
Below is a compact contract skeleton that supports unary queries and server streaming updates.
syntax = "proto3";
package fulfillment.v1;

import "google/protobuf/timestamp.proto";

service Fulfillment {
  rpc GetOrder(GetOrderRequest) returns (GetOrderResponse);
  rpc WatchOrder(WatchOrderRequest) returns (stream OrderUpdate);
}

message GetOrderRequest { string order_id = 1; }
message GetOrderResponse { Order order = 1; }

message WatchOrderRequest { string order_id = 1; }

message OrderUpdate {
  google.protobuf.Timestamp at = 1;
  Order order = 2;
}

message Order {
  string order_id = 1;
  string customer_id = 2;
  OrderStatus status = 3;
  repeated LineItem items = 4;
}

message LineItem { string sku = 1; int32 quantity = 2; }

enum OrderStatus { ORDER_STATUS_UNSPECIFIED = 0; PLACED = 1; SHIPPED = 2; CANCELED = 3; }
This design keeps the contract readable: requests are small, responses are explicit, and streaming updates carry both time and the latest order snapshot.
Mind Map: Protobuf Contract Design
Practical Example: Middleware-Friendly Contract Fields
Even though this section focuses on protobuf, you should anticipate middleware needs. For example, if you plan to enforce rate limits per customer, include customer_id in the request or ensure it can be derived deterministically from order_id. If you need idempotency for “place order,” include an idempotency_key field in the request so the server can deduplicate safely.
A small contract tweak can prevent a lot of awkward server-side lookups later. The contract should make the common path easy to validate and the failure path easy to explain.
12.2 Implementing Server Handlers with Streaming and Unary Calls
A practical service usually mixes unary calls for request-response workflows and streaming calls for continuous data. In Tonic, both are implemented as async Rust handlers, but the shape of the handler determines how you handle backpressure, cancellation, and error mapping.
Core Handler Shapes
Unary handler takes a single request and returns a single response. The handler is a good place for validation, authorization checks, and a single database or cache interaction.
Server streaming handler returns a stream of responses. The handler should produce items incrementally and stop promptly when the client cancels.
Bidirectional streaming handler consumes a stream of requests and produces a stream of responses. This is where you must be careful about buffering and fairness between reading and writing.
Mind Map: Handler Responsibilities
Unary Handler Example with Clear Error Boundaries
A unary handler should fail fast on invalid input and keep the happy path straightforward. The key is to convert domain errors into tonic::Status at the boundary.
use tonic::{Request, Response, Status};

async fn get_user(req: Request<GetUserRequest>)
    -> Result<Response<GetUserResponse>, Status>
{
    let id = req
        .get_ref()
        .id
        .trim()
        .to_string();

    if id.is_empty() {
        return Err(Status::invalid_argument("id must be non-empty"));
    }

    let user = user_store::get_user(&id)
        .await
        .map_err(|e| match e {
            user_store::Error::NotFound => Status::not_found("user not found"),
            user_store::Error::Transient => Status::unavailable("temporary failure"),
        })?;

    Ok(Response::new(GetUserResponse { user: Some(user.into()) }))
}
This pattern keeps domain logic free of gRPC concepts. It also makes it obvious which failures are client mistakes (invalid_argument) versus service issues (unavailable).
Server Streaming Handler Example with Bounded Output
For server streaming, avoid building an unbounded vector of results. Instead, generate items and push them into a bounded channel. When the channel fills, you naturally slow down production, which is the simplest form of backpressure.
use tokio::sync::mpsc;
use tokio_stream::wrappers::ReceiverStream;
use tonic::{Request, Response, Status};

async fn list_events(req: Request<ListEventsRequest>)
    -> Result<Response<ReceiverStream<Result<Event, Status>>>, Status>
{
    let start = req.get_ref().start;
    if start < 0 {
        return Err(Status::invalid_argument("start must be >= 0"));
    }

    let (tx, rx) = mpsc::channel::<Result<Event, Status>>(32);

    tokio::spawn(async move {
        let mut cursor = start;
        loop {
            match event_store::next_event(cursor).await {
                Ok(Some((event, next_cursor))) => {
                    if tx.send(Ok(event)).await.is_err() { break; }
                    cursor = next_cursor;
                }
                Ok(None) => break,
                Err(_) => {
                    let _ = tx.send(Err(Status::internal("event retrieval failed"))).await;
                    break;
                }
            }
        }
    });

    Ok(Response::new(ReceiverStream::new(rx)))
}
The bounded channel size (32 here) is a deliberate tradeoff: it limits memory growth while still allowing some buffering for throughput.
Bidirectional Streaming Handler Example with Coordinated Flow
Bidirectional streaming is easiest to get wrong by either reading too far ahead or writing too slowly. A common approach is to process each incoming message into an outgoing response and keep the work per message small.
use tonic::{Request, Response, Status};
use tokio_stream::StreamExt;

async fn chat(
    req: Request<tonic::Streaming<ChatMessage>>,
) -> Result<Response<tonic::codec::Streaming<ChatMessage>>, Status> {
    let mut inbound = req.into_inner();

    let (tx, rx) = tokio::sync::mpsc::channel::<Result<ChatMessage, Status>>(32);

    tokio::spawn(async move {
        while let Some(msg) = inbound.next().await {
            let msg = match msg {
                Ok(m) => m,
                Err(_) => { let _ = tx.send(Err(Status::invalid_argument("bad message"))).await; break; }
            };

            if msg.text.is_empty() {
                let _ = tx.send(Err(Status::invalid_argument("text must be non-empty"))).await;
                continue;
            }

            let reply = ChatMessage { text: format!("echo: {}", msg.text) };
            if tx.send(Ok(reply)).await.is_err() { break; }
        }
    });

    Ok(Response::new(tokio_stream::wrappers::ReceiverStream::new(rx).into_stream()))
}
This keeps per-message logic local and uses a bounded channel to prevent runaway buffering. If the client disconnects, send fails and the task exits.
Practical Checklist for Handler Implementation
- Validate inputs at the start of unary and streaming handlers.
- Convert domain errors to
tonic::Statusat the handler boundary. - Use bounded channels for streaming outputs to control memory.
- Stop work promptly when the client cancels by reacting to channel closure.
- Keep per-message work small in bidirectional streams to avoid head-of-line blocking.
With these patterns, your handlers remain predictable under load: unary calls fail fast, server streams apply backpressure naturally, and bidirectional streams stay responsive without unbounded buffering.
12.3 Building a Tower Layer Stack for Auth Rate Limits and Observability
A good Tower stack makes cross-cutting concerns predictable: each layer does one job, and the order of layers defines the meaning of the request pipeline. In this section, we build a stack that enforces authentication, applies rate limits, and records observability signals for every call.
Mind Map: Layer Responsibilities and Data Flow
Layer Order That Matches Semantics
Place observability outermost so it sees both successful and rejected requests. Put authentication before rate limiting so rate limits can key by identity rather than by raw client address. Rate limiting should run before the handler so expensive work never happens for disallowed requests.
A practical order is:
- Observability
- Authentication
- Rate limiting
- Handler
Authentication Layer with Request Extensions
The authentication layer reads gRPC metadata, validates it, and stores the resulting identity in request extensions. That way, downstream layers and the handler can use the same identity without re-parsing metadata.
Example: metadata key authorization contains a bearer token. The layer extracts it, validates it, and inserts UserId into extensions.
use http::Request;
use tonic::Status;

#[derive(Clone, Debug)]
pub struct UserId(pub String);

pub fn authenticate(req: &mut Request<()>) -> Result<(), Status> {
    let auth = req
        .headers()
        .get("authorization")
        .and_then(|v| v.to_str().ok())
        .ok_or_else(|| Status::unauthenticated("missing authorization"))?;

    if !auth.starts_with("Bearer ") {
        return Err(Status::unauthenticated("invalid authorization scheme"));
    }

    let token = &auth[7..];
    if token.is_empty() {
        return Err(Status::unauthenticated("empty token"));
    }

    req.extensions_mut().insert(UserId("user-123".to_string()));
    Ok(())
}
In a real implementation, validation would check signatures or a credential store. The important part is that the layer returns a tonic::Status early, and it stores identity for later layers.
Rate Limiting Layer Keyed by Identity and Method
Rate limiting should be deterministic and cheap. Keying by identity prevents one user from consuming another user’s quota. Including the RPC method avoids mixing traffic patterns across endpoints.
Use a shared limiter state behind an async-aware lock. The layer checks whether the request is allowed; if not, it returns Status::resource_exhausted.
use std::{collections::HashMap, sync::Arc};
use tokio::sync::Mutex;
use tonic::Status;

#[derive(Default)]
struct Counters { hits: HashMap<String, u64> }

#[derive(Clone)]
pub struct RateLimiter { state: Arc<Mutex<Counters>>, limit: u64 }

impl RateLimiter {
    pub async fn check(&self, key: &str) -> Result<(), Status> {
        let mut s = self.state.lock().await;
        let n = s.hits.entry(key.to_string()).or_insert(0);
        *n += 1;
        if *n > self.limit {
            return Err(Status::resource_exhausted("rate limit exceeded"));
        }
        Ok(())
    }
}
This example uses a simple counter, but the layer interface stays the same. Swap in a token bucket or fixed window without changing the stack wiring.
Observability Layer with Consistent Fields
Observability should capture: method name, outcome (success or error), latency, and identity when available. Since authentication runs after observability in the order above, the observability layer must handle the “identity not yet present” case gracefully.
A common approach is to start a span at the beginning, then record fields after the inner service returns. That guarantees you record the final status.
use std::time::Instant;
use tonic::Status;

pub fn record_outcome(start: Instant, res: &Result<(), Status>) {
    let elapsed_ms = start.elapsed().as_millis();
    match res {
        Ok(()) => {
            // record: latency_ms, outcome=success
        }
        Err(e) => {
            // record: latency_ms, outcome=error, grpc_code=e.code()
        }
    }
}
In practice, you’d integrate with tracing and a metrics crate, but the layer contract remains: start timing, call inner service, then record outcome.
Putting It Together with a Tower Stack
The stack wiring is where correctness lives. If you reverse authentication and rate limiting, you’ll key by missing identity and get confusing throttling behavior.
The handler should only run after both auth and rate checks pass.
// Pseudocode sketch of the order
// ObservabilityLayer -> AuthLayer -> RateLimitLayer -> Handler
// Each layer returns tonic::Status on failure.
Practical Example: One Request, Three Decisions
Consider a request to CreateOrder.
- Observability starts a span and timer.
- Authentication reads
authorization, validates it, and insertsUserId. - Rate limiting builds a key like
CreateOrder:user-123and checks the quota. - If allowed, the handler runs and the observability layer records success.
- If rejected, the handler never runs, and observability records the error code and latency.
This structure keeps behavior consistent: every request gets the same observability treatment, and every rejection happens before expensive work.
12.4 Implementing Client Call Patterns With Timeouts and Error Handling
A good client call pattern does two things reliably: it bounds how long work can take, and it turns failures into errors your application can reason about. In Rust with Tonic, you typically combine three layers: call configuration (timeouts and retry decisions), request-level metadata (deadlines and correlation IDs), and a consistent error mapping strategy.
Mind Map: Client Call Patterns
Timeouts That Actually Bound Work
Start with a per-call timeout. For unary RPCs, wrap the future so the caller never waits forever. Use a duration that matches your service SLO, then keep it consistent across layers so middleware and handlers don’t fight each other.
use std::time::Duration;
use tonic::transport::Channel;
use tokio::time;

async fn fetch_user<C>(client: &mut C, id: String) -> Result<String, tonic::Status>
where
    C: /* your generated client type */,
{
    let req = /* build your request */;
    let fut = client /* .method(req) */;

    let res = time::timeout(Duration::from_millis(500), fut).await;
    match res {
        Ok(r) => r,
        Err(_) => Err(tonic::Status::deadline_exceeded("client timeout")),
    }
}
For streaming, timeouts should cover both “time to first item” and “time between items.” A single global timeout often fails under bursty traffic. If you need finer control, apply timeouts around the next-item await rather than the entire stream.
Error Taxonomy That Keeps Logic Simple
Tonic errors come in two main shapes: transport-level failures (connection issues, timeouts at the HTTP/2 layer) and gRPC status failures (the server returned a status code). Your application should treat them differently.
A practical approach is to map everything into one internal error enum, but preserve the original details for logging.
#[derive(Debug)]
pub enum RpcError {
    Timeout,
    Unavailable(String),
    Unauthorized,
    NotFound,
    InvalidArgument(String),
    Internal(String),
}

fn map_status(status: tonic::Status) -> RpcError {
    match status.code() {
        tonic::Code::DeadlineExceeded => RpcError::Timeout,
        tonic::Code::Unavailable => RpcError::Unavailable(status.message().to_string()),
        tonic::Code::Unauthenticated => RpcError::Unauthorized,
        tonic::Code::NotFound => RpcError::NotFound,
        tonic::Code::InvalidArgument => RpcError::InvalidArgument(status.message().to_string()),
        _ => RpcError::Internal(status.message().to_string()),
    }
}
When you wrap futures with tokio::time::timeout, you’ll create a synthetic timeout. Map it to the same internal variant you use for tonic::Code::DeadlineExceeded, so downstream logic doesn’t care where the timeout came from.
Retry Decisions Without Guesswork
Retries are only safe when the operation is idempotent or when you can detect duplicates. For example, a “get by id” call is usually safe to retry; a “create order” call is not unless the client supplies an idempotency key and the server enforces it.
A systematic retry rule set for unary calls:
- Retry only on transport failures and on a small set of status codes (commonly
UnavailableandDeadlineExceeded). - Retry at most a small number of times.
- Keep the total time budget bounded by the outer timeout.
- Include correlation IDs in metadata so logs can stitch attempts together.
Example: Unary Call with Timeout and Retry
use tokio::time::{sleep, timeout, Duration};

async fn call_with_retry<F, Fut, T>(mut op: F) -> Result<T, RpcError>
where
    F: FnMut() -> Fut,
    Fut: std::future::Future<Output = Result<T, tonic::Status>>,
{
    let mut attempts = 0;
    let max_attempts = 3;
    let per_attempt = Duration::from_millis(300);

    loop {
        attempts += 1;
        let res = timeout(per_attempt, op()).await;
        let out = match res {
            Ok(r) => r,
            Err(_) => Err(tonic::Status::deadline_exceeded("client timeout")),
        };

        match out {
            Ok(v) => return Ok(v),
            Err(s) => {
                let retryable = matches!(s.code(), tonic::Code::Unavailable | tonic::Code::DeadlineExceeded);
                if !retryable || attempts >= max_attempts {
                    return Err(map_status(s));
                }
                sleep(Duration::from_millis(50 * attempts)).await;
            }
        }
    }
}
This keeps the logic explicit: you can read it and know exactly when retries happen and when they stop.
Streaming Call Patterns with Bounded Consumption
For server streaming, treat the stream as a sequence of steps: connect, receive first item, then receive subsequent items. Apply timeouts around message().await so a stalled server doesn’t hang your task.
For client streaming, bound both the upload and the “finish” phase. If your client sends a large stream, ensure you stop producing when the server is slow; otherwise you’ll buffer in memory and pretend it’s fine.
Mind Map: Error Handling Flow
Practical Integration Notes
Keep timeout durations consistent between client and server. If the server enforces a shorter deadline than the client, the client will see DeadlineExceeded anyway, so your client timeout should be at least as strict as the server’s effective deadline. Finally, always include a correlation ID in metadata so retries and failures can be grouped without guessing which attempt produced which log line.
12.5 End-to-End Validation with Load Testing and Metrics Review
Validation is where the layered design stops being a diagram and starts being a system. The goal is to confirm that your Tonic handlers, Tower middleware stack, and client call patterns agree on behavior under realistic load: latency, throughput, error mapping, backpressure, and cancellation.
Define Success Criteria Before You Run
Start with measurable targets tied to user-visible behavior.
- Latency SLOs: p50, p95, p99 for unary calls; per-message latency for streaming.
- Throughput: requests per second and sustained bytes per second.
- Error budget: gRPC status distribution, with particular attention to
UNAVAILABLE,DEADLINE_EXCEEDED, andRESOURCE_EXHAUSTED. - Correctness invariants: auth decisions are consistent, rate limits trigger deterministically, and metadata propagation preserves correlation IDs.
A simple checklist helps avoid “we ran load and it looked fine” outcomes.
- Unary: 200 OK rate matches expected; timeouts occur only when deadlines are exceeded
- Streaming: bounded memory; cancellation stops work promptly
- Middleware: headers and trace context survive every layer
- Errors: domain errors map to stable gRPC statuses
Build a Reproducible Load Scenario
Use a load plan that exercises both the happy path and the failure modes your middleware handles.
- Traffic mix: e.g., 80% unary reads, 15% unary writes, 5% streaming uploads.
- Concurrency: ramp from low to target while holding message sizes constant.
- Deadline strategy: set client deadlines slightly above typical service time; then run a second pass with tighter deadlines to confirm correct
DEADLINE_EXCEEDEDbehavior. - Failure injection: simulate auth failures, backend timeouts, and oversized payloads to verify status mapping and logging.
Example: a client test harness that tags each request with a correlation ID and records the gRPC status.
// Pseudocode sketch for a unary call loop
for i in 0..N {
  let req = Request::new(MyRequest { /* ... */ });
  req.metadata_mut().insert("x-correlation-id", format!("req-{i}"));
  let deadline = Instant::now() + Duration::from_millis(250);
  let resp = client
    .my_unary(req)
    .timeout_at(deadline)
    .await;
  record_status(i, resp.as_ref().map(|r| r.get_ref().status_code()));
}
Validate Metrics at Three Layers
Metrics are only useful if you can explain them at the layer where they originate.
- Client-side: request latency, retry counts, and final status.
- Server-side: handler time, middleware time, queueing time, and streaming backpressure indicators.
- System-side: CPU saturation, memory growth, network throughput, and thread/task pressure.
When p99 latency spikes, you want to know whether it’s time spent waiting to enter the handler, time spent in middleware (like rate limiting or auth checks), or time spent in the handler itself.
Review Metrics with a Structured Method
Use a “shape then cause” approach.
- Shape: compare p50/p95/p99 and error rates across the ramp.
- Cause: correlate spikes with middleware events and handler stages.
- Consistency: confirm that the same correlation IDs appear in client logs and server logs.
Mind Map: End-to-End Validation Flow
Check Streaming and Cancellation Behavior
Streaming failures often hide behind “it didn’t crash.” Validate that cancellation stops work and that buffering stays bounded.
- Start a streaming upload, then cancel at a known offset.
- Confirm the server stops producing responses and releases resources.
- Ensure the client receives a terminal status consistent with cancellation and deadlines.
Example: verify that the server’s in-flight message counters return to baseline after cancellation.
Confirm Error Mapping and Middleware Semantics
Run targeted tests that force each middleware to respond.
- Auth: invalid token should consistently return
UNAUTHENTICATED. - Rate limiting: exceed limit should return
RESOURCE_EXHAUSTED. - Concurrency limits: overload should return
UNAVAILABLEorRESOURCE_EXHAUSTEDdepending on your chosen policy. - Domain errors: map to stable statuses with consistent details.
Then confirm that the client interprets those statuses the same way across retries. If you retry on non-idempotent operations, you’ll see it immediately as duplicate side effects.
Produce a Final Validation Report
A good report is short and specific.
- A table of p50/p95/p99 for unary and per-message metrics for streaming.
- gRPC status distribution under normal and failure-injected runs.
- Evidence that correlation IDs connect client and server logs.
- A list of deviations from success criteria and the exact middleware/handler stage responsible.
Use the report to decide what to change next, but keep the validation pass focused: measure, explain, and verify. If you can’t explain a metric spike in terms of middleware timing, handler timing, or system pressure, the system is still telling you a story you haven’t learned to read yet.