Zig Programming for Systems Performance
1. Systems Performance Goals and Zig’s Execution Model
1.1 Defining Performance Targets for Latency Throughput and Footprint
Performance work starts with targets that are specific enough to measure and constrained enough to guide tradeoffs. If you only say “make it faster,” you’ll get faster in whatever direction is easiest to optimize, not necessarily the direction that matters.
Performance Targets That Actually Guide Design
Latency
Latency is how long a single operation takes from request to completion. For systems that serve interactive workloads, latency often matters more than average throughput.
Define latency targets at the right granularity:
- End-to-end latency: includes parsing, allocation, I/O, and response formatting.
- Service latency: excludes network time if you can isolate it.
- Tail latency: percentiles like p50, p95, p99, because “usually fast” can still be unacceptable.
A practical target format is: p99 end-to-end latency ≤ X ms under a stated load level.
Throughput
Throughput is how much work you complete per unit time. It’s usually measured as operations per second, bytes per second, or requests per second.
Throughput targets must specify:
- Work type: small messages vs large payloads, fixed-size vs variable.
- Concurrency: how many operations are in flight.
- Sustained vs burst: whether you care about steady-state or short spikes.
A practical target format is: sustained throughput ≥ Y ops/s at Z concurrent clients.
Footprint
Footprint is the memory and resource usage that limits scalability and stability. In low-level software, footprint includes:
- Peak heap usage: worst-case allocations during a workload.
- Stack usage: important for deep call graphs and large local buffers.
- Working set size: memory that stays hot in caches.
A practical target format is: peak resident memory ≤ M MiB and max allocations per request ≤ N.
Mind Map: Choosing Targets and Turning Them into Constraints
Turning Targets into Measurable Statements
Targets become useful when they include the “when” and “how.” Here’s a systematic template you can reuse.
- State the operation: what counts as one unit of work.
- State the input shape: typical and worst-case sizes.
- State the load: concurrency and duration.
- State the metric: p99 latency, sustained throughput, peak memory.
- State the constraints: memory cap, allocation cap, CPU budget.
Example: A Request Parser Service
Suppose you’re building a parser that turns bytes into a typed structure.
- Operation: parse one request and validate it.
- Input shape: 200–800 bytes typical, up to 4 KiB worst-case.
- Load: 1, 8, and 32 concurrent requests.
- Targets:
- Latency: p99 end-to-end ≤ 2.5 ms at 32 concurrency.
- Throughput: ≥ 20,000 requests/s sustained at 8 concurrency.
- Footprint: peak heap ≤ 64 MiB; allocations per request ≤ 2.
These numbers don’t have to be perfect on day one, but they must be measurable and tied to the actual workload.
Common Failure Modes and How to Avoid Them
Optimizing the Wrong Metric
If you only track average latency, a small fraction of slow requests can hide behind the mean. Tail percentiles force you to notice the “rare but expensive” paths.
Ignoring Input Distribution
A parser that is fast for short messages but slow for long ones can still meet average throughput while failing real traffic. Include both typical and worst-case input sizes in your test plan.
Letting Footprint Drift
If you don’t cap allocations and peak memory, performance regressions can appear as stability problems: GC pressure, allocator contention, or cache thrash.
A Simple Baseline You Can Trust
Before changing code, establish a baseline that matches your targets’ conditions. Use the same input distribution, concurrency, and measurement scope. Then record:
- p50/p95/p99 latency
- sustained throughput
- peak memory and allocation counts
Once you have that baseline, every improvement has a clear “did it move the target?” answer.
Quick Checklist for This Section
- Latency target includes percentile and scope.
- Throughput target includes concurrency and sustained vs burst.
- Footprint target includes peak memory and allocation behavior.
- Targets specify operation, input shape, and load conditions.
- Baseline measurement matches the target conditions.
1.2 Mapping Workloads to CPU Cache Branch Prediction and Memory Bandwidth
Core Idea
Performance bottlenecks usually show up as either “waiting for data” or “waiting for the next instruction path.” Cache behavior and branch prediction decide how often the CPU can proceed without stalling, while memory bandwidth decides how quickly it can recover when it must fetch from slower levels.
Step 1: Classify the Workload Shape
Start by describing what the program does per unit of work.
- Compute-heavy: lots of arithmetic per byte touched. Cache misses hurt less because the CPU has time to do useful work.
- Memory-heavy: few operations per byte. Cache misses and bandwidth limits dominate.
- Branch-heavy: control flow depends on data. Mispredictions can cost more than a cache miss in tight loops.
A practical way to estimate this without fancy tools is to count bytes moved and branches executed in a representative loop, then compare to the number of arithmetic operations.
Step 2: Understand Cache Levels as a Latency Ladder
Think of caches as multiple “fast lanes” with decreasing speed.
- L1 data cache: tiny and very fast; ideal for hot working sets.
- L2: larger, slower; tolerates moderate working set growth.
- L3: shared and slower; helps when threads share read-mostly data.
- Main memory: slowest; stalls are visible.
Mapping workloads means ensuring the working set for the inner loop fits in the relevant cache level. If it doesn’t, you’ll see repeated stalls even if your code is otherwise efficient.
Step 3: Connect Memory Access Patterns to Cache Hit Rate
Cache hit rate depends on how addresses relate to cache lines.
- Spatial locality: sequential access uses the same cache line before moving on.
- Temporal locality: reusing the same addresses soon after first use.
- Stride: a stride larger than a cache line can skip useful data and reduce hit rate.
- Pointer chasing: each load depends on the previous one, limiting prefetching and increasing stall time.
A simple rule: if your loop touches memory in a way that looks random to the CPU, you’re likely paying the main-memory tax.
Step 4: Connect Branch Prediction to Control Flow Regularity
Branch prediction works best when the branch outcome is predictable.
- Predictable branches: repeated patterns like “mostly true” or “mostly false.”
- Unpredictable branches: outcomes vary with data in a way that lacks repetition.
- Loop branches: usually predictable because iteration counts are stable.
When a branch is mispredicted, the CPU discards work and fetches the correct path. In tight loops, this can become a steady tax.
Step 5: Use a Combined Mental Model
Treat each iteration as a pipeline of events:
- Load data (cache hit or miss)
- Execute instructions (including branches)
- Possibly load more data based on results
If loads miss and branches are unpredictable, the CPU can’t hide latency. If loads hit and branches are predictable, the CPU can keep the pipeline full.
Mind Map: Mapping Workloads to Hardware Bottlenecks
Example: Same Algorithm, Different Data Layout
Suppose you filter records and sum a field.
- Layout A: array of structs
{flag, value} - Layout B: separate arrays
flags[]andvalues[]
If flag is used to decide whether to include value, you may load flag and then conditionally load value. With Layout A, each record load brings both fields, which can be wasteful if many records are filtered out. With Layout B, you can scan flags sequentially (good spatial locality) and only touch values for selected indices. This can reduce memory traffic, but it may introduce a less predictable access pattern to values if selected indices are scattered.
The mapping step is deciding which cost is smaller: extra bytes from Layout A or extra cache misses from scattered values in Layout B.
Example: Reducing Unpredictable Branches in a Hot Loop
Consider a loop that checks a condition per element.
- Branchy form:
if (x > threshold) sum += x; - Branch-reduced form: compute a mask and use it to conditionally add
In Zig, you can often express the second form with arithmetic on booleans or integers, keeping the loop structure uniform. The goal is not to remove branches at all costs, but to avoid branches whose outcomes vary irregularly across iterations.
Step 6: Measure the Right Signals
To map workloads effectively, measure:
- Bytes moved per iteration (indicates cache and bandwidth pressure)
- Branch frequency and predictability (indicates control-flow stalls)
- Time per iteration in a representative hot loop
If bytes moved is high and arithmetic is low, focus on locality and reducing memory streams. If bytes moved is moderate but time is high, inspect branch behavior and dependent loads.
Practical Checklist for Mapping
- Ensure the inner loop touches memory with strong spatial locality.
- Keep the working set small enough for the intended cache level.
- Avoid dependent pointer chains in the hottest path.
- Prefer regular control flow in per-element loops.
- Reduce memory traffic before micro-optimizing arithmetic.
When these pieces line up, you get a loop that runs like it knows where the next data is coming from—because, for once, it does.
1.3 Understanding Zig’s Compilation Model and Its Implications for Code Generation
Zig’s compilation model is best understood as a pipeline that produces a concrete program from generic building blocks. The key performance implication is simple: many decisions happen while compiling, not while running. That means the compiler can generate specialized code paths, remove dead branches, and keep runtime work predictable.
From Source to Concrete Code
Zig starts with source that may contain generic functions, comptime-known values, and conditional logic. During compilation, Zig evaluates what it can at compile time and leaves the rest for runtime. The result is a concrete set of functions and data layouts that match the types and values you actually use.
A practical way to see this is to compare two calls to the same generic function. If the element type differs, Zig will produce different instantiations.
fn sum(comptime T: type, xs: []const T) T {
    var s: T = 0;
    for (xs) |x| s += x;
    return s;
}

pub fn main() void {
    const a = [_]u32{ 1, 2, 3 };
    const b = [_]u64{ 1, 2, 3 };
    _ = sum(u32, a[0..]);
    _ = sum(u64, b[0..]);
}
Even though sum is written once, the compiler can generate two versions because T is known at compile time. That reduces runtime type checks and helps the optimizer reason about arithmetic and loop behavior.
Comptime Values and Specialization Boundaries
Comptime is not “everything is computed at compile time.” It’s “if a value is known at compile time, Zig can use it to shape code.” The boundary matters for performance because it determines what becomes constant and what remains dynamic.
Consider a function that chooses an algorithm based on a comptime parameter.
fn dot(comptime N: usize, a: [N]f32, b: [N]f32) f32 {
    var s: f32 = 0;
    inline for (0..N) |i| {
        s += a[i] * b[i];
    }
    return s;
}
If you call dot(4, ...), the loop can be unrolled because N is comptime-known. If you instead pass N as a runtime value, Zig cannot unroll, and the generated code must handle all possible sizes.
Inline, Unrolled Loops, and Predictable Control Flow
inline for is a direct lever on code generation. It tells the compiler to replicate the loop body for each iteration when the range is comptime-known. This often improves performance by:
- Removing loop overhead.
- Making memory access patterns more explicit.
- Enabling constant propagation into the loop body.
The tradeoff is code size. If N is large, unrolling can bloat the binary and hurt instruction cache behavior. Zig makes this tradeoff visible because you choose when to inline.
Error Sets, Control Flow, and What Gets Kept
Zig’s compilation model also affects error handling. Error sets are part of the type system, so the compiler can often optimize away checks when the error set is empty or when control flow proves a path is impossible.
For example, a function that cannot fail can be written without an error union, and the caller doesn’t need to handle errors. Conversely, if a function returns !T, the generated code must include the runtime branching required to propagate or handle failures.
Memory Layout Decisions Made Early
Type-driven layout is another compile-time win. When you use arrays with known lengths, structs with known field types, and slices with explicit element types, Zig can compute sizes, alignments, and offsets during compilation. That reduces runtime bookkeeping and makes pointer arithmetic straightforward for the optimizer.
A common pattern is to accept slices for flexibility while still keeping element type and bounds information explicit.
Mind Map: Compilation Model to Code Generation
Putting It Together with a Small End-To-End Example
A typical performance-oriented Zig design uses comptime parameters to shape code, slices to keep interfaces efficient, and inline loops only where the iteration count is small and known.
fn scale(comptime N: usize, xs: []f32, factor: f32) void {
    // Caller ensures xs has at least N elements.
    inline for (0..N) |i| {
        xs[i] *= factor;
    }
}

pub fn main() void {
    var buf = [_]f32{ 1, 2, 3, 4 };
    scale(4, buf[0..], 0.5);
}
Here, N drives unrolling, while the slice keeps the function usable with different backing arrays. The compiler can generate a tight sequence of multiply operations for N = 4, with minimal runtime branching.
Summary
Zig’s compilation model turns type and comptime information into concrete code. When values are known early, Zig can specialize functions, unroll loops, and simplify control flow. When values are unknown, Zig generates runtime-safe code that handles variability. The performance art is choosing which variability belongs at compile time and which belongs at runtime.
1.4 Using Zig’s Error Handling and Safety Features Without Sacrificing Speed
Zig’s safety features are not meant to be “free,” but they can be made predictable. The trick is to separate what must be checked from what can be proven, and then to place checks where they cost the least.
Mind Map: Safety and Speed Tradeoffs
Foundational Choices for Failure
Zig gives you three common ways to represent “something went wrong.” An error union like T!E carries a specific failure reason. An optional like ?T represents “no value” without a reason. panic is for conditions you treat as bugs.
For performance, the key is to avoid forcing error propagation inside tight loops when the failure can be handled earlier. If a parser must reject malformed input, do the expensive validation once at the start of the parse function, not on every byte.
Example: boundary validation, then a fast loop.
const std = @import("std");

fn parseDigitsFast(input: []const u8) !u32 {
    if (input.len == 0) return error.Empty;
    if (input.len > 10) return error.TooLong;

    var value: u32 = 0;
    for (input) |c| {
        if (c < '0' or c > '9') return error.InvalidDigit;
        value = value * 10 + @as(u32, c - '0');
    }
    return value;
}
This still checks each digit, but it keeps the control flow simple: one error path per invalid character. If you can guarantee digit-only input from an earlier stage, you can provide a second function that assumes validity and uses unreachable for invariants.
Safety Features That Stay Predictable
Zig’s safety checks include bounds checks for slices and runtime checks for certain operations. The compiler can often remove bounds checks when it can prove indices are within range.
To help it, structure loops around slice lengths and avoid manual index arithmetic that obscures invariants. Prefer iterating with for (slice) |elem, i| when you need indices, because the compiler knows the iteration bounds.
Example: bounds-friendly iteration.
fn sumBytes(data: []const u8) u32 {
    var total: u32 = 0;
    for (data) |b| total += b;
    return total;
}
If you must use indexing, keep the index derived from the loop variable and avoid mixing multiple counters.
Error Propagation Patterns That Don’t Spread
In Zig, try is convenient, but it can also create “error plumbing” that touches many layers. For speed, keep error propagation at the edges of subsystems.
A common pattern is to convert low-level errors into a smaller set of domain errors once, then operate with a clean internal API. That reduces repeated branching and keeps the hot path focused.
Example: map errors once.
const std = @import("std");

fn readHeader(reader: anytype) !u32 {
    const raw = reader.readIntLittle(u32) catch |err| switch (err) {
        error.EndOfStream => return error.Truncated,
        else => return error.BadHeader,
    };
    return raw;
}
Inside the rest of the pipeline, you now deal only with Truncated and BadHeader.
Panic and Unreachable for Programmer Bugs
Using panic or unreachable correctly can reduce runtime checks. The rule of thumb: use panic for conditions that should never happen in valid inputs, and use unreachable when the compiler can treat the path as impossible.
Example: invariant enforcement.
fn indexOfPowerOfTwo(n: u32) u8 {
    if (n == 0) unreachable;
    if ((n & (n - 1)) != 0) unreachable;

    var k: u8 = 0;
    while (n > 1) : (k += 1) n >>= 1;
    return k;
}
This is fast because it avoids returning error values for cases you already ruled out.
Ownership and Safety Without Hidden Costs
Allocator-based memory control is safe when ownership is explicit. Inject the allocator into the function that allocates, return errors normally, and ensure deinitialization happens in the same scope.
A practical approach is to allocate once, then reuse buffers within the function. That keeps error handling from turning into repeated allocation failures in the hot path.
Putting It Together: A Cohesive Strategy
- Validate inputs at subsystem boundaries and return errors there.
- Keep inner loops branch-light by separating “checked” and “assumed” code paths.
- Write loops in a bounds-friendly way so the compiler can remove checks.
- Map low-level errors to a small domain set once, then propagate cleanly.
- Use
unreachablefor invariants you can prove from earlier checks.
Zig rewards code that makes invariants obvious. When the compiler can see the shape of your data and the scope of your failures, safety features become structured control flow rather than scattered overhead.
1.5 Establishing Baselines with Deterministic Builds and Repeatable Measurements
Before you optimize, you need numbers you can trust. A baseline is not just “a benchmark result”; it is a repeatable measurement protocol tied to a specific build configuration, input set, and measurement method. In Zig, deterministic builds help you keep the code generation story consistent, while careful measurement design keeps the runtime story honest.
Deterministic Builds as a Measurement Contract
Determinism means the same source and build settings produce the same executable behavior for the aspects you measure. Start by pinning the build mode and target. Use release-safe for a realistic safety/performance balance, and release-fast only when you intentionally accept more aggressive assumptions. Also pin the target triple so you don’t accidentally compare x86_64 with a different ABI or instruction set.
A practical baseline contract includes:
- Build mode and target
- Compiler version and build flags
- Link mode and any feature toggles
- Input data version and generation method
- Measurement harness settings (warmup, iterations, timing method)
If any of those change, treat the baseline as a new baseline.
Controlling Variables in the Benchmark Harness
Runtime measurements are fragile because systems are busy. Your harness should reduce noise by controlling:
- Warmup: run the workload a few times before timing to stabilize caches and branch predictors.
- Iteration count: enough repetitions to smooth out jitter.
- Timing source: use a monotonic clock, not wall time.
- Allocation behavior: either pre-allocate or measure allocations explicitly.
In Zig, the simplest way to keep allocation noise out of the hot path is to pass an allocator into the function under test and use a fixed allocator strategy. For example, a fixed-size arena can make allocation costs consistent across runs, while still letting you detect accidental growth.
A Repeatable Measurement Workflow
Use a consistent workflow every time:
- Build the baseline binary with pinned settings.
- Generate inputs deterministically from a fixed seed.
- Run warmup iterations without recording.
- Record timing for N iterations.
- Record secondary metrics such as bytes allocated and error counts.
- Repeat the whole run multiple times and summarize.
The key is that you measure the same thing each time. If you change the input size, you changed the workload, not just the code.
Mind Map: Baseline Inputs Build Settings and Measurement
Baseline Mind Map
Example: Deterministic Input Generation and Timing Loop
The following example shows a deterministic input generator and a timing loop that separates warmup from measurement. It also demonstrates capturing allocation counts via an allocator wrapper.
const std = @import("std");

fn genInput(allocator: std.mem.Allocator, seed: u64, n: usize) ![]u8 {
    var rng = std.rand.DefaultPrng.init(seed);
    const bytes = try allocator.alloc(u8, n);
    for (bytes) |*b| b.* = rng.random().int(u8);
    return bytes;
}

fn timeOnce(comptime T: type, f: fn ([]u8) T, input: []u8) u64 {
    const start = std.time.nanoTimestamp();
    _ = f(input);
    return std.time.nanoTimestamp() - start;
}
Now add warmup and repetition. Keep the input fixed across runs so you measure code changes, not data changes.
fn benchmark(f: fn ([]u8) void, input: []u8, warmup: usize, iters: usize) !void {
    var i: usize = 0;
    while (i < warmup) : (i += 1) f(input);

    var best: u64 = std.math.maxInt(u64);
    i = 0;
    while (i < iters) : (i += 1) {
        const t = timeOnce(void, f, input);
        if (t < best) best = t;
    }
    std.debug.print("best_ns={d}\n", .{best});
}
This “best of N” approach is simple and often useful, but you should still repeat the whole benchmark run a few times and compare distributions. If the best time changes wildly between runs, your harness is still measuring noise.
Example: Pinning Build Settings in a Baseline Script
A baseline is only meaningful if you can reproduce it. Capture build identity in a small script or make target so you don’t rely on memory.
# Baseline Build Identity
zig build -Doptimize=ReleaseSafe -Dtarget=x86_64-linux-gnu
# Run with Fixed Seed and Fixed Input Size
./zig-out/bin/bench --seed 2026-02-24 --n 1048576
The date here is just an example seed. The important part is that the seed and input size are explicit and stable.
What to Record Alongside Results
For each baseline, record:
- Build mode, target, and any toggles
- Seed, input size, and input generation method
- Warmup and iteration counts
- Timing metric and unit
- Allocation metrics (if relevant)
When you later compare two versions, you want to be able to say: “Only the code changed.” If you can’t, you don’t have a baseline—you have a guess with extra steps.
2. Comptime Fundamentals and Compile Time Specialization
2.1 What Comptime Means and How It Changes Program Structure
Comptime is Zig’s way of running code during compilation, not during execution. That single fact changes how you structure programs: you can move decisions earlier, generate specialized code, and validate assumptions before the binary exists. The result is often fewer runtime branches, clearer invariants, and less “guessing” at runtime.
What Comptime Is in Practice
In Zig, a value can be known at compile time or only at runtime. Comptime code runs when the compiler can determine inputs. If it can’t, Zig forces you to separate compile-time logic from runtime logic.
A useful mental model is a two-lane program:
- Compile-time lane computes types, constants, and function bodies.
- Runtime lane performs the actual work on real data.
When you write a function that depends on compile-time parameters, Zig can generate a tailored version of that function. When you write a function that depends on runtime values, Zig must keep the logic general.
How Comptime Changes Program Structure
Types Become Computation Inputs
Instead of treating types as fixed labels, Zig lets you compute with them. For example, you can build a function that accepts a type and returns a specialized implementation.
fn sum(comptime T: type, xs: []const T) T {
    var total: T = 0;
    for (xs) |x| total += x;
    return total;
}

pub fn main() void {
    const a = [_]u32{ 1, 2, 3 };
    const s = sum(u32, a[0..]);
    _ = s;
}
Here, T is compile-time. Zig can choose the correct arithmetic and avoid runtime type checks.
Control Flow Can Move Earlier
Runtime loops and branches are still normal, but comptime lets you replace them with compile-time decisions. A common pattern is generating a lookup table or unrolling logic based on a known size.
fn makeMask(comptime bits: u8) u32 {
    return (1 << bits) - 1;
}

pub fn main() void {
    const m = makeMask(5); // computed at compile time
    _ = m;
}
If bits is known, the compiler computes the result and the binary just uses the constant.
Generic Code Becomes Specialization
Zig’s generics are often “compile-time templates.” You write one algorithm, and Zig instantiates it for each set of compile-time parameters. This is why comptime can improve performance: the compiler sees more facts.
You Must Keep Runtime Data Out of Comptime
Comptime code can’t depend on runtime values. If you try, Zig will complain because the compiler can’t evaluate it. This pushes you toward clean boundaries: compute decisions from compile-time inputs, then run the algorithm on runtime data.
Mind Map: Comptime’s Effects on Structure
A Systematic Example: Compile-Time Dispatch with Runtime Data
Suppose you want a function that parses bytes differently depending on a compile-time mode. The mode is known when you build the program, but the bytes arrive at runtime.
const Mode = enum { ascii, hex };

fn parseByte(comptime mode: Mode, b: u8) u8 {
    return switch (mode) {
        .ascii => b,
        .hex => blk: {
            const v = if (b >= '0' and b <= '9') b - '0'
                else if (b >= 'a' and b <= 'f') b - 'a' + 10
                else if (b >= 'A' and b <= 'F') b - 'A' + 10
                else 0;
            break :blk v;
        },
    };
}

pub fn main() void {
    const input = [_]u8{ 'A', 'f' };
    const out0 = parseByte(.hex, input[0]);
    const out1 = parseByte(.hex, input[1]);
    _ = out0 + out1;
}
Because mode is compile-time, Zig can compile only the relevant branch for each instantiation. The runtime loop over input stays simple, and the parsing logic is as tight as the chosen mode allows.
The Key Takeaway
Comptime is not just “code that runs earlier.” It is a structural tool: it lets you turn compile-time knowledge into specialized code and earlier validation, while keeping runtime code focused on processing data. When you design with that split in mind, your program tends to become both faster and easier to reason about—because fewer decisions are left to runtime.
2.2 Writing Comptime Parameters for Types Values and Behaviors
Comptime parameters let you move decisions from runtime to compilation. That means fewer branches, tighter loops, and clearer contracts. The trick is to treat comptime parameters as a design tool: you specify what can vary, constrain how it varies, and keep the runtime surface small.
Foundational Model for Comptime Parameters
A comptime parameter is evaluated during compilation, so you can use it to select types, compute constants, and generate specialized code paths. In Zig, you typically write comptime T: type for types, comptime N: usize for values, and comptime f: fn(...) ... for behaviors.
A useful mental rule: if a choice affects layout, calling convention, or loop structure, it belongs in comptime. If it only affects data, keep it runtime.
Types Parameters for Layout and Interfaces
When you accept a type parameter, you can write one algorithm that works for many element types while still producing specialized code.
Example: a generic fixed-size buffer that knows its element type and capacity at compile time.
const std = @import("std");

pub fn FixedBuffer(comptime T: type, comptime N: usize) type {
    return struct {
        data: [N]T = undefined,
        len: usize = 0,

        pub fn push(self: *Self, x: T) void {
            self.data[self.len] = x;
            self.len += 1;
        }
    };
}
Because N and T are comptime, the array layout is fixed. That removes bounds checks you would otherwise need for dynamic growth, and it keeps iteration predictable.
Values Parameters for Constants and Loop Structure
Value parameters are ideal for sizes, strides, masks, and thresholds. They let you compute derived constants once.
Example: compile-time mask for fast indexing.
pub fn RingIndex(comptime Pow2: usize) type {
    comptime {
        if ((Pow2 & (Pow2 - 1)) != 0) @compileError("Pow2 must be power of two");
    }
    const Mask = Pow2 - 1;

    return struct {
        pub fn idx(i: usize) usize {
            return i & Mask;
        }
    };
}
The @compileError runs at compile time, so invalid configurations fail early. The runtime function becomes a single & operation.
Behaviors Parameters for Zero-Cost Customization
A behavior parameter is usually a function or a struct with a known interface. The goal is to inject policy without paying for dynamic dispatch.
Example: a specialized “apply” that calls a comptime-provided function.
pub fn apply(comptime F: fn (u32) u32, xs: []u32) void {
    for (xs) |*x| {
        x.* = F(x.*);
    }
}

fn square(x: u32) u32 { return x * x; }
When F is comptime, the compiler can inline it. If you pass a different function, you get a different compiled version.
Mind Map: Choosing What Becomes Comptime
Systematic Pattern: Constrain, Compute, Generate
- Constrain: Use
@compileErrorto enforce invariants like power-of-two sizes or supported element types. - Compute: Derive constants from comptime values so runtime code stays small.
- Generate: Use comptime parameters to select code paths, unroll loops, or define specialized helper types.
Example: a safe, specialized byte parser that chooses the integer width at compile time.
pub fn parseIntLE(comptime T: type, bytes: []const u8) !T {
    comptime {
        if (@typeInfo(T) != .Int) @compileError("T must be an integer type");
    }
    if (bytes.len != @sizeOf(T)) return error.BadLength;

    var v: T = 0;
    inline for (0..@sizeOf(T)) |i| {
        v |= @as(T, bytes[i]) << @intCast(u8, 8 * i);
    }
    return v;
}
The inline for is driven by a comptime size, so the loop unrolls. The type constraint ensures the shifts and casts are valid.
Practical Guidelines That Keep Code Understandable
Prefer comptime parameters that are easy to name and easy to validate. If a parameter can take many values, consider whether you’re creating too many compiled variants. Also, keep runtime signatures stable: accept slices and return results, while using comptime parameters to shape the internal machinery.
A good test is to ask what the compiler would need to know to make the runtime code smaller. If the answer is “the size, the element type, or the policy function,” then comptime is doing the right job.
2.3 Using Inline and Unrolled Logic for Hot Paths with Predictable Code
Hot paths are where you pay for every extra branch, call frame, and bounds check. Zig gives you tools to keep the generated code predictable: inline to encourage direct substitution, and unrolling to trade a little code size for fewer loop-control operations. The goal is not “more clever,” but “fewer surprises.”
Inline as a Controlled Substitution
Inlining is most effective when the callee is small, frequently called, and its behavior depends on compile-time information. In Zig, you typically use inline on a function call site or on a function definition, depending on how you want control.
Start with a baseline: write a clear function that does one job. Then mark the call as inline when the compiler can see the body and when the call is in a tight loop.
const std = @import("std");

fn clampU8(x: u8, lo: u8, hi: u8) u8 {
    if (x < lo) return lo;
    if (x > hi) return hi;
    return x;
}

pub fn scaleAndClamp(dst: []u8, src: []const u8, gain: u8) void {
    for (src, 0..) |v, i| {
        const scaled: u8 = @intCast(u8, v * gain);
        dst[i] = @call(.auto, clampU8, .{ scaled, 10, 240 });
    }
}
To encourage substitution, use inline at the call site when you know the function is tiny and stable.
pub fn scaleAndClampInline(dst: []u8, src: []const u8, gain: u8) void {
    for (src, 0..) |v, i| {
        const scaled: u8 = @intCast(u8, v * gain);
        dst[i] = inline clampU8(scaled, 10, 240);
    }
}
This keeps the loop body self-contained, which helps the compiler reason about control flow and register allocation. If the function grows, you should stop inlining and return to a normal call.
Unrolling Loops with Compile-Time Bounds
Unrolling removes loop overhead and can reduce branch mispredictions when the loop body is simple. Zig’s comptime makes it practical when the iteration count is known at compile time.
A common pattern is processing fixed-size blocks, like 16 bytes at a time.
fn process16(dst: *[16]u8, src: *const [16]u8) void {
    inline for (0..16) |i| {
        dst.*[i] = src.*[i] ^ 0x5A;
    }
}
inline for is the unrolling mechanism: the loop index range is compile-time, so the compiler emits 16 copies of the body. This is predictable because there is no runtime loop counter.
Choosing Between Inline and Unrolling
Use inline when:
- The callee is small.
- The call is inside a hot loop.
- The function arguments are simple and don’t hide large control flow.
Use unrolling when:
- The iteration count is fixed or can be made fixed.
- The loop body is straight-line or has limited branching.
- You want to eliminate loop-control overhead.
If you unroll a loop with complex branching, code size can balloon and instruction cache pressure can become the bottleneck. Predictability is about the generated structure, not about “always unroll.”
Mind Map: Predictable Hot Code
Advanced Details That Keep Code Predictable
- Keep the loop body free of hidden work. If the body calls another function, consider whether that function should also be inlined or rewritten as a small expression.
- Prefer compile-time constants for unrolled ranges. If the range depends on runtime values, unrolling won’t happen, and you’ll get a normal loop.
- Watch for bounds checks. When you index into slices, Zig can sometimes prove safety. If it can’t, you may pay for checks inside the hot loop. Fixed-size arrays like
[16]u8often make safety obvious. - Use
inlineto reduce control-flow indirection. A call through a function pointer or a large generic instantiation can prevent the compiler from producing a single predictable sequence.
Example: Fixed-Block Processing with a Clean Fallback
When input sizes vary, handle the fixed block with unrolling, then finish the remainder with a normal loop.
fn xorBlock(dst: []u8, src: []const u8) void {
    var i: usize = 0;
    while (i + 16 <= src.len) : (i += 16) {
        var d: [16]u8 = undefined;
        var s: [16]u8 = undefined;
        @memcpy(&s, src[i .. i + 16]);
        process16(&d, &s);
        @memcpy(dst[i .. i + 16], &d);
    }
    while (i < src.len) : (i += 1) {
        dst[i] = src[i] ^ 0x5A;
    }
}
The fixed-block path is predictable: it has no runtime loop counter inside process16. The remainder path is simple and correct, without forcing unrolling where it doesn’t apply.
Practical Checklist for Hot Paths
- Is the iteration count known at compile time for unrolling?
- Is the helper function small enough to inline without code bloat?
- Does the hot loop avoid bounds-check uncertainty?
- Does the generated structure stay simple enough for the instruction cache?
If you answer “yes” to those, inline and unrolled logic usually improves both speed and reasoning clarity. The code becomes longer in places, but the control flow becomes easier to predict—like swapping a rickety ladder for a fixed set of steps.
2.4 Building Compile Time Dispatch Tables and Function Selection
When you need to choose behavior based on a value that is known at compile time, Zig lets you move that decision out of the hot path. The result is usually fewer branches at runtime and clearer intent: “this type of input uses this exact function.” The trick is to structure your dispatch so the compiler can see the key and generate only the needed code.
Foundational Idea: Compile Time Keys and Specialization
A dispatch table is just a mapping from a compile-time key to a function (or a function-like value). The key might be an enum tag, a comptime-known integer, or a type. The function selection can happen in two common ways:
- Indexing a table where the index is comptime-known.
- Selecting with comptime branching so only one branch is compiled.
Both approaches benefit from the same rule: if the key is not comptime-known, you’ll end up with runtime selection and the dispatch table becomes less useful.
Mind Map: Dispatch Table Design
Example: Enum to Function Table
Suppose you parse a protocol field where the tag determines how to interpret bytes. You want the tag-to-parser mapping resolved at compile time.
const std = @import("std");

const Tag = enum { u8, i32, f32 };

fn parseU8(bytes: []const u8) u32 {
    return bytes[0];
}
fn parseI32(bytes: []const u8) u32 {
    return @bitCast(u32, bytes[0..4].*);
}
fn parseF32(bytes: []const u8) u32 {
    return @bitCast(u32, bytes[0..4].*);
}

fn parserFor(comptime tag: Tag) fn ([]const u8) u32 {
    const table = [_]fn ([]const u8) u32{
        parseU8,
        parseI32,
        parseF32,
    };
    return table[@intFromEnum(tag)];
}

pub fn parse(comptime tag: Tag, bytes: []const u8) u32 {
    const f = parserFor(tag);
    return f(bytes);
}
Key points:
- The table is created inside
parserFor, so it’s tied to the compile-time context. - The function signatures are uniform:
fn ([]const u8) u32. That uniformity is what makes the table easy to reason about. - When
parseis called with a comptime-knowntag, the compiler can inline the selected function.
Example: Compile Time Branching with Exhaustiveness
A table is convenient, but sometimes you want explicit control and better error messages. A switch on a comptime-known enum tag is a clean alternative.
const Tag = enum { u8, i32, f32 };

fn parseU8(bytes: []const u8) u32 { return bytes[0]; }
fn parseI32(bytes: []const u8) u32 { return @bitCast(u32, bytes[0..4].*); }
fn parseF32(bytes: []const u8) u32 { return @bitCast(u32, bytes[0..4].*); }

pub fn parse(comptime tag: Tag, bytes: []const u8) u32 {
    return switch (tag) {
        .u8 => parseU8(bytes),
        .i32 => parseI32(bytes),
        .f32 => parseF32(bytes),
    };
}
This form is often best when:
- You want the compiler to enforce exhaustiveness.
- You prefer readable mapping logic over index arithmetic.
Advanced Detail: Making the Signature Work for You
Dispatch tables are easiest when every target function shares the same signature. If you need different signatures, normalize them. For example, wrap results into a common return type, or accept a shared context struct.
A practical pattern is:
- Define a
Contextstruct with fields needed by all handlers. - Make every handler
fn (ctx: *Context, input: []const u8) ResultType.
That way, the table stores only one function type, and you avoid awkward adapters.
Advanced Detail: Avoiding Accidental Runtime Dispatch
If the key is not comptime-known, Zig will still let you index a table, but you’ll pay runtime selection costs. You can guard against this by:
- Requiring
comptimeon the key parameter. - Keeping the dispatch function generic over the key so callers must supply a comptime value.
When you see comptime in the signature, treat it as a contract: “this selection happens during compilation.”
Mind Map: Common Failure Modes
Putting It Together: Choosing Between Table and Switch
Use a dispatch table when:
- The mapping is large and regular.
- You want a compact representation.
- The enum values map cleanly to indices.
Use comptime switch when:
- The mapping is small or irregular.
- You want the compiler to enforce completeness.
- You care about readable, direct mapping logic.
Either way, the goal is the same: make the compiler pick the right function while the program is being built, so the runtime code stays tight and predictable.
2.5 Avoiding Common Comptime Pitfalls Such as Excessive Instantiation
Comptime is powerful because it moves work from runtime to compilation. The downside is that you can accidentally ask the compiler to generate a mountain of specialized code. When that happens, build times rise, binaries bloat, and error messages get… educational in the worst way.
The Core Problem
Excessive instantiation usually comes from one of these patterns:
- Comptime parameters that vary too much: a generic function is specialized for many distinct values, not just types.
- Comptime recursion or nested generics: a small generic calls another generic with new comptime parameters.
- Unbounded compile-time loops: comptime code iterates over large ranges or data structures.
- Inlining everything: “just make it inline” turns into “generate it everywhere.”
A good rule: specialize on what must be known early (types, sizes, layout decisions), but keep runtime variability runtime.
A Mind Map of Instantiation Sources
Foundational Guardrails
Prefer Type Specialization over Value Specialization
If you write a function that takes a comptime integer, it will generate a new version for each integer used. That’s fine for a small set of sizes, like 4, 8, 16. It’s not fine for “every possible length.”
Bad pattern:
fn readN(comptime N: usize, buf: []u8) void {
    // Generates a new function for each N used.
    _ = buf;
}
Better approach: specialize on element type or alignment, but pass lengths at runtime.
Keep Comptime Loops Small and Bounded
A comptime loop that runs over a large range multiplies work by the number of instantiations. If the loop depends on a comptime parameter, you’ve created a “compile-time cartesian product.”
A safer pattern is to move large iteration to runtime:
fn process(buf: []u8) void {
    // Runtime loop: one function, many inputs.
    for (buf) |b| {
        _ = b;
    }
}
Use comptime loops for small fixed tables, like generating a lookup for 16 nibble values.
Advanced Details That Actually Matter
Watch for Nested Generics with Expanding Parameters
Consider a generic that calls another generic and forwards a comptime value. If the first generic is instantiated many times, the second one multiplies the count.
A common fix is to “collapse” the parameter earlier. For example, if you only need N to decide a strategy among a few options, map N to a small enum at comptime, then branch on that enum.
Use Runtime Branching for High-Cardinality Variability
If a comptime parameter can take many distinct values in real usage, runtime branching is often cheaper overall. The compiler can still optimize the hot path if the branch condition is predictable, and you avoid generating a new copy of the function for every value.
Reduce Inlining Scope
Inlining is not inherently bad, but it can amplify code size. If you inline a generic helper inside a frequently instantiated function, you may end up duplicating the helper body across many instantiations.
A practical approach is:
- Inline small, leaf-level operations that are clearly beneficial.
- Avoid inlining large functions that contain loops or multiple branches.
- Keep “policy” functions non-inline so they remain single copies.
Prefer Precomputed Tables over Recomputing at Each Instantiation
If you compute the same compile-time data for every instantiation, you’re paying repeatedly. When the computed result depends only on a small set of parameters, store it in a const scoped to the instantiation boundary, not inside inner loops.
Concrete Example: Strategy Selection Without Code Explosion
Suppose you want different parsing strategies based on a size. If you generate a new parser for every size, you’ll get a new parser for every input length you ever test.
Instead, bucket sizes into a few categories at comptime, then use one runtime parser per category.
const Strategy = enum { Small, Medium, Large };

fn strategyFor(comptime N: usize) Strategy {
    if (N <= 32) return .Small;
    if (N <= 256) return .Medium;
    return .Large;
}

fn parse(comptime N: usize, buf: []const u8) void {
    const s = strategyFor(N);
    switch (s) {
        .Small => {},
        .Medium => {},
        .Large => {},
    }
    _ = buf;
}
This still uses comptime where it helps, but it limits the number of distinct generated bodies to the number of categories, not the number of possible N values.
Quick Checklist
- Are any comptime parameters high-cardinality in real usage?
- Do comptime loops iterate over large ranges?
- Does one generic forward comptime values into another generic?
- Are you inlining functions that contain substantial logic?
- Can you bucket or map comptime values into a small set of strategies?
If you answer “yes” to the first three, you likely have instantiation growth. If you answer “yes” to the last two, you probably have a straightforward path to keep builds fast and code size under control.
3. Memory Control with Allocators and Ownership Boundaries
3.1 Choosing Allocation Strategies for Pools Arenas and Stack Backed Buffers
Allocation strategy is mostly about lifetime shape. If you know how long objects live, you can pick an allocator that makes the common case cheap and the cleanup predictable. In Zig, that choice is explicit: you pass an allocator, you decide where memory comes from, and you structure deinitialization so it matches reality.
Lifetime Shapes and What They Imply
Start with three common lifetime patterns:
- Many objects, same short lifetime: e.g., parsing one request, building a temporary index, formatting one log line. This usually fits an arena.
- Many objects, repeated reuse: e.g., fixed-size nodes in a queue, connection objects, message buffers. This usually fits a pool.
- Single scope, strictly nested lifetime: e.g., scratch buffers inside one function call chain. This usually fits stack-backed buffers.
A good rule: if you can free everything at once, prefer arena-like cleanup; if you need to free individual items frequently, prefer pool-like reuse; if you can avoid heap entirely, prefer stack-backed storage.
Mind Map: Allocation Strategy Selection
Pools: Reuse for Frequent Individual Lifetimes
A pool is best when you allocate and free items of the same type repeatedly, and you want predictable performance. Internally, a pool typically keeps a free list of previously used slots.
Example: a pool for fixed-size nodes used in a work queue.
const Node = struct { next: ?*Node, value: u32 };

const NodePool = struct {
    storage: []Node,
    free_head: ?*Node,

    pub fn init(storage: []Node) NodePool {
        var i: usize = 0;
        while (i + 1 < storage.len) : (i += 1) {
            storage[i].next = &storage[i + 1];
        }
        if (storage.len > 0) storage[storage.len - 1].next = null;
        return .{ .storage = storage, .free_head = if (storage.len > 0) &storage[0] else null };
    }

    pub fn alloc(self: *NodePool) ?*Node {
        const head = self.free_head orelse return null;
        self.free_head = head.next;
        return head;
    }

    pub fn free(self: *NodePool, node: *Node) void {
        node.next = self.free_head;
        self.free_head = node;
    }
};
Key details:
- The pool has a fixed capacity, so allocation can fail; handle that explicitly.
- Returning a node must happen only when no other code still uses it.
- Pool storage is contiguous, which helps cache behavior.
Arenas: Bulk Lifetime Cleanup for Short Phases
An arena is a bump allocator: each allocation advances a pointer. Deallocation is usually “reset the arena” rather than freeing individual blocks.
Example: parse one message into temporary structures, then discard everything together.
const std = @import("std");

pub fn parseMessage(arena: *std.heap.ArenaAllocator, input: []const u8) ![]u8 {
    const alloc = arena.allocator();
    const out = try alloc.alloc(u8, input.len);
    std.mem.copy(u8, out, input);
    return out;
}
Usage pattern:
- Create an arena per request or per phase.
- Pass
arena.allocator()down the call stack. - After the phase, reset the arena so all allocations become invalid at once.
Safety boundary:
- Any pointer returned from arena allocations must not outlive the arena reset. That’s not a limitation; it’s the contract.
Stack-Backed Buffers: Avoid Heap for Nested Scratch
Stack-backed buffers are the simplest and fastest when the lifetime is strictly nested. You allocate a fixed-size array (or a slice view into it) on the stack, then write into it.
Example: build a small formatting buffer inside one function.
const std = @import("std");

pub fn formatSmall(id: u32) ![]u8 {
    var buf: [64]u8 = undefined;
    const s = try std.fmt.bufPrint(&buf, "id={d}", .{id});
    return s;
}
Important nuance: returning s as a slice is only safe if the caller consumes it before the function returns. If you need to return data beyond the scope, you must copy it into a longer-lived allocation (arena or heap).
Choosing Between Them Without Guessing
Use this decision checklist:
- Do you free individual objects at arbitrary times? Choose a pool.
- Do you free everything together at phase end? Choose an arena.
- Is the lifetime strictly within one call chain? Choose stack-backed buffers.
- Is capacity bounded and known? Pools and stack buffers shine.
- Is allocation count high but lifetimes uniform? Arenas reduce overhead.
Finally, make the lifetime shape visible in your API. If a function takes an allocator, document whether it expects an arena-like lifetime or a pool-like one by how long returned pointers remain valid. That single clarity point prevents most real-world memory bugs.
3.2 Understanding Allocator Interfaces and Error Propagation Patterns
Allocator interfaces in Zig are designed to make two things explicit: who owns memory and what can go wrong. Once you see allocators as “a contract plus a failure channel,” the rest of the patterns become straightforward.
Allocator Interfaces as Contracts
An allocator is typically passed in as a value that implements methods like alloc, resize, and free. Even when the concrete allocator type differs, the interface stays consistent so your code can focus on behavior rather than implementation.
The contract has three practical parts:
- Inputs are precise: you provide an element count and alignment expectations. If you pass the wrong sizes, you’re asking for the wrong memory.
- Outputs are explicit: allocation returns a slice (or pointer plus length) that describes usable memory.
- Failures are explicit: allocation can fail, and the failure is represented in the type system.
A key detail: allocators don’t “fix” your program. They either provide memory or report failure. Your code decides how to respond.
Error Propagation Patterns That Stay Predictable
In Zig, allocation failures are commonly represented as an error set (often including OutOfMemory). The most common pattern is to propagate errors upward with try, so callers decide the policy.
Consider a function that builds a buffer. The function should not silently ignore failure, because that would force later code to handle invalid memory.
const std = @import("std");

pub fn buildMessage(allocator: std.mem.Allocator, text: []const u8) ![]u8 {
    const out = try allocator.alloc(u8, text.len + 1);
    std.mem.copy(u8, out[0..text.len], text);
    out[text.len] = 0;
    return out;
}
This is the simplest propagation pattern: allocate, fill, return. The caller receives either a valid slice or an error.
Freeing on the Way Out
When you allocate multiple resources, you need a consistent cleanup strategy. Zig’s defer works well because it ties cleanup to control flow.
pub fn parseTwo(allocator: std.mem.Allocator, a: []const u8, b: []const u8) !struct {
    left: []u8,
    right: []u8,
} {
    var left = try allocator.alloc(u8, a.len);
    errdefer allocator.free(left);

    var right = try allocator.alloc(u8, b.len);
    errdefer allocator.free(right);

    std.mem.copy(u8, left, a);
    std.mem.copy(u8, right, b);

    errdefer allocator.free(right);
    return .{ .left = left, .right = right };
}
The idea is simple: errdefer runs only if the function returns an error. That means successful returns skip cleanup, while failing returns release everything already allocated.
Mind Map: Allocator Interfaces and Error Flow
Advanced Details: Resize and Partial Ownership
Resizing introduces a subtlety: you may need to preserve old data or update references only after success. The safe approach is to treat resize as a transaction: either it succeeds and you adopt the new slice, or it fails and you keep the old one.
A typical pattern is:
- Call
resizewith the old slice. - If it succeeds, update your slice variable.
- If it fails, return the error without losing the original slice.
This keeps ownership unambiguous and prevents “half-updated” state.
Advanced Details: Designing Functions Around Ownership
A function that allocates should clearly communicate ownership by its signature. If it returns ![]u8, the caller owns the returned slice and must free it. If it takes a buffer parameter, it should document whether it writes into existing memory or may reallocate.
When you structure APIs this way, error propagation becomes mechanical: allocation errors bubble up with try, and cleanup happens only for allocations made inside the failing function.
Putting It Together
A good mental model is: allocators are services, errors are receipts, and cleanup is the accounting. If you always propagate allocation failures immediately and use errdefer for partial allocations, you get code that is both safe and easy to reason about—without turning every function into a maze of manual checks.
3.3 Designing Ownership Boundaries with Clear Lifetimes and Deinitialization
Ownership boundaries answer two questions: who is responsible for freeing memory, and when is it safe to do so. In Zig, you make those answers explicit by pairing allocation with deinitialization and by ensuring that any borrowed views never outlive the data they reference.
Core Concepts First
A useful mental model is three layers:
- Owner: holds the allocator and the backing storage.
- Borrower: receives a slice or pointer view that does not free anything.
- Lifetime boundary: the scope in which the owner remains valid.
In practice, the lifetime boundary is usually the lexical scope of a variable, but it can also be enforced by types and function signatures.
The Deinit Contract
A deinit function is a contract with a specific meaning: after deinit, the value must not be used, and any borrowed views derived from it must also be considered invalid. Zig does not automatically prevent misuse, so the contract must be clear in naming and structure.
A common pattern is:
initreturns a fully constructed owner.deinitreleases resources and leaves the owner in a state where callingdeinitagain is either impossible or harmless.
To keep the contract honest, prefer designs where the owner stores everything needed to clean up, including allocator references.
Mind Map: Ownership and Lifetime Flow
Designing Types That Make Lifetimes Obvious
Start with a container that owns memory and exposes read-only access.
const std = @import("std");

pub const Buffer = struct {
    allocator: std.mem.Allocator,
    data: []u8,

    pub fn init(allocator: std.mem.Allocator, n: usize) !Buffer {
        var b = Buffer{ .allocator = allocator, .data = try allocator.alloc(u8, n) };
        return b;
    }

    pub fn deinit(self: *Buffer) void {
        self.allocator.free(self.data);
        self.data = &[_]u8{}; // make misuse easier to notice
    }

    pub fn bytes(self: *const Buffer) []const u8 {
        return self.data;
    }
};
Two details matter for ownership boundaries:
Bufferstores the allocator, sodeinitdoes not depend on external state.bytesreturns[]const u8, a borrowed view. It does not free memory and it cannot extend the lifetime beyondBuffer.
Example: Borrowed Views That Stay Inside the Boundary
This code is safe because the borrowed slice is used before deinit.
const std = @import("std");

pub fn demo(allocator: std.mem.Allocator) !void {
    var b = try Buffer.init(allocator, 16);
    defer b.deinit();

    const view = b.bytes();
    std.debug.print("len={d} first={any}\n", .{ view.len, view[0] });
}
If you try to return view from demo, you would be forcing a borrowed reference to escape the lifetime boundary. Zig will not magically fix that; the API should be structured so the owner outlives the borrower.
Example: Returning an Owner Instead of a Borrow
When callers need access beyond the current scope, return the owner, not the borrowed slice.
pub fn makeBuffer(allocator: std.mem.Allocator) !Buffer {
    var b = try Buffer.init(allocator, 32);
    // caller owns b and will call deinit
    return b;
}
Now the lifetime boundary is explicit: the caller’s scope controls when deinit happens.
Advanced Details Without the Confusion
Prefer deinit on a Pointer Receiver
Using deinit(self: *T) allows you to invalidate fields after freeing. That makes accidental reuse less likely to silently work.
Make Double-Free Hard
If your design can naturally prevent double-free, do it. If not, you can set freed slices to an empty slice as shown, or store a boolean flag like initialized and check it in deinit.
Keep Borrowed Data Out of Long-Lived Structures
If you store a slice inside another struct, that struct becomes a borrower. It must either:
- also store the owner (so it can keep the lifetime boundary), or
- be parameterized so the borrower cannot outlive the owner.
In Zig, the simplest safe approach is to store the owner or to pass the borrowed slice only to functions that complete within the boundary.
Practical Checklist
- Every allocation has a matching deallocation in
deinit. - The owner stores enough information to free correctly, usually the allocator.
- Borrowed views are returned as slices/pointers with no freeing responsibility.
- Borrowed views are never used after
deinit. - APIs return owners when lifetimes must extend; they return borrows only for short-lived access.
When these rules are followed, ownership boundaries become a predictable part of the code rather than a thing you have to remember every time you read it.
3.4 Implementing Custom Allocators for Performance Critical Components
Custom allocators let you control where memory comes from, how it’s laid out, and what happens on allocation failure. In Zig, you typically implement an allocator by providing an Allocator-compatible interface that routes alloc, resize, and free to your own logic. The key is to keep the fast path small and predictable, while still making ownership rules explicit.
Core Concepts That Make Custom Allocators Work
A custom allocator is easiest to reason about when you separate three concerns:
- Storage: the backing memory region (heap, arena buffer, slab pages, or a fixed pool).
- Policy: how you choose a block size, alignment, and placement strategy.
- Accounting: how you track free space, detect misuse, and handle failures.
For performance-critical components, the policy usually aims to reduce fragmentation and avoid per-allocation overhead. For safety, the accounting should catch obvious errors early in debug builds.
Mind Map: Custom Allocator Design
Choosing a Strategy Based on Allocation Patterns
Before writing code, identify the allocation pattern:
- Many same-size objects: use a fixed-size pool or slab. This makes allocation O(1) with minimal metadata.
- Short-lived bursts: use an arena. Allocation is a bump pointer; freeing is usually “reset the arena,” not per-object.
- Mixed sizes with moderate churn: use size classes with free lists. You trade some internal fragmentation for speed.
A good rule: if you can group allocations into a small set of sizes, size classes usually win.
Implementing a Fixed-Size Pool Allocator
A fixed-size pool is a clean starting point. You pre-allocate a buffer, then maintain a free list of blocks. Each block stores a pointer to the next free block.
Below is a minimal pool allocator skeleton. It assumes the pool is initialized with a backing slice and that block_size is already rounded up for alignment and metadata needs.
const std = @import("std");

pub const Pool = struct {
    buf: []u8,
    free_head: ?*anyopaque,

    pub fn init(buf: []u8, block_size: usize) Pool {
        var p = Pool{ .buf = buf, .free_head = null };
        var i: usize = 0;
        while (i + block_size <= buf.len) : (i += block_size) {
            const block_ptr = @ptrCast(*anyopaque, buf[i..].ptr);
            @ptrCast(*?*anyopaque, block_ptr).* = p.free_head;
            p.free_head = block_ptr;
        }
        return p;
    }
};
To integrate with Zig’s allocator ecosystem, you provide methods that match the allocator interface. The fast path for alloc pops from free_head. The fast path for free pushes back.
pub fn alloc(self: *Pool, comptime T: type, n: usize) ![*]T {
    if (n != 1) return error.OutOfMemory;
    if (self.free_head == null) return error.OutOfMemory;
    const block = self.free_head.?;
    self.free_head = @ptrCast(*?*anyopaque, block).*;
    return @ptrCast([*]T, block);
}

pub fn free(self: *Pool, ptr: anytype) void {
    const block_ptr = @ptrCast(*anyopaque, ptr);
    @ptrCast(*?*anyopaque, block_ptr).* = self.free_head;
    self.free_head = block_ptr;
}
This example is intentionally strict: it only supports n == 1. In real code, you’d implement alloc for arbitrary size and alignment by selecting a size class, or you’d expose a typed pool API and keep it out of generic allocator paths.
Handling Alignment and Size Classes Without Slowdowns
If you want a pool to satisfy arbitrary size and alignment, you need a mapping step. The mapping should be cheap:
- Round
sizeup to a class boundary. - Choose the class index using integer math.
- Ensure each class’s blocks are aligned to the maximum alignment it will serve.
A common mistake is to “fix alignment” by over-allocating per request. That turns a constant-time allocator into a variable-time one with extra bookkeeping.
Making Failure Behavior Predictable
Custom allocators must decide what happens when memory is exhausted. For performance-critical code, returning error.OutOfMemory quickly is often better than attempting fallback allocations. If you need fallback, do it at a higher level where you can control the policy.
Example: Injecting the Allocator into a Component
A practical pattern is allocator injection: your component accepts an allocator and uses it for all internal allocations, so you can swap in the pool during performance tests.
const std = @import("std");

pub fn RingBuffer(comptime T: type) type {
    return struct {
        alloc: std.mem.Allocator,
        data: []T,

        pub fn init(alloc: std.mem.Allocator, n: usize) !@This() {
            var self = @This(){ .alloc = alloc, .data = &[_]T{} };
            self.data = try self.alloc.alloc(T, n);
            return self;
        }

        pub fn deinit(self: *@This()) void {
            self.alloc.free(self.data);
        }
    };
}
When you use a pool-backed allocator for T, the ring buffer’s allocation becomes predictable, and its deinitialization becomes a single free operation per slice.
Validation Mindset for Custom Allocators
After implementing the allocator, validate three things:
- Correctness: allocated pointers are within the backing buffer and are not double-freed.
- Alignment: returned pointers meet the requested alignment.
- Accounting: allocation counts and free list integrity remain consistent under stress.
A small amount of instrumentation in debug builds pays off quickly, because allocator bugs tend to fail later and farther away from the cause.
3.5 Verifying Allocation Behavior With Instrumentation and Debug Builds
Performance work is easier when you can see what allocations are doing. In Zig, you can verify allocation behavior by combining allocator instrumentation with debug builds that keep safety checks and clearer failure modes. The goal is not to eliminate every allocation blindly, but to confirm where allocations happen, how often they occur, and whether their lifetimes match your intent.
Foundations: What You Are Actually Verifying
Start by defining three observable properties:
- Allocation count: how many allocation calls happen per operation.
- Allocated bytes: how many bytes are requested and how much is retained.
- Lifetime correctness: whether frees match allocations and whether memory is used after free.
A common mistake is to measure only “bytes allocated” while ignoring “how many allocations.” Many small allocations can be worse than fewer large ones, even if total bytes are similar.
Instrumentation Strategy: Wrap the Allocator
Zig’s allocator interface makes it straightforward to wrap an allocator with counters and optional logging. In debug builds, you can also rely on safety checks to catch misuse earlier.
Below is a minimal counter wrapper that tracks allocation and free calls. It assumes you already have an underlying allocator (like a general-purpose allocator) and want to observe behavior.
const std = @import("std");

pub const CountingAllocator = struct {
    inner: std.mem.Allocator,
    allocs: usize = 0,
    frees: usize = 0,
    bytes_alloc: usize = 0,

    pub fn allocator(self: *CountingAllocator) std.mem.Allocator {
        return .{
            .ptr = self,
            .vtable = &.{
                .alloc = allocFn,
                .resize = resizeFn,
                .free = freeFn,
            },
        };
    }

    fn allocFn(ctx: *anyopaque, n: usize, align: u29, ra: usize) ?[*]u8 {
        _ = align; _ = ra;
        const self: *CountingAllocator = @ptrCast(@alignCast(ctx));
        self.allocs += 1;
        self.bytes_alloc += n;
        return self.inner.rawAlloc(n, align, ra);
    }

    fn resizeFn(ctx: *anyopaque, buf: []u8, n: usize, align: u29, ra: usize) bool {
        const self: *CountingAllocator = @ptrCast(@alignCast(ctx));
        return self.inner.rawResize(buf, n, align, ra);
    }

    fn freeFn(ctx: *anyopaque, buf: []u8, align: u29, ra: usize) void {
        _ = align; _ = ra;
        const self: *CountingAllocator = @ptrCast(@alignCast(ctx));
        self.frees += 1;
        self.inner.rawFree(buf);
    }
};
Use it in a test or a benchmark harness where you run one operation repeatedly. Then assert that allocs and frees match expectations for that operation.
Debug Builds: Catch Misuse, Not Just Count Calls
Instrumentation tells you “what happened.” Debug builds help you confirm “did it happen safely.” In practice, debug builds are where you want to:
- Trigger allocator misuse detection (like freeing memory incorrectly).
- Catch out-of-bounds access that might corrupt allocator metadata.
- Surface error paths that skip frees.
A useful pattern is to test both success and failure paths. If your code returns early on validation errors, allocations might leak unless cleanup is centralized.
Mind Map: Allocation Verification Workflow
Example: Verifying a Single Operation’s Allocation Profile
Consider a function that parses input into a temporary buffer. You want to confirm it allocates at most once, and that it frees everything before returning.
const std = @import("std");

fn parseThing(alloc: std.mem.Allocator, input: []const u8) !usize {
    var buf = try alloc.alloc(u8, input.len);
    defer alloc.free(buf);

    // Simulate work
    for (input, 0..) |c, i| buf[i] = c;
    return buf.len;
}

test "allocation profile" {
    var gpa = std.heap.GeneralPurposeAllocator(.{}){};
    defer _ = gpa.deinit();

    var counter = CountingAllocator{ .inner = gpa.allocator() };
    var a = counter.allocator();

    _ = try parseThing(a, "hello");
    try std.testing.expect(counter.allocs == counter.frees);
    try std.testing.expect(counter.allocs == 1);
}
This test is intentionally narrow: it verifies the allocation behavior of one call. If you later refactor and accidentally allocate twice, the test fails immediately.
Advanced Details: Handling Resizes and Hidden Allocations
Resizing complicates “bytes allocated” accounting because the allocator may grow or shrink buffers without a new allocation call. If you need precise byte tracking, extend the wrapper to track resize deltas and record the maximum live bytes.
Hidden allocations often come from convenience APIs that build temporary containers internally. When you see unexpected allocs, reduce the problem by isolating the smallest function that triggers the extra allocation, then inspect that function’s data flow.
Practical Checklist for Debug Verification
- Run tests in debug mode and ensure no allocator misuse is reported.
- Assert
allocs == freesfor operations that should leave no live memory. - Add targeted tests for error paths, not just the happy path.
- Keep instrumentation local to the test so production code stays clean.
When these checks are in place, allocation behavior becomes a measurable property instead of a guess. That’s the difference between “it feels faster” and “it is faster, and we can prove why.”
4. Slices Arrays and Bounds Safety for High Performance Code
4.1 Using Slices for Contiguous Views and Efficient Parameter Passing
A slice in Zig is a view: a pointer to a contiguous region plus a length. That combination is what makes slices both fast and safe enough for everyday systems code. When you pass a slice, you avoid copying the underlying data, and you keep bounds information available for checks at the boundaries.
Core Idea: Contiguous Views with Length
A slice is typically written as []T. The pointer part lets you index into memory, and the length part lets Zig prevent out-of-bounds access when you use safe indexing patterns.
A useful mental model is: “I’m not owning the bytes; I’m describing a window over them.” That window can be a whole array, a subrange, or a buffer returned by an API.
Mind Map: Slice Mental Model
Efficient Parameter Passing: Prefer Slices over Pointers
When a function needs to read or write a region, a slice communicates intent better than a raw pointer. It also makes the function easier to call correctly.
Compare two signatures:
fn process(buf: []u8) voidmeans “I will use exactlybuf.lenbytes.”fn process(ptr: [*]u8, len: usize) voidmeans “I will trust you to keeplenconsistent with the memory behindptr.”
In performance code, the difference is not just style. With slices, the loop bounds come from len, and Zig can keep the indexing logic straightforward.
Example: Slice Parameter for a Tight Loop
const std = @import("std");

fn xorInPlace(buf: []u8, key: u8) void {
    for (buf) |*b| {
        b.* ^= key;
    }
}

pub fn main() !void {
    var data: [8]u8 = .{ 1,2,3,4,5,6,7,8 };
    xorInPlace(data[0..], 0xAA);
    _ = data;
}
This passes a contiguous view without copying. The loop iterates exactly over the slice length, so there’s no manual pointer arithmetic.
Sub-Slicing: Creating Views Without Losing Contiguity
Sub-slicing buf[start..end] produces another slice pointing into the same memory. This is a common pattern in parsing and packet processing: you carve out fields while keeping the rest of the buffer available.
Example: Parsing a Header Then a Payload
const std = @import("std");

fn parsePacket(packet: []const u8) void {
    if (packet.len < 4) return;

    const header = packet[0..4];
    const payload = packet[4..];

    _ = header;
    _ = payload;
}
The key detail is that both header and payload remain contiguous slices. You can iterate them, pass them to other functions, and keep bounds logic consistent.
Arrays, Coercion, and When You Should Be Explicit
In Zig, an array can coerce to a slice when a slice is expected. That’s convenient, but it can hide intent if you’re not careful.
- Passing
data[0..]makes it explicit you want the whole array as a slice. - Passing
data[0..n]makes it explicit you want a prefix.
When you want compile-time clarity, prefer explicit slicing at call sites.
Example: Prefix View for a Fixed-Size Buffer
fn checksumPrefix(buf: []const u8) u32 {
    var sum: u32 = 0;
    for (buf) |b| sum +%= b;
    return sum;
}

pub fn demo() void {
    var arr: [16]u8 = undefined;
    _ = checksumPrefix(arr[0..8]);
}
Advanced Details: Indexing, Bounds, and Loop Structure
Indexing a slice with buf[i] is bounds-checked in safe builds. In release-fast, Zig may optimize checks away when it can prove safety. The practical way to help it is to structure loops so the compiler can see that i stays within 0..buf.len.
Prefer:
for (buf) |b|when you just need iteration.for (buf, 0..) |b, i|when you need indices.while (i < buf.len) : (i += 1)when you need manual control.
Avoid mixing raw pointer arithmetic with slice bounds unless you have a clear reason.
Example: Index-Driven Loop with Clear Bounds
fn scale(buf: []u16, factor: u16) void {
    var i: usize = 0;
    while (i < buf.len) : (i += 1) {
        buf[i] = buf[i] * factor;
    }
}
The loop condition ties directly to buf.len, which keeps the bounds story consistent.
Practical Rules of Thumb
- Use
[]Tin parameters when the function operates on a contiguous region. - Use sub-slicing to create smaller views rather than inventing new pointer/length pairs.
- Make call sites explicit with
arr[start..end]when it matters for correctness. - Structure loops around
buf.lenso bounds checks are easy to reason about.
Slices are small, but they carry the right information: “where the bytes are” and “how many bytes you’re allowed to touch.” That’s the foundation for both safety and predictable performance.
4.2 Enforcing Bounds With Slice Lengths and Compile Time Checks
Bounds safety in Zig is mostly about making illegal states unrepresentable. Slices already carry a length, so the compiler can help you keep indexing honest—especially when you structure code so the length is known, or at least provably correct, at the moment you index.
Foundational Idea: Slices Carry Length
A slice is a pointer plus a length. That means slice[i] can be checked against slice.len when safety is enabled. The practical takeaway is simple: if you can express your data as a slice, you can express your bounds as part of the type.
const std = @import("std");

fn sumFirstTwo(xs: []const u32) u64 {
    // This is safe only if xs has at least 2 elements.
    // We enforce that precondition explicitly.
    if (xs.len < 2) return 0;
    return @as(u64, xs[0]) + @as(u64, xs[1]);
}
This pattern scales: every time you index at a fixed position, you either guard with a length check or restructure so the compiler can prove the length.
Enforcing Bounds with Runtime Checks
When the slice length comes from outside your function, you need runtime checks. Keep them close to the indexing site so the reasoning stays local.
A good rule: validate once, then index freely in the hot part of the function.
fn clampFirst(xs: []i32, lo: i32, hi: i32) void {
    if (xs.len == 0) return;
    const v = xs[0];
    xs[0] = if (v < lo) lo else if (v > hi) hi else v;
}
Notice how the function avoids repeated checks. That keeps both the logic and the generated code straightforward.
Enforcing Bounds with Compile Time Checks
Compile time checks shine when the slice length is known from the type. Arrays are the key: [N]T bakes N into the type, so you can use N for compile time reasoning.
Prefer Arrays When You Know the Size
If a function truly requires exactly N elements, accept an array or a slice derived from an array with a known length.
fn dot3(a: [3]f32, b: [3]f32) f32 {
    return a[0]*b[0] + a[1]*b[1] + a[2]*b[2];
}
Here, there is no bounds question: indexing 0..2 is always valid.
Use Compile Time Assertions for Invariants
Sometimes you need to assert properties about sizes or alignments. comptime assertions are ideal when the condition depends on compile time values.
fn readHeader(comptime HeaderSize: usize, buf: []const u8) u32 {
    comptime {
        if (HeaderSize != 16) @compileError("HeaderSize must be 16");
    }
    if (buf.len < HeaderSize) return 0;
    // Now HeaderSize is fixed, and the runtime check ensures buf is large enough.
    return @as(u32, buf[0]) | (@as(u32, buf[1]) << 8);
}
This combines two layers: compile time locks the structural rule, runtime ensures the input buffer is large enough.
Mind Map: Bounds Enforcement Strategy
- Bounds Safety with Slices
  - Slice Basics
    - Pointer + Length
    - Indexing Uses Length
  - Runtime Enforcement
    - Validate Precondition
      - `xs.len < needed` guard
      - Early return
    - Validate Once Then Index
      - Keep checks near indexing
  - Compile Time Enforcement
    - Use Arrays for Fixed Sizes
      - `[N]T` makes N part of the type
    - Compile Time Assertions
      - `comptime { if (...) @compileError(...) }`
    - Hybrid Approach
      - Compile time invariants
      - Runtime input size checks
  - Practical Coding Patterns
    - Fixed index positions
      - Guard length or accept arrays
    - Loops
      - Iterate over `0..xs.len` or `for (xs) |*x, i|`
Advanced Details: Making Proofs Easy
The compiler can only help when your code structure makes the relationship between indices and lengths obvious. Two patterns help a lot.
Pattern: Loop over Length, Not over Assumptions
Instead of indexing with a separate counter that might drift, iterate using the slice length.
fn countNonZero(xs: []const u8) usize {
    var c: usize = 0;
    for (xs) |v| {
        if (v != 0) c += 1;
    }
    return c;
}
This avoids manual index arithmetic entirely.
Pattern: Convert to a Smaller Slice After Validation
If you need only the first k elements, validate xs.len >= k and then create a sub-slice with a known length. That makes later indexing simpler and safer.
fn firstKSum(comptime K: usize, xs: []const u32) u64 {
    if (xs.len < K) return 0;
    const ys = xs[0..K];
    var s: u64 = 0;
    for (ys) |v| s += v;
    return s;
}
Because K is compile time, ys has a length that matches the slice expression, and the loop naturally respects it.
Summary: A Two-Layer Discipline
Use runtime checks when input sizes are unknown, and use compile time checks when sizes are part of the program’s structure. When you combine them—compile time invariants plus runtime input validation—you get code that stays fast without turning safety into a guessing game.
4.3 Converting Between Arrays Pointers and Slices Safely
Arrays and slices both describe contiguous memory, but they carry different guarantees. An array value knows its length at compile time; a slice value carries a runtime length. Converting between them is usually safe when you preserve two invariants: (1) the pointer still points to the first element, and (2) the length matches the actual accessible region.
Core Concepts That Make Conversions Predictable
An array type looks like [N]T, while a slice type looks like []T or []const T. A slice is essentially { ptr: *T, len: usize } with bounds checks enforced by the slice length. A pointer alone, like *T or [*]T, does not carry a length, so it cannot protect you from out-of-bounds access.
When you convert, ask: “What length information am I keeping, and what length information am I discarding?” If you discard length, you must reintroduce it later before indexing.
Mind Map: Conversions with Safety in Mind
Array to Slice Conversions
This is the easiest direction because the array length is already known. If you have var a: [N]u8, you can create a slice that covers the whole array. The slice length becomes N, so bounds checks remain meaningful.
const std = @import("std");

pub fn main() void {
    var a: [4]u8 = .{ 1, 2, 3, 4 };
    const s: []u8 = a[0..]; // slice of entire array
    std.debug.print("len={} first={}\n", .{ s.len, s[0] });
}
Key detail: a[0..] uses the array’s length to set the slice length. You are not guessing; Zig is not asking you to provide len manually.
Slice to Array Conversions
Converting a slice to an array is only safe when the slice length exactly matches the array length. If you attempt to treat a shorter slice as a larger array, you would be inventing elements that are not there.
A practical pattern is to check s.len == N before converting, then use @ptrCast only if you also ensure the memory layout matches.
const std = @import("std");

pub fn takeArray4(s: []const u8) ![4]u8 {
    if (s.len != 4) return error.BadLength;
    var out: [4]u8 = undefined;
    std.mem.copy(u8, &out, s);
    return out;
}
This approach copies, which is often the right tradeoff: it avoids aliasing surprises and keeps the array value self-contained.
Pointer to Slice Conversions
This is where safety can quietly evaporate. A pointer like *T has no length, so creating a slice requires you to supply len. The conversion is safe only if ptr actually points to at least len contiguous elements of T.
Prefer slice inputs when possible. If you must accept a pointer, pair it with an explicit length parameter.
const std = @import("std");

pub fn sumN(ptr: [*]const u8, len: usize) u32 {
    const s: []const u8 = ptr[0..len];
    var total: u32 = 0;
    for (s) |v| total += v;
    return total;
}
Notice the type choice: [ * ]const u8 signals “pointer to many, but length unknown.” The function then supplies len to restore bounds for indexing.
Partial Views and Offsets
When slicing an array or slice with a range, you’re creating a new { ptr, len } pair. The pointer becomes base + start, and the length becomes end - start. Safety depends on the range being within bounds.
A common pattern is to compute offsets using checked arithmetic when offsets come from external data.
const std = @import("std");

pub fn viewMiddle(a: []const u8, start: usize, end: usize) ![]const u8 {
    if (start > end or end > a.len) return error.BadRange;
    return a[start..end];
}
Mutability and Const Correctness
Conversions must respect mutability. A []const T cannot be turned into []T without an explicit unsafe cast, and even then you risk violating the original const contract. If you need mutation, accept []T from the start.
Practical Checklist for Safe Conversions
- Convert array to slice using
a[0..]ora[start..end]to preserve correct length. - Convert slice to array only after verifying
s.len == N; copying is often simplest. - Convert pointer to slice only when you also have a trustworthy
len. - Avoid indexing through raw pointers; reintroduce slice length before loops.
- Keep constness aligned with the function’s intent.
With these rules, conversions become mechanical: you either preserve length automatically (array to slice) or you reattach length explicitly (pointer to slice) after validating it.
4.4 Handling Alignment and Element Size for Efficient Memory Access
Efficient memory access is mostly about two facts: CPUs fetch memory in fixed-size chunks, and your data layout decides how much useful information fits into each chunk. In Zig, you control layout through types, field ordering, and explicit alignment. The goal is simple: make the bytes you touch land where the CPU expects them, with minimal wasted bandwidth and minimal extra instructions.
Alignment Basics and Why It Matters
Alignment means an address is a multiple of some number. When a type has alignment A, the compiler assumes every instance starts at an address divisible by A. That assumption lets the compiler generate faster loads and stores, and it avoids slower paths on some architectures.
In practice, alignment affects:
- Load/store efficiency: aligned accesses can map cleanly to hardware instructions.
- Struct padding: fields may be separated by unused bytes to satisfy alignment.
- Slice element stepping: element size determines how far the pointer advances between elements.
A quick mental model: if your element size is not a multiple of the alignment you care about, you can end up with elements that straddle cache-line boundaries more often than necessary.
Element Size, Stride, and Cache Line Utilization
For arrays and slices, the CPU walks memory with a stride equal to the element size. If you iterate []T, the pointer advances by @sizeOf(T) each element. If @sizeOf(T) is larger than you need, you waste bandwidth and reduce the number of elements per cache line.
You can reason about this without benchmarks by comparing:
- Cache line size (commonly 64 bytes)
- Element size (from
@sizeOf(T))
If @sizeOf(T) is 24, then two elements fit in 48 bytes, and the third starts in the next cache line. If @sizeOf(T) is 16, four elements fit neatly into one line. That difference shows up as fewer cache misses and more predictable iteration.
Using Zig Types to Control Layout
Zig gives you tools to shape layout:
- Field ordering reduces padding by placing larger-aligned fields first.
- Explicit alignment can be applied when you know the access pattern benefits from it.
- Packed structs can reduce size, but they may force unaligned accesses depending on the target.
A practical approach is to start with a clear, safe layout, then measure the size and alignment assumptions you’re making.
Example: Inspecting Size and Alignment
const std = @import("std");

const A = struct {
    x: u8,
    y: u32,
};

const B = struct {
    y: u32,
    x: u8,
};

pub fn main() void {
    std.debug.print("A size {} align {}\n", .{ @sizeOf(A), @alignOf(A) });
    std.debug.print("B size {} align {}\n", .{ @sizeOf(B), @alignOf(B) });
}
This often shows that reordering fields reduces padding. Even if alignment stays the same, the total element size can shrink, improving stride and cache utilization.
Alignment Attributes and When to Use Them
Explicit alignment is useful when you want to:
- Ensure a type is suitable for vectorized or atomic operations.
- Match a hardware requirement for DMA or memory-mapped regions.
- Guarantee that a buffer’s base address meets a constraint.
However, increasing alignment can also increase padding and reduce how many elements fit in cache lines. Treat alignment as a trade: you’re paying extra bytes to buy safer or faster access.
Example: Aligning a Buffer for Predictable Access
const std = @import("std");

const Vec4 = struct {
    a: f32,
    b: f32,
    c: f32,
    d: f32,
};

pub fn main() void {
    var buf: [8]align(16) Vec4 = undefined;
    const p = &buf[0];
    std.debug.print("base align {}\n", .{ @intFromPtr(p) % 16 });
}
The key idea is that aligning the array elements makes the base address and each element start predictable, which helps the compiler and the hardware agree on how to load data.
Packed Structs and Unaligned Access Tradeoffs
Packed structs reduce size by removing padding. That can improve cache utilization, but it can also force unaligned loads. On some targets, unaligned loads are fine; on others, they may be slower or require special handling.
If you use packed layouts, keep them at the boundaries:
- Use packed structs for wire formats or on-disk formats.
- Convert into an aligned, unpacked working representation for hot loops.
This keeps the parsing step flexible while keeping the performance-critical loop predictable.
Mind Map: Alignment and Element Size
Putting It Together for Fast Loops
When writing a tight loop over []T, check three things in order: (1) the element size, (2) the alignment of the element type and the slice base, and (3) whether your struct fields are ordered to minimize padding. If you need a packed representation, treat it as an input format and copy into an aligned working type before the hot loop. This keeps the memory access pattern consistent, which is where performance and safety meet.
4.5 Writing Tight Loops with Minimal Overhead and Predictable Branching
Tight loops are where small costs become big costs. In Zig, you can keep loops fast by controlling three things: what work happens per iteration, how often the compiler must “think” at runtime, and how predictable the control flow is for the CPU.
Foundations for Predictable Loop Behavior
Start with the loop’s shape. A loop that walks a slice is usually the simplest and fastest pattern because the slice carries both pointer and length. Prefer for (slice) |*elem| when you need element access, and prefer indexed loops when you need stable indices for later logic.
Next, decide where branching belongs. Branches inside the hot path are fine when they are predictable, but they become expensive when they vary wildly. A common technique is to move rare cases out of the loop body, leaving the loop body with straight-line work.
Finally, keep the loop’s data access regular. If each iteration touches memory with a consistent stride, the CPU can prefetch effectively and cache behavior becomes more stable.
Mind Map: Loop Tightness Checklist
Per-Iteration Overhead: What to Remove First
The fastest loop is the one that does less. Typical overhead sources are repeated bounds checks, repeated conversions, and repeated function calls that the compiler cannot inline.
A practical approach is to hoist invariants. If you compute something like threshold or mask from arguments, compute it once before the loop. If you need a constant stride or element size, compute it once.
Also watch for conversions inside the loop. If you repeatedly convert an integer type, do it once and store the converted value.
Predictable Branching: Hot Path and Slow Path
Consider a loop that validates bytes and counts matches. If invalid bytes are rare, you want the common case to be branch-light.
fn countAsciiDigits(buf: []const u8) usize {
    var count: usize = 0;
    for (buf) |b| {
        // Hot path: digits are common
        if (b >= '0' and b <= '9') {
            count += 1;
        } else {
            // Slow path: do nothing or handle rare cases
        }
    }
    return count;
}
This is already reasonable, but you can make it more predictable by splitting into two phases when you have a natural partition. For example, if you know the buffer is mostly digits, you can scan until you hit a non-digit, then handle the remainder with a different strategy. The key is that the branch outcome becomes more consistent.
Two-Phase Loops with Sentinels
When you can tolerate a small structural change, two-phase loops reduce unpredictable branching. Phase one handles the common region with a simple condition. Phase two handles the remainder.
fn findFirstNonDigit(buf: []const u8) ?usize {
    var i: usize = 0;
    while (i < buf.len) : (i += 1) {
        const b = buf[i];
        if (b < '0' or b > '9') return i;
    }
    return null;
}
This keeps the branch inside the loop, but the condition is simple and the early exit often stops quickly. When early exit is common, predictability improves because the loop length varies less in practice.
Bounds Safety Without Paying for It Twice
Zig’s slice length lets the compiler reason about bounds. When you index with buf[i], ensure the loop condition enforces i < buf.len. That makes bounds checks straightforward for the compiler to eliminate in optimized builds.
If you need to process a fixed number of elements, prefer buf[0..n] slicing once, then iterate that slice. This avoids checking i < buf.len against the original larger buffer repeatedly.
Memory Access Patterns That Stay Fast
Use contiguous slices and avoid pointer chasing in the hot loop. If you have a structure-of-arrays layout, iterating one array at a time often yields more predictable cache behavior than jumping between fields of many structs.
When you must access multiple arrays, keep their iteration indices aligned. Mismatched strides force the CPU to do more work to keep data flowing.
A Complete Example: Tight Validation Loop
The following example validates bytes and counts matches while keeping work per iteration small. It hoists constants and uses a single branch for the hot path.
fn countAndValidate(buf: []const u8) struct { count: usize, ok: bool } {
    const lo: u8 = '0';
    const hi: u8 = '9';

    var count: usize = 0;
    var ok: bool = true;

    for (buf) |b| {
        if (b >= lo and b <= hi) {
            count += 1;
        } else {
            ok = false;
        }
    }

    return .{ .count = count, .ok = ok };
}
If you want to reduce branching further when invalid bytes are rare, you can switch to early exit: return immediately on the first invalid byte. That changes semantics slightly if you need the full count, but it often matches real validation tasks.
Mind Map: Branching Strategies
Practical Rules of Thumb
- Hoist invariants out of the loop.
- Iterate slices, not ad-hoc pointer arithmetic.
- Make the hot path do the least work.
- Keep branch conditions simple and consistent.
- Prefer early exit when you don’t need full results.
These rules don’t remove all branching, but they make the remaining branching easier for both the compiler and the CPU to handle.
5. Error Handling and Control Flow Patterns That Stay Fast
5.1 Choosing Between Error Unions and Optional Values for Hot Paths
Hot paths care about two things: how often failure happens, and what the failure representation costs in code size and control flow. In Zig, you typically choose between an error union like T!E and an optional like ?T. The trick is to pick the representation that matches the meaning of “not successful” in your domain.
Foundational Distinction
An error union T!E carries a value on success and an error value on failure. The failure path is typed, and Zig’s try and catch make propagation explicit.
An optional ?T carries either a value (T) or null. It has no error payload, so it’s best when “missing” is not exceptional and you don’t need to explain why.
A practical rule: if callers need to distinguish multiple failure reasons, prefer an error union. If callers only need to know whether a value exists, prefer an optional.
Mind Map: Error Unions Versus Optionals
Performance-Oriented Reasoning
Error unions often lead to more explicit branching because the error value exists and may be handled or propagated. Optional checks are usually simpler: a single null test decides the path.
Failure frequency matters more than theoretical cost. If failure is rare, the extra structure of error unions is paid infrequently. If failure is common, you want the cheapest “not found” representation, which is usually ?T.
Branch predictability also benefits from matching your domain. If most lookups succeed, both approaches will be fast, but optionals can keep the success path visually and mechanically tight because the failure path is just “no value.”
Example: Parsing with Optional for “Maybe Present”
Suppose you scan a buffer for a delimiter and only sometimes find a token. Missing tokens are normal, so ?[]const u8 fits.
fn findToken(buf: []const u8) ?[]const u8 {
    const start = std.mem.indexOf(u8, buf, "=") orelse return null;
    const rest = buf[start + 1 ..];
    const end = std.mem.indexOfScalar(u8, rest, '\n') orelse rest.len;
    return rest[0..end];
}
Callers can keep the hot loop clean:
for (lines) |line| {
    if (findToken(line)) |tok| {
        // tok exists, do work
    } else {
        // no token, skip
    }
}
Example: Validation with Error Union for “Something Went Wrong”
Now consider a function that must produce a valid integer, and invalid input is a real failure that should carry a reason.
const ParseError = error{InvalidDigit, Overflow};

fn parseU32Strict(s: []const u8) !u32 {
    var n: u32 = 0;
    for (s) |c| {
        if (c < '0' or c > '9') return ParseError.InvalidDigit;
        const d: u32 = c - '0';
        n = n * 10 + d;
        if (n / 10 != (n - d) / 10) return ParseError.Overflow;
    }
    return n;
}
Callers can propagate errors without cluttering the inner logic:
fn processLine(line: []const u8) !void {
    const tok = try requireToken(line);
    const value = try parseU32Strict(tok);
    // use value
}
Choosing in Practice: A Decision Checklist
- Is absence expected? If yes, use
?T. - Do you need multiple failure reasons? If yes, use
T!E. - Will callers mostly branch on presence only? If yes, optionals keep code tight.
- Will callers mostly propagate failures upward? If yes, error unions integrate well with
try. - Is the hot path dominated by the success case? Either can work, but pick the representation that makes the success path the simplest.
A Subtle Integration Pattern
You can combine both meanings cleanly by separating “not present” from “present but invalid.” For example, findToken returns ?[]const u8, while parseU32Strict returns !u32. This keeps the hot loop’s skip logic cheap, while still giving strict parsing meaningful errors when it matters.
5.2 Structuring Functions to Minimize Error Checks in Inner Loops
Inner loops are where error handling can quietly become the main character. The goal is not to remove checks entirely, but to move them to places where they run rarely, predictably, and with minimal disruption to the hot path.
Foundations: Separate Validation from Work
A common pattern is:
- Validate inputs once before the loop.
- Precompute invariants the loop depends on.
- Run the loop with a “no surprises” contract: the loop body assumes the contract holds.
- Handle errors outside the loop by returning early.
In Zig, this maps well to passing slices with known lengths, using if checks before iteration, and avoiding try inside the tightest region.
Mind Map: Error Checks Placement Strategy
Two-Phase Processing Pattern
Suppose you parse integers from a byte slice and then compute a checksum. A naive approach might parse and handle errors for each element inside the checksum loop.
Instead, do it in two phases:
- Phase 1: parse and validate, producing a list of integers (or a failure).
- Phase 2: compute the checksum over the validated integers.
This keeps the checksum loop free of error checks.
Example: Parse Once, Compute Many
const std = @import("std");

fn checksumFromBytes(alloc: std.mem.Allocator, input: []const u8) !u64 {
    var nums = std.ArrayList(u32).init(alloc);
    defer nums.deinit();

    var it = std.mem.splitScalar(u8, input, ',');
    while (it.next()) |tok| {
        const n = try std.fmt.parseInt(u32, tok, 10);
        try nums.append(n);
    }

    var sum: u64 = 0;
    for (nums.items) |n| {
        sum = sum * 131 + n;
    }
    return sum;
}
The try calls happen during parsing, not during the checksum loop. The checksum loop becomes a straight-line computation with predictable control flow.
Converting Per-Item Errors into Classification
Sometimes you truly need per-item failure information, but you still want to avoid error unions in the hot path. A practical approach is to classify each item as “valid” or “invalid” using a sentinel value, then handle invalids after the loop.
For example, if you’re mapping bytes to a lookup table and invalid bytes should be skipped:
- Precompute the lookup table once.
- In the loop, use a sentinel like
0xFFto mark invalid mappings. - Accumulate results and count invalids without returning errors per element.
Example: Sentinel Mapping with Post-Loop Error
const std = @import("std");

fn mapAndCount(input: []const u8) !usize {
    var table: [256]u8 = undefined;
    for (table) |*b, i| b.* = if (i >= '0' and i <= '9') @intCast(u8, i - '0') else 0xFF;

    var invalid: usize = 0;
    var out: usize = 0;

    for (input) |c| {
        const v = table[c];
        if (v == 0xFF) {
            invalid += 1;
        } else {
            out += v;
        }
    }

    if (invalid != 0) return error.InvalidByte;
    _ = out;
    return out;
}
The loop still has a branch, but it’s a simple equality check on a byte value, not an error-propagation path. The function returns an error once, after the loop.
Advanced Details: Keep Invariants Explicit
To make the loop contract real, ensure invariants are enforced before iteration:
- Slice lengths: if the loop assumes at least
Nbytes, checkinput.len >= Nonce. - Alignment assumptions: if you use pointer casts, validate alignment before the loop.
- Bounds for indexing: if indexing uses computed offsets, precompute and clamp or reject inputs early.
This avoids sprinkling defensive checks inside the loop body.
Practical Checklist for Hot Loops
- Can you move
tryto a setup phase? - Can you replace “error per element” with “classify per element, decide after”?
- Are you indexing with values proven safe by earlier checks?
- Does the loop body avoid allocator calls and formatting/parsing?
- Is the loop body doing one job, not mixing validation with computation?
When these answers are “yes,” your inner loop stays fast and your error handling stays correct—just not in the place where it hurts the most.
5.3 Using Try Catch and Error Mapping for Clear and Efficient Propagation
When you write low-level code, you usually want two things at once: errors should be precise, and the hot path should stay readable. Zig’s catch and error mapping help you do both by separating “what went wrong” from “how to report it.”
Foundational Concepts for Propagation
In Zig, errors are values. A function can return T or error{...}. Propagation is the default style: if a call returns an error union, you can return it upward with try. That keeps control flow clean, but it also means you may need to translate errors at module boundaries.
Error mapping is the act of converting one error set into another. You do it when:
- A lower layer exposes errors that are too detailed or too implementation-specific.
- A higher layer needs a stable error contract.
- You want to attach context while still returning an error union.
Mind Map: Try Catch and Error Mapping
Core Pattern: Catch, Translate, Return
A common boundary pattern is: call a lower-level function, catch its errors, map them, then return the mapped error.
const std = @import("std");

const LowErr = error{BadHeader, BadChecksum, Io};
const ApiErr = error{InvalidInput, CorruptInput, SystemFailure};

fn parseLow(input: []const u8) LowErr!usize {
    if (input.len < 4) return LowErr.BadHeader;
    if (input[0] == 0xFF) return LowErr.BadChecksum;
    return input.len;
}

fn parseApi(input: []const u8) ApiErr!usize {
    return parseLow(input) catch |e| switch (e) {
        LowErr.BadHeader => ApiErr.InvalidInput,
        LowErr.BadChecksum => ApiErr.CorruptInput,
        LowErr.Io => ApiErr.SystemFailure,
    };
}
This structure is systematic: the catch is the only place you translate. The rest of parseApi can assume the mapped contract.
Catching for Recovery Without Losing Clarity
Sometimes you don’t want to translate; you want to recover. Use catch to choose a fallback value or alternate path, then continue.
const std = @import("std");

const ReadErr = error{Timeout, NotFound};

fn readOrDefault(path: []const u8) ReadErr![]const u8 {
    // Imagine a lower-level read that can fail.
    // Here we show the control flow pattern.
    if (path.len == 0) return ReadErr.NotFound;
    return path;
}

fn getConfig(path: []const u8) []const u8 {
    return readOrDefault(path) catch |e| switch (e) {
        ReadErr.Timeout => "default",
        ReadErr.NotFound => "default",
    };
}
Notice the difference: getConfig does not return an error union, so it must decide immediately what to do. That decision is local and explicit.
Mapping with Partial Handling and Propagation
You can catch only the errors you care about and propagate the rest. This is useful when most errors should bubble up unchanged.
const LowErr = error{BadHeader, BadChecksum, Io};
const ApiErr = error{InvalidInput, CorruptInput, SystemFailure};

fn parseApiSelective(input: []const u8) ApiErr!usize {
    const n = parseLow(input) catch |e| switch (e) {
        LowErr.BadHeader => return ApiErr.InvalidInput,
        LowErr.BadChecksum => return ApiErr.CorruptInput,
        LowErr.Io => ApiErr.SystemFailure,
    };
    return n;
}
Here, every error is still mapped, but the structure makes it obvious which ones are treated as “input problems” versus “system problems.”
Designing Stable Error Contracts at Boundaries
A good rule: lower layers can be noisy; public APIs should be consistent. Mapping lets you keep internal detail while presenting a small, intentional error set.
Practical guidelines:
- Map by meaning, not by accident. If two low-level errors both mean “user input is wrong,” map them to the same API error.
- Keep the mapping exhaustive. A
switchover an error set should cover every member you intend to translate. - Avoid broad
catchthat swallows errors. If you catch everything and return a single generic error, you lose debuggability.
Efficient Propagation in Hot Paths
Error handling can be cheap, but it still affects readability and sometimes code size. To keep hot paths clean:
- Use
tryinside loops when errors should abort the operation. - Catch outside the loop when you want to translate once per operation, not once per iteration.
- Prefer targeted
catch |e| switch (e)over catch-all recovery.
Mind Map: Boundary Responsibilities
Quick Example: Parsing Pipeline with Mapped Errors
A pipeline often has multiple steps. Map errors at each boundary so the next stage doesn’t need to know internal details.
const LowErr = error{BadHeader, BadChecksum, Io};
const ApiErr = error{InvalidInput, CorruptInput, SystemFailure};

fn step1(input: []const u8) LowErr!usize {
    return parseLow(input);
}

fn step2(n: usize) ApiErr!u32 {
    if (n == 0) return ApiErr.InvalidInput;
    return @intCast(u32, n);
}

fn parsePipeline(input: []const u8) ApiErr!u32 {
    const n = step1(input) catch |e| switch (e) {
        LowErr.BadHeader => ApiErr.InvalidInput,
        LowErr.BadChecksum => ApiErr.CorruptInput,
        LowErr.Io => ApiErr.SystemFailure,
    };
    return step2(n);
}
The pipeline stays readable because each stage either propagates with try semantics or maps errors immediately when crossing a boundary.
5.4 Designing Result Types for Parsing and Validation Pipelines
A parsing and validation pipeline usually has two jobs: turn bytes into structured values, and then prove those values meet rules. In Zig, the cleanest way to keep both jobs readable and fast is to design a result type that carries exactly what you need on success, and exactly what you need on failure.
Foundational Model for Result Types
Start by separating three concerns:
- Parsing errors: the input doesn’t match the expected shape (missing delimiter, invalid digit, truncated buffer).
- Validation errors: the shape is correct, but the values violate constraints (range, ordering, required fields).
- Control flow: how callers decide what to do next (stop, skip, accumulate diagnostics).
A practical result type makes these concerns explicit. For example, you can use an error union for control flow and a structured error payload for diagnostics.
Mind Map: Result Type Design
A Systematic Approach from Simple to Rich
Step 1: Use a typed error union for fail-fast.
For many pipelines, the simplest useful design is:
parsereturnsParseError!TvalidatereturnsValidationError!T
Then the pipeline can call both and stop at the first failure.
const std = @import("std");

const ParseError = error{InvalidDigit, Truncated};
const ValidationError = error{OutOfRange, BadOrder};

fn parseU8(s: []const u8) ParseError!u8 {
    if (s.len == 0) return ParseError.Truncated;
    if (s.len != 1) return ParseError.InvalidDigit;
    const d: u8 = s[0] - '0';
    if (d > 9) return ParseError.InvalidDigit;
    return d;
}

fn validatePair(a: u8, b: u8) ValidationError!struct{a:u8,b:u8} {
    if (a > 7 or b > 7) return ValidationError.OutOfRange;
    if (a > b) return ValidationError.BadOrder;
    return .{ .a = a, .b = b };
}
This design is fast because it avoids allocating diagnostics and avoids string formatting in the hot path. It’s also clear: callers can distinguish parsing failures from validation failures by the error set.
Step 2: Map errors at the pipeline boundary.
Often you want one public error type. You can map internal errors into a single error set without losing meaning.
const PipelineError = error{ParseInvalid, ParseTruncated, OutOfRange, BadOrder};

fn parseAndValidate(s: []const u8) PipelineError!struct{a:u8,b:u8} {
    // Expect format: "ab" where a and b are digits.
    if (s.len != 2) return PipelineError.ParseTruncated;
    const a = parseU8(s[0..1]) catch |e| switch (e) {
        ParseError.InvalidDigit => return PipelineError.ParseInvalid,
        ParseError.Truncated => return PipelineError.ParseTruncated,
    };
    const b = parseU8(s[1..2]) catch |e| switch (e) {
        ParseError.InvalidDigit => return PipelineError.ParseInvalid,
        ParseError.Truncated => return PipelineError.ParseTruncated,
    };
    return validatePair(a, b) catch |e| switch (e) {
        ValidationError.OutOfRange => return PipelineError.OutOfRange,
        ValidationError.BadOrder => return PipelineError.BadOrder,
    };
}
Step 3: Add structured diagnostics when you need them.
When you want to report where and why something failed, use a tagged union result payload. Keep it lightweight: store indices and error codes, not formatted strings.
const Diag = union(enum){
    Parse: struct{ at: usize, code: u8 },
    Validate: struct{ at: usize, code: u8 },
};

const PipelineResult = union(enum){
    Ok: struct{a:u8,b:u8},
    Err: Diag,
};
Now your pipeline can return PipelineResult instead of an error union. The caller can decide whether to stop or continue collecting more diagnostics.
Advanced Composition Patterns That Stay Understandable
Fail-fast with error unions is best when the caller only needs one reason.
Fail-soft with diagnostic payloads is best when you want multiple issues in one pass. A common pattern is: parse into a partially filled struct using ? fields or sentinel values, then run validation that emits Diag.Validate entries for each violated rule.
Avoid formatting in the inner loop. Even if you later want human-readable messages, store codes and positions first. Formatting can happen at the boundary where you already decided to spend time producing text.
Example: Validation Pipeline with Result Payloads
Imagine parsing two digits and validating both range and ordering. On failure, you return a diagnostic with the index of the offending digit.
- If digit 0 is invalid:
Diag.Parse{ at: 0, code: 1 } - If digit 1 is invalid:
Diag.Parse{ at: 1, code: 1 } - If range fails for digit 0:
Diag.Validate{ at: 0, code: 2 } - If ordering fails:
Diag.Validate{ at: 0, code: 3 }
This keeps the pipeline deterministic: the same input yields the same diagnostic structure, which makes tests straightforward and debugging less guessy.
Practical Rules for Designing Result Types
- Make success and failure shapes distinct:
OkvsErrpayloads, or separate error sets. - Keep payloads data-only: indices, codes, and raw values; format later if needed.
- Map at boundaries: internal errors can be specific, but public errors should be stable and intentional.
- Choose fail-fast or fail-soft deliberately: don’t mix them accidentally in the same API.
A well-designed result type turns parsing and validation from a tangle of if statements into a predictable contract: callers know what they get, what they might miss, and what information is available when something goes wrong.
5.5 Preventing Error Handling from Forcing Unnecessary Code Paths
Error handling can be correct and still be expensive. In Zig, the cost usually comes from two places: (1) code paths that the compiler cannot prove are unreachable, and (2) error propagation patterns that force extra checks inside hot loops. The goal is to keep error checks at the boundaries where they belong, while letting inner loops operate on “already validated” data.
Foundational Principle: Validate Once, Run Many
A common performance pattern is to separate a function into two phases:
- Validation phase: parse inputs, check invariants, and return errors early.
- Execution phase: assume invariants hold and avoid repeated checks.
In Zig, this often means converting an error-returning API into a “validated view” that the hot loop consumes.
Example: a packet processor that parses headers once, then processes payload bytes without checking header fields repeatedly.
const std = @import("std");

const Header = struct { len: usize };

fn parseHeader(buf: []const u8) !Header {
    if (buf.len < 4) return error.Truncated;
    const len = std.mem.readIntLittle(u32, buf[0..4]);
    if (len > buf.len - 4) return error.BadLength;
    return Header{ .len = len };
}

fn processPayload(payload: []const u8) void {
    var sum: u64 = 0;
    for (payload) |b| sum += b;
    _ = sum;
}

pub fn handle(buf: []const u8) !void {
    const h = try parseHeader(buf);
    const payload = buf[4 .. 4 + h.len];
    processPayload(payload);
}
The inner loop in processPayload has no error handling at all. The checks live in parseHeader, where they are cheap relative to the work done per byte.
Mind Map: Where Error Checks Should Live
Narrow Error Sets to Reduce Branching
When an error union has many possible errors, the compiler may generate more branching to handle them. You can often narrow the error set to what the caller can actually act on.
Example: map parsing errors into a smaller set for the caller.
const ParseError = error{ Truncated, BadLength };

fn parseHeaderSmall(buf: []const u8) ParseError!Header {
    if (buf.len < 4) return error.Truncated;
    const len = std.mem.readIntLittle(u32, buf[0..4]);
    if (len > buf.len - 4) return error.BadLength;
    return Header{ .len = len };
}
Now the caller’s try handles only two cases, and the generated control flow is simpler.
Avoid Error Unions in Tight Loops
If you write a loop that returns !T per iteration, you force the loop body to carry error-tag logic repeatedly. Instead, restructure so the loop body operates on non-error values.
Example: convert a fallible iterator into a one-time “materialize then process” step.
fn parseNumbers(buf: []const u8, out: []u32) !usize {
    var i: usize = 0;
    var it = std.mem.tokenizeScalar(u8, buf, ' ');
    while (it.next()) |tok| {
        if (i >= out.len) return error.Overflow;
        out[i] = try std.fmt.parseInt(u32, tok, 10);
        i += 1;
    }
    return i;
}

fn sumNumbers(nums: []const u32) u64 {
    var s: u64 = 0;
    for (nums) |n| s += n;
    return s;
}

pub fn run(buf: []const u8) !u64 {
    var tmp: [256]u32 = undefined;
    const n = try parseNumbers(buf, tmp[0..]);
    return sumNumbers(tmp[0..n]);
}
All parsing errors happen in parseNumbers. sumNumbers is clean and branch-light.
Use Unreachable for Proven Invariants
Sometimes you can prove a condition after validation. In that case, unreachable documents the invariant and can remove branches.
Example: after checking that len fits, the slice bounds are guaranteed.
fn payloadView(buf: []const u8, len: usize) []const u8 {
    // Caller must have validated that 4 + len <= buf.len.
    if (buf.len < 4 + len) unreachable;
    return buf[4 .. 4 + len];
}
This is not a replacement for validation; it is a way to keep the execution phase from re-checking what you already established.
Practical Checklist
- Put
tryand error unions at boundaries, not inside per-element loops. - Split functions into validation and execution phases.
- Narrow error sets when the caller only needs a few outcomes.
- Convert fallible iteration into a one-time fallible materialization step.
- Use
unreachableonly when invariants are proven by earlier checks.
When these rules are followed, error handling stays readable and the hot path stays boring—in the best possible way.
6. Data Layout and Type Design for Cache Friendly Performance
6.1 Selecting Struct Layouts That Reduce Cache Misses
Cache misses are expensive partly because they waste time waiting, and partly because they force the CPU to drag in more bytes than your code actually uses. Struct layout is one of the few knobs you can turn that directly changes which bytes sit next to each other in memory. The goal is simple: keep the bytes your hot loop touches close together, and keep unrelated bytes out of the way.
Foundations: What a Cache Line Actually Means
Most modern CPUs fetch memory in fixed-size chunks called cache lines. When your code reads one field inside a struct, the hardware typically brings the entire cache line containing that field into the cache. If your hot loop reads several fields from the same cache line, you get good spatial locality. If it jumps between fields that live in different cache lines, you pay more round trips.
A practical way to reason about this is to treat your struct as a layout of “hot bytes” and “cold bytes.” Hot bytes are touched frequently and in tight loops. Cold bytes are touched rarely, or only during setup, error handling, or teardown.
Step 1: Identify Hot Access Patterns
Before changing layout, write down the access pattern. For example, suppose you have a physics particle update loop that reads position and velocity every tick, but only occasionally reads mass and flags.
A good layout keeps pos and vel near each other, and pushes mass and flags toward the end. If you later discover that flags are also checked every tick, you move them back into the hot region.
Step 2: Order Fields by Hotness and Alignment
Field ordering affects both padding and which fields share cache lines. Zig will insert padding to satisfy alignment requirements. If you place a large-aligned field between small fields, you may create padding gaps that waste space and can separate hot fields.
A systematic ordering rule works well:
- Group fields by hotness.
- Within each group, order by decreasing alignment.
- Place low-alignment, low-hotness fields last.
This reduces padding and keeps hot bytes clustered.
Step 3: Use Layout Checks to Prevent Accidental Regressions
You can enforce assumptions with compile-time checks. For instance, you can assert that the hot prefix fits within a cache line budget.
const std = @import("std");

pub fn assertHotPrefixFits(comptime Hot: type, comptime PrefixBytes: usize) void {
    comptime {
        const size = @sizeOf(Hot);
        if (size > PrefixBytes) @compileError("Hot prefix too large");
    }
}
Use this by defining a “hot view” type that contains only the fields your loop reads. That way, the check measures what matters rather than the entire struct.
Step 4: Prefer SoA When Each Loop Touches One Field
Struct-of-arrays (SoA) often beats array-of-structs (AoS) when the loop touches one field across many elements. If your loop reads only x and y for every particle, SoA keeps those arrays contiguous and reduces cache line waste.
AoS can still be fine when the loop touches multiple fields per element. The key is to match layout to the loop’s actual reads.
Mind Map: Struct Layout Decisions for Cache Miss Reduction
Example: AoS with Hot Prefix and Cold Suffix
Consider an AoS particle where the hot loop reads pos and vel every tick.
const Particle = struct {
    // Hot prefix
    pos: [3]f32,
    vel: [3]f32,

    // Cold suffix
    mass: f32,
    flags: u32,
};
Here, pos and vel are adjacent, so a single cache line fetch is more likely to contain both. mass and flags land later, so if the loop never reads them, they don’t force extra cache traffic.
If you later find that flags is checked every tick, move it into the hot prefix. If you find that mass is only used during rare events, keep it in the cold suffix.
Example: SoA for Single-Field Loops
If your loop reads only positions, SoA keeps x, y, and z arrays contiguous.
const ParticlesSoA = struct {
    pos_x: []f32,
    pos_y: []f32,
    pos_z: []f32,

    vel_x: []f32,
    vel_y: []f32,
    vel_z: []f32,
};
Now the loop can stream through pos_* arrays with minimal cache-line waste, because it doesn’t drag in velocity or mass bytes it doesn’t use.
Practical Checklist for Zig Struct Layout
- Put hot fields first and keep them together.
- Order fields by decreasing alignment within hot and cold groups.
- Create a hot-prefix view type and assert its size at compile time.
- Choose AoS or SoA based on what the loop actually reads, not on what you wish it read.
- Re-check layout after changing types, because alignment changes can silently alter padding.
6.2 Using Packed Representations Carefully with Alignment Constraints
Packed structs let you control how fields are laid out in memory, often reducing padding. That’s useful when you’re storing data in tight buffers, sending it over the wire, or mapping it to a hardware-defined layout. The tradeoff is that packed layouts can force unaligned loads and stores, which may be slower or even illegal on some targets. The goal is to keep the layout correct while ensuring the code that touches it stays safe and efficient.
What Packed Changes at the Byte Level
A normal struct may insert padding so each field starts at an alignment boundary. Packed representations reduce or remove that padding, so fields can start immediately after the previous one. In practice, this means:
- Field offsets become smaller and more predictable for serialization.
- Alignment requirements for the struct and its fields may become weaker.
- The compiler may need to generate extra instructions to access misaligned fields.
A good mental model: padding is the compiler’s way of buying alignment for speed. Packing spends that padding budget to save space.
Alignment Constraints and Why They Matter
Alignment is the requirement that an address must satisfy for a type. If you read a value from an address that doesn’t meet its alignment, the CPU may:
- Handle it transparently but slower.
- Trap (especially on strict architectures).
- Require the compiler to synthesize safe access sequences.
Zig gives you tools to make these constraints explicit. The key is to ensure that any packed value you dereference is located at an address that won’t violate the target’s rules.
A Safe Pattern for Packed Data
Instead of taking pointers to packed fields and reading them directly, a robust approach is to treat packed data as bytes, then copy out into properly aligned local variables. This keeps the “byte layout” separate from the “value access” path.
const std = @import("std");

const Header = packed struct {
    version: u4,
    flags: u12,
    length: u16,
};

fn parseHeader(bytes: []const u8) !Header {
    if (bytes.len < @sizeOf(Header)) return error.Short;
    var h: Header = undefined;
    std.mem.copy(u8, std.mem.asBytes(&h), bytes[0..@sizeOf(Header)]);
    return h;
}
This works because the copy writes the packed representation into a local Header value. The local variable is then accessed through Zig’s normal rules, and the compiler can choose the safest access strategy for the target.
When Direct Field Access Is Fine
Direct access to packed fields can be acceptable when all of the following hold:
- The packed value resides in memory that is suitably aligned for the access strategy Zig will use.
- You’re not taking pointers to packed fields and storing them elsewhere.
- You’re not mixing packed structs with APIs that assume natural alignment.
If you’re unsure, prefer the byte-copy pattern. It’s slightly more code, but it’s predictable and keeps alignment concerns localized.
Using Compile Time Checks to Prevent Layout Surprises
Packed layouts are only useful if you can trust their size and offsets. Use compile-time assertions to lock in expectations.
const Header = packed struct {
    version: u4,
    flags: u12,
    length: u16,
};

comptime {
    std.debug.assert(@sizeOf(Header) == 4);
    std.debug.assert(@bitSizeOf(Header) == 32);
}
These checks catch accidental changes when you refactor fields or types. They also make it obvious when the layout no longer matches the protocol or hardware spec you’re targeting.
Mind Map: Packed Layouts and Alignment Constraints
Practical Example: Serialize and Deserialize Without Surprises
When you serialize, you want the packed bytes exactly. When you deserialize, you want to avoid unaligned dereferences. The simplest integrated workflow is:
- Serialize by copying from a packed value into a byte slice.
- Deserialize by copying from a byte slice into a packed local.
- Only then interpret fields.
This keeps the “wire format” stable while letting Zig handle access safely.
Common Mistakes to Avoid
- Casting an arbitrary
*u8buffer to*Headerand dereferencing it. That assumes alignment you don’t control. - Storing pointers to packed fields. Those pointers inherit the packed alignment assumptions and can outlive the safe context.
- Relying on
@sizeOfalone without checking bit size when bitfields are involved.
Packed structs are a precision tool. Use them when you need exact byte layout, and use copying plus compile-time checks to keep alignment constraints from turning into runtime surprises.
6.3 Designing SoA Versus AoS Layouts with Zig Types and Slices
When you choose between Array of Structures (AoS) and Structure of Arrays (SoA), you’re mostly choosing what your CPU will fetch when it processes one “thing” at a time. In Zig, you can make that choice explicit with types and slices, then keep the rest of your code honest by passing views rather than raw pointers.
Core Idea and Mental Model
AoS stores elements like {x, y, z} next to each other for each entity. If your hot loop reads x and y for many entities, AoS often fetches extra fields you don’t use.
SoA stores x[], y[], z[] in separate contiguous arrays. If your hot loop reads only x and y, SoA fetches exactly what you touch.
A practical rule: if your loop repeatedly processes one or two fields across many entities, SoA usually wins. If your loop frequently needs all fields of one entity together, AoS can be simpler and competitive.
Mind Map: Layout Tradeoffs
Zig Types That Make the Choice Concrete
AoS: One Slice of Entities
AoS typically uses a single slice of a struct. That’s ergonomic for “entity-centric” code.
const Vec3 = struct { x: f32, y: f32, z: f32 };

fn stepAoS(positions: []Vec3) void {
    for (positions) |*p| {
        p.x += 1.0;
        p.y += 2.0;
    }
}
This loop touches x and y but still loads cache lines containing z for each element. If z is rarely used in this loop, that’s wasted bandwidth.
SoA: One Slice per Field
SoA groups arrays into a struct of slices. The hot loop then receives only the fields it needs.
const PositionsSoA = struct {
    xs: []f32,
    ys: []f32,
    zs: []f32,
};

fn stepSoA(pos: PositionsSoA) void {
    const n = pos.xs.len;
    for (pos.xs[0..n], pos.ys[0..n]) |*x, *y| {
        x.* += 1.0;
        y.* += 2.0;
    }
}
Here, the loop reads and writes only xs and ys. The zs slice exists, but it doesn’t get pulled into the working set.
Designing APIs Around Access Patterns
The biggest practical difference is API shape.
- AoS-friendly API: functions take
[]Vec3or[]Entityand operate on whole elements. - SoA-friendly API: functions take a struct containing only the slices required by the algorithm.
In Zig, you can enforce correctness by constructing the SoA view from validated buffers once, then passing that view everywhere. That keeps indexing consistent and avoids “mismatched lengths” bugs.
Advanced Details That Matter
Alignment and Contiguity
Both layouts can be contiguous, but SoA guarantees contiguity per field. That improves spatial locality when you stream through one field.
If you store small integers or packed data, alignment can change how many useful values fit per cache line. Zig’s explicit types help you reason about that, especially when you keep field arrays separate.
Iteration Strategy
AoS iteration is naturally “one pointer per element.” SoA iteration is “one index, multiple arrays.” In Zig, prefer iterating with slices and zipping slices (as shown) to keep bounds checks clear and localized.
Passing “One Entity” in SoA
Sometimes you need entity-centric operations. A common approach is to create a temporary view or copy just the fields you need. Avoid building a struct that pretends to be an entity if it would require strided loads every time you access a field.
Decision Checklist
- Identify the hot loop and list the fields it reads and writes.
- If the loop touches a subset of fields across many entities, prefer SoA.
- If the loop frequently needs all fields of one entity, AoS is often simpler.
- In Zig, encode the choice in types:
[]Structfor AoS, and a slice-group struct for SoA.
Example: Same Computation, Two Layouts
Suppose you compute a 2D acceleration from positions and ignore z.
- AoS:
stepAoS([]Vec3)loadszeven though it’s unused. - SoA:
stepSoA(PositionsSoA{ .xs, .ys, .zs })can ignorezsentirely while still using the same underlying storage.
That difference is the whole game: you’re aligning your data layout with what your code actually touches.
6.4 Minimizing Padding With Field Ordering and Compile Time Assertions
Padding is the quiet tax you pay when a struct’s fields don’t line up neatly with the alignment rules of the target CPU. In Zig, you can often reduce that tax by ordering fields from most-aligned to least-aligned, then verifying the resulting layout with compile time assertions. The goal is simple: keep the struct compact without relying on “it seems fine” assumptions.
Foundational Layout Rules
Most targets impose an alignment requirement for each type. A field with alignment A must start at an address that’s a multiple of A. If the previous field ends at an address that doesn’t satisfy the next field’s alignment, the compiler inserts padding bytes.
Two practical consequences follow:
- Field ordering matters because it changes where each field starts.
- The struct’s total size may include trailing padding so that arrays of the struct keep each element aligned.
Field Ordering Strategy
A reliable baseline strategy is:
- Place fields in descending alignment order.
- Group fields with the same alignment together.
- Keep large fields early when they have higher alignment, but don’t ignore access patterns; compactness and locality both matter.
Consider a “header” struct that mixes a 32-bit value, a byte flag, and a 64-bit timestamp.
const BadHeader = struct {
    flag: u8,
    value: u32,
    timestamp: u64,
};

const GoodHeader = struct {
    timestamp: u64,
    value: u32,
    flag: u8,
};
On many 64-bit targets, BadHeader forces padding after flag to align value, and then additional padding before timestamp to align it to 8 bytes. GoodHeader reduces the number of alignment gaps because the 8-byte field comes first.
Compile Time Assertions That Actually Help
Field ordering is a technique, not a guarantee. Compilers, targets, and type choices can change alignment. Compile time assertions turn layout expectations into enforced rules.
Use @sizeOf(T) to check total size and @alignOf(T) to check alignment. For deeper checks, you can also verify field offsets with @offsetOf(T, "field").
const Header = struct {
    timestamp: u64,
    value: u32,
    flag: u8,
};

comptime {
    std.debug.assert(@alignOf(Header) == @alignOf(u64));
    std.debug.assert(@sizeOf(Header) <= 16);
    std.debug.assert(@offsetOf(Header, "timestamp") == 0);
    std.debug.assert(@offsetOf(Header, "value") == 8);
    std.debug.assert(@offsetOf(Header, "flag") == 12);
}
The assertions above do three different jobs: they confirm alignment, cap total size, and lock in the offsets that matter for predictable serialization and tight memory packing.
Mind Map: Padding Sources and Fixes
Advanced Details That Prevent “Accidental” Layout Drift
-
Be careful with mixed integer widths. A
u16followed by au32can introduce padding depending on alignment rules. Ordering by alignment usually fixes it, but assertions confirm. -
Watch for alignment changes from type aliases. Even if two fields look similar, their underlying types might differ in alignment due to target-specific ABI decisions.
-
Consider whether you need the exact layout. If you serialize the struct by copying bytes, you must ensure offsets and size are stable. If you serialize field-by-field, you still benefit from compactness, but the offset assertions become optional.
Example: A Compact Packet Metadata Struct
A common pattern is a small metadata block that you store in arrays. Compactness reduces memory bandwidth and improves cache behavior.
const Meta = struct {
    seq: u32,
    ts: u64,
    kind: u8,
};

comptime {
    std.debug.assert(@offsetOf(Meta, "ts") == 8);
    std.debug.assert(@offsetOf(Meta, "seq") == 0);
    std.debug.assert(@offsetOf(Meta, "kind") == 12);
    std.debug.assert(@sizeOf(Meta) <= 16);
}
If you later reorder fields during refactoring, these assertions fail at compile time, forcing the change to be intentional rather than accidental.
Mind Map: A Systematic Workflow
Summary
Minimizing padding in Zig is mostly about respecting alignment rules and then proving the result. Field ordering reduces the number of alignment gaps, while compile time assertions prevent layout drift and make performance-oriented memory layouts dependable rather than hopeful.
6.5 Implementing Efficient Iteration Patterns over Custom Containers
Efficient iteration is mostly about two things: producing the next element with minimal overhead, and doing it in a way the compiler can reason about. In Zig, you typically get both by designing your container’s iteration API around slices, indices, and predictable control flow.
Core Iteration Model
Start with a simple invariant: your container stores elements contiguously in memory, or it can expose them as if it were contiguous. If you can represent the data as a slice, iteration becomes straightforward and fast.
A good custom container iteration design usually includes:
- A method that returns an iterator object with internal state.
- An iterator
next()method that returns either the next element or a termination signal. - Optional support for
items()returning a slice-like view for cases where you want direct slice iteration.
When your container is backed by a slice, you can keep iteration logic tiny and predictable.
Mind Map: Iteration Design Checklist
Example: Slice-Backed Container with Index Iterator
Assume a container that owns a buffer and tracks its length. The iterator stores the slice and a current index.
const std = @import("std");

pub fn Vec(T: type) type {
    return struct {
        buf: []T,

        pub fn init(allocator: std.mem.Allocator, n: usize) !@This() {
            var v = @This(){ .buf = try allocator.alloc(T, n) };
            return v;
        }

        pub fn deinit(self: *@This(), allocator: std.mem.Allocator) void {
            allocator.free(self.buf);
        }

        pub fn iter(self: *@This()) Iterator(T) {
            return .{ .slice = self.buf, .i = 0 };
        }

        pub fn Iterator(comptime U: type) type {
            return struct {
                slice: []U,
                i: usize,

                pub fn next(it: *@This()) ?U {
                    if (it.i >= it.slice.len) return null;
                    const v = it.slice[it.i];
                    it.i += 1;
                    return v;
                }
            };
        }
    };
}
This iterator is efficient because next() is just a bounds check, a load, and an increment. Returning U by value is fine for small types; for larger elements, return *U or []U views instead.
Example: Borrowed Iteration Returning Pointers
If T is large, returning pointers avoids copying. The container still controls validity because the iterator borrows self.
pub fn PtrIterator(comptime U: type) type {
    return struct {
        slice: []U,
        i: usize,

        pub fn next(it: *@This()) ?*U {
            if (it.i >= it.slice.len) return null;
            const p = &it.slice[it.i];
            it.i += 1;
            return p;
        }
    };
}
Use this iterator when you want to mutate elements during traversal without exposing the entire buffer.
Example: Iterating with a Range View
Sometimes you want to iterate only a subrange without creating a new container. A range view can store a slice and reuse the same iterator logic.
pub fn RangeView(comptime U: type) type {
    return struct {
        slice: []U,

        pub fn iter(self: *@This()) PtrIterator(U) {
            return .{ .slice = self.slice, .i = 0 };
        }
    };
}
This keeps iteration composable: you can slice your container and then iterate the view.
Advanced Details Without Footguns
-
Inline-Friendly
next(): Keepnext()free of loops, allocations, and heavy branching. If you need complex stepping (like skipping invalid entries), do it with a tight loop that still advances the cursor monotonically. -
Correct Termination Signaling: Prefer
?Tor?*Tfor termination. It makes the control flow explicit and keeps the iterator usable inwhile (it.next()) |x| { ... }patterns. -
Element Type Choices: Decide early whether iteration returns values, pointers, or indices. Values are simplest; pointers are better for large elements; indices are useful when you need stable positions.
-
Bounds Are the Safety Contract: If your iterator uses an index, the only safety mechanism you need is a single
i >= lencheck. Avoid additional checks inside the loop body.
Mind Map: Common Iteration Pitfalls
Practical Pattern Summary
For a custom container, the most reliable efficient approach is: store data in a slice, implement an iterator with a cursor (index or pointer), and make next() a small function that either returns the next element or signals completion. When you need flexibility, add range views rather than complicating the core iterator.
7. Compile Time Metaprogramming for Parsers and Protocol Code
7.1 Building Zero Allocation Parsers with Slice Based Input
A zero-allocation parser is one that does not call an allocator while it reads input and decides what the next token or structure should be. In Zig, the easiest way to get there is to treat the input as immutable bytes and return views into it using slices. You can still validate thoroughly; you just avoid copying.
Core Idea: Parse into Views
Start with a function that takes []const u8 and returns either an error or a result that references the original buffer.
- Use slices to represent substrings like identifiers, numbers, or fields.
- Track progress with an index instead of consuming by allocation.
- Return the new index alongside the parsed value so the caller can continue.
This pattern keeps the parser fast and predictable: no heap activity, no hidden buffering, and no lifetime confusion because every returned slice points to the caller-owned input.
Mind Map: Zero Allocation Parser Architecture
Minimal Building Blocks
Cursor and Bounds
A common mistake is to index into the slice without checking length. Instead, write helpers that ensure you never read past the end.
const std = @import("std");

pub fn isDigit(c: u8) bool {
    return c >= '0' and c <= '9';
}

pub fn takeWhileDigits(input: []const u8, i: usize) !struct { slice: []const u8, next: usize } {
    var j = i;
    while (j < input.len and isDigit(input[j])) : (j += 1) {}
    if (j == i) return error.ExpectedDigit;
    return .{ .slice = input[i..j], .next = j };
}
This allocates nothing. The returned slice is a view into input, and next tells the caller where parsing should resume.
Error Types That Stay Useful
Use a small error set that matches what the parser can fail on. The caller can map those errors to user-facing messages without forcing the parser to allocate.
pub const ParseError = error{
    ExpectedDigit,
    UnexpectedEnd,
    InvalidChar,
};
When you need to distinguish failures, keep the errors specific. “InvalidChar” is more actionable than a generic “ParseFailed”.
Example: Parsing an Unsigned Integer as a Slice
The simplest useful parser returns the digit slice and lets later code decide how to interpret it. That keeps the parser generic and avoids copying.
pub fn parseU32View(input: []const u8, i: usize) !struct { digits: []const u8, next: usize } {
    if (i >= input.len) return error.UnexpectedEnd;

    var j = i;
    while (j < input.len and isDigit(input[j])) : (j += 1) {}
    if (j == i) return error.ExpectedDigit;

    // Optional: validate range without allocating.
    // Here we parse to u32 using a small local accumulator.
    var acc: u64 = 0;
    for (input[i..j]) |c| {
        acc = acc * 10 + (c - '0');
        if (acc > std.math.maxInt(u32)) return error.InvalidChar;
    }

    return .{ .digits = input[i..j], .next = j };
}
Notice the range check uses only locals. The digits slice is still returned, so you can reuse it for formatting, diagnostics, or exact reproduction.
Example: Parsing a Key Value Pair Without Copying
Assume input like name=123. We return a slice for the key and a slice for the digits.
pub fn parseKeyValue(input: []const u8, i: usize) !struct {
    key: []const u8,
    valueDigits: []const u8,
    next: usize,
} {
    var j = i;
    while (j < input.len and input[j] != '=' and input[j] != '\n') : (j += 1) {}
    if (j == i) return error.InvalidChar;
    if (j >= input.len) return error.UnexpectedEnd;
    if (input[j] != '=') return error.InvalidChar;

    const key = input[i..j];
    j += 1;

    const parsed = try parseU32View(input, j);
    j = parsed.next;

    return .{ .key = key, .valueDigits = parsed.digits, .next = j };
}
No allocations occur. The parser is strict about structure: it refuses missing = and stops at newline.
Advanced Details That Prevent Hidden Allocations
- Avoid building strings: formatting into owned buffers often triggers allocation. Prefer returning slices and letting the caller format.
- Don’t use dynamic containers:
ArrayListand friends allocate. If you need temporary state, use fixed-size arrays or locals. - Keep backtracking cheap: if your grammar requires trying alternatives, do it by moving the cursor index and re-parsing, not by storing intermediate buffers.
- Return small structs: returning slices and integers is allocation-free and keeps the call graph clear.
Mind Map: Validation Without Allocation
- Validation Without Allocation
  - Character Checks
    - digit, alpha, whitespace
  - Structural Checks
    - required separators like '='
    - termination like newline
  - Range Checks
    - local accumulators for numbers
  - Bounds Checks
    - guard `i < len` and `j < len`
  - Error Propagation
    - `try` with precise error sets
Putting It Together
A zero-allocation parser is mostly discipline: treat input as read-only bytes, represent parsed parts as slices, advance a cursor, and validate with local variables. Once you adopt the “return value plus next index” pattern, the rest of the parser becomes a sequence of small, composable functions that never need to allocate to be correct.
7.2 Using Comptime to Generate Tokenizers and State Machines
A tokenizer turns a byte stream into tokens like identifiers, numbers, and punctuation. A state machine describes how the tokenizer moves between states as it consumes input. In Zig, comptime lets you generate the state machine structure and the transition logic so the runtime loop stays small and predictable.
Foundations: What Comptime Can Generate
At runtime, you want a tight loop: read a byte, decide the next state, maybe emit a token. At compile time, you can precompute:
- The set of states and transitions for your grammar.
- Which transitions are accepting and what token kind they produce.
- Character classification tables (for ASCII) or predicate functions specialized to your token set.
The key idea is to separate “what the tokenizer recognizes” from “how it scans.” comptime makes the “what” become concrete code and data.
Designing Token Specs for Generation
Start with a small, explicit token specification. For example, recognize:
- Whitespace to skip
- Identifiers:
[A-Za-z_][A-Za-z0-9_]* - Integers:
[0-9]+ - Operators:
+ - * / =
Represent this as compile-time data: token kinds plus rules. Even if you don’t build a full regex engine, you can still generate a state machine from a structured spec.
Building a Minimal State Machine Model
A practical tokenizer state machine has:
state: current scanning mode (e.g.,Start,InIdent,InInt).next: transition target for each input class.emit: whether leaving a state produces a token.reconsume: whether the current byte should be processed again after emission.
You can model input classes as an enum: Letter, Digit, Underscore, Whitespace, Plus, Minus, Other. Then generate a transition table indexed by (state, class).
Example: Compile-Time Transition Table
Below is a compact pattern for generating a table. It uses ASCII classification and a small state set. The transition function is generated at compile time by specializing on the token spec.
const State = enum(u8) { Start, InIdent, InInt };
const Class = enum(u8) { Letter, Digit, Underscore, Whitespace, Plus, Other };

fn classify(b: u8) Class {
    return switch (b) {
        'A'...'Z', 'a'...'z' => .Letter,
        '0'...'9' => .Digit,
        '_' => .Underscore,
        ' ', '\n', '\t', '\r' => .Whitespace,
        '+' => .Plus,
        else => .Other,
    };
}

fn buildTable(comptime Spec: type) [@typeInfo(State).Enum.fields.len][@typeInfo(Class).Enum.fields.len]State {
    _ = Spec;
    var t: [3][6]State = undefined;
    // Start
    t[@intFromEnum(State.Start)][@intFromEnum(Class.Whitespace)] = .Start;
    t[@intFromEnum(State.Start)][@intFromEnum(Class.Letter)] = .InIdent;
    t[@intFromEnum(State.Start)][@intFromEnum(Class.Underscore)] = .InIdent;
    t[@intFromEnum(State.Start)][@intFromEnum(Class.Digit)] = .InInt;
    t[@intFromEnum(State.Start)][@intFromEnum(Class.Plus)] = .Start;
    t[@intFromEnum(State.Start)][@intFromEnum(Class.Other)] = .Start;
    // InIdent
    t[@intFromEnum(State.InIdent)][@intFromEnum(Class.Letter)] = .InIdent;
    t[@intFromEnum(State.InIdent)][@intFromEnum(Class.Digit)] = .InIdent;
    t[@intFromEnum(State.InIdent)][@intFromEnum(Class.Underscore)] = .InIdent;
    t[@intFromEnum(State.InIdent)][@intFromEnum(Class.Whitespace)] = .Start;
    t[@intFromEnum(State.InIdent)][@intFromEnum(Class.Plus)] = .Start;
    t[@intFromEnum(State.InIdent)][@intFromEnum(Class.Other)] = .Start;
    // InInt
    t[@intFromEnum(State.InInt)][@intFromEnum(Class.Digit)] = .InInt;
    t[@intFromEnum(State.InInt)][@intFromEnum(Class.Letter)] = .Start;
    t[@intFromEnum(State.InInt)][@intFromEnum(Class.Underscore)] = .Start;
    t[@intFromEnum(State.InInt)][@intFromEnum(Class.Whitespace)] = .Start;
    t[@intFromEnum(State.InInt)][@intFromEnum(Class.Plus)] = .Start;
    t[@intFromEnum(State.InInt)][@intFromEnum(Class.Other)] = .Start;
    return t;
}
The table above is intentionally small. In a real generator, Spec would drive which transitions exist and which states are accepting.
Emission Logic: Accepting States Without Runtime Guesswork
Transitions decide where you go. Emission decides what you output. A clean approach is to generate an accept table mapping state to a token kind or “no token.” Then, when you detect you’re leaving an accepting state, you emit the token.
For example:
InIdentemitsIdentifierwhen the next class is notLetter,Digit, orUnderscore.InIntemitsIntegerwhen the next class is notDigit.
This keeps runtime logic simple: compare current state and next state, and emit when the state changes from accepting to non-accepting.
Reconsume Handling for Correct Token Boundaries
When you emit because the next byte doesn’t belong to the current token, you must not skip it. Two common strategies:
- Lookahead: classify the byte first, then decide whether to emit and reprocess.
- Reconsume flag: after emission, decrement the input index or keep the byte in a buffer.
In Zig, the lookahead approach often reads cleanly: you classify b, compute next_state, and if emission happens, you emit using the already-advanced cursor minus one.
Mind Map: Comptime Tokenizer Generation
Advanced Detail: Specializing Predicates and Tables
Once the structure works, you can specialize further at compile time:
- Generate classification tables for a fixed ASCII alphabet so
classifybecomes a single array lookup. - Generate per-token predicate functions for tricky rules like hex numbers or quoted strings, while still using the same state machine runtime.
- Keep the runtime loop generic over the generated tables, so adding tokens doesn’t require rewriting the scanner.
The payoff is that the runtime loop stays consistent and small, while the compile-time generator absorbs the complexity of your token rules.
7.3 Validating Formats With Compile Time Grammars and Constraints
Format validation is where “safe and fast” gets real. You want to reject bad inputs early, produce useful errors, and avoid runtime parsing logic that grows unpredictable. Zig’s compile-time capabilities let you describe a format once, then generate a specialized validator that checks structure and constraints with minimal overhead.
Foundations: From Grammar Shape to Constraint Checks
Start by separating two ideas:
- Structure: what fields exist, in what order, and how many bytes each consumes.
- Constraints: what values are allowed (ranges, exact matches, character classes, length limits).
A compile-time grammar encodes the structure. Constraints are attached to nodes in that grammar so the generated validator can enforce them while it walks the input.
A practical mental model: the validator is a small state machine whose transitions are fixed at compile time. That means fewer branches that depend on the input’s “type,” and more branches that depend on the input’s actual bytes.
Mind Map: Grammar and Constraints Pipeline
Designing a Small Grammar for a Real Format
Consider a compact binary header:
- 4 bytes: magic
ZIG1 - 1 byte: version (allowed 1..=3)
- 2 bytes: payload length (big-endian, must be <= 1024)
- payload: exactly that many bytes
The grammar is a fixed sequence. Constraints are attached to the magic, version, and payload length.
In Zig, you can represent this as a compile-time description and generate a function that validates a []const u8.
Example: Compile Time Validator Skeleton
const std = @import("std");

pub const HeaderSpec = struct {
    pub const magic = "ZIG1";
    pub const min_version: u8 = 1;
    pub const max_version: u8 = 3;
    pub const max_payload: u16 = 1024;
};

pub fn validateHeader(comptime Spec: type, input: []const u8) !struct {
    version: u8,
    payload_len: u16,
} {
    if (input.len < 7) return error.TooShort;
    if (!std.mem.eql(u8, input[0..4], Spec.magic)) return error.BadMagic;

    const version = input[4];
    if (version < Spec.min_version or version > Spec.max_version) return error.BadVersion;

    const payload_len = std.mem.readInt(u16, input[5..7], .big);
    if (payload_len > Spec.max_payload) return error.PayloadTooLarge;
    if (input.len != 7 + payload_len) return error.LengthMismatch;

    return .{ .version = version, .payload_len = payload_len };
}
This is already useful: the “grammar” is encoded in HeaderSpec, and the validator is specialized for that spec at compile time. The runtime work is just byte checks and integer comparisons.
Adding Choice and Repetition Without Losing Predictability
Many formats aren’t pure sequences. Suppose the payload begins with a one-byte type tag:
- Tag
0x01: payload is a list of NUL-free ASCII tokens separated by,. - Tag
0x02: payload is raw bytes.
A compile-time grammar can model this as a choice node driven by the tag. The validator reads the tag once, then calls the specialized branch validator.
For repetition, prefer bounded repetition when possible. If the format says “up to 16 items,” generate a loop that checks at most 16 items and fails if it sees more. That keeps the control flow stable and prevents accidental quadratic behavior.
Mind Map: Error Reporting Strategy
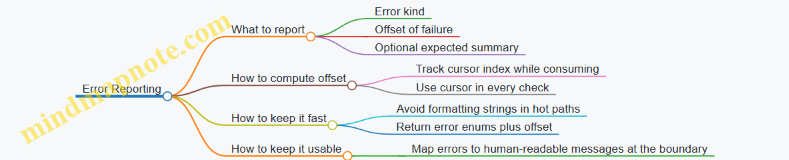
Example: Offset-Aware Errors for Debuggability
const std = @import("std");

pub const ValidateError = error{
    TooShort,
    BadMagic,
    BadVersion,
    PayloadTooLarge,
    LengthMismatch,
};

pub fn validateHeaderWithOffset(comptime Spec: type, input: []const u8) !struct {
    version: u8,
    payload_len: u16,
    error_offset: usize,
} {
    var cursor: usize = 0;
    if (input.len < 7) return error.TooShort;

    if (!std.mem.eql(u8, input[cursor..cursor+4], Spec.magic))
        return error.BadMagic;
    cursor += 4;

    const version = input[cursor];
    if (version < Spec.min_version or version > Spec.max_version)
        return error.BadVersion;
    cursor += 1;

    const payload_len = std.mem.readInt(u16, input[cursor..cursor+2], .big);
    if (payload_len > Spec.max_payload) return error.PayloadTooLarge;
    cursor += 2;

    if (input.len != cursor + payload_len) return error.LengthMismatch;
    return .{ .version = version, .payload_len = payload_len, .error_offset = cursor };
}
Even if you don’t return the offset for every failure, tracking a cursor makes it straightforward to include it when you need it. The key is to keep error creation cheap: return enums from the validator, and format messages only at the boundary where you log or display them.
Constraints That Pay Off: Length, Ranges, and Character Classes
Constraints should be checked at the earliest moment the relevant bytes are available. For example:
- Check payload length immediately after reading it, before scanning the payload.
- For character classes, validate each byte as you consume it, and stop at the first invalid character.
- For exact matches like magic bytes, compare slices directly rather than looping byte-by-byte in Zig code.
Putting It Together: A Cohesive Validation Flow
A compile-time grammar approach works best when you:
- Define a spec type that captures structure and constraints.
- Generate a validator that consumes input with a cursor.
- Enforce constraints immediately and return precise errors.
- Keep branch structure driven by compile-time choices or a single runtime tag read.
The result is a validator that is both strict and predictable: it rejects malformed inputs quickly, and it does so with code paths that are mostly fixed by the grammar rather than by the input’s surprises.
7.4 Handling Endianness and Integer Parsing Efficiently
When you parse integers from bytes, you’re really doing two jobs: interpreting byte order (endianness) and converting a fixed-width sequence into a numeric value. Zig makes both explicit, which is great for performance work because you can see exactly what the compiler can optimize.
Foundations of Endianness
Endianness describes how multi-byte values are laid out in memory or on the wire.
- Little-endian: least significant byte comes first (e.g.,
0x1234as34 12). - Big-endian: most significant byte comes first (e.g.,
0x1234as12 34).
A common mistake is to treat “byte order” as if it were the same as “alignment” or “pointer casting.” In Zig, you should avoid reinterpreting raw bytes as integers via pointer casts unless you’ve proven alignment and endianness match. Instead, parse from slices using explicit conversions.
Efficient Integer Parsing Strategy
A good parsing function has three properties:
- No hidden allocations: it should operate on
[]const u8and return values directly. - Predictable control flow: ideally no per-byte branching in hot paths.
- Clear width handling: the code should state whether it parses
u16,u32,i64, etc.
For unsigned integers, the core idea is to combine bytes with shifts and bitwise OR. For signed integers, parse as unsigned first, then reinterpret via two’s complement rules.
Mind Map: Endianness and Parsing
Example: Big-Endian U16 And U32
This example parses fixed widths from a byte slice. It checks length once, then combines bytes without branching per byte.
const std = @import("std");

fn readU16BE(bytes: []const u8) !u16 {
    if (bytes.len < 2) return error.ShortBuffer;
    return (@as(u16, bytes[0]) << 8) | @as(u16, bytes[1]);
}

fn readU32BE(bytes: []const u8) !u32 {
    if (bytes.len < 4) return error.ShortBuffer;
    return (@as(u32, bytes[0]) << 24) |
        (@as(u32, bytes[1]) << 16) |
        (@as(u32, bytes[2]) << 8)  |
        @as(u32, bytes[3]);
}
The @as casts matter: they prevent accidental promotion to a larger type and keep the shift widths well-defined.
Example: Little-Endian U16 And U32
The only change is the order of shifts.
fn readU16LE(bytes: []const u8) !u16 {
    if (bytes.len < 2) return error.ShortBuffer;
    return (@as(u16, bytes[1]) << 8) | @as(u16, bytes[0]);
}

fn readU32LE(bytes: []const u8) !u32 {
    if (bytes.len < 4) return error.ShortBuffer;
    return (@as(u32, bytes[3]) << 24) |
        (@as(u32, bytes[2]) << 16) |
        (@as(u32, bytes[1]) << 8)  |
        @as(u32, bytes[0]);
}
Signed Integers Without Surprises
Signed values in binary formats are usually stored in two’s complement. The simplest approach is:
- Parse as the corresponding unsigned type.
- Cast to the signed type.
fn readI16BE(bytes: []const u8) !i16 {
    const u = try readU16BE(bytes);
    return @bitCast(i16, u);
}

fn readI32LE(bytes: []const u8) !i32 {
    const u = try readU32LE(bytes);
    return @bitCast(i32, u);
}
@bitCast preserves the bit pattern exactly, which is what you want for two’s complement.
Compile-Time Selection for Reuse
If you parse many fields with the same widths but different endianness, you can parameterize the function with comptime flags. This keeps the call sites clean and lets the compiler remove unused branches.
fn readU32(comptime is_be: bool, bytes: []const u8) !u32 {
    if (bytes.len < 4) return error.ShortBuffer;
    if (is_be) {
        return (@as(u32, bytes[0]) << 24) |
            (@as(u32, bytes[1]) << 16) |
            (@as(u32, bytes[2]) << 8)  |
            @as(u32, bytes[3]);
    } else {
        return (@as(u32, bytes[3]) << 24) |
            (@as(u32, bytes[2]) << 16) |
            (@as(u32, bytes[1]) << 8)  |
            @as(u32, bytes[0]);
    }
}
Because is_be is comptime, only one branch remains in the generated code.
Practical Notes for Real Parsers
- Check buffer length once per field: repeated checks inside tight loops add overhead.
- Prefer fixed-width reads: parsing
u24or odd widths should be explicit so you don’t accidentally sign-extend or drop bits. - Keep parsing separate from validation: first convert bytes to numbers, then validate ranges. This makes the hot path predictable and the error messages more precise.
Example: Parsing a Header Field Set
A typical pattern is to parse sequential fields from a cursor slice.
const Header = struct { magic: u32, version: u16 };

fn parseHeader(bytes: []const u8) !Header {
    if (bytes.len < 6) return error.ShortBuffer;
    const magic = try readU32(true, bytes[0..4]);
    const version = try readU16BE(bytes[4..6]);
    return .{ .magic = magic, .version = version };
}
This approach keeps indexing simple and avoids pointer casting, while still being efficient.
7.5 Producing Typed Output Structures with Minimal Runtime Overhead
Typed output is where a parser stops being “a function that returns bytes” and becomes “a function that returns meaning.” In Zig, you can produce strongly typed structures while keeping runtime work small by pushing decisions to compile time and by using slices and fixed layouts carefully.
From Tokens to Types Without Extra Work
Start with a clear separation:
- Input view: a
[]const u8slice. - Parsing stage: functions that consume the slice and return either an error or a typed value.
- Output stage: a struct (or union) whose fields match the parsed meaning.
A common mistake is to parse into temporary generic containers (like []u8 plus tags) and then convert later. That adds allocations or extra passes. Instead, parse directly into the final typed fields.
Mind Map: Typed Output Pipeline
A Minimal Typed Output Example
Suppose you parse a simple header: version=<u32>;flags=<u8>. The output is a typed struct.
const std = @import("std");

const Header = struct {
    version: u32,
    flags: u8,
};

fn parseU32(input: []const u8, cursor: *usize) !u32 {
    const start = cursor.*;
    while (cursor.* < input.len and input[cursor.*] >= '0' and input[cursor.*] <= '9') cursor.* += 1;
    return std.fmt.parseInt(u32, input[start..cursor.*], 10);
}

fn parseU8(input: []const u8, cursor: *usize) !u8 {
    const start = cursor.*;
    while (cursor.* < input.len and input[cursor.*] >= '0' and input[cursor.*] <= '9') cursor.* += 1;
    return std.fmt.parseInt(u8, input[start..cursor.*], 10);
}

fn parseHeader(input: []const u8) !Header {
    var c: usize = 0;
    if (!std.mem.startsWith(u8, input[c..], "version=")) return error.BadFormat;
    c += "version=".len;
    const version = try parseU32(input, &c);
    if (input[c] != ';') return error.BadFormat;
    c += 1;
    if (!std.mem.startsWith(u8, input[c..], "flags=")) return error.BadFormat;
    c += "flags=".len;
    const flags = try parseU8(input, &c);
    return Header{ .version = version, .flags = flags };
}
This produces Header directly. There’s no intermediate “key-value map,” no second conversion pass, and the only runtime branching is the parsing itself.
Compile-Time Output Shapes for Variants
For formats with variants, prefer a tagged union where the tag is derived during parsing. You can also use comptime to select the union shape based on a parameter.
const Kind = enum { a, b };
const Out = union(Kind) {
    a: struct { x: u32 },
    b: struct { y: u8 },
};

fn parseOut(comptime kind: Kind, input: []const u8) !Out {
    _ = input;
    return switch (kind) {
        .a => Out{ .a = .{ .x = 1 } },
        .b => Out{ .b = .{ .y = 2 } },
    };
}
In real code, you’d parse fields instead of constants, but the key idea holds: the output union layout is known at compile time, so there’s no runtime reflection or dynamic allocation.
Typed Enums for Constrained Fields
When a field has a small set of valid values, parse into an enum rather than a raw integer. This keeps downstream code honest: pattern matching on the enum becomes the control flow.
A practical approach is to parse the numeric form, then map it to the enum with a small switch. The mapping cost is tiny and localized, and the rest of the program benefits from type checking.
Keeping Runtime Overhead Low
To avoid hidden costs while producing typed output:
- Parse into final fields: return
HeaderorOutdirectly. - Use slices as views: pass
[]const u8and a cursor index; don’t allocate substrings. - Push decisions to comptime: when the output shape depends on a known configuration, use
comptimeparameters. - Keep layouts predictable: prefer structs with straightforward field ordering so the compiler can generate efficient loads.
Mind Map: Overhead Control Checklist
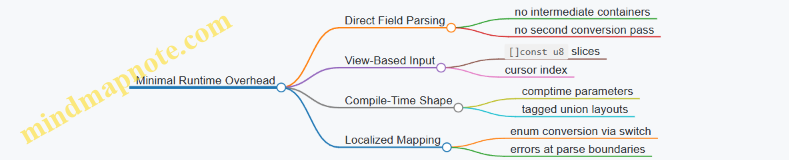
Putting It Together
A good typed output design ends up looking boring in the hot path: parse bytes, validate boundaries, construct a struct or union, return. The “interesting” work happens in the type definitions and in the compile-time choices that prevent runtime guessing. That’s how you get safer low-level code without paying for it twice.
8. Concurrency and Parallelism with Deterministic Resource Control
8.1 Choosing Concurrency Primitives for Throughput and Latency
Concurrency primitives are tools for controlling two competing goals: throughput (how much work finishes per unit time) and latency (how long one unit of work waits before completing). The trick is to pick primitives that match your workload’s shape: bursty vs steady, CPU-bound vs I/O-bound, and whether tasks can be processed independently.
Foundational Model for Decisions
Start by classifying the work.
- CPU-bound tasks: mostly compute, benefit from parallelism, and are sensitive to scheduling overhead.
- I/O-bound tasks: mostly waiting on reads/writes, benefit from overlapping waits, and are sensitive to buffer management and backpressure.
- Mixed tasks: often need a pipeline where one stage overlaps I/O while another crunches CPU.
Then decide what you want to optimize.
- Low latency usually means minimizing time spent waiting in queues, avoiding global locks, and keeping critical sections short.
- High throughput usually means keeping all cores busy, reducing context switching, and batching where it doesn’t inflate tail latency.
Finally, map those goals to primitives.
- Threads: good for CPU-bound work; cost more to create and switch.
- Async I/O: good for I/O-bound work; cost less per waiting operation.
- Channels / queues: good for decoupling stages and applying backpressure.
- Mutexes / atomics: good for shared state; can hurt latency if contention grows.
Mind Map: Primitive Selection
Threads for CPU-Bound Throughput
For CPU-bound work, threads are usually the simplest and fastest path. The key is to partition the input so each thread can run mostly independently.
A common pattern is a work queue with fixed worker threads. Use a bounded queue so producers can’t outrun consumers.
const std = @import("std");

fn worker(id: usize, rx: *std.Channel([]u8, .{ .capacity = 64 })) void {
    while (true) {
        const msg = rx.receive() catch break;
        // Process msg with CPU-heavy logic
        // Keep per-thread scratch space local
        _ = id;
        _ = msg;
    }
}

pub fn main() !void {
    var gpa = std.heap.GeneralPurposeAllocator(.{}){};
    defer _ = gpa.deinit();

    var ch = std.Channel([]u8, .{ .capacity = 64 }){};
    var threads: [4]std.Thread = undefined;
    for (&threads, 0..) |*t, i| t.* = try std.Thread.spawn(.{}, worker, .{ i, &ch });

    // Producer: send tasks; bounded capacity applies backpressure
    // Close channel when done
    ch.close();
    for (threads) |t| t.join();
}
This structure tends to improve throughput because workers stay busy, while bounded capacity helps latency by preventing unbounded queue growth.
Async I/O for Latency Under Waiting
For I/O-bound work, async I/O avoids dedicating a thread per waiting operation. The latency benefit comes from not blocking threads while waiting for the kernel.
A practical rule: keep the event loop responsive by ensuring that any CPU work inside the async path is either small or offloaded to a worker pool. If you do heavy computation in the async handler, you’ll turn “waiting” into “stalling.”
Channels for Decoupling and Backpressure
Channels are the glue between stages. They also define where latency accumulates: time spent waiting to send or receive.
Use channels when:
- you want clear ownership boundaries between producer and consumer
- you need backpressure (bounded capacity)
- you want to avoid shared mutable state
Avoid channels when:
- each message is tiny and overhead dominates
- you need strict ordering with complex shared invariants that are easier with locks
Mutexes and Atomics for Shared State
Mutexes are appropriate when multiple tasks must update shared data with non-trivial invariants. To protect latency:
- keep the locked region small
- avoid locking around slow operations
- prefer sharded locks (multiple mutexes keyed by partition)
Atomics are appropriate for simple shared values like counters or flags. They reduce contention compared to mutexes, but they don’t replace the need for correct invariants. If you need to update multiple fields consistently, a mutex (or message passing) is usually the safer choice.
A Systematic Selection Checklist
- Identify the bottleneck: compute vs waiting.
- Choose the primary execution model: threads for CPU, async for I/O.
- Decide communication style: message passing via channels vs shared state via locks/atomics.
- Add backpressure: bounded channels or explicit throttling.
- Partition work: per-thread local buffers and independent chunks.
- Measure queue depth and wait time: latency often hides in waiting.
Example: Two-Stage Pipeline with Controlled Latency
Suppose you read data from a socket (I/O) and then parse and validate it (CPU). A good primitive mix is async for reading and a bounded channel to a CPU worker pool.
- Async task reads into a buffer and sends it through a bounded channel.
- Workers parse and validate.
- If the channel fills, the async reader slows down, preventing memory growth and reducing tail latency.
This design keeps the event loop from blocking while ensuring the system doesn’t accumulate unlimited pending work—two goals that are easy to fight if you pick primitives without a plan.
8.2 Managing Per Thread Allocations With Allocator Injection
Per-thread allocation is where performance and correctness meet. If each thread allocates from its own allocator, you avoid cross-thread contention and you make ownership boundaries obvious. Allocator injection is the mechanism: you pass an allocator into the code that needs memory, instead of reaching for a global allocator.
Foundational Model of Allocator Injection
Allocator injection means every function that may allocate receives an std.mem.Allocator parameter. That allocator can be backed by a thread-local arena, a pool, or a bump allocator. The key is that the allocation policy is chosen at the call site, not hidden inside the callee.
A practical rule: if a function allocates more than once, it should accept an allocator and use it consistently. If it allocates exactly once, injection still helps testing and lets you swap strategies without rewriting the function.
Mind Map: Per Thread Allocation Flow
Thread Local Allocator Setup
A common pattern is: create one allocator per worker thread, then reuse it for a batch of tasks. The allocator is reset or deinitialized when the batch ends.
const std = @import("std");

fn workerLoop(alloc: std.mem.Allocator) void {
    // alloc is injected; worker decides policy upstream.
    // Do work in batches and reset allocator between batches.
}

pub fn main() !void {
    var gpa = std.heap.GeneralPurposeAllocator(.{}){};
    defer _ = gpa.deinit();
    const base = gpa.allocator();

    // Example: create per-thread arenas from base.
    // In real code, do this per thread at startup.
    var arena = std.heap.ArenaAllocator.init(base);
    defer arena.deinit();
    const thread_alloc = arena.allocator();

    workerLoop(thread_alloc);
}
The important detail is that arena.deinit() happens when the thread is done with that allocator’s lifetime. That makes memory reclamation deterministic without requiring cross-thread frees.
Designing APIs That Accept Allocators
Inject allocators at the boundary where memory policy should be decided. For example, a parser that builds a list of tokens should accept an allocator so callers can choose arenas for short-lived parse results.
const std = @import("std");

pub fn parseNumbers(alloc: std.mem.Allocator, input: []const u8) ![]u32 {
    var out = std.ArrayList(u32).init(alloc);
    errdefer out.deinit();

    var it = std.mem.tokenizeScalar(u8, input, ' ');
    while (it.next()) |tok| {
        const n = try std.fmt.parseInt(u32, tok, 10);
        try out.append(n);
    }
    return out.toOwnedSlice();
}
If the caller uses a per-thread arena, the returned slice becomes valid until the arena is reset or deinitialized. That’s a clear lifetime contract: the allocator defines the lifetime.
Keeping Inner Loops Allocation Free
Allocator injection helps you move allocations out of hot loops. A typical approach is to preallocate buffers once per task batch, then reuse them.
const std = @import("std");

pub fn processBatch(alloc: std.mem.Allocator, items: []const u32) !void {
    var tmp = try std.ArrayList(u32).initCapacity(alloc, items.len);
    defer tmp.deinit();

    for (items) |x| {
        // No allocations here; tmp has capacity.
        try tmp.append(x * 2);
    }
}
This pattern prevents allocator calls from showing up in profiling traces during the loop. It also reduces the number of failure points, because capacity allocation happens once.
Advanced Detail: Choosing the Right per Thread Allocator
Different per-thread allocators serve different shapes of work:
- Arena allocator: best for short-lived graphs of allocations where you can discard everything together. Great for parsing, building temporary indices, and per-request scratch data.
- Pool allocator: best when you repeatedly allocate and free objects of the same size. It keeps allocation cost stable across time.
- Bump allocator: best for streaming buffers where you only grow and reset in bulk.
Allocator injection makes these choices local to the thread setup code, not scattered across the program.
Correctness Boundaries and Failure Modes
Two rules keep things sane:
- Free with the same allocator that allocated. If you use arenas, you often avoid individual frees entirely and rely on
deinitor reset. - Do not share mutable allocations across threads. If a buffer is owned by a thread allocator, treat it as thread-local data unless you copy it into a shared structure with a different ownership plan.
When you follow these rules, allocator injection becomes both a performance tool and a correctness guardrail.
Mind Map: Common Pitfalls
Integrated Summary
Allocator injection turns memory policy into an explicit parameter. Per-thread allocators then provide stable performance by keeping allocation work local, while also making lifetimes and ownership boundaries easier to reason about. The result is code that stays fast under load and predictable under review.
8.3 Avoiding Contention With Work Partitioning and Local Buffers
Contention usually shows up as time spent waiting: threads block on a shared lock, a shared queue, or a shared cache line that keeps getting rewritten. The fix is rarely “make the lock faster.” It’s usually “stop sharing the hot stuff.” Work partitioning and local buffers do exactly that: each worker touches its own memory and only exchanges results at well-defined boundaries.
Foundational Idea: Partition First, Share Later
Start by deciding what can be independent. Common choices are:
- Input partitioning: split a byte stream into chunks aligned to message boundaries.
- Key partitioning: route records by hash ranges so each worker owns a key subset.
- Stage partitioning: separate parsing from aggregation so each stage has its own buffers.
Then define a boundary where sharing is allowed. For example, workers may push completed aggregates into a single reducer queue, but they should not push per-record updates.
Mind Map: Contention Sources and Countermeasures
Local Buffers: The “No Shared Writes” Rule
A local buffer is memory owned by one worker for the duration of a task. The worker writes freely without synchronization. Later, the worker publishes a compact summary.
In Zig, the simplest pattern is allocator injection plus per-thread state:
- Create a worker context with a local allocator or local arena.
- Allocate scratch buffers from that allocator.
- Keep shared structures read-only during the hot loop.
Example: per-worker aggregation with a merge boundary.
const std = @import("std");

pub fn workerMain(comptime K: usize, input: []const u8, out: *[K]u64) void {
    var local: [K]u64 = .{0} ** K;
    var i: usize = 0;
    while (i < input.len) : (i += 1) {
        const key: usize = input[i] % K;
        local[key] += 1;
    }
    // Publish once per worker
    for (local, 0..) |v, idx| out[idx] += v;
}
This still updates out at the end, so contention can remain if many workers finish at once. The next step is to avoid shared writes even during publishing.
Advanced Detail: Two-Phase Publishing
Use a two-phase approach:
- Local phase: compute into local buffers.
- Batch publish phase: write into per-worker slots, then merge in a single thread.
That turns “many writers” into “one merger.”
const std = @import("std");

pub fn publishAndMerge(comptime K: usize, workers: usize, inputs: [][]const u8) [K]u64 {
    var per_worker: [workers][K]u64 = .{.{0} ** K} ** workers;

    for (inputs, 0..) |inp, w| {
        var local: [K]u64 = .{0} ** K;
        for (inp) |b| local[b \% K] += 1;
        per_worker[w] = local;
    }

    var merged: [K]u64 = .{0} ** K;
    for (per_worker) |slot| for (slot, 0..) |v, i| merged[i] += v;
    return merged;
}
Even if you later parallelize the worker loop, the merge stays deterministic and contention-free.
Work Partitioning Patterns That Fit Zig
- Chunked input with boundary handling: split by approximate size, then adjust chunk edges to message delimiters. Each worker parses its own chunk.
- Key range ownership: compute
worker_id = hash(key) % workersand route records. Each worker updates only its owned keys. - Stage-local buffers: parsing writes tokens into a local buffer; aggregation consumes from that local buffer without touching shared memory.
Key point: partitioning must match the access pattern. If you partition by input but aggregate by key, you’ll still need cross-worker updates unless you buffer per key locally.
Avoiding False Sharing
False sharing happens when independent variables share a cache line. If each worker writes to adjacent elements of a shared array, performance can collapse.
Mitigation:
- Store per-worker counters in separate cache-line-sized regions.
- Or keep per-worker data in distinct allocations.
In practice, the “per-worker slot then merge” approach already reduces false sharing because workers write to their own slots.
Capacity Planning and Backpressure
Local buffers must have capacity. If a worker’s local buffer grows unpredictably, it may trigger allocations or spills that reintroduce contention.
A practical rule:
- Pre-size local buffers based on chunk size or expected record counts.
- If overflow is possible, use a two-pass strategy: first count locally, then allocate exact capacity locally.
Putting It Together: A Cohesive Workflow
- Partition work so each worker owns a disjoint subset.
- Allocate scratch and aggregation buffers locally.
- Publish results in batches into per-worker slots.
- Merge once, deterministically, outside the hot loop.
This structure keeps the hot path free of locks and shared writes, which is where most systems performance problems hide.
8.4 Coordinating Tasks with Channels and Bounded Queues
Channels let tasks exchange values without sharing mutable state directly. Bounded queues add a crucial constraint: if producers run faster than consumers, they must slow down (or fail) instead of consuming unbounded memory. The result is predictable backpressure and fewer “why did RAM explode” surprises.
Foundations: What Channels Guarantee
A channel is a conduit with two roles: senders and receivers. A send either succeeds immediately (if capacity exists) or waits until a receiver makes room. A receive either returns a value immediately (if one is available) or waits until a sender provides one.
Bounded queues are the same idea with capacity. This capacity is not just a performance knob; it defines the system’s safety envelope. If you choose a small capacity, you force tighter coordination. If you choose a large capacity, you allow more buffering but increase memory usage and latency.
Designing the Producer Consumer Contract
Start by writing down what each side promises.
- Sender contract: “I will send at most N items before I stop, and I will handle backpressure by waiting.”
- Receiver contract: “I will continuously receive until a shutdown signal arrives, then drain remaining items.”
In Zig, you typically pass an allocator and an explicit shutdown mechanism. A common pattern is to send work items and then close the channel so receivers can exit cleanly.
Mind Map: Channel Coordination Decisions
Example: Bounded Work Queue with Clean Shutdown
This example uses a bounded channel to distribute work to worker tasks. The main task sends a fixed number of jobs, then closes the channel. Workers exit after draining.
const std = @import("std");
const Job = struct { id: u32 };

pub fn main() !void {
    var gpa = std.heap.GeneralPurposeAllocator(.{}){};
    defer _ = gpa.deinit();
    const alloc = gpa.allocator();

    var chan = std.Channel(Job).init(alloc, 64);
    defer chan.deinit();

    var workers: [4]std.Thread = undefined;
    for (&workers) |*t| {
        t.* = try std.Thread.spawn(.{}, workerMain, .{ &chan });
    }

    for (0..1000) |i| try chan.send(.{ .id = @intCast(i) });
    chan.close();

    for (workers) |t| t.join();
}

fn workerMain(chan: *std.Channel(Job)) void {
    while (chan.recv()) |job| {
        _ = job; // process
    }
}
Key points: the channel capacity is 64, so at most 64 jobs can be buffered. If workers lag, senders block at send, which naturally throttles producers.
Choosing Capacity Without Guessing
Capacity should relate to the cost of processing and the acceptable buffering.
- If each job takes about 1 ms and you want producers to stay within ~10 ms of “freshness,” a capacity around 10 jobs per worker is a reasonable starting point.
- If jobs are tiny and processing is fast, capacity can be smaller because waiting is cheap.
- If jobs are expensive, capacity can be larger to keep workers busy, but memory still grows linearly with capacity.
A practical method is to measure queue wait time by instrumenting send blocking duration in debug builds, then adjust capacity based on observed contention.
Ownership and Memory Control in Queued Work
Bounded queues make ownership rules more important, not less.
- If
Jobcontains owned memory (like a slice), decide who frees it. - A safe approach is to send small value types or indices into a shared pool whose lifetime outlives all workers.
- If you must send heap allocations, consider sending a struct that includes a pointer plus a clear “free me” policy handled by the receiver.
When you keep queued items small, you reduce copying overhead and avoid allocator churn.
Advanced Coordination: Multiple Producers and Backpressure
With multiple producers, bounded capacity becomes a fairness mechanism. Producers will contend for space, and the channel’s internal scheduling determines which producer proceeds first.
If fairness matters, you can reduce contention by partitioning work: each producer sends to its own bounded channel, and a set of workers drains those channels. This keeps hot producers from starving others, while still bounding memory.
Advanced Coordination: Results and Separate Channels
Often you need both a work queue and a results queue. Use two bounded channels so results cannot accumulate without limit.
- Work channel: carries
Job. - Result channel: carries
Resultor status.
If results are slower than work, bounding the results queue forces workers to slow down too, which keeps the whole pipeline stable.
Shutdown That Doesn’t Lose Work
Closing the work channel is the simplest shutdown mechanism when workers can drain until empty. If you need to stop immediately, you must add an explicit cancellation signal and decide whether to drop queued jobs or drain them.
For most systems performance work, draining is preferable because it preserves determinism: every accepted job is processed exactly once, and shutdown behavior is easy to reason about.
8.5 Ensuring Thread Safety with Clear Ownership and Immutable Data
Thread safety in Zig is mostly about making illegal states unrepresentable. You do that by combining explicit ownership boundaries with data that cannot be mutated while shared. The trick is to decide, per type and per field, who is allowed to write and when.
Ownership Boundaries That Make Writes Obvious
Start by classifying data into three buckets:
- Thread-local mutable: only one thread can write.
- Shared immutable: many threads can read, nobody writes.
- Shared mutable: multiple threads may write, so you must synchronize.
In Zig, you express this with types and APIs. If a function takes *T, it implies mutation is allowed. If it takes []const T or *const T, mutation is not part of the contract.
A practical pattern is to store shared state behind an immutable handle and keep mutation confined to a single owner thread.
Immutable Data Patterns That Scale Cleanly
Immutable shared data is the easiest to make correct. Use const in the type, not just in the variable name. For example, a lookup table shared across workers should be passed as []const u32.
When you need to “update” immutable data, prefer replace-by-copy: build a new immutable structure, then publish a pointer to it. Readers only ever see fully constructed data.
Publishing Immutable Snapshots Safely
Publishing requires one synchronization point: the moment readers learn about the new snapshot. A common approach is to use an atomic pointer to an immutable allocation.
const std = @import("std");
const AtomicPtr = std.atomic.AtomicPtr;

pub const Snapshot = struct { table: []const u32 };

pub const Store = struct {
    ptr: AtomicPtr(Snapshot) = AtomicPtr(Snapshot).init(null),

    pub fn load(self: *Store) ?*const Snapshot {
        return self.ptr.load(.Acquire);
    }

    pub fn publish(self: *Store, snap: *Snapshot) void {
        self.ptr.store(snap, .Release);
    }
};
Readers call load(.Acquire) and then only read through *const Snapshot. Writers build Snapshot fully, then call publish with .Release. This ensures readers never observe partially initialized memory.
Preventing Use-After-Free with Ownership Transfer
Atomic publication solves visibility, not lifetime. If you free an old snapshot while readers still hold it, you get a classic bug.
To avoid that, choose one of these lifetime strategies:
- Single-writer, no-free: keep old snapshots until shutdown. Simple, but memory grows.
- Reference counting: increment on load, decrement on drop. More overhead, but bounded memory.
- Epoch-based reclamation: track when all readers are done. Efficient, but more code.
For many systems, reference counting is the most straightforward correctness-first option.
Example: Reference Counting for Shared Snapshots
Below is a minimal sketch using an atomic counter. The key rule: the snapshot is freed only when the counter reaches zero.
const std = @import("std");
const AtomicUsize = std.atomic.AtomicUsize;

pub const RefSnapshot = struct {
    refs: AtomicUsize = AtomicUsize.init(1),
    table: []const u32,

    pub fn retain(self: *RefSnapshot) void {
        _ = self.refs.fetchAdd(1, .AcqRel);
    }

    pub fn release(self: *RefSnapshot, allocator: std.mem.Allocator) void {
        if (self.refs.fetchSub(1, .AcqRel) == 1) {
            allocator.free(self.table);
            allocator.destroy(self);
        }
    }
};
A reader loads the pointer, calls retain, uses the data as []const, then calls release. The writer publishes the new snapshot and later releases its own reference.
Mind Map: Thread Safety Through Ownership and Immutability
Advanced Details That Prevent Subtle Bugs
- Don’t “const-cast” your way out: if you store
[]const T, treat it as read-only. Zig won’t stop you from lying, but the compiler can’t save you from incorrect contracts. - Keep construction private: build snapshots in a single thread, then publish. If construction happens concurrently with publication, you lose the visibility guarantee.
- Make synchronization points explicit: atomic loads/stores should be the only place where threads coordinate. If other shared mutable state exists, document and synchronize it similarly.
A Cohesive Rule Set
If you remember only three rules, make them these:
- Shared data is either immutable or synchronized mutable.
- Mutation happens only through APIs that take mutable pointers.
- Shared immutable snapshots are published with Acquire/Release, and their lifetime is managed so readers never outlive the data.
That combination is boring in the best way: it turns thread safety into a set of checkable invariants rather than a hope-and-pray exercise.
9. Interfacing with the System ABI and I/O
9.1 Calling Conventions and ABI Considerations for Performance Critical Code
When you write low-level Zig code that crosses boundaries—C libraries, system calls, or hand-tuned assembly—you’re really negotiating an ABI contract. The ABI (Application Binary Interface) specifies how arguments are passed, how return values are delivered, which registers are preserved, and how the stack is aligned. Zig helps you stay correct, but performance-critical code still needs you to understand the rules you’re relying on.
Core ABI Concepts That Affect Performance
Calling convention determines where parameters live (registers vs stack) and how the caller and callee coordinate cleanup. Register preservation matters because saving/restoring registers costs cycles and can increase pressure on the register allocator. Stack alignment matters because misalignment can force slower memory accesses or break instructions that assume alignment.
A practical way to think about it: every boundary crossing is a small “tax.” Your job is to make that tax predictable and small by matching the ABI precisely and minimizing unnecessary data movement.
Zig’s Role in Keeping the Contract Honest
Zig’s extern declarations let you describe foreign functions with explicit linkage. For performance-critical code, the key is to ensure your Zig types match the ABI expectation of the callee.
- Use
extern "c"for C ABI compatibility. - Prefer integer and pointer types with clear sizes.
- Avoid passing Zig-specific aggregates unless you’re sure how they map to the ABI.
Example: A Minimal C ABI Function
const std = @import("std");

extern "c" fn c_add(a: u32, b: u32) callconv(.C) u32;

pub fn addFast(a: u32, b: u32) u32 {
    return c_add(a, b);
}
This keeps the ABI surface simple: two 32-bit integers in, one 32-bit integer out. That simplicity reduces the chance of hidden stack traffic.
Data Layout and Parameter Passing
ABI rules interact with data layout. A struct might be passed by value, returned in registers, or passed indirectly depending on size and platform rules. Even when it “works,” passing large structs by value can create extra copies.
For hot paths, prefer:
- Passing pointers to structs rather than passing structs by value.
- Using fixed-size arrays or slices carefully, since slices are a pair (pointer + length) and may be passed in registers.
- Keeping parameter lists short so the ABI can use registers efficiently.
Example: Passing a Pointer Instead of a Struct
const std = @import("std");

const Packet = extern struct {
    len: u16,
    flags: u16,
    data: [64]u8,
};

extern "c" fn process_packet(p: *const Packet) callconv(.C) u32;

pub fn process(p: *const Packet) u32 {
    return process_packet(p);
}
Using a pointer avoids copying the 72-byte payload across the boundary.
Register Preservation and Volatile Memory
If you call into foreign code, assume it follows the ABI’s register preservation rules. If you use inline assembly, you must follow the same discipline: declare clobbers correctly and avoid relying on register values across the call.
For memory-mapped I/O or hardware registers, the ABI doesn’t save you. You must use Zig’s volatile semantics (or equivalent) so the compiler doesn’t optimize away required reads/writes.
Example: Volatile Access Pattern
const Reg = *volatile u32;

pub fn writeReg(reg: Reg, value: u32) void {
    reg.* = value;
}
This makes the side effect explicit and prevents “helpful” optimizations.
Stack Alignment and Frame Layout
On many platforms, the ABI requires the stack to be aligned at call boundaries. Zig generally handles this for normal calls, but if you mix in assembly or unusual calling patterns, alignment becomes your responsibility.
A common performance pitfall is accidentally forcing the compiler to spill registers because your call boundary uses types that don’t map cleanly to registers. That spill increases stack traffic and can cascade into more cache misses.
Mind Map: ABI Checklist for Performance Boundaries
Advanced Details Without the Footguns
- Use
callconv(.C)explicitly when you mean C ABI. Don’t rely on defaults when correctness and performance both matter. - Keep signatures stable. Changing a parameter type from
u32tousizecan alter register usage and stack layout. - Prefer
extern structfor ABI-facing layouts. It signals that the layout is part of the contract. - Avoid passing slices to foreign code unless the foreign side expects the same representation. A Zig slice is pointer + length; C code won’t know that unless you define a matching struct.
Example: ABI-Facing Slice Wrapper
const SliceU8 = extern struct {
    ptr: [*]const u8,
    len: usize,
};

extern "c" fn handle_bytes(s: SliceU8) callconv(.C) usize;

pub fn callHandleBytes(bytes: []const u8) usize {
    const s: SliceU8 = .{ .ptr = bytes.ptr, .len = bytes.len };
    return handle_bytes(s);
}
This makes the ABI representation explicit, so you control what crosses the boundary.
Practical Summary
Performance-critical ABI work is mostly about being precise: match the calling convention, keep types ABI-friendly, and avoid accidental copies. When you do that, the compiler can generate tight code on both sides of the boundary, and you spend your cycles on the work you actually care about.
9.2 Using Pointers and Volatile Memory Correctly
Pointers are Zig’s way of saying “I know where this lives.” Volatile memory is Zig’s way of saying “the value might change without your code touching it.” Getting both right matters for correctness and for performance, because the compiler will otherwise make assumptions that are true in ordinary code and false in low-level code.
Foundations: What Pointers Mean in Zig
A pointer in Zig is a typed address. The type controls how the compiler reads and writes memory: alignment, element size, and whether the access is allowed to be optimized.
Start with the three common pointer shapes:
*Tis a mutable pointer toT.*const Tis a read-only pointer toT.[*]Tand[*]const Tare “many-item” pointers without a length; they are useful for FFI and raw memory, but you must supply bounds separately.
A key rule: if you convert a pointer to a slice, you must provide the length. That length is what enables bounds checks and safe iteration.
Volatile: When the Compiler Must Not Assume Stability
volatile tells the compiler that each load or store is an observable operation. That means it must not cache the value in a register across volatile reads, and it must not remove or reorder volatile accesses in ways that would change what the hardware or another agent sees.
Use volatile for memory-mapped I/O registers, status flags updated by hardware, and shared variables updated by interrupt handlers or other execution contexts.
Mind Map: Pointers and Volatile Memory
Correct Patterns: Volatile Registers
A typical pattern is a struct that models a register block. Each field is a volatile type, so reads and writes happen exactly where you write them.
const Regs = extern struct {
    control: u32,
    status: u32,
    data: u32,
};

pub fn readStatus(base: *volatile Regs) u32 {
    // Each load is volatile because the pointed-to memory is volatile.
    return base.status;
}
If you instead wrote base: *Regs and then tried to mark individual reads as volatile, you’d need explicit volatile operations. The “volatile pointed-to” approach is usually clearer for register blocks.
Example: Polling a Status Bit
Polling is correct only if each iteration performs a fresh volatile load.
pub fn waitReady(base: *volatile Regs) void {
    while ((base.status & 0x1) == 0) {
        // Empty loop body on purpose.
        // The volatile load in base.status prevents caching.
    }
}
Advanced Details: Volatile Granularity and Pointer Conversions
Volatile applies to the memory being accessed, not to the variable name. That means you should choose the smallest unit that matches the hardware behavior.
- If the hardware updates a 32-bit register atomically, model it as
u32. - If it updates individual bytes, model the register as
u8or use explicit volatile byte accesses.
Also watch out for conversions that accidentally strip volatility. For example, taking base.status into a non-volatile local and then reusing it is fine, but only if you intentionally want the snapshot.
pub fn snapshotStatus(base: *volatile Regs) u32 {
    const s = base.status; // volatile load happens here
    return s;              // subsequent uses are non-volatile
}
Pointers and Safety: Avoiding Undefined Behavior
Volatile does not fix pointer mistakes. If you use a pointer that is misaligned, out of bounds, or points to memory that doesn’t exist, you can still get undefined behavior.
For raw pointers, prefer converting to slices when you have a length. For example, a DMA buffer pointer should become []u8 with an explicit size before you iterate.
Practical Checklist
- Use
*volatile Regsfor a register block so each field access is volatile. - Poll by reading volatile status each loop iteration.
- Model the smallest hardware update unit with the correct integer width.
- Convert pointers to slices only when you know the length.
- Don’t assume volatile makes misalignment or invalid pointers safe.
When you treat pointers as “typed addresses” and volatile as “observable memory accesses,” the compiler’s optimizations become predictable rather than surprising. That predictability is the whole point of doing this carefully.
9.3 Performing Syscalls and Managing Buffers for I/O Efficiency
Syscalls are where your program meets the operating system’s rules for files, sockets, and devices. Zig gives you low-level control, but the efficiency comes from disciplined buffer management and predictable call patterns.
Foundational Principles for Efficient Syscalls
Start by separating two concerns: (1) how you move bytes and (2) how you ask the OS to move bytes. The first is buffer layout and reuse; the second is syscall selection and argument correctness.
A common mistake is to allocate a fresh buffer per read or write. That turns I/O into an allocation benchmark. Instead, keep a reusable buffer with a clear ownership story: who owns it, how long it lives, and when it can be refilled.
Buffer Strategy for Reads
For reads, you want a buffer that can be filled repeatedly. A slice is the right abstraction: it carries both pointer and length, so you can pass only the valid region.
Use a loop that continues until you have enough data for your next step. For example, parsing a line requires searching for a delimiter, not assuming a single read contains it.
const std = @import("std");

pub fn readSome(fd: std.posix.fd_t, buf: []u8) !usize {
    // Reads up to buf.len bytes.
    return std.posix.read(fd, buf);
}
When you need “more than one read,” keep an index of how much data is currently in the buffer. After consuming bytes, shift remaining bytes to the front or use a ring buffer. Shifting is simple; a ring buffer avoids copying.
Buffer Strategy for Writes
For writes, the OS may accept fewer bytes than you asked for. Treat write as “write as much as possible,” not “write everything.”
A robust pattern is to track an offset into the slice and retry until complete or an error occurs.
pub fn writeAll(fd: std.posix.fd_t, data: []const u8) !void {
    var sent: usize = 0;
    while (sent < data.len) {
        const n = try std.posix.write(fd, data[sent..]);
        if (n == 0) return error.UnexpectedEof;
        sent += n;
    }
}
This loop is boring on purpose: it prevents silent truncation and keeps the control flow explicit.
Choosing Syscall Shapes and Minimizing Overhead
Zig’s standard library exposes POSIX syscalls through std.posix. The key is to match the syscall to your intent:
- Use
readfor “fill a buffer from a stream.” - Use
writefor “send bytes from a buffer.” - Use
readvorwritevwhen you already have multiple contiguous segments and want fewer syscalls.
Even without vector I/O, you can reduce overhead by batching work: build a single output buffer (or a small set of segments) and write once per logical message.
Mind Map: Syscalls and Buffer Management
Advanced Details That Matter in Practice
Handling Nonblocking and Errors
If a file descriptor is nonblocking, syscalls may return “try again.” In Zig, that typically appears as an error you can switch on. The important part is to avoid spinning: integrate with your event loop or backoff strategy.
Avoiding Off-by-One Buffer Bugs
When searching for delimiters, ensure you never scan beyond the filled length. A slice like buf[0..filled] makes the boundary explicit, and it prevents accidental reads of stale bytes.
Parsing with Incremental Buffers
A practical approach is: read into the buffer, scan for a complete unit (like a newline), process it, then keep the remainder for the next read. This keeps syscalls independent from parsing granularity.
Example: Line-Oriented Reader with Reuse
This example reads from a file descriptor into a fixed buffer, extracts complete lines, and preserves leftovers.
pub fn readLines(fd: std.posix.fd_t, buf: []u8) !void {
    var filled: usize = 0;
    while (true) {
        const n = try std.posix.read(fd, buf[filled..]);
        if (n == 0) return;
        filled += n;

        var start: usize = 0;
        while (true) {
            const idx = std.mem.indexOfScalar(u8, buf[start..filled], '\n') orelse break;
            const line = buf[start .. start + idx];
            _ = line; // process line bytes
            start = start + idx + 1;
        }

        if (start > 0) {
            std.mem.copy(u8, buf[0..filled-start], buf[start..filled]);
            filled -= start;
        }
    }
}
The copy at the end is a tradeoff: it keeps the logic simple and still avoids repeated allocations. If you need to eliminate copying, switch to a ring buffer, but the line extraction logic becomes more careful.
Example: Efficient Message Writer
When you have a header and payload, build a single contiguous buffer if the payload is already in memory. If not, use vector I/O to avoid copying.
pub fn writeMessage(fd: std.posix.fd_t, header: []const u8, payload: []const u8) !void {
    var tmp: [4096]u8 = undefined;
    if (header.len + payload.len <= tmp.len) {
        std.mem.copy(u8, tmp[0..header.len], header);
        std.mem.copy(u8, tmp[header.len .. header.len + payload.len], payload);
        try writeAll(fd, tmp[0 .. header.len + payload.len]);
    } else {
        // Fallback: write in two steps with writeAll.
        try writeAll(fd, header);
        try writeAll(fd, payload);
    }
}
This keeps syscall count low for typical message sizes while still handling large payloads safely.
Summary of the Integrated Approach
Efficient syscalls come from predictable buffer lifetimes, explicit slice boundaries, and loops that handle partial progress. Once you treat reads and writes as “incremental byte movement,” the rest becomes straightforward: parse what you have, preserve what you don’t, and only call the OS when you’re ready to move bytes.
9.4 Handling File and Socket Reads with Slice Based APIs
Reading from files and sockets is where “safe enough” meets “fast enough.” In Zig, slice-based APIs help you keep the hot path simple: you pass a buffer slice in, you get a slice length back, and you avoid hidden allocations. The key is to treat reads as filling bytes, not as producing strings.
Foundational Model for Reads
A read operation has three moving parts:
- Destination: a
[]u8slice that owns the memory elsewhere. - Result: the number of bytes written into that slice.
- Status: whether the read succeeded, hit end-of-stream, or failed.
In practice, you want a function signature that makes this explicit:
- Input:
buf: []u8 - Output:
!usizefor “bytes written”
This keeps bounds checks localized to the slice length and makes it easy to reuse the same buffer across many reads.
Slice Based API Design
Choosing Buffer Shapes
Use []u8 for raw byte reads. If you need typed records, keep the read layer byte-oriented and parse in a separate step. That separation prevents accidental coupling between I/O boundaries and your data model.
A common pattern is a loop that reads until you have enough bytes for a header, then until you have enough for the payload.
Handling Partial Reads
File reads may return fewer bytes than requested, and sockets almost always do. Your API should therefore return the actual byte count and let the caller decide whether to continue.
Mind Map: Read Flow and Responsibilities
Example: A Reusable Read Until Minimum Bytes
This helper reads from a generic reader into a slice until it has at least min bytes or it cannot continue.
fn readAtLeast(reader: anytype, buf: []u8, min: usize) !usize {
    var total: usize = 0;
    while (total < min) {
        const n = try reader.read(buf[total..]);
        if (n == 0) return total; // end-of-stream
        total += n;
    }
    return total;
}
The slice buf[total..] is the whole point: it shrinks the destination to exactly what remains, so the reader never writes past the intended region.
Example: File Reads with a Fixed Buffer
Files are often simpler: you can read chunks and process them immediately. Still, you should not assume one read equals one logical unit.
fn readFileChunks(file: anytype, allocator: anytype) !void {
    var buf: [4096]u8 = undefined;
    while (true) {
        const n = try file.read(&buf);
        if (n == 0) break;
        // Process buf[0..n] as bytes
        _ = allocator; // placeholder for downstream parsing
    }
}
Even if you later parse into structures, keep the I/O loop byte-based. It makes the loop reusable for both files and sockets.
Example: Socket Reads with Message Framing
Sockets need framing. A typical approach is a length-prefixed protocol: read a fixed-size header, parse the length, then read exactly that many payload bytes.
const HeaderLen = 4;

fn readLengthPrefixed(reader: anytype, out: []u8) !usize {
    var header: [HeaderLen]u8 = undefined;
    const hn = try readAtLeast(reader, &header, HeaderLen);
    if (hn < HeaderLen) return 0;

    const len: usize = @as(u32, @bitCast(header)).*;
    if (len > out.len) return error.BufferTooSmall;

    const pn = try readAtLeast(reader, out[0..len], len);
    return pn;
}
This shows the core discipline: the read layer fills buffers; the framing layer decides how many bytes to request next.
Advanced Details That Matter
Error Handling Without Losing Control
Treat error.EndOfStream (or a zero-byte read, depending on the reader) as a normal termination condition for loops. Reserve “hard errors” for actual failures. This keeps your control flow predictable.
Avoiding Accidental Copies
When you pass slices to readers, you avoid copying. When you parse, prefer working with slices into the existing buffer rather than creating new arrays.
Bounds Safety with Predictable Performance
Slicing like buf[total..] is safe and cheap: it updates the slice pointer and length. The bounds checks happen where they should—at the slice boundary—so your inner loop stays straightforward.
Mind Map: Slice Boundaries and Loop Invariants
Summary of the Integrated Approach
Build a read layer that accepts []u8 and returns “bytes written.” Use slice shrinking to handle partial reads cleanly. Then add framing logic in the caller: header first, then payload, with explicit buffer size checks. This division keeps the I/O code small, the parsing code honest, and the performance characteristics easy to reason about.
9.5 Building Reusable I/O Components with Comptime Configuration
Reusable I/O code is mostly about making the “shape” of the work explicit: what the component reads or writes, how it buffers, and which error and completion rules apply. In Zig, comptime is a practical tool for turning those choices into compile-time constants, so the hot path stays simple and the compiler can remove branches.
Core Design: Separate Policy from Mechanism
Start with a mechanism that performs the same loop every time: fill a buffer, process bytes, emit results. Then inject policy at compile time.
Policy knobs that usually pay off:
- Buffer size: affects syscall frequency and cache behavior.
- Whether to use a fixed-size stack buffer or a heap-backed one.
- Whether to require full writes or allow partial progress.
- Whether to treat short reads as an error or as end-of-stream.
- Optional transformations such as line splitting or delimiter scanning.
A good rule: if a choice changes control flow in the loop, make it comptime.
A Minimal Reusable Reader Skeleton
The example below builds a reusable buffered reader that can be configured for delimiter scanning. The delimiter behavior is compile-time, so the loop doesn’t carry extra runtime flags.
const std = @import("std");

pub fn BufferedReader(
    comptime Delim: u8,
    comptime BufferSize: usize,
    comptime TreatShortReadAsEof: bool,
) type {
    return struct {
        reader: anytype,
        buf: [BufferSize]u8 = undefined,
        pos: usize = 0,
        len: usize = 0,

        pub fn init(reader: anytype) @This() {
            return .{ .reader = reader };
        }

        fn refill(self: *@This()) !void {
            self.pos = 0;
            self.len = try self.reader.read(self.buf[0..]);
            if (self.len == 0 and TreatShortReadAsEof) return error.EndOfStream;
        }

        pub fn readUntilDelim(self: *@This(), out: []u8) !usize {
            var i: usize = 0;
            while (i < out.len) {
                if (self.pos == self.len) try self.refill();
                const b = self.buf[self.pos];
                self.pos += 1;
                if (b == Delim) return i;
                out[i] = b;
                i += 1;
            }
            return i;
        }
    };
}
This skeleton shows the pattern: Delim, BufferSize, and TreatShortReadAsEof are compile-time, while the reader loop remains runtime-simple.
Mind Map: Comptime Configuration for I/O
Buffering Choices That Affect Correctness
Buffer size is not just performance. With delimiter-based framing, a too-small buffer can force more refills and change how often you hit end-of-stream. That’s why the refill rule is part of the configuration.
Also decide what happens when the output buffer fills before the delimiter appears. In the example, readUntilDelim returns the number of bytes written, letting the caller decide whether to treat that as an error.
Reusable Writer with Full Write Policy
Writers often need a “full write” policy because partial writes are normal on some systems. Make it compile-time so the loop can either keep retrying or fail immediately.
const std = @import("std");

pub fn BufferedWriter(
    comptime BufferSize: usize,
    comptime RequireFullWrite: bool,
) type {
    return struct {
        writer: anytype,
        buf: [BufferSize]u8 = undefined,
        len: usize = 0,

        pub fn init(writer: anytype) @This() {
            return .{ .writer = writer };
        }

        fn flush(self: *@This()) !void {
            var sent: usize = 0;
            while (sent < self.len) {
                const n = try self.writer.write(self.buf[sent..self.len]);
                if (n == 0) return error.WriteZero;
                sent += n;
                if (!RequireFullWrite) break;
            }
            self.len = 0;
        }

        pub fn writeAll(self: *@This(), data: []const u8) !void {
            var i: usize = 0;
            while (i < data.len) {
                const space = BufferSize - self.len;
                const take = @min(space, data.len - i);
                @memcpy(self.buf[self.len .. self.len + take], data[i .. i + take]);
                self.len += take;
                i += take;
                if (self.len == BufferSize) try self.flush();
            }
        }
    };
}
Here, RequireFullWrite controls whether the flush loop continues after a partial write.
Error Boundaries and Ownership Clarity
Keep ownership rules obvious: if the component owns heap memory, provide deinit. If it only stores fixed buffers, no deinit is needed.
For errors, map them at the boundary of the component. For example, translate error.EndOfStream into a domain-specific result in the caller, rather than mixing domain logic into the refill loop.
Integrated Example: Framing a Stream
A practical use is reading framed messages separated by a delimiter, then writing processed output with a writer configured for the system’s behavior.
- Configure reader: delimiter and buffer size.
- Allocate an output buffer sized for the maximum frame you accept.
- Loop: call
readUntilDelim, process bytes, write results.
This keeps framing logic consistent while letting you tune buffering and completion rules per deployment without rewriting the loop.
10. Benchmarking and Profiling Zig Programs for Real Bottlenecks
10.1 Building Release Safe and Debug Variants for Meaningful Comparisons
Meaningful performance comparisons start with one boring rule: compare like with like. In Zig, that means building multiple variants that differ in safety and optimization, while keeping the same inputs, the same measurement harness, and the same observable behavior.
Core Idea
A “debug” build is for catching mistakes; a “release-safe” build is for measuring code that still keeps safety checks; a “release-fast” build is for measuring the cost of removing checks. If you only measure one variant, you’ll often measure the compiler’s mood rather than your algorithm.
Mind Map: Build Variants and What They Measure
Step 1: Keep the Benchmark Harness Identical
Write one benchmark function that accepts a configuration struct and an allocator, and returns a small summary. The harness should not change across builds except for compile-time flags.
Key points:
- Use the same input data for every run.
- Warm up once before timing to reduce one-time effects.
- Accumulate results into a variable that the compiler must treat as observable.
Step 2: Use Release-Safe for the Main Comparison
Release-safe is the sweet spot when you want to know whether your design is efficient without turning off safety entirely. It still includes checks that can affect timing, but it also applies optimizations that make the code representative.
A practical workflow:
- First, confirm correctness in Debug.
- Then, measure in Release-safe to compare versions of your code.
- Optionally, measure Release-fast to estimate the ceiling when checks are removed.
Step 3: Control Safety-Related Behavior Explicitly
Safety overhead can come from multiple sources: bounds checks, integer overflow checks, null checks, and panic/unreachable paths. Zig’s safety settings influence these.
To keep comparisons fair:
- Avoid changing data structures between variants.
- Avoid adding “benchmark-only” branches.
- If you use unchecked operations, do it consistently across variants.
Example: One Benchmark, Three Build Modes
Below is a minimal pattern for a benchmark harness that works across build modes. The important part is that the timed loop and the observable accumulation stay the same.
const std = @import("std");

pub fn bench(comptime N: usize, input: []const u8) u64 {
    var sum: u64 = 0;
    var i: usize = 0;
    while (i < N) : (i += 1) {
        const b = input[i \% input.len];
        sum +%= @as(u64, b);
    }
    return sum;
}
If you want to avoid overflow checks affecting results, use +%= consistently and document that choice in your benchmark summary. The point is not to “cheat,” but to make the safety model explicit.
Step 4: Build Commands and What to Expect
Use separate build modes so the compiler can’t mix assumptions.
zig build -Doptimize=Debug
zig build -Doptimize=ReleaseSafe
zig build -Doptimize=ReleaseFast
In Debug, expect higher variance and more overhead. In Release-safe, expect stable comparisons. In Release-fast, expect the lowest overhead and the most aggressive removal of checks.
Step 5: Measure Allocations and Bytes When Relevant
If your code allocates, safety mode can change when allocations happen and how errors are handled. For allocation-heavy benchmarks, track:
- number of allocations
- total bytes
- peak live memory (if you can)
Even a tiny allocator difference can dominate timing, so treat allocation metrics as first-class results.
Step 6: Compare Medians, Not Single Runs
Performance noise is real, especially in Debug. Use repeated runs and compare medians. If you see a regression only in Debug, it might be a safety-check artifact rather than a core algorithm issue.
Step 7: Record the Build Identity
When you write your benchmark output, include the build mode and the key compile-time parameters. A simple label like “Release-safe, N=1_000_000, allocator=arena” prevents confusion later.
A good practice is to include a run date in your logs, for example 2026-02-24, but keep the benchmark logic unchanged.
Step 8: Interpret differences systematically
When Release-safe is slower than expected, check these in order:
- Bounds and overflow checks triggered by your data.
- Branch-heavy code paths that safety checks amplify.
- Allocation patterns that differ due to error handling.
- Hot loop structure that prevents optimization.
When Release-fast is much faster than Release-safe, that gap is a strong hint that safety checks are on the critical path. When both are similar, your algorithm is likely the dominant cost.
10.2 Writing Microbenchmarks With Controlled Inputs and Warmups
Microbenchmarks answer a narrow question: “How much time does this specific operation take under specific conditions?” The trick is making those conditions repeatable, otherwise you measure noise with confidence.
Core Principle: Control Inputs, Control State
Start by separating three things:
- Input data: the bytes, numbers, or slices your code processes.
- State: allocator behavior, caches, branch history, and any mutable global data.
- Timing window: the exact region you measure.
A good microbenchmark keeps input constant across runs and resets state so each run begins from the same baseline.
Choosing Controlled Inputs
Pick inputs that are representative but stable. For example, if you benchmark parsing, use a fixed set of valid messages and a fixed set of invalid ones. If you benchmark hashing, use a fixed array of keys.
Avoid generating random inputs inside the timed region. If you need randomness, generate it once before timing, then reuse it.
Warmups: Why They Matter
Warmups reduce the gap between “first run” and “steady-state.” Common causes include:
- one-time initialization paths
- allocator page growth
- CPU cache effects
- branch predictor settling
Warmups should run the same code path as the measurement, using the same input shape.
Benchmark Structure That Stays Honest
Use this pattern:
- Setup: allocate buffers, prepare inputs, create any objects.
- Warmup loop: run the operation several times without recording.
- Measure loop: run many iterations and record elapsed time.
- Verification: consume results so the compiler can’t remove the work.
In Zig, “consume results” often means accumulating into a variable that you print or return after the benchmark.
Example: Parsing with Fixed Inputs and Warmups
The snippet below benchmarks a parse function over a fixed byte slice. It warms up first, then measures. The checksum prevents dead-code elimination.
const std = @import("std");

fn parseAndChecksum(input: []const u8) u64 {
    var i: usize = 0;
    var sum: u64 = 0;
    while (i < input.len) : (i += 1) {
        sum +%= input[i];
    }
    return sum;
}

pub fn main() !void {
    const input = "Zig microbench";
    var checksum: u64 = 0;
    const warm_iters: usize = 10_000;
    const measure_iters: usize = 1_000_000;

    // Warmup
    var w: usize = 0;
    while (w < warm_iters) : (w += 1) {
        checksum ^= parseAndChecksum(input);
    }

    // Measure
    var timer = try std.time.Timer.start();
    var m: usize = 0;
    while (m < measure_iters) : (m += 1) {
        checksum ^= parseAndChecksum(input);
    }
    const ns = timer.read();

    std.debug.print("ns={d} checksum={d}\n", .{ ns, checksum });
}
Mind Map: Microbenchmark Design
Microbenchmark Design Mind Map
Advanced Details That Prevent Common Benchmark Lies
- Timer placement: start the timer right before the measured loop and stop right after it. Even a small amount of extra work can dominate tiny operations.
- Iteration count selection: choose enough iterations so the total time is large compared to timer resolution. If the measured duration is too small, you’ll mostly measure measurement overhead.
- Avoid hidden allocations: if your operation allocates, the benchmark measures allocator behavior too. If you want to isolate compute, use preallocated buffers.
- Keep types stable: changing generic parameters or input lengths between runs can cause different code paths and different optimization decisions.
Practical Warmup Sizing
A simple approach is to start with a warmup that is large enough to cover initialization and steady-state effects. If you observe that the first measured run is consistently slower than later runs, increase warmup iterations. If warmup is already long, increase measurement iterations instead so the average is stable.
Interpreting Results Without Overthinking
Report time per iteration (e.g., ns / iter). Compare implementations using the same input set, warmup count, and measurement count. If two versions differ only because one triggers a different allocation pattern, that’s still a real difference—just not the one you intended to measure.
10.3 Using Built In Profiling Tools and Interpreting Results
Profiling in Zig is easiest when you treat it like measurement, not storytelling. Your goal is to connect a symptom (slow request, high CPU, allocator churn) to a specific code region and then verify the fix with another measurement. This section focuses on using Zig’s built-in profiling support, interpreting what you see, and avoiding the common “I stared at the flame graph until it stared back” mistakes.
Mind Map: Profiling Workflow
Build for Observability Without Lying to Yourself
Start from a release build so the optimizer doesn’t turn your program into a different species. Ensure symbols are available so the profiler can map machine addresses back to function names. Then enable profiling in the way Zig expects for your target platform.
Example build commands (adjust flags to your environment):
zig build -Doptimize=ReleaseSafe
zig build -Doptimize=ReleaseFast -Dprofile=cpu
If you also care about allocations, run with allocator instrumentation enabled in your code path (for example, by using an allocator wrapper that counts allocations and bytes). CPU profiling tells you where time goes; allocation profiling tells you what pressure the program creates.
Run Representative Workloads
Profiling results are only meaningful if the run resembles production behavior. Use the same input distribution, not just the same input size. For request-like workloads, include a realistic mix of small and large cases. For batch workloads, include the full range of record sizes and formats.
A practical rule: run long enough that startup effects are amortized. If your program has a warm-up phase (JIT-like behavior doesn’t apply here, but caches and memory pages still matter), discard the first run or include warm-up iterations in your harness.
Inspect Results and Find Hotspots
CPU profiling typically produces a view such as a call tree or a flame graph. The “wide” regions are where time accumulates. The “deep” regions show call paths leading to that time.
When you see a hotspot, answer three questions:
- Is the hotspot doing useful work or just moving data around? If it’s mostly copying, consider slicing, avoiding intermediate buffers, or restructuring loops.
- Is the hotspot in a generic function instantiated many times? If so, comptime specialization may help, but also check for code bloat that increases instruction cache misses.
- Does the hotspot correlate with allocations or cache misses? If you don’t have allocation data yet, rerun with allocator instrumentation.
Interpret Results Correctly
Inline Effects
Zig may inline functions aggressively in release builds. That can make a small helper function disappear from the call tree, even though it still contributes work. If you suspect inlining hides structure, temporarily reduce optimization or use build settings that preserve more call boundaries, then compare.
Optimizer Artifacts
Optimizers can remove dead work, reorder computations, or hoist invariants. If a hotspot vanishes after a change, it might be because the work became unnecessary, not because the profiler was wrong. Always verify with a second run and a before-after comparison.
Sampling Versus Instrumentation
If your profiling mode samples execution, short-lived spikes may be underrepresented. If it instruments every event, overhead can distort results. Use the profiler’s mode consistently across comparisons so the relative ranking stays trustworthy.
Use Call Paths to Choose the Right Fix
Hotspots are rarely fixed by micro-optimizing the exact line that appears widest. Instead, use the call path to locate the decision that causes repeated work.
Example reasoning pattern:
- Call path shows repeated parsing of the same header fields.
- Fix by parsing once and storing typed results in a struct.
- Then verify that the hotspot shifts from parsing to downstream processing.
Example: Interpreting a CPU Hotspot
Suppose profiling shows most time in a function that repeatedly scans a buffer for a delimiter. The call path reveals it’s called once per field, and each call rescans from the start.
A systematic fix is to change the algorithm so each byte is examined once:
- Maintain an index into the buffer.
- Advance the index as you find delimiters.
- Return slices referencing the original buffer rather than allocating new strings.
Then rerun profiling. You should see the hotspot move from repeated scanning to the actual processing of extracted fields.
Verify with Before-After Metrics
After each change, rerun the same harness and compare:
- CPU time or cycles in the top hotspots
- Total runtime
- Allocation counts and bytes (if measured)
If runtime improves but allocations rise, you may have traded CPU for memory pressure. If allocations drop but CPU stays flat, you likely removed churn that wasn’t on the critical path. Either way, the profiler plus allocator data should agree on what changed.
Mind Map: Interpreting Results
10.4 Measuring Allocation Counts and Bytes with Allocator Instrumentation
When you measure allocations, you’re not just counting bytes—you’re tracking how often your program asks for memory and how much it gets back. Allocation counts correlate with overhead (allocator bookkeeping, synchronization, fragmentation pressure), while allocation bytes correlate with bandwidth and cache effects. The trick is to measure both with minimal distortion.
Mind Map: What You Measure and Why
Foundations: Pick the Right Metrics and Test Shape
Start by deciding what “good” means for your workload. If you’re optimizing a request handler, allocation count often matters more than raw bytes because each allocation can add latency variance. If you’re optimizing a batch processor, total bytes and peak usage usually dominate.
Use a harness that runs the same input repeatedly. The first run may pay for one-time setup (like growing internal structures), so you want a steady-state window. Keep the test focused: measure only the function under test, and pass in prebuilt inputs so you don’t accidentally measure parsing or I/O.
Allocator Instrumentation: Wrap, Don’t Rewrite
In Zig, the clean approach is to wrap an existing allocator with an instrumentation layer. Your wrapper intercepts allocation and free calls, updates counters, and forwards to the underlying allocator.
A minimal pattern is:
- Store counters in a struct.
- Implement
allocandresizeto add to “bytes” and increment “count”. - Implement
freeto increment “free count” and optionally track outstanding bytes.
Here’s a compact example of a counting allocator wrapper. It tracks allocation calls, total requested bytes, and outstanding bytes.
const std = @import("std");

pub const Stats = struct {
    alloc_calls: usize = 0,
    free_calls: usize = 0,
    bytes_requested: usize = 0,
    bytes_outstanding: usize = 0,
};

pub fn InstrumentedAllocator(comptime A: type) type {
    return struct {
        base: A,
        stats: *Stats,

        pub fn alloc(self: *@This(), n: usize, align: u29) ![]u8 {
            const mem = try self.base.alloc(u8, n, align);
            self.stats.alloc_calls += 1;
            self.stats.bytes_requested += n;
            self.stats.bytes_outstanding += n;
            return mem;
        }

        pub fn free(self: *@This(), mem: []u8, align: u29) void {
            self.stats.free_calls += 1;
            self.stats.bytes_outstanding -= mem.len;
            self.base.free(mem, align);
        }
    };
}
This example assumes alloc returns a slice whose length matches the requested size. If your allocator supports resize, you should also instrument it, because resizing can change both count-like behavior and byte totals.
Example: Measuring a Hot Function
Suppose you have a function that builds a temporary buffer and returns a result. You want to know whether it allocates repeatedly or can reuse memory.
A typical measurement flow is:
- Create a base allocator (often
std.heap.GeneralPurposeAllocatorin tests). - Wrap it with the instrumentation allocator.
- Run the function many times.
- Read counters and compare across code changes.
test "allocation stats" {
    var gpa = std.heap.GeneralPurposeAllocator(.{}){};
    defer _ = gpa.deinit();

    var stats = Stats{};
    var inst = InstrumentedAllocator(@TypeOf(gpa.allocator())).{
        .base = gpa.allocator(),
        .stats = &stats,
    };

    // Replace with your real function.
    // It should accept an allocator so you can inject inst.
    // try buildSomething(&inst);

    _ = inst; // placeholder
    _ = stats; // placeholder
}
Even if you don’t show the full test harness, the key is dependency injection: the function under test must use the provided allocator, not a global one.
Interpreting Results Without Guessing
Once you have numbers, interpret them as a shape, not a single verdict.
- High allocation calls, moderate bytes: you likely have many small temporary buffers. Fix by reusing a single buffer, using stack-backed storage for small sizes, or switching to APIs that accept caller-provided output slices.
- Low allocation calls, high bytes: you’re allocating large blocks. Fix by reducing the size of intermediate representations or avoiding extra copies.
- Bytes outstanding not returning to zero: you have a leak or a missing free path. The counters make this obvious without needing a debugger.
- Peak vs total: if you track peak outstanding bytes, you can distinguish “bursty” lifetimes from steady growth. Peak helps when memory pressure is the problem.
Advanced Details: Resize, Alignment, and Threading
If your code uses realloc-like behavior, instrument resize too. Otherwise, you’ll undercount allocations that happen through growth. Also ensure your wrapper respects alignment parameters; mis-handling alignment can cause subtle correctness issues that look like “random” allocation patterns.
For multithreaded code, decide whether you want per-thread stats or a shared atomic counter. Shared atomics can distort timing, but per-thread stats can be merged after the run. Either way, keep the measurement method consistent across comparisons.
Action Loop: Turn Counters into Code Changes
After each change, rerun the same harness and compare:
- Allocation calls: did frequency drop?
- Bytes requested: did total work shrink?
- Bytes outstanding: did lifetime behavior improve?
This loop is boring in the best way: it ties each optimization to a measurable effect, so you don’t “optimize” by accident.
10.5 Turning Profiling Findings Into Targeted Code Changes
Profiling is only useful if it turns into edits that you can explain. The goal is not to “optimize everything”; it is to remove the specific costs you measured while keeping behavior identical. A good workflow starts with mapping symptoms to mechanisms, then choosing the smallest code change that removes the mechanism.
From Measurements to Hypotheses
Begin by classifying each hotspot into one of four buckets: time in CPU instructions, time stalled on memory, time spent waiting on locks or syscalls, or time spent in allocation and deallocation. If you see high CPU time but low cache misses, you likely have expensive arithmetic or branches. If you see high stall time with low instruction retirement, you likely have poor locality or too many pointer-chasing patterns.
A practical checklist:
- Identify the function(s) with the largest self time.
- Check whether the hotspot correlates with allocations, bounds checks, or indirect calls.
- Compare debug and release behavior to ensure you are not optimizing artifacts.
- Confirm that the change target is inside the hot loop, not just near it.
Mind Map: Profiling to Code Change
A Systematic Edit Loop
Use a loop with tight scope: change one mechanism, measure, and keep the diff small enough to review. For example, if profiling shows allocation churn inside a parser loop, the mechanism is allocator overhead and fragmentation pressure, not “parsing being slow.”
Example: Removing Per-Iteration Allocation
Suppose you currently build a temporary slice for each token.
fn parseTokens(alloc: std.mem.Allocator, input: []const u8) !void {
    var it = std.mem.tokenizeAny(u8, input, " ,\n\t");
    while (it.next()) |tok| {
        var tmp = try alloc.alloc(u8, tok.len);
        std.mem.copy(u8, tmp, tok);
        defer alloc.free(tmp);
        // process tmp
    }
}
Targeted change: reuse a single buffer or process directly from the token slice. If you only need read-only access, avoid copying.
fn parseTokens(input: []const u8) !void {
    var it = std.mem.tokenizeAny(u8, input, " ,\n\t");
    while (it.next()) |tok| {
        // process tok directly
        // no allocation, no copy
    }
}
If you truly need owned storage, allocate once with a maximum size, then slice it per token. The mechanism removed is allocator calls in the hot loop.
Example: Turning Cache Misses into Data Layout Changes
If profiling shows memory stalls during iteration over an array of structs, the mechanism is likely that the loop touches only a subset of fields. Reorder fields so the hot fields are contiguous, or switch to a structure-of-arrays layout.
const Item = struct {
    id: u32,
    value: f32,
    next: u32,
    name: [16]u8,
};

fn process(items: []const Item) void {
    for (items) |it| {
        // hot path uses id and value
        _ = it.id;
        _ = it.value;
    }
}
Targeted change: split hot fields from cold fields.
const Hot = struct { id: []const u32, value: []const f32 };
const Cold = struct { next: []const u32, name: []const [16]u8 };

fn processHot(h: Hot) void {
    for (h.id, h.value) |id, v| {
        _ = id;
        _ = v;
    }
}
This reduces cache line waste because the loop no longer drags name along for the ride.
Example: Reducing Branch Cost with Comptime Dispatch
If profiling shows frequent indirect calls or unpredictable branches, the mechanism can be runtime dispatch. When the set of behaviors is known at compile time, comptime can select the correct implementation.
fn op(comptime Mode: type, x: u32) u32 {
    return switch (Mode) {
        Add => x + 1,
        Mul => x * 2,
    };
}

fn run(comptime Mode: type, xs: []const u32) void {
    for (xs) |x| {
        _ = op(Mode, x);
    }
}
The targeted change removes runtime selection from the hot loop.
Verification That Actually Matches the Change
After each edit, re-run the same benchmark with the same input sizes and compare:
- Execution time and self time of the hotspot.
- Allocation counts and bytes.
- Cache and stall indicators if available.
- Correctness, including error paths that might have been simplified.
If the numbers do not move, the hypothesis is wrong or the hotspot moved. In that case, repeat the loop: reclassify the symptom, pick a new mechanism, and keep the next diff focused.
11. Practical Case Studies in Safer and Faster High-Performance Software Design
11.1 Case Study: Building a High-Performance Ring Buffer with Clear Ownership
A ring buffer is a fixed-size queue that reuses memory in a circular pattern. The performance goal is simple: avoid allocations during steady-state operations, keep operations O(1), and make the ownership story obvious so you don’t accidentally read stale bytes or overwrite data you still need.
Mind Map: Ring Buffer Design Decisions
Foundational Choices
Capacity and Indexing
You need a capacity known at initialization. In Zig, the cleanest approach is to store elements in a fixed-size slice backed by caller-provided memory. That makes ownership explicit: the caller owns the backing storage, while the ring buffer owns the indices and the responsibility to manage element lifetimes.
A common rule is to track count alongside head and tail. This avoids the “one slot wasted” ambiguity and keeps isFull and isEmpty trivial.
Element Lifetimes
If T is a plain integer, copying is fine. If T is a type with resources (like a struct containing an owned buffer), you must ensure overwritten or removed elements are properly deinitialized. The ring buffer should therefore be generic over T and call deinit when it discards an element.
Example: A Minimal Ring Buffer API
const std = @import("std");

pub fn RingBuffer(comptime T: type) type {
    return struct {
        buf: []T,
        head: usize = 0,
        tail: usize = 0,
        count: usize = 0,

        pub fn init(storage: []T) @This {
            return .{ .buf = storage };
        }

        pub fn len(self: *@This()) usize { return self.count; }
        pub fn isEmpty(self: *@This()) bool { return self.count == 0; }
        pub fn isFull(self: *@This()) bool { return self.count == self.buf.len; }
    };
}
This version is intentionally incomplete: it shows the ownership boundary (storage: []T) and the index state (head, tail, count). Next we add push and pop with correct lifetime handling.
Example: Push and Pop with Clear Ownership
pub fn push(self: *@This(), value: T) !void {
    if (self.isFull()) return error.Full;
    self.buf[self.tail] = value;
    self.tail = (self.tail + 1) % self.buf.len;
    self.count += 1;
}

pub fn pop(self: *@This()) !T {
    if (self.isEmpty()) return error.Empty;
    const out = self.buf[self.head];
    self.head = (self.head + 1) % self.buf.len;
    self.count -= 1;
    return out;
}
This works for copyable T, but it is not yet correct for resource-owning T if you need to deinitialize elements that are removed or overwritten. The fix is to use std.mem.replace-style patterns and call deinit when appropriate.
Example: Resource-Safe Variant
pub fn push(self: *@This(), value: T) !void {
    if (self.isFull()) return error.Full;
    self.buf[self.tail] = value;
    self.tail = (self.tail + 1) % self.buf.len;
    self.count += 1;
}

pub fn pop(self: *@This()) !T {
    if (self.isEmpty()) return error.Empty;
    const idx = self.head;
    self.head = (self.head + 1) % self.buf.len;
    self.count -= 1;
    return self.buf[idx];
}

pub fn deinit(self: *@This()) void {
    if (@hasDecl(T, "deinit")) {
        var i: usize = 0;
        while (i < self.count) : (i += 1) {
            const idx = (self.head + i) % self.buf.len;
            self.buf[idx].deinit();
        }
    }
}
Here, ownership is explicit: the ring buffer owns the elements currently stored, and deinit cleans up anything still inside when the ring buffer is destroyed. Removed elements are returned to the caller, so the caller becomes responsible for their lifetime.
Advanced Details Without Extra Complexity
Peek Without Mutation
Peek should not change indices or count. It returns a copy of T (or a value) from head. For large T, you may prefer returning *const T to avoid copying, but that changes the API and requires careful aliasing rules.
Avoiding Stale Reads
Stale reads happen when you read from slots that are not part of the logical queue. Using count ensures pop only reads from valid positions. Even if old values remain in memory, they are unreachable through the API.
Branching and Hot Paths
push and pop each have one guard branch (Full/Empty) and then a small fixed sequence of index updates. That keeps the steady-state path tight.
Integrated Usage Example
const RB = RingBuffer(u32);

pub fn main() !void {
    var storage: [8]u32 = undefined;
    var rb = RB.init(storage[0..]);

    try rb.push(10);
    try rb.push(20);

    const a = try rb.pop();
    const b = try rb.pop();

    _ = a; _ = b;
}
The caller supplies storage, so there are no allocations. The ring buffer only tracks indices and count, and it never reads beyond the logical queue.
Summary of Ownership Guarantees
- The caller owns the backing storage slice.
- The ring buffer owns the elements currently stored and will deinitialize them in
deinitifTprovidesdeinit. poptransfers ownership of the returned element to the caller.pushrequires space and never overwrites existing live elements.
This combination keeps performance predictable and makes the lifetime rules hard to misunderstand, which is the real win in low-level code.
11.2 Case Study: Implementing a Typed Memory Arena for Short Lived Objects
Short-lived objects are common in parsers, request handlers, and packet processing. The goal of a typed arena is simple: allocate many objects quickly, free them all at once, and keep the types honest so you don’t accidentally interpret bytes as the wrong structure. Zig makes this practical because you can combine comptime type information with a low-level bump allocator.
Problem Setup
Assume you parse a message into a graph of nodes. Each node contains a small payload and references other nodes by pointer. All nodes live only for the duration of one parse. If you allocate each node individually, you pay allocator overhead and risk fragmentation. If you allocate raw bytes, you risk type confusion.
We’ll build an arena that:
- Allocates memory in a contiguous buffer using a bump pointer.
- Provides
alloc(T)for a specific typeT. - Optionally runs
Tinitialization and tracks alignment. - Frees everything by resetting the bump pointer.
Mind Map: Typed Arena Design
Foundational Building Blocks
A bump allocator needs two pieces of state: the buffer and the current offset. Allocation computes the next aligned address, checks capacity, then advances the offset. The “typed” part is just using @sizeOf(T) and @alignOf(T) at compile time.
Here’s a compact arena that supports single objects and slices.
const std = @import("std");

pub fn Arena(comptime MaxBytes: usize) type {
    return struct {
        buf: [MaxBytes]u8 = undefined,
        offset: usize = 0,

        pub fn reset(self: *@This()) void {
            self.offset = 0;
        }

        fn alignForward(self: *@This(), ptr: usize, align: usize) usize {
            const mask = align - 1;
            return (ptr + mask) & ~mask;
        }

        pub fn alloc(self: *@This(), comptime T: type) !*T {
            const start = @intFromPtr(&self.buf[0]);
            const raw = start + self.offset;
            const aligned = self.alignForward(raw, @alignOf(T));
            const new_offset = (aligned - start) + @sizeOf(T);
            if (new_offset > MaxBytes) return error.OutOfMemory;
            self.offset = new_offset;
            return @ptrCast(*T, @intToPtr(*u8, aligned));
        }

        pub fn allocSlice(self: *@This(), comptime T: type, n: usize) ![]T {
            const start = @intFromPtr(&self.buf[0]);
            const raw = start + self.offset;
            const aligned = self.alignForward(raw, @alignOf(T));
            const bytes = @sizeOf(T) * n;
            const new_offset = (aligned - start) + bytes;
            if (new_offset > MaxBytes) return error.OutOfMemory;
            self.offset = new_offset;
            const ptr = @intToPtr(*T, aligned);
            return ptr[0..n];
        }
    };
}
Example: Typed Node Allocation
Now we use the arena to allocate a small node graph. We’ll initialize nodes after allocation so the arena stays generic.
const std = @import("std");

const Node = struct {
    kind: u8,
    value: u32,
    next: ?*Node,
};

pub fn parseOne(arena: *Arena(4096)) !*Node {
    const n1 = try arena.alloc(Node);
    n1.* = .{ .kind = 1, .value = 10, .next = null };

    const n2 = try arena.alloc(Node);
    n2.* = .{ .kind = 2, .value = 20, .next = n1 };

    return n2;
}
The important detail is that alloc(Node) returns a *Node, not *u8. That eliminates a whole class of “wrong cast” bugs while keeping allocation overhead tiny.
Advanced Details Without Hand-Waving
Alignment and Padding
The alignForward helper ensures that the returned pointer meets @alignOf(T). Without this, some targets would fault or silently slow down due to unaligned access. The padding cost is paid only when alignment requires it.
Bulk Free via Reset
Because every allocation advances the bump pointer, freeing is just reset(). That’s correct only if you don’t keep arena pointers beyond the arena’s lifetime. In this case study, that matches the parse lifetime.
Slices for Arrays
When you need many objects of the same type, allocSlice(T, n) is better than repeated alloc(T). It reduces pointer chasing in your own code and makes it easier to initialize in a tight loop.
Mind Map: Usage Discipline
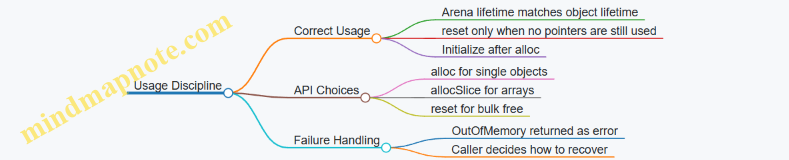
Practical Integration in a Parser Loop
A typical flow is: create arena, parse, use nodes, then reset and parse the next message. The arena’s typed API keeps the code readable: allocation sites show exactly what type is being created, and initialization is explicit.
pub fn handleMany() !void {
    var arena = Arena(4096){};
    var i: usize = 0;
    while (i < 1000) : (i += 1) {
        arena.reset();
        _ = try parseOne(&arena);
    }
}
This pattern stays fast because allocation is just arithmetic plus a bounds check, and it stays safer because types are enforced at the boundary where bytes become structured data.
11.3 Case Study: Generating Specialized Hashing and Equality Functions with Comptime
A common systems problem is making hash tables fast without giving up correctness. The trap is writing one generic hash/equality pair that handles every type with branches and conversions. In Zig, you can generate specialized functions at compile time so the hot path becomes straight-line code for each key type.
Foundations: What Specialization Buys You
Hashing and equality are usually called far more often than they are defined. That means small overheads—like runtime type checks, indirect calls, or repeated conversions—compound quickly.
Specialization targets three costs:
- Conversion cost: turning a key into bytes or a canonical form.
- Branch cost: choosing behavior based on type at runtime.
- Call cost: calling through generic wrappers that the compiler can’t fully inline.
With comptime, you can decide the algorithm once per key type and emit a dedicated hash and eql implementation.
Mind Map: Design Steps for Specialized Hashing
Case Study Setup: A Key Type with Real Constraints
Assume a key type used in a lookup table:
- It is a struct with a fixed-size identifier.
- It must not hash padding bytes.
- Equality must compare the same fields that hashing uses.
We’ll use a struct with two fields: a 64-bit id and a 32-bit tag. The tag might be small enough that you want it mixed in efficiently.
Example: Compile Time Generator for Hash and Equality
const std = @import("std");

pub fn KeyOps(comptime T: type) type {
    return struct {
        pub fn hash(key: T, seed: u64) u64 {
            return switch (@typeInfo(T)) {
                .Struct => hashStruct(key, seed),
                .Int => hashInt(key, seed),
                else => @compileError("Unsupported key type"),
            };
        }

        pub fn eql(a: T, b: T) bool {
            return switch (@typeInfo(T)) {
                .Struct => eqlStruct(a, b),
                .Int => a == b,
                else => @compileError("Unsupported key type"),
            };
        }

        fn hashInt(x: T, seed: u64) u64 {
            var h = std.hash.Wyhash.hash(0, @ptrCast(&x), @sizeOf(T));
            return h ^ seed;
        }

        fn hashStruct(key: T, seed: u64) u64 {
            const S = @typeInfo(T).Struct;
            var h: u64 = seed;
            inline for (S.fields) |f| {
                const v = @field(key, f.name);
                h = std.hash.Wyhash.hash(h, @ptrCast(&v), @sizeOf(f.field_type));
            }
            return h;
        }

        fn eqlStruct(a: T, b: T) bool {
            const S = @typeInfo(T).Struct;
            inline for (S.fields) |f| {
                if (@field(a, f.name) != @field(b, f.name)) return false;
            }
            return true;
        }
    };
}
This generator makes two compile-time choices: the hashing strategy and the equality strategy. For structs, it iterates fields using inline for, so the compiler emits direct field accesses.
Example: Using the Generated Ops
const Key = struct {
    id: u64,
    tag: u32,
};

const Ops = KeyOps(Key);

pub fn demo() void {
    const k1 = Key{ .id = 10, .tag = 7 };
    const k2 = Key{ .id = 10, .tag = 7 };
    const k3 = Key{ .id = 10, .tag = 8 };

    const h1 = Ops.hash(k1, 0x1234);
    const h2 = Ops.hash(k2, 0x1234);
    const h3 = Ops.hash(k3, 0x1234);

    _ = h1;
    _ = h2;
    _ = h3;
    _ = Ops.eql(k1, k2);
    _ = Ops.eql(k1, k3);
}
Correctness Details That Matter
Hashing Only Defined Bytes
The struct hashing above hashes each field’s bytes, not the struct’s raw memory. That avoids padding bytes, which may be uninitialized or contain arbitrary data.
Equality Consistent with Hashing
Equality compares the same fields that hashing mixes. That property is essential: if two keys are equal, their hashes must match.
Padding and Field Ordering
Field iteration uses the declared field list, so the hash is stable across builds that keep the same type definition. If you later reorder fields, the hash changes, but equality remains correct. That’s fine as long as you treat the hash as an internal detail.
Advanced Refinement: Handling Special Cases
If you need normalization (for example, case-insensitive string keys stored as fixed arrays), you can add a comptime configuration parameter to KeyOps and generate a different hashing/equality path for that key type.
The key idea stays the same: decide the algorithm at compile time, then emit code that does only what the chosen algorithm requires.
Integration Checklist
- Generate
hashandeqlfrom the same compile-time type information. - For structs, hash and compare fields, not raw struct bytes.
- Use
inline forso the compiler can inline field operations. - Add tests that assert
eql(a,b) => hash(a)==hash(b)for representative keys.
This approach keeps the table’s hot path lean while preserving the boring but crucial part: correctness under all the key values you actually store.
11.4 Case Study: Writing a Bounds Checked Yet Tight Packet Processing Loop
Packet processing loops usually fail in two ways: they either trust too much and crash on malformed input, or they check too much and burn cycles. The goal here is a loop that stays bounds-safe while keeping the hot path small and predictable.
Mind Map: Packet Loop Invariants
Foundational Setup: Define the Packet Shape
Assume a simple wire format:
- Header: 8 bytes
version(u8)flags(u8)payload_len(u16, little-endian)seq(u32, little-endian)
- Payload:
payload_lenbytes
We’ll parse from a []const u8 and return either a typed view or an error. The key invariant: after the initial validation, the payload slice is guaranteed to be in-bounds.
Example: One-Time Validation Then Typed Slices
const std = @import("std");

const ParseError = error{TooShort, BadVersion, BadLength};

pub fn parsePacket(buf: []const u8) ParseError!struct {
    version: u8,
    flags: u8,
    seq: u32,
    payload: []const u8,
} {
    if (buf.len < 8) return error.TooShort;

    const version = buf[0];
    if (version != 1) return error.BadVersion;

    const flags = buf[1];
    const payload_len = std.mem.readIntLittle(u16, buf[2..4]);
    const need = 8 + @as(usize, payload_len);
    if (need > buf.len) return error.BadLength;

    const seq = std.mem.readIntLittle(u32, buf[4..8]);
    const payload = buf[8..need];

    return .{ .version = version, .flags = flags, .seq = seq, .payload = payload };
}
This function performs all bounds checks once. Notice the payload slice uses 8..need, so later code can iterate without checking indices against the original buffer.
Mind Map: Hot Path Structure
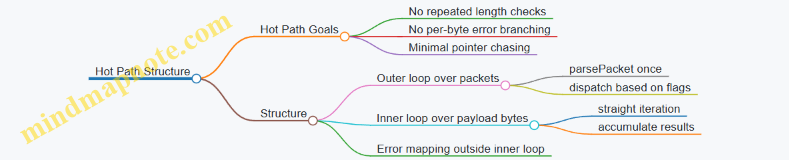
Example: Tight Inner Loop with No Bounds Logic
Suppose we compute a checksum over the payload and look for a delimiter byte 0x7E. We keep the inner loop simple: it iterates over payload only.
fn processPayload(payload: []const u8) u32 {
    var sum: u32 = 0;
    for (payload) |b| {
        sum +%= @as(u32, b);
        if (b == 0x7E) break;
    }
    return sum;
}
The for (payload) loop is bounds-safe because payload is already a slice with a correct length. The only branch inside is the delimiter check, which is data-dependent but not bounds-dependent.
Integrated Loop: Parse Once, Then Process
In a real system you might receive many packets in a ring buffer. Here’s a minimal loop that keeps parsing and error handling outside the inner payload loop.
pub fn handlePackets(frames: []const []const u8) void {
    for (frames) |frame| {
        const parsed = parsePacket(frame) catch {
            // Drop malformed packets; reason mapping can happen here.
            continue;
        };

        const checksum = processPayload(parsed.payload);
        _ = checksum; // In real code, store or forward it.
    }
}
The hot path is processPayload. The parsing path is separate and runs only once per packet.
Advanced Detail: Avoiding Accidental Bounds Work
Two common mistakes:
- Re-slicing repeatedly inside the inner loop. If you do
buf[8..]or compute offsets per iteration, you add extra work and risk mistakes. - Mixing parsing and processing. If you parse fields while also scanning payload, you’ll interleave bounds checks with data-dependent loops.
A practical pattern is: validate and create typed slices first, then run tight loops over those slices.
Testing Strategy: Crafted Lengths and Boundary Cases
To keep the “bounds checked yet tight” promise, test the edges:
buf.lenexactly 8 (payload_len must be 0)payload_lenthat makesneed == buf.lenpayload_lenthat makesneed == buf.len + 1(must error)- payload containing
0x7Eat the first byte, middle, and absent
These tests ensure the initial validation is correct and that the inner loop never needs to defend itself.
Mind Map: Failure Modes and Where They Are Caught
This structure keeps safety checks concentrated where they belong and leaves the byte-scanning loop clean, predictable, and fast.
11.5 Case Study: Integrating Error Handling With Fast Validation Pipelines
A fast validation pipeline usually has two jobs: reject bad input quickly, and produce useful error information when rejection happens. In Zig, the trick is to keep the hot path simple while still using error unions and allocator-aware parsing in a disciplined way.
Foundational Model
Start by defining a validation stage contract. Each stage takes a slice of bytes and returns either a validated value or an error. To keep the pipeline fast, avoid allocating during validation. If you must build structured output, do it only after the input passes all cheap checks.
A practical pattern is:
- Stage 1: cheap structural checks (length, delimiters, character classes).
- Stage 2: numeric parsing and range checks.
- Stage 3: cross-field validation that needs multiple parsed values.
Each stage should return a specific error set so callers can map errors to user-facing messages without inspecting strings.
Mind Map: Error Handling Flow
Error Set Design
Define a tight error set that matches validation outcomes. This keeps error handling predictable and prevents accidental “catch-all” behavior that hides the real reason for failure.
const ValidationError = error{
    InvalidLength,
    BadFormat,
    InvalidChar,
    BadNumber,
    RangeViolation,
    InconsistentFields,
};
Example: Fast Stages with Specific Errors
Assume a simple record format: LEN|A|B where LEN is a decimal length, and A and B are unsigned integers. Validation ensures:
- The byte slice length matches
LEN. AandBparse as numbers.AandBsatisfyA <= B.
Stage 1: checks structure and character classes without parsing numbers yet.
fn validateStage1(input: []const u8) ValidationError!struct{len: usize, a_pos: usize, b_pos: usize} {
    if (input.len < 5) return ValidationError.InvalidLength;
    const sep1 = std.mem.indexOfScalar(u8, input, '|') orelse return ValidationError.BadFormat;
    const sep2 = std.mem.lastIndexOfScalar(u8, input, '|') orelse return ValidationError.BadFormat;
    if (sep1 == 0 or sep2 <= sep1 + 1) return ValidationError.BadFormat;

    for (input[0..sep1]) |c| if (c < '0' or c > '9') return ValidationError.InvalidChar;
    for (input[sep1+1..sep2]) |c| if (c < '0' or c > '9') return ValidationError.InvalidChar;
    for (input[sep2+1..]) |c| if (c < '0' or c > '9') return ValidationError.InvalidChar;

    // Positions for later parsing
    return .{ .len = sep1, .a_pos = sep1 + 1, .b_pos = sep2 + 1 };
}
Stage 2: parses numbers only after Stage 1 has confirmed the characters are digits.
fn parseU(input: []const u8) ValidationError!u32 {
    var v: u32 = 0;
    for (input) |c| {
        v = v * 10 + @as(u32, c - '0');
    }
    return v;
}
Stage 3: performs cross-field checks.
fn validateStage3(a: u32, b: u32) ValidationError!void {
    if (a > b) return ValidationError.InconsistentFields;
}
Integrated Pipeline Function
The pipeline function wires stages together and maps errors at the boundary. The hot path uses try so error propagation stays compact.
const Validated = struct{ a: u32, b: u32 };

fn validateRecord(input: []const u8) ValidationError!Validated {
    const s1 = try validateStage1(input);
    const sep1 = std.mem.indexOfScalar(u8, input, '|').?;
    const sep2 = std.mem.lastIndexOfScalar(u8, input, '|').?;

    const len = try parseU(input[0..sep1]);
    if (len != input.len) return ValidationError.InvalidLength;

    const a = try parseU(input[s1.a_pos..sep2]);
    const b = try parseU(input[s1.b_pos..]);

    if (a > 1_000_000 or b > 1_000_000) return ValidationError.RangeViolation;
    try validateStage3(a, b);

    return .{ .a = a, .b = b };
}
Mind Map: Error Mapping Boundary
Why This Stays Fast
The pipeline avoids allocations during validation, and it performs cheap checks before numeric parsing. Error unions are used for control flow, but the hot path remains mostly straight-line code with try statements that compile down to efficient branching. Specific error values also prevent the common mistake of returning a generic failure that forces callers to re-validate or inspect raw input again.
Finally, mapping errors happens once at the boundary, so the validation core stays focused on correctness and speed rather than formatting messages or building extra structures.
12. Engineering Guidelines for Maintainable Performance Oriented Zig Code
12.1 Establishing Coding Conventions for Comptime and Generic Components
Comptime-heavy Zig code stays fast when it is also predictable. Conventions are how you keep generic components from turning into a maze of special cases. The goal is simple: make it obvious what happens at compile time, what happens at runtime, and what each function promises.
Core Principles for Comptime and Generics
- Separate compile-time decisions from runtime work. If a branch depends on types or constants, keep it in comptime-visible code paths. If it depends on values, keep it runtime.
- Make specialization explicit in names and signatures. If a function is generic over a type, name it accordingly and keep the generic parameters near the top.
- Constrain generics with clear requirements. Use
comptimeparameters and@typeInfochecks to fail early with readable errors. - Prefer small, composable building blocks. A generic component should be assembled from helpers that each have one job.
- Keep comptime loops bounded and intentional. Unbounded iteration at comptime can make builds slow and error messages painful.
Mind Map: Conventions That Prevent Generic Chaos
Naming and Signature Conventions
Use role-based names for generic parameters: T is fine for simple cases, but KeyType, ValueType, and ElemType reduce mental overhead when you read error messages. Put generic parameters first, then runtime parameters. Mark comptime only when the value must be known during compilation.
A common pattern is a “factory” that selects behavior at comptime and returns a runtime function:
pub fn makeAdder(comptime T: type) type {
    return struct {
        pub fn add(a: T, b: T) T {
            return a + b;
        }
    };
}
This keeps the specialization decision (the type) separate from the runtime operation (addition). It also makes it easy to test: you can instantiate makeAdder(i32) and makeAdder(u64) without changing code.
Constraints and Trait-Like Checks
Zig doesn’t have traits, but you can enforce “capabilities” with compile-time checks. The convention: validate requirements in one place, and keep the rest of the code assuming those requirements.
fn requireIndexable(comptime T: type) void {
    const info = @typeInfo(T);
    if (info != .Struct) @compileError("Expected a struct type");
}

pub fn process(comptime T: type, items: []T) void {
    requireIndexable(T);
    // Runtime logic can now assume T is acceptable.
    _ = items;
}
If you need more nuance, check for fields or methods using @hasDecl and @TypeOf. The key convention is to fail early with a message that points to the missing requirement.
Structure: Compile-Time Selection, Runtime Execution
When a generic component has multiple strategies, use a comptime switch to select a strategy once, then run a single tight loop at runtime. This avoids repeated branching inside hot code.
pub fn makeSum(comptime UseFastPath: bool) type {
    return struct {
        pub fn sum(nums: []const i64) i64 {
            var total: i64 = 0;
            if (UseFastPath) {
                for (nums) |n| total += n;
            } else {
                for (nums) |n| total += n; // placeholder for slower checks
            }
            return total;
        }
    };
}
Even if both branches look similar here, the convention matters: the selection happens at comptime, so the runtime loop stays straightforward.
Testing Conventions That Match the Code
Use two layers of tests.
- Compile-time tests validate constraints and error messages. They catch “wrong type” issues before runtime.
- Runtime tests validate behavior for representative inputs.
A practical convention is to keep constraint checks in small helper functions so tests can call them directly.
Documentation Style for Generic Components
Document the contract in terms of compile-time parameters and runtime behavior. State what is required of T, what the function returns, and whether it allocates. If a function expects a slice to be non-empty, say so; if it tolerates empty slices, say that too. Generic code is easier to use when the contract is precise and boring.
A Quick Checklist Before You Ship
- Generic parameters are named by role.
comptimeis used only where compilation-time knowledge is required.- Constraints are centralized and produce clear
@compileErrormessages. - Hot loops contain minimal branching.
- Tests cover both compile-time constraints and runtime behavior.
12.2 Designing APIs That Make Ownership and Lifetimes Obvious
When an API makes ownership and lifetimes obvious, callers stop guessing and start using. In Zig, that clarity comes from signatures: who allocates, who frees, and how long data remains valid. The goal is simple: if a reader can’t answer those questions from the type alone, the API is doing extra work.
Core Concepts That Drive API Shape
Ownership Is a Contract, Not a Comment
Ownership answers: “Who is responsible for releasing resources?” In Zig, that responsibility is typically expressed by requiring an allocator parameter for functions that allocate, and by returning either owned values or borrowed views.
A practical rule: if the function allocates, it should accept an allocator; if the caller must free, the return type or documentation should make that explicit. Better yet, encode it in the type by returning an owned container that has a deinit method.
Lifetimes Are Expressed Through Borrowed Views
Borrowed data is usually represented as slices ([]T) or pointers (*T / [*]T) with clear constraints. A slice carries length, which prevents accidental reads past the end. A pointer without a length is still valid, but the API must state whether the memory is expected to remain stable.
Error Paths Must Not Break Ownership
If a function can fail after partially allocating, it must clean up before returning the error. Callers should never need to “half-free” internal allocations. This is where consistent error propagation patterns matter.
Mind Map: Ownership and Lifetimes in API Design
Designing the API Surface
Use Owned Return Types for Allocated Results
Suppose you want to parse a message into a structure that owns its buffers. The API should return a type that can be deinitialized.
const std = @import("std");

pub const Parsed = struct {
    header: u32,
    payload: []u8,

    pub fn deinit(self: *Parsed, allocator: std.mem.Allocator) void {
        allocator.free(self.payload);
    }
};

pub fn parse(allocator: std.mem.Allocator, input: []const u8) !Parsed {
    var payload = try allocator.alloc(u8, input.len);
    std.mem.copy(u8, payload, input);
    return Parsed{ .header = 0, .payload = payload };
}
The caller can now see the lifetime: payload is valid until deinit is called. The allocator is passed to deinit so the ownership contract stays explicit.
Use Borrowed Views for Non-Owning Data
If the API only needs to read data, accept []const u8 and return computed values without storing references.
pub fn checksum(input: []const u8) u64 {
    var sum: u64 = 0;
    for (input) |b| sum +%= b;
    return sum;
}
No ownership transfer occurs, so there is no deinit. The lifetime is “only during the call.” That’s a big deal for correctness and for performance.
Make Mutability and Aliasing Rules Visible
If a function mutates memory, the signature should reflect it with []u8 or *T. If it must not alias with other buffers, document the constraint and structure the signature to reduce ambiguity.
A common pattern is to separate read-only and write APIs:
fn validate(input: []const u8) !voidfn normalize(buf: []u8) !void
This keeps callers from accidentally passing the same buffer to two roles.
Handling Lifetimes Across Boundaries
Avoid Returning References to Caller-Owned Buffers Unless You Mean It
Returning a slice that points into the caller’s input can be correct, but only if the API makes the relationship explicit. The safest approach is to return owned data when the result must outlive the call.
If you do return a borrowed slice, ensure the caller can infer that validity is tied to the input slice.
pub fn firstToken(input: []const u8) ?[]const u8 {
    const space = std.mem.indexOfScalar(u8, input, ' ') orelse return null;
    return input[0..space];
}
Here, the returned slice is valid as long as input remains valid. The signature communicates borrowing: no allocator, no deinit.
Keep Error Handling from Creating Ownership Confusion
If allocation happens inside parse, failures should free anything allocated before returning the error. Using try with cleanup in a errdefer block is a common, readable approach.
Practical Checklist for API Review
- Does every allocating function accept an allocator?
- Does every owned return value have a clear deinitialization path?
- Are borrowed returns clearly non-owning by lacking allocator/deinit?
- Are lifetimes tied to inputs when returning slices or pointers?
- Do failure paths clean up without requiring caller intervention?
- Are read-only and mutating operations separated in the type system?
When these answers are “yes,” callers can reason about correctness from the signature alone. That’s the whole point: fewer surprises, fewer leaks, and fewer late-night “wait, who frees this?” moments.
12.3 Creating Reusable Utility Functions Without Hidden Overhead
Reusable utilities are only useful if their cost is predictable. In Zig, “hidden overhead” usually means one of three things: extra allocations, extra work done at runtime that could be decided at compile time, or extra indirection that prevents the compiler from optimizing.
Foundational Rules for Utility Functions
Start with a simple contract: a utility function should make its resource behavior obvious from its signature and types.
- Allocator behavior must be explicit. If the function allocates, it should accept an
allocator: std.mem.Allocator(or a specific allocator-like interface) and return errors when allocation fails. - Ownership must be visible. Prefer returning owned values (like
[]Twith a clear allocator) or requiring the caller to provide output buffers. - Avoid “magic” conversions in hot paths. If a utility converts types, document the cost through types and keep conversions outside loops.
A practical pattern is to split utilities into two layers: a small, allocation-free core that operates on slices, and a wrapper that handles allocation when needed.
Designing Allocation-Free Cores
When a utility only needs to read or transform data, take slices and return results without allocating.
Example: a utility that normalizes ASCII whitespace in-place.
const std = @import("std");

pub fn normalizeWhitespaceInPlace(buf: []u8) void {
    var i: usize = 0;
    var last_was_space = false;

    for (buf) |*ch| {
        const is_space = ch.* == ' ' or ch.* == '\n' or ch.* == '\t' or ch.* == '\r';
        if (is_space) {
            if (!last_was_space) {
                buf[i] = ' ';
                i += 1;
                last_was_space = true;
            }
        } else {
            buf[i] = ch.*;
            i += 1;
            last_was_space = false;
        }
    }

    // Caller decides what to do with the tail.
}
This function has no allocator, no error union, and a single pass. The signature tells you it mutates a caller-owned buffer.
Adding Allocation Only When It’s Actually Needed
If you need a version that returns a new buffer, keep it as a thin wrapper.
pub fn normalizeWhitespaceAlloc(
    allocator: std.mem.Allocator,
    input: []const u8,
) ![]u8 {
    var out = try allocator.alloc(u8, input.len);
    @memcpy(out, input);
    normalizeWhitespaceInPlace(out);
    return out;
}
The wrapper allocates exactly once. The core does not allocate, so you can reuse it in contexts where allocation is forbidden.
Preventing Runtime Work from Sneaking In
Reusable utilities often become generic. Generics are fine, but you must ensure the compiler can specialize.
Use comptime parameters for decisions that affect control flow or layout. For example, a utility that chooses a comparison strategy at compile time.
pub fn compareSlices(
    comptime T: type,
    a: []const T,
    b: []const T,
) bool {
    if (a.len != b.len) return false;
    var i: usize = 0;
    while (i < a.len) : (i += 1) {
        if (a[i] != b[i]) return false;
    }
    return true;
}
Here, T is compile-time, so the loop uses the concrete element type. If you instead passed a runtime flag like mode: u8, you’d likely introduce branches inside the loop.
Mind Map: Utility Function Overhead Control
Error Handling That Doesn’t Pollute Hot Paths
If a utility is allocation-free, don’t make it return !T just because a wrapper might allocate. Keep error unions where they belong.
A common approach:
- Core:
fn core(...) voidorfn core(...) bool. - Wrapper:
fn wrapper(...) ![]u8.
This keeps the caller’s control flow clean and avoids forcing error checks in tight loops.
Compile-Time Assertions for Reusable Assumptions
Reusable utilities often assume properties like alignment, element size, or that a type is copyable. Use compile-time checks to fail early.
Example: ensure a utility only works for types that can be safely byte-copied.
pub fn copyBytes(comptime T: type, dst: []T, src: []const T) void {
    comptime {
        if (@sizeOf(T) == 0) @compileError("Zero-sized types are not supported");
    }
    const n = @min(dst.len, src.len);
    var i: usize = 0;
    while (i < n) : (i += 1) dst[i] = src[i];
}
The assertion is cheap, and the runtime loop stays straightforward.
A Reusable Utility Checklist
Before you reuse a utility, verify:
- The function either allocates explicitly or never allocates.
- The function’s mutation and ownership are clear from parameter and return types.
- Any generic behavior is decided with
comptimewhen it affects control flow. - Inner loops avoid runtime branching on strategy flags.
- Error unions appear only where failures can actually happen.
When these rules hold, reuse becomes a performance feature rather than a gamble.
12.4 Using Compile Time Assertions and Tests to Lock in Assumptions
Performance-oriented Zig code lives or dies by assumptions: sizes, layouts, alignment, error behavior, and invariants that must hold even when refactoring. Compile-time assertions and tests turn those assumptions into executable rules. The trick is to choose what belongs at compile time versus runtime, and to write checks that fail loudly with actionable messages.
Foundational Assumptions Worth Checking
Start by listing assumptions that are both (1) easy to state and (2) expensive to debug when wrong. Common examples include:
- Memory layout: struct size, field offsets, alignment, and padding.
- API contracts: slice lengths, null-termination expectations, and error mapping.
- Safety properties: bounds checks that must remain enabled for specific code paths.
- Performance-critical behavior: “this function does not allocate” or “this loop stays branch-light.”
If an assumption can be expressed as a boolean expression over types, constants, or small compile-time computations, it belongs in a compile-time assertion.
Compile Time Assertions That Catch Layout Bugs Early
Zig’s @compileError is the blunt instrument; std.debug.assert is runtime. For layout, prefer @sizeOf, @alignOf, and @offsetOf.
Example: Locking in a Packet Header Layout
const std = @import("std");

const Header = packed struct {
    version: u4,
    flags: u4,
    length: u16,
};

comptime {
    if (@sizeOf(Header) != 4) {
        @compileError("Header must be 4 bytes for wire format");
    }
    if (@alignOf(Header) != 1) {
        @compileError("Header alignment must be 1 for packed wire layout");
    }
}
This check prevents a silent mismatch between your in-memory representation and the wire format. It also forces you to decide whether you truly want packed layout or whether you need explicit serialization.
Mind Map: What to Assert and Where
Runtime Tests That Validate Behavior Under Real Inputs
Compile-time checks are great for structure, but they can’t prove correctness of parsing, encoding, or error propagation for arbitrary data. Runtime tests should cover:
- Representative valid inputs: including edge values.
- Representative invalid inputs: malformed lengths, wrong checksums, truncated buffers.
- Allocator behavior: whether a function allocates when it shouldn’t.
Example: Testing Error Mapping Without Guesswork
const std = @import("std");

fn parseLen(input: []const u8) !u16 {
    if (input.len < 2) return error.Truncated;
    return (@as(u16, input[0]) << 8) | input[1];
}

test "parseLen maps truncation correctly" {
    try std.testing.expectError(error.Truncated, parseLen(&[_]u8{0}));
}
This test locks in the contract that truncation is signaled as error.Truncated, not some generic failure. When refactoring, you’ll notice immediately if the error type changes.
Combining Compile Time Assertions with Tests
A cohesive approach is to use compile-time assertions to guarantee the “shape” and runtime tests to guarantee the “behavior.” For example, if a header layout is asserted to be 4 bytes, tests can focus on decoding and encoding round trips.
Example: Round Trip Test with Layout Assumptions
const std = @import("std");

const Header = packed struct {
    version: u4,
    flags: u4,
    length: u16,
};

comptime {
    if (@sizeOf(Header) != 4) @compileError("Header size mismatch");
}

test "Header round trip preserves fields" {
    const h = Header{ .version = 3, .flags = 5, .length = 0x1234 };
    const bytes = std.mem.asBytes(&h);
    const h2 = std.mem.bytesAsValue(Header, bytes).*;
    try std.testing.expect(h2.version == 3);
    try std.testing.expect(h2.flags == 5);
    try std.testing.expect(h2.length == 0x1234);
}
This structure keeps the test focused: it assumes the layout is correct (compile time) and verifies field preservation (runtime).
Practical Rules for Writing Assertions That Don’t Rot
- Assert the contract, not the implementation detail: checking
@sizeOfis a contract when it represents a wire format. - Use clear failure messages: the compile error should tell you what broke and why.
- Avoid redundant assertions: if a test already covers a property with strong evidence, don’t mirror it with a brittle compile-time check.
- Keep compile-time work small: heavy computations slow compilation and make failures harder to interpret.
Systematic Checklist
- Identify invariants that must hold for all inputs.
- Express type and layout invariants with
comptimechecks. - Express data-dependent correctness with tests.
- Make failures actionable with specific messages and targeted test names.
- Run both compile-time and runtime checks together so refactors can’t “pass by accident.”
12.5 Documenting Performance Critical Decisions with Evidence and Constraints
Performance work gets messy when “because it’s faster” replaces “because it’s measured and constrained.” This section shows a practical way to write decisions so future edits don’t accidentally undo the gains.
Start with a Decision Statement That Survives Code Review
Write a short decision block at the point where the code is introduced or changed. Include:
- Decision: what you chose (e.g., allocator type, data layout, error strategy).
- Why: the specific performance or safety goal.
- Evidence: what you measured and under what conditions.
- Constraints: what must remain true for the decision to hold.
A good decision statement is testable. If someone can’t tell what would invalidate it, the note is decoration.
Capture Evidence in a Form That Can Be Reproduced
Evidence should be tied to a repeatable harness. Record the shape of the experiment, not just the result.
- Input model: sizes, distributions, and whether data is already in cache.
- Build mode: release vs debug, and whether safety checks are enabled.
- Metrics: latency, throughput, allocations, bytes copied, branch misses if available.
- Acceptance threshold: what counts as “good enough.”
Example decision note you can paste near the code:
Decision: Use a ring buffer with preallocated storage and index wrapping.
Why: Avoid per-message allocations and keep writes contiguous.
Evidence: In release mode, 1M messages of fixed size show 0 allocations per message and stable throughput; allocations occur only during setup.
Constraints: Message size must not exceed buffer element capacity; producer and consumer must follow the single-producer/single-consumer contract.
State Constraints as Invariants, Not Vibes
Constraints are the rules that keep the performance characteristics intact. In Zig, you can often express them as types, compile-time checks, or runtime assertions.
Common constraint categories:
- Memory constraints: maximum sizes, alignment requirements, lifetime boundaries.
- Control-flow constraints: error paths are rare, hot loops avoid branching.
- Concurrency constraints: ownership model, thread confinement, synchronization assumptions.
- Data layout constraints: field ordering, packing assumptions, stride expectations.
When you can, encode constraints so they fail loudly.
const MaxPacket = 1500;
const Packet = struct {
    header: [14]u8,
    payload: [MaxPacket]u8,
    payload_len: u16,
};

comptime {
    // Constraint: header must be contiguous for fast parsing.
    @compileError(@sizeOf(Packet.header) != 14);
}
Use a Mind Map to Keep Notes Consistent Across the Codebase
The mind map below is a checklist for writing decision notes that stay coherent.
Tie Notes to Enforcement Mechanisms
A decision note without enforcement is a promise that can be broken silently. In Zig, you can enforce constraints with:
- Compile-time checks using
comptimeblocks and@compileError. - Type design that makes invalid states unrepresentable.
- Runtime assertions in debug builds for assumptions that can’t be proven at compile time.
Example: documenting and enforcing an allocator choice.
const std = @import("std");

pub fn makeScratch(allocator: std.mem.Allocator, n: usize) ![]u8 {
    // Constraint: scratch must be contiguous.
    if (n == 0) return &[_]u8{};
    const buf = try allocator.alloc(u8, n);
    // Evidence note: this path is measured to be allocation-free after warmup.
    return buf;
}
Write Notes That Explain Tradeoffs Without Repeating the Code
A constraint note should also say what you gave up. That prevents future “cleanup” from removing the very thing you depended on.
Example tradeoff phrasing:
- “We avoid bounds checks in the hot loop because the slice length is validated once before the loop.”
- “We use a packed representation only for wire format structs; internal structs remain aligned for CPU-friendly access.”
Keep the Format Short Enough to Be Used
Use a consistent template so developers actually read it. A compact format works well:
- Decision
- Evidence
- Constraints
- Enforcement
- Tradeoff
If you can’t fill one field, that’s a signal the decision isn’t ready to be documented.
Example Integrated Decision Note for a Hot Loop
Decision: Validate packet length once, then iterate over payload using a slice with a fixed stride. Evidence: Release build, 10k packets with realistic payload sizes; throughput improves and allocations remain at zero during processing. Constraints: Payload stride must match the wire format; the loop assumes
payload_len <= MaxPacket. Enforcement:payload_lenis checked before the loop; compile-time size checks ensure header layout. Tradeoff: Error reporting is centralized, so per-element diagnostics are not available inside the hot loop.
This style keeps performance decisions legible, measurable, and hard to accidentally undo.