AI Driven Software Development
1. Foundations of AI-Assisted Development
1.1 What AI Can and Cannot Do in the Software Lifecycle
AI can help you move faster, but it doesn’t replace the parts of software work that require truth, accountability, and context. Think of it as a high-speed assistant for drafting and transforming text and code, with a strong tendency to sound confident even when it’s wrong. Your job is to decide where that speed is useful and where it’s risky.
What AI is good at
1) Turning instructions into drafts AI is excellent at producing first-pass artifacts: function skeletons, API handlers, test templates, documentation drafts, and migration plans. These are useful because they reduce the “blank page” cost. For example, if you ask for a REST endpoint handler with validation and error mapping, you’ll usually get a coherent starting point you can refine.
Example prompt (for a draft):
- “Write a TypeScript Express route for
POST /usersthat validatesemailandname, returns201with the created user, and returns400with field-level errors.”
Typical output characteristics:
- It will likely include routing, validation checks, and response shapes.
- It may miss your project’s exact error format or validation library.
- It will still give you a concrete baseline to adapt.
2) Translating between representations AI can convert requirements into structured forms: user stories into acceptance criteria, acceptance criteria into test cases, and data models into serialization code. This is translation work, not truth discovery.
Example: If you provide acceptance criteria like “The endpoint returns 409 when the email already exists,” AI can generate tests that assert the status code and error body.
3) Summarizing and mapping existing code Given a codebase excerpt, AI can explain what a module likely does, identify call paths within the provided snippet, and suggest where to make changes. This is most reliable when you provide enough surrounding context (file names, key functions, and types).
Example task:
- “Here is
auth.tsandmiddleware.ts. Explain how requests are authenticated and where to add role checks.”
4) Generating repetitive structure AI shines when the work has consistent patterns: CRUD endpoints, DTOs, boilerplate tests, mapping layers, and standard logging wrappers. It’s less helpful when the work is mostly about nuanced product decisions.
5) Helping with debugging as a hypothesis generator AI can propose likely causes of a failure based on logs and stack traces. It’s useful when you treat its output as hypotheses to verify, not as a final diagnosis.
Example:
- “Tests fail with
expected 200 but got 500. Here are the stack trace and the handler code. Suggest the most likely bug and how to confirm it.”
What AI is not good at
1) Knowing the real state of your system AI cannot observe your runtime environment, hidden configuration, database contents, or production behavior. If you don’t provide the relevant details, it will guess. Even with details, it may misunderstand them.
Concrete example:
- You ask for “fix the failing integration test.” If you only paste the test file but not the failing assertion output, environment variables, or mocks, the AI may “fix” the wrong thing.
2) Guaranteeing correctness of logic and edge cases AI can produce plausible code that fails on edge conditions: time zones, concurrency, numeric precision, null handling, and authorization rules. It may also omit constraints that exist elsewhere in the system.
Example:
- You ask for a date parser. The AI might handle ISO-8601 strings but forget how your system treats empty strings or invalid formats.
3) Preserving project-specific invariants without explicit guidance Every codebase has rules: error response formats, naming conventions, transaction boundaries, performance expectations, and security constraints. AI will follow the rules you state, but it won’t automatically infer every invariant.
Example:
- If your project requires errors to include
errorCodeandtraceId, AI might return only a message unless you specify the exact schema.
4) Making final decisions that require human accountability Software decisions often involve tradeoffs: what to log, what to store, what to deny, and what to accept. AI can propose options, but humans must choose and own the outcome.
Example:
- “Should we allow password resets for unverified emails?” AI can draft policy text, but the decision belongs to your team.
5) Acting safely without guardrails AI-generated code can introduce security issues, data leaks, and broken access control. It can also generate code that compiles but violates your threat model.
Example:
- If you ask for “build a search endpoint,” AI might concatenate query strings into SQL unless you explicitly require parameterized queries and show the database access pattern.
A mind map of AI’s role across the lifecycle
Practical boundary-setting: where to use AI
Use AI when you can answer two questions:
- What inputs will it have? (Paste the relevant code, types, and error schemas.)
- What outputs must be verified? (Tests, linting, security checks, and code review.)
A simple rule of thumb: AI drafts quickly; you verify deliberately.
Example workflow for a small feature:
- You provide: endpoint spec, request/response JSON shapes, existing error format, and the database access pattern.
- You ask AI to: generate the route handler and unit tests.
- You verify: run tests, run type checks, and review authorization logic.
If you skip the “provide existing error format” step, you’ll often get a handler that behaves correctly in spirit but not in your system’s contract. That’s not a moral failing; it’s just missing requirements.
Summary
AI can accelerate drafting, translation, and pattern-based code generation, especially when you supply the right context. It cannot reliably know your system’s true state, guarantee correctness across edge cases, or make accountable product and security decisions. Treat its output as a strong starting point, then use tests, static checks, and review to turn drafts into dependable software.
1.2 Common AI Workflows for Developers and Teams
Teams usually don’t “use AI” in one way. They use it in a few repeatable workflows that match how software work already happens: clarify, draft, verify, and integrate. Below are the most common workflows, with practical examples and the checks that keep them from turning into guesswork.
Mind map: where AI fits in a typical delivery loop
Workflow A: Requirement shaping (from “idea” to “buildable task”)
When it’s useful: You have a feature request, but it’s missing the details that engineers need to implement it safely.
What you ask for: A structured breakdown: user goal, system behavior, edge cases, and acceptance criteria.
Example prompt (requirements):
“We need an endpoint
POST /v1/invitationsthat emails an invite link. Write acceptance criteria and list edge cases. Constraints: rate limit 10/min per user, reject expired emails, and return a stable error code format.”
What a good AI output includes:
- A short behavior spec (happy path + failure modes)
- A table of inputs/outputs (request fields, response shape)
- Explicit edge cases (e.g., duplicate invites, invalid email, already accepted)
- Acceptance criteria phrased so tests can be written
Team habit that helps: Have the AI produce a “testable checklist” first, then generate code only after the checklist is agreed upon. This prevents the classic failure mode: code gets written for the wrong interpretation of the requirement.
Workflow B: Code scaffolding (generate structure before logic)
When it’s useful: You want a starting point that matches your project conventions.
What you ask for: File layout, function signatures, and placeholder logic that compiles.
Example prompt (scaffold):
“In a Node/TypeScript service, create
invitations.controller.tsandinvitations.service.ts. Use dependency injection for the email sender. Provide function signatures and TODOs for business logic. Follow existing naming conventions: services insrc/services, controllers insrc/controllers.”
What to verify immediately:
- Imports and module paths match your repo
- Types compile (even if TODOs remain)
- Error handling shape matches the rest of the API
Why this works: Scaffolding reduces the amount of “creative freedom” the model has. You’re asking for the skeleton that your build system can enforce.
Workflow C: Test-first drafting (tests as the contract)
When it’s useful: You want to lock down behavior before implementation details get messy.
What you ask for: Unit tests and example fixtures that describe expected behavior.
Example prompt (tests):
“Write Jest tests for
createInvitation(email, userId)with these cases: valid email creates a record; invalid email returnsINVALID_EMAIL; duplicate invite within 24h returnsALREADY_EXISTS; rate limit throwsRATE_LIMITED. Include a mock repository and mock clock.”
What a good AI output includes:
- Test names that read like requirements
- Clear arrange/act/assert sections
- Fixtures that match your domain model
Practical check: Run the tests right away. If they fail to compile, fix the test harness first. If they compile but fail, use the failure output as the next prompt input.
Workflow D: Failure-driven repair (use the error message as input)
When it’s useful: You already have code, and the build or tests tell you what’s wrong.
What you ask for: A targeted fix for a specific error, not a rewrite.
Example prompt (fix from logs):
“Here is the TypeScript error:
Argument of type 'X' is not assignable to parameter of type 'Y'. The relevant code is below. Provide the smallest patch to fix the type mismatch and explain which type contract changed.”
What to require from the AI:
- A minimal diff or patch
- No changes outside the failing area unless necessary
- A short explanation tied to the exact error
Team rule: If the AI proposes a large refactor, ask it to justify it with the failing test(s) or compiler errors. Otherwise, you’ll end up reviewing a different feature than the one you asked for.
Workflow E: Patch-oriented edits in existing codebases
When it’s useful: You’re working in a mature repo with conventions, not a blank file.
What you ask for: “Change only these lines/behaviors,” and provide the surrounding context.
Example prompt (patch):
“In
invitations.service.ts, updatecreateInvitationso it rejects emails that are already accepted. Only modify the logic inside that function. Keep the repository interface unchanged. Here is the current function and the expected behavior.”
What to include in your prompt:
- The exact function body (or a narrow excerpt)
- The expected behavior in bullet points
- Constraints like “no new dependencies”
Why it matters: Patch-oriented prompts reduce accidental drift—like changing response formats or error codes that other parts of the system rely on.
Workflow F: Team workflow integration (review, templates, and traceability)
When it’s useful: Multiple people use AI, and you need consistent outcomes.
What you set up:
- Shared prompt templates for common tasks (requirements, tests, fixes)
- A review checklist that covers the same categories every time
- Traceability: link generated changes to the prompt and the acceptance criteria
Example checklist for PR review (AI-assisted):
- Does the change satisfy the acceptance criteria checklist?
- Are error codes and response shapes consistent with existing endpoints?
- Do tests cover the edge cases listed in the requirements?
- Are there any TODOs left in production paths?
- Did the AI introduce new dependencies or change configuration?
Mind map: prompt inputs and outputs by workflow
A simple “choose your workflow” guide
- If the request is vague: start with Workflow A.
- If you need structure that compiles: use Workflow B.
- If you want behavior locked down: draft tests with Workflow C.
- If something fails: feed the failure into Workflow D.
- If you’re editing a mature module: prefer Workflow E.
- If multiple people are involved: standardize with Workflow F.
These workflows are not mutually exclusive. A typical feature might go A → C → B → D → E, with F applied throughout so the team can review changes without guessing what the AI thought the task meant.
1.3 Choosing the Right Task for AI Assistance
AI helps most when the work is well-scoped, text-heavy, and has a clear “done” state. It helps least when the task depends on hidden context, requires deep domain judgment, or has ambiguous success criteria. A good rule: if you can write a checklist for correctness, you can usually prompt for it.
A quick decision filter
Use this filter before you start prompting.
- Text-to-structure tasks: Convert requirements into outlines, schemas, interfaces, or test cases.
- Text-to-text tasks: Draft explanations, error messages, or developer-facing docs.
- Transformation tasks: Rewrite code comments, normalize style, or convert one format to another.
- Reasoning tasks with constraints: Generate step-by-step plans that must satisfy explicit rules.
- Code generation tasks with guardrails: Produce small functions or modules where you can run tests immediately.
Avoid tasks that are primarily:
- Unbounded exploration (e.g., “figure out the whole system”).
- Ambiguous acceptance (e.g., “make it better”).
- High-stakes judgment without evidence (e.g., “decide the legal wording”).
- Tasks requiring live access to private state (unless you provide the needed data).
Mind map: task selection
Task categories with practical examples
1) Requirements to structured plans
Best fit: you have a feature description and need a plan that your team can execute.
Example prompt goal: “Turn this feature into an implementation plan with acceptance criteria.”
Input you provide:
- user story
- existing endpoints
- constraints (e.g., “no new dependencies”)
What you ask the model to output:
- a checklist of tasks
- explicit acceptance criteria
- a list of edge cases to test
Why it works: the output is structured and you can verify it by turning the checklist into tickets or commits.
2) Interface and contract drafting
Best fit: you know the behavior but want help writing the interface cleanly.
Example: You need an API contract for POST /v1/invoices.
You provide:
- request fields
- validation rules
- response shape
You ask for:
- request/response JSON schema (or typed interface)
- error response formats
- example payloads
Verification: you can use the generated contract to drive tests and client code.
3) Test generation from a spec
Best fit: you can describe expected behavior, including failure modes.
Example: “Write unit tests for a function that parses dates.”
You provide:
- function signature
- accepted formats
- invalid input rules
You ask for:
- table-driven tests
- expected outputs
- specific error messages (or error codes)
Why it works: tests are an objective target, and you can run them immediately.
4) Small, bounded code generation
Best fit: a function or module with clear boundaries.
Example: “Implement normalizeUsername(username: string): string.”
You provide:
- exact normalization rules
- examples
- constraints (e.g., “trim, lowercase, allow only letters/digits/underscore”)
You ask for:
- the function
- edge-case handling
- a short set of tests
Why it works: the scope is small enough that you can review the whole output and run tests without surprises.
5) Refactoring support with explicit invariants
Best fit: you want mechanical improvements while preserving behavior.
Example: “Refactor this function to reduce duplication, but keep the same inputs/outputs and error behavior.”
You provide:
- the current function
- a list of invariants (e.g., “must throw
InvalidIdErrorfor empty string”)
You ask for:
- a refactored version
- a brief mapping of old branches to new branches
Verification: you run the existing tests plus a few targeted ones for invariants.
Mind map: what to avoid
A practical workflow: pick the task, then pick the output
- Write the acceptance criteria first (even a short list).
- Choose the smallest artifact that proves correctness.
- If you can test it, generate tests.
- If you can compile it, generate the function.
- If you can review it, generate the interface.
- Provide examples for tricky cases.
- Ask for a constrained output format so you can diff it.
Example: choosing between “plan” and “code”
Scenario: You want a new feature, but you’re unsure about edge cases.
- If you start with code, you may bake in wrong assumptions.
- If you start with a plan plus edge-case list, you can correct assumptions before writing implementation.
A good prompt sequence:
- First request: “Produce acceptance criteria and a test matrix.”
- Second request: “Implement only the function(s) needed for the first test group.”
This keeps the task selection aligned with what you can verify.
Mini checklists you can reuse
Checklist: “Is this a good AI task?”
- I can state what “done” means.
- I can provide inputs or examples.
- The output can be reviewed or tested quickly.
- The scope is small enough to validate end-to-end.
Checklist: “What should I ask the model to output?”
- A structured artifact (plan, contract, tests, or function).
- Explicit edge cases.
- A format I can paste into the codebase.
- Notes only where they prevent mistakes (not where they add noise).
Summary
Choosing the right task is mostly about matching the work to an objective target: a spec you can test, a contract you can compile, or a function you can run. When the task is bounded and the success criteria are concrete, AI becomes a drafting partner rather than a guessing machine.
1.4 Defining Inputs and Outputs for Reliable Results
Reliable generation starts with a boring truth: the model can only work with what you give it, and it can only be checked against what you specify. “Good prompts” are often just well-defined inputs and outputs.
Inputs: what the model needs to do the job
Think of inputs in three buckets: context, constraints, and evidence.
- Context tells the model what domain it’s in and what artifacts exist.
- Constraints tell it what it must not violate (formats, limits, rules).
- Evidence tells it what “correct” looks like (examples, schemas, expected behavior).
A common failure mode is missing context that humans assume is obvious. For example, “Generate a function to parse dates” is ambiguous unless you specify the accepted formats, timezone rules, and error behavior.
Mind map: inputs
Outputs: what you will accept as correct
Outputs should be defined at two levels: shape and meaning.
- Shape is the exact structure: keys, types, code blocks, and ordering.
- Meaning is the semantics: what each field represents and how errors are handled.
If you only define meaning, the model may return something that “sounds right” but can’t be used. If you only define shape, it may produce valid structure with incorrect logic.
Mind map: outputs
A practical template: “Input contract”
Use a compact contract that you can reuse for different tasks.
Task: <what to build>
Language/Runtime: <e.g., TypeScript 5.x>
Inputs:
- <input name>: <type/shape>
- <input name>: <type/shape>
Constraints: - Output must be <exact format>
- Error handling must be <rule>
- Edge cases: <list>
Evidence: - Example 1: <input> => <expected output>
- Example 2: <input> => <expected output>
Output: - Return <shape>
- Include <what sections>
Acceptance criteria: - <checklist of pass/fail items>
Example 1: parsing dates without ambiguity
Bad input definition
“Generate a date parser. Return null if invalid.”
Problems: accepted formats are unspecified, timezone handling is unclear, and “null” might conflict with a type system.
Better input/output definition
Task: Implement
parseDate(input: string): Date | null.Inputs:
inputis a string.Constraints:
- Accept formats:
YYYY-MM-DDonly.- Interpret as UTC midnight.
- Return
nullfor any other format or impossible dates (e.g., 2024-02-30).- Do not throw.
Evidence:
"2024-01-05"=>Daterepresenting2024-01-05T00:00:00.000Z"05/01/2024"=>null"2024-02-30"=>nullOutput:
- Provide only the function code.
Acceptance criteria:
- All examples match exactly.
- No exceptions are thrown.
This forces the model to choose a single interpretation and gives you concrete checks.
Example 2: generating an API handler with explicit error shape
Suppose you want an endpoint that validates a payload.
Bad output definition
“Return an error message when validation fails.”
The model might return { error: "..." }, { message: "..." }, or even a plain string.
Better output definition
Task: Write an Express handler
createUser(req, res).Inputs:
req.bodyis an object with keysage(number).Constraints:
- If
- If
ageis missing or not an integer between 13 and 120, respond with status 400.- On success, respond with status 201 and echo
{ id, email, age }.Output shape (JSON only):
- Success:
{ "id": string, "email": string, "age": number }- Validation error:
{ "error": { "code": string, "details": Array<{ "field": string, "message": string }> } }Evidence:
- Input:
{ "email": "not-an-email", "age": 20 }=> status 400,code: "VALIDATION_ERROR", details includes{ field: "email" }- Input:
{ "email": "[email protected]", "age": 10 }=> status 400, details includes{ field: "age" }Acceptance criteria:
- Response JSON matches the exact shape.
- Status codes match.
Now you can write tests that assert exact keys and nesting.
Example 3: “evidence” as a mini oracle for logic
When logic is tricky, examples do more than illustrate—they act as an oracle.
Task: Implement
normalizeUsername(s: string): string.Constraints:
- Trim whitespace.
- Convert to lowercase.
- Replace any sequence of non-alphanumeric characters with a single underscore.
- Remove leading/trailing underscores.
Evidence:
" Alice__Bob "=>"alice__bob""A!@B"=>"a_b""___"=>""
Even if the model’s first attempt is close, the examples tell you exactly what to correct.
Common checklist: before you ask for generation
- Have you specified accepted formats and timezone/locale rules when parsing is involved?
- Have you defined error behavior (status codes, return values, exceptions) as part of the output contract?
- Did you include at least two evidence examples that cover a normal case and a failure case?
- Is the output shape machine-checkable (exact JSON keys, exact function signature, exact code boundaries)?
When inputs and outputs are explicit, the prompt becomes less of a request and more of a contract. The model still guesses, but your job shifts from “interpret what it meant” to “verify what it produced.”
1.5 Building a Reproducible Development Loop with Examples
Reproducibility in AI-assisted development means you can take the same inputs—requirements, relevant code context, and generation settings—and get outputs that are close enough to verify, test, and iterate without guesswork. The goal is not “perfect sameness.” The goal is a loop where every change has a reason you can point to.
The loop: inputs → generation → verification → feedback
A practical loop has four stages:
- Lock the inputs: requirements, constraints, and the exact project context you will provide.
- Generate: produce code and (ideally) a plan of what the code is supposed to do.
- Verify: run tests, linters, type checks, and a small set of targeted checks.
- Feed back: convert failures into precise instructions for the next generation.
A loop becomes reproducible when you treat each stage as a checklist, not a vibe.
Mind map: the reproducible loop
Stage 1: Lock the inputs
Start by writing a short “spec packet” you can reuse.
Spec packet template (copy/paste):
- Feature: one sentence.
- Acceptance criteria: 3–7 bullet points.
- Constraints: e.g., “no new dependencies,” “must use existing DB layer,” “keep public API unchanged.”
- Examples: at least two input/output pairs.
- Files to consider: list the modules you will provide as context.
Example spec packet (CRUD endpoint):
- Feature: Add
GET /api/orders/{id}. - Acceptance criteria:
- Returns 200 with JSON when the order exists.
- Returns 404 when the order does not exist.
- Response includes
id,status, andtotalCents.
- Constraints:
- Use existing
OrderRepository. - Do not change routing conventions.
- Use existing
- Examples:
- Input: id=
42→ Output:{ "id": 42, "status": "PAID", "totalCents": 1999 } - Input: id=
999→ Output: 404.
- Input: id=
- Files to consider:
routes/orders.tsrepositories/orderRepository.tsmodels/order.ts
Reproducibility improves when you always include the same “Files to consider” and the same examples, even if you change the prompt wording later.
Stage 2: Generate with scope and format rules
When generation scope is vague, verification becomes expensive. Narrow scope to the smallest set of files and functions that satisfy the acceptance criteria.
Generation checklist:
- Ask for a plan that references the acceptance criteria.
- Ask for code only for the specified files.
- Ask for tests that cover each acceptance criterion.
- Ask for explicit error handling (404 vs 200, etc.).
Example generation request (targeted):
- “Implement
getOrderByIdinrepositories/orderRepository.tsif missing, and wire it intoroutes/orders.ts. - Add unit tests for repository behavior and route behavior.
- Keep response fields exactly:
id,status,totalCents. - If an order is not found, return 404.”
This request is reproducible because it defines scope, output shape, and error behavior.
Stage 3: Verify with a fixed command sequence
Verification should be consistent. Use the same order of checks so failures are easier to interpret.
Example verification sequence (Node/TypeScript):
npm testnpm run lintnpm run typecheck
If you run checks in a different order each time, you’ll sometimes fix the wrong thing first.
Example: interpreting failures
- If tests fail with “expected 404 but got 500,” you likely have an exception path not mapped to HTTP status.
- If typecheck fails, you likely have a mismatch between model fields and response mapping.
- If lint fails, you likely have formatting or unused imports—fix those before re-running tests to avoid noise.
Stage 4: Feed back failures as structured instructions
The most effective feedback is specific and minimal. Don’t ask for “better code.” Ask for a targeted correction.
Failure-to-fix mapping template:
- Failure type: (test assertion / type error / lint / runtime)
- Evidence: paste the failing assertion message or compiler error.
- Location: file and line range.
- Expected behavior: restate the acceptance criterion.
- Requested change: “Update only X to satisfy Y.”
Example feedback message (from a failing test):
- Failure type: test assertion
- Evidence:
expected status 404, received 500 - Location:
routes/orders.ts: handler for GET /api/orders/:id - Expected behavior: “When repository returns not-found, respond with 404.”
- Requested change: “Add explicit not-found handling and ensure other errors still return 500.”
This keeps the next generation anchored to the exact mismatch.
A concrete end-to-end loop example (one feature)
Step A: Inputs
You prepare the spec packet and include the three files listed earlier plus two examples.
Step B: First generation
You request:
- Implementation in
routes/orders.tsandorderRepository.ts. - Tests for both the repository and the route.
- Response shape exactly as specified.
Step C: Verification
You run:
npm testnpm run lintnpm run typecheck
Assume results:
- Unit tests: pass
- Route test: fails for missing id (500 instead of 404)
- Lint: passes
- Typecheck: passes
Step D: Feedback and targeted regeneration
You send a feedback message focused only on the route handler’s error mapping, including the failing assertion and the handler location.
Step E: Second verification
Re-run the same command sequence. If tests pass, you stop. If not, repeat the feedback template with the new failure evidence.
Recording artifacts for repeatability
To make the loop reproducible across days and team members, record these artifacts per iteration:
- The spec packet used.
- The exact prompt (including context file list and examples).
- The generated diff.
- The test/lint/typecheck output.
- The failure-to-fix note (one sentence).
A loop without recorded artifacts is just a series of attempts. With artifacts, it becomes a process you can run again and explain.
Practical guardrails
- Keep scope small: if you change too many files at once, you can’t tell what fixed the issue.
- Prefer targeted fixes: after a failure, ask for the smallest change that addresses the evidence.
- Don’t fight the toolchain: fix type/lint issues before re-checking behavior, so you don’t chase phantom bugs.
A reproducible loop is less about getting the “right answer” immediately and more about making each next attempt cheaper than the last one.
2. Prompt Engineering for Engineering-Grade Outputs
2.1 Prompt Structure That Produces Deterministic-Like Results
Deterministic-like results come from reducing ambiguity and forcing the model to follow a repeatable procedure. You can’t guarantee identical output every time, but you can make the output stable enough to treat as a draft that reliably improves with iteration.
The core idea: constrain the job, then constrain the format
A good prompt usually has four parts:
- Role: what the model should act like.
- Task: what it must produce.
- Constraints: what it must not do, and what rules to follow.
- Output format: exactly how the answer should be structured.
If you skip any of these, the model fills gaps with guesses. Those guesses vary, and your results drift.
Mind map: prompt structure for stability
A reusable prompt template (copy, then fill)
Use this template when you want consistent structure across runs.
Role: You are a senior software engineer.
Task: Produce <artifact> for <problem>.
Inputs:
- Requirements: <paste>
- Existing code (if any): <paste>
- Example I/O (if any): <paste>
Constraints:
- Language: <X>
- Version/runtime: <Y>
- Must: <rule 1>, <rule 2>
- Must not: <rule 1>, <rule 2>
- Edge cases: <list>
Output format (follow exactly):
- Assumptions (only if needed):
- Plan (max 5 bullets):
- Final code:
- Tests (if applicable):
- Notes on edge cases:
Quality gate:
- If required inputs are missing, ask up to 3 clarifying questions instead of guessing.
The “Quality gate” line is important. Without it, the model will invent missing details and then commit to them.
Example 1: Function generation with fixed format
Weak prompt
“Write a function to validate a password.”
This prompt leaves too much open: what counts as valid, what errors look like, and what language to use.
Improved prompt
Role: You are a senior software engineer.
Task: Write a TypeScript function validatePassword(password: string) that returns a list of validation errors.
Inputs:
- Rules:
- Minimum length: 12
- Must include at least one uppercase letter
- Must include at least one lowercase letter
- Must include at least one digit
- Must include at least one of these symbols: ! @ # $ % ^ & *
Constraints:
- Language: TypeScript
- Must return string[]; empty array means valid.
- Must not throw exceptions.
- Error messages must be stable and exact.
Output format (follow exactly):
- Assumptions (only if needed):
- Plan (max 5 bullets):
- Final code:
- Tests:
- Notes on edge cases:
Quality gate:
- If any rule is ambiguous, ask up to 3 questions.
Why this is more deterministic
- The return type is fixed.
- The error messages must be stable.
- The symbol set is explicitly enumerated.
- The “must not throw” constraint removes a common source of variation.
Example 2: Prompting for code + tests together
When you ask for tests, you reduce the chance the model “forgets” how the code should behave.
Improved prompt
Role: You are a senior software engineer.
Task: Implement a Python function parse_csv_line(line: str) -> list[str] that splits a CSV line by commas, without supporting quoted commas.
Inputs:
- Examples:
- "a,b,c" -> ["a","b","c"]
- "a,,c" -> ["a","","c"]
- "a,b," -> ["a","b",""]
Constraints:
- Language: Python 3.11
- Must strip whitespace around fields.
- Must not use external libraries.
- If line is empty, return [].
Output format (follow exactly):
- Assumptions:
- Plan:
- Final code:
- Tests (pytest):
- Notes on edge cases:
Quality gate:
- If you need clarification, ask up to 3 questions.
Determinism lever: explicit scope
“Without supporting quoted commas” prevents the model from adding a feature you didn’t request. That single line often determines whether outputs match your expectations.
Example 3: Controlling format to prevent “helpful” extra text
Models sometimes add commentary inside code blocks or change headings. You can stop that by specifying exact boundaries.
Prompt snippet
- “Final code must be the only content inside the ```python block.”
- “Do not include explanations inside code blocks.”
- “No additional sections beyond 1–5.”
These constraints are small, but they make downstream parsing and review much easier.
A practical checklist for stable prompts
Use this checklist before you run the prompt:
- Are all types specified? (return type, parameter types, units)
- Are rules enumerated? (lists beat prose)
- Is the scope explicit? (what is not supported)
- Is the output format rigid? (fixed headings, fixed sections)
- Is there a quality gate? (ask questions instead of guessing)
- Do examples exist for tricky cases? (empty input, boundaries, invalid input)
Common failure modes and how to fix them
- Ambiguous requirements → Add a “Rules:” list and define exact thresholds.
- Unspecified error behavior → State “must not throw” or “must return error codes.”
- Unstable formatting → Require exact section headings and “no extra sections.”
- Over-scoped solutions → Add “must not support …” constraints.
- Silent assumptions → Add “Assumptions (only if needed)” and a quality gate.
A deterministic-like prompt is less about clever wording and more about removing degrees of freedom. When you reduce those degrees, the model’s output becomes consistent enough to iterate like a normal engineering workflow.
2.2 Writing Clear Requirements with Constraints and Acceptance Criteria
Clear requirements are not “more text.” They are fewer ambiguities. When you write them well, the model has something to follow, and your team has something to verify.
Requirements that work: the three layers
A practical requirement usually has three layers:
- Goal: what the feature should accomplish.
- Constraints: what must be true (limits, rules, and non-negotiables).
- Acceptance criteria: how to prove it’s done.
If you skip constraints, the model fills gaps with guesses. If you skip acceptance criteria, you can’t tell whether the output is correct or merely plausible.
Constraints: specify the “shape” of the solution
Constraints are best written as testable statements. They answer questions like: What should not happen? What must always happen? What boundaries exist?
Common constraint types (with examples)
-
Functional constraints (must do X, must not do Y)
- Example: “The endpoint must return HTTP 400 for invalid input; it must not return 200 with an error payload.”
-
Non-functional constraints (performance, reliability, usability)
- Example: “The request must complete within 200 ms for inputs up to 10,000 characters (excluding network latency).”
-
Data constraints (formats, ranges, invariants)
- Example: “
emailmust match RFC 5322-like patterns; empty strings are invalid.”
- Example: “
-
Integration constraints (dependencies, interfaces, compatibility)
- Example: “The service must use the existing
UserRepositoryinterface and must not introduce a new database client.”
- Example: “The service must use the existing
-
Operational constraints (logging, error handling, observability)
- Example: “On validation failure, log at
infowith a request id; do not log raw passwords.”
- Example: “On validation failure, log at
A quick rule for constraints
Write constraints as If/Then statements when possible.
- If input is invalid, then return 400.
- If the user is not found, then return 404.
- If the database times out, then return 503 and include a retry hint.
Acceptance criteria: make “done” measurable
Acceptance criteria should be written so a person can check them without reading the implementation.
Good acceptance criteria have these traits
- Observable: you can see the result.
- Specific: includes exact status codes, messages, or behaviors.
- Independent: each criterion can be tested on its own.
- Complete enough: covers success and key failure modes.
Example: requirement for a “Create Project” endpoint
Goal: Create a new project and return its id.
Constraints:
- The endpoint must validate
namelength between 3 and 60 characters. - The endpoint must reject duplicate names for the same owner.
- The endpoint must not accept
ownerIdfrom the client; it must come from the authenticated session.
Acceptance criteria:
- Given a valid request with
name="Apollo", when the owner exists, then the API returns201and a JSON body containingprojectId. - Given
nameshorter than 3 characters, then the API returns400with a field-level error forname. - Given a duplicate project name for the same owner, then the API returns
409. - Given a request that includes
ownerId, then the API ignores it and uses the authenticated owner. - Given an unauthenticated request, then the API returns
401.
Notice how each criterion describes a concrete input and a concrete outcome.
Mind map: requirement writing workflow
Requirement Writing Mind Map
Turning requirements into a prompt (with constraints and criteria)
A model prompt should mirror the structure you want in the code. If you give the model the same layers—goal, constraints, acceptance criteria—it has fewer places to improvise.
Example prompt fragment
Use a template like this:
- Goal: …
- Constraints:
- …
- Acceptance criteria:
-
- …
-
- …
-
- Output:
- Provide: endpoint signature, validation rules, error mapping, and tests.
Concrete example: prompt for a validator function
Goal: Validate a slug used in URLs.
Constraints:
- Must be lowercase.
- Allowed characters:
a-z, digits, and hyphens. - Length must be 1 to 50.
Acceptance criteria:
"my-project"is valid."My-Project"is invalid (uppercase)."project_1"is invalid (underscore).""is invalid.- A 51-character slug is invalid.
A good prompt would ask for:
- A function signature.
- A clear list of validation checks in order.
- Exact error messages for each failure type.
- Unit tests covering each acceptance criterion.
Common failure modes (and how to prevent them)
-
Constraint written as a preference
- Weak: “Try to keep responses small.”
- Strong: “Responses must not exceed 10 KB for validation errors.”
-
Acceptance criteria that describe implementation
- Weak: “Use a regex for validation.”
- Strong: “Reject slugs containing underscores with a 400 and
error.code="INVALID_SLUG".”
-
Missing ownership of data
- Weak: “The endpoint should use ownerId.”
- Strong: “ownerId must come from the authenticated session; client-provided ownerId is ignored.”
-
No mapping from errors to outcomes
- Weak: “Handle invalid input.”
- Strong: “Invalid input returns 400 with field errors for each invalid field.”
A compact checklist you can reuse
- Goal is one sentence.
- Constraints are written as testable rules.
- Acceptance criteria include success + key failure modes.
- Each criterion states input conditions and expected output.
- Error handling is specified (status codes and message shape).
- Data ownership and side effects are explicit.
When you follow this structure, the prompt becomes a specification, and the generated code becomes something you can verify without guesswork.
2.3 Few-Shot Prompting with Minimal, High-Value Examples
Few-shot prompting means you show the model a small number of examples that demonstrate the exact transformation you want. The trick is not “more examples,” but “better examples”: each one should teach a specific rule, cover a common edge case, and match your target format.
What few-shot examples should do
A good example set usually covers four things:
- A clean input that resembles your real task.
- A clear output format (headings, JSON keys, code fences, etc.).
- A rule that is easy to miss (like how to handle errors or missing fields).
- A boundary case that prevents the model from guessing.
If your examples don’t include the output structure, the model will often invent one. If your examples don’t include an edge case, the model will handle it inconsistently.
Mind map: building a minimal example set
A practical template
Use a fixed pattern so the model learns where the task begins.
- System/role instruction: one sentence about the job.
- Rules: 3–6 bullet points.
- Examples: 2–3 pairs.
- Final input: the only thing that changes.
Here’s a compact template you can reuse.
You are a code assistant.
Rules:
- Output only the requested format.
- Follow the mapping rules exactly.
- For invalid input, return the specified error shape.

Example 1
Input: ...
Output: ...

Example 2
Input: ...
Output: ...

Example 3
Input: ...
Output: ...

Now do this:
Input: ...
Output:
Example set 1: extracting fields into JSON
Task: Convert a short product description into a JSON object.
Rules to enforce
- Always return keys:
name,price,currency,category. - If price is missing, set
pricetonull. - Use ISO currency codes (USD, EUR, GBP).
- Output JSON only, no surrounding text.
Few-shot examples (minimal)
Example 1 (happy path):
- Input:
“Aurora Mug - 12.50 USD, kitchen essentials” - Output:
{
  "name": "Aurora Mug",
  "price": 12.50,
  "currency": "USD",
  "category": "kitchen"
}
Example 2 (format stress):
- Input:
“Aurora Mug (limited) — $12.50; kitchen essentials” - Output:
{
  "name": "Aurora Mug",
  "price": 12.50,
  "currency": "USD",
  "category": "kitchen"
}
Example 3 (edge case):
- Input:
“Aurora Mug - kitchen essentials” - Output:
{
  "name": "Aurora Mug",
  "price": null,
  "currency": null,
  "category": "kitchen"
}
Notice what’s doing the work: Example 2 teaches that punctuation and symbols shouldn’t change the mapping. Example 3 teaches deterministic null handling.
Prompt for the final input
You are a data extraction assistant.
Rules:
- Output JSON only.
- Always include keys: name, price, currency, category.
- If price is missing, set price and currency to null.
- category should be a short label like "kitchen".

Example 1
Input: “Aurora Mug - 12.50 USD, kitchen essentials”
Output: {"name":"Aurora Mug","price":12.50,"currency":"USD","category":"kitchen"}

Example 2
Input: “Aurora Mug (limited) — $12.50; kitchen essentials”
Output: {"name":"Aurora Mug","price":12.50,"currency":"USD","category":"kitchen"}

Example 3
Input: “Aurora Mug - kitchen essentials”
Output: {"name":"Aurora Mug","price":null,"currency":null,"category":"kitchen"}

Now do this:
Input: “Nimbus Notebook - 9 GBP, office supplies”
Output:
Example set 2: generating a function with a specific error strategy
Task: Write a JavaScript function parseLimit that reads a string like "limit=25".
Rules
- Return
{ ok: true, value: number }on success. - Return
{ ok: false, error: "message" }on failure. - Accept whitespace around
=. - Reject non-integer values.
Few-shot examples
Example 1 (happy path):
- Input:
"limit=25" - Output:
function parseLimit(s) {
  const m = /^\s*limit\s*=\s*(\d+)\s*$/.exec(s);
  if (!m) return { ok: false, error: "Invalid limit format" };
  return { ok: true, value: Number(m[1]) };
}
Example 2 (edge case: non-integer):
- Input:
"limit=25.5" - Output:
function parseLimit(s) {
  const m = /^\s*limit\s*=\s*(\d+)\s*$/.exec(s);
  if (!m) return { ok: false, error: "Invalid limit format" };
  return { ok: true, value: Number(m[1]) };
}
These two examples look similar because the rule is the same: the regex defines the accepted format. The second example still matters because it confirms the rejection behavior.
Prompt for the final function
Write JavaScript code only.
Rules:
- Implement parseLimit(s).
- Accept strings like "limit=25" with optional whitespace.
- Integers only; reject anything else.
- Return { ok: true, value: number } or { ok: false, error: "Invalid limit format" }.

Example 1
Input: "limit=25"
Output:
function parseLimit(s) {
  const m = /^\s*limit\s*=\s*(\d+)\s*$/.exec(s);
  if (!m) return { ok: false, error: "Invalid limit format" };
  return { ok: true, value: Number(m[1]) };
}

Example 2
Input: "limit=25.5"
Output:
function parseLimit(s) {
  const m = /^\s*limit\s*=\s*(\d+)\s*$/.exec(s);
  if (!m) return { ok: false, error: "Invalid limit format" };
  return { ok: true, value: Number(m[1]) };
}

Now do this:
Implement parseLimit(s) with the same rules.
Common failure modes and how examples prevent them
- Wrong output wrapper: the model adds commentary or extra keys. Fix by showing the exact wrapper in every example.
- Inconsistent null/error shapes: the model returns different error text. Fix by using one edge case example that demonstrates the exact error object.
- Overgeneralization: the model accepts formats you didn’t intend. Fix by including a “near miss” example (like
25.5when only integers are allowed). - Format drift: indentation or quoting changes. Fix by keeping examples consistent and by explicitly requiring JSON-only or code-only.
A quick checklist before you run the prompt
- Do all examples share the same output schema?
- Does at least one example include the most likely edge case?
- Does the final task input match the examples’ style (labels, punctuation, units)?
- Are your rules short enough that they don’t contradict the examples?
Few-shot prompting works best when your examples are small but surgical: each one should teach a rule you care about, not just demonstrate that the model can produce something plausible.
2.4 Controlling Format, Style, and Scope in Generated Code
When code generation goes wrong, it’s often not the logic—it’s the shape. The model may produce correct ideas wrapped in the wrong file layout, inconsistent naming, or extra features you didn’t ask for. This section shows how to control three things: format (what the output looks like), style (how it reads and fits your codebase), and scope (what it includes and what it must not include).
Format control: make the output easy to paste and verify
Start by specifying an output contract. Instead of “generate code,” ask for a single file with exact sections.
Practice: require a fixed response template
Use a prompt that demands:
- One code block only
- A specific filename
- No extra commentary
- A brief header comment inside the code
Example prompt:
You are generating code for
src/price.rs. Output exactly one Rust code block. Inside the code, include a header comment with:// File: src/price.rs. Do not include tests, benchmarks, or other files. Implementpub fn total_price(items: &[Item]) -> Result<i64, PriceError>. Use the providedItemandPriceErrortypes.
Why it works: the “one code block only” rule reduces accidental extra text, and the filename anchors the paste location.
Common failure mode: the model adds a second code block for tests. Fix it by explicitly banning it: “No tests. No mod tests.”
Style control: align with conventions using small, explicit rules
Style is easiest to control when you provide micro-rules that are checkable. “Follow best practices” is too vague. “Use snake_case for functions and PascalCase for types” is concrete.
Practice: include a style checklist in the prompt
Example style rules for a TypeScript service:
- Use
camelCasefor variables and methods - Prefer
constoverletwhen values don’t change - Return early for invalid inputs
- Use
throw new Error(...)with a specific message format
Example prompt:
Generate
src/invoice.ts. Output exactly one TypeScript code block. Style rules:
- Use
camelCaseandconst.- Validate inputs at the top of each exported function.
- Error messages must start with
invoice:.- No unused variables. Scope: implement only
export function computeInvoice(...).
Concrete example of style impact:
- Bad style:
let total = 0;then later reassigning. - Controlled style:
const total = ...computed once, which also reduces bugs.
Scope control: specify what to include and what to exclude
Scope is where “helpful” additions become harmful. A model may add caching, logging, retries, or extra endpoints because they sound reasonable. You want a boundary.
Practice: define scope with three lists
- Must include: required functions, types, behaviors
- Must not include: features to forbid
- Edge handling: what to do with invalid inputs
Example prompt for a Python function:
Implement
parse_user_id(text: str) -> intinuser_id.py. Must include:
- Accept strings like
"user:42"and"42".- Raise
ValueErrorfor anything else. Must not include:- No regex compilation caching.
- No logging.
- No CLI entry point. Edge handling:
- Leading/trailing whitespace should be ignored. Output exactly one Python code block.
Why this matters: “No logging” prevents the model from adding side effects that complicate tests and production behavior.
Mind map: controlling format, style, and scope
Mind map: Controlling Generated Code
A combined prompt pattern you can reuse
Use a single block that covers all three controls.
You are generating code for: <filename>.
Output rules:
- Output exactly one code block.
- No tests, no extra files, no commentary.
- Include a header comment: <header text>.
Style rules:
- <naming rule>
- <mutability rule>
- <error message rule>
- <validation rule>
Scope:
Must include:
- <required items>
Must not include: - <forbidden items>
Edge handling: - <invalid input behavior>
Implement:
- <function signatures>
Mini example: controlling a function without accidental features
Goal: generate a small formatter that returns a string.
Bad prompt (too open):
- “Write a function to format currency.”
Better prompt (controlled):
Generate
format_currency.ts. Output exactly one TypeScript code block. Implementexport function formatCurrency(amountCents: number, currency: 'USD'|'EUR'): string. Must include:
- If
amountCentsis not a finite number, throwTypeError.- Use
Intl.NumberFormatwithcurrency. Must not include:- No caching of formatters.
- No React components.
- No tests. Style rules:
- Use
const.- Validate inputs at the top.
- Error message must start with
formatCurrency:.
What to watch for in the output:
- The function should not accept additional currencies.
- It should not add a helper for caching.
- It should throw the specified error type and message prefix.
Practical checklist before you accept generated code
- Format: Is it exactly one code block for the correct file?
- Style: Do names and error messages match your rules?
- Scope: Are there any extra exports, tests, or side effects you didn’t request?
- Edges: Does it handle invalid inputs exactly as specified?
A good prompt doesn’t just ask for code; it constrains the output so you can trust the shape. Once format, style, and scope are controlled, the remaining work is usually real engineering: verifying behavior, not untangling surprises.
2.5 Debugging Prompts Using Failure Modes and Iteration
Debugging prompts is less about “fixing the model” and more about tightening the contract between you and the output. When the generated code fails, treat it like a test failure: identify the failure mode, change one prompt variable at a time, and re-run the smallest possible check.
Failure modes: what goes wrong in practice
Most prompt-driven failures fall into a few repeatable buckets. The trick is to map each symptom to a likely cause, then adjust the prompt to remove that cause.
Mind map: failure modes and prompt levers
A simple iteration loop (smallest change, measurable effect)
Use this loop whenever you get a failure.
- Record the failure: paste the exact error message and the relevant snippet of generated output.
- Classify the failure mode: pick one primary bucket from the mind map.
- Choose one prompt lever: change only the prompt part that addresses that bucket.
- Add one constraint or example: examples are especially effective for output shape and formatting.
- Re-generate only the affected unit: don’t ask for a full rewrite when a function-level fix will do.
A prompt change should be traceable to a specific symptom. If you can’t point to the symptom, you probably changed too much.
Example 1: Output shape failure (JSON keys don’t match)
Symptom (test failure):
- Expected:
{ "id": 123, "status": "active" } - Got:
{ "ID": 123, "state": "active" }
Failure mode: wrong output shape.
First prompt (too vague):
- “Generate a function that returns user status as JSON.”
Improved prompt lever: require exact schema and include a concrete example.
Revised prompt:
- “Return JSON with exactly these keys:
id(number) andstatus(string). No other keys. Example:{ "id": 123, "status": "active" }. If the user is missing, return{ "id": null, "status": "unknown" }.”
Why this works: the model is now constrained by a literal key set and a sample payload, which reduces “creative renaming.”
Example 2: Interface mismatch (compile errors)
Symptom (compiler):
- “Function
parseDateis called with 2 arguments, but signature expects 1.”
Failure mode: interface mismatch.
First prompt (missing target signature):
- “Write
parseDatethat converts a string to a Date.”
Improved prompt lever: paste the exact signature and forbid inventing APIs.
Revised prompt:
- “Implement
parseDate(input: string, format: string): Datewith this signature exactly. Do not change the function name or parameters. Use only the standard library; no new helper functions outside this file.”
Why this works: the prompt now includes the contract the compiler enforces, so the model can’t drift into a different signature.
Example 3: Logic errors (edge cases missing)
Symptom (unit tests):
- For input
"", expected errorInvalidInput, but function returnsnull. - For input
" ", expectedInvalidInput, but it trims and accepts.
Failure mode: incomplete coverage (and hidden assumptions about whitespace).
First prompt (happy-path bias):
- “Parse the input and return a result.”
Improved prompt lever: list boundary cases and require explicit error branches.
Revised prompt:
- “Implement
normalizeUsername(s: string): string.- If
sis empty ("") or only whitespace, throwInvalidInput. - Otherwise, trim leading/trailing spaces and return the normalized string.
- Do not return
null.”
- If
Why this works: the prompt forces the model to treat error handling as part of the spec, not an afterthought.
Example 4: Format drift (extra text breaks a parser)
Symptom:
- A downstream script expects only code, but the output includes explanations and .
Failure mode: format drift.
First prompt:
- “Provide the code for the function.”
Improved prompt lever: specify output boundaries precisely.
Revised prompt:
- “Output only the code for
calculateTotal(items: Item[]): number.- No fences.
- No comments.
- No additional text before or after the code.”
Why this works: the prompt defines the output channel, not just the content.
A “prompt diff” checklist for iteration
When you iterate, keep a short log:
- Failure mode chosen: (e.g., wrong output shape)
- Prompt change: (e.g., added exact JSON keys)
- Unit regenerated: (e.g., only the serializer function)
- Result: pass/fail and the new error message
If the failure changes but doesn’t resolve, re-classify the new symptom and repeat the loop.
Practical debugging template (copy, then fill)
Use this structure to keep changes focused.
Task: <what you want>
Target contract:
- Function/class signature: <paste exact signature>
- Input constraints: <list>
- Output schema/format: <exact keys or required format>
Failure observed:
- Error message: <paste>
- What was generated (relevant snippet): <paste>
Fix instructions (one failure mode only):
- <e.g., “Match JSON keys exactly: id, status; no others.”>
Regenerate:
- Only the affected unit: <file/function>
- Keep everything else unchanged.
How to avoid “prompt whack-a-mole”
If you keep adding constraints without identifying the failure mode, you’ll often get a different kind of failure. Instead, pick one bucket from the mind map, apply one lever, and re-run the smallest test that reproduces the issue.
A good debugging prompt is specific enough that the next output can be judged immediately. When the next run still fails, the error message becomes your next clue, not your next excuse.
3. Spec to Code: Turning Requirements into Implementations
3.1 Translating User Stories into Technical Tasks
User stories describe value from a user’s point of view. Technical tasks describe work that can be built, tested, and reviewed. The translation step is where teams prevent “we built the thing, but it doesn’t solve the problem” from becoming a recurring hobby.
Start with a story you can test
A usable user story usually includes:
- Role (who): “As a customer…”
- Need (what): “…I want to reset my password…”
- Outcome (why): “…so I can regain access.”
- Acceptance criteria (how you’ll know it’s done): specific, observable conditions.
If the story lacks acceptance criteria, create them before writing tasks. Otherwise, tasks become guesses with commit hashes.
Mind map: from story to tasks
Mind map: Translating a User Story into Technical Tasks
Step 1: Convert acceptance criteria into “taskable” statements
Take each acceptance criterion and rewrite it as a checklist of technical outcomes.
Example user story
- Story: “As a user, I want to reset my password so I can regain access.”
- Acceptance criteria:
- User can request a password reset using email.
- System sends a reset link that expires after 30 minutes.
- User can set a new password using the link.
- Invalid or expired links are rejected with a clear message.
Translation into taskable outcomes
- Request flow:
- Validate email format.
- Look up user by email.
- Create a reset token with expiration.
- Persist token and expiration.
- Trigger email sending.
- Link flow:
- Verify token exists and is not expired.
- Allow password update.
- Invalidate token after successful use.
- Enforce password rules (length, complexity, history if applicable).
- Error handling:
- Return consistent error response for invalid/expired tokens.
- UI shows message without leaking whether the email exists.
Notice how each acceptance criterion becomes multiple technical outcomes, not one monolithic task.
Step 2: Identify the “layers” touched by the story
Most stories touch more than one layer. Listing layers early prevents tasks that only cover the happy path.
A practical layer set:
- API: endpoints, request/response, status codes.
- Domain: state changes and business rules.
- Persistence: schema changes, queries, indexes.
- UI: forms, states, and user feedback.
- Cross-cutting: auth, rate limiting, logging, auditing.
Example mapping for the password reset story
- API:
POST /password-reset/request,GET /password-reset/{token},POST /password-reset/{token} - Domain: token generation, expiration check, token invalidation
- Persistence:
password_reset_tokenstable (or equivalent), expiration field, used flag - UI: request form, “check your email” screen, reset form, error message states
- Cross-cutting: rate limit request endpoint, avoid account enumeration in responses
Step 3: Turn outcomes into tasks with clear boundaries
A good task has:
- A verb (“Implement”, “Add”, “Update”, “Write”, “Refactor”).
- The artifact (“endpoint”, “migration”, “UI component”, “test suite”).
- A scope (“for password reset only”, “for expired token case”).
- A verification hook (“covered by tests X and Y”).
Example task list (initial draft)
- Add migration for password reset tokens (token hash, user id, expires at, used at).
- Implement token creation in the service layer.
- Implement
POST /password-reset/requestendpoint. - Implement email dispatch integration (mockable sender).
- Implement token verification logic (expired/used handling).
- Implement
GET /password-reset/{token}to render reset page state. - Implement
POST /password-reset/{token}to update password and invalidate token. - Add UI components for request and reset forms.
- Add unit tests for token verification and invalidation.
- Add integration tests for request-to-reset flow.
- Add rate limiting and consistent error responses.
- Add logging for request attempts and reset success/failure (without sensitive data).
Each task should map to one or more acceptance criteria. If a task doesn’t map to anything, it’s probably not part of this story.
Step 4: Decide the “slice” strategy
Two common packaging strategies:
- Vertical slice: one thin end-to-end path (API + domain + UI + tests) for one acceptance criterion.
- Horizontal slice: one layer across multiple criteria (e.g., persistence first, then API, then UI).
For stories with multiple user-visible steps, vertical slices often reduce confusion.
Vertical slice example
- Slice A: request reset link (criteria 1)
- Migration + service + endpoint + UI request form + tests
- Slice B: validate link and show reset form (criteria 2 and 3 precondition)
- Token verification + reset page state + tests
- Slice C: update password and reject invalid links (criteria 3 and 4)
- Password update + token invalidation + error handling + tests
Step 5: Add “definition of done” per task type
Tasks become easier to review when “done” is explicit.
- API tasks: includes request/response schema, status codes, and tests for success + failure.
- Persistence tasks: includes migration, rollback plan (if applicable), and queries covered by tests.
- UI tasks: includes states (loading, success, error) and at least one test or snapshot strategy.
- Security/cross-cutting tasks: includes rate limiting behavior and log redaction rules.
Step 6: Use a trace table to prevent gaps
A simple trace table catches missing work.
| Acceptance criterion | Technical outcomes | Example tasks | Example tests |
|---|---|---|---|
| Request using email | validate email, create token, send email | migration, request endpoint, email sender mock | unit test token creation, integration test request |
| Link expires after 30 min | expiration check, reject expired | token verification logic | unit test expired token, integration test expired flow |
| Set new password | update password, invalidate token | reset endpoint, password rules | unit test invalidation, integration test success |
| Invalid/expired rejected | consistent error + clear message | error mapping, UI error state | integration test invalid token, UI state test |
Concrete example: rewriting a vague story into tasks
Vague story: “Users should be able to reset passwords.”
Improved story with acceptance criteria:
- Request endpoint returns the same message whether email exists.
- Reset link expires after 30 minutes.
- After successful reset, the same link cannot be reused.
Resulting tasks become specific:
- Add “email exists” ambiguity handling in responses.
- Add expiration enforcement in token verification.
- Add token invalidation on success and tests for reuse.
The translation is successful when a reviewer can point to a task and say, “That task proves this acceptance criterion.”
3.2 Creating API Contracts and Data Models from Prompts
A good API contract starts with two things the prompt must provide: (1) what the client sends and (2) what the server guarantees back. When you generate both the contract and the data model together, you reduce the number of “interpretation gaps” that otherwise show up later as mismatched fields, inconsistent nullability, or tests that don’t agree with behavior.
Step 1: Turn the prompt into a contract skeleton
Before writing any schema, extract the contract’s backbone:
- Resources (what is being created/read/updated/deleted)
- Operations (endpoints or methods)
- Request shape (body, path params, query params)
- Response shape (success payload and error payload)
- Constraints (required fields, allowed values, size limits)
- Semantics (idempotency, status codes, pagination rules)
A practical way to do this is to ask the model to output a structured draft with placeholders you can verify.
Example prompt (input): “Build an API for managing book loans. A loan has a borrower name, a book id, and a due date. Create a loan, list loans with pagination, and return a loan. Use ISO-8601 dates. If a due date is in the past, reject the request with a 400.”
Contract skeleton you want to end up with (output outline):
POST /loans→201with created loanGET /loans?page=&pageSize=→200with list + pagination metadataPOST /loans/{loanId}/return→200with updated loan- Error responses include
code,message, anddetails
Step 2: Define the data model with explicit nullability and invariants
Data models are where ambiguity becomes expensive. Your prompt should lead to decisions like:
- Which fields are required vs optional
- Which fields can be null vs omitted
- Which fields are server-generated (e.g.,
id,createdAt) - Which invariants must always hold (e.g.,
dueDate >= today)
A useful pattern is to separate models into:
- Input models (what clients send)
- Output models (what clients receive)
- Internal models (what your service uses, if different)
Example models (conceptual):
CreateLoanRequestLoan(response)ListLoansResponseErrorResponse
Mind map: contract-to-model mapping
Mind map: From prompt to API contract and data models
Step 3: Generate schemas that match the contract’s semantics
Once you have the skeleton, generate schemas that reflect it. The most common mismatch is status codes and error payloads: the contract says “400 on invalid due date,” but the schema doesn’t define the error body.
Example: CreateLoanRequest schema (conceptual JSON Schema style):
borrowerName: string, min length 1bookId: string or integer (choose one and stick to it)dueDate: string inYYYY-MM-DDformat
Example: Loan schema (response):
id: string (server-generated)borrowerName: stringbookId: same type as requestdueDate: same date formatstatus: enum likeACTIVEorRETURNEDcreatedAt: ISO-8601 timestamp
Example: ErrorResponse schema (response):
code: string enum (e.g.,INVALID_DUE_DATE,NOT_FOUND)message: human-readable stringdetails: array of field-level issues (optional)
Step 4: Use “contract examples” to force alignment
Schemas alone don’t guarantee alignment; examples do. Provide at least one example per operation: one success and one failure.
Example: POST /loans
- Success request:
borrowerName: “Avery Chen”bookId: “B-1042”dueDate: “2026-04-10”
- Success response (201):
- includes
id,status: "ACTIVE", andcreatedAt
- includes
- Failure request (due date in past):
dueDate: “2026-01-01”
- Failure response (400):
code: "INVALID_DUE_DATE"detailsincludes which field failed and why
Example: GET /loans?page=1&pageSize=2
- Success response (200):
items: array ofLoanpage: current pagepageSize: echoed valuetotalItems: total count (if your contract includes it)
Mind map: examples as “tests for the contract”
Mind map: Examples that validate the contract
Step 5: Write a prompt that produces contract-ready output
When prompting for contracts, ask for explicit sections: endpoints, request/response models, error model, and examples. Also require consistency checks: “use the same type for bookId across request and response.”
Example prompt (output request): “Produce an API contract for the book-loan service. Output: (1) endpoint list with method, path, status codes; (2) data models for CreateLoanRequest, Loan, ListLoansResponse, ErrorResponse; (3) validation rules for dueDate; (4) two examples for POST /loans (success and due date in past) and one example for GET /loans with pagination. Ensure bookId type is consistent everywhere.”
Step 6: Convert the contract into implementation constraints
Even if you generate code later, the contract should already constrain behavior:
- If
dueDateis validated as “not in the past,” your handler must enforce it before persistence. - If
statuschanges on return, the return endpoint must update it and reflect it in the response. - If pagination includes
totalItems, your list operation must compute or store it.
A small but effective checklist:
- Every endpoint has a success response schema.
- Every error status code has an error schema.
- Every field has a clear type and format.
- Every validation rule has a corresponding failure example.
Quick reference: what to insist on in the prompt
- Formats: ISO-8601 date vs timestamp
- Types: string vs integer for identifiers
- Requiredness: required vs optional vs nullable
- Status codes: which ones for which conditions
- Error codes: stable machine-readable values
- Examples: at least one per endpoint
When these are present, the generated contract and data models tend to agree with each other, and the later steps (tests, code generation, and review) become mostly mechanical rather than interpretive.
3.3 Generating Function-Level Designs Before Code
Function-level design is the step where you decide what each function does, what it takes, what it returns, and what it refuses to do. When you do this before writing code, you reduce the chance that the first implementation becomes the specification. It also makes it easier to test, review, and refactor later.
What “function-level design” includes
A good function design usually contains:
- Purpose: one sentence describing the job.
- Inputs: parameter names, types, and constraints (including “must not be empty”).
- Outputs: return type and what each output value means.
- Errors: which failures are expected, and how they are represented.
- Side effects: whether it mutates state, performs I/O, or logs.
- Invariants: conditions that must hold before and after execution.
- Algorithm sketch: the high-level steps, not the final code.
A practical trick: write the design so a reviewer could implement it without asking questions. If they would ask, your design is missing a constraint or an error behavior.
Mind map: from requirement to function design
Function-Level Design Mind Map
A template you can reuse
Use a consistent structure so the design stays comparable across functions.
Function: <name>
Purpose: <one sentence>
Inputs:
- <param>: <type>, constraints: <rules>
- …
Outputs:
- returns: <type>
- success: <meaning>
Errors:
- <error type/strategy>: <when it happens>
- …
Side effects:
- <none | state change | I/O | logging>
Invariants:
- Pre: <conditions>
- Post: <conditions>
Algorithm sketch:
- …
- …
- …
Examples:
- Input: … -> Output: …
- Input: … -> Error: …
Example: designing a request validator before coding
Suppose you’re building an endpoint that accepts a JSON body with a user id and an action.
Requirement (simplified):
- Input JSON:
{ "userId": "...", "action": "..." } userIdmust be a non-empty string of digits.actionmust be one of:"activate","deactivate".- Return a normalized object for downstream logic.
A function-level design might look like this:
Function design:
- Function:
parseActionRequest(body) - Purpose: Convert raw request JSON into a validated, normalized structure.
Inputs:
body:unknown(raw parsed JSON), constraints: may benullor missing fields.
Outputs:
- returns:
{ userId: string; action: "activate" | "deactivate" } - success: returned object contains validated values.
Errors:
ValidationError(expected):bodyis not an objectuserIdmissing, empty, or contains non-digitsactionmissing or not in the allowed set
Side effects:
- none (pure function).
Invariants:
- Pre: none (it can handle any input).
- Post: on success,
userIdmatches^\d+$andactionis one of the allowed literals.
Algorithm sketch:
- Check
bodyis an object. - Read
userIdandactionfields. - Validate
userIdwith a digits-only rule. - Validate
actionagainst the allowed set. - Return normalized object.
Examples:
- Input:
{ "userId": "42", "action": "activate" }-> Output:{ userId: "42", action: "activate" } - Input:
{ "userId": "", "action": "activate" }-> Error:ValidationError - Input:
{ "userId": "abc", "action": "activate" }-> Error:ValidationError - Input:
{ "userId": "42", "action": "delete" }-> Error:ValidationError
Notice what’s missing: no mention of HTTP status codes. That belongs to the handler, not the parser. Keeping responsibilities separate makes the function easier to reuse and test.
Example: designing a computation function with explicit edge cases
Now consider a function that computes a discounted total.
Requirement:
- Inputs:
subtotal(number),couponCode(string or null) - If
couponCodeis"SAVE10", apply 10% off. - Never return a negative total.
Function design:
- Function:
computeTotal(subtotal, couponCode) - Purpose: Calculate final total after applying an optional coupon.
Inputs:
subtotal:number, constraints: must be finite and>= 0.couponCode:string | null, constraints: may be null; case-sensitive match.
Outputs:
- returns:
number - success: total is
>= 0.
Errors:
RangeError(expected):subtotalis negative or not finite.
Side effects:
- none.
Invariants:
- Pre: none beyond input constraints.
- Post: result equals
max(0, subtotal * (1 - discount)).
Algorithm sketch:
- Validate
subtotal. - Set
discount = 0. - If
couponCode === "SAVE10", setdiscount = 0.1. - Compute
total = subtotal * (1 - discount). - Return
Math.max(0, total).
Examples:
- Input:
(100, null)->100 - Input:
(100, "SAVE10")->90 - Input:
(5, "SAVE10")->4.5 - Input:
(-1, "SAVE10")-> ErrorRangeError
The key nuance: the design states how invalid inputs are handled, so the code doesn’t guess.
How to generate these designs from a prompt (without jumping to code)
When asking for function-level designs, instruct the output format and require explicit error behavior.
A useful prompt pattern:
- Provide the requirement.
- Specify the function name(s) you want.
- Demand a structured design template.
- Require at least 3 examples, including one failure case.
Example prompt (short):
- “Design
parseActionRequest(body)using the template. Include constraints, error strategy, and 4 examples (3 success/failure mix). Keep it pure.”
This forces the model to commit to decisions that code will later reflect.
Mind map: common design decisions to make explicit
Practical payoff
Once you have function-level designs, code generation becomes a mechanical translation. More importantly, review becomes targeted: reviewers can check constraints and error behavior without scanning through implementation details. That’s where quality improves—before the first line of code is written.
3.4 Producing Implementation Plans with Stepwise Checkpoints
An implementation plan turns “build the feature” into a sequence of small, verifiable moves. Each checkpoint should answer one question: did we do the right thing, and is it still true? The trick is to plan at a granularity that makes failure cheap.
What a good stepwise plan looks like
A stepwise implementation plan has four traits:
- Each step has an observable outcome. You should be able to point to a file, a test result, a log line, or a UI state.
- Each step has a stop condition. If the outcome is wrong, you know exactly where to intervene.
- Steps are ordered by dependency. You don’t write business logic before you know the data shape.
- The plan includes “proof steps.” These are small checks that confirm assumptions before you invest more work.
Mind map: from requirement to checkpoints
Implementation Plan Mind Map
Designing checkpoints: a practical template
Use this template for every step.
- Step name: Short and specific.
- Purpose: What assumption this step validates.
- Deliverable: What artifact exists after the step.
- Checkpoint test: The smallest test or command that proves it.
- Stop condition: What failure means “pause and revise.”
- Next step unlock: What becomes safe to do after passing.
Example checkpoint template (filled in)
- Step name: Define request/response contract
- Purpose: Ensure the API shape matches acceptance criteria.
- Deliverable:
CreateOrderRequestandCreateOrderResponsetypes + validation. - Checkpoint test: Run unit tests for validation rules; verify sample payloads.
- Stop condition: Any mismatch between expected fields and actual types.
- Next step unlock: Implement order creation logic using the validated model.
Stepwise plan example: “Create an order” feature
Assume a backend service with an endpoint POST /orders. Acceptance criteria:
- Requires
customerId(UUID) anditems(non-empty array). - Each item has
productId(UUID) andquantity(integer > 0). - Returns
201withorderId. - Invalid input returns
400with a list of field errors.
Step 0: Clarify & align (the “don’t build the wrong thing” step)
- Purpose: Confirm success signals and error format.
- Deliverable: A short spec summary and a list of unknowns.
- Checkpoint test: A single table mapping invalid inputs to expected
400responses.
Concrete example table (field errors):
| Case | Input | Expected error |
|---|---|---|
| Missing customerId | { "items": [] } | customerId: "required" |
| Empty items | { "customerId": "...", "items": [] } | items: "must not be empty" |
| Bad quantity | quantity: 0 | items[0].quantity: "must be > 0" |
- Stop condition: If the team can’t agree on error shape, implementation should not start.
Step 1: Skeleton & contracts
- Purpose: Lock down types and endpoint wiring before business logic.
- Deliverable: Endpoint handler stub + request/response types.
- Checkpoint test: Build succeeds; a “happy path” request returns
501 Not Implemented.
Why this matters: it proves routing, serialization, and basic plumbing are correct.
Step 2: Validation and error mapping
- Purpose: Ensure invalid inputs fail fast and consistently.
- Deliverable: Validation logic and error-to-response mapping.
- Checkpoint test: Unit tests for validation rules and error formatting.
Concrete example: table-driven unit tests.
| Test name | Input | Expected status |
|---|---|---|
missing_customerId | { "items": [{"productId":"...","quantity":1}] } | 400 |
empty_items | { "customerId":"...","items":[] } | 400 |
- Stop condition: If error messages don’t match the agreed field paths, fix mapping before proceeding.
Step 3: Core logic (business rules)
- Purpose: Implement order creation using validated inputs.
- Deliverable: A service function like
createOrder(request). - Checkpoint test: Unit tests that verify:
- orderId is generated
- items are transformed correctly
- quantities are preserved
Concrete example test assertions:
-
Given two items with quantities 2 and 3, the persisted line items have quantities 2 and 3.
-
The service never sees invalid quantities because validation already filtered them.
-
Stop condition: If the service needs to re-validate, that’s a sign the contract step was incomplete.
Step 4: Integration wiring
-
Purpose: Connect endpoint -> service -> persistence.
-
Deliverable: Repository calls and transaction boundaries.
-
Checkpoint test: Integration test that hits the endpoint and checks:
- status code is
201 - response contains
orderId - database contains the expected rows
- status code is
-
Stop condition: If integration fails, isolate whether the issue is serialization, persistence schema, or transaction handling.
Step 5: Verification and cleanup
-
Purpose: Confirm the feature is stable and reviewable.
-
Deliverable: Full test pass + lint/type checks + minimal documentation.
-
Checkpoint test:
test+lint+typecheckcommands all succeed. -
Stop condition: Any new warnings or failing tests require fixes before merging.
How to use this plan with AI-generated code
When generating code, treat the plan as a checklist for what the model must produce at each stage.
- At Step 1, request only contracts and stubs.
- At Step 2, request validation and error mapping, plus tests.
- At Step 3, request the core service and unit tests.
- At Step 4, request integration wiring and one end-to-end test.
This prevents the common failure mode where everything is generated at once, and the first error forces a messy unwind.
A compact “checkpoint prompt” pattern
Use a consistent instruction so each generation round targets one deliverable.
You are implementing Step X of the plan.
Deliverable: <what files/functions must exist>
Constraints: <validation rules, error format, types>
Checkpoint test: <the smallest test/command to run>
If anything is missing, list it explicitly before writing code.
Example: Step 2 prompt (validation)
You are implementing Step 2 (Validation and error mapping).
Deliverable:
- CreateOrderRequest validation for customerId and items
- Map validation failures to a 400 response with field paths
Constraints:
- items must be non-empty
- quantity must be integer > 0
Checkpoint test:
- Add table-driven unit tests for at least 3 invalid cases
Stop condition:
- If field paths don’t match the agreed format, do not proceed
Final checklist for stepwise checkpoints
Before moving to the next step, confirm:
- The deliverable exists and matches the contract.
- The checkpoint test is run and passing.
- The stop condition is understood (what would cause a rollback to this step).
- The next step can proceed without redoing earlier work.
A good plan doesn’t just describe work; it defines when work is “done enough” to safely continue. That’s how you keep momentum without sacrificing correctness.
3.5 End-to-End Example: From Feature Description to Working Module
This example turns a feature request into a working module by moving through the same checkpoints you’ll use for real projects: clarify inputs/outputs, design the module boundary, generate implementation, generate tests, and iterate using failures as feedback.
Feature description (the starting point)
We want an endpoint that accepts a list of items and returns a summary.
- Input: JSON body with
items: [{"name": string, "price": number}]. - Rules:
- Reject if any item has an empty
name. - Reject if any
priceis negative. - Compute:
count: number of valid itemstotal: sum of pricesaverage: total / count (0 if count is 0)
- Reject if any item has an empty
- Output:
- On success:
{ "count": number, "total": number, "average": number } - On failure:
{ "error": string, "details": string[] }
- On success:
A good first move is to decide what “working module” means. Here, it means a pure function that performs validation and computation, plus a thin wrapper that turns errors into HTTP responses.
Mind map: the module boundary and data flow
Step 1: Define the contract precisely
Before writing code, write down the exact function signature and error shape. This reduces “almost correct” outputs.
- Pure function signature:
validateAndSummarize(items) -> { ok: true, value: Summary } | { ok: false, error: string, details: string[] }
- Summary type:
count: numbertotal: numberaverage: number
Concrete example inputs help catch edge cases early:
items: []should return{count:0,total:0,average:0}.items: [{name:"",price:10}]should fail with a details entry aboutname.items: [{name:"A",price:-1},{name:"B",price:2}]should fail and include both issues.
Step 2: Generate the implementation (with guardrails)
The prompt should instruct the model to:
- keep the function pure,
- validate all items,
- return a discriminated union (
okflag), - avoid throwing for validation errors.
Here’s a compact Node/TypeScript-style module.
// summary.ts
export type Item = { name: string; price: number };
export type Summary = { count: number; total: number; average: number };

export type OkResult = { ok: true; value: Summary };
export type ErrResult = { ok: false; error: string; details: string[] };
export type Result = OkResult | ErrResult;

export function validateAndSummarize(items: Item[]): Result {
  const details: string[] = [];

  items.forEach((item, i) => {
    if (typeof item?.name !== 'string' || item.name.trim().length === 0) {
      details.push(`items[${i}].name must be a non-empty string`);
    }
    if (typeof item?.price !== 'number' || Number.isNaN(item.price)) {
      details.push(`items[${i}].price must be a number`);
    } else if (item.price < 0) {
      details.push(`items[${i}].price must be >= 0`);
    }
  });

  if (details.length > 0) {
    return { ok: false, error: 'Invalid request', details };
  }

  const count = items.length;
  const total = items.reduce((sum, it) => sum + it.price, 0);
  const average = count === 0 ? 0 : total / count;

  return { ok: true, value: { count, total, average } };
}
A subtle but important choice is validating price for “not a number” separately from “negative.” That prevents confusing error messages when the input is malformed.
Step 3: Generate the wrapper (HTTP handler)
The wrapper’s job is to translate the pure function result into the response shape. It should not duplicate validation logic.
// handler.ts
import { validateAndSummarize, Item } from './summary';

export function summarizeHandler(req: any, res: any) {
  const items = req?.body?.items;
  const result = validateAndSummarize(Array.isArray(items) ? items : []);

  if (!result.ok) {
    return res.status(400).json(result);
  }

  return res.status(200).json(result.value);
}
Notice the wrapper uses [] when items is missing or not an array. That’s a deliberate behavior choice; if you prefer a different rule (e.g., treat missing items as an error), you’d change the wrapper and add tests.
Step 4: Generate tests that match the contract
Tests should cover:
- empty input
- valid computation
- multiple validation errors
- wrapper response codes and shapes
// summary.test.ts
import { validateAndSummarize } from './summary';

describe('validateAndSummarize', () => {
  test('empty list returns zeros', () => {
    const r = validateAndSummarize([]);
    expect(r).toEqual({ ok: true, value: { count: 0, total: 0, average: 0 } });
  });

  test('computes total and average', () => {
    const r = validateAndSummarize([
      { name: 'A', price: 10 },
      { name: 'B', price: 20 }
    ]);
    expect(r.ok).toBe(true);
    if (r.ok) expect(r.value).toEqual({ count: 2, total: 30, average: 15 });
  });

  test('collects multiple validation errors', () => {
    const r = validateAndSummarize([
      { name: ' ', price: -1 },
      { name: 'B', price: -2 }
    ]);
    expect(r.ok).toBe(false);
    if (!r.ok) {
      expect(r.error).toBe('Invalid request');
      expect(r.details).toEqual([
        'items[0].name must be a non-empty string',
        'items[0].price must be >= 0',
        'items[1].price must be >= 0'
      ]);
    }
  });
});
The test for multiple errors asserts the exact order of details. That’s useful because it forces deterministic output, which makes debugging less annoying.
Step 5: Run tests and iterate using failures
If a test fails, don’t immediately “fix the code blindly.” First, identify which contract assumption was wrong.
Common failure patterns and what to do:
- Average mismatch: If you accidentally divide by
countbefore computingtotal, the empty list case will expose it. - Error message mismatch: If the prompt or code uses a different wording, update either the code or the expected strings, but keep them consistent.
- Wrapper shape mismatch: If the handler returns
{count,total,average}but the test expects{ok:true,value:...}, adjust the handler to return only the public shape.
Mind map: the iteration loop
Step 6: Add one wrapper test (optional but clarifying)
A small handler test ensures you didn’t accidentally leak internal result objects.
// handler.test.ts
import { summarizeHandler } from './handler';

test('handler returns 400 with error shape', () => {
  const req = { body: { items: [{ name: '', price: 1 }] } };
  const res: any = {
    statusCode: 0,
    body: null,
    status(code: number) { this.statusCode = code; return this; },
    json(payload: any) { this.body = payload; return this; }
  };

  summarizeHandler(req, res);
  expect(res.statusCode).toBe(400);
  expect(res.body).toHaveProperty('error');
  expect(res.body).toHaveProperty('details');
});
At this point, the “working module” is real: the pure function is deterministic and testable, and the wrapper is a thin translation layer.
What to carry forward into your next feature
For the next feature, reuse the same structure:
- write the contract (inputs/outputs and error shape),
- split pure logic from transport concerns,
- generate tests that pin down edge cases,
- iterate only on the specific mismatch revealed by failures.
That’s the difference between “code that runs” and “code that behaves.”
4. Automated Code Generation Workflows
4.1 Selecting Generation Granularity: Snippets, Files, or Modules
Granularity is the size of the unit you ask the model to produce. Smaller units are easier to verify and easier to correct; larger units reduce coordination overhead but increase the chance of mismatched assumptions. The trick is to pick the smallest unit that still preserves the context needed for correctness.
A quick decision rule
Use this rule of thumb: if the output must compile and run as-is, generate at least a file; if it must integrate with existing interfaces, generate at least a module; if it only needs to illustrate logic, generate a snippet.
A practical way to apply it:
- Snippets for local logic (parsing a line, validating a field, mapping an enum).
- Files for cohesive units with imports and exports (a utility module, a controller, a repository class).
- Modules for cross-cutting behavior (a feature package with routes, handlers, data access, and tests).
Mind map: choosing granularity
Snippets: when “small” is the right size
Snippets work well when you can define a tight contract: inputs, outputs, and constraints. A snippet prompt should include:
- The exact function signature (or a close approximation).
- The expected behavior for normal and edge cases.
- Any formatting requirements (e.g., JSON shape, error messages).
- A minimal example input and expected output.
Example: snippet for validation
Prompt (conceptual): “Write a function validateEmail(email: string): string | null that returns null for valid emails and a specific error code string for invalid ones. Valid means it matches local@domain with no spaces and at least one dot in the domain.”
What you get should be easy to test:
- Input:
"[email protected]"→null - Input:
"a@b"→"ERR_EMAIL_DOMAIN" - Input:
"a [email protected]"→"ERR_EMAIL_SPACES"
Why this granularity helps: you can run unit tests immediately without worrying about imports, module exports, or project-specific wiring.
Common snippet failure mode: the model invents a helper or type you didn’t ask for. Fix it by explicitly forbidding extra dependencies: “Do not introduce new imports or external libraries; use only standard language features.”
Files: when you need compilation and boundaries
A file prompt is appropriate when the output must:
- Include imports.
- Define exports.
- Match existing project conventions (naming, folder structure, error handling).
A file prompt should include the surrounding contract. If you’re generating a file that implements an interface, paste the interface definition or the relevant type signatures.
Example: file for a repository implementation
Suppose your project has an interface:
UserRepositorywith methodsgetById(id),create(user), anddelete(id).
A file-level prompt should include:
- The interface (or TypeScript types / Java signatures).
- The expected persistence mechanism (e.g., SQL query builder, ORM, or raw SQL).
- The shape of returned objects.
- Error behavior (e.g., “return
nullwhen not found, throw on DB errors”).
The model can then generate a single file like userRepository.ts that:
- Imports the DB client.
- Implements the interface.
- Exports the repository class.
Why file granularity reduces pain: you can run the compiler and catch missing imports, wrong exports, and type mismatches in one pass.
Common file failure mode: the model “almost” matches the interface but changes a field name. Prevent this by including a small mapping example: “User domain object has userId, but DB row has id; map id -> userId.”
Modules: when multiple files must agree
Modules are the right choice when the feature has internal contracts that must stay consistent across files. A module prompt should define:
- The module boundary (what it owns, what it does not).
- The public API of the module (what other parts import).
- Internal contracts shared across files (types, DTOs, error codes).
- The tests that prove integration within the module.
Example: module for a “create order” feature
A module might include:
routes.ts(HTTP endpoint)service.ts(business logic)repository.ts(data access)types.ts(request/response and domain types)service.test.ts(unit tests)
A module prompt should provide the request/response contract and the error policy:
- Request:
{ "customerId": string, "items": [{"sku": string, "qty": number}] } - Response:
{ "orderId": string } - Errors: invalid input →
400with{ "code": "ERR_*" }, missing customer →404, DB failure →500.
Then the model generates a consistent set of files that share the same ERR_* codes and type shapes.
Why module granularity matters: if you generate only snippets, you’ll spend time stitching them together and reconciling mismatched types. If you generate a file without the module context, you may miss how errors should propagate to the route layer.
A practical workflow: start small, then scale
A reliable pattern is to generate at the smallest granularity that can be verified quickly, then increase scope only when the interfaces are stable.
- Generate a snippet for the core logic (e.g., “compute order totals”).
- Write tests for the snippet behavior.
- Generate a file that wires the snippet into the service layer.
- Generate a module only when you’re ready to connect route, service, repository, and tests.
This workflow keeps the feedback loop tight. You don’t need to guess the entire feature at once; you can lock in the tricky parts first.
Prompting templates by granularity (copyable structure)
Snippet template
- Provide signature.
- Provide constraints.
- Provide 2–4 examples.
- Ask for only the snippet.
File template
- Provide file path and expected exports.
- Provide relevant interfaces/types.
- Provide error handling rules.
- Ask for the full file content.
Module template
- Provide module name and folder layout.
- Provide public API and shared types.
- Provide route/service/repository responsibilities.
- Ask for all files plus tests.
Mind map: what to include in each prompt
Choosing granularity for your current task
If you’re unsure, ask: What is the smallest unit I can run a test or compile check on?
- If you can test it with a single unit test, snippet is usually enough.
- If you need imports/exports to compile, generate a file.
- If correctness depends on consistent contracts across multiple layers, generate a module.
Granularity isn’t about producing more or less code; it’s about matching the output size to the verification effort you’re willing to spend.
4.2 Using Context Windows Effectively with Project Artifacts
A context window is the amount of project information your model can “see” in one go. When it’s used well, the model can generate code that matches your repository’s conventions, types, and patterns. When it’s used poorly, you get plausible output that quietly disagrees with your actual code.
What “context” should include (and what it shouldn’t)
Start by separating artifacts into three buckets:
- Ground truth (must include): the exact types, function signatures, interfaces, and file paths the model will reference.
- Behavior constraints (should include): validation rules, error formats, permission checks, and any invariants.
- Background (optional): README explanations, architecture overviews, or style guides that don’t affect the generated code directly.
A common mistake is stuffing the window with background while omitting the ground truth. If the model can’t see the real interface, it will invent one that “looks right.”
A practical workflow: artifact selection → packing → verification
Step 1: Select artifacts by dependency, not by topic
When generating a feature, list the files the feature touches, then expand to their dependencies. For example, if you’re adding an endpoint, you typically need:
- the router/controller file
- the request/response types
- the service layer interface
- the repository/data access layer types
- shared error types and validation helpers
If you’re generating a new module, include the closest existing module as a template, plus any shared utilities it uses.
Step 2: Pack artifacts with “surgical excerpts”
Instead of pasting entire files, include the smallest excerpt that preserves meaning:
- For types: include the type definitions and any related enums.
- For functions: include the signature and the core logic that establishes invariants.
- For patterns: include one representative example of the pattern you want repeated.
This keeps the model focused and reduces the chance it latches onto irrelevant details.
Step 3: Verify alignment before asking for code
Before requesting a full implementation, ask for a short “alignment check” response: list the interfaces it believes exist, the imports it plans to use, and the error cases it will handle. If anything is off, fix the artifacts and try again.
Mind map: context packing strategy
Token budgeting without guessing
You don’t need exact token counts to budget effectively. Use a simple rule: if an excerpt doesn’t change the generated output, remove it.
A good excerpt is one that answers a question the model must answer to write correct code. For instance:
- If your code must return
{ code: "INVALID_INPUT", message: string }, include the exact error type definition. - If your code must validate
emailwith a specific regex or library, include the existing validator. - If your code must use a custom pagination type, include that type and how it’s constructed.
Example 1: Endpoint generation with minimal, high-signal context
Suppose you’re adding POST /api/invitations.
Artifacts to include (excerpts):
- The router/controller pattern (one existing endpoint)
- The request DTO type
- The response DTO type
- The shared error type(s)
- The service method signature you will call
What to exclude:
- Entire unrelated controllers
- Large README sections
- Unused helper functions
Prompt skeleton (conceptual):
- “Here is the existing endpoint pattern from
controllers/invitations.ts(excerpt).” - “Here are the request/response types from
types/invitations.ts(excerpt).” - “Here is the error contract from
errors.ts(excerpt).” - “Here is the service interface from
services/invitations.ts(excerpt).” - “Implement the new endpoint and include tests for success and each error case.”
The key is that the model sees the exact shapes it must use, so it doesn’t improvise.
Example 2: Generating a function that must match existing invariants
You want to implement normalizePhoneNumber(input: string): PhoneNumber.
If you only provide the function name and a vague description, the model will likely choose a common normalization approach. Instead, include:
- the
PhoneNumbertype definition - any existing normalization helper
- at least one test case that demonstrates expected behavior
Artifacts to include (excerpts):
type PhoneNumber = { e164: string; country: string }- the existing
parseCountryCodehelper - one or two tests showing how invalid inputs are handled
Then ask for:
- the implementation
- a table-driven test set covering edge cases already represented in the existing tests
This turns “guessing” into “matching.”
Example 3: Context window packing for multi-file changes
For a feature that touches multiple layers, pack context in stages.
-
Stage A: Interfaces and contracts
- Include only the types and signatures across layers.
- Ask the model to propose an implementation plan and list the exact functions it will call.
-
Stage B: Implementation details
- Include the relevant excerpts for each layer’s invariants.
- Ask for code generation per layer.
-
Stage C: Tests and integration points
- Include the test utilities and one existing test file per layer.
- Ask for tests that match the repository’s testing style.
This reduces the chance that the model mixes concerns because it’s forced to commit to contracts first.
Common failure modes and how to prevent them
-
Failure mode: Wrong imports or types
- Prevention: include the exact type definitions and the import paths used in nearby files.
-
Failure mode: Error handling doesn’t match
- Prevention: include the shared error type and one existing endpoint’s error branches.
-
Failure mode: Model ignores a constraint
- Prevention: place the constraint near the prompt’s “must follow” section and include a short excerpt that demonstrates it in code.
-
Failure mode: Too much context, not enough signal
- Prevention: replace long files with targeted excerpts and one representative example.
A compact checklist for “ready to generate”
Before you ask for code, confirm:
- The model has the exact request/response types or function signatures it must use.
- The model has the repository’s error contract and at least one example of it in action.
- The model has the relevant invariants (validation rules, authorization checks, normalization rules).
- The model has one representative example of the pattern you want repeated.
- Background material is minimal and only included when it affects decisions.
When these boxes are checked, the context window becomes a tool for precision rather than a place to dump everything you know.
4.3 Managing Dependencies and Imports During Generation
When an AI generates code, it often focuses on the “what” and forgets the “how it fits.” Dependency and import management is the part that keeps the generated module from becoming a pile of plausible snippets. The goal is simple: every generated file should compile in the context of your project, with imports that match your actual package structure and dependency graph.
The dependency problem in plain terms
Dependencies show up in three places:
- Language-level imports (e.g.,
import .../require(...)/use ...). - Build-level dependencies (e.g.,
package.json,pyproject.toml,go.mod,pom.xml). - Runtime dependencies (e.g., environment variables, optional libraries, feature flags).
Generation usually gets (1) wrong first, then (2), and only later (3). So you want a workflow that catches errors early and keeps changes localized.
A mind map for dependency-safe generation
Provide the right context (not everything)
You do not need to paste the whole repository. You need enough to make imports unambiguous.
Minimum context checklist for a generation request:
- The target file path (e.g.,
src/services/billing.ts). - The module system (ESM vs CommonJS, Python package layout, etc.).
- The existing import patterns from a nearby file.
- The dependency manifest relevant to the language (e.g.,
package.jsonorpyproject.toml). - Any local aliasing rules (e.g.,
@/in TypeScript,src.in Python).
Example prompt fragment (TypeScript):
- “Use existing imports from
src/utils/*and follow the import style insrc/services/userService.ts. Do not introduce new third-party libraries unless already present inpackage.json.”
This single constraint prevents the most common failure: the model inventing a dependency that “sounds right.”
Use an “import contract” inside the prompt
Treat imports like an interface. Ask for a specific output format so you can verify it quickly.
Example prompt (Python):
- “Return two sections: (A)
Proposed importsas a bullet list, (B)Updated filewith imports placed at the top. Only use modules that exist in this project or standard library.”
Then, before accepting the code, you scan the proposed imports for obvious mismatches (wrong package names, missing local modules, or imports that don’t exist in your tree).
Prefer local utilities and existing abstractions
If your project already has a helper for validation, logging, or HTTP calls, use it. This reduces both dependency churn and import complexity.
Concrete example (Node/TypeScript):
- Instead of generating
import axios from 'axios', preferimport { httpClient } from '../utils/httpClient'if that file exists.
This is not just style. It also avoids version mismatches and keeps behavior consistent (timeouts, headers, retries).
Keep generation changes scoped to one module
A common trap is asking the model to generate “the feature” and letting it touch multiple files. That multiplies import paths, dependency manifests, and potential circular references.
A safer approach:
- Generate one module (one file) with correct imports.
- Run type-check/compile.
- Only then generate the next module.
This turns dependency fixing into a predictable loop rather than a scavenger hunt.
Mind map: failure modes and targeted fixes
Example: managing imports in a single pass (TypeScript)
Assume you’re adding a new function to src/services/invoiceService.ts.
Bad generated imports (typical):
import { format } from 'date-fns';
If your package.json doesn’t include date-fns, the build fails. The fix is either:
- Use an existing formatter utility in the repo, or
- Add the dependency (but that’s a bigger change).
Better approach:
- Ask the model to reuse
src/utils/date.ts.
Example “import contract” output you can request:
- Proposed imports:
import { formatDate } from '../utils/date';import { getInvoiceById } from './invoiceRepository';
Then you generate the updated file with those imports only.
Example: Python relative imports and package layout
Python import errors often come from relative vs absolute imports.
Scenario: Your project uses a package layout like:
src/app/services/invoice_service.pysrc/app/utils/date.py
If other modules import like from app.utils.date import format_date, you should match that.
Prompt constraint:
- “Use absolute imports starting with
app.as insrc/app/services/user_service.py. Do not use relative imports likefrom ..utils ....”
This prevents the model from generating imports that work in one execution mode but fail in another.
Example: dependency manifest changes (when you must add one)
Sometimes you genuinely need a new dependency. When you do, keep it explicit and minimal.
Rule of thumb:
- If you add a dependency, also add a note in the same PR describing why the existing utilities were insufficient.
Prompt fragment:
- “If you introduce a new third-party package, list it in
New dependencieswith the exact manifest entry to add. Otherwise, reuse existing project utilities.”
This forces the model to justify the dependency and gives you a clean checklist for review.
A practical generation workflow
- Request code with an import contract (proposed imports + updated file).
- Verify imports against your project conventions (aliases, absolute vs relative).
- Compile/type-check.
- Fix only import-related errors first.
- If build fails due to missing packages, decide between “reuse existing utilities” vs “add manifest dependency,” then regenerate the affected file.
Dependency and import management is mostly discipline: constrain the model, validate early, and keep diffs small. The payoff is that generated code behaves like it belongs in your codebase rather than like it wandered in from somewhere else.
4.4 Generating Tests Alongside Code with Clear Oracles
When you ask for code, you also want its “truth source”: what counts as correct behavior. A clear oracle is that truth source—an explicit rule for expected outcomes that your tests can check. The goal is not to test the model’s writing style; it’s to test the behavior you intended.
The core idea: generate tests from the same contract
Start from the same inputs and outputs you used for the implementation. If the code is a function, the oracle is usually a mapping from inputs to expected outputs. If the code is an API endpoint, the oracle is usually a mapping from request to response (status code, body shape, and key fields).
A practical workflow:
- Write a short contract: inputs, outputs, and edge cases.
- Generate the code.
- Generate tests that directly exercise the contract.
- Run tests and use failures to refine both code and the oracle when the contract was ambiguous.
Mind map: test generation with oracles
Oracles you can write quickly
1) Equality oracle (exact expected output)
Use when the output is deterministic and small enough to list.
Example contract: formatMoney(amountCents, currency) returns a string like "$12.34".
Oracle: for known inputs, the exact string must match.
2) Structural oracle (shape and key fields)
Use when the response includes generated fields (timestamps, ids) but you still know what must be present.
Oracle: validate required keys, types, and constraints.
3) Invariant oracle (properties)
Use when exact values are hard, but rules are clear.
Oracle: for any valid input, certain properties must hold.
Example: a normalizeEmail function should always return lowercase and never contain spaces.
4) Error oracle (what failure looks like)
Use when invalid inputs should fail in a specific way.
Oracle: expect a particular error type/message pattern or a specific status code.
Example: generating tests for a pure function
Contract
Function: parsePositiveInt(s).
- Input: string
s. - Output: integer
nwheren >= 1. - Behavior:
- If
sis a valid base-10 integer andn >= 1, returnn. - Otherwise, throw
InvalidInputError.
- If
Tests with an equality oracle
Below is a compact table-driven suite. The oracle is explicit: exact return values for valid cases, and a specific error for invalid cases.
// parsePositiveInt.test.ts
import { parsePositiveInt, InvalidInputError } from './parsePositiveInt';

type Case = { s: string; ok?: number };
const okCases: Case[] = [
  { s: '1', ok: 1 },
  { s: '42', ok: 42 },
  { s: '007', ok: 7 },
];

test.each(okCases)('returns $ok for input $s', ({ s, ok }) => {
  expect(parsePositiveInt(s)).toBe(ok);
});

const badInputs = ['', '0', '-3', '1.2', 'abc', '  ', '01x'];

test.each(badInputs)('throws InvalidInputError for input %s', (s) => {
  expect(() => parsePositiveInt(s)).toThrow(InvalidInputError);
});
Why this works: the tests don’t “guess” behavior. They encode the contract directly. If the implementation returns 0 for '0', the failing test points to a contract mismatch, not a vague quality issue.
Example: generating tests alongside an API endpoint
Contract
Endpoint: POST /api/discount/apply.
- Request body:
{ "code": string, "cartTotalCents": number }. - Response:
200with{ "discountCents": number, "finalTotalCents": number }.400with{ "error": string }for invalid input.
- Rules:
cartTotalCentsmust be>= 1.codemust be non-empty.- If
codeis unknown, returndiscountCents: 0.
Oracles: structural + error
- For success: validate numeric fields and the relationship
finalTotalCents = cartTotalCents - discountCents. - For failure: validate status code and that
erroris a string.
// discount.apply.test.ts
import request from 'supertest';
import { app } from './app';

test('200: applies known code', async () => {
  const res = await request(app)
    .post('/api/discount/apply')
    .send({ code: 'SAVE10', cartTotalCents: 1000 });

  expect(res.status).toBe(200);
  expect(res.body).toEqual(
    expect.objectContaining({
      discountCents: expect.any(Number),
      finalTotalCents: expect.any(Number),
    })
  );
  expect(res.body.finalTotalCents).toBe(900);
});

test('200: unknown code yields zero discount', async () => {
  const res = await request(app)
    .post('/api/discount/apply')
    .send({ code: 'NOPE', cartTotalCents: 500 });

  expect(res.status).toBe(200);
  expect(res.body.discountCents).toBe(0);
  expect(res.body.finalTotalCents).toBe(500);
});

test('400: invalid cartTotalCents', async () => {
  const res = await request(app)
    .post('/api/discount/apply')
    .send({ code: 'SAVE10', cartTotalCents: 0 });

  expect(res.status).toBe(400);
  expect(res.body).toEqual(expect.objectContaining({ error: expect.any(String) }));
});
Notice the oracle choices:
- The first test uses an equality oracle for a known code.
- The second test uses equality for the “unknown code” rule.
- The third test uses a structural oracle for error shape.
A prompt pattern that keeps tests honest
When generating tests, include the contract and explicitly request oracles. A good instruction is: “For each rule in the contract, create at least one test case that checks it.”
A minimal prompt template:
- Contract: paste inputs/outputs/rules.
- Implementation: paste or summarize.
- Tests: “Use table-driven tests. For each rule, state the expected outcome (oracle) and assert it.”
Common failure mode: testing the wrong thing
If your tests assert internal details (like a specific helper function call), they may pass while the behavior is wrong, or fail after harmless refactors. Prefer oracles that describe externally observable behavior: return values, response bodies, and error outcomes.
Quick checklist for clear oracles
- Every test maps to a specific contract rule.
- Valid cases assert exact outputs when feasible.
- Invalid cases assert the error type/shape and status code.
- At least one test checks a boundary value.
- At least one test checks an “unknown but valid” scenario (like an unknown discount code).
With this approach, generating tests alongside code stops being an afterthought. The tests become the executable form of the contract, and the oracle becomes the shared reference point for both implementation and verification.
4.5 End-to-End Example: Generate a CRUD Service with Tests
This example builds a small CRUD service for a Task resource. The goal is not just to generate code, but to generate code that compiles, passes tests, and fails in useful ways when something is wrong.
Scenario and constraints
- Resource:
Task - Fields:
id(UUID),title(string),completed(boolean) - Operations:
POST /tasksGET /tasks/{id}GET /tasksPUT /tasks/{id}DELETE /tasks/{id}
- Validation rules:
titlemust be non-emptycompleteddefaults tofalseif omitted
- Error behavior:
- Unknown
idreturns404 - Invalid input returns
400
- Unknown
Mind map: the workflow
CRUD Service Generation Mind Map
Step 1: Define the contract (routes + payloads)
Write the contract in plain text so it can be copied into prompts.
Request/response shapes
POST /tasks- Request:
{ "title": "Buy milk", "completed": false }(completed optional) - Response:
201 { "id": "...", "title": "...", "completed": false }
- Request:
GET /tasks/{id}- Response:
200 { ... }or404 { "error": "not_found" }
- Response:
GET /tasks- Response:
200 [ { ... }, ... ]
- Response:
PUT /tasks/{id}- Request:
{ "title": "Updated", "completed": true } - Response:
200 { ... }or404 ...
- Request:
DELETE /tasks/{id}- Response:
204or404 ...
- Response:
Validation mapping
- If
titleis empty or missing:400 { "error": "invalid_title" }
Step 2: Generate the core types and validation
A common failure mode is mismatched validation between handlers and tests. To avoid that, keep validation rules centralized.
Example prompt (for types + validation)
Use a prompt that asks for explicit error types and deterministic behavior.
Create a CRUD Task service in TypeScript using Express.
Requirements:
- Task has: id (UUID string), title (string), completed (boolean).
- Validation: title must be non-empty after trimming.
- If completed is omitted in POST/PUT, default to false.
- Define a validation function that returns either {ok:true, value} or {ok:false, errorCode}.
- Error codes: invalid_title.
Output: Task type, validation function, and error mapping helpers.
Example implementation (types + validation)
export type Task = {
  id: string;
  title: string;
  completed: boolean;
};

export type ValidationResult<T> =
  | { ok: true; value: T }
  | { ok: false; errorCode: 'invalid_title' };

export type TaskInput = {
  title?: string;
  completed?: boolean;
};

export function validateTaskInput(input: TaskInput): ValidationResult<Omit<Task, 'id'>> {
  const title = (input.title ?? '').trim();
  if (!title) return { ok: false, errorCode: 'invalid_title' };
  const completed = input.completed ?? false;
  return { ok: true, value: { title, completed } };
}
Step 3: Repository + service layer
Even with in-memory storage, keep a repository interface. Tests become easier because you can test repository behavior without HTTP.
Mind map: layers
Layer Mind Map
Example repository (in-memory)
import { Task } from './taskTypes';
import { randomUUID } from 'crypto';

export class TaskRepository {
  private tasks = new Map<string, Task>();

  create(input: Omit<Task, 'id'>): Task {
    const id = randomUUID();
    const task: Task = { id, ...input };
    this.tasks.set(id, task);
    return task;
  }

  getById(id: string): Task | null {
    return this.tasks.get(id) ?? null;
  }

  list(): Task[] {
    return Array.from(this.tasks.values());
  }

  update(id: string, input: Omit<Task, 'id'>): Task | null {
    const existing = this.tasks.get(id);
    if (!existing) return null;
    const updated: Task = { ...existing, ...input, id };
    this.tasks.set(id, updated);
    return updated;
  }

  delete(id: string): boolean {
    return this.tasks.delete(id);
  }
}
Step 4: HTTP handlers with explicit error mapping
A handler should not guess error codes. It should map known service outcomes to HTTP responses.
Define service outcomes:
invalid_title→400not_found→404
Example service
import { TaskRepository } from './taskRepo';
import { validateTaskInput } from './taskTypes';

export type ServiceError =
  | { code: 'invalid_title' }
  | { code: 'not_found' };

export class TaskService {
  constructor(private repo: TaskRepository) {}

  create(input: any) {
    const v = validateTaskInput(input);
    if (!v.ok) return { ok: false as const, error: { code: v.errorCode } as ServiceError };
    const task = this.repo.create(v.value);
    return { ok: true as const, value: task };
  }

  getById(id: string) {
    const task = this.repo.getById(id);
    if (!task) return { ok: false as const, error: { code: 'not_found' } as ServiceError };
    return { ok: true as const, value: task };
  }

  list() {
    return { ok: true as const, value: this.repo.list() };
  }

  update(id: string, input: any) {
    const v = validateTaskInput(input);
    if (!v.ok) return { ok: false as const, error: { code: v.errorCode } as ServiceError };
    const updated = this.repo.update(id, v.value);
    if (!updated) return { ok: false as const, error: { code: 'not_found' } as ServiceError };
    return { ok: true as const, value: updated };
  }

  delete(id: string) {
    const deleted = this.repo.delete(id);
    if (!deleted) return { ok: false as const, error: { code: 'not_found' } as ServiceError };
    return { ok: true as const };
  }
}
Example handlers (Express)
import express from 'express';
import { TaskRepository } from './taskRepo';
import { TaskService } from './taskService';

export function createApp() {
  const app = express();
  app.use(express.json());

  const service = new TaskService(new TaskRepository());

  app.post('/tasks', (req, res) => {
    const result = service.create(req.body);
    if (!result.ok) {
      if (result.error.code === 'invalid_title') return res.status(400).json({ error: 'invalid_title' });
    }
    return res.status(201).json(result.value);
  });

  app.get('/tasks/:id', (req, res) => {
    const result = service.getById(req.params.id);
    if (!result.ok) return res.status(404).json({ error: 'not_found' });
    return res.json(result.value);
  });

  app.get('/tasks', (_req, res) => {
    return res.json(service.list().value);
  });

  app.put('/tasks/:id', (req, res) => {
    const result = service.update(req.params.id, req.body);
    if (!result.ok) {
      if (result.error.code === 'invalid_title') return res.status(400).json({ error: 'invalid_title' });
      return res.status(404).json({ error: 'not_found' });
    }
    return res.json(result.value);
  });

  app.delete('/tasks/:id', (req, res) => {
    const result = service.delete(req.params.id);
    if (!result.ok) return res.status(404).json({ error: 'not_found' });
    return res.status(204).send();
  });

  return app;
}
Step 5: Tests that cover success and failure paths
Use two layers of tests:
- Repository/service tests for state and error codes.
- Handler tests for HTTP status and JSON shapes.
Mind map: test cases
Test Mind Map
Example integration tests (Jest + supertest)
import request from 'supertest';
import { createApp } from './app';

describe('Task CRUD API', () => {
  test('POST /tasks creates a task and defaults completed=false', async () => {
    const app = createApp();
    const res = await request(app).post('/tasks').send({ title: 'Buy milk' });
    expect(res.status).toBe(201);
    expect(res.body.title).toBe('Buy milk');
    expect(res.body.completed).toBe(false);
    expect(typeof res.body.id).toBe('string');
  });

  test('POST /tasks rejects empty title', async () => {
    const app = createApp();
    const res = await request(app).post('/tasks').send({ title: '   ' });
    expect(res.status).toBe(400);
    expect(res.body).toEqual({ error: 'invalid_title' });
  });

  test('GET /tasks/:id returns 404 for unknown id', async () => {
    const app = createApp();
    const res = await request(app).get('/tasks/not-a-real-id');
    expect(res.status).toBe(404);
    expect(res.body).toEqual({ error: 'not_found' });
  });
});
Example test for update + delete
import request from 'supertest';
import { createApp } from './app';

describe('Task update and delete', () => {
  test('PUT updates and DELETE removes', async () => {
    const app = createApp();

    const created = await request(app).post('/tasks').send({ title: 'A', completed: false });
    const id = created.body.id;

    const updated = await request(app).put(`/tasks/${id}`).send({ title: 'B', completed: true });
    expect(updated.status).toBe(200);
    expect(updated.body.title).toBe('B');
    expect(updated.body.completed).toBe(true);

    const del = await request(app).delete(`/tasks/${id}`);
    expect(del.status).toBe(204);

    const after = await request(app).get(`/tasks/${id}`);
    expect(after.status).toBe(404);
    expect(after.body).toEqual({ error: 'not_found' });
  });
});
Step 6: The iteration loop (how to fix failures quickly)
When a test fails, do not rewrite everything. Use the failing assertion to guide the next prompt.
Common failures and targeted fixes:
- 400 expected but got 201: handler is not using validation result; ensure
validateTaskInputis called and errors map toinvalid_title. - 404 expected but got 200: repository
getByIdis returning a default object; ensure it returnsnullwhen missing. - completed default mismatch: handler or validation ignores missing
completed; ensurecompleted = input.completed ?? false.
Example “fix prompt” template
A test failed: expected status 400 with body {error:'invalid_title'}.
Current behavior returns status 201.
Please modify only the POST /tasks handler and any directly related service code.
Constraints:
- Keep route path the same.
- Keep validation centralized in validateTaskInput.
- Do not change response shape for success.
Return the minimal code changes.
Step 7: What “done” looks like
A CRUD example is complete when:
- Every route returns the correct status code for both success and failure.
- JSON shapes match tests exactly.
- Validation rules are consistent across POST and PUT.
- Deleting a task makes subsequent GET return 404.
That’s the whole trick: generate in layers, test in layers, and let the tests tell you where the story stopped making sense.
5. Code Quality and Maintainability by Design
5.1 Enforcing Coding Standards with Prompted Conventions
Coding standards are easiest to follow when they’re treated like part of the interface: inputs in, outputs out. In AI-assisted development, “prompted conventions” means you explicitly encode your style rules, structure rules, and review rules into the instructions you give the model—so the generated code lands close to what your team already accepts.
What “prompted conventions” should cover
A good convention set is specific enough to be testable, but small enough to remember. Use three layers: formatting, structure, and behavior.
- Formatting: indentation, line length, import ordering, naming case, docstring style.
- Structure: file layout, module boundaries, function size expectations, error-handling pattern.
- Behavior: how to validate inputs, how to report errors, how to log, and what not to do.
A useful mental model is: the model should know what “good” looks like before it writes anything.
Mind map: convention layers and enforcement points
Prompted Conventions Mind Map
A convention prompt template that actually works
Instead of one long paragraph, use a compact checklist inside the prompt. The model tends to follow enumerated constraints more reliably than prose.
Template (adapt to your stack):
- Role: “You are a senior engineer writing production code for our codebase.”
- Scope: “Only modify the requested files; do not change unrelated behavior.”
- Formatting rules: list exact naming and formatting requirements.
- Structure rules: list file and function layout expectations.
- Behavior rules: list validation, error, and logging requirements.
- Output format: “Return only the code for each file, with no commentary.”
- Self-check: “Before finalizing, verify each rule from the checklist.”
Here’s a concrete example for a Python service.
You are writing production Python code.
Scope: implement `parse_user_id(text: str) -> int`.
Do not change other functions.

Formatting rules:
- Use 4-space indentation.
- Use snake_case for variables and functions.
- Keep lines <= 100 characters.
- Add a docstring with Args/Returns.

Structure rules:
- Keep the function under 25 lines.
- No nested functions.

Behavior rules:
- Accept only digits; otherwise raise ValueError.
- Do not log inside this function.

Output:
- Return only the updated function code.
- After writing, ensure these rules are satisfied.
Examples: conventions in action
Example A: naming and docstrings
Prompt-convention snippet
- “Use snake_case.”
- “Docstring must include Args and Returns.”
Generated function (good landing):
def parse_user_id(text: str) -> int:
    """Parse a user id from a string.

    Args:
        text: Expected to contain only digits.

    Returns:
        The parsed integer user id.

    Raises:
        ValueError: If `text` is not composed only of digits.
    """
    if not text.isdigit():
        raise ValueError("user id must be digits")
    return int(text)
Notice how the docstring structure is consistent with the rule, and the error message is short and deterministic.
Example B: error-handling pattern
If your codebase uses a specific pattern, encode it. For instance: “Return a typed result object” or “Raise domain-specific exceptions.”
Prompt-convention snippet
- “On invalid input, raise
InvalidRequestwith a message and afieldattribute.”
Why it matters: without that rule, the model might raise ValueError or return None, and your callers will have to handle multiple styles.
Example C: import ordering and module boundaries
Prompt-convention snippet
- “Imports must be grouped: standard library, third-party, local.”
- “Do not import from
adaptersinsidedomain.”
This prevents the model from “helpfully” reaching across layers. It’s not about taste; it’s about keeping dependency direction consistent.
The output checklist: a small contract for the model
After the prompt, ask for a checklist-driven self-review. Keep it short and tied to your rules.
Self-check checklist (answer internally, then output code):
- Naming matches snake_case
- Docstring includes Args and Returns
- Function length <= 25 lines
- Raises ValueError for non-digits
- No logging
- Lines <= 100 characters
Even if the model doesn’t literally “check,” the checklist nudges it to align with the constraints.
Mind map: common convention failures and fixes
Practical guidance for writing convention rules
- Prefer “must” over “should.” If it’s optional, say so. If it’s required, make it required.
- Tie each rule to a reason in one sentence. Example: “No logging in this function to keep it deterministic for tests.”
- Keep the rule set small per task. If you try to enforce every style rule at once, the model will miss some.
- Use one or two examples of correct output. A single “good” example often beats ten lines of abstract rules.
A compact convention block you can reuse
When you reuse this block across tasks, you reduce the chance that each new prompt reinvents the rules. The result is code that looks like it came from the same team, not from a different universe with different defaults.
5.2 Writing Readable Code with Naming and Structure Rules
Readable code is mostly about reducing the number of questions a future reader has to ask. Naming and structure do that by making intent obvious, keeping related logic together, and isolating exceptions.
Naming rules that prevent “guessing games”
1) Use names that describe behavior, not just type.
- Prefer
calculateTaxovertaxCalc. - Prefer
isEligibleForDiscountoverdiscountFlag.
2) Keep nouns for data and verbs for actions.
user,order,invoice(nouns)validateOrder,sendEmail,archiveInvoice(verbs)
3) Make boolean names read like questions.
canRetry,isActive,hasPermission.- Avoid double negatives like
!isNotBlocked.
4) Encode units and formats in the name.
timeoutMs,priceCents,createdAtIso8601.- If you store seconds but name it
timeoutMs, you’ve created a bug with a friendly face.
5) Avoid abbreviations unless they’re standard in your domain.
reqandrespare often fine in HTTP-heavy codebases.cfgmight be fine, butcfg2is never fine.
6) Don’t reuse the same word for different meanings.
- If
statusmeans HTTP status in one place and business status in another, rename one of them.
7) Keep scope-specific names short, but meaningful.
- In a small loop,
iis acceptable. - In a method,
iis a tax on every reader.
Structure rules that keep logic navigable
1) Use small functions with one clear job. A function should usually have one reason to change. If it handles parsing, validation, and persistence, it’s doing three jobs.
2) Prefer early returns over deep nesting. When invalid conditions are handled immediately, the “happy path” stays visible.
3) Group related operations together. Validation first, then transformation, then side effects. Readers can skim sections in that order.
4) Keep control flow flat.
If you see if inside if inside if, consider extracting a helper like shouldRetry(request, error).
5) Separate pure logic from I/O. Pure functions are easier to test and reason about. I/O functions should be thin wrappers around the pure core.
6) Use consistent ordering inside functions. A common pattern:
- Inputs and invariants
- Validation
- Core computation
- Side effects
- Return value
Mind map: naming and structure checklist
Mind map: Readable code rules
Example: naming and structure in practice
Before (hard to read)
function process(u, t) {
  if (u && t) {
    let x = t * 0.2;
    let ok = true;
    if (u.role === 'admin') {
      ok = false;
    }
    if (ok) {
      return {v: x, r: u.id};
    }
  }
  return null;
}
Problems:
processdoesn’t say what it processes.uandtforce readers to infer meaning.xhides the unit and purpose.okis vague, and the admin rule is buried.- Returning
{v: x, r: u.id}uses cryptic keys.
After (readable and structured)
function calculateDiscountedTax(user, taxAmountCents) {
  if (!user) return null;
  if (taxAmountCents == null) return null;

  const isAdmin = user.role === 'admin';
  if (isAdmin) return null;

  const discountRate = 0.2;
  const discountedTaxCents = Math.round(taxAmountCents * discountRate);

  return {
    discountedTaxCents,
    userId: user.id,
  };
}
Improvements:
- The function name states the outcome.
- Parameters carry meaning:
user,taxAmountCents. - Boolean logic reads as intent:
isAdmin. - Units are explicit:
discountedTaxCents. - Early returns keep the main path short.
- Output keys are self-explanatory.
Example: structure with validation, computation, and side effects
Before (mixed responsibilities)
def handle(order, repo):
    if order.total > 0:
        if order.customer is None:
            raise ValueError('missing')
        tax = order.total * 0.1
        repo.save(order)
        repo.log('saved')
        return tax
    return None
Issues:
- Validation, tax calculation, persistence, and logging are tangled.
- The return type changes based on conditions.
- Exceptions and
Noneare mixed.
After (separated steps)
def validate_order(order):
    if order is None:
        raise ValueError('order is required')
    if order.total <= 0:
        raise ValueError('total must be positive')
    if order.customer is None:
        raise ValueError('customer is required')


def calculate_tax_cents(order):
    return round(order.total * 0.10)


def save_order_and_log(order, repo):
    repo.save(order)
    repo.log('saved')


def handle(order, repo):
    validate_order(order)
    tax_cents = calculate_tax_cents(order)
    save_order_and_log(order, repo)
    return tax_cents
Now each function has a single job, and the handle function reads like a checklist.
A practical mini-template for writing readable code
Use this as a mental structure when drafting a function:
Function skeleton:
- Inputs
- Invariants / early exits
- Validation
- Core computation (pure if possible)
- Side effects (I/O)
- Return value Naming checks:
- Verbs for actions, nouns for data
- Units in names when relevant
- Booleans as questions
- No cryptic abbreviations in public interfaces
Quick self-review questions
- If I remove the comments, can I still tell what the function does from its name and parameters?
- Are there any variables whose meaning requires reading multiple lines to infer?
- Is the control flow mostly flat, with early returns handling invalid cases?
- Does the function do more than one kind of work (validation + persistence + formatting)?
- Are output fields named for their meaning, not for their position?
Readable code is rarely about cleverness. It’s about making intent easy to see and keeping the structure consistent enough that readers can move through it without friction.
5.3 Handling Error Cases and Edge Conditions Explicitly
Edge cases are where “it works on my machine” goes to retire. The goal here is not to list every possible failure, but to make error handling predictable: you decide what can go wrong, you encode those decisions in code, and you verify them with tests.
Start with an Error Inventory (Not a Guess)
Before writing any error-handling logic, write down the failure modes you expect for the function or module you’re generating.
A practical inventory has three columns:
- Where it fails: parsing, validation, I/O, business rules, external calls.
- What the caller needs: retry, user message, fallback value, or hard stop.
- How you represent it: exception, error return type, error code, or structured result.
Example: a createUser(email) function.
- Parsing: none (email is a string), but normalization can fail (e.g., whitespace-only).
- Validation: invalid email format, duplicate email.
- Business rules: banned domain.
- Storage: database write failure.
The key is that each failure mode maps to a specific representation so callers can handle it consistently.
Choose an Error Contract and Stick to It
Generated code often mixes styles: sometimes it throws, sometimes it returns null, sometimes it logs and continues. Pick one contract per boundary.
Common contracts:
- Return a
Result-like object:Ok(value)orErr(error). - Throw exceptions for programmer errors (e.g., invalid internal state) and return errors for expected failures (e.g., user input).
- Use error codes only when you truly need stable, machine-readable categories.
Example (TypeScript-style pseudocode):
- Expected failures (bad input, duplicates) return
Err. - Unexpected failures (buggy invariants) throw.
This separation keeps callers from treating everything as recoverable.
Make Edge Conditions Visible in the Types
If your types can express “this may be missing,” do it. If they can express “this is non-empty,” do it. If they can express “this is already normalized,” do it.
Example: parsing a query parameter limit.
- Edge cases: missing parameter, empty string, non-numeric, negative, zero, too large.
- Type-level idea: parse into
PositiveInt(or equivalent) rather than a raw number.
Even if you don’t have advanced types, you can still enforce invariants at the boundary and represent failures explicitly.
Use a Mind Map to Cover the Usual Suspects
Error & Edge-Case Mind Map (for a typical request handler)
This mind map is a checklist you can reuse when prompting for code: you’re telling the generator what to consider, not hoping it remembers.
Map Failures to Caller Actions
A good error is actionable. Decide what the caller should do for each category.
Example mapping for an HTTP endpoint:
- 400 Bad Request: validation failures (missing required field, invalid format).
- 409 Conflict: duplicate resource or state conflict.
- 404 Not Found: referenced entity doesn’t exist.
- 429 Too Many Requests: rate limiting.
- 500 Internal Server Error: storage failures, unexpected exceptions.
The edge condition here is consistency: if you return 400 for one validation error, return 400 for all validation errors of the same kind.
Concrete Example: Robust JSON Body Parsing
Suppose you’re generating a handler that expects:
{ "email": "[email protected]", "age": 21 }
Edge cases:
- Body is not valid JSON.
emailis missing or empty.ageis missing, not a number, or negative.ageis extremely large.
A clear approach is: parse → validate → business rule checks → persist.
Example implementation sketch (language-agnostic pseudocode):
- Parse JSON into a raw object.
- Validate types and required fields.
- Normalize email (trim, lowercase).
- Validate email format.
- Validate age range (e.g.,
0..130). - If any validation fails, return a structured error with field-level details.
Field-level details matter because they prevent the caller from guessing which input was wrong.
Concrete Example: Table-Driven Tests for Edge Conditions
Write tests that enumerate inputs and expected outcomes. This is especially effective for generated code because it forces the generator to align with your contract.
Example test cases for normalizeEmail(email):
- Input:
" [email protected] "→ Output:"[email protected]". - Input:
""→ Error:EmptyEmail. - Input:
" \n\t"→ Error:EmptyEmail. - Input:
"not-an-email"→ Error:InvalidEmailFormat.
For parseAge(age):
- Input:
-1→ Error:AgeOutOfRange. - Input:
0→ Ok(0) (if allowed). - Input:
131→ Error:AgeOutOfRange. - Input:
"21"→ Error:AgeNotANumber(if you require numeric input).
The nuance: decide whether you accept coercion (string numbers) or reject it. Tests lock that decision in.
Prompting for Explicit Error Handling (Without Overpromising)
When asking for code generation, request an error contract and a list of edge cases to cover. A good prompt includes:
- The expected input/output shape.
- The error categories you want.
- The boundary rules (min/max, required fields).
- The status codes or error representations.
Example prompt fragment you can reuse:
- “Return
Errwithcategoryanddetailsfor validation failures; throw only for impossible internal states.” - “Handle empty strings, whitespace-only strings, and out-of-range numeric values.”
This keeps the generator from treating errors as an afterthought.
Don’t Forget the “Quiet” Edge Cases
Some failures don’t crash; they silently corrupt behavior.
Common quiet edges:
- Whitespace differences:
"[email protected]"vs"[email protected] ". - Case sensitivity: emails, usernames, headers.
- Time zones: date parsing and comparisons.
- Empty arrays: should “no items” be Ok([]) or an error?
- Rounding: currency or measurement conversions.
Make these explicit in validation and tests, not in comments.
A Simple Checklist Before You Call It Done
- Every expected failure mode has a defined error representation.
- Validation errors are distinguishable from system errors.
- Boundary values have tests.
- Quiet edges (whitespace, casing, empty collections) are covered.
- Logs include a correlation id and avoid sensitive data.
When these are true, error handling stops being a patch and becomes part of the design.
5.4 Refactoring Generated Code Safely with Checklists
Generated code often gets you to “works on my machine” faster than you can say “wait, where did that come from?”. Refactoring is how you turn that first working version into something your team can maintain without fear. The key is to refactor with guardrails: prove behavior first, change in small steps, and keep a paper trail of what you intended.
The safety principle: prove, change, verify
Refactoring is safe when you can answer three questions in order:
- What behavior must not change? (capture it)
- What code changes are you making? (limit it)
- How will you confirm the behavior stayed the same? (verify it)
A checklist makes those questions repeatable.
Mind map: the refactoring checklist
Checklist 1: Pre-refactor readiness (do this before touching code)
Use this list every time you refactor generated code, even if you’re “just renaming variables.”
- Build is green: run the same command CI uses.
- Tests cover the behavior you’ll keep: at least one test per public behavior.
- You can reproduce the current output: capture expected results for a few representative inputs.
- You know the boundaries: identify what is input, output, and side effects (DB writes, network calls, files).
- No hidden dependencies: confirm configuration, environment variables, and feature flags.
- You can explain the current code: write a 3–5 sentence summary of what it does.
Example (what “boundaries” looks like):
If you’re refactoring a generated function parseOrder(text), note whether it:
- returns a value or throws,
- normalizes whitespace,
- accepts multiple formats,
- logs warnings,
- and whether it mutates global state. Those details determine what tests you need.
Checklist 2: Scope control (limit change so verification stays meaningful)
Generated code sometimes mixes concerns. Your job is to separate them without changing outcomes.
- One refactor goal per commit (e.g., “extract validation into a helper”).
- Avoid refactoring across interfaces unless necessary.
- Do not change formatting and logic in the same diff (formatting can hide real changes).
- Keep function signatures stable unless you also update all callers and tests.
- Preserve error semantics: same error type, same message pattern, same status code.
Example (separating concerns):
Instead of changing handleRequest() to both:
- validate inputs,
- and change how errors are returned, split into two commits: first extract validation, then adjust error mapping only if tests require it.
Checklist 3: Behavior guardrails (make “same behavior” concrete)
Use guardrails that match the code’s nature.
- Golden tests for deterministic outputs
- Example: parsing returns the same structured object.
- Table-driven tests for multiple inputs
- Example: invalid formats produce the same error.
- Property checks for invariants
- Example: normalization is idempotent:
f(f(x)) == f(x).
- Example: normalization is idempotent:
- Integration tests for side effects
- Example: endpoint writes exactly one row.
Example: golden test for a parser
// parseOrder.test.ts
import { parseOrder } from './parseOrder';

test('parses a standard order string', () => {
  const input = 'SKU=ABC;QTY=2;PRICE=10.50';
  const expected = { sku: 'ABC', qty: 2, price: 10.5 };
  expect(parseOrder(input)).toEqual(expected);
});
If you refactor internals, this test should still pass.
A practical refactor workflow (small steps, frequent verification)
Follow this loop:
- Add/adjust tests to cover the behavior you’ll preserve.
- Refactor one thing (rename, extract, reorganize).
- Run tests and checks.
- Inspect diffs for unintended logic changes.
- Repeat.
Example: extracting validation from generated code
Suppose generated code looks like this (simplified):
export function submitOrder(req: any) {
  const sku = req.body?.sku;
  const qty = Number(req.body?.qty);
  if (!sku || !qty || qty < 1) {
    return { status: 400, error: 'Invalid order' };
  }
  // more logic...
  return { status: 201, id: 'ord_123' };
}
Refactor goal: improve readability without changing behavior.
Step 1: extract validation while keeping return shape identical.
function validateOrderBody(body: any) {
  const sku = body?.sku;
  const qty = Number(body?.qty);
  if (!sku || !qty || qty < 1) {
    return { ok: false as const, error: 'Invalid order' };
  }
  return { ok: true as const, sku, qty };
}

export function submitOrder(req: any) {
  const result = validateOrderBody(req.body);
  if (!result.ok) return { status: 400, error: result.error };
  // more logic...
  return { status: 201, id: 'ord_123' };
}
Step 2: run tests. If you had a test for invalid input returning status 400 with the same message, you’re protected.
Checklist 4: Verification loop (prove it stayed the same)
- Run unit tests for touched modules.
- Run integration tests if you changed boundaries or error handling.
- Run type checks / linters to catch accidental contract drift.
- Review coverage of changed paths (not just overall coverage).
- Spot-check logs and error messages if they’re part of behavior.
Example (error message as behavior):
If clients depend on error: 'Invalid order', changing it to error: 'Bad input' breaks expectations even if status code stays 400.
Mind map: common refactor moves and what to watch
Checklist 5: PR hygiene (make future refactors easier)
- State the intent: “Extract validation to improve readability; no behavior change.”
- Reference the tests that prove behavior.
- Keep commit history readable: one refactor per commit.
- Call out any intentional behavior changes explicitly.
A final example: refactor with a “no surprises” mindset
If you’re refactoring generated code that builds a response object, do this sequence:
- Write a table-driven test with 3 inputs: valid, missing field, invalid type.
- Extract response construction into a helper.
- Keep the exact response keys and values.
- Run tests and verify the diff only reorganized code, not outcomes.
That’s the whole trick: refactoring generated code safely is less about clever edits and more about disciplined proof. The checklist turns “I think it’s the same” into “it is the same, and here’s how we know.”
5.5 End-to-End Example: Improve a Generated Function Without Changing Behavior
You have a generated function that works, but it’s hard to read and slightly inefficient. The goal is to improve it while keeping behavior identical for every input. “Identical” here means: same return value, same thrown errors, and same side effects (including logging) for the same inputs.
Starting point: the generated function
Assume a small utility that parses a comma-separated list of user IDs. It trims whitespace, ignores empty segments, and returns an array of strings.
export function parseUserIds(input: string): string[] {
  const result: string[] = [];
  const parts = input.split(',');
  for (let i = 0; i < parts.length; i++) {
    const p = parts[i];
    if (p !== undefined && p !== null) {
      const trimmed = p.trim();
      if (trimmed !== '') {
        result.push(trimmed);
      }
    }
  }
  return result;
}
It’s correct, but it has a few issues:
- The
p !== undefined && p !== nullcheck is redundant becausesplitalways returns strings. - The loop is more verbose than needed.
- The intent (“trim, drop empties”) isn’t obvious at a glance.
Step 1: Lock behavior with tests
Before changing anything, write tests that capture the current behavior. These tests are your safety rails.
import { parseUserIds } from './parseUserIds';

describe('parseUserIds', () => {
  test('splits and trims', () => {
    expect(parseUserIds(' a, b ,c ')).toEqual(['a', 'b', 'c']);
  });

  test('drops empty segments', () => {
    expect(parseUserIds('a,, ,b')).toEqual(['a', 'b']);
  });

  test('handles trailing comma', () => {
    expect(parseUserIds('a,b,')).toEqual(['a', 'b']);
  });

  test('handles only commas and spaces', () => {
    expect(parseUserIds(' , , ')).toEqual([]);
  });
});
If these tests pass today, they define the behavior you must preserve.
Step 2: Create a “behavior contract” mind map
Use this mind map to keep the refactor honest.
## Behavior Contract Mind Map
- Input
  - string
- Output
  - array of strings
- Transformation rules
  - split by ','
  - trim each segment
  - remove segments that become '' after trimming
- Edge cases
  - consecutive commas => ignore empties
  - leading/trailing commas => ignore empties
  - segments with only whitespace => ignore
- Side effects
  - none
- Errors
  - none expected for string input
Step 3: Refactor with the smallest possible change
A safe refactor keeps the same transformation rules but expresses them more directly. Here, split, map, and filter match the contract.
export function parseUserIds(input: string): string[] {
  return input
    .split(',')
    .map((s) => s.trim())
    .filter((s) => s !== '');
}
Why this preserves behavior:
split(',')produces the same segments as before.trim()is applied to every segment, just like the original.- The original pushed only when
trimmed !== ''; the newfilterkeeps exactly those. - No extra checks are introduced, and no new side effects appear.
Step 4: Run tests and confirm equivalence
At this point, you run the test suite. If all tests pass, you’ve confirmed behavior for the covered cases.
But you can go one step further: add a couple of “characteristic” tests that mirror the original loop’s structure.
test('does not preserve internal spaces beyond trimming ends', () => {
  expect(parseUserIds('a,  b   ,c')).toEqual(['a', 'b', 'c']);
});

test('returns empty array for empty string', () => {
  expect(parseUserIds('')).toEqual([]);
});
These tests help ensure you didn’t accidentally change how empty strings behave.
Step 5: Improve readability without changing logic
Now that behavior is locked, you can refine naming and structure. Suppose you want to make the intent explicit while staying functionally identical.
export function parseUserIds(input: string): string[] {
  const trimmedIds = input.split(',').map((s) => s.trim());
  return trimmedIds.filter((id) => id !== '');
}
This version is slightly longer than the one-liner, but it makes the intermediate meaning clear: first trim everything, then remove empties.
Step 6: “Prompted refactor” example (how to ask for the change)
If you’re using an AI assistant to perform the refactor, you want it to follow the behavior contract and avoid “helpful” semantic changes. Here’s a prompt you could use.
Refactor the function below for readability and simplicity.
Constraints:
- Preserve behavior exactly as defined by these tests.
- Do not add new error handling or side effects.
- Keep output type and transformation rules: split by ',', trim each segment, drop segments that become '' after trimming.
Return only the updated function.

Function:
<insert current parseUserIds code>

Tests:
<insert test cases>
A good assistant response will mirror the contract: it will remove redundant checks, use a clearer structure, and avoid changing edge-case behavior.
Step 7: Refactor checklist mind map
This checklist prevents the common failure mode: “it looks better, but it behaves differently.”
## Refactor Checklist Mind Map
- Before
  - tests exist and pass
  - behavior contract written
- During
  - transformation rules unchanged
  - no new side effects
  - no new error behavior
  - redundant checks removed only if provably safe
- After
  - all tests pass
  - add 1–2 targeted edge tests if coverage is thin
  - review for intent clarity (names, structure)
Final result
You end with a function that is easier to scan and maintain, while the tests and contract ensure it behaves the same. The key is not the specific refactor style; it’s the discipline of defining behavior first, then changing only what improves clarity.
6. Verification: Testing Strategies for AI-Generated Code
6.1 Test Pyramid Applied to Generated Components
When code is generated, the risk isn’t just “it might be wrong.” It’s also “it might be wrong in a way that looks right.” The test pyramid helps you catch the common failures cheaply (units), the integration failures realistically (services and boundaries), and the remaining surprises at the top (end-to-end).
The pyramid, mapped to generated components
A practical rule: generated code should earn its keep through tests that match its responsibility.
- Unit tests: verify behavior of a small unit (function, class, module) using controlled inputs.
- Integration tests: verify interactions between units (HTTP handlers + service + persistence, or parser + tokenizer + validator).
- End-to-end tests: verify user-visible workflows (request in, response out, data persisted, UI/API contract honored).
Generated code often starts life as a bundle of small functions. That’s good news: unit tests are usually the fastest way to establish correctness before you spend time wiring up bigger tests.
Mind map: where tests belong
Unit tests: the first line of defense
Unit tests should focus on behavior, not implementation. Generated code tends to produce consistent logic, so you can often lock it down with a small set of high-value cases.
Example: generated price calculator
Suppose a generator produced a function:
calculateTotal(items, taxRate)- It sums
item.price * item.quantity - Then applies tax
A good unit test suite checks:
- Empty list returns zero.
- Rounding behavior is explicit.
- Negative values are rejected (or handled) according to requirements.
// Example unit tests (TypeScript + Jest)

describe('calculateTotal', () => {
  test('returns 0 for empty items', () => {
    expect(calculateTotal([], 0.2)).toBe(0);
  });

  test('applies tax to subtotal', () => {
    const items = [{ price: 10, quantity: 3 }];
    // subtotal = 30, tax = 6
    expect(calculateTotal(items, 0.2)).toBe(36);
  });

  test('rejects negative price', () => {
    const items = [{ price: -1, quantity: 2 }];
    expect(() => calculateTotal(items, 0.2)).toThrow('Invalid price');
  });
});
Notice what’s missing: no database, no HTTP, no file system. Those belong lower in the pyramid.
Unit tests for generated edge-case logic
Generated code often includes “helpful” branches: default values, fallback parsing, special-case formatting. Those branches are where tests pay off.
A simple technique: create a table of inputs that correspond to each branch.
// Table-driven unit tests

test.each([
  ['  42  ', 42],
  ['-7', -7],
  ['abc', null],
])('parseNumber(%s) -> %s', (input, expected) => {
  expect(parseNumber(input)).toBe(expected);
});
If the generator wrote parseNumber with a specific contract (e.g., return null on failure), the test makes that contract real.
Integration tests: verify the seams
Integration tests should cover how generated code meets other code. The generator may be correct in isolation and still fail when wiring, serialization, or error mapping is involved.
Example: generated HTTP handler + service
Imagine the generator created:
POST /invoices- Handler parses JSON, calls
createInvoice, returns status and body.
Unit tests can validate createInvoice and the JSON parsing helper. Integration tests validate the seam:
- Handler returns
400for invalid payloads. - Handler returns
201and the expected JSON shape for valid payloads. - Handler maps service errors to correct HTTP status codes.
// Integration test sketch (supertest-style)

describe('POST /invoices', () => {
  test('returns 400 for invalid payload', async () => {
    const res = await request(app)
      .post('/invoices')
      .send({ items: [{ price: 'nope', quantity: 2 }] });

    expect(res.status).toBe(400);
    expect(res.body.error).toMatch(/Invalid price/);
  });

  test('returns 201 with created invoice', async () => {
    const res = await request(app)
      .post('/invoices')
      .send({ items: [{ price: 10, quantity: 3 }], taxRate: 0.2 });

    expect(res.status).toBe(201);
    expect(res.body.total).toBe(36);
    expect(res.body.id).toBeTruthy();
  });
});
Integration tests should use a controlled environment: a test database, a stubbed external dependency, or an in-memory store. The goal is to test interaction, not to reproduce production infrastructure.
End-to-end tests: confirm the workflow contract
End-to-end tests are expensive, so they should be few and targeted. For generated components, use end-to-end tests to confirm:
- Routing and request/response wiring works.
- Authorization is enforced.
- The system produces the expected user-visible outcome.
Example: create invoice end-to-end
A minimal end-to-end test might:
- Authenticate as a valid user.
- Create an invoice via the API.
- Fetch it via a GET endpoint.
- Assert status codes and key fields.
Keep assertions focused on the contract: status codes, required fields, and a couple of computed values.
A workflow that fits the pyramid
A simple sequence that keeps tests aligned with the pyramid:
- Generate the smallest unit (function/module) and write unit tests immediately.
- Generate the boundary adapter (handler/service integration) and add integration tests for error mapping and serialization.
- Generate the workflow (API route(s) and orchestration) and add one or two end-to-end tests for the happy path and one failure path.
This order prevents the common trap: writing a big end-to-end test first, then discovering the bug was inside a helper function.
Common failure patterns and where tests catch them
- Off-by-one or rounding mistakes → unit tests with explicit expected values.
- Incorrect input validation → unit tests for each validation branch + integration tests for HTTP status mapping.
- Wrong JSON field names → integration tests that assert response shape.
- Error messages that don’t match requirements → unit tests for error creation + integration tests for error response.
- Missing authorization checks → end-to-end tests for role-based access.
Mind map: test intent checklist
Closing principle
The pyramid isn’t a rigid ratio; it’s a strategy. For generated components, the best ROI comes from unit tests that lock down behavior and integration tests that validate seams. End-to-end tests then serve as contract checks for the workflow, not as the first place you look for bugs.
6.2 Unit Tests with Deterministic Inputs and Expected Outputs
Unit tests are the part of your pipeline that should feel boring—in a good way. They run fast, fail for understandable reasons, and don’t depend on time, network, randomness, or the order in which other tests happened. This section focuses on unit tests where the inputs are deterministic and the expected outputs are explicit.
What “deterministic” means in practice
Determinism is not just “no randomness.” It also means:
- No hidden state: the test doesn’t rely on global variables, cached singletons, or previously mutated objects.
- No time dependence: avoid
Date.now()ornew Date()inside the unit under test, or inject a clock. - No environment dependence: don’t assume locale, filesystem layout, or process configuration.
- No concurrency surprises: if the unit uses async code, the test should control scheduling via awaited calls.
A simple rule: if you can’t explain why the output should be the same every run, the test isn’t deterministic yet.
Mind map: unit tests with deterministic inputs
Arrange / Act / Assert, but with discipline
Use the classic structure, but keep it tight:
- Arrange: create inputs and any required dependencies.
- Act: call exactly one function or method.
- Assert: check outputs and only the side effects you truly care about.
If your test asserts ten things, it’s likely you’re testing multiple behaviors at once. Split it.
Example 1: Pure function with exact expected output
Suppose you have a function that normalizes a username.
// normalizeUsername.ts
export function normalizeUsername(input: string): string {
  return input.trim().toLowerCase();
}
A deterministic unit test checks exact output.
// normalizeUsername.test.ts
import { normalizeUsername } from './normalizeUsername';

describe('normalizeUsername', () => {
  test('trims and lowercases', () => {
    const input = '  Alice  ';
    const result = normalizeUsername(input);
    expect(result).toBe('alice');
  });
});
Why this works: the input is a constant string, and the expected output is a single exact value.
Example 2: Table-driven tests for edge coverage
When you have multiple input/output pairs, table-driven tests keep the intent clear and reduce copy-paste errors.
// normalizeUsername.table.test.ts
import { normalizeUsername } from './normalizeUsername';

describe('normalizeUsername (table)', () => {
  const cases: Array<[string, string]> = [
    ['  Alice  ', 'alice'],
    ['BOB', 'bob'],
    ['   ', ''],
    ['MiXeD', 'mixed'],
  ];

  test.each(cases)('input %p -> %p', (input, expected) => {
    expect(normalizeUsername(input)).toBe(expected);
  });
});
The test name includes the input and expected output, so failures point to the exact case.
Example 3: Testing error paths deterministically
Error handling is part of correctness. If your unit returns an error object or throws, assert that behavior explicitly.
// parsePort.ts
export function parsePort(value: string): number {
  const n = Number(value);
  if (!Number.isInteger(n) || n < 1 || n > 65535) {
    throw new Error('Invalid port');
  }
  return n;
}
// parsePort.test.ts
import { parsePort } from './parsePort';

describe('parsePort', () => {
  test('throws on invalid port', () => {
    expect(() => parsePort('0')).toThrow('Invalid port');
  });

  test('returns number on valid port', () => {
    expect(parsePort('8080')).toBe(8080);
  });
});
This is deterministic because the input strings are fixed and the function has no external dependencies.
Example 4: Controlling time with dependency injection
If your unit uses time, inject a clock so tests can pin the output.
// tokenExpiry.ts
export type Clock = { nowMs(): number };

export function tokenExpiry(clock: Clock, ttlMs: number): number {
  return clock.nowMs() + ttlMs;
}
// tokenExpiry.test.ts
import { tokenExpiry, Clock } from './tokenExpiry';

describe('tokenExpiry', () => {
  test('adds ttl to fixed time', () => {
    const clock: Clock = { nowMs: () => 1_700_000_000_000 };
    expect(tokenExpiry(clock, 60_000)).toBe(1_700_000_000_000 + 60_000);
  });
});
Without injection, you’d be forced to guess what time the test ran, which is the opposite of deterministic.
Example 5: Verifying side effects without flakiness
If the unit mutates state, assert the final state. If it calls a collaborator, mock it and assert the call arguments.
// cart.ts
export type Cart = { items: string[] };

export function addItem(cart: Cart, item: string): void {
  cart.items.push(item);
}
// cart.test.ts
import { addItem, Cart } from './cart';

describe('addItem', () => {
  test('pushes item into cart', () => {
    const cart: Cart = { items: [] };
    addItem(cart, 'apple');
    expect(cart.items).toEqual(['apple']);
  });
});
Fresh objects per test prevent cross-test contamination.
Mind map: expected outputs and assertion strategy
Common pitfalls (and how to avoid them)
- Using the same object across tests: create new inputs inside each test.
- Asserting too loosely:
toBeTruthy()can hide real bugs. Prefer exact or structural checks. - Mixing unit and integration: if the test needs a database or HTTP, it’s not a unit test.
- Overfitting to implementation: assert behavior, not internal variable names.
A unit-test checklist you can apply immediately
- Inputs are constants or derived from constants.
- No time, randomness, or external calls inside the unit (or they’re injected/mocked).
- Each test covers one behavior.
- Expected outputs are explicit (value, structure, or error).
- Assertions are minimal but sufficient.
Deterministic unit tests don’t just make failures easier to debug; they also make generated code safer to integrate, because you can trust the test signal instead of chasing ghosts.
6.3 Integration Tests for Interfaces and Data Flow
Integration tests answer a simple question: “When two real components talk to each other, do they agree on the rules?” In AI-assisted code generation, this matters because the model may produce correct-looking individual functions while still mismatching interface contracts, serialization formats, or error semantics.
What to test in an integration test
Focus on boundaries where data changes shape or meaning:
- API boundary: HTTP request/response mapping, status codes, headers, and error bodies.
- Service boundary: method parameters, return types, pagination fields, and domain mapping.
- Data boundary: JSON schema, field naming, date/time formats, numeric precision, and nullability.
- Error boundary: how failures propagate (e.g., validation errors vs. internal errors).
A useful rule of thumb: if a bug would show up only when components are wired together, it belongs here.
Mind map: integration test scope
Designing an integration test: the “contract triad”
For each boundary, define three things:
- Contract: what the caller sends and what the callee returns (including exact field names and types).
- Transformation: how data is mapped (DTO → domain → persistence, or persistence → DTO).
- Failure mapping: what happens when input is invalid or downstream fails.
When you write the test, you assert all three. If you only assert the happy-path response, you’ll miss the most common integration failures: wrong field names, missing defaults, and inconsistent error codes.
Example: HTTP endpoint to service to repository
Assume an endpoint POST /users that accepts JSON and stores a user.
Expected request
{
  "email": "[email protected]",
  "displayName": "Ava"
}
Expected response
201with body containingid,email,displayName.
Expected error mapping
- Missing
email→400with{ "errorCode": "VALIDATION_ERROR" }. - Duplicate email →
409with{ "errorCode": "EMAIL_TAKEN" }.
Integration test strategy
- Use the real HTTP layer (or a framework test client).
- Use the real JSON serializer and request validator.
- Use a real repository implementation against an in-memory database (or a test container).
- Stub only truly external systems (e.g., email sending).
Example test (TypeScript + Jest style)
import request from "supertest";
import { createApp } from "../app";
import { createTestDb } from "../testDb";

test("POST /users stores and returns created user", async () => {
  const db = await createTestDb();
  const app = createApp({ db });

  const res = await request(app)
    .post("/users")
    .send({ email: "[email protected]", displayName: "Ava" });

  expect(res.status).toBe(201);
  expect(res.body).toEqual(
    expect.objectContaining({
      id: expect.any(String),
      email: "[email protected]",
      displayName: "Ava"
    })
  );

  const stored = await db.users.findByEmail("[email protected]");
  expect(stored).not.toBeNull();
  expect(stored?.displayName).toBe("Ava");
});
This test checks both directions: the response body and the persisted data shape. That catches cases where the endpoint returns the input but the repository writes a different field name.
Example: catching a data-flow mismatch
A common integration failure is a field naming mismatch: the client sends displayName, but the repository expects display_name.
Write a test that asserts persistence, not just the response.
test("POST /users persists displayName field correctly", async () => {
  const db = await createTestDb();
  const app = createApp({ db });

  await request(app)
    .post("/users")
    .send({ email: "[email protected]", displayName: "Bea" })
    .expect(201);

  const stored = await db.users.findByEmail("[email protected]");
  expect(stored).toMatchObject({ displayName: "Bea" });
});
If generated code accidentally maps displayName to display_name, this test fails even though the HTTP response might still look fine.
Mind map: oracles and assertions
Testing error paths without making brittle tests
Error responses often include extra details like stack traces or timestamps. Assert only what your contract promises.
For example, if the contract says errorCode is stable, assert that and ignore the rest:
test("POST /users returns VALIDATION_ERROR when email is missing", async () => {
  const db = await createTestDb();
  const app = createApp({ db });

  const res = await request(app)
    .post("/users")
    .send({ displayName: "No Email" });

  expect(res.status).toBe(400);
  expect(res.body).toEqual(
    expect.objectContaining({ errorCode: "VALIDATION_ERROR" })
  );
});
This keeps the test focused on the interface contract rather than incidental formatting.
Keeping integration tests deterministic
Integration tests fail for two reasons: real contract mismatches and accidental nondeterminism.
To reduce nondeterminism:
- Use a fixed clock or avoid asserting timestamps.
- Use a clean database per test.
- Avoid random IDs in assertions unless you assert only the type.
- Ensure validators and serializers are the same ones used in production wiring.
Example: interface mismatch in pagination
Suppose GET /orders?page=1&size=2 returns:
items: [...]pageInfo: { page, size, total }
A generated implementation might return totalCount instead of total. A good integration test asserts the exact field names in pageInfo.
test("GET /orders returns pageInfo with total", async () => {
  const db = await createTestDb({ seedOrders: 5 });
  const app = createApp({ db });

  const res = await request(app)
    .get("/orders?page=1&size=2")
    .expect(200);

  expect(res.body).toEqual(
    expect.objectContaining({
      items: expect.any(Array),
      pageInfo: expect.objectContaining({
        page: 1,
        size: 2,
        total: 5
      })
    })
  );
});
This catches contract drift between controller and service layers.
Practical checklist for interface and data-flow integration tests
- Assert status codes and stable errorCode values.
- Assert response fields and persisted fields when storage is involved.
- Assert mapping details (field names, enum strings, date formats).
- Use real serializers/validators; stub only external systems.
- Keep assertions contract-focused, not formatting-focused.
Integration tests are where “it compiles” stops being enough. They verify that the system’s parts don’t just run—they agree on what the data means.
6.4 Property-Based and Table-Driven Tests from Prompts
Property-based tests check invariants that should hold for many inputs, while table-driven tests check expected behavior for a curated set of cases. When you generate both from prompts, you get a practical mix: broad coverage from properties and clear regression checks from tables.
Property-based tests: write invariants, not examples
A good property test starts with a statement like: “For any valid input, the output should satisfy X.” The prompt should force you to name the invariant and define what “valid input” means.
Example target: a function normalizeEmail(email) that trims whitespace, lowercases, and rejects missing @.
Prompt you can use to generate properties:
- “Define 3 invariants for
normalizeEmailgiven these rules: trim, lowercase, reject if no@.” - “For each invariant, specify the input domain and a concrete check.”
Mind map: property test design
Three useful invariants for normalizeEmail:
- Idempotence:
normalizeEmail(normalizeEmail(x)) == normalizeEmail(x)for any input. - Normalization: For valid inputs, the result contains exactly one
@and has no leading/trailing whitespace; all letters are lowercase. - Rejection consistency: If the trimmed input does not contain
@, the function always rejects (throws or returns an error).
Concrete checks (language-agnostic):
- Idempotence check: compute
a = normalizeEmail(x); computeb = normalizeEmail(a); asserta == b. - Normalization check: for valid inputs, assert
result == result.toLowerCase()andresult == result.trim(). - Rejection check: for invalid inputs, assert the function returns an error for every generated case.
A subtle but important detail: properties should not accidentally depend on the generator producing only “nice” strings. If your generator can produce empty strings, whitespace-only strings, or strings with multiple @, your invariants must say what should happen in those cases.
Table-driven tests: curate behavior you don’t want to regress
Table-driven tests are ideal for rules that are easy to state as input → expected output. They also serve as documentation: the table is the contract.
Example table for normalizeEmail:
| case | input | expected |
|---|---|---|
| trims | " [email protected] " | “[email protected]” |
| lowercases | “[email protected]” | “[email protected]” |
| rejects missing @ | “aliceexample.com” | error |
| rejects empty | " " | error |
| preserves local part | “[email protected]” | “[email protected]” |
Mind map: table-driven test structure
When generating the table from a prompt, ask for:
- the exact expected output format (string vs structured error)
- the error type (e.g.,
InvalidEmailFormatrather than a generic failure) - boundary cases that match your validation rules
Combining both: properties for coverage, tables for clarity
Use properties to catch “weird but valid” inputs and tables to lock in the rules you already know. For normalizeEmail, a clean combination looks like this:
- Property tests cover many random combinations of whitespace and casing for inputs that contain
@. - Table tests cover the specific examples your team agrees on, including whitespace-only and missing-
@cases.
Example prompt that produces both:
- “Generate 3 property tests and 6 table rows for
normalizeEmailwith rules: trim, lowercase, reject if no@after trim.” - “For each property, state the invariant and the input domain.”
A practical template for prompt-to-tests
Below is a compact structure you can reuse in prompts to keep outputs consistent.
Function: <name>
Rules:
- <rule 1>
- <rule 2>
- <rule 3>
Property tests:
- Invariant: <statement>
Domain: <valid/invalid input description>
Check: <how to assert> - …
Table-driven tests:
Rows:
- input: <value>
expected: <output or error> - …
Edge cases to include:
- <list>
Example: property + table for a parser
Consider a function parseKeyValue(s) that parses strings like "key=value" into {key, value}. It should reject inputs without exactly one =.
Property invariants:
- Round-trip shape (for valid inputs): If
parseKeyValue(s)succeeds, thenresult.keyandresult.valueare non-empty andresult.key + "=" + result.valuecontains exactly one=. - Rejection consistency (for invalid inputs): If
shas zero or more than one=, parsing always fails.
Table rows:
"a=b"→{key:"a", value:"b"}"a="→{key:"a", value:""}(if empty values are allowed)"=b"→{key:"", value:"b"}(if empty keys are allowed)"ab"→ error"a=b=c"→ error""→ error
The table forces you to decide whether empty keys/values are acceptable, while the properties ensure the “exactly one =” rule is enforced across many generated strings.
Common pitfalls to prevent with prompt constraints
- Vague invariants: “Output should be correct” is not a property. Require a precise predicate (e.g., idempotence, normalization, or error conditions).
- Unspecified error behavior: Properties need to say whether invalid inputs throw or return an error object.
- Mismatch between generator and domain: If your generator can produce inputs outside the domain, your invariant must still hold (usually by asserting rejection).
- Overfitting to the table: If you only test the curated rows, you’ll miss formatting edge cases. Properties exist to avoid that.
Property-based and table-driven tests complement each other when the prompt explicitly asks for invariants, domains, and expected outcomes. The result is test code that is both broad in coverage and precise in what it guarantees.
6.5 End-to-End Example: Test a Parser and Validate Error Handling
This example walks through a small parser that reads a simple expression language and produces an AST. The goal isn’t just “it parses valid input,” but also “it fails in a way that helps a developer fix the input.” You’ll see how to design tests so that error handling is precise, stable, and easy to reason about.
The mini-language
We’ll parse expressions like:
add(2, 3)mul(add(1,2), 4)
Grammar (informal):
- An expression is either a function call:
name(expr, expr, ...)or a number. - Numbers are base-10 integers.
- Whitespace may appear between tokens.
We’ll represent the AST as:
Number(value: number)Call(name: string, args: Expr[])
Mind map: what we must test
Implementation sketch (TypeScript-like)
Below is a compact reference implementation to anchor the tests. The key detail is that errors include line, column, and a code so tests can assert behavior without being brittle.
type Expr = { kind: 'Number'; value: number } |
             { kind: 'Call'; name: string; args: Expr[] };

type ParseError = {
  code: 'UnexpectedToken' | 'ExpectedToken' | 'TrailingInput';
  message: string;
  line: number;
  column: number;
};

function parse(input: string): { ast?: Expr; error?: ParseError } {
  // Assume tokenizer + recursive descent exist.
  // This example focuses on tests and error expectations.
  return { error: { code: 'UnexpectedToken', message: 'stub', line: 1, column: 1 } };
}
In a real project, you’d implement or import parse. The tests below are written to be meaningful regardless of the internal approach.
Test strategy
You’ll use table-driven tests for both success and failure.
- Success cases assert deep equality of the AST.
- Failure cases assert:
codeis correct (category)lineandcolumnare correct (location)- the message references what was expected or what was found
This combination keeps tests stable while still checking the parts that matter.
Mind map: error expectations
Success tests: valid parsing
Example test cases:
add(2, 3)producesCall('add', [Number(2), Number(3)])mul(add(1,2), 4)nests correctly- Whitespace is ignored:
add( 2 ,3 )
const okCases = [
  {
    input: 'add(2, 3)',
    ast: { kind: 'Call', name: 'add', args: [
      { kind: 'Number', value: 2 },
      { kind: 'Number', value: 3 }
    ]}
  },
  {
    input: 'mul(add(1,2), 4)',
    ast: { kind: 'Call', name: 'mul', args: [
      { kind: 'Call', name: 'add', args: [
        { kind: 'Number', value: 1 },
        { kind: 'Number', value: 2 }
      ]},
      { kind: 'Number', value: 4 }
    ]}
  },
  {
    input: 'add( 2 ,3 )',
    ast: { kind: 'Call', name: 'add', args: [
      { kind: 'Number', value: 2 },
      { kind: 'Number', value: 3 }
    ]}
  }
];

for (const t of okCases) {
  const res = parse(t.input);
  if (res.error) throw new Error(`Expected success for: ${t.input}`);
  expect(res.ast).toEqual(t.ast);
}
These tests catch structural issues like argument ordering, nesting, and whitespace handling.
Failure tests: validate error handling
Now the interesting part: errors should be specific and point to the right place.
We’ll cover three categories:
ExpectedToken: the parser knew what it wanted but didn’t find it.UnexpectedToken: it found something it couldn’t use.TrailingInput: it parsed a valid expression but didn’t consume the entire input.
Failure cases:
- Missing comma:
add(2 3)should fail when it expects,after2. - Missing closing paren:
add(2, 3should fail at end-of-input where)is expected. - Unexpected token:
add(2, )should fail when an expression is expected after the comma. - Trailing junk:
add(2, 3) extrashould fail after a successful parse.
const errCases = [
  {
    input: 'add(2 3)',
    code: 'ExpectedToken',
    line: 1,
    column: 6, // points at the space before 3 in many tokenizers
    messageIncludes: 'Expected ","'
  },
  {
    input: 'add(2, 3',
    code: 'ExpectedToken',
    line: 1,
    column: 10, // end-of-input location
    messageIncludes: 'Expected ")"'
  },
  {
    input: 'add(2, )',
    code: 'UnexpectedToken',
    line: 1,
    column: 9,
    messageIncludes: 'Unexpected ")"'
  },
  {
    input: 'add(2, 3) extra',
    code: 'TrailingInput',
    line: 1,
    column: 11,
    messageIncludes: 'Unexpected trailing input'
  }
];

for (const t of errCases) {
  const res = parse(t.input);
  expect(res.ast).toBeUndefined();
  expect(res.error).toBeDefined();
  expect(res.error!.code).toBe(t.code);
  expect(res.error!.line).toBe(t.line);
  expect(res.error!.column).toBe(t.column);
  expect(res.error!.message).toContain(t.messageIncludes);
}
A small note on columns: tokenizers differ on whether they count columns from the first character, the first non-whitespace, or the start of the offending token. The tests should match your chosen convention, and you should keep it consistent.
Mind map: choosing stable assertions
Why these tests are end-to-end
They exercise the whole path from raw string to either AST or structured error.
- Success tests verify tokenization, parsing, and full consumption.
- Failure tests verify the parser’s decision points and its ability to report what it expected versus what it saw.
Optional extra: property-style table for whitespace
Whitespace bugs are common and easy to miss. Add a small set of variants that should parse identically.
const wsVariants = [
  'add(2,3)',
  'add( 2,3 )',
  'add(2 , 3)',
  'add(\n2,\n3\n)'
];

for (const input of wsVariants) {
  const res = parse(input);
  expect(res.error).toBeUndefined();
  expect(res.ast).toEqual({
    kind: 'Call', name: 'add', args: [
      { kind: 'Number', value: 2 },
      { kind: 'Number', value: 3 }
    ]
  });
}
This catches cases where the parser accidentally treats whitespace as a token boundary or fails to skip it in one branch of the grammar.
Summary of what “good” looks like
For each invalid input, the parser should:
- stop at the earliest point where it can’t proceed
- report a category (
code) that matches the failure mode - provide a location that points to the offending region
- include enough message detail for a developer to correct the input quickly
When these properties are tested together, error handling becomes a feature rather than an afterthought.
7. Static Analysis, Linting, and Build Integration
7.1 Using Linters and Formatters as Feedback Loops
Linters and formatters are the fastest “reviewers” you can run locally. The trick is to treat their output as a structured feedback loop, not as a one-time cleanup step.
The feedback loop: from signal to change
A useful loop has four stages:
- Generate: produce code (manually or via an assistant).
- Constrain: run formatter(s) to normalize style and reduce noise.
- Diagnose: run linter(s) to find semantic issues and rule violations.
- Correct: apply targeted edits, then re-run to confirm the fix.
If you skip stage 2, linters often report style-related issues that hide real problems. If you skip stage 4, you can “fix” one warning while introducing another.
Mind map: what to configure and how to use it
Formatter first: make diffs boring
Formatters are best used as a normalization step. When formatting is consistent, you can focus on actual logic changes.
Example (TypeScript):
- Formatter: Prettier
- Linter: ESLint
Workflow:
- Run
prettier --write .. - Run
eslint .. - Fix only what ESLint still reports.
Why this matters: ESLint rules often include formatting-adjacent checks (like spacing or quote style). If Prettier already normalized those, ESLint can concentrate on real issues.
Linter output as a checklist, not a wall of text
Treat each linter message as a unit of work. A good triage approach:
- Classify the message:
- Correctness: likely a bug (e.g., unreachable code, wrong types).
- Maintainability: readability or structure (e.g., too complex, missing default).
- Style: superficial rules (e.g., naming, spacing).
- Decide the action:
- Fix code directly.
- Adjust configuration if the rule is inappropriate for the project.
- Suppress only with a comment that explains why.
A suppression without an explanation is just a note to future-you that you didn’t want to think today.
Concrete examples: common linter failures and fixes
Example 1: unused variables
Generated code (Python):
def parse_user(payload: dict) -> dict:
    user_id = payload.get("id")
    name = payload.get("name")
    return {"id": user_id, "name": name}
If a linter rule complains about unused variables, it usually means the variable isn’t used in the returned structure or the code changed since generation.
Fix: ensure the variable is actually referenced, or remove it.
def parse_user(payload: dict) -> dict:
    return {"id": payload.get("id"), "name": payload.get("name")}
Example 2: missing error handling
Generated code (JavaScript):
function toInt(s) {
  return parseInt(s, 10);
}
A linter might flag that parseInt can return NaN and that the function should handle invalid input.
Fix: decide the contract (throw, return null, or return a default) and implement it explicitly.
function toInt(s) {
  const n = Number.parseInt(s, 10);
  if (Number.isNaN(n)) throw new Error("Invalid integer");
  return n;
}
Now the linter’s complaint becomes a concrete requirement: “invalid input must not silently pass.”
Example 3: import ordering and unused imports
Generated code (Go):
import (
  "fmt"
  "net/http"
  "strings"
)
If strings is unused, the linter will complain. The formatter won’t remove unused imports; the linter will.
Fix: remove the unused import, then re-run.
import (
  "fmt"
  "net/http"
)
Using linter feedback to guide the next generation step
When you generate code iteratively, the linter output should be the input to your next edit request. The goal is to avoid re-asking for the whole file when only one rule failed.
A practical pattern:
- Run formatter.
- Run linter.
- Copy the exact linter messages (including line numbers).
- Request a minimal patch that addresses only those messages.
Example prompt fragment (generic):
- “Here are the linter errors: … (paste). Apply minimal changes to fix them. Do not reformat the whole file; keep the diff small.”
This reduces churn and makes it easier to review what changed.
Guardrails: configuration hygiene
Linters and formatters are only helpful if their rules match the project’s intent.
- Prefer project-level configuration checked into version control.
- Avoid turning off many rules to “make it pass.” If you must disable a rule, do it narrowly and document the reason in the config.
- Keep formatter and linter aligned. If the formatter changes code in ways the linter dislikes, you’ll get a loop that never converges.
A simple “run order” you can standardize
Use a consistent sequence so the loop behaves predictably:
- Formatter (write changes).
- Linter (report remaining issues).
- Tests (only after lint is clean, or at least after the correctness-related lint is clean).
This order prevents tests from failing due to trivial formatting or obvious rule violations.
Checklist: what “good” looks like
- The formatter produces stable output with no repeated diffs.
- Linter messages are actionable and mostly about correctness or maintainability.
- Each iteration reduces the number of linter findings.
- Fixes are localized, and the commit contains either logic changes or formatting changes—not both mixed together.
When you run linters and formatters as a loop, you’re not just cleaning code. You’re training your development process to respond to concrete signals with concrete edits.
7.2 Type Checking and Contract Validation in Generated Code
Generated code is only as trustworthy as the assumptions it encodes. Type checking and contract validation turn those assumptions into something the compiler, test runner, and runtime can agree on. The goal is simple: if the model guesses wrong about shapes, nullability, or invariants, you want the failure to happen early and with a useful message.
What “type checking” means for generated code
Type checking is the combination of:
- Static checks: the language/type system rejects mismatched types before the program runs.
- Contract checks: runtime validation ensures inputs and outputs match the contract when static types can’t fully prove it.
A common pattern is: static types cover the “happy path,” while contract validation covers the “someone passed the wrong thing” path.
Mind map: where types and contracts should be enforced
Step 1: Force the generator to produce explicit types
If the model emits “whatever compiles,” you’ll get inconsistent shapes across files. Instead, require explicit types at boundaries.
Example (TypeScript): a generated endpoint should declare request and response types, not rely on inference.
type CreateUserRequest = {
  email: string;
  age?: number;
};

type CreateUserResponse =
  | { ok: true; userId: string }
  | { ok: false; error: { code: string; message: string } };

export async function createUser(
  req: CreateUserRequest
): Promise<CreateUserResponse> {
  // generated logic
  return { ok: true, userId: "u_123" };
}
Why this matters: when the generator later writes req.email.toUpperCase() it can’t “accidentally” treat email as optional. The type system will complain immediately.
Step 2: Validate at the boundary with schemas
Static types don’t protect you from external inputs (HTTP bodies, messages, files). Contract validation turns those inputs into typed values.
Example (TypeScript with a schema validator): validate the request before calling business logic.
import { z } from "zod";

const CreateUserRequestSchema = z.object({
  email: z.string().email(),
  age: z.number().int().min(0).max(130).optional()
});

type CreateUserRequest = z.infer<typeof CreateUserRequestSchema>;

export function parseCreateUserRequest(input: unknown): CreateUserRequest {
  return CreateUserRequestSchema.parse(input);
}
Now the generated endpoint can accept unknown at the outermost layer and only proceed with a validated CreateUserRequest.
Step 3: Validate responses too (not just requests)
It’s tempting to validate only inputs. But generated code can also violate its own output contract, especially when it branches on conditions.
Example: enforce that every response matches the CreateUserResponse union.
const CreateUserResponseSchema = z.union([
  z.object({ ok: z.literal(true), userId: z.string() }),
  z.object({
    ok: z.literal(false),
    error: z.object({ code: z.string(), message: z.string() })
  })
]);

export function assertCreateUserResponse(
  value: unknown
): z.infer<typeof CreateUserResponseSchema> {
  return CreateUserResponseSchema.parse(value);
}
Practical payoff: if the generator returns { ok: true } without userId, you’ll get a precise validation error instead of a downstream undefined surprise.
Step 4: Check cross-field invariants explicitly
Types often express shape, not meaning. Cross-field rules need contract validation.
Example invariant: if age is provided, it must be consistent with email domain policy.
const PolicySchema = z.object({
  email: z.string().email(),
  age: z.number().int().min(0).max(130).optional()
}).superRefine((data, ctx) => {
  const domain = data.email.split("@")[1];
  if (domain === "example.com" && data.age !== undefined && data.age < 18) {
    ctx.addIssue({
      code: z.ZodIssueCode.custom,
      message: "example.com users must be at least 18 when age is provided",
      path: ["age"]
    });
  }
});
This is the difference between “it’s a number” and “it’s a number that makes sense.”
Step 5: Make error contracts predictable
Generated code frequently fails by returning errors with inconsistent fields. Define a single error shape and validate it.
Example error contract:
code: stable stringmessage: human-readable- optional
details: structured data
type ApiError = {
  code: string;
  message: string;
  details?: Record<string, unknown>;
};

function toApiError(e: unknown): ApiError {
  if (e instanceof Error) return { code: "internal_error", message: e.message };
  return { code: "internal_error", message: "Unknown error" };
}
Then ensure your response union always uses ApiError.
Step 6: Use compile-time exhaustiveness for unions
When generated code uses unions (like ok: true/false), exhaustiveness checks prevent missing branches.
Example:
type CreateUserResponse =
  | { ok: true; userId: string }
  | { ok: false; error: ApiError };

function handleCreateUserResponse(r: CreateUserResponse) {
  if (r.ok) {
    return r.userId;
  }
  return r.error.code;
}
If the union grows later, TypeScript will force updates where the generator previously assumed only two cases.
Step 7: Turn validation failures into actionable feedback
When contract validation fails, the message should point to the mismatch. That means:
- include the failing path (field name)
- include the expected type/constraint
- keep the error shape consistent
Example: map schema errors into your ApiError contract.
function schemaErrorToApiError(err: unknown): ApiError {
  if (err && typeof err === "object" && "issues" in err) {
    const issues = (err as any).issues as Array<{ path: (string|number)[]; message: string }>;
    const first = issues[0];
    return {
      code: "validation_error",
      message: first ? `${first.path.join(".")}: ${first.message}` : "Invalid input"
    };
  }
  return { code: "validation_error", message: "Invalid input" };
}
Now a developer can fix the spec or prompt without guessing what went wrong.
A cohesive workflow: generate, type-check, validate, then test
- Generate with explicit boundary types (request/response, not internal guesses).
- Compile to catch signature mismatches.
- Validate inputs at the boundary using schemas.
- Validate outputs before returning.
- Add tests that assert both success and failure shapes.
Mini end-to-end example: generated handler with contracts
type CreateUserRequest = { email: string; age?: number };

type ApiError = { code: string; message: string };

type CreateUserResponse =
  | { ok: true; userId: string }
  | { ok: false; error: ApiError };

function createUserLogic(req: CreateUserRequest): CreateUserResponse {
  if (req.email.endsWith("@blocked.com")) {
    return { ok: false, error: { code: "blocked_email", message: "Email domain is blocked" } };
  }
  return { ok: true, userId: "u_123" };
}
In practice, you’d wrap createUserLogic with:
- request parsing/validation (
unknown->CreateUserRequest) - response validation (ensure
okunion is respected) - tests that check both branches and the exact error contract fields.
Mind map: common contract mistakes and how to catch them
Type checking and contract validation work best together: static types prevent many shape mistakes, while runtime contracts catch the rest at the boundaries where reality enters the system.
7.3 Interpreting Build Failures and Feeding Back Fix Prompts
When AI-generated code fails a build, the fastest path to a correct fix is to treat the error output as a structured signal, not as a wall of text. The goal is to convert compiler and test failures into a small set of targeted constraints you can feed back into the next prompt.
Step 1: Classify the failure type
Start by sorting the failure into one of these buckets. This prevents you from asking the model to “fix everything” when the problem is actually narrow.
- Parsing/formatting errors: The compiler can’t understand the file (missing braces, invalid syntax, wrong indentation rules).
- Name resolution errors: Symbols can’t be found (missing imports, wrong identifiers, renamed functions).
- Type errors: The code compiles syntactically but violates type rules (wrong return types, incompatible generics).
- Linker/runtime errors: The build links but fails at runtime (missing environment variables, null dereferences).
- Test failures: The code runs but doesn’t meet expected behavior.
A quick rule: if the error mentions a file/line and a syntax token, treat it as parsing. If it mentions “cannot find symbol” or “unresolved import,” treat it as name resolution. If it mentions “expected type” or “cannot assign,” treat it as type errors.
Step 2: Extract the minimal evidence
Build logs often include cascades: one root issue triggers many follow-on errors. Pick the earliest error that points to your generated code, then ignore later ones until the first is fixed.
Create a short “evidence card” for each failure:
- Root error line: the first error in your generated file.
- What the compiler expected: e.g., “expected
Userbut gotstring.” - What it found instead: e.g., “got
string.” - Likely cause: e.g., “wrong mapping from request body.”
This evidence card becomes the backbone of your fix prompt.
Step 3: Feed back constraints, not vibes
A good fix prompt includes: (1) the exact error message, (2) the relevant snippet, (3) what must remain unchanged, and (4) the smallest acceptable correction.
Use a template like this:
- Error: paste the exact compiler/test message.
- Context: include the function or file section around the failing line.
- Non-goals: say what not to change (public API, behavior, file layout).
- Fix scope: request a targeted edit (e.g., “adjust the type conversion only”).
- Verification: ask for a brief checklist of what should pass after the change.
Mind map: Build failure triage and prompt feedback
Example 1: Name resolution error (missing import)
Build error (example):
error TS2304: Cannot find name 'parseUser'atsrc/userService.ts:42
What this usually means: the function name doesn’t exist in scope, or the import is missing, or the model used the wrong identifier.
Evidence card:
- Root error:
Cannot find name 'parseUser'at line 42. - Expected: a symbol named
parseUser. - Found: nothing in scope.
- Likely cause: missing import or wrong function name.
Fix prompt (targeted):
You generated
src/userService.ts. The build fails with:TS2304: Cannot find name 'parseUser'at line 42. Here is the snippet around line 42:const user = parseUser(req.body);Non-goal: do not change the public API of
userServiceor the request/response shapes. Fix scope: make this line compile by either importing the correct existing function or renaming to the correct in-project function. If there is no such function, implement a minimalparseUserhelper in the same file with the correct types. After your change, the file should type-check.
Why this works: it tells the model to resolve scope first, not to rewrite logic.
Example 2: Type error (wrong mapping)
Build error (example):
error: Type 'string' is not assignable to type 'UserId'atsrc/order.ts:18
What this usually means: the code is producing a raw string where the project expects a branded type or a wrapper.
Evidence card:
- Root error: string assigned to
UserId. - Expected:
UserId. - Found:
string. - Likely cause: missing conversion function.
Fix prompt (conversion-focused):
Build error:
Type 'string' is not assignable to type 'UserId'atsrc/order.ts:18. Snippet:const userId: UserId = req.body.userId;Non-goal: do not change the request schema or the
UserIdtype definition. Fix scope: convertreq.body.userIdintoUserIdusing the existing conversion utility in the codebase (if present). If no utility exists, add a small conversion function and use it here. Keep the rest of the file unchanged. Provide the exact edited lines.
Why this works: it narrows the correction to a conversion step.
Example 3: Cascading errors from one syntax issue
Build error (example):
error: expected '}'atsrc/parser.ts:77- Follow-on errors: many “cannot find symbol” messages after that.
What this usually means: the parser got confused after a missing brace, so later errors are unreliable.
Evidence card:
- Root error: missing
}at line 77. - Expected: closing brace.
- Found: file structure mismatch.
- Likely cause: a truncated block or mismatched braces.
Fix prompt (structure-first):
The build fails with
expected '}'atsrc/parser.ts:77. Here is the region around the error:(paste lines 65-90)Non-goal: do not change the parsing rules or output types. Fix scope: correct the block structure (braces/indentation) so the file parses. After fixing structure, re-run the build and stop once the syntax error is gone.
Why this works: it explicitly instructs the model to fix the root structural issue before addressing downstream symptoms.
Practical prompt feedback checklist
Before sending the next fix prompt, confirm you included:
- The exact error text (not paraphrased).
- The smallest snippet that contains the failing line.
- A non-goal (what must not change).
- A fix scope (import, conversion, braces, or behavior).
If you do these four things, the model’s next response is more likely to be a surgical edit rather than a full rewrite.
A quick iteration loop
- Run build.
- Identify the earliest error in your generated code.
- Classify the bucket.
- Create an evidence card.
- Send a targeted fix prompt.
- Re-run build.
- Repeat until the failure bucket shifts from compile errors to tests.
This loop keeps each prompt grounded in a specific failure signal, which is exactly what you want when you’re trying to turn “it doesn’t compile” into “it compiles and behaves correctly.”
7.4 Automating Code Review Prompts for Style and Risks
Automated review prompts work best when they behave like a careful reviewer with a checklist: they ask for the same evidence every time, they constrain the output format, and they separate “style” from “risk.” The goal is not to generate a verdict; it’s to generate review notes that a human can act on quickly.
What to automate (and what to leave to humans)
Automate checks that are (a) repeatable, (b) measurable, and (c) easy to verify from the diff or file content. Typical targets:
- Style and consistency: naming, formatting, comment clarity, docstrings, import ordering.
- Correctness red flags: obvious off-by-one errors, incorrect null/empty handling, inconsistent return types.
- Security risks: injection points, unsafe deserialization, missing authorization checks.
- Reliability hazards: missing timeouts, swallowed exceptions, non-idempotent retries.
Leave to humans when the decision depends on business rules, domain semantics, or subtle tradeoffs (for example, whether a particular error message should reveal internal details).
Mind map: review prompt components
Mind map: Automated code review prompt
A prompt template that stays consistent
Use one template for style and one for risks, then reuse them across projects. The key is to force the model to cite evidence and to avoid “vibes-based” feedback.
Template: Style review prompt
You are a code reviewer.
Review ONLY the provided diff/changed files.
Focus on style, consistency, and readability.
Output format (use these headings exactly):
- Summary (1-3 bullets)
- Findings
- For each finding include:
- Severity: minor/major
- Location: file + line range if available
- Evidence: quote the exact snippet
- Why it matters: 1-2 sentences
- Suggested fix: concrete change
- For each finding include:
- No-findings note
- If none, write: "No style findings based on the diff."
Constraints:
- Do not comment on security or correctness unless it is directly tied to readability.
- Do not propose large refactors; keep suggestions local.
- If standards are unclear, ask up to 3 questions.
Diff:
<<<
{DIFF}
>>>
Template: Risk review prompt
You are a security-and-reliability reviewer.
Review ONLY the provided diff/changed files.
Focus on risks: security, correctness red flags, reliability hazards, and privacy.
Output format (use these headings exactly):
- Summary (1-3 bullets)
- Findings
- For each finding include:
- Severity: blocker/major/minor
- Category: security / reliability / correctness / privacy
- Location: file + line range if available
- Evidence: quote the exact snippet
- Risk explanation: 2-4 sentences
- Suggested fix: concrete change
- Verification: how to test or validate
- For each finding include:
- Questions
- Ask only if missing info prevents a confident assessment.
- No-findings note
- If none, write: "No risk findings based on the diff."
Constraints:
- Do not guess about unseen code; if needed, ask questions.
- Do not include speculative attack scenarios; keep it grounded in the code.
- Prefer minimal changes over redesigns.
Diff:
<<<
{DIFF}
>>>
Example: style findings that are actionable
Suppose the diff includes a function with inconsistent naming and unclear error handling. A good automated style review might produce:
- Severity: major
- Location:
services/user.py:42-58 - Evidence:
def getUser(id):and lateruser_id = ... - Why it matters: The mixed casing and parameter naming make it harder to scan and increases the chance of using the wrong variable in later edits.
- Suggested fix: Rename
idtouser_idand use consistent snake_case:def get_user(user_id):.
Notice what’s missing: no “this is bad” commentary, no refactor spree, and no security talk. The model is forced to tie each note to a concrete snippet.
Example: risk findings grounded in evidence
If the diff shows string concatenation into a query, the risk prompt should respond with evidence and verification steps:
- Severity: blocker
- Category: security
- Location:
db/search.js:10-18 - Evidence:
const sql = "SELECT * FROM items WHERE name = '" + name + "'"; - Risk explanation: This constructs a query using untrusted input. Even if the UI filters input, the server-side code is still a direct injection point. The risk is not theoretical: the concatenation happens before the database sees the query.
- Suggested fix: Use parameterized queries:
db.query("SELECT * FROM items WHERE name = ?", [name])(or the framework’s equivalent). - Verification: Add a unit test that passes a value containing quotes and verify it returns expected rows without syntax errors.
The “Verification” field is important because it turns a review note into a test plan.
How to automate review without drowning in noise
- Scope to changed lines. If the prompt includes the full file, the model will comment on old code. Provide only the diff or changed hunks.
- Require evidence quotes. Evidence forces specificity and reduces generic commentary.
- Limit refactor size. “Local changes only” prevents the model from proposing rewrites that are hard to review.
- Use severity labels with different expectations. Blockers should include a fix and a verification method; minor notes can be suggestions without tests.
- Ask questions when context is missing. If the diff doesn’t show how auth is handled, ask where the authorization check occurs rather than guessing.
A combined workflow: style first, risks second
Run two passes. Style pass cleans up readability so risk notes are easier to interpret. Risk pass then focuses on security and reliability.
Practical checklist for the prompt author
When you write or adjust these prompts, verify that they:
- enforce diff-only scope
- demand evidence quotes
- separate style from risk categories
- include verification steps for anything above minor severity
- avoid speculative claims by requiring questions when code context is missing
With these constraints, automated code review becomes a structured assistant: it produces review notes that are specific enough to act on, and cautious enough to avoid inventing details.
7.5 End-to-End Example: Fix Lint and Type Errors Iteratively
You have a small TypeScript service that generates a report from a list of orders. The generator is correct in spirit, but the build fails due to lint and type errors. The goal of this section is to show a tight loop: generate → run checks → interpret errors → prompt for minimal fixes → re-run checks.
Starting point: the failing code
Assume the file src/report.ts contains:
- A function
buildReport(orders)that returns{ total, lines }. - A helper
formatMoney(amount). - A type
Orderwith fieldsid,amountCents, andstatus.
The linter and type checker report two issues:
- Lint:
formatMoneyusestoFixedon a value typed asstring | number. - Type:
buildReportreturnslineswithamounttyped asstring, but the declared return type expectsnumber.
Even before changing anything, treat the errors as a map. Lint tells you what expression is suspicious; TypeScript tells you what shape is inconsistent.
Mind map: the iterative fix loop
Step 1: Triage the first failure (lint)
Lint complains about formatMoney. That’s a good first target because it’s likely the root of the type mismatch too.
A typical lint message looks like:
TS2345: Argument of type 'string | number' is not assignable to parameter of type 'number'.- Or an ESLint rule like
@typescript-eslint/restrict-plus-operands.
The key is to find the exact expression. Suppose the code currently does something like:
const dollars = amountCents / 100;- but
amountCentsis inferred asstring | numberdue to how it’s passed.
Reasoning: If formatMoney expects a numeric cents value, the cleanest fix is to make its parameter type numeric and ensure callers pass numbers.
Step 2: Prompt for a minimal, targeted edit
Use a prompt that includes:
- The function signature you want.
- The lint error text.
- The constraint: “do not change behavior; only make types consistent.”
Example prompt you can use in your editor:
You are editing src/report.ts.
Lint error: formatMoney uses toFixed on a value typed as string | number.
Current function:
- function formatMoney(amount: any) { ... }
Desired contract:
- formatMoney(amountCents: number): string
Make the smallest change to satisfy lint and TypeScript.
Return a patch: show only the changed lines.
Do not change the report calculation logic.
The expected edit is to:
- Change
formatMoneysignature toamountCents: number. - Ensure any arithmetic uses numbers.
- If the caller passes
amountCentsfromOrder, confirmOrder.amountCentsis alreadynumber.
If Order.amountCents is typed correctly, the lint error likely came from a loose parameter type like any or from a union created earlier.
Step 3: Re-run checks and interpret the next failure
After applying the patch, re-run lint and type checking.
Now lint is clean, but TypeScript reports the second issue:
Type '{ lines: { amount: string; ... }[]; total: number; }' is not assignable to type 'Report'.- Specifically:
amountshould benumber.
Reasoning: This is a contract mismatch, not a formatting issue. The report schema expects numeric amounts, but the code is producing strings—often because formatMoney returns a string and is being used where a number is required.
Step 4: Fix the type mismatch with a contract-aware change
A common mistake is to store formatted money in the data model. If the return type expects lines[].amount: number, then formatting should happen at the presentation layer, not in the typed model.
So the minimal fix is:
- Keep
lines[].amountas a number. - Add a separate field like
lines[].displayif you need a formatted string.
But if you cannot change the return type, then remove formatting from the amount field and only format when rendering.
Prompt for a minimal change:
In src/report.ts, TypeScript error says Report.lines[].amount must be number.
Current code sets lines[].amount = formatMoney(order.amountCents).
Fix it with the smallest change.
Constraints:
- Keep Report return type unchanged.
- Do not change total calculation.
- If formatting is needed, store it in a different field only if the type allows it.
Return a patch with only the changed lines.
Expected edit:
- Replace
amount: formatMoney(order.amountCents)withamount: order.amountCents / 100(or whatever numeric unit the type expects). - If
amountis supposed to be dollars, ensure the division happens once and stays numeric.
Step 5: Confirm unit consistency (the quiet source of bugs)
Type errors can be “fixed” while still being wrong in meaning. For money, unit consistency matters.
Add a quick check in your head:
- If
Order.amountCentsis cents, thenamountin the report should be dollars if the type saysnumberand the rest of the code treats it as dollars. - If the report expects cents, then don’t divide.
If you have a test, this is where it pays off. If not, add a small unit test for one order.
Mind map: what to change vs what to avoid
Step 6: Final re-run and sanity pass
Run:
- Lint: should be clean.
- TypeScript: should compile.
Then do a quick runtime sanity check by reasoning through one example order:
- Input:
{ id: 'A1', amountCents: 1234, status: 'paid' } - Expected numeric amount:
12.34if dollars are used. - Expected total: sum of numeric amounts.
If the code now returns numeric amounts and formatting is handled elsewhere, the build should be both correct and maintainable.
What the iteration looked like (compressed timeline)
- Fix
formatMoneytyping so arithmetic is numeric. - Re-run checks; lint passes.
- Fix
lines[].amountto be numeric, not formatted string. - Re-run checks; type passes.
- Sanity-check units with one concrete order.
That’s the loop: each iteration targets the next failing contract, and each prompt asks for the smallest patch that makes the compiler and linter agree with your intent.
8. Security and Safety Practices for Generated Code
8.1 Threat Modeling for Common Code Generation Targets
Code generation tools tend to touch the same “high-impact” surfaces: inputs that become code, code that becomes execution, and execution that touches data. Threat modeling here is less about guessing what the model will do and more about mapping where untrusted text can turn into unsafe behavior.
What you’re protecting (and what you’re not)
Start by naming assets in plain terms:
- Application behavior: the logic users rely on (auth checks, pricing rules, permissions).
- Data confidentiality: secrets, user data, tokens.
- Data integrity: correctness of writes, preventing unauthorized changes.
- Availability: avoiding crashes, runaway resource usage, and broken deployments.
Then define the trust boundaries:
- User-provided text (requirements, prompts, form fields) is untrusted.
- Repository files (existing code, schemas) are trusted but may contain mistakes.
- Generated code is untrusted until it passes checks you control (tests, linters, review gates).
Mind map: threat model for code generation targets
Target 1: Authentication and authorization code
Generated auth code fails in two common ways: it omits a check, or it checks the wrong thing.
Typical risky prompt pattern: “Add an endpoint that only admins can access. Use the existing user model.”
- The model may interpret “admin” as a boolean field that doesn’t exist, or it may check a role name that differs from the system’s canonical values.
Threats
- Broken access control: endpoint works for non-admins.
- Confused deputy: authorization depends on data the caller can influence.
Concrete example (bad)
// Express-style middleware (example of a common mistake)
function requireAdmin(req, res, next) {
  if (req.body.isAdmin) return next();
  return res.status(403).send('Forbidden');
}
Why it’s risky: req.body.isAdmin is user-controlled. Even if the UI hides the field, an attacker can send it.
Safer generation target
- Authorization should read from server-side identity context (e.g.,
req.user.role) established by a trusted authentication step. - The generated code should fail closed: if role is missing, deny.
Example (safer)
function requireAdmin(req, res, next) {
  const role = req.user?.role;
  if (role === 'admin') return next();
  return res.status(403).send('Forbidden');
}
Threat-model control
- Add a test case that proves non-admins cannot access the endpoint, using a request that includes
isAdmin: truein the body.
Target 2: Input parsing and validation
When requirements mention “validate the input,” the model may produce validation that is incomplete or inconsistent with downstream expectations.
Threats
- Type confusion: treating strings as numbers without conversion rules.
- Missing edge checks: empty strings, nulls, oversized payloads.
- Inconsistent validation: one layer validates, another layer trusts.
Concrete example (bad)
def parse_age(payload):
    age = payload.get('age')
    if age:
        return int(age)
    return None
Issues: age='0' becomes None because '0' is truthy? Actually '0' is truthy, but age='' becomes None; negative ages pass if not checked; huge values can cause resource issues later.
Safer generation target
- Define explicit rules: allowed range, required vs optional, and maximum length.
Example (safer)
def parse_age(payload):
    if 'age' not in payload:
        return None
    raw = payload['age']
    if raw is None:
        return None
    if isinstance(raw, str) and raw.strip() == '':
        return None
    try:
        age = int(raw)
    except (TypeError, ValueError):
        raise ValueError('age must be an integer')
    if age < 0 or age > 130:
        raise ValueError('age out of range')
    return age
Threat-model control
- Generate tests from the validation rules: boundary values (0, 130), invalid strings (
'12x'), and oversized inputs.
Target 3: SQL/NoSQL queries
The most common injection risk is not “the model will be malicious,” but “the generated code will interpolate strings because it looks convenient.”
Threats
- SQL injection via string concatenation.
- Authorization bypass via missing tenant filters.
Concrete example (bad)
-- Example: building a query with user input
SELECT * FROM orders WHERE user_id = '${userId}'
If userId contains quotes or operators, the query can change meaning.
Safer generation target
- Parameterize queries and enforce tenant scoping in the query builder.
Example (safer)
SELECT * FROM orders WHERE user_id = ?
Paired with parameter binding in application code.
Threat-model control
- Add a test where
userIdincludes characters that would break a naive query, and verify no extra rows are returned.
Target 4: File and command execution
Generated code that shells out or reads files based on inputs can create path traversal or command injection.
Threats
- Command injection when building shell commands.
- Path traversal when joining paths without normalization.
Concrete example (bad)
import os

def read_report(base_dir, filename):
    path = os.path.join(base_dir, filename)
    with open(path, 'r') as f:
        return f.read()
If filename is ../../etc/passwd, os.path.join alone won’t stop it.
Safer generation target
- Normalize and enforce that the resolved path stays within
base_dir.
Example (safer)
import os

def read_report(base_dir, filename):
    base = os.path.abspath(base_dir)
    target = os.path.abspath(os.path.join(base_dir, filename))
    if not target.startswith(base + os.sep):
        raise ValueError('invalid filename')
    with open(target, 'r') as f:
        return f.read()
Threat-model control
- Test with
../sequences and absolute paths.
Target 5: Serialization, deserialization, and templates
Generated code may parse data formats or render templates. These are frequent sources of unsafe behavior.
Threats
- Unsafe deserialization (e.g., loading objects that can trigger behavior).
- Template injection if user input is treated as template code.
Concrete example (bad)
// Example of rendering user input as a template
const output = templateEngine.render(userProvidedTemplate, data);
If userProvidedTemplate contains template directives, it can execute unintended logic depending on the engine.
Safer generation target
- Treat user input as data, not template code.
- Use escaping defaults and restrict template features.
Threat-model control
- Add tests that include template metacharacters and verify they appear as literal text.
Target 6: Logging and error messages
Generated code often includes helpful logs. Helpful logs can also leak secrets.
Threats
- Secret leakage in stack traces, request dumps, or “debug” logs.
- PII exposure in structured logs.
Concrete example (bad)
logger.error('Request failed: %s', request_body)
If request_body includes tokens or passwords, they end up in logs.
Safer generation target
- Log identifiers and redacted fields.
Example (safer)
def redact(body):
    body = dict(body)
    for k in ['password', 'token', 'secret']:
        if k in body:
            body[k] = '[REDACTED]'
    return body

logger.error('Request failed: %s', redact(request_body))
Threat-model control
- Add a test that asserts logs do not contain known secret strings.
A practical workflow: threat modeling as a checklist
Use a short, repeatable gate for each generated change:
- Identify the target (auth, queries, file IO, templates, serialization, logging).
- List the top two threats for that target.
- Add one test per threat (a negative test that should fail).
- Constrain the generation: require parameterization, explicit validation rules, and safe data handling.
- Review the diff with focus on the threat-specific lines (e.g., query construction, path joins, middleware checks).
This approach keeps threat modeling grounded: you’re not trying to predict every model mistake, you’re ensuring the code paths that matter are protected by tests and constraints.
8.2 Preventing Injection Vulnerabilities with Parameterization
Injection happens when untrusted input is interpreted as part of a command, query, or program structure. Parameterization prevents that by separating “data” from “instructions.” The key idea is simple: the database or interpreter receives a fixed query shape, and only the values vary.
The mental model: query shape vs. query values
When you write SQL like this, the input becomes part of the query text:
- Bad pattern:
"... WHERE email = '" + userInput + "'"
With parameterization, the query text stays constant, and the input is transmitted as a value:
- Good pattern:
WHERE email = ?with a bound parameter.
This separation is what stops payloads from changing the meaning of the query.
Mind map: where injection shows up and how parameterization helps
SQL injection: parameterize values, not structure
Consider a login endpoint that checks credentials.
Vulnerable example (string concatenation)
SELECT id, role
FROM users
WHERE email = '" + email + "'
  AND password_hash = '" + passwordHash + "';
If email contains quotes and logic, the query can change shape.
Safe example (parameterized query)
SELECT id, role
FROM users
WHERE email = ?
  AND password_hash = ?;
Then bind email and passwordHash as parameters using your database driver.
Concrete test input that should not “work”
Use an input like:
email = "' OR '1'='1"
A parameterized query treats that entire string as the email value. The database searches for an email literally equal to ' OR '1'='1, which almost certainly doesn’t exist.
Sorting and filtering: parameterize values, use allowlists for identifiers
A common trap is trying to parameterize column names or sort directions.
Bad idea: ORDER BY ? where ? is replaced by "name" or "created_at".
Most SQL drivers do not allow binding identifiers as parameters, and even if they do, it’s easy to get it wrong.
Instead:
- Parameterize the values in
WHEREclauses. - Use an allowlist for identifiers.
Example approach:
- Allow sort keys:
['name', 'created_at'] - Allow directions:
['ASC', 'DESC'] - Reject anything else.
Then build only the identifier portion from the allowlist, while keeping the rest parameterized.
Command injection: parameterize arguments by avoiding the shell
Command injection occurs when user input is inserted into a shell command string.
Vulnerable example (shell string)
sh -c "grep -n \"$pattern\" $file"
If pattern contains shell metacharacters, it can alter what runs.
Safer example (argument-based execution)
Use an API that passes arguments directly, without invoking a shell.
import subprocess
subprocess.run(["grep", "-n", pattern, file], check=True)
Here, pattern is treated as a literal argument to grep, not as shell syntax.
Template injection: parameterize by rendering as data, not code
If you render user input into templates, injection can happen when the template engine evaluates expressions from untrusted strings.
Rule of thumb:
- Treat user input as plain text unless the template engine explicitly supports safe evaluation.
- Avoid “evaluate this expression” features for user-controlled content.
Example pattern:
- Good:
{{ userMessage }}where the engine escapes or treats it as text. - Risky: any feature that interprets user strings as expressions.
Parameterization in practice: a checklist that actually helps
Use this checklist during code review:
-
No string concatenation for executable syntax
- If the code builds SQL, shell commands, or query languages by concatenating user input, it’s a red flag.
-
Use the driver’s parameter API
- Prepared statements, query parameters, and argument arrays are your friends.
-
Parameterize values; allowlist identifiers
- Column names, table names, and sort directions often require allowlists.
-
Validate types early
- If an input is supposed to be an integer, parse it as an integer before binding.
- This reduces both injection risk and logic bugs.
-
Test with payloads that change meaning
- Add tests that include quotes, comment markers, and shell metacharacters.
- The expected result is usually “no match” or “safe error,” not “successful execution.”
Mini example: safe search endpoint
Suppose you have a search API that filters by status and sorts by created_at.
statusis a value: parameterize it.sortis an identifier/direction: allowlist it.
A safe SQL shape:
WHERE status = ?ORDER BY created_at DESC(built from allowlist)
Then bind status as a parameter.
Common failure modes (and how to spot them)
- “We parameterized most of it.” If any user input is still concatenated into executable syntax, injection may still work.
- “We escaped it.” Escaping can help in some contexts, but it’s not a substitute for parameterization when the target is executable syntax.
- “We used parameters for identifiers.” If the code binds column names or directions without an allowlist, review it carefully.
Summary
Parameterization prevents injection by keeping the executable structure fixed and binding untrusted input as data. Use it for values, rely on allowlists for identifiers, and avoid shell-based execution when running commands. When you pair this with tests that include meaning-changing payloads, you get a defense that’s both practical and verifiable.
8.3 Secure Authentication and Authorization Patterns
Authentication answers “who are you?”, while authorization answers “what are you allowed to do?”. In secure systems, these two concerns should be designed separately, then connected with explicit, testable rules.
Authentication patterns (practical and safe)
1) Use short-lived access tokens with refresh tokens
A common failure mode is treating a long-lived token like a password. Instead, issue:
- Access token: short lifetime (minutes), used on each request.
- Refresh token: longer lifetime, used only to obtain a new access token.
Example behavior:
- Client calls
POST /auth/refreshwith refresh token. - Server validates refresh token, then returns a new access token.
- If refresh token is stolen, you can revoke it without waiting for an access token to expire.
2) Store refresh tokens securely and rotate on use
If refresh tokens are stored in a database, store hashed refresh tokens (like passwords). Rotate them on every refresh:
- Client presents refresh token A.
- Server verifies A, issues access token and refresh token B.
- Server invalidates A.
This makes replay attacks less useful: if an attacker tries to reuse A after rotation, the server rejects it.
3) Bind authentication to a stable identity
Your authorization logic should rely on stable identifiers (e.g., user_id) rather than mutable fields (like email). Email changes should not break permissions.
4) Fail closed and keep error messages boring
When authentication fails, return consistent responses:
401 Unauthorizedfor missing/invalid credentials.- Avoid telling the client whether the user exists.
A slightly playful rule: if the error message helps an attacker, it’s too helpful.
Authorization patterns (clear rules that don’t surprise you)
1) Prefer “deny by default” with explicit allow rules
Start with an empty permission set. Then add permissions based on:
- Role (e.g.,
admin,member) - Ownership (e.g., user owns the resource)
- Explicit grants (e.g., resource-level permissions)
This prevents accidental access when new endpoints are added.
2) Use a single authorization decision point
Scattershot checks across controllers lead to inconsistent behavior. Instead, centralize authorization in one layer (middleware, policy engine, or service method) that:
- Extracts identity from the access token.
- Loads required resource context.
- Applies rules.
3) Implement ownership checks carefully
Ownership checks must be based on the resource’s stored owner, not on client-provided fields.
Example: for DELETE /projects/{projectId}
- Load project by
projectId. - Compare
project.owner_user_idtorequest.user_id. - If mismatch, deny.
4) Separate authentication claims from authorization data
Token claims are convenient, but they can become stale. Use claims for identity and coarse roles, then fetch authoritative data for fine-grained permissions when needed.
Mind maps
Mind map: Secure authentication
Mind map: Secure authorization
Concrete examples
Example A: Middleware-style authorization check
Assume an access token provides user_id and role. The middleware enforces authorization before the handler runs.
// Pseudocode (TypeScript-like)
function requireProjectAccess(action: 'read' | 'delete') {
  return async (req, res, next) => {
    const userId = req.auth.user_id;
    const projectId = req.params.projectId;

    const project = await db.projects.findById(projectId);
    if (!project) return res.status(404).end();

    const isAdmin = req.auth.role === 'admin';
    const isOwner = project.owner_user_id === userId;

    const allowed = isAdmin || (action === 'read' && project.is_public) || isOwner;
    if (!allowed) return res.status(403).end();

    req.project = project;
    next();
  };
}
Key security details:
- The ownership check uses
project.owner_user_idfrom the database. - The middleware returns
403after authentication, which is the correct semantic signal. - The handler can assume
req.projectis authorized.
Example B: Ownership + role for updates
For PATCH /projects/{projectId} you might require ownership or admin.
# Pseudocode (Python-like)
def can_update_project(auth, project):
    if auth['role'] == 'admin':
        return True
    return project.owner_user_id == auth['user_id']

def update_project_handler(req, res):
    project = db.projects.get(req.path_params['projectId'])
    if not project:
        return res.status(404)

    if not can_update_project(req.auth, project):
        return res.status(403)

    # Apply validated changes only after authorization
    changes = validate_patch(req.body)
    db.projects.update(project.id, changes)
    return res.status(200)
Notice the ordering: authorization happens before validation and persistence. Validation is still important, but it shouldn’t be the gatekeeper for access control.
Example C: Avoid “client claims decide permissions”
Bad pattern: trusting a claim like can_delete=true from the token.
Good pattern: compute permissions server-side using authoritative data.
- Token claim:
role=member - Server: checks resource ownership or explicit grants in the database.
This prevents a client from forging permissions by crafting a token payload.
Testing the patterns (what to verify)
- 401 tests: missing token, expired token, malformed token.
- 403 tests: authenticated user but wrong role/ownership.
- Ownership tests: user A cannot access user B’s resource.
- Rotation tests: refresh token A works once; second use fails.
- Centralization tests: ensure every protected endpoint uses the same authorization mechanism.
If these tests pass, your authentication and authorization behavior is consistent, predictable, and much harder to break accidentally.
8.4 Secret Handling and Safe Logging Practices
Secrets are anything that grants access: API keys, database passwords, OAuth tokens, session cookies, private keys, and even “temporary” credentials that still work. The goal is simple: keep secrets out of logs, out of prompts, and out of places they can be copied accidentally.
Core rules that prevent most incidents
- Treat logs as a public channel. Assume someone can view them, search them, export them, or forward them to another system.
- Never log raw secrets. This includes request headers, environment dumps, exception messages that might contain credentials, and “debug” payloads.
- Log intent, not values. Record what happened (e.g., “token invalid”) without recording the token.
- Redact at the boundary. Redact as early as possible—ideally when the data enters your application—so downstream code can’t forget.
- Use allowlists for structured logging. If you must log request context, log only specific fields you’ve approved.
Mind map: where secrets leak
Mind map: Secret leakage paths
Safe logging patterns (with examples)
1) Prefer structured logs with explicit fields
Instead of logging an entire request object, log only safe metadata.
Unsafe (common):
logger.info({ request }, "incoming request")
Safer:
logger.info({ method, path, requestId }, "incoming request")
Example (TypeScript-style pseudocode):
logger.info({ method: req.method, path: req.path, requestId }, "incoming request")
This keeps the log useful for tracing behavior while avoiding accidental capture of headers or bodies.
2) Redact sensitive headers and cookies
If you log headers for debugging, redact them first. A practical approach is to define a list of header names to always redact.
Headers to redact (typical):
AuthorizationCookieSet-CookieX-API-Key
Example redaction rule:
redactHeaders = ["authorization", "cookie", "set-cookie", "x-api-key"]
Then apply it before logging:
safeHeaders = redact(req.headers, redactHeaders)
logger.debug({ headers: safeHeaders }, "request headers")
3) Avoid logging request bodies by default
Bodies often contain secrets: passwords, tokens, one-time codes, and personal data. If you need to log bodies, log only specific fields and only in non-production environments.
Example allowlist:
safeBody = pick(req.body, ["email", "planId", "requestType"])
logger.info({ body: safeBody }, "create request")
If you must log a field that can contain secrets (like query), log a hash or a truncated non-sensitive summary—never the raw value.
4) Handle exceptions carefully
Stack traces are valuable, but exception messages can include sensitive content. Two tactics help:
- Log exception type and a sanitized message.
- Separate “debug details” from “production logs.”
Example:
logger.error({ errType: err.name, errCode: err.code, requestId }, "request failed")
If you need the full error for debugging, store it in a restricted channel and ensure it’s sanitized before it’s sent.
5) Don’t let AI prompts or generated code include secrets
When you use AI to help with debugging or code generation, prompts can accidentally include secrets from logs or request dumps. A simple guard is to sanitize any text you plan to send.
Example sanitization steps:
- Remove lines that match secret patterns (e.g.,
Authorization:,Bearer) - Replace values after known keys with placeholders like
REDACTED - Strip cookies and tokens from any JSON payload
Example placeholder behavior:
"Authorization": "Bearer eyJ..." -> "Authorization": "Bearer REDACTED"
Redaction that actually works
Redaction is more than a string replace. It should be consistent, testable, and applied to all relevant data structures.
Recommended redaction strategy
- Normalize keys (case-insensitive header names).
- Redact by key, not by value. Values vary; keys are stable.
- Handle nested structures. Tokens can appear inside JSON objects.
- Test with fixtures. Include realistic payloads and verify the output contains no secret substrings.
Example: nested JSON redaction
Suppose a request body includes:
{
  "user": {"email": "[email protected]"},
  "auth": {"token": "abc123", "refreshToken": "def456"}
}
A key-based redactor would output:
{
  "user": {"email": "[email protected]"},
  "auth": {"token": "REDACTED", "refreshToken": "REDACTED"}
}
Practical checklist for developers
- Logging statements never include entire request/response objects.
- Headers and cookies are redacted before logging.
- Exception logging uses sanitized fields (type/code/requestId).
- No secrets are included in prompts, code snippets, or test fixtures.
- Redaction behavior is covered by unit tests.
- CI and local debug logs follow the same redaction rules.
A short end-to-end example
Imagine an endpoint that authenticates a request and returns an error when the token is invalid.
- The application receives
Authorization: Bearer <token>. - Authentication fails.
- The error handler logs: method, path, requestId, and error code.
- The log does not include the token, the full header set, or the raw request body.
Result: you can troubleshoot “why requests fail” without storing the credential that caused the failure.
That’s the whole trick—make logs useful for diagnosis while treating secrets as radioactive: present only in memory when needed, and never written down.
8.5 End-to-End Example: Harden an Endpoint Against Common Attacks
This example hardens a simple “create comment” endpoint. We’ll start with a typical vulnerable shape, then apply defenses in a sequence that maps to how attacks actually fail: input handling, authorization, safe data access, and predictable error behavior.
Scenario
- Endpoint:
POST /api/posts/{postId}/comments - Request body:
{ "author": "...", "content": "..." } - Response: created comment with
id,postId,author,content,createdAt - Assumptions: the server uses an ORM, and authentication provides
userId.
Initial (vulnerable) endpoint sketch
Common problems in this shape:
- Trusts
authorfrom the client. - Accepts unbounded
content. - Doesn’t validate
postId. - Returns detailed errors that help attackers.
- Uses string concatenation in a query (or similar unsafe patterns).
Mind map: threat model for this endpoint
Hardened Endpoint Mind Map
Step 1: Define strict request validation
Validation should be boring and explicit. The goal is to reject bad requests early, before any database call.
Rules
postId: integer,>= 1content: string, trimmed, length1..500author: ignore client field entirely
Example validation logic (TypeScript-like pseudocode)
function parseCreateComment(req): { postId: number; content: string } {
  const postId = Number(req.params.postId);
  if (!Number.isInteger(postId) || postId < 1) throw new BadRequest();

  const body = req.body ?? {};
  const raw = body.content;
  if (typeof raw !== 'string') throw new BadRequest();

  const content = raw.trim().replace(/\s+/g, ' ');
  if (content.length < 1 || content.length > 500) throw new BadRequest();

  return { postId, content };
}
Why this order matters: trimming and whitespace normalization happen before length checks, so users don’t get surprising rejections for “invisible” characters.
Step 2: Enforce authentication and authorization
Authentication answers “who are you?” Authorization answers “what are you allowed to do?”
Authorization rule for this example
- Only authenticated users can comment.
- The user can comment only if the post is visible to them.
Example authorization check
async function canComment(userId: string, postId: number): Promise<boolean> {
  const post = await db.post.findUnique({ where: { id: postId }, select: { visibility: true } });
  if (!post) return false;

  // Example: public posts are open; private posts require membership.
  if (post.visibility === 'public') return true;
  return await db.membership.exists({ where: { userId, postId } });
}
Note the choice to return false for missing posts. That prevents attackers from learning whether a post exists.
Step 3: Prevent injection by construction
If you use an ORM with parameterized queries, you already avoid the most common SQL injection pattern. The remaining risk is accidental raw query usage.
Good: ORM create with structured fields.
async function createComment(userId: string, postId: number, content: string) {
  return db.comment.create({
    data: {
      postId,
      authorId: userId,
      content
    },
    select: { id: true, postId: true, authorId: true, content: true, createdAt: true }
  });
}
Avoid: building SQL strings like "... WHERE postId = " + postId.
Step 4: Handle XSS safely at output time
Storing raw user text can be fine if you always escape it when rendering HTML. If the endpoint returns JSON, the client still must escape when inserting into the DOM.
A practical server-side defense is to ensure the API never returns HTML fragments as “trusted.” In this example, we return plain text in JSON and rely on the frontend to render it safely.
Example response mapping
function toCommentResponse(comment) {
  return {
    id: comment.id,
    postId: comment.postId,
    author: comment.authorId, // or fetch display name separately
    content: comment.content,
    createdAt: comment.createdAt.toISOString()
  };
}
If you do server-side HTML rendering anywhere, escape at that boundary. Don’t try to “sanitize” with ad-hoc regexes.
Step 5: Make error responses consistent
Attackers love inconsistency: different messages for “post exists” vs “post doesn’t exist,” or “validation failed” vs “database failed.”
Client-facing behavior
- Invalid input:
400with a generic message. - Unauthorized:
401or403. - Not allowed to comment (including missing post):
404or403—pick one and keep it consistent. - Unexpected errors:
500with a generic message.
Example handler
app.post('/api/posts/:postId/comments', async (req, res) => {
  try {
    const userId = req.auth?.userId;
    if (!userId) return res.status(401).json({ message: 'Unauthorized' });

    const { postId, content } = parseCreateComment(req);

    const allowed = await canComment(userId, postId);
    if (!allowed) return res.status(404).json({ message: 'Not found' });

    const comment = await createComment(userId, postId, content);
    return res.status(201).json(toCommentResponse(comment));
  } catch (e) {
    if (e instanceof BadRequest) return res.status(400).json({ message: 'Invalid request' });
    console.error('createComment failed', { err: e });
    return res.status(500).json({ message: 'Server error' });
  }
});
The server logs keep details for operators, while clients get stable, non-informative messages.
Step 6: Add abuse controls that match the endpoint
Even a perfectly validated endpoint can be abused. For this example, implement:
- Request size limit (server-level)
- Rate limiting per user/IP
- Optional: require a minimum delay between attempts
Example rate limit check
app.use('/api/posts/:postId/comments', rateLimit({
  windowMs: 60_000,
  max: 30,
  keyGenerator: (req) => req.auth?.userId ?? req.ip
}));
Step 7: Verify with concrete test cases
Write tests that mirror real attacks, but assert outcomes, not internal implementation.
Test cases
postId = "abc"→400content = " "→400contentlength501→400- Unauthenticated request →
401 - Authenticated user on a private post without membership →
404 - Ensure
authorin body is ignored (response author matches authenticated user) - Ensure no SQL errors leak (force an ORM error and expect
500with generic message)
Final checklist for this endpoint
- Client-controlled fields are ignored where they shouldn’t exist (
author). - Inputs are validated with clear bounds (
postId,content). - Authorization is checked before writes.
- Data access uses parameterized ORM calls.
- Errors are consistent and don’t reveal existence details.
- Abuse controls limit request volume.
With these changes, the endpoint fails safely: malformed input gets rejected, unauthorized actions look like “not found,” and common injection attempts don’t have a foothold.
9. Data Handling, Schemas, and Validation
9.1 Designing Schemas from Requirements with Constraints
A schema is the contract between your requirements and your code. If you design it well, downstream work becomes mostly mechanical: validation, persistence, API payloads, and tests all line up. If you design it poorly, you end up rewriting logic to compensate for missing constraints. The goal in this section is to turn requirements into a schema that is specific enough to prevent ambiguity, but flexible enough to evolve without breaking everything.
Start with requirements that can be “typed”
Not every requirement maps cleanly to a schema. Before you write fields, classify each requirement:
- Identity: What uniquely identifies an entity? (e.g.,
userId,orderId) - Attributes: What properties describe it? (e.g.,
email,status) - Relationships: How do entities connect? (e.g.,
orderbelongs touser) - Rules: What must always be true? (e.g., “end date must be after start date”)
- Operations: What actions happen? (e.g., “cancel order” changes
status)
A practical trick: for each requirement, ask “What would a database or validator need to know to enforce this?” If the answer is “nothing,” it may belong in business logic rather than the schema.
Translate constraints into schema-level enforcement
Constraints come in different flavors. Some belong in types, some in validation rules, and some in database constraints.
- Type constraints: numeric vs string, date vs timestamp, enum vs free text.
- Cardinality constraints: one-to-one, one-to-many, many-to-many.
- Uniqueness constraints: unique email, unique SKU per tenant.
- Range and format constraints: min/max, regex-like patterns, length limits.
- Cross-field constraints:
endAt >= startAt,total = sum(lineItems).
When you design the schema, decide where each constraint lives:
- In the schema definition (types, required/optional, enums)
- In validation logic (cross-field checks)
- In the database (unique indexes, foreign keys)
This division keeps your code honest: you don’t rely on application logic to enforce what the database can enforce.
Mind map: schema design from requirements
Example scenario: a booking system
Requirements (condensed but realistic):
- A user can create bookings.
- Each booking has a start and end time.
- Bookings must not overlap for the same user.
- A booking has a status:
draft,confirmed,canceled. endAtmust be afterstartAt.- Bookings are stored per tenant (multi-tenant).
Let’s turn these into a schema.
Step 1: choose entities and keys
We likely need:
users(already exists in many systems)bookings
For bookings, the identity could be a generated bookingId. Tenant scoping suggests every booking belongs to a tenantId.
Key decision: do you enforce “no overlap” at the database level or in application logic? Database-level enforcement is possible but more complex; application-level enforcement is simpler but must be tested carefully. The schema should still support the rule with clear fields and indexes.
Step 2: define fields with types and nullability
A good schema makes “unknown” explicit.
tenantId: required string (or UUID)bookingId: required UUIDuserId: required UUIDstartAt: required timestampendAt: required timestampstatus: required enumcreatedAt: required timestampupdatedAt: required timestamp
Avoid using nullable fields to represent “not set yet” unless the requirement truly allows it. For example, if a booking must always have times, make them required.
Step 3: encode constraints where they fit
endAt > startAt: cross-field constraint → validator (and optionally a database check constraint if your DB supports it).- Status values: enum → schema type.
- No overlap for same user: typically enforced via application logic plus careful indexing, or via advanced database constraints.
- Tenant scoping: foreign keys and composite uniqueness/indexes.
Step 4: add indexes that match constraints
Even if you enforce overlap in code, you want the database to help you find conflicts quickly.
For overlap checks, you’ll query bookings for a user within a time range. An index on (tenantId, userId, startAt) is usually helpful.
Example: schema definition (conceptual)
Entity: Booking
Fields
- bookingId: UUID (PK)
- tenantId: UUID (required)
- userId: UUID (required)
- startAt: timestamp (required)
- endAt: timestamp (required)
- status: enum[draft, confirmed, canceled] (required)
- createdAt: timestamp (required)
- updatedAt: timestamp (required)
Constraints
- endAt > startAt
- status in allowed enum values
- tenant scoping via tenantId
- no-overlap for bookings with status != canceled (rule choice)
Indexes
- (tenantId, userId, startAt)
Notice the rule choice: “no overlap” often depends on status. If canceled bookings should not block new ones, encode that in the overlap-check logic and document it in the schema’s rule section.
Example: validation rules derived from constraints
Cross-field validation is where requirements often get lost. Here’s a clear rule set for the booking times.
- If
startAtis missing: reject (schema already requires it). - If
endAtis missing: reject. - If
endAt <= startAt: reject with a specific message.
A validator should also normalize time zones consistently. If your API accepts ISO-8601 timestamps, store them as UTC timestamps internally.
Example: API payloads that match the schema
A schema is only useful if your API payloads align with it.
Valid create payload:
{
  "tenantId": "3f2a...",
  "userId": "9c10...",
  "startAt": "2026-03-20T10:00:00Z",
  "endAt": "2026-03-20T11:00:00Z",
  "status": "confirmed"
}
Invalid payload (endAt before startAt):
{
  "tenantId": "3f2a...",
  "userId": "9c10...",
  "startAt": "2026-03-20T11:00:00Z",
  "endAt": "2026-03-20T10:00:00Z",
  "status": "confirmed"
}
The schema-level types catch missing fields and invalid enums; the cross-field rule catches the time ordering.
Common pitfalls and how to avoid them
- Using strings for everything: If you store
statusas a string, you’ll re-implement enum validation in multiple places. - Confusing “optional” with “unknown”: If a value can be unknown, model it explicitly (e.g., separate field or a status like
pending). - Forgetting tenant scoping in constraints: Uniqueness and overlap rules must include
tenantIdor you’ll block unrelated tenants. - Indexes that don’t match queries: Overlap checks need time-range queries; indexes should reflect that access pattern.
- Cross-field rules hidden in UI: If a rule matters, it belongs in validation and tests, not only in the front end.
Practical checklist for schema design from requirements
- Every requirement is classified: identity, attribute, relationship, rule, or operation.
- Each field has a type and a clear required/optional decision.
- Enums are modeled as enums, not free text.
- Cross-field constraints are written as explicit validation rules.
- Tenant scoping is included in keys, indexes, and uniqueness logic.
- Overlap/consistency rules have a defined enforcement location and a test plan.
When you follow this flow, the schema stops being a passive data structure and becomes an enforceable representation of the requirements. That’s the difference between “we stored the fields” and “we prevented invalid states from entering the system.”
9.2 Input Validation and Output Sanitization Patterns
Input validation and output sanitization are the two halves of the same promise: your system should accept only what it can reason about, and it should emit only what it intends to show. Validation stops bad requests early; sanitization prevents accidental “helpfulness” in responses (like echoing unsafe strings into HTML).
Core principle: validate at boundaries, sanitize at sinks
- Validate at boundaries (HTTP request, message queue payload, file upload). Convert raw input into typed, constrained values.
- Sanitize at sinks (HTML rendering, SQL queries, shell commands, logs, JSONP). Treat each sink as having its own rules.
A practical way to remember this: validation answers “Is this input acceptable?” while sanitization answers “Is this output safe for where it’s going?”
Mind map: validation and sanitization patterns
Pattern 1: “Parse → Validate → Normalize” pipeline
A clean pipeline reduces surprises. Parsing turns bytes into a data structure; validation checks rules; normalization makes downstream logic simpler.
Example (request body to typed model in TypeScript):
type CreateUserInput = {
  email: string;
  age: number;
};

function normalizeEmail(s: string) {
  return s.trim().toLowerCase();
}

function parseAndValidate(input: unknown): CreateUserInput {
  if (typeof input !== "object" || input === null) throw new Error("Bad body");
  const obj = input as Record<string, unknown>;

  const email = obj["email"];
  const age = obj["age"];

  if (typeof email !== "string") throw new Error("email must be a string");
  if (typeof age !== "number" || !Number.isFinite(age)) throw new Error("age must be a finite number");

  const normalizedEmail = normalizeEmail(email);
  if (normalizedEmail.length > 254) throw new Error("email too long");
  if (!/^[^\s@]+@[^\s@]+\.[^\s@]+$/.test(normalizedEmail)) throw new Error("email format");

  if (age < 13 || age > 120) throw new Error("age out of range");

  return { email: normalizedEmail, age };
}
Why this works: downstream code can assume email is trimmed and lowercased, and age is a finite number within a known range.
Pattern 2: Reject unknown fields (optional, but powerful)
If you accept extra fields, you may accidentally ignore malicious or confusing data. Some teams allow unknown fields for backward compatibility; others enforce strictness for new endpoints.
Example (strict JSON schema idea):
- Allowed:
email,age - Rejected:
role,isAdmin,debug
Even if you don’t use a schema library, you can implement a simple check:
function rejectUnknownFields(obj: Record<string, unknown>, allowed: Set<string>) {
  for (const key of Object.keys(obj)) {
    if (!allowed.has(key)) throw new Error(`Unknown field: ${key}`);
  }
}
Pattern 3: Cross-field validation (semantics, not just types)
Many vulnerabilities come from “valid-looking” fields that conflict with each other.
Example:
startDatemust be beforeendDatetimezonemust be present if dates are timezone-aware
function validateDateRange(start: string, end: string) {
  const s = new Date(start);
  const e = new Date(end);
  if (Number.isNaN(s.getTime()) || Number.isNaN(e.getTime())) throw new Error("Invalid date");
  if (s.getTime() >= e.getTime()) throw new Error("startDate must be before endDate");
}
Pattern 4: Normalize inputs to reduce edge-case drift
Normalization is not “making things pretty”; it’s reducing the number of representations your system must handle.
Common normalization steps:
- Trim leading/trailing whitespace
- Canonicalize Unicode (when relevant)
- Convert case for fields where case-insensitivity is intended (like emails)
- Normalize line endings for text blobs
Example: If you store usernames case-insensitively, normalize before persistence and before comparisons.
Pattern 5: Output sanitization by sink
Validation doesn’t automatically make output safe. A string that is valid as data can still be unsafe when rendered as HTML.
HTML sink
Use escaping or templating that escapes by default.
Example (escaping):
- Input:
"<script>alert(1)</script>" - Output HTML should display the characters, not execute them.
SQL sink
Parameterize queries.
Example (conceptual):
- Bad:
"SELECT ... WHERE email = '" + email + "'" - Good:
query("SELECT ... WHERE email = ?", [email])
Logs sink
Logs are often overlooked. Untrusted input can contain control characters that mess up log parsing.
Example (safe logging):
- Prefer structured logging:
{ "email": email } - Redact secrets: never log passwords or tokens
- Escape newlines if you must log raw strings
Pattern 6: Consistent error responses without leaking internals
When validation fails, return a predictable structure. Avoid echoing raw input in ways that could create secondary issues.
Example error shape:
code: stable identifier likeINVALID_EMAILmessage: human-readablefield: optional
This keeps clients from guessing and keeps your error messages from becoming an accidental data exfiltration channel.
Pattern 7: “Sanitize late” but “validate early”
A useful workflow:
- Validate and normalize early.
- Keep internal representations clean and typed.
- Sanitize at the moment you write to a sink.
This prevents double-escaping and avoids the classic bug where a string is escaped for HTML but later used in JSON or an email template.
Mini end-to-end example: safe request → safe response
Suppose you accept a displayName and return it in a JSON response.
- Validate: length and allowed characters.
- Output: JSON encoding handles escaping for JSON, but if the UI later injects it into HTML, the UI must escape for HTML.
Example validation (server-side):
function validateDisplayName(s: unknown): string {
  if (typeof s !== "string") throw new Error("displayName must be a string");
  const trimmed = s.trim();
  if (trimmed.length < 1 || trimmed.length > 60) throw new Error("displayName length");
  if (!/^[\p{L}\p{N} _.'-]+$/u.test(trimmed)) throw new Error("displayName characters");
  return trimmed;
}
Reasoning: the server ensures the value is a reasonable name. The client/UI still needs to escape when rendering into HTML, because “valid name” is not the same as “safe HTML.”
Quick checklist
- Validate request shape, types, constraints, and cross-field semantics.
- Normalize where comparisons and storage depend on canonical forms.
- Reject unknown fields when feasible.
- Sanitize per sink: HTML escape, parameterized SQL, safe logging.
- Return consistent, non-leaky validation errors.
These patterns keep your system predictable: it fails early on bad inputs, and it treats outputs according to where they will be used.
9.3 Handling Migrations and Backward Compatibility
Migrations change data shape; backward compatibility changes how long old clients can keep working. In practice, you manage both at once: you evolve the schema while keeping reads and writes safe across versions.
The core idea: compatibility is a contract
Backward compatibility usually means one of these contracts:
- Read compatibility: old code can still read new data (or at least doesn’t crash).
- Write compatibility: old code can still write data that new code can understand.
- API compatibility: old request/response formats still work.
A migration plan should state which contract you’re protecting for how long. If you don’t name it, you’ll end up protecting everything and changing nothing, which is its own kind of failure.
Mind map: migration strategy and compatibility checks
Migration & Backward Compatibility Mind Map
Phase 1: Prepare the schema without forcing immediate changes
A common mistake is to make a column non-nullable or rename a field before the application is ready. Instead, add the new shape in a way that old code can ignore.
Example: adding a new field to a user table
Suppose you currently store:
users(id, email, name)
You want to introduce display_name.
Safer migration steps
- Add
display_nameas nullable. - Deploy code that can handle both cases:
- If
display_nameis present, use it. - Otherwise, fall back to
name.
- If
This keeps old rows valid and prevents old code from failing due to missing values.
Phase 2: Dual-read and dual-write (only where needed)
Dual-write means the new code writes both representations so that old code keeps working. Dual-read means the new code can read either representation.
When to use dual-write
- You have multiple application versions running at once.
- You can’t guarantee that old clients stop calling immediately.
When dual-read is enough
- Old clients only read, and you can tolerate them seeing older fields.
- You can keep the old fields populated via backfill.
Example: changing how an order total is stored
Old schema:
orders(id, currency, total_amount)
New schema:
orders(id, currency, total_minor_units, total_scale)
Plan:
- Add
total_minor_unitsandtotal_scaleas nullable. - Update the application:
- Read: if
total_minor_unitsis not null, computetotal_amount; otherwise usetotal_amount. - Write: when creating/updating orders, write both
total_amountand the new fields.
- Read: if
This prevents a window where one version writes the new fields and another version expects the old one.
Phase 3: Backfill with idempotency and observability
Backfill copies or transforms existing data into the new shape. It should be safe to run multiple times because migrations get interrupted.
Backfill rules that reduce pain
- Make the script idempotent: rerunning should not corrupt data.
- Use batching to avoid long locks.
- Record progress (for example, by tracking a watermark or using a job table).
Example: backfilling display_name
If you added display_name as nullable, you can backfill:
- Set
display_name = nameonly wheredisplay_name IS NULL.
That condition makes the script safe to rerun and avoids overwriting intentional custom values.
Phase 4: Cutover reads, then stop dual-writing
Cutover is when the application stops relying on the old representation.
A practical cutover sequence:
- Deploy code that reads from the new fields first, with fallback.
- After backfill completes, monitor that fallback is rarely used.
- Deploy code that removes fallback and assumes the new fields exist.
- Stop dual-writing only after you’re confident old code isn’t running.
Example: cutover for order totals
- After backfill, you can switch reads to use
total_minor_unitsexclusively. - Then you can stop writing
total_amount.
If you remove fallback too early, you’ll see null-related errors immediately. If you keep fallback too long, you’ll keep carrying complexity. The monitoring step is what keeps the balance grounded.
Phase 5: Cleanup with a grace period
Cleanup removes deprecated columns or code paths. The grace period depends on how long old clients and old deployments can exist.
Cleanup checklist
- Deprecated fields are no longer written.
- Backfill has populated the new fields.
- Tests cover both old-shaped and new-shaped records (at least for the duration of the grace period).
- Monitoring shows no unexpected usage of fallback paths.
Example: removing name after introducing display_name
- Only remove
nameafter you’ve confirmed:- All rows have
display_name. - No code path still depends on
name. - No API contract still returns
name.
- All rows have
Compatibility patterns that work well in real systems
Nullable columns + fallback logic
This is the simplest and most common approach. It trades a bit of conditional logic for safety.
Versioned records
Add a schema_version or record_type column so the application can interpret data correctly.
Example: versioned payload storage
events(id, schema_version, payload_json)- Version 1 payload uses
user_id. - Version 2 payload uses
actor_id.
The reader checks schema_version and maps fields accordingly.
Adapter layers in code
Instead of sprinkling compatibility checks everywhere, centralize them.
Example: mapping order totals
- Create a function
readTotal(order)that:- uses new columns when present
- otherwise computes from old columns
Then the rest of the code doesn’t care which representation is stored.
Testing migrations and compatibility
You want tests that simulate the real “in-between” states.
Test cases to include
- New code reading old rows (new columns null).
- New code reading mixed rows (some rows backfilled, some not).
- Old code reading new rows (only if you dual-write or keep old fields populated).
- Migration rerun safety (idempotency).
Example: unit test for fallback behavior
- Given an order with
total_amount=19.99andtotal_minor_units=NULL,readTotalreturns 19.99. - Given an order with
total_minor_units=1999andtotal_scale=2,readTotalreturns 19.99.
A concrete end-to-end mini-plan
Scenario: Add display_name and stop using name in API responses.
- Migration: add
display_namenullable. - Deploy: API returns
display_nameif present, elsename. - Backfill: set
display_name=namewhere null. - Deploy: API always returns
display_name. - Cleanup: remove
nameusage in code and optionally drop the column after the grace period.
This plan keeps behavior stable for existing data and avoids breaking clients during the transition.
Common failure modes (and how to avoid them)
- Making a column non-nullable too early: old rows violate constraints.
- Renaming without dual-read: one version expects a field that the other doesn’t write.
- Backfill overwriting user edits: use
WHERE ... IS NULLor preserve precedence. - Non-idempotent scripts: reruns create duplicates or inconsistent values.
- Removing fallback before backfill completes: nulls become runtime errors.
Backward compatibility isn’t a single feature; it’s a sequence of small, reversible steps. When each step is safe on its own, the whole migration becomes predictable.
9.4 Generating Serialization and Deserialization Safely
Serialization is where “it worked in memory” meets “it survived the network/disk.” Deserialization is where you discover whether untrusted input can trick your program into doing something it shouldn’t. When AI generates serialization code, the safest approach is to treat it like you’re writing a parser: validate early, validate often, and make failure boring.
What “safe” means in practice
Safe serialization/deserialization usually includes:
- Schema alignment: The serialized shape matches the expected schema exactly (no silent field dropping or type coercion).
- Explicit validation: Required fields are present, types match, and values satisfy constraints.
- Defensive parsing: Unknown fields are handled intentionally (either rejected or captured in a controlled way).
- No implicit execution: Deserialization never triggers code execution paths (e.g., dynamic imports, reflection-based instantiation without allowlists).
- Predictable errors: Failures return structured errors that help debugging without leaking sensitive details.
Mind map: safe serialization pipeline
A practical generation strategy (promptable)
When asking an AI to generate serialization code, request it in two phases:
- Define the data contract (fields, types, constraints, unknown-field policy).
- Generate two functions: one for serialization, one for deserialization that validates.
A good contract includes constraints like: max string length, allowed enum values, numeric ranges, and whether extra fields are rejected.
Example: JSON serialization with strict validation (TypeScript)
Assume a domain object:
UserProfilehasid(string),displayName(string, max 60),role(enum), andcreatedAt(ISO-8601 string).- Unknown fields should be rejected.
type Role = "admin" | "member";

type UserProfile = {
  id: string;
  displayName: string;
  role: Role;
  createdAt: Date;
};

type UserProfileDTO = {
  id: string;
  displayName: string;
  role: Role;
  createdAt: string; // ISO-8601
};
Now the safe deserializer: parse into a DTO-like shape, validate, then construct the domain object.
function parseUserProfile(input: unknown): UserProfile {
  if (typeof input !== "object" || input === null) throw new Error("Not an object");
  const obj = input as Record<string, unknown>;

  const allowed = new Set(["id","displayName","role","createdAt"]);
  for (const k of Object.keys(obj)) {
    if (!allowed.has(k)) throw new Error(`Unknown field: ${k}`);
  }

  const id = obj.id;
  const displayName = obj.displayName;
  const role = obj.role;
  const createdAt = obj.createdAt;

  if (typeof id !== "string" || id.length === 0) throw new Error("Invalid id");
  if (typeof displayName !== "string" || displayName.length > 60) throw new Error("Invalid displayName");
  if (role !== "admin" && role !== "member") throw new Error("Invalid role");
  if (typeof createdAt !== "string") throw new Error("Invalid createdAt");

  const date = new Date(createdAt);
  if (Number.isNaN(date.getTime())) throw new Error("createdAt must be ISO-8601");

  return { id, displayName, role, createdAt: date };
}
And the serializer: it should produce exactly the DTO shape.
function serializeUserProfile(p: UserProfile): UserProfileDTO {
  return {
    id: p.id,
    displayName: p.displayName,
    role: p.role,
    createdAt: p.createdAt.toISOString(),
  };
}
Why this is safer than “just cast and go”:
- Unknown fields are rejected, so attackers can’t smuggle unexpected data.
createdAtis validated by checking the parsed date is notNaN.- Constraints like
displayNamelength are enforced at the boundary.
Mind map: validation checks you should generate
Handling polymorphism safely
Polymorphic deserialization (e.g., Event with multiple subtypes) is where unsafe patterns often sneak in. The safe pattern is:
- Include a discriminator field like
type. - Use an allowlist mapping from
typeto a specific parser. - Reject unknown
typevalues.
Example (sketch):
typeis either"user.created"or"user.deleted".- Each subtype parser validates its own fields.
type Event =
  | { type: "user.created"; userId: string }
  | { type: "user.deleted"; userId: string; reason: string };

function parseEvent(input: unknown): Event {
  if (typeof input !== "object" || input === null) throw new Error("Not an object");
  const obj = input as Record<string, unknown>;
  const t = obj.type;

  if (t === "user.created") {
    const userId = obj.userId;
    if (typeof userId !== "string") throw new Error("Invalid userId");
    return { type: "user.created", userId };
  }

  if (t === "user.deleted") {
    const userId = obj.userId;
    const reason = obj.reason;
    if (typeof userId !== "string" || typeof reason !== "string") throw new Error("Invalid fields");
    return { type: "user.deleted", userId, reason };
  }

  throw new Error("Unknown event type");
}
This avoids “instantiate class by name” approaches that can accidentally turn data into behavior.
Round-trip and malformed-input tests (what to ask for)
When AI generates serialization code, require tests that cover both correctness and failure behavior.
Minimum test set:
- Round-trip: serialize then parse yields the same domain values.
- Malformed input: missing fields, wrong types, unknown fields.
- Boundary values: max-length strings, empty strings (if disallowed), invalid dates.
A simple round-trip test idea:
- Create a
UserProfilewith a known ISO timestamp. - Serialize to JSON.
- Parse back.
- Compare fields and
createdAt.toISOString().
Prompting pattern for safe generation
Use a prompt that forces the AI to specify policies:
- “Reject unknown fields.”
- “Validate max lengths.”
- “No implicit coercion.”
- “Return structured errors.”
A compact prompt template:
- Provide the schema.
- Provide constraints.
- Provide unknown-field policy.
- Provide the target language.
- Ask for
serializeXandparseXwith explicit validation.
When you do this, the generated code tends to look like a parser at the boundary, which is exactly what you want.
9.5 End-to-End Example: Validate Requests and Map to Domain Models
This example shows a complete path from an incoming HTTP request to a domain model instance, with validation, error mapping, and a clean separation between transport concerns and business logic.
Scenario
You’re building an endpoint to create a Booking.
- Request:
POST /bookings - Body:
customerId(string, non-empty)startDate(ISO-8601 date, required)endDate(ISO-8601 date, required)notes(optional string, max 500 chars)
- Rules:
startDatemust be beforeendDate.customerIdmust matchCUST-followed by digits.notesmust be trimmed and must not exceed 500 characters.
Mind map: request-to-domain pipeline
Step 1: Define transport DTOs and domain model
Keep the transport DTO close to the HTTP payload, and keep the domain model focused on business rules.
Transport DTO (request):
customerId: stringstartDate: stringendDate: stringnotes?: string
Domain model (booking):
customerId: CustomerIddateRange: DateRangenotes?: string
Value objects make validation easier to reason about because they can enforce invariants at construction time.
Step 2: Implement validation with clear failure reasons
The key is to validate in layers:
- First, confirm required fields exist and are of the right basic type.
- Then, validate formats and cross-field rules.
- Finally, normalize values (trim notes) so the domain model receives clean inputs.
Below is a compact TypeScript-style example. It uses a Result pattern so you can return either a domain object or a structured list of field errors.
type FieldError = { field: string; message: string };
type Result<T> =
  | { ok: true; value: T }
  | { ok: false; errors: FieldError[] };

function validateBookingRequest(input: any): Result<{
  customerId: string;
  startDate: string;
  endDate: string;
  notes?: string;
}> {
  const errors: FieldError[] = [];
  const customerId = input?.customerId;
  const startDate = input?.startDate;
  const endDate = input?.endDate;
  const notesRaw = input?.notes;
  if (typeof customerId !== 'string' || customerId.trim() === '') {
    errors.push({ field: 'customerId', message: 'customerId is required' });
  }
  if (typeof startDate !== 'string' || startDate.trim() === '') {
    errors.push({ field: 'startDate', message: 'startDate is required' });
  }
  if (typeof endDate !== 'string' || endDate.trim() === '') {
    errors.push({ field: 'endDate', message: 'endDate is required' });
  }
  if (typeof notesRaw !== 'undefined' && typeof notesRaw !== 'string') {
    errors.push({ field: 'notes', message: 'notes must be a string' });
  }
  if (errors.length) return { ok: false, errors };
  const normalizedNotes = typeof notesRaw === 'string' ? notesRaw.trim() : undefined;
  if (normalizedNotes && normalizedNotes.length > 500) {
    return { ok: false, errors: [{ field: 'notes', message: 'notes must be <= 500 characters' }] };
  }
  const cust = customerId.trim();
  if (!/^CUST-\d+$/.test(cust)) {
    return { ok: false, errors: [{ field: 'customerId', message: 'customerId format must be CUST-<digits>' }] };
  }
  const s = new Date(startDate);
  const e = new Date(endDate);
  if (Number.isNaN(s.getTime()) || Number.isNaN(e.getTime())) {
    return { ok: false, errors: [{ field: 'startDate', message: 'startDate must be ISO-8601 date' }, { field: 'endDate', message: 'endDate must be ISO-8601 date' }] };
  }
  if (s >= e) {
    return { ok: false, errors: [{ field: 'endDate', message: 'endDate must be after startDate' }] };
  }
  return { ok: true, value: { customerId: cust, startDate: startDate.trim(), endDate: endDate.trim(), notes: normalizedNotes } };
}
Notice what’s intentionally not done here:
- No domain object is created yet.
- No HTTP response is built yet.
That separation keeps the validation logic reusable in other contexts (like a CLI import) without rewriting transport details.
Step 3: Map validated input to domain models
Now that the request is validated, mapping becomes straightforward. The domain layer can still enforce invariants, but you should expect fewer surprises.
class CustomerId {
  constructor(public readonly value: string) {
    if (!/^CUST-\d+$/.test(value)) throw new Error('Invalid CustomerId');
  }
}

class DateRange {
  constructor(public readonly start: Date, public readonly end: Date) {
    if (!(start < end)) throw new Error('Invalid DateRange');
  }
}

class Booking {
  constructor(
    public readonly customerId: CustomerId,
    public readonly dateRange: DateRange,
    public readonly notes?: string
  ) {}
}

function mapToDomain(valid: {
  customerId: string;
  startDate: string;
  endDate: string;
  notes?: string;
}): Booking {
  const customerId = new CustomerId(valid.customerId);
  const start = new Date(valid.startDate);
  const end = new Date(valid.endDate);
  const dateRange = new DateRange(start, end);
  return new Booking(customerId, dateRange, valid.notes);
}
Step 4: Build the HTTP handler with consistent error payloads
The handler should:
- Parse JSON.
- Validate.
- Map to domain.
- Return either
400with field errors or201with a response body.
function bookingToResponse(booking: Booking) {
  return {
    customerId: booking.customerId.value,
    startDate: booking.dateRange.start.toISOString().slice(0, 10),
    endDate: booking.dateRange.end.toISOString().slice(0, 10),
    notes: booking.notes
  };
}

async function createBookingHandler(req: any, res: any) {
  let body: any;
  try { body = await req.json(); } catch { return res.status(400).json({ errors: [{ field: 'body', message: 'Invalid JSON' }] }); }

  const validated = validateBookingRequest(body);
  if (!validated.ok) return res.status(400).json({ errors: validated.errors });

  const booking = mapToDomain(validated.value);
  return res.status(201).json({ booking: bookingToResponse(booking) });
}
Step 5: Concrete examples
Example A: Valid request
Request
{
  "customerId": "CUST-12345",
  "startDate": "2026-04-01",
  "endDate": "2026-04-10",
  "notes": "  Window seat if available  "
}
Response (201)
{
  "booking": {
    "customerId": "CUST-12345",
    "startDate": "2026-04-01",
    "endDate": "2026-04-10",
    "notes": "Window seat if available"
  }
}
The trimming happens during validation, so the domain model stores normalized data.
Example B: Multiple validation failures
Request
{
  "customerId": "12345",
  "startDate": "not-a-date",
  "endDate": "2026-04-01",
  "notes": 42
}
Response (400)
{
  "errors": [
    { "field": "customerId", "message": "customerId format must be CUST-<digits>" },
    { "field": "startDate", "message": "startDate must be ISO-8601 date" },
    { "field": "endDate", "message": "endDate must be ISO-8601 date" },
    { "field": "notes", "message": "notes must be a string" }
  ]
}
Even when multiple fields are wrong, the payload stays structured: each error points to a field and a human-readable reason.
Mind map: mapping decisions and where they live
Practical checklist for this pattern
- Validate required fields before doing expensive parsing.
- Normalize user-provided strings before storing them.
- Use value objects for invariants so mapping stays clean.
- Keep HTTP concerns (status codes, JSON parsing) out of domain logic.
- Return field-level errors with stable field names.
This structure makes the endpoint predictable: inputs either become a valid domain model or return a precise list of what went wrong.
10. Prompting for Architecture and System Design
10.1 Decomposing Systems into Components and Responsibilities
When a system grows, the hardest part is not writing code—it’s keeping responsibilities from blurring. Decomposition turns “a big thing” into smaller parts that each have a clear job, clear inputs, and clear outputs. The goal is simple: when something breaks, you should know where to look and what to change.
Start with responsibilities, not folders
A common mistake is to decompose by directory structure (“controllers,” “services,” “utils”) before you understand the responsibilities. Instead, begin with what the system must do.
A useful decomposition question is: “What decisions does this part own?”
- If a part decides how to authenticate a user, it owns authentication responsibility.
- If a part decides which data to fetch for a request, it owns data access responsibility.
- If a part decides how to validate inputs, it owns validation responsibility.
Once responsibilities are identified, components follow naturally.
A practical decomposition workflow
Use this sequence for each new feature or subsystem.
-
List externally visible behaviors Write short statements like: “Create an order,” “List orders by customer,” “Reject invalid addresses.” These become your top-level responsibilities.
-
Identify the boundaries where decisions change Boundaries often occur at interfaces: HTTP endpoints, message queues, database queries, or domain events.
-
Assign responsibilities to components Each component should own a small set of decisions. If a component both validates inputs and formats responses, it’s doing two jobs.
-
Define inputs/outputs for each component Inputs might be typed request objects; outputs might be domain objects or result types.
-
Write “contract bullets” For each component, add 3–5 bullets describing what it guarantees and what it expects. This prevents accidental coupling.
-
Check for responsibility overlap If two components both “handle errors,” decide which one owns error classification and which one owns error presentation.
Mind map: responsibilities to components
Decomposition Mind Map
Example: decomposing an “Order Creation” feature
Imagine a service that creates orders. A naive decomposition might put everything into one handler. A responsibility-based decomposition separates concerns.
Responsibilities to identify
- Accept an order creation request.
- Validate required fields and basic constraints.
- Enforce domain invariants (e.g., quantity must be positive; items must be eligible).
- Persist the order.
- Return a response with a stable shape.
Components
-
HTTP handler (API layer)
- Owns mapping from HTTP to an internal request object.
- Owns response formatting.
- Does not own domain rules.
-
CreateOrder use case (application layer)
- Owns the orchestration: validate, apply domain rules, call persistence.
- Owns error classification at the use-case level (e.g., “invalid input” vs “ineligible item”).
-
Order domain model (domain layer)
- Owns invariants and state transitions.
- Exposes methods like
Order.create(...)that either succeed or return a domain error.
-
Order repository (infrastructure layer)
- Owns persistence details.
- Exposes
save(order)andnextId()or relies on DB-generated IDs.
Contract bullets (example)
- HTTP handler guarantees: it returns
201with{orderId}on success; it never decides eligibility rules. - CreateOrder use case guarantees: it calls domain creation exactly once and persists only if domain creation succeeds.
- Order domain model guarantees: it never creates an order with invalid quantity.
- Repository guarantees: it persists the order atomically within the transaction boundary.
A decomposition checklist that catches common issues
Use this when reviewing a proposed component split.
- Single responsibility per component: can you summarize its job in one sentence?
- No hidden ownership: does one component silently rely on another’s internal behavior?
- Clear error boundaries: who decides error categories, and who decides HTTP status codes?
- Data ownership is explicit: which component knows schema details (columns, joins, serialization)?
- Interfaces are stable: are component inputs/outputs typed and narrow?
Mind map: boundaries and contracts
Boundaries Mind Map
Concrete example: avoiding responsibility overlap
Suppose you add a “validate address” step. Validation can be split:
- Basic validation (non-empty fields, length limits) belongs in the API layer or a request validator.
- Domain validation (address must be deliverable for the chosen shipping method) belongs in the domain or use case.
If you put both in the HTTP handler, you’ll end up duplicating logic when the same rule is needed elsewhere (like a background job). If you put everything in the domain, you might make the API layer harder to provide helpful error messages.
A clean split is: API layer checks shape; use case/domain checks meaning.
Turning decomposition into a component diagram (Mermaid)
    flowchart LR
  A[HTTP Request] --> B[API Handler]
  B --> C[CreateOrder Use Case]
  C --> D[Order Domain Model]
  C --> E[Order Repository]
  E --> F[(Database)]
  C --> G[Result: OrderId or Error]
  G --> B
  B --> H[HTTP Response]
How to use this in AI-assisted development
When generating code, ask for decomposition artifacts before implementation: a list of responsibilities, then component contracts, then interfaces. This prevents the model from jumping straight to a monolithic handler.
A good prompt pattern is: “Given this feature description, produce (1) responsibilities, (2) component list with inputs/outputs, (3) contract bullets, then (4) a minimal skeleton for each component.” The skeleton should be thin: method signatures, types, and placeholder logic, not full business rules.
Decomposition is the part that makes later automation reliable. If responsibilities are clear, generated code has fewer ways to be “almost right.”
10.2 Choosing Patterns for State, Concurrency, and Data Flow
Good architecture starts with a few boring questions: Where does truth live? Who is allowed to change it? How do messages move without losing meaning? This section gives practical patterns for state, concurrency, and data flow, with examples you can adapt.
State: where truth lives (and how to keep it sane)
State is any information that changes over time and affects behavior. The first decision is the state’s ownership model.
Pattern A: Stateless services + external state
Use when you want easy scaling and predictable behavior.
- Truth lives in a database or cache.
- The service computes results from inputs.
- Concurrency issues mostly become database consistency problems.
Example (HTTP handler):
- Input:
userId,requestId - Read: user profile from DB
- Compute: permissions
- Write: audit record
Key practice: make writes idempotent using requestId so retries don’t duplicate side effects.
Pattern B: Single-writer state (actor-like)
Use when updates must be serialized to avoid race conditions.
- One component owns the state.
- All changes go through a queue or message channel.
- Reads can be served from the owner or via snapshots.
Example (order state):
- Owner receives
PlaceOrder,CancelOrder,ShipOrdermessages. - It updates an in-memory state machine.
- It persists events or snapshots.
Key practice: define allowed transitions explicitly (e.g., Canceled cannot go to Shipped).
Pattern C: Shared state with locks (last resort)
Use when you must share memory and cannot restructure.
- Multiple writers require synchronization.
- You must define lock boundaries and invariants.
Example (in-process counters):
- Use a lock around the counter update.
- Keep the critical section small.
Key practice: avoid holding locks while doing I/O (network calls, disk writes). That’s where latency and deadlocks breed.
Mind map: state ownership
Concurrency: choosing how work overlaps
Concurrency is about how multiple operations happen at the same time. The pattern choice depends on whether operations conflict.
Pattern A: Request-per-thread (or per-task) with isolation
Use for independent requests.
- Each request handles its own work.
- Shared resources are accessed through safe boundaries (DB transactions, connection pools).
Example (payment authorization):
- Each request runs in isolation.
- The DB enforces uniqueness on
(paymentId). - Retries are safe because the uniqueness constraint blocks duplicates.
Key practice: treat the database as the concurrency authority when possible.
Pattern B: Work queues with backpressure
Use for background jobs and bursty workloads.
- Producers enqueue tasks.
- Consumers process at a controlled rate.
- Retries and dead-letter handling keep failures contained.
Example (email sending):
SendEmailtasks go to a queue.- A worker processes one task at a time per recipient (optional partitioning).
Key practice: define retry rules based on error type (temporary vs permanent).
Pattern C: Partitioned concurrency (shard by key)
Use when you can group operations by a key so conflicts stay within a partition.
- Choose a partition key (e.g.,
userId,tenantId,orderId). - Ensure all updates for the same key go to the same partition.
Example (user profile updates):
- Partition by
userId. - Within a partition, process updates sequentially.
- Across partitions, process in parallel.
Key practice: keep the partition key stable and documented; changing it later is painful.
Pattern D: Optimistic concurrency control
Use when conflicts are rare.
- Read current version.
- Write only if version matches.
- On conflict, retry or return a clear error.
Example (editing a document):
- Client sends
If-Match: version=12. - Server updates to version 13 only if still at 12.
Key practice: return a response that helps the client resolve conflicts (e.g., current version payload).
Mind map: concurrency choices

Data flow: how information moves without losing meaning
Data flow patterns decide how data is transformed, validated, and delivered.
Pattern A: Request/response with explicit contracts
Use for synchronous interactions.
- Validate inputs at boundaries.
- Transform into internal models.
- Return outputs with clear error semantics.
Example (create comment):
- Validate
postId,body. - Map to
CommentDraft. - Persist.
- Return
CommentCreatedwithcommentId.
Key practice: define error codes that are stable and actionable (e.g., POST_NOT_FOUND, BODY_TOO_LONG).
Pattern B: Pipeline processing (stages)
Use when work has multiple steps.
- Stage 1: parse/validate
- Stage 2: enrich data
- Stage 3: compute
- Stage 4: persist/emit
Example (import job):
- Each stage produces a typed intermediate result.
- Failures include stage context so debugging is quick.
Key practice: keep stage outputs small and well-typed; it reduces accidental coupling.
Pattern C: Event-driven flow with clear event semantics
Use when you want decoupling between producers and consumers.
- Events represent facts that happened.
- Consumers react and update their own projections.
Example (order lifecycle):
- Producer emits
OrderPlaced. - Inventory consumer reserves stock.
- Billing consumer creates an invoice.
Key practice: events should be immutable and include enough data for consumers to act without extra queries.
Mind map: data flow patterns
Putting it together: selecting a pattern set
A useful way to choose is to map requirements to constraints.
- Is there a single authoritative state?
- If yes, decide whether ownership is external (stateless) or internal (single-writer).
- Do updates conflict?
- If conflicts are frequent, serialize by key or use single-writer.
- If conflicts are rare, optimistic concurrency can work well.
- Is the interaction synchronous or asynchronous?
- Synchronous favors request/response.
- Asynchronous favors queues or events.
Example decision (shopping cart):
- State: cart contents are authoritative.
- Concurrency: partition by
userIdso cart updates serialize per user. - Data flow: HTTP endpoints enqueue
AddItemandRemoveItemcommands; a cart owner processes them and emitsCartUpdatedevents.
This avoids two common failure modes: lost updates (from concurrent writers) and unclear behavior (from mixing validation rules across layers).
Concrete mini-example: command handling with partitioned concurrency
Below is a compact sketch of a single-writer-per-key approach. The important part is the routing and the serialized processing.
type Command =
  | { type: "AddItem"; userId: string; sku: string; qty: number }
  | { type: "RemoveItem"; userId: string; sku: string };

function partitionKey(cmd: Command) {
  return cmd.userId;
}

async function handleCommand(cmd: Command, stateStore: any) {
  const cart = await stateStore.loadCart(cmd.userId);
  switch (cmd.type) {
    case "AddItem":
      cart.add(cmd.sku, cmd.qty);
      break;
    case "RemoveItem":
      cart.remove(cmd.sku);
      break;
  }
  await stateStore.saveCart(cmd.userId, cart);
}
In practice, you route commands by userId to a worker that processes them sequentially. That single decision often eliminates the need for locks in application code.
Practical checklist for your next design
- State: identify the source of truth and whether updates are serialized.
- Concurrency: pick the conflict strategy (single-writer, partitioning, optimistic, or transactions).
- Data flow: choose request/response, pipeline stages, or events based on coupling and timing.
- Boundaries: validate at the edges and keep internal models consistent.
- Failure behavior: define what happens on retries, duplicates, and partial failures.
When these choices are explicit, the rest of the system becomes easier to reason about, test, and evolve without surprises.
10.3 Defining Interfaces and Boundaries with Examples
Interfaces are the contracts between parts of a system. Boundaries are the lines you draw so each part can be understood, tested, and changed without dragging the whole codebase along for the ride. When you ask an AI to generate code, clear boundaries reduce “creative interpretation” and make review faster.
1) Start with the boundary question
Before writing any interface, answer: What does this component promise, and what does it refuse to know? A useful boundary statement has three parts:
- Inputs: what the component accepts (types, formats, invariants).
- Outputs: what it returns (data shape, error behavior).
- Non-goals: what it does not handle (side effects, persistence, authorization, UI concerns).
Example boundary statement (for a pricing module):
- Inputs:
Cartwith line items and quantities. - Outputs:
PriceQuotewith totals and applied discounts. - Non-goals: payment processing, tax rules for every jurisdiction, and reading from databases.
This turns interface design into a checklist rather than a debate.
2) Define interfaces as “shape + rules”
An interface is more than a function signature. Include rules that remove ambiguity.
Interface rules to specify:
- Validation: what happens with invalid inputs.
- Error model: error types vs. error strings; which errors are recoverable.
- Idempotency: whether repeated calls produce the same result.
- Time assumptions: whether the component depends on the current time.
- Side effects: whether it writes to storage, emits events, or logs.
A practical pattern is to write a short “contract block” above the interface.
Example: contract block for a quote generator
Contract: QuoteGenerator
- Input: Cart (must include productId, quantity >= 1)
- Output: PriceQuote
- Errors:
  - InvalidCart: thrown when invariants are violated
  - PricingRuleMissing: thrown when a required rule is not configured
- Side effects: none
- Determinism: same Cart + same rules => same PriceQuote
Even if the AI writes the code, you still control the contract.
3) Use boundary-friendly abstractions
Good boundaries often map to abstractions that are hard to misuse.
- Prefer domain types over raw strings for identifiers and money.
- Prefer ports/adapters: the core depends on interfaces, adapters implement them.
- Keep data mapping at the edges, not in the middle.
Example: domain types at the boundary
Instead of:
userId: stringamount: number
Use:
UserId(validated wrapper)Money(currency + integer minor units)
This makes invalid states harder to represent, so the interface can be simpler.
4) Mind map: boundaries and interface ingredients
Mind map: Interface & Boundary Ingredients
5) Example: designing an API boundary for a checkout service
Assume you have a checkout endpoint. The endpoint should not contain pricing logic or persistence details.
Step A: define the core interface
CheckoutService
- Input: CheckoutRequest
- Output: CheckoutResult
- Side effects: emits OrderCreated event (or returns data for caller to emit)
- Non-goals: HTTP concerns, database writes, session management
Step B: define the adapter interfaces
CartRepositoryfor fetching carts.PricingEnginefor computing totals.OrderWriterfor persistence (if the core returns an order, the adapter writes it).
This keeps the core focused on business rules.
Step C: show a clean separation in code terms
- HTTP layer: parses request, calls
CheckoutService, maps result to HTTP response. - Core layer: validates request invariants, calls
PricingEngine, buildsOrder. - Infrastructure layer: implements repositories and writers.
Even without a specific language, the boundary story stays consistent.
6) Example: interface design for a text parser
Parsing is a great place to demonstrate explicit error behavior.
Contract
LogLineParser
- Input: line (string)
- Output: ParsedLogLine
- Errors:
  - ParseError with fields: lineNumber, reason, snippet
- Side effects: none
- Determinism: same input => same output
Boundary reason
The parser should not decide where log lines come from or where errors are reported. Those are boundary responsibilities.
Example behavior
- Input:
"2026-03-23T10:00Z INFO user=abc" - Output:
{ timestamp, level, fields } - Invalid input: returns
ParseErrorwith a reason likeMissingLevel.
This makes downstream code simpler because it can pattern-match on error types.
7) Interface boundaries for AI-generated code: a concrete prompting pattern
When you generate code, ask for the interface contract first, then the implementation.
A practical workflow:
- Request the contract block.
- Request the function/class signature matching the contract.
- Request the implementation.
- Request tests that cover contract rules.
This prevents the common failure mode where the code “works” but violates the contract in subtle ways.
Example prompt fragment (contract-first)
Write a contract for a component named X.
Include: inputs, outputs, error model, side effects, and non-goals.
Then provide the interface (types/signatures) that matches the contract.
Finally, implement it and add tests for each contract rule.
8) Review checklist for boundaries
Use this when evaluating generated code.
- Hidden side effects: does the component write to storage or call external services without stating it?
- Ambiguous errors: are errors returned in a consistent structure?
- Leaky abstractions: does the core depend on HTTP/DB details?
- Missing invariants: are input constraints enforced at the boundary?
- Edge mapping: are DTO-to-domain conversions kept at the edges?
A good boundary makes the “what changed?” question answerable in minutes.
9) Summary
Defining interfaces and boundaries is about making promises precise: what goes in, what comes out, what errors mean, and what the component refuses to do. Once those rules are written, code generation becomes less about guessing and more about following a contract.
10.4 Generating Diagrams and Documentation from Specs
When you generate code from a spec, diagrams and documentation are the glue that keeps the team aligned. The trick is to treat diagrams as structured summaries, not decoration. A good diagram answers “what connects to what,” while documentation answers “why this choice, and how to use it safely.”
Start from a spec that can be diagrammed
A spec becomes diagram-friendly when it includes at least these elements:
- Actors (users, services, external systems)
- Inputs/outputs (requests, events, data fields)
- State (what changes over time)
- Rules (validation, authorization, business constraints)
- Boundaries (what is inside your system vs outside)
If your spec lacks one of these, your diagram will either be vague or misleading. A practical approach is to add a “diagram checklist” to your prompt: ask the model to extract actors, data objects, and transitions before it draws anything.
Example spec excerpt (for a “Create Order” endpoint):
- Actor: Customer
- Input:
customerId,items[],shippingAddress - Rules: items must be in stock; address must be valid; total must be computed server-side
- Output:
orderId,status - State: order moves from
PendingtoConfirmed - Boundaries: inventory and payment are external services
Produce documentation that matches the diagram
Documentation should mirror the diagram’s structure so readers can jump between them without re-deriving meaning.
A simple documentation outline that works well:
- Overview: one paragraph describing the feature and its boundaries.
- Actors and interactions: list actors and the messages they send/receive.
- Data model: key entities and fields, with constraints.
- State transitions: allowed transitions and what triggers them.
- Error handling: common failures and response shapes.
- Usage notes: assumptions that prevent misuse.
For the order example, the documentation would explicitly state that the server computes totals and rejects client-provided totals.
Mind maps: extract structure before you draw
Mind maps are useful when the spec is messy or when you need to coordinate multiple concerns (data, rules, and flows). Use them to force a first-pass organization.
Mind map for “Create Order”
This mind map is not the final artifact; it’s a checklist. If a section is missing (for example, no “Error Handling”), you know exactly what to ask for next.
Generate diagrams that reflect boundaries and triggers
For system behavior, use diagrams that show messages and state changes. Two diagrams usually cover most needs: a sequence diagram for interactions and a state diagram for lifecycle.
Mermaid sequence diagram (interactions)
sequenceDiagram
  participant C as Customer
  participant API as Orders API
  participant Inv as Inventory Service
  participant Pay as Payment Service

  C->>API: POST /orders(customerId, items, shippingAddress)
  API->>API: Validate address and items
  API->>Inv: Check stock(items)
  Inv-->>API: Stock availability
  API->>API: Compute total server-side
  API->>Pay: Charge(total, customerId)
  Pay-->>API: Payment result
  alt Payment success
    API->>API: Create Order(status=Confirmed)
    API-->>C: 201 {orderId, status}
  else Payment failure
    API->>API: Create Order(status=Failed)
    API-->>C: 402 {error}
  end
Notice what this diagram does: it shows validation, external calls, and the branching outcome. It does not show internal implementation details like database queries, because those change more often than the interaction contract.
Mermaid state diagram (lifecycle)
stateDiagram-v2
  [*] --> Pending
  Pending --> Confirmed: payment success
  Pending --> Failed: payment failed
  Pending --> Failed: out of stock
  Confirmed --> [*]
  Failed --> [*]
This state diagram is intentionally small. If you add too many states, you’ll spend more time maintaining the diagram than using it.
Turn diagrams into “documentation that compiles in your head”
A common failure mode is diagrams that look right but don’t match the written rules. To prevent that, generate a short “diagram-to-doc mapping” section.
Example mapping for the order feature:
- Sequence diagram
- Validation step corresponds to documentation section “Error Handling: 400 invalid address/items.”
- Branch on payment result corresponds to “State transitions: Pending -> Confirmed/Failed.”
- State diagram
- Triggers correspond to “Rules: out of stock and payment failure.”
Then include a compact “contract summary” that mirrors the API response.
Example contract summary:
- Success:
201with{ orderId: string, status: "Confirmed" } - Failure:
402with{ errorCode: "PAYMENT_FAILED", message: string }
Prompting pattern: extract, then render
To generate diagrams and documentation reliably, use a two-step approach in your workflow:
- Extraction step: ask for structured lists (actors, messages, states, errors).
- Rendering step: ask for Mermaid and outputs using only the extracted lists.
A concise prompt template for the extraction step:
- “From the spec, output: actors, endpoints, request/response fields, external dependencies, validation rules, state transitions, and error codes. Use bullet lists and keep names consistent.”
A concise prompt template for the rendering step:
- “Using the extracted lists, generate (a) a Mermaid sequence diagram, (b) a Mermaid state diagram, and (c) a documentation section with the outline: overview, interactions, data model, state transitions, error handling, usage notes.”
This separation reduces mismatches because the diagram generator is constrained by the extracted structure.
Example: integrated documentation snippet
Below is a compact documentation draft that aligns with the diagrams.
Orders API — Create Order
- Overview: Creates an order from customer-provided items and shipping address. The API validates inputs, checks stock via Inventory Service, computes totals server-side, and charges the customer via Payment Service.
- Actors and interactions: Customer calls
POST /orders. Orders API calls Inventory Service to verify stock and calls Payment Service to charge the computed total. - Data model:
Order:id,status,items,shippingAddress,total.OrderItem:sku,quantity,unitPrice.
- State transitions:
Pendingis created after validation.Pending -> Confirmedon payment success.Pending -> Failedon out-of-stock or payment failure.
- Error handling:
400for invalid address or malformed items.409when any requested SKU is out of stock.402when payment fails.
- Usage notes: The client must not provide
total; the API computes it from inventory pricing and requested quantities.
This snippet is short, but each line corresponds to a diagram element or a rule extracted from the spec, which keeps the documentation trustworthy.
10.5 End-to-End Example: Design a Modular Service with Clear Contracts
Imagine you’re building a small “Order Intake” service. It accepts an order request, validates it, calculates totals, stores it, and returns a response. The goal is not just to make it work, but to make each part easy to test and safe to change.
Step 1: Write the contract at the boundaries
Start with the external interface. Keep it boring and explicit.
API contract (HTTP)
- POST /orders
- Request: customerId, currency, items[]
- Response: orderId, status, totals
- Errors: 400 for invalid input, 409 for conflicts, 500 for unexpected failures
Request example
{
  "customerId": "c_102",
  "currency": "USD",
  "items": [
    {"sku": "SKU-1", "qty": 2, "unitPrice": 19.99},
    {"sku": "SKU-2", "qty": 1, "unitPrice": 5.50}
  ]
}
Response example
{
  "orderId": "o_9001",
  "status": "ACCEPTED",
  "totals": {
    "subtotal": 45.48,
    "tax": 3.64,
    "total": 49.12,
    "currency": "USD"
  }
}
Key contract decisions:
- Use a stable status vocabulary (e.g., ACCEPTED, REJECTED).
- Return totals in the response even if storage happens later.
- Define error shapes so clients can parse them consistently.
Step 2: Split the service into modules with narrow responsibilities
A modular design is easiest when each module has one job and a clear input/output.
Proposed modules
- OrderController: HTTP parsing and response mapping.
- OrderValidator: schema and business rule validation.
- PricingEngine: compute subtotal, tax, total.
- OrderRepository: persistence and retrieval.
- IdGenerator: create order IDs.
Each module should be testable without the others. That means no hidden dependencies and no “reach into the database” from the pricing logic.
Step 3: Mind map the design
Use this mind map as a checklist for what each module must own.
Mind map: Modular Order Intake Service
Step 4: Define domain types and internal contracts
Internal contracts prevent “stringly-typed” chaos.
Domain types
OrderDraft: validated input ready for pricingOrderTotals: computed numbersOrderRecord: persisted representation
Example internal contract (conceptual)
- Validator returns either:
OrderDraft(customerId, currency, items with numeric fields), orValidationErrorwith field-level details
- PricingEngine returns:
OrderTotals(subtotal, tax, total, currency)
- Repository returns:
orderIdorConflictError
Step 5: Specify module interfaces (with examples)
These interfaces are what you want your code generator to follow.
OrderValidator interface
- Input: raw request object
- Output:
OrderDraftorValidationError
Validation example rules:
currencymust be a 3-letter uppercase code.- Each item must have
qtyas integer > 0. unitPricemust be a number >= 0.- Max 50 items.
PricingEngine interface
- Input:
OrderDraft - Output:
OrderTotals
Pricing example:
- taxRate = 0.08 for USD (hardcoded for this example)
- subtotal = 219.99 + 15.50 = 45.48
- tax = 45.48 * 0.08 = 3.6384 → round to 3.64
- total = 49.12
OrderRepository interface
- Input:
OrderRecord - Output:
orderIdorConflictError
Conflict example:
- If the same customer submits the same idempotency key twice (idempotency key not shown in the API examples), repository returns 409.
Step 6: End-to-end flow with explicit checkpoints
Write the flow as a sequence of transformations. Each checkpoint has a contract.
Flow checkpoints
- HTTP request arrives
- Contract: controller receives parsed JSON
- Validate
- Input: raw request
- Output: OrderDraft OR ValidationError
- Price
- Input: OrderDraft
- Output: OrderTotals
- Build record
- Input: OrderDraft + OrderTotals + orderId
- Output: OrderRecord
- Persist
- Input: OrderRecord
- Output: orderId OR ConflictError
- Respond
- Success: orderId, status=ACCEPTED, totals
- Failure: status code + error body
Step 7: Example prompt-to-code structure (what to generate)
When generating code, ask for one module at a time and require it to match the interface.
Prompt pattern for each module
- “Implement
OrderValidatorwith function signature X. ReturnOrderDrafton success. On failure, returnValidationErrorwith fields: ….” - “Write unit tests for edge cases: empty items, negative price, too many items.”
Concrete example: PricingEngine test cases
- USD with two items returns totals rounded to 2 decimals.
- Zero subtotal returns zero tax.
- Currency mismatch is rejected earlier by validator, so pricing assumes valid currency.
Step 8: Minimal code sketch (interfaces and wiring)
Below is a compact example showing the contracts in code form.
// Domain contracts
type OrderDraft = { customerId: string; currency: string; items: { sku: string; qty: number; unitPrice: number }[] };
type OrderTotals = { subtotal: number; tax: number; total: number; currency: string };

type ValidationError = { type: 'VALIDATION_ERROR'; details: { field: string; message: string }[] };
type ConflictError = { type: 'CONFLICT_ERROR'; message: string };

type PricingResult = { ok: true; totals: OrderTotals } | { ok: false; error: ValidationError };
// Module interfaces
interface OrderValidator { validate(req: any): OrderDraft | ValidationError; }
interface PricingEngine { price(draft: OrderDraft): OrderTotals; }
interface OrderRepository { save(record: any): { orderId: string } | ConflictError; }
interface IdGenerator { nextId(): string; }

// Controller wiring (contract-driven)
async function createOrder(reqBody: any, deps: { validator: OrderValidator; pricing: PricingEngine; repo: OrderRepository; ids: IdGenerator }) {
  const draftOrErr = deps.validator.validate(reqBody);
  if ('type' in draftOrErr) return { status: 400, body: draftOrErr };
  const totals = deps.pricing.price(draftOrErr);
  const record = { orderId: deps.ids.nextId(), ...draftOrErr, totals };
  const saved = deps.repo.save(record);
  if ('type' in saved) return { status: 409, body: saved };
  return { status: 201, body: { orderId: saved.orderId, status: 'ACCEPTED', totals } };
}
Step 9: Testing strategy aligned to contracts
Write tests per module, not per workflow.
- OrderValidator tests: verify exact error details (field + message).
- PricingEngine tests: verify rounding and arithmetic.
- Repository tests: verify conflict behavior.
- Controller tests: verify mapping from module outputs to HTTP responses.
A good rule: if a test fails, it should be obvious which module’s contract was violated.
Step 10: Contract-driven iteration example
Suppose tax rounding is wrong. You fix it in PricingEngine and update only its tests. The controller and repository tests should remain unchanged because their contracts didn’t move.
That’s the practical payoff: clear contracts turn changes into localized edits, and they make generated code easier to trust because each module has a measurable contract.
11. Working with Existing Codebases and Legacy Constraints
11.1 Reading Code with AI: Asking for Summaries and Maps
When you ask an AI to read code, you’re really asking it to build a mental model you can verify. The trick is to request outputs that are easy to cross-check: short summaries, explicit boundaries, and “where does this go next?” maps.
What to ask for (and why)
Start with a summary that states scope and assumptions, then follow with a map that names entry points, data flow, and side effects.
- Scope summary: “What does this file/module do?”
- Example prompt: “Summarize
billing/service.pyin 8 bullets. For each bullet, include the function name and the external effect (DB write, HTTP call, message publish, or none).” - Why it works: you get traceable claims tied to concrete functions.
- Entry points and call graph: “Where does execution start, and what calls what?”
- Example prompt: “List the top-level entry points in this module (functions/classes that are likely called externally). Then provide a call graph in text form:
A -> B -> Cfor the main path.” - Why it works: you can compare the “main path” to your understanding of request handling.
- Data flow: “What data moves, where it changes, and where it’s validated.”
- Example prompt: “For each public function, describe input fields, transformations, and output fields. Note where validation occurs and what errors are returned.”
- Why it works: bugs often hide in transformation steps and error paths.
- Side effects and invariants: “What does the code change, and what must always be true?”
- Example prompt: “Create a table of side effects (DB, filesystem, network, cache). For each, state the conditions under which it happens and the expected invariants.”
- Why it works: you learn what not to break when you modify behavior.
A practical prompt template
Use a template so every request produces the same kinds of artifacts.
Prompt template (copy and adapt):
- “You are reviewing code for maintainability. Read the following code excerpt. Output: (1) 8-bullet scope summary, (2) entry points list, (3) data flow map, (4) side effects list, (5) 5 questions you would ask a maintainer to confirm assumptions. Keep each item grounded in the excerpt.”
If you’re working with a whole repository, add: “Assume I will verify by searching for the named functions and routes.” That nudges the model toward verifiable statements.
Mind maps you can ask the AI to produce
Ask for maps in so you can paste them into your notes.
Mind map: module-level overview
Mind map: request-to-response (when code is a web handler)
Concrete examples: good vs. vague requests
Example 1: summary that’s actually useful
- Vague prompt: “Summarize this file.”
- Better prompt: “Summarize this file in 8 bullets. Each bullet must start with a function name and include (a) inputs, (b) outputs, and (c) one side effect or none.”
Example 2: mapping without guessing
- Vague prompt: “Show how data flows.”
- Better prompt: “Trace the main request path from the first exported function. For each step, list:
field changes,validation, anderror return.”
Example 3: finding invariants
- Vague prompt: “What are the rules?”
- Better prompt: “List invariants enforced by the code. For each invariant, cite the exact check (e.g.,
if amount <= 0: ...) and state what would break if removed.”
How to handle partial code excerpts
If you only paste a snippet, the AI will fill gaps unless you prevent it. Add constraints.
- Prompt add-on: “If you cannot confirm something from the excerpt, label it as
Unconfirmed:and explain what evidence is missing.” - Prompt add-on: “Do not invent function names. Only use names present in the excerpt.”
This keeps the output honest and makes it easier to verify.
A quick workflow for reading unfamiliar code
- Ask for a scope summary for each file you touch.
- Ask for entry points so you know what to search for.
- Ask for a data flow map to understand transformations.
- Ask for side effects to avoid accidental behavior changes.
- Ask 5 maintainer questions to target your next search.
Example: one-shot prompt for a code excerpt
Read the following excerpt from `orders/processor.py`.
Output in this order:
1) 8-bullet scope summary; each bullet begins with a function name.
2) Entry points list (public functions/classes only).
3) Data flow map: inputs -> transformations -> outputs.
4) Side effects list: DB/network/filesystem/messaging.
5) 5 verification questions labeled “Search:” that I can answer by grepping.
Rules: do not invent names; if uncertain, mark “Unconfirmed:”.

[PASTE EXCERPT HERE]
A good result reads like a checklist you can validate in minutes. If the summary is generic, tighten the prompt with “cite function names” and “include side effects.” If the map is too detailed, ask for “main path only” first, then expand once you know where the complexity lives.
11.2 Making Minimal Changes with Patch-Oriented Prompts
Minimal-change prompts aim for one thing: modify the smallest possible surface area to achieve the requested behavior. The trick is to force the model to (1) locate the exact edit points, (2) describe the patch in terms of before/after, and (3) avoid “helpful” rewrites.
Why minimal patches work
A patch-oriented workflow reduces risk in three ways:
- Fewer moving parts: If you change one function, you’re less likely to break unrelated behavior.
- Easier review: Diffs are smaller, so reviewers can focus on correctness rather than style.
- More reliable testing: You can target tests to the changed behavior and edge cases.
Mind map: patch-oriented prompt strategy
Prompt template: “patch only”
Use this structure whenever you want the model to behave like a careful editor.
You are editing an existing codebase.
Task: Make the smallest possible change to implement: <behavior>.
Constraints:
- Do not refactor.
- Do not change public APIs unless required.
- Keep existing style, naming, and formatting.
- Only modify the minimum lines needed.
Context:
- File(s): <paths>
- Relevant excerpt(s): <paste>
- Current failure: <test name / error>
Acceptance criteria:
- <criterion 1>
- <criterion 2>
Output requirements:
- Provide a unified diff (or line-based patch) only for the changed lines.
- Explain briefly which lines you changed and why.
- If tests are needed, add the smallest focused test.
Before/after rule:
- Show the exact before snippet and the exact after snippet for each change.
Example 1: Fixing a bug without rewriting the module
Scenario: A Node/TypeScript service returns the wrong HTTP status when a user is not found.
Existing code excerpt:
export function toHttpStatus(err: AppError): number {
  if (err.type === 'NotFound') return 500;
  if (err.type === 'Validation') return 400;
  return 500;
}
Failing test (excerpt):
it('returns 404 for NotFound', () => {
  expect(toHttpStatus({ type: 'NotFound' } as AppError)).toBe(404);
});
Patch-oriented prompt:
Implement: NotFound should map to HTTP 404.
Constraints:
- No refactors.
- Change only the minimal lines needed.
Context:
- File: src/http/toHttpStatus.ts
- Excerpt: <paste toHttpStatus>
- Current failure: test ‘returns 404 for NotFound’
Acceptance criteria:
- toHttpStatus({type:‘NotFound’}) returns 404.
- Validation remains 400.
Output:
- Provide a unified diff only for changed lines.
- Show before/after snippet for each change.
Expected patch (unified diff):
 a/src/http/toHttpStatus.ts
+++ b/src/http/toHttpStatus.ts
@@
 export function toHttpStatus(err: AppError): number {
-  if (err.type === 'NotFound') return 500;
+  if (err.type === 'NotFound') return 404;
   if (err.type === 'Validation') return 400;
   return 500;
 }
Why this prompt works: It names the exact mapping error, forbids refactors, and ties the change to a single acceptance criterion.
Example 2: Minimal change in a parser
Scenario: A Python parser should accept trailing whitespace after a token.
Existing function excerpt:
def parse_token(s: str) -> str:
    if not s:
        raise ValueError('empty')
    if ' ' in s:
        raise ValueError('spaces not allowed')
    return s
Failing test:
def test_allows_trailing_whitespace():
    assert parse_token('abc   ') == 'abc'
Patch-oriented prompt:
Implement: Allow trailing whitespace after the token.
Constraints:
- Do not change the function signature.
- Do not rewrite the function.
- Minimal edits only.
Context:
- File: parser.py
- Excerpt: <paste parse_token>
- Current failure: test_allows_trailing_whitespace
Acceptance criteria:
- ’abc ’ returns ‘abc’.
- ‘a b’ still raises ValueError(‘spaces not allowed’).
Output requirements:
- Provide a unified diff.
- Show before/after snippet.
- Add no new tests (existing test covers it).
Expected patch:
 a/parser.py
+++ b/parser.py
@@
 def parse_token(s: str) -> str:
     if not s:
         raise ValueError('empty')
-    if ' ' in s:
+    s = s.rstrip()
+    if ' ' in s:
         raise ValueError('spaces not allowed')
     return s
Reasoning baked into the patch: rstrip() removes only trailing whitespace, so internal spaces still trigger the existing check.
Example 3: Patch when you only have partial context
Sometimes you can’t paste the whole file. Patch prompts still work if you force the model to operate on the provided excerpt and explicitly request missing details.
Scenario: A Java method fails to handle a null input.
You provide: the failing test and the method signature, but not the entire class.
Patch-oriented prompt:
Task: Handle null input by returning an empty list.
Constraints:
- Minimal change.
- Do not change other logic.
Context:
- File: src/WidgetService.java
- Method signature: public List<String> listNames(String filter)
- Excerpt around method: <paste 20 lines including method body>
- Failing test: listNames(null) should return empty list
If any required context is missing, ask a single clarifying question before proposing the patch.
Output:
- Unified diff for only the method body lines that change.
This “ask first” clause prevents the model from guessing about surrounding behavior.
Common failure modes (and how to prevent them)
- Over-editing: The model changes formatting or reorganizes code. Fix by adding “only modify changed lines” and “no refactors.”
- Signature drift: The model changes parameters or return types. Fix by explicitly forbidding API changes.
- Behavior creep: The model adds extra features. Fix by listing acceptance criteria and requiring the patch to map directly to them.
Quick checklist for your next patch prompt
- I pasted the smallest relevant excerpt.
- I included the failing test or error.
- I stated constraints: no refactors, minimal lines, no API changes.
- I required a unified diff and before/after snippets.
- I listed acceptance criteria that the patch must satisfy.
When these pieces are present, the model has less room to “improve” the code in ways you didn’t ask for—and your diff stays reviewable.
11.3 Preserving Behavior While Improving Structure
Improving structure is safest when you treat behavior as a contract. “Structure” includes naming, module boundaries, control flow shape, and how data moves through the system. “Behavior” includes outputs, side effects, error handling, timing-sensitive outcomes (like ordering), and even which exceptions you throw.
The core rule: change shape, not meaning
A useful way to think about refactoring is: keep the same observable results for the same inputs. Observable results include:
- Return values and response bodies
- HTTP status codes and headers
- Database writes and transaction boundaries
- Logging and metrics (at least at the level your tests assert)
- Which errors are caught vs. allowed to propagate
If you can’t list the observable results, you can’t confidently preserve behavior.
Mind map: behavior-preserving refactor workflow
Step 1: Build a behavior map (before touching code)
Pick one unit to refactor: a function, a class method, or a small module. Then write down what it does.
Example: a function that processes an order.
- Input:
orderId: string,requesterRole: 'admin' | 'user' - Output: returns
{ status: 'ok' | 'forbidden' | 'not_found' } - Side effects: writes an audit event only when status is
ok - Error behavior: never throws; returns
not_foundfor missing orders - Ordering: audit event must be written before returning
This list becomes your checklist. If you later realize you forgot an item (say, audit events for forbidden orders), you can update the checklist and tests before refactoring.
Step 2: Add or tighten tests that encode behavior
If tests already exist, use them as the contract. If they’re weak, strengthen them before restructuring.
Practical test types for behavior preservation:
- Golden tests: compare serialized outputs (JSON, CSV) exactly.
- Boundary tests: verify HTTP status codes, headers, and error payload shapes.
- Side-effect tests: use fakes/spies for database writes and audit logging.
- Error-shape tests: assert exception types or error codes, not just “it fails.”
Example scenario: you want to refactor a handler that currently mixes validation and business logic.
Current behavior (simplified):
- If
quantityis missing: return400with{ error: 'quantity_required' } - If
quantityis negative: return400with{ error: 'quantity_invalid' } - Otherwise: call
reserveStock()and return200.
A behavior-preserving test suite should assert all three branches and the exact error payload keys.
Step 3: Refactor in small steps with “diff discipline”
Large refactors create multiple failure modes at once. Instead, do one structural change per step and verify.
Common safe structural moves:
- Extract a helper function without changing inputs/outputs.
- Rename variables and functions while keeping call sites identical.
- Reorder internal statements only when dependencies are clear.
- Introduce an interface or wrapper, but delegate to the old implementation.
A simple discipline: after each step, run the smallest relevant test set. If something breaks, you know which step caused it.
Step 4: Watch for the “behavior traps”
Structure changes often accidentally alter subtle behavior. Here are frequent traps and how to guard them.
Trap A: Default values and falsy checks
Before:
if (quantity)treats0as missing. After refactor, you might usequantity == nulland suddenly allow0.
Guard with tests that include edge inputs like 0, '', and null.
Trap B: Error handling shape
Changing from throw new Error('x') to returning { error: 'x' } changes behavior even if the user sees “an error.”
Guard by asserting error type, status code, and payload.
Trap C: Ordering and side effects
If you move audit logging into a helper, it’s easy to log after returning or in a different branch.
Guard with side-effect assertions that check call order when it matters.
Trap D: Time and formatting
Refactoring date formatting can change time zones or string formats.
Guard with tests that assert exact formatted strings.
Concrete example: reorganizing a handler without changing outcomes
Before (mixed responsibilities)
function handleCheckout(req: any, res: any) {
  const { orderId, quantity } = req.body || {};

  if (!orderId) {
    res.status(400).json({ error: 'order_id_required' });
    return;
  }

  if (quantity == null) {
    res.status(400).json({ error: 'quantity_required' });
    return;
  }

  if (quantity < 0) {
    res.status(400).json({ error: 'quantity_invalid' });
    return;
  }

  const result = reserveStock(orderId, quantity);
  if (!result.ok) {
    res.status(404).json({ error: 'not_found' });
    return;
  }

  audit('checkout', { orderId, quantity });
  res.status(200).json({ status: 'ok' });
}
Goal (improve structure)
- Separate validation from business logic
- Keep the exact status codes and payloads
- Keep audit only on success
Step 1: Extract validation (no behavior change)
function validateCheckoutInput(body: any) {
  const { orderId, quantity } = body || {};

  if (!orderId) return { ok: false, status: 400, error: 'order_id_required' };
  if (quantity == null) return { ok: false, status: 400, error: 'quantity_required' };
  if (quantity < 0) return { ok: false, status: 400, error: 'quantity_invalid' };

  return { ok: true, orderId, quantity };
}
Step 2: Use the validator in the handler
function handleCheckout(req: any, res: any) {
  const validation = validateCheckoutInput(req.body);
  if (!validation.ok) {
    res.status(validation.status).json({ error: validation.error });
    return;
  }

  const result = reserveStock(validation.orderId, validation.quantity);
  if (!result.ok) {
    res.status(404).json({ error: 'not_found' });
    return;
  }

  audit('checkout', { orderId: validation.orderId, quantity: validation.quantity });
  res.status(200).json({ status: 'ok' });
}
What changed structurally:
- Validation logic moved into a helper
- The handler now reads more linearly
What must not change behavior:
- The exact error strings
- The status codes for each branch
- The audit call only on success
If tests already cover these branches, they should pass unchanged. If not, add tests for each validation failure and for the reserveStock not-found path.
Mind map: “behavior-preserving” checklist for each refactor step
Step 5: Verify and only then clean up
After the structural changes compile and tests pass, do cleanup that doesn’t alter behavior:
- Remove unused variables
- Consolidate duplicate code only if tests still pass
- Ensure formatting is consistent
If you want to do a second structural improvement, start again with a small step and a verification run.
Preserving behavior while improving structure is mostly about restraint: make one change, prove it didn’t break the contract, then move on. The code becomes easier to read because the risk is contained, not because the refactor is “clever.”
11.4 Handling Incomplete or Inconsistent Project Conventions
Most teams have conventions; fewer teams have conventions that are complete, consistent, and actually followed. When you ask an AI to change code in that environment, the risk isn’t just “wrong code.” It’s code that looks right locally but quietly violates the project’s unwritten rules. The goal of this section is to help you recover those rules from the codebase and then steer generation so it matches what’s already there.
Start by mapping what’s missing (not what’s ideal)
Before prompting for changes, identify which conventions are incomplete versus inconsistent.
- Incomplete: The project never defined something (e.g., error handling style, naming for DTOs).
- Inconsistent: The project defined it, but multiple styles exist (e.g.,
snake_casein one folder,camelCasein another). - Implicit: The convention exists only through examples (e.g., “every service returns
{ ok: true }on success”).
A quick way to classify: pick one file that “feels central” (a controller, a service base class, a shared utility) and scan for patterns in:
- naming
- folder placement
- exported symbols
- error handling
- logging
- validation
If you can’t find a pattern after scanning a handful of files, treat it as incomplete and plan to infer from the closest neighbors.
Infer conventions from “nearest neighbors”
When conventions are inconsistent, you want the AI to follow the local neighborhood of the change, not the whole repository.
Use this workflow:
- Locate the entry points related to your change (routes, handlers, service methods).
- Find two or three similar implementations that already work.
- Extract the conventions those files demonstrate.
- Prompt the AI to match those conventions explicitly.
Example prompt fragment (for a change to an HTTP handler):
- “Follow the same response shape and status code mapping used in
handlers/user.tsandhandlers/admin.ts.” - “Use the same error mapping helper and message format as in
handlers/user.ts.”
This reduces the chance the AI invents a new house style.
Use a “convention checklist” to force alignment
Create a small checklist you can reuse in prompts and reviews. Keep it short enough to apply under time pressure.
Convention checklist (copy/paste into prompts):
- Naming: Match existing identifier casing and abbreviations.
- Structure: Place new functions in the same module layout.
- Errors: Use the same error types and mapping strategy.
- Logging: Use the same logger and log levels.
- Validation: Reuse existing validators and error formats.
- Types: Match type alias vs interface usage.
- Formatting: Match import ordering and line wrapping.
If a checklist item is unknown, don’t guess. Instead, instruct the AI to “search for the closest existing pattern and mirror it.”
Prompt with “constraints + evidence”
When conventions are inconsistent, “be consistent” is too vague. Replace it with constraints backed by evidence.
A good prompt includes:
- what you’re changing
- what must remain unchanged
- which files to mirror
- what to avoid
Example (JavaScript/TypeScript handler):
- “Implement
POST /widgetsinroutes/widgets.tsusing the same validation approach asroutes/orders.ts.” - “Return errors using
toHttpError()exactly asroutes/orders.tsdoes.” - “Do not introduce new response shapes; reuse the existing
ApiResponsetype.”
This turns convention alignment into a measurable requirement.
Handle missing conventions by creating local ones
If the project doesn’t define a convention, you still need one—but you should create it locally and keep it small.
Rules for creating local conventions:
- Prefer reuse: If any similar helper exists, use it.
- Keep scope tight: Apply the new convention only to the new code you add.
- Document in-code: Add a brief comment near the decision point.
- Avoid “framework-level” changes: Don’t retrofit the entire codebase unless the team already planned it.
Example: Suppose there’s no standard for request validation errors. You can:
- reuse the existing validation library already used elsewhere
- map errors into the same error envelope used by other endpoints
- add a short comment explaining the mapping choice
Resolve inconsistencies with a “tie-breaker” policy
When multiple styles exist, you need a deterministic tie-breaker so the AI doesn’t pick randomly.
Common tie-breakers:
- Most recent: Prefer patterns in the newest files.
- Closest layer: Prefer patterns in the same layer (controller vs service).
- Most used: Prefer the style with more occurrences.
- Most tested: Prefer patterns covered by existing tests.
You can encode this in prompts:
- “If there are multiple naming styles, follow the one used in the most recently modified file under
services/.” - “Prefer the error mapping used in endpoints that have integration tests.”
Mind maps for convention recovery
Mind Map: Handling Incomplete or Inconsistent Conventions
Concrete example: inconsistent error handling
Imagine a codebase where some endpoints return { error: { code, message } } while others return { message }.
Bad approach: Prompt the AI to “handle errors consistently.” It may pick one style and apply it everywhere in the touched files.
Better approach:
- Find two endpoints that are closest to yours.
- Identify the error envelope they use.
- Force the AI to reuse that envelope.
Example prompt:
- “Add error handling to
handlers/widgets.ts. Use the same error envelope and HTTP status mapping ashandlers/orders.ts.” - “When validation fails, return the same
error.codevalues used inhandlers/orders.ts.” - “Do not introduce a new error envelope type; reuse existing types.”
If handlers/orders.ts uses a helper like mapErrorToResponse(), instruct the AI to call it rather than re-implementing.
Concrete example: missing naming conventions
Suppose there’s no guidance for naming database columns in a new migration. You can still avoid chaos.
Approach:
- inspect existing migrations
- copy the established column naming style (e.g.,
snake_case) - match constraints naming (e.g.,
fk_*,idx_*)
Example prompt:
- “In migration
2026xxxx_add_widget_table, name columns using the same pattern as migrations inmigrations/2025*(snake_case). Name indexes using the sameidx_<table>_<column>format.”
If the project truly has no pattern, create one locally and keep it consistent within the migration.
Review checklist for convention alignment
Before merging, verify:
- the new code matches the local module layout
- imports follow the same ordering and grouping
- error mapping uses the same helpers and types
- naming matches the nearest neighbors
- tests assert the expected response shape
A small, strict review catches most convention drift. The trick is to make the review criteria concrete so the AI can be guided toward them in the first place.
11.5 End-to-End Example: Add a Feature Using a Minimal Patch Strategy
You have a small service that already works, and you need one new feature: add an endpoint that returns a user’s profile summary. The key constraint is to change as little as possible: minimal code edits, minimal prompt scope, and maximum verification.
Scenario
- Existing stack: Node.js + TypeScript, Express, Jest.
- Existing endpoints:
GET /health,GET /users/:id. - New requirement:
GET /users/:id/summaryreturns:iddisplayNamepostCountlastPostAt(ISO string ornull)
- Existing data access:
userRepo.getUserById(id)andpostRepo.countPostsByUser(id)andpostRepo.getLastPostAtByUser(id).
Minimal Patch Mind Map
Minimal Patch Strategy (End-to-End)
- Goal
- Add one endpoint: GET /users/:id/summary
- Keep existing behavior unchanged
- Patch scope
- Routes: add one new handler
- Controller: add one function
- Service/repo usage: reuse existing repo methods
- Types: add one response type
- Tests: add focused unit/integration tests
- Guardrails
- No refactors outside touched files
- Preserve existing error handling patterns
- Match response shape exactly
- Workflow
- Inspect existing patterns
- Draft minimal diffs (route + controller)
- Generate tests first (expected JSON)
- Implement handler
- Run tests + fix only what fails
- Run typecheck/lint and stop
Step 1: Inspect the Existing Pattern (Before Prompting)
Open the current route file and find how GET /users/:id is wired. You’re looking for three things:
- How it parses
:id. - How it handles “not found” and other errors.
- How it formats JSON responses.
Write down the existing handler skeleton in your notes (not as a copy-paste prompt yet). For example, you might see a pattern like:
- parse
req.params.id - call a controller method
- return
res.status(200).json(payload) - catch errors and map them to status codes
This matters because your minimal patch should mirror the existing structure. The model is good at generating code, but it’s your job to keep the patch consistent.
Step 2: Define the Patch Contract (What Changes, What Doesn’t)
Create a tiny checklist that you will enforce:
- ✅ Add
UserSummaryResponsetype. - ✅ Add
getUserSummarycontroller function. - ✅ Add one Express route.
- ✅ Add tests for:
- success response shape
- user not found behavior
- ❌ Do not rename existing functions.
- ❌ Do not change existing endpoints.
- ❌ Do not introduce new abstractions.
A minimal patch prompt should include this checklist explicitly.
Step 3: Generate Tests First (Focused and Shape-Driven)
You’ll add an integration test that hits the new route. The test should assert the exact JSON keys and types.
Example Jest test (keep it small and direct):
import request from 'supertest';
import { app } from '../app';

describe('GET /users/:id/summary', () => {
  it('returns profile summary with expected fields', async () => {
    const res = await request(app).get('/users/123/summary');
    expect(res.status).toBe(200);
    expect(res.body).toEqual({
      id: '123',
      displayName: 'Ava Chen',
      postCount: 7,
      lastPostAt: '2026-01-15T10:30:00.000Z'
    });
  });
});
Add a second test for not found. Use the same status code and error body format as GET /users/:id.
Step 4: Minimal Prompt for the Route Patch
Use a prompt that asks for a diff-like change and restricts scope to the route file only. Include:
- the new path
- the controller function name
- the expected status code
- the error mapping behavior (copied from the existing route)
Example prompt text you can use:
- “In the existing users routes file, add
GET /users/:id/summary. Follow the same parsing and error handling asGET /users/:id. CallusersController.getUserSummary(id). Return200with the controller payload. Do not change any other routes.”
The model should produce only the new route handler and its wiring.
Step 5: Minimal Prompt for the Controller Patch
Now patch the controller file. Restrict scope:
- add one exported function
getUserSummary(id: string) - call existing repos
- return the response object with exact keys
Example controller logic (illustrative):
const user = await userRepo.getUserById(id)- if user missing, throw the same “not found” error used elsewhere
const postCount = await postRepo.countPostsByUser(id)const lastPostAt = await postRepo.getLastPostAtByUser(id)- normalize
lastPostAtto ISO string ornull
Minimal prompt text:
- “Add
getUserSummarytousersController.ts. Reuse existing error types and patterns fromgetUserByIdcontroller. UseuserRepo.getUserById,postRepo.countPostsByUser, andpostRepo.getLastPostAtByUser. Return{ id, displayName, postCount, lastPostAt }wherelastPostAtis ISO string or null. Do not refactor other functions.”
Step 6: Add the Response Type (Small, Exact)
If the project uses shared types, add one type definition. Keep it near existing response types.
Example:
export type UserSummaryResponse = {
  id: string;
  displayName: string;
  postCount: number;
  lastPostAt: string | null;
};
Then ensure the controller returns that shape.
Step 7: Wire Everything and Run Tests
At this point, you should have:
- route added
- controller added
- type added
- tests added
Run tests. If a test fails, resist the urge to “improve” the code. Fix only what the failure indicates.
Common minimal fixes:
lastPostAtis aDateobject but the test expects a string → convert with.toISOString().idis numeric in one place → ensure it’s treated consistently as a string.- not-found status differs → match the existing endpoint’s error mapping.
Step 8: Second Mind Map for Debugging (Failure-Driven Patch)
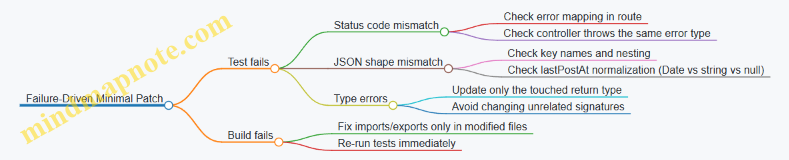
Step 9: Final Verification (Stop When Done)
Run:
- unit/integration tests
- typecheck
- lint (if your workflow includes it)
Stop after the patch is green. Minimal patch strategy is not “do everything”; it’s “change only what’s necessary and prove it.”
What “Minimal” Looks Like in Practice
A good minimal patch has three visible traits:
- Touched files are few (route, controller, types, tests).
- No behavior drift (existing endpoints remain unchanged).
- Tests describe the contract (the response JSON is asserted exactly).
When you keep those traits, the new feature lands cleanly, and the codebase stays boring in the best way.
12. Team Workflows and Collaboration with AI
12.1 Creating Shared Prompt Templates for a Team
Shared prompt templates turn “good results from one person” into “repeatable results for everyone.” The goal is not to standardize creativity; it’s to standardize inputs, constraints, and output shape so reviews are faster and failures are easier to diagnose.
Why templates matter (in practical terms)
A template reduces three common sources of friction:
- Missing context: prompts often forget the project’s conventions, target language version, or expected error-handling style.
- Unclear success criteria: the model may produce code that “looks right” but doesn’t meet the team’s definition of done.
- Inconsistent formatting: one engineer gets a single file, another gets a patch, and a third gets a mix of both.
A good template makes these choices explicit, so the team can focus on correctness rather than interpretation.
Template design principles
Use these principles as a checklist when creating or editing a template.
- Separate stable structure from variable content: keep the prompt skeleton constant, and only swap the task-specific fields.
- Force output shape: require headings, code fences, and a fixed order of sections.
- Include “do not” constraints: specify what must not be changed (public API, database schema, existing behavior).
- Require assumptions to be stated: if the prompt lacks information, the output should list assumptions before code.
- Add a verification step: ask for a short checklist that maps to tests, linting, and edge cases.
Mind map: what a team template should contain
A concrete template: “Generate a feature module + tests”
Below is a template you can copy into your team’s prompt library. It’s written to produce consistent artifacts and to make reviewable decisions.
Template fields
TASK: what to buildCONTEXT: relevant files, interfaces, and conventionsCONSTRAINTS: what must not changeOUTPUT_MODE:filesorpatchACCEPTANCE: how success is judged
Prompt template
You are assisting a software team. Produce implementation-ready output.

TASK:
{TASK}

CONTEXT (project conventions and relevant interfaces):
{CONTEXT}

CONSTRAINTS (must follow):
- Do not change public APIs unless explicitly requested.
- Follow existing error-handling patterns from the project.
- Use the team’s naming and folder conventions.
- Do not add new dependencies unless approved in CONTEXT.

OUTPUT_MODE:
{OUTPUT_MODE} (files or patch)

ACCEPTANCE CRITERIA:
{ACCEPTANCE}

REQUIRED OUTPUT FORMAT (in this exact order):
1) Assumptions (bullets; if none, write “None”).
2) Plan (numbered steps).
3) Implementation (code fences; include file paths if OUTPUT_MODE=files).
4) Tests (code fences; include test names and what they assert).
5) Edge cases & error cases (bullets).
6) Verification checklist (bullets mapping to acceptance criteria).

Before writing code, briefly confirm that you understand the constraints.
Example: filling the template for a small API feature
TASK: “Add an endpoint POST /v1/invitations that validates input, creates an invitation record, and returns 201 with the created ID.”
CONTEXT: “The project uses TypeScript, Express, and Zod for validation. Existing endpoints live in src/routes/v1/*.ts. Errors are returned via next(err) using HttpError.”
CONSTRAINTS: “Do not change the database schema. Use existing repository InvitationRepo.create.”
OUTPUT_MODE: files
ACCEPTANCE:
- Valid payload returns
201and JSON{ id: string } - Invalid payload returns
400with a consistent error shape - Unit tests cover both success and validation failure
When the team uses the template, the model’s output becomes review-friendly: file paths are predictable, tests are always included, and the verification checklist maps directly to the acceptance criteria.
Mind map: how to standardize “output contract”
Team conventions to bake into templates
Templates should encode the team’s “house rules” so individuals don’t have to remember them.
- Error-handling rule: “Use
next(err)andHttpError” is better than “handle errors properly.” - Formatting rule: “Always include file paths” prevents reviewers from guessing where code belongs.
- Test rule: “Every acceptance criterion must have at least one test” is concrete and measurable.
- Dependency rule: “No new dependencies” avoids surprise build changes.
A lightweight review checklist for prompt outputs
Add a short checklist to the template library so reviewers know what to look for.
- Did the output follow the required section order?
- Are assumptions explicitly stated when context is missing?
- Do tests cover both success and failure paths?
- Are constraints respected (no API changes, no new dependencies)?
- Does the verification checklist match the acceptance criteria exactly?
Versioning and ownership (keep it simple)
Treat templates like code: assign an owner, keep a change log, and avoid silent edits.
- Owner: one person maintains the canonical version.
- Change log: record what changed and why (e.g., “added edge-case section to reduce review churn”).
- Deprecation: if a template is replaced, keep the old one available for tasks that already started.
A shared template works best when it’s stable enough to trust and specific enough to reduce ambiguity. When it’s done right, the team spends less time arguing about format and more time fixing real bugs.
12.2 Reviewing AI Output with Checklists and Roles
AI can draft code, tests, and explanations quickly, but speed is not the same as correctness. A good review process turns “looks right” into “is right” by assigning roles, using checklists, and requiring evidence for each acceptance decision.
Roles: who checks what
Use three lightweight roles so reviewers don’t step on each other’s toes.
- Author (the person who prompted and assembled context): Ensures the request was specific enough and that the output matches the intended scope.
- Verifier (the person who checks behavior): Focuses on tests, edge cases, and whether the implementation satisfies acceptance criteria.
- Risk Reviewer (the person who checks safety and integration): Looks for security issues, dependency problems, and build/runtime risks.
A single person can cover multiple roles on small tasks, but the checklist sections should still be completed in order.
The review checklist: evidence-based, not vibes-based
1) Scope match (Author)
Confirm the output answers the exact question.
- Acceptance criteria coverage: Each criterion is explicitly addressed in the code or tests.
- Out-of-scope items removed: No extra features that change behavior unexpectedly.
- Assumptions stated: Any assumptions are either documented in comments or reflected in tests.
Example (scope mismatch):
- Prompt: “Add a
GET /users/{id}endpoint that returns 404 when not found.” - AI output: returns 200 with an empty object.
- Checklist result: behavior doesn’t match acceptance criteria; reject and re-prompt with the 404 rule.
2) Correctness and edge cases (Verifier)
Check behavior with small, targeted tests.
- Happy path test exists: The main scenario passes.
- Boundary tests exist: Empty inputs, minimum/maximum values, and missing fields.
- Error mapping is consistent: Exceptions become the correct HTTP status / error type.
- Determinism: Tests don’t rely on timing, randomness, or external services unless explicitly controlled.
Example (edge case gap):
- AI output parses a date string but doesn’t handle invalid formats.
- Verifier adds a test:
"2024-13-01"should produce a validation error. - If the code fails, the fix is required before merge.
3) Code quality and maintainability (Verifier)
Quality checks prevent future “mystery meat”.
- Naming matches domain: Variables and functions use the same vocabulary as the spec.
- Single responsibility: Functions do one thing; helpers are used for clarity.
- No dead code: Unused variables/imports are removed.
- Readable control flow: Avoid deeply nested conditionals when a guard clause works.
Example (maintainability issue):
- AI output uses a long
if/elsechain for validation. - Refactor suggestion: extract validators into small functions and test them individually.
4) Integration and build readiness (Risk Reviewer)
Make sure the output fits the project.
- Imports and dependencies compile: No missing packages or incorrect module paths.
- Type/contract alignment: Function signatures match existing interfaces.
- Configuration assumptions: Environment variables and defaults are correct.
- No silent behavior changes: Logging level, response schema, and error formats remain consistent.
Example (integration mismatch):
- AI output introduces a new response field not present in the API contract.
- Risk reviewer rejects until the response schema matches the established model.
5) Security and safety (Risk Reviewer)
Focus on common failure modes.
- Input handling: Parameters are validated and normalized.
- Injection resistance: SQL queries use parameterization; templates escape user content.
- AuthZ/AuthN correctness: Access checks occur before data retrieval.
- Safe logging: No secrets or raw tokens in logs.
Example (security gap):
- AI output logs the full request body including an API key.
- Risk reviewer requires redaction and adds a test that asserts logs don’t contain the secret.
Mind maps
Mind map: review flow
Mind map: evidence to collect
Concrete review examples
Example A: reviewing a generated function
Generated function goal: “Compute the total price after applying a discount, but never return a negative total.”
Verifier checklist highlights:
- Add tests:
subtotal=100, discount=0→100subtotal=100, discount=100→0subtotal=100, discount=150→0(clamp)
- Confirm error handling:
- If inputs are negative, decide whether to reject or clamp; match the spec.
Risk reviewer checklist highlights:
- Ensure numeric types are safe (no overflow in the chosen language).
- Confirm no rounding surprises: if currency uses cents, operate in integers.
Example B: reviewing generated tests
Problem: AI writes tests that assert the function returns the expected value, but doesn’t test failure modes.
Fix using checklist:
- Author confirms the prompt asked for “validation errors for invalid inputs.”
- Verifier adds tests for invalid inputs and checks that the error type/message matches the project’s conventions.
Example C: reviewing an endpoint
Generated endpoint goal: “Return 404 when a user ID doesn’t exist.”
Common AI mistake: returning 200 with null.
Checklist decision:
- Verifier rejects because acceptance criteria explicitly require 404.
- Author re-prompts with a small rule set:
- “If lookup returns empty, respond with status 404 and body
{error: 'not_found'}.”
- “If lookup returns empty, respond with status 404 and body
- Risk reviewer verifies that the error body matches the API’s standard schema.
A practical “review decision” rubric
Use a simple rubric to avoid endless back-and-forth.
- Approve if:
- All acceptance criteria are covered by tests or explicit code paths.
- Build/lint/type checks pass.
- No security red flags are present.
- Request changes if:
- Behavior is correct but missing edge cases or tests.
- Integration details need alignment (schemas, imports, config).
- Reject and re-prompt if:
- The output contradicts acceptance criteria.
- Core logic is wrong in a way that would require large rewrites.
When reviewers document the exact checklist item that failed, the next prompt can be targeted instead of generic. That’s the difference between “reviewing” and “teaching the model what to do next.”
12.3 Documenting Decisions and Assumptions in Generated Work
Generated code is easiest to trust when you can answer two questions quickly: “Why was this chosen?” and “What must be true for it to work?” Documentation for AI-assisted changes should be short, specific, and tied to the exact artifacts it describes (prompts, generated files, and the resulting behavior).
What to document (and what to skip)
Document decisions that affect behavior, interfaces, or failure modes. Examples include:
- Interface choices: request/response shapes, error formats, naming conventions.
- Assumptions about inputs: required fields, allowed ranges, encoding expectations.
- Tradeoffs: performance vs. simplicity, strict validation vs. permissive parsing.
- Safety choices: escaping rules, authorization checks, logging redaction.
- Test expectations: what the tests prove and what they do not.
Skip documentation that repeats the code line-by-line. If a reader can infer it from types, names, and tests, you don’t need extra prose.
A practical template for decision notes
Use a consistent structure so reviewers can scan it. Keep it in the PR description, a DECISIONS.md file, or a docs/ entry tied to the feature.
Decision Note Template
- Context: What feature or bug is being addressed?
- Decision: What was chosen (one sentence)?
- Assumptions: What must be true?
- Alternatives considered: List 1–3 options and why they were rejected.
- Impact: What changes for callers, storage, or error handling?
- Verification: Which tests/build checks confirm the behavior.
- Known gaps: What is not covered yet.
Mind map: decision documentation workflow
Decision & Assumption Documentation Mind Map
Mind map: what counts as an assumption
Assumptions Mind Map
Examples: turning prompts into decision notes
Example 1: Error handling contract
Generated change: A new endpoint returns structured errors.
Decision note
- Context: Add
POST /v1/invoices. - Decision: Return
400for validation failures with{ code, message, fieldErrors }. - Assumptions:
- Client can handle
fieldErrorsas an array of{ field, reason }. - Validation happens before any side effects.
- Client can handle
- Alternatives considered:
- Return plain strings (rejected: harder for clients to map fields).
- Return
422(rejected: existing API uses400for bad input).
- Impact: Clients should not rely on free-form messages.
- Verification: Unit tests cover missing fields and invalid formats; integration test checks status codes.
- Known gaps: No test for extremely large payloads.
Why this helps: A reviewer can quickly confirm that the generated behavior matches the team’s existing contract, and they can see what was intentionally not covered.
Example 2: Validation strictness
Generated change: A parser accepts either ISO dates or epoch milliseconds.
Decision note
- Context: Parse
startDateandendDatefrom query parameters. - Decision: Accept ISO-8601 dates and epoch milliseconds; reject anything else.
- Assumptions:
- Epoch values are in milliseconds (not seconds).
- Timezone for ISO dates is either explicit or treated as UTC by the date library.
- Alternatives considered:
- Accept seconds too (rejected: ambiguity; would require heuristics).
- Accept only ISO dates (rejected: breaks existing clients).
- Impact: Mixed formats are allowed per field.
- Verification: Table-driven tests cover both formats and invalid strings; property tests ensure round-trip for epoch inputs.
- Known gaps: No test for leap-second edge cases.
Why this helps: The assumption about milliseconds is the kind of detail that can silently break production if it’s wrong.
Example 3: Security-related assumptions
Generated change: A handler logs request metadata.
Decision note
- Context: Add logging for invoice creation attempts.
- Decision: Log
requestId, user id, and endpoint name; never log raw authorization headers. - Assumptions:
- Middleware attaches
userIdto the request context. - Authorization headers are present but should not be persisted.
- Middleware attaches
- Alternatives considered:
- Log full headers (rejected: secrets risk).
- Log only status code (rejected: reduces debugging value).
- Impact: Logs are safe to store in shared environments.
- Verification: Unit test asserts logger receives redacted fields; code review checklist confirms no header logging.
- Known gaps: No test for unusual header casing.
Why this helps: Security documentation should focus on what the code assumes about the environment and what it intentionally avoids.
How to write notes that stay accurate
- Tie notes to artifacts: reference file paths and the specific function or endpoint name.
- Record the “why” only when there’s a tradeoff: if there’s no alternative, the decision note can be one sentence.
- Make assumptions testable: if an assumption isn’t verified, label it as a known gap.
- Prefer concrete statements: “Epoch values are milliseconds” beats “Epoch is supported.”
- Update notes when prompts change: if you regenerate with different constraints, the assumptions may shift.
A reviewer-friendly checklist (quick scan)
- Can I predict the endpoint’s error shape from the notes?
- Are input invariants stated (and do tests cover them)?
- Are security assumptions explicit (and do we avoid logging secrets)?
- Do verification items match the actual test suite and build checks?
- Are known gaps listed without hiding behind vague language?
Good decision documentation doesn’t make the code longer; it makes the code cheaper to review.
12.4 Managing Versioning and Traceability for Generated Changes
Generated code is still code: it needs a paper trail. Versioning tells you what changed and when; traceability tells you why it changed and which prompt, spec, and checks produced the result. Without both, debugging turns into archaeology.
What to track (and why it matters)
- Source of truth: the requirement text, user story, or ticket that triggered generation.
- Example: Ticket
PROJ-1842contains the acceptance criteria for “POST /invoices validates currency codes.”
- Example: Ticket
- Generation inputs: the exact prompt(s), model settings (if applicable), and the project context you provided (files, schemas, snippets).
- Example: You include
Invoiceschema and the existingCurrencyenum; later you can confirm the model had the right constraints.
- Example: You include
- Generated artifacts: file paths, commit hashes, and any intermediate outputs (drafts, patches, test stubs).
- Example:
src/invoices/handler.tsandtests/invoices.test.tswere produced together, not separately.
- Example:
- Validation results: test outcomes, lint/type-check results, and build status.
- Example: The change passes
pnpm testandpnpm lintbut fails one integration test; you record that failure so the next iteration starts from reality.
- Example: The change passes
- Human review decisions: what the reviewer accepted, requested changes for, and any deviations from the original plan.
- Example: Reviewer keeps the error message format but changes the status code mapping.
A practical traceability model
Use a consistent identifier that ties everything together.
- Change ID: a short token you generate per request, like
GEN-1842-01. - Trace record: a small JSON/YAML file stored in the repo (or attached to the PR) that records the inputs and outcomes.
A trace record should include:
changeIdticketspecDigest(a hash of the requirement text)promptDigest(hash of the prompt text)contextDigest(hash of referenced files or a manifest)artifacts(paths)checks(commands and results)reviewNotes(optional)
This keeps traceability stable even if prompts evolve.
Mind map: traceability workflow
Mind map: Versioning + Traceability for Generated Changes
Versioning strategy: keep history readable
Generated changes often touch multiple files. If you commit everything as one blob, you lose the ability to isolate issues. If you split too aggressively, you create dependency confusion. A balanced approach:
- One PR per logical change (per ticket or per acceptance criterion).
- Within the PR, use multiple commits only when they represent meaningful checkpoints.
- Commit A: “Generate handler + DTOs”
- Commit B: “Add tests for validation and error mapping”
- Commit C: “Fix lint/type errors and adjust error messages”
- Avoid rewriting commit messages to hide generation details.
- If a commit is generated, say so in the commit message or PR section.
Example commit messages:
GEN-1842-01: generate invoice validation handler and DTOsGEN-1842-01: add tests for currency validation and error responsesGEN-1842-01: fix type/lint issues and align error mapping
Trace record example (minimal but useful)
Store a trace file alongside the PR or in a dedicated folder like trace/.
{
  "changeId": "GEN-1842-01",
  "ticket": "PROJ-1842",
  "specDigest": "sha256:9c2f...",
  "promptDigest": "sha256:1a7b...",
  "contextManifest": [
    "src/invoices/schema.ts",
    "src/currency/enum.ts",
    "src/invoices/handler.ts"
  ],
  "artifacts": [
    "src/invoices/handler.ts",
    "src/invoices/dto.ts",
    "tests/invoices.test.ts"
  ],
  "checks": {
    "unit": {"cmd": "pnpm test", "result": "pass"},
    "lint": {"cmd": "pnpm lint", "result": "pass"},
    "typecheck": {"cmd": "pnpm typecheck", "result": "pass"}
  },
  "commits": ["a1b2c3d", "d4e5f6g"],
  "reviewNotes": "Reviewer approved status code mapping; kept error message format."
}
How to connect traceability to the PR
In the PR description, include a short “Trace” section:
- Change ID
- Ticket
- Trace file path (or embedded trace record)
- Checks summary (pass/fail)
- Any manual edits that diverged from the generated output
Example PR “Trace” section:
- Change ID:
GEN-1842-01 - Ticket:
PROJ-1842 - Trace file:
trace/GEN-1842-01.json - Checks: unit pass, lint pass, typecheck pass
- Manual edits: adjusted error mapping to match existing API conventions
This makes it easy for reviewers to verify that the generated work aligns with the ticket and that the final code is backed by checks.
Common failure modes (and fixes)
- Trace record missing the spec digest
- Fix: Always hash the exact requirement text you used.
- Context drift (you generated with one version of a file, but the repo later changed)
- Fix: Record a context manifest and commit hash(es for referenced files.
- Artifacts list is incomplete
- Fix: Generate a file list from git diff at the time you create the trace record.
- Checks recorded without commands
- Fix: Store the command strings so another developer can reproduce the same validation.
Mind map: trace record fields
Mind map: Trace record fields
A small, concrete workflow you can repeat
- Create
GEN-<ticket>-<n>. - Freeze the spec text and compute
specDigest. - Save the prompt text and compute
promptDigest. - Create a context manifest of the files you provided.
- Generate code, then run checks.
- Create/update
trace/<changeId>.jsonwith artifacts, checks, and commit hashes. - In the PR description, paste the trace summary and note any manual deviations.
When something breaks later, you can answer three questions quickly: which ticket, which inputs, and which checks. That’s traceability doing its job—quietly, consistently, and without requiring anyone to remember what happened six commits ago.
12.5 End-to-End Example: PR Workflow with AI-Assisted Drafts and Reviews
This example shows a realistic pull request (PR) workflow where AI helps draft changes, but humans keep control of correctness, style, and risk. The goal: add a new endpoint that returns a user’s profile summary, plus tests and a small documentation update.
Scenario
- Repo:
acme-api(Node/TypeScript) - Change: Add
GET /v1/users/:id/summary - Behavior:
- Returns
{ id, displayName, plan, createdAt } - Returns
404when the user does not exist
- Returns
- Constraints:
- Must pass lint and TypeScript checks
- Must include unit tests
- Must follow existing error-handling conventions
Mind map: PR workflow with AI-assisted drafts and reviews
Step 1: Prepare a “reviewable” change request
Start with a short spec that mirrors what reviewers will check. The trick is to include acceptance criteria in a form that can be checked line-by-line.
Issue text (used as AI input):
- Add
GET /v1/users/:id/summary - Response fields:
id,displayName,plan,createdAt createdAtmust be ISO 8601 string- If user not found: return
404with existing error body format - Add unit tests for:
- existing user
- missing user
Reviewer checklist (also used as AI input):
- Route path and HTTP method correct
- Status codes correct
- Response shape matches DTO
- Types compile
- Tests assert exact fields
- No new error-handling style introduced
Step 2: AI drafts the PR description and file plan
AI should produce a PR description that a reviewer can scan quickly. Include a “what changed” list and a “how to verify” list.
Example PR description draft (AI output):
Summary
Adds `GET /v1/users/:id/summary` to return a user profile summary.

Behavior
- 200: `{ id, displayName, plan, createdAt }`
- 404: user not found (uses existing error response format)

Files changed
- `src/routes/users.ts`
- `src/services/users.ts`
- `src/controllers/users.ts`
- `src/dto/users.ts`
- `src/routes/users.summary.test.ts`

How to verify
- Run unit tests: `npm test`
- Confirm lint/typecheck pass: `npm run lint && npm run typecheck`
A human should adjust file paths to match the repo’s actual structure, but the draft is already aligned with the checklist.
Step 3: AI drafts code, but in small, reviewable chunks
Instead of asking for “the whole feature,” request each layer separately: route/controller, service, DTO mapping, then tests. This reduces the chance of a single large mistake.
Route/controller draft
AI produces a handler that calls a service method and maps the result to the response DTO. The reviewer’s job is to check that it uses the repo’s existing error helper.
Example prompt fragment (for controller):
- “Use existing
notFoundError()helper fromsrc/errors/httpErrors.ts.” - “Do not change logging style; follow pattern in
GET /v1/users/:id.”
Controller draft (illustrative):
// src/controllers/users.ts
export async function getUserSummary(req: Request, res: Response) {
  const { id } = req.params;
  const user = await usersService.getUserById(id);

  if (!user) {
    throw notFoundError(`User ${id} not found`);
  }

  res.status(200).json(mapUserToSummaryDto(user));
}
Reviewer notes to check:
throw notFoundError(...)matches existing middleware behaviormapUserToSummaryDtoexists and returnscreatedAtas ISO string
Service + DTO mapping draft
AI drafts mapping logic and ensures field names match the DTO.
DTO mapping example:
// src/dto/users.ts
export function mapUserToSummaryDto(user: User) {
  return {
    id: user.id,
    displayName: user.displayName,
    plan: user.plan,
    createdAt: user.createdAt.toISOString(),
  };
}
Reviewer notes to check:
createdAtis aDatein the domain model; if it’s a string, mapping must change- No extra fields are returned
Step 4: AI drafts tests with explicit assertions
Tests should be deterministic and assert the exact response body. Reviewers should confirm that the test uses the same request/response helpers as other tests.
Test draft (illustrative):
// src/routes/users.summary.test.ts
it('returns 200 with summary for existing user', async () => {
  mockUsersService.getUserById.mockResolvedValue({
    id: 'u1',
    displayName: 'Ava',
    plan: 'pro',
    createdAt: new Date('2024-01-01T00:00:00.000Z'),
  });

  const res = await request(app)
    .get('/v1/users/u1/summary');

  expect(res.status).toBe(200);
  expect(res.body).toEqual({
    id: 'u1',
    displayName: 'Ava',
    plan: 'pro',
    createdAt: '2024-01-01T00:00:00.000Z',
  });
});
404 test (illustrative):
it('returns 404 when user does not exist', async () => {
  mockUsersService.getUserById.mockResolvedValue(null);

  const res = await request(app)
    .get('/v1/users/missing/summary');

  expect(res.status).toBe(404);
  expect(res.body).toMatchObject({
    errorCode: 'NOT_FOUND',
  });
});
Reviewer notes to check:
- The 404 assertion matches the repo’s error body shape (exact vs partial)
- The test doesn’t accidentally pass due to overly broad matching
Step 5: AI-assisted review comments that are actionable
When the PR is opened, AI can draft review comments, but the reviewer should edit them into short, verifiable points.
Example AI-generated review comment set (edited for clarity):
- “Controller throws
notFoundError(...); confirm middleware converts it to the sameerrorCodeused elsewhere.” - “DTO mapping uses
user.createdAt.toISOString(). IfcreatedAtis stored as a string in this repo, this will throw.” - “Test asserts full body for 200 case; good. For 404 case, consider asserting the exact error body fields used by other endpoints.”
- “Route path: ensure it’s registered under the same router prefix as other
/v1/users/:idroutes.”
Step 6: AI helps resolve review feedback with patch-oriented prompts
Instead of re-generating everything, ask for targeted fixes.
Example patch prompt:
- “Only update
mapUserToSummaryDtoand the corresponding test ifcreatedAtis not aDate.” - “Do not change controller logic.”
Example follow-up change: If the domain model uses a string timestamp, mapping becomes:
createdAt: new Date(user.createdAt).toISOString(),
Then the 200 test remains valid because it expects ISO output.
Step 7: Final PR checklist before merge
AI can draft a final checklist, but the human should confirm each item against CI output.
Final verification
-
npm run lintpasses -
npm run typecheckpasses -
npm testpasses - 200 response matches DTO exactly
- 404 response uses existing error format
- No unused imports or dead code
- PR description includes how to verify
Mind map: what reviewers actually look for
This workflow keeps AI useful without turning review into a guessing game. The PR is still “human-owned,” but the drafts reduce the mechanical work: wiring, formatting, and test scaffolding. The reviewer spends time on the few questions that matter—semantics, consistency, and correctness.
13. Automation with Tooling and Agent-Like Execution
13.1 Defining Tool-Use Tasks with Clear Preconditions
Tool-use tasks are the bridge between “the model can write code” and “the system can actually change something safely.” The key is to define what must be true before the tool runs, what the tool is allowed to do, and what evidence proves it worked. When preconditions are explicit, failures become actionable instead of mysterious.
What a “tool-use task” definition must include
A solid task definition has five parts:
- Goal (one sentence): What outcome you want.
- Inputs (concrete artifacts): File paths, parameters, or data structures.
- Preconditions (must be true): Checks that prevent wrong-context actions.
- Tool contract (allowed actions): What the tool may read/write and any limits.
- Success criteria (verifiable): Tests, diffs, or structured outputs.
A good rule of thumb: if someone else could not run the task without guessing, the preconditions are not clear enough.
Preconditions: the difference between “works” and “works here”
Preconditions are not just “the code builds.” They are the specific facts that make the tool’s action correct for this repository and this change.
Common preconditions include:
- Repository state: correct branch, clean working tree, expected files exist.
- Version constraints: dependency versions, API signatures, or schema versions.
- Context constraints: the target function/class name exists and matches the described behavior.
- Safety constraints: no production secrets in logs, no writes outside an allowed directory.
- Workflow constraints: required tests are present, or a lockfile exists.
Mind map: task definition checklist
Example 1: Generate a new endpoint file (with guardrails)
Goal: Create src/api/users.ts with a GET /users handler.
Inputs:
projectRoot: repository root pathopenApiSpecPath:./openapi.yamltargetRoute:/users
Preconditions:
./src/apiexists.openapi.yamlexists and contains aGET /usersoperation.- The project uses the same router style as existing endpoints (e.g.,
router.get(...)). - The tool is not allowed to modify files outside
src/apiandsrc/types.
Tool contract:
- Allowed reads:
openapi.yaml, existing endpoint files. - Allowed writes:
src/api/users.tsonly. - No dependency changes.
Success criteria:
- The file compiles (typecheck passes).
- A unit test exists or is added in
src/api/users.test.ts. - The handler returns the response shape defined in the OpenAPI spec.
Why these preconditions matter:
If GET /users is missing from the spec, generating a handler would create a mismatch that tests might not catch immediately. If the router style differs, the code could compile but fail at runtime.
Example 2: Apply a patch to an existing function (minimal change)
Goal: Add input validation to parseOrderId without changing its external behavior.
Inputs:
filePath:src/parsers/order.tsfunctionName:parseOrderIdvalidationRule: “must reject empty strings and non-matching formats”
Preconditions:
src/parsers/order.tsexists.parseOrderIdexists and is exported.- There is at least one existing test covering
parseOrderId. - The tool may only modify lines within the
parseOrderIdfunction body.
Tool contract:
- Allowed reads: the function body and its tests.
- Allowed writes: only the function body and its test file.
- No refactors outside the function.
Success criteria:
- Existing tests still pass.
- New tests cover:
- empty string
- invalid format
- valid format
- No changes to exported types.
Concrete precondition check:
Before patching, the system should confirm the function body boundaries (e.g., by locating the exact export function parseOrderId( signature). If the signature differs, the task should stop and report the mismatch.
Example 3: Run a formatter and then lint (sequenced tools)
Goal: Ensure generated code is formatted and lint-clean.
Inputs:
paths: list of changed filesformatterCmd:npm run formatlintCmd:npm run lint
Preconditions:
package.jsoncontainsformatandlintscripts.pathsare within the repository.- The working tree is not in the middle of a merge conflict.
Tool contract:
- Formatter may rewrite only the provided paths.
- Lint may read the whole repo but must not modify files.
Success criteria:
- Formatter exits with code 0.
- Lint exits with code 0.
- No unexpected files were modified beyond the provided paths.
Practical detail: To verify “no unexpected files,” capture a file list before and after (or use git status) and compare. This turns a vague “it looks fine” into a measurable check.
A reusable template for task definitions
Use a consistent structure so preconditions are never skipped.
Task: <one-sentence goal>
Inputs:
- <name>: <value or artifact path>
Preconditions (must be true): - <check 1>
- <check 2>
- <check 3>
Tool contract: - Reads: <what the tool may read>
- Writes: <what the tool may write>
- Limits: <timeouts, max files, etc.>
Success criteria: - <verifiable outcome 1>
- <verifiable outcome 2>
Failure handling: - If precondition fails, <stop and report required info>
Failure handling: what to do when preconditions don’t hold
When a precondition fails, the system should not “try anyway.” Instead, it should:
- Report which precondition failed.
- Provide the observed fact (e.g., file missing, signature mismatch).
- Suggest the minimum next action (e.g., “update file path” or “confirm router style”).
This keeps the workflow deterministic: either the tool runs under known conditions, or it stops with a precise reason.
Mind map: precondition types and examples
Putting it together: a short, concrete task definition
Task: Add validation to parseOrderId
Inputs:
- filePath: src/parsers/order.ts
- functionName: parseOrderId
Preconditions (must be true): - filePath exists
- parseOrderId is exported
- at least one test references parseOrderId
- tool may only edit within parseOrderId body
Tool contract: - Reads: order.ts and its test file
- Writes: parseOrderId body + its test file
Success criteria: - tests pass
- new tests for empty string and invalid format
Failure handling: - If any precondition fails, stop and report the missing item
Clear preconditions turn tool-use from a gamble into a controlled procedure. The model can still be creative, but the system decides when creativity is allowed to become code changes.
13.2 Automating Repetitive Edits with Structured Instructions
Repetitive edits are where AI can save real time—if you give it instructions that are specific enough to be checked. The goal is not “write code,” but “apply a transformation” with constraints, so the result is predictable.
What counts as a repetitive edit
These are edits you can describe as a repeatable rule:
- Rename with scope: change
snake_casevariables tocamelCaseonly in one module. - Insert boilerplate: add a missing
try/catcharound a known call site. - Normalize formatting: convert
if (x==null)toif (x === null)across a folder. - Add tests: create a table-driven test for each function variant.
- Refactor patterns: replace
new Foo()withFoo.create()while keeping behavior.
If you can write the rule in plain language and list the exceptions, you can automate it.
The structured instruction recipe
Use a three-part structure every time: Target, Rule, Verification.
1) Target
Tell the model exactly what to edit.
- Provide file paths.
- Provide the minimal snippet that shows the pattern.
- State what not to touch (other folders, comments, generated files).
Example target statement:
Edit only
src/orders/service.ts. Do not change tests insrc/orders/service.test.ts.
2) Rule
Describe the transformation as steps the model can follow.
- Include before → after examples.
- Specify formatting requirements.
- List edge cases.
Example rule statement:
Replace
if (x==null)withif (x === null). Do not changex!=null.
3) Verification
Require a check that can be done mechanically.
- Ask for a diff-style summary.
- Ask it to count replacements.
- Ask it to list files changed.
Example verification statement:
Report how many replacements were made and show the first and last changed lines.
Mind map: turning “edit requests” into reliable transformations
Structured Instructions Mind Map
Example 1: Rename a function call consistently
Scenario: In a TypeScript codebase, you want to rename fetchUser to getUser in one module.
Structured instruction (copy/paste style):
Target:
- File: src/auth/userClient.ts
- Only edit code (not comments)
- Do not change exports or function declarations
Rule:
- Replace calls: fetchUser(…) -> getUser(…)
- Keep argument lists exactly the same
- Do not rename variables named fetchUser
Before/after examples:
- fetchUser(userId) -> getUser(userId)
- await fetchUser(id) -> await getUser(id)
Verification:
- List all lines changed
- Count total replacements
- Confirm no occurrences of
fetchUser(remain in this file
Why this works: the target narrows scope, the rule prevents accidental renames of identifiers, and the verification gives you a quick “did it finish?” signal.
Example 2: Insert missing error handling
Scenario: A function calls payment.charge() but lacks error handling. You want to wrap only that call.
Structured instruction:
Target:
- File: src/billing/checkout.ts
- Edit only the function
submitPayment - Do not change surrounding logic
Rule:
- Find the line: const result = await payment.charge(request)
- Replace it with a try/catch that:
- On success: returns the same
resultvalue - On failure: throws a new Error(‘Payment failed’)
- On success: returns the same
- Preserve the original variable name
result
Edge cases:
- If submitPayment already has try/catch, do not add a second one
Verification:
- Show the updated submitPayment function
- Confirm there is exactly one try/catch block in submitPayment
Reasoning: you’re not asking for a redesign; you’re asking for a localized transformation with explicit success and failure behavior.
Example 3: Normalize equality operators across a folder
Scenario: You want to convert == null to === null and != null to !== null.
Structured instruction:
Target:
- Folder: src/
- Only files matching: *.ts and *.tsx
- Exclude: src//generated/
Rule:
- Replace
x == nullwithx === null - Replace
x != nullwithx !== null - Do not change
x === nullorx !== null - Do not change other equality operators (==, !=) unless they involve null
Verification:
- Provide a count of each replacement type
- List files that had changes
- Include 3 representative before/after snippets
Reasoning: the rule is constrained to null comparisons, which prevents broad, risky edits.
Example 4: Add tests for each function variant
Scenario: A module has three parsing functions. Each needs a table-driven test for invalid input.
Structured instruction:
Target:
- File: src/parsers/index.ts (read-only)
- Test file: src/parsers/index.test.ts (edit)
Rule:
- For each exported parser function
parseA,parseB,parseC:- Add a table-driven test case for invalid input
- Expect the same error type used elsewhere in this test file
- Use the existing test helpers and naming conventions
Before/after example:
- Follow the structure of the existing test block for
parseA
Verification:
- Confirm there are 3 invalid-input test cases total
- Ensure test names are unique
- Do not change existing passing tests
Reasoning: tests are repetitive, but they’re also easy to break. Tying the structure to an existing block reduces variance.
Practical batching strategy
Run one rule per pass. If you combine renames, formatting, and logic changes in a single request, verification becomes fuzzy and failures become harder to interpret.
A good batch size is “one folder” or “one file,” depending on how consistent the pattern is. When a run fails verification, adjust the target or exceptions, then rerun.
Quick checklist for structured edits
- I can point to the exact files and snippets.
- I wrote a before/after example.
- I listed exceptions and exclusions.
- I specified a mechanical verification step.
- I asked for a minimal output (diff summary or updated function), not a full rewrite.
13.3 Orchestrating Multi-Step Workflows with Guardrails
Multi-step generation is where things usually go wrong: the model produces something plausible, but later steps silently assume earlier ones were correct. Guardrails make the workflow “fail loudly” when assumptions break, and “fail usefully” by telling you what to fix.
The orchestration pattern: plan → act → verify → repair
A practical workflow for code generation looks like this:
- Plan: produce a short checklist of steps and explicit acceptance criteria.
- Act: generate artifacts step-by-step (design, code, tests, docs).
- Verify: run checks that are cheap and deterministic first.
- Repair: feed failures back with targeted instructions and minimal context.
The key is that each step has a contract: what must be true before moving on, and how you’ll detect violations.
Guardrails that actually help
Use guardrails at three levels: inputs, outputs, and transitions.
1) Input guardrails (prevent bad starts)
- Scope lock: specify what the model must not change (e.g., “do not modify existing public APIs”).
- Context budget: provide only the files and snippets needed for the current step.
- Assumption list: require the model to list assumptions it is making about missing details.
Example prompt fragment for scope lock:
“You may add new files and internal helpers, but do not change the existing route paths or request/response JSON shapes. If you need a new field, ask a question instead of inventing it.”
2) Output guardrails (make results checkable)
- Structured outputs: require headings or JSON blocks for plans, file lists, and test expectations.
- Format constraints: enforce imports, naming, and return types.
- Completeness checks: require the model to enumerate what it generated (files, functions, test cases).
Example output checklist request:
“After generating code, list: (a) every file created/edited, (b) each new public function signature, and (c) the tests that cover success and failure paths.”
3) Transition guardrails (stop cascading errors)
- Gate conditions: do not proceed unless verification passes.
- Failure classification: categorize errors (type mismatch, failing test, lint violation, missing dependency).
- Repair budget: limit iterations per step to avoid endless churn.
A simple rule: if tests fail, do not regenerate the whole module; regenerate only the failing function or test expectation.
Mind map: guardrailed orchestration
A concrete workflow example: add a “cancel order” endpoint
Assume you’re adding an endpoint POST /orders/{id}/cancel.
Step 1: Plan with acceptance criteria
Ask for a plan that includes explicit gates:
- Gate A: endpoint validates input and returns correct status codes.
- Gate B: business rule prevents canceling already-shipped orders.
- Gate C: tests cover success and each failure mode.
Example plan prompt:
“Create a step-by-step plan to implement POST /orders/{id}/cancel. Include acceptance criteria and list assumptions about the Order model fields and status enum. Do not write code yet.”
Guardrail: require the model to list assumptions. If it assumes a field like status, but your code uses state, you catch it before any code is generated.
Step 2: Act—generate only the minimal design
Request a small design artifact:
- endpoint handler behavior
- service method signature
- error mapping table (domain error → HTTP response)
Example design request:
“Provide a design with: (1) handler pseudocode, (2) service method signature, (3) error-to-HTTP mapping. Keep it to 15–25 lines.”
Guardrail: keep the design short so it’s easy to review and less likely to drift.
Step 3: Act—generate code with patch boundaries
Instead of “rewrite the controller,” instruct patch behavior:
- add a new route registration line
- add handler function
- add service method
Example patch prompt:
“Generate a patch: show only the code blocks that must be added or modified. Do not reformat unrelated files. Include imports only for the changed files.”
Guardrail: patch boundaries reduce accidental changes.
Step 4: Verify—run checks in a strict order
Verification order matters:
- Type/lint (fast, deterministic)
- Unit tests for the service and handler
- Integration test for the endpoint
If lint fails, repair only the lint issues. If unit tests fail, repair the specific failing test or function.
Example repair instruction when tests fail:
“Here is the failing test output. Classify the failure (wrong status code, wrong error mapping, or business rule). Then propose a minimal code change to fix only that behavior. Do not regenerate unrelated functions.”
Step 5: Repair—targeted iteration with a repair budget
Set a limit like “max 2 repairs per step.” After that, you switch strategies: inspect the code manually, or ask for a revised plan.
Example repair budget policy:
- Step 3 (code): up to 2 repair rounds
- Step 4 (tests): up to 2 repair rounds
- If still failing: stop and request a new plan that includes a corrected error mapping table.
Mind map: the repair decision tree
A compact “orchestrator” checklist you can reuse
- Before acting: confirm scope lock, context budget, and assumptions.
- Before moving on: require a gate condition to pass (lint/type or a specific test subset).
- During repair: classify the failure and patch minimally.
- After each successful step: summarize what changed and what is now guaranteed.
This approach keeps the workflow from turning into a chain reaction of plausible but incorrect edits, and it makes each iteration cheaper to understand.
13.4 Capturing Artifacts and Logs for Auditable Runs
Auditable runs mean you can answer three questions after the fact: What happened? Why did it happen? What changed? The trick is to capture evidence at the same time you execute, not after you notice something went wrong.
What to capture (artifacts)
Treat artifacts as the “paper trail” of a run. A good minimum set looks like this:
- Run manifest: a single file that records run metadata (timestamp, repo commit, tool versions, model name if applicable, and the exact command or workflow entrypoint).
- Inputs snapshot: the exact prompts/specs/config used, plus any environment variables that affect behavior.
- Generated outputs: files created or modified, stored with paths and content hashes.
- Intermediate steps: plans, patch proposals, and tool calls (even if you later discard them).
- Test results: raw logs and a structured summary (pass/fail counts, failing test names, exit codes).
- Review notes: the checklist results and any human decisions that affect acceptance.
A practical rule: if you can’t reconstruct the run from your artifacts, you don’t have an audit trail yet.
What to capture (logs)
Logs are the time-ordered narrative. Artifacts are the evidence; logs are the timeline.
Capture logs at three layers:
- Orchestrator logs: each step start/end, command lines, tool invocation parameters, and exit codes.
- Tool logs: stdout/stderr from linters, compilers, test runners, and formatters.
- Decision logs: why a step was chosen (e.g., “patch applied because unit tests failed with X”).
Decision logs should be short and specific. “Tried something” is not a decision. “Applied patch because type checker reported mismatch in function signature” is.
A mind map for auditable runs
Directory layout that stays readable
Use a run folder with predictable names. Example:
runs/2026-03-23T14-22-10Z/manifest.jsoninputs/spec.mdprompt.txtenv.json
steps/01_plan/plan.md02_generate/patch.diff03_test/test.log04_fix/fix.log
outputs/changed_files/diffs/
summary.json
This layout makes it easy to compare runs and to locate the exact failing command.
Capturing diffs and hashes
When you store generated outputs, store both diffs and content hashes.
- Diffs answer: “What changed?”
- Hashes answer: “Did the file content match what we recorded?”
A simple approach:
- For each changed file, save:
pathbefore_hashafter_hashdiff_path
If a later step claims it used an earlier generated file, you can verify it by comparing hashes.
Example: a run manifest (JSON)
{
  "run_id": "2026-03-23T14-22-10Z",
  "repo": "my-service",
  "git_commit": "a1b2c3d4",
  "entrypoint": "./scripts/ai_feature.sh --ticket T-184",
  "tool_versions": {
    "node": "20.11.1",
    "python": "3.12.2",
    "eslint": "9.1.0"
  },
  "model": {
    "name": "gpt-4.1-mini",
    "temperature": 0.2
  },
  "started_at": "2026-03-23T14:22:10Z",
  "workspace": "runs/2026-03-23T14-22-10Z"
}
Keep the manifest small but complete. If you omit something that affects behavior, you’ll end up guessing later.
Example: step logging with exit codes
A step log should record the command and the result. Here’s a compact pattern:
{
  "step": "03_test",
  "command": "npm test",
  "started_at": "2026-03-23T14:23:02Z",
  "ended_at": "2026-03-23T14:23:18Z",
  "exit_code": 1,
  "artifacts": {
    "log": "steps/03_test/test.log",
    "summary": "steps/03_test/test-summary.json"
  }
}
When exit codes are captured consistently, you can automate routing: retry generation only when failures match known categories.
Example: decision logs that don’t ramble
Decision logs should connect an observation to an action.
{
  "event": "fix_strategy_selected",
  "trigger": "TypeScript error TS2345 in src/api/user.ts",
  "evidence": "steps/03_test/test.log",
  "action": "Regenerate function signature and update call sites",
  "patch_input": "inputs/prompt.txt"
}
This format helps reviewers trust the workflow without reading every line of output.
Capturing tool calls (when you use them)
If your workflow calls tools (formatters, code generators, patch appliers), log the parameters and store the raw outputs. For example, store:
- the exact command line
- the working directory
- stdout/stderr
- any generated files produced by the tool
Even if the tool is deterministic, logging parameters prevents “works on my machine” archaeology.
A mind map for “where the evidence lives”
Putting it together: a minimal auditable run checklist
Before you call it done, verify these items exist in the run folder:
manifest.jsonexists and includes repo commit + tool versions.inputs/contains the exact spec/prompt/config used.steps/contains logs for every executed command.outputs/contains diffs or changed-file snapshots.summary.jsonincludes test results and the final status.
If any item is missing, the run is not auditable; it’s just a story.
Example: summary.json
{
  "run_id": "2026-03-23T14-22-10Z",
  "final_status": "failed",
  "tests": {
    "total": 128,
    "passed": 127,
    "failed": 1,
    "failing_tests": ["UserParser rejects invalid date"]
  },
  "last_step": "04_fix",
  "artifacts": {
    "test_log": "steps/03_test/test.log",
    "fix_log": "steps/04_fix/fix.log",
    "diffs": "outputs/diffs/"
  }
}
A summary is not a replacement for logs; it’s a fast way to locate the relevant evidence.
Practical note: keep logs consistent across steps
Consistency matters more than volume. Use the same field names for step identifiers, timestamps, and exit codes. When you do, you can scan runs quickly and write small scripts to compare outcomes without re-parsing everything by hand.
13.5 End-to-End Example: Generate, Test, and Fix a Feature in One Run
Scenario
You’re adding a feature to an existing web service: create a “project” via POST /projects. The service uses a simple in-memory store for now, but it already has request validation, error formatting, and a test harness.
Goal: Given a JSON body like {"name":"Atlas","ownerId":"u1"}, the endpoint should:
- Validate required fields.
- Create a project with a generated
id. - Return
201with the created object. - Return
400with a consistent error shape for invalid input.
Mind map: one-run workflow
One-run workflow mind map
Step 1: Write a precise prompt for the change
Use a prompt that includes: existing file names, expected behavior, and the error shape. Here’s a compact prompt you can paste into your tool.
Prompt (copy/paste):
- “Add
POST /projects. - Files to edit:
src/routes/projects.ts,src/services/projects.ts,src/store/projects.ts,tests/projects.test.ts. - Use existing error helper
formatError(code, message, details). - Request body:
{ name: string, ownerId: string }. - Validation rules:
namenon-empty, max 80 chars;ownerIdnon-empty. - On success: return status 201 and
{ id, name, ownerId, createdAt }. idcan be a simple incrementing string for now.- On validation failure: return 400 with
{ error: { code, message, details } }usingformatError. - Add tests for: valid request, missing name, empty name, missing ownerId, and empty ownerId.”
The key detail is the error helper and the exact file list. That reduces “creative interpretation” and keeps the model aligned with your project’s conventions.
Step 2: Generate code and tests together
Generate in two passes: first the core implementation, then the tests. This keeps failures localized.
Implementation expectations (what you should see)
src/routes/projects.ts- Defines the route.
- Calls a service method like
createProject({ name, ownerId }). - Catches validation errors and returns
400usingformatError.
src/services/projects.ts- Performs validation (or delegates to a validator if the project already has one).
- Calls
store.create(...).
src/store/projects.ts- Implements
createProjectwith an incrementingidandcreatedAt.
- Implements
tests/projects.test.ts- Uses the existing HTTP test client.
- Asserts status codes and response bodies.
Step 3: Example tests (happy + unhappy paths)
Assume the test harness already provides request(app) and a JSON parser.
// tests/projects.test.ts
describe('POST /projects', () => {
  it('creates a project', async () => {
    const res = await request(app)
      .post('/projects')
      .send({ name: 'Atlas', ownerId: 'u1' });

    expect(res.status).toBe(201);
    expect(res.body).toEqual(
      expect.objectContaining({
        id: expect.any(String),
        name: 'Atlas',
        ownerId: 'u1',
        createdAt: expect.any(String)
      })
    );
  });

  it('returns 400 when name is missing', async () => {
    const res = await request(app)
      .post('/projects')
      .send({ ownerId: 'u1' });

    expect(res.status).toBe(400);
    expect(res.body.error.code).toBe('VALIDATION_ERROR');
  });
});
You’ll add the remaining cases similarly, but with one important discipline: assert the error code and one stable field (like message or details). Don’t assert the entire error object if it includes variable text.
Step 4: Run tests and capture failures
Run the test suite once. In a real project, you’ll likely see one of these common issues:
- The route returns
200instead of201. - Validation happens in the wrong layer, so the error shape differs.
- The response omits
createdAt. - The store generates
idas a number but tests expect a string.
Assume the first run fails with:
Expected status 201, received 200createdAt is undefined
Step 5: Fix with minimal changes
Make a small patch, then rerun tests.
Fix 1: status code
If POST /projects returns 200, change the route handler to use res.status(201).json(...).
Fix 2: createdAt
If createdAt is missing, ensure the store sets it and the service returns it.
Here’s a minimal store shape that matches the test expectation:
// src/store/projects.ts
let nextId = 1;
const projects = new Map();

export function createProject({ name, ownerId }) {
  const id = String(nextId++);
  const createdAt = new Date().toISOString();
  const project = { id, name, ownerId, createdAt };
  projects.set(id, project);
  return project;
}
After these changes, rerun tests.
Step 6: Handle the next failure (error shape)
Suppose the validation test fails because res.body.error.code is undefined. That usually means the route isn’t wrapping errors with the same helper.
Fix the route to catch validation exceptions and call formatError.
// src/routes/projects.ts
router.post('/projects', async (req, res) => {
  try {
    const project = await createProject(req.body);
    return res.status(201).json(project);
  } catch (err) {
    const formatted = formatError('VALIDATION_ERROR', err.message, err.details);
    return res.status(400).json({ error: formatted });
  }
});
Now rerun tests again.
Step 7: Final verification checklist
Before calling the run “done,” confirm:
- All tests pass.
- Status codes match the spec (
201for success,400for validation). - Response includes
id,name,ownerId,createdAt. - Error responses follow
{ error: { code, message, details } }.
Mind map: fix loop decision points
What “one run” produces
By the end, you have a complete vertical slice: route → service → store → tests. The feature is not only implemented, but also constrained by tests that encode the expected behavior, including the parts that tend to drift (status codes, stable error fields, and response shape).
14. Operational Readiness and Deployment-Oriented Code
14.1 Configuration Management and Environment Separation
Configuration is the part of your system that changes when you move from your laptop to staging to production—without changing the code. The goal of environment separation is simple: the same application artifact should run everywhere, while only configuration values differ.
Why environment separation matters
When configuration is mixed into code, you get a familiar set of problems: rebuilds for every environment, accidental use of production credentials in tests, and “works on my machine” behavior caused by hidden defaults. Separation forces you to make differences explicit and reviewable.
A practical rule: if a value can change between environments, it should be provided from outside the program.
The configuration layers model
Think in layers, from most stable to most variable:
- Code defaults: safe fallbacks that keep local development usable.
- Environment overrides: values supplied by the runtime environment.
- Secrets: sensitive values provided through a secrets mechanism.
- Runtime flags: optional toggles that change behavior without redeploying (use sparingly).
A good configuration design makes it obvious which layer a value comes from.
Mind map: configuration and environment separation
Mind map: Configuration Management
Naming conventions that prevent mistakes
Environment separation fails most often due to inconsistent naming. Pick a convention and stick to it.
A common pattern is:
APP_ENV(e.g.,local,test,staging,production)APP_prefix for all app variablesAPP_DB_URL,APP_HTTP_PORT,APP_LOG_LEVELAPP_FEATURE_X_ENABLEDfor toggles
Example (local):
APP_ENV=localAPP_HTTP_PORT=8080APP_DB_URL=postgres://localuser:localpass@localhost:5432/appdb
Example (production):
APP_ENV=productionAPP_HTTP_PORT=8080APP_DB_URLpoints to the production database
The key is that code reads the same variable names in every environment.
Configuration files vs environment variables
Use config files for non-secret settings that benefit from versioning and review (like feature defaults). Use environment variables for values that are environment-specific and easy to inject at deploy time.
A clean approach:
- Keep
config.default.ymlin the repo (non-secret defaults). - Keep
config.<env>.ymlfor non-secret overrides if you need them. - Provide secrets only through the secrets mechanism or environment variables injected at runtime.
Example: layered config resolution
Suppose your app needs:
- database URL
- log level
- allowed CORS origins
Resolution order:
- Start with defaults in code.
- Overlay non-secret config file for the environment.
- Overlay environment variables.
- Overlay secrets for sensitive values.
- Validate everything.
This order makes it predictable which value wins.
Fail-fast validation at startup
If configuration is wrong, the application should stop immediately with a clear message. “Fail fast” is not a slogan here; it prevents partial startup that later fails in confusing ways.
Validate:
- required keys exist
- values have correct formats (ports are integers, URLs parse)
- mutually exclusive settings aren’t both enabled
- environment-specific constraints are respected (e.g.,
APP_ENV=productionmust not allow insecure debug mode)
Example: startup validation logic (pseudo-code)
load config from layers
required = ["APP_ENV", "APP_DB_URL", "APP_HTTP_PORT"]
for key in required:
  if missing(config[key]):
    error("Missing required config: " + key)

if not isInteger(config["APP_HTTP_PORT"]):
  error("APP_HTTP_PORT must be an integer")

if config["APP_ENV"] == "production" and config["APP_DEBUG"] == true:
  error("APP_DEBUG cannot be true in production")

start application
Same artifact, different configuration
To keep deployments consistent, build once and run many. The artifact should not embed environment-specific values.
A common anti-pattern is baking environment variables into a compiled bundle at build time. Instead, read configuration at runtime.
Example: avoiding build-time environment coupling
Bad approach:
- Build step reads
APP_DB_URLfrom your machine. - The compiled artifact contains that URL.
Better approach:
- Build step produces the same artifact regardless of environment.
- Runtime reads
APP_DB_URLfrom injected variables.
Environment separation checklist
Use this checklist when adding a new configuration value.
- Is it environment-specific? If yes, it must come from outside the code.
- Is it secret? If yes, do not store it in repo files.
- What is the default? Provide a safe default only for local development.
- How is it validated? Ensure startup checks catch missing or invalid values.
- How is it logged? Never log secrets; log only whether a value is present.
Example: safe logging
Instead of logging the database URL, log:
DB configured: yesDB host: <hostname>(if you can do so without exposing secrets)
Concrete example: three environments with one codebase
Assume these settings:
APP_ENVAPP_HTTP_PORTAPP_DB_URLAPP_CORS_ORIGINSAPP_DEBUG
Local:
APP_ENV=localAPP_HTTP_PORT=8080APP_DB_URL=postgres://...@localhost:5432/appdbAPP_CORS_ORIGINS=http://localhost:3000APP_DEBUG=true
Test:
APP_ENV=testAPP_HTTP_PORT=0(let the system choose a free port)APP_DB_URL=postgres://...@localhost:5433/appdb_testAPP_CORS_ORIGINS=http://localhost:3001APP_DEBUG=false
Production:
APP_ENV=productionAPP_HTTP_PORT=8080APP_DB_URL=postgres://...@prod-db/appdbAPP_CORS_ORIGINS=https://example.comAPP_DEBUG=false
Notice what stays consistent: variable names and validation rules. What changes: values.
Mind map: common configuration pitfalls
Mind map: Pitfalls to avoid

Summary
Environment separation is achieved by treating configuration as input: explicit, validated, and provided from outside the program. When you combine consistent naming, layered resolution, startup validation, and a “same artifact everywhere” deployment approach, you reduce both operational risk and debugging time—without changing how your developers write code.
14.2 Observability: Logging, Metrics, and Error Reporting
Observability is what lets you answer three questions quickly: What happened? Where did it happen? How bad is it? Logging, metrics, and error reporting each cover a different slice of that. The trick is to make them agree on identifiers, timestamps, and severity so you can connect dots without reading tea leaves.
Logging: useful by default
Good logs are structured, scannable, and bounded. “Bounded” means you don’t accidentally dump entire request bodies or create infinite log volume.
Logging best practices (with examples):
-
Log at the right level
DEBUG: internal state useful during development.INFO: meaningful events (request accepted, job started).WARN: something unexpected but not failing the request.ERROR: request failed, background job failed, or an invariant broke.
-
Use structured fields, not only sentences Prefer key-value fields so filters and dashboards work.
-
Include correlation identifiers Add
trace_id(orrequest_id) to every log line tied to a request. -
Log the minimum necessary context Example: log
user_idandorder_id, not full objects. -
Avoid duplicate noise If you log an error once at the point of failure, don’t log the same error again at every layer. Log layers should add context, not repeat the same message.
Example: request logging (JSON-style fields)
INFO  request.start  trace_id=9f3a... method=POST path=/api/orders user_id=42
WARN  request.validation trace_id=9f3a... field=quantity reason="must be > 0"
INFO  request.end    trace_id=9f3a... status=400 duration_ms=12
A small detail that pays off: log duration_ms at the end. It’s a cheap metric that helps you spot slow endpoints even before you wire full metrics.
Metrics: numbers that answer “how much”
Metrics are for trends and rates. Logs are for investigation. If you find yourself counting errors by reading logs, you’re already doing metrics work manually.
Core metric types:
- Counters: “How many times?” (e.g., total requests, total failures)
- Gauges: “What is the current value?” (e.g., queue depth)
- Histograms/Summaries: “How long did it take?” (e.g., latency distribution)
Metric best practices (with examples):
-
Name metrics by intent, not implementation Use
http_requests_totalrather thancount_of_something_in_code. -
Label carefully Labels should help you slice data without exploding cardinality. Logging
user_idas a metric label is usually a bad idea; loggingrouteandstatusis usually fine. -
Track both volume and quality For an endpoint, track:
- request count
- error count
- latency distribution
-
Separate client errors from server errors A spike in
400might indicate a frontend bug or user behavior. A spike in500indicates server trouble.
Example: endpoint metrics (conceptual)
http_requests_total{route="/api/orders", method="POST", status="200"}http_requests_total{route="/api/orders", method="POST", status="400"}http_requests_total{route="/api/orders", method="POST", status="500"}http_request_duration_ms_histogram{route="/api/orders", method="POST"}
When you later set alerts, you’ll want stable denominators. For example, alert on error rate rather than raw error count if traffic varies.
Error reporting: making failures searchable and actionable
Error reporting systems (or internal equivalents) collect exceptions and stack traces. The goal is not to store everything; it’s to make failures deduplicated, grouped, and triage-friendly.
Error reporting best practices (with examples):
-
Group by a stable signature Grouping by message text alone is brittle. Prefer grouping by exception type plus a normalized location (e.g., file/function) and a key context.
-
Attach the right context Add fields like
trace_id,route,user_id(if appropriate), and a small set of request parameters. -
Include a “what we were doing” breadcrumb Example:
action="create_order"is more useful thanaction="something". -
Capture both the exception and the outcome If the system returns a
400due to validation, that’s not an exception worth reporting as a server error. Reserve error reporting for failures that represent unexpected behavior or broken invariants.
Example: error event payload
ERROR  exception  trace_id=9f3a... action=create_order
exception_type=DatabaseTimeout
route=/api/orders
status=500
context={"retryable":true,"attempt":1}
A practical rule: if the error handler can map the failure to a user-facing response, include that mapping in the event. It helps you confirm whether the system is failing safely.
Making the three pieces work together
The most common observability failure is inconsistency: logs use one identifier, metrics use another, and error reports omit both. You want a simple contract.
A minimal consistency checklist:
- Every request has a
trace_id. - Every log line related to the request includes
trace_id. - Metrics include labels that match the same routing concept used in logs (e.g.,
routenotpathif you normalize). - Error events include
trace_idand the sameroutelabel.
Mind map: observability components and their responsibilities
A concrete walkthrough: one failing endpoint
Imagine POST /api/orders sometimes fails when the database times out.
-
Log the start and end
request.startincludestrace_id,user_id, and route.request.endincludesstatusandduration_ms.
-
Record metrics
- Increment request counter with
status=500. - Observe latency in the histogram.
- Increment request counter with
-
Report the exception
- Capture
DatabaseTimeoutwithtrace_id,action=create_order, androute. - Mark it as retryable if your handler retries.
- Capture
Example: combined view (what you’d see across systems)
Logs:
INFO request.start trace_id=9f3a... route=/api/orders user_id=42
ERROR create_order failed trace_id=9f3a... exception=DatabaseTimeout
INFO request.end trace_id=9f3a... status=500 duration_ms=842

Metrics:
http_requests_total{route="/api/orders",status="500"} += 1
http_request_duration_ms_histogram{route="/api/orders"} observe(842)

Error report:
group=DatabaseTimeout@create_order
trace_id=9f3a...
context={"retryable":true,"attempt":1}
Notice the pattern: logs give the timeline, metrics quantify the impact, and error reporting gives you a searchable failure group. When these agree on trace_id and route, you can move from alert to root cause without switching mental models.
14.3 Handling Retries, Timeouts, and Idempotency
Retries, timeouts, and idempotency are the three knobs that keep automated systems from either giving up too early or accidentally doing the same work twice. The goal is simple: when something fails, you want to retry safely, stop at the right time, and ensure repeated attempts don’t corrupt state.
Mind map: failure-handling decisions
Timeouts: stop waiting with intent
A timeout is not “make it faster.” It’s a contract: the caller will stop waiting after a defined budget. Without it, retries can stack up and turn a temporary slowdown into a full outage.
Use multiple timeouts, not one big guess. For HTTP calls, separate connect time from response time. A connect timeout catches routing or DNS issues quickly; a read timeout catches slow downstream processing.
Example: HTTP client budgets
- Connect timeout: 2s
- Read/response timeout: 5s
- Total timeout: 6s (includes overhead)
If you only set a total timeout, you lose visibility into which phase is failing, and you make tuning harder.
Timeout tuning rule of thumb: set timeouts slightly above the 95th percentile of normal latency, but never so high that one request ties up a worker for too long. If your service has a 30s request budget, a 25s downstream timeout leaves little room for retries, logging, and cleanup.
Retries: retry only the failures that deserve it
Retries should be conditional. Retrying everything is like re-pressing the elevator button repeatedly while the doors are already closing.
Retryable categories (typical):
- Network interruptions (connection reset, DNS hiccups)
- Timeouts
- Temporary server overload (often 429, 503, 504)
Usually not retryable:
- 400-series validation errors (bad input, missing fields)
- 401/403 authorization failures
- 404 when the resource truly doesn’t exist
Example: retry policy sketch
- If the request timed out: retry up to 2 times
- If status is 429: retry after
Retry-Afterif present, else use backoff - If status is 503/504: retry with backoff
- If status is 400/422: do not retry; return error
Backoff with jitter:
- Attempt 1: immediate
- Attempt 2: wait 200ms–800ms
- Attempt 3: wait 600ms–2s
Jitter prevents a thundering herd where many callers retry in lockstep.
Idempotency: make repeated attempts safe
Retries can cause duplicate side effects unless you design for idempotency. Idempotency means: repeating the same operation produces the same outcome as the first attempt.
There are two common approaches:
- Idempotency keys: the client sends a unique key per logical operation.
- Idempotent design: the operation is naturally safe to repeat (e.g., “create if not exists” semantics).
Idempotency keys are usually the most practical for “create” or “charge” style operations.
Mind map: idempotency key lifecycle
Concrete example: payment-like endpoint
Assume an endpoint POST /charges that creates a charge record and triggers downstream processing. Without idempotency, a timeout could lead to two charges.
Client behavior:
- Generate
Idempotency-Keyonce per user action. - Reuse the same key for retries.
Server behavior:
- On first request: create a record and store the response.
- On duplicate: return the stored response.
Minimal server-side flow (pseudocode)
on POST /charges:
  key = request.header("Idempotency-Key")
  assert key is present and valid

  existing = find_charge_by_key(user_id, key)
  if existing:
    return existing.stored_response

  begin transaction
    create charge row with status="processing"
    store idempotency key mapping
  commit

  result = call downstream processor

  update charge row with final status and result
  store response payload for this key
  return response
Why store the response, not just “success”: clients often need the charge id, confirmation URL, or error details. Returning the same payload for duplicates avoids confusing mismatches.
Handling timeouts and retries together
A common mistake is retrying after a timeout without idempotency. If the downstream actually completed but the response didn’t arrive in time, the retry repeats the side effect.
Safe pattern:
- Use idempotency keys for any operation that changes state.
- Treat timeouts as “unknown outcome,” and rely on idempotency to converge.
Example: retrying with idempotency
- Client sends
Idempotency-Key: 3f2a... - First attempt times out at the client
- Client retries with the same key
- Server returns the stored response from the first attempt
From the client’s perspective, the second response matches the first logical outcome.
Idempotency for non-HTTP or internal calls
The same idea applies to message processing and internal jobs. If a worker might re-run a task after a crash, store a deduplication record keyed by (task_type, business_id, idempotency_key).
Example: background job
- Task: “Send invoice email for invoice_id=123”
- Idempotency key:
invoice_id + template_version - Dedup table prevents sending twice
Operational details that prevent subtle bugs
- Scope the key correctly. A key should be unique per logical action and scoped to the authenticated user or tenant. Reusing a key across users can leak results.
- Decide what to do when a key is “in progress.” You can either wait briefly, or return a status indicating the client should retry later. The important part is consistency.
- Cap retries. Infinite retries turn transient issues into persistent load.
- Log correlation identifiers. When debugging, you need to connect the client request, retry attempt, and stored idempotency record.
Quick checklist
- Timeouts: separate connect vs response; set budgets that match your service constraints.
- Retries: retry only network/timeouts and clearly temporary status codes; use backoff + jitter; cap attempts.
- Idempotency: for any state-changing operation, require an idempotency key and return the stored response for duplicates.
- Unknown outcomes: treat timeouts as “may have succeeded,” and rely on idempotency to make retries safe.
14.4 Generating Health Checks and Operational Endpoints
Health checks are small, boring endpoints that answer one question: “Is this service able to do its job right now?” Operational endpoints answer a slightly broader question: “What’s going on, and what should we look at first?” The trick is to keep both predictable, low-cost, and safe.
Health check types: readiness vs. liveness
Use two distinct endpoints so your orchestrator and your humans don’t step on each other.
- Liveness answers: “Is the process alive and not stuck?” It should be fast and not depend on external systems.
- Readiness answers: “Can this service handle real traffic?” It may check dependencies like databases, caches, or required background workers.
A common mistake is making liveness depend on the database. If the database is down, the service would restart repeatedly even though the process itself is fine.
What to include in each check
Liveness checklist
- Event loop / thread responsiveness (e.g., can you acquire a lock quickly?)
- Basic internal invariants (e.g., required in-memory structures initialized)
- No network calls
Readiness checklist
- Database connectivity (or a lightweight query)
- Cache connectivity (if required for correctness)
- Ability to reach required internal services (only if the service cannot function without them)
- Background workers started (if requests depend on them)
Return a structured response so monitoring systems can parse it without guessing.
Example response shape:
status:"ok"or"degraded"or"fail"checks: list of named checks withstatus,durationMs, and optionalerrortimestamp: server time
Mind map: health and operational endpoints
Health & Operational Endpoints Mind Map
HTTP status codes and response rules
Pick a simple mapping and stick to it.
- 200: service is healthy for that endpoint
- 503: service is not ready (or liveness failed)
- 429 (optional): diagnostics endpoints rate-limited
For readiness, you can use "degraded" when the service can handle traffic but with reduced capability. If you do, keep the behavior consistent: degraded should still return 200 only if you truly want traffic routed to it.
Example: minimal endpoints in a typical web service
Below is a compact example showing the separation between liveness and readiness, plus an operational diagnostics endpoint that avoids secrets.
from time import time
from threading import Lock

lock = Lock()

def liveness_check():
    start = time()
    acquired = lock.acquire(timeout=0.01)
    if acquired:
        lock.release()
    return {
        "name": "lock_responsive",
        "status": "ok" if acquired else "fail",
        "durationMs": int((time() - start) * 1000),
    }

def readiness_check(db_client, cache_client, worker):
    checks = []
    checks.append(db_client.ping())
    checks.append(cache_client.ping())
    checks.append(worker.is_running())
    return checks
And the endpoints:
from datetime import datetime

def health_response(status, checks):
    return {
        "status": status,
        "checks": checks,
        "timestamp": datetime.utcnow().isoformat() + "Z",
    }

def healthz_live(request):
    c = liveness_check()
    ok = c["status"] == "ok"
    return (health_response("ok" if ok else "fail", [c]), 200 if ok else 503)

def healthz_ready(request, db_client, cache_client, worker):
    checks = readiness_check(db_client, cache_client, worker)
    ok = all(ch["status"] == "ok" for ch in checks)
    status = "ok" if ok else "fail"
    return (health_response(status, checks), 200 if ok else 503)

def ops_diagnostics(request, last_error_summary):
    body = {
        "lastError": last_error_summary,
        "queueDepth": request.app.queue_depth,
        "uptimeSeconds": int(request.app.uptime_seconds),
    }
    return (body, 200)
Notes on the example:
liveness_checkuses a short lock timeout to detect a stuck process without calling the network.readiness_checkdelegates to dependency-specificpingmethods that should include their own timeouts.ops_diagnosticsreturns only safe operational data. It should not include tokens, connection strings, or raw stack traces.
Dependency checks that don’t melt your service
Health endpoints get scraped frequently. If each readiness check performs multiple slow calls, you’ll create self-inflicted load.
Practical safeguards:
- Timeout every dependency call (e.g., 200–500 ms budgets).
- Cache readiness results briefly (e.g., 5–15 seconds) so concurrent scrapes don’t stampede.
- Keep checks idempotent: pings should not mutate state.
A simple caching pattern:
- Store
lastReadinessResultandlastCheckedAtin memory. - If the last check is recent, return the cached response.
Operational endpoints: what’s useful and what’s not
Operational endpoints are for troubleshooting and operational awareness. They should be:
- Readable: small JSON payloads
- Safe: no secrets, no user data
- Bounded: no huge dumps of logs or full request bodies
Good candidates:
- Queue depth / worker lag
- Last error summary (message category, timestamp, and a short reason)
- Current configuration snapshot (feature flags, environment name, non-sensitive limits)
Avoid:
- Returning full stack traces to every caller
- Exposing internal topology details that help attackers
- Dumping large in-memory structures
Security and access control
Health endpoints are often public to the orchestrator, but operational diagnostics usually should be restricted.
- Allow unauthenticated access to
/healthz/liveand/healthz/readyfrom trusted network paths. - Require authentication (or stricter network rules) for
/ops/*endpoints. - Add rate limiting to diagnostics endpoints to prevent accidental overload.
Logging and correlation
Health endpoints should log enough to explain failures without spamming.
- Log readiness failures at a controlled rate (e.g., once per minute per instance).
- Include which checks failed and their durations.
- Use a correlation ID for the request so you can trace a scrape to logs.
A good failure log line includes:
- endpoint name
- status code returned
- failed check names
- total duration
End-to-end example: readiness failure that helps debugging
Suppose the database is down. Your readiness endpoint might return:
status:"fail"checks:db_ping:"fail"witherror:"timeout"cache_ping:"ok"worker_running:"ok"
Your monitoring sees 503, and your logs show the exact failing check with timing. The service doesn’t restart endlessly because liveness remains healthy.
That’s the whole goal: health checks should be decisive, operational endpoints should be informative, and both should stay cheap enough to run often.
14.5 End-to-End Example: Add Observability and Safe Retry Logic
This example upgrades a simple “create order” endpoint so it logs useful context, exposes operational signals, and retries safely when the downstream payment service is temporarily unavailable.
Starting point (current behavior)
Assume an HTTP endpoint POST /orders that calls POST /payments/charge.
Problems you’ll see in production:
- When payment fails, logs don’t show which order was affected.
- There’s no metric for “payment timeouts” vs “payment declined.”
- Retries are either missing or unsafe (e.g., retrying a non-idempotent charge).
Goal
- Add structured logs with correlation IDs.
- Add metrics for latency and outcome categories.
- Add a retry policy that only retries safe failure modes.
- Ensure the payment call is idempotent using an idempotency key.
Mind map: observability + safe retries
Step 1: Define consistent IDs and log fields
Generate or propagate a request_id from the incoming HTTP request. Use order_id from the request body or generated order record. Use a payment_request_id as the idempotency key.
Example: request flow
- Client sends
POST /orderswithIdempotency-Keyheader (optional). - Server creates
order_id. - Server sets
payment_request_id = <order_id>(or combines order + customer). - Server sends
Idempotency-Key: payment_request_idto the payment service.
Step 2: Implement structured logging
Log at key events: order created, payment attempt started, payment succeeded, payment failed, and final failure.
Example log events (JSON-like fields)
event="order_created" order_id=... request_id=...event="payment_attempt" attempt=1 payment_request_id=...event="payment_result" outcome="success|timeout|retryable_http_error|non_retryable_error" ...event="order_payment_failed" outcome=... attempts=...
A useful rule: every log line that relates to payment should include order_id, request_id, and payment_request_id. That way, grepping becomes a scalpel instead of a sledgehammer.
Step 3: Add metrics for outcomes and latency
Use two metric types:
- A histogram for payment latency:
payment_charge_latency_ms. - Counters for outcome categories:
payment_charge_outcome_total{outcome=...}.
Also track retries:
payment_charge_retry_total{reason=...}.
Outcome categories should match your retry eligibility logic, such as:
successtimeoutretryable_http_5xxnon_retryable_4xxrate_limited_429(only if you choose to retry)
Step 4: Safe retry policy
Retry only when the payment call is likely to be transient and the operation is idempotent.
Retry eligibility
- Retry on:
- network timeouts
- HTTP 502/503/504
- Do not retry on:
- HTTP 400/401/403/404
- HTTP 409 (often indicates a state conflict)
- other non-transient 4xx
Backoff
- Exponential backoff with jitter.
- Cap attempts (e.g., 3) and cap total time (e.g., 2.5 seconds).
Idempotency
- Send
Idempotency-Keyto the payment service. - If the payment service supports it, repeated requests with the same key should not double-charge.
Step 5: End-to-end code example (Node.js/TypeScript style)
type Outcome =
  | "success"
  | "timeout"
  | "retryable_http_5xx"
  | "non_retryable_4xx";

function isRetryable(status: number | null, err: unknown): { ok: boolean; reason: Outcome } {
  if (status === null) return { ok: true, reason: "timeout" }; // assume timeout
  if (status >= 500 && status <= 504) return { ok: true, reason: "retryable_http_5xx" };
  if (status >= 400 && status <= 499) return { ok: false, reason: "non_retryable_4xx" };
  return { ok: false, reason: "non_retryable_4xx" };
}
async function chargeWithRetry(params: {
  orderId: string;
  requestId: string;
  paymentRequestId: string;
  chargeFn: (idempotencyKey: string) => Promise<{ status: number; ms: number }>;
  logger: any;
  metrics: any;
}) {
  const { orderId, requestId, paymentRequestId, chargeFn, logger, metrics } = params;
  const maxAttempts = 3;
  const baseDelayMs = 200;
  const deadlineMs = Date.now() + 2500;
  for (let attempt = 1; attempt <= maxAttempts; attempt++) {
    logger.info({ event: "payment_attempt", attempt, orderId, requestId, paymentRequestId });
    const start = Date.now();
    try {
      const res = await chargeFn(paymentRequestId);
      metrics.histogram("payment_charge_latency_ms", res.ms);
      metrics.counter("payment_charge_outcome_total", { outcome: "success" });
      logger.info({ event: "payment_result", outcome: "success", orderId, requestId, paymentRequestId });
      return res;
    } catch (e: any) {
      const status = typeof e?.status === "number" ? e.status : null;
      const { ok, reason } = isRetryable(status, e);
      metrics.counter("payment_charge_outcome_total", { outcome: reason });
      logger.warn({
        event: "payment_result",
        outcome: reason,
        retryable: ok,
        orderId,
        requestId,
        paymentRequestId,
        attempt
      });
      if (!ok || attempt === maxAttempts || Date.now() > deadlineMs) {
        logger.error({ event: "order_payment_failed", outcome: reason, orderId, requestId, paymentRequestId, attempts: attempt });
        throw e;
      }
      metrics.counter("payment_charge_retry_total", { reason });
      const backoff = baseDelayMs * Math.pow(2, attempt - 1);
      const jitter = Math.floor(Math.random() * 100);
      const sleepMs = Math.min(backoff + jitter, Math.max(0, deadlineMs - Date.now()));
      await new Promise(r => setTimeout(r, sleepMs));
    } finally {
      void (Date.now() - start);
    }
  }
}
Step 6: Wire it into the endpoint
app.post("/orders", async (req, res) => {
  const requestId = req.headers["x-request-id"] ?? crypto.randomUUID();
  const orderId = crypto.randomUUID();
  const paymentRequestId = orderId; // idempotency key

  logger.info({ event: "order_created", orderId, requestId });

  try {
    await chargeWithRetry({
      orderId,
      requestId,
      paymentRequestId,
      logger,
      metrics,
      chargeFn: async (idempotencyKey) => {
        const t0 = Date.now();
        const r = await fetch("https://payments.example/charge", {
          method: "POST",
          headers: {
            "Content-Type": "application/json",
            "Idempotency-Key": idempotencyKey
          },
          body: JSON.stringify({ orderId })
        });
        const ms = Date.now() - t0;
        if (!r.ok) {
          const err: any = new Error("payment failed");
          err.status = r.status;
          throw err;
        }
        return { status: r.status, ms };
      }
    });

    res.status(201).json({ orderId, requestId });
  } catch (e: any) {
    res.status(502).json({ orderId, requestId, error: "payment_failed" });
  }
});
Step 7: Verification checklist (what to test)
- Retry decision tests: given status 503 => retryable; given status 400 => not retryable.
- Idempotency test: ensure
Idempotency-KeyequalspaymentRequestIdon every attempt. - Metric assertions: on success,
payment_charge_outcome_total{outcome="success"}increments once; on timeout, outcome increments withtimeoutand retry counter increments. - Log assertions: every attempt includes
orderId,requestId, andpayment_request_id.
Mind map: what you should see in logs
This end-to-end change makes failures easier to diagnose and retries safer to run. The key is that observability and retry logic share the same vocabulary: the retry eligibility outcome drives both what you log and what you count.
15. Practical End-to-End Case Study and Playbooks
15.1 Case Study Setup: Requirements, Constraints, and Success Criteria
This case study builds a small but realistic feature: a “Receipt Parser” service that accepts an uploaded receipt image (or a text extract) and returns structured fields. The goal is not to impress anyone with clever prompts; it’s to produce code that passes tests, handles errors predictably, and fits into a simple API.
Problem Statement (What we’re building)
Feature: POST /receipts/parse
Inputs:
Content-Type: multipart/form-data- Field
file: image bytes (PNG/JPG) or a plain text file containing OCR output
Outputs (JSON):
merchantNametotalAmount(number)currency(ISO code likeUSD)date(ISOYYYY-MM-DDwhen present)lineItems(array of{ description, quantity, unitPrice, lineTotal })confidence(0–1)
Behavior:
- If parsing succeeds, return HTTP
200with the fields. - If the input is missing or unsupported, return HTTP
400. - If the receipt cannot be parsed, return HTTP
422with an error code.
A small twist keeps the case study honest: the service must accept either an image or pre-extracted text, so the code has two parsing paths.
Stakeholder Requirements (What matters to users and operators)
Write requirements as observable outcomes.
- Correctness: Returned fields match the receipt content for supported formats.
- Example: “Total: $12.34” should produce
totalAmount = 12.34andcurrency = "USD".
- Example: “Total: $12.34” should produce
- Predictable errors: Clients can reliably distinguish invalid input from unparseable receipts.
- Example: missing file →
400; unreadable receipt →422.
- Example: missing file →
- Testability: Core parsing logic must be unit-testable without calling external services.
- Example: parsing functions accept strings and return structured results.
- Operational clarity: Logs and responses must include enough context to debug failures.
- Example: include
errorCodeand a shortmessage.
- Example: include
Constraints (What limits the solution)
Constraints prevent “works on my machine” code.
- No external OCR calls in tests. The parsing layer must accept text input directly.
- Supported currencies:
USD,EUR,GBPonly. - Date formats: Accept
YYYY-MM-DDandMM/DD/YYYY. - Line items: Up to 50 items; missing quantities default to
1. - Performance: For unit tests, parsing must complete under 50ms per sample on a typical laptop.
- Security: Uploaded files must be size-limited to 5MB and only accept PNG/JPG/text.
Success Criteria (How we decide it’s done)
Success criteria should be measurable and tied to acceptance tests.
Functional acceptance criteria
- A valid text receipt returns HTTP
200with all mandatory fields. - A valid image request returns HTTP
200when the “image-to-text” step is stubbed. - Unsupported file type returns HTTP
400. - Unparseable receipt returns HTTP
422witherrorCode = "UNPARSEABLE_RECEIPT".
Quality acceptance criteria
- Unit tests cover:
- currency parsing
- date parsing
- total amount extraction
- line item extraction and defaults
- error mapping (400 vs 422)
- Static checks pass:
- lint: no unused variables
- type checks: no implicit
any
- Code structure:
- API layer calls a parsing module
- parsing module has no HTTP concerns
Example-based success criteria
- Given:
"Total: $12.34"- Output must include
totalAmount: 12.34andcurrency: "USD".
- Given:
"Date: 03/14/2026"- Output must include
date: "2026-03-14".
Mind Map: Requirements to Implementation Targets
Concrete Test Samples (So prompts have something real)
Use a small set of receipts that cover the tricky parts.
Sample A: Text receipt with line items
- Input text:
"Merchant: Corner Coffee\nDate: 03/14/2026\n1 Latte 3.50 3.50\nTotal: $12.34"
- Expected highlights:
merchantName = "Corner Coffee"date = "2026-03-14"totalAmount = 12.34currency = "USD"lineItems.length >= 1
Sample B: Text receipt with missing quantity
- Input text:
"Merchant: Book Nook\nDate: 2026-01-02\nNotebook 5.00\nTotal: EUR 5.00"
- Expected highlights:
currency = "EUR"lineItems[0].quantity = 1
Sample C: Unparseable receipt
- Input text:
"Thank you for your purchase. See you next time."
- Expected highlights:
- HTTP
422 errorCode = "UNPARSEABLE_RECEIPT"
- HTTP
Sample D: Unsupported file type
- Upload
filewithContent-Type: application/pdf - Expected highlights:
- HTTP
400
- HTTP
Prompt-Ready Requirement Checklist (for later steps)
When later prompts generate code, they should be guided by a checklist that mirrors these requirements.
- API validates file presence, size (<= 5MB), and allowed types.
- Parser accepts text input and returns a typed result.
- Currency parsing supports only USD/EUR/GBP.
- Date parsing supports
YYYY-MM-DDandMM/DD/YYYY. - Line items default missing quantity to
1. - Unparseable receipts map to
422witherrorCode. - Tests cover parsing rules and error mapping.
Minimal API Contract Sketch (to prevent ambiguity)
The API contract should be explicit so generated code doesn’t guess.
{
  "success": true,
  "data": {
    "merchantName": "Corner Coffee",
    "totalAmount": 12.34,
    "currency": "USD",
    "date": "2026-03-14",
    "lineItems": [
      {
        "description": "Latte",
        "quantity": 1,
        "unitPrice": 3.50,
        "lineTotal": 3.50
      }
    ],
    "confidence": 0.82
  }
}
And for errors:
{
  "success": false,
  "errorCode": "UNPARSEABLE_RECEIPT",
  "message": "Receipt text did not contain required fields."
}
With these requirements, constraints, and success criteria fixed, the later steps can focus on generating code and tests that match the contract rather than negotiating what “done” means.
15.2 Prompt Playbook for Design, Code, Tests, and Review
This playbook is a repeatable sequence you can run for a single feature. The goal is not to get “perfect output” in one shot, but to drive the model toward decisions you can verify.
The workflow in one pass
- Design prompt: produce a small spec with explicit inputs/outputs, edge cases, and acceptance criteria.
- Code prompt: generate only the implementation that matches the spec, with clear function boundaries.
- Test prompt: generate tests that prove the acceptance criteria, including failure paths.
- Review prompt: run a checklist-based critique and request targeted fixes.
Mind map: the prompt loop
Step 1: Design prompt (small spec first)
Use a prompt that forces the model to commit to concrete behavior.
Prompt template
- Role: “You are a senior engineer writing a spec.”
- Inputs: what the feature receives.
- Outputs: what it returns or changes.
- Constraints: libraries allowed, style rules, performance expectations.
- Acceptance criteria: 3–7 bullet points.
- Edge cases: at least 5.
- Non-goals: what it will not do.
Example feature: “Add an endpoint that validates a coupon code and returns a normalized response.”
Design prompt example
- “Design a function
validateCoupon(code: string) -> { normalizedCode, isValid, reason }.- Rules: trim whitespace, uppercase letters, allow only
[A-Z0-9-]. - Valid codes: length 8–16.
- If invalid, set
reasonto one of:EMPTY,INVALID_CHARS,WRONG_LENGTH. - Non-goals: checking whether the coupon is active in a database.
- Provide acceptance criteria and list edge cases.”
- Rules: trim whitespace, uppercase letters, allow only
What good design output looks like
- A short spec with exact normalization steps.
- A deterministic mapping from input to
reason. - Clear precedence rules (e.g., empty check before invalid chars).
Common pitfall to prevent: asking for code before the precedence rules are stated. If the model doesn’t specify precedence, tests will disagree with implementation.
Step 2: Code prompt (implementation that matches the spec)
Now you generate code that is constrained by the spec. Ask for minimal surface area.
Prompt template
- “Implement exactly the behavior described in the spec below.”
- “Do not add new features.”
- “Include input validation and explicit error handling.”
- “Return values must match the spec types.”
- “Use the project’s style: [naming, formatting, error conventions].”
Example code prompt
- “Implement
validateCouponin TypeScript. Spec:- Trim whitespace.
- Uppercase.
- Allowed chars: A–Z, 0–9,
-. - Length 8–16.
- Reasons: EMPTY, INVALID_CHARS, WRONG_LENGTH.
- Precedence: EMPTY → INVALID_CHARS → WRONG_LENGTH.
Output:
{ normalizedCode, isValid, reason }wherereasonisnullwhen valid.”
Example output constraints you should request
- “No regex backtracking tricks; use a simple anchored regex.”
- “No throwing exceptions for invalid input; return
isValid=false.”
Step 3: Test prompt (tests as executable acceptance criteria)
Tests should mirror the spec’s precedence and normalization.
Prompt template
- “Write tests that cover every acceptance criterion and every edge case listed in the spec.”
- “Use a table-driven approach.”
- “Each test case must include input, expected
normalizedCode,isValid, andreason.” - “Include at least one test for each precedence branch.”
Example test prompt
- “Write Jest tests for
validateCoupon. Use table-driven cases:- input: ’ ’ → normalizedCode: '' → isValid false → reason EMPTY
- input: ‘ab!12345’ → INVALID_CHARS
- input: ‘A1B2C3’ → WRONG_LENGTH
- input: ’ code-1234 ’ → valid, normalizedCode ‘CODE-1234’, reason null Add two more edge cases of your choice that follow the spec.”
Mindful detail: ask for tests to assert normalizedCode even when invalid. That forces the implementation to apply normalization consistently.
Step 4: Review prompt (checklist critique, then patch)
A review prompt should be structured so the model can’t “agree and move on.” Require a pass/fail style assessment.
Review checklist prompt template
- “Review the code and tests against the spec.”
- “For each item below, answer: PASS/FAIL and cite the exact line or behavior.”
- Spec match (normalization, allowed chars, length rules)
- Precedence order is implemented correctly
- Return shape matches types (reason null vs string)
- Tests cover all edge cases and precedence branches
- No missing imports or failing test setup
- Readability: function is small, names are clear
- Security: no unsafe regex or injection vectors (for this function, keep it simple)
- “If any FAIL, provide a minimal patch: only changed code and updated tests.”
Example review prompt
- “Review the proposed
validateCouponimplementation and Jest tests. Spec and acceptance criteria are as follows: [paste spec]. Run the checklist and then return a minimal patch if needed.”
A complete mini-run (design → code → tests → review)
Below is a compact example of how you might structure the prompts in sequence.
Design prompt
- “Write a spec for
validateCouponwith precedence EMPTY → INVALID_CHARS → WRONG_LENGTH. Include edge cases and acceptance criteria.”
Code prompt
- “Implement
validateCouponin TypeScript to match the spec exactly. Return{ normalizedCode, isValid, reason }withreason=nullwhen valid.”
Test prompt
- “Write Jest tests using a table of cases. Assert
normalizedCodefor both valid and invalid inputs.”
Review prompt
- “Review code and tests against the spec. If anything fails, output a minimal patch.”
Practical tips that make the loop work
- Keep the spec small: if it’s longer than a page, you’ll get inconsistent code and tests.
- Force precedence: most “mysterious” failures come from ambiguous ordering.
- Make normalization testable: always assert normalized outputs.
- Ask for minimal patches: it reduces churn and makes review easier.
- Treat review as a gate: don’t accept output until the checklist passes.
15.3 Iteration Playbook for Failures in Tests and Builds
When tests or builds fail, the goal is not to “try again until it works.” The goal is to reduce uncertainty fast: identify which assumption broke, then change the smallest thing that addresses that break.
The iteration loop (use it every time)
- Classify the failure: test assertion vs. runtime error vs. compile/type error vs. flaky timing.
- Reproduce deterministically: run the failing test alone, with the same inputs and environment.
- Localize the fault: map the failure to a specific module, function, or contract.
- Form a single hypothesis: “This mismatch is caused by X,” not “Something is wrong.”
- Change one lever: update code, prompt instructions, mocks, fixtures, or test expectations—only one category at a time.
- Re-run the smallest suite: the failing test first, then the next layer.
- Record the fix: note what changed and why, so the next failure is faster.
A slightly playful rule: if you can’t explain the failure in one sentence, you’re not ready to change anything.
Mind map: failure-to-fix workflow
Common failure patterns and what to do
1) Compile or type errors
What it usually means: the generated code violates an interface contract, uses the wrong types, or misses imports.
Fast actions
- Copy the exact compiler/type error message into your notes.
- Identify the first error in the chain; later errors often cascade.
- Check the expected function signature from the project’s existing code.
Example
- Test fails to compile:
Argument of type 'string' is not assignable to parameter of type 'Email'. - Hypothesis: the generator treated
Emailasstring. - Fix lever: update the conversion/validation layer, not the test.
Concrete prompt adjustment (when you regenerate)
- Add a constraint: “Use the existing
Emailconstructor/validator; do not accept raw strings.” - Provide the signature of the
Emailtype or a short excerpt showing how it’s created.
2) Test assertion failures
What it usually means: the logic is close but not aligned with the expected behavior, or the test expectation is wrong.
Fast actions
- Inspect the assertion diff: expected vs. actual.
- Confirm whether the test is checking the right thing (behavior) or the wrong thing (incidental formatting).
- Look for off-by-one, swapped fields, or incorrect default values.
Example
- Assertion: expected
status=200, gotstatus=201. - Hypothesis: the handler uses the wrong response code for the “create” vs “update” path.
- Fix lever: adjust the branching logic in the handler.
How to avoid changing the test prematurely
- If the test describes a business rule (e.g., “create returns 201”), keep the test and fix the code.
- If the test describes an implementation detail (e.g., exact JSON key ordering), consider rewriting the test to assert semantic equality.
3) Runtime exceptions
What it usually means: null/undefined handling, missing fields, wrong assumptions about data shape, or incorrect error handling.
Fast actions
- Read the stack trace top-to-bottom until you hit the first project file.
- Check the inputs used in the failing test.
- Verify invariants: “Does this function ever receive an empty list?”
Example
- Error:
TypeError: Cannot read properties of undefined (reading 'id'). - Hypothesis: the code assumes
request.userexists, but the test uses an unauthenticated fixture. - Fix lever: either update the fixture to match the scenario, or add a guard clause if unauthenticated access is valid.
Decision rule
- If the scenario is “authenticated request,” fix the fixture.
- If the scenario is “unauthenticated request,” fix the code to return the correct error response.
4) Flaky tests and timeouts
What it usually means: race conditions, shared state, network calls, or timing assumptions.
Fast actions
- Run the test multiple times locally to confirm flakiness.
- Eliminate nondeterminism: seed randomness, freeze time, remove real network calls.
- Ensure tests clean up shared resources.
Example
- Timeout in a test that waits for an async job.
- Hypothesis: the job runner uses a background queue that isn’t drained in the test.
- Fix lever: change the test harness to await the job completion signal, or inject a synchronous runner.
Mind map: choosing the “one lever”
A worked iteration: failing build after code generation
Scenario: You generated a createUser endpoint plus a unit test. The build fails with a failing test.
- Reproduce: run
npm test -- createUser.test. - Classify: the test fails with
expected 201, got 200. - Localize: the assertion points to
createUserresponse builder. - Hypothesis: the handler uses the “update” response code.
- Change one lever: update the response mapping in the handler.
- Verify: re-run the single test.
If it still fails
- Inspect the response body: maybe the status is fixed but the returned payload shape is wrong.
- Add a single extra assertion for the payload field that’s mismatched.
- Fix only the payload mapping next.
This approach prevents the common spiral: “fix status, then change test, then change prompt, then change everything.”
Prompt iteration when tests fail (without rewriting the whole prompt)
Use prompt changes only when the failure suggests a misunderstanding of requirements or contracts.
Good prompt edits
- Add the exact expected behavior: “Return 201 for create, 200 for update.”
- Provide the relevant function signature or type definition.
- Specify error mapping: “On invalid input, return 400 with
{ field, message }.”
Bad prompt edits
- “Make it correct.”
- “Improve code quality.”
- Removing constraints that the tests rely on.
Documentation template for each failure
Exit criteria: when to stop iterating
Stop when:
- The failing test passes and the next layer (e.g., integration tests) is clean.
- You can state the root cause and the exact change that addressed it.
- You added or adjusted a check that would catch the same class of failure next time.
If you can’t meet those, the iteration is still guessing—and guessing is expensive.
15.4 Security and Quality Playbook for Production-Grade Output
Production-grade output is less about “perfect code” and more about predictable behavior under messy conditions: bad inputs, partial failures, and mismatched assumptions. This playbook turns that idea into a repeatable checklist you can run every time you ask for code generation.
Security-first checklist (run in this order)
-
Define trust boundaries before writing code
- Decide what is untrusted (HTTP request body, query params, headers) and what is trusted (server-side config, database records).
- Example: If a route accepts
userIdfrom the URL, treat it as untrusted even if it’s numeric.
-
Validate inputs at the edges
- Use a schema/validator that rejects invalid shapes early.
- Example (conceptual):
- Input:
{ "email": "not-an-email" } - Expected:
400 Bad Requestwith a field-level error.
- Input:
-
Use parameterized operations for anything that touches a query
- Never build SQL strings by concatenating user input.
- Example: Prefer
WHERE email = ?with bound parameters overWHERE email = '${email}'.
-
Enforce authorization explicitly
- Authentication only proves identity; authorization proves permission.
- Example: For
DELETE /projects/{id}:- Check that the authenticated user owns the project (or has a role that grants access).
- Return
403when authenticated but not allowed.
-
Handle secrets and logs safely
- Don’t log request bodies that may contain tokens or passwords.
- Redact sensitive fields in structured logs.
- Example: If you log
Authorizationheaders, replace the token with"[REDACTED]".
-
Make error responses non-informative but actionable
- Don’t leak stack traces or internal identifiers to clients.
- Example: Return
"Invalid input"to the client, but log the detailed reason server-side.
-
Add resource limits
- Cap payload sizes, timeouts, and pagination bounds.
- Example: Reject requests larger than 1MB and enforce
limit <= 100.
Quality checklist (run after security)
-
Specify behavior with acceptance criteria
- Include success and failure cases.
- Example: “Create user” must:
- Return
201on success. - Return
409when email already exists. - Return
400for invalid email format.
- Return
-
Require deterministic formatting and interfaces
- Generated code should match project conventions: naming, module layout, error types.
- Example: If the codebase uses
Result<T, E>patterns, require that shape in the output.
-
Demand tests that prove the edge cases
- At minimum: one “happy path” and one “nasty path” per component.
- Example: For a request validator, test both:
- Valid payload passes.
- Missing required field fails with a clear error.
-
Use static checks as a gate
- Linting, type checking, and formatting should run before merging.
- Example: If type checking fails, do not proceed to integration tests.
-
Require observability hooks
- Include structured logs for key events and metrics for outcomes.
- Example: Log
request_id,route, andstatus_code.
-
Ensure safe concurrency and idempotency where relevant
- If endpoints can be retried, design them to avoid duplicate side effects.
- Example: For “create payment session,” store a unique idempotency key.
Mind maps (use as a quick scan)
Security & Quality Mind Map
Prompting patterns that enforce security and quality
Use prompts that instruct the model to produce verifiable artifacts, not just code.
1) “Contract-first” prompt
- Ask for: endpoint behavior, status codes, validation rules, and error shapes.
- Example prompt snippet:
- “List required fields, validation rules, and exact HTTP responses for: valid input, missing field, invalid format, unauthorized user, and duplicate resource.”
2) “Threat-aware” prompt
- Ask for: a short threat list tied to the specific endpoint.
- Example prompt snippet:
- “Before writing code, identify the top 5 threats relevant to this endpoint (input validation bypass, injection, authz failure, sensitive logging, resource exhaustion) and map each to a concrete mitigation in the code.”
3) “Test-required” prompt
- Ask for: unit tests plus at least one integration-style test.
- Example prompt snippet:
- “Write tests that assert status codes and error payloads for invalid input and unauthorized access. Include one test that verifies no sensitive fields are logged.”
Concrete example: hardening a “create user” endpoint
Goal: POST /users creates a user from { "email": "...", "password": "..." }.
Acceptance criteria
201with{ "id": "...", "email": "..." }on success.400when email is missing or not a valid format.409when email already exists.500only for unexpected failures; client message must not include stack traces.
Security mitigations to require in the output
- Validate email format and presence before any database call.
- Hash the password before storage.
- Use parameterized queries for the uniqueness check.
- Log only safe fields (e.g.,
request_id,emaillowercased, not the password).
Quality mitigations to require in the output
- Tests for:
- Valid payload returns
201. - Invalid email returns
400with a field error. - Duplicate email returns
409. - Password is never returned in responses.
- Valid payload returns
Example “review checklist” you can run on generated code
Generated Code Review Checklist
-
Inputs
- All external inputs are validated (shape + constraints)
- Validation happens before side effects
-
Authorization
- Every protected action checks permissions
- Responses distinguish 401 vs 403 correctly
-
Data access
- No SQL/command strings built from user input
- Queries use bound parameters
-
Secrets & logs
- No tokens/passwords in logs
- Sensitive fields are redacted
-
Errors
- Client errors are safe and consistent
- Detailed errors are logged server-side
-
Quality
- Tests cover happy + nasty paths
- Lint/type checks pass
- Observability fields exist (request_id, status)
Handling common failure modes (and what to ask the model to fix)
-
Failure mode: “It compiles but behavior is wrong.”
- Fix by adding missing acceptance criteria and tests that assert exact status codes and error payloads.
- Ask: “Update tests to cover the failing scenario and adjust implementation to satisfy them.”
-
Failure mode: “Validation exists but is incomplete.”
- Fix by tightening schema constraints and adding tests for boundary values.
- Ask: “List the exact validation rules you implemented and add tests for empty strings, oversized payloads, and malformed types.”
-
Failure mode: “Auth is present but not enforced per action.”
- Fix by requiring explicit authorization checks in each protected handler.
- Ask: “Show where authorization is checked for this endpoint and add a test that proves unauthorized users cannot perform the action.”
-
Failure mode: “Logs leak sensitive data.”
- Fix by introducing redaction and updating tests to verify log content.
- Ask: “Identify every log statement that includes request-derived sensitive fields and replace them with redacted versions. Add a test that asserts the redaction.”
Final production gate (merge only if all boxes are checked)
A generated change is production-ready when it passes: (1) input validation and authorization checks, (2) safe data access patterns, (3) redaction-safe logging, (4) deterministic error responses, and (5) tests plus static checks. If any one of these is missing, treat it as a build blocker and iterate until the checklist is fully satisfied.
15.5 Full Walkthrough: Deliver a Complete Feature from Prompt to Merge
This walkthrough shows one complete feature delivery using a repeatable loop: define acceptance criteria, generate an implementation plan, produce code and tests, run checks, fix failures with targeted prompts, and finish with a merge-ready review.
Scenario
You maintain a small web service that manages “projects.” The feature: create a project with validation, persistence, and a clean API response.
Acceptance criteria
POST /projectsaccepts JSON:{ "name": "...", "ownerId": "..." }.namemust be 3–80 characters, trimmed.ownerIdmust be a valid UUID.- On success, returns
201with{ "id": "...", "name": "...", "ownerId": "..." }. - On validation failure, returns
400with{ "errors": [ { "field": "...", "message": "..." } ] }. - Unit tests cover validation and persistence mapping.
- Integration test covers the endpoint end-to-end.
Mind map: the delivery loop
Mind map: Prompt → Code → Tests → Fix → Merge
Step 1: Write a prompt that is specific enough to be testable
Start with a prompt that includes the acceptance criteria verbatim, plus the project’s existing patterns. The key is to ask for interfaces and behavior, not just code.
Prompt (condensed)
- “Implement
POST /projects.” - “Use existing router conventions and response helpers.”
- “Add validation: trim name, enforce length, validate UUID.”
- “Return errors in the exact structure.”
- “Add unit tests for validation and mapping.”
- “Add an integration test for the endpoint.”
- “If any required helpers exist, reuse them; otherwise, create them with minimal surface area.”
The first output should be a plan, not code.
Step 2: Generate an implementation plan (and lock the data flow)
Ask for a plan with named artifacts.
Plan output you want
ProjectCreateRequestvalidation functionProjectdomain model mappingcreateProjectservice methodPOST /projectshandlerprojectsrepository insert method- Unit tests:
validateCreateRequestcases- mapping from request → entity → response
- Integration test:
- success case returns
201 - invalid UUID returns
400with correct error shape
- success case returns
Mind map: data flow
Mind map: Request handling data flow

Step 3: Generate code in small, reviewable chunks
Generate the handler first, but require it to call stubbed functions so tests can be written immediately.
Code chunk 1: request validation (unit-testable)
Ask for a pure function that returns either a validated object or structured errors.
Example behavior to specify in the prompt:
- Input
{ "name": " ab ", "ownerId": "..." }becomes name"ab"and then fails length if below 3. - Errors include
fieldvalues matching request keys:name,ownerId.
Code chunk 2: service and repository mapping
Require the service to accept validated input and return a domain result.
Example requirement:
- Repository returns an
idand the stored fields. - Service constructs the response object with the same field names the API expects.
Code chunk 3: handler wiring
Require the handler to:
- call validation
- call service on success
- format errors exactly on failure
Step 4: Write tests alongside code, not after
Ask for tests immediately after each chunk. This prevents “working code that fails the contract” from sneaking in.
Unit tests: validation
Include a table-driven set of cases.
Example cases:
- name too short:
"ab"→ error onname - name too long: 81 chars → error on
name - name with spaces:
" abc "→ success with trimmed"abc" - ownerId invalid:
"not-a-uuid"→ error onownerId - both invalid: both errors returned (order can be defined; pick one and assert it)
Unit tests: mapping
Test that the service returns the response shape with the same name and ownerId values.
Integration test: endpoint
Use the existing test harness (HTTP client + test server). Assert:
- status code
- response JSON keys and values
- error JSON structure on invalid input
Step 5: Run checks and fix failures with targeted prompts
Assume you run lint, typecheck, and test. When something fails, don’t ask for “fix everything.” Ask for the smallest correction.
Failure pattern A: contract mismatch
- Symptom: integration test expects
{ errors: [...] }but receives a different shape. - Targeted prompt: “The handler returns the wrong error structure. Update only the error formatting to match
{errors:[{field,message}]}. Keep validation logic unchanged. Show the exact diff.”
Failure pattern B: validation logic mismatch
- Symptom: unit test says trimmed name should be validated after trimming.
- Targeted prompt: “Validation currently checks length before trimming. Change it to trim first, then validate length. Update tests if they are wrong; otherwise keep tests and fix code.”
Failure pattern C: build/import issues
- Symptom: typecheck fails due to missing exports or wrong module paths.
- Targeted prompt: “Typecheck error indicates module path mismatch. Identify the failing import and correct it to match existing project conventions. Do not change runtime behavior.”
Step 6: Ensure the merge-ready checklist passes
Before merging, verify these items.
Merge checklist
- Tests are deterministic (no time-based assertions).
- Error responses match the exact JSON structure.
- Status codes are correct (
201success,400validation failure). - Code follows existing naming and folder conventions.
- No unused variables or dead code from earlier iterations.
- Diffs are focused: handler, service, repository, tests.
Mind map: merge readiness
Mind map: Merge readiness
Step 7: Final “prompt-to-merge” wrap-up
Once tests pass, generate a short summary for the PR description using the acceptance criteria as headings:
- “What changed” (handler/service/repository)
- “Validation behavior” (trim + length + UUID)
- “Error format” (400 payload structure)
- “Tests added” (unit + integration)
Then do a final review pass by reading only:
- the handler’s success and error branches
- the validation function’s edge cases
- the integration test assertions
If those three align with the acceptance criteria, the feature is ready to merge.